Homemade Sports Pennants 🏀 4 Different Designs!
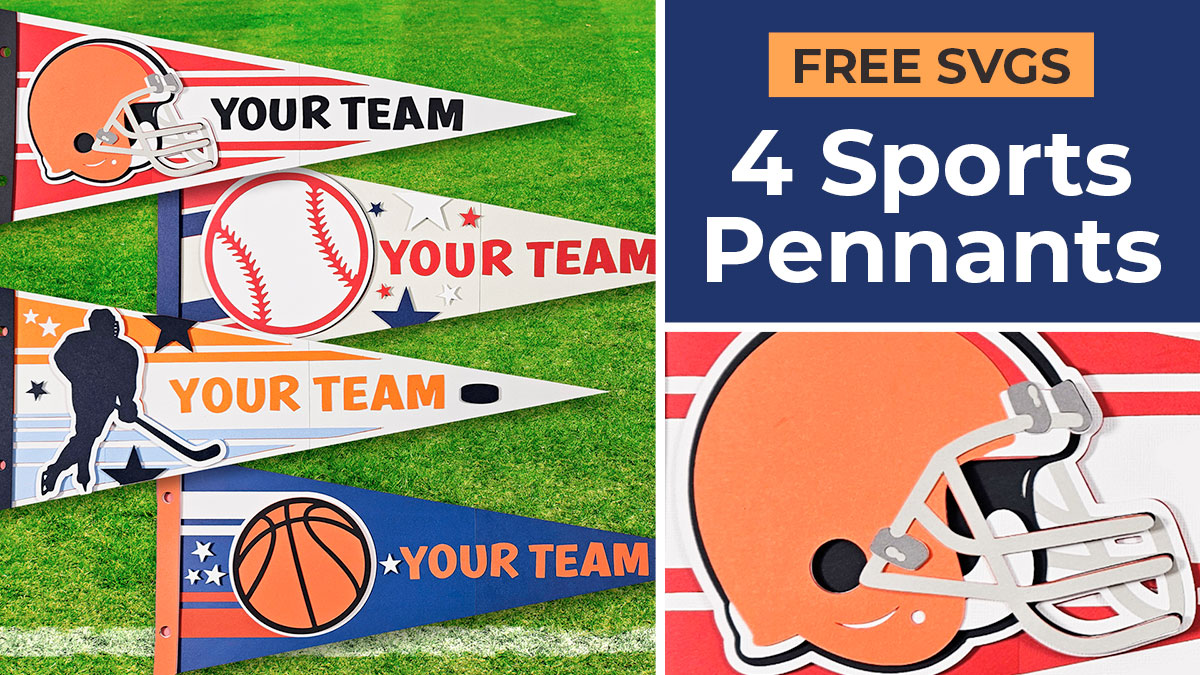
Showcase your love for your favourite sports team with free sports pennants cut files!
These sports flags come in two sizes so that you can choose whether you’d like to make the supersized version or the smaller one which can be cut from single pieces of card rather than splitting the design up into sections.
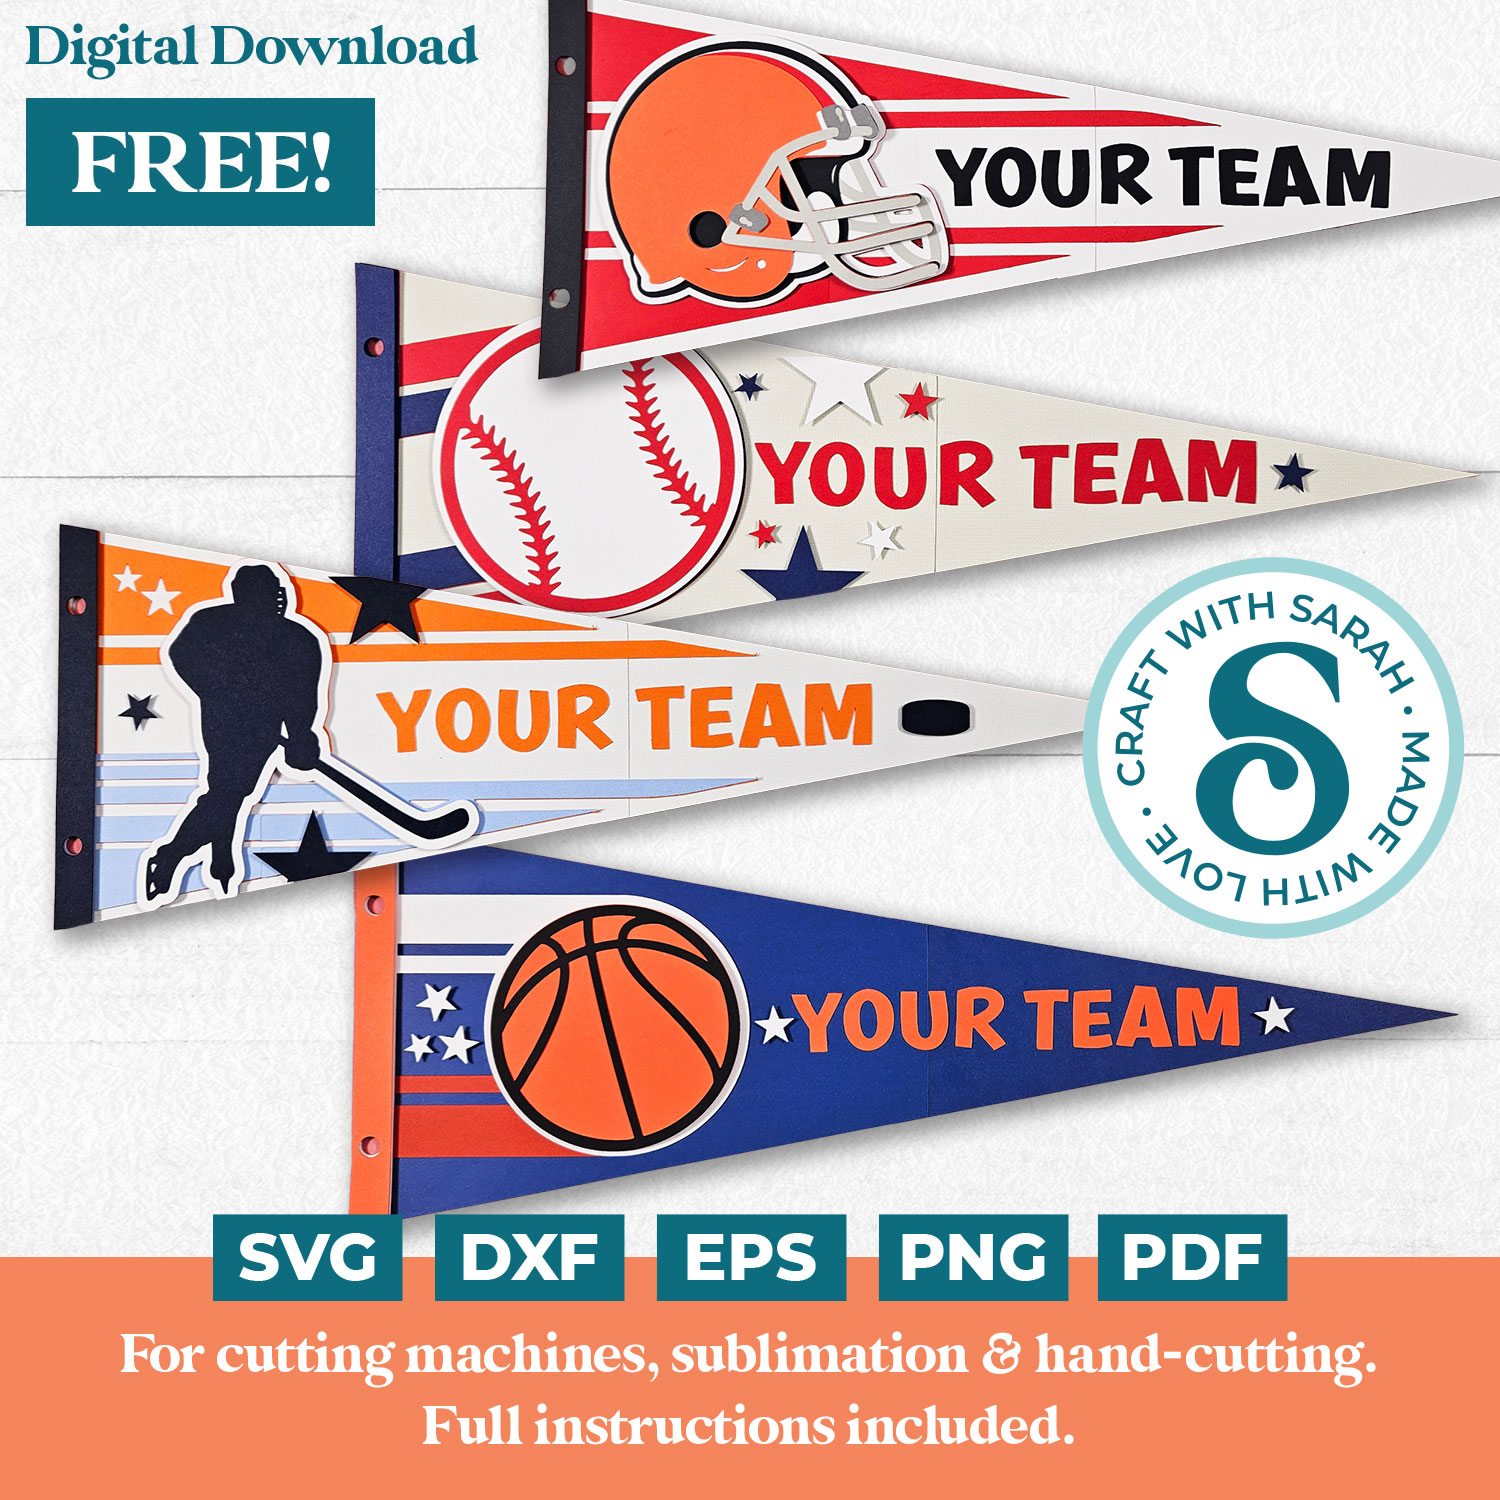
There are four different designs included for free: American football, ice hockey, basketball and baseball. You can choose your favourite or make them all!
These pennants would also make lovely gifts for the sporting enthusiasts that you know.
Keep scrolling until the end for 50 more sports craft ideas. 🎾
Video tutorial for homemade sports flags
Watch the video below to see how to make this sporty craft project. Keep scrolling for a written tutorial.
Materials for sports flag Cricut craft
Here is a list of the materials that I used to make this project.
This is a great project for using up your card scraps as it doesn’t need much of the different colours for the sporting designs.
Please note that some of the links included in this article are affiliate links, which means that if you click through and make a purchase I may receive a commission (at no additional cost to you). You can read my full disclosure at the bottom of the page.
- Cricut Machine
- Light blue Cricut cutting mat
- Coloured Card
- Collall All Purpose Glue or similar
- Needle Tip Applicator Bottle
- 3D foam pads
- String or ribbon to hang the pennants (optional)
This project is suitable for the following types of Cricut machine: Explore Air 2, Explore Air 3, Maker, Maker 3, Venture, Joy Xtra and Joy.
Layered sports pennants SVG assembly instructions
Here’s how to make your very own sporting signs using a Cricut machine!
Step 1) Download the free file & unzip the downloaded folder
Download the Free Cutting File
Please login to your account to download this file.
TERMS OF USE:
You may sell finished, handmade physical craft items that you have made using this product but must not sell or share the digital files. Read full terms of use
Before you upload the SVG to Design Space, you need to unzip the download folder that it comes in.
- How to unzip a folder on Windows computer
- How to unzip a folder on a Mac
- How to unzip a folder on an iPad/iPhone
- How to unzip a folder on an Android device
Step 2) Upload the SVG file into Design Space
Open up Cricut Design Space and choose the design you want to make.
There are large and small versions of each design.
The small ones can be cut from single sheets of card. The large ones have the biggest pieces split up into sections to make a larger pennant.
For this tutorial I am showing the larger versions, but the steps are the same for the smaller ones too.
Make sure you upload the file which starts svg- in the filename!!
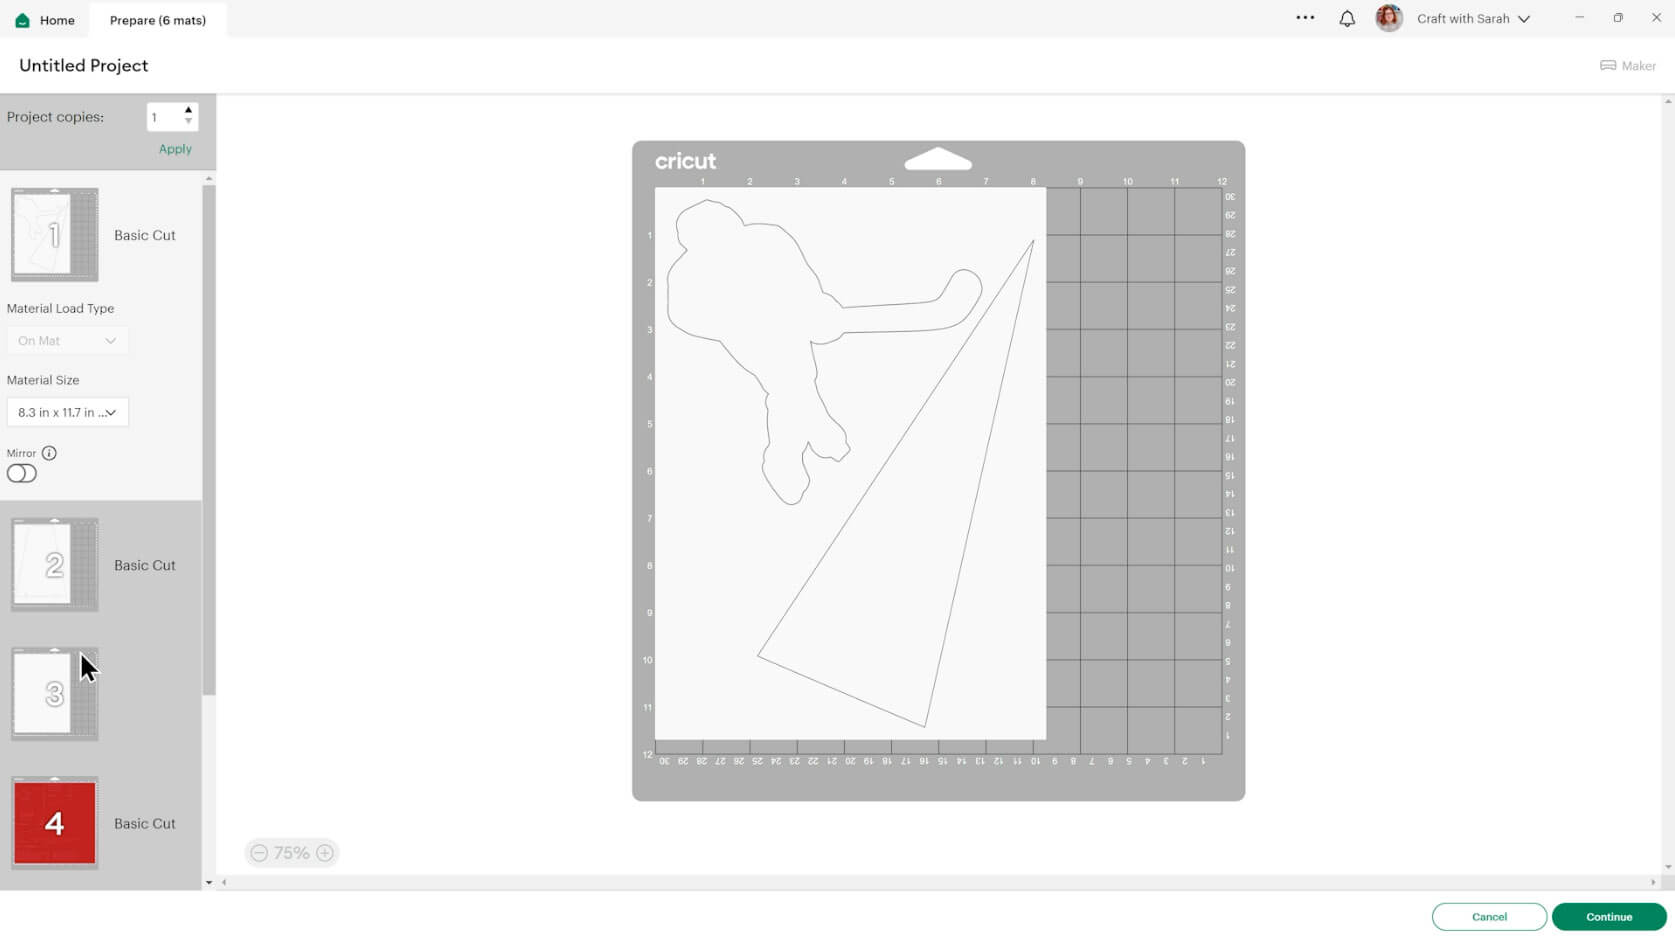
This is how it should look after you have uploaded the file:
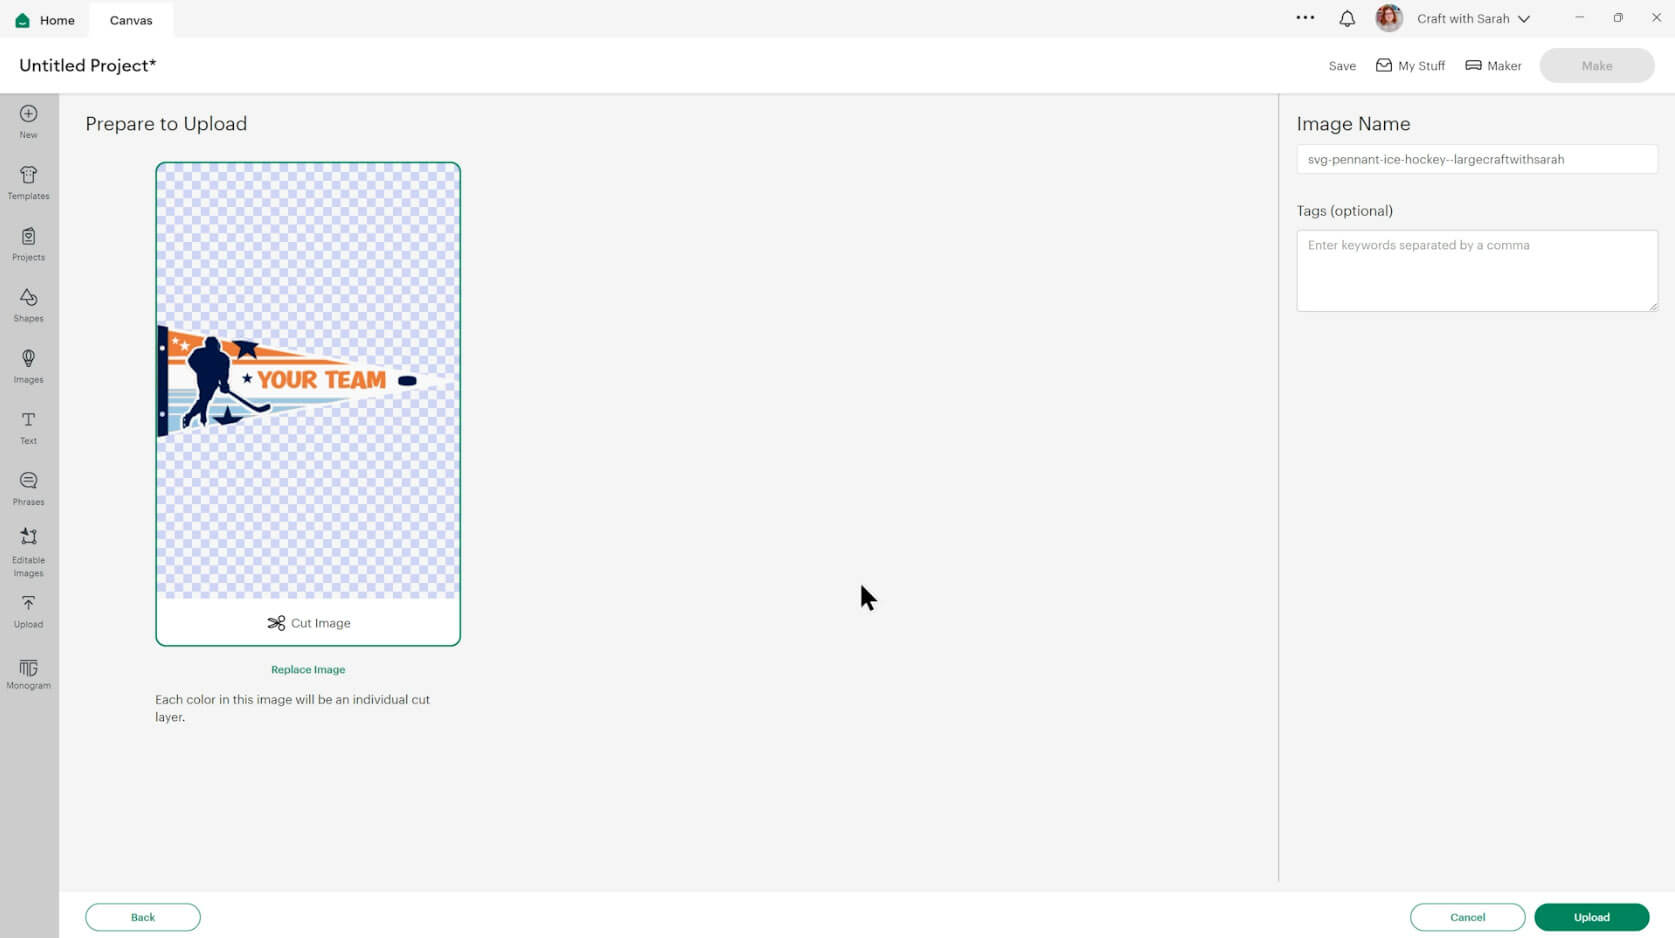
After uploading, the design will show in your “Recently Uploaded Images”. Click on it and then press “Add to Canvas” to put it onto your Project.

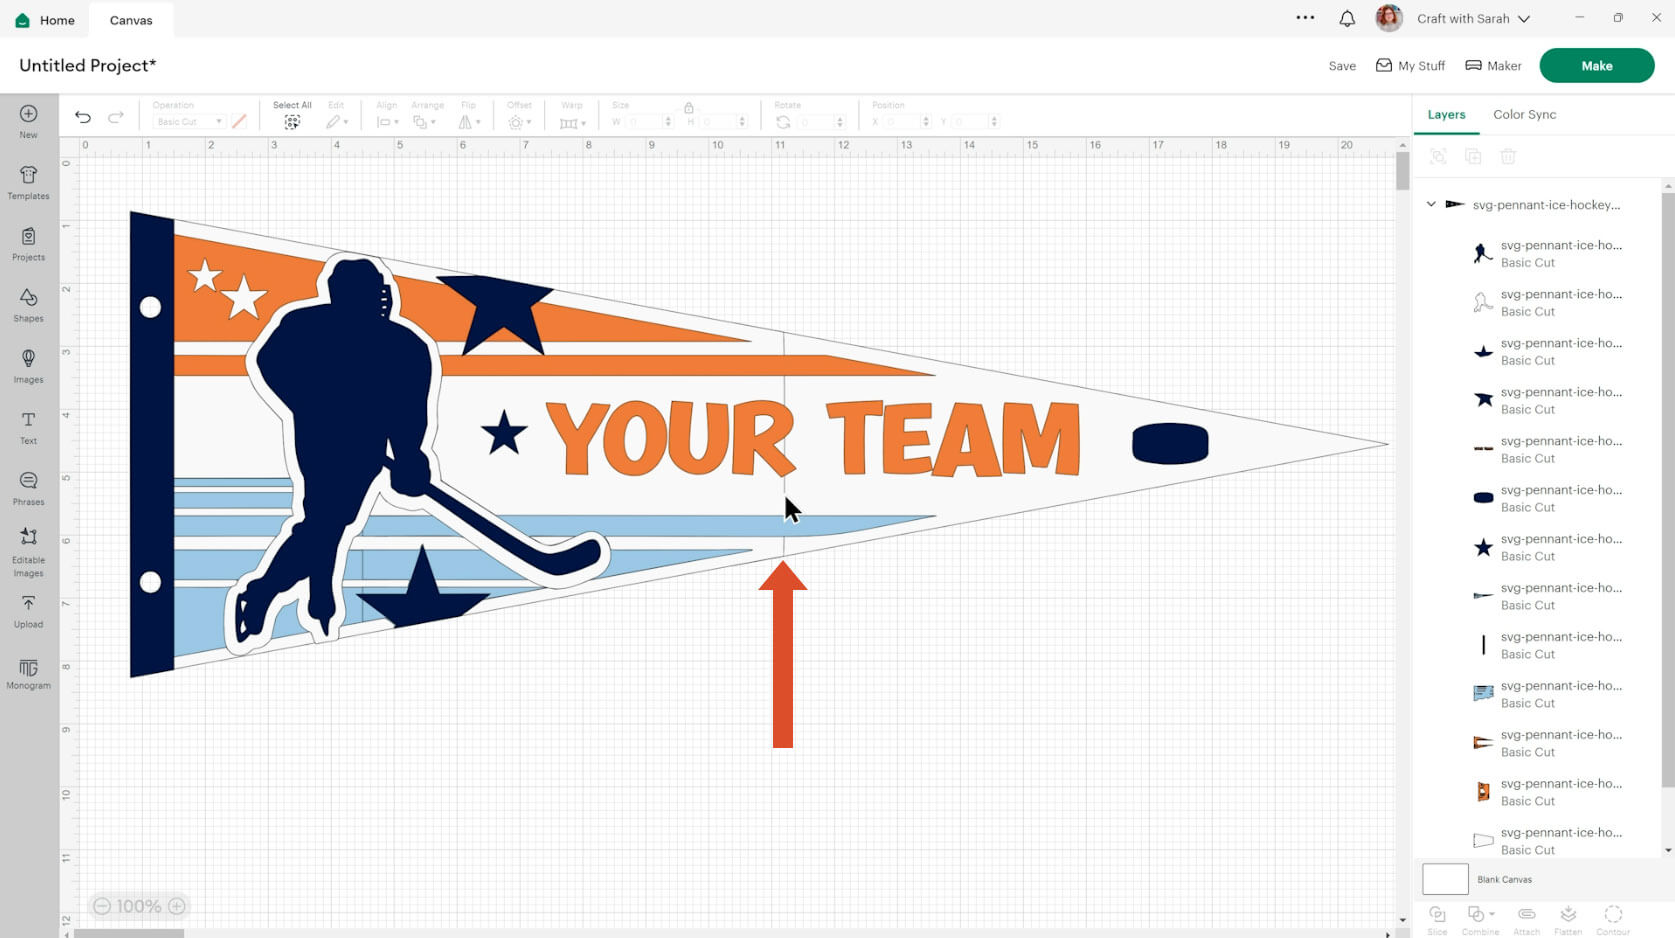
If you have chosen to make a large version, you’ll notice it has a line down the bottom section of the pennant. This is where the two bits of paper will overlap.
Click the design on your canvas and use the width/height boxes near the top of the screen to make it the size that you want to cut it.
The large version of the pennants should load in at around 20 inches wide.
The small versions can be resized to however big or small you want to make them. I would say that around 7 inches wide would be the smallest to make them before they get difficult to cut.
Step 3) Personalise the design
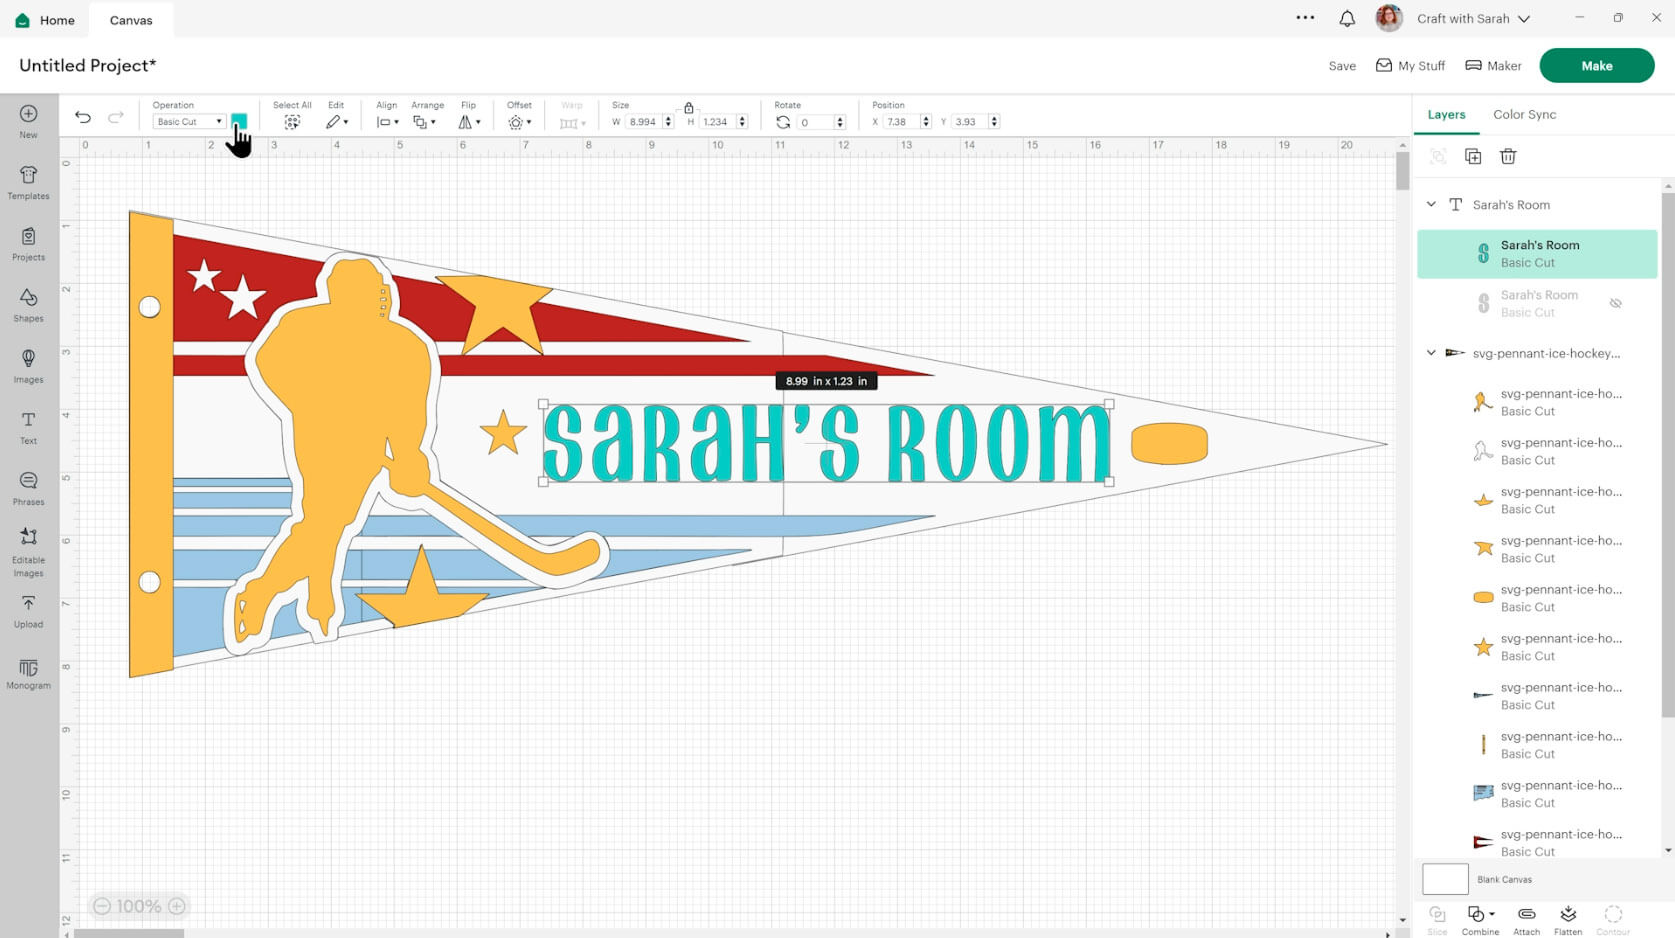
Changing the colours to match your team is easy. Look down the Layers panel, select the bits you want to change and then click the colour box. Within there you can change the colour to whatever you wish.
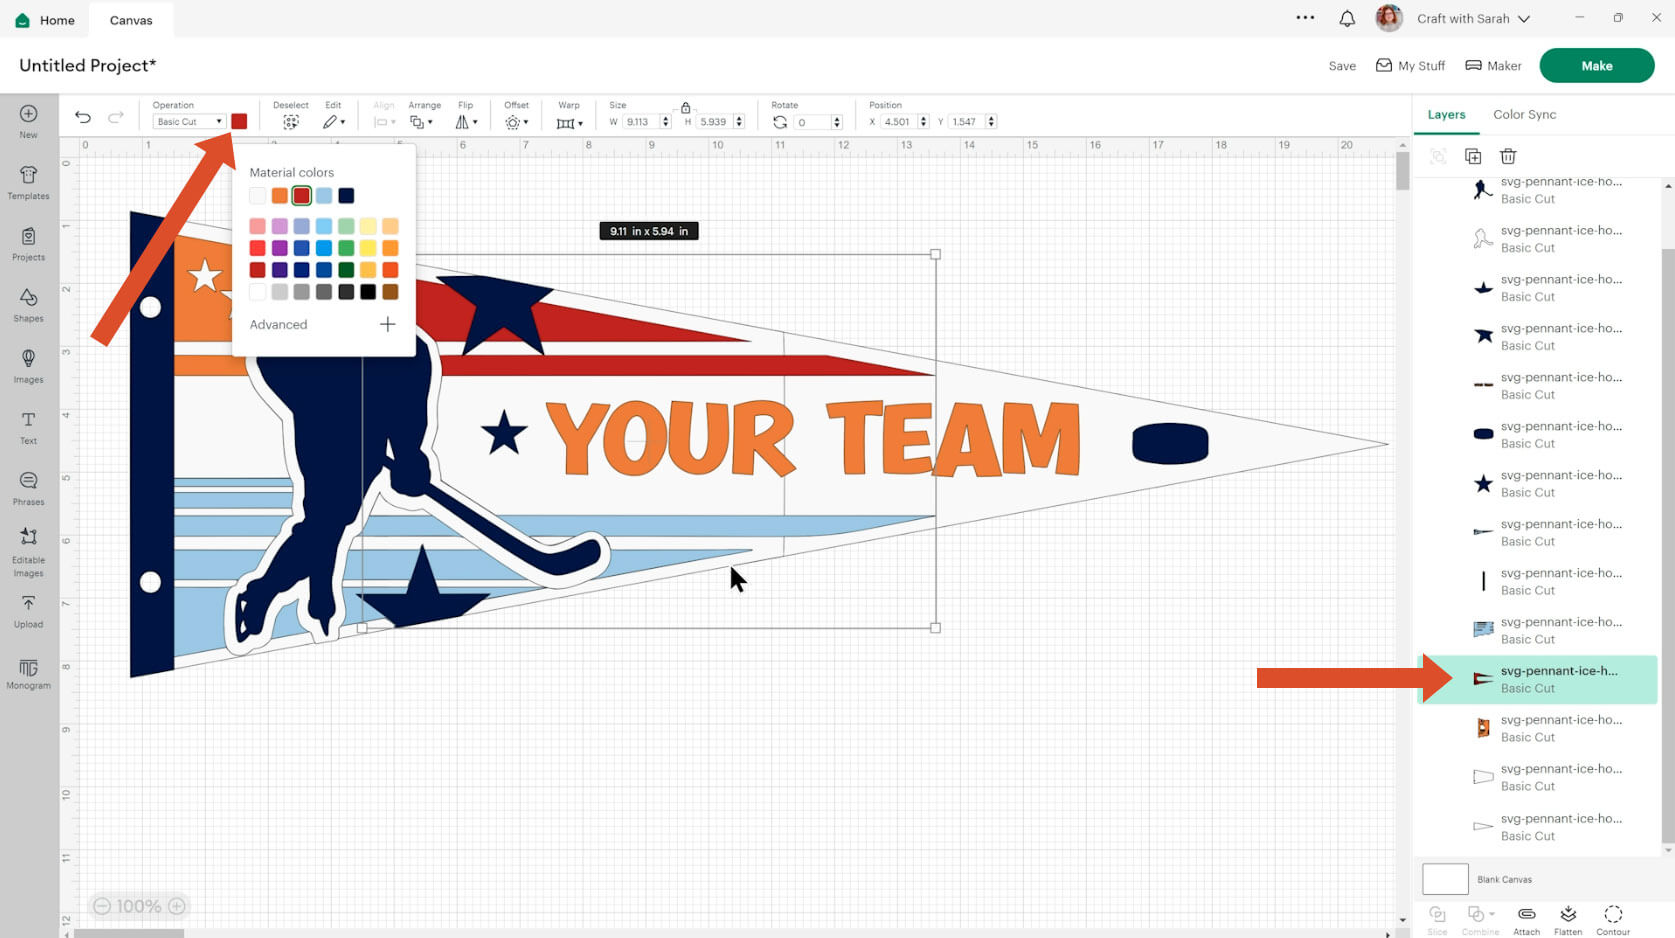
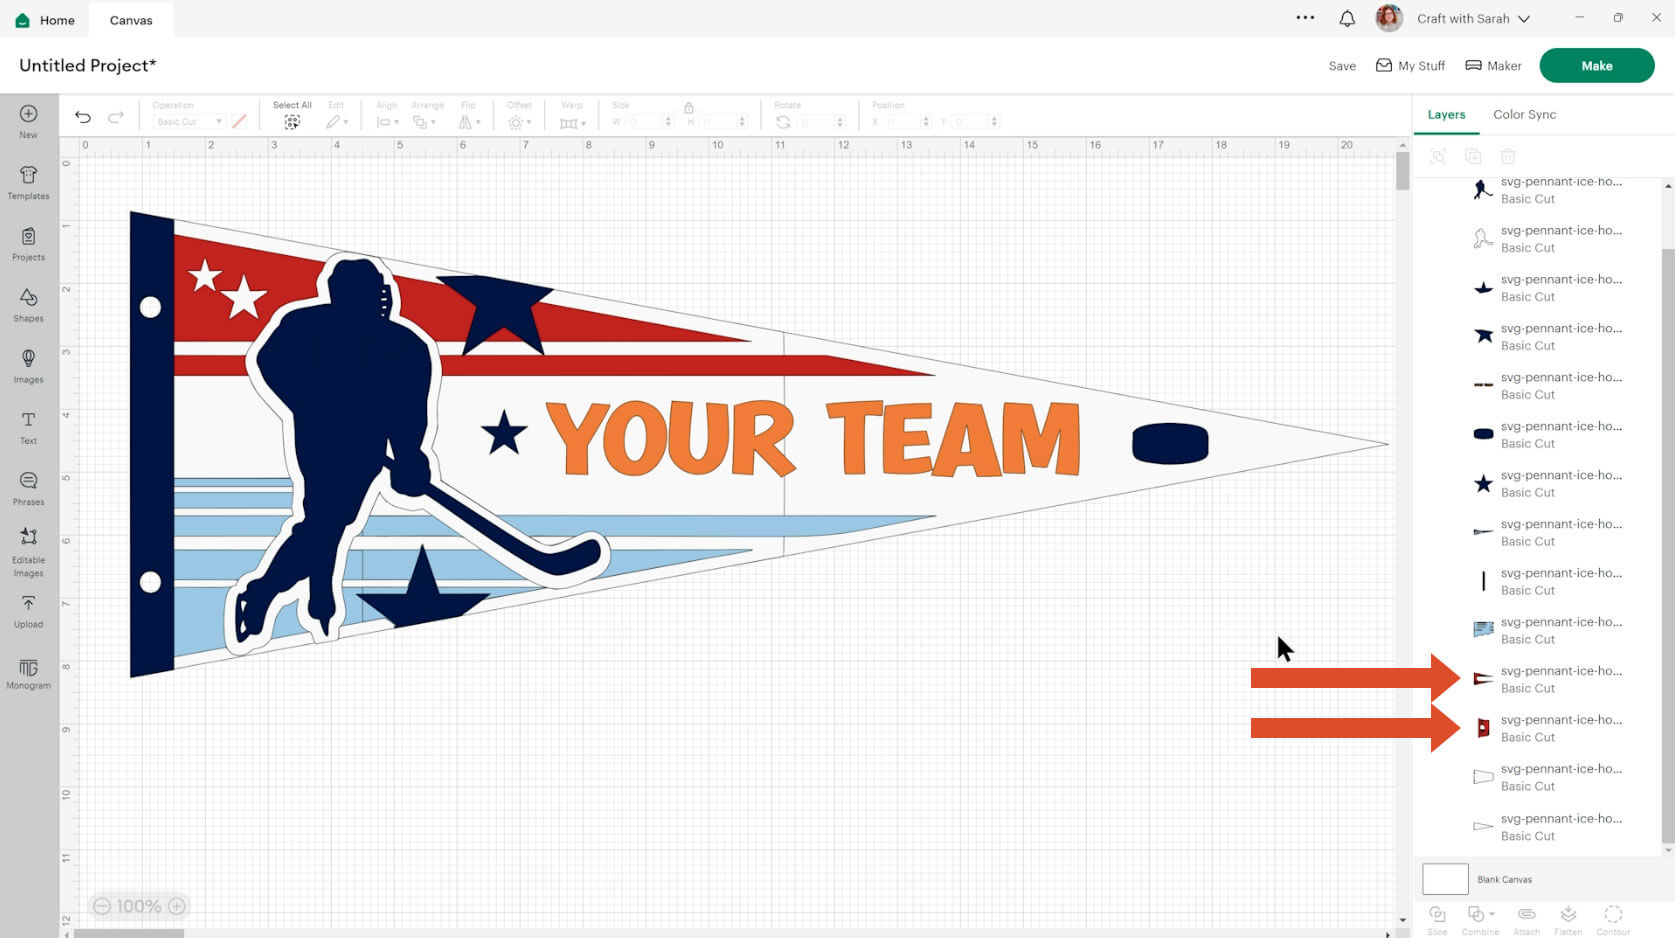
If you are making the larger version, make sure you change both pieces for the big layers as they come in two rather than one.
A quicker way to change multiple colours at once, for example to turn everything from dark blue to yellow, would be to change one of the colours and then click “Color Sync” at the top of the layers panel.
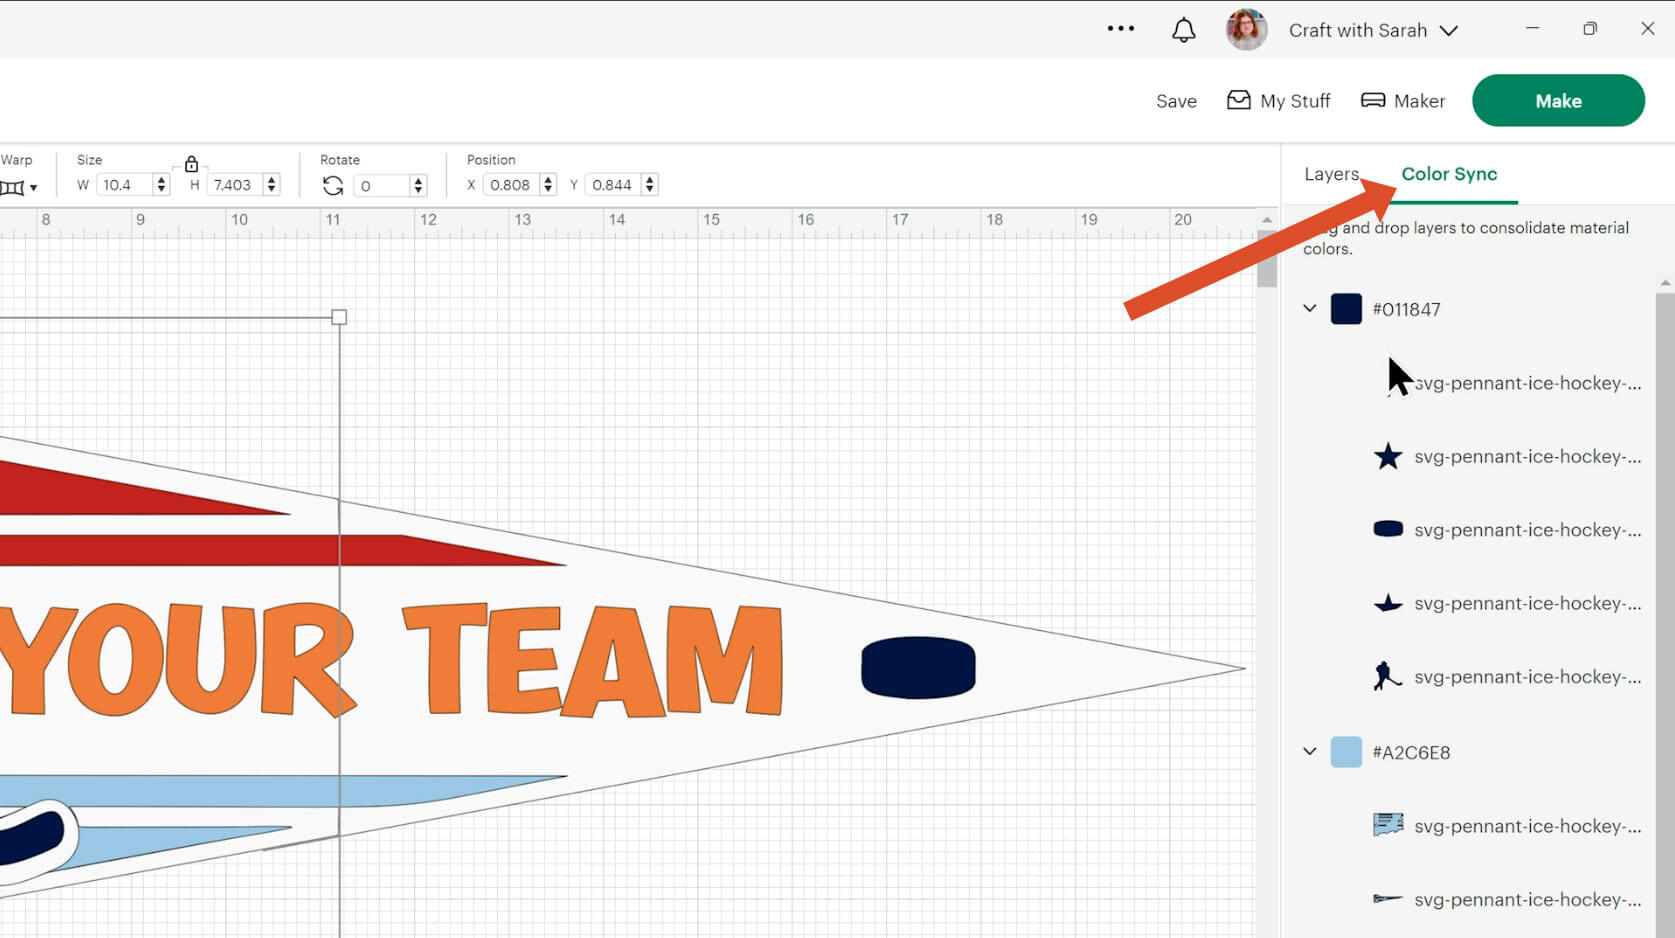
Then locate the remaining blue and drag it into the yellow section and it will all change at once.

Next, delete the text and type whatever you’d like onto your pennant. This could be the team name, a person’s name, “Happy Birthday” or anything else that you might like on there.
You want a nice thick and bold font so that it matches the design of the pennant. I used “DonJuan” which is a Cricut Access font.
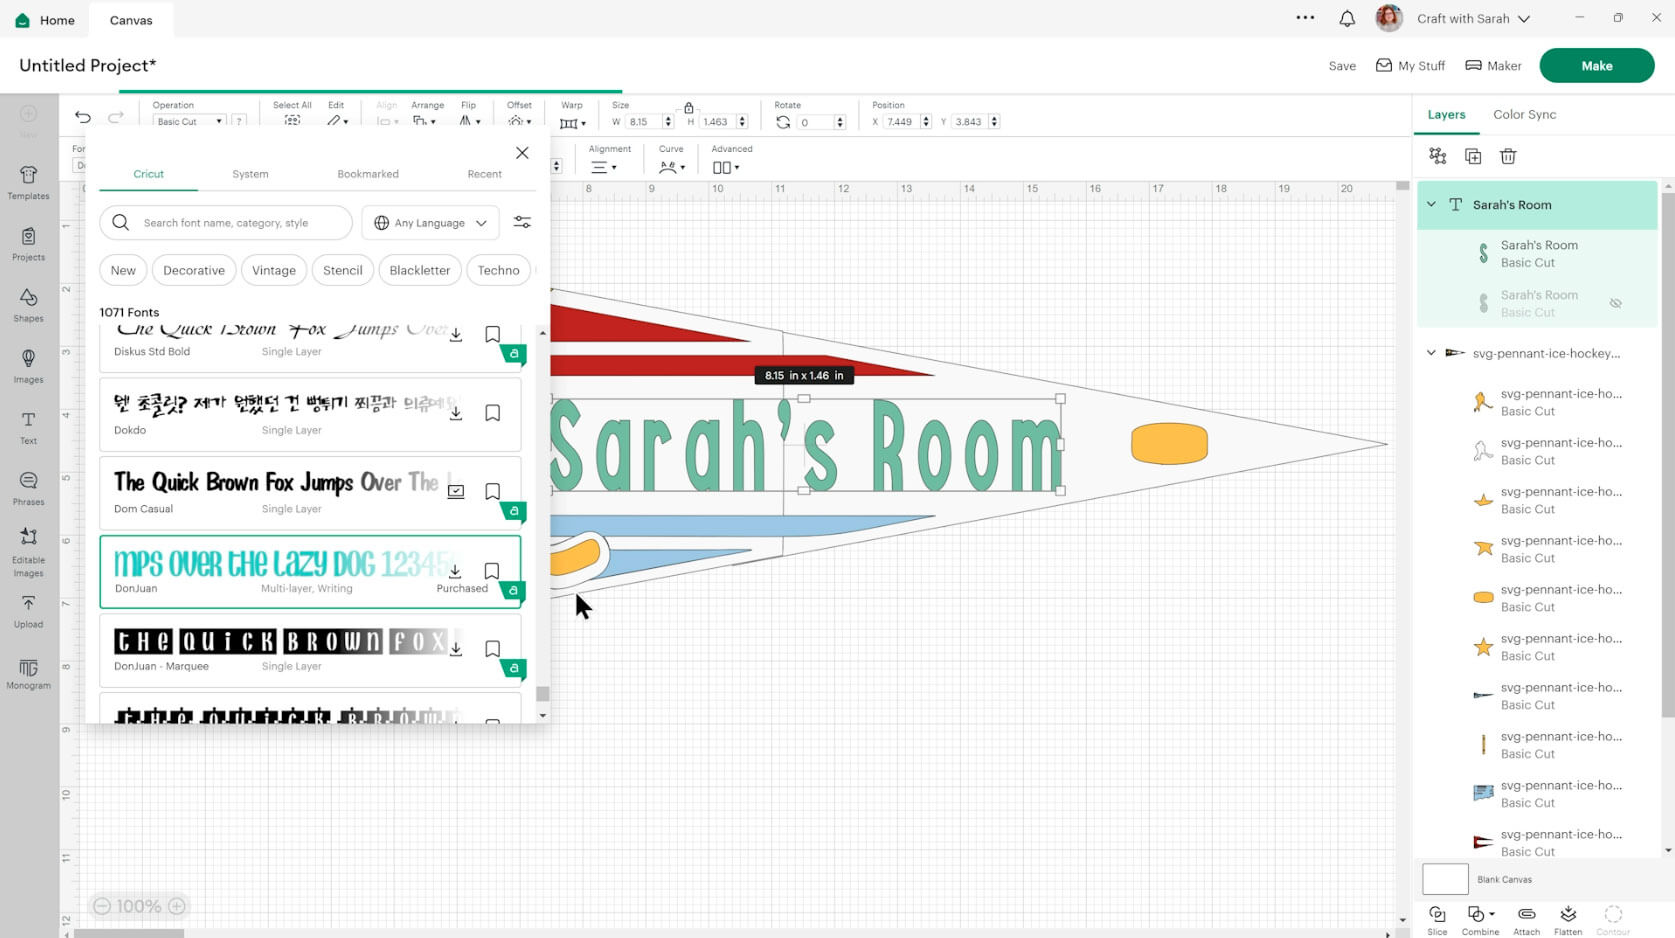
If you choose a font where the letters are joined together it will be easier to glue on rather than a letter at a time. This is recommended for the smaller pennants.
For the large ones, the text will cut quite big so even if the letters are separate (like mine), it will still be ok to glue them on individually.
If you are cutting the larger pennant, it is important to note the size. It will be 20 inches once it’s stuck together so keep an eye on your text as you might need to separate it into several layers if it’s too long.
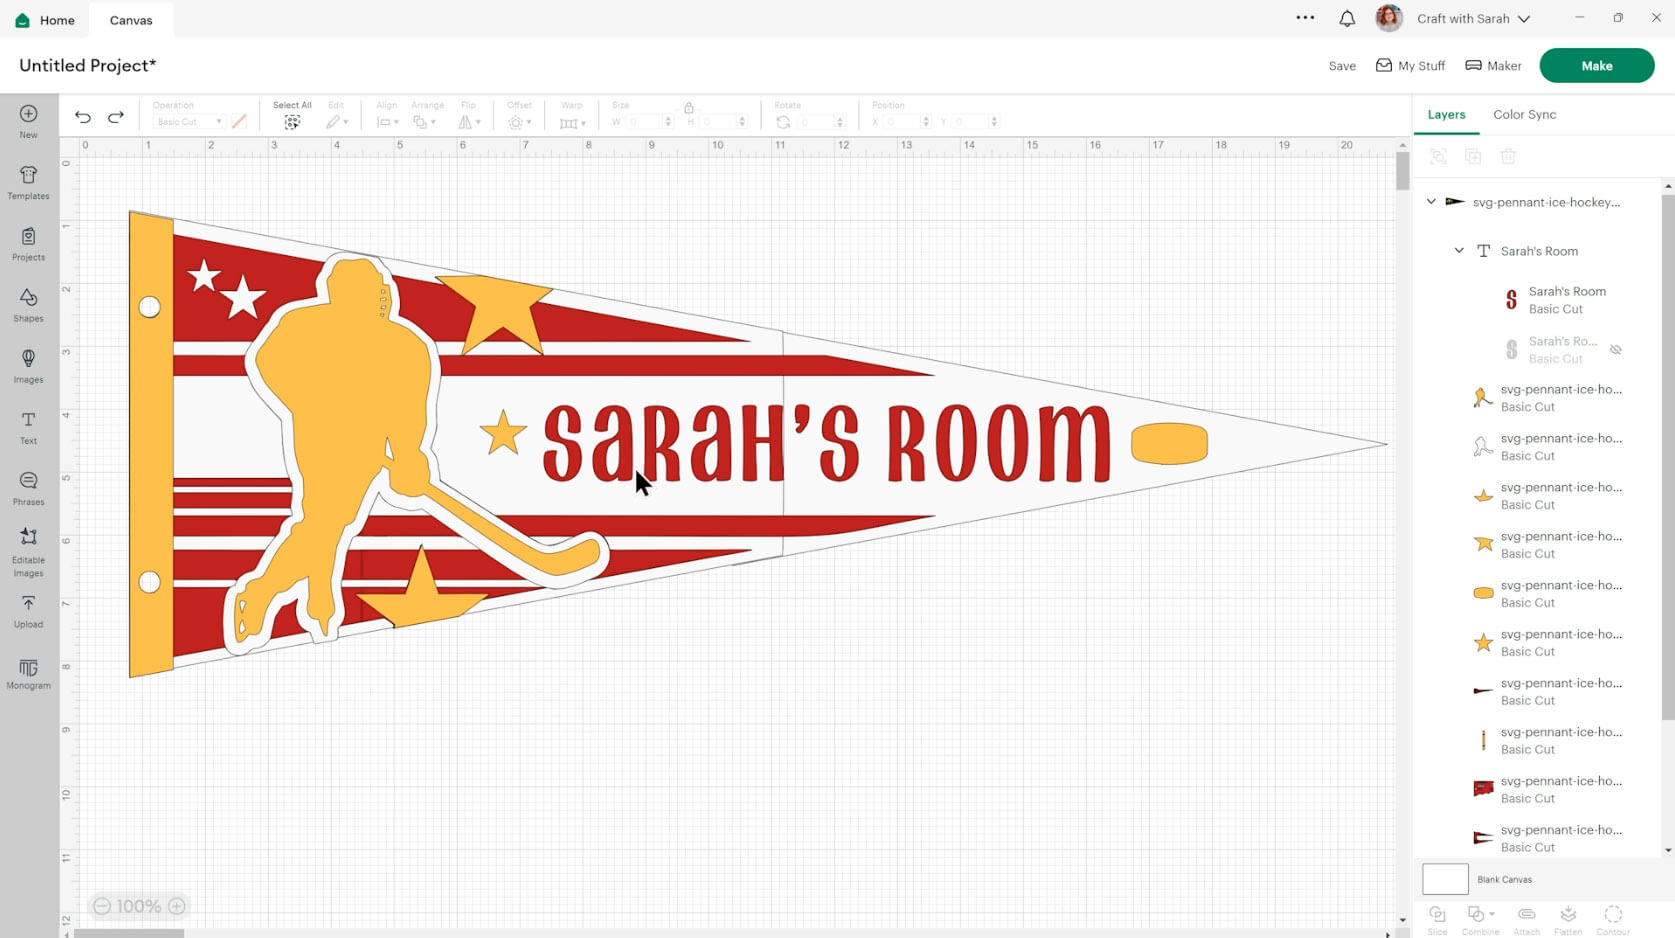
Finish changing the colours of your pennant.
Step 4) Cut the design from cardstock
When you’re happy how the pennant is looking in Design Space, click “Make” and follow the instructions on-screen to cut out all the layers.
Change the paper size using the dropdowns on the left.
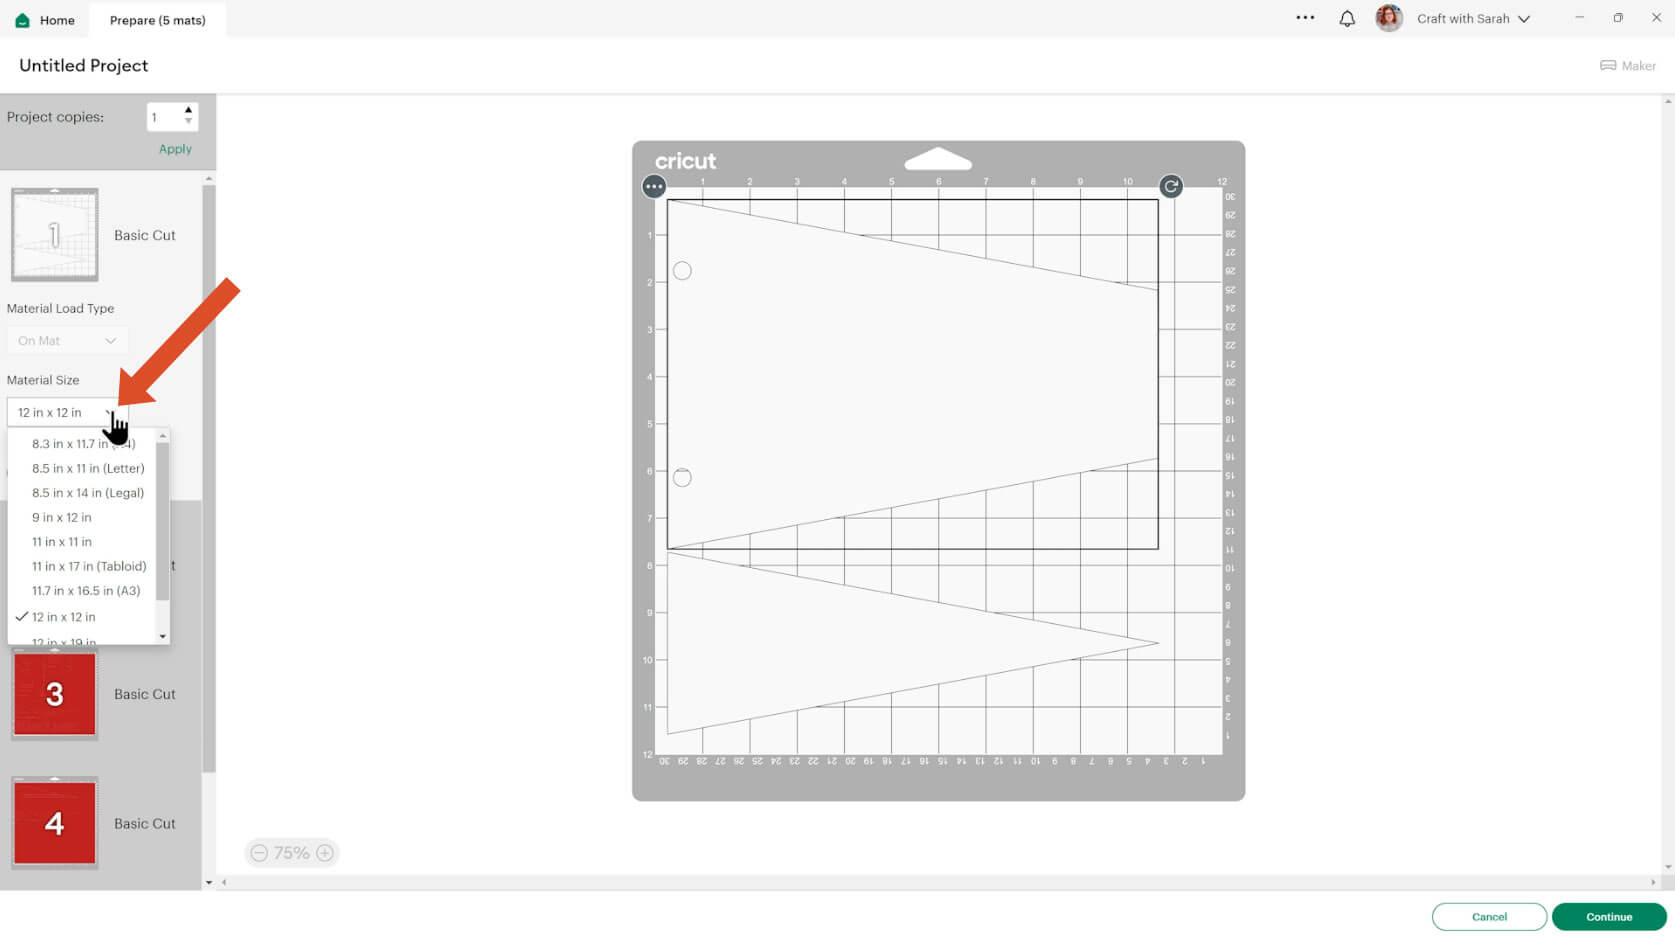
You can click-and-drag shapes around to use up less of your cardstock.
TIP: New to cutting cardstock with a Cricut? Check out this in-depth tutorial which goes through every step of the process, including tips for getting the best quality cuts from your Cricut.
Step 5) Stick the layered pennants together
Use 3D foam pads and glue to stick the layers together.
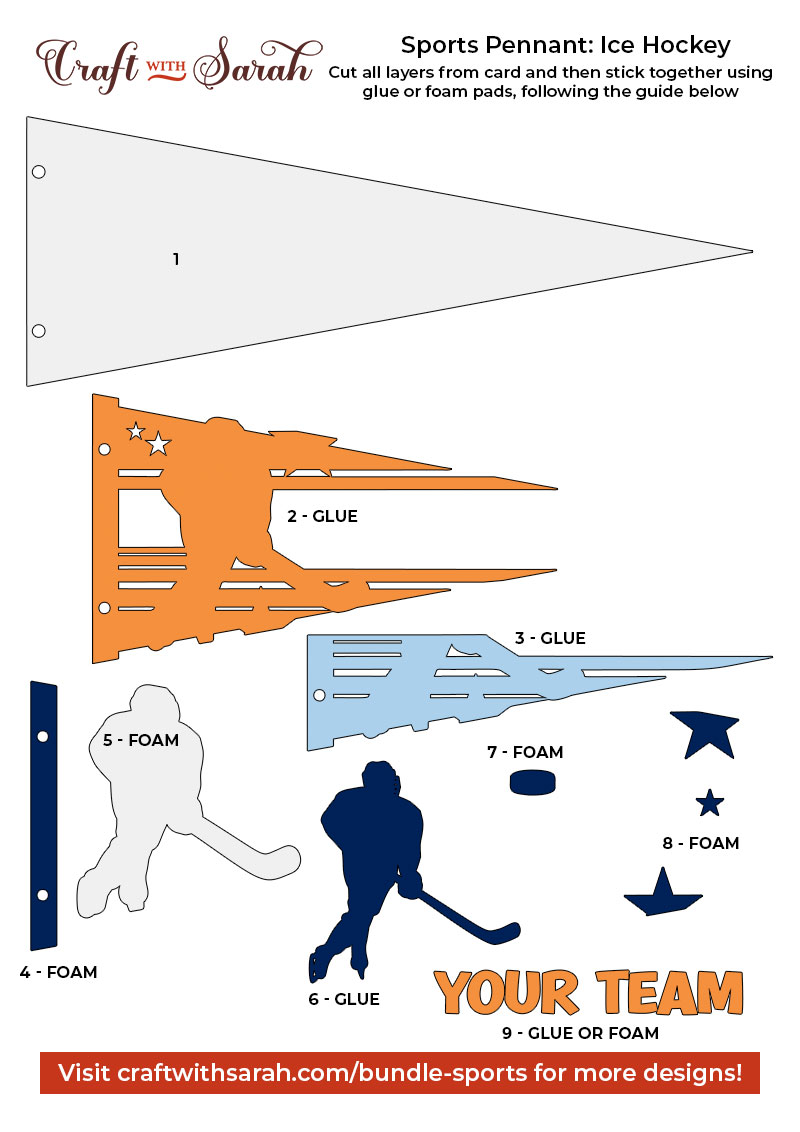
Use these guides to see the order to stick the layers together in. A high quality printable version of this assembly guide is included in the folder when you download this SVG.
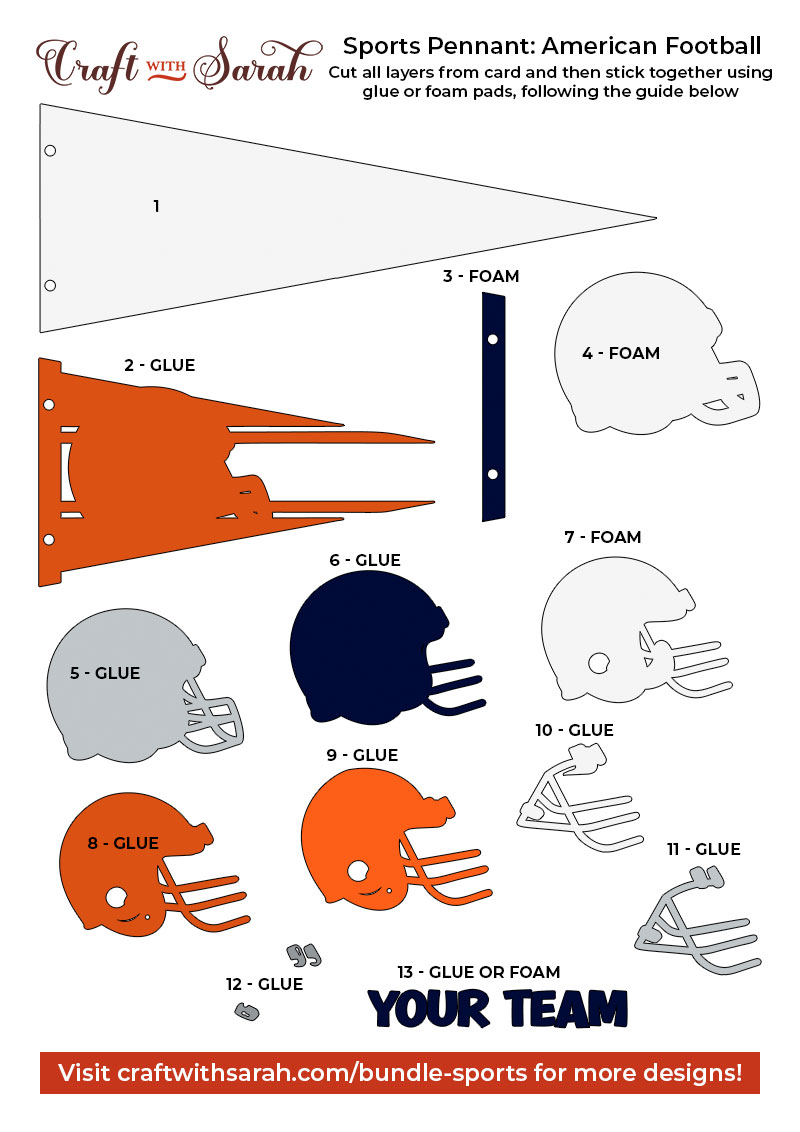
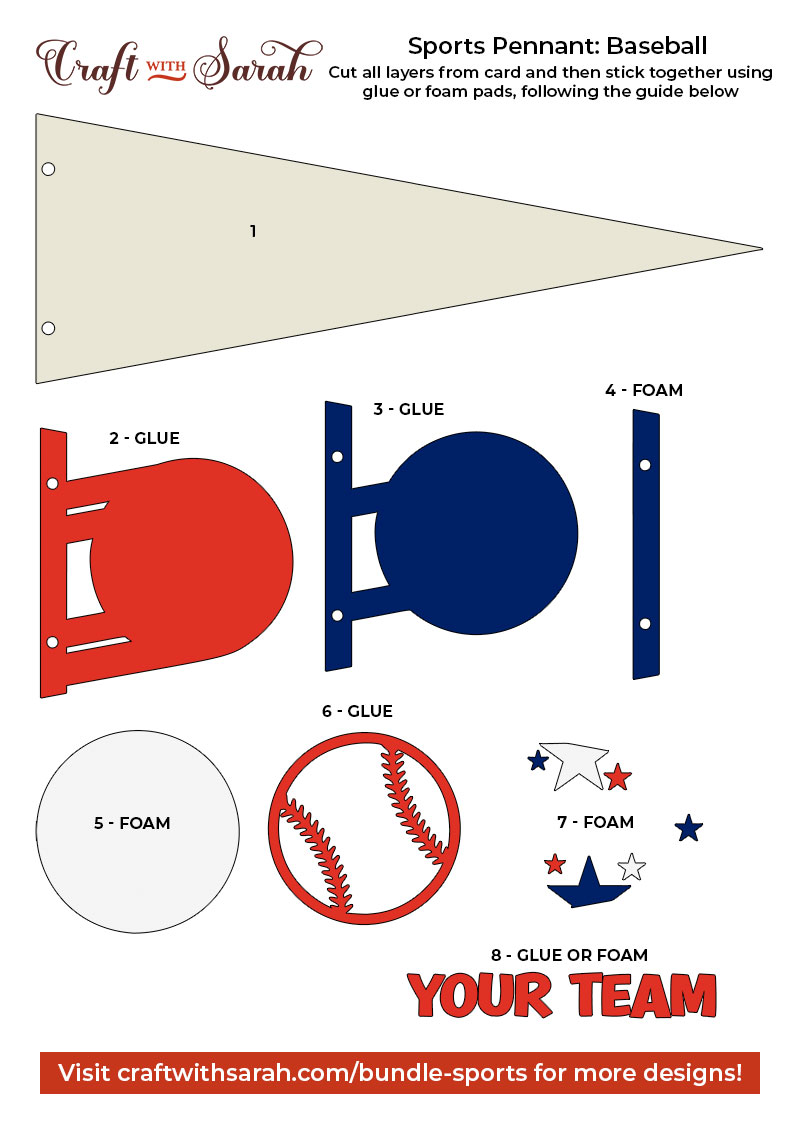
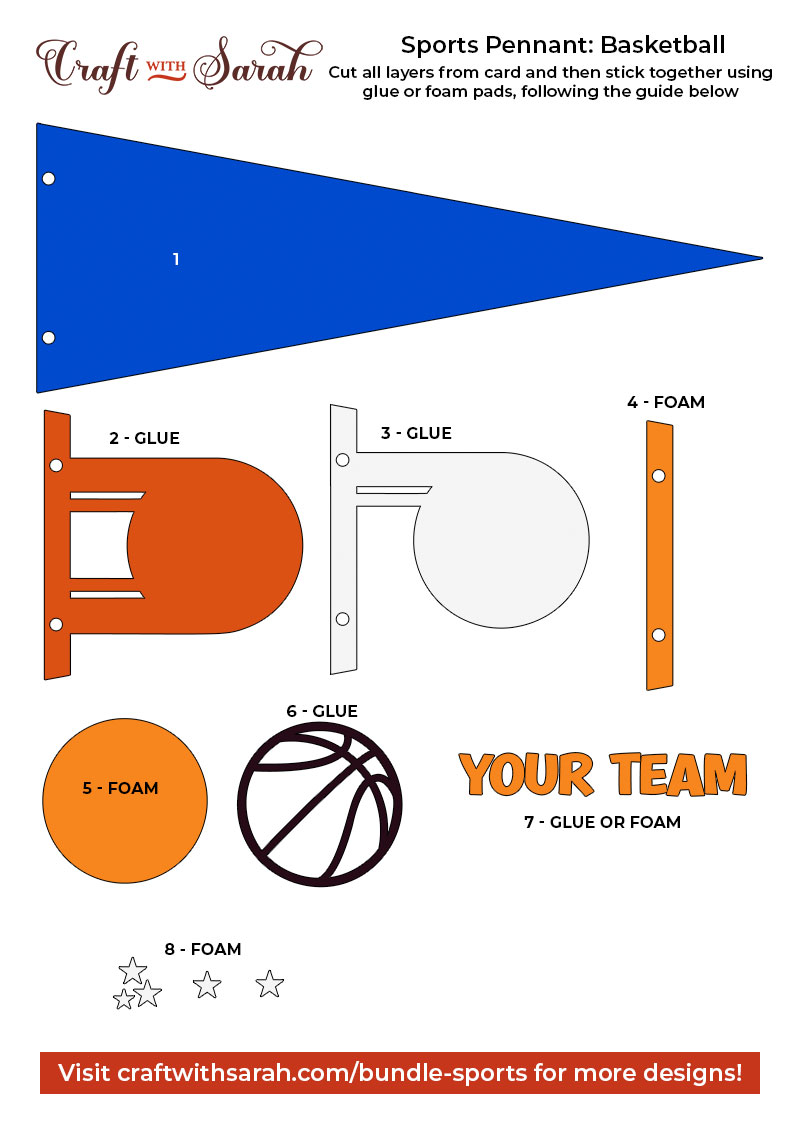
For this project, you will need two different types of adhesive: glue and foam squares.
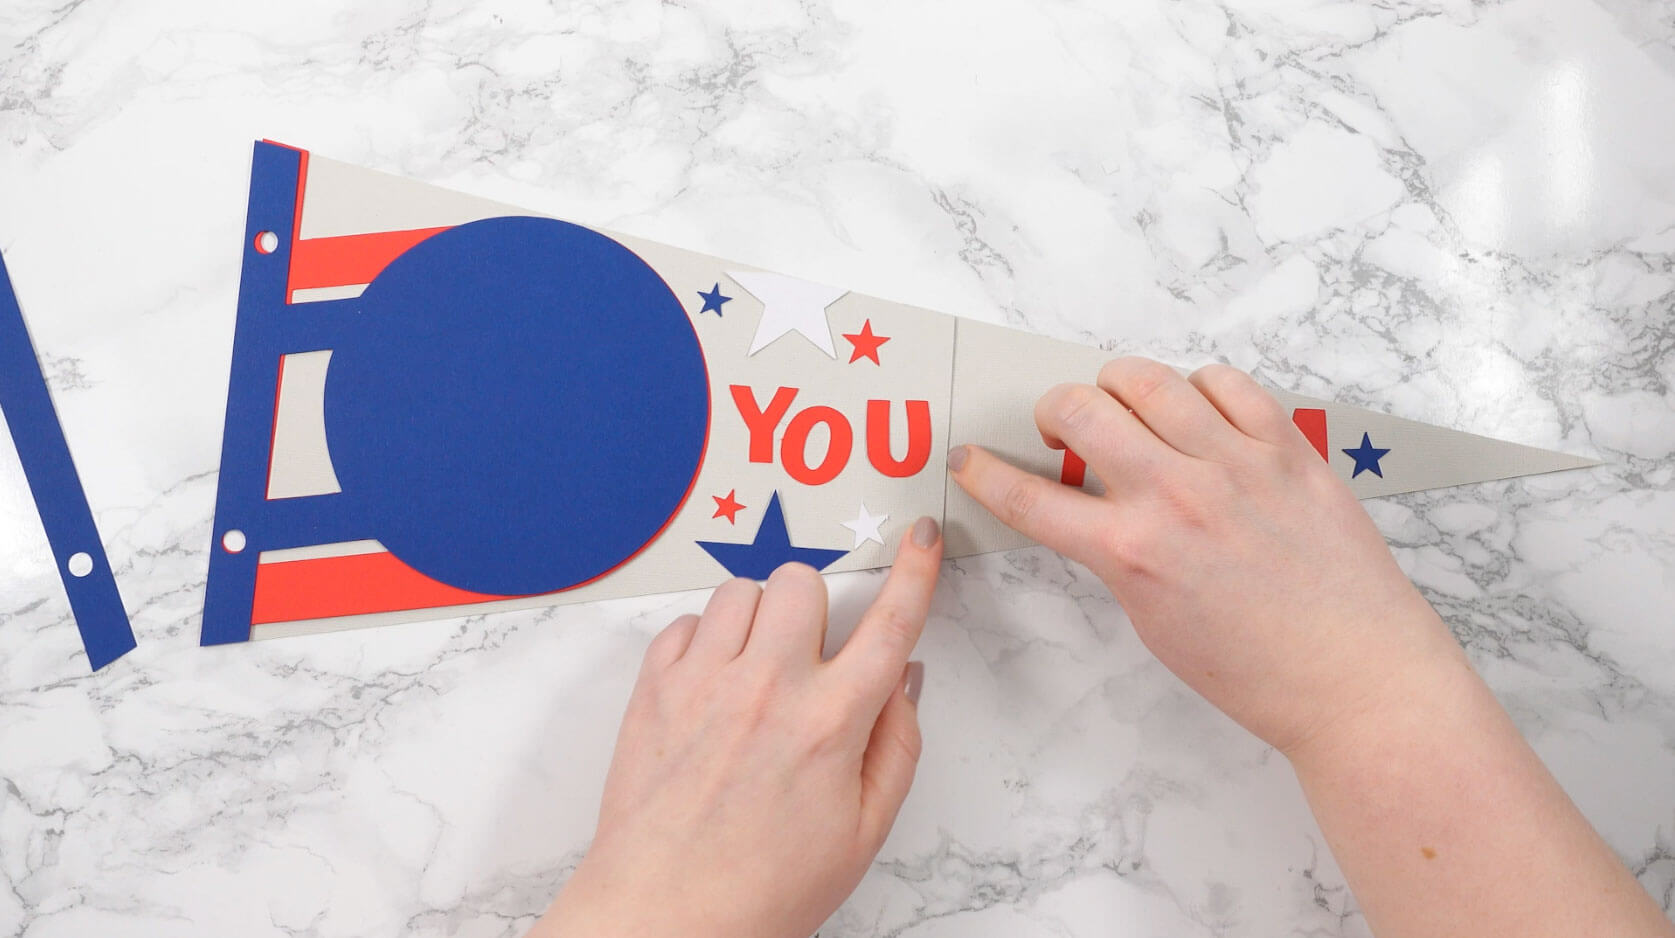
Start by sticking the two sections of the bottom together if you’re making the large design.
You can see the other pieces on my flag base as I like to lie them in position before sticking, but nothing is actually stuck together at this point.
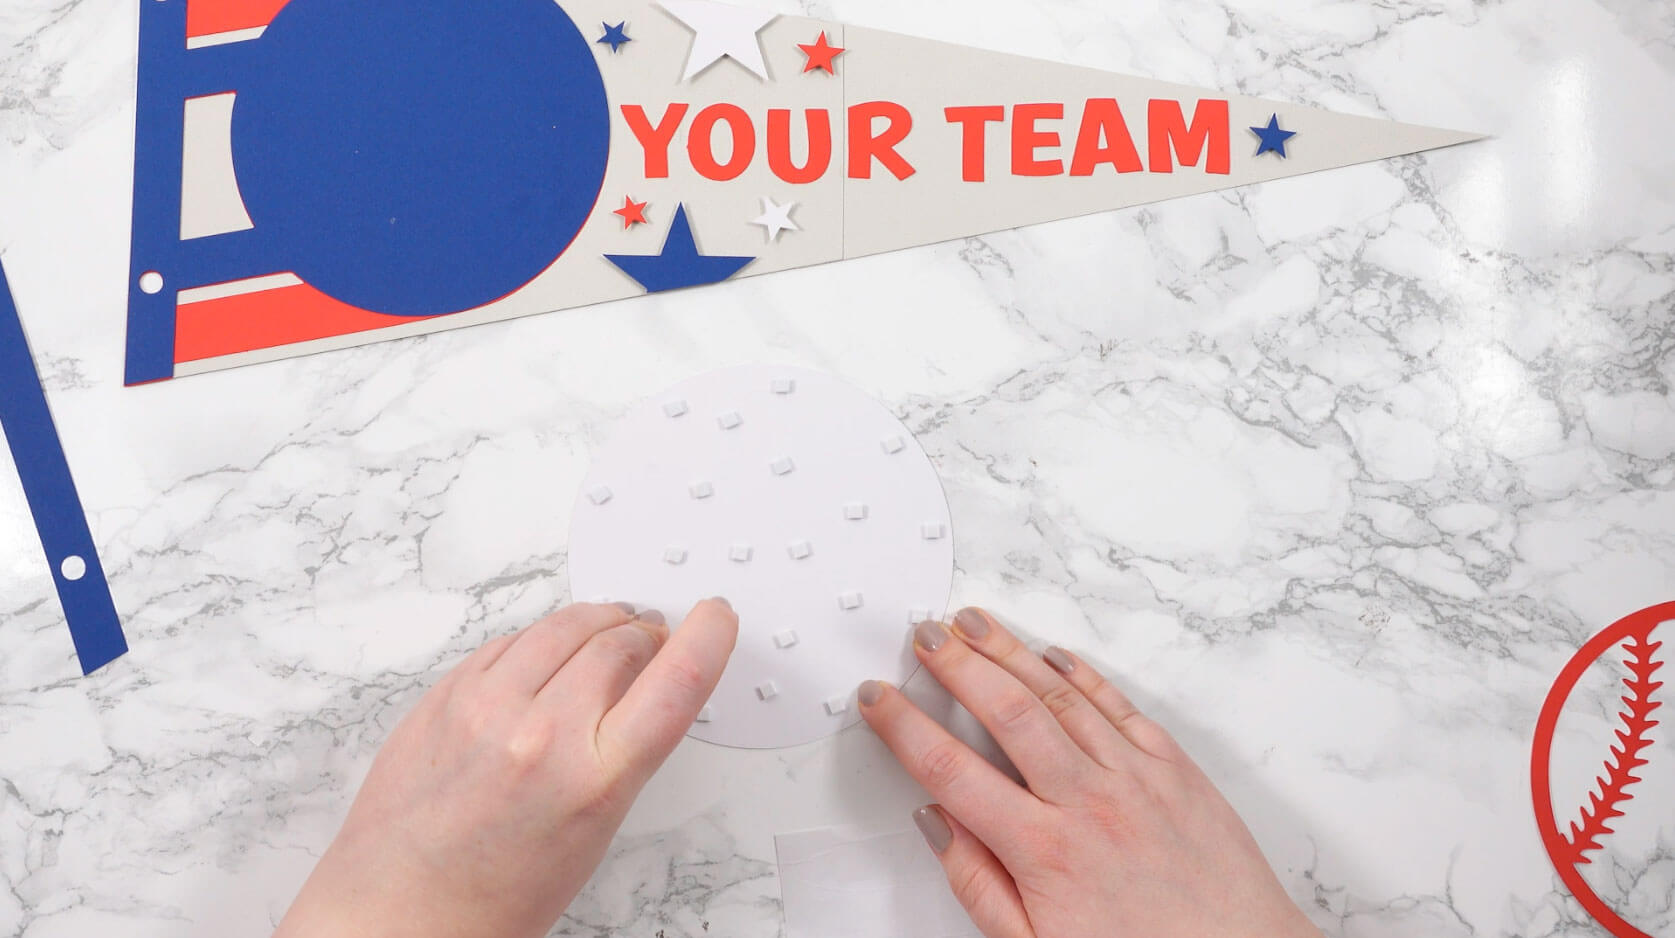
When adding the foam pads to the relevant layers, make sure you add some in the middle of the pieces of card so it give stability to the middles. If you don’t add any foam pads in the middles then it can “sag” under the weight of the other layers which doesn’t look as good.
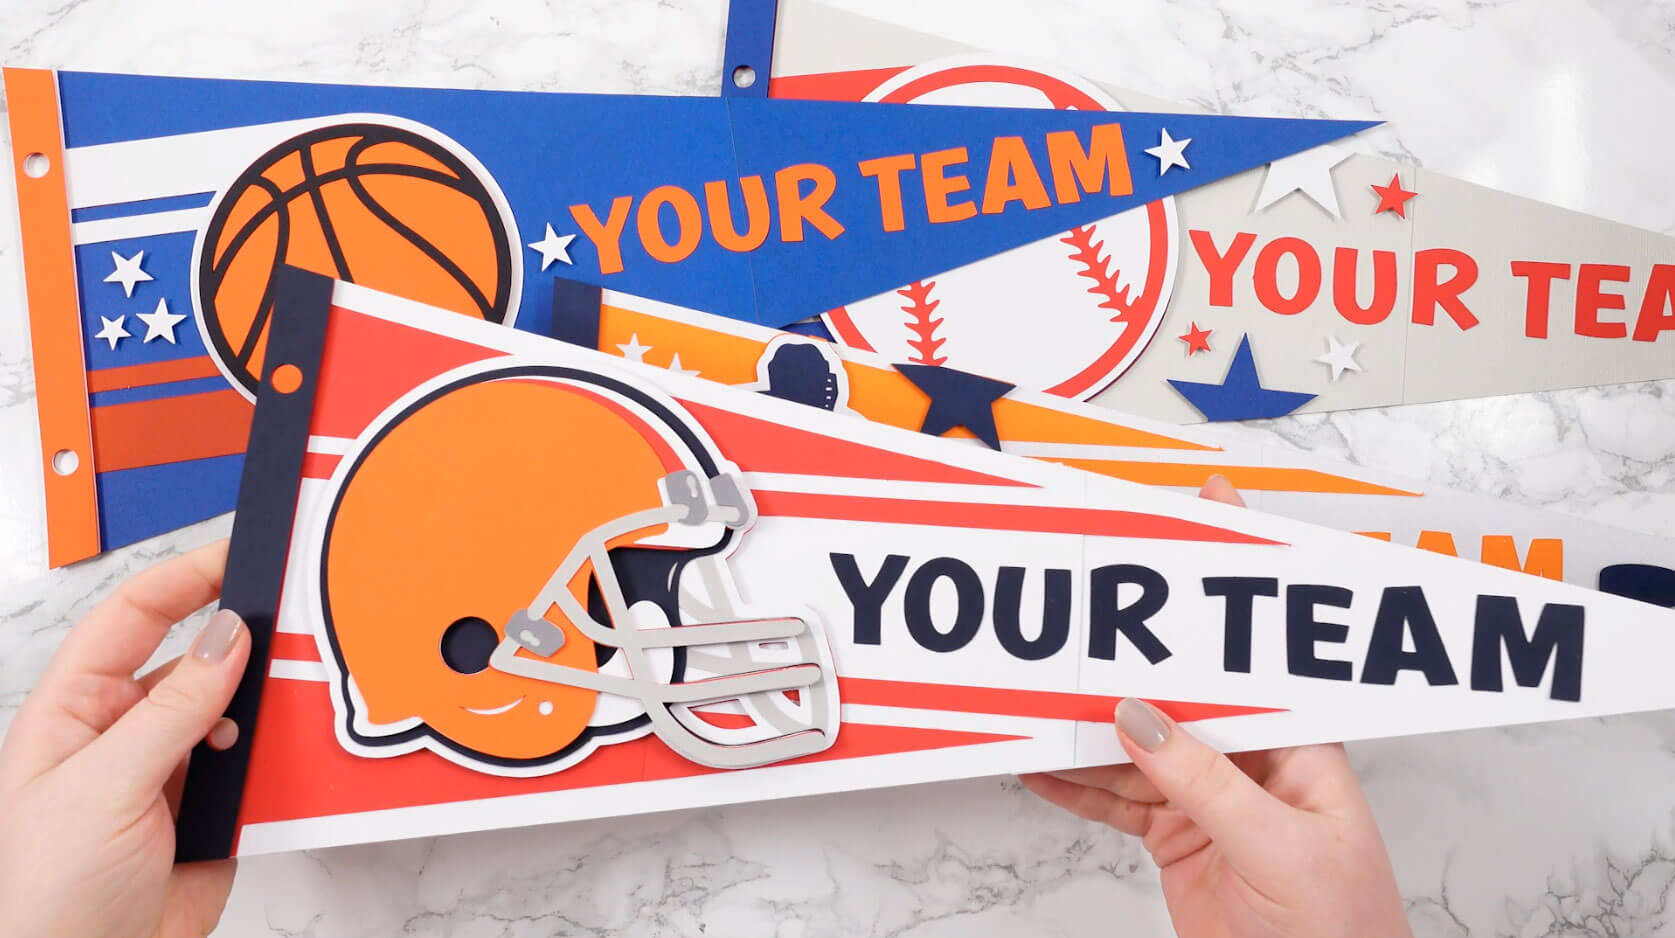
Free sports flag cut files
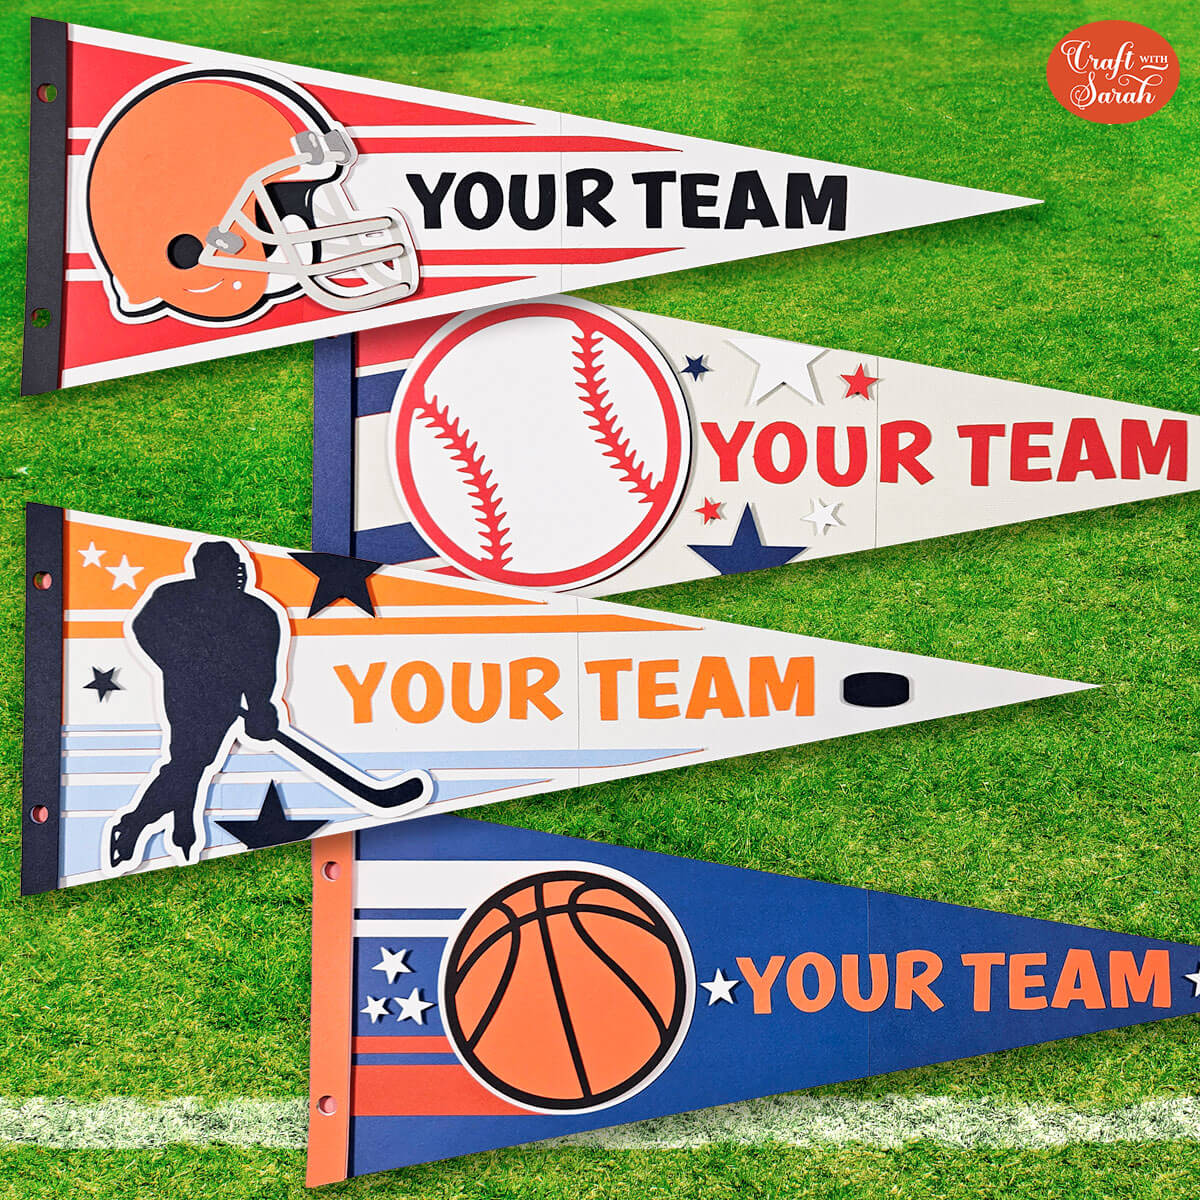
Here is how the all four of the sports pennants will look once all of the layers are stuck together.
They are now ready to be hung, framed or displayed.
But if you are a sports fan don’t go anywhere just yet because I’ve got something very exciting for you which is going to fulfil all your sports layered design needs.
Let’s take a look…
50 more sports project ideas
If you love sports AND crafting, check out the Sports Mega Bundle.
It contains layered cardstock cut files for a whopping 50 different sports.
From American football to soccer, baseball to cricket, water sports, team sports, martial arts, car and motorbike sports and everything in between – all your favourite sporting themes in one affordable SVG bundle.
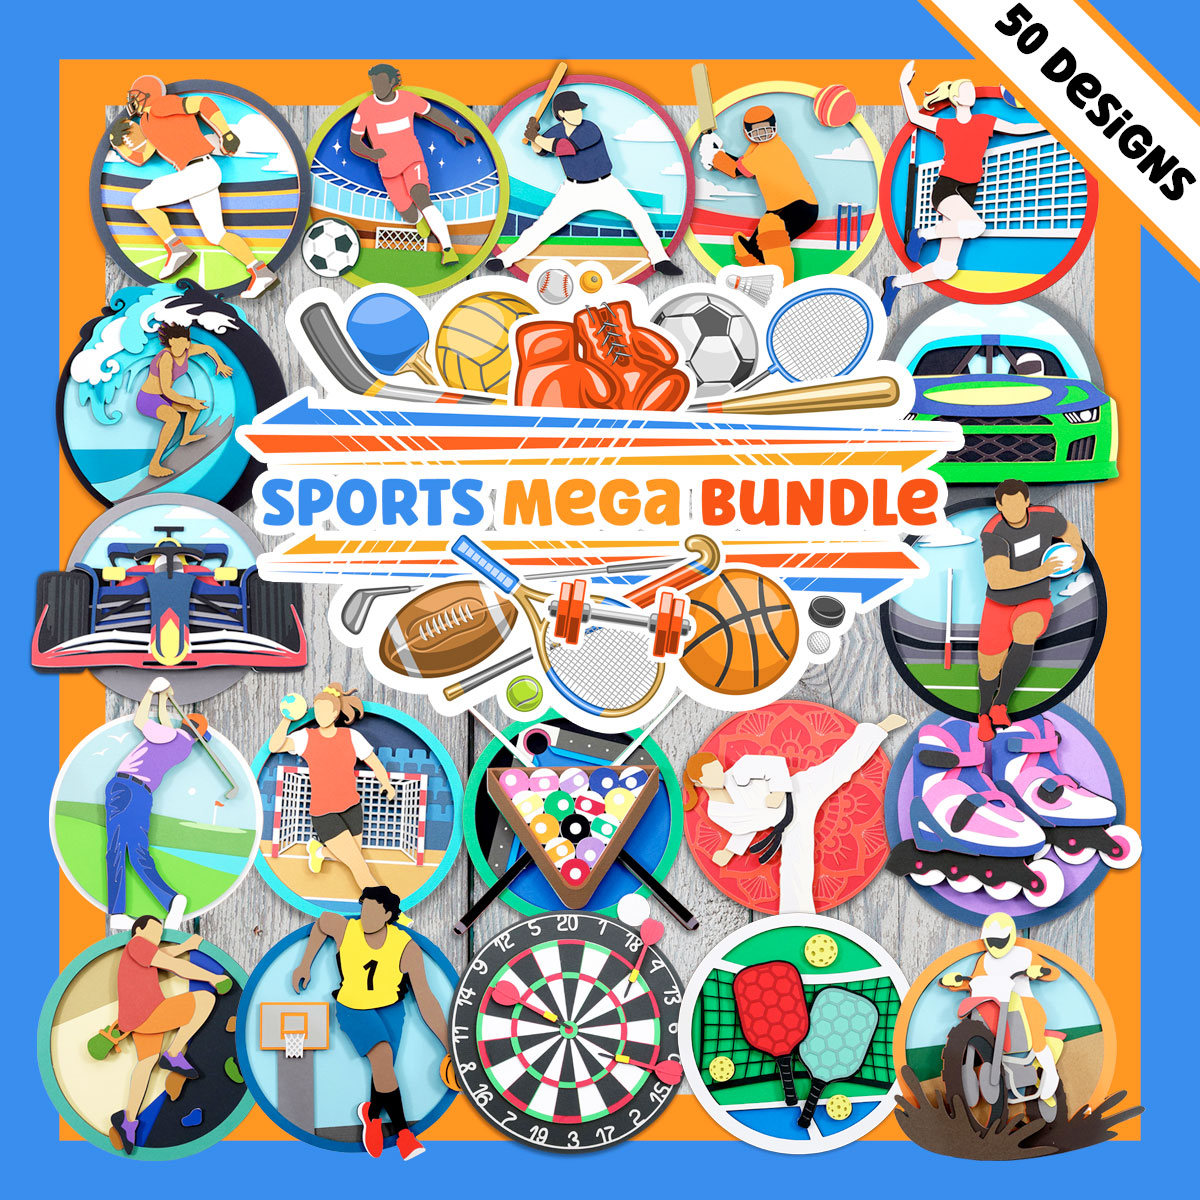
Male and female versions are included for each design that features a person, and there are also a wide range of cut files solely focused on the sport, without any people in them.
My layered SVG files retail for $5 each, which means purchasing all 50 designs would usually cost $250.
However, you can purchase the mega bundle for just $97 – getting you all these sporty designs at a much reduced price.

Happy crafting,
Sarah x

