How to Make Halloween Coloring Cards with Crayons

Looking for a non-candy Halloween treat for kids? Halloween coloring cards with crayons are a great option!
These Halloween coloring cards can be made quickly and easily in Cricut Design Space and you can use ANY image from Cricut Access to use as the coloring picture.
The pictures are drawn using pens, so no printer is needed to make this project.
Please note that some of the links included in this article are affiliate links, which means that if you click through and make a purchase I may receive a commission (at no additional cost to you). You can read my full disclosure at the bottom of the page.

Video tutorial for designing Halloween coloring cards
Watch this video to see how to design coloring cards in Cricut Design Space and then how to assemble them once cut.
A full written tutorial is available further down on this page.
[cws_halloween2020]
How to design coloring cards in Design Space
I wanted to include a written tutorial for this project as I know that many of my readers prefer this to watching a video, however if you are new to Design Space then I’d recommend watching the video because you’ll be able to see exactly how I use the Design Space software, in real-time.
Step 1) Find the existing coloring card project
Go to “Projects” and search for “Valentine coloring”. This will bring up an existing Cricut Access project called “Valentine Coloring Card with Crayons”.
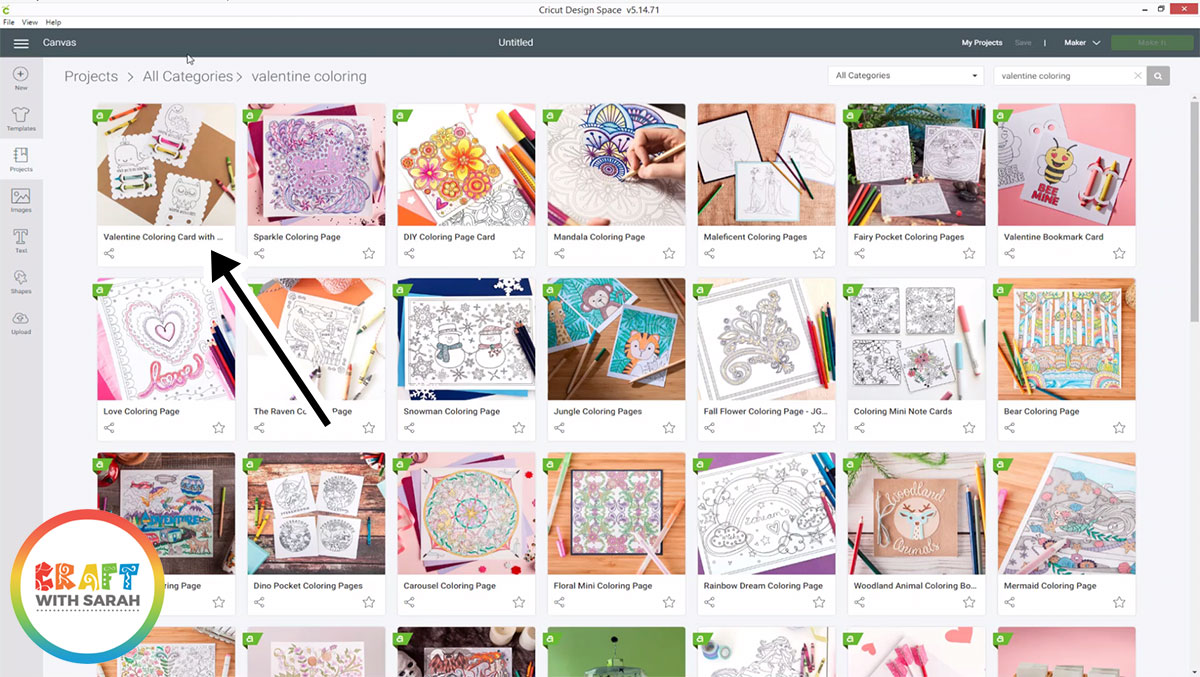
Click this to see more information about the project and then click the “Customize” button.

Step 2) Prepare the coloring cards for customization
These cards are for Valentine’s Day and we are making them for Halloween, so we need to customize this project.
Click on the second and third Valentine coloring cards and delete them so you are just left with the first one.

Click on the remaining coloring card to select it and then click the “Detach” button down the bottom of the Layers panel on the right-side of your screen.

Step 3) Customize the coloring card
Click on the dinosaur layer and delete it as we are going to be replacing it with a Halloween picture instead.
Double click into the Valentine’s text and change it to a Halloween message, e.g. “Happy Halloween”.
This may fill in some of the letters like this…

If it does, that means that Cricut has changed the font to a “cut” linetype rather than “draw”.
To fix this, go into the Linetype dropdown and select “Draw”. This should fix the text, so it looks like this:

Click and drag a box around the coloring card and press the “Group” button to group all of the layers together.
Right-click on the group and duplicate it twice so you have three coloring cards (or however many you want to make!).
Step 4) Add the Halloween coloring images.
Now it’s time to choose your coloring images!
Click “Images” and type “Halloween” into the search box.
The easiest way to find great-looking draw images is to change the “Art Type” files to “Draw Only”.

Select your images and insert them into your project.
Step 5) Position the coloring images
Drag the image so that it sits on top of the coloring card you want to put it on, and resize the image to fit.
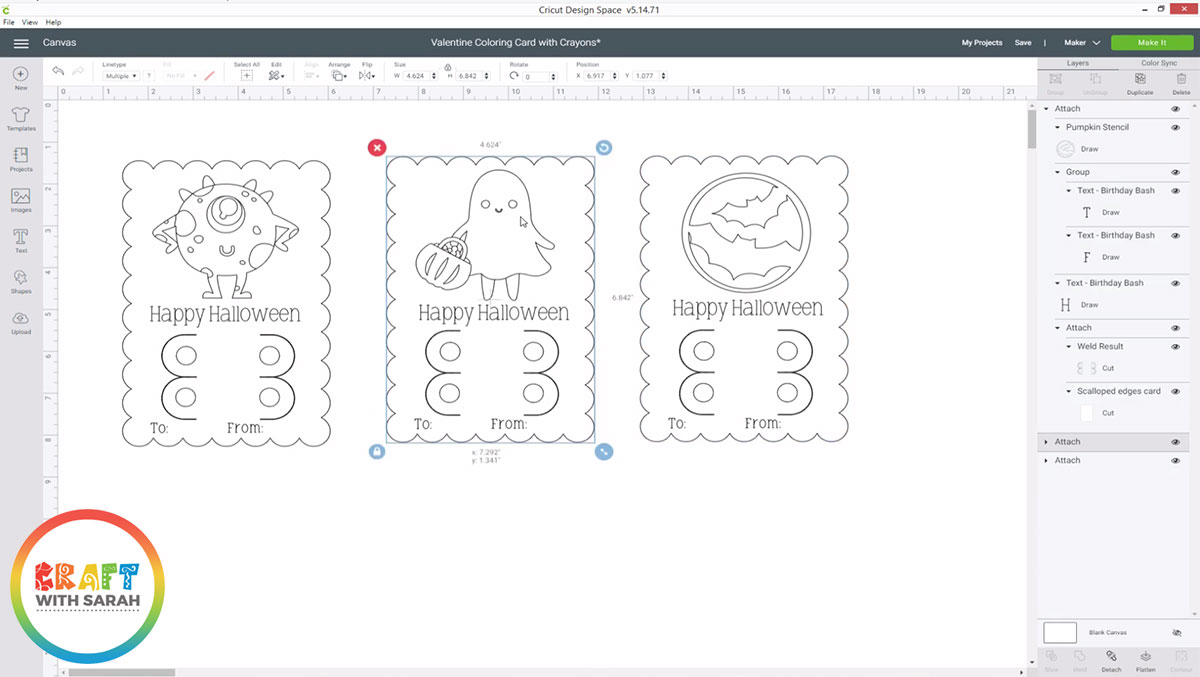
Draw a box around each individual coloring card and press “Attach”.
This tells your Cricut machine to draw that image on that particular coloring card.
Once you’re happy with the designs, click “Make It” and follow the steps for your Cricut to draw the images and cut out the shapes.
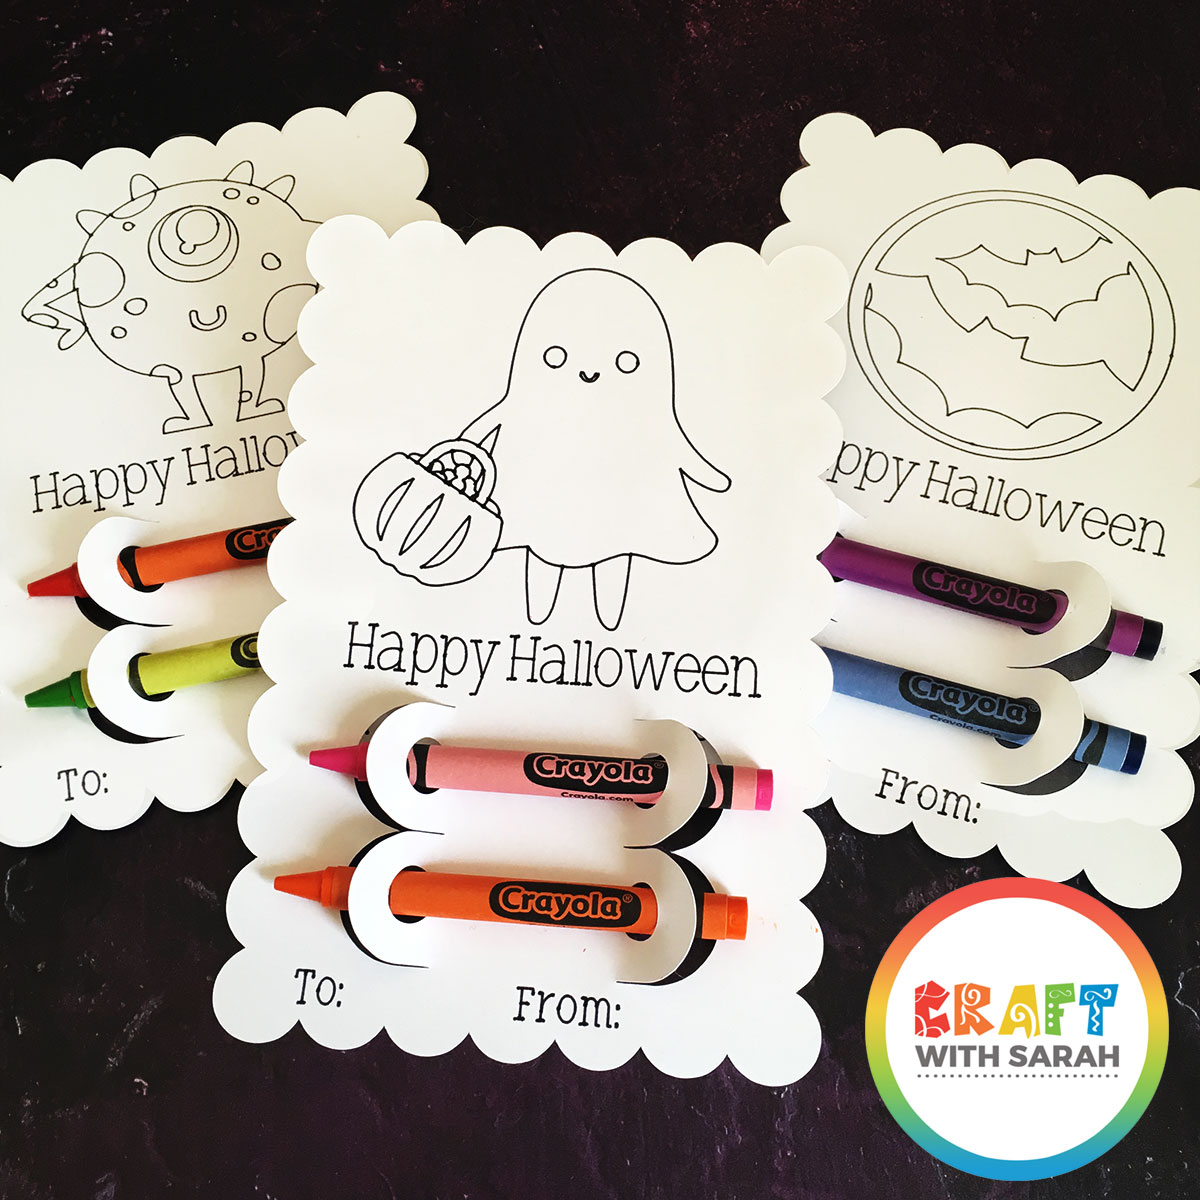
Step 6) Assemble the coloring cards
The most effective way to get the coloring cards off of your Cricut mat is to first peel off the excess card around the edge.
Next, turn your Cricut mat upside down and bend it gently backwards.
This will “pop” your coloring cards off the mat so you can gently remove them without the card bending/warping.

Now all that’s left to do is to thread some crayons through the holes in the coloring cards, and you’re all finished!
I hope you enjoyed this tutorial on how to create coloring cards with crayons in Design Space.
This is a really cute non-candy Halloween treat, either for trick-or-treaters or as a classroom gift, and it would also work well for any holiday – Christmas, Valentine’s Day, back to school, etc.
[cws_clubhouse design=’1108′]
Happy crafting,
Sarah x
[cws_halloween2020]

