Papercraft Christmas Wreaths: Cardinals & Robins
Make your own papercraft Christmas wreaths!
Wreaths are essential Christmas decorations in my house and I love making papercraft versions to decorate the rooms inside.
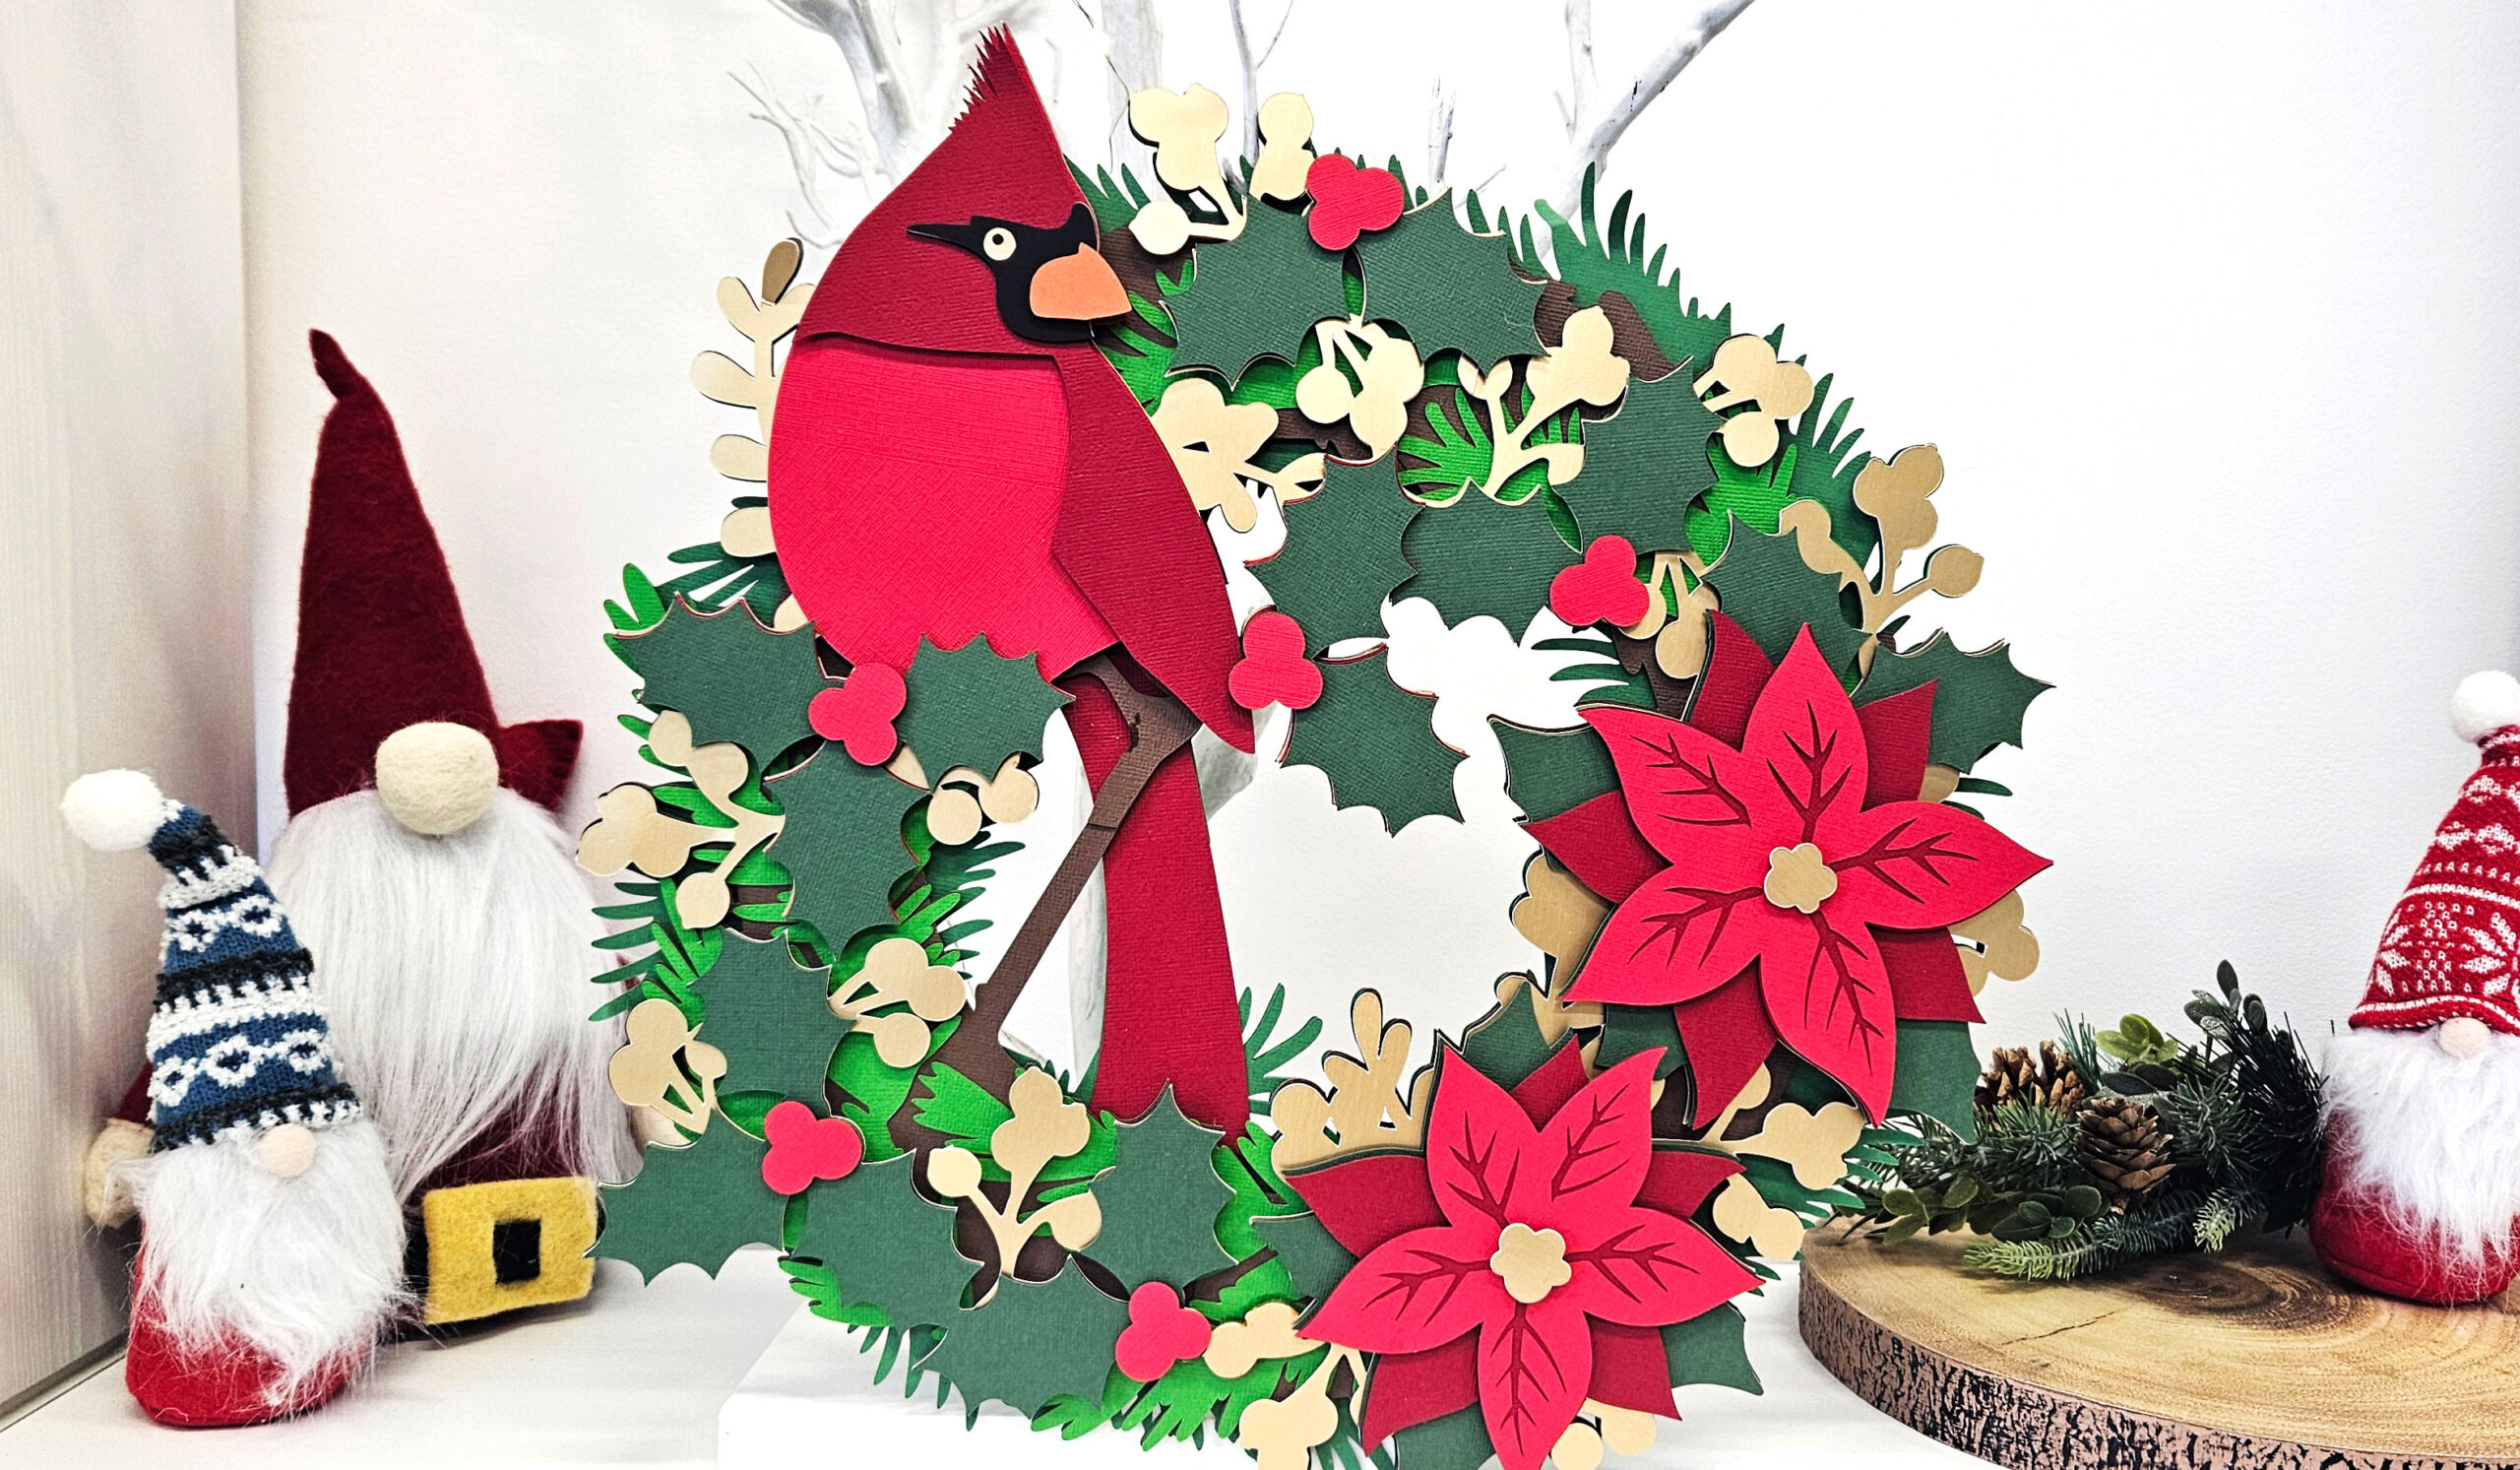
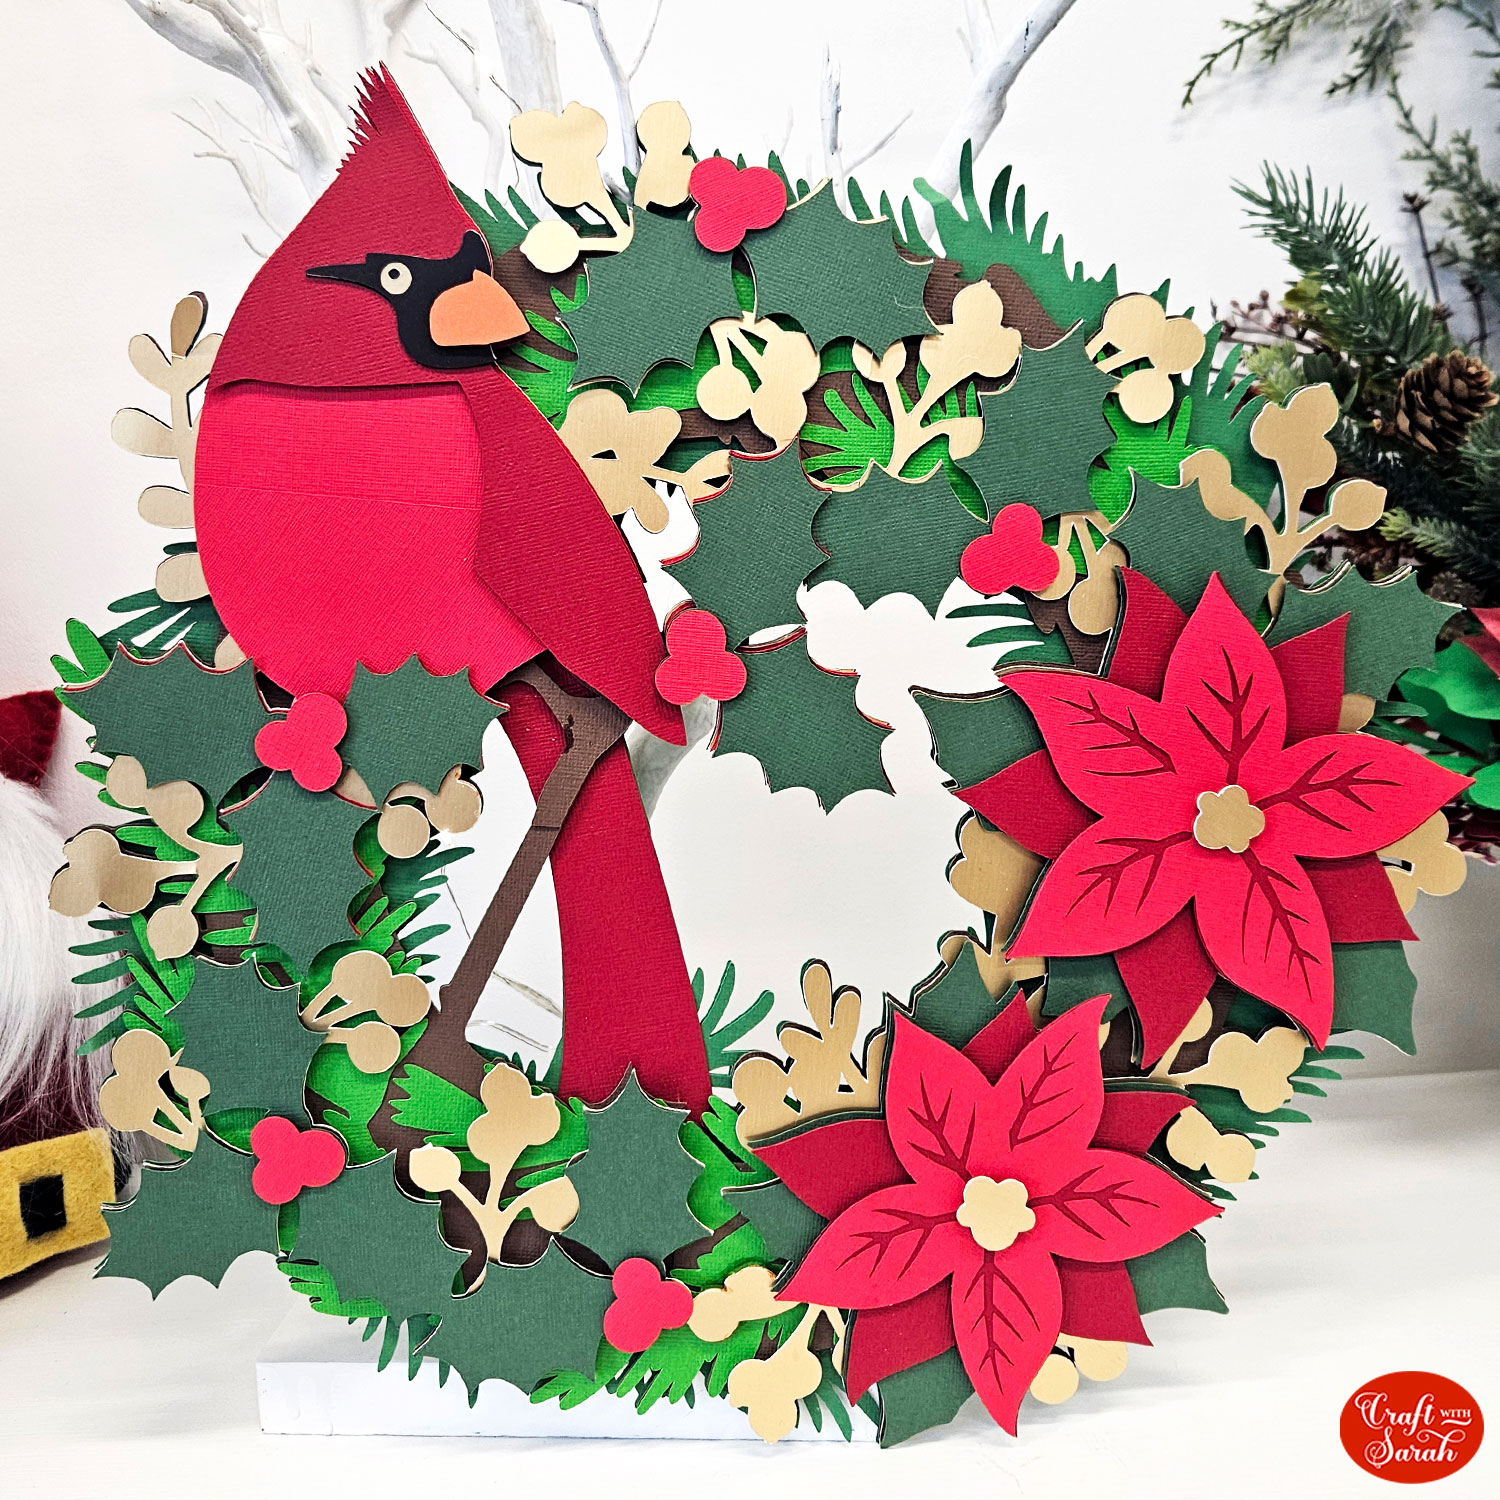
This giant papercraft wreath is complete with Christmas greenery, some poinsettias and even a perched cardinal.
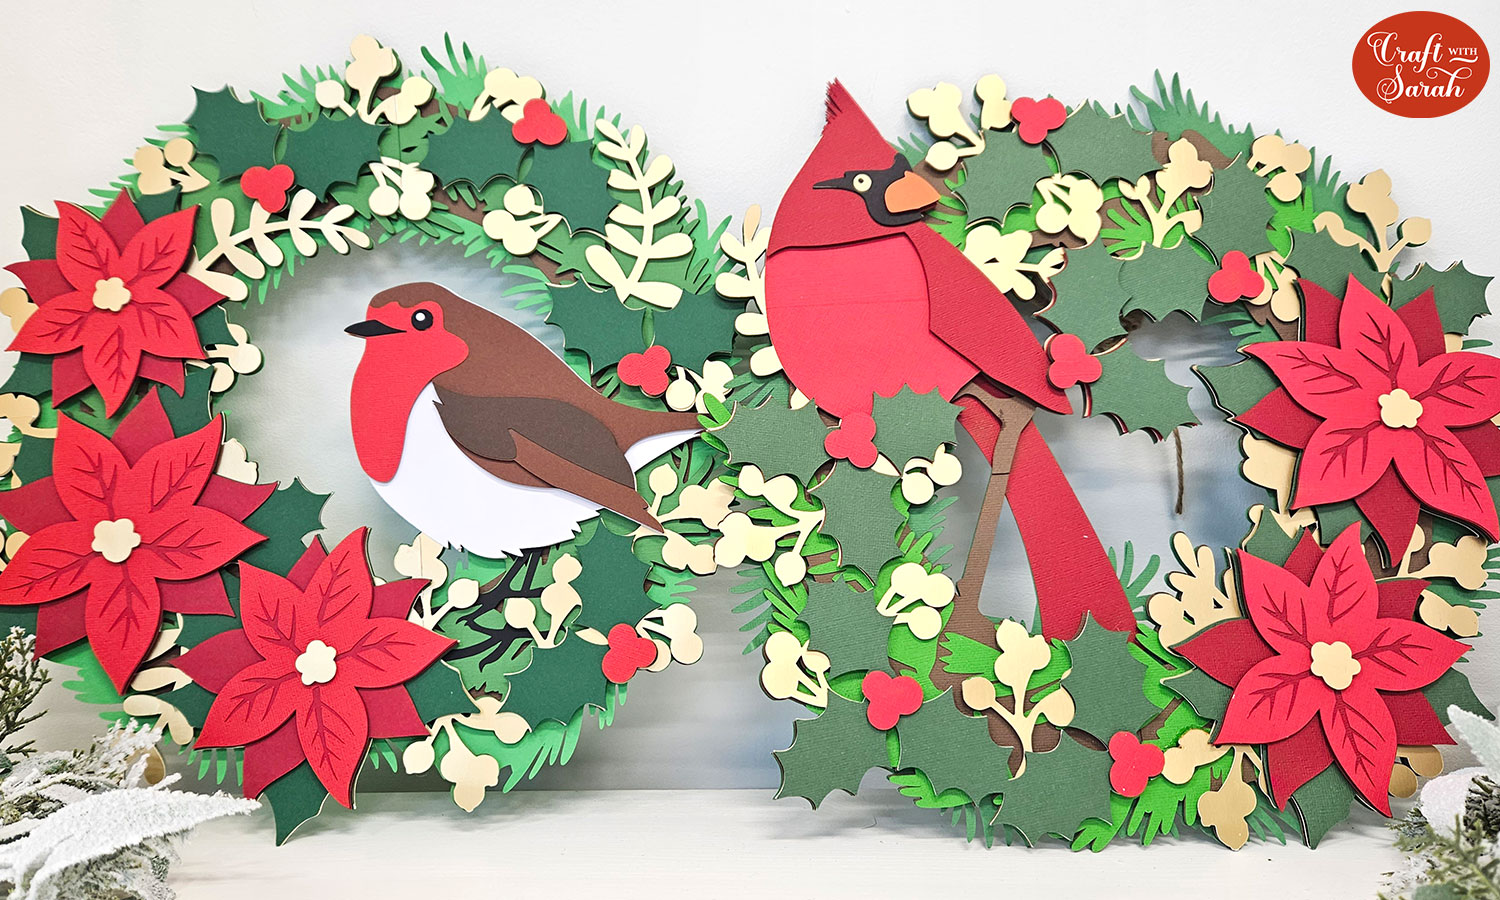
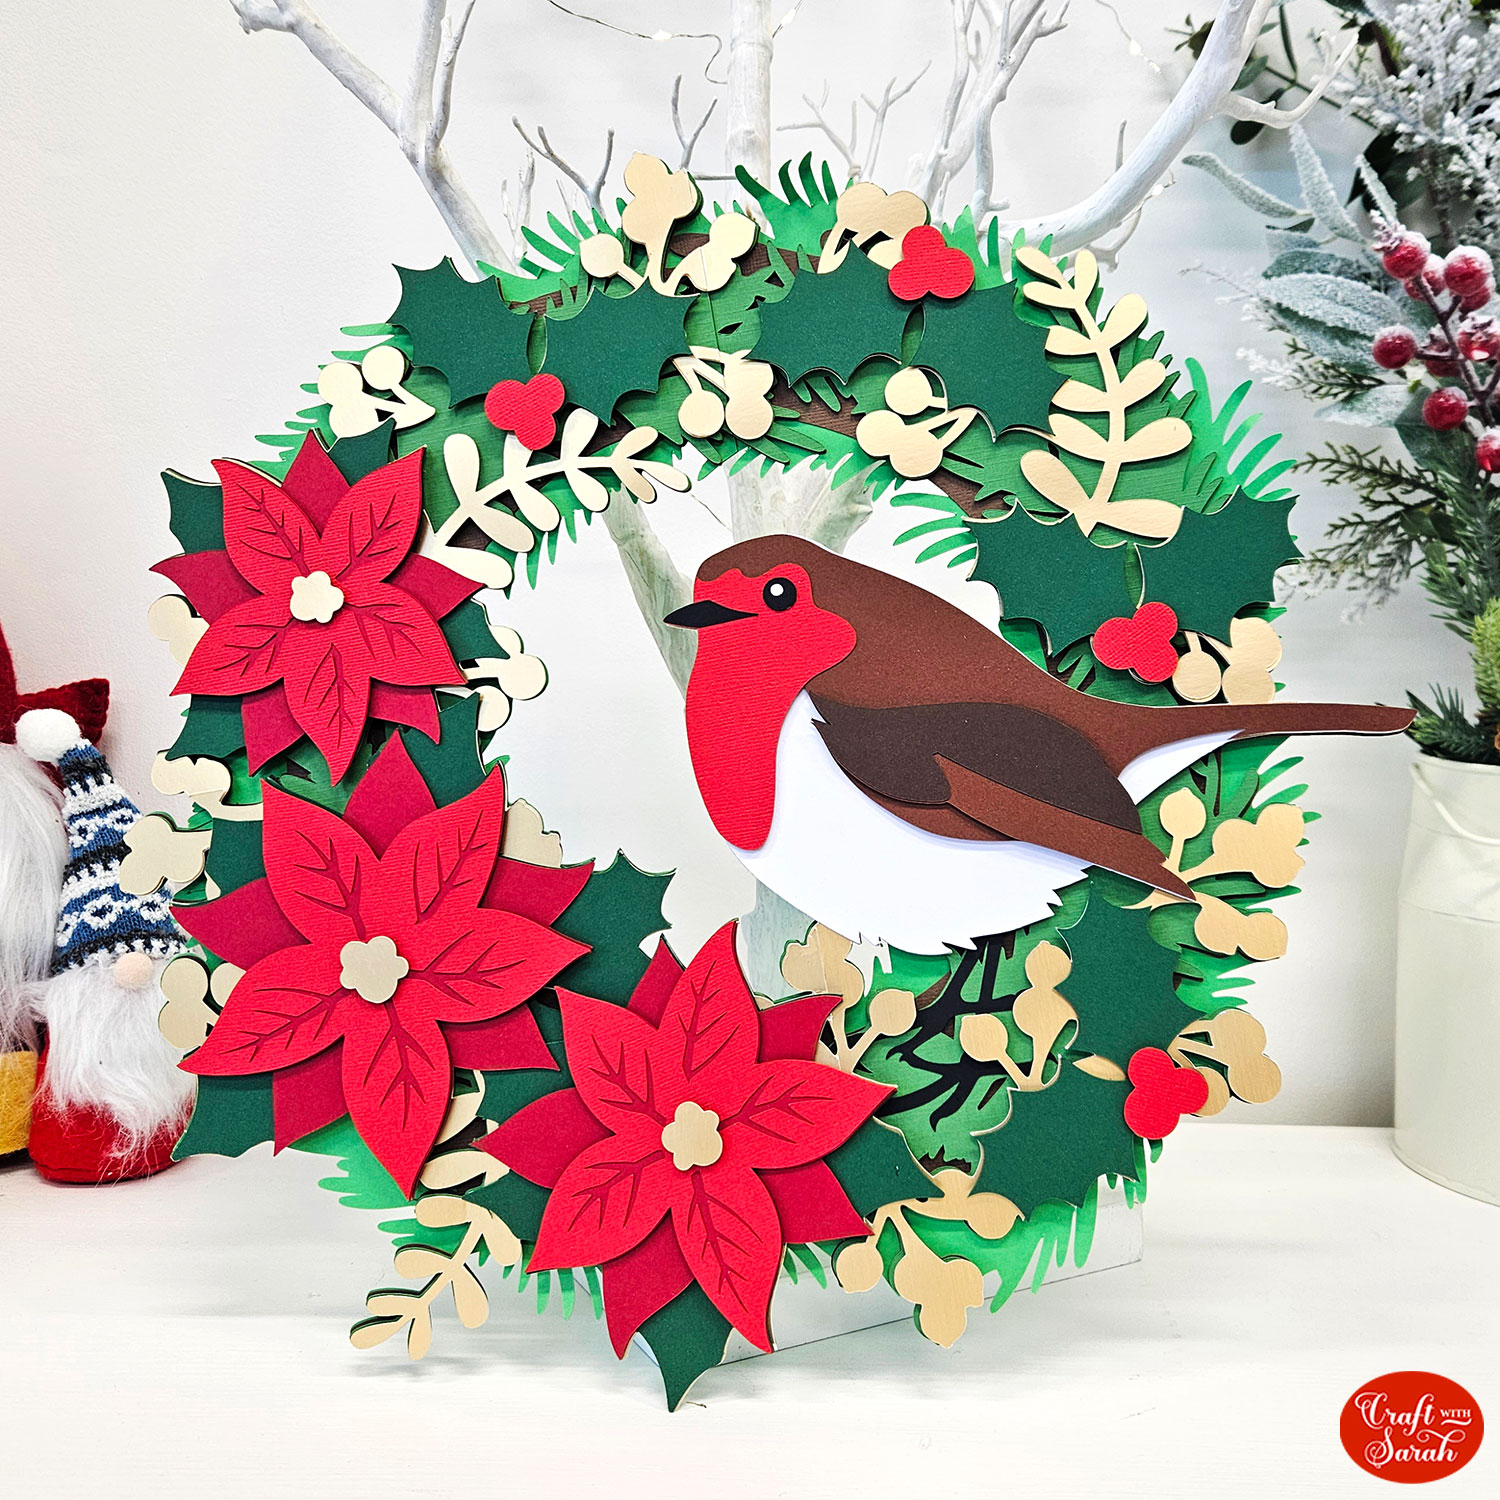
In case you live somewhere like I do where sadly we don’t have cardinal birds, I’ve included a second version of the wreath too, with a robin bird instead.
The wreaths are off-the-mat projects which means that once they are stuck together, they are actually bigger than the Cricut machines can cut.
But don’t worry, as the bottom sections come in multiple sections that can be cut on a regular sized cutting mat from 12×12, US Letter or A4 cardstock.
I don’t recommend displaying the wreaths outside as they are made of cardstock so will be susceptible to weather damage, but they make beautiful indoor decorations.
Materials supply list
Here is a list of the materials that I used to make this project.
Please note that some of the links included in this article are affiliate links, which means that if you click through and make a purchase I may receive a commission (at no additional cost to you). You can read my full disclosure at the bottom of the page.
- Cricut machine
- Light blue Cricut cutting mat
- Coloured Card
- Collall All Purpose Glue
- Needle Tip Applicator Bottle
- 3D foam pads
- Twine or ribbon
- Washi tape, painters tape or masking tape
- Sticky tape / cellotape
Video tutorial
Watch the video below to see how to make this project. Keep scrolling for a written tutorial.
Written tutorial (with photos!)
Here’s how to make your very own DIY papercraft wreath for Christmas using a Cricut machine!
Step 1) Download the cutting file(s) & unzip the downloaded folder
The download box below contains both the cardinal and robin versions of the wreath.
Download the Free Cutting File

Please login to your account to download this file.
TERMS OF USE:
You may sell finished, handmade physical craft items that you have made using this product but must not sell or share the digital files. Read full terms of use
Before you upload the SVG to Design Space, you need to unzip the download folder that it comes in.
- How to unzip a folder on Windows computer
- How to unzip a folder on a Mac
- How to unzip a folder on an iPad/iPhone
- How to unzip a folder on an Android device
Step 2) Upload the SVG file into Design Space
Open up Cricut Design Space and start a new Project.
I’m showing how to make the cardinal design in this tutorial, but the robin goes together in a very similar way.
Click “Upload” and then find the unzipped version of the downloaded files for this project.
Select the file called svg-cardinal-wreath-craftwithsarah.svg
This is how it should look after you have uploaded the file:

Make sure you upload the file which starts SVG_ in the filename!!
All the layers should appear “on top of each other” as per the image above. If you see all the layers next to each other instead, that means you’ve accidentally uploaded the wrong file type. If that’s the case, click “Cancel” on the bottom-right of the screen and try again.
After uploading, the design will show in your “Recently Uploaded Images”.
Click on it and then press “Add to Canvas” to put it onto your Project.
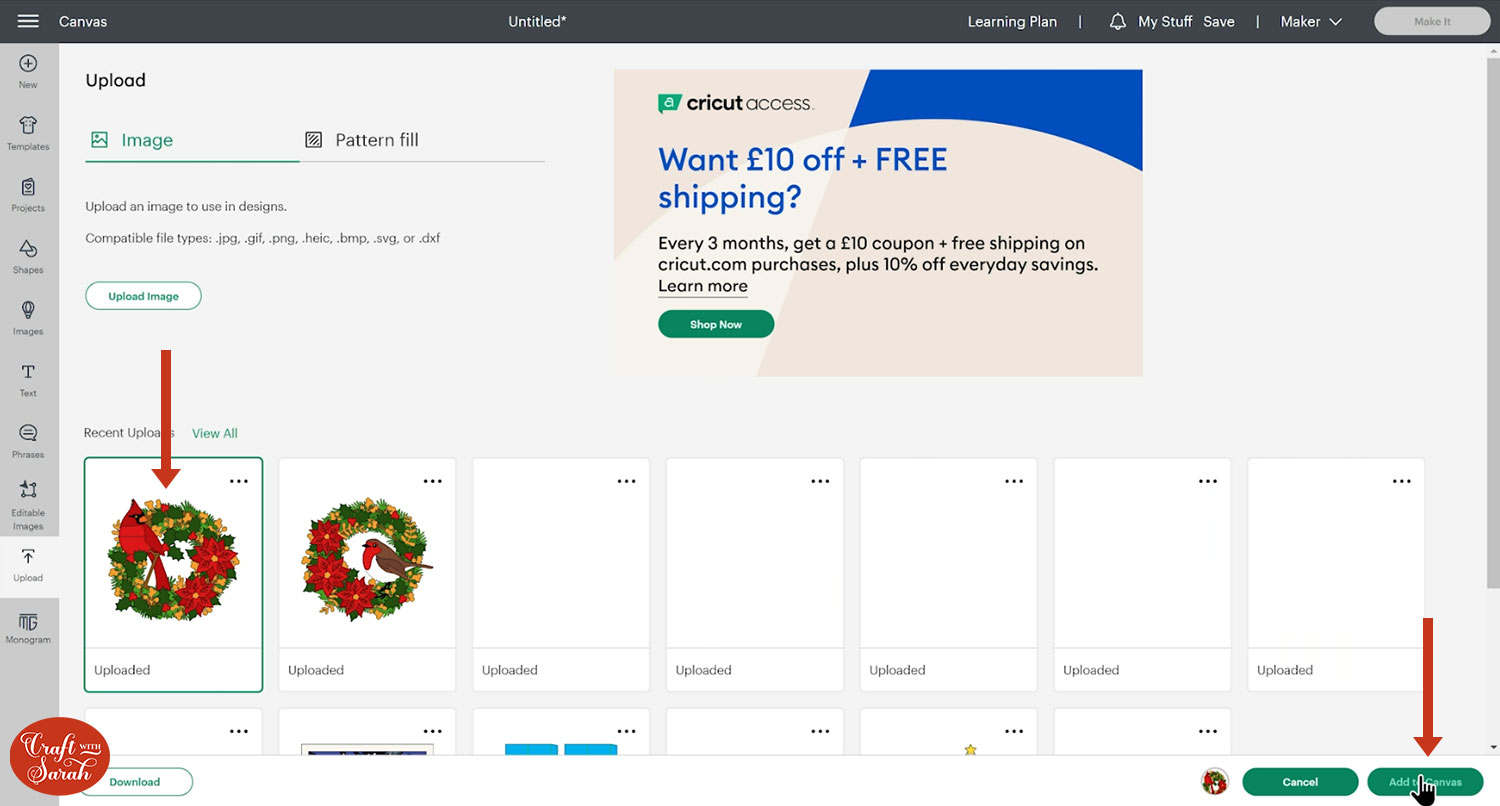
The design should load in at the correct size of 15 inches wide and 13.967 inches tall, but if not then resize it to match those dimensions.
Even though this is a bigger size than the regular Cricut mats, it will still cut on them as the bottom layers of the design are broken up into four sections so it can still be cut on 12×12, A4 or US letter sized cardstock. This means you can make it on a Cricut Joy Xtra too!
Step 3) Cut out all the layers
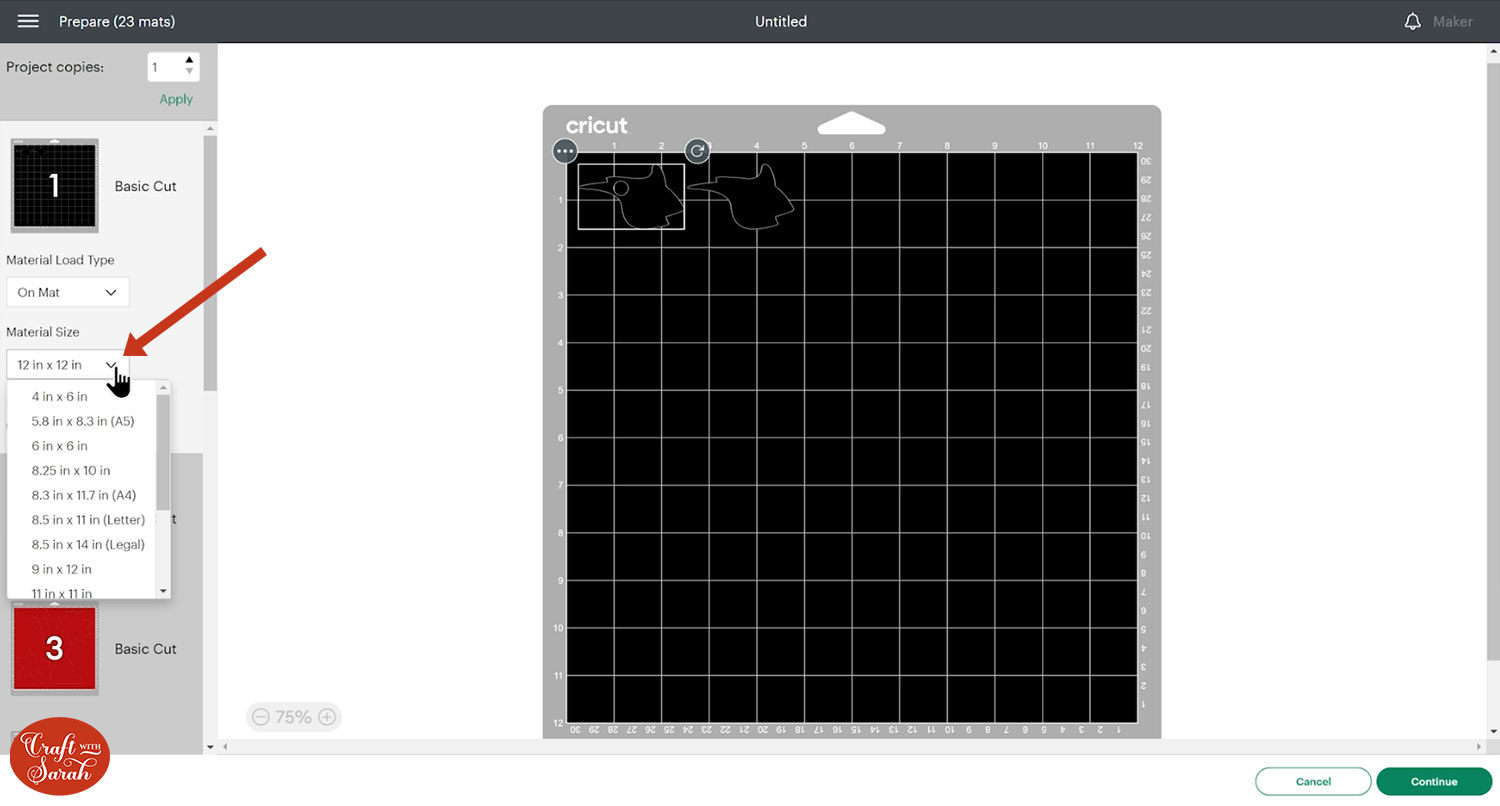
When you’re happy with how the project looking in Design Space, click “Make It” and follow the instructions on-screen to cut out all the layers.
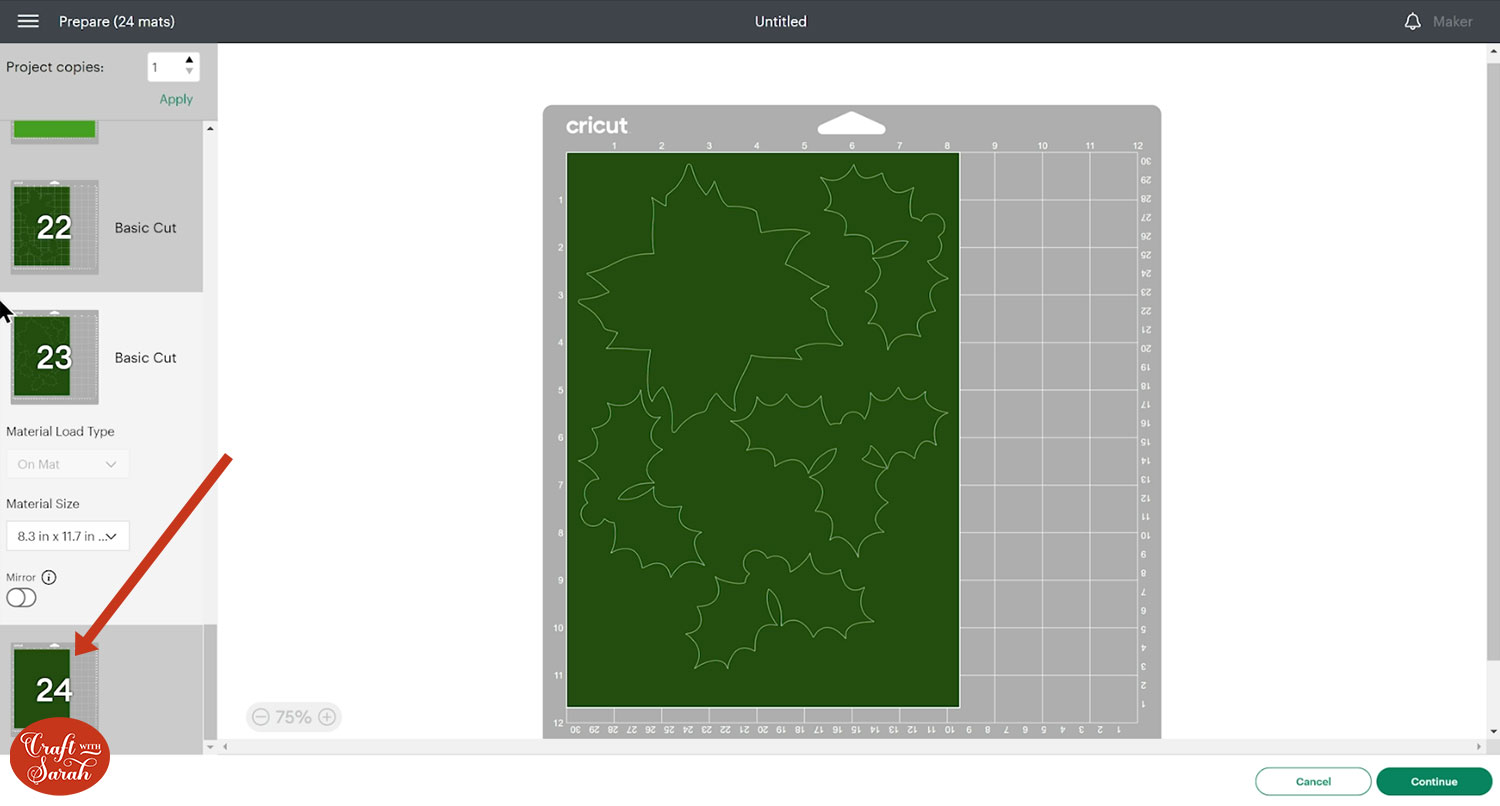
To change the paper size, go into the dropdowns over on the left side of the screen and choose the paper size that you want to use. You need to change it for every single colour.
To save space on your cardstock, you can move things around by clicking and dragging. Make sure when you’re moving things about that nothing overlaps because otherwise, it won’t cut out properly.
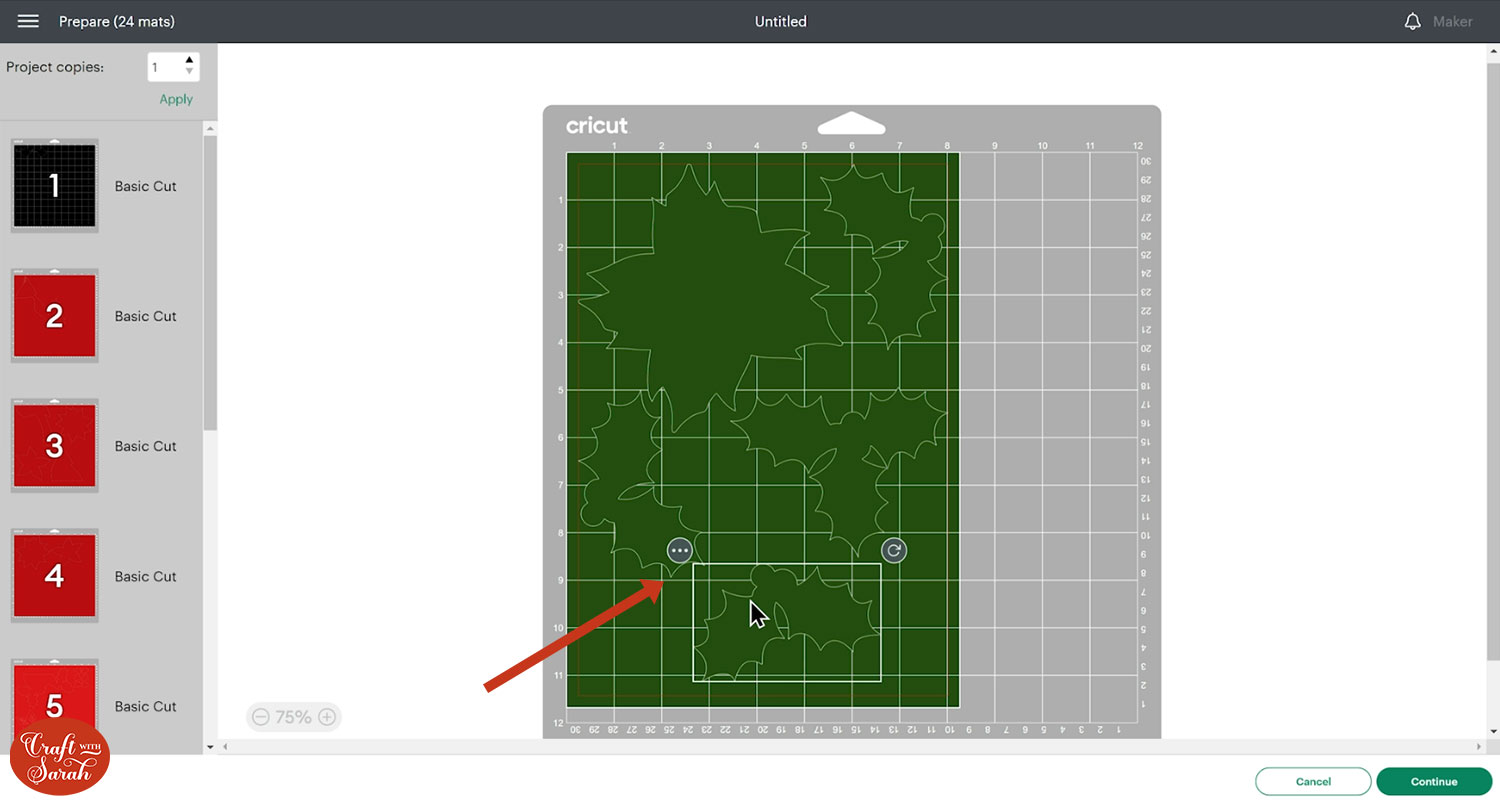
There is a bug in Design Space at the moment (as of October 2023) which you may come across when changing the paper size.
Sometimes you are unable to scroll all the way down to see your mats and change all of the paper sizes past the 10th one. Click Cancel to go back to your project and then click “Make It” again. Scroll to the bottom of the lists of mats and start changing the paper size from the bottom upwards and then they should all stay on the screen.
TIP: New to cutting cardstock with a Cricut? Check out this in-depth tutorial which goes through every step of the process, including tips for getting the best quality cuts from your Cricut.
Step 4) Stick the base together
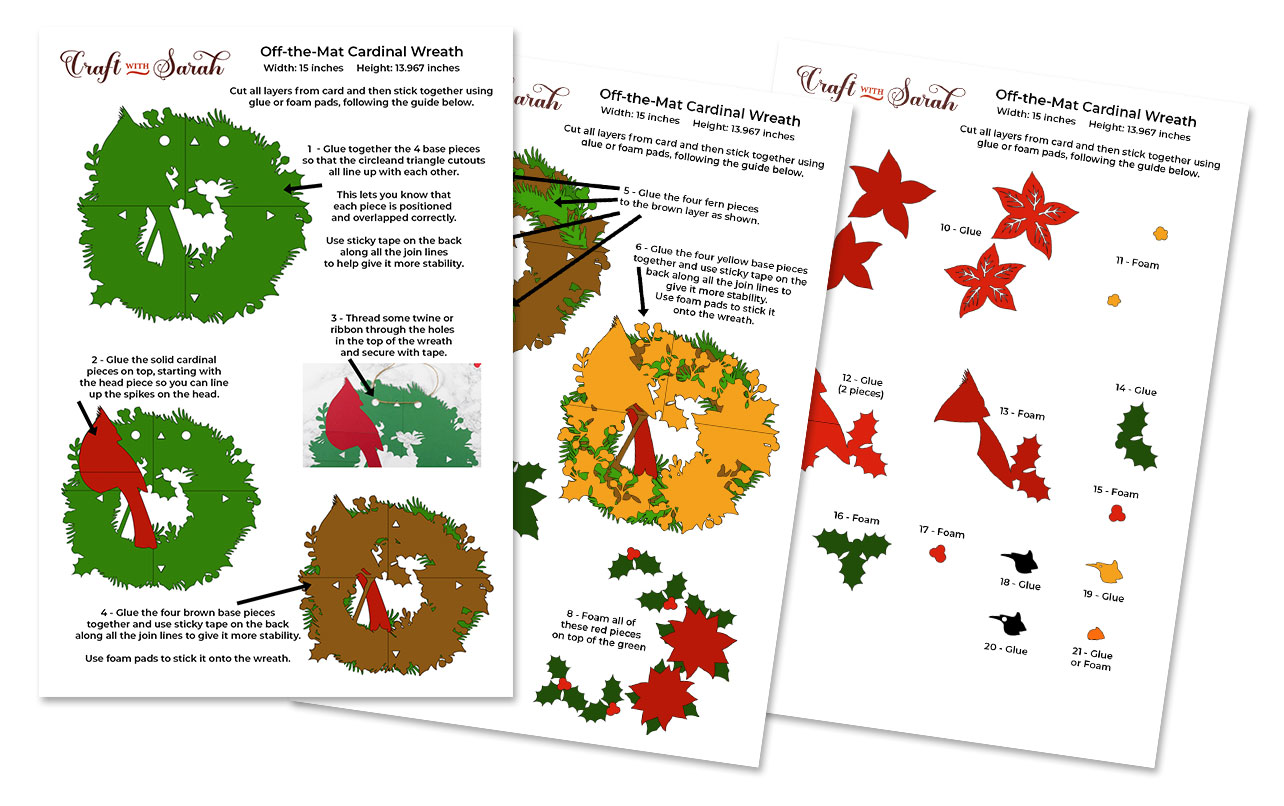
The download folder contains separate assembly guides for both the cardinal and robin wreath designs.
It will be helpful to have this guide in front of you as you piece this wreath together, either on your computer screen or printed out.
Lay all the pieces on top of each other to check you’re happy with all the colours and haven’t missed any pieces.
We will be starting from the bottom up so gently remove the layers so that you can start on the bottom.
Try and keep them in their little groups as you take them off to save you working out which bits go where again.
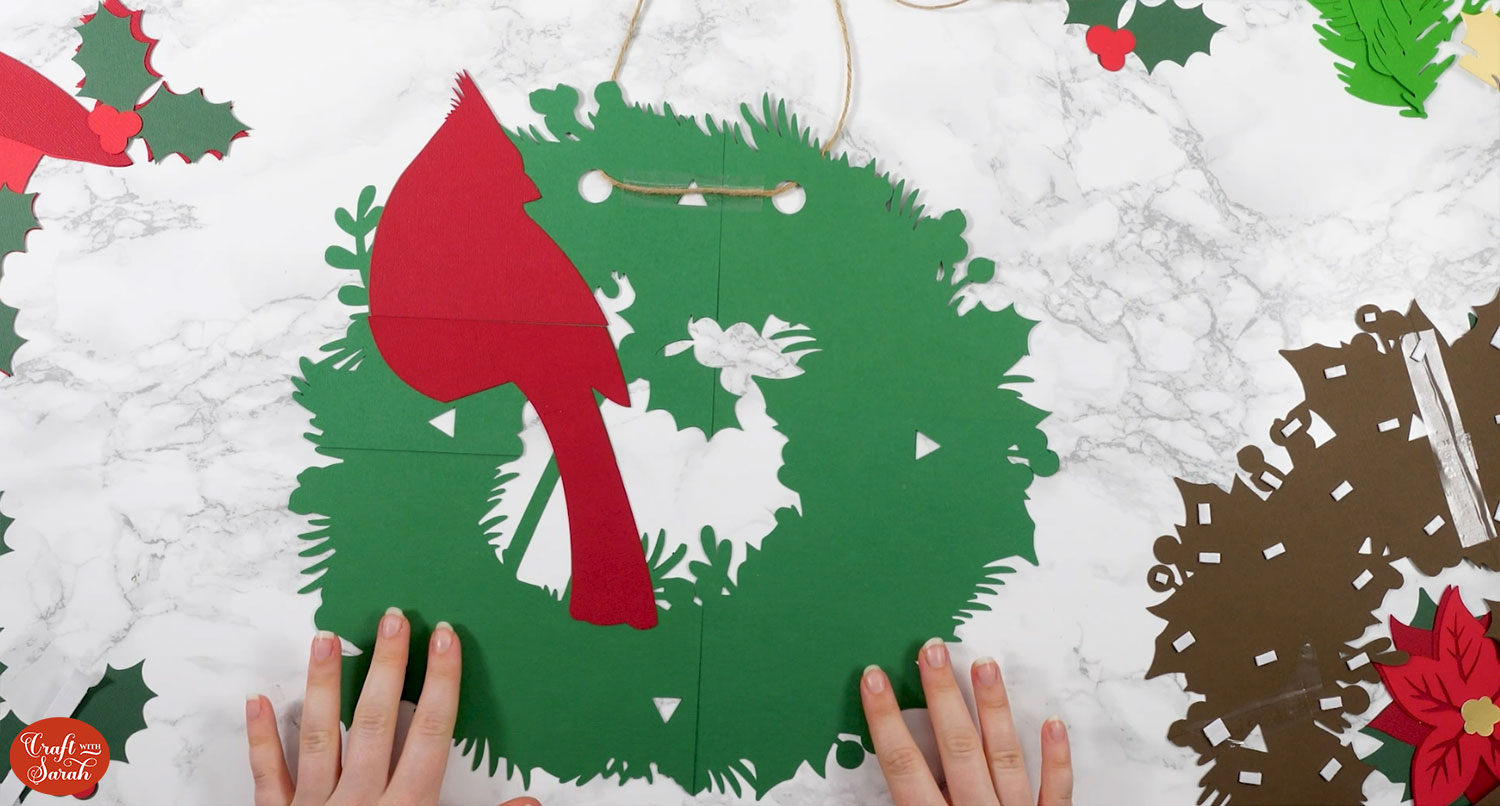
You will be left with the four green base pieces that make up the bottom of the wreath.
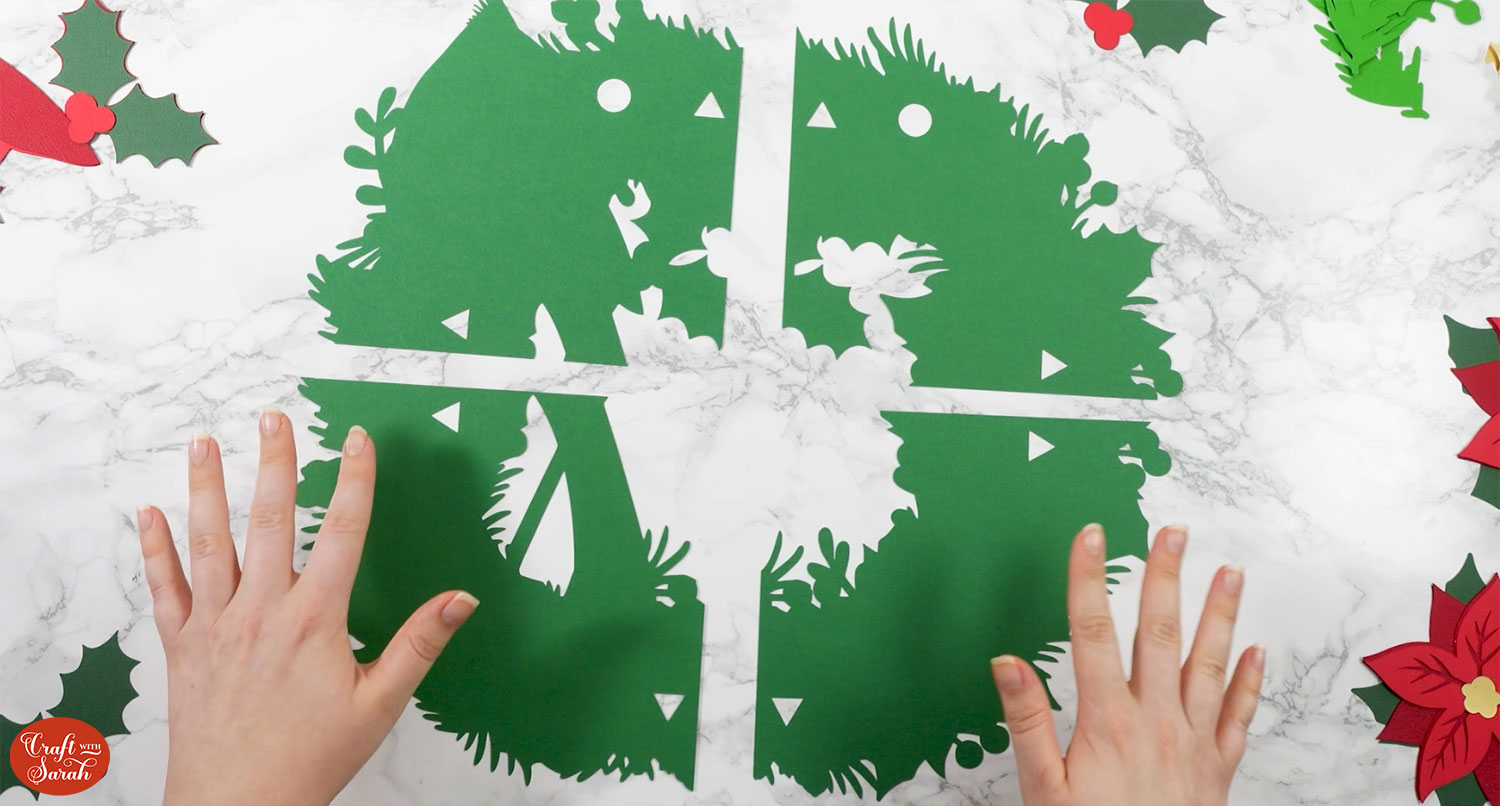
Line up the four pieces so that the triangle cutouts perfectly overlap each other. These triangles are your guides to make sure you are sticking the pieces in exactly the right place.
It may be helpful to use washi tape, painters tape or masking tape to gently tack the pieces to your work surface to stop them moving above.
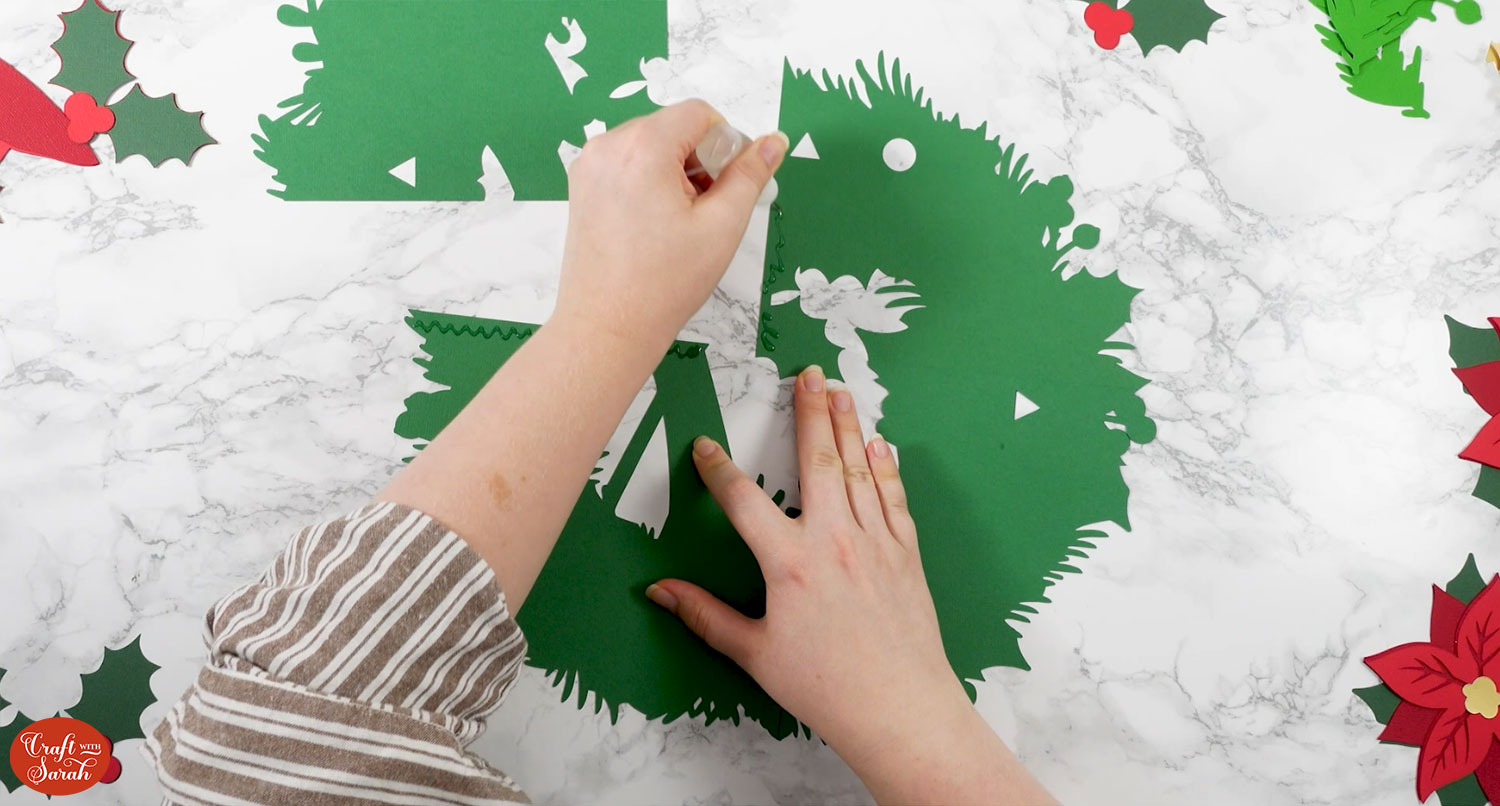
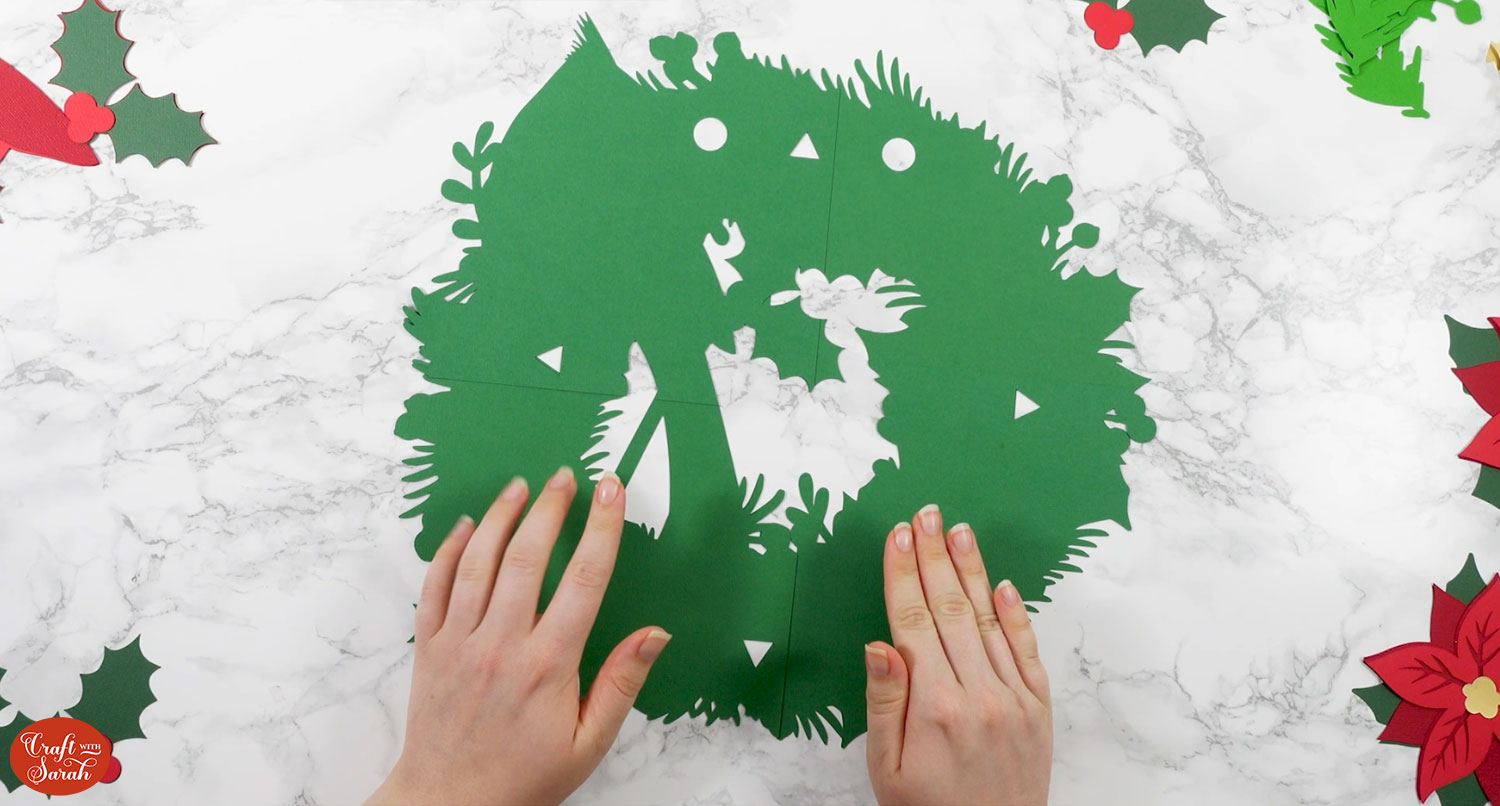
Glue along all of the edges, lining them up and sticking them together.
Be careful not to glue above the triangle as that may show when you’ve stuck it together. The final piece will have two triangles to line up on each side.
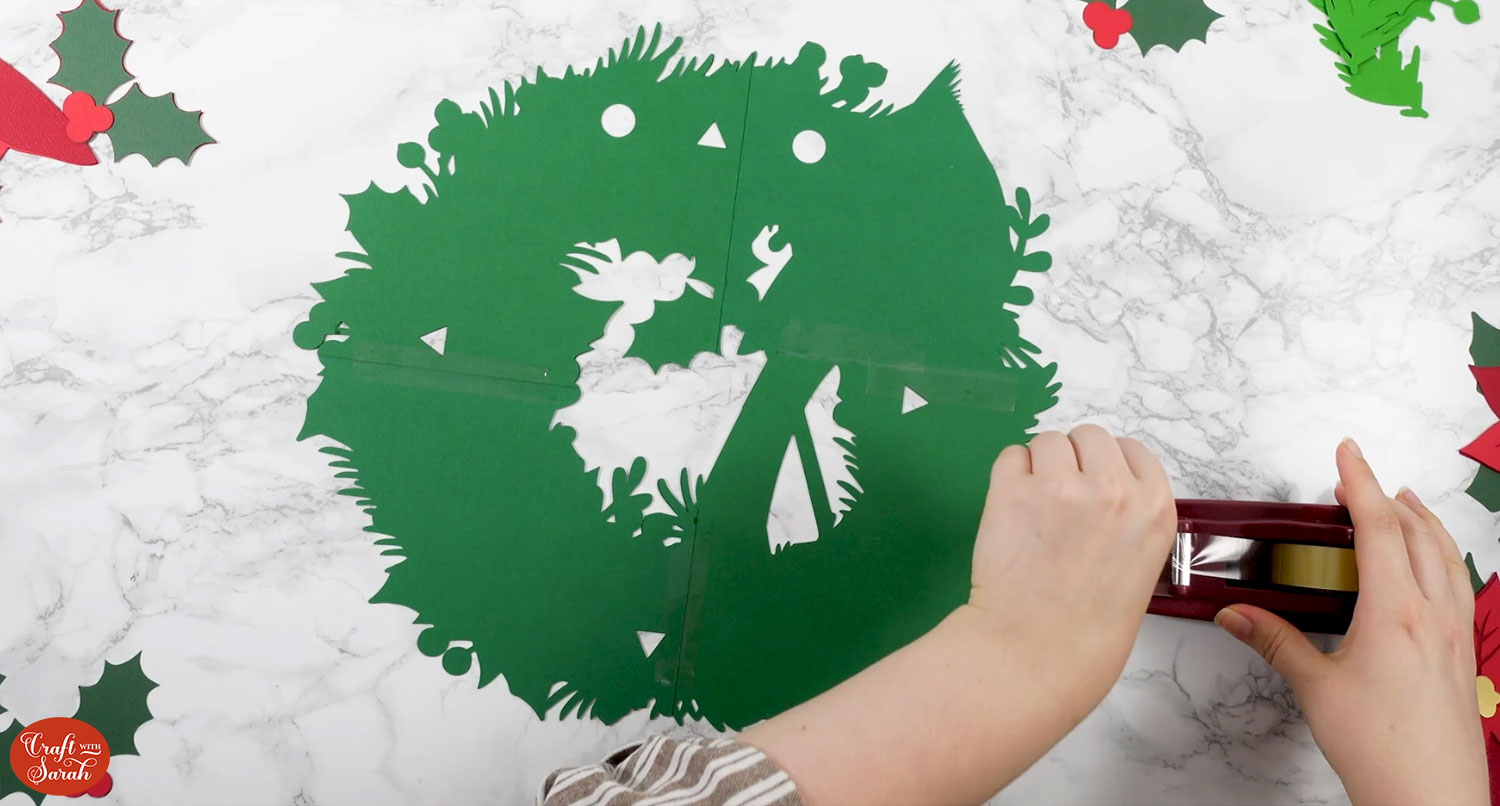
Allow the glue to completely dry and then flip the wreath over. Add sticky tape to the join lines on the back to give it some stability.
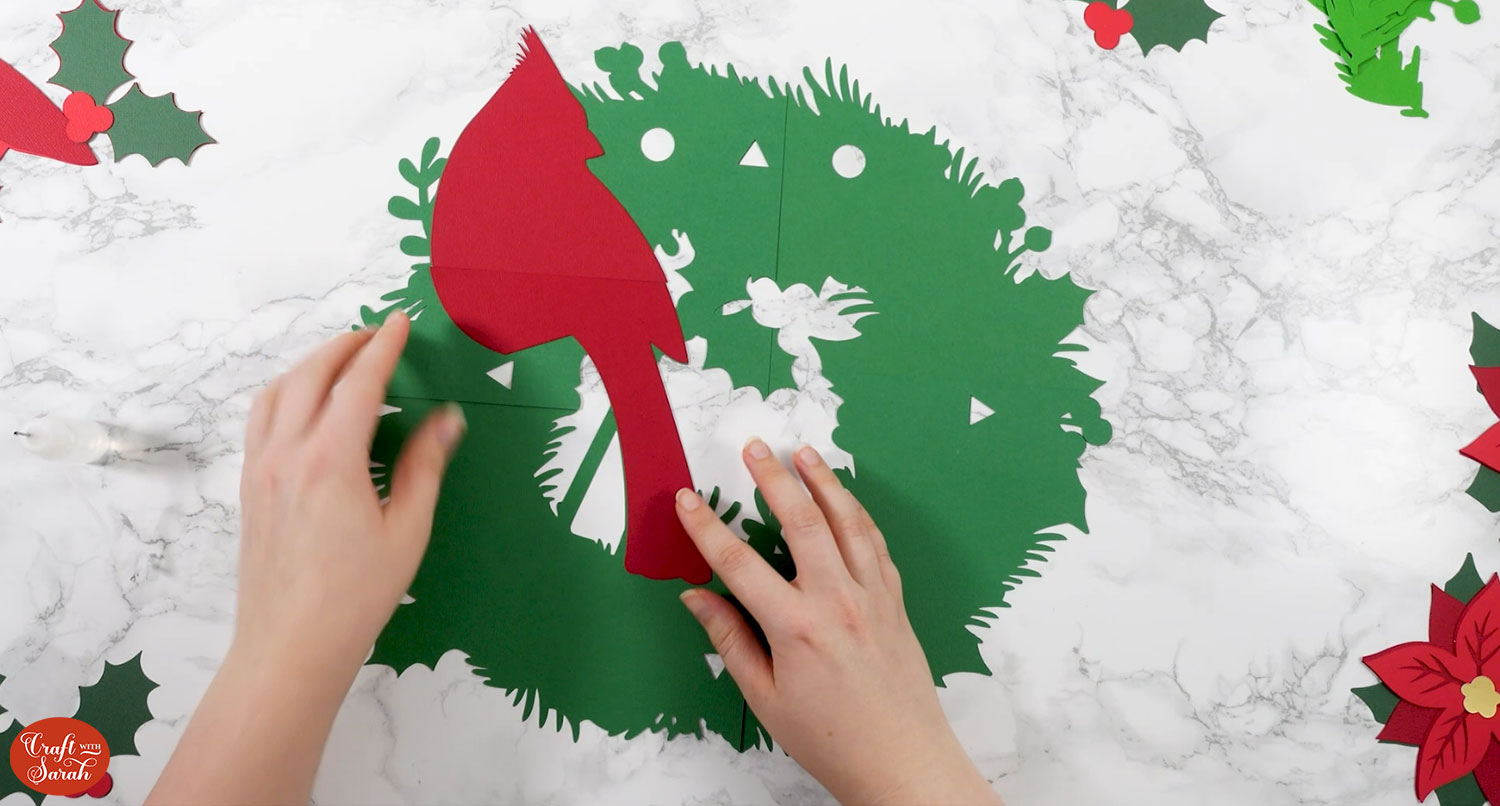
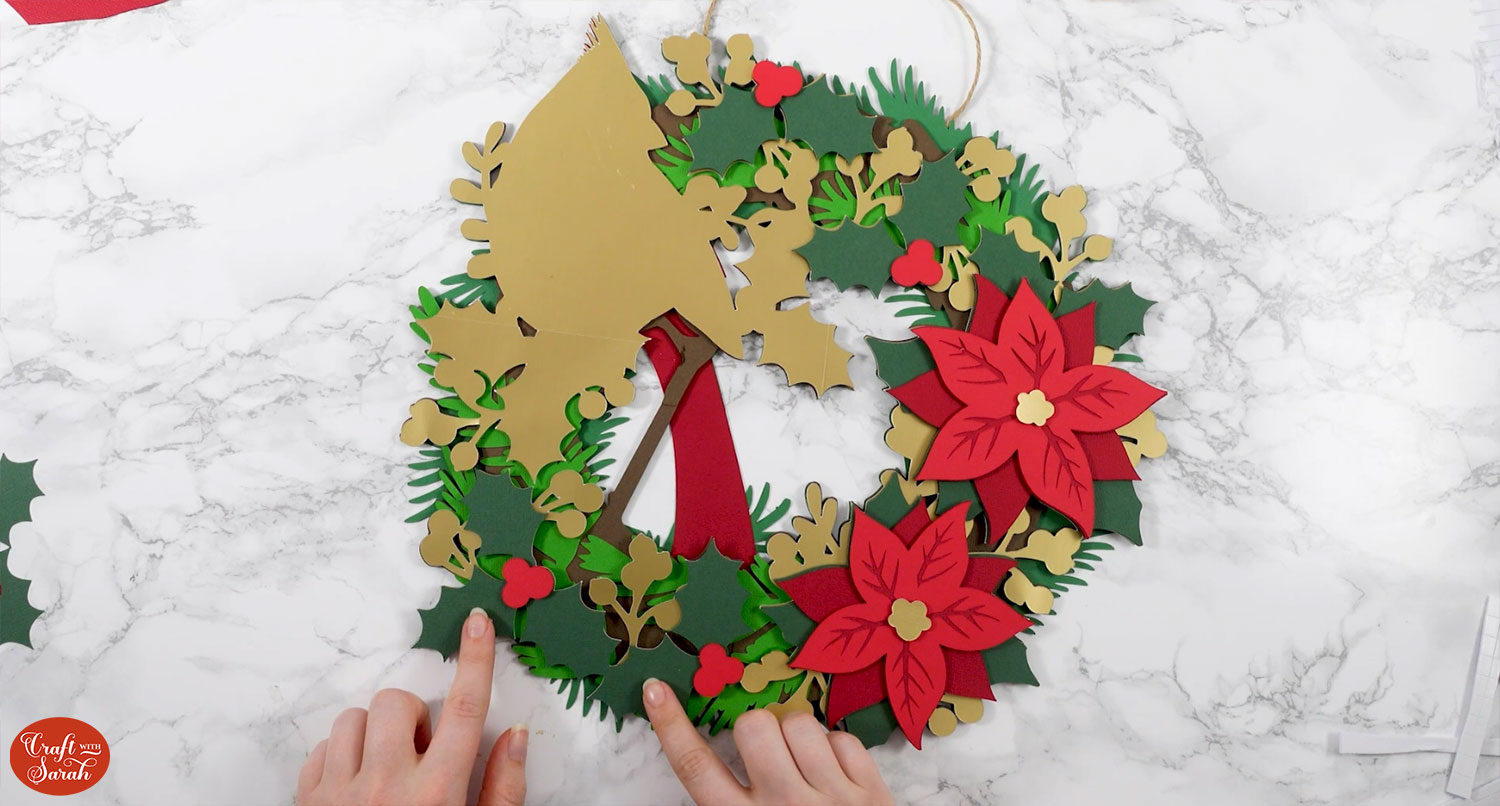
Turn the wreath back over and glue the two bottom cardinal pieces onto the wreath. These pieces don’t overlap – they go right up to each other and touch.
These pieces are making up the tail of the cardinal, but I included the full shape of the body to make it easier to line the tail section up.
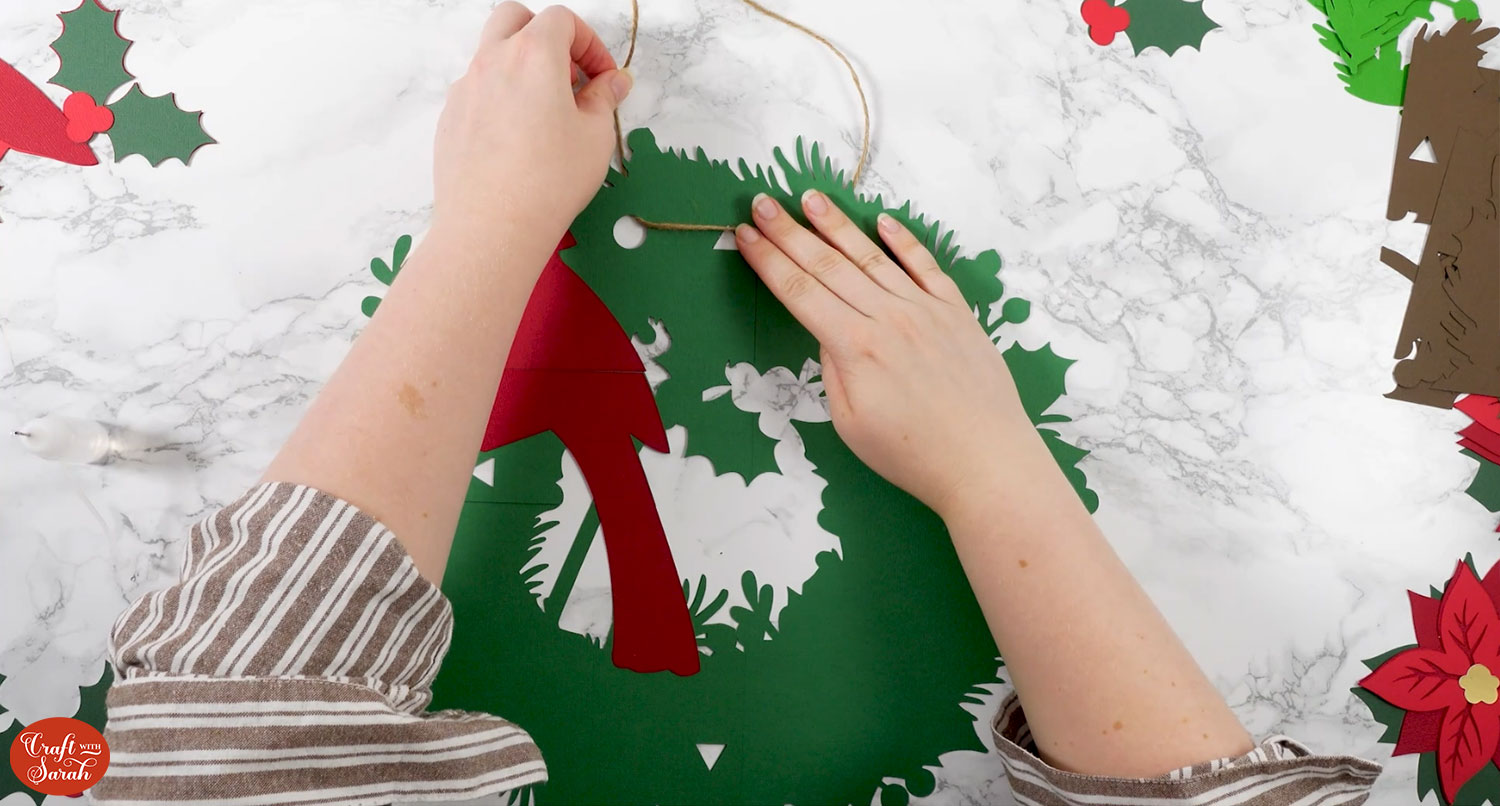
Next, grab some twine or ribbon and thread one end through one of the circles and the other end through the other.
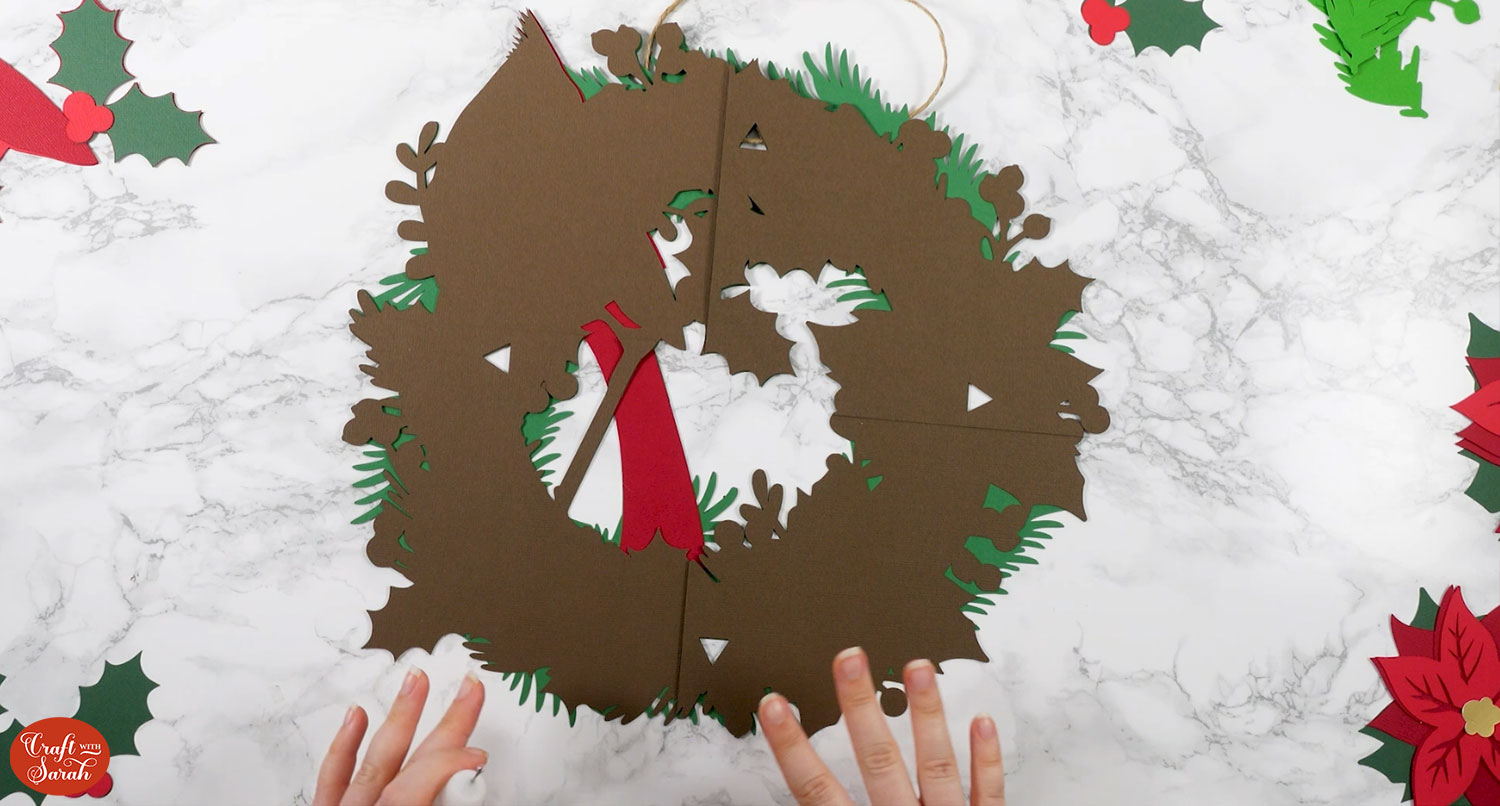
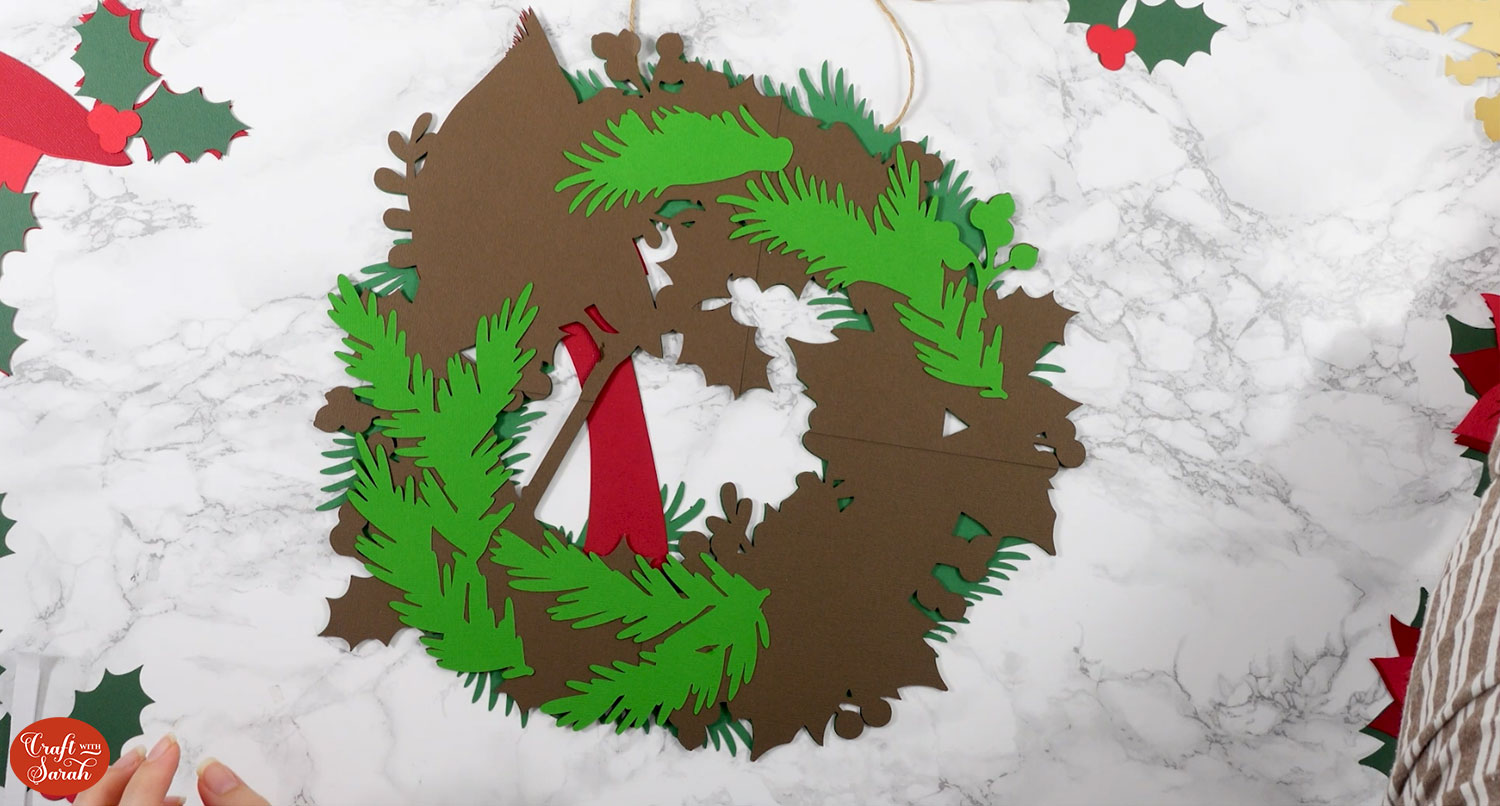
Take the four brown wreath pieces and glue them together, lining them up with the overlapping triangles. Don’t stick this down to your wreath just yet.
Add tape to the back join lines to give it stability.
Add foam squares to the back of the brown wreath piece. Avoid placing your foam squares along the top where it will need to sit over the twine.
Use the top triangle as a guide and you can see in the picture below if you are not sure where to leave a gap.
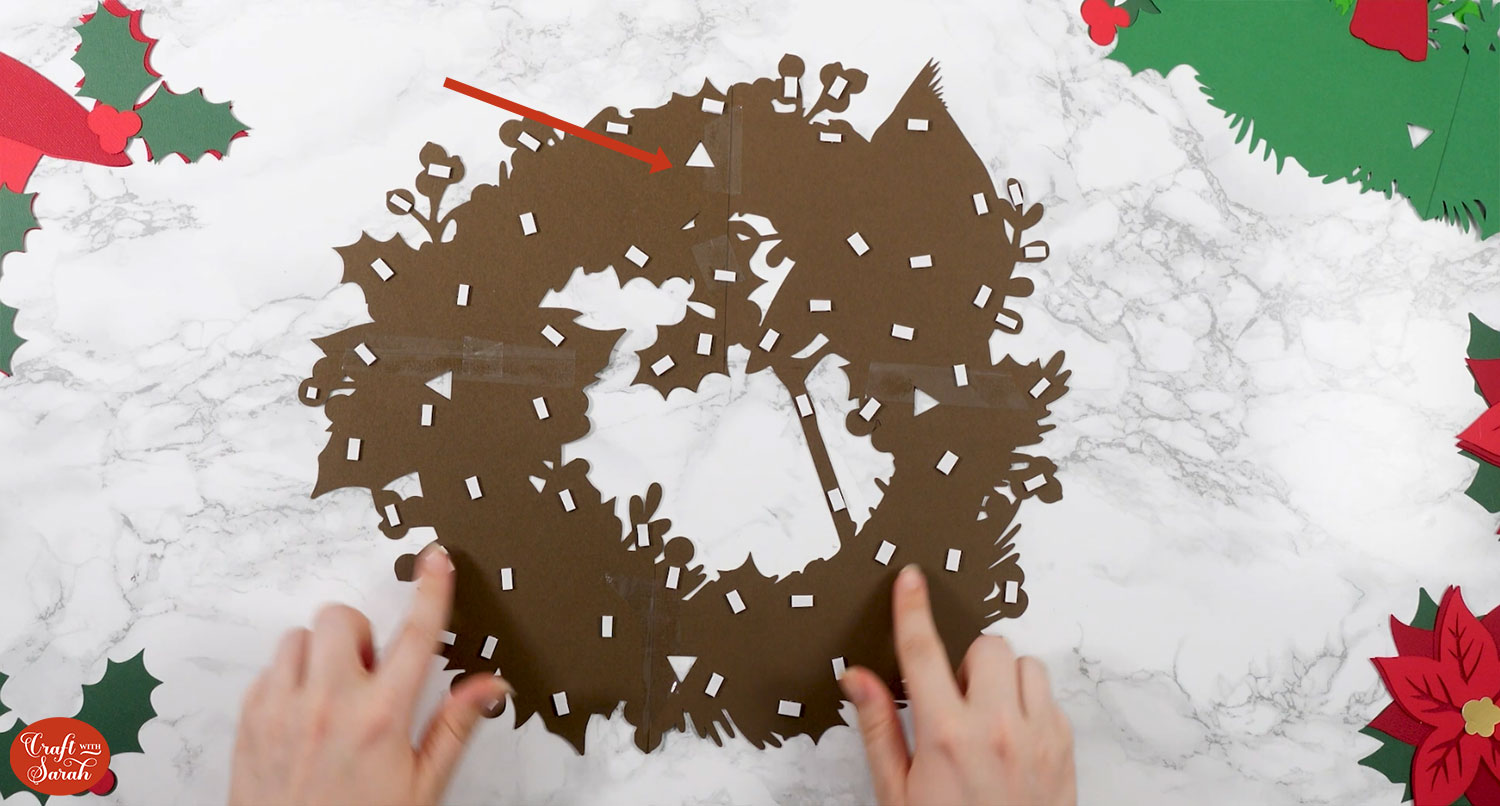
You may need to cut your foam smaller with a pair of scissors so that you can place it on the smaller bits on the outside of the wreath.
Use a strip of sticky tape to hold the twine down.
Stick the brown layer onto the wreath by lining it up and gently dropping it down. This means you can pick it up and reposition it if it’s not quite right before it sticks.
Press it down to seal once you’re happy with the position.

Glue the light green foliage pieces onto the wreath. Refer to the assembly guide to see the exact positioning.
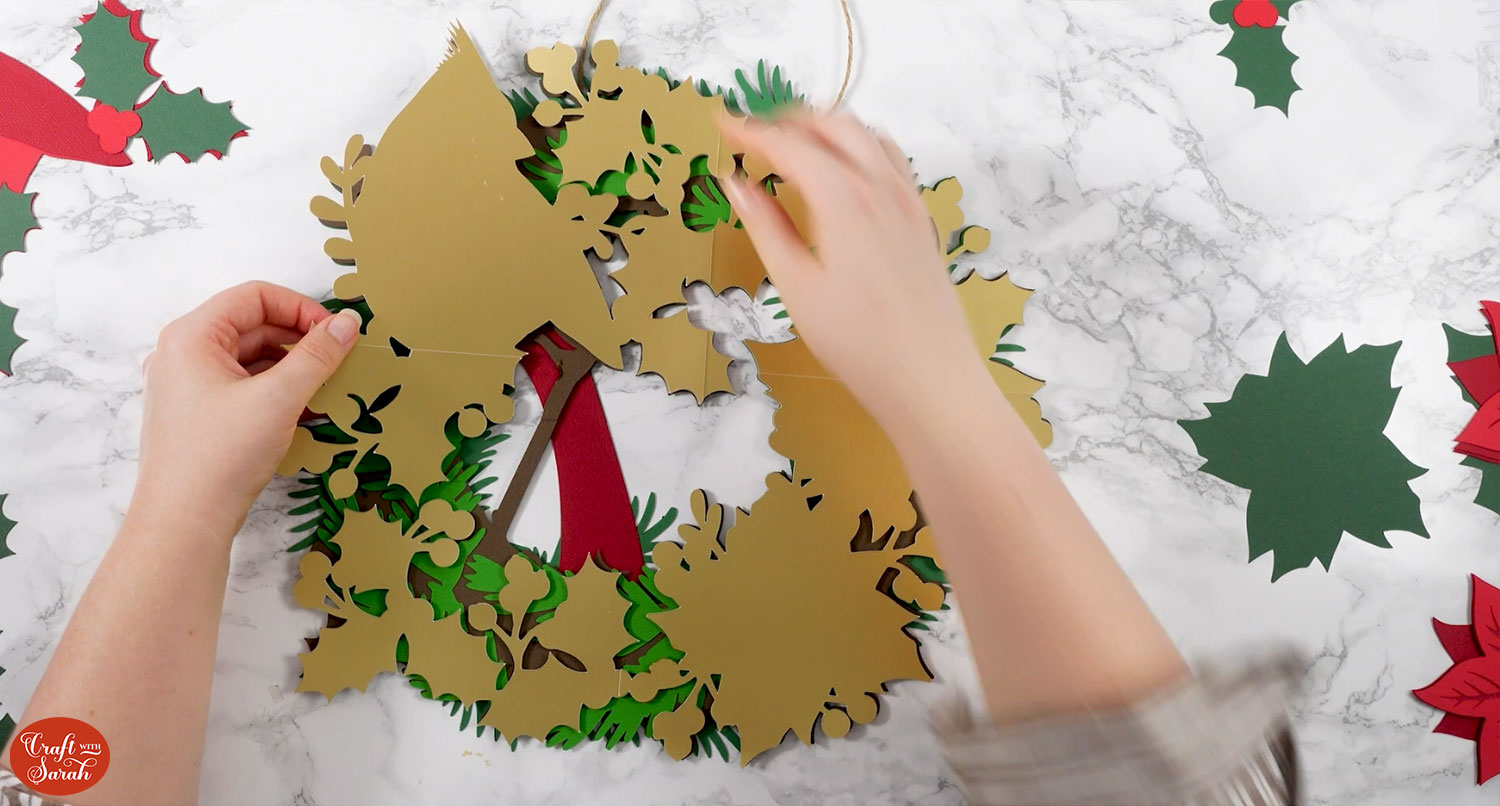
Glue the four gold layers together (not onto the wreath). There aren’t triangles this time, but you can use the edges of existing wreath to help line them up.
Once it’s dry, flip it over and add sticky tape to the join lines and add foam squares to the back.
Use foam pads to stick the gold onto the wreath.
Step 5) Add the poinsettia flowers
You’ll be pleased to know that the tricky parts are now all done!
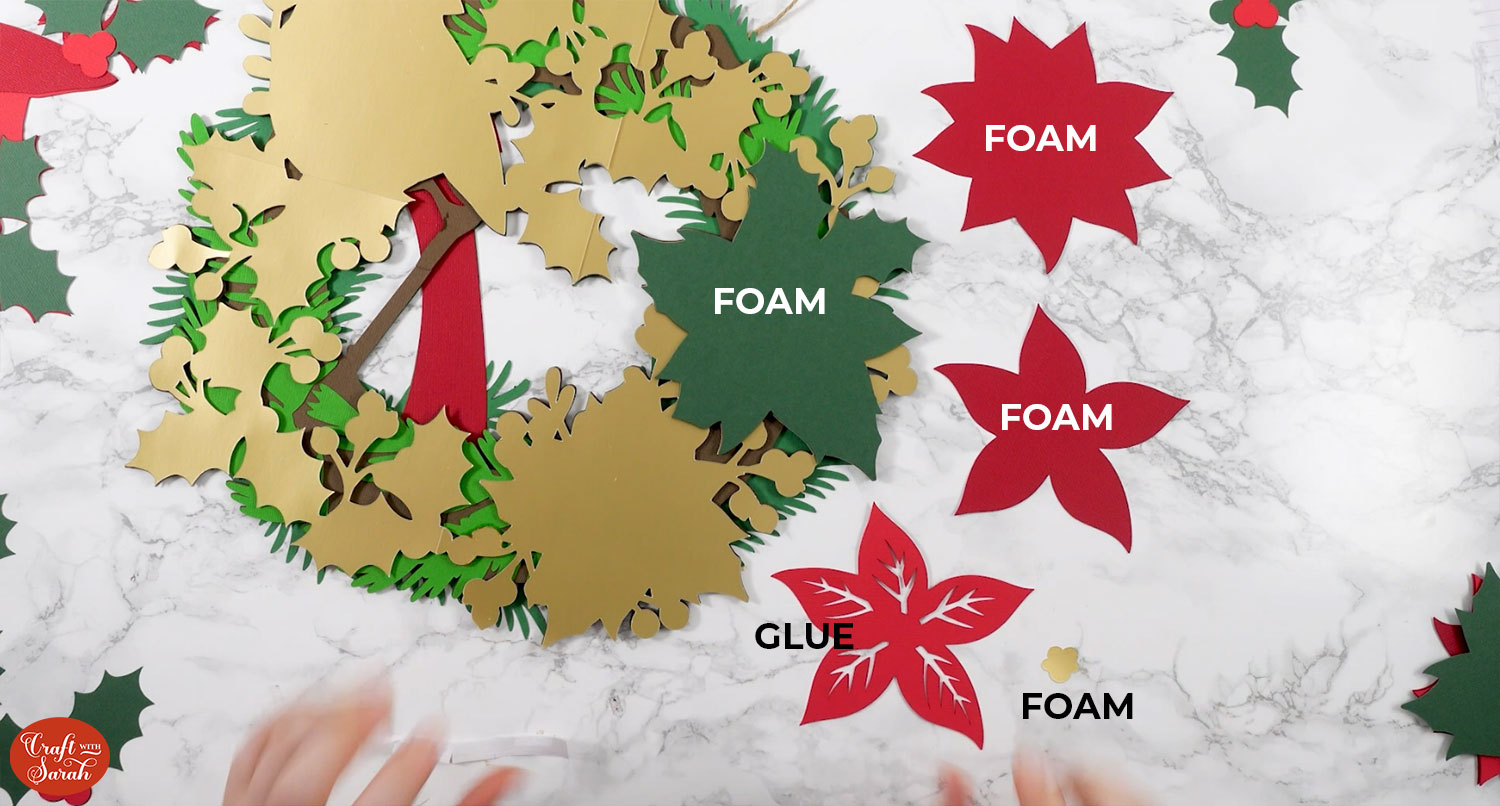
It’s time to start adding some dimension to the wreath by creating the two poinsettia flowers.
First, use foam pads to stick on the green leaf parts.
Foam the largest red flower pieces on top.
Foam the next red flower layers. These are the ones cut in the darker colour of red, without the vein cutouts in the petals.
Glue the lighter red pieces with the vein cutouts on top.
Foam the gold middles onto the poinsettia.
At this point, add all the holly leaves around the whole design (apart from the two that sit on top of the cardinal) by using foam squares for both the green leaves and the red berries.
Step 6) Complete the layered cardinal papercraft
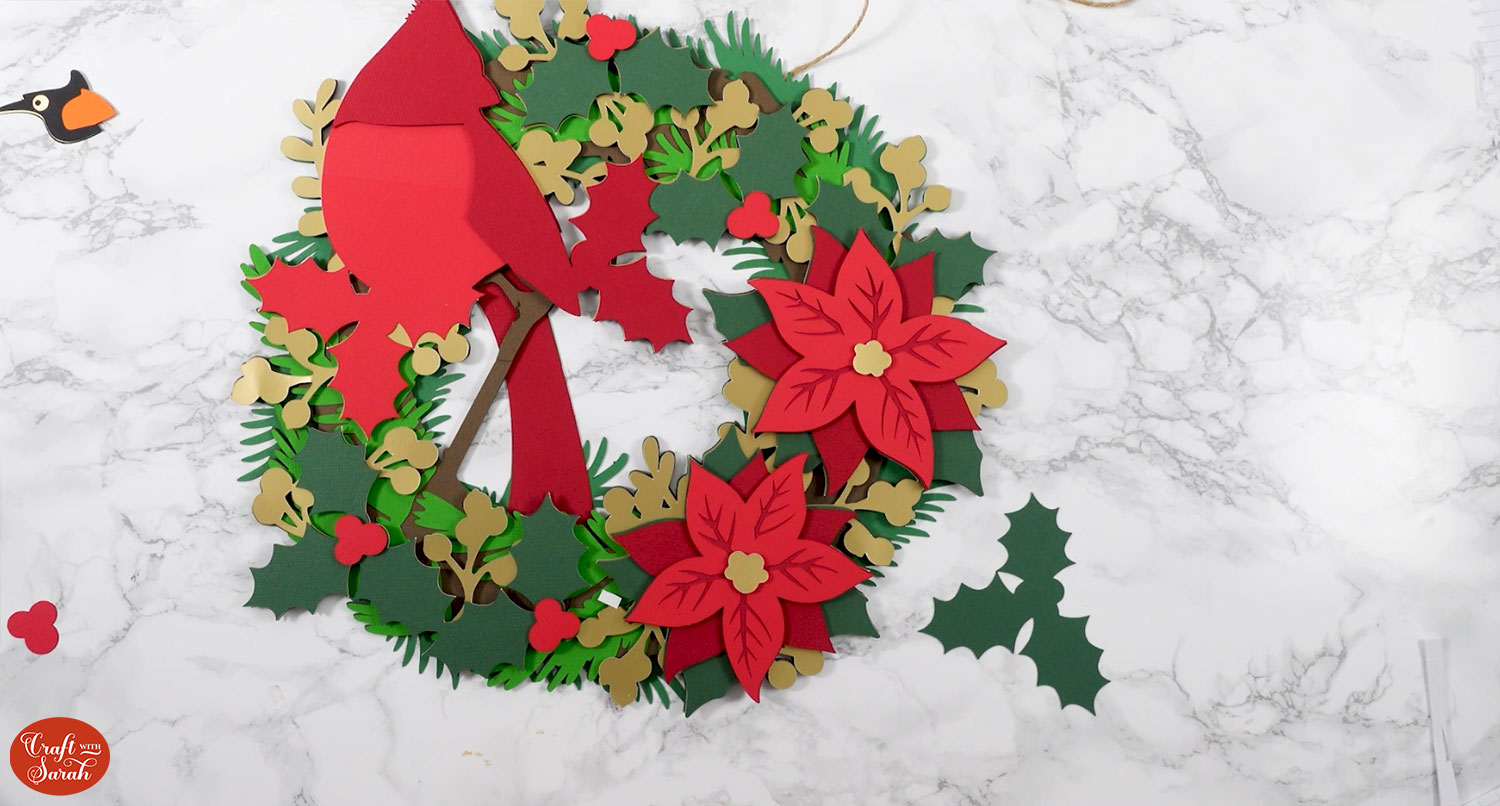
Glue the two pieces which make up the cardinal’s body.

Foam the darker red cardinal layer.
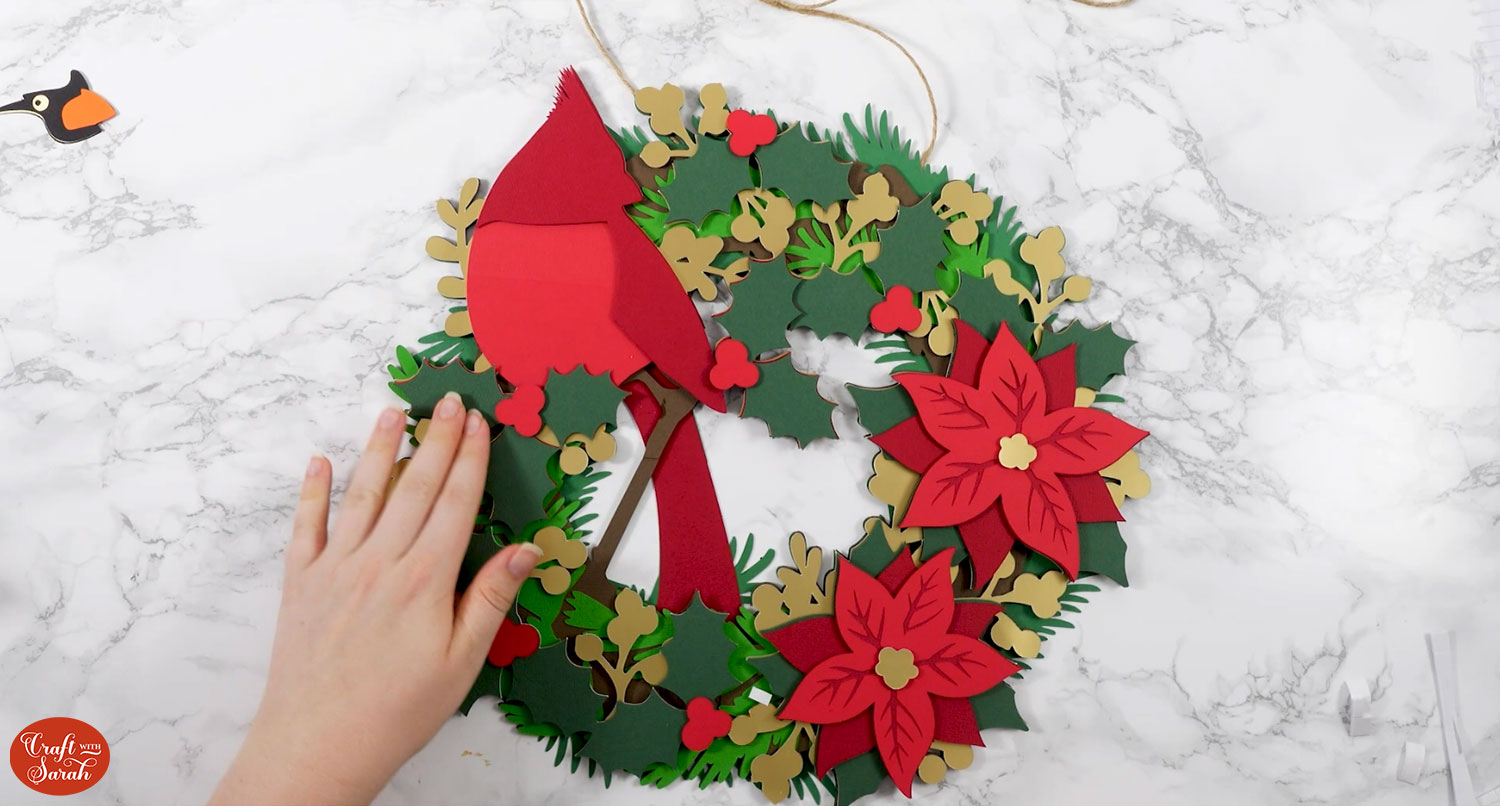
Use foam squares to stick the green pieces of holly to the cardinal, and another piece of foam to stick the red berries on top.
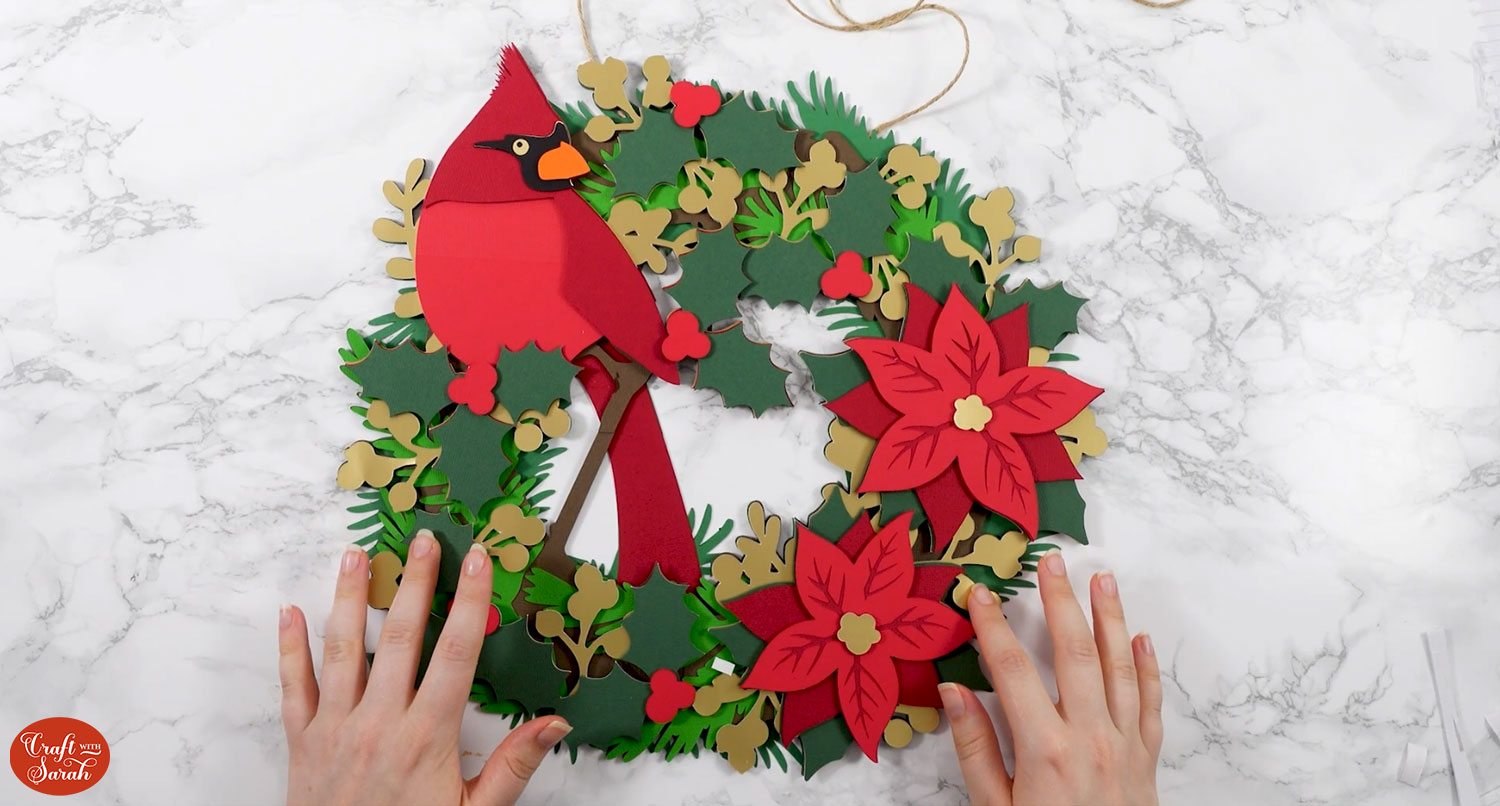
Glue the three layers of the cardinal’s face together. The solid black piece goes at the bottom, then the gold piece, then the black piece with the eye hole cut out.

Finally, use foam squares to attach the cardinal’s beak.
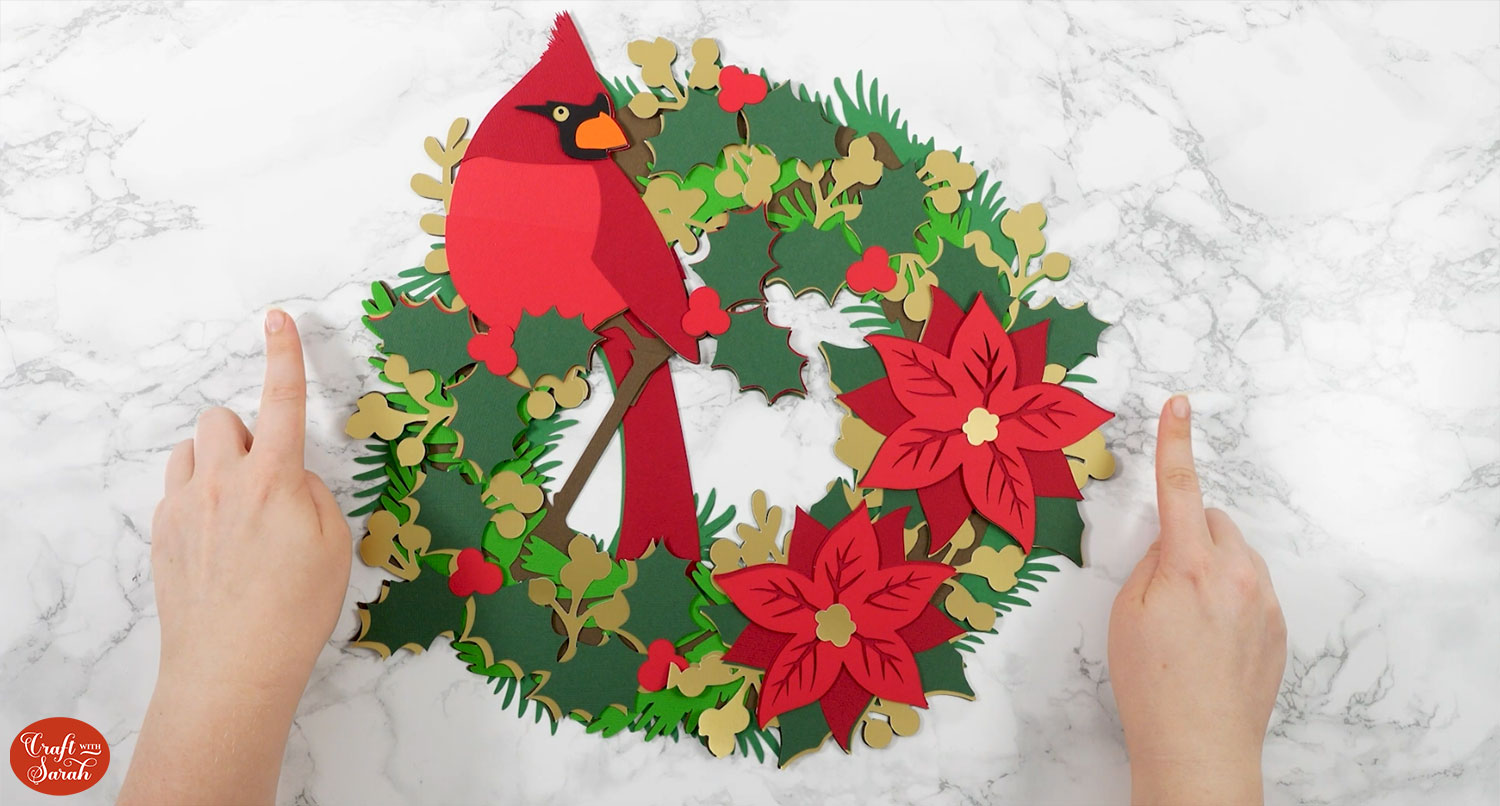
Make beautiful DIY cardstock wreaths with a Cricut
Now, your 15-inch Christmas cardinal wreath is complete.
All that is left is to tie off your twine and hang it up in your home this Christmas!
I love all the Christmas colours in this wreath, it will look so beautiful once it’s hung up for the festive season.
Once you’ve made this wreath you can get it out each year and it will last you multiple Christmases!
Don’t forget that you can make the robin wreath too for a matching pair.
Happy crafting,
Sarah x

