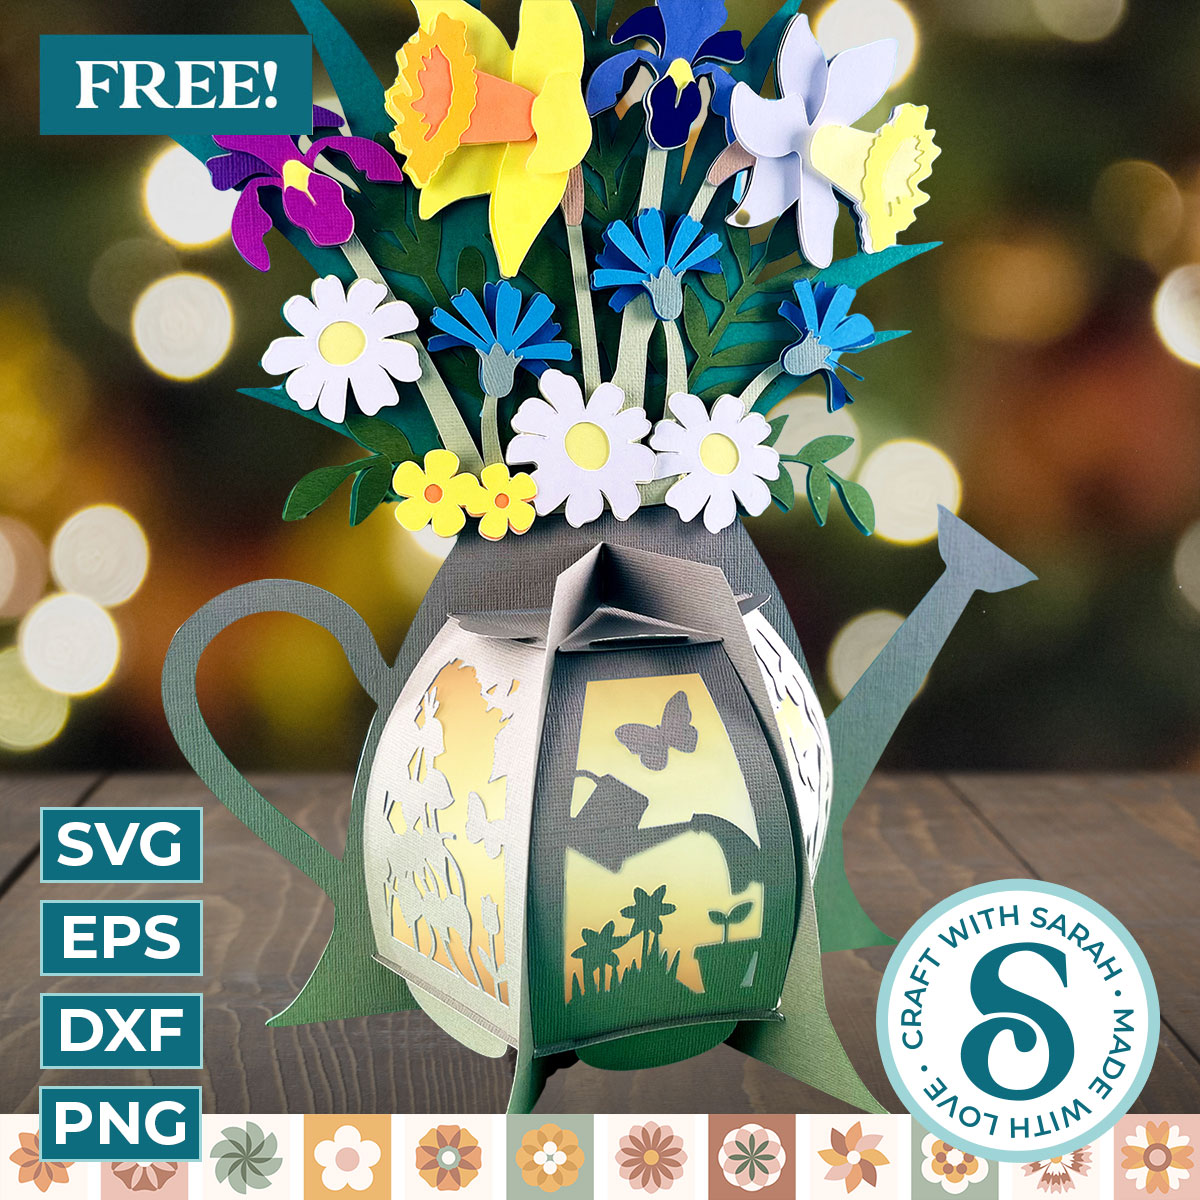
Paper Flower Bouquet 🌼 DIY Watering Can Lantern Craft
Make a beautiful DIY watering can craft with this 3D lantern that’s bursting with paper flowers.
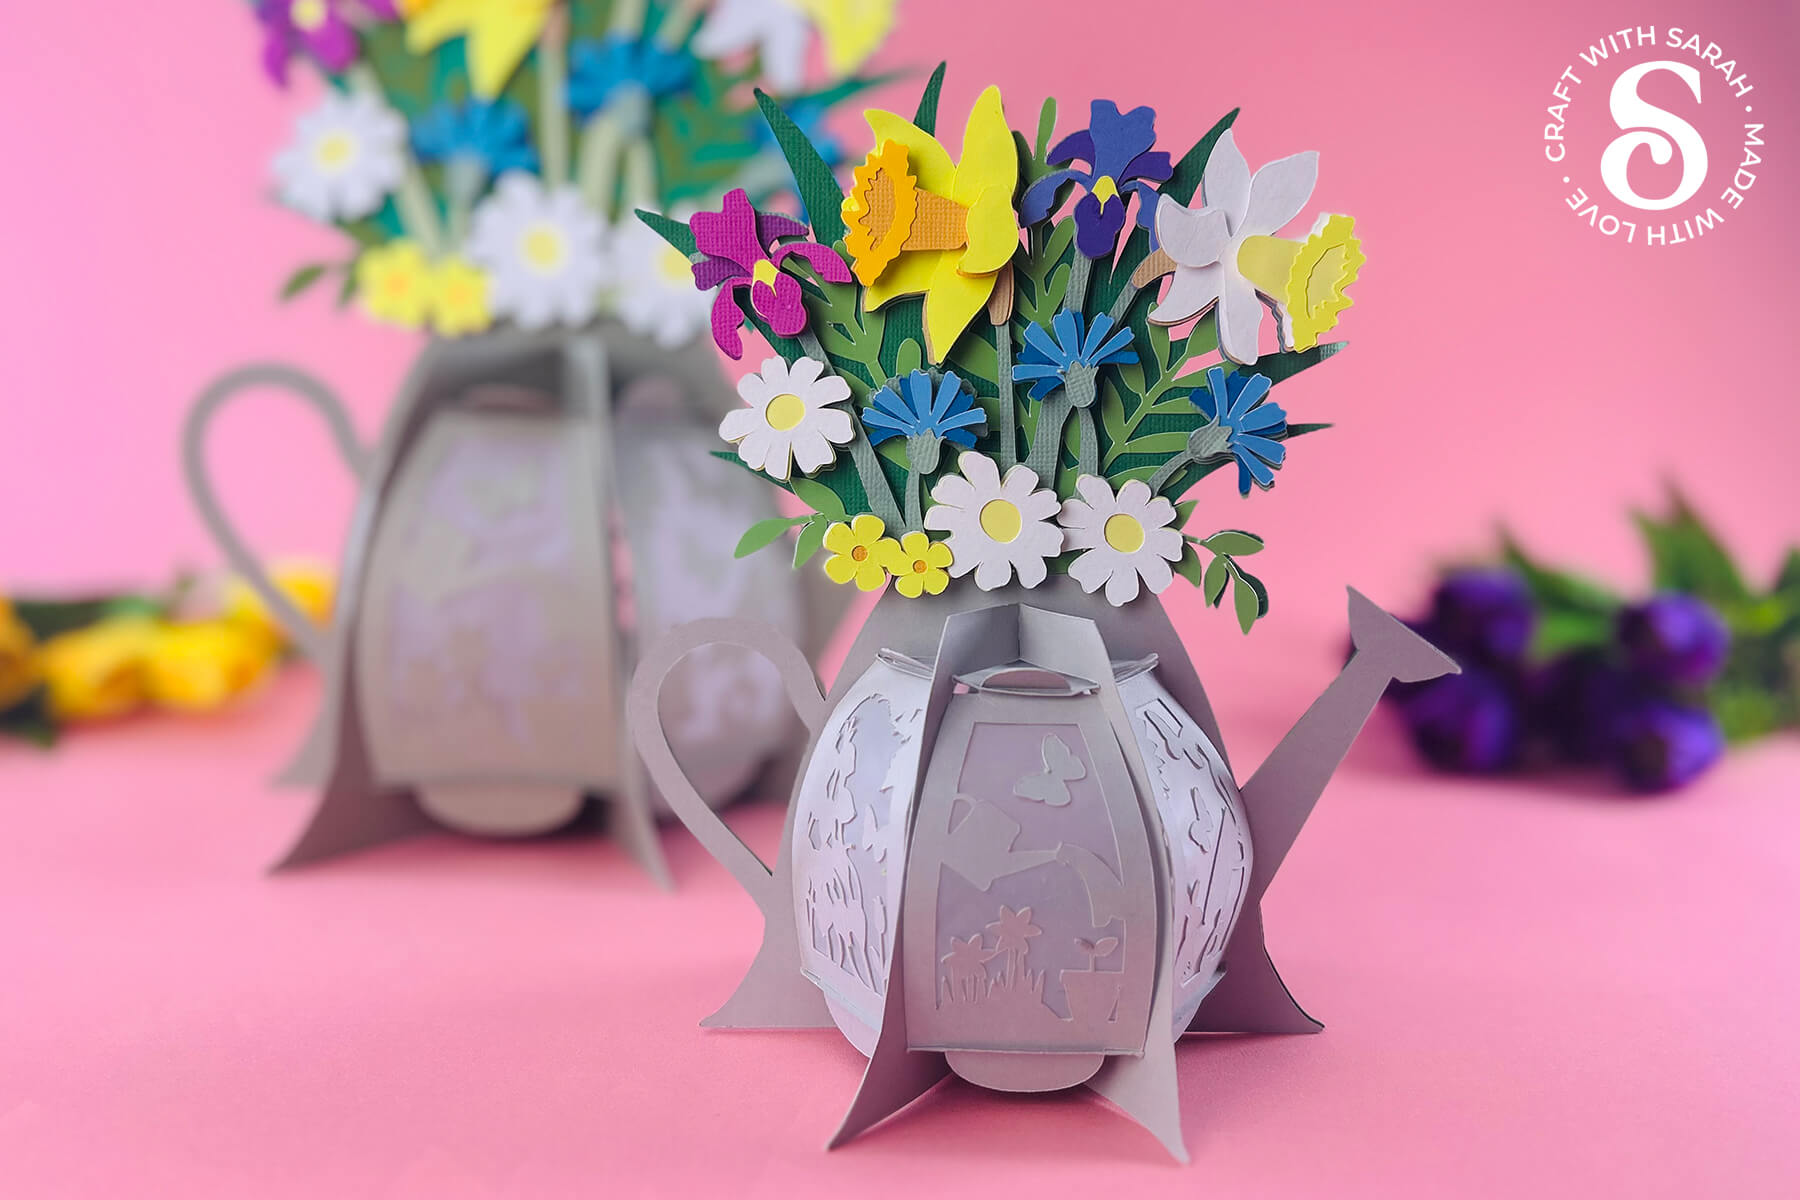
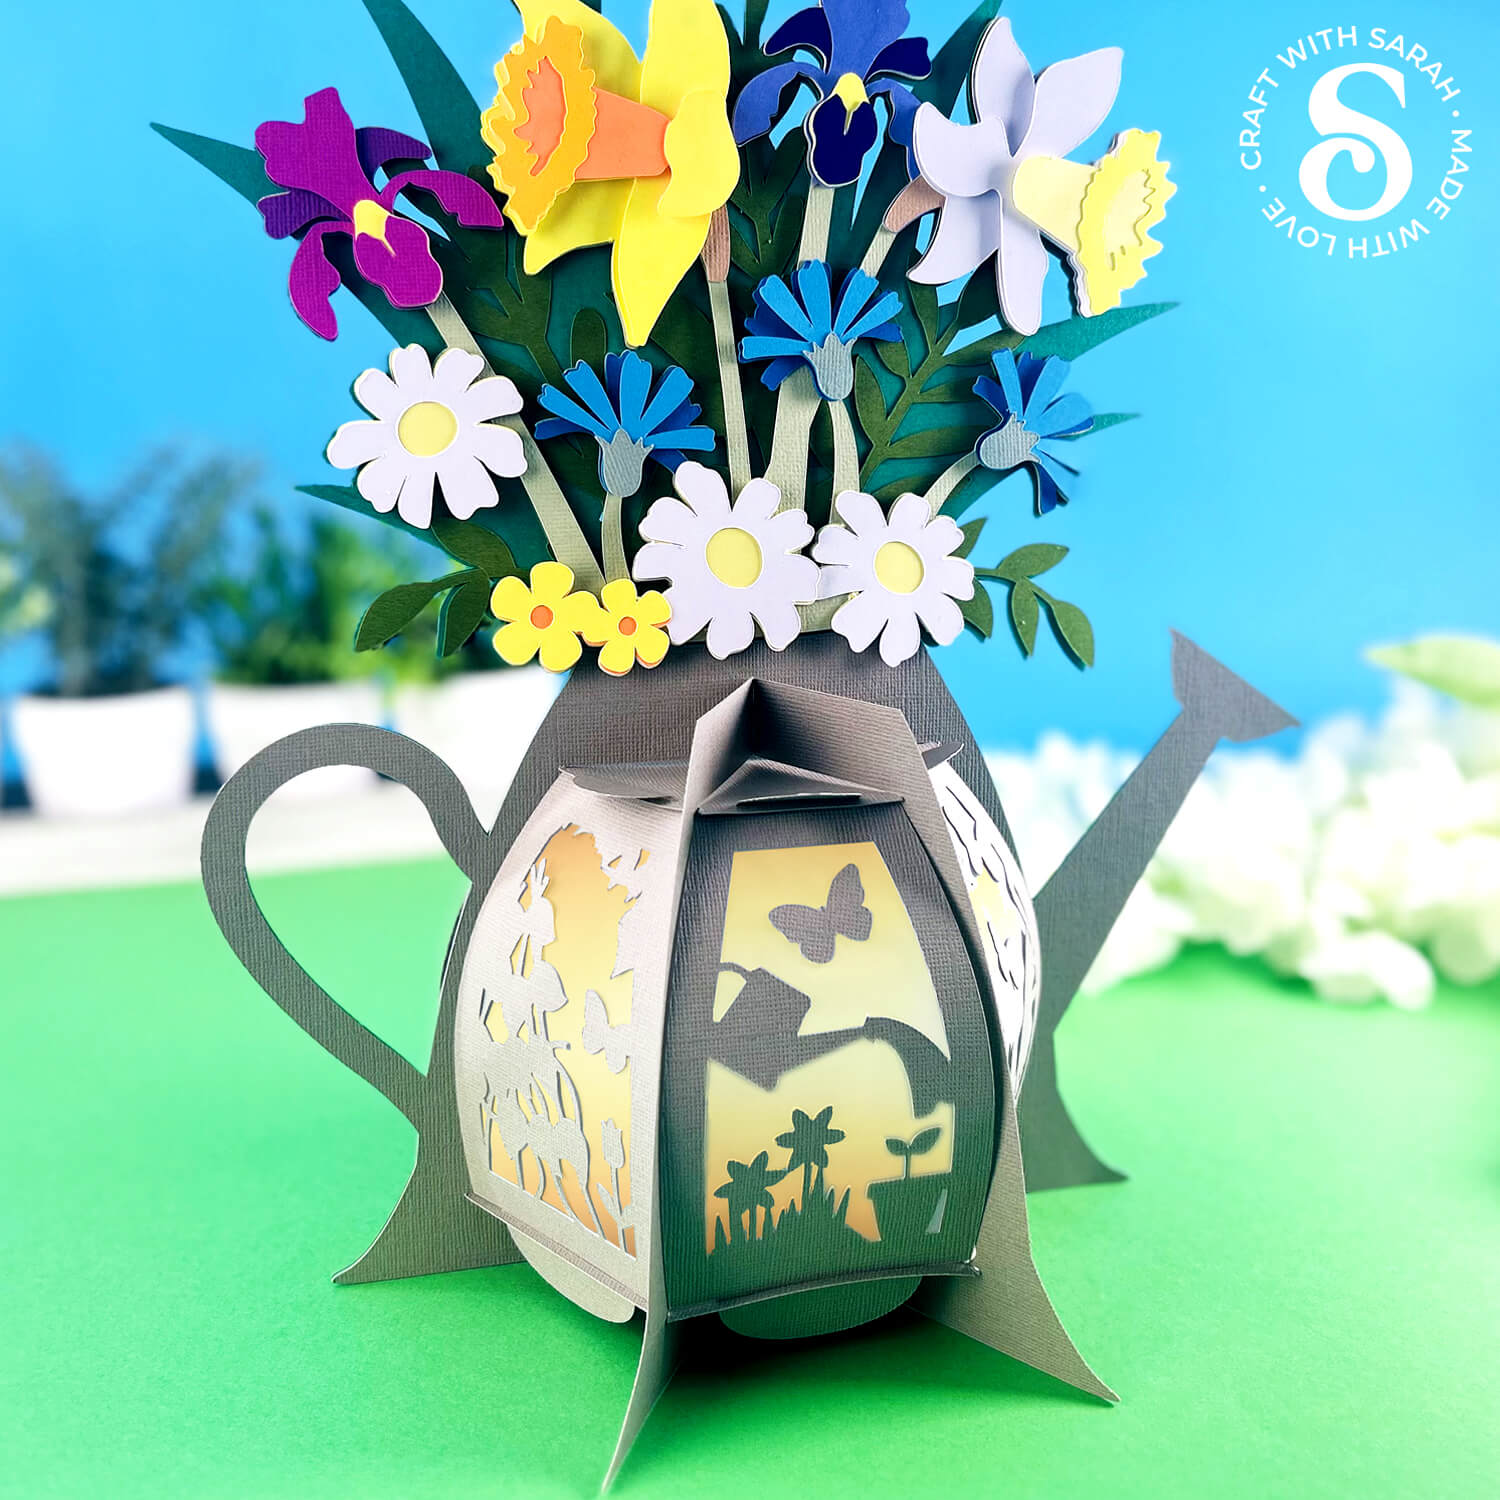
Are you ready to make something truly stunning with your Cricut machine? In this tutorial, I’m going to walk you through how to craft a gorgeous 3D watering can lantern — complete with beautiful spring flowers like daffodils, daisies, and irises.
This isn’t just any paper project. It’s a 3D floral lantern shaped like a watering can!
You can add fairy lights or other battery powered lights inside to make it glow, or keep it simple with colorful cardstock behind the window cutouts.
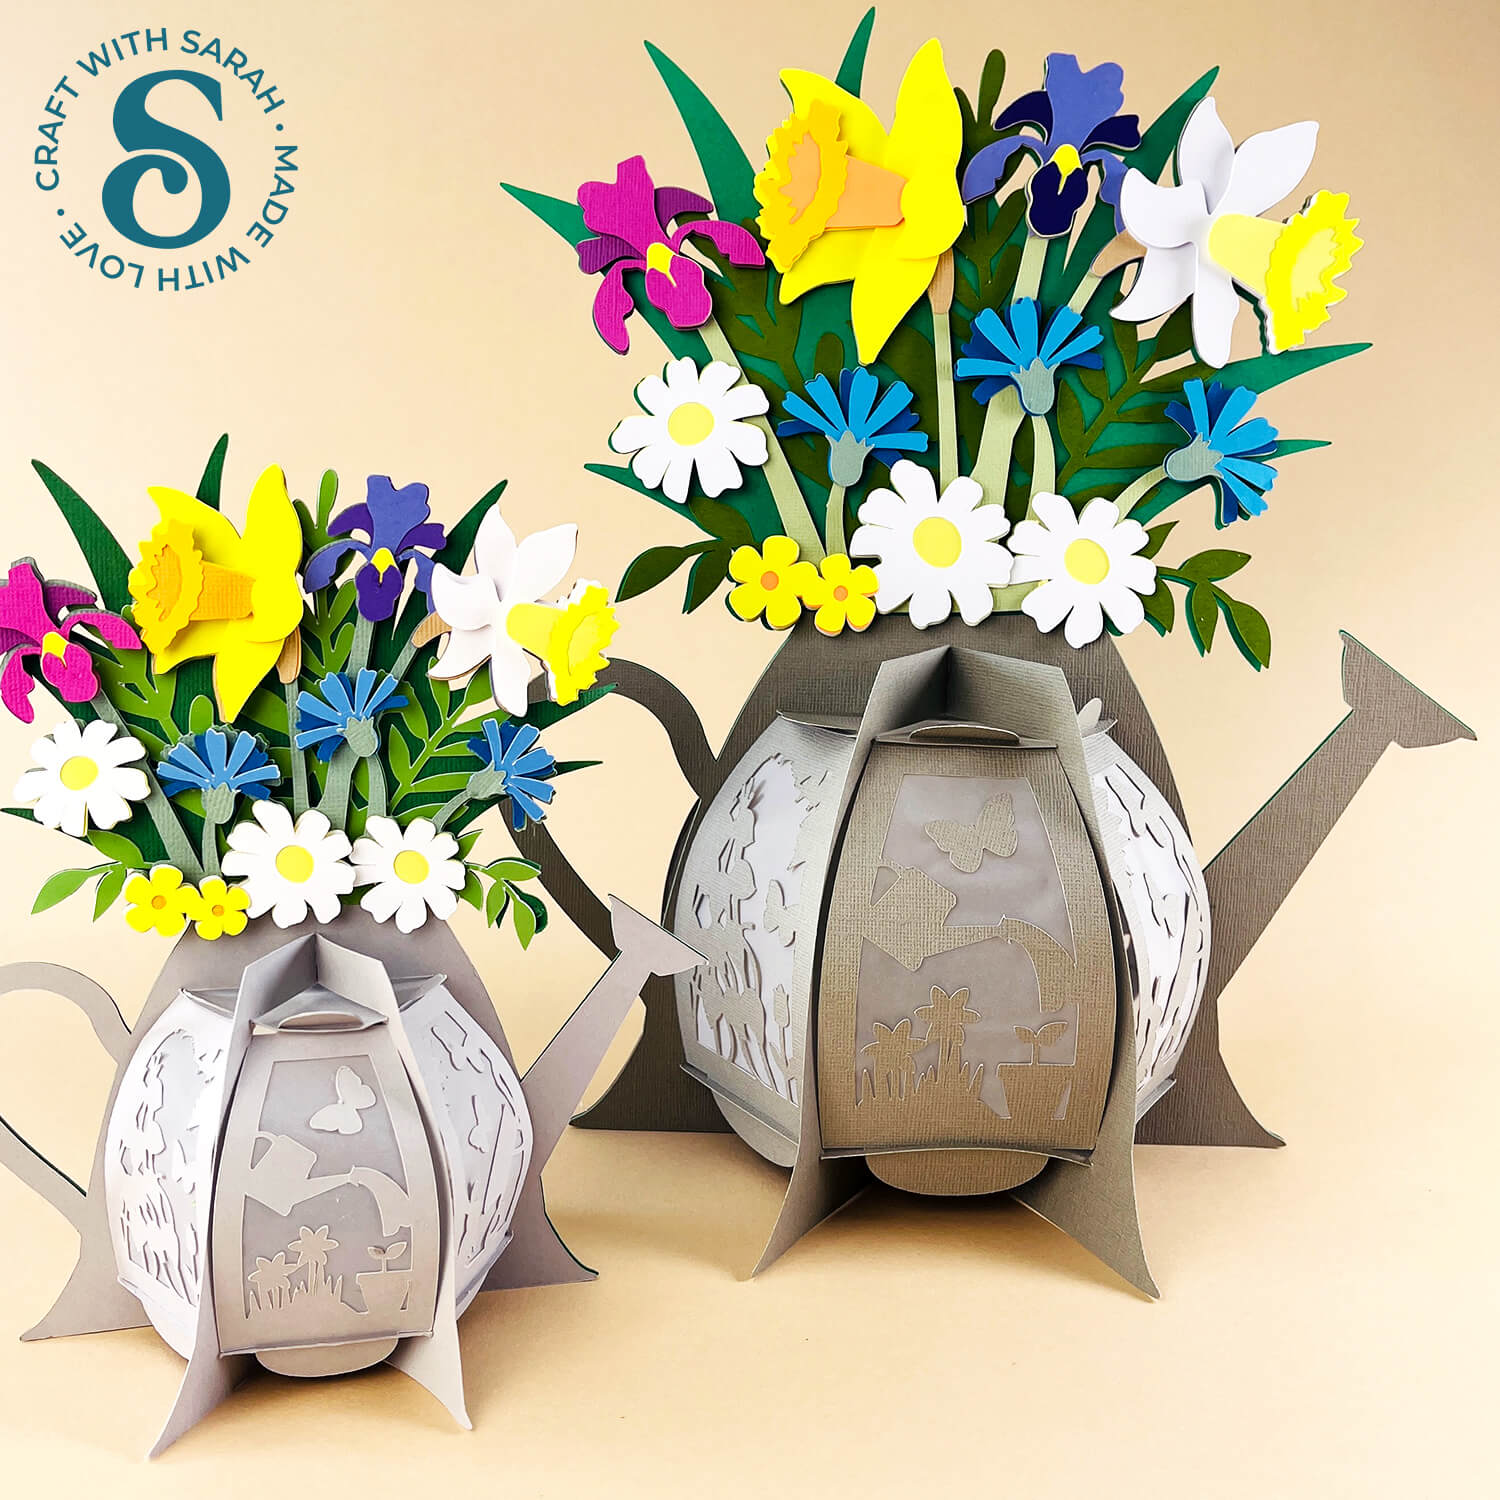
You even have the option to make a large display piece or a mini version.
Whether you’re new to Cricut or a seasoned crafter, this project is a joy to make and perfect for displaying on a table or windowsill — whether you go big and bold or small and sweet.
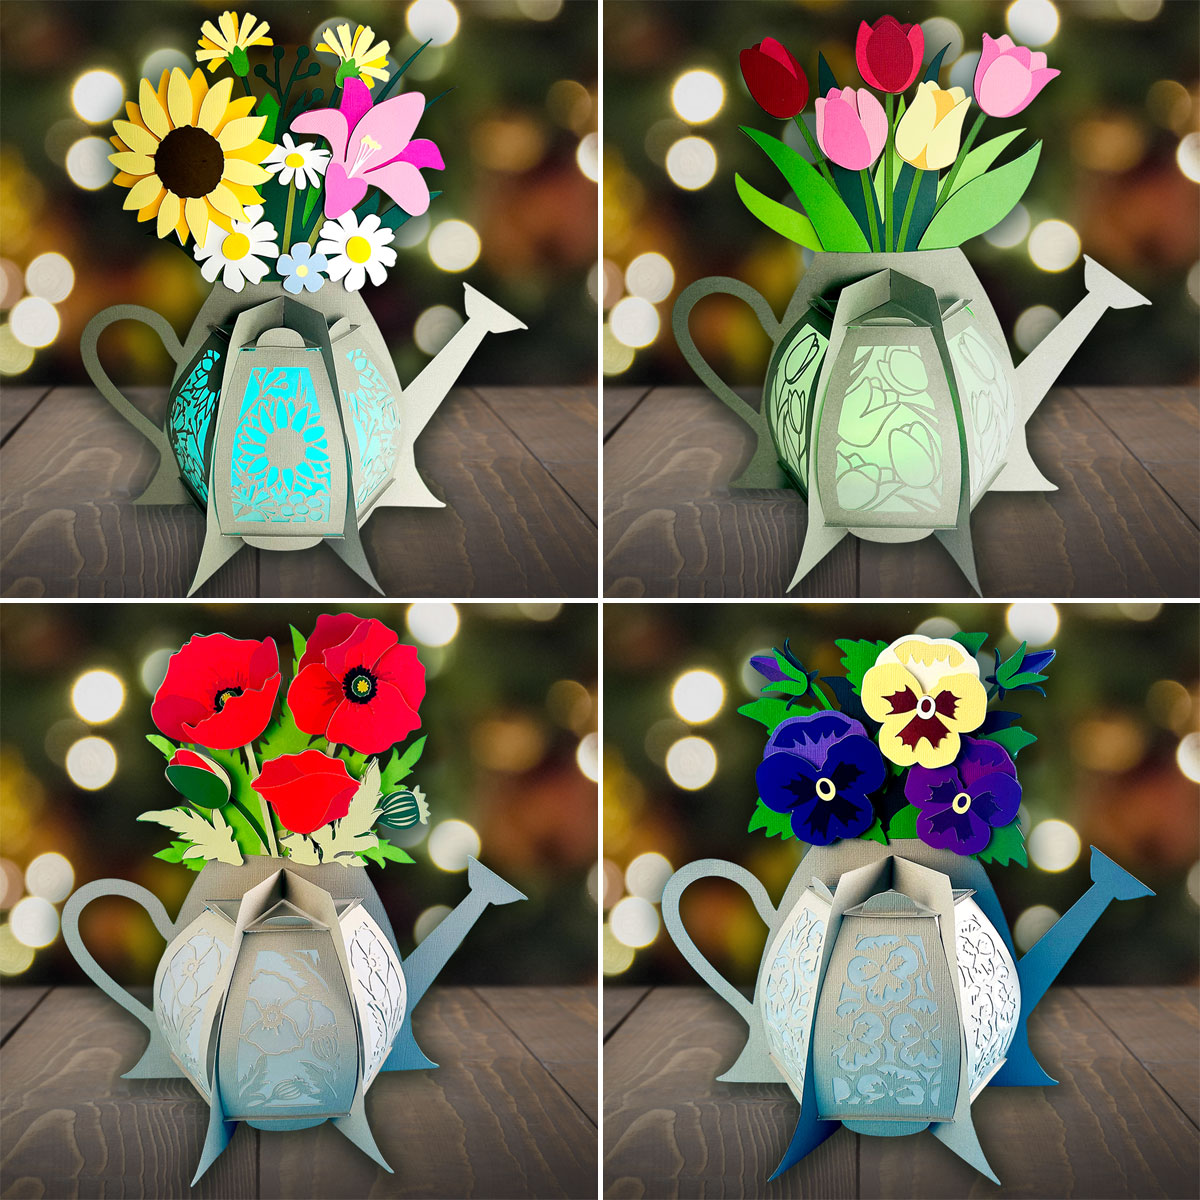
These same instructions can be used for any of the other watering can lantern designs available – including tulips, pansies, summer flowers and poppies – as well as any future base lanterns that are released (new designs will be coming later this year for Halloween and Christmas).
Let’s take the mystery out of making 3D papercrafts, and get you crafting something gorgeous today!
Video tutorial for watering can lanterns
Watch the video below to see how to make this light-up craft project. Keep scrolling for a written tutorial.
Materials list for slot-together flowers lantern
Here is a list of the materials that you will need to make this craft project.
Please note that some of the links included in this article are affiliate links, which means that if you click through and make a purchase I may receive a commission (at no additional cost to you). You can read my full disclosure at the bottom of the page.
- Cricut Machine
- Light blue Cricut cutting mat
- Coloured Card
- Craft glue (I like Bearly Art Glue and Collall All Purpose Glue)
- 3D foam pads
- Translucent vellum, tracing paper or similar
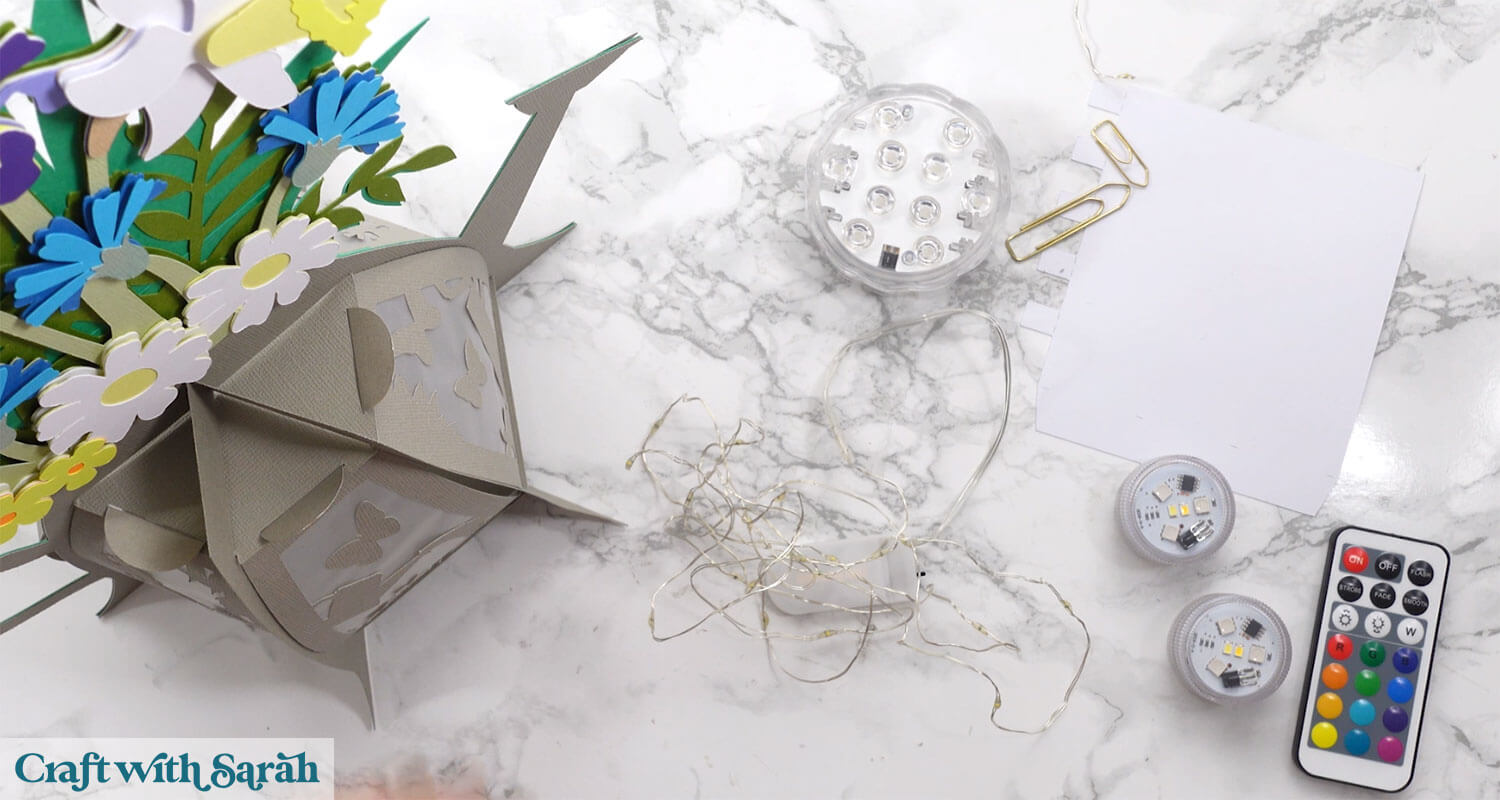
- Lights to go inside the lantern such as submersible lights, battery powered tea lights or fairy lights with small battery packs
What lights work best inside the lanterns?
Never use a real flame/candle as your lantern will catch fire!!
Instead, choose battery powered lights.
As you are putting the light in an enclosed space with the walls made from cardstock, it is essential that you choose lights that do NOT get warm during use.
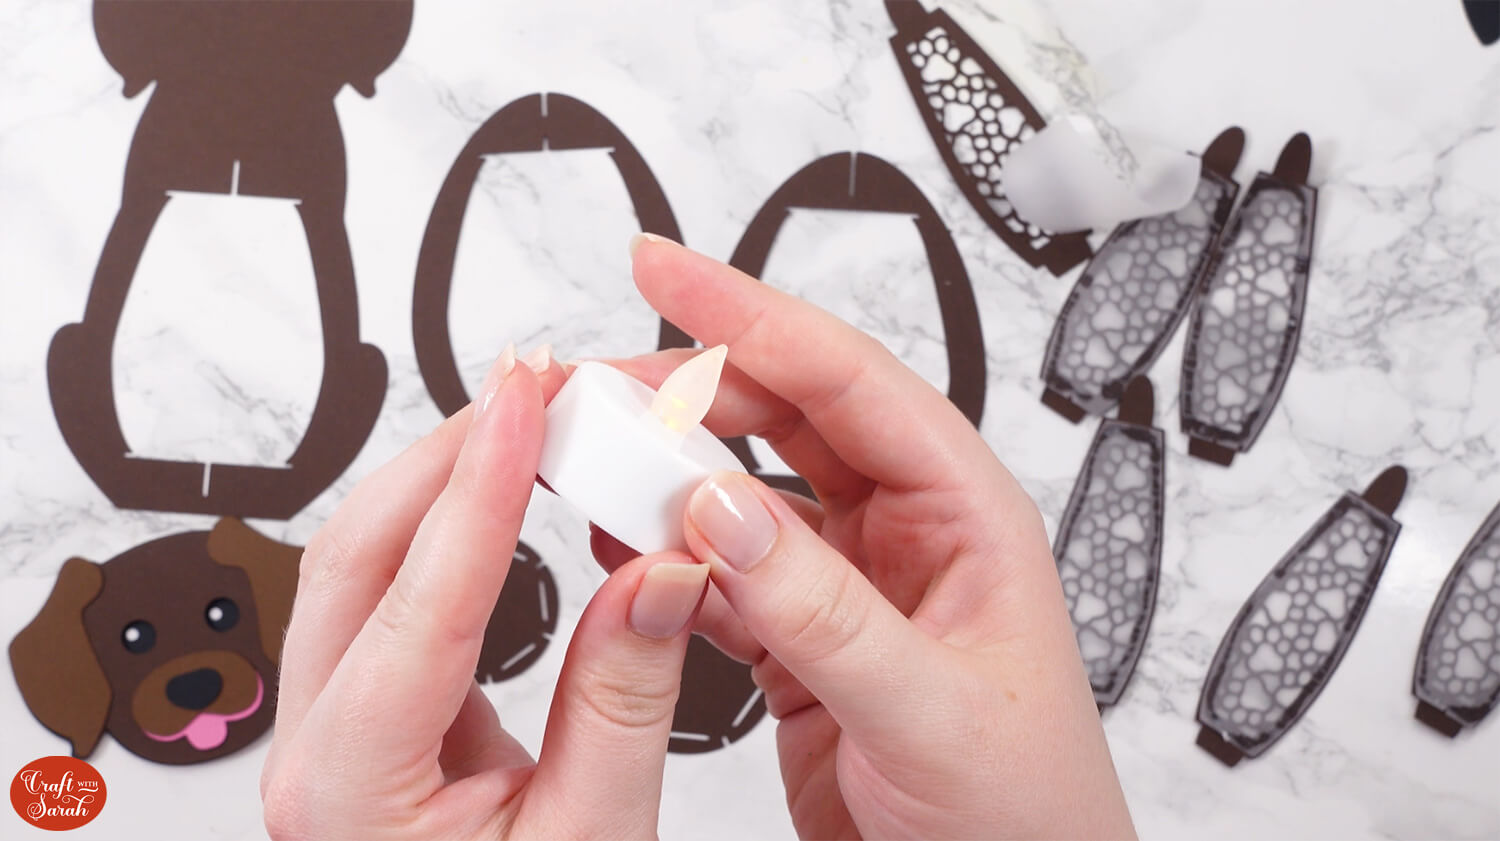
Option 1: Battery powered tea lights
This is a quick and simple light option and you may already have some of these lights in your home, however they are not the most effective for this particular type of lantern.
Base lanterns / watering can lanterns are quite large, so tea lights probably won’t be strong enough to make much of an impact.
Find battery powered tea lights on Amazon
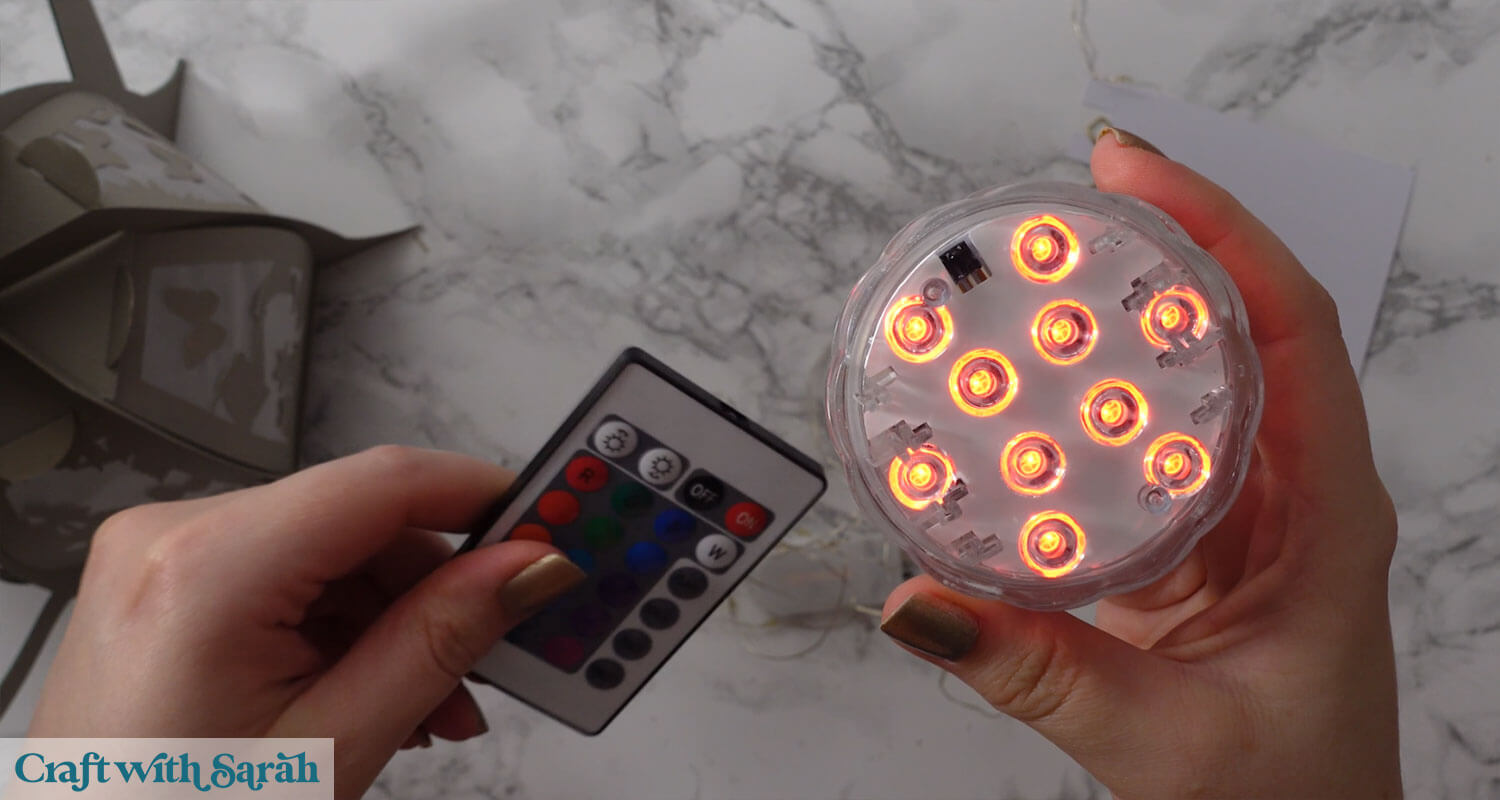
Option 2: Submersible LED lights
This is my favourite lighting option. These tiny little lights come with a remote control to change the colour. You can even make your own disco light show by having them flash or fade through all the different colours!
If you use a smaller light like these, you will need 2-3 inside to light the lantern adequately.
Find small submersible lights on Amazon
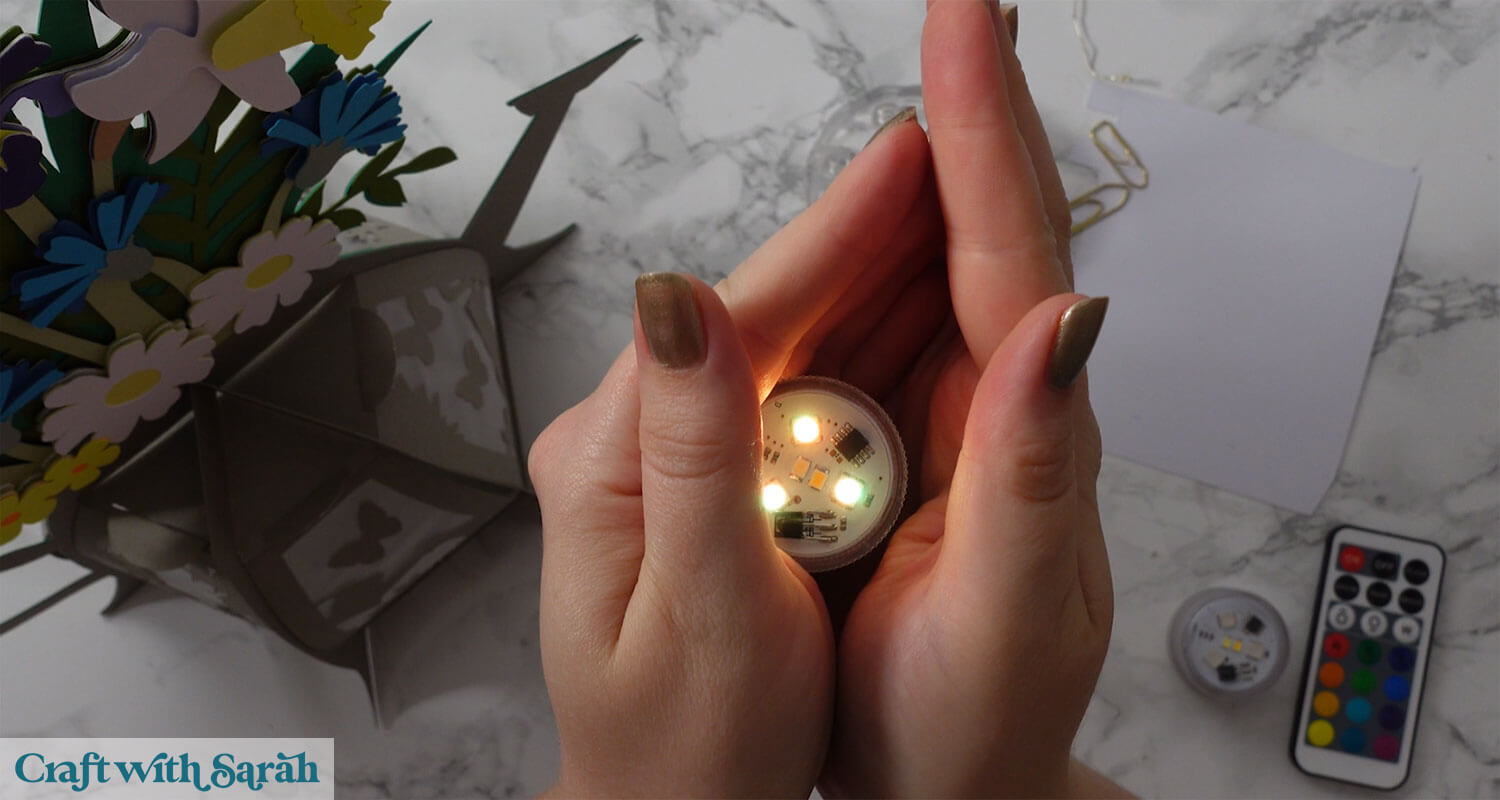
These larger lights work best for the base lanterns. They require 3 x AAA batteries.
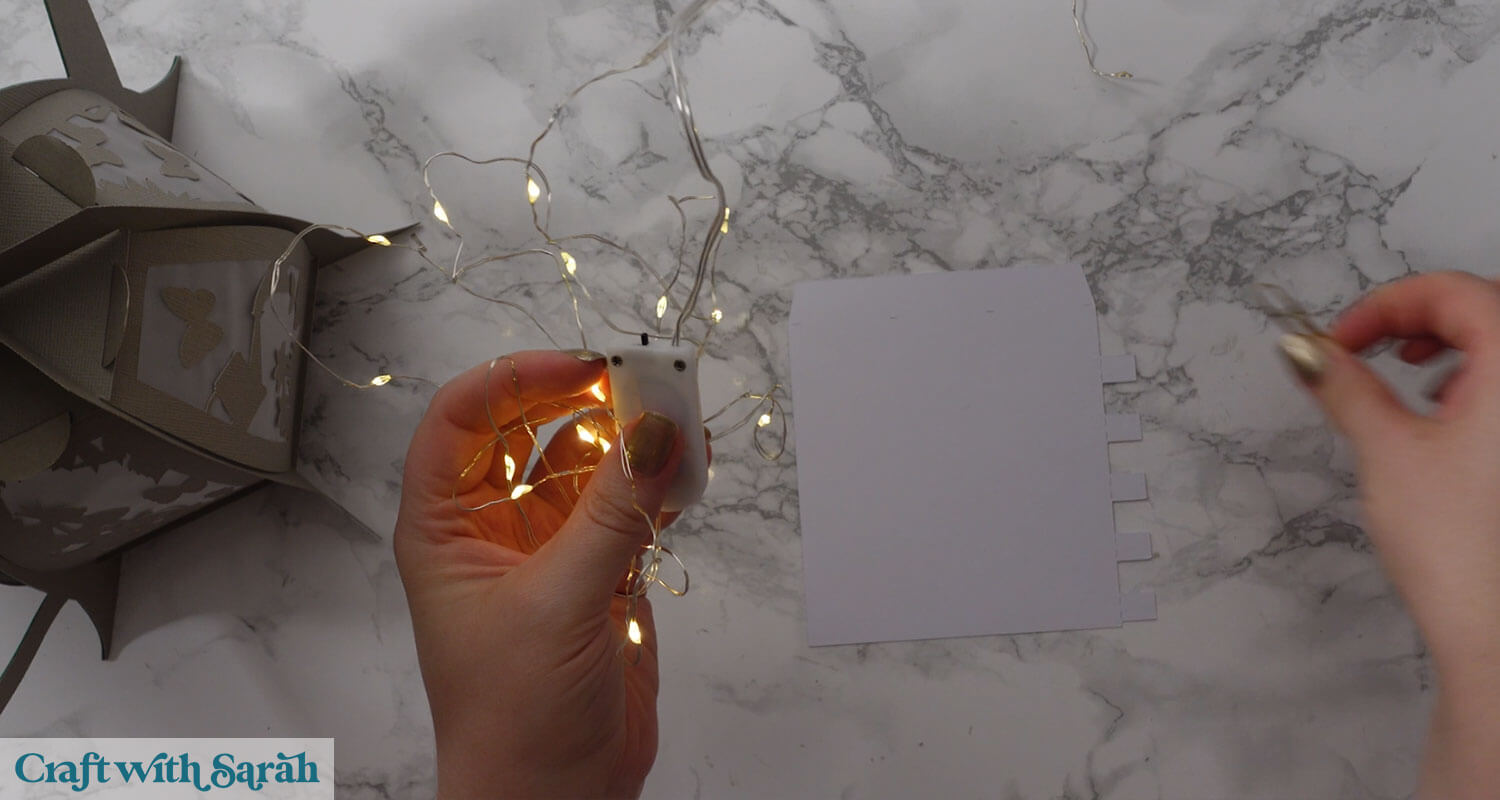
Option 3: Fairy lights
Putting a string of fairy lights inside the lanterns gives the brightest overall effect.
Choose lights with small battery packs and make sure you unravel/unwrap the lights from the battery pack before using them, for safety reasons.
The design comes with an optional lighting tube to wrap the lights around, so that the light will reach all the way to the top of the lantern.
Base lantern instructions
Step 1) Download the free file & unzip the downloaded folder
Download the Free Cutting File
Please login to your account to download this file.
TERMS OF USE:
You may sell finished, handmade physical craft items that you have made using this product but must not sell or share the digital files. Read full terms of use
Before you upload the SVGs to Design Space, you need to unzip the download folder that they come in.
- How to unzip a folder on Windows computer
- How to unzip a folder on a Mac
- How to unzip a folder on an iPad/iPhone
- How to unzip a folder on an Android device
After unzipping, upload the SVG file(s) into your cutting machine software.
Not sure how to use cut files with your type of machine? The following links lead to videos on how to open cut files in:
- Cricut Design Space
- Silhouette Studio
- CanvasWorkspace (for ScanNCut machines)
Step 2) Upload the SVG file into Design Space
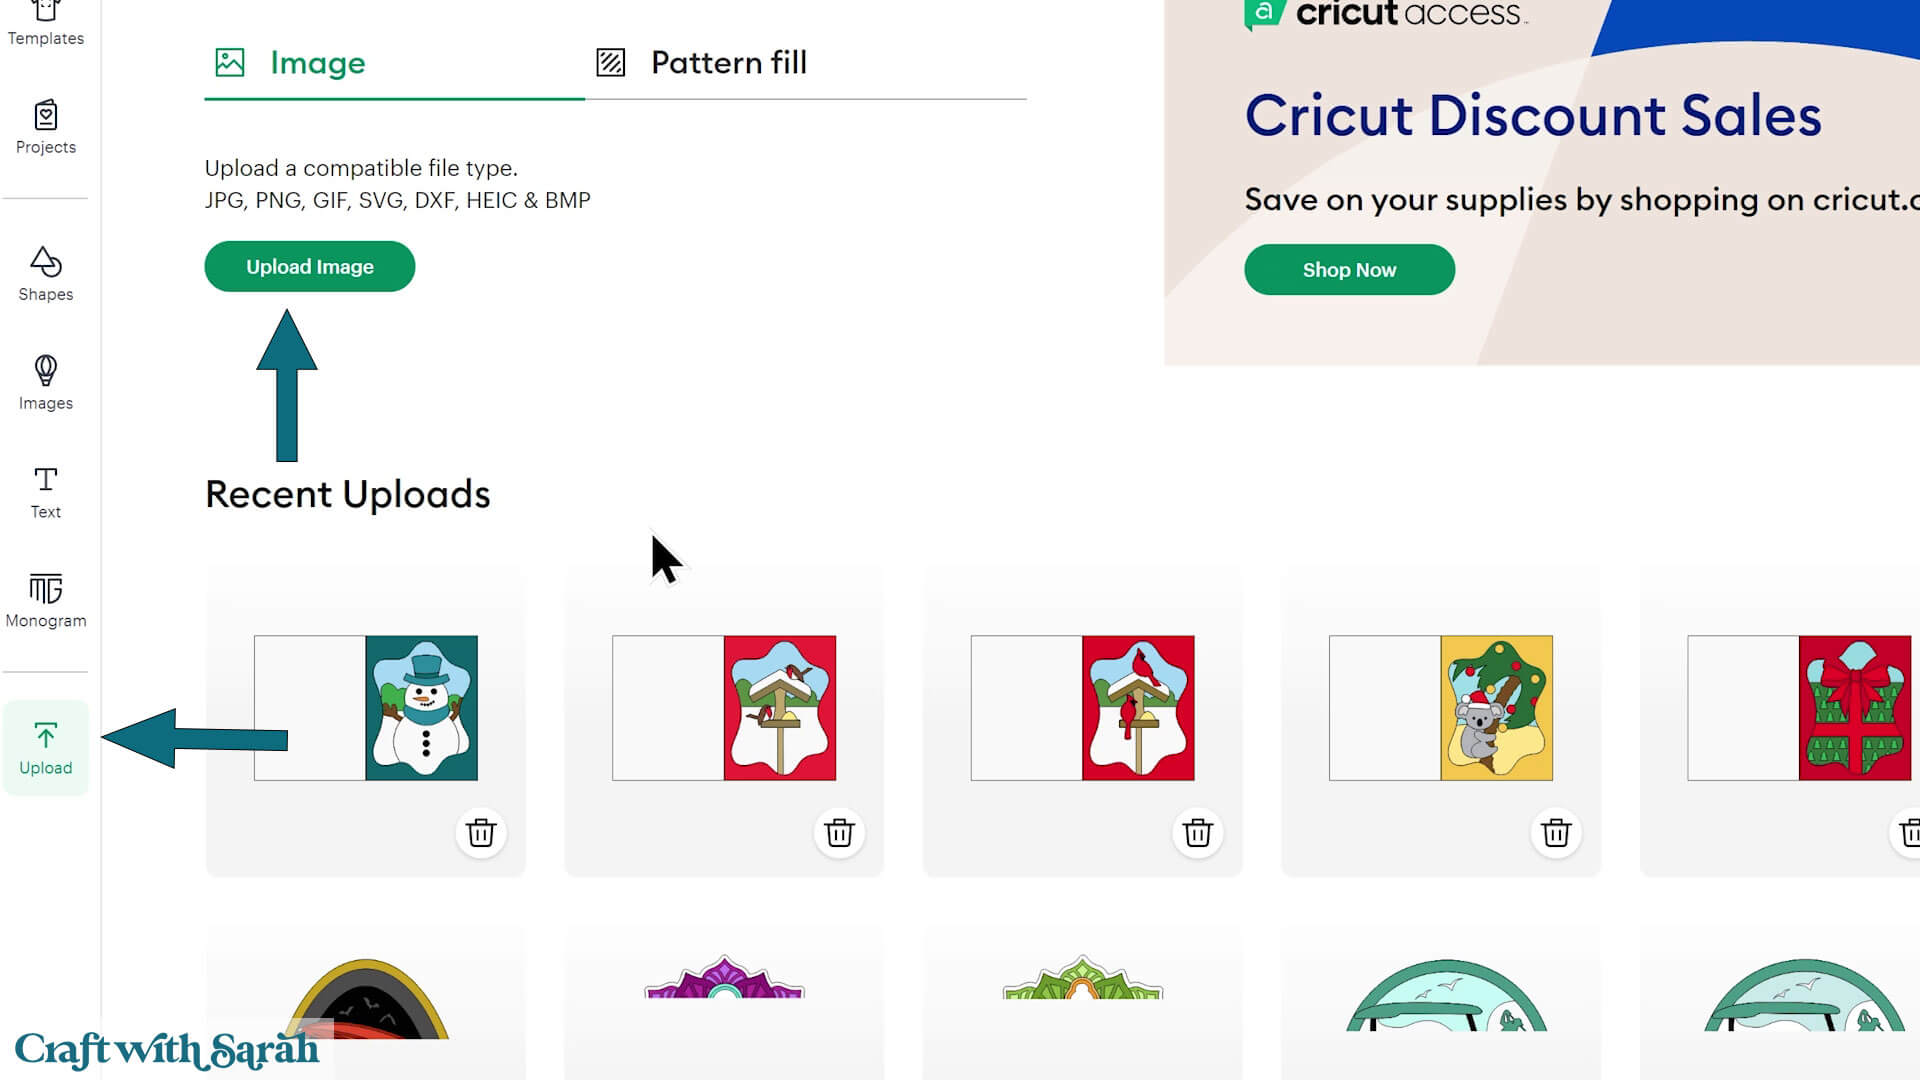
If you are using Cricut Design Space, start a new project and then click the “Upload” button on the left of the screen, then press “Upload Image”.
You can then either click “Browse” to find the file on your computer, or drag-and-drop it.
Upload the file in the “01 Cricut Version” subfolder called svg-01-lantern-watering-can-craftwithsarah.svg
Don’t worry if the image preview appears blurry – it will show in full quality once it’s inserted onto your project.
Press “Upload” on the next screen.
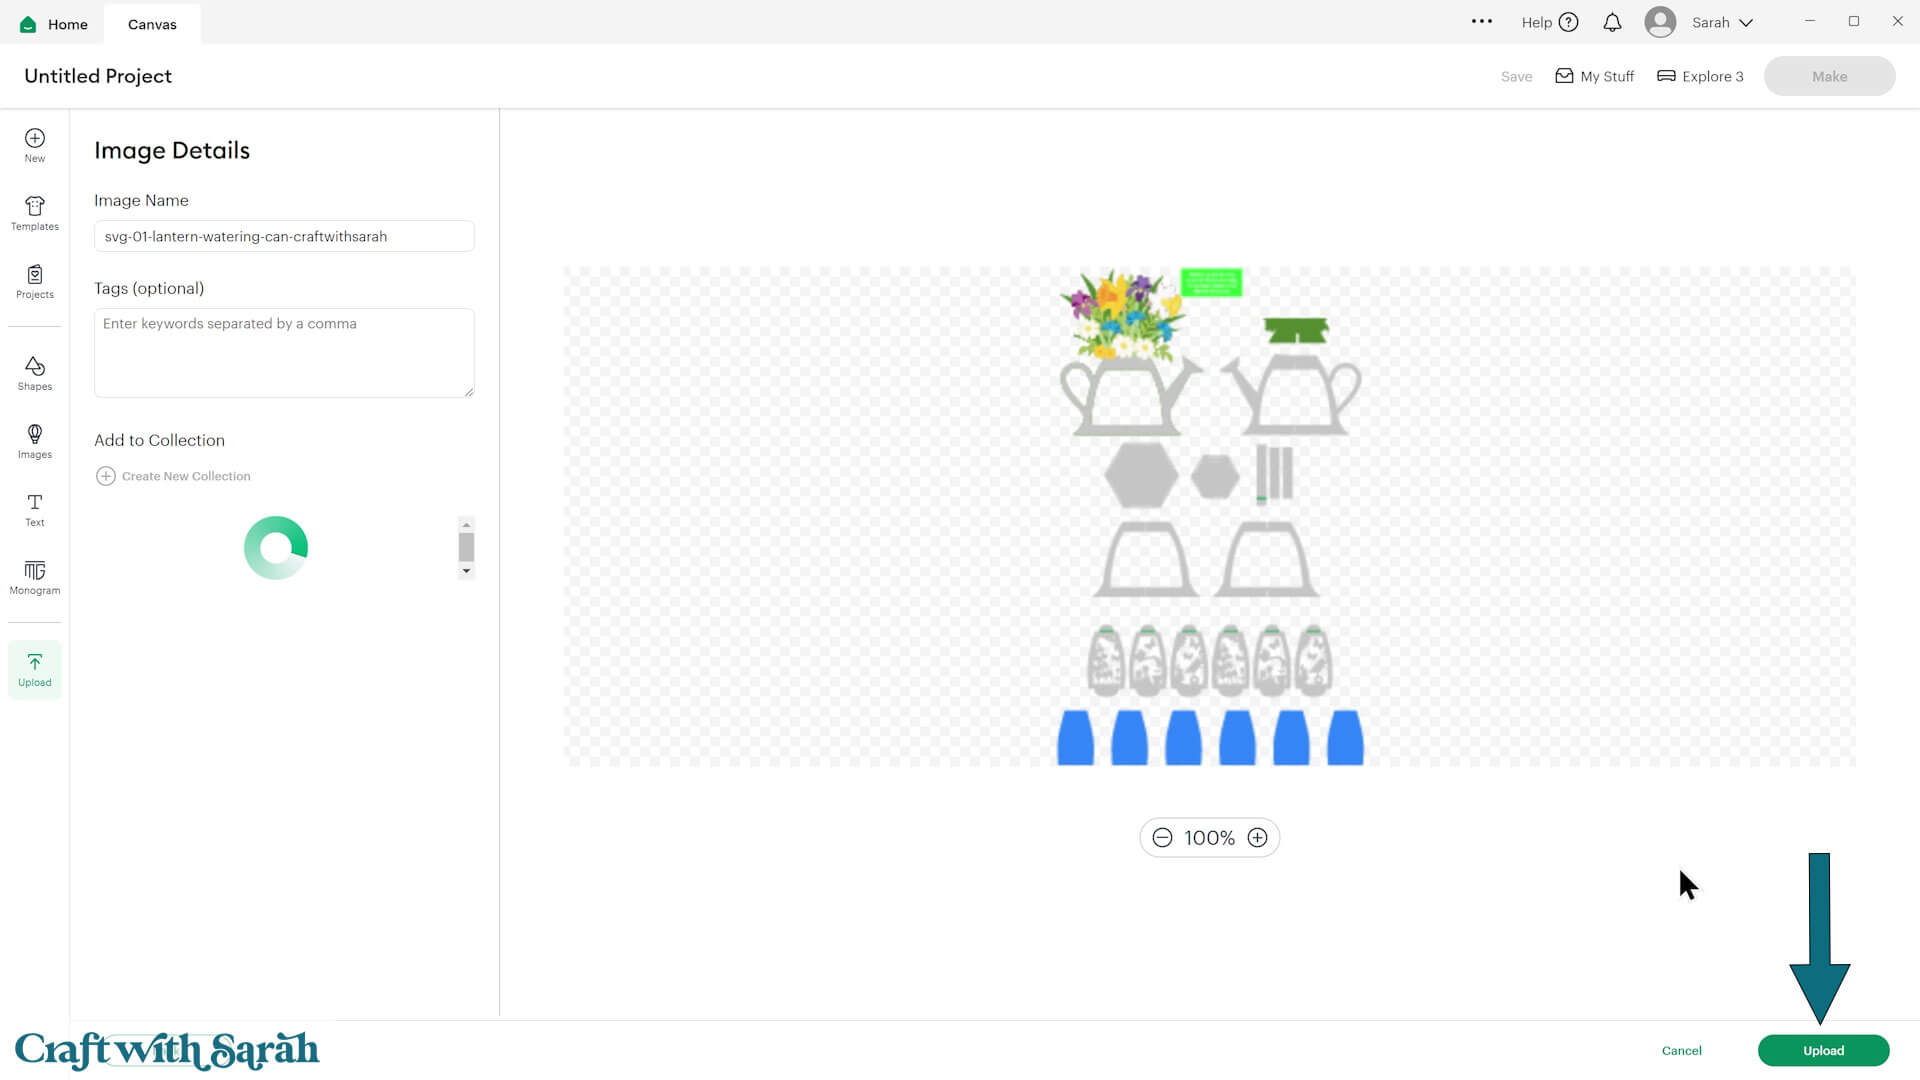
After uploading, the lantern design should be automatically inserted onto your Canvas.
In June 2025, Cricut introduced a feature where you get a “pop out” bar of similar images when you Upload a design. To hide this bar (to give you more space for designing!), click the arrow that’s about half way down the page.
If the design doesn’t get inserted onto your Canvas, it will show under “Uploads” in your “Recently Uploaded Images”. Click on it and then press “Add to Canvas” to put it onto your Project.
Step 3) Prepare the project for cutting
If you’re planning to use fairy lights, there’s an optional light tower you can include. It helps spread the light evenly throughout the lantern. Upload this file just like the others and make sure it’s included if you resize the whole design.
You’ll see a green box on the top of the design that tells you the size it should load in at.
Check to see if yours matches that size. If not, resize the design to match those measurements.
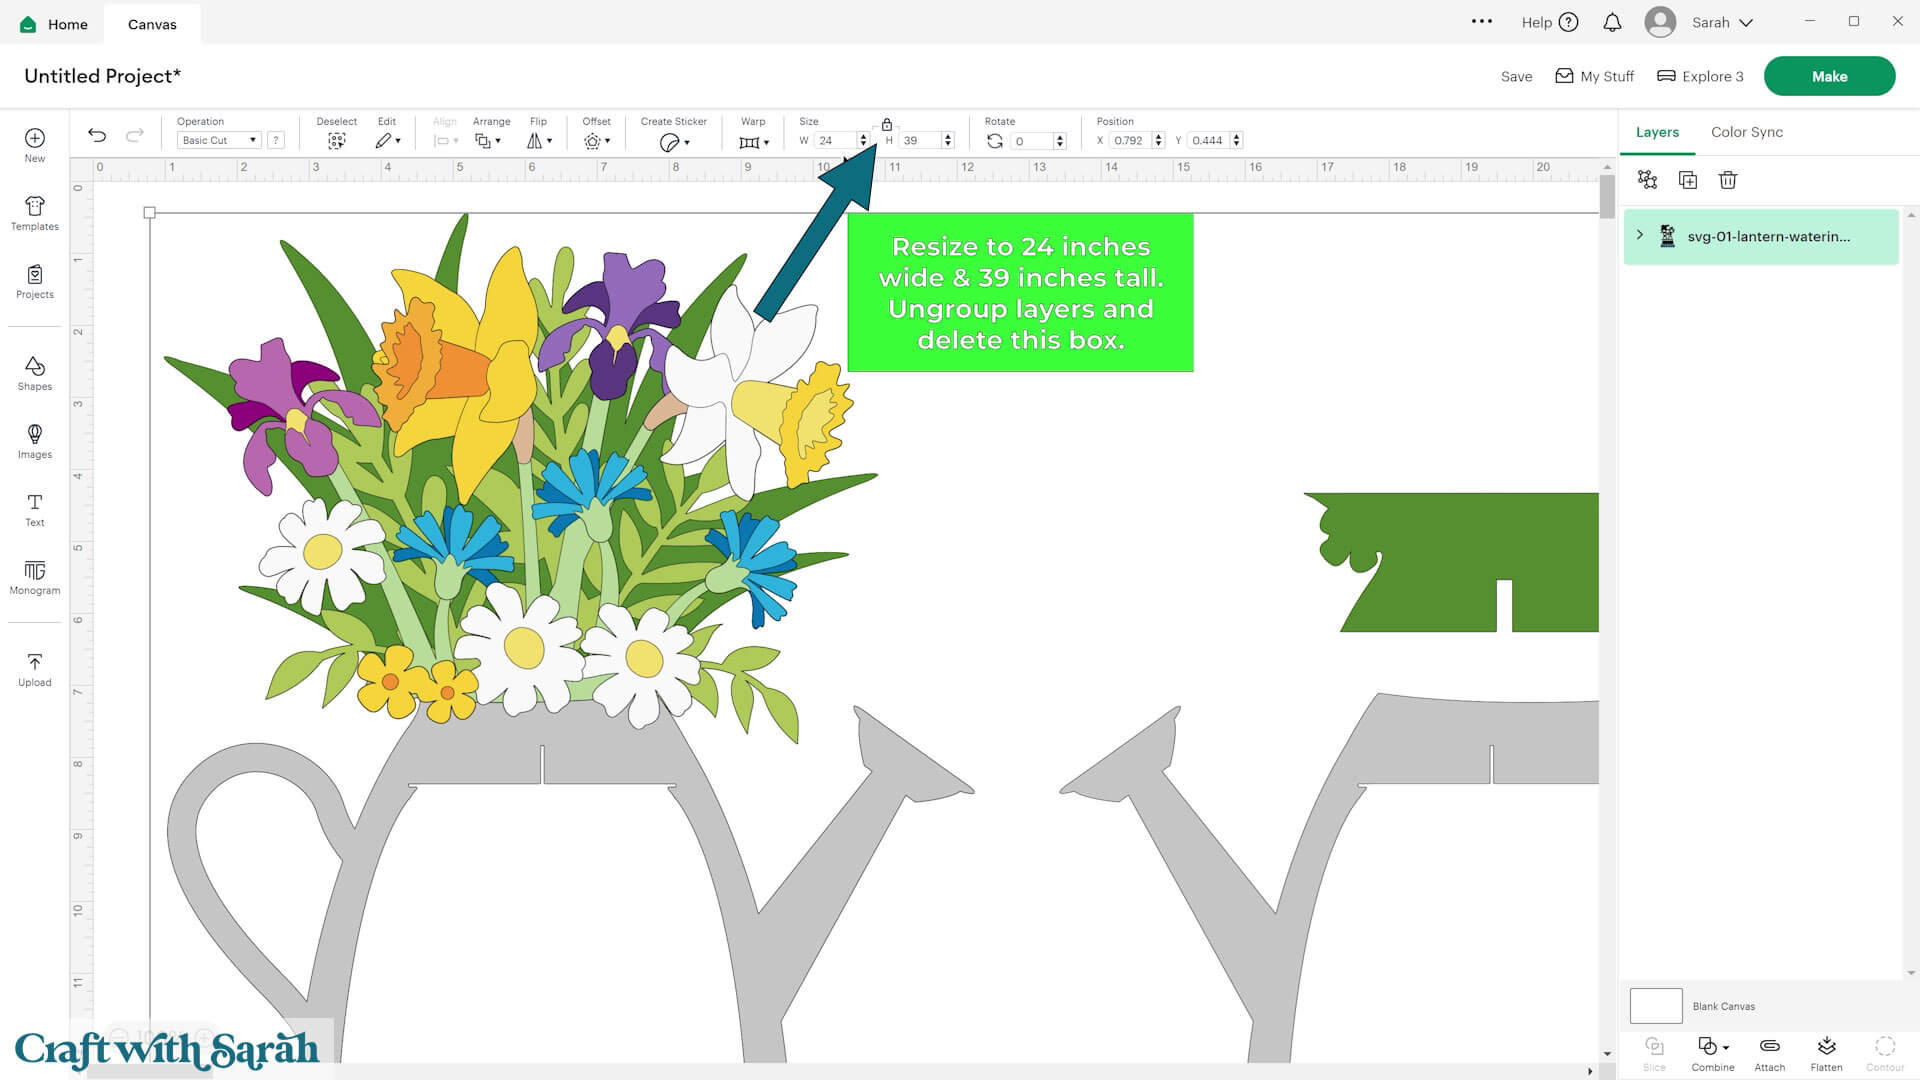
Click the “Ungroup” button at the top of the layers panel.
Click the bright green rectangle with the size details on, then delete that layer.
Next, we’ll format the score lines. If you don’t have a scoring stylus or wheel, don’t worry — you can delete those lines and fold by hand.
If you do want to score, look down the Layers panel for a mini group (as shown by a chevron icon). Click the chevron to see the layers. Click on the single line layer.
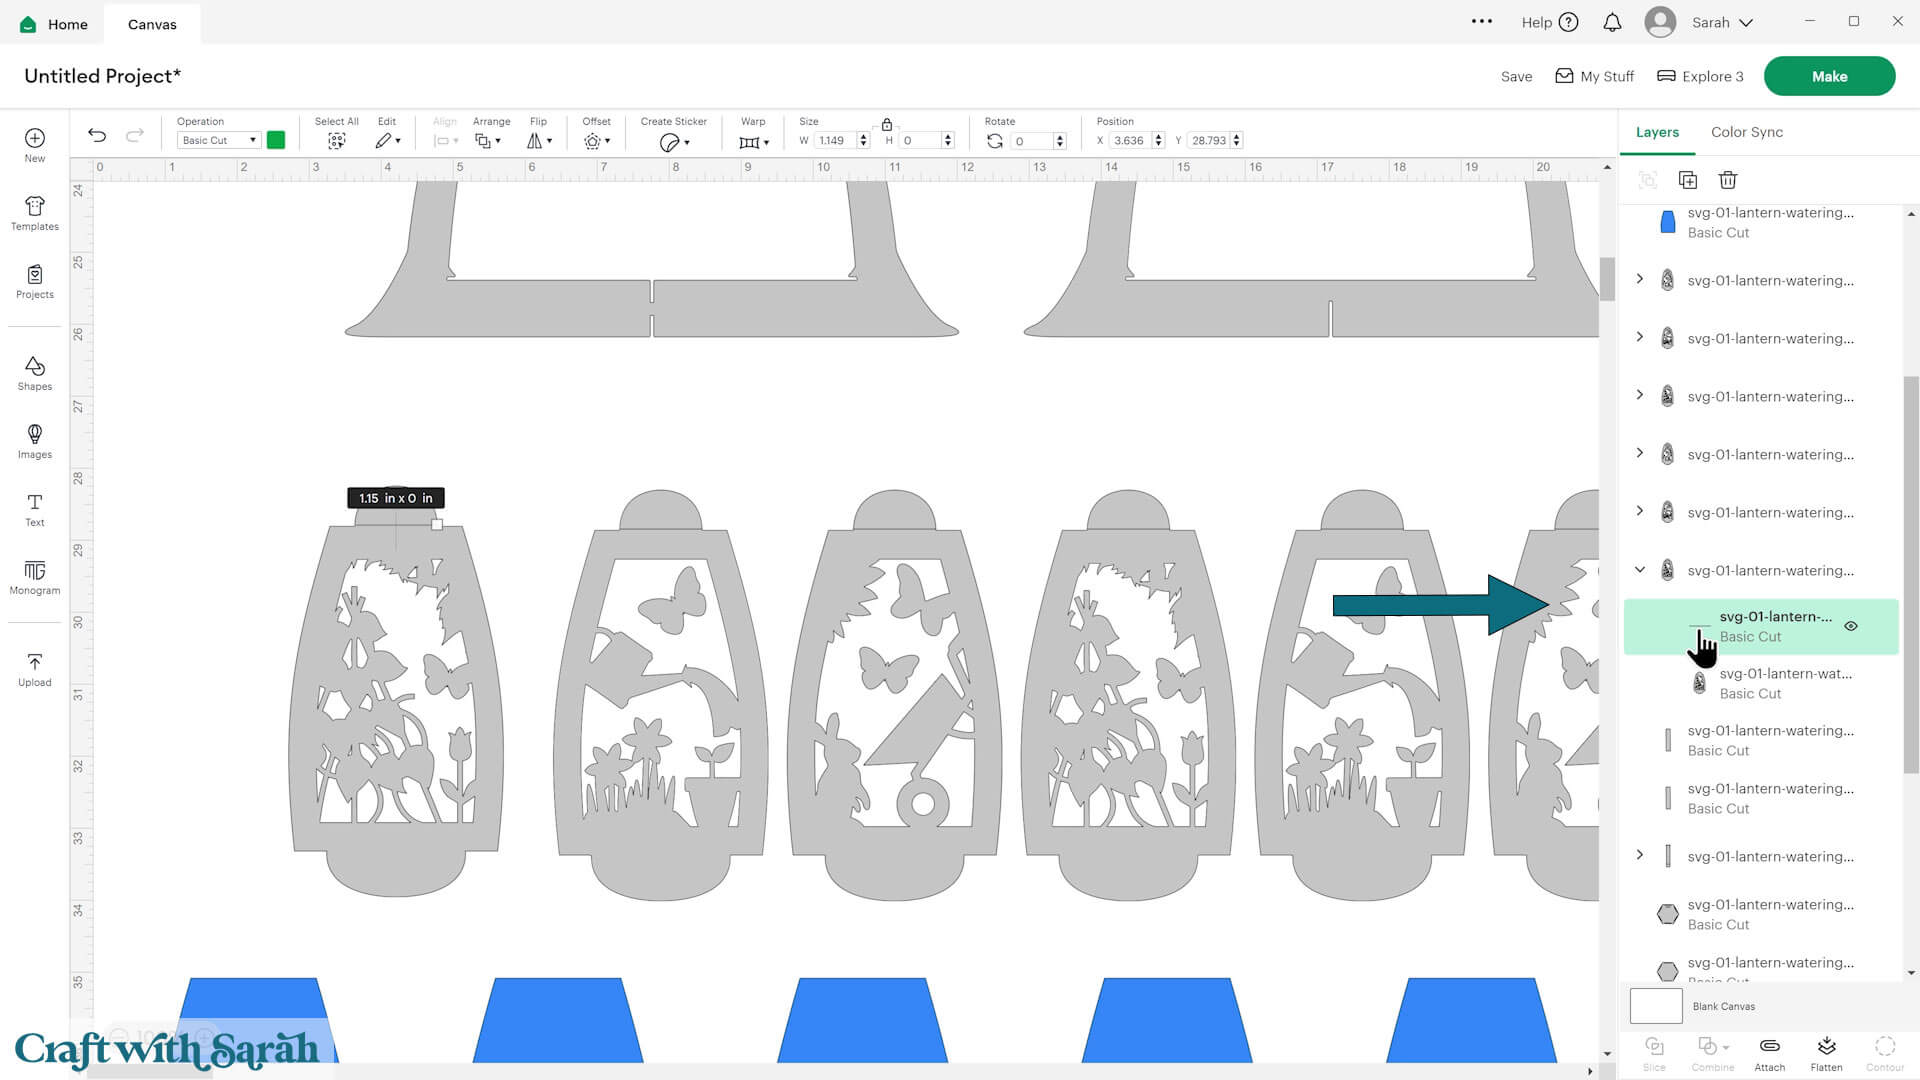
Change it from “Cut” to “Score” in the Operations dropdown menu.

Click to select both of the layers in the mini group. Press “Attach” to tell the Cricut where to do the scoring.
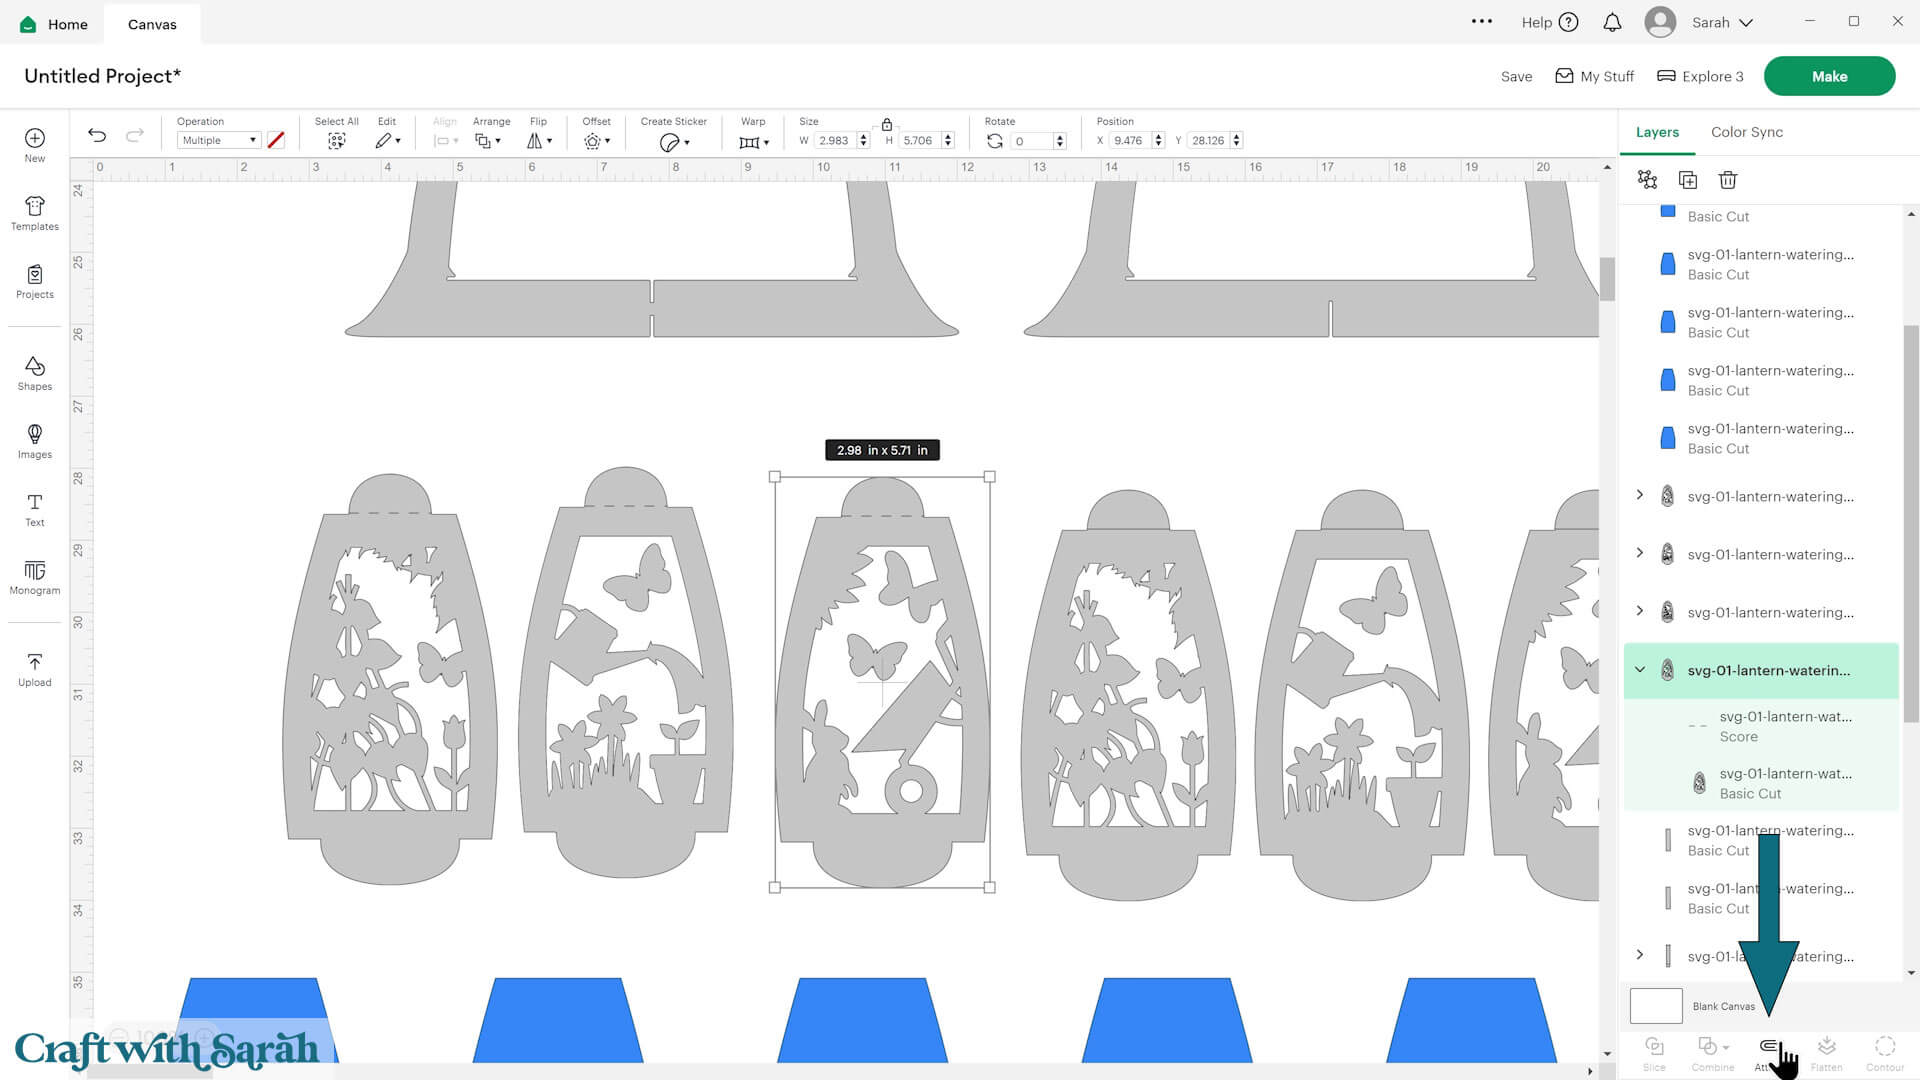
Repeat these steps until you have formatted all the score lines.
Step 4) Resize the design (optional)
The watering can lanterns are designed to be fairly large when cut and they require 12×12 cardstock for some of the layers.
However, you can make it smaller if you wish.
To do this, first select all of the layers and click Group.
If you’re using the optional light tower, make sure it’s inserted onto your Canvas before you start resizing, and that it gets included in your Group.
Add a square shape to your canvas and resize it to your desired width (e.g., 7 inches).
Use it as a guide to shrink your lantern.
Make sure the padlock icon is closed so everything resizes in proportion.
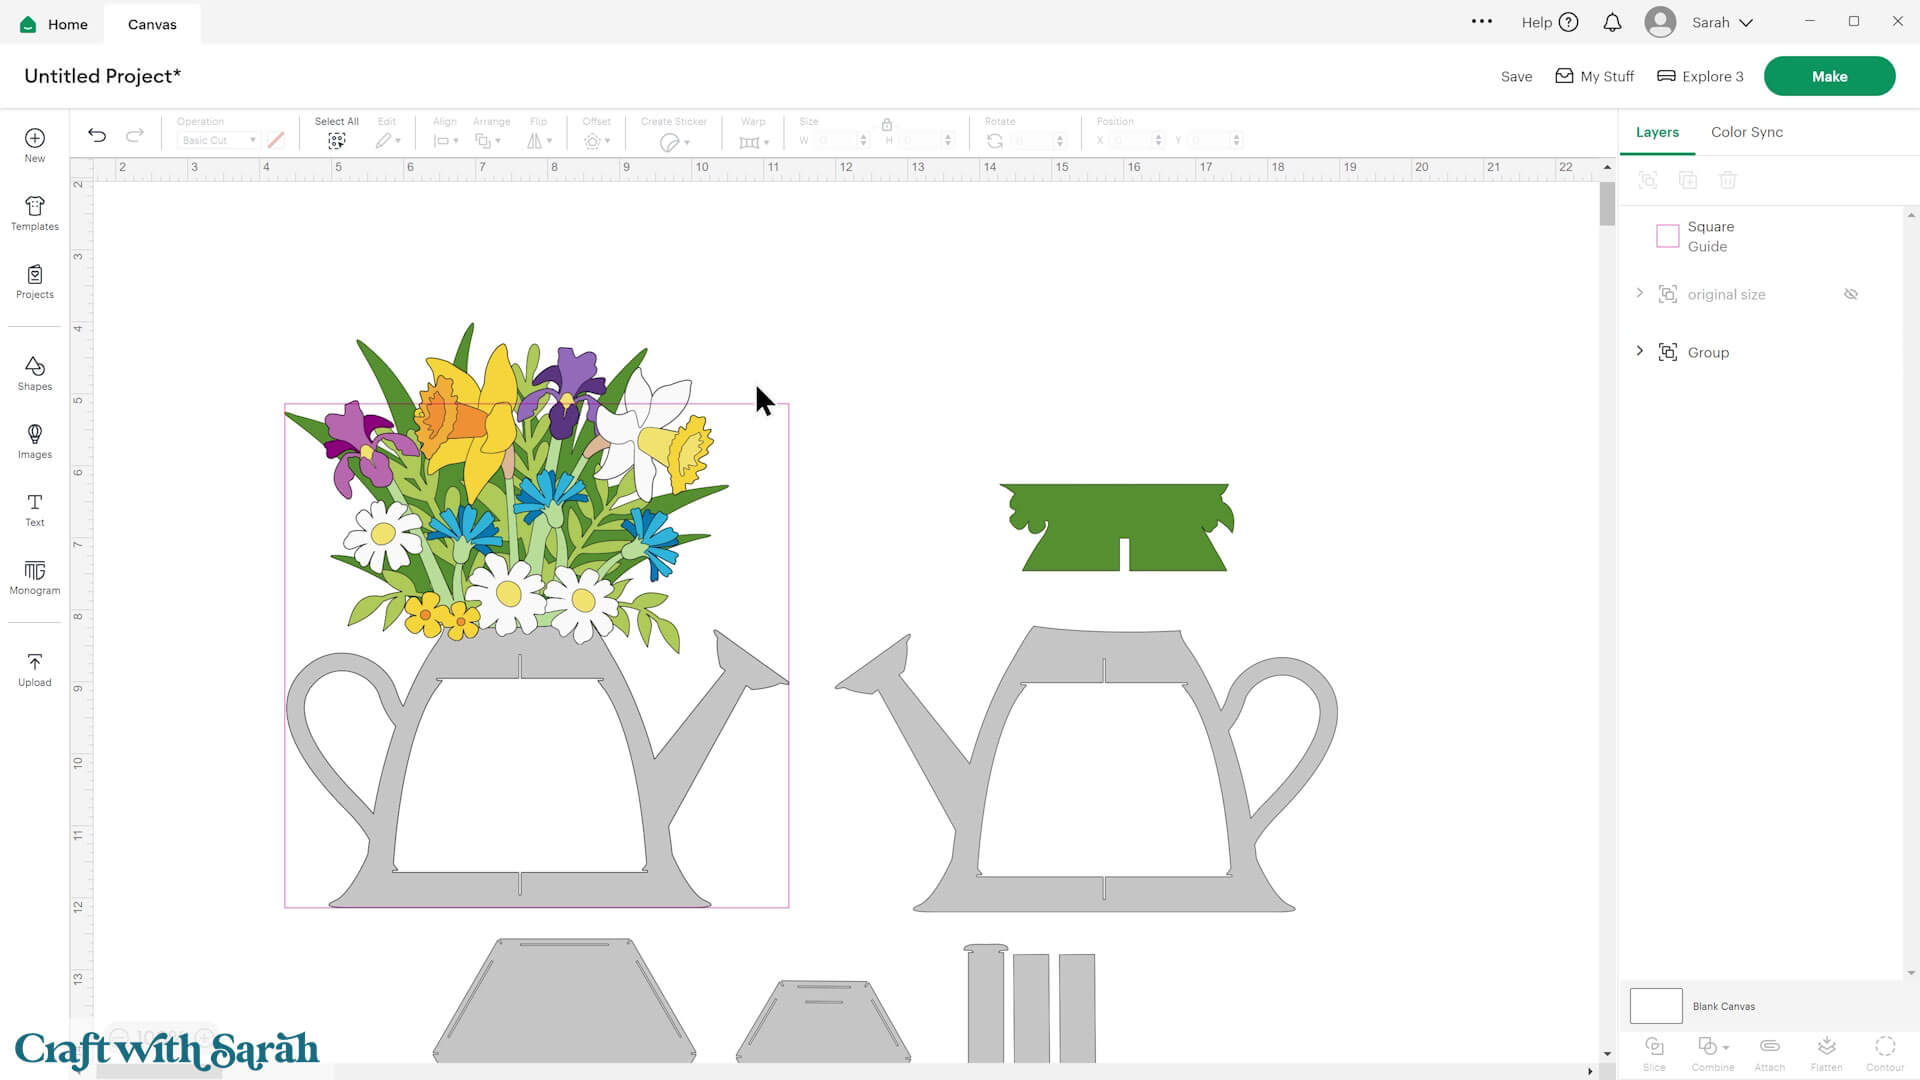
Delete the guide rectangle when you are done resizing.
TIP: Smaller versions are adorable, but they are harder to put together. I recommend staying above 8 inches wide for easier assembly, as the slots on the sides of the shapes get VERY small and a little hard to use if the designs get too little.
Step 5) Cut the project
Once everything’s formatted and sized the way you want, click “Make” in the top-right corner to begin the cut process.
You can change the paper size with the dropdowns on the left of the screen. You need to change it for every colour.
Larger pieces will not allow you to change the size, as they require 12×12 inch card.
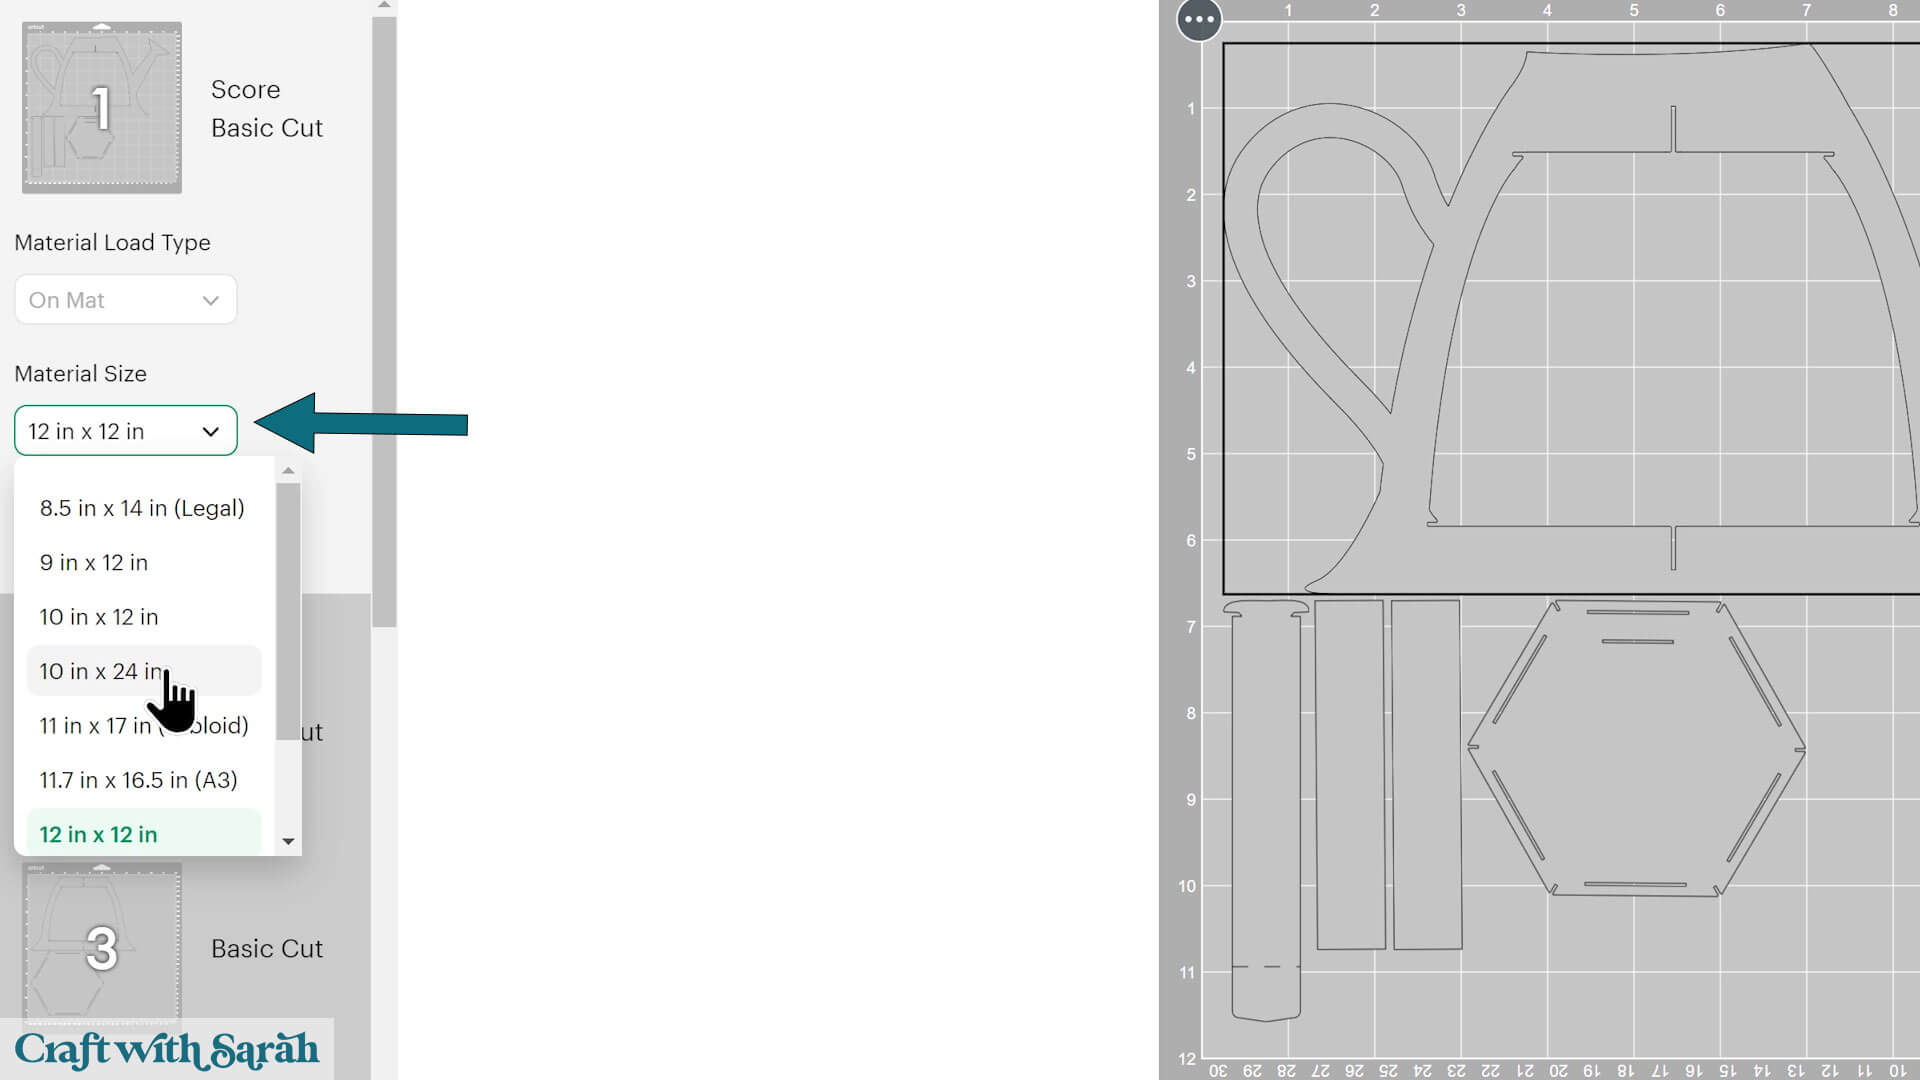
You can drag-and-drop the pieces on the screen to move them about to take up less space on your cardstock.
Make sure that no pieces overlap, otherwise they won’t cut out correctly.
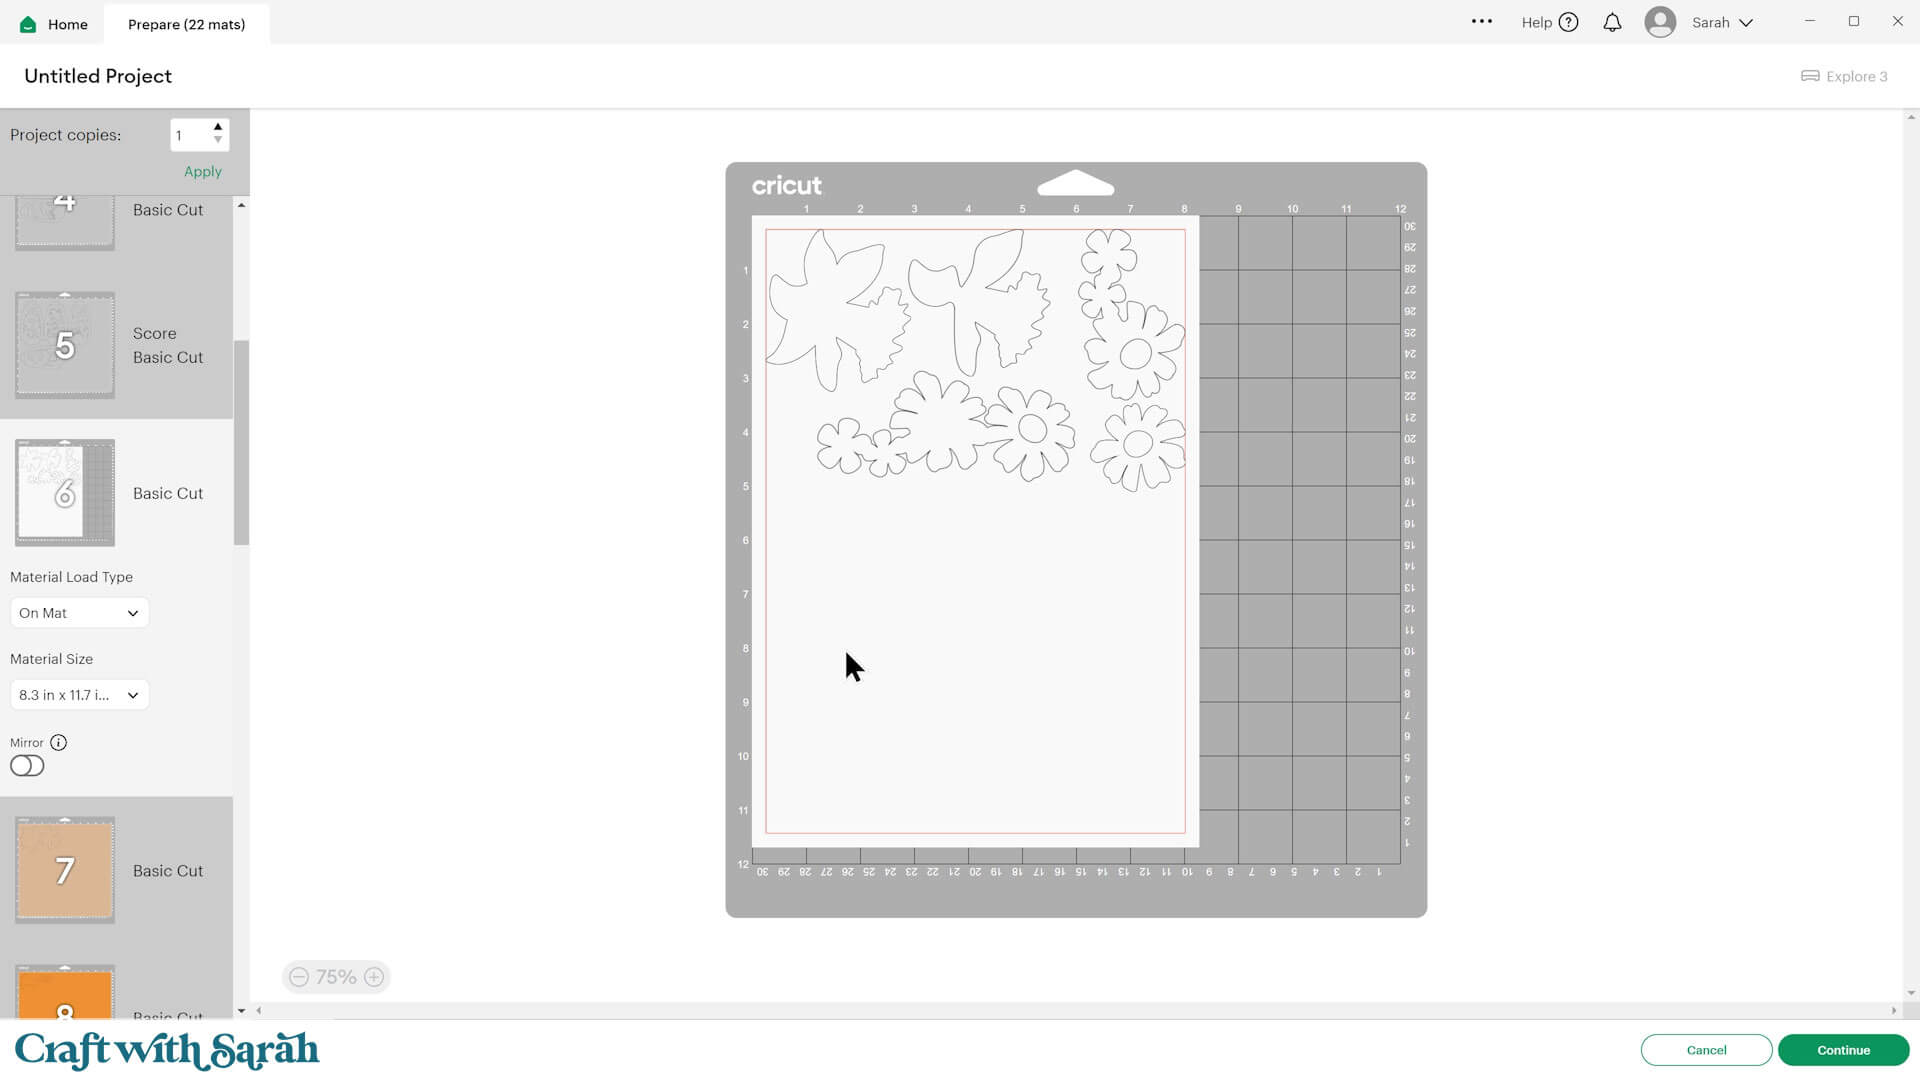
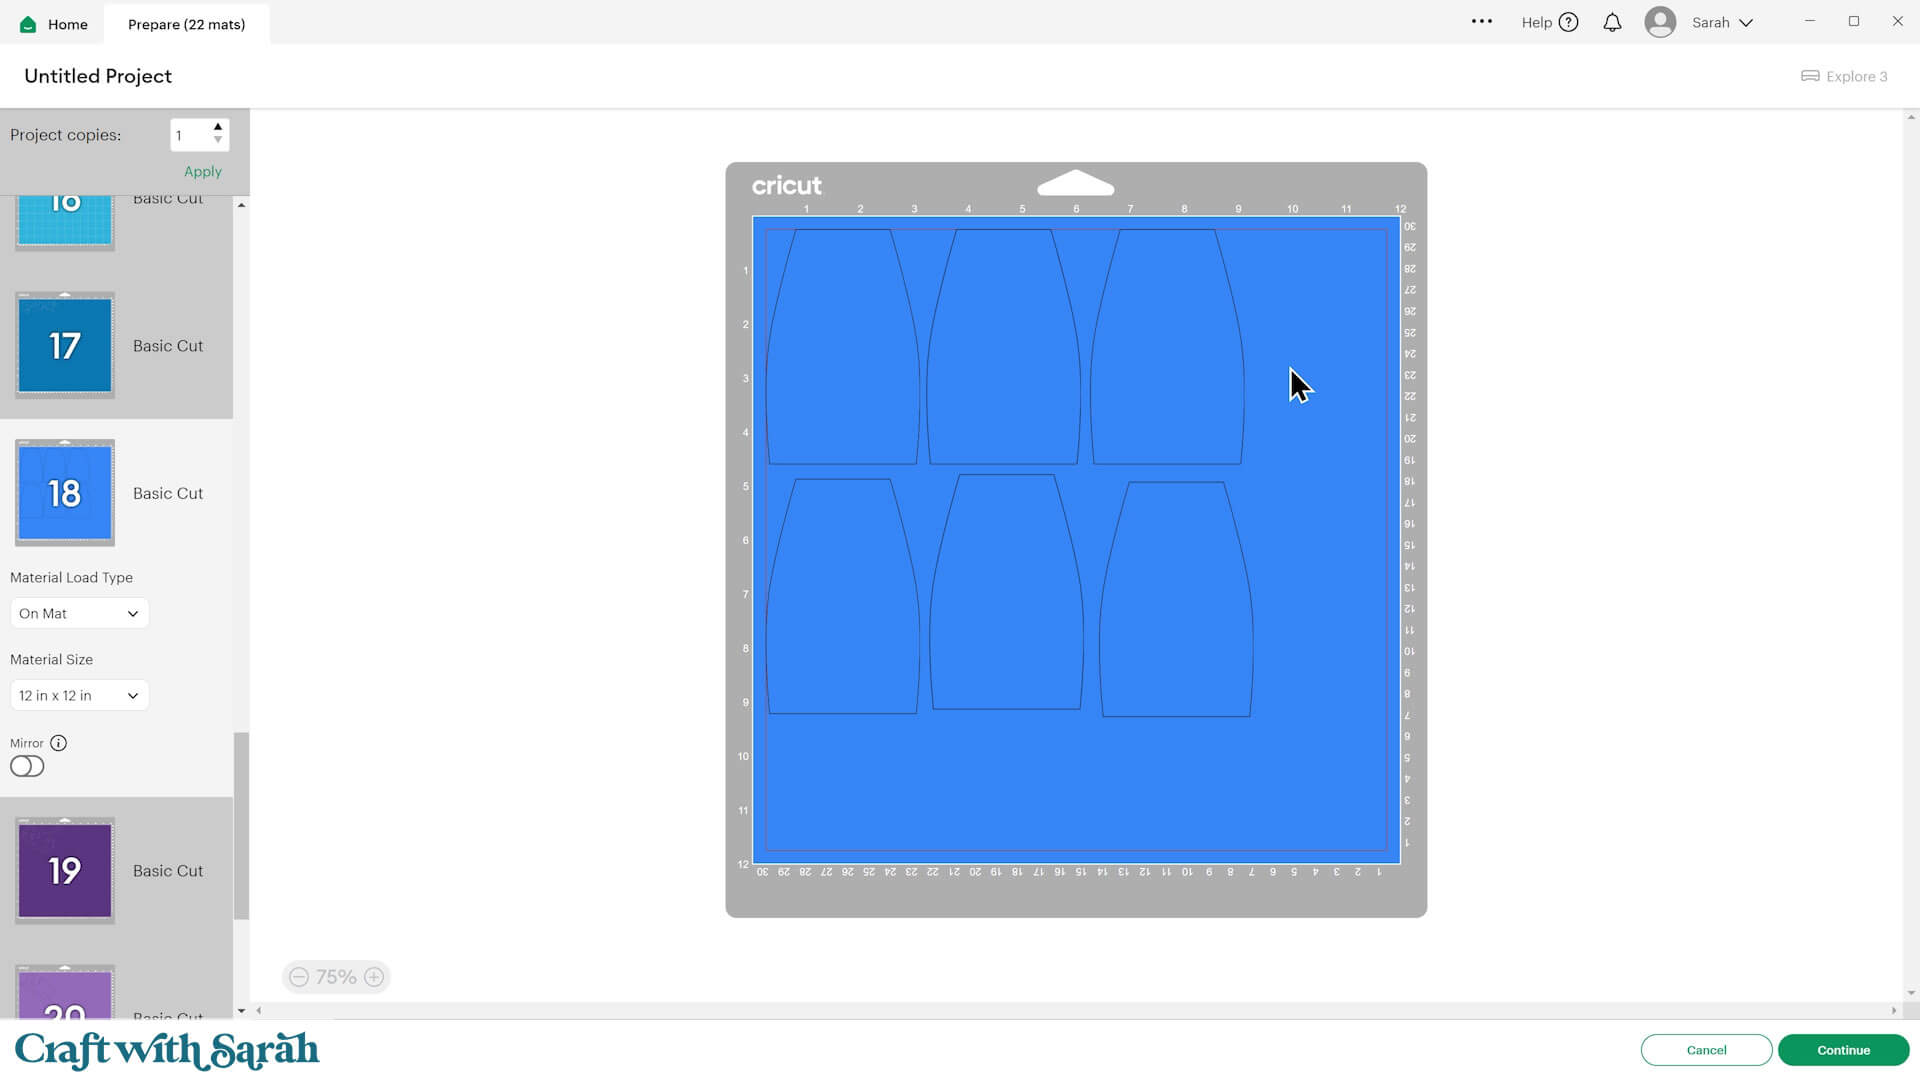
Most of the design will be cut from cardstock, but there are some exceptions.
The bright blue shapes that appear at the bottom of the file should be cut from a translucent material such as vellum, tracing paper or butcher paper.
If you don’t have anything semi-transparent then a full transparent material such as acetate or the cover of an old Cricut mat would work too, but it won’t be quite as effective as you will see the light mechanisms inside the lantern.
I use the “Vellum” setting to cut my tracing paper.
Step 6) Stick the window panels and back-stand together
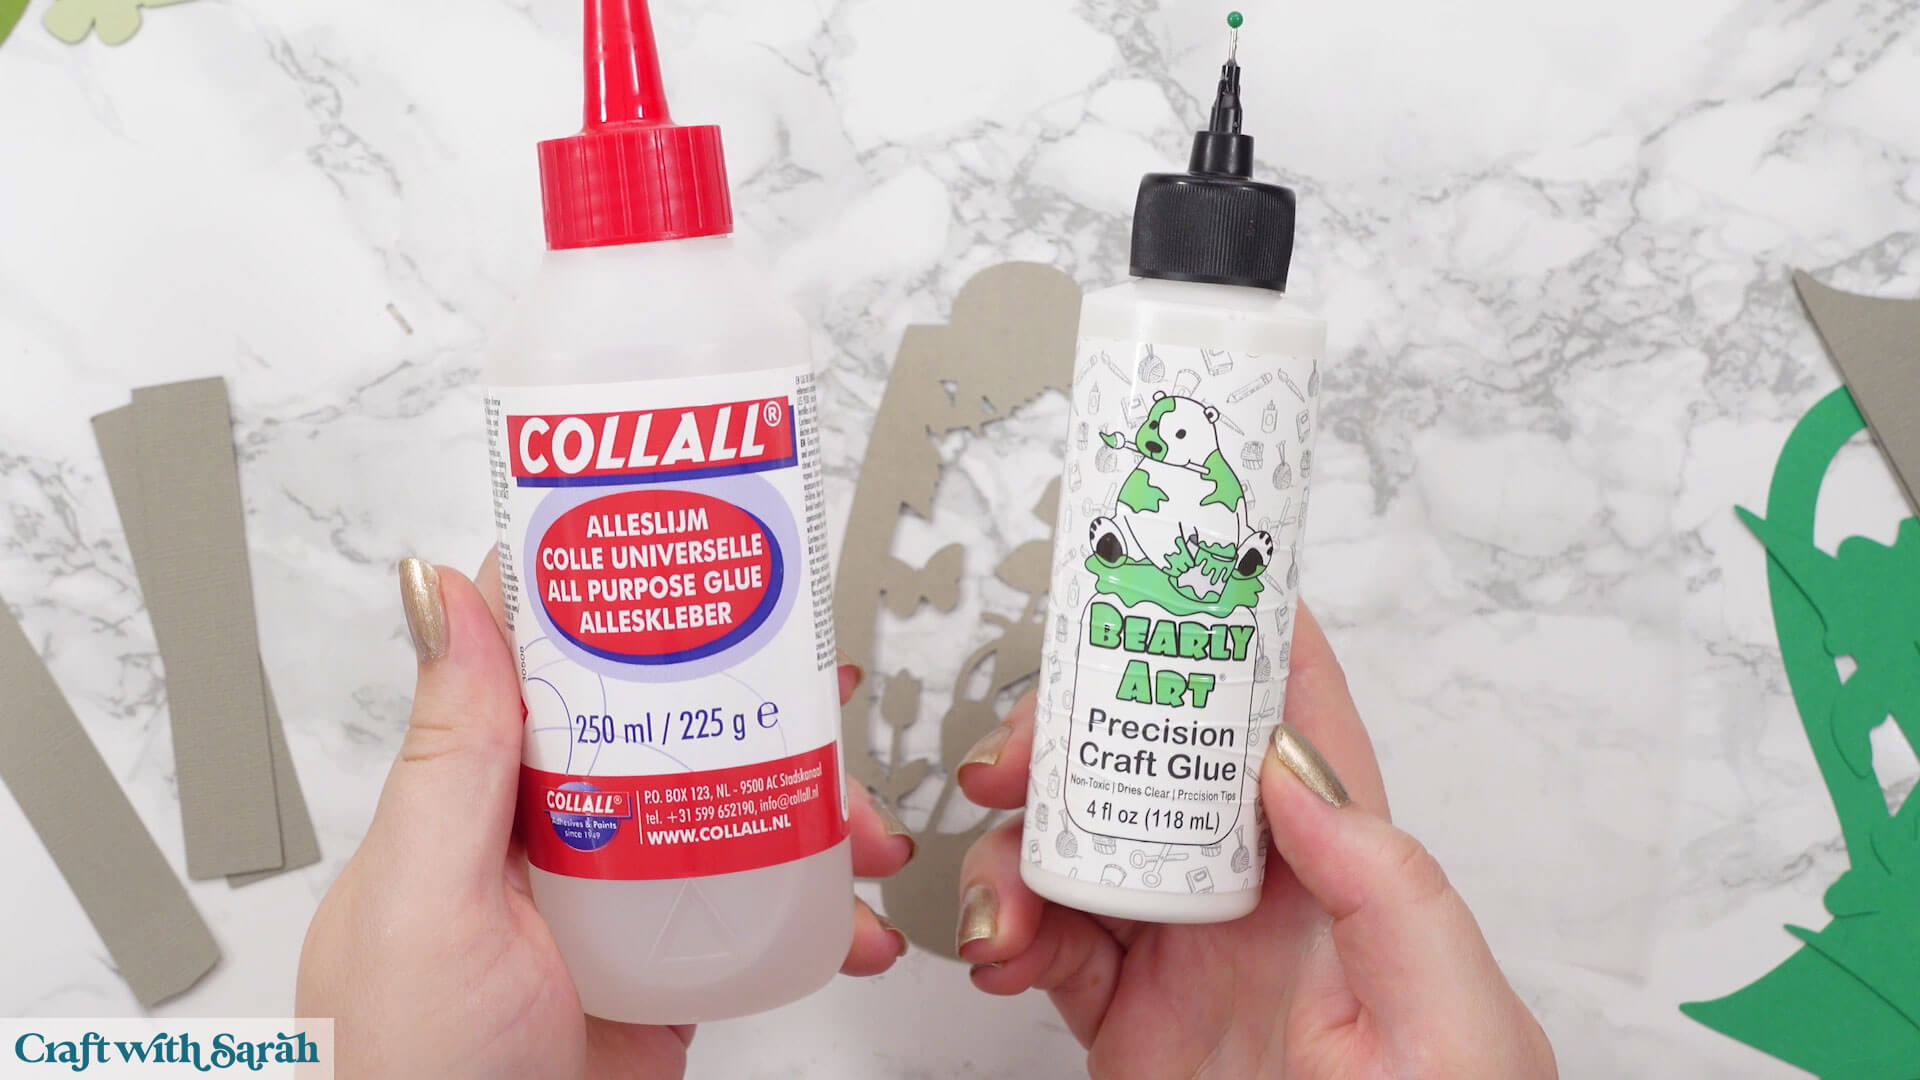
I used Bearly Art Glue to stick the project together.
It’s SO good because it doesn’t “warp” or bend the cardstock like some glues do. You can use as much of it as you want and the card stays perfect – and it dries perfectly clear too!
Collall All-Purpose Glue is another great one to use for cardstock, although it’s a solvent glue so it has a bit of a smell to it.
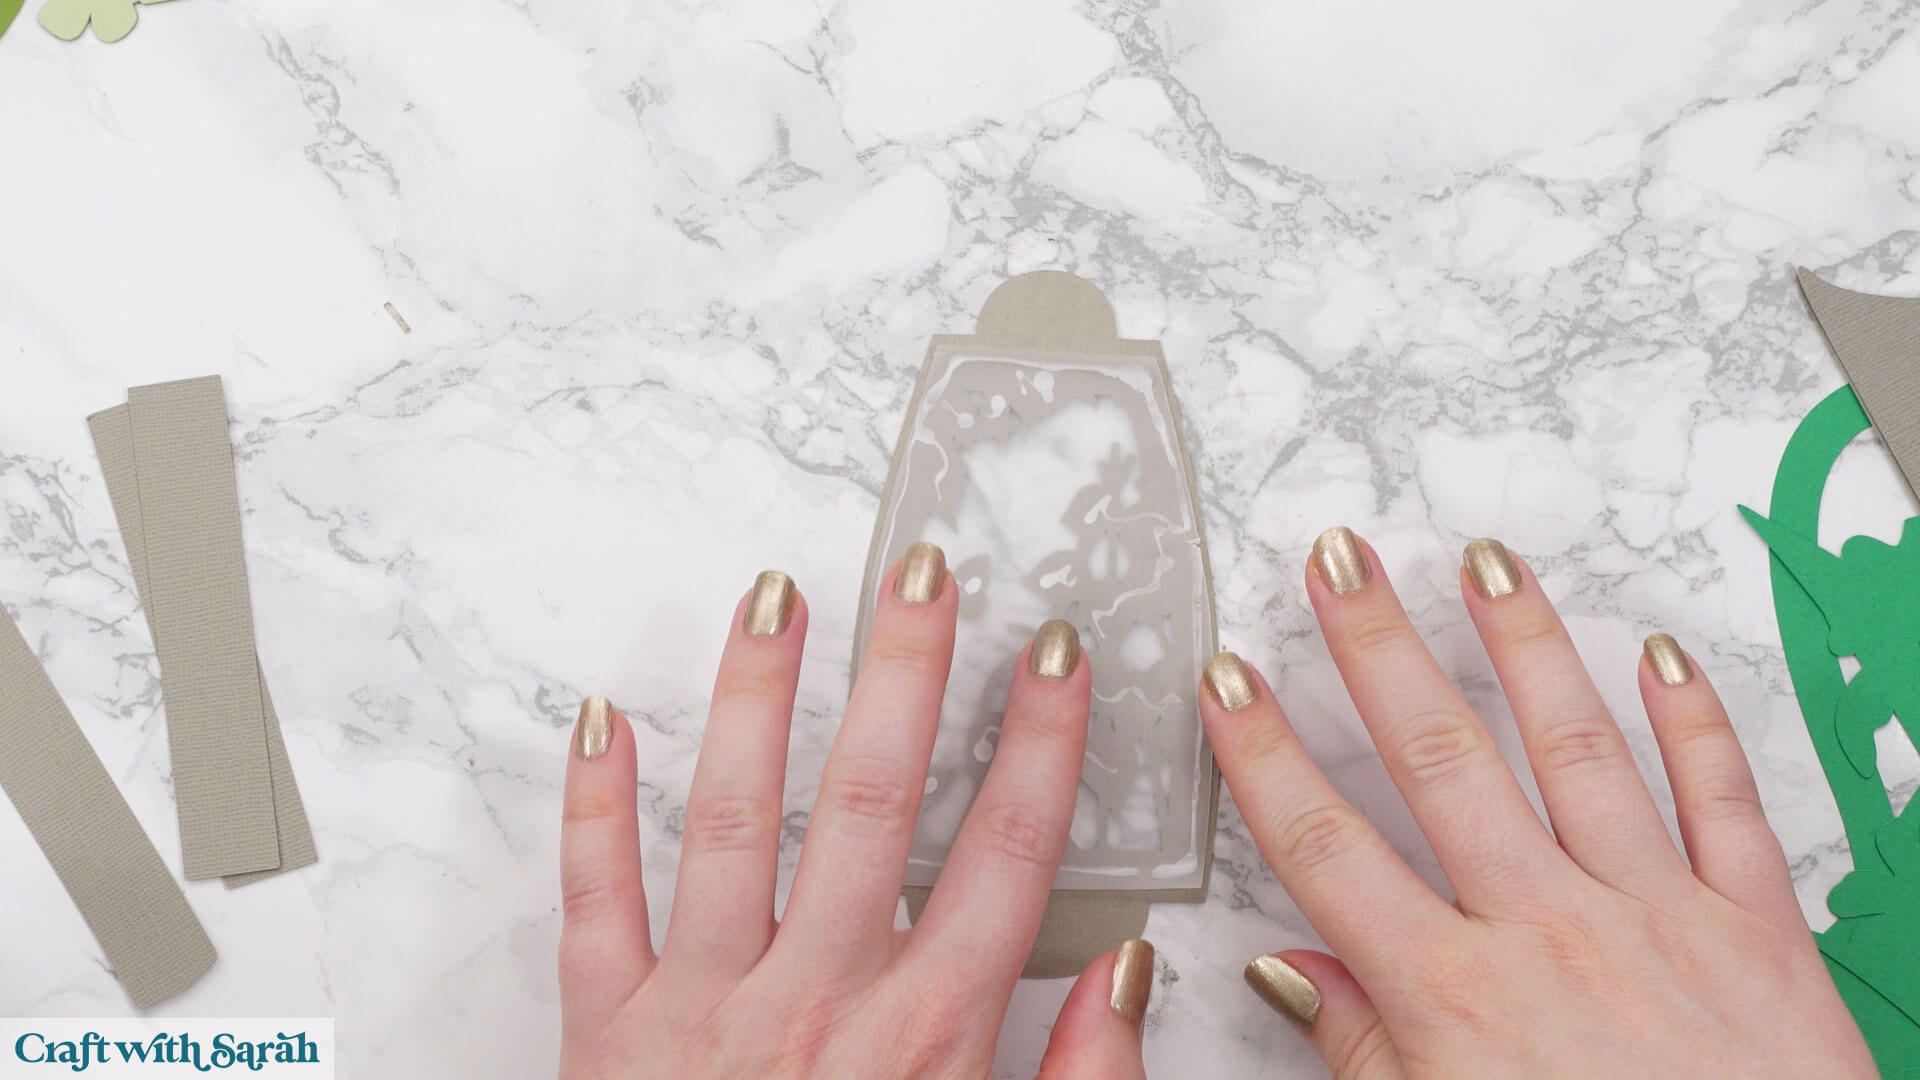
Turn the window panels upside down so you are looking at the bottom side.
Carefully add a small amount of glue around the edges and glue the vellum pieces to the backs. The wider side of the vellum goes at the bottom of the window panels.
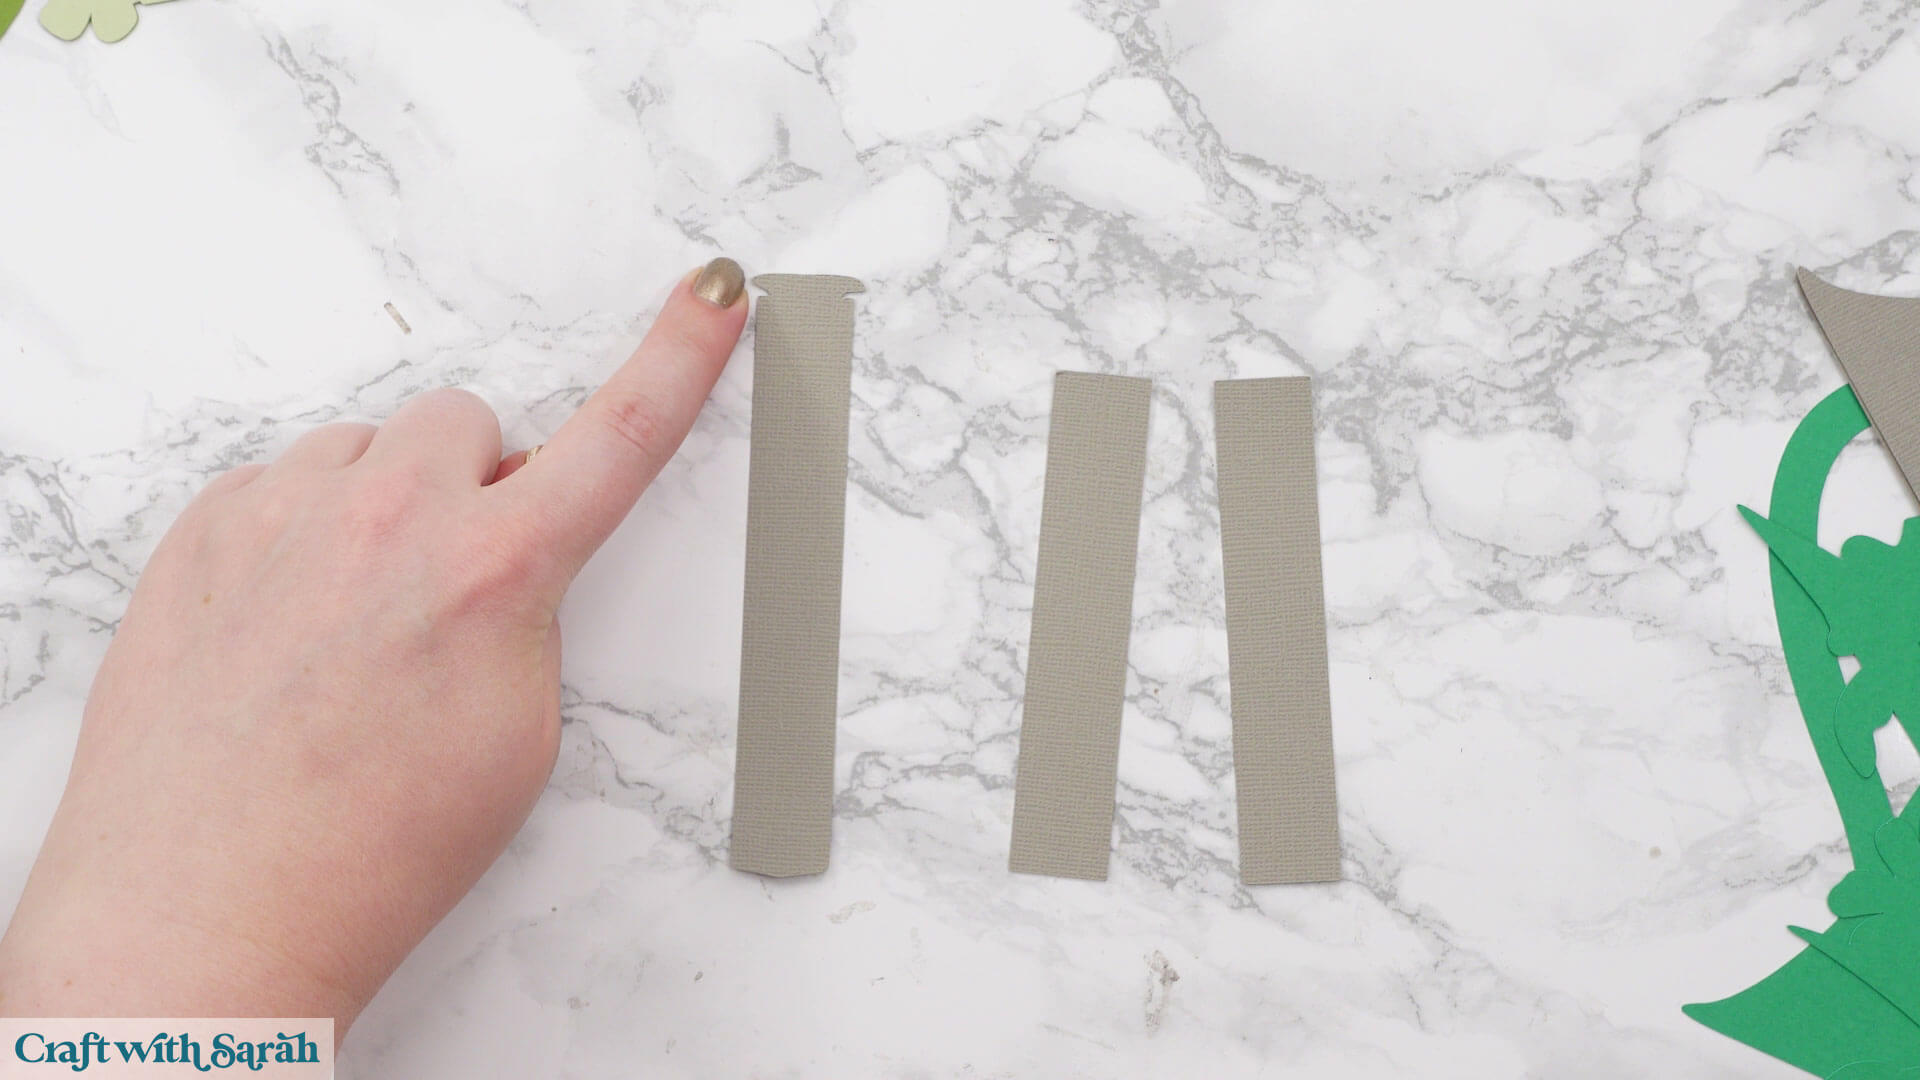
Then take the three rectangular pieces. Two look like plain rectangles, one has a hook on one end and a score line the other end.
These will help to “pull” the weight of the flowers backwards so that they stand up straight.
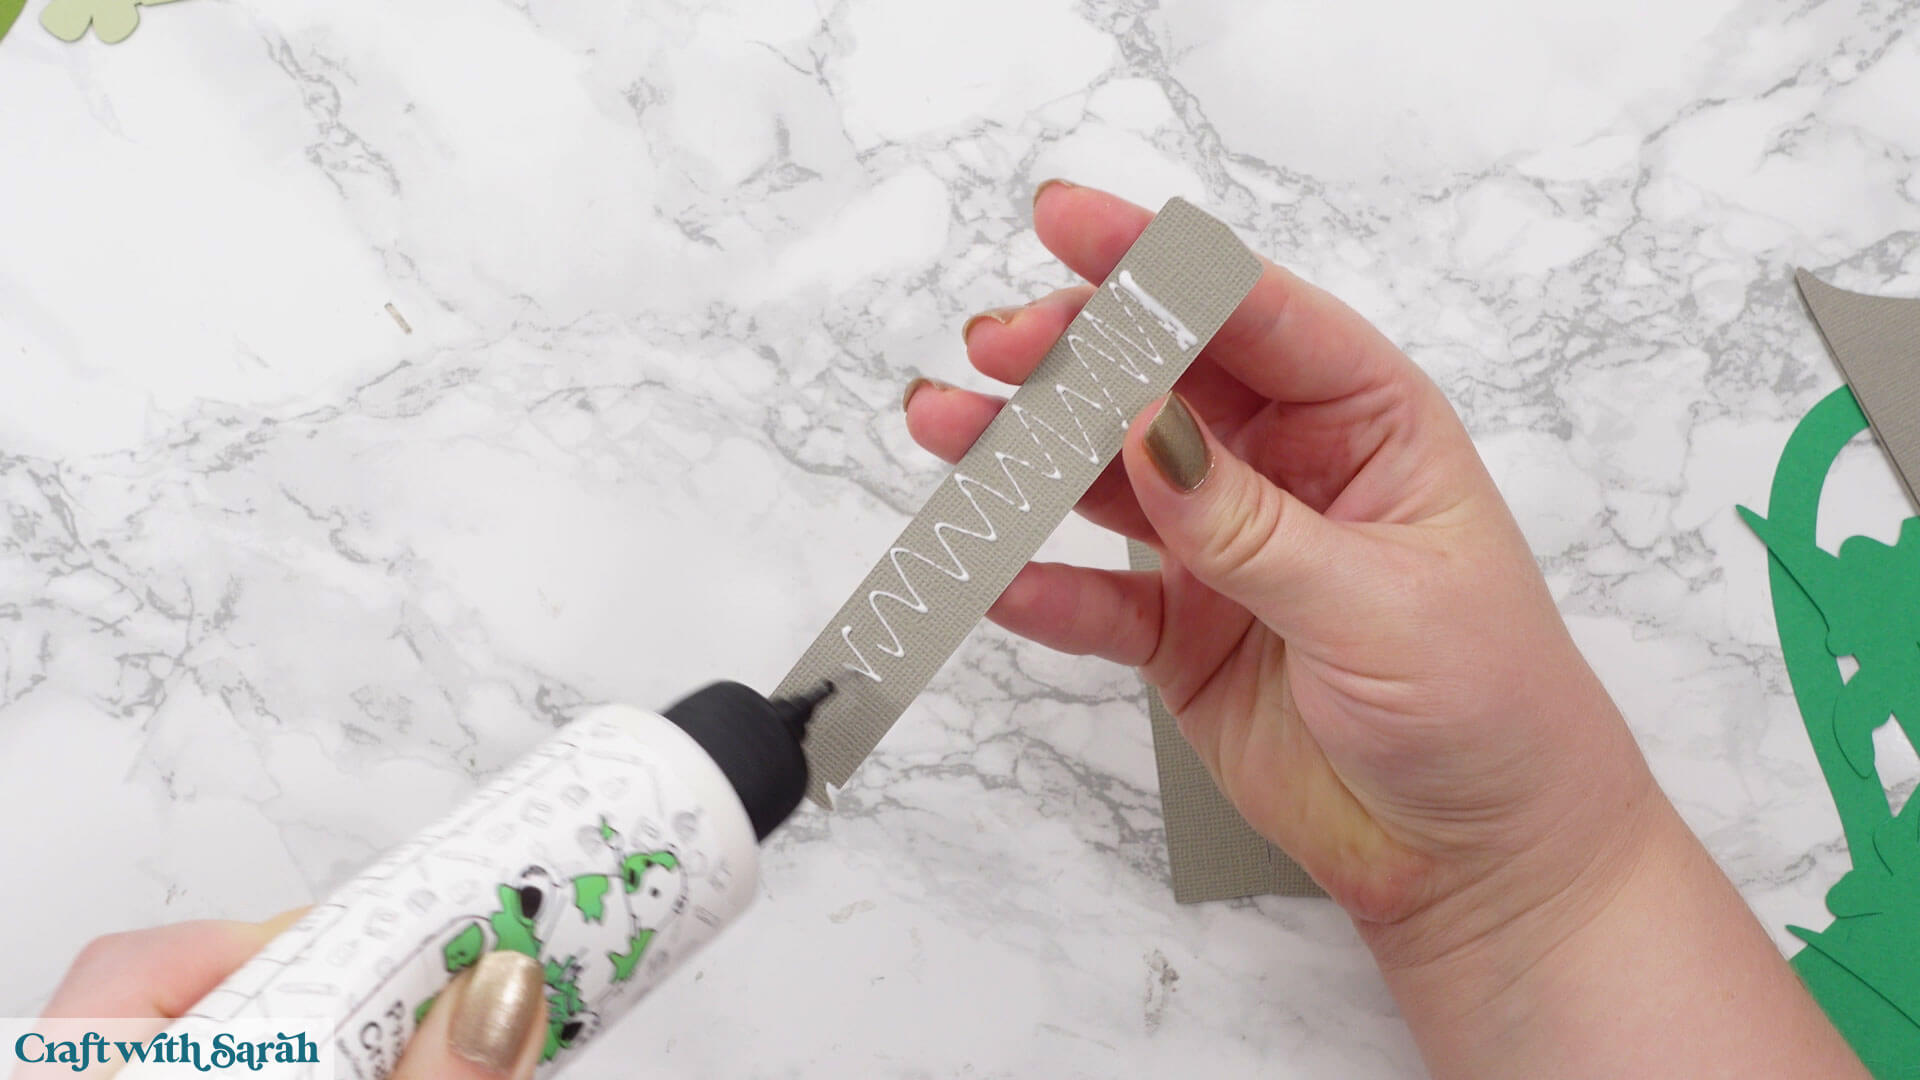
Add glue to the rectangle (with a hook) from the score line to just before the hook.
Stick one of the rectangles on top.
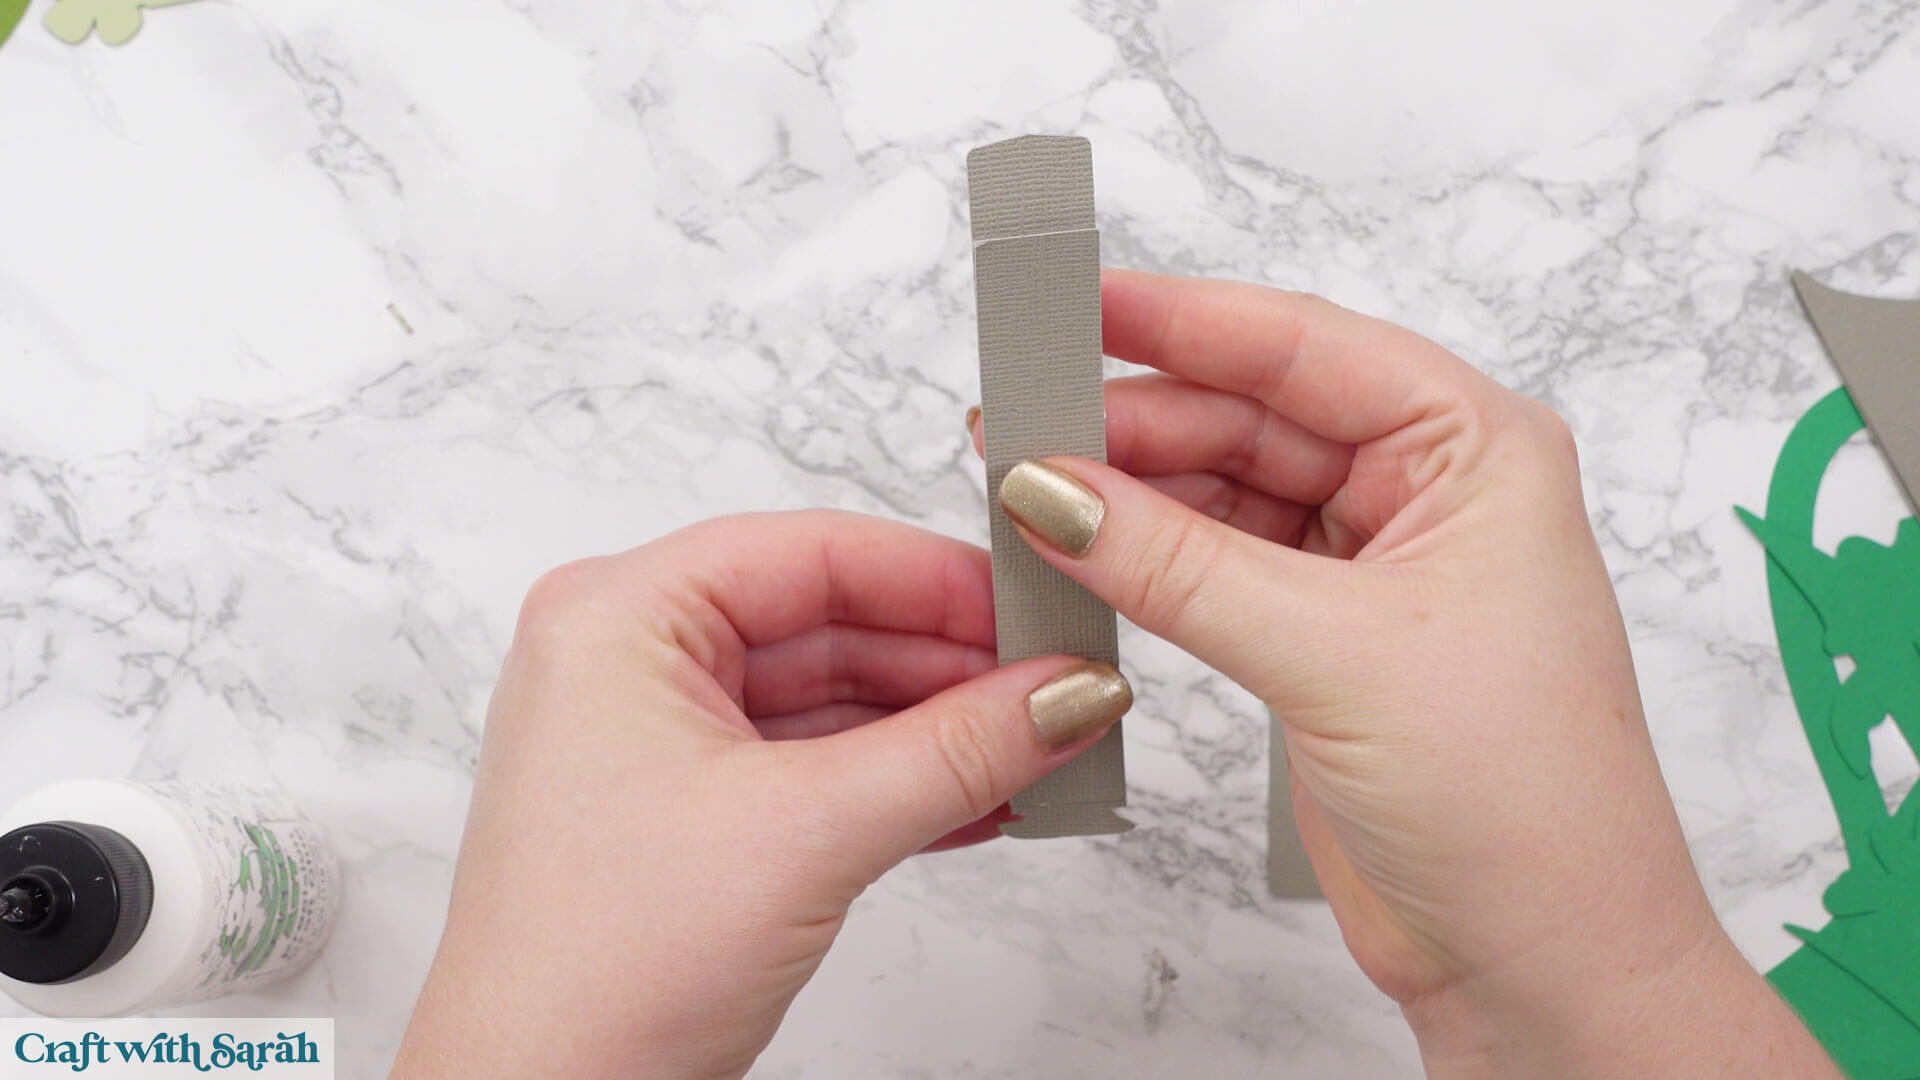
Add glue to the bottom in the same way and glue the other rectangle to it. This will help to give it stability so that it can hold all the flowers.
Step 7) Prepare the main structure piece
Note: the lantern structure process will vary depending on which design you are making.
The pictures below show the steps for the free spring flowers watering can lantern.
To check the specific instructions for the exact lantern design you are making, look at the Assembly Guide that’s included in your download folder.
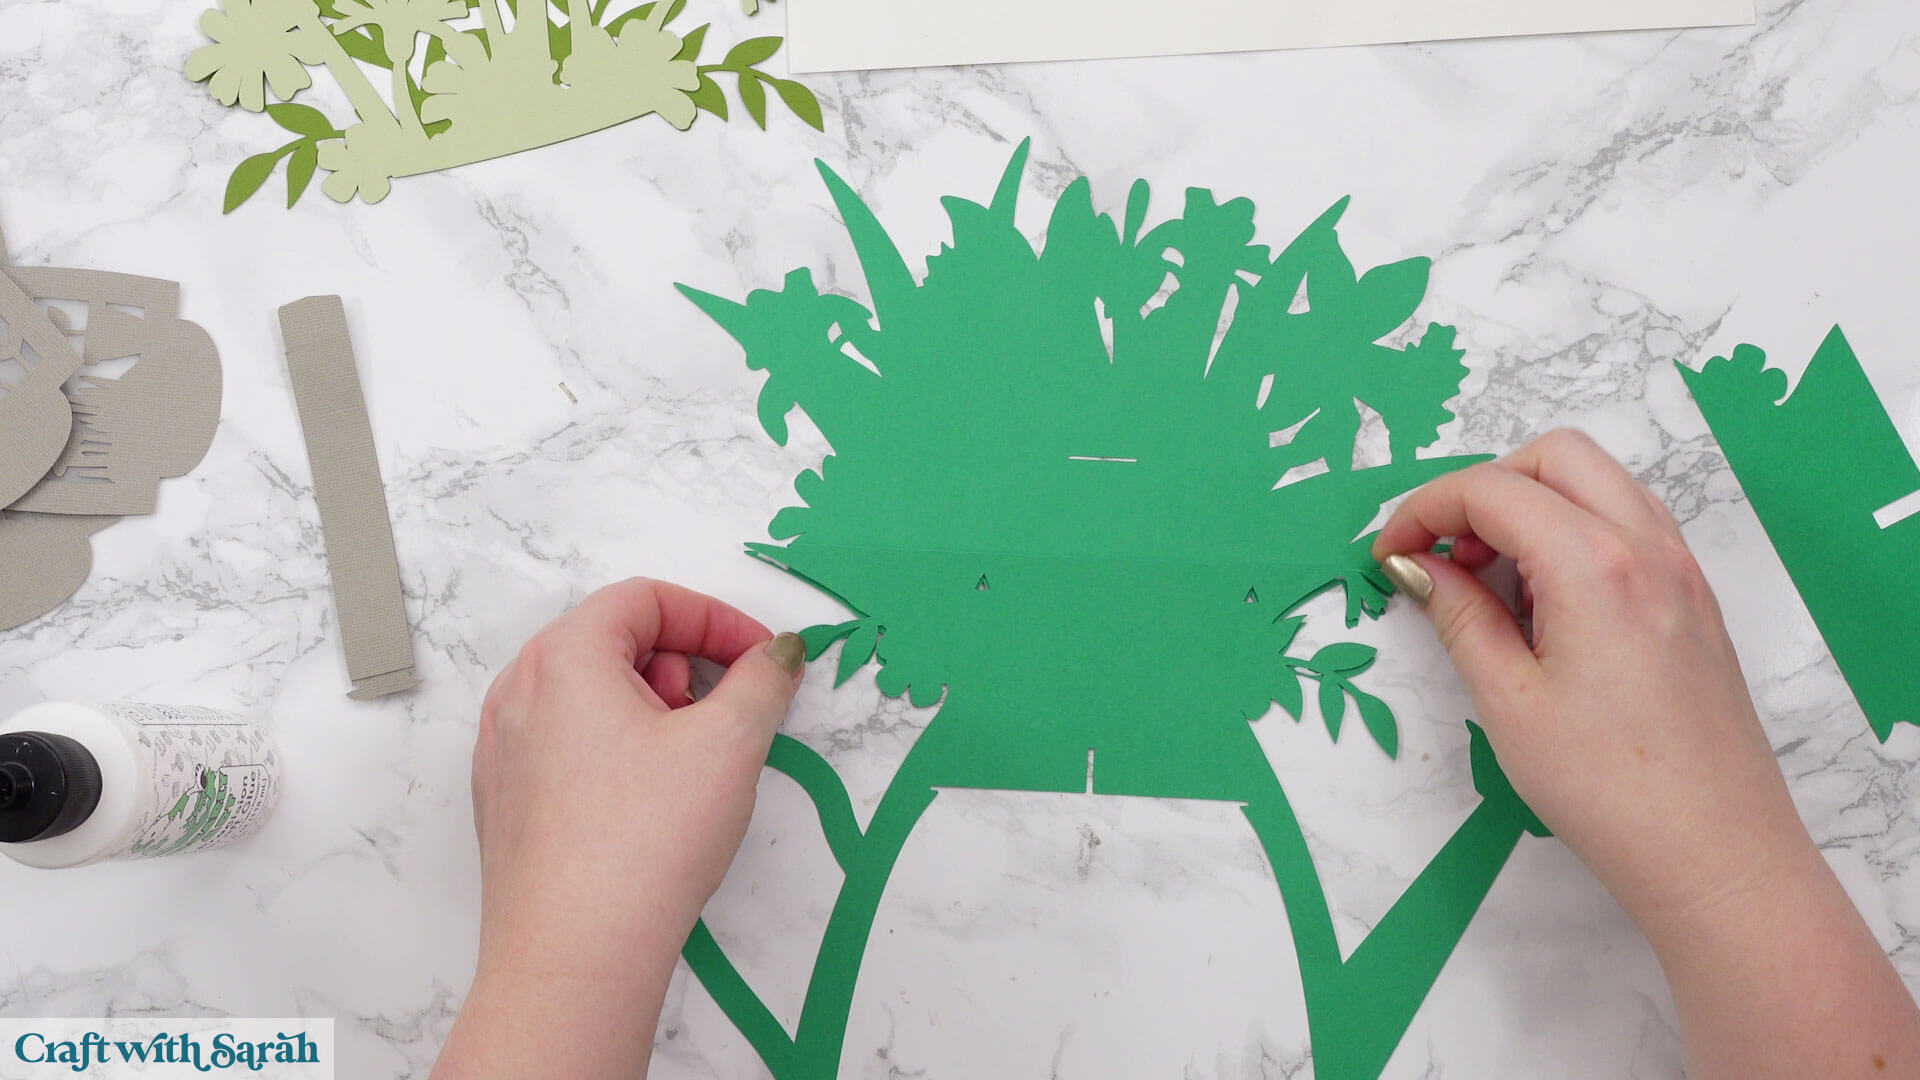
Take the green watering can piece which has the triangle cutouts along with the matching flower piece and glue them together to make your base piece.
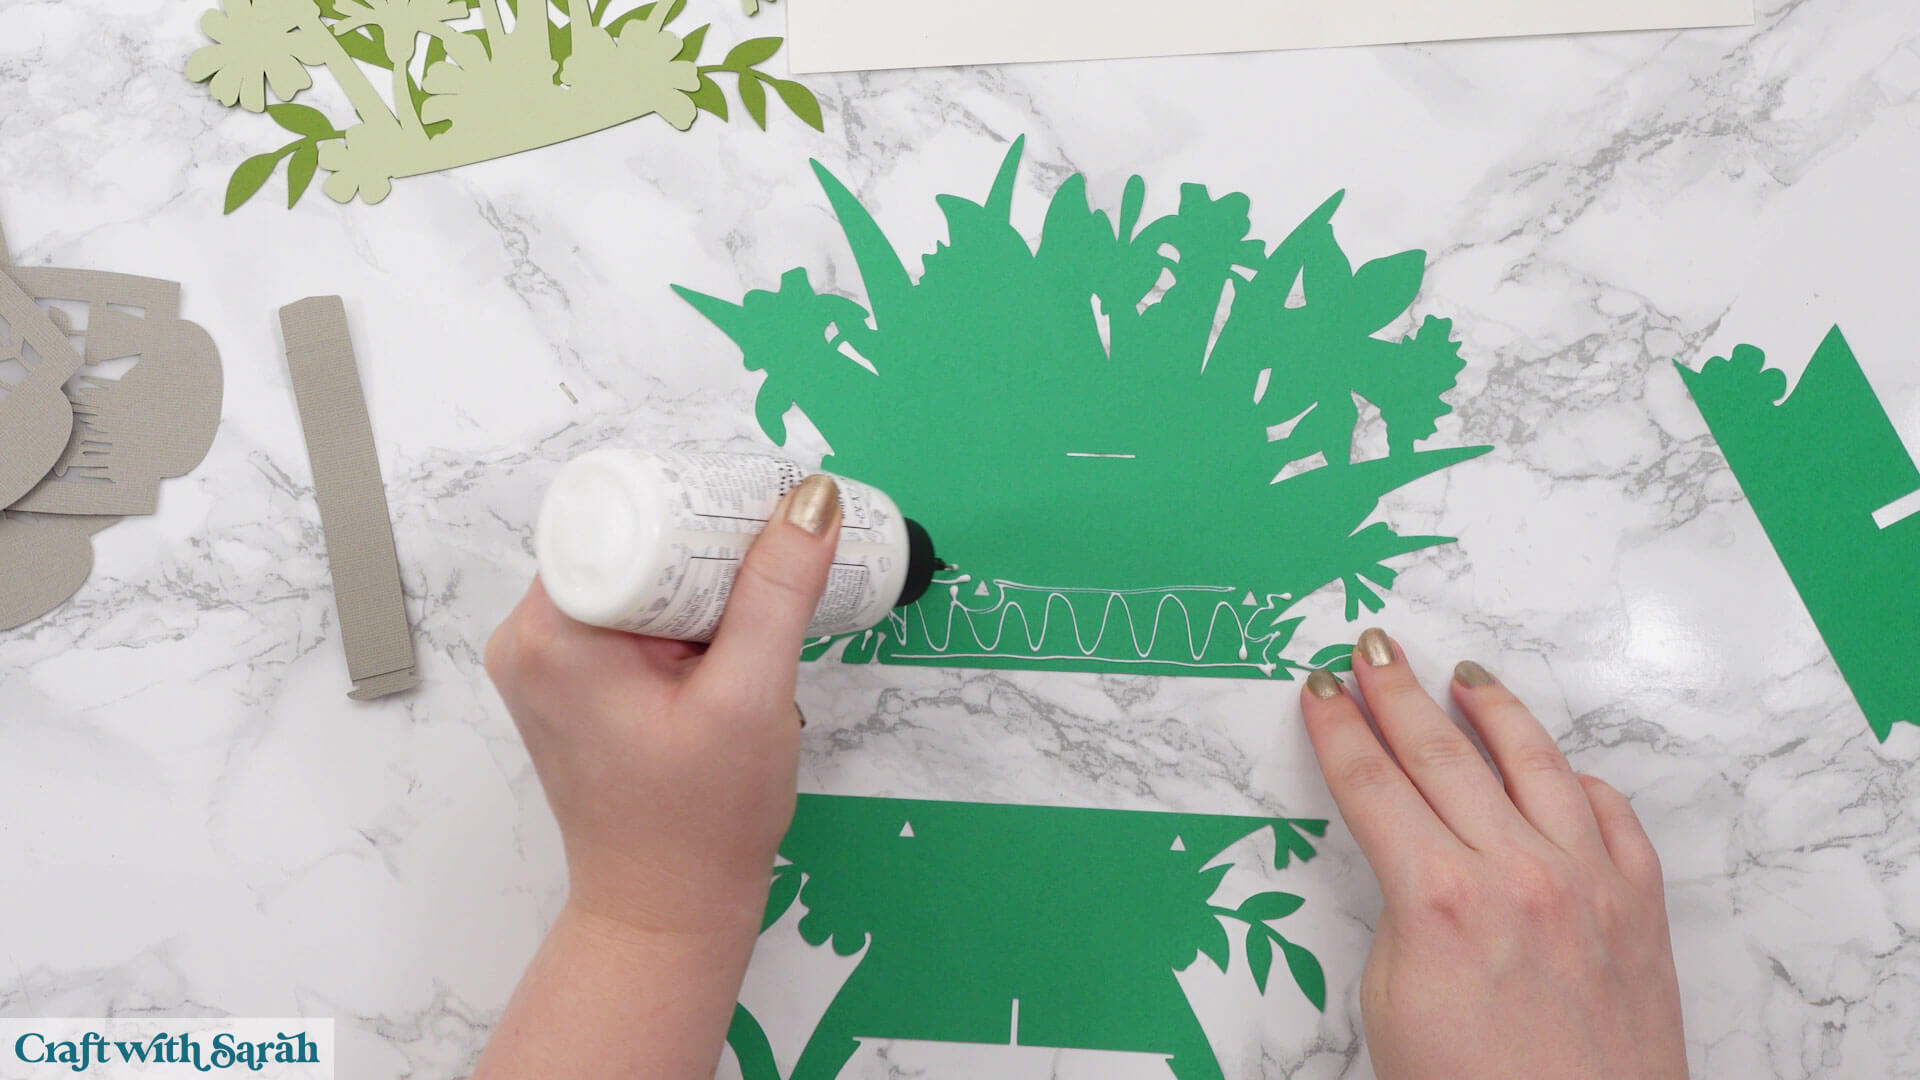
The two pieces will overlap slightly so make sure you line them up correctly when sticking. The triangle cutouts should line up perfectly to show you have the pieces in the correct place.
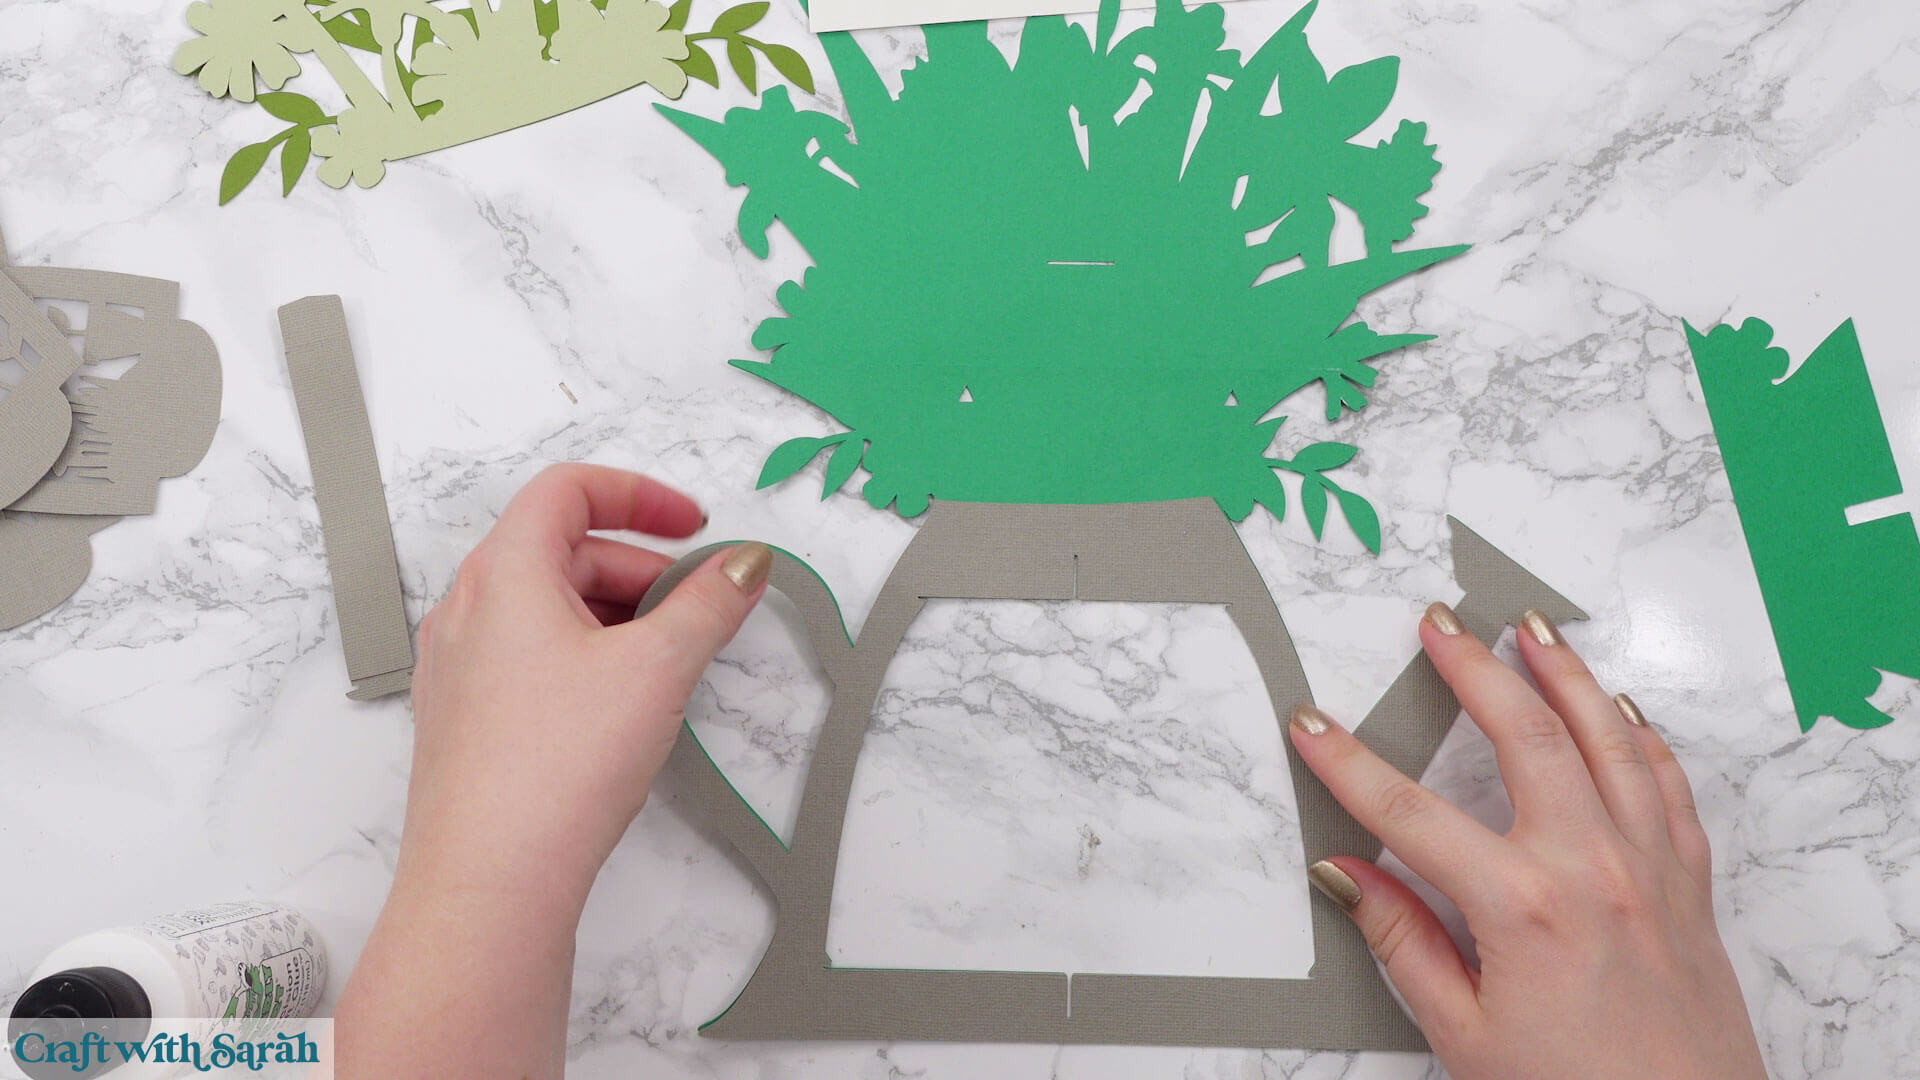
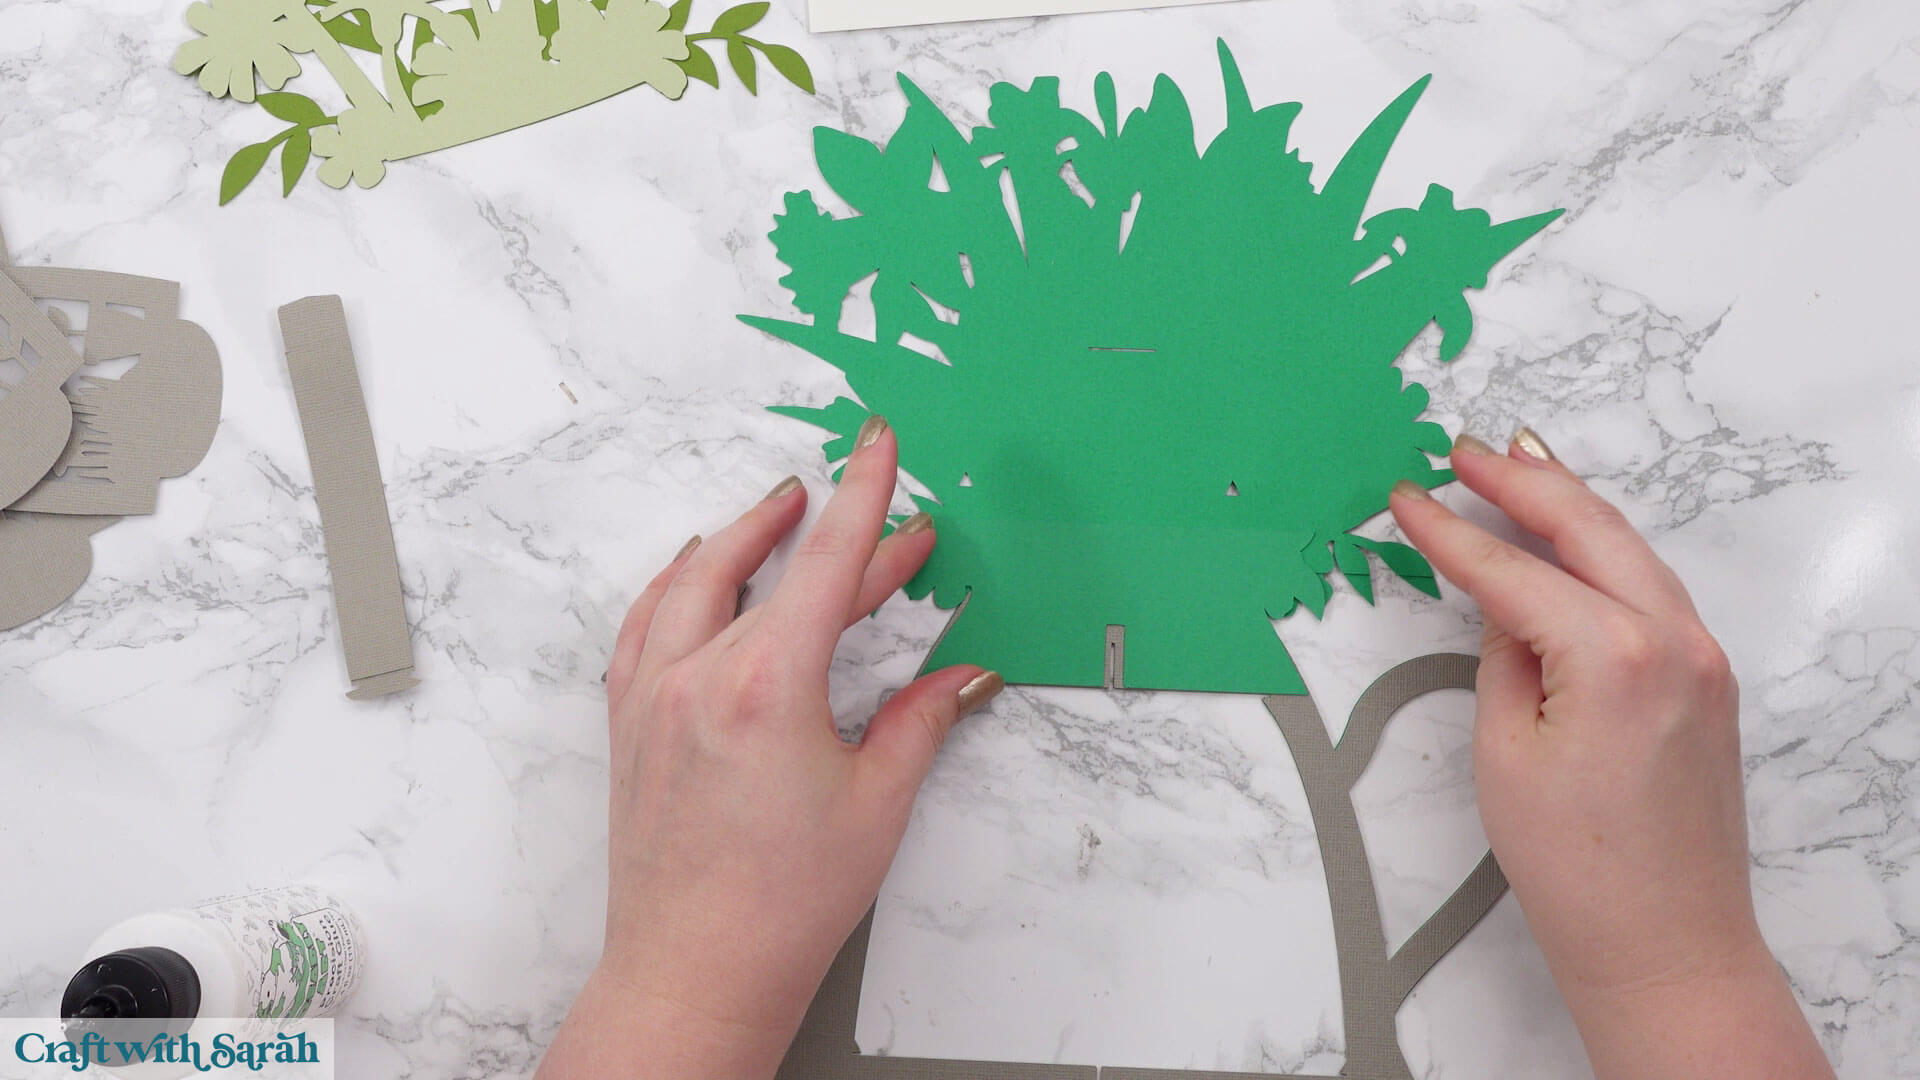
Glue the two grey watering can pieces to the front and back of the green base.
Make sure you perfectly line up the slits at the top, bottom and corners so that it will work correctly when we add the structure pieces.
Turn the structure piece over so that you are looking at the back side.
With the back of the design facing up towards you, take the small green piece of cardstock and glue it to the back to add stability.
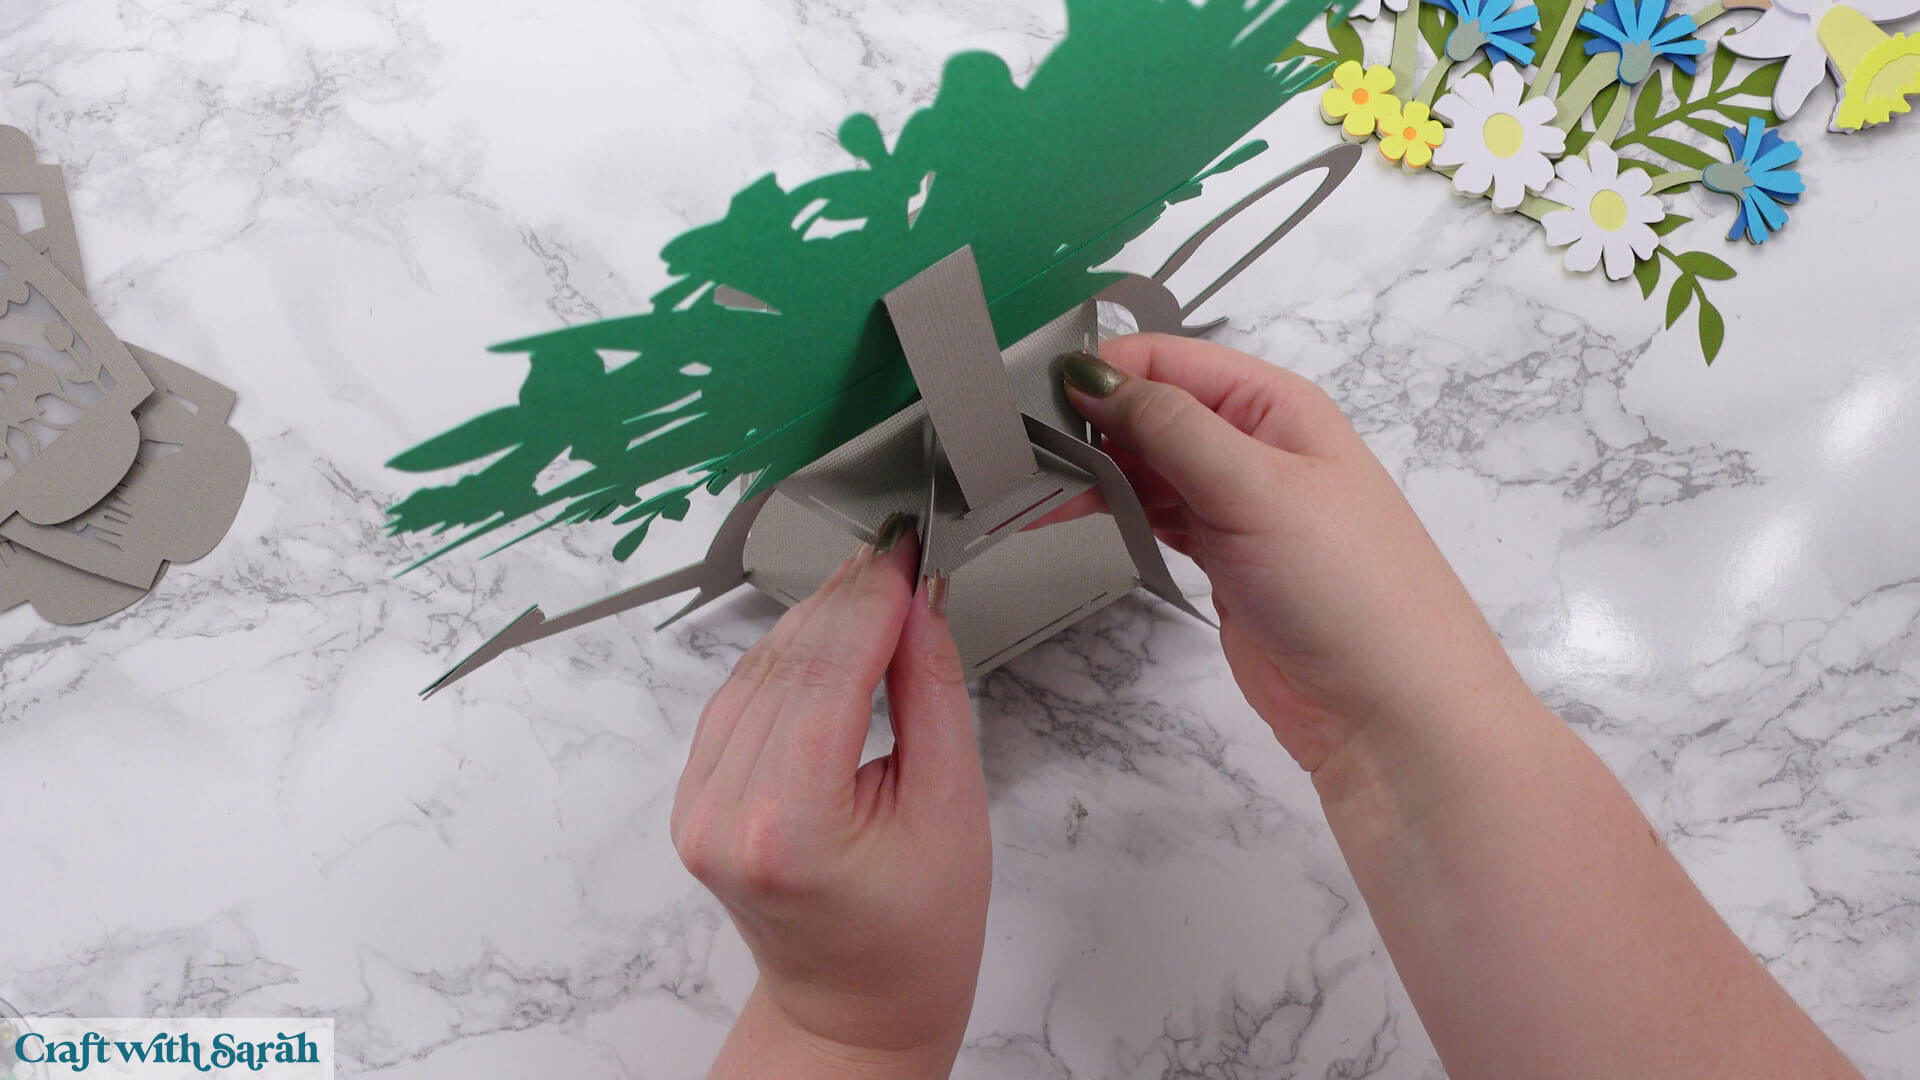
Now take the rectangle (back-stand) we glued together earlier and fold along the score line.
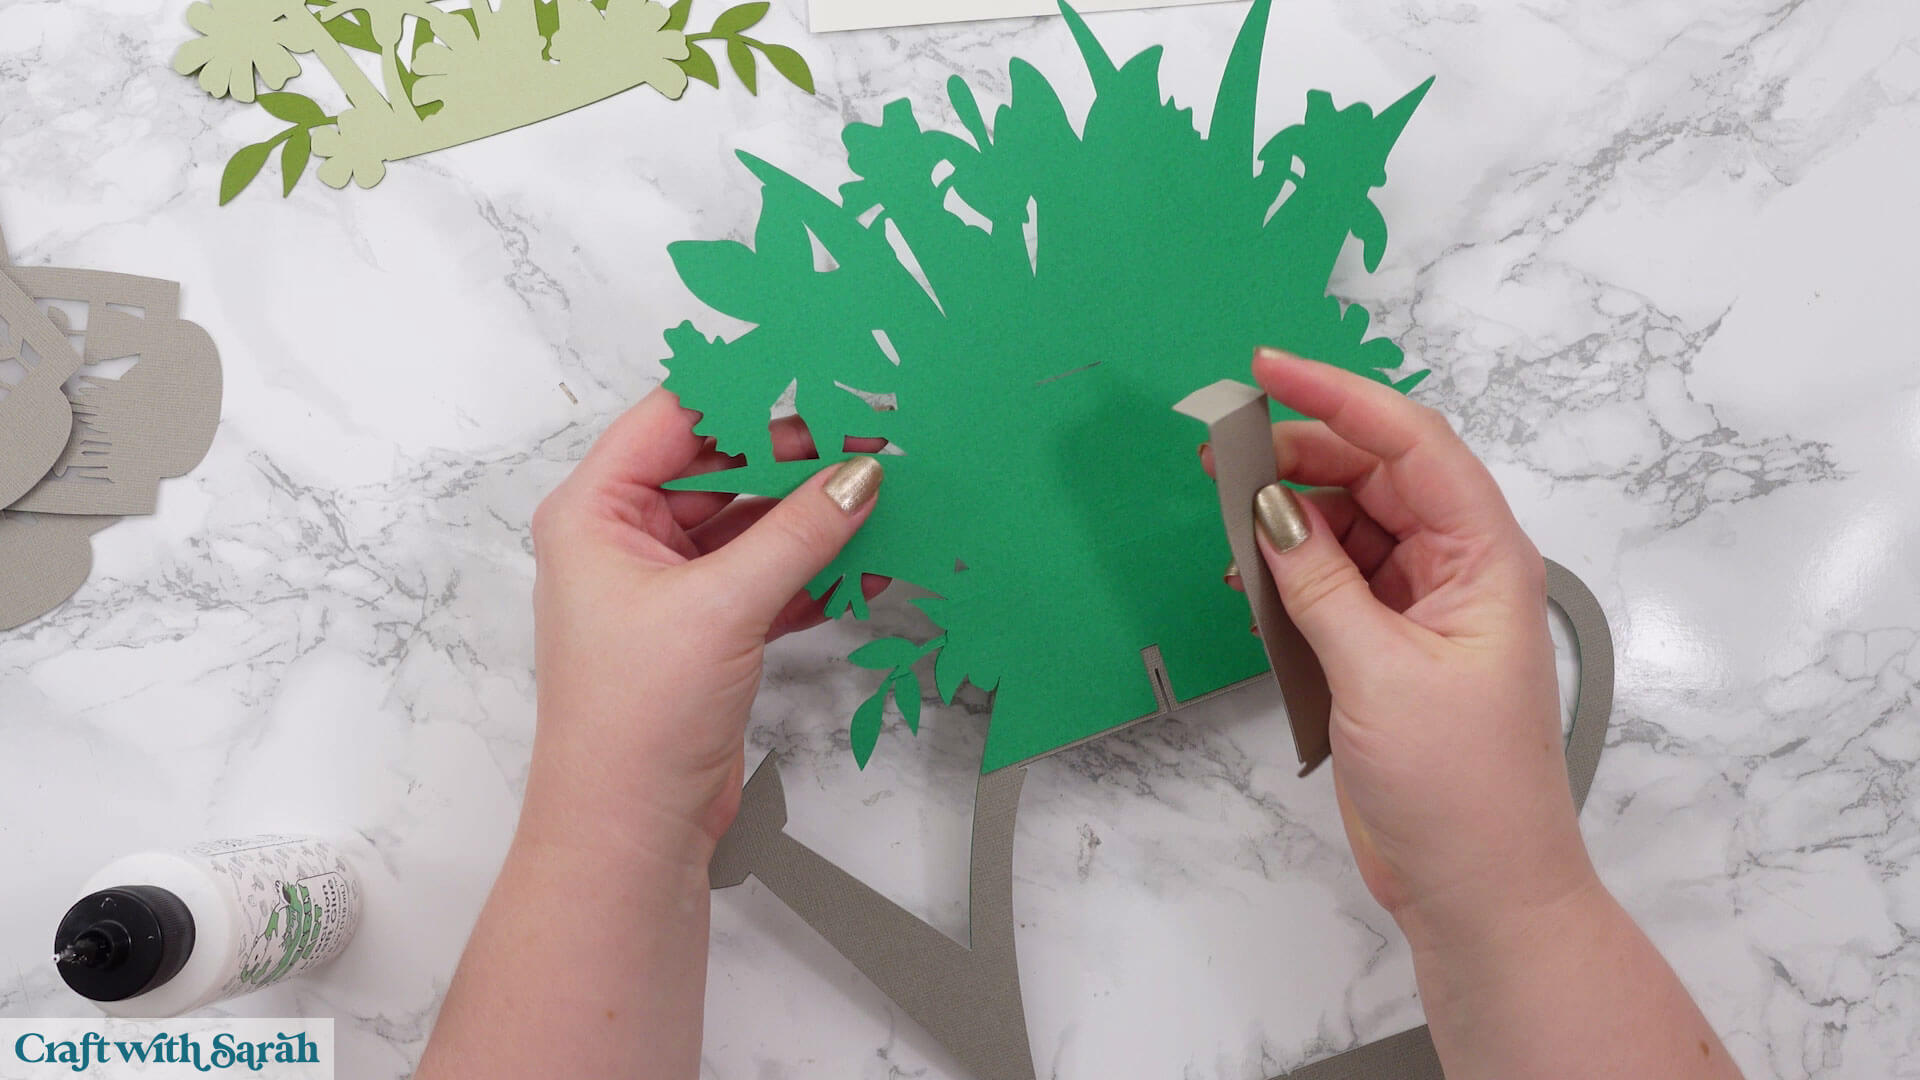
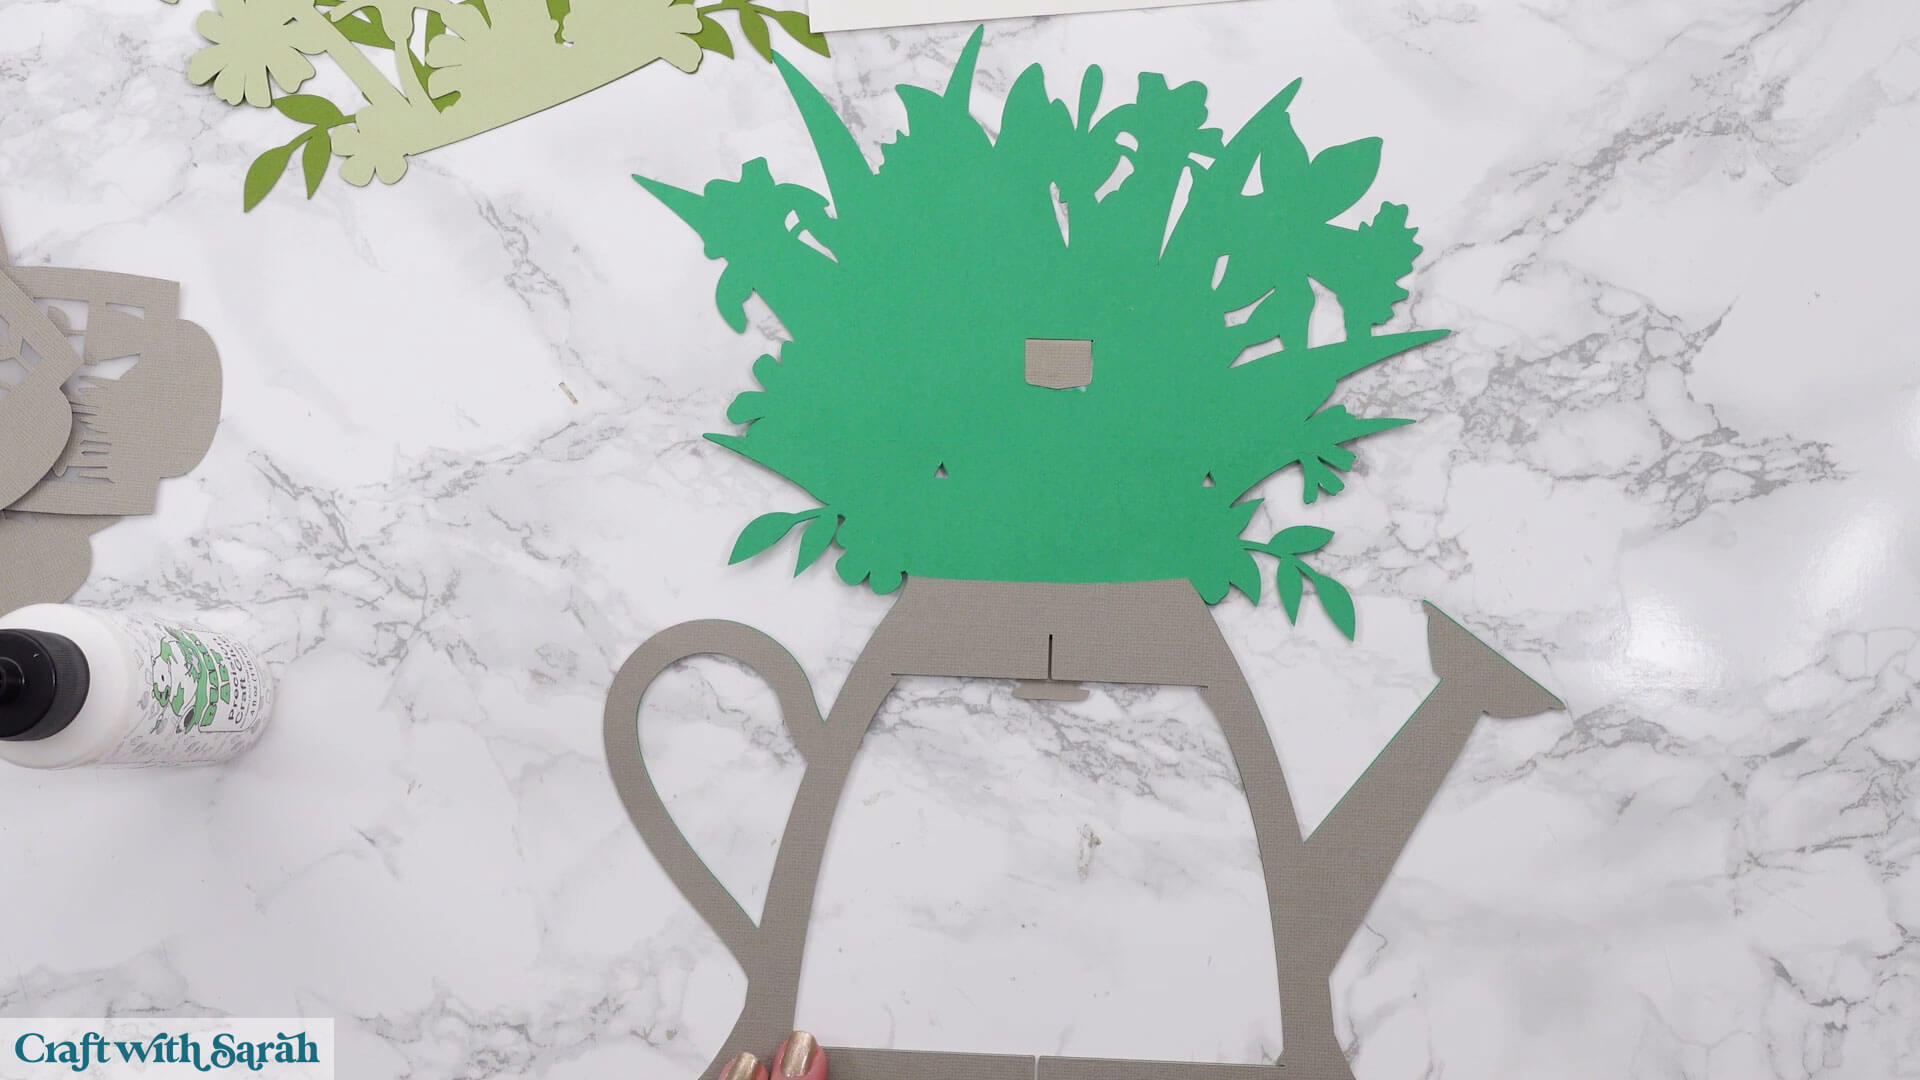
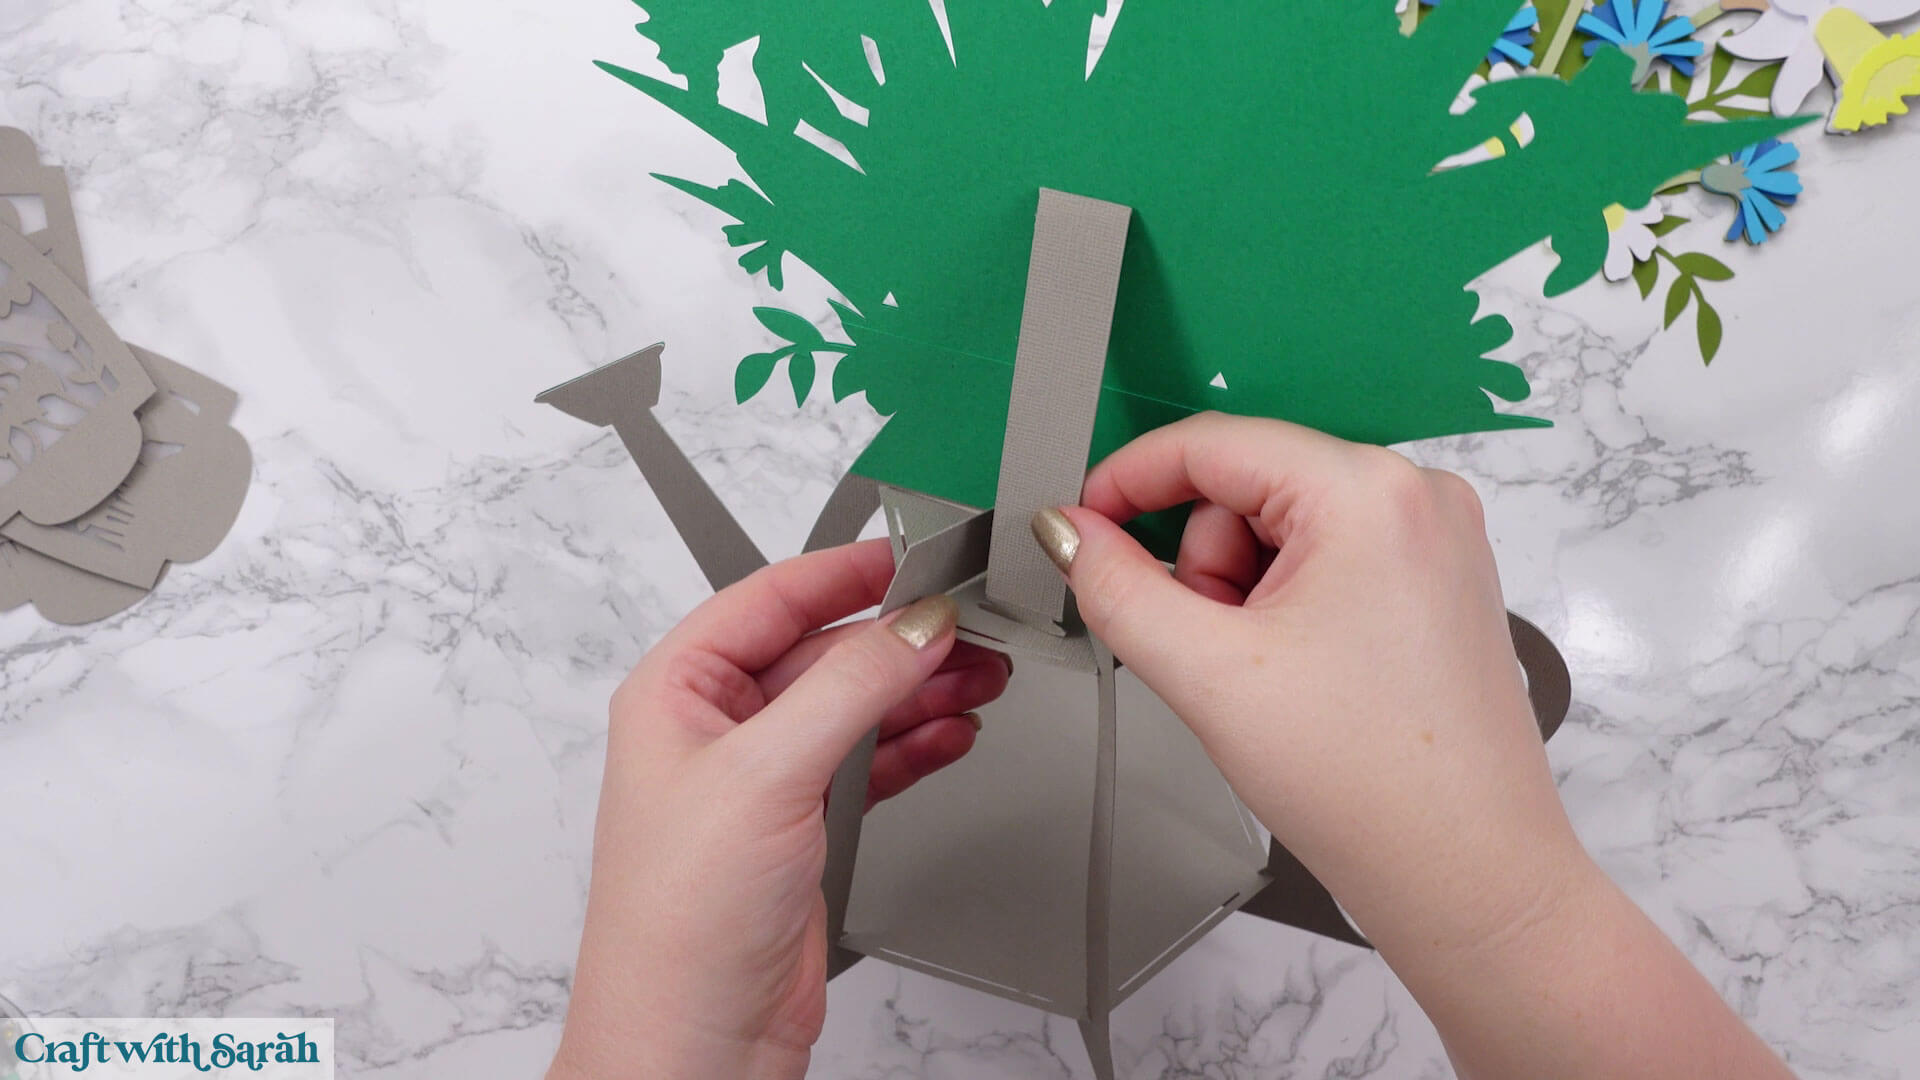
Thread it through the slit in the back of the flowers and glue the tab downwards on the front of the lantern.
The image below shows how it looks from the FRONT once the tab is glued.
Step 8) Stick the flowers together
Now we will move on to building up the flowers.
It is very important that you do NOT build the flowers directly onto the structure piece from the previous step. If you do, it will be incredibly difficult to build the lantern.
Instead, build the flowers separately and we will glue them to the lantern at the very end.
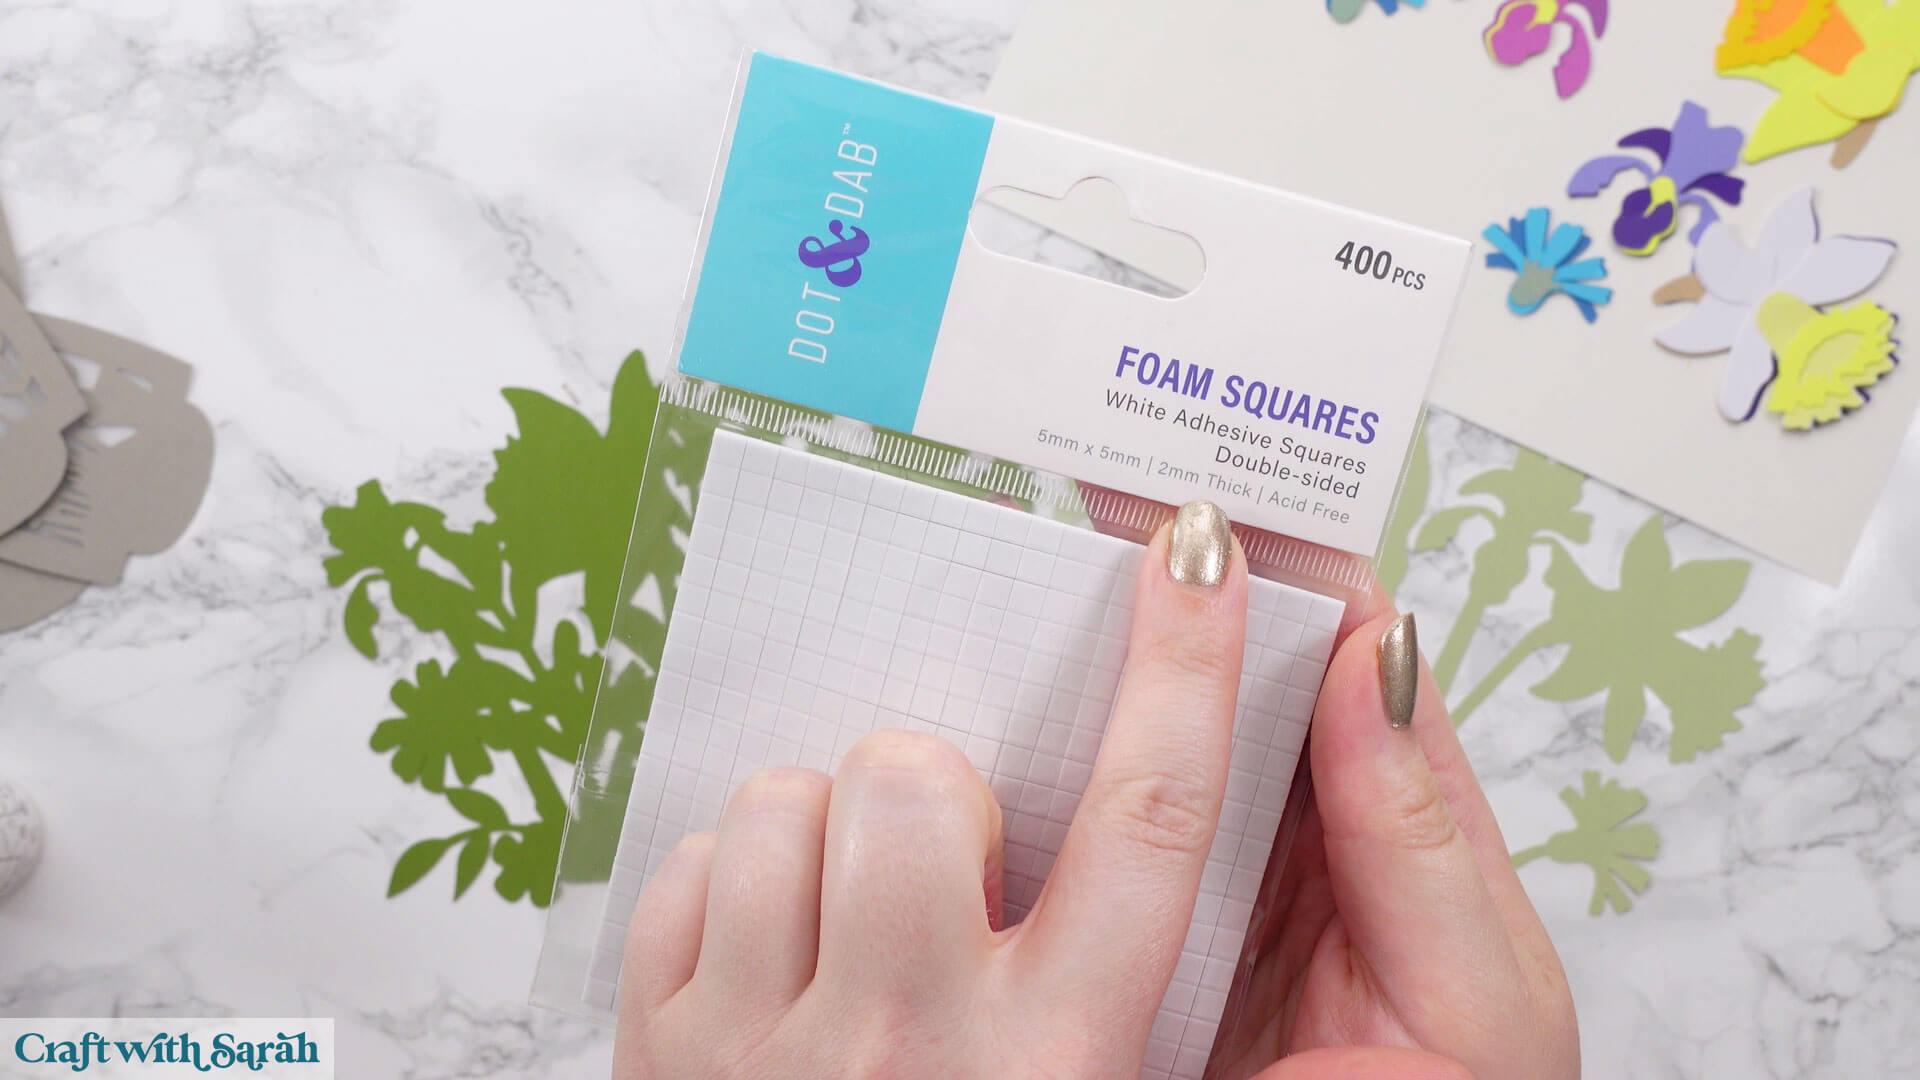
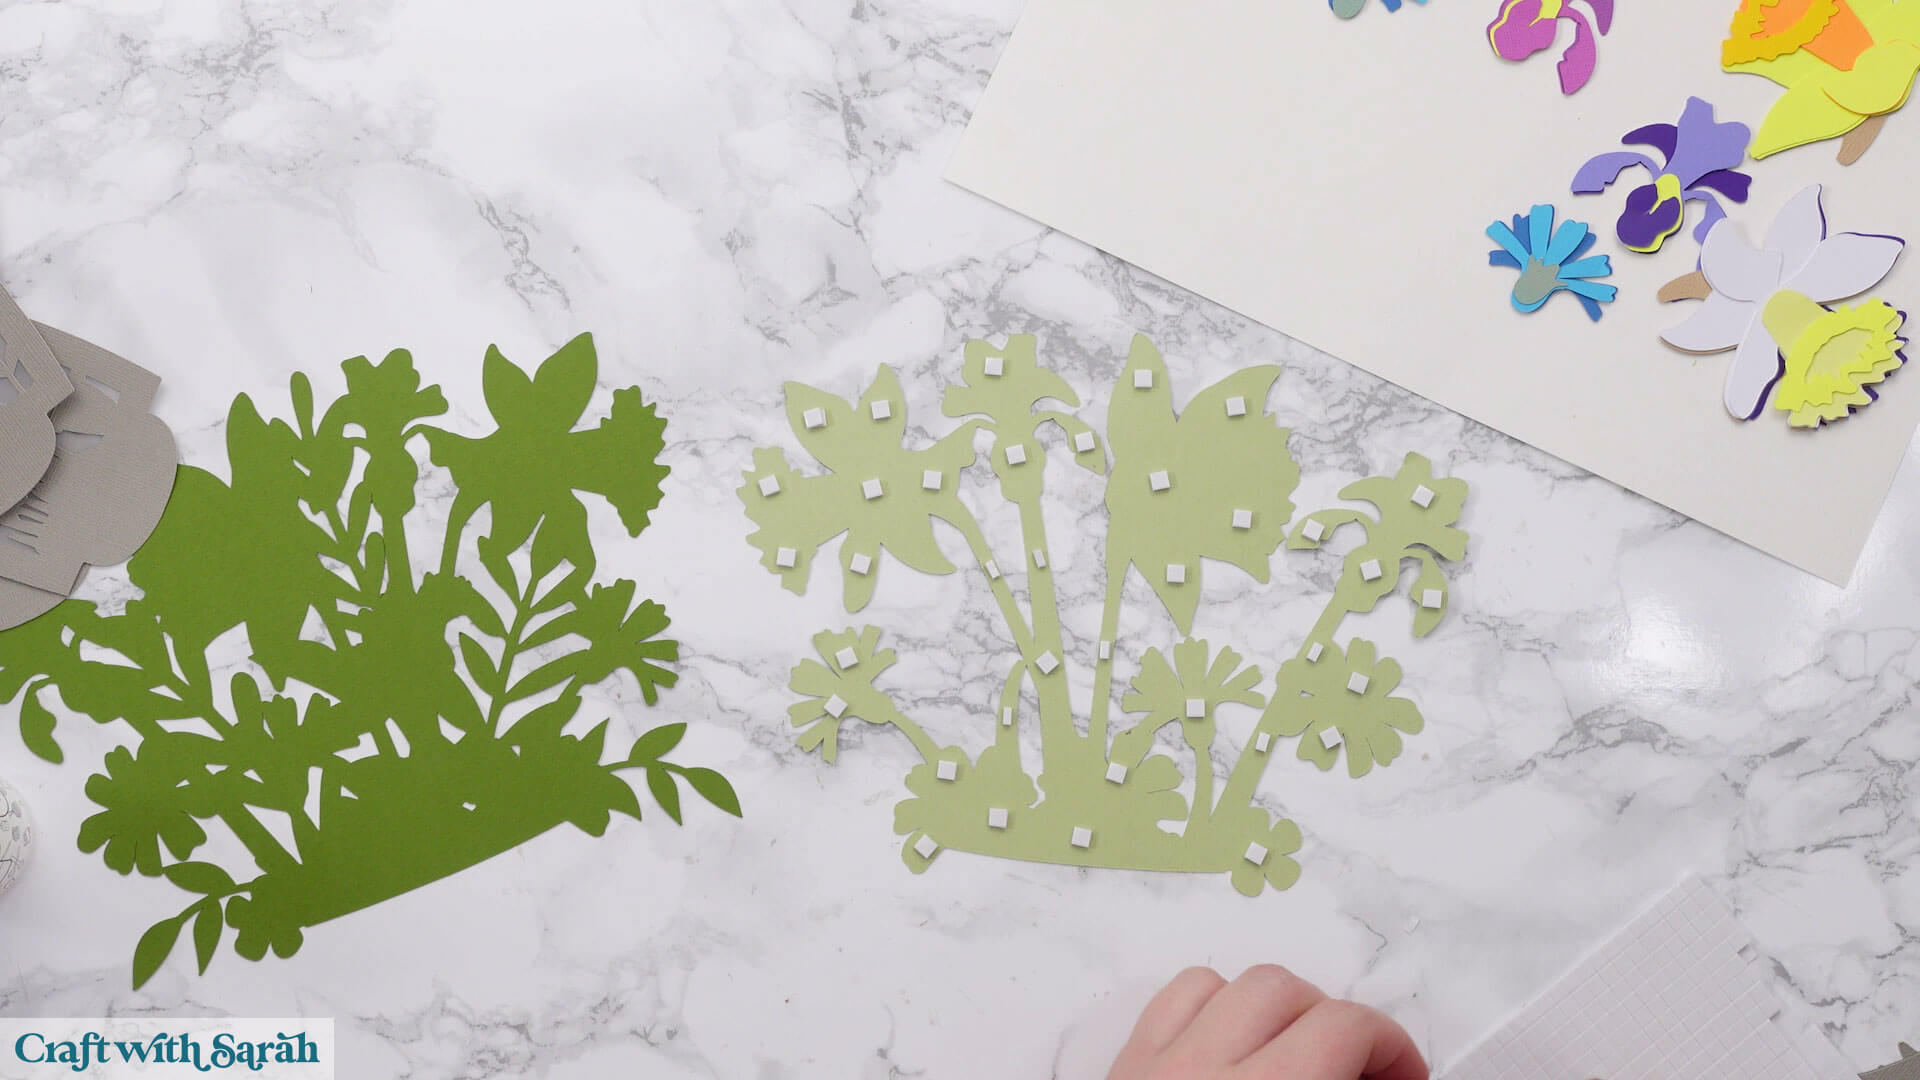
The flowers will be stuck together with a combination of glue and foam squares.
I like these foam pads from “Dot & Dab”, but any will do. If yours are large then you might need to cut them smaller with a pair of scissors.
Follow this assembly guide to see the order to put the flowers together in:
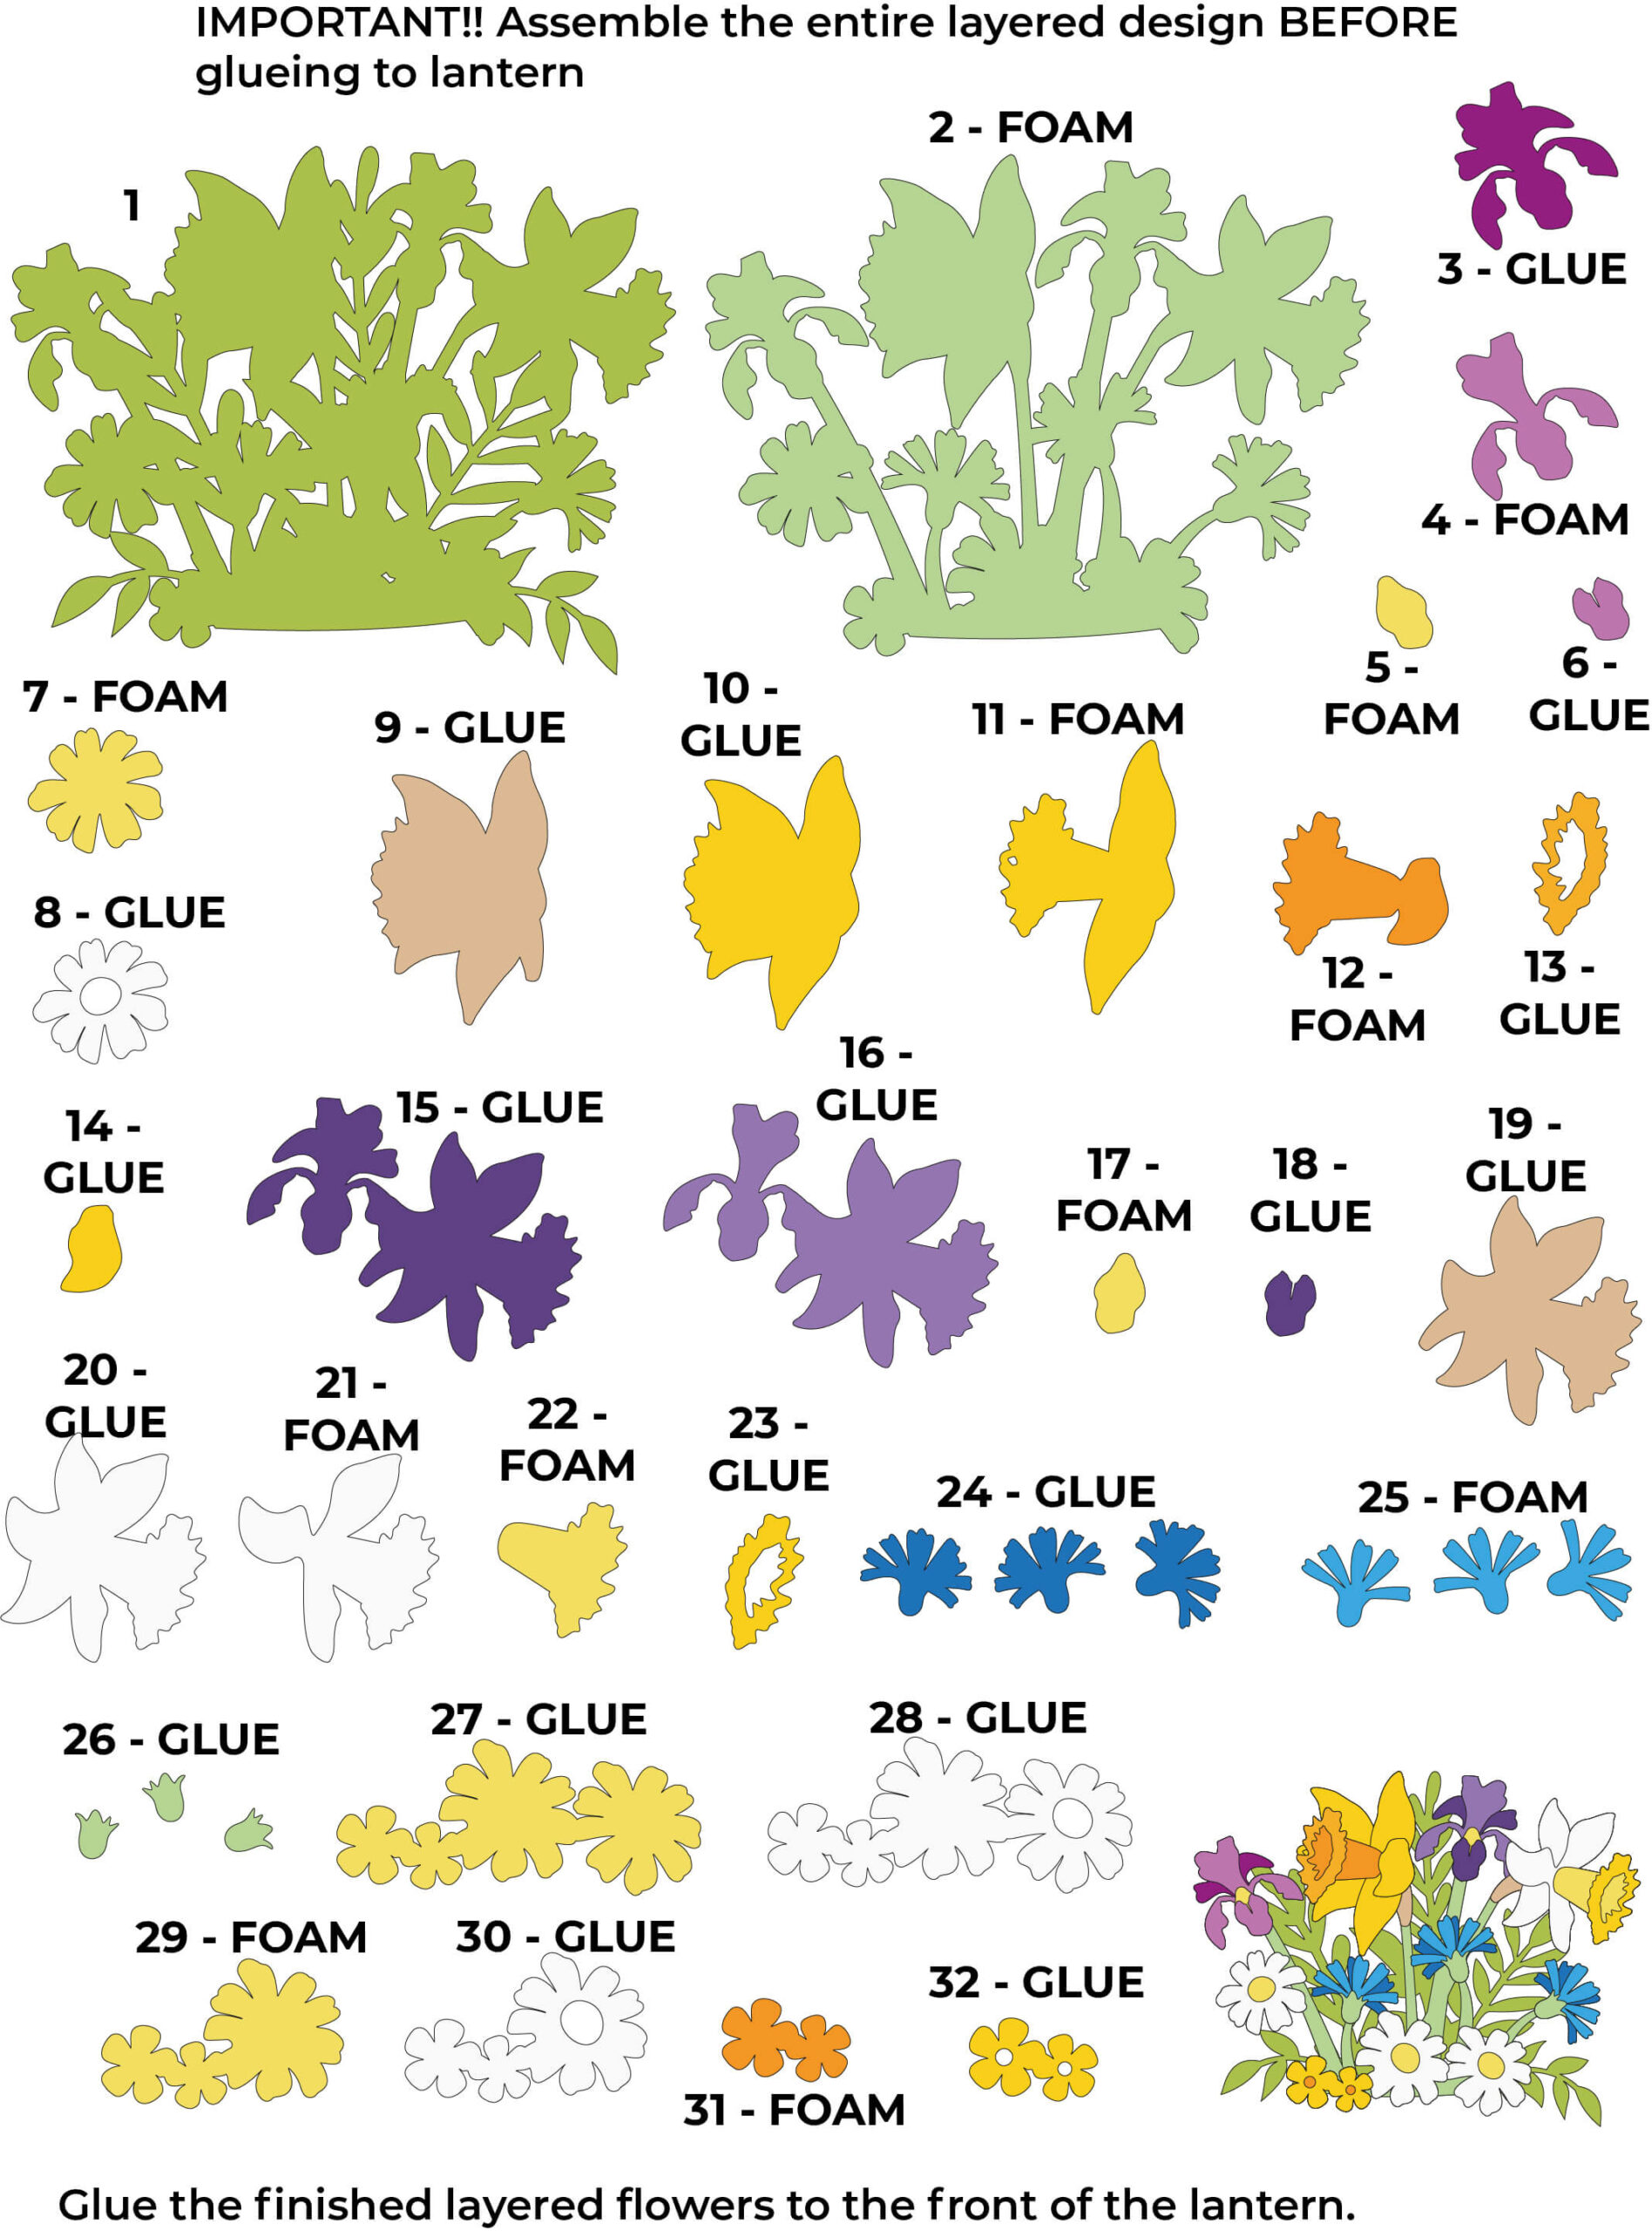
When adding the foam pads to larger pieces, make sure you add some in the middle of the pieces of card so it gives some stability to the middles. If you don’t add any foam pads in the middles then it can dip/sag down under the weight of the other layers which doesn’t look as good.
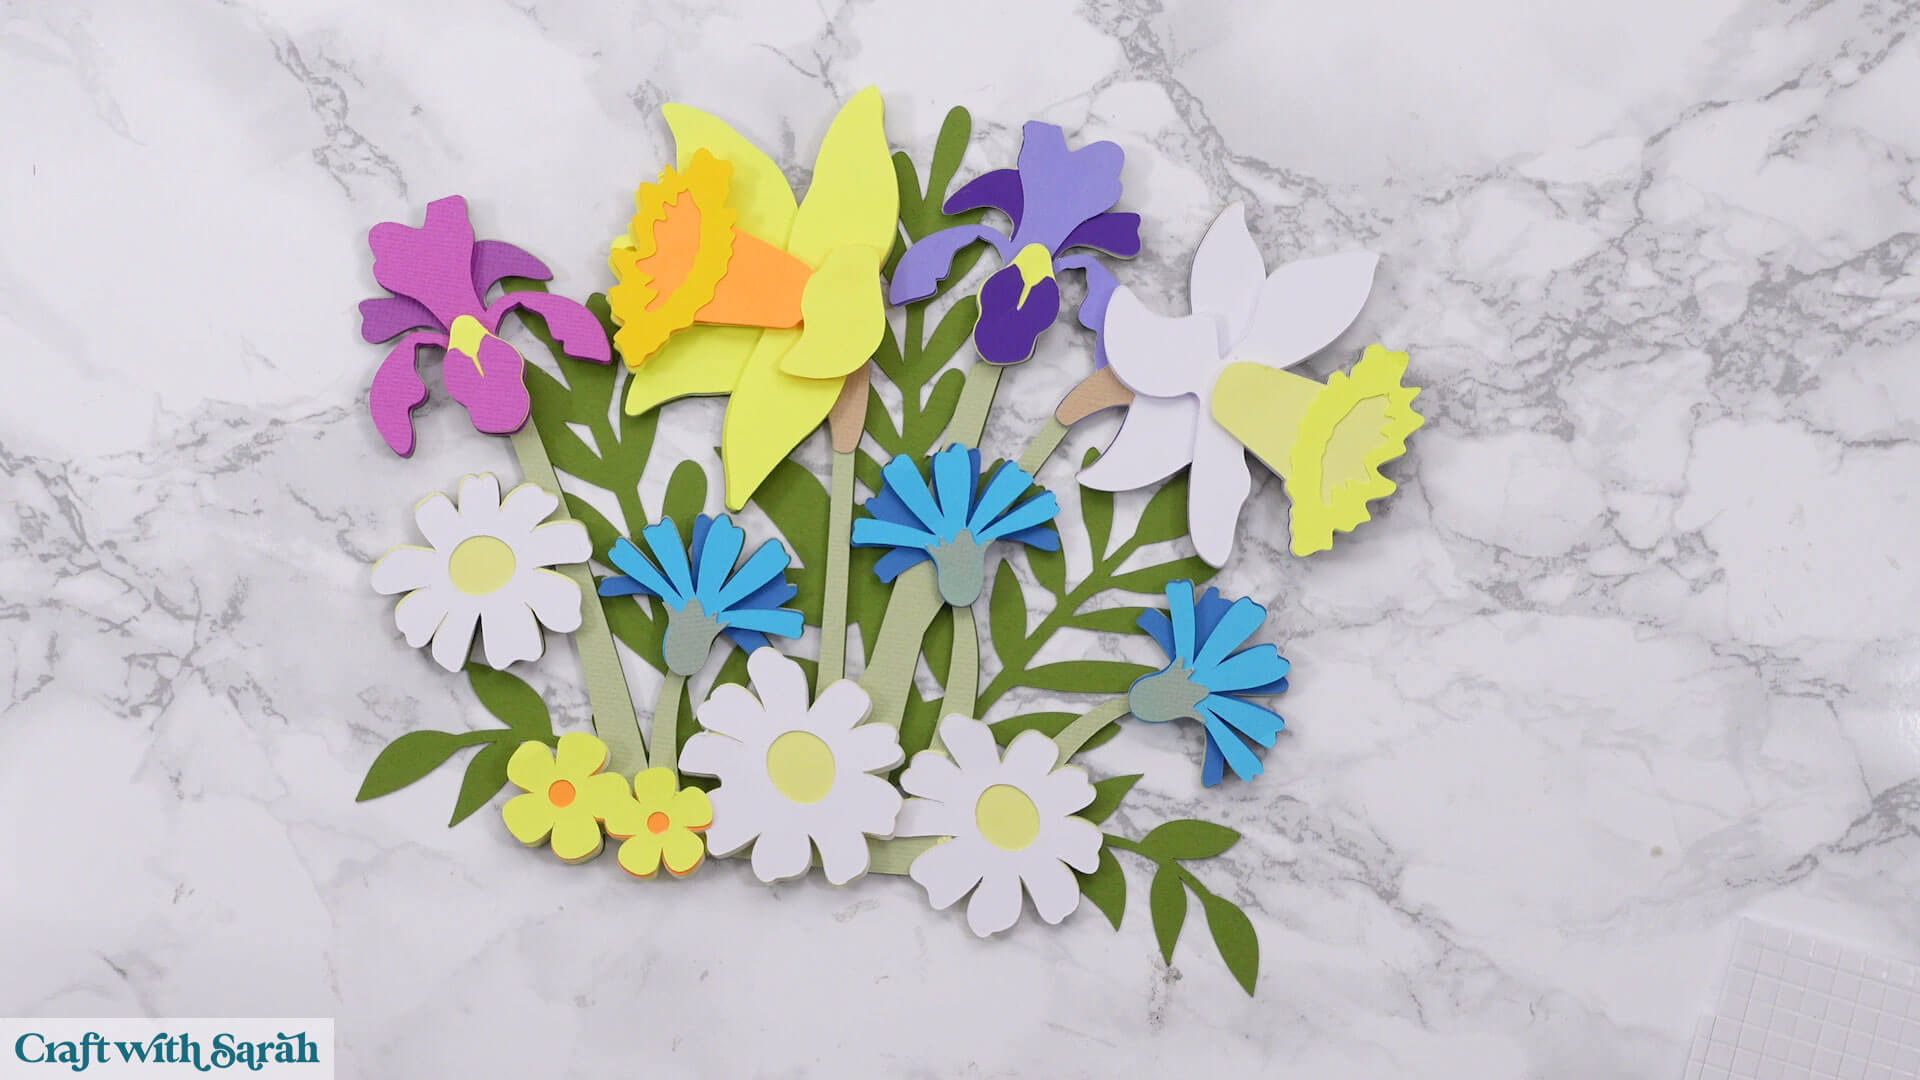
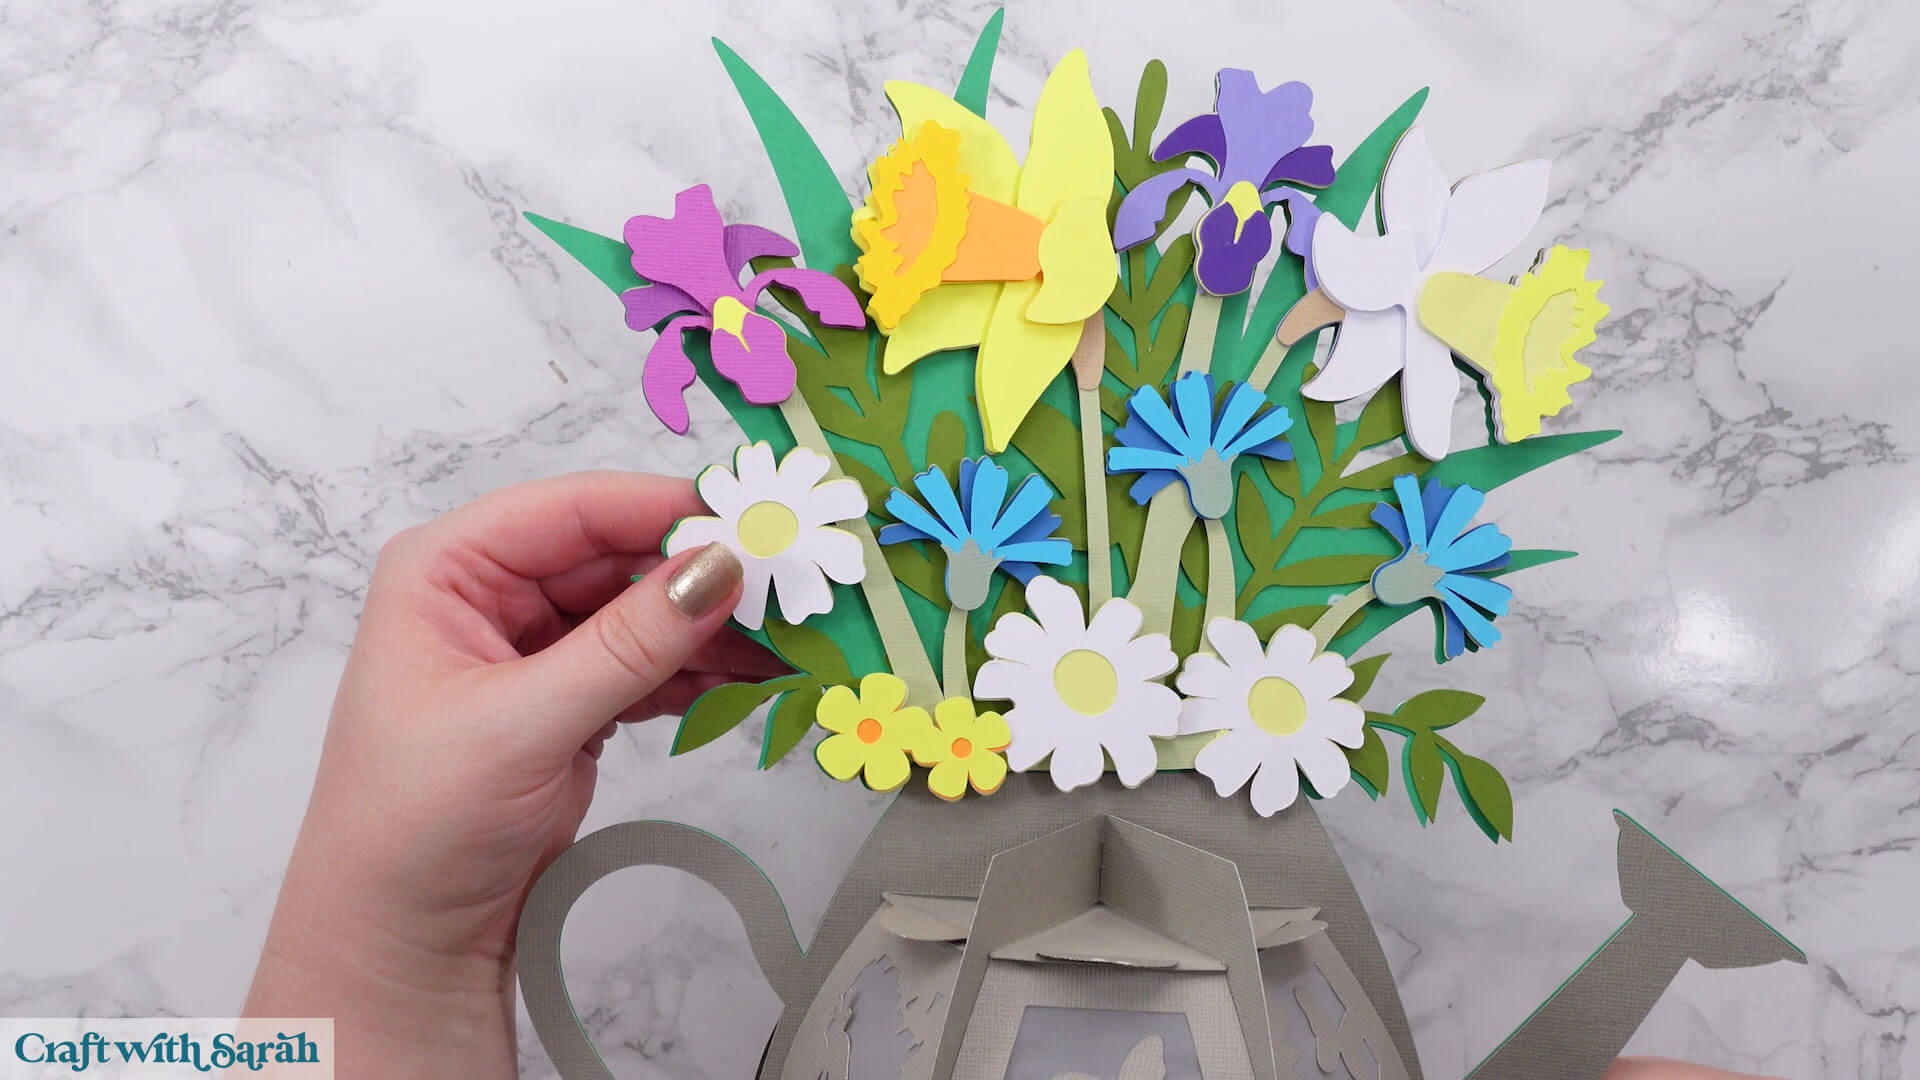
Here’s how the flowers look once finished:
Step 9) Assemble the lantern structure
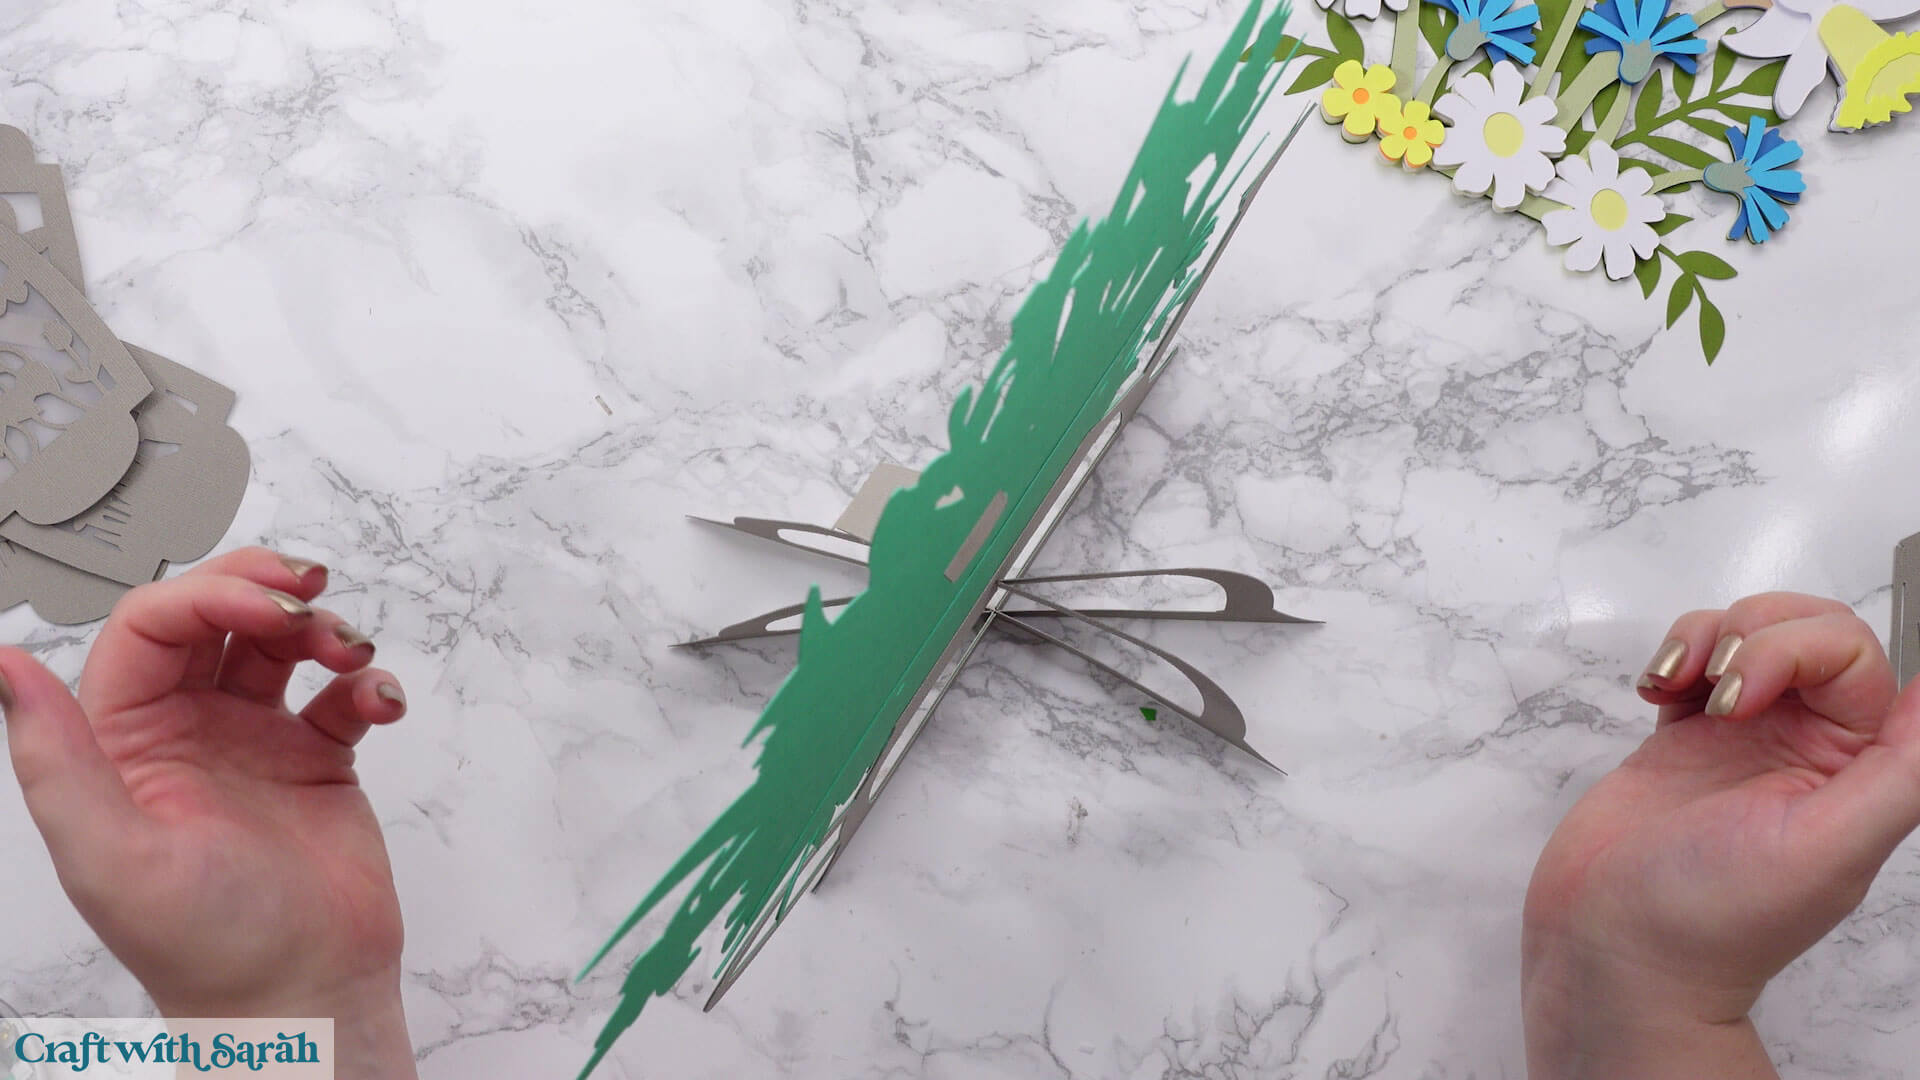
Take the structure piece which matches the image below.
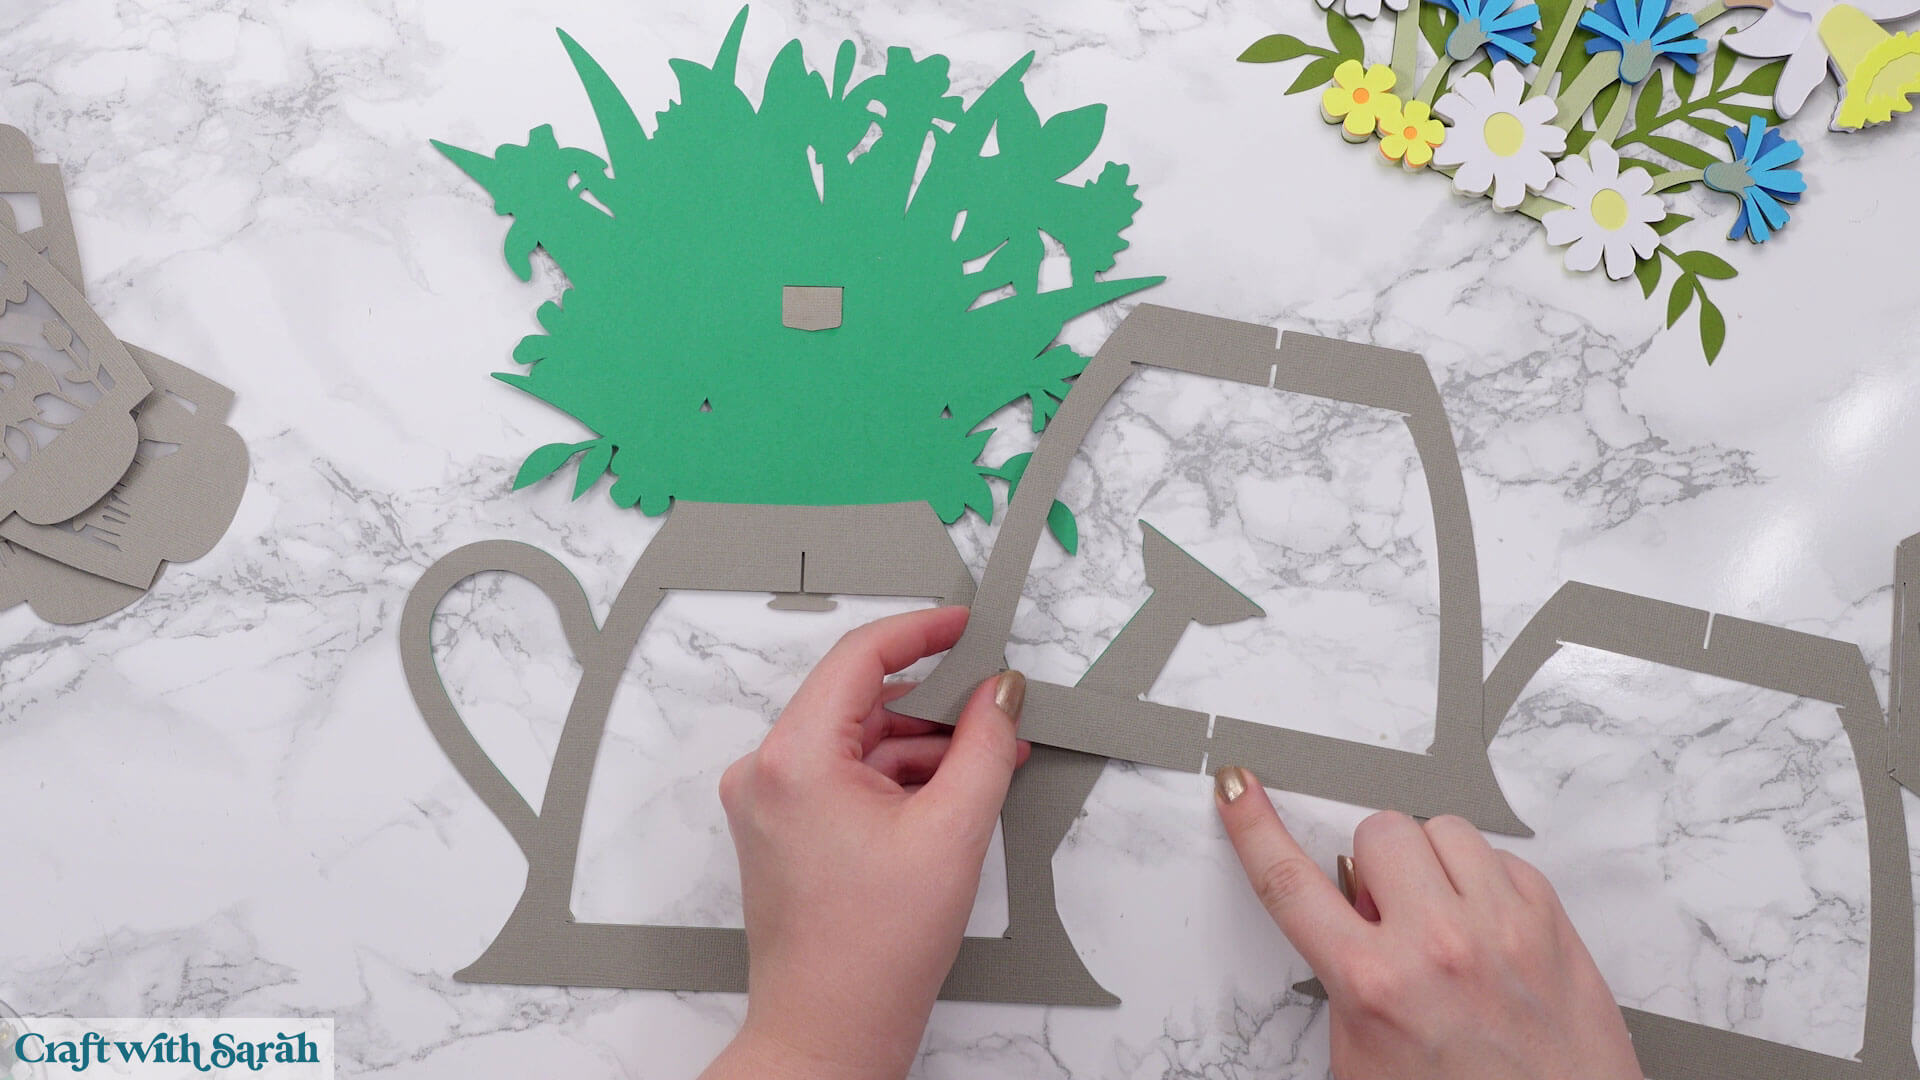
Place it into the slits on the top and bottom of the base piece.
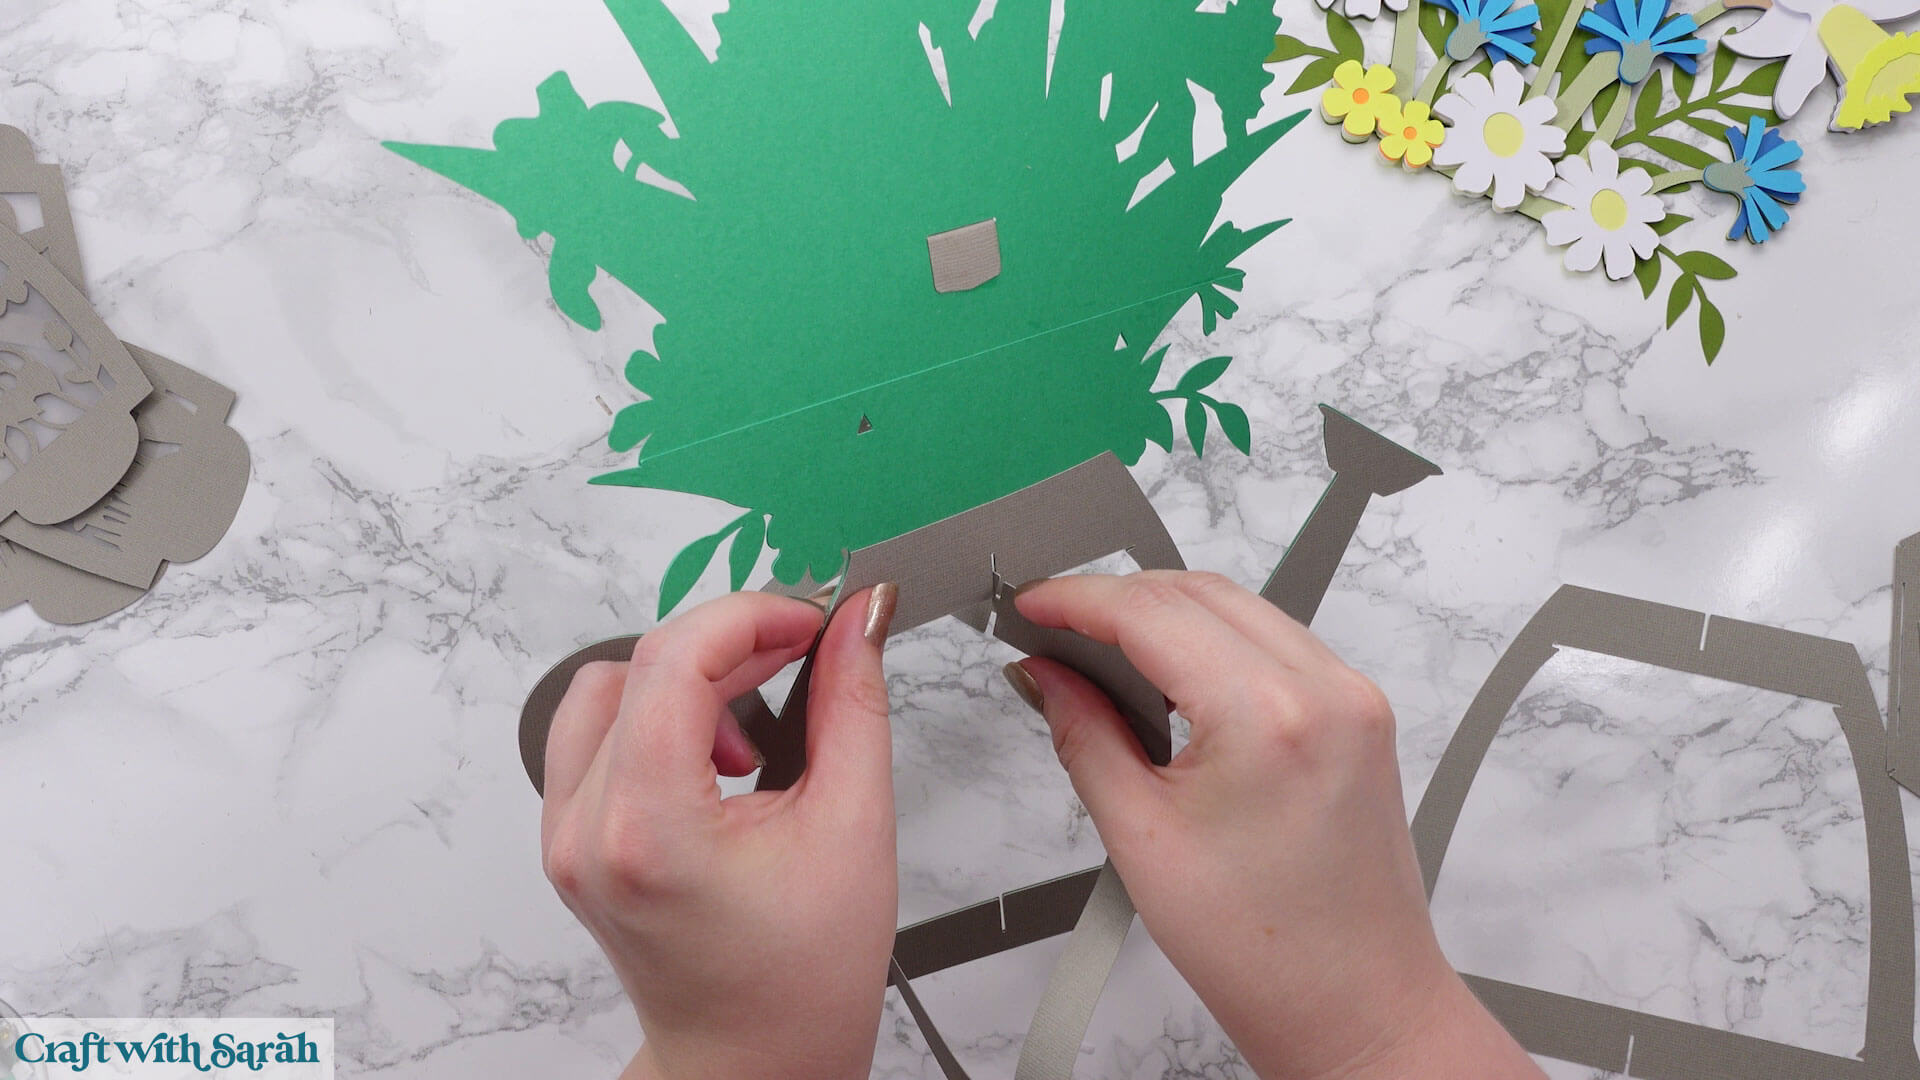
Then hold the two pieces flat against each and slot the final structure piece in.
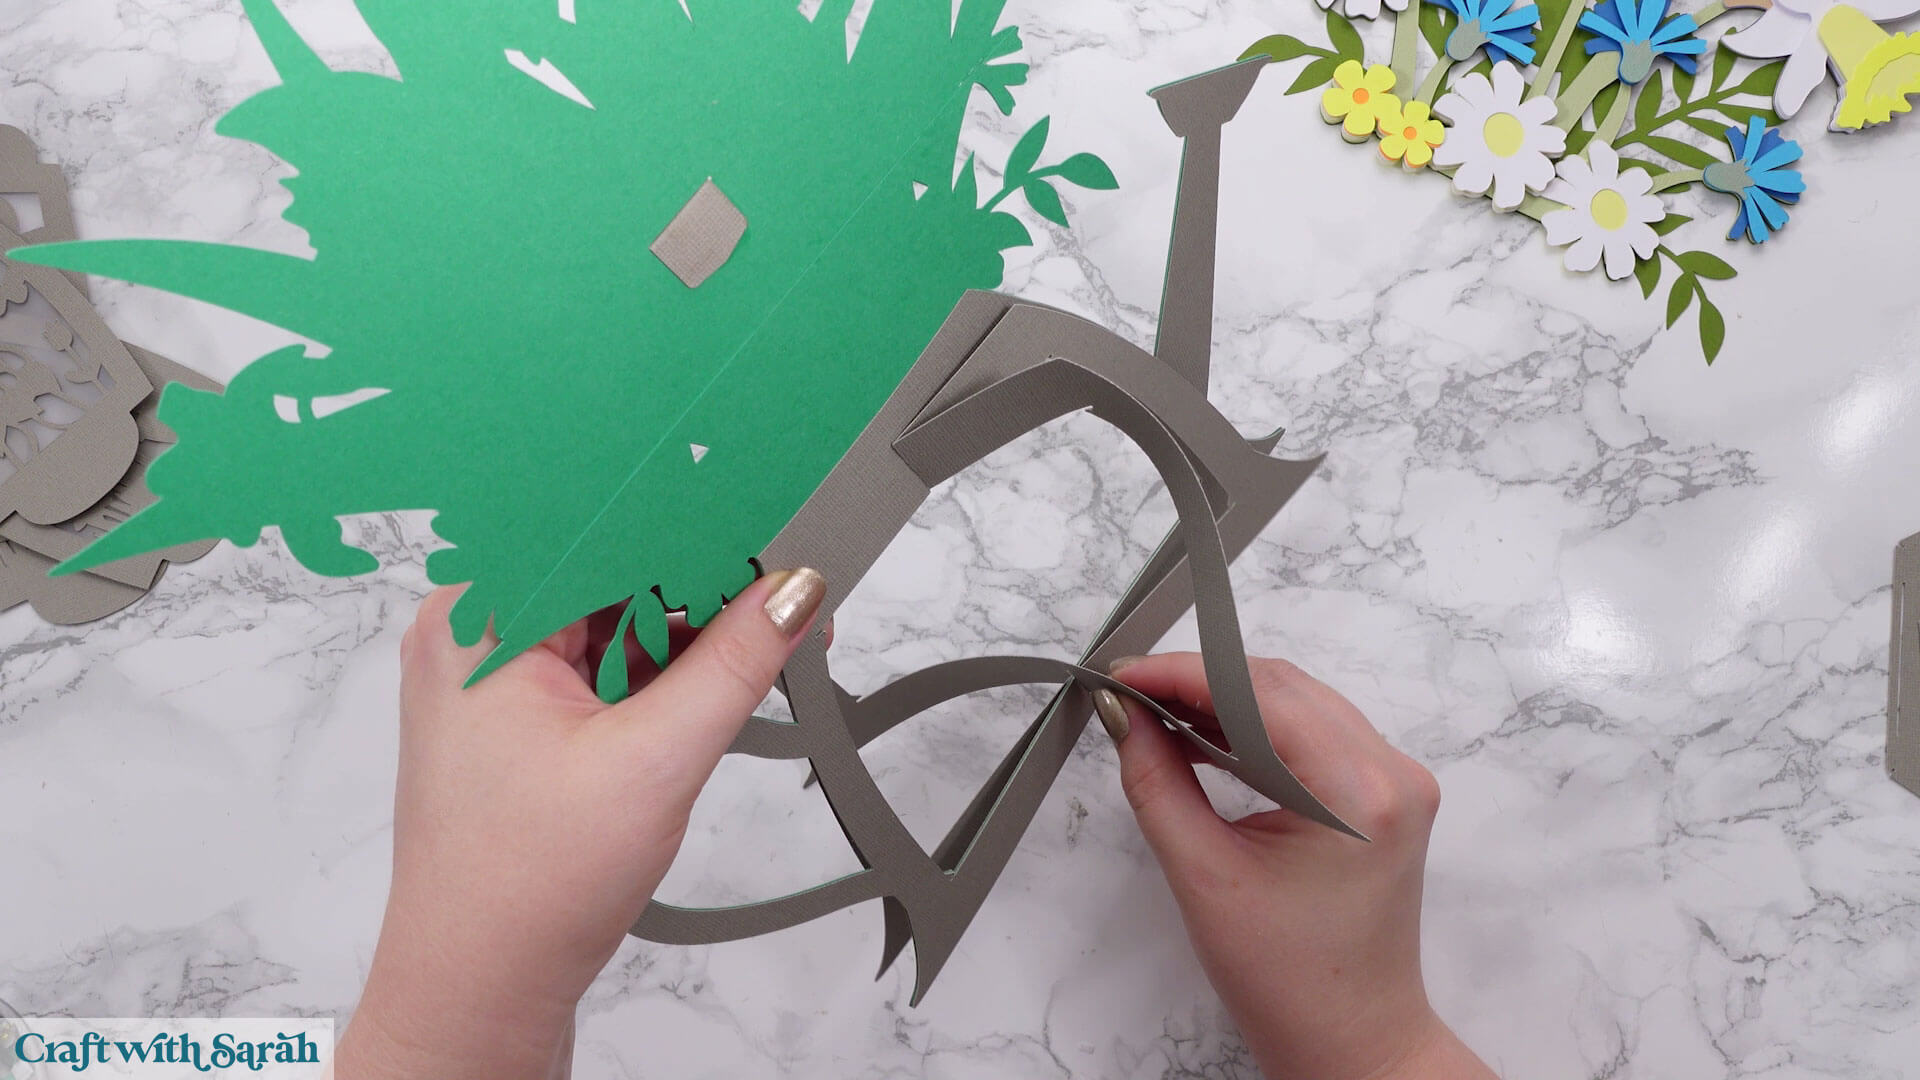
Now you will have a 6 sided structure that stands up by itself.
Take the largest hexagon and place it inside the bottom of the watering can.
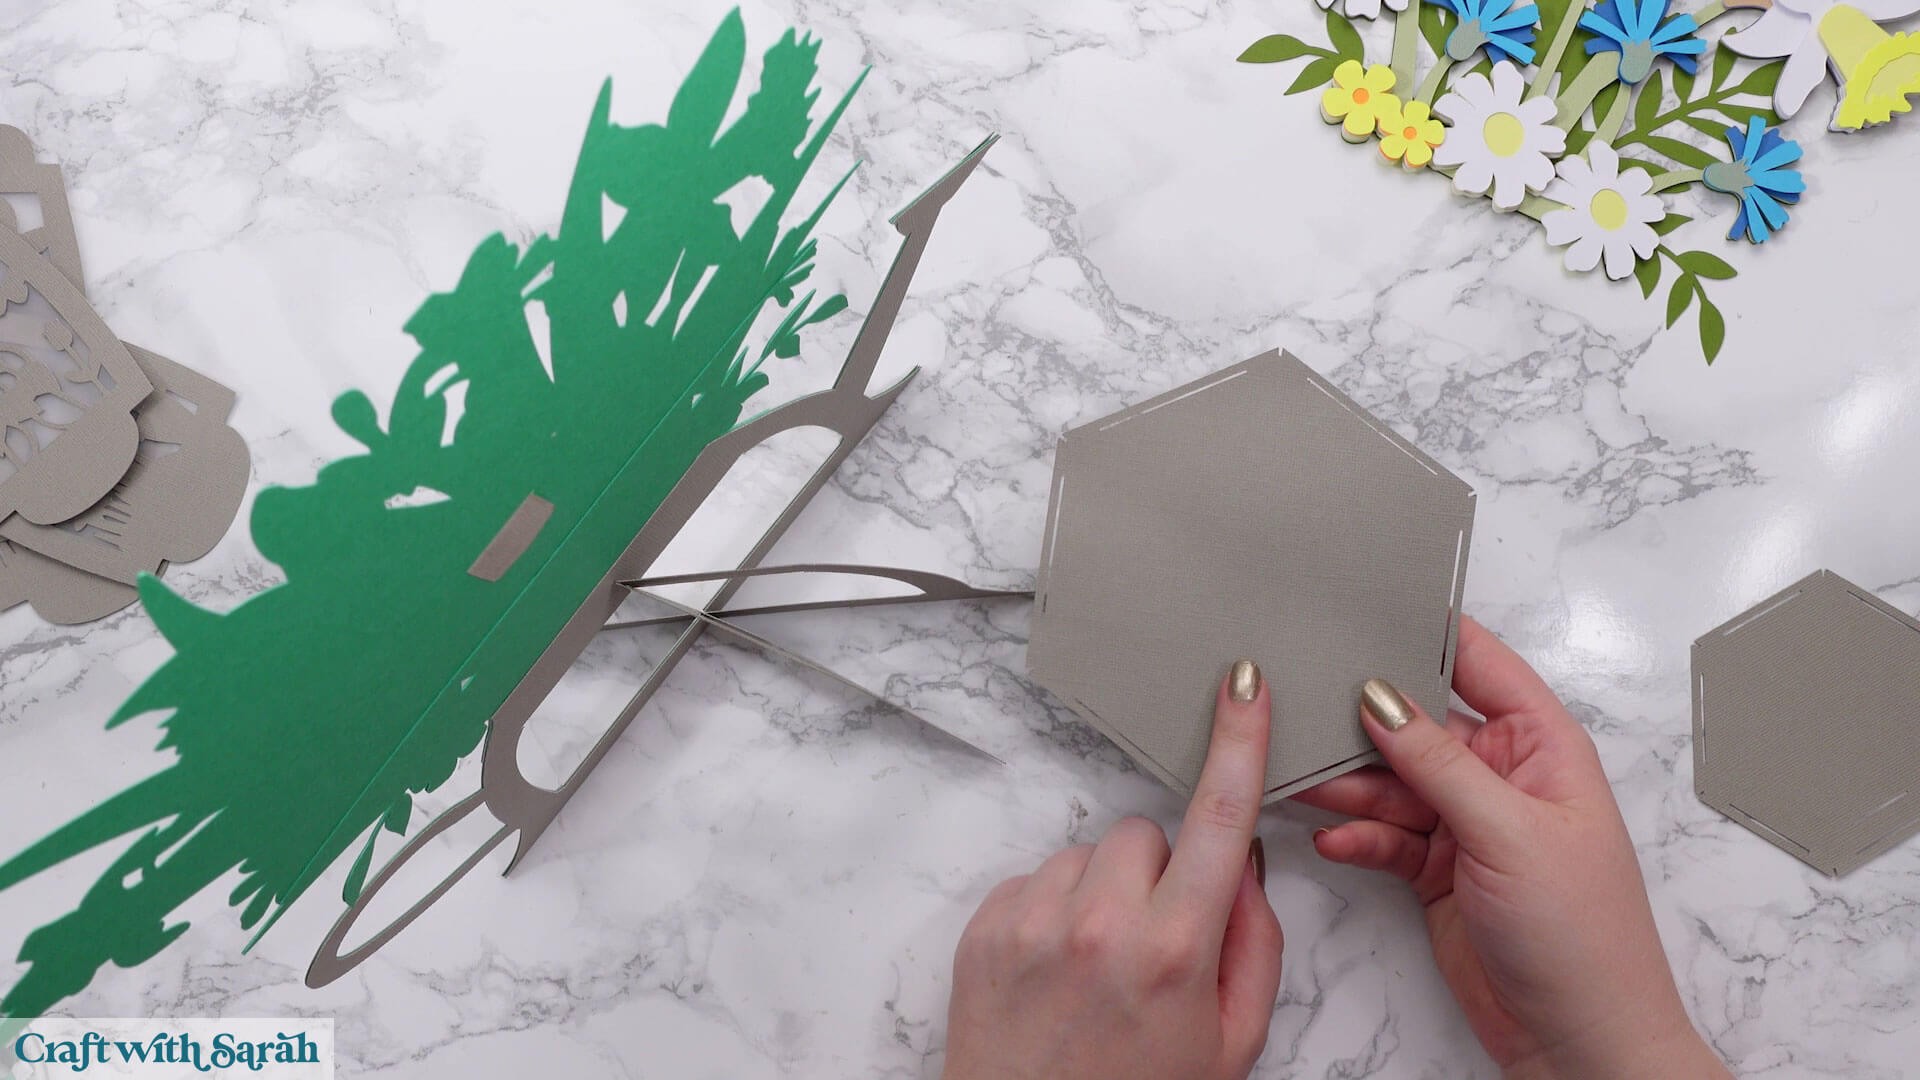
The small slits in the side of the hexagon will go into the slits in the bottom of the lantern.
This part can be a bit fiddly, so go slowly and be careful not to tear the cardstock.
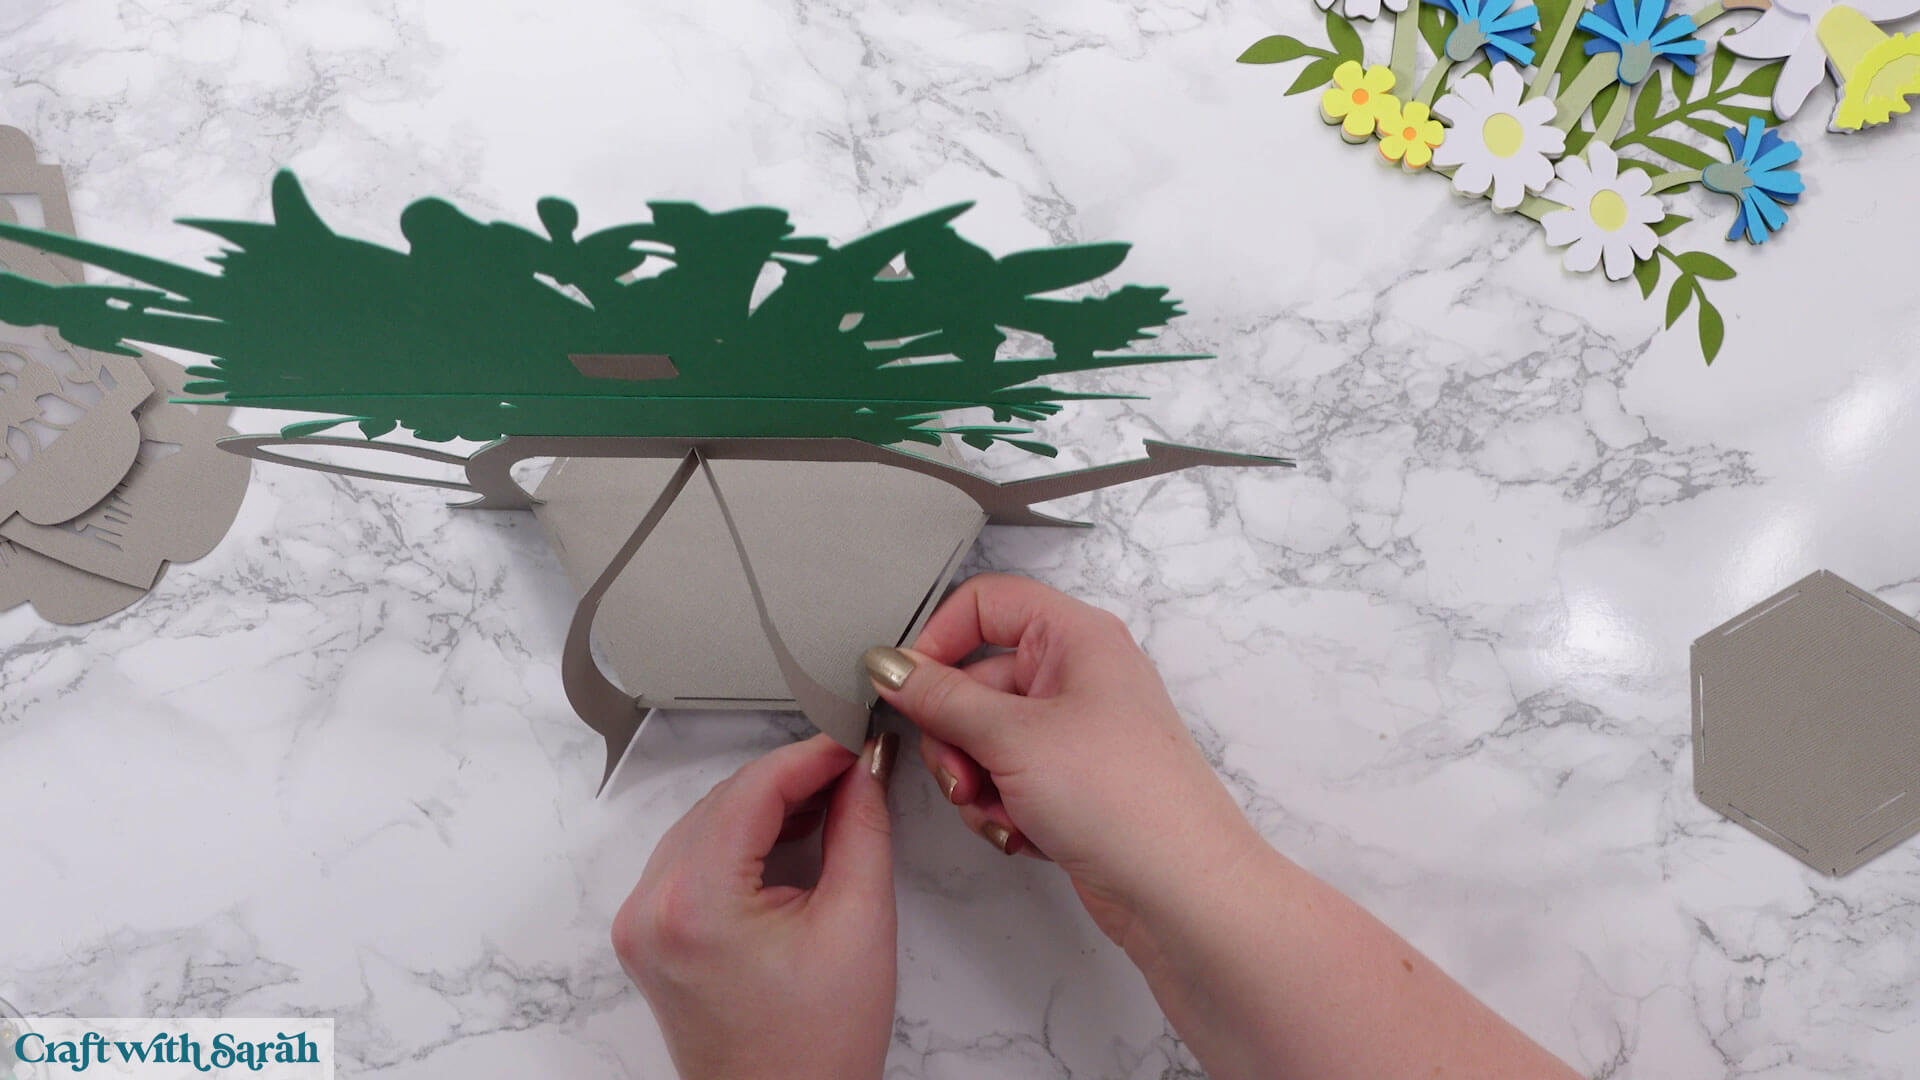
Do the same for the smaller hexagon in the top of the watering can. With this one, make sure the extra rectangular hole in the hexagon lines up with the hook on the back of the flowers.
Slot the hook through the slit to secure it.
Step 10) Finish the lantern
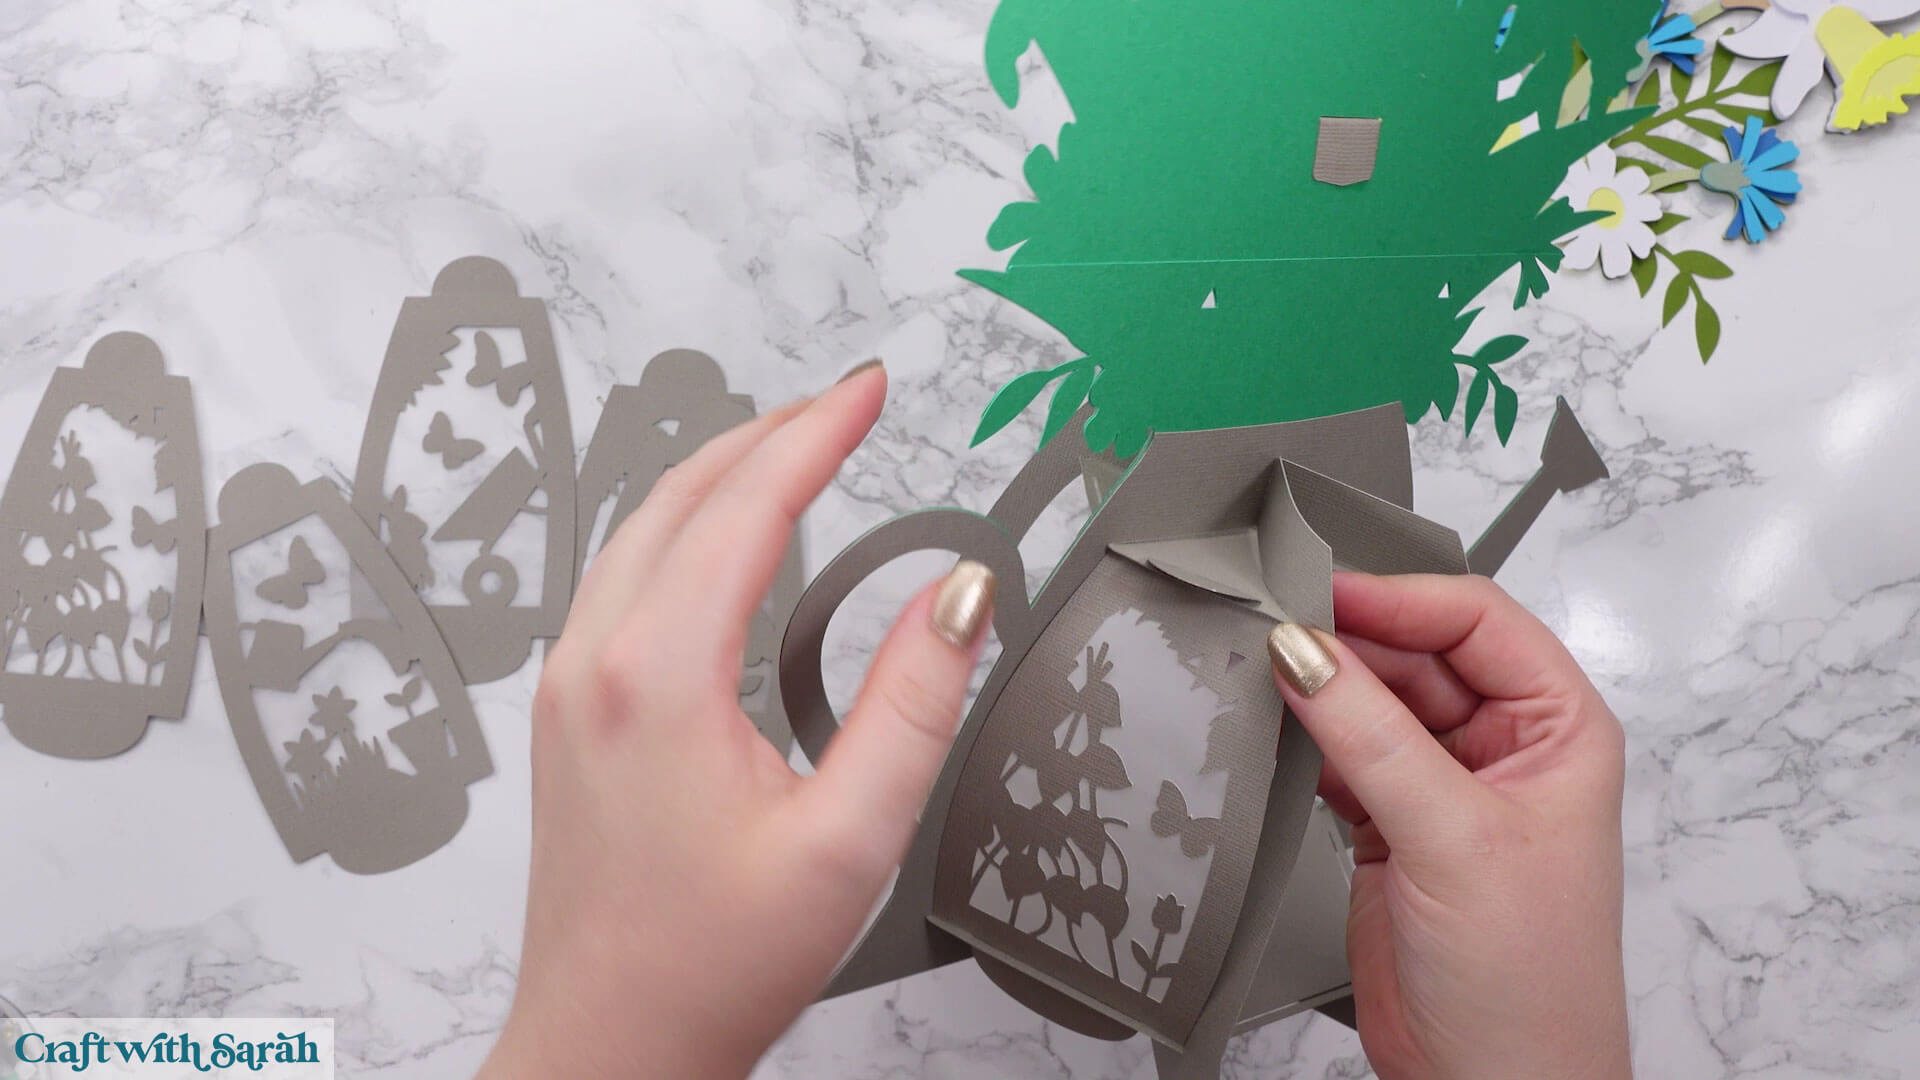
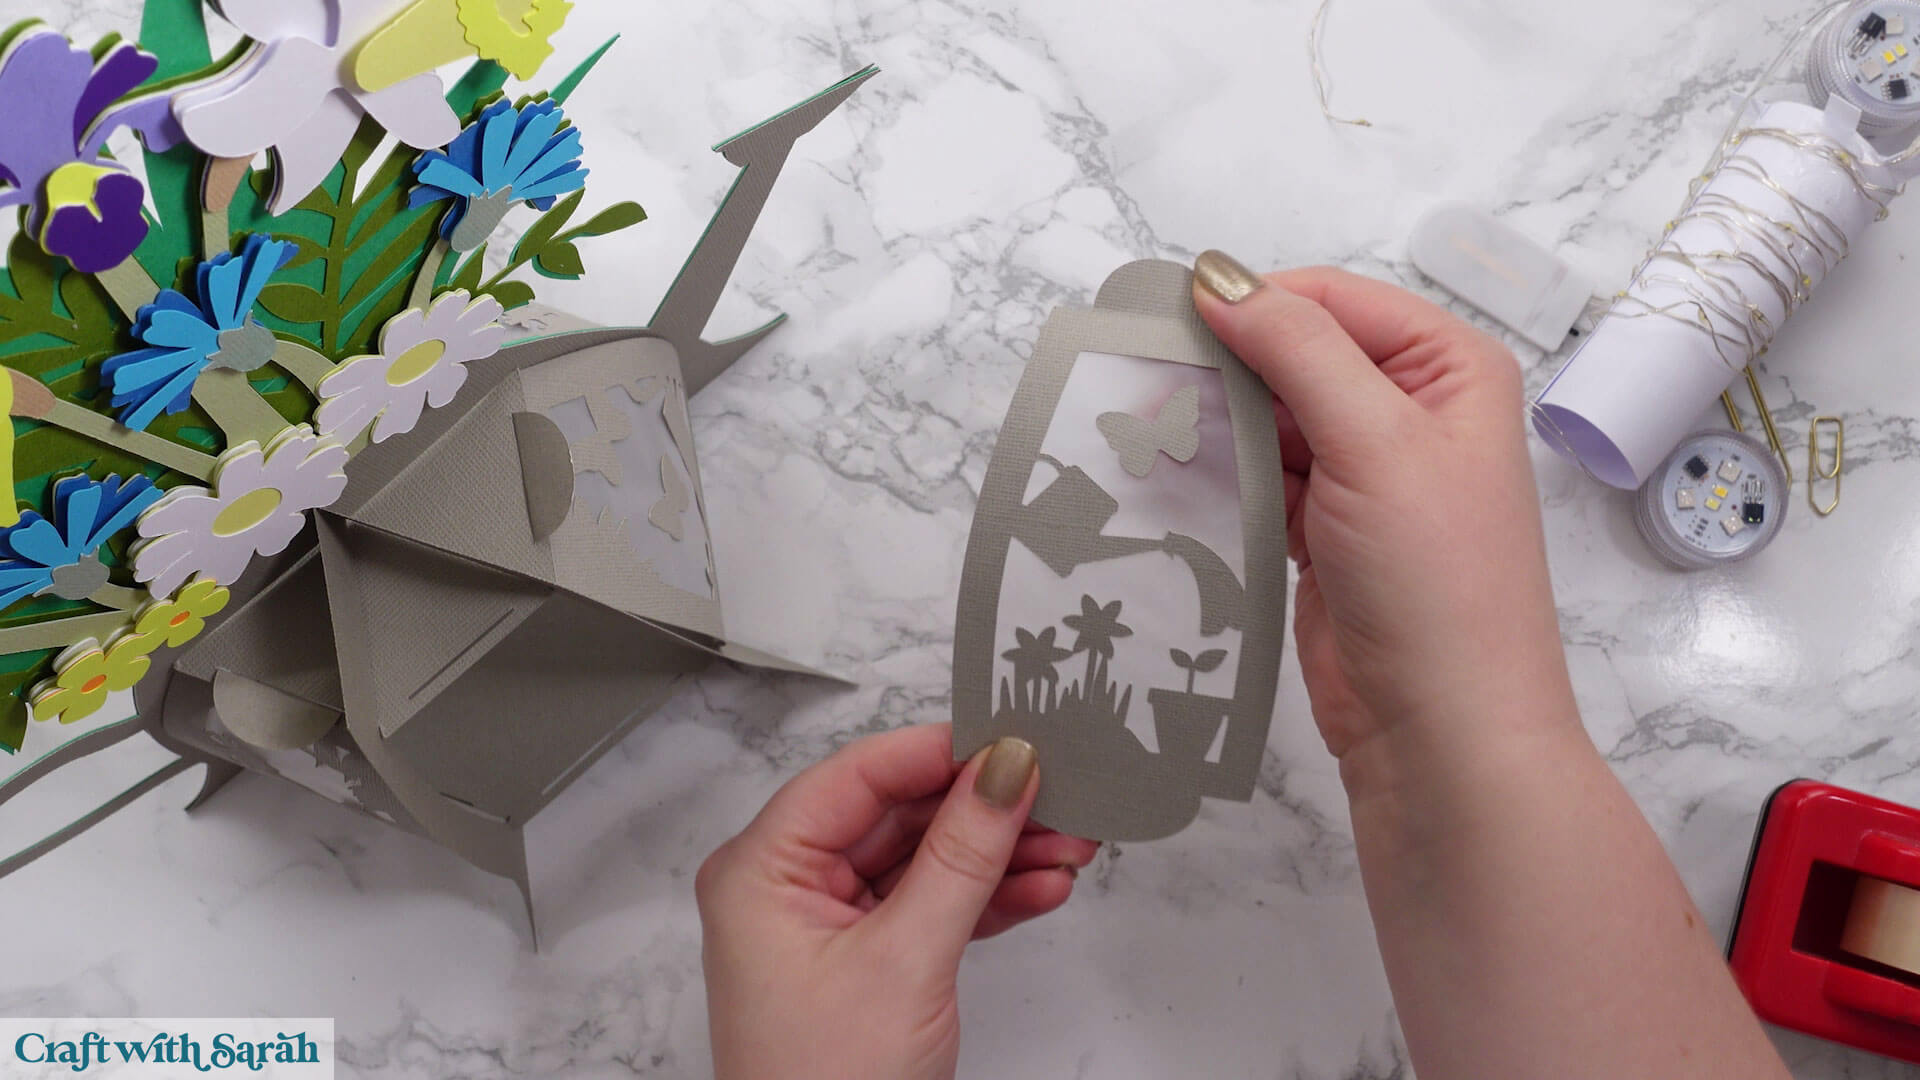
Slot the six side panels into the lantern.

Bend the tabs towards you along the score line to hold them in place. Press firmly when you fold them to make the tabs run flat against the hexagon.
Add glue to the back of the flowers and stick them to the lantern.
If you’re using submersible LED lights or other standalone lights, take out one of the side panels, put your light inside and then put the side panel back on.
If you’re using fairy lights, check out the optional extra step below.
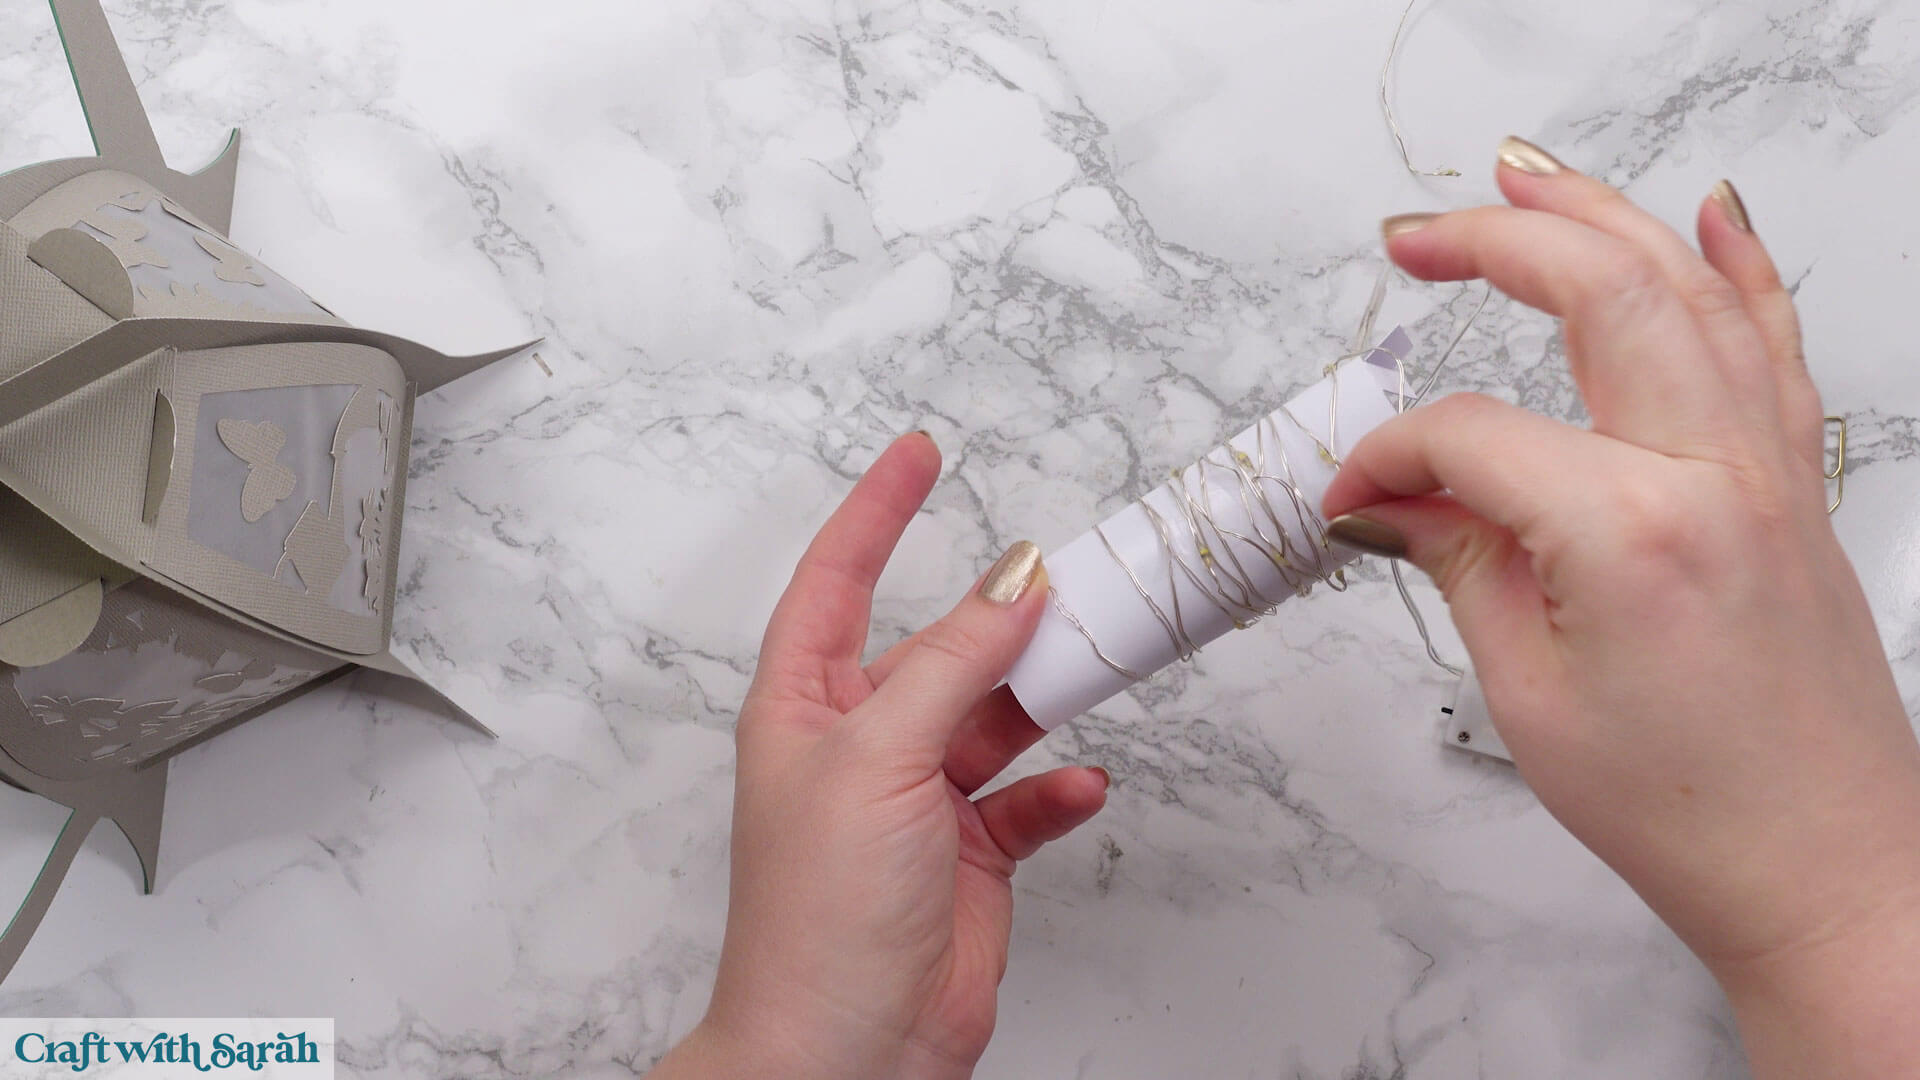
Step 11) Build the light tower (optional)
This step is only needed if you are using fairy lights and opting for the optional light tower to distribute the glow more evenly.
Take the light tower piece and locate the dashed lines.
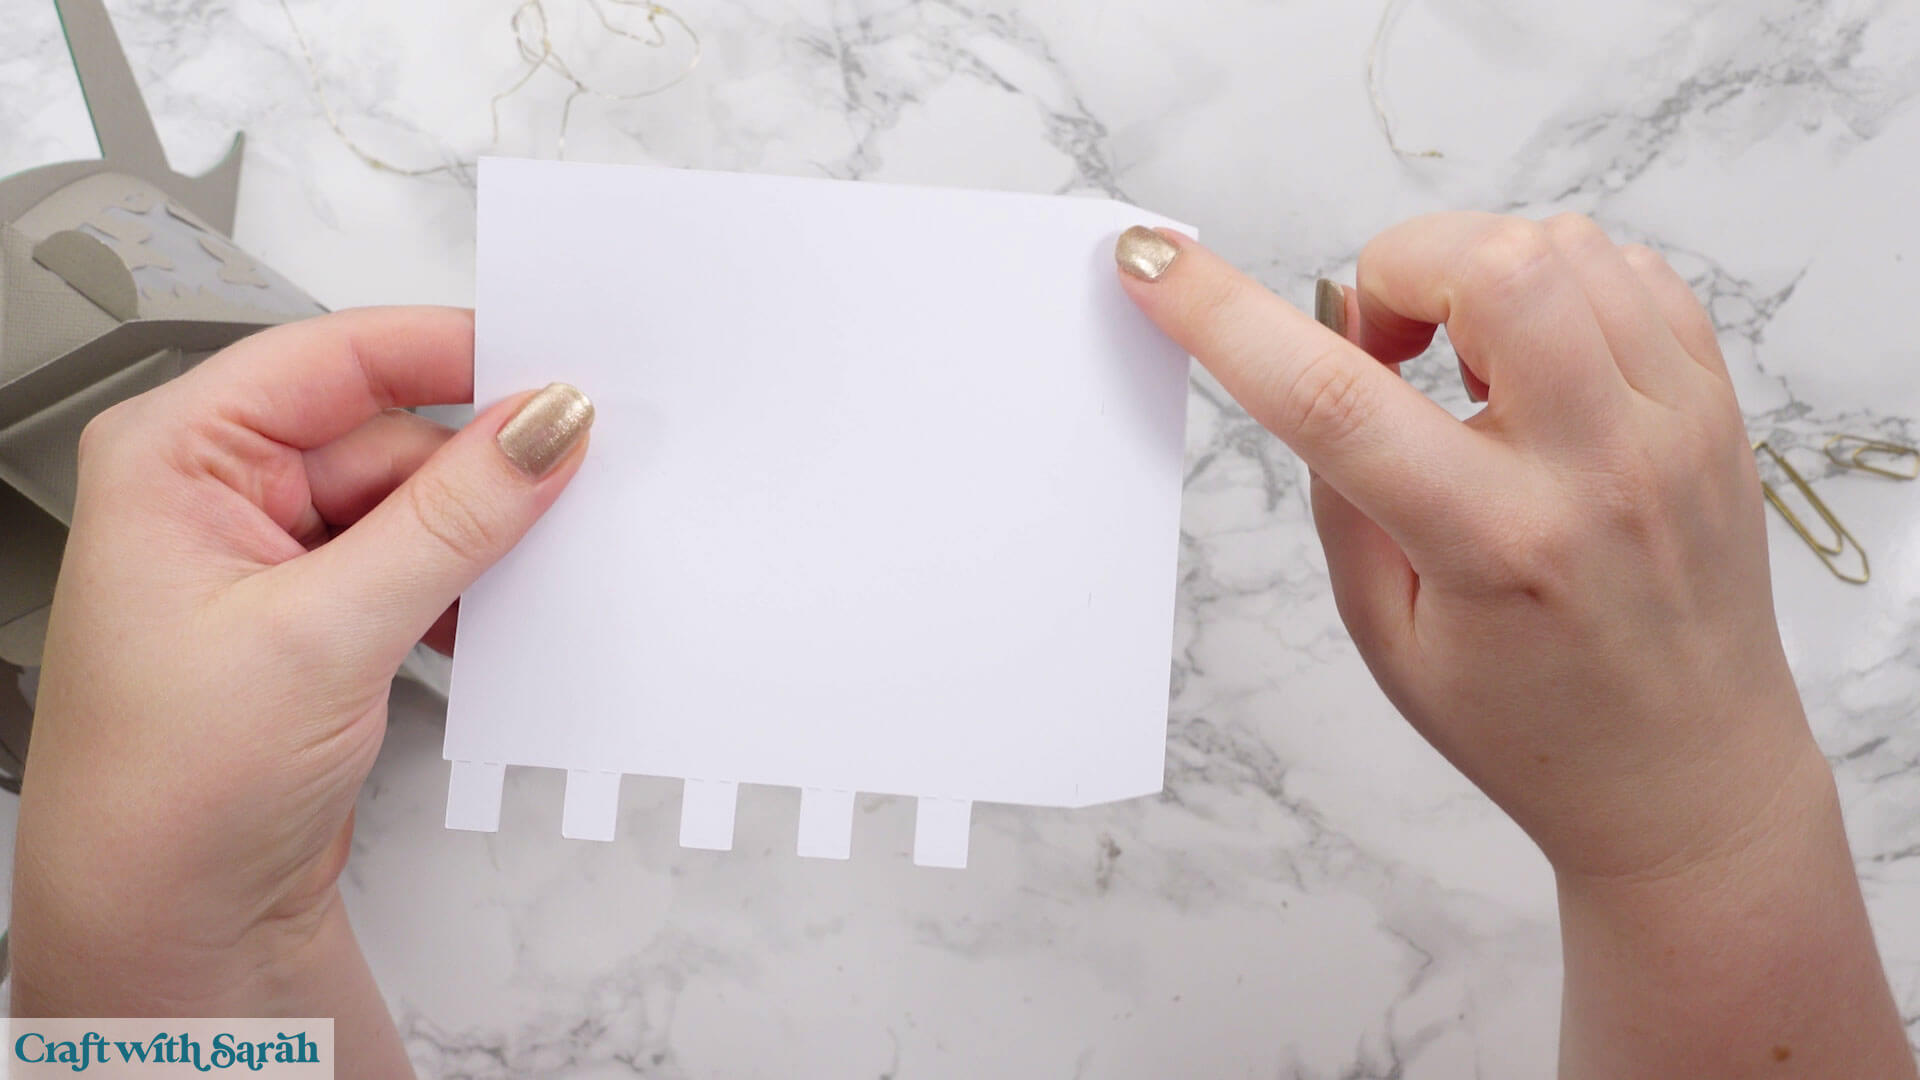
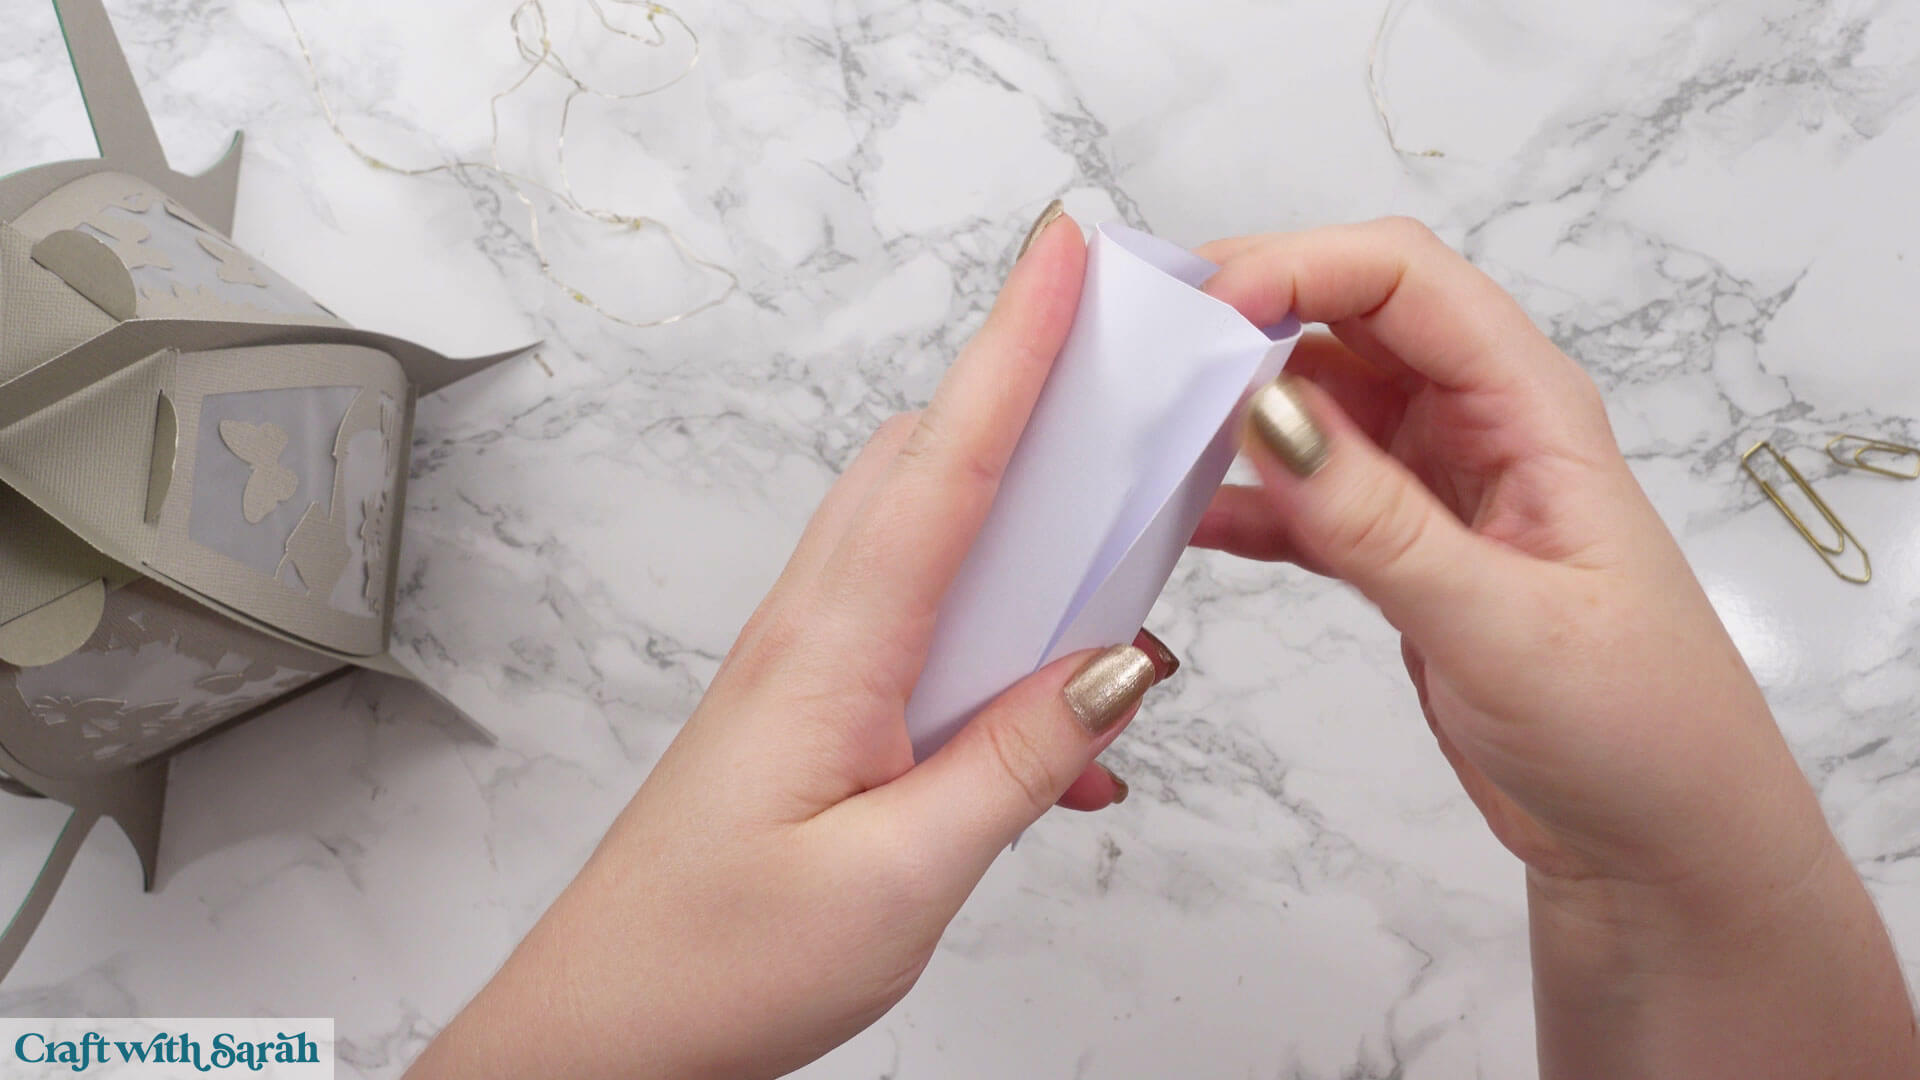
Fold it inwards and roll it round to train the paper so that it will roll up.
Add glue to the edge of the cardstock piece, up to where the dashed lines are.
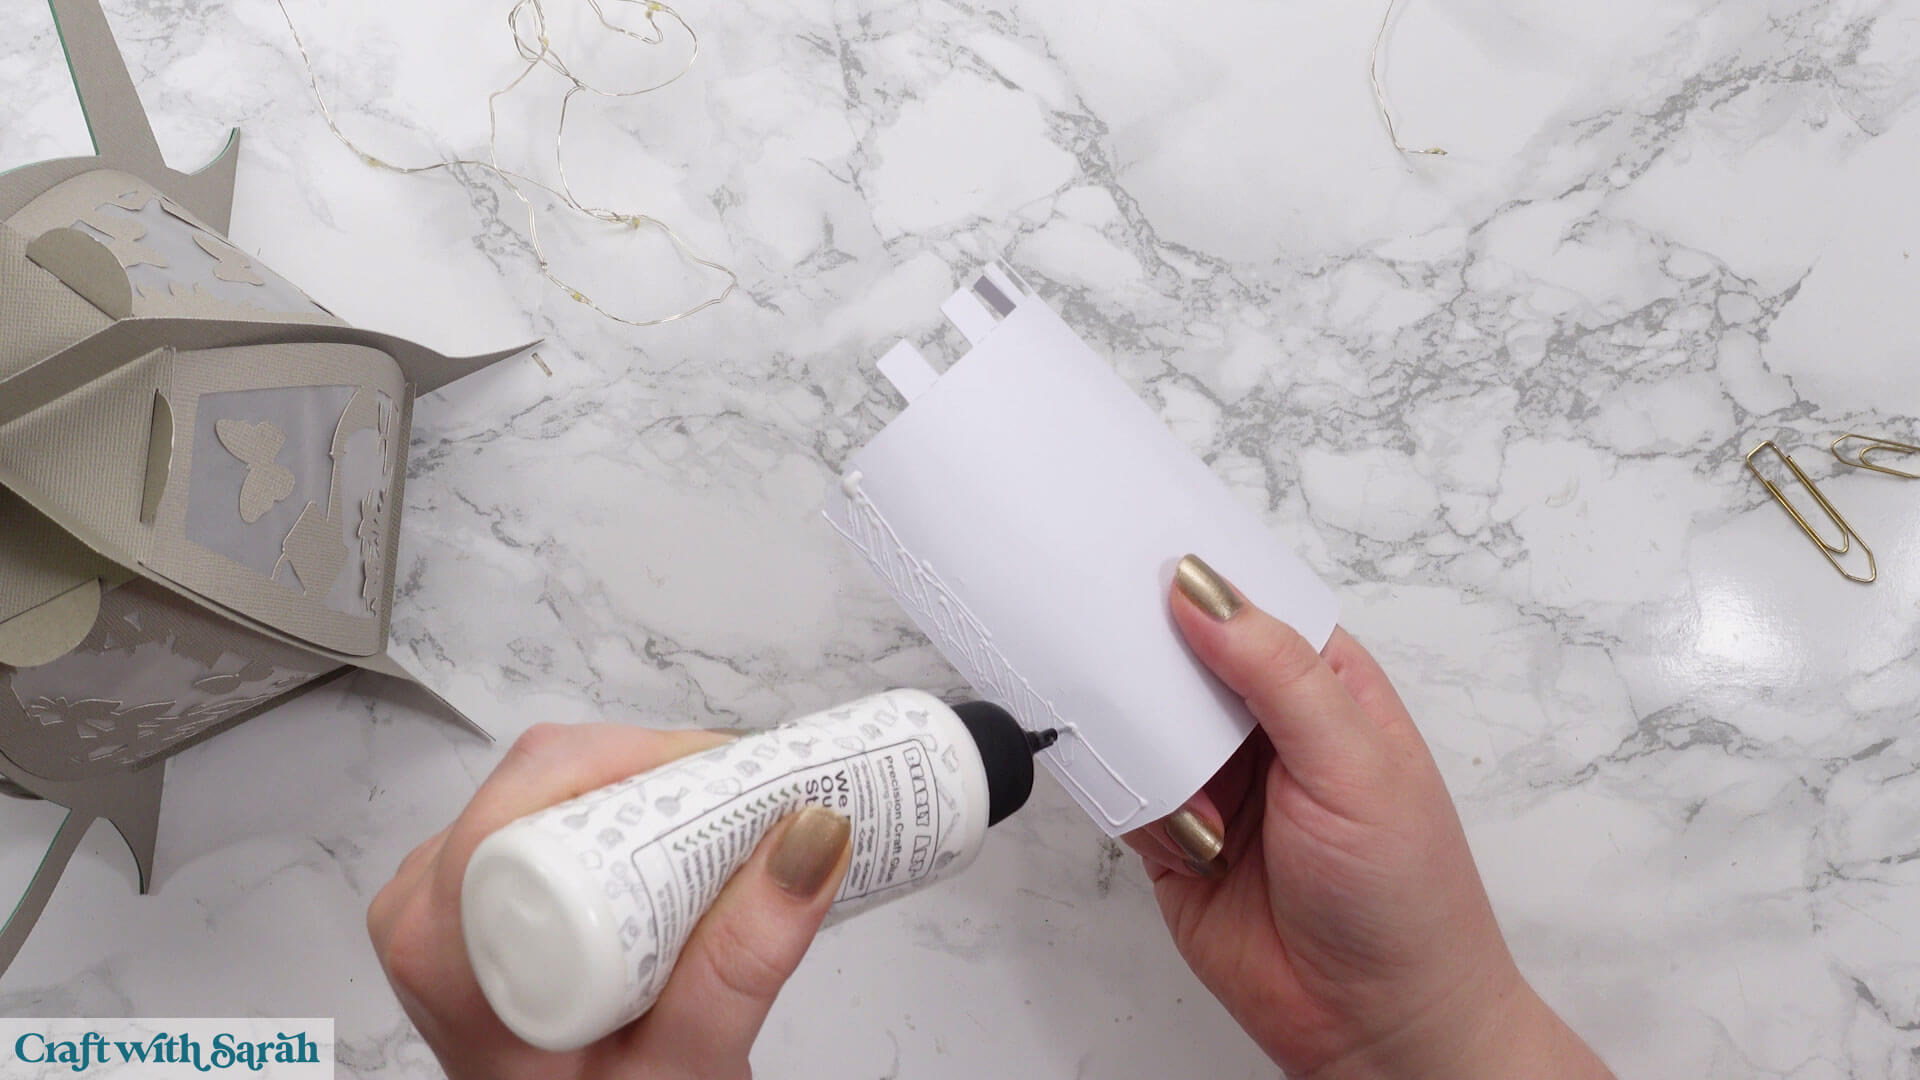
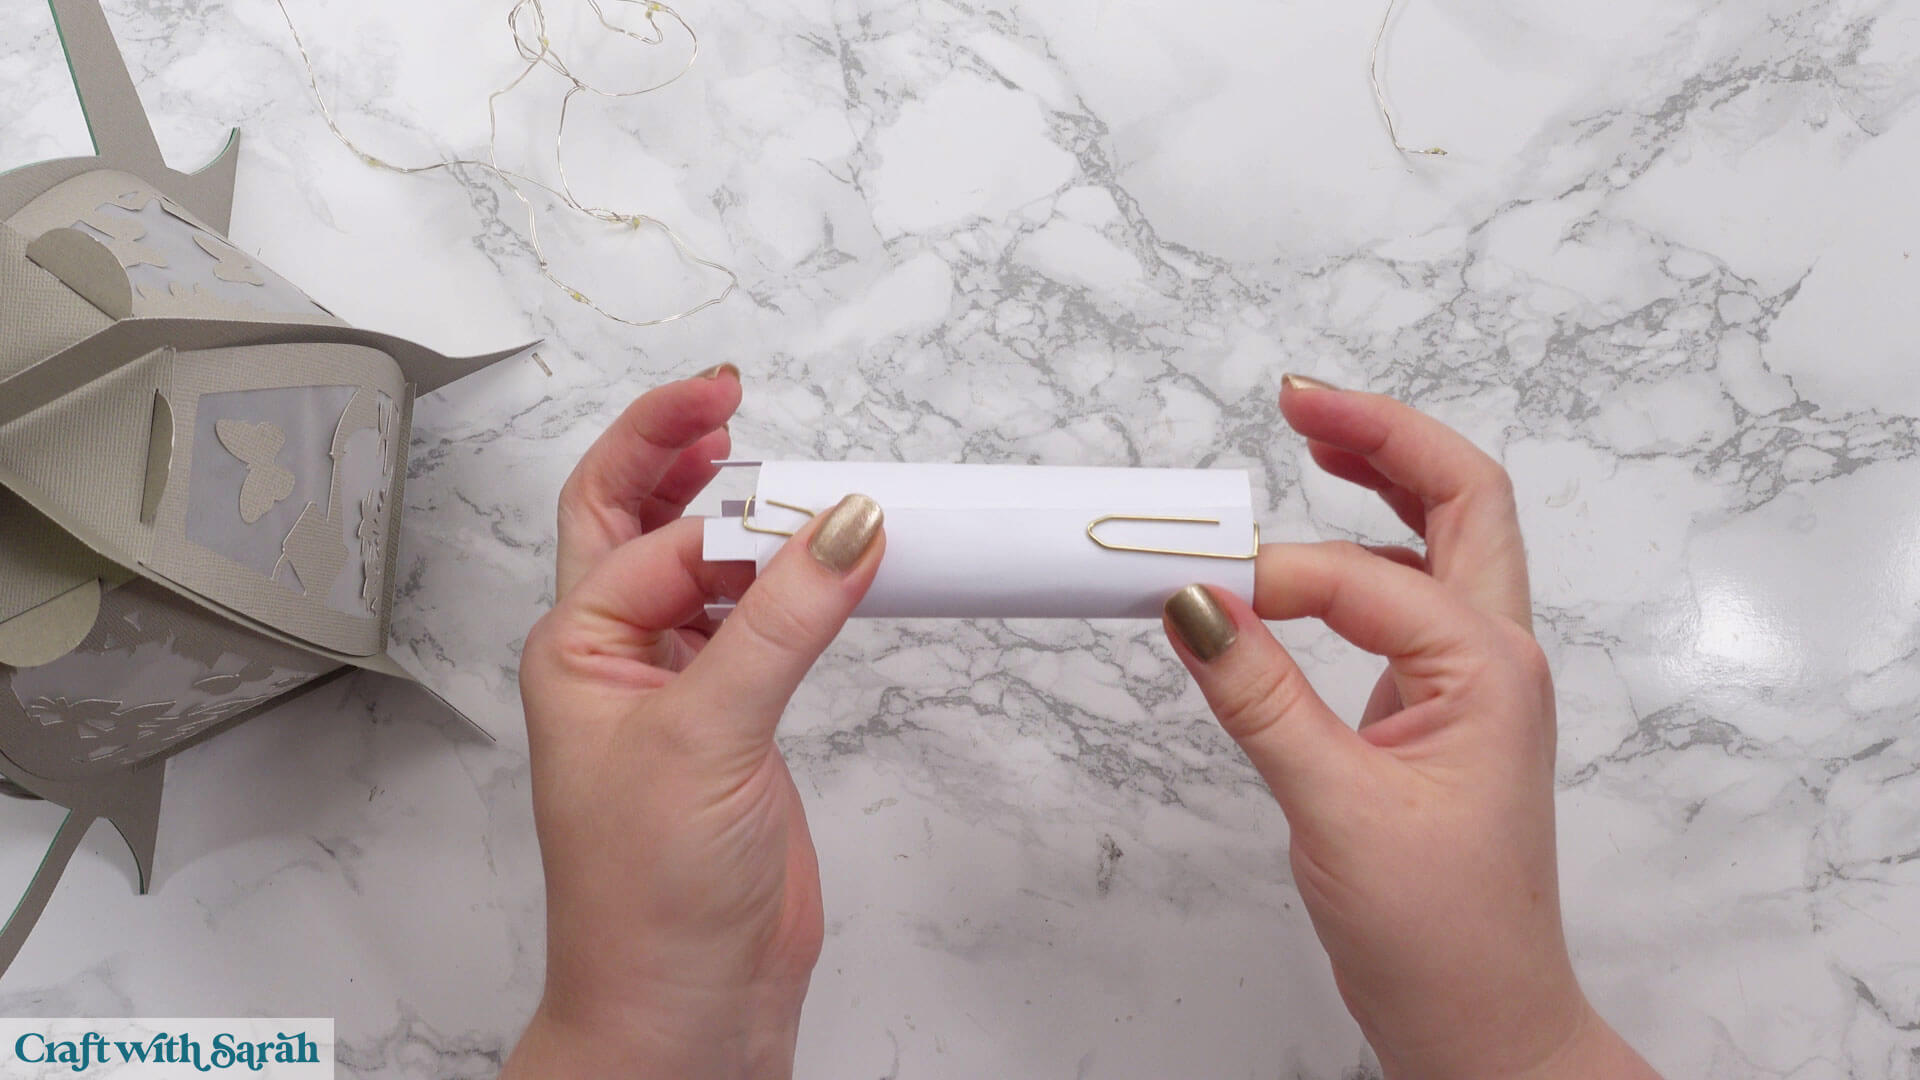
Roll into a tube and hold until the glue sticks, or use paperclips/bulldog clips to hold in place.
Once the glue is completely dry, fold out the four tabs along the bottom so that the tube can stand up.
Take your fairy lights and wrap them around the cylinder, using sticky tape to secure them.
You can use two sets of fairy lights to give a better effect.
Don’t wrap the lights too tightly, in case they get warm. They should be a little bit loose around the tube.
Slide the tube into the lantern so that the tabs sit along the bottom of the lantern.
It will hold itself in place – there’s no need to stick/glue it inside.
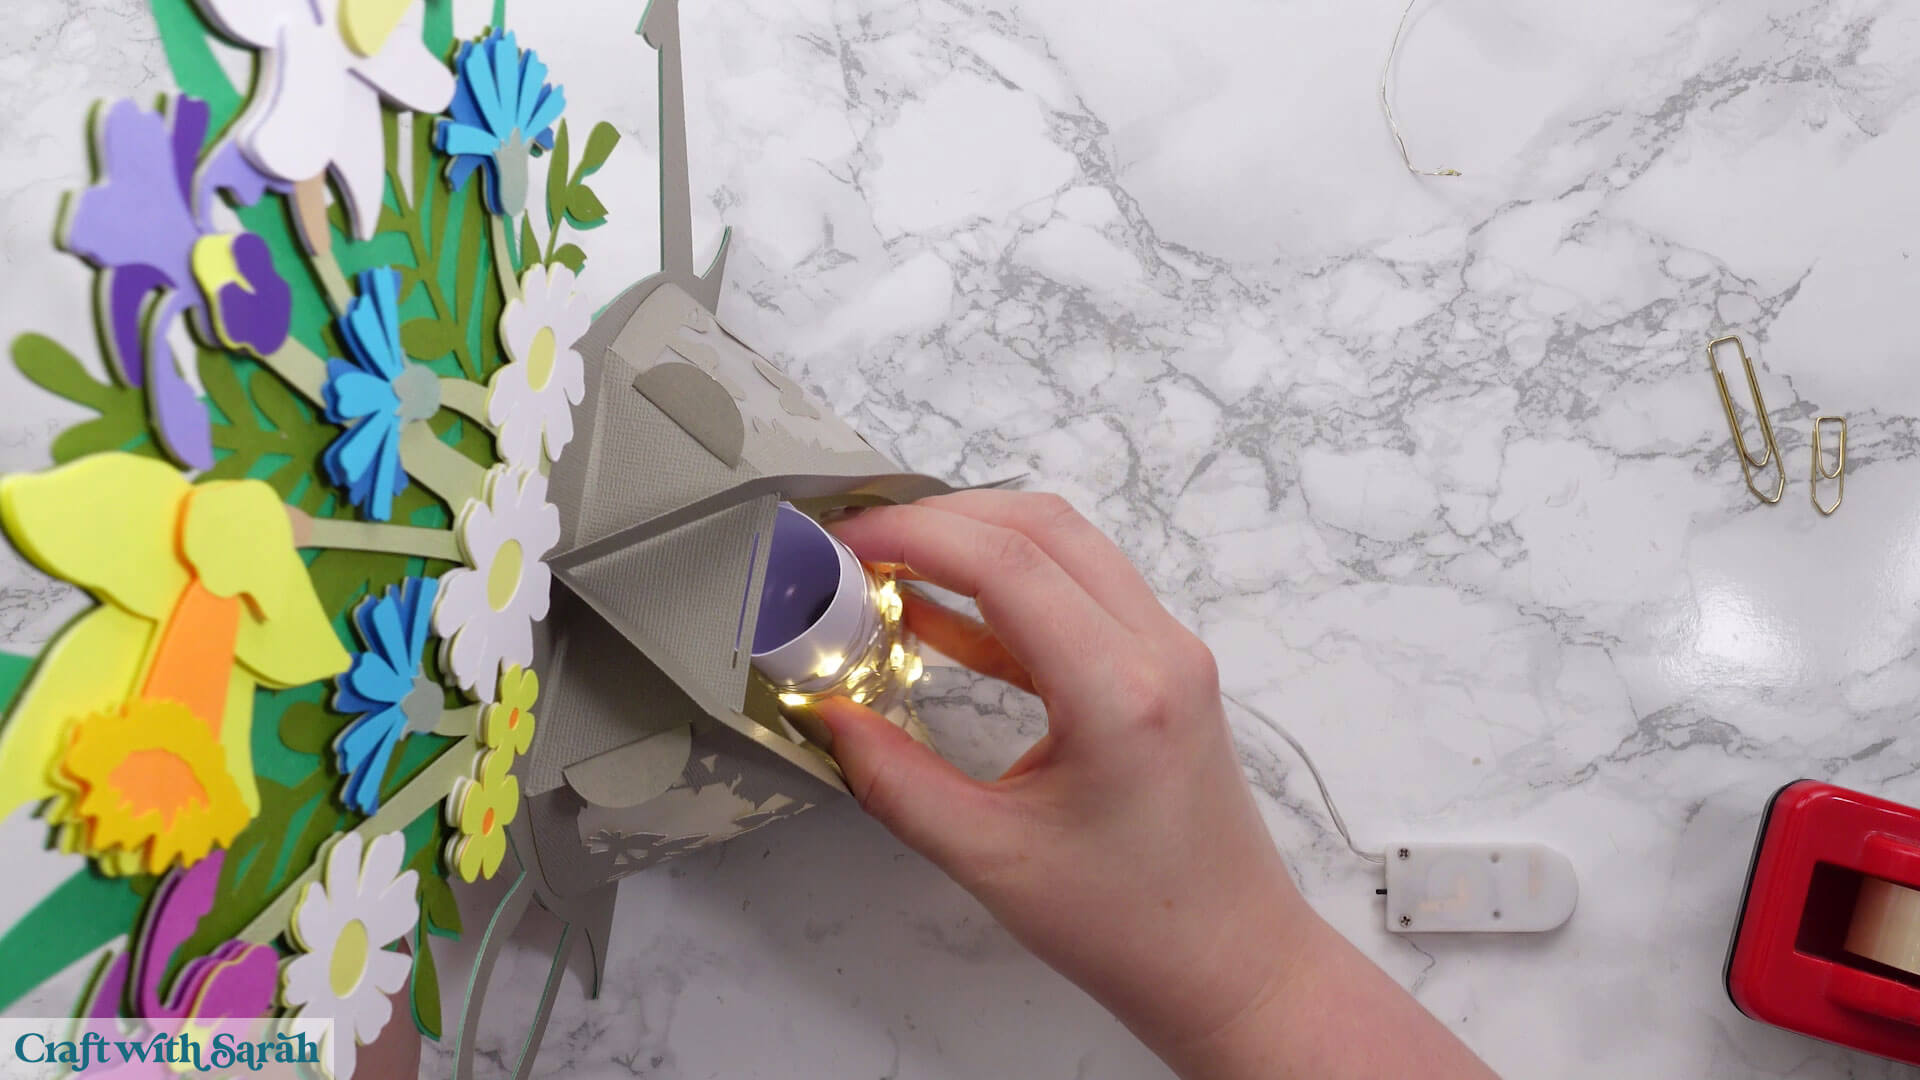
Slot the final side panel into the lantern, and you’re all finished!
100+ additional lantern designs
If you like this watering can lantern, check out these other 3D papercraft luminary designs for over 100 more projects.
Additional watering can lanterns include: tulips, summer flowers, poppies and pansies.
There is also a wide range of animals, dog breeds, cat breeds and additional designs.
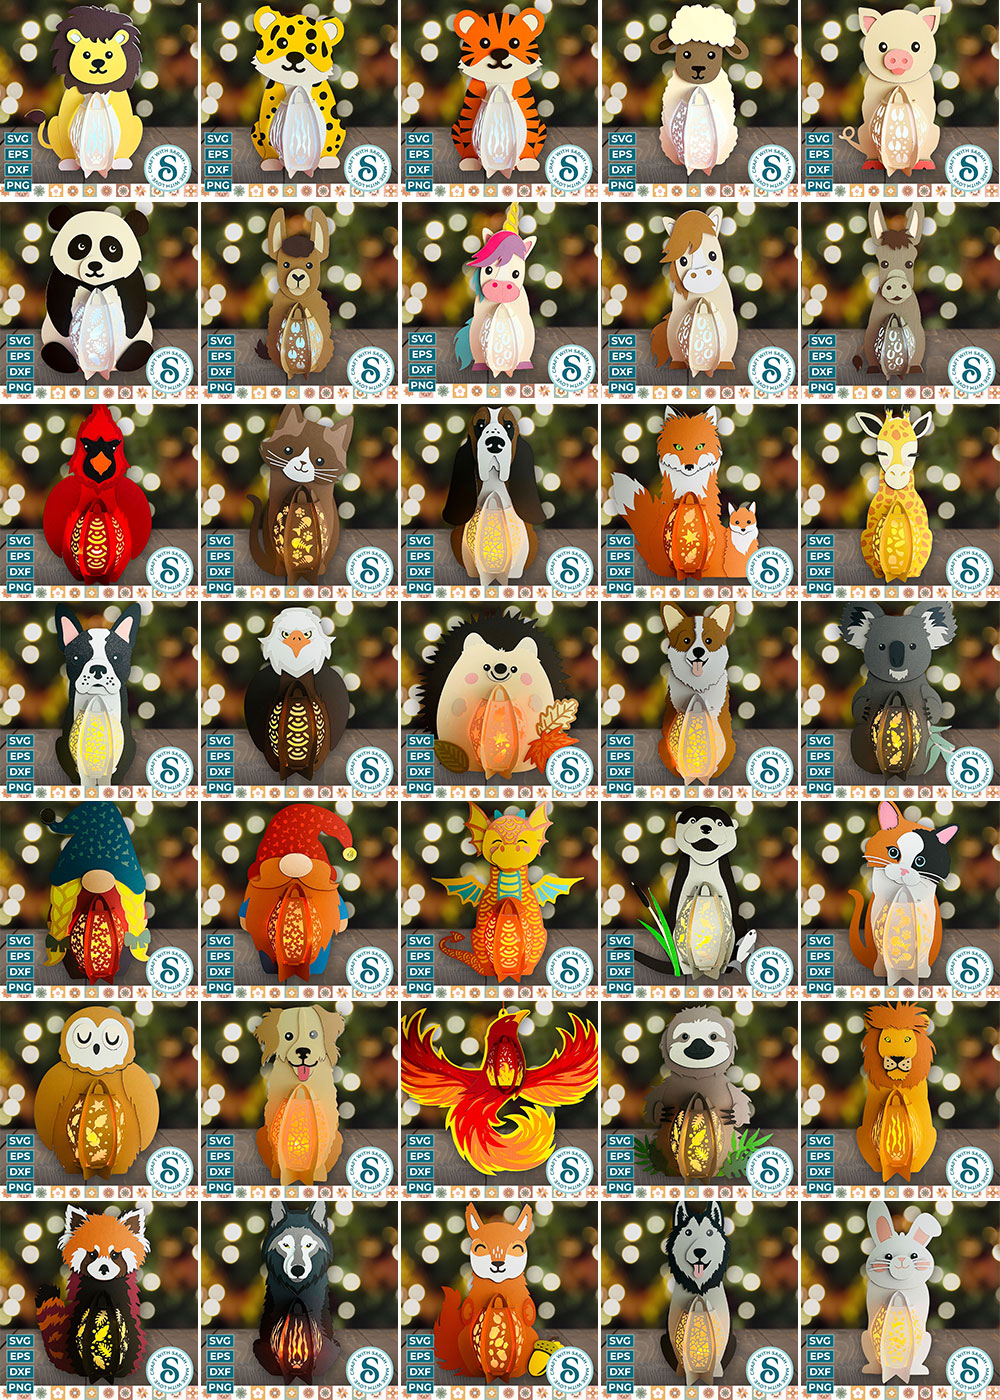
The lanterns shown above are available to purchase for $5 USD each. If there are several projects you’re interested in, you could save money by joining the Craft with Sarah membership.
For just $20, you can download up to TEN lanterns (or other types of cut file such as layered SVGs or greetings cards) every month!
That’s 10 lanterns… for the price of 4!!
![]()
- The most cost-effective way to enjoy Craft with Sarah cut files
- 20 design credits per month to download your favorite cut files (or 25 per month with the yearly membership)
- That means you can download up to $75-worth of files each month... for just a $20 membership fee!
- Unused credits roll over to the next month - you don't lose them!
- Get 2 months FREE if you choose the yearly payment option
- Enjoy exclusive member-only video tutorials, with a new Class added each month
- Software tutorials in Classes are recorded three times for greater machine compatibility. Watch each Class in Cricut Design Space, Silhouette Studio and Brother CanvasWorkspace (for ScanNCut machines)
- Enter monthly member-only Challenges for your chance to win awesome prizes
- Submit two design suggestions/requests per month
- Remove the "website ads" for a clutter-free browsing experience
- Save $30 on all Craft Countdown events
You can cancel your membership at any time. After cancellation, any unused Design Credits remain on your account so you can still use them.
Design your OWN watering can lanterns
One of the fabulous benefits of the Craft with Sarah membership is that you get access to a brand NEW papercraft Class every month – plus instant access to all existing Classes.
If you’ve been admiring our premade watering can lanterns such as this spring flowers design, but wishing for different blooms in the top, this Class is what you need!
Here’s what my custom watering can looks like, after the videos in this Class. I love the bright colours and the fun, retro theme.

Transform our templates with your own flowers, or choose from the wide range of flowers, leaves and decorations included in the Class.
I’ll show you how to position your flowers for the best effect, how to add stems, how to build up leaves and decorations and then – most crucially – how to join all the layers together so that your lantern will cut perfectly.
The lessons for this Class have been recorded in three different software programs: Design Space, for if you have a Cricut machine, Silhouette Studio, for if you have a Silhouette machine, and CanvasWorkSpace, for if you have a Brother ScanNCut machine.
Happy crafting,
Sarah x

