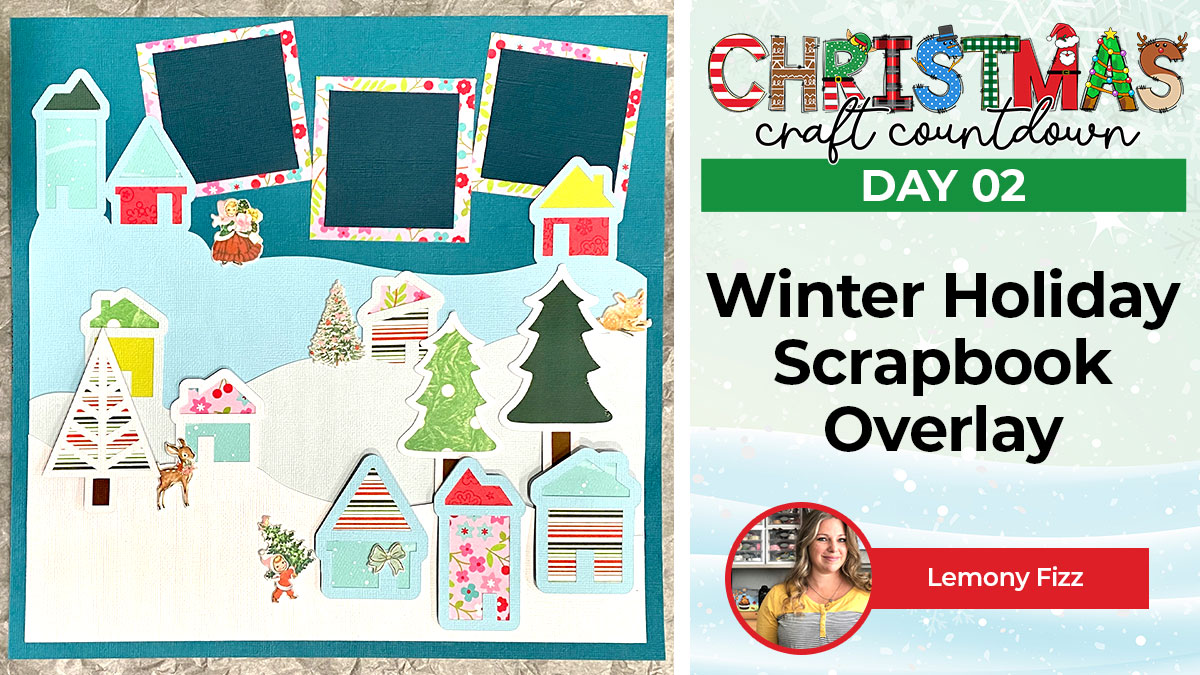
CCC 2023 Day 02 ☃️ Winter Holiday Scrapbook Overlay
After a Christmas scrapbook page? Here’s a beautiful design to help you use up your patterned paper scraps!
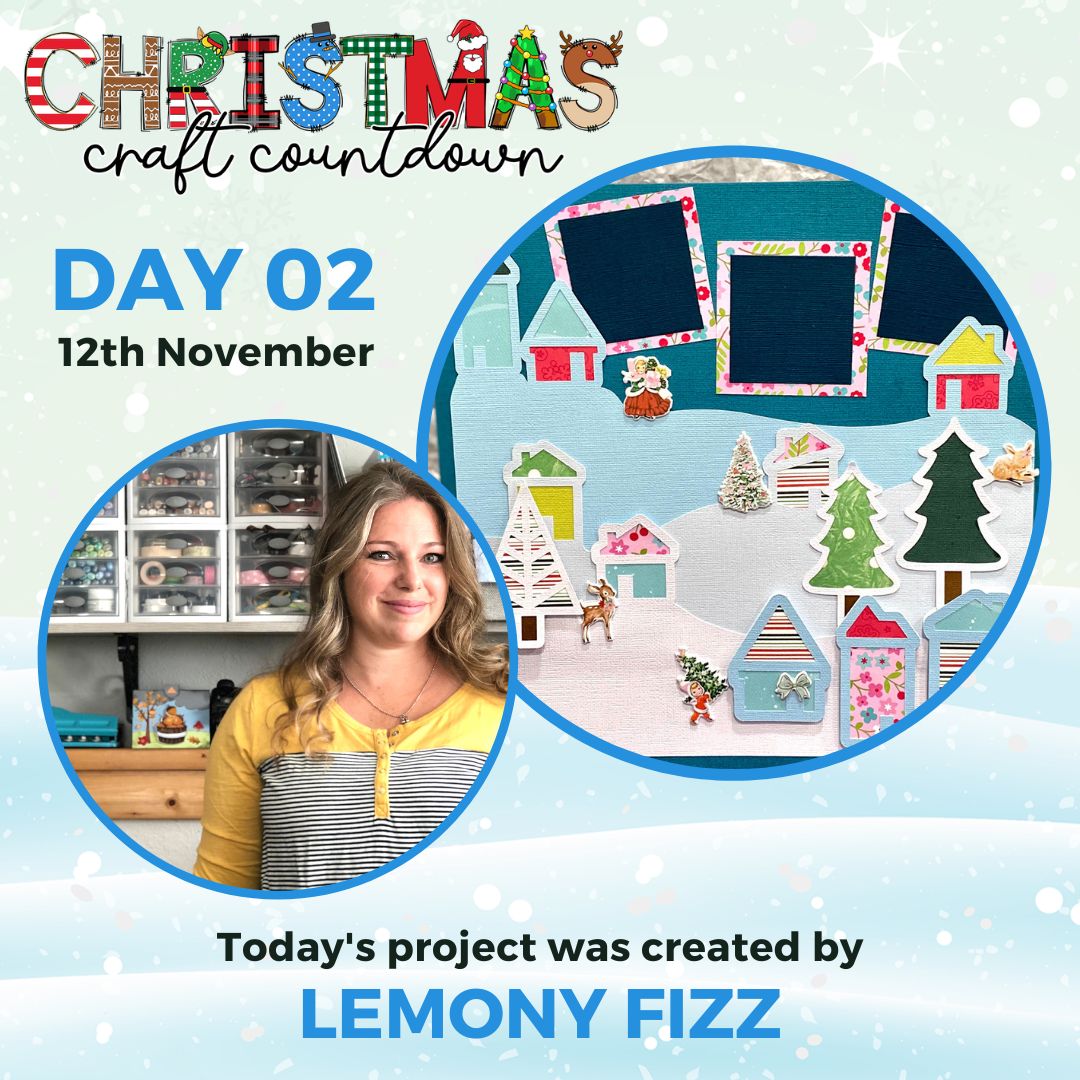
It’s Day 2 of the Christmas Craft Countdown and Rhoda from Lemony Fizz is sharing this winter scrapbook page with us.
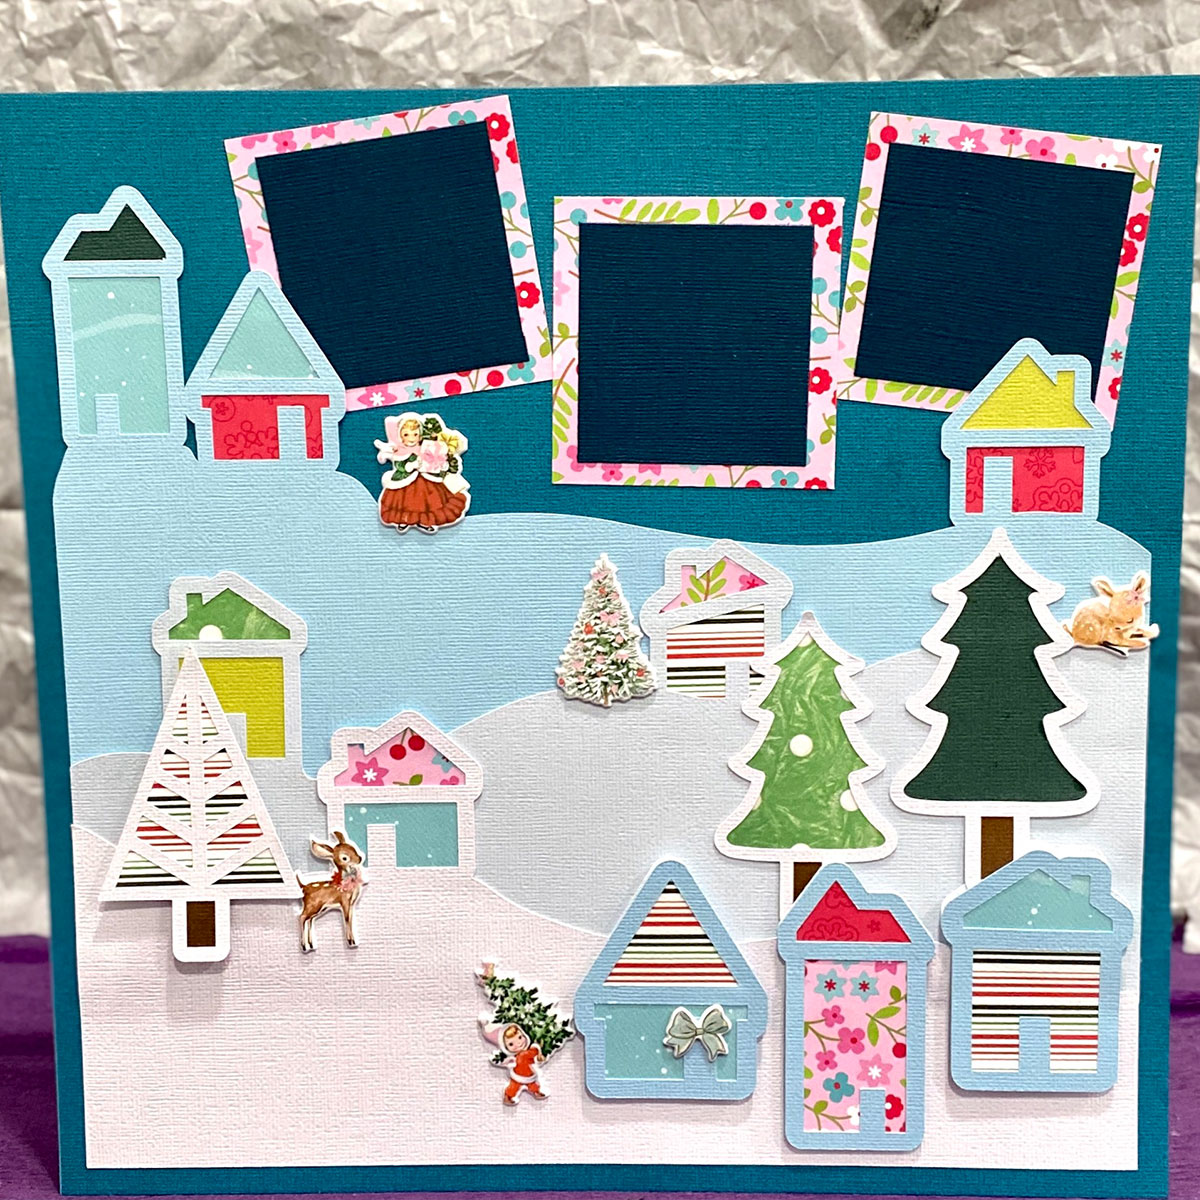
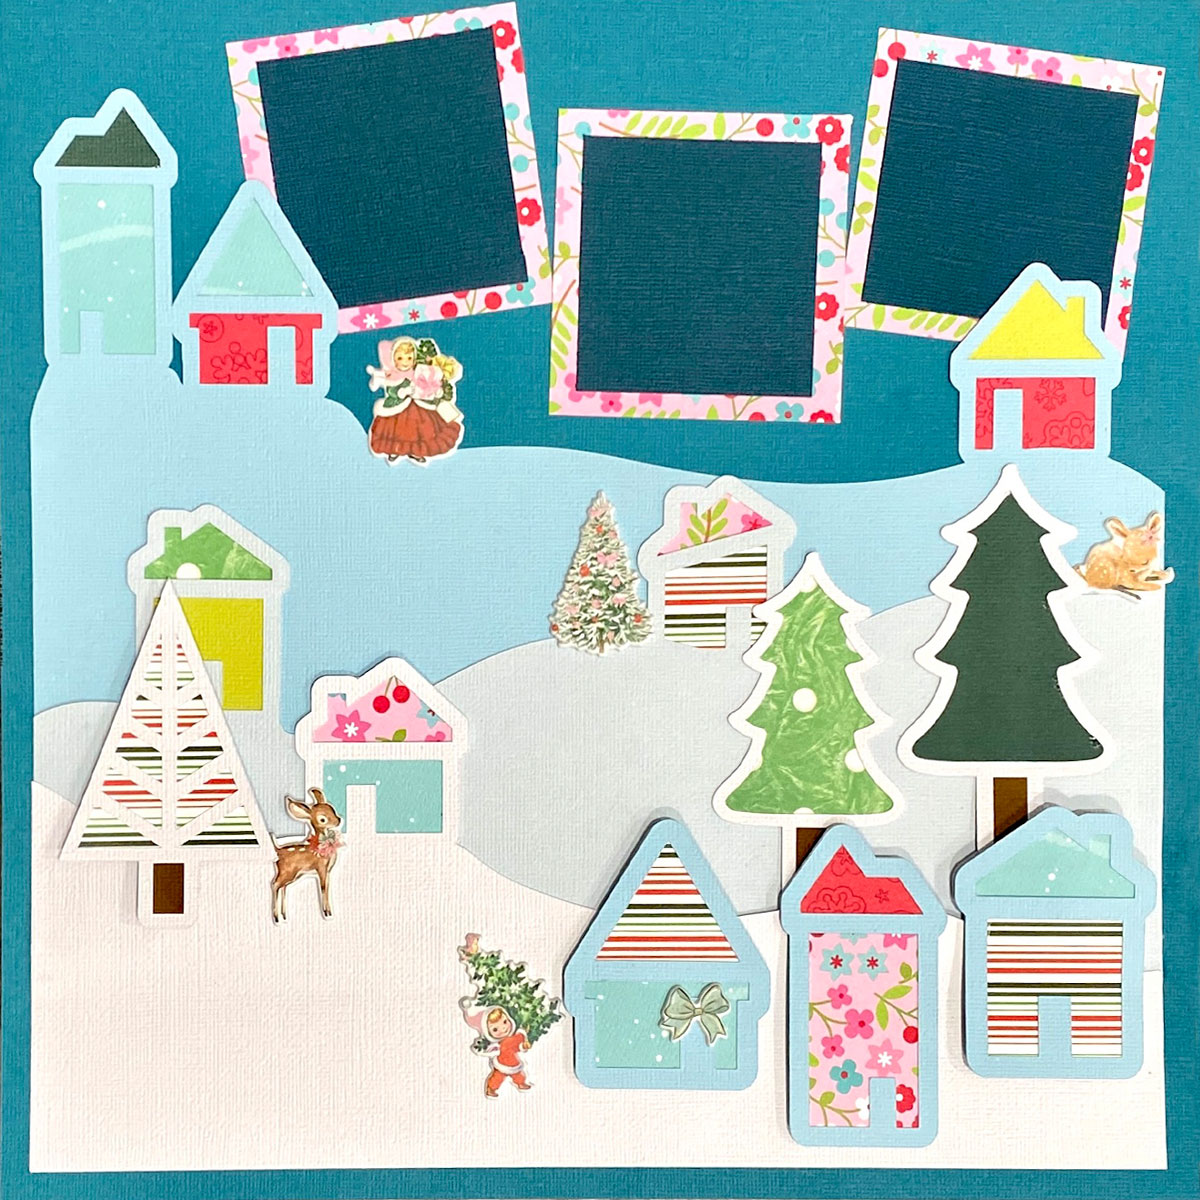
She uses a combination of different patterned paper to achieve a beautiful scrapbook page where you can place photos of your favourite Christmas memories.
The layers making up the hills on this scrapbook page add dimension along with the houses which really pop!
This Project was part of the Christmas Craft Countdown 2023
Materials supply list
Here is a list of the materials that Rhoda used to make this project.
Please note that some of the links included in this article are affiliate links, which means that if you click through and make a purchase I may receive a commission (at no additional cost to you). You can read my full disclosure at the bottom of the page.
- Cricut machine
- Light blue Cricut cutting mat
- Coloured card or scrapbook paper
- A 12×12 inch square of card to stick the design to
- Glue
- 3D foam pads
- Scissors
- Premade embellishments/stickers etc. that match the theme of the page
This project is suitable for the following types of Cricut machine: Explore Air 2, Explore Air 3, Maker and Maker 3.
Video tutorial
I love all the different patterns which come together to make such a beautiful page.
Watch the video below to see how to make this scrapbook page.
If you prefer to read rather than watch, keep scrolling!
This project was created by Lemony Fizz
Rhoda has always loved to create things from paper. Colors make her world go round. With a minor in art education and a passion for sharing creative ideas with others, Rhoda designs SVG files for cards, scrapbook layouts, paper boxes, and mini albums to share with other paper lovers.
Written tutorial (with photos!)
Here’s how to make your very own winter scrapbook layout using a Cricut machine!
Step 1) Download the cutting files & unzip the downloaded folder
Download the files using the box below.
Before you upload the SVG files to Design Space, you need to unzip the download folder that they come in.
Step 2) Upload the SVG file into Design Space
Open up Cricut Design Space and start a new Project.
Click “Upload” and then find your unzipped version of the downloaded files for this project.

Find the file in the “SVG” folder called holiday-overlay_full.svg and upload it.
This is what it looks like:
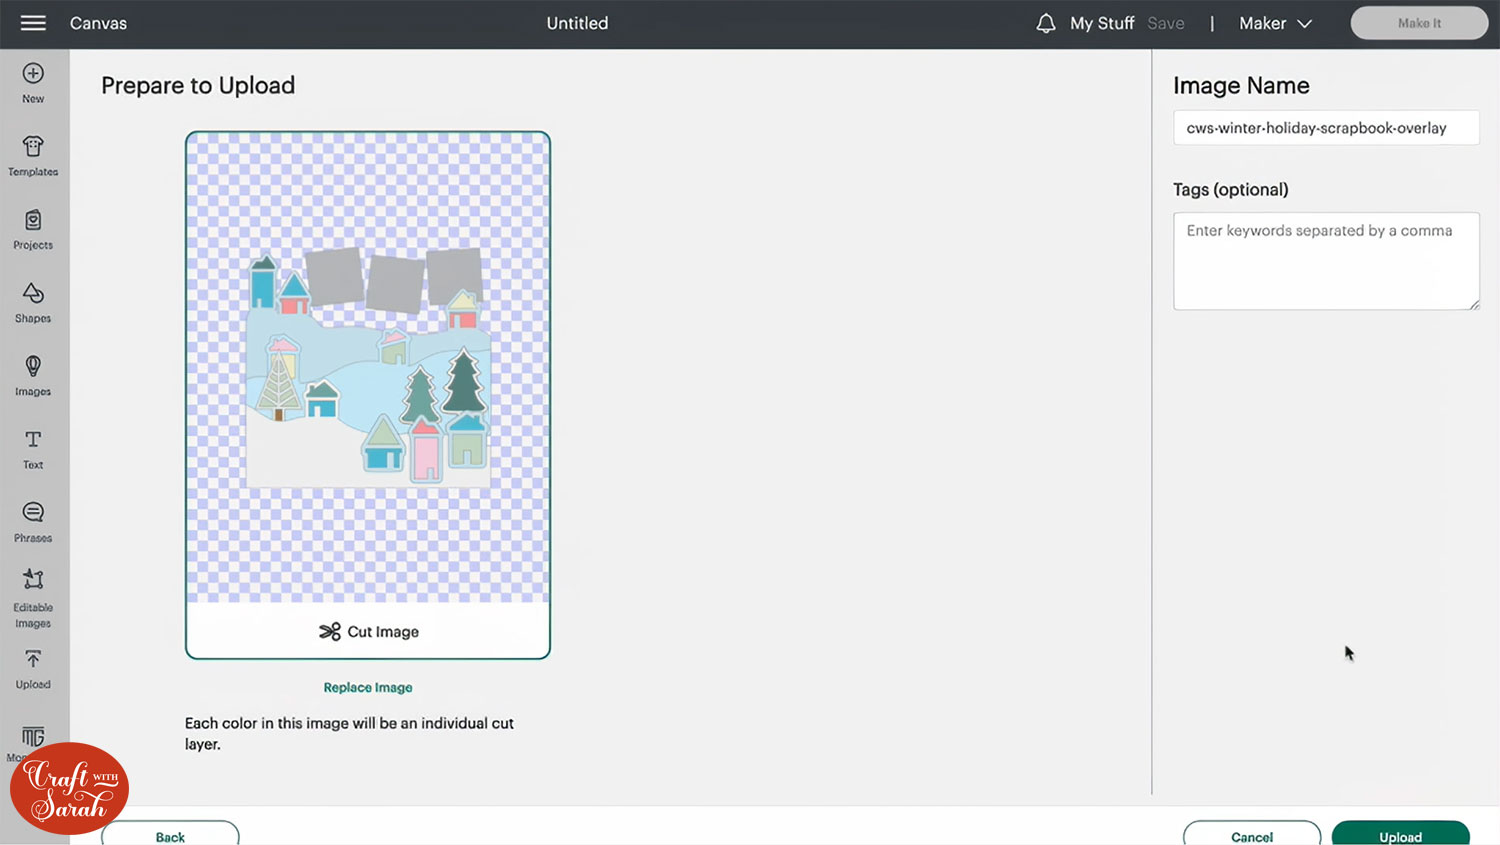
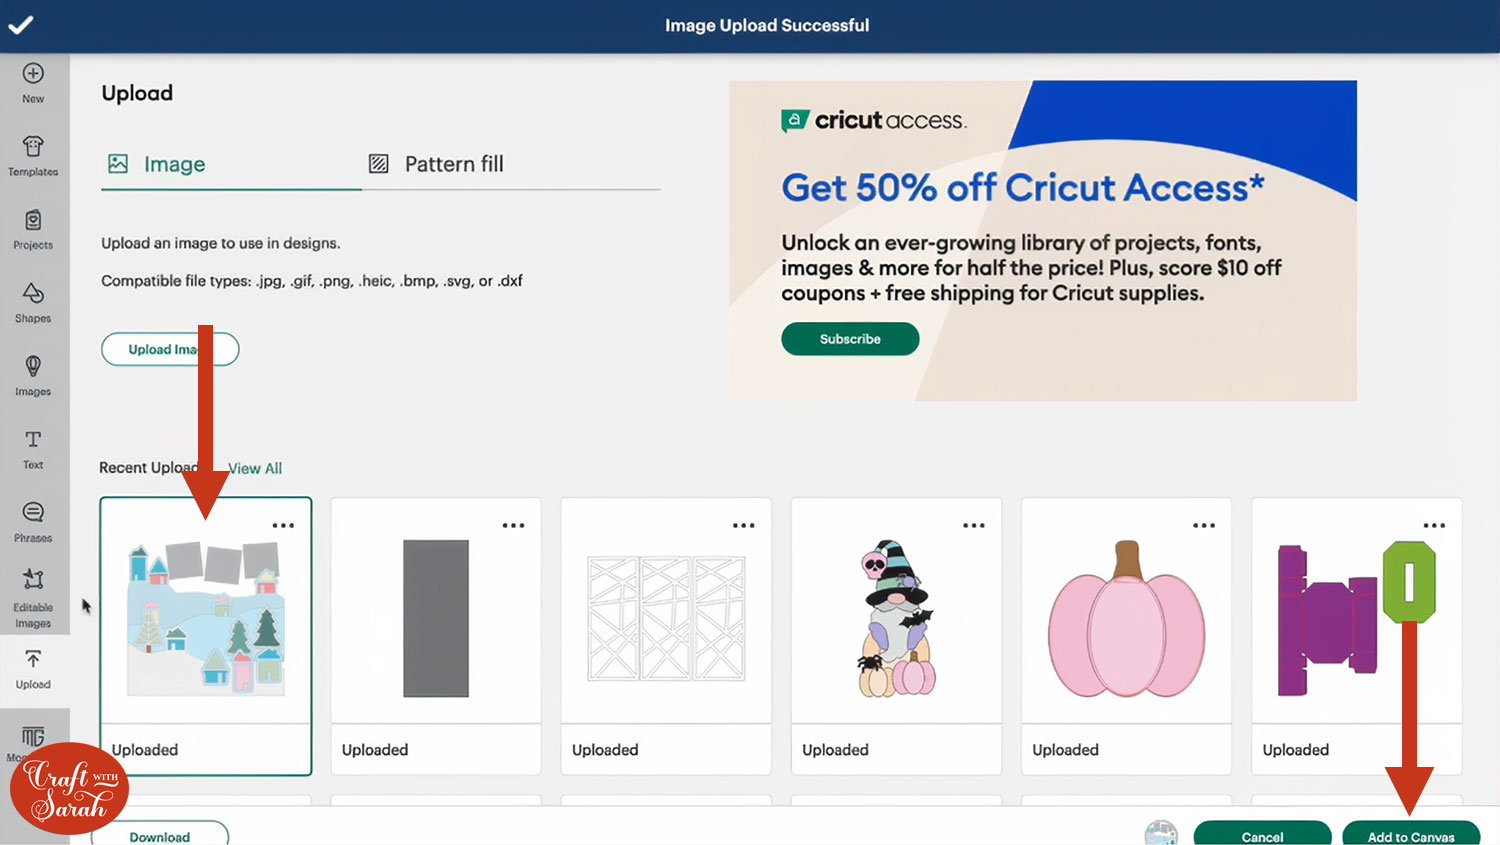
After uploading, the design will show in your “Recently Uploaded Images”.
Click on it and then press “Add to Canvas” to put it onto your Project.
Step 3) Check and change the colours in Design Space & cut the design
Although there is not anything that you need to do in Design Space in terms of formatting, it is important that you change the colours to match the patterned paper you have in mind for the different house and tree pieces.
You may not be able to get the colours to match your paper exactly but it will just help you to remember which patterned paper is for which house.
Click Colour Sync in the layers panel to help you see all the colours that you will need.

You could use this scrapbook page for different seasons, for example, If you wanted to do a fall scene you could use reds and browns.
Once you are happy with all the colours, click Make It and follow the on screen instructions to get everything cut out.
Step 4) Lay out the scrapbook page pieces
Once everything is cut you will find that you have lots of different pieces which you will need to match up with the corresponding outlines.
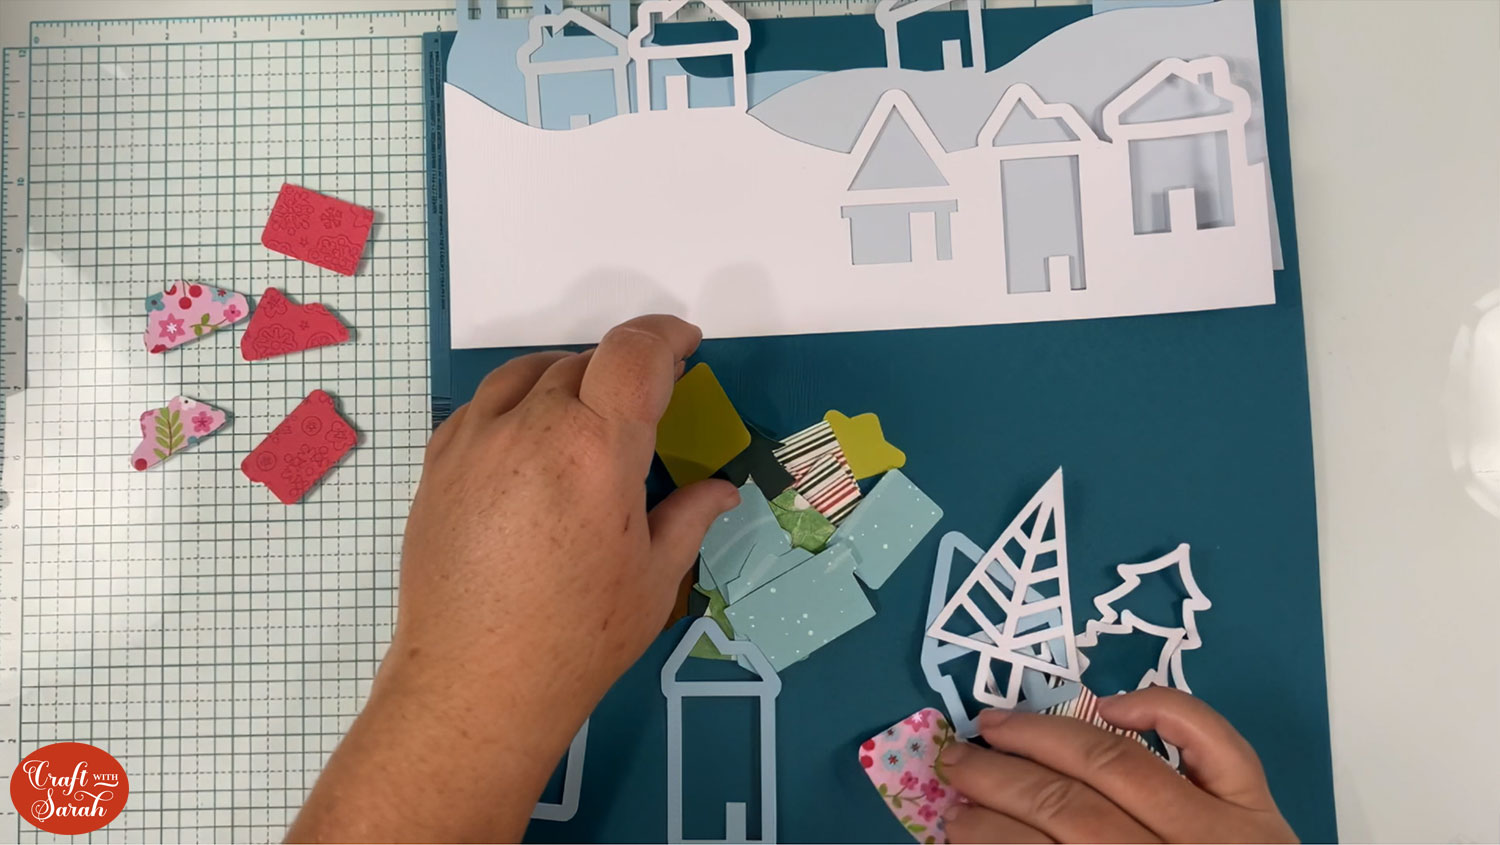
As you match up the different pieces, set them aside so that they are easy to find and place onto your page when you get to that point.
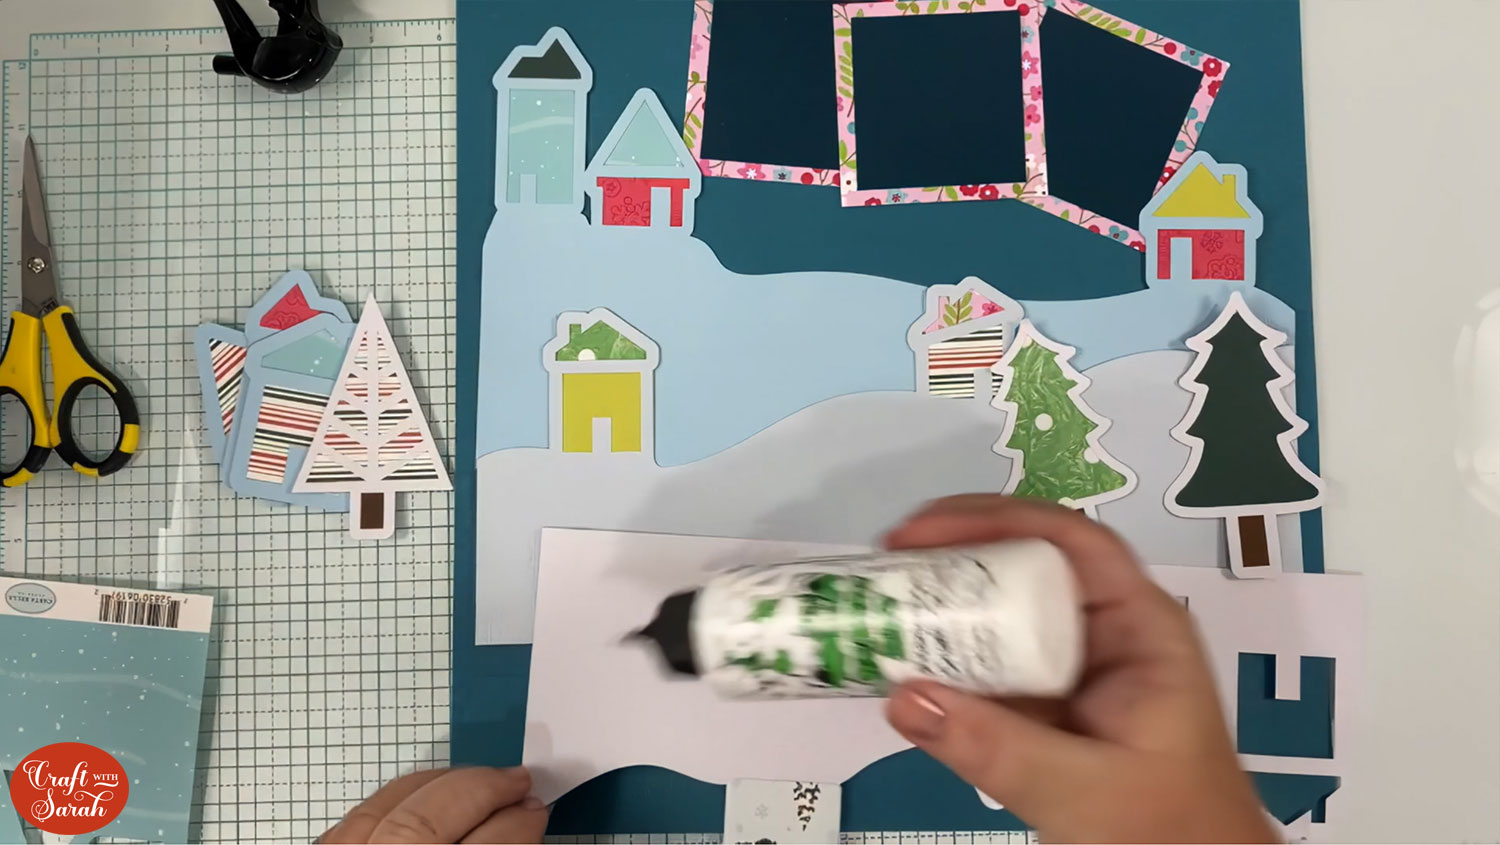
With each piece, you want to take the outline, place it face down and add a layer of glue.
You want your glue to be close to the inside edge so that it touches the patterned paper that goes underneath it.
Add the coloured card pieces to the back.
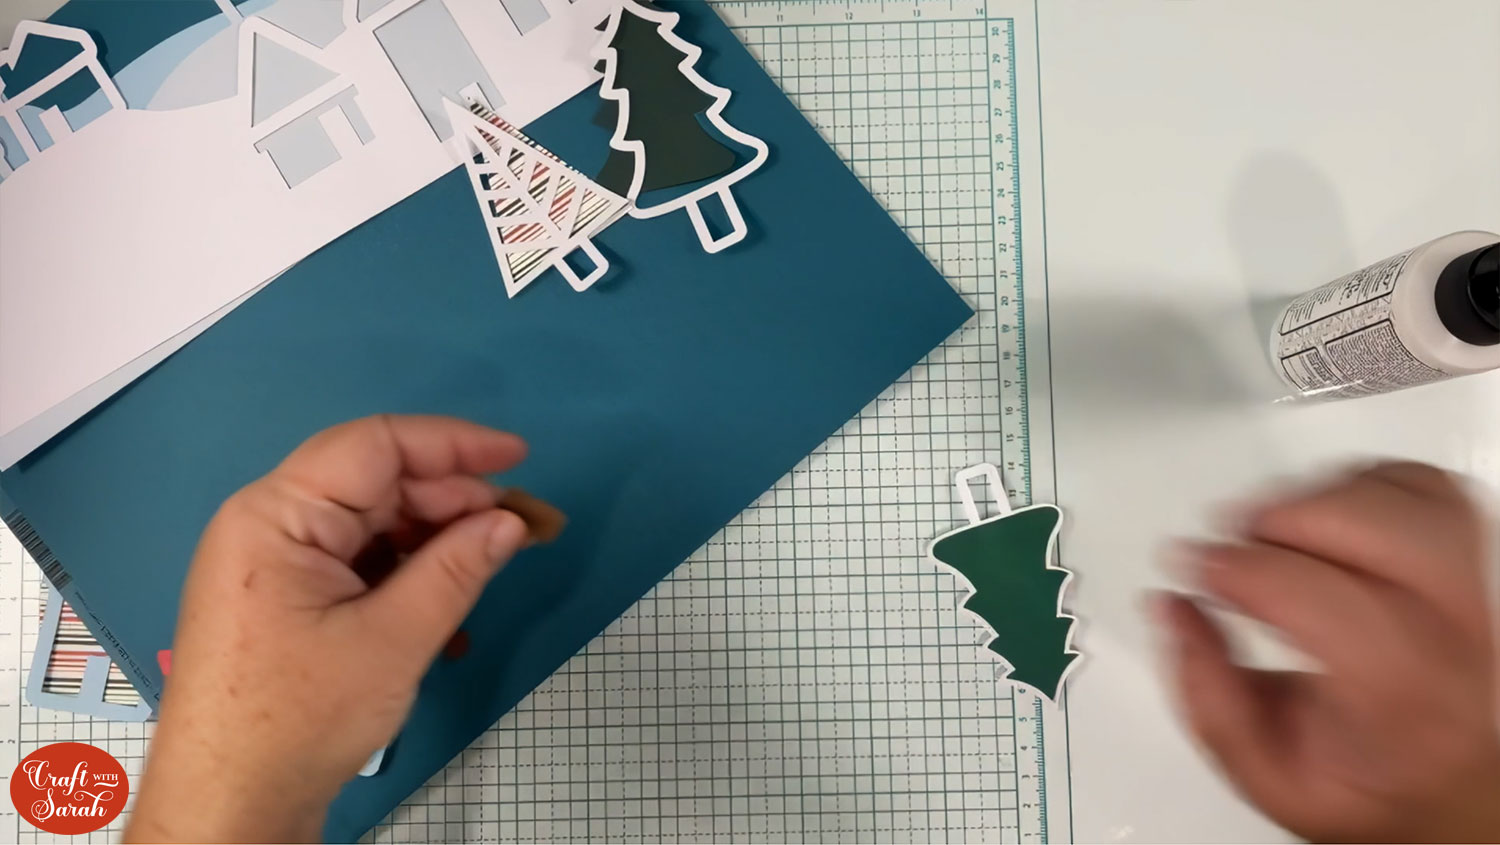
Some of them might have several colours, for example this tree:
Do this for each of your pieces and their outlines.
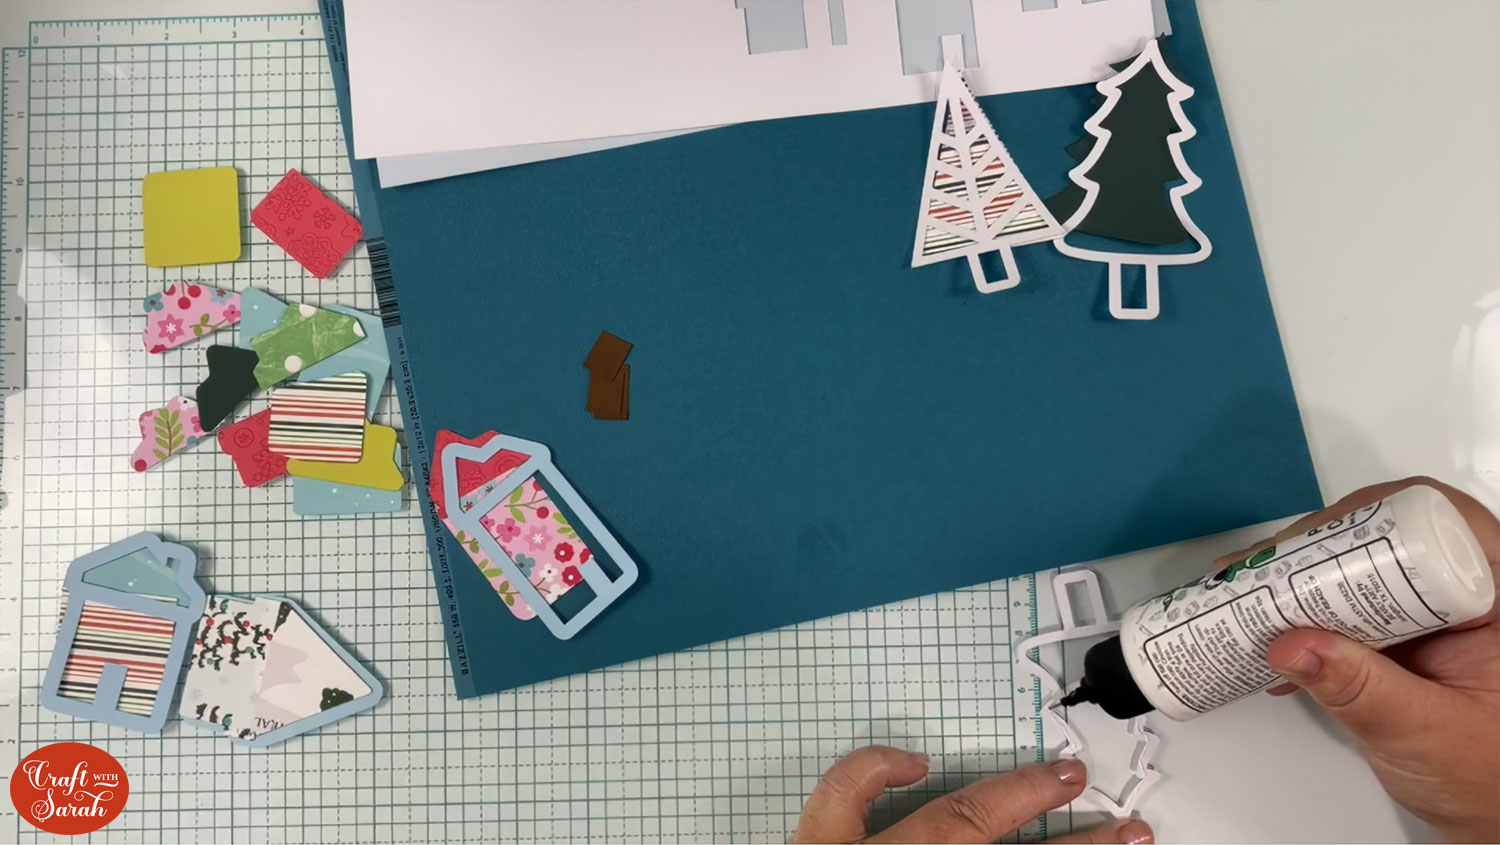
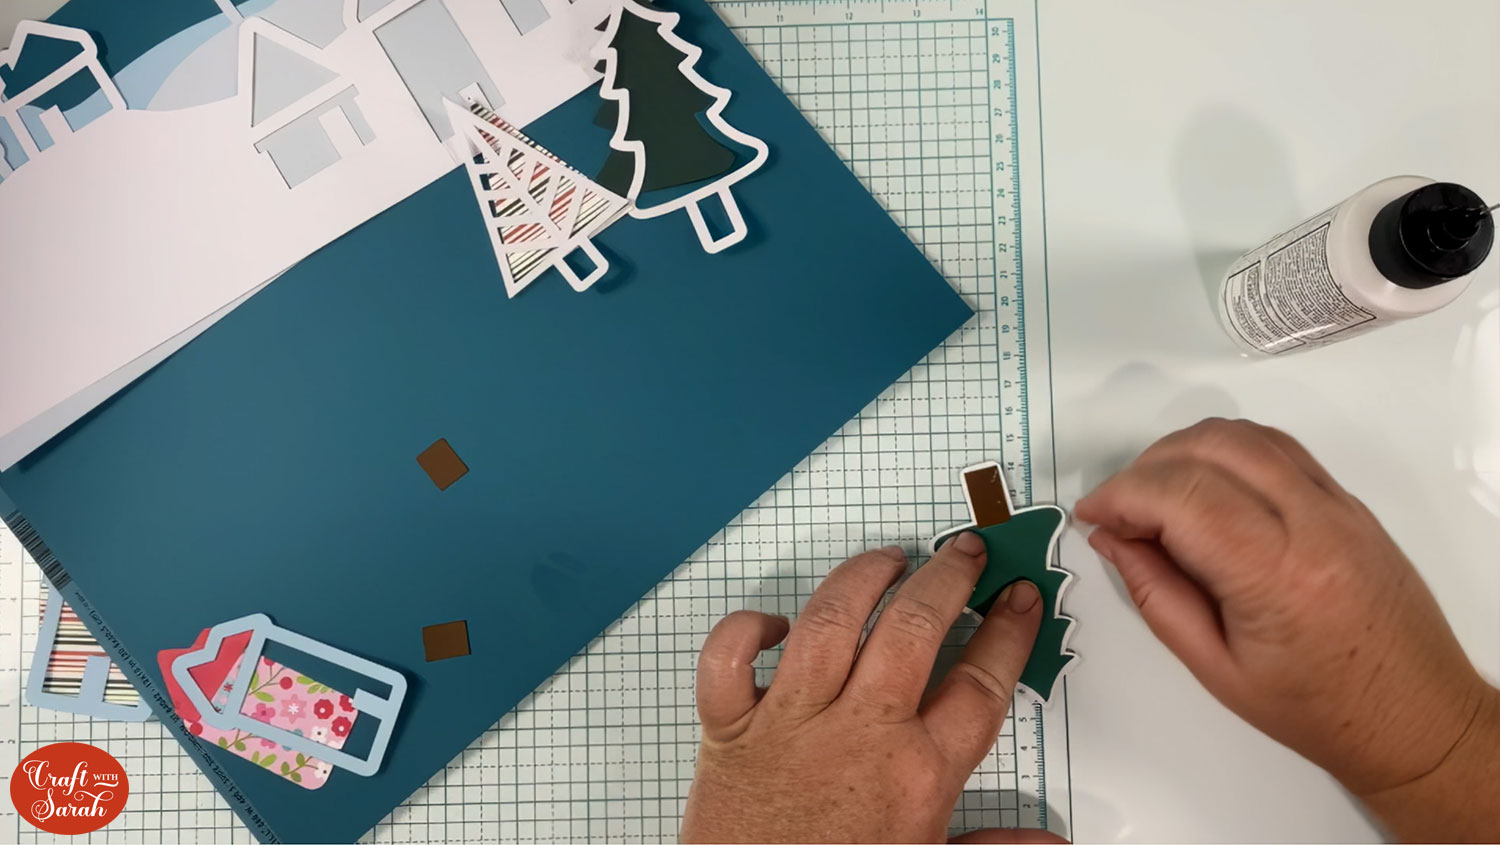
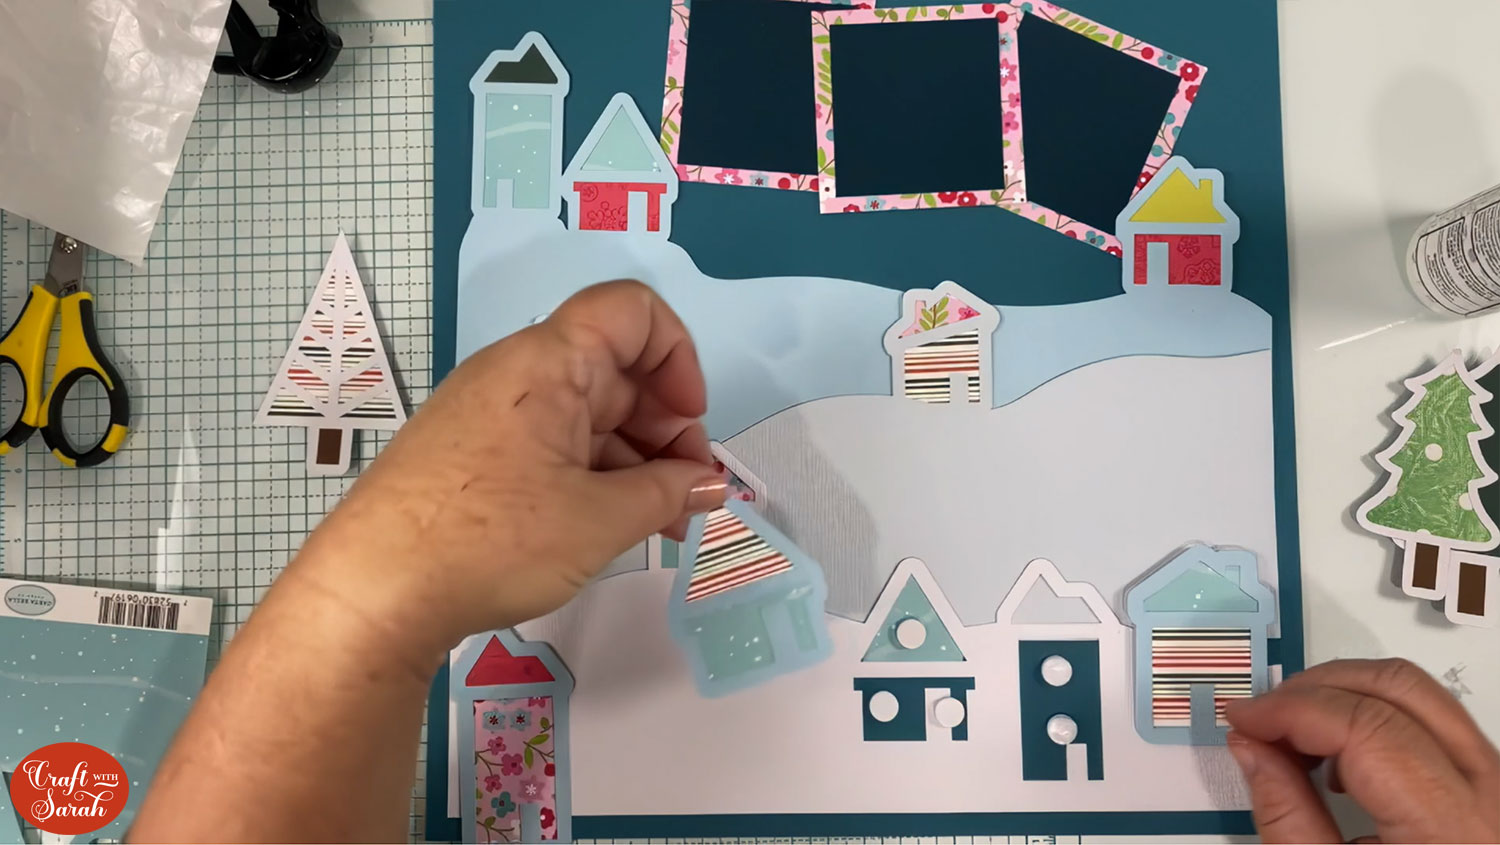
You can do this on the houses which are attached to the larger hill pieces but don’t stick the whole section onto your scrapbook page yet.

Continue adding in the colours for the houses on the top two levels of snow.

You won’t need to add patterned paper to the bottom snow layer as three of your houses will be stuck on top of the outlines with foam dots so that they pop.
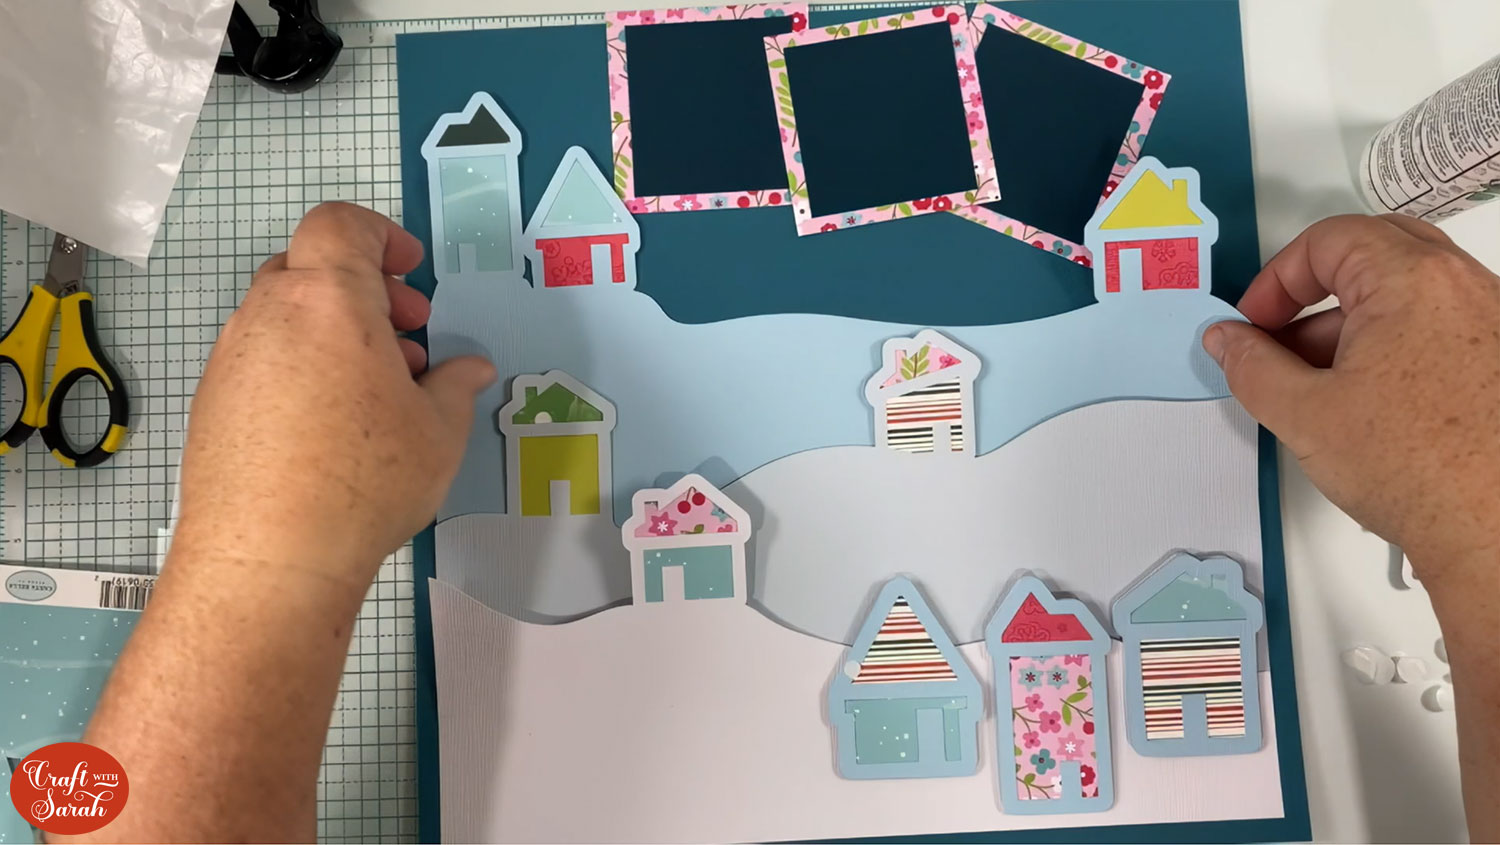
Line your 3 hill pieces so that the sides of all three of them line up. Your white snow layer will be on the bottom, then the grey/blue in the middle and the lighter blue on top.
Place your trees and other house pieces on to your 12×12 inch card where you would like them to go. Placing them on before glueing will help you decide how you would like things laid out.
The photo mounts will go at the top of your page.
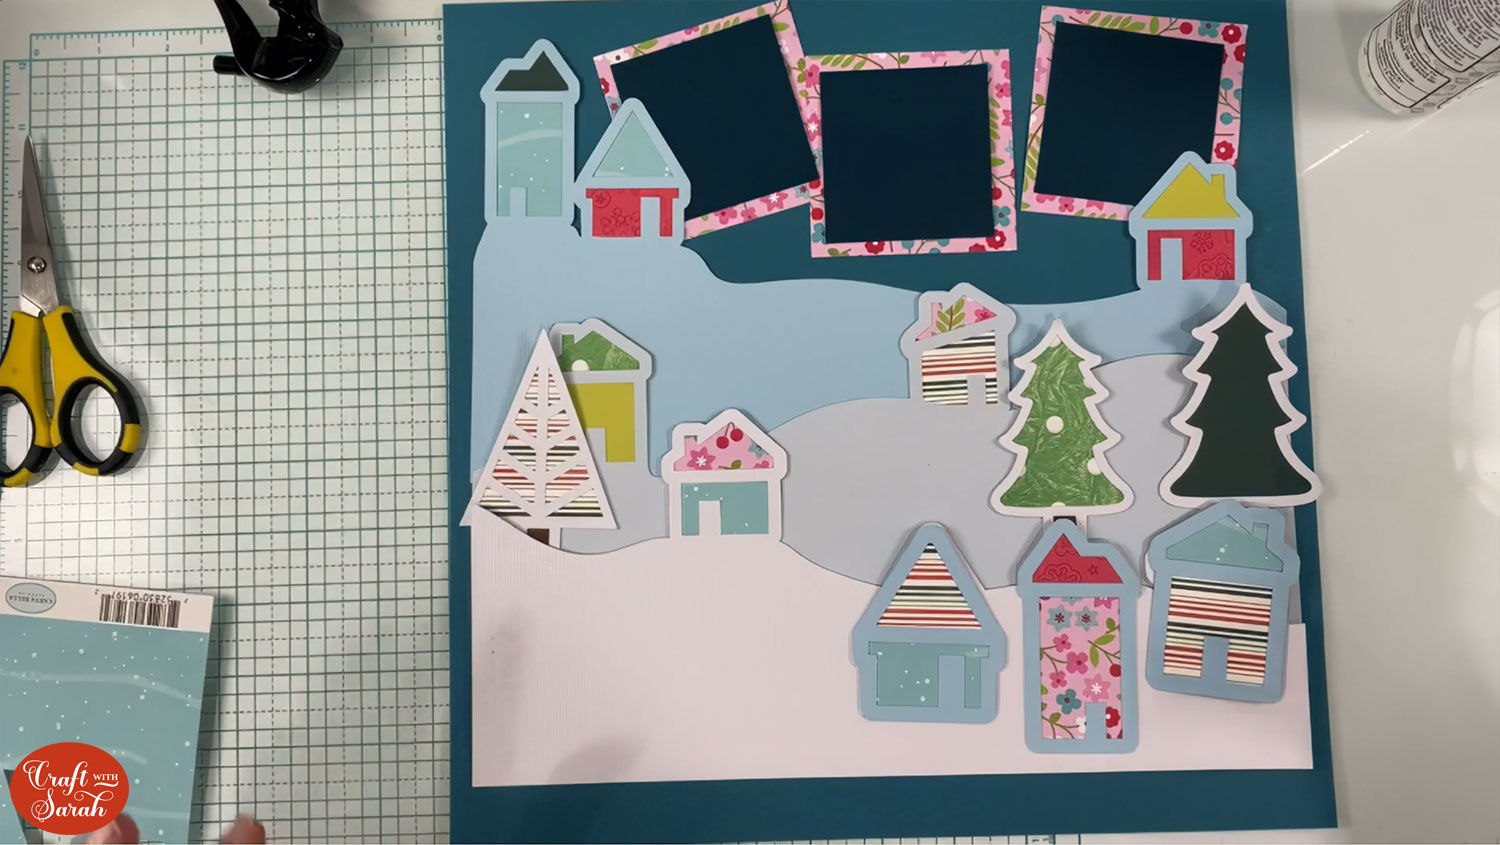
You may wish to choose your other embellishments at this stage too, if you are using any.
Step 5) Stick down the pieces to the scrapbook page
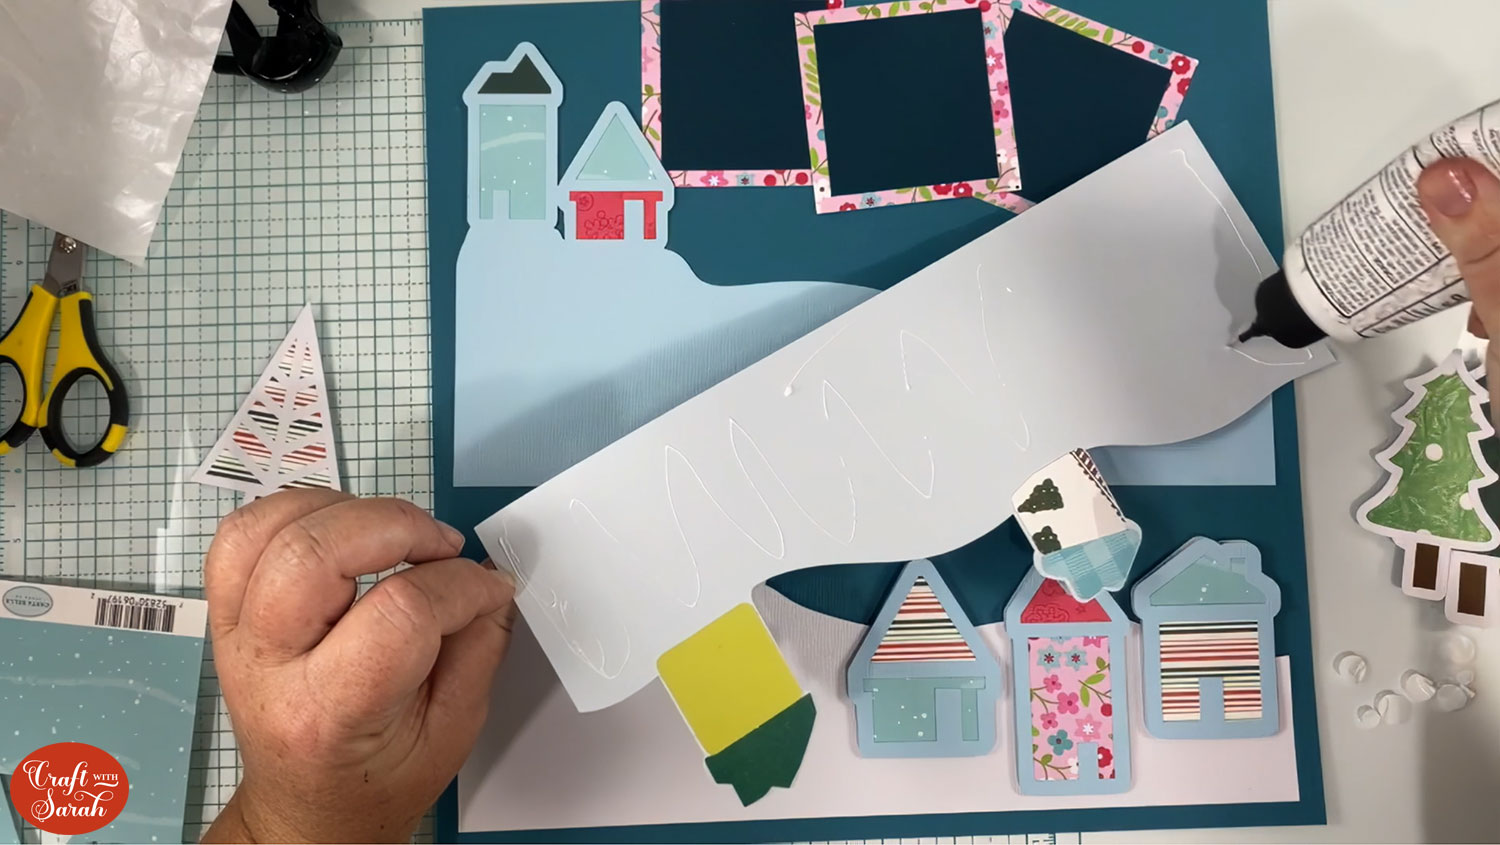
Leaving as much as you can where you’ve laid it out, start with your bottom white piece, apply glue to the bottom edge to partially stick down to your page.
You could also foam any of these pieces for some dimension if you would rather.
Take care not to glue your piece to the next hill layer.
Make sure you place it down carefully, leaving a border around the edge.
Alternatively, you could start with your top piece, and work downwards once you have it exactly where you want it. You may also have to mark the base piece with a pencil so that you have an even border around the edge when you come to the bottom piece.
Add foam squares to the houses along the very bottom of the design and stick the patterned paper houses on top.
Take the second hill piece and glue the bottom edge down behind the first piece you stuck.
It will tuck in like this:
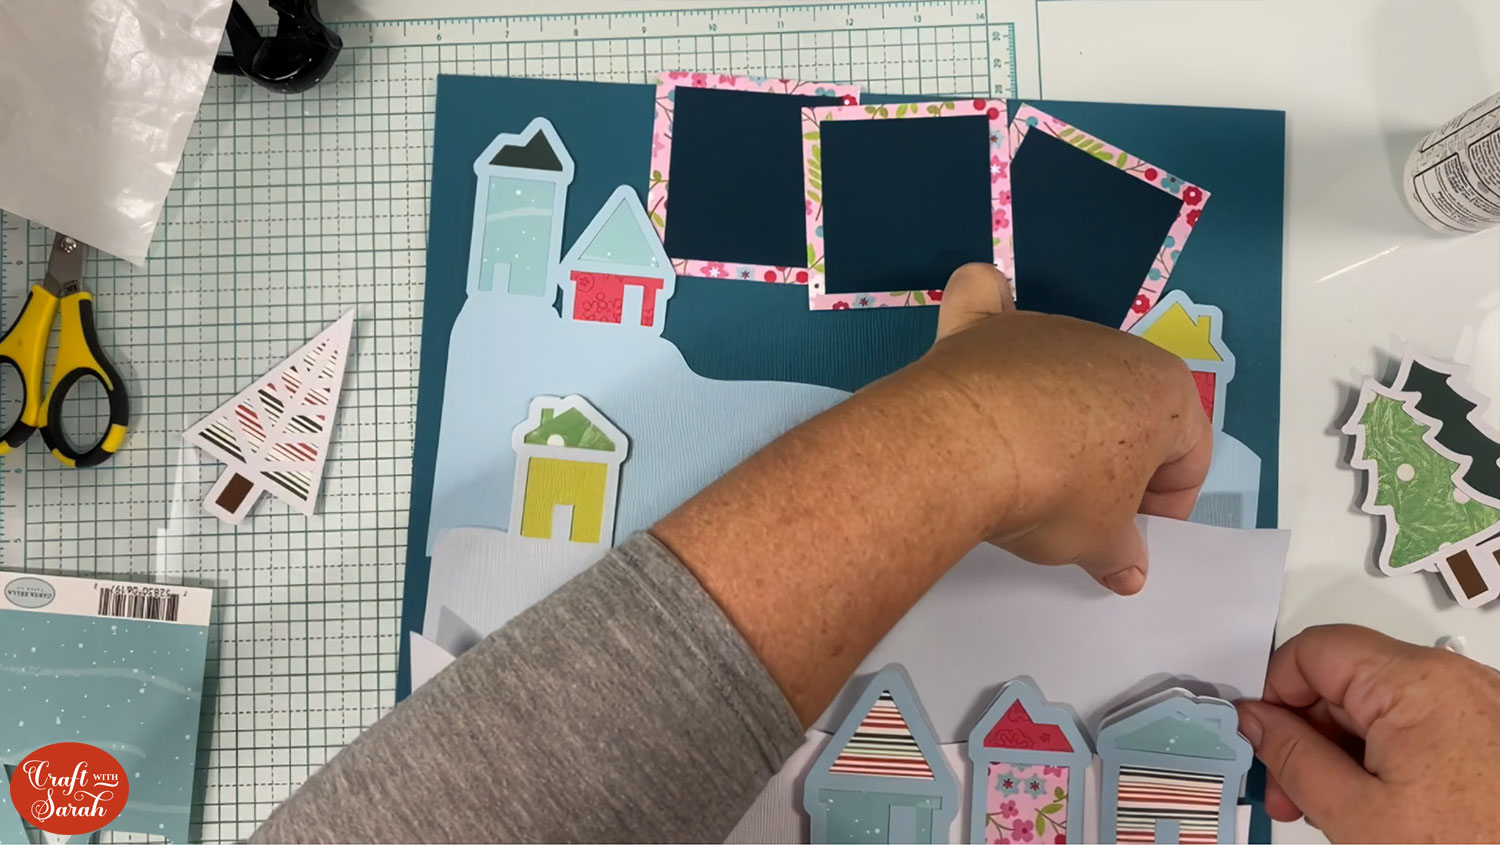
For the final hill piece, you can glue the whole section. You will need to leave the two shorter houses without glue as they will overlap the photo mounts.
Glue around the edges which are sticking up where you know you won’t be wanting to tuck some of the extra pieces into.

Use foam dots to stick the trees where you want them to go.
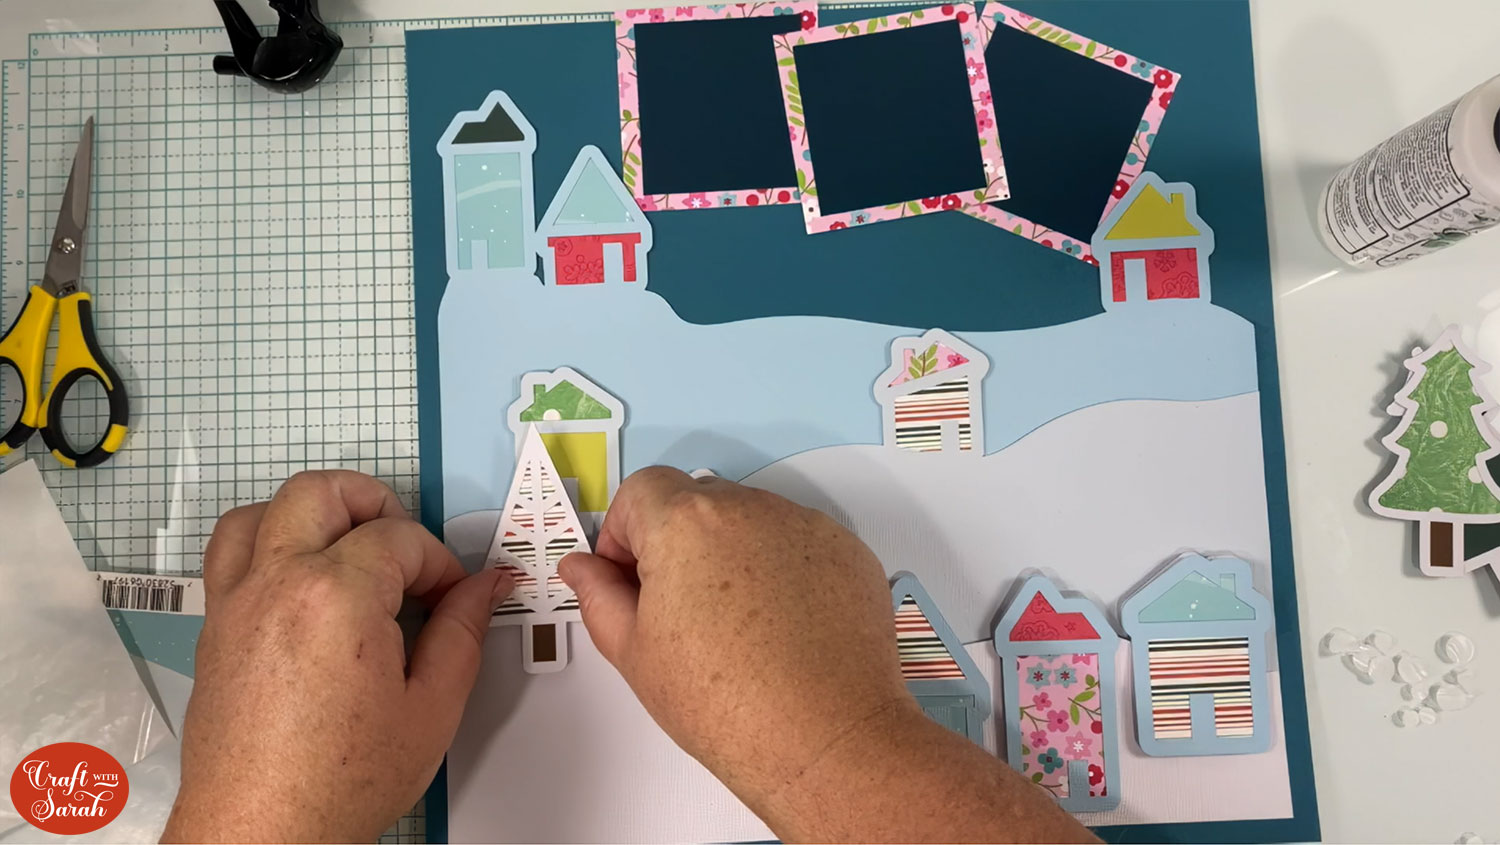
Make sure all the houses are securely stuck down too.
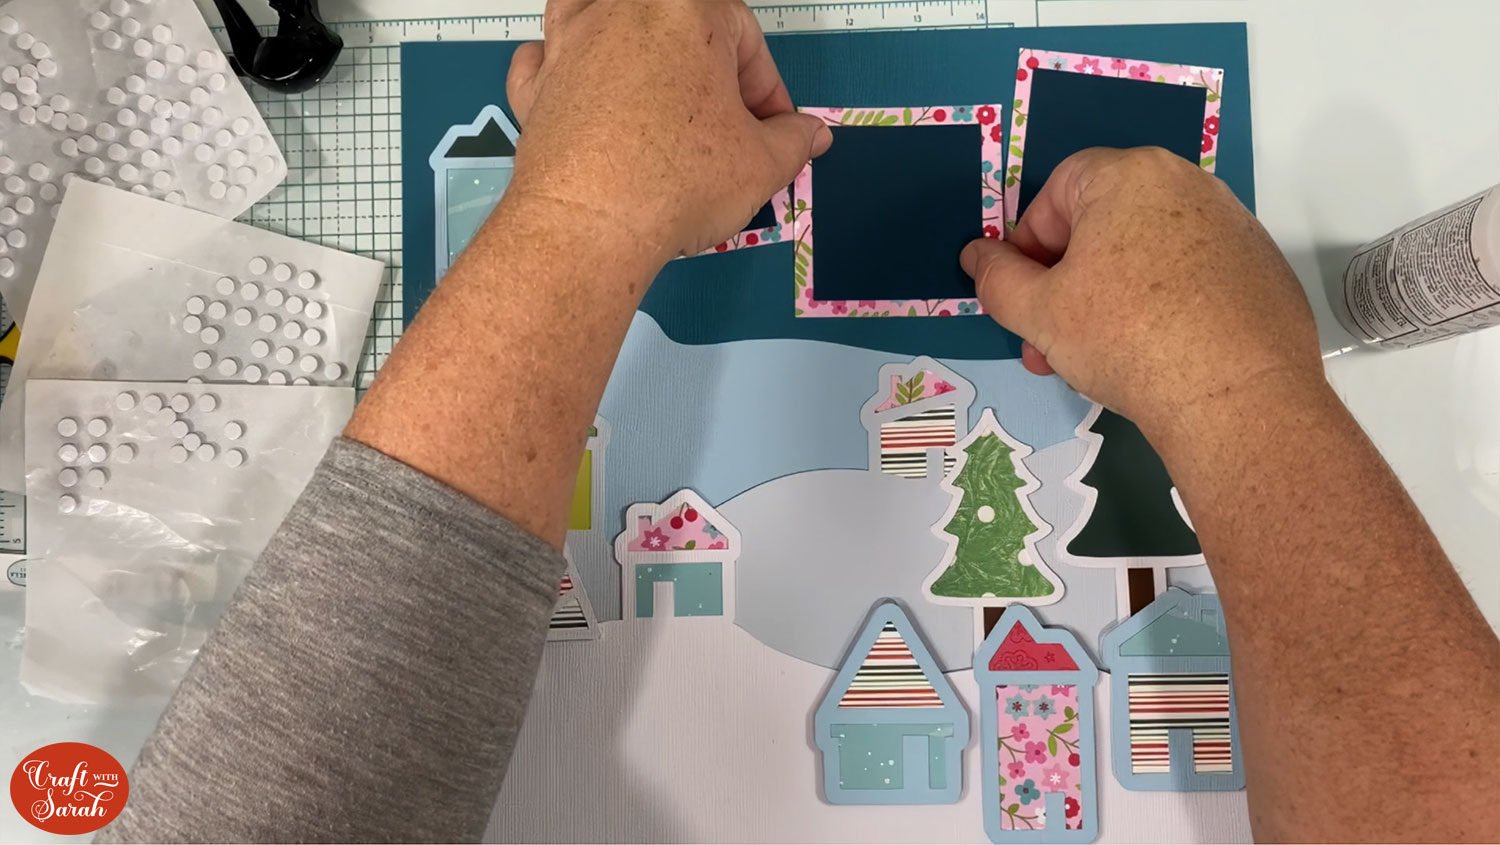
Place the photo mounts where you would like them. Once you’re happy, stick them down using glue. If you’d rather you could use one 4×6 or 5×7 photo instead.
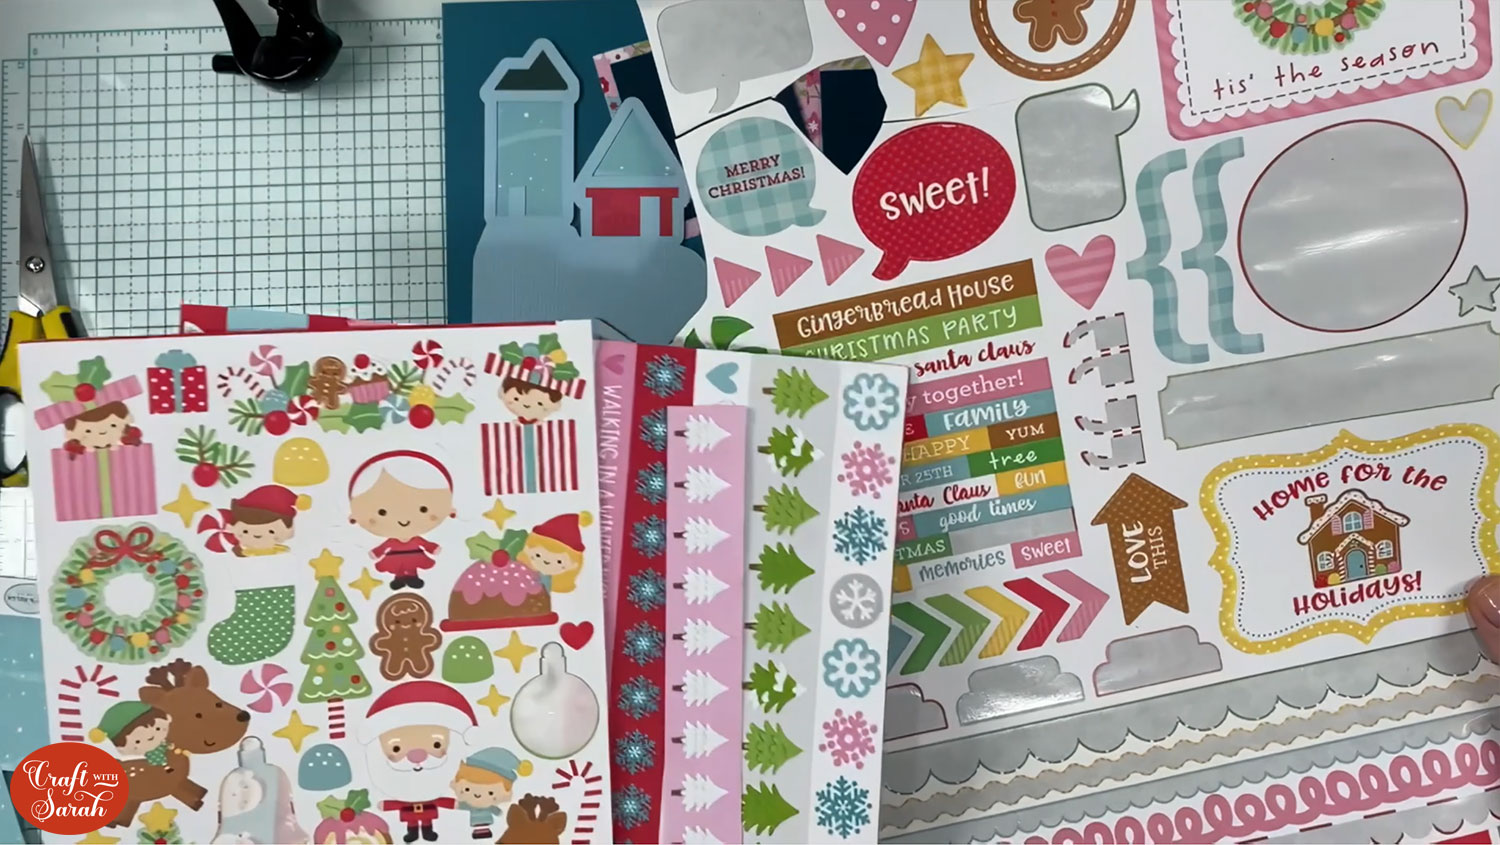
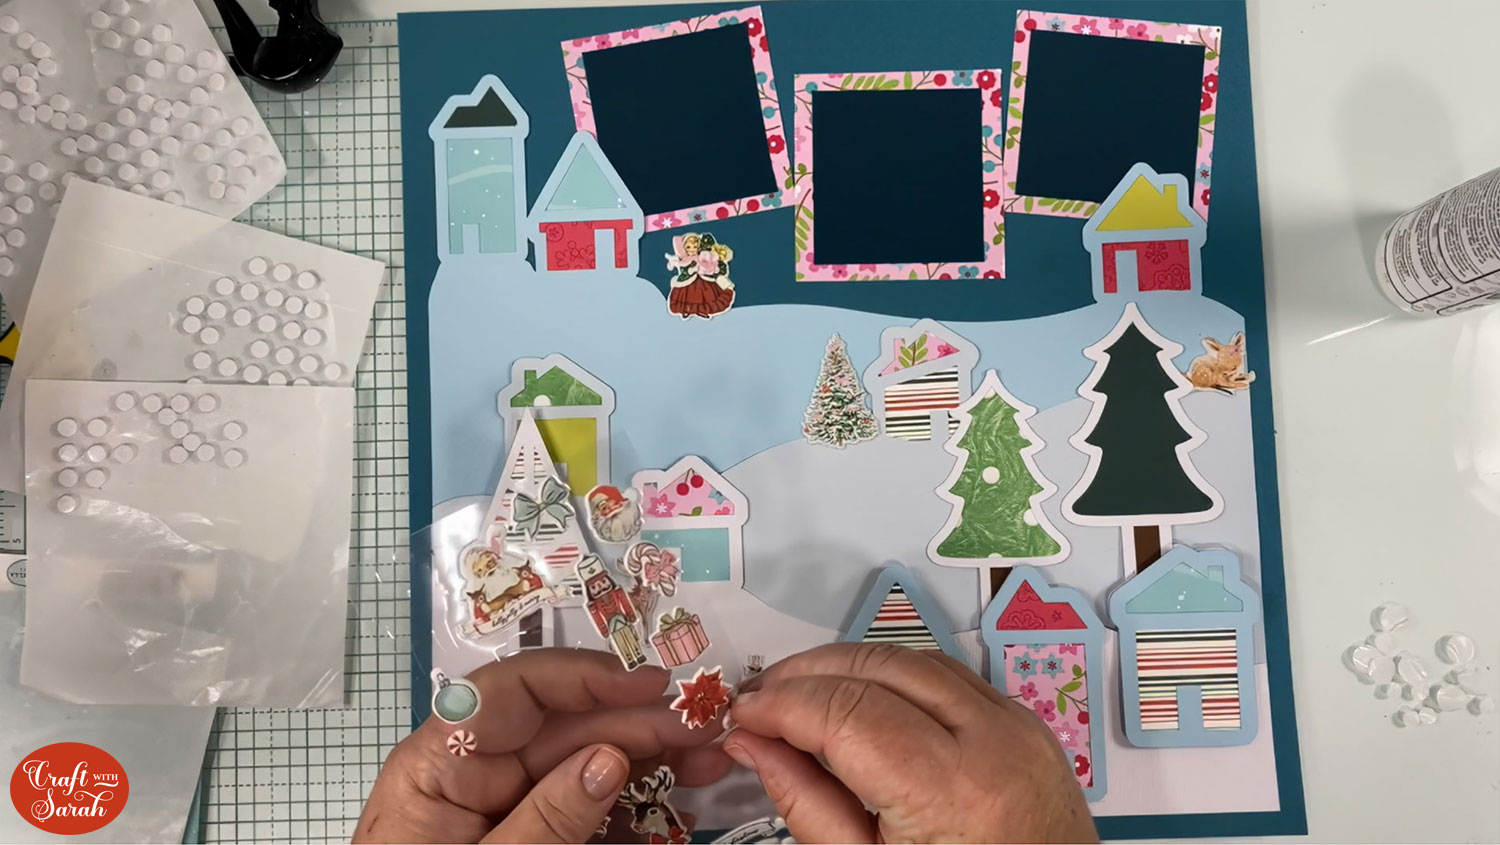
Embellish your scrapbook page with whatever embellishments you have and want to use. Some Christmas themed stickers would look beautiful.
Custom scrapbook page for winter holidays
Now your scrapbook page is finished! I just love the snowy hills and trees.

It will be even more special when it has photos of your favourite Christmas memories in the photo mounts.
Happy crafting,
Sarah x

