HCC 2023 Day 14 🦇 Trick or Treat Papercraft Banner
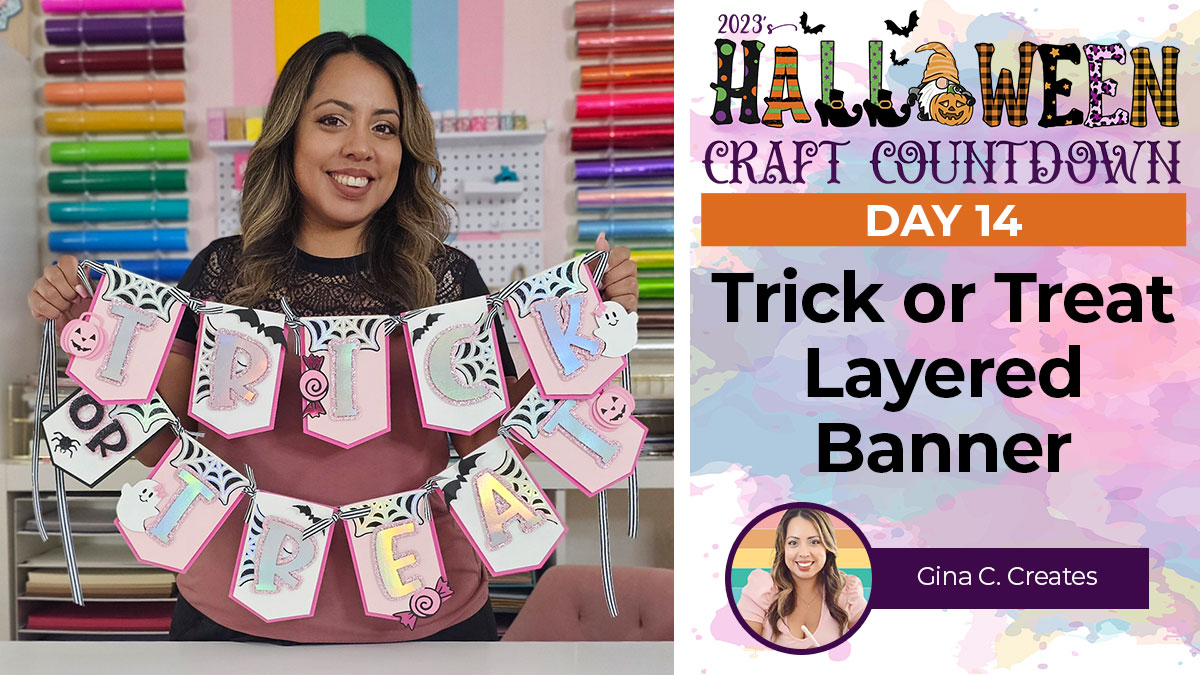
If you’re looking for the perfect Halloween banner to decorate your home, then you’re in luck!
It’s Day 14 of the Halloween Craft Countdown and Gina from Gina C. Creates is taking us through all the steps for making this beautiful trick or treat banner.
Grab your favourite holographic cardstock and follow along with the pink theme or you can opt for the more traditional Halloween colours which Gina has also included for you.
Don’t worry if you haven’t made a banner like this before. Gina shows you how to make it, from start to finish.
This Project was part of the Halloween Craft Countdown 2023

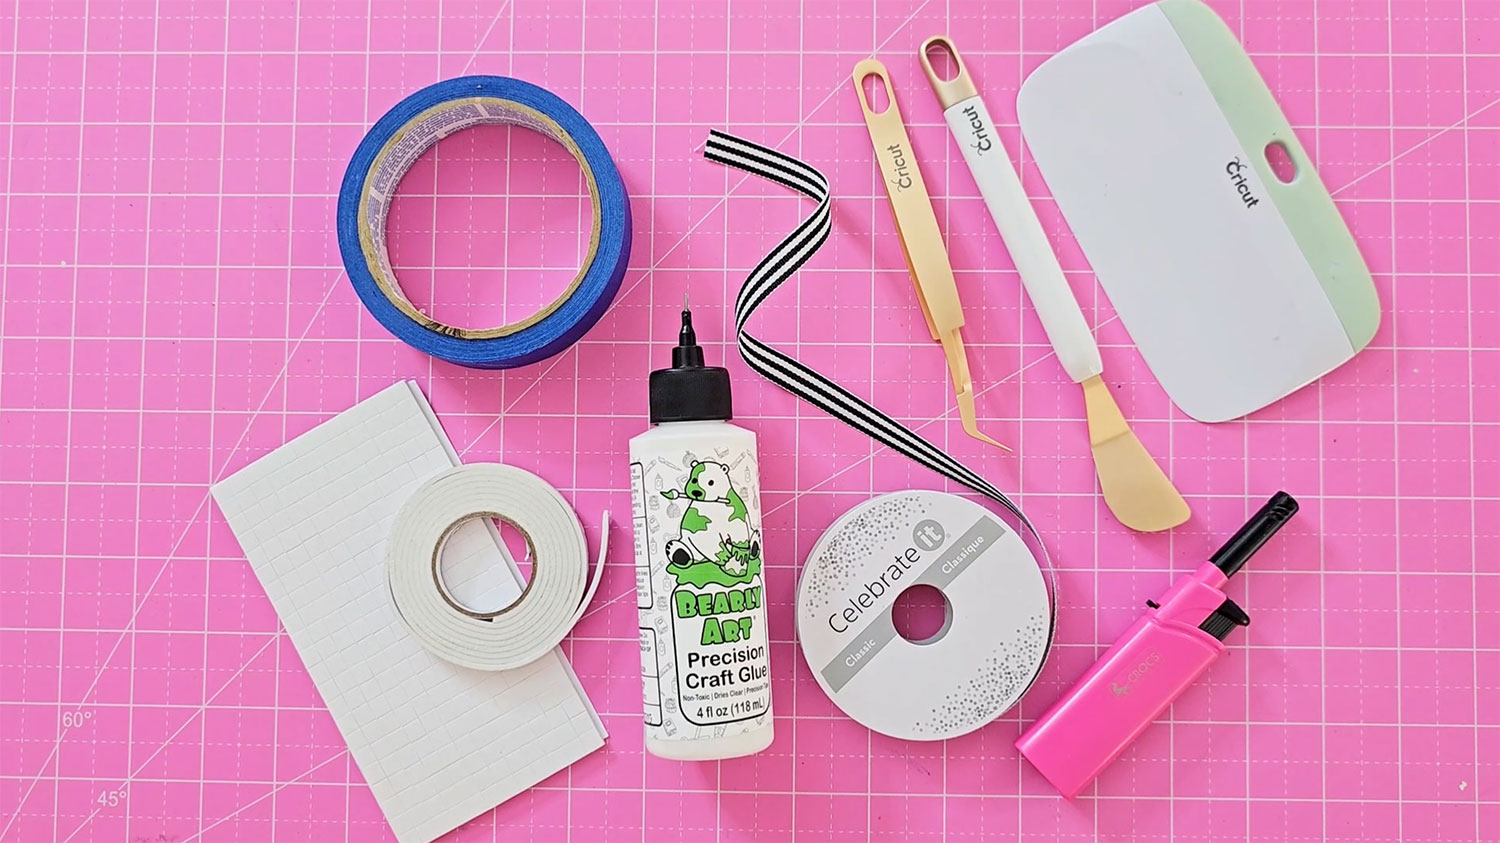
Materials supply list
Here is a list of the materials that are required to make this project.
Please note that some of the links included in this article are affiliate links, which means that if you click through and make a purchase I may receive a commission (at no additional cost to you). You can read my full disclosure at the bottom of the page.
- Cricut Machine
- Standard grip cutting mat
- Foam tape and squares
- Glue
- Lighter
- Ribbon
- Various cardstock colours
- Cricut tools
This project is suitable for the following types of Cricut machine: Explore Air 2, Explore Air 3, Maker, Maker 3, Venture and Joy Xtra. You will need to resize it smaller to cut on the original Cricut Joy machine.
Video tutorial for Halloween paper banner
Watch the video below to see how to make this Halloween banner with a Cricut.
If you prefer to read rather than watch, keep scrolling!
This project was created by Gina C. Creates
After many years of designing, Gina gained her expertise once she owned her first Cricut! Her specialty is creating SVG cut files for her fellow crafters. She strives for creative easy-to-use cut files.
Trick or Treat banner tutorial
Making papercraft banners with your Cricut is easier than you might think! Let Gina show you how…
Step 1) Upload the design into Cricut Design Space

Before you upload the SVG to Design Space, you need to unzip the download folder that it comes in.
- How to unzip a folder on Windows computer
- How to unzip a folder on a Mac
- How to unzip a folder on an iPad/iPhone
- How to unzip a folder on an Android device
Open up Design Space and start a new project.
Click “Upload”, find the design on your computer and save it as a cut image.
There are two versions of the banner to choose from: a pink colour scheme and a more traditional Halloween colour scheme.
Important – make sure you unzip the download folder before uploading the SVG
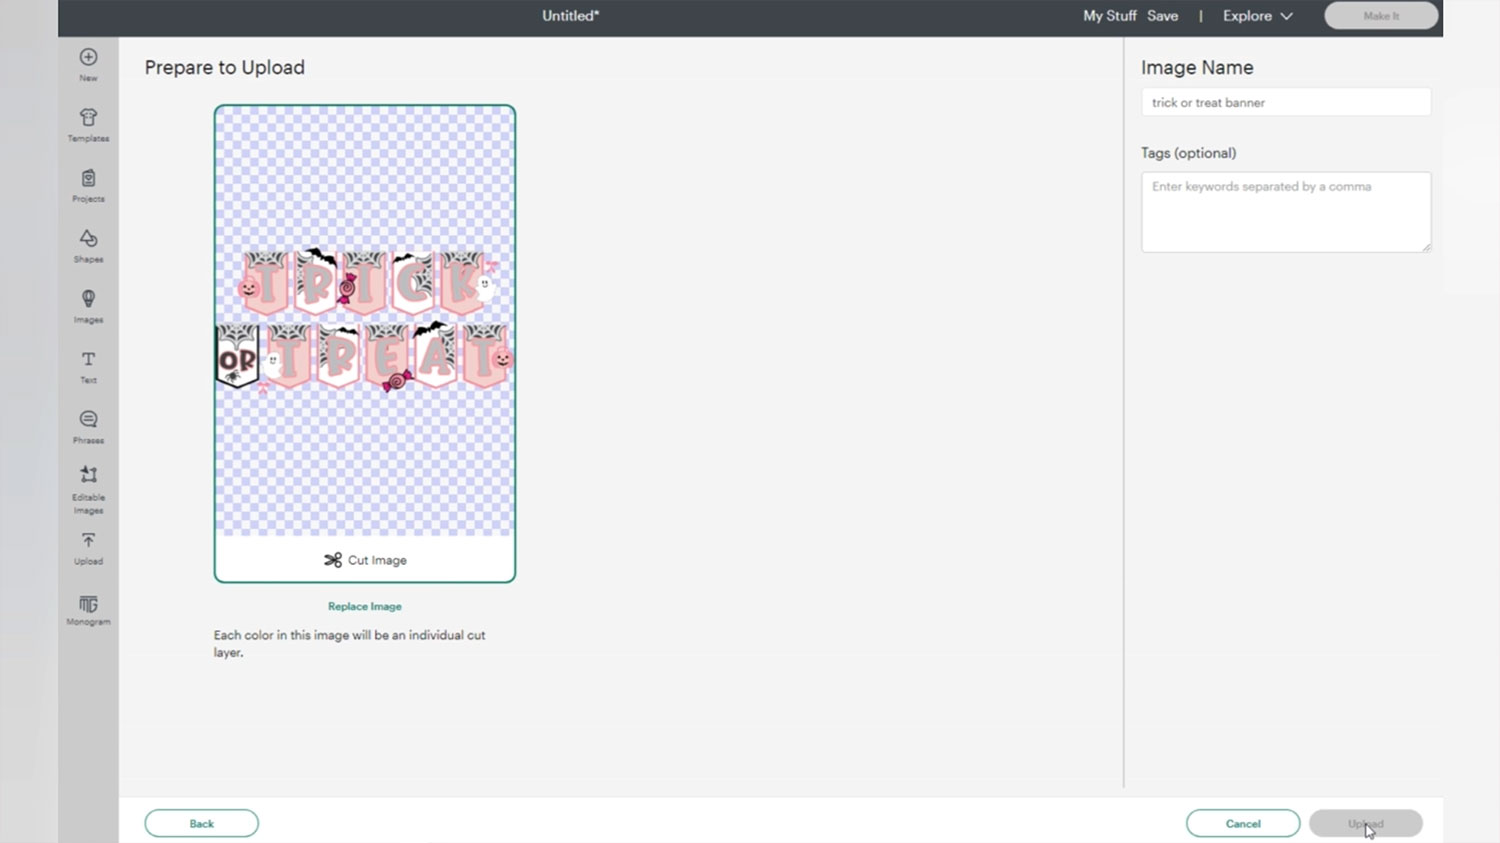
Add the design to your canvas. It should load in at 27.64 inches in width and this will make each little pendant 4×6 inches.

Ungroup the design and you will see that each colour is grouped so it will make it easy to select and change the colours.
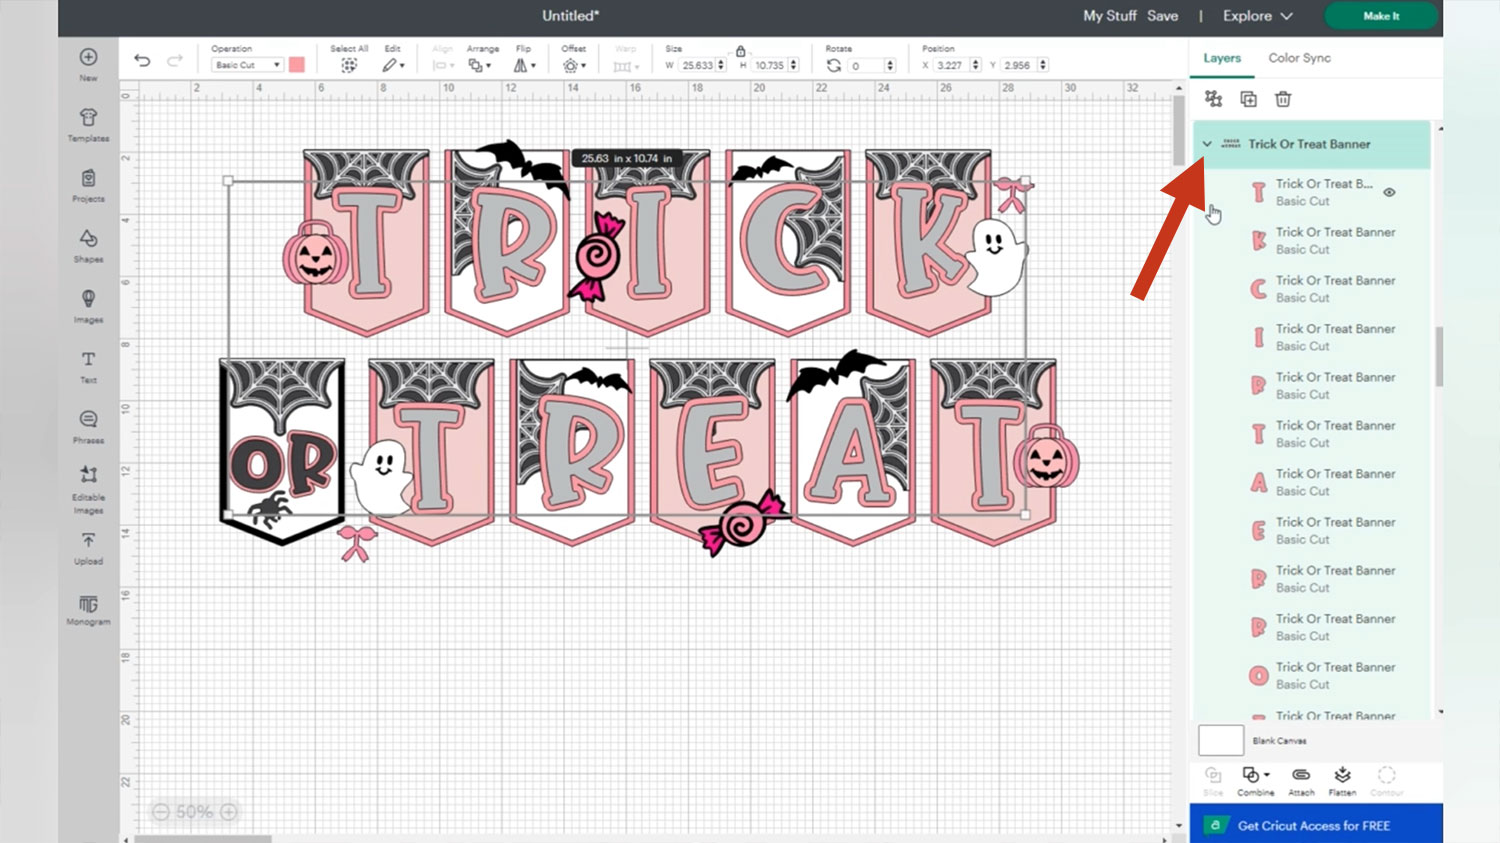
You will see a grey layer of text letters which is going to be the holographic cardstock.
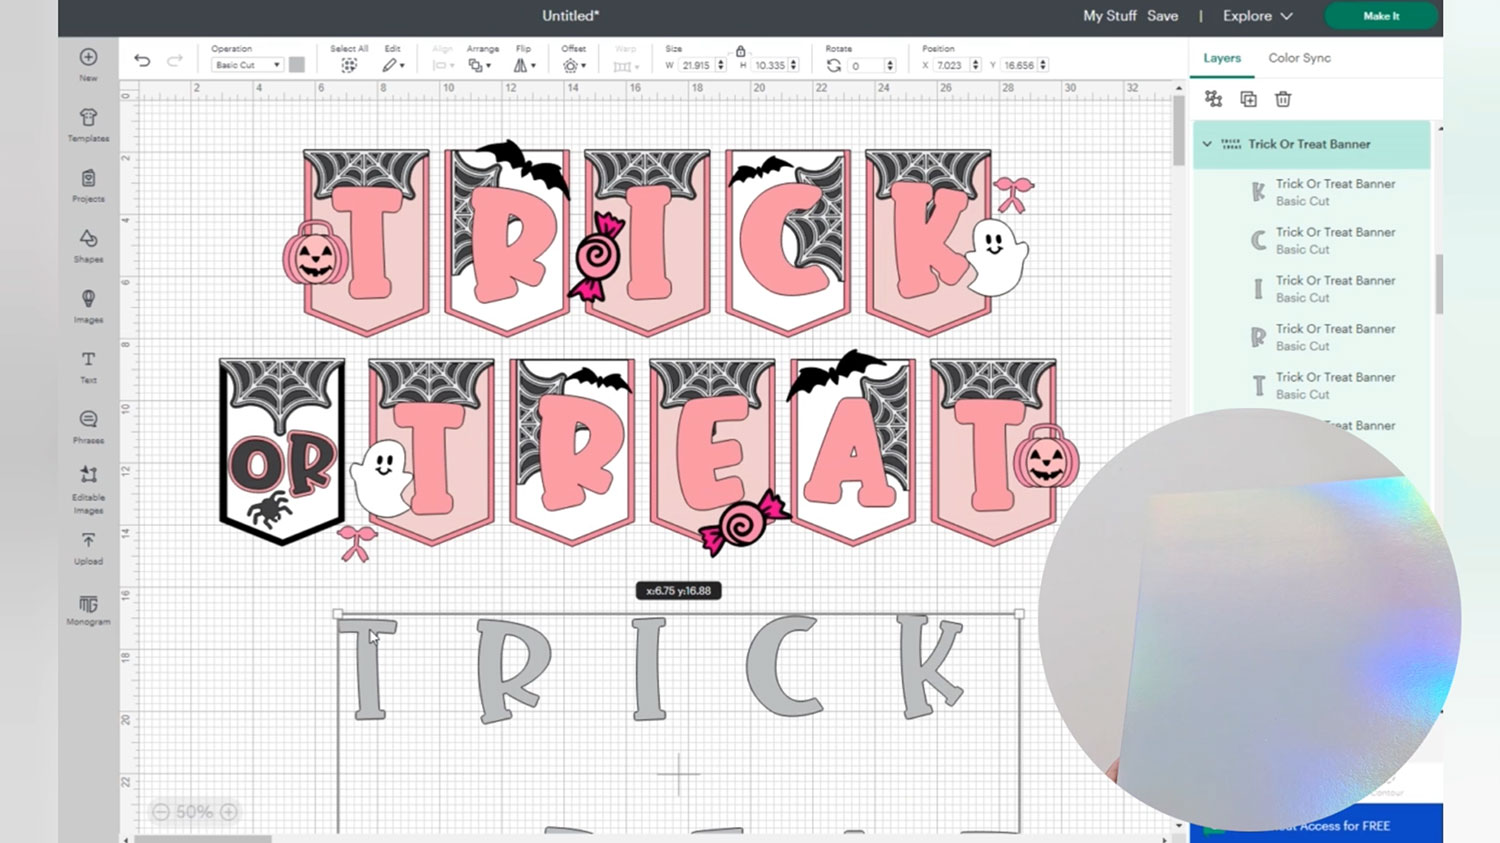
The offset of the layers will be cut from the pink glitter cardstock and the dark grey will be cut from a dark glitter cardstock.
The true back will be cut from a regular black cardstock along with the different pinks in between and the white however, the top of the skinny layer of spider webs will be a white glitter cardstock.
The grey offset of the spider webs will be a holographic cardstock and the bright pink candy wrapper will be cut from the foil pink.
The banner pieces will be cut from the 2 sheets of the lightest pink and the back pieces will be cut from the dark pink.
Step 2) Cut the banner
When you’re happy with how everything is looking in Design Space, click “Make It” to start the cut process.
Make sure you have selected the correct cardstock size and position your cuts on the mat.
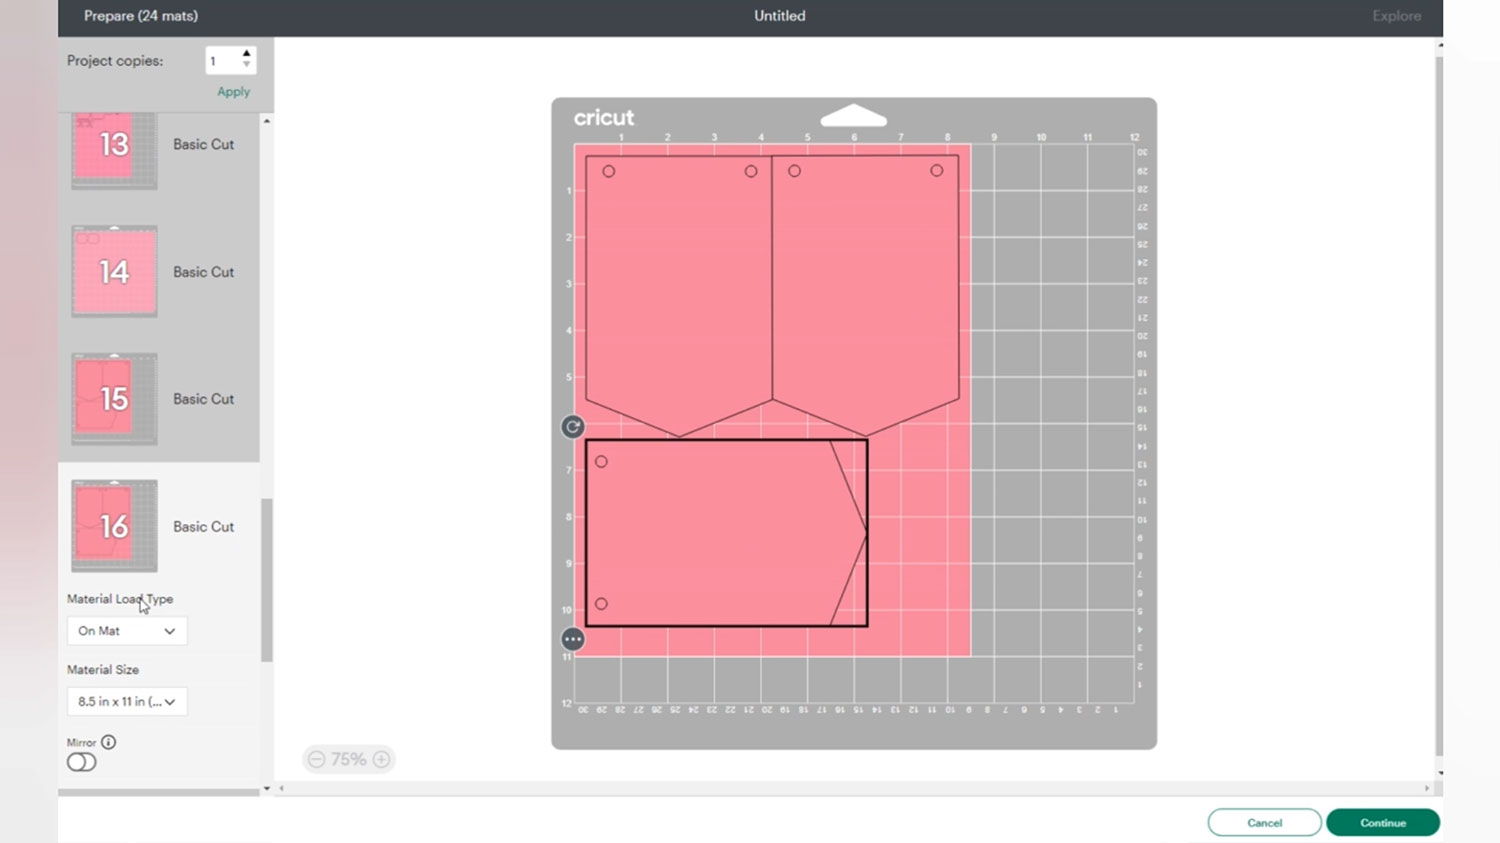
You may need to alter the material settings for both glitter and foil cardstock as the cardstock setting may not cut them all the way.
Tip from Sarah – use the “Kraft Board” setting for very thick card such as holographic or glitter card
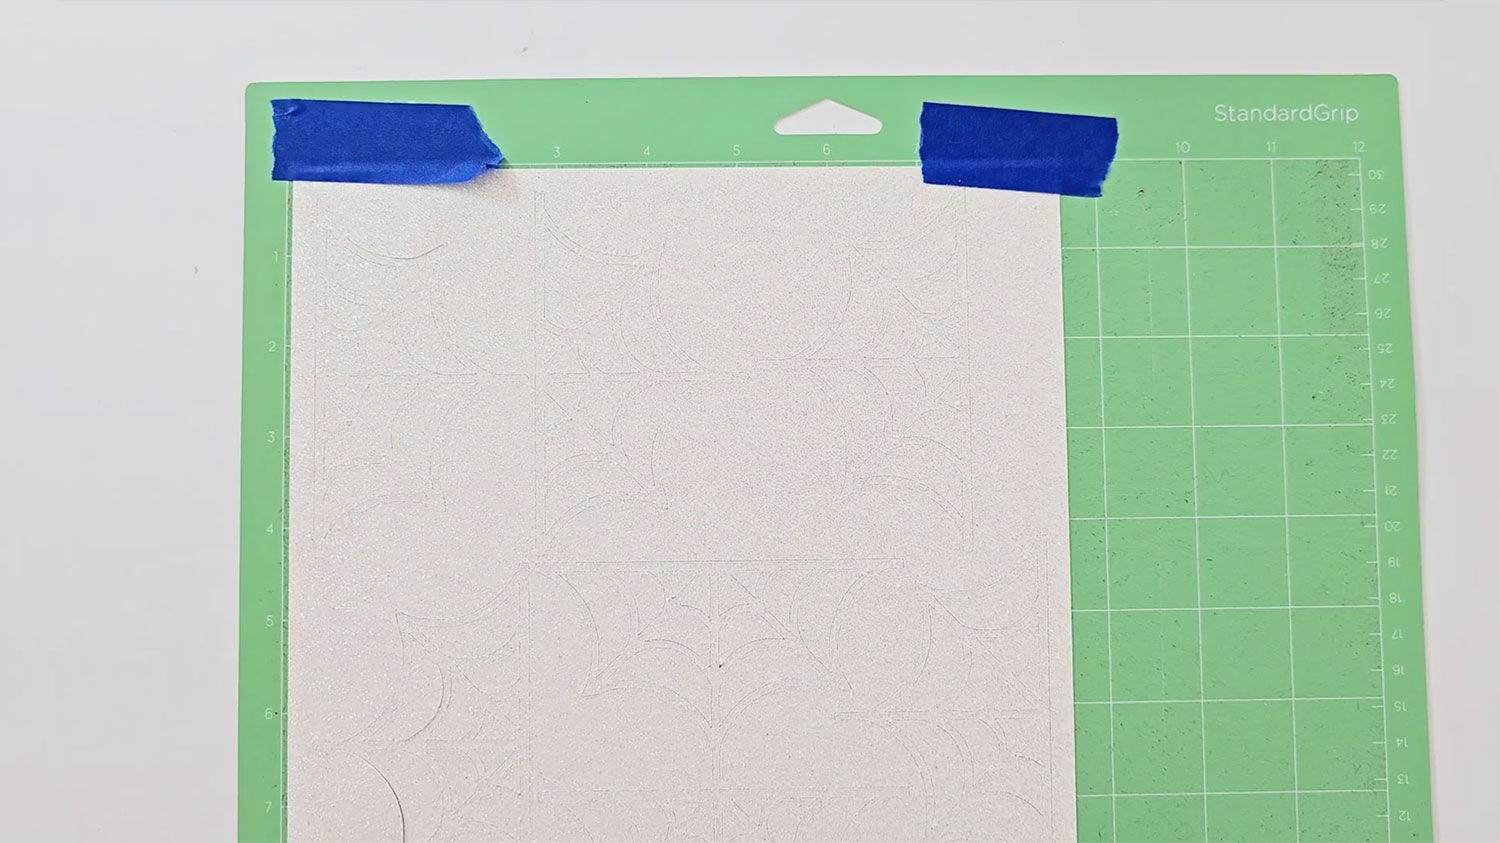
When using glitter cardstock you can use painter’s tape to make sure it stays securely on your mat.
Get everything cut out and next we will start assembling our banner!
Step 3) Build the smaller pieces
Organise your pieces so that you don’t get confused as the banner is pieced together. We will be assembling with a mixture of foam tape, foam squares and glue.
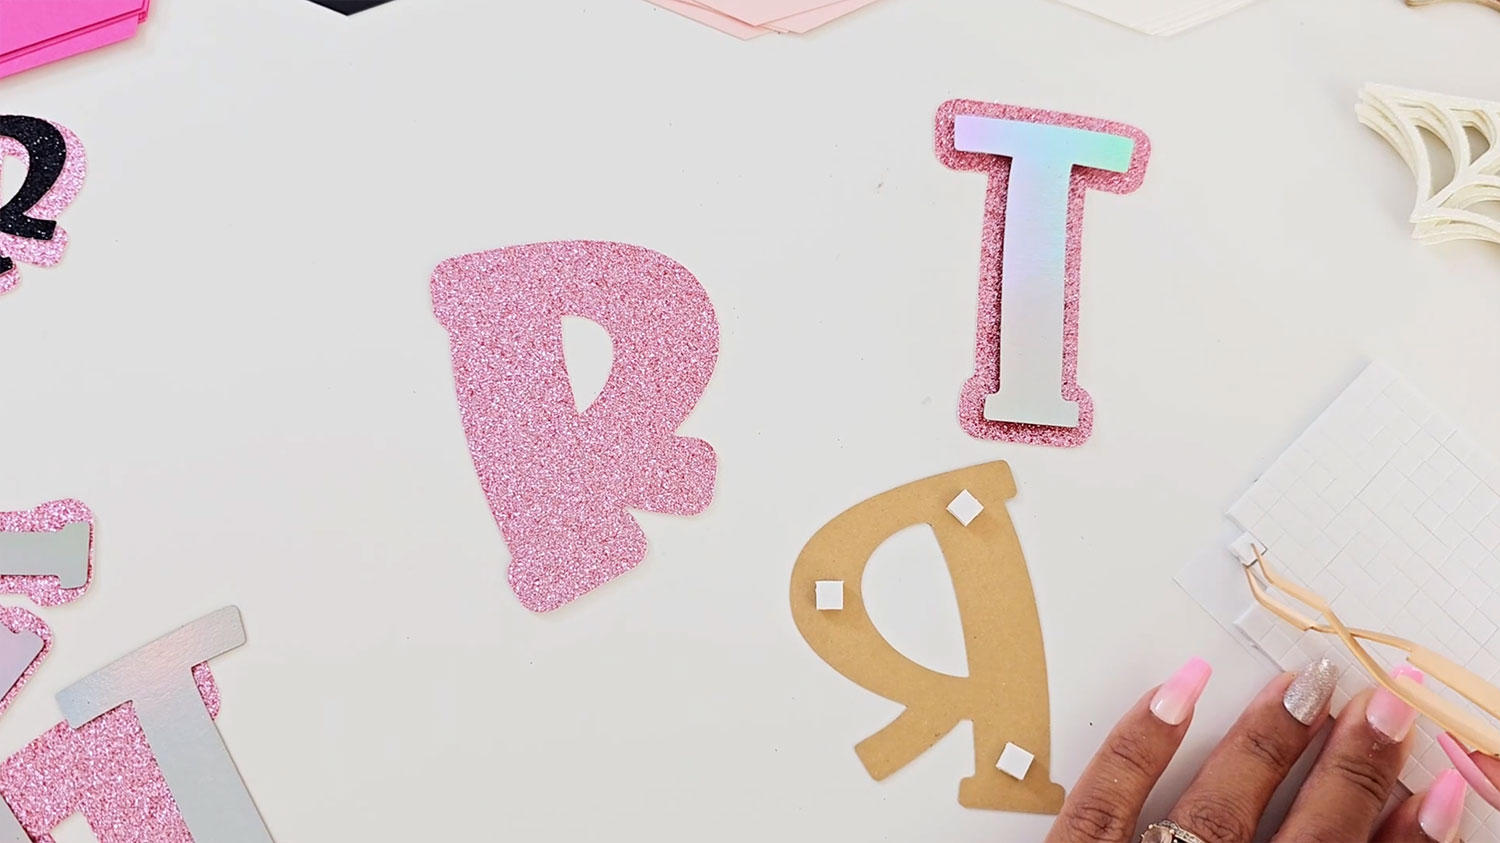
Start with your cardstock letters, which are made up of two layers. Foam the letter to the matching offset piece.
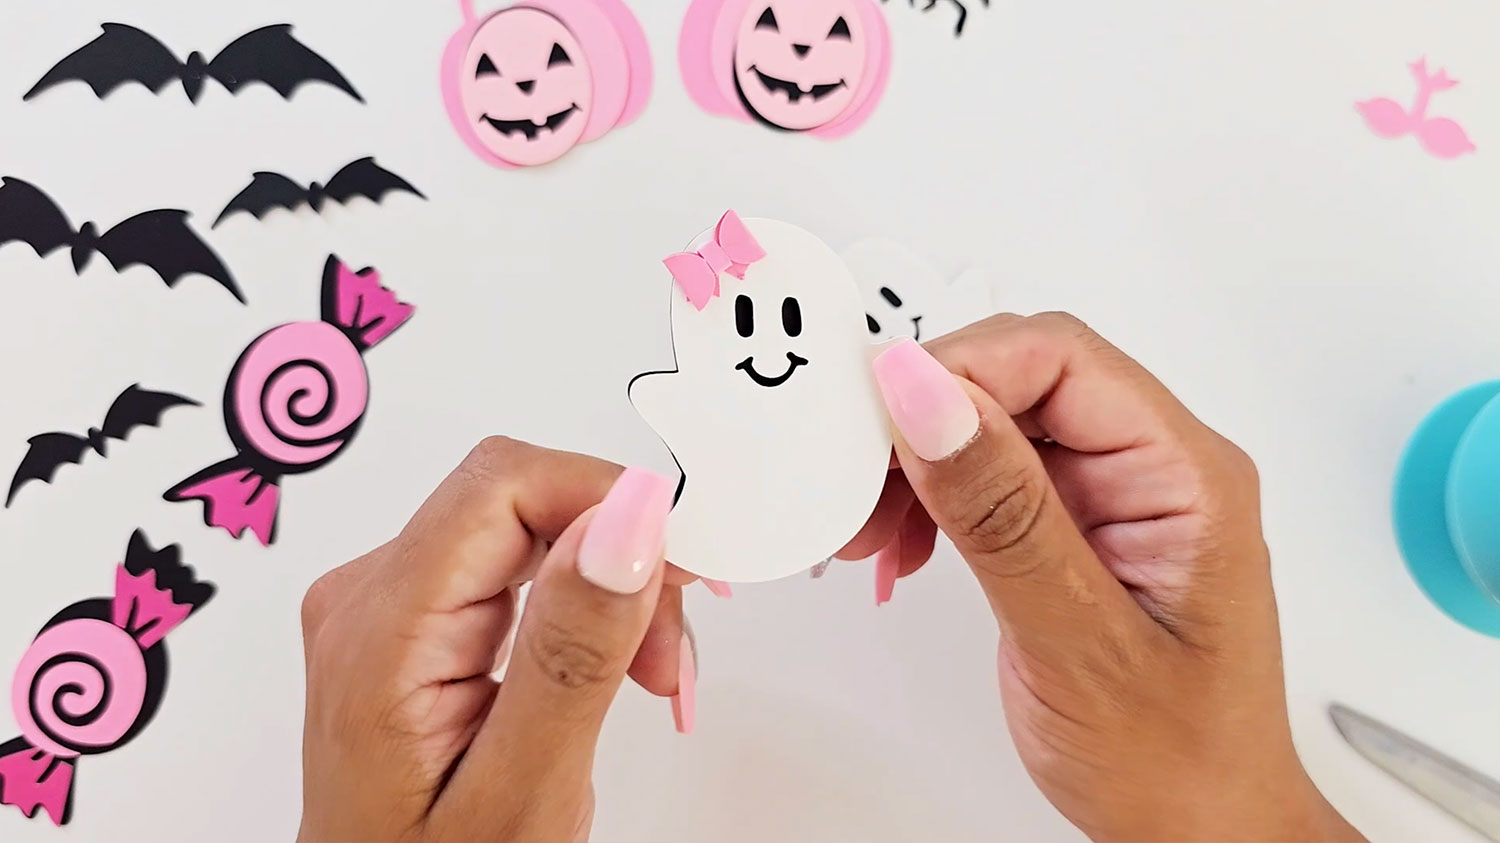
Once all the letters are glued together, glue the ghost to the black back piece and find the pink bows.
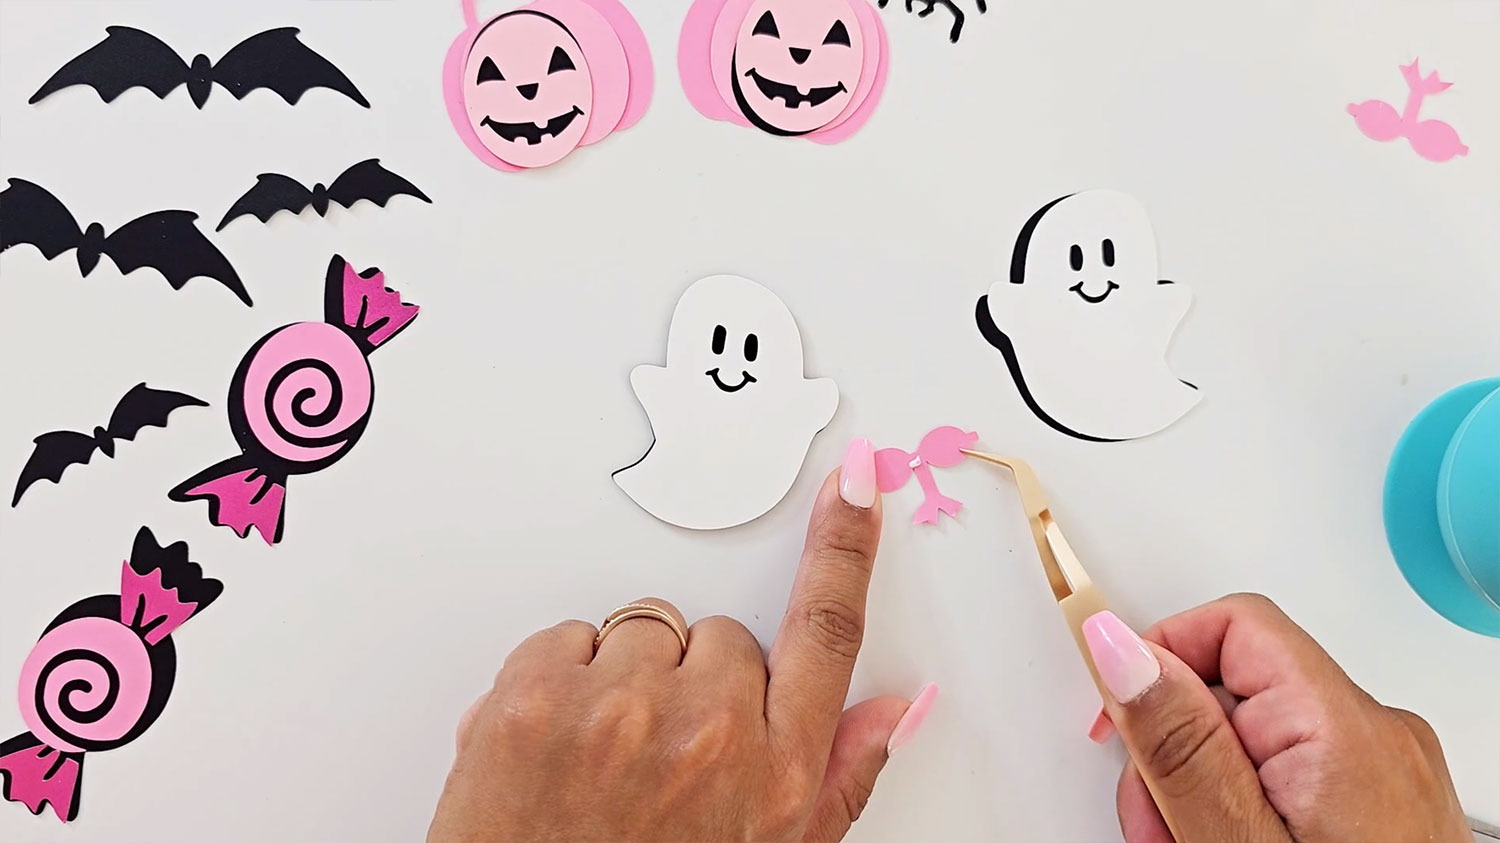
You will need to add a small amount of glue in the middle of the bow and fold the edges in so that they meet.
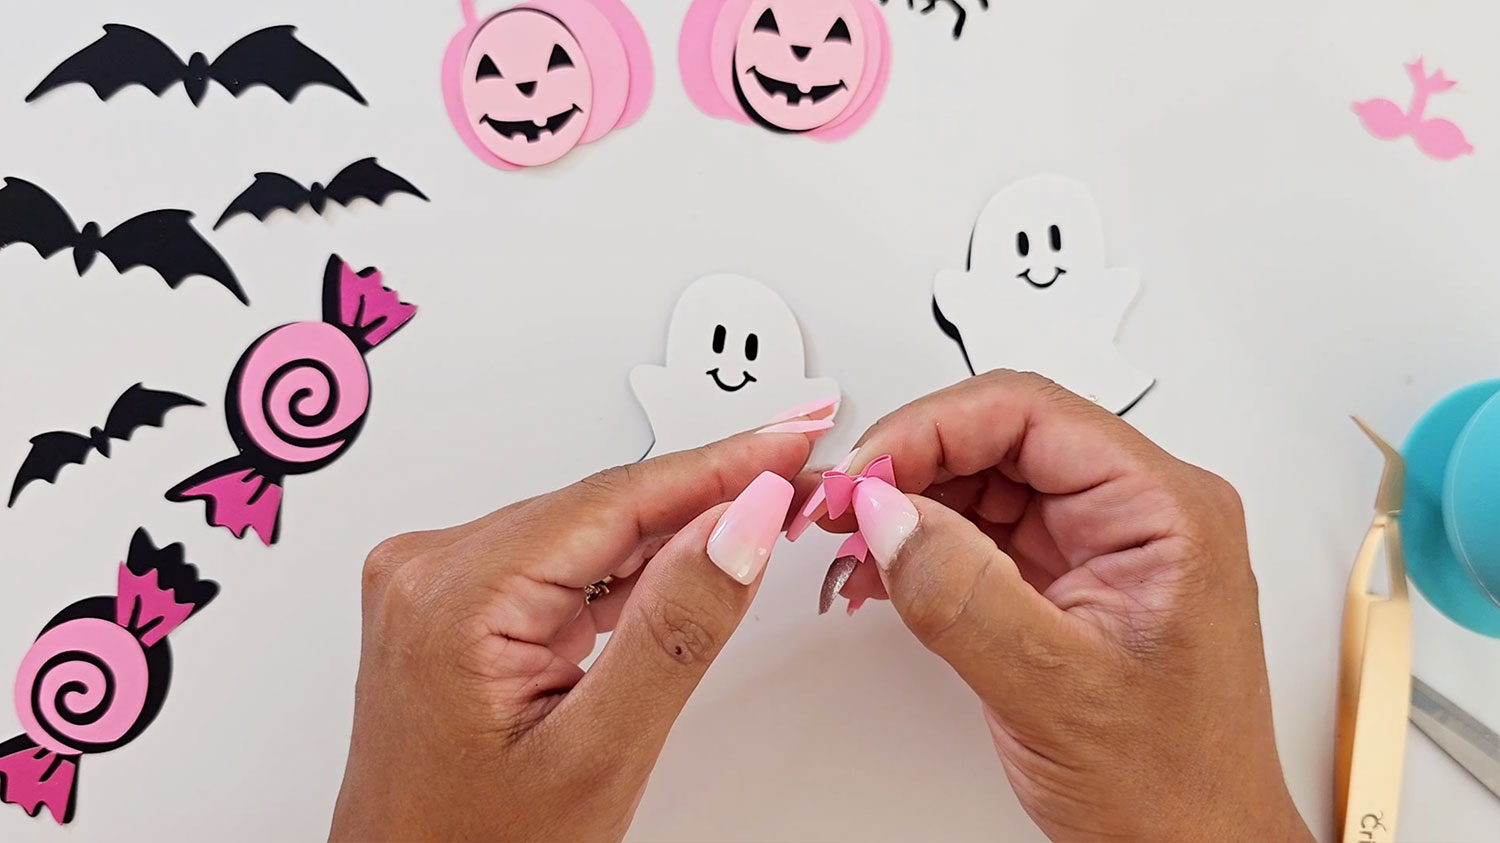
Let it dry and wrap the center tail around the whole thing once. Glue to secure.
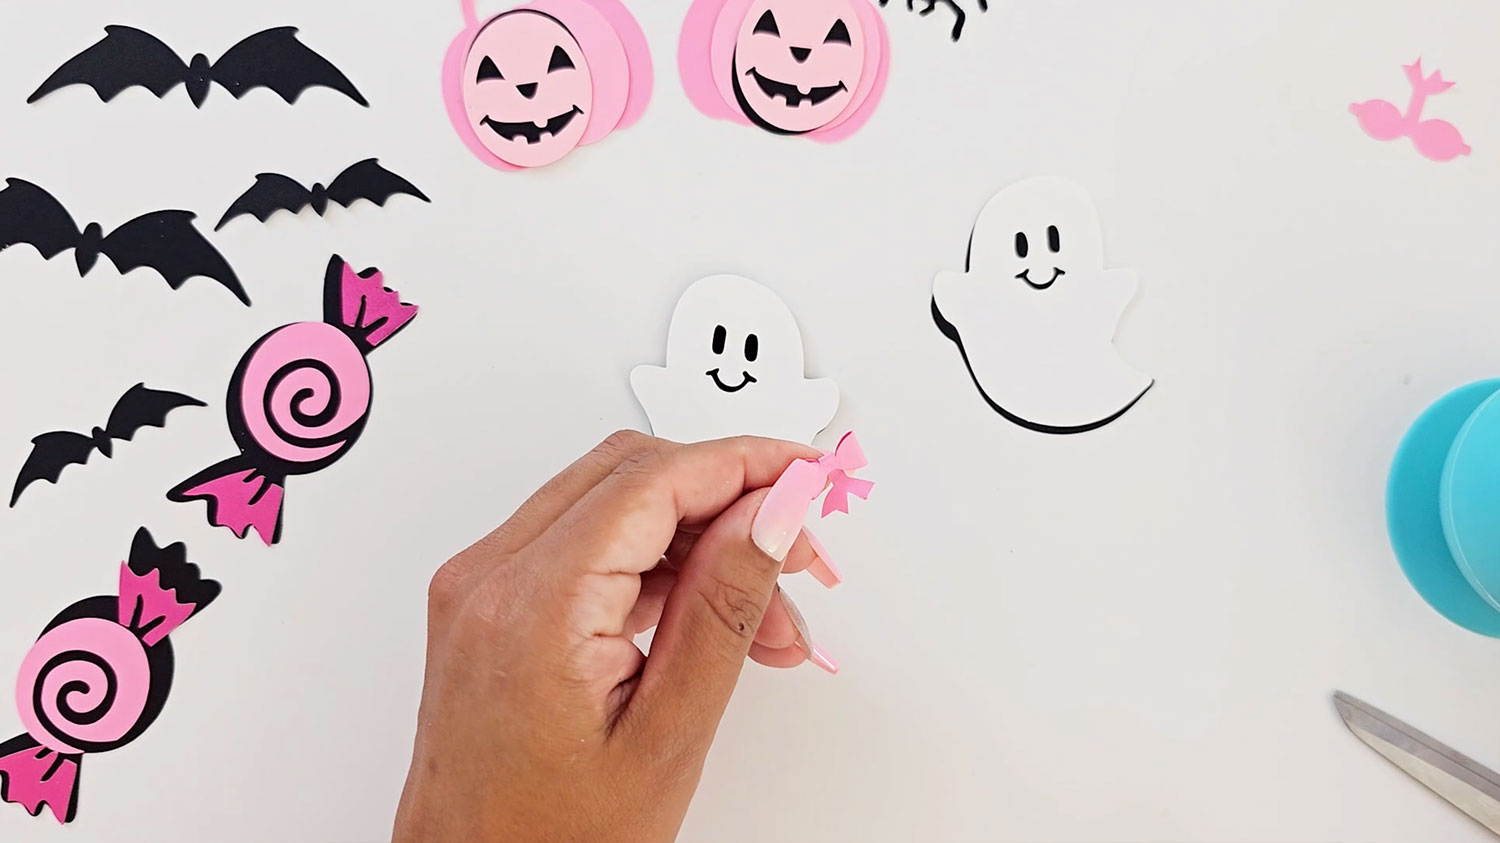
Glue the bows to the ghosts’ heads.
Find the pumpkin candy buckets and glue the Jack o lanterns’ faces on top of the black shapes.
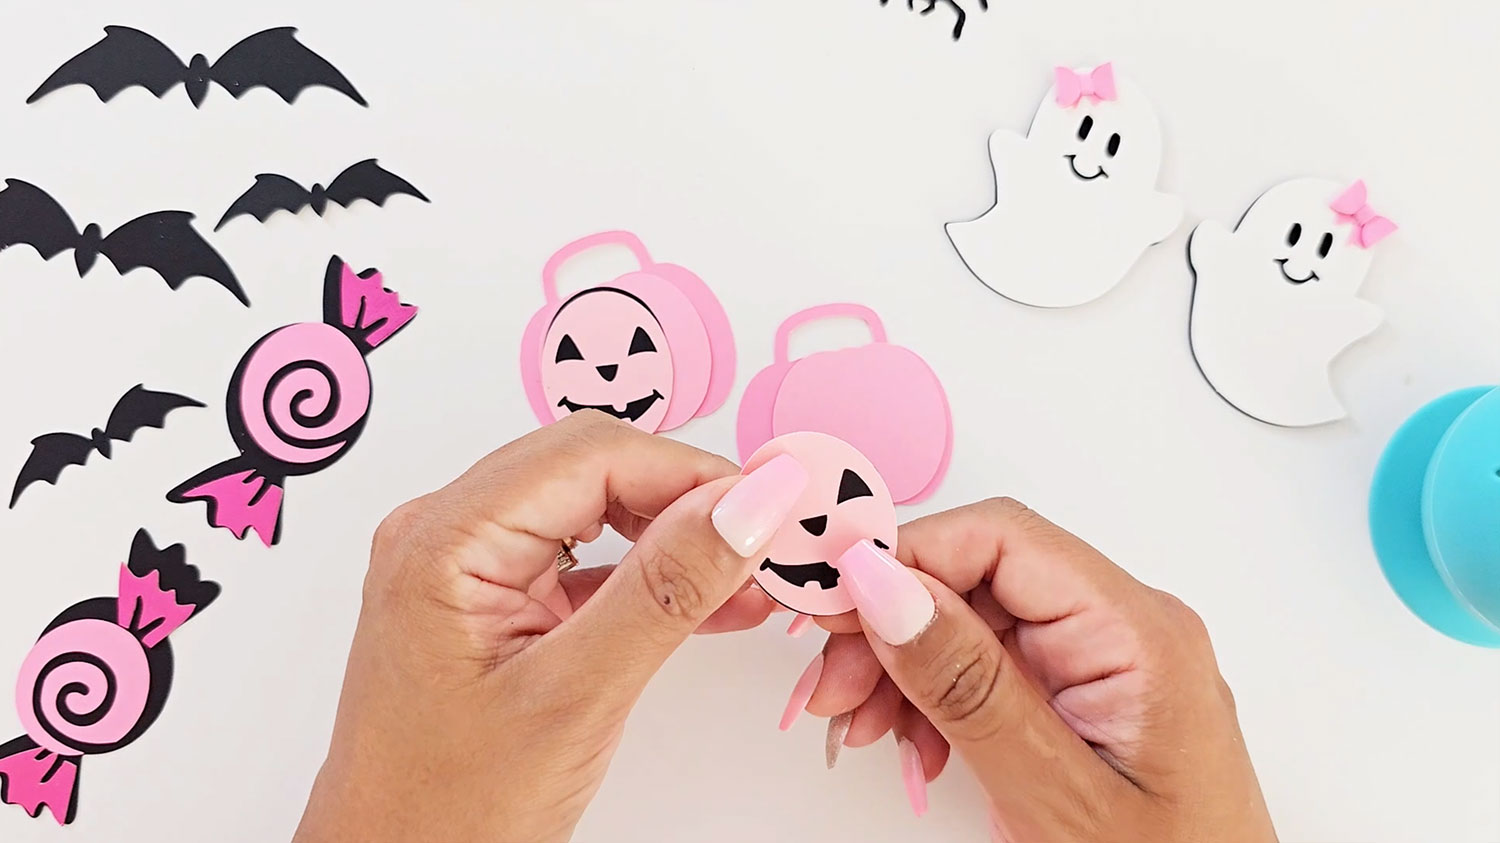
Foam the back and layer them on top of the candy buckets.

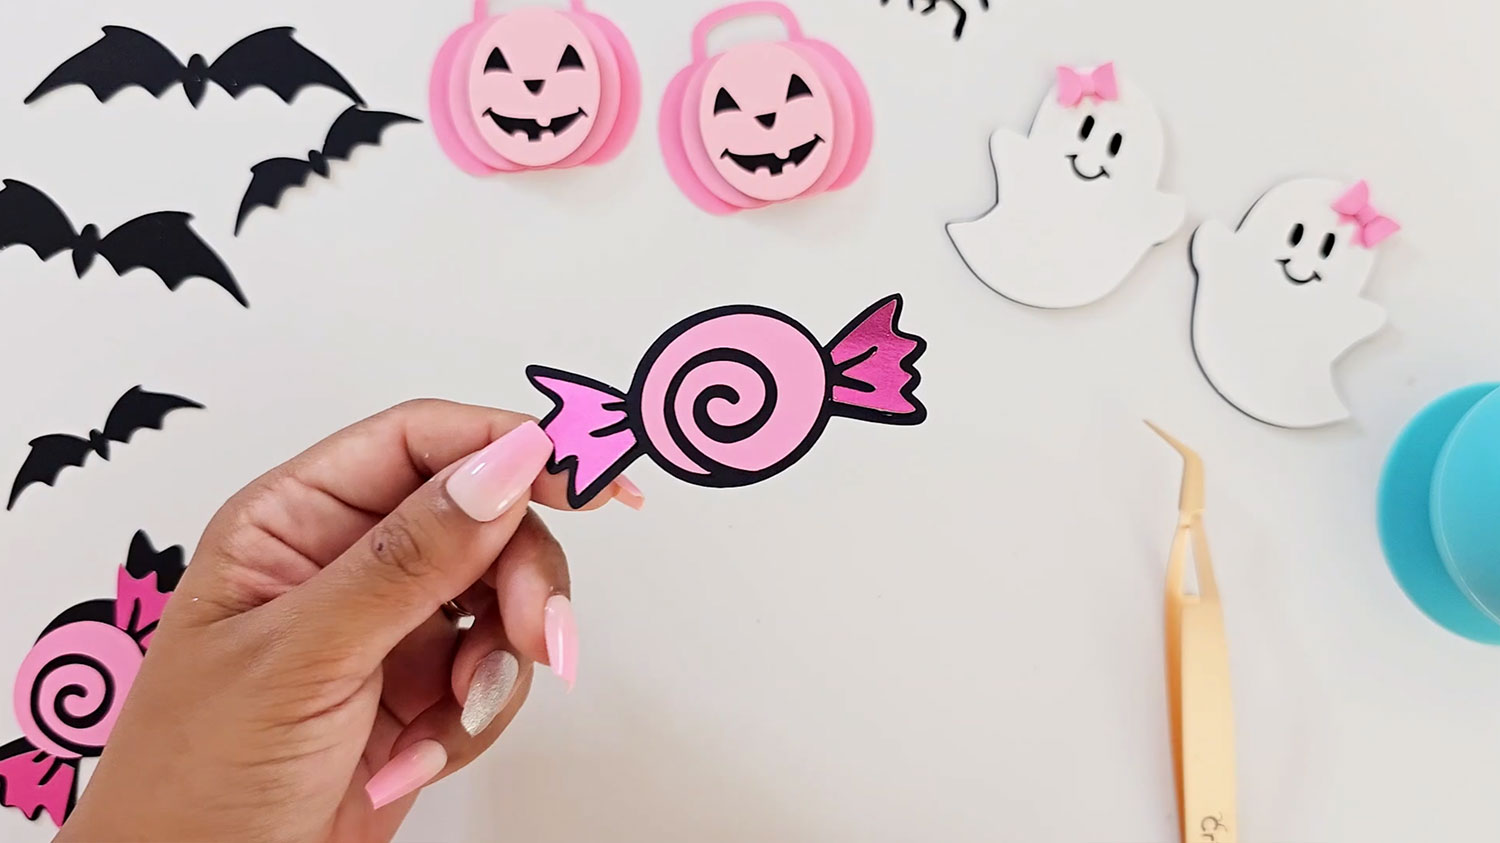
For the candy, use glue to layer the pieces on.
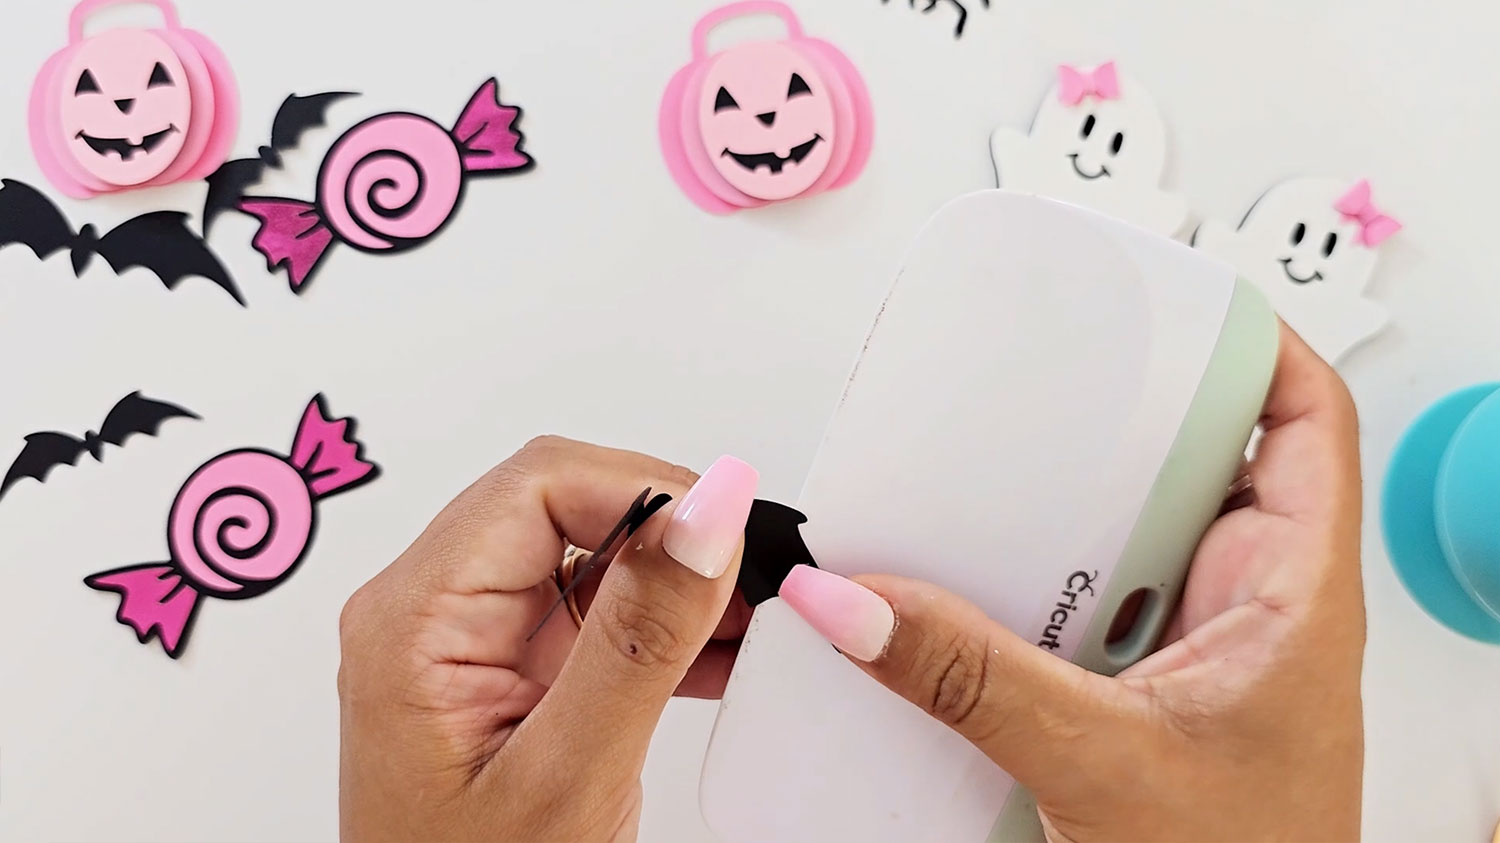
To give the bats more dimension, fold over the bat wings to create little arches in the wings.
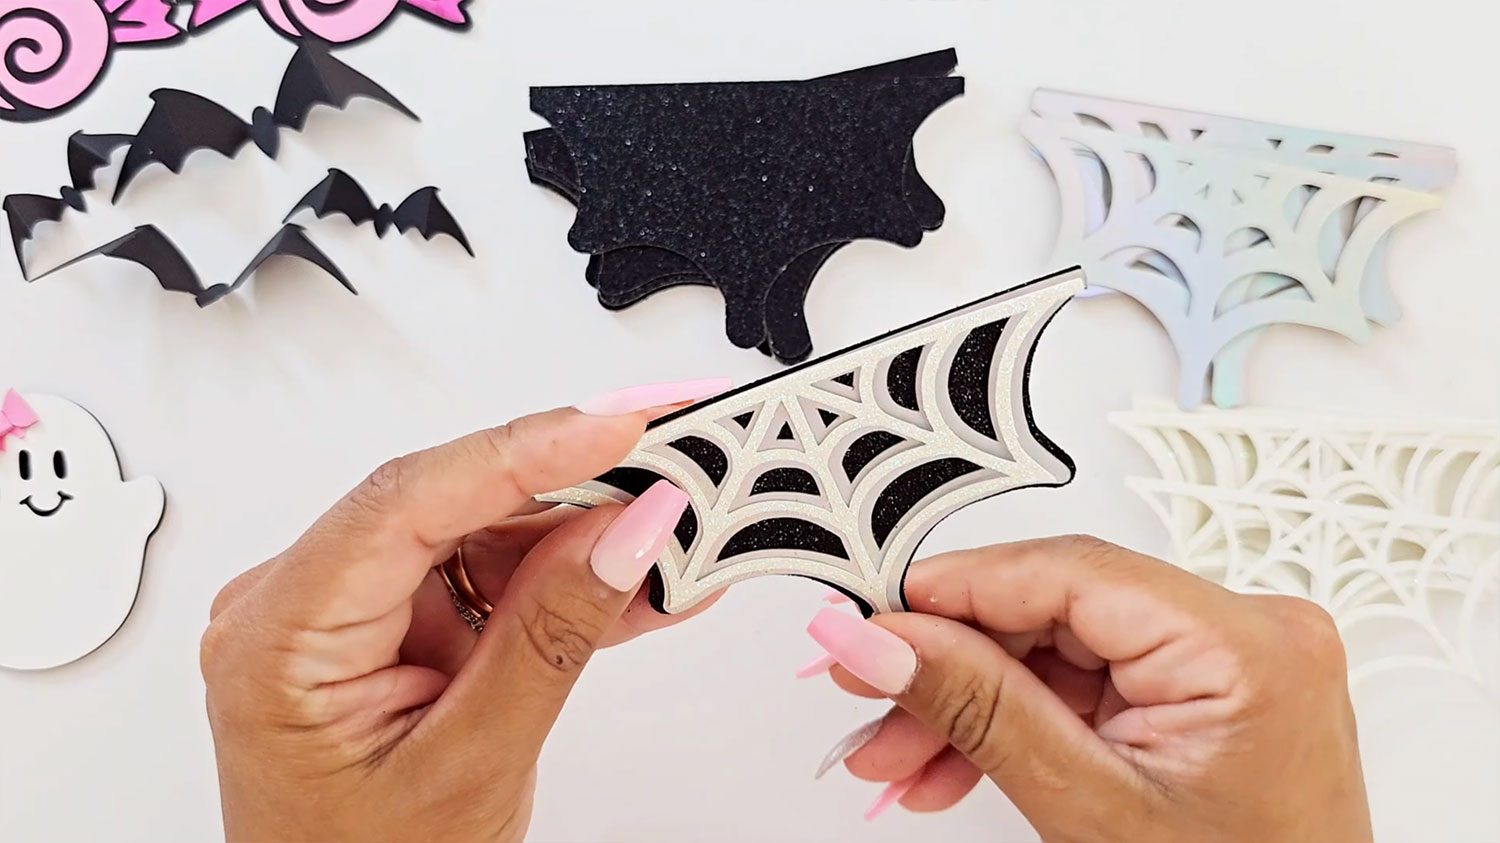
The spider webs have three layers. Make sure they are all facing the correct way as you layer them.
As you line them up you are going to have the straight edge flush with all three layers.
Step 4) Assemble the banner
Each section of the banner has two layers. When you are layering, take care not to cover up the holes on the back piece with foam squares.

Use foam pads/squares to attach the smaller coloured pennant layers to their matching backing piece.
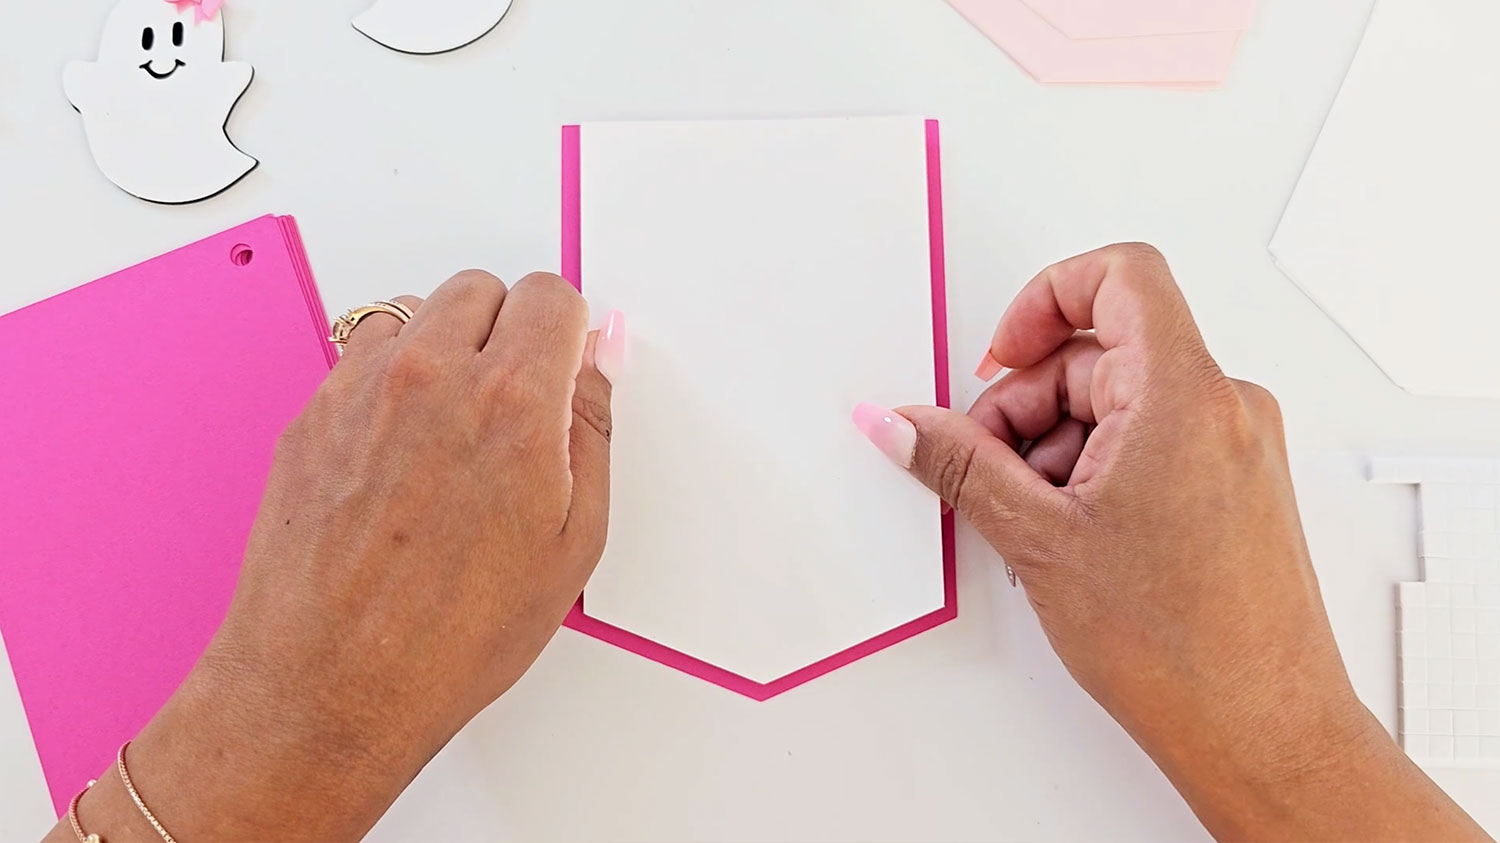
Once you have attached the pieces, you can move them around to line up the pattern.

Look at the project in Design Space to help you to place the spider webs where they are supposed to go on the banner. Use glue to secure them to the banner.
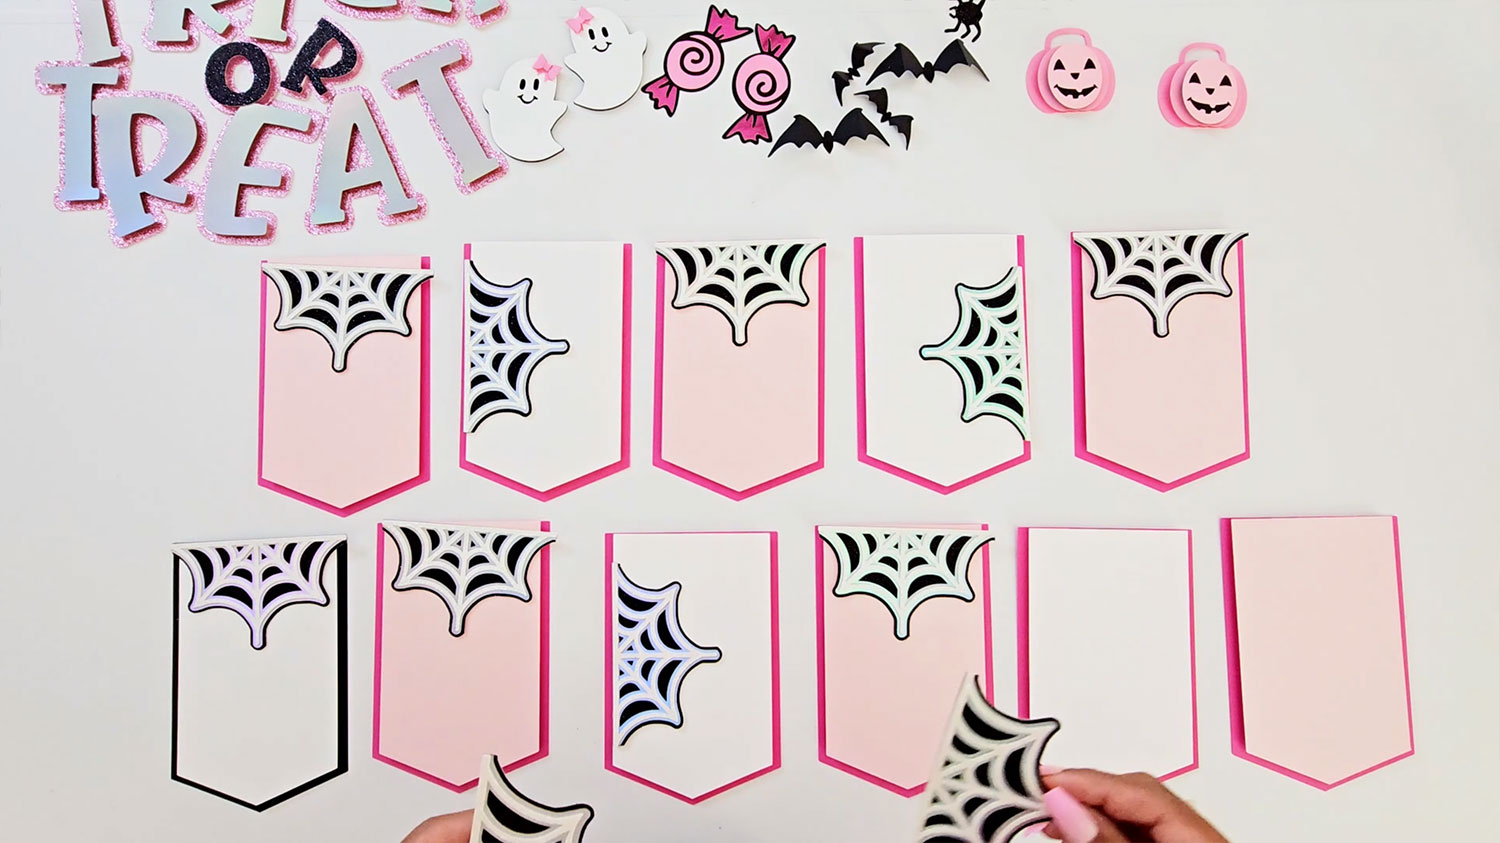
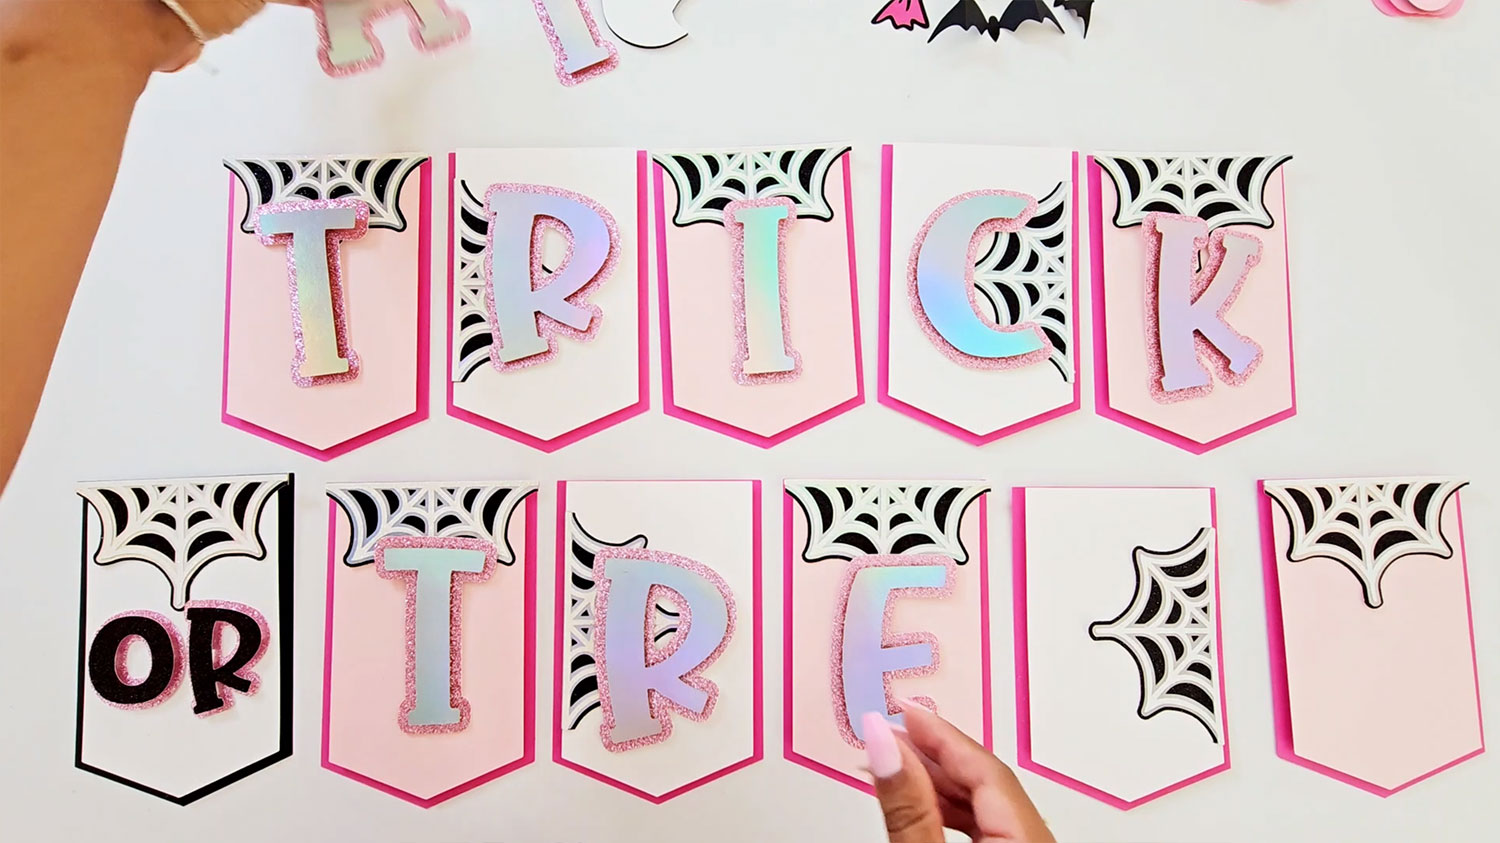
With all of the spider webs glued down, lay your letters onto your banner so that you can see what your banner will look like and to check that you have all your letters.
Use foam squares to secure the letters centrally on the banner pieces.
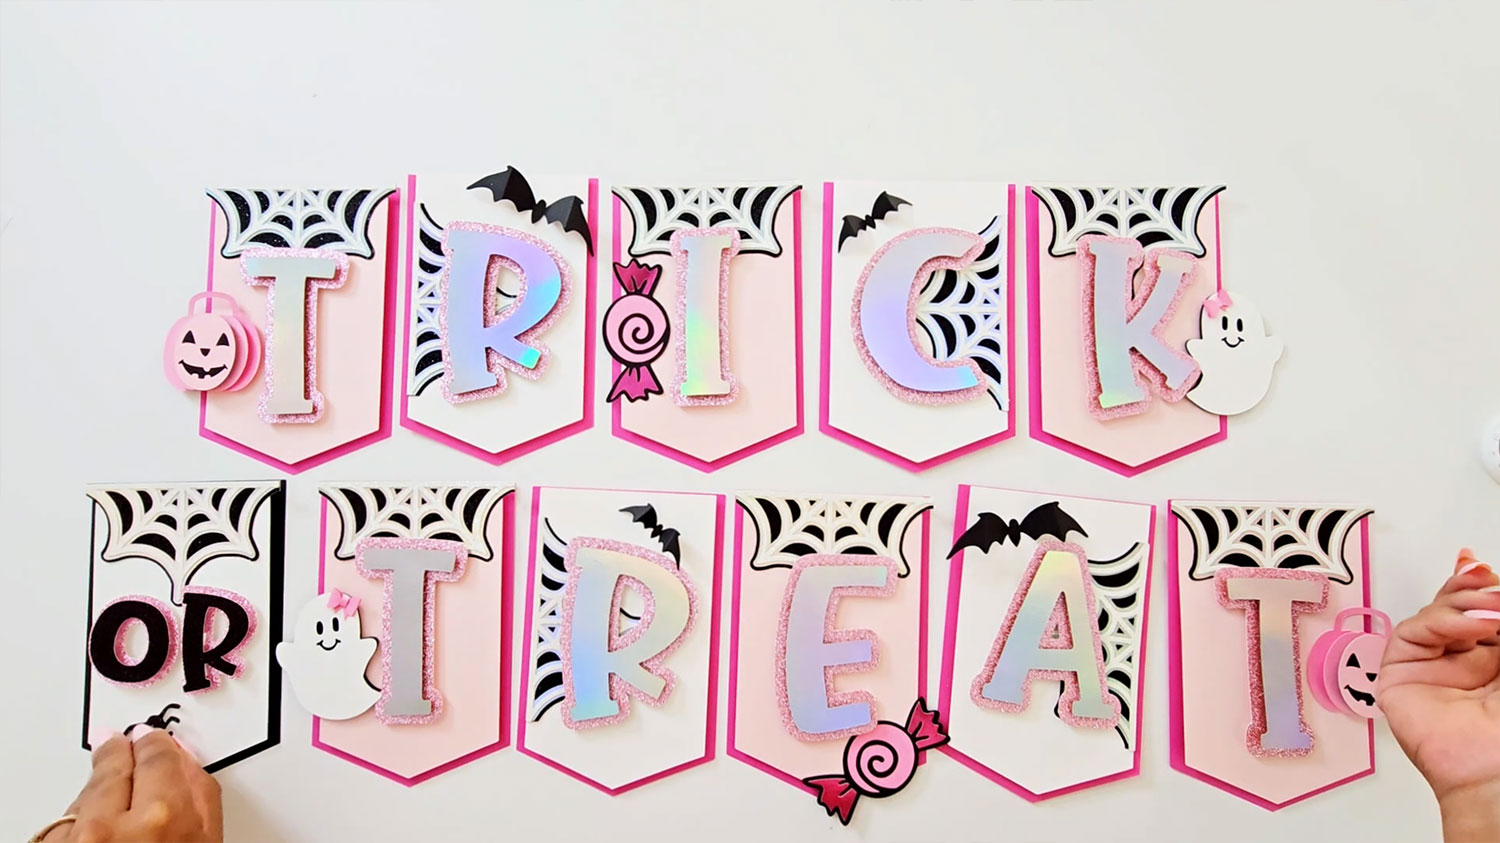
Place the Halloween characters onto the banner so that you can work out where to glue each of them. Once you’re happy, glue them on.
Step 5) String the banner together
Cut your ribbon into 9 pieces which are each 8 inches in length. Alternatively, you can hang your banner using one longer piece of ribbon.
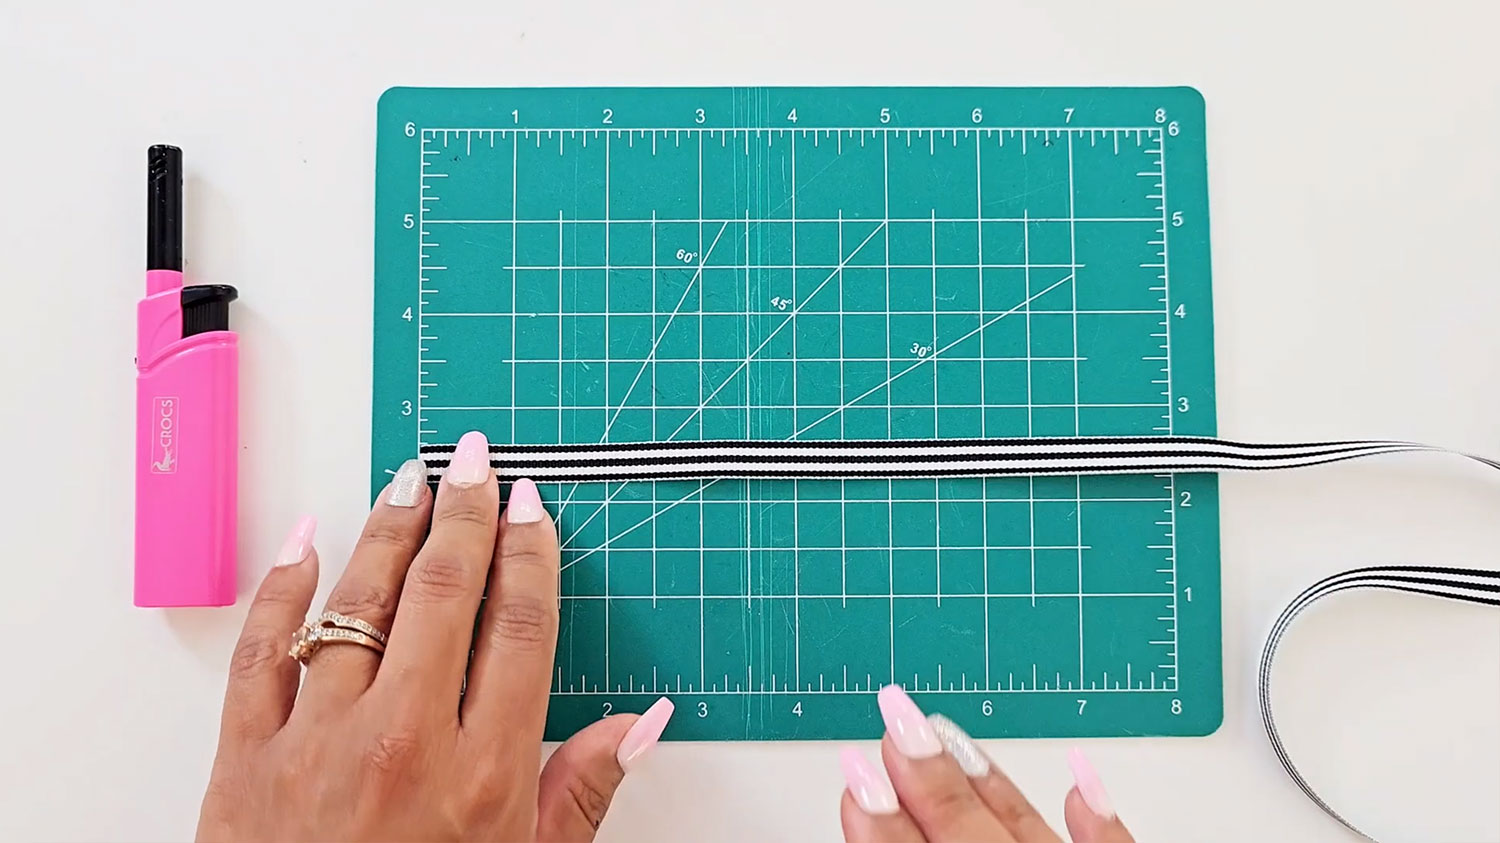
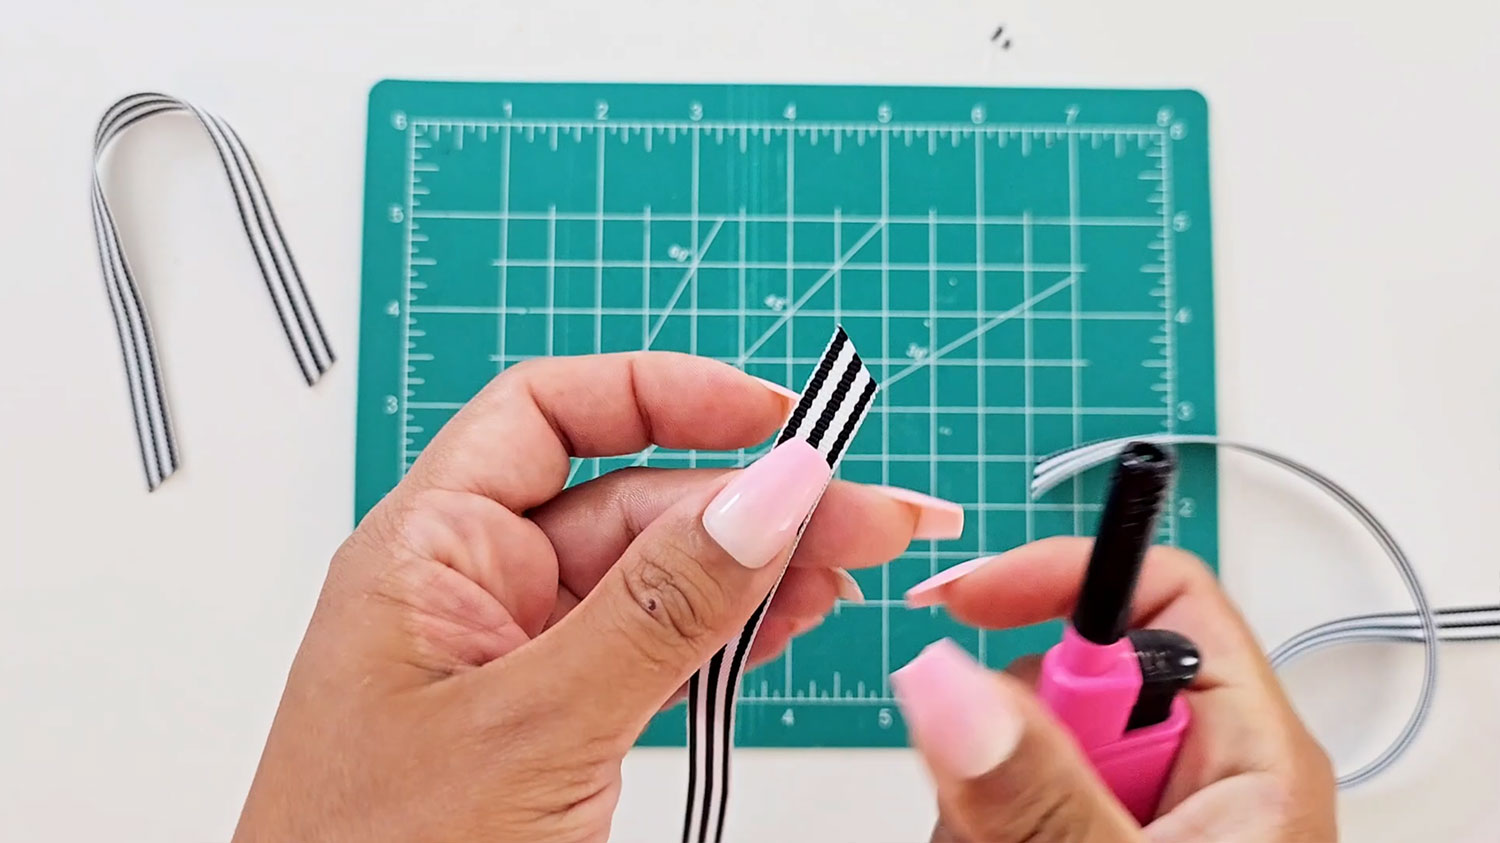
Carefully burn the ends of the ribbon to ensure the ends don’t fray.
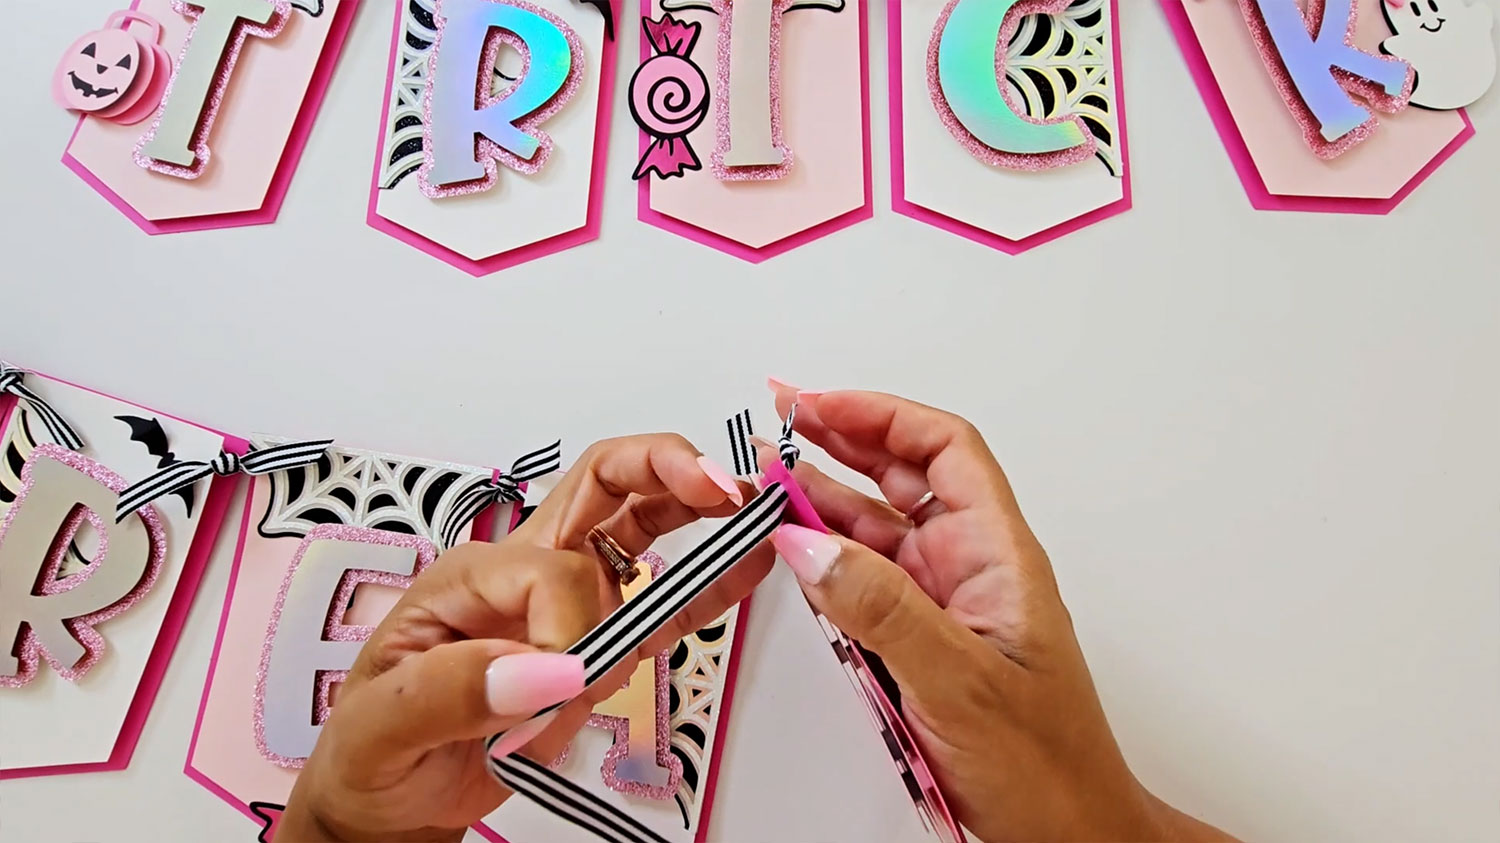
To join the pennants together, feed the ribbon strips strips through the back hole in a pennant and into the front hole the piece that goes next to it.
Fasten them with a double knot.
For the pennants on the edge of the design, add a 20 inch piece of ribbon to the edge holes so that you will be able to hang it up.
Feed your ribbon from front to back and knot the back so that it cannot be pulled through the hole.
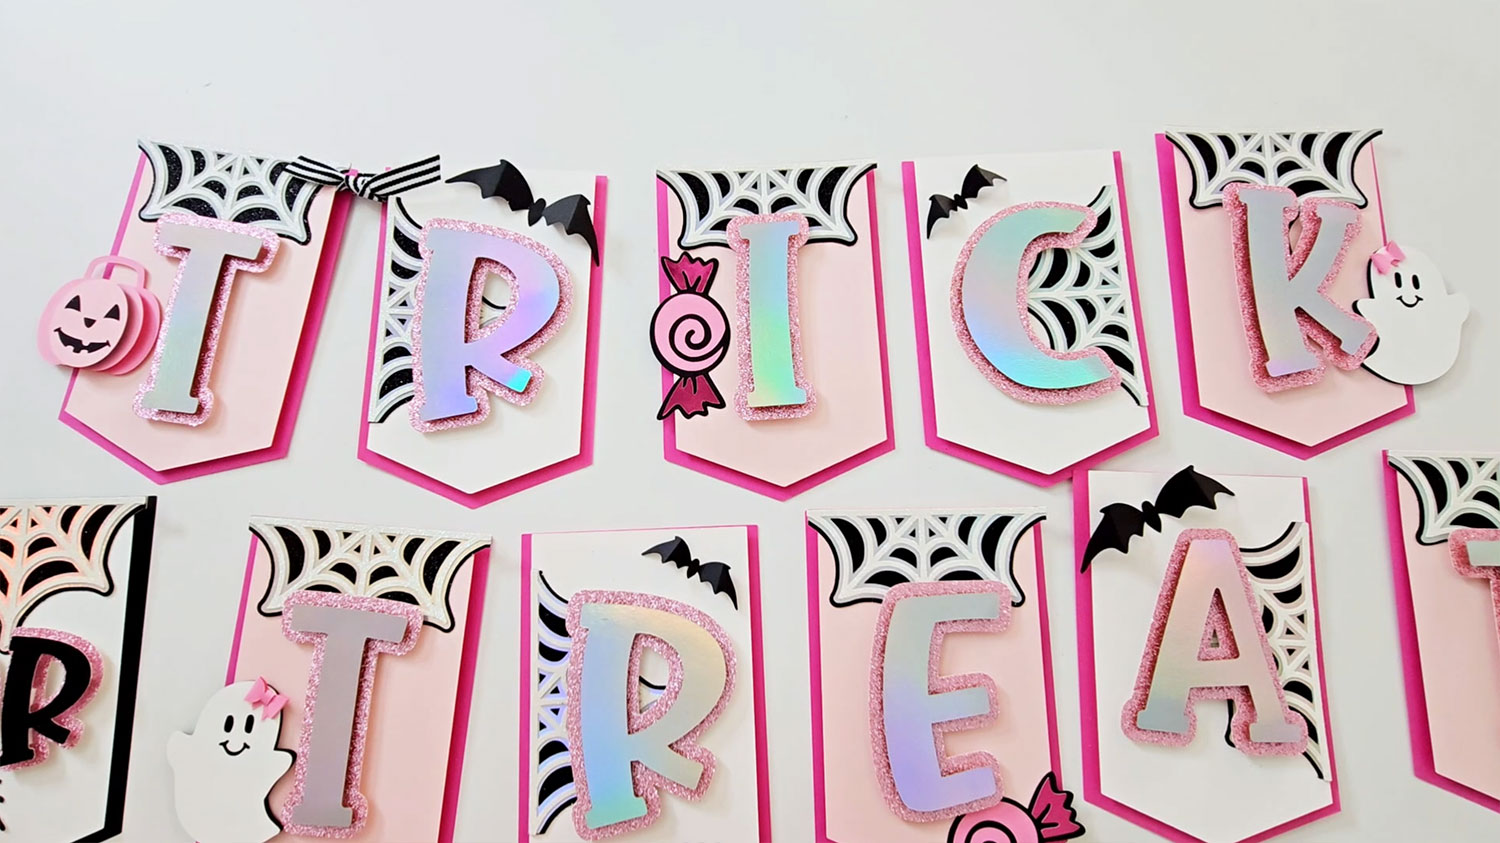
And there you have it! Your Halloween trick or treat banner is finished and ready to go on display.
How to make a party banner with a Cricut
I hope you enjoyed this tutorial on how to make a Halloween party banner with a Cricut machine.
This has got to be the prettiest of Halloween banners. I love the layered spider webs and holographic cardstock for the letters.

The pink colour scheme REALLY speaks to me too… it’s so delicate and beautiful!
This is a must-have for your Halloween decorations and I think I’ll be putting mine up very early this year so that I can admire it for longer.
Happy crafting,
Sarah x

