HCC 2023 Day 20 🦇 Halloween T-Shirt with Puffy Vinyl
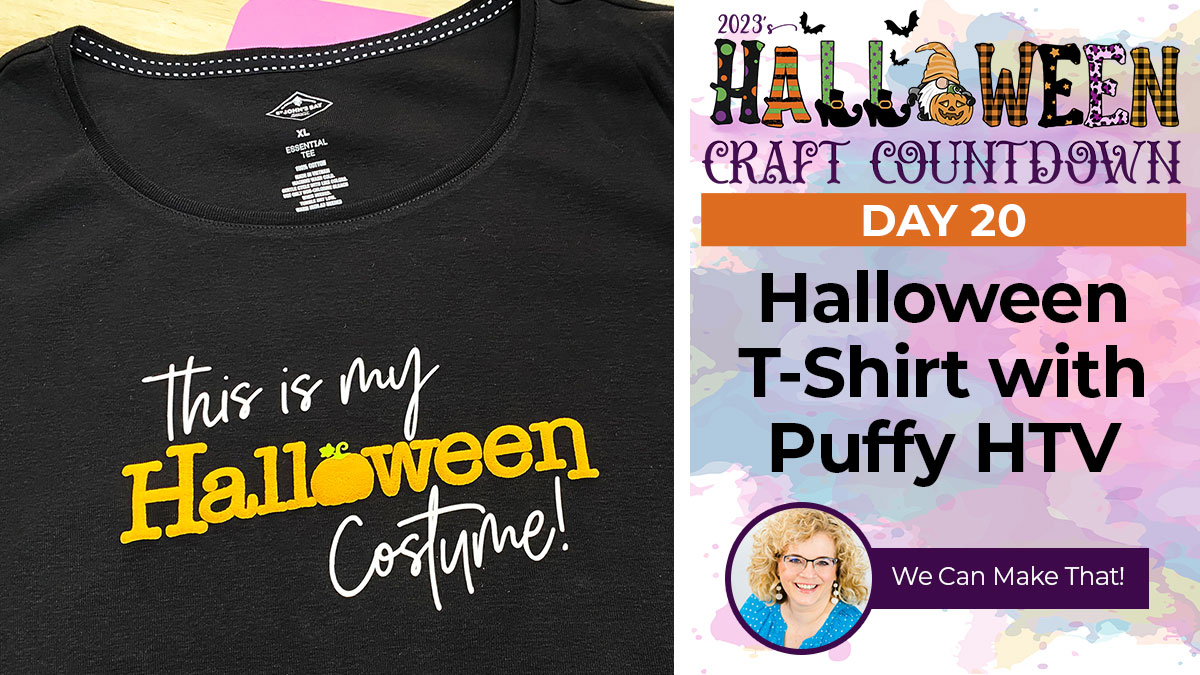
Need a last minute Halloween costume? Here’s one to suit everybody!
It’s the final day of the Halloween Craft Countdown and there’s one more craft project for you to get creative with.
Chelly from We Can Make That! is showing us how to use puff vinyl to make the perfect Halloween T-shirt.
Grab a black T-shirt and start looking through your vinyl scraps!
If you’re new to puff vinyl, there’s no need to worry. It’s all explained in this tutorial.
I love the unusual 3D puff-out effect that takes place when you press it.
This Project was part of the Halloween Craft Countdown 2023
Materials supply list
Here is a list of the materials that are required to make this project.
Please note that some of the links included in this article are affiliate links, which means that if you click through and make a purchase I may receive a commission (at no additional cost to you). You can read my full disclosure at the bottom of the page.
- Cricut Machine
- Heat press
- Black T-shirt or another colour of your choice
- Puff vinyl (Orange)
- Coloured vinyl (Green and white)
- Teflon sheet
This project is suitable for the following types of Cricut machine: Explore Air 2, Explore Air 3, Maker, Maker 3, Venture, Joy Xtra, Joy

Video tutorial for Halloween costume t-shirt
Watch the video below to see how to make this Halloween t-shirt with puffy vinyl.
If you prefer to read rather than watch, keep scrolling!
This project was created by We Can Make That!
Chelly Ontis is the CEO and SVG designer at We Can Make That (a blog for crafters and business crafters). You usually find Chelly designing SVG files, making home decor with her Cricut, getting creative with recycled DIYs, sewing, or enjoying the ‘empty nest’ with her hubby.
Find all this and her passion for helping craft business owners on her website. Happy Crafting!
Puff HTV Tutorial
Using puffy vinyl is a fun way to add extra depth and dimension to your Cricut clothing projects. Here’s how to use it.
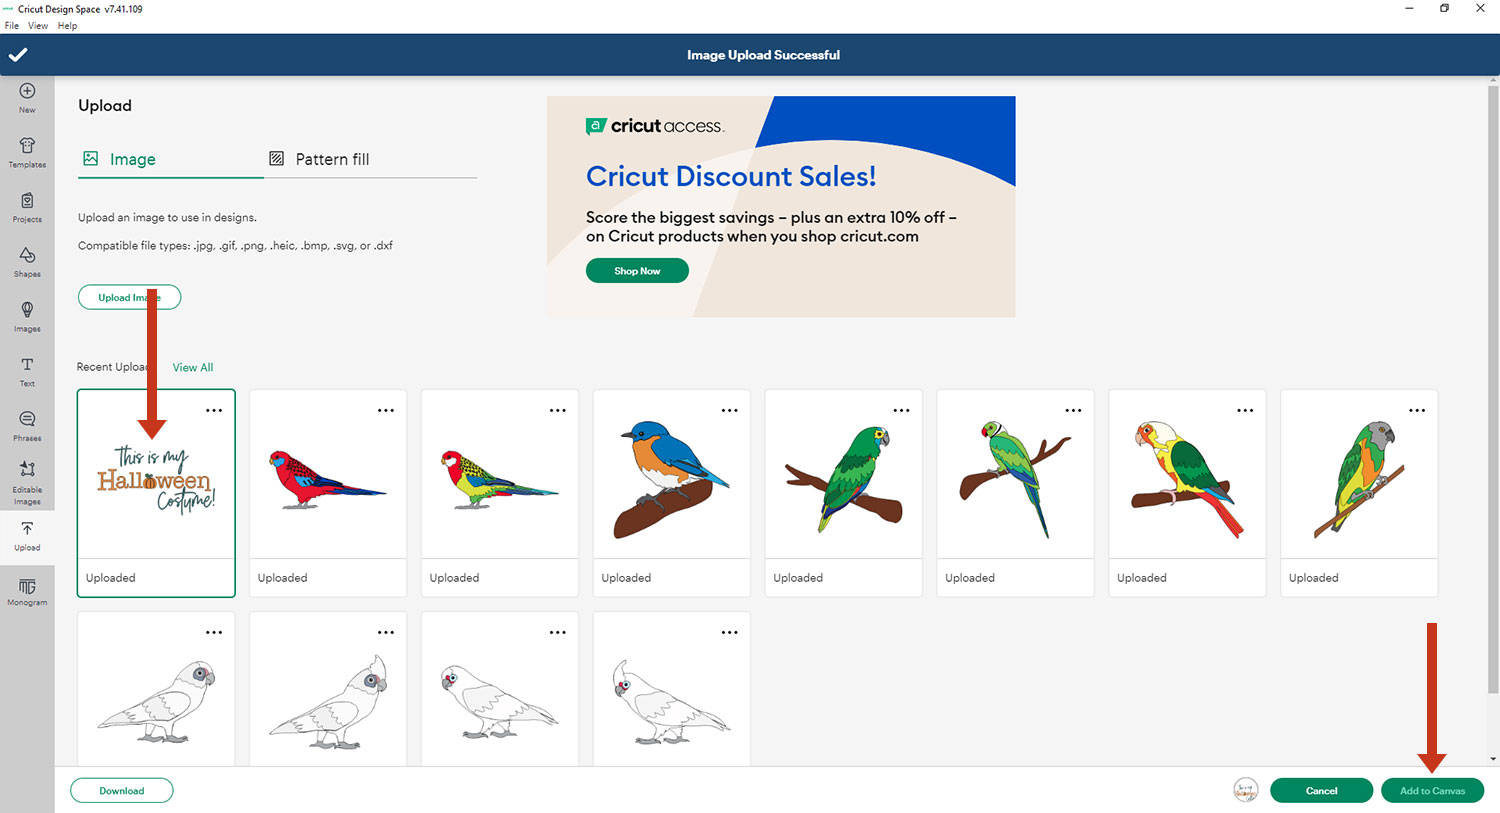
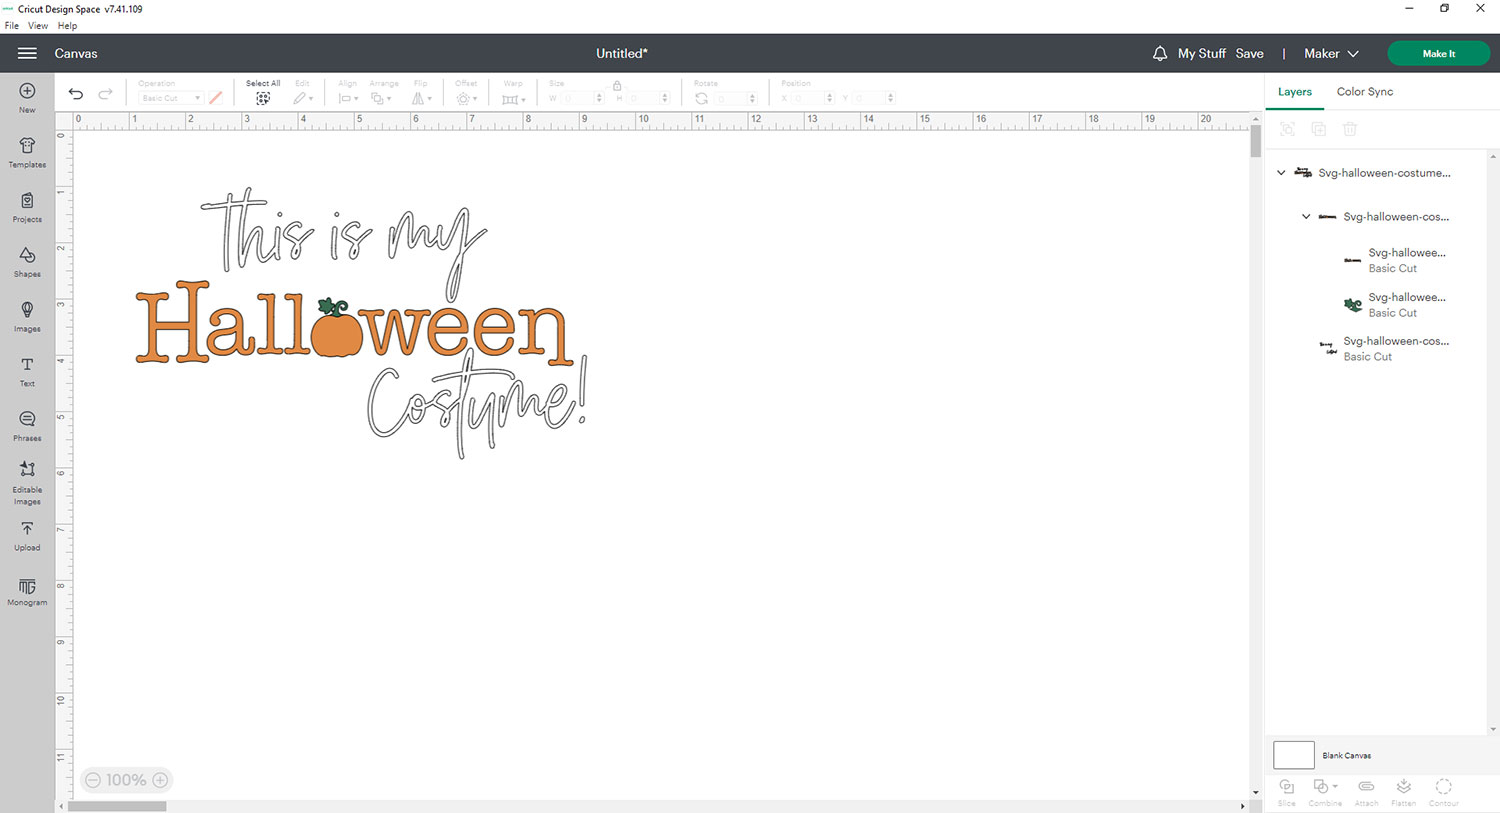
Step 1) Upload the design into Cricut Design Space
Download the files using the box below.
Open up Design Space and start a new project.
Click Upload and then find the SVG file and upload it.

Important: For Cricut Design Space, upload the file called svg-halloween-costume-wecanmakethat.svg
After uploading, it will appear in your recent uploads. Click it to get the green border, then press “Add to Canvas”.
Size the design as you wish. For this T-shirt, Chelly resized it to 8 inches.
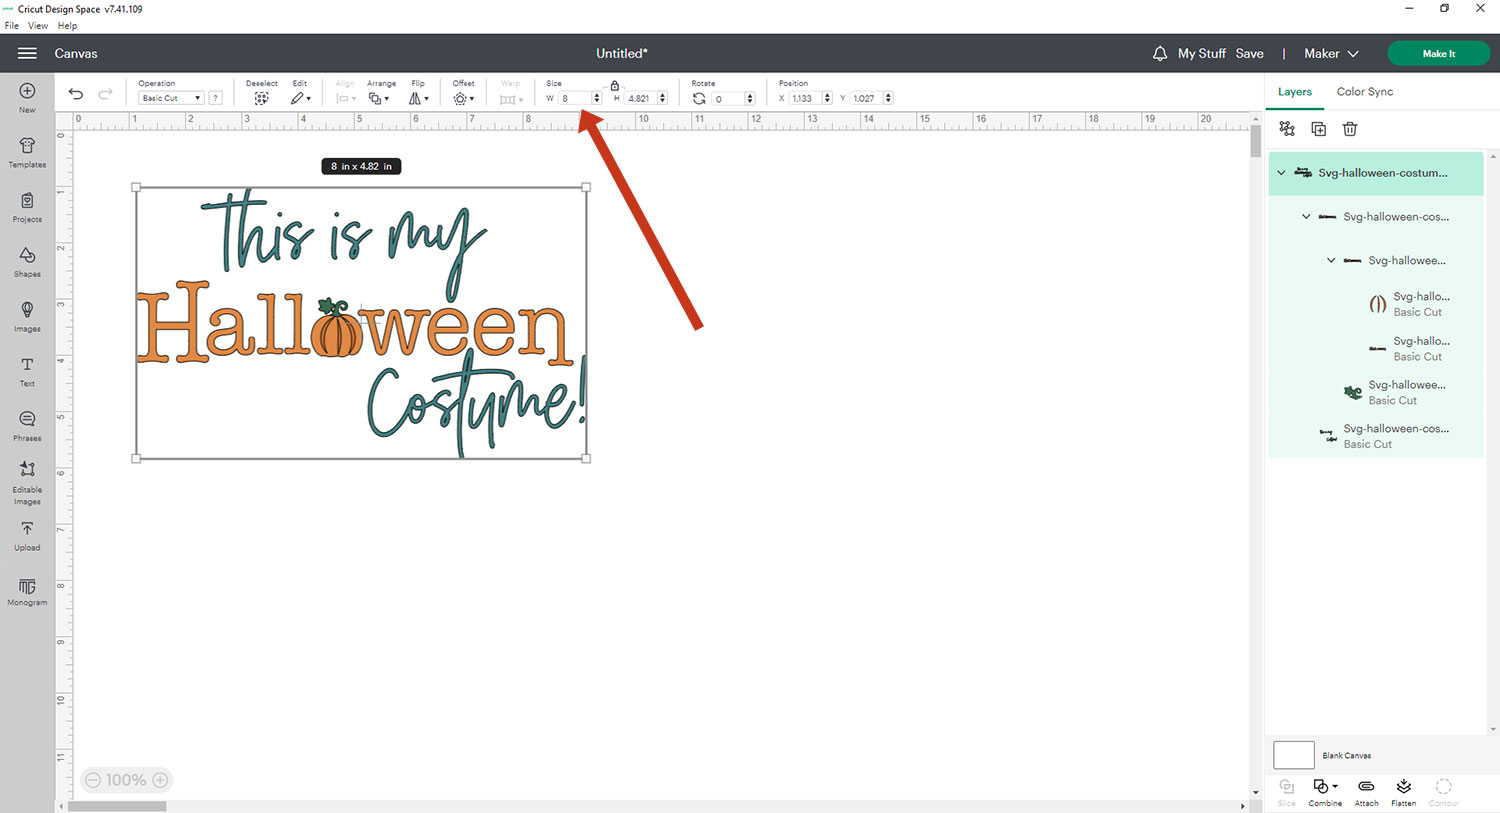
Ungroup the design and delete the pumpkin inside texture layer if you are just using one shade of orange like Chelly did.
Change the teal coloured writing to white so that it will show up on a black T-shirt and check that you are happy with the colours on screen.
Step 2) Cut the vinyl using a Cricut
Click “Make It” to begin the cutting process and follow the instructions on-screen.
Don’t forget to mirror your design so that it is the right way around once it’s pressed.
Important – you need to mirror each colour of vinyl individually
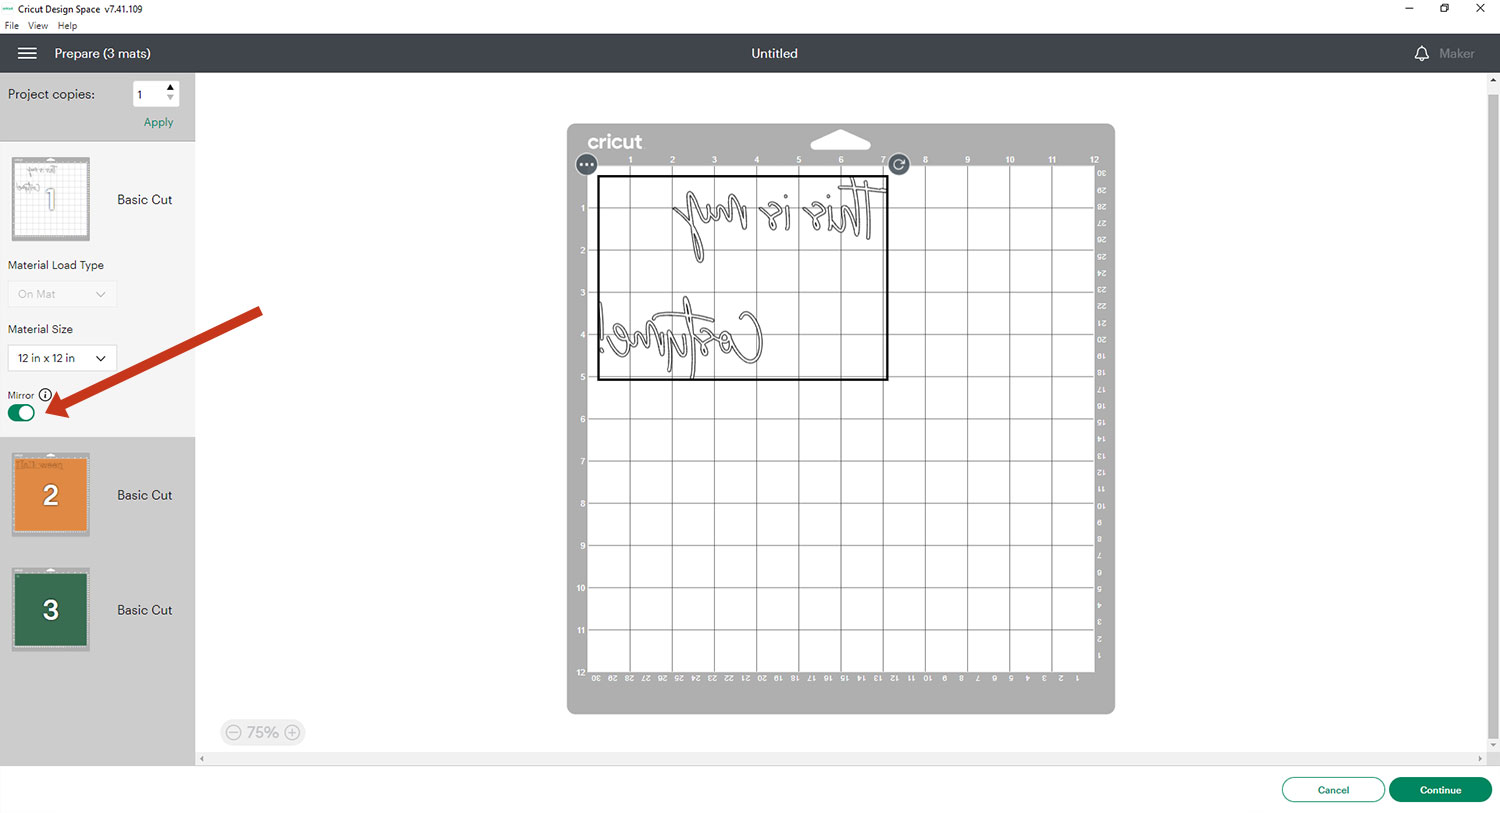
Cut the orange layer from puffy vinyl and the green/white layers from regular heat transfer vinyl (HTV).
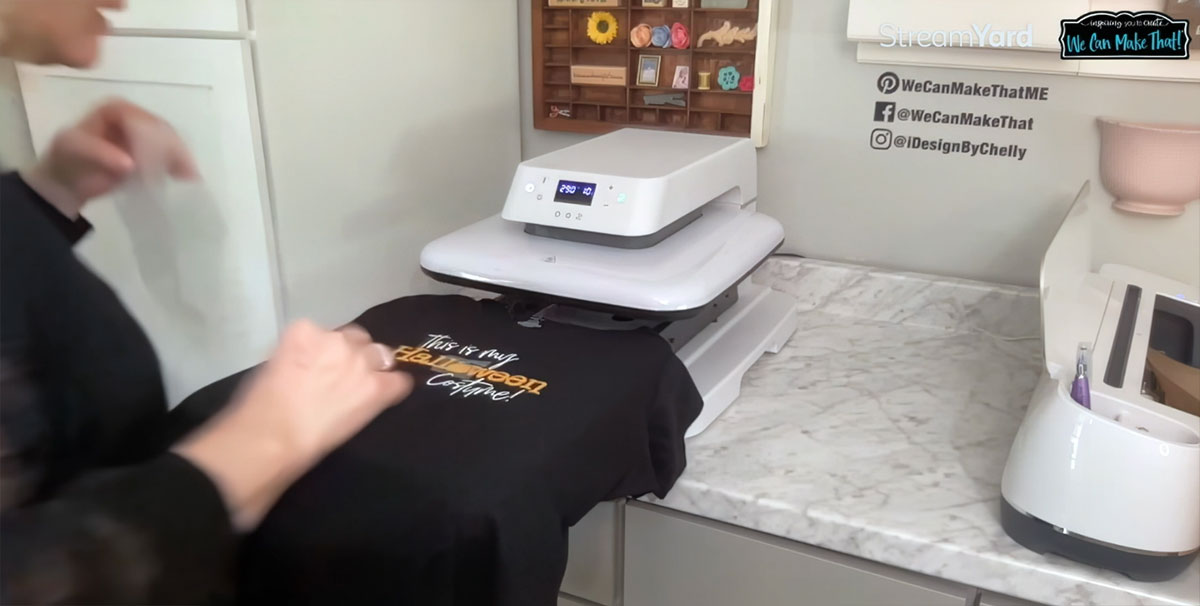
Step 3) Press the design onto the T-shirt
Heat up your press following the instructions that apply to the vinyl you’re using.
Important – Puff vinyl cannot usually be pressed more than once so make sure you press that part LAST if you are using it.
Place your first piece of vinyl, this will be the “This is my…costume” white layer.
Line up your vinyl on the T-shirt. The label may be a good indication for placing your design centrally however, they aren’t always in the center so take care as you do this step.
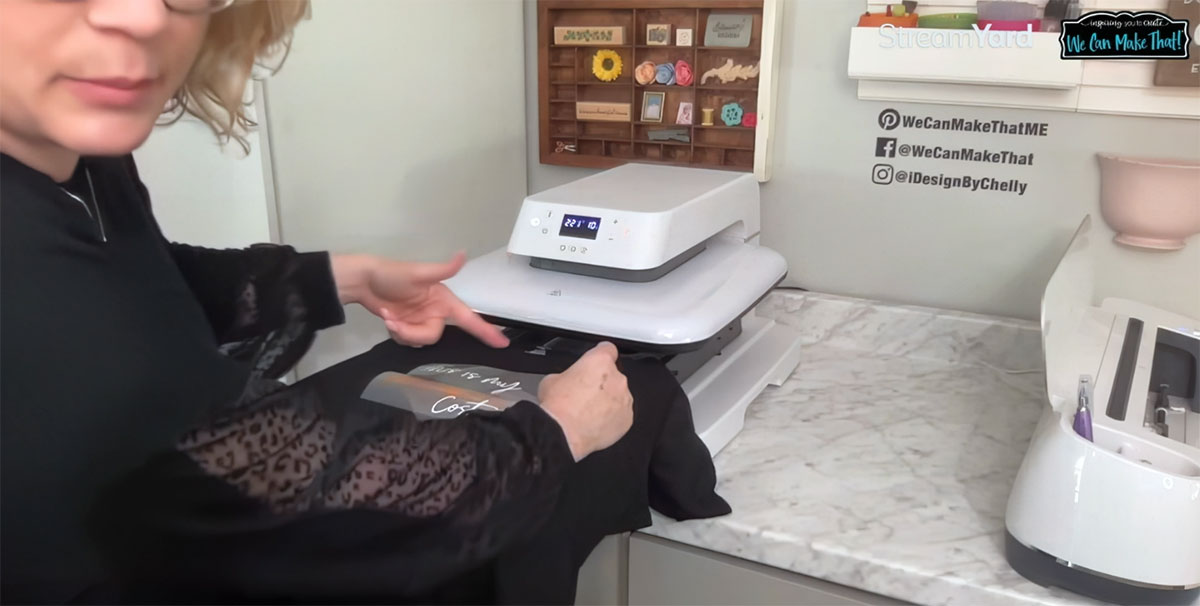
Cover your T-shirt with a Teflon sheet and press.
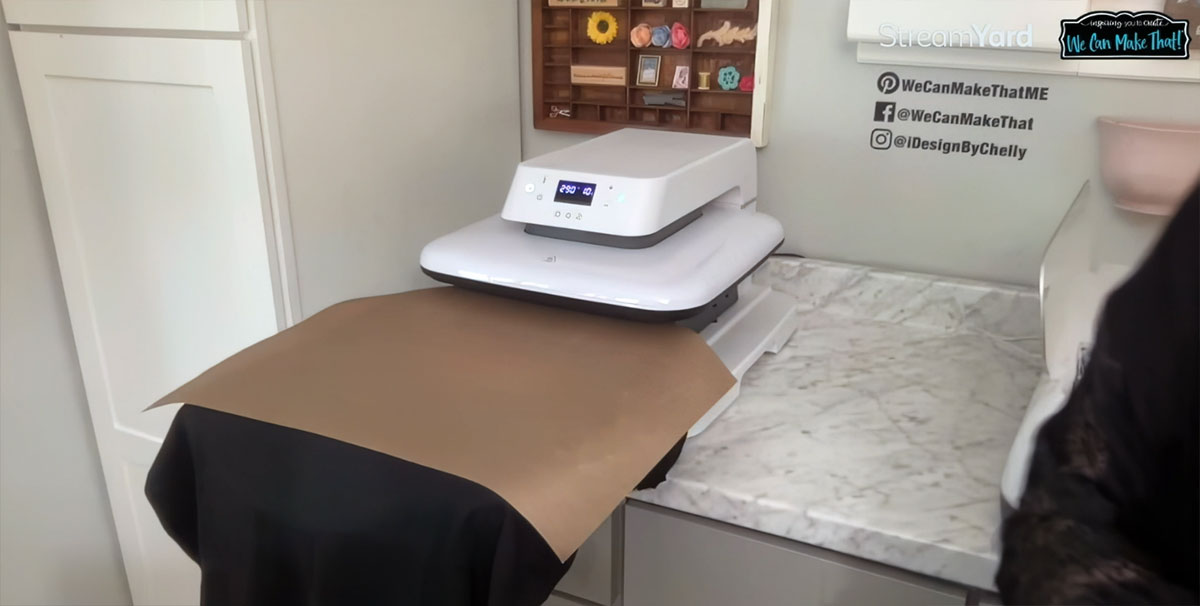
Take care to note whether your vinyl is hot or cold peel and remove the Teflon sheet and protective sheet once it has been pressed.
You will need to repeat the same process for your green stalk layer and finally the puff vinyl “Halloween” layer after each press has cooled down.
The puffy effect will appear like magic when the vinyl is pressed! Be sure to add a good amount of pressure for a better effect.
You may want to use the “Halloween” layer to help you position the stalk so that you know it will fit once you come to the final layer.
When lining up your stalk, take care to position it carefully, looking at the finished design on screen.
The “Halloween” layer will need to fit in between the bottom of the Y in “my” and the top of the T in “costume”. The T sits just in between the W and the E in “Halloween”.
Lining up the highest part of the H in “Halloween” under the TH of the previous layer may help you when lining things up.
Press your remaining vinyl.
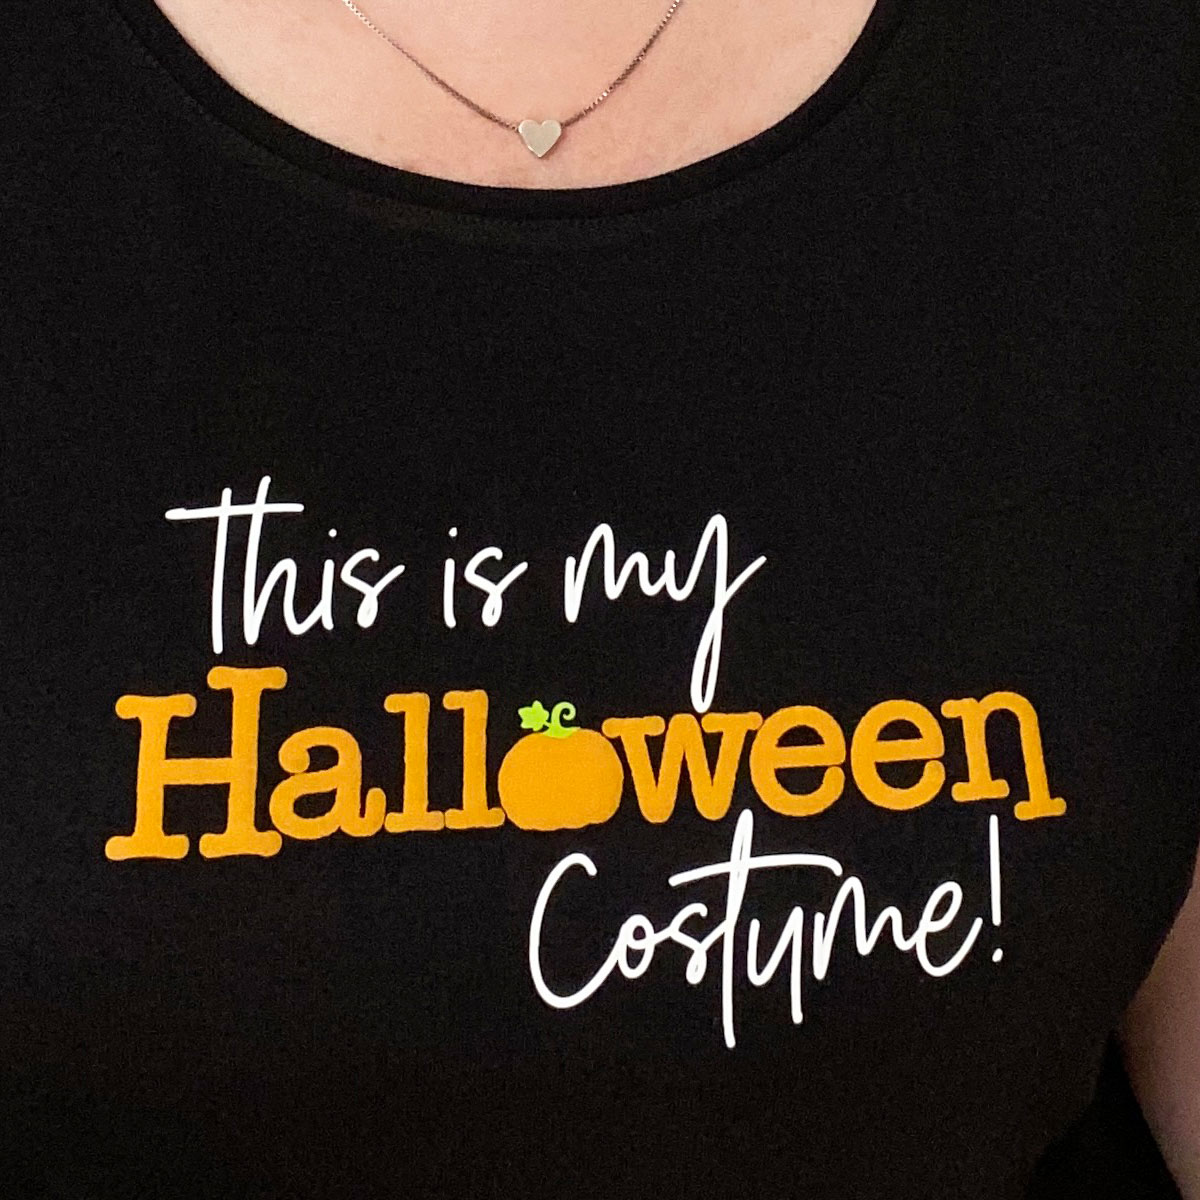
And just like magic, your Halloween costume T-shirt is finished!
How to make a t-shirt with 3D puff vinyl
I hope you enjoyed this short and sweet tutorial on how to use heat transfer to make a last-minute Halloween costume idea with your Cricut.
Here’s a photo of Chelly in her new t-shirt!
Doesn’t she look fabulous?
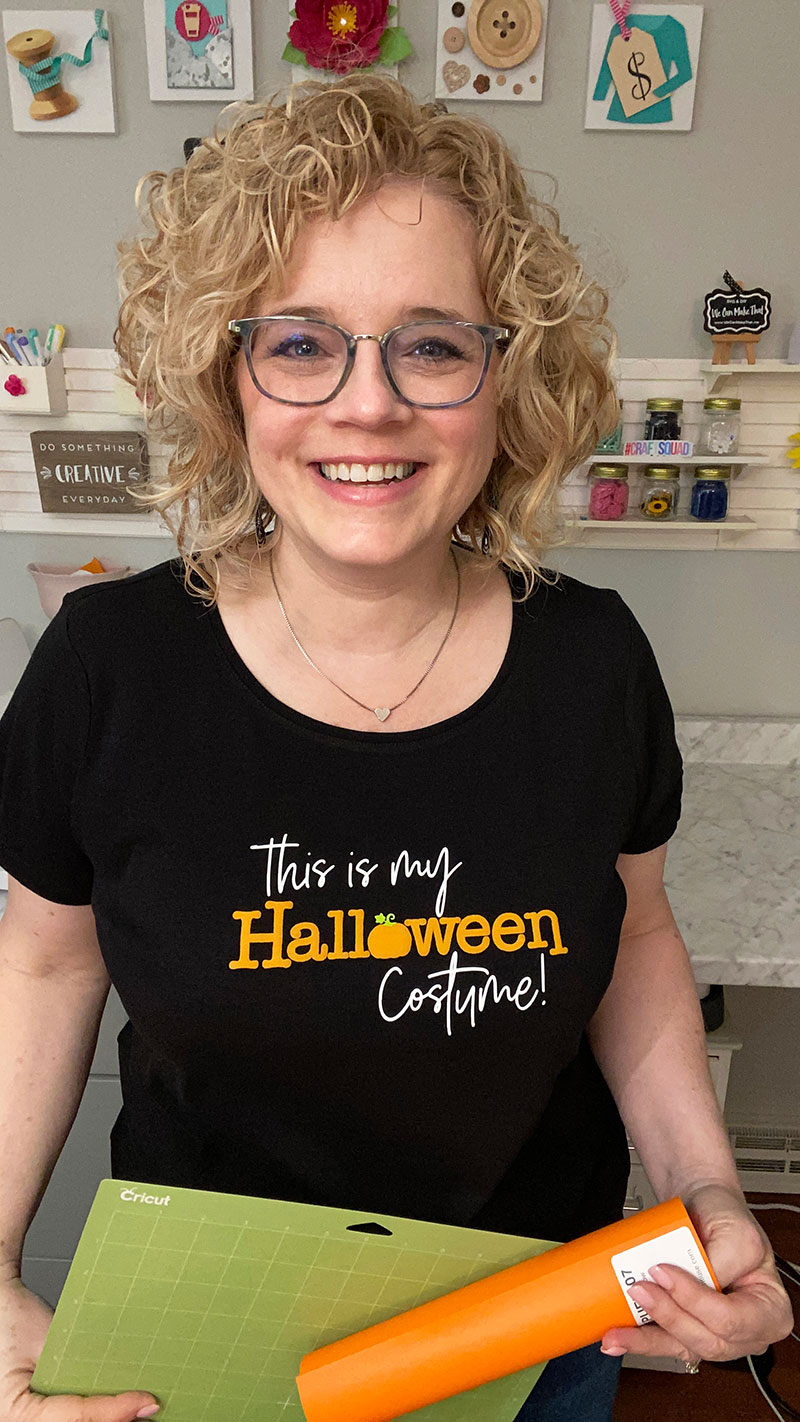
I love how quick this project is. It looks so impressive, especially with the puff vinyl adding an extra touch.
I can imagine this design on all sorts of clothing or a matching T-shirt for everyone in the family!
Happy Halloween,
Sarah x

