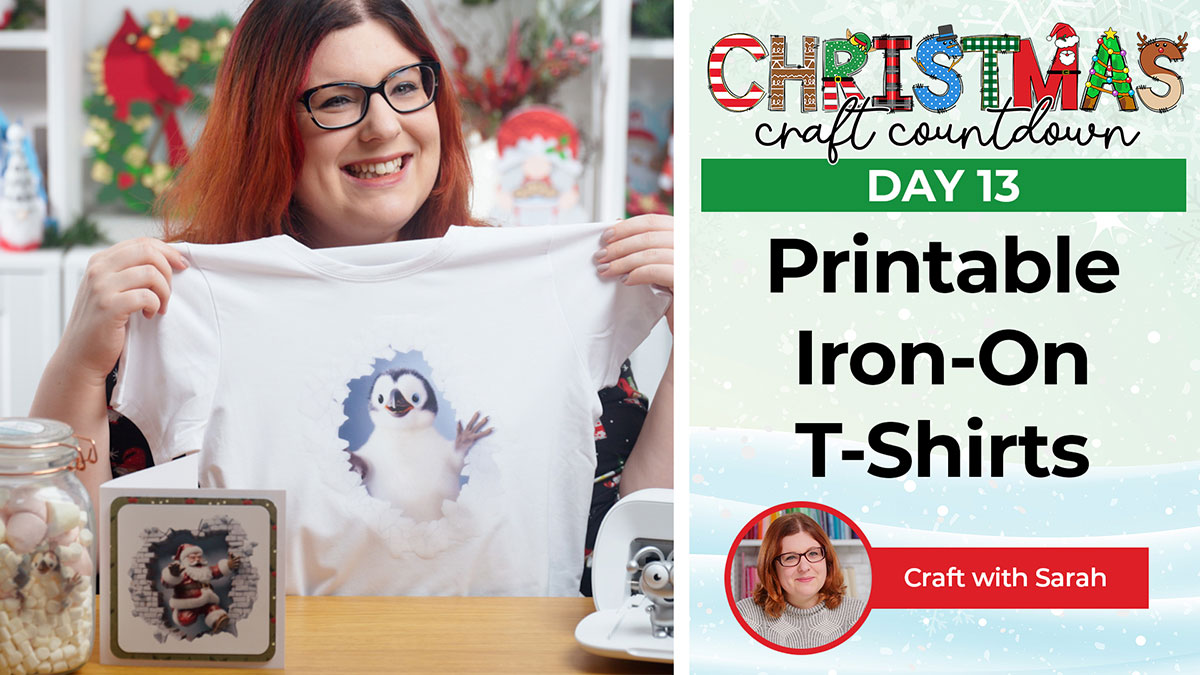
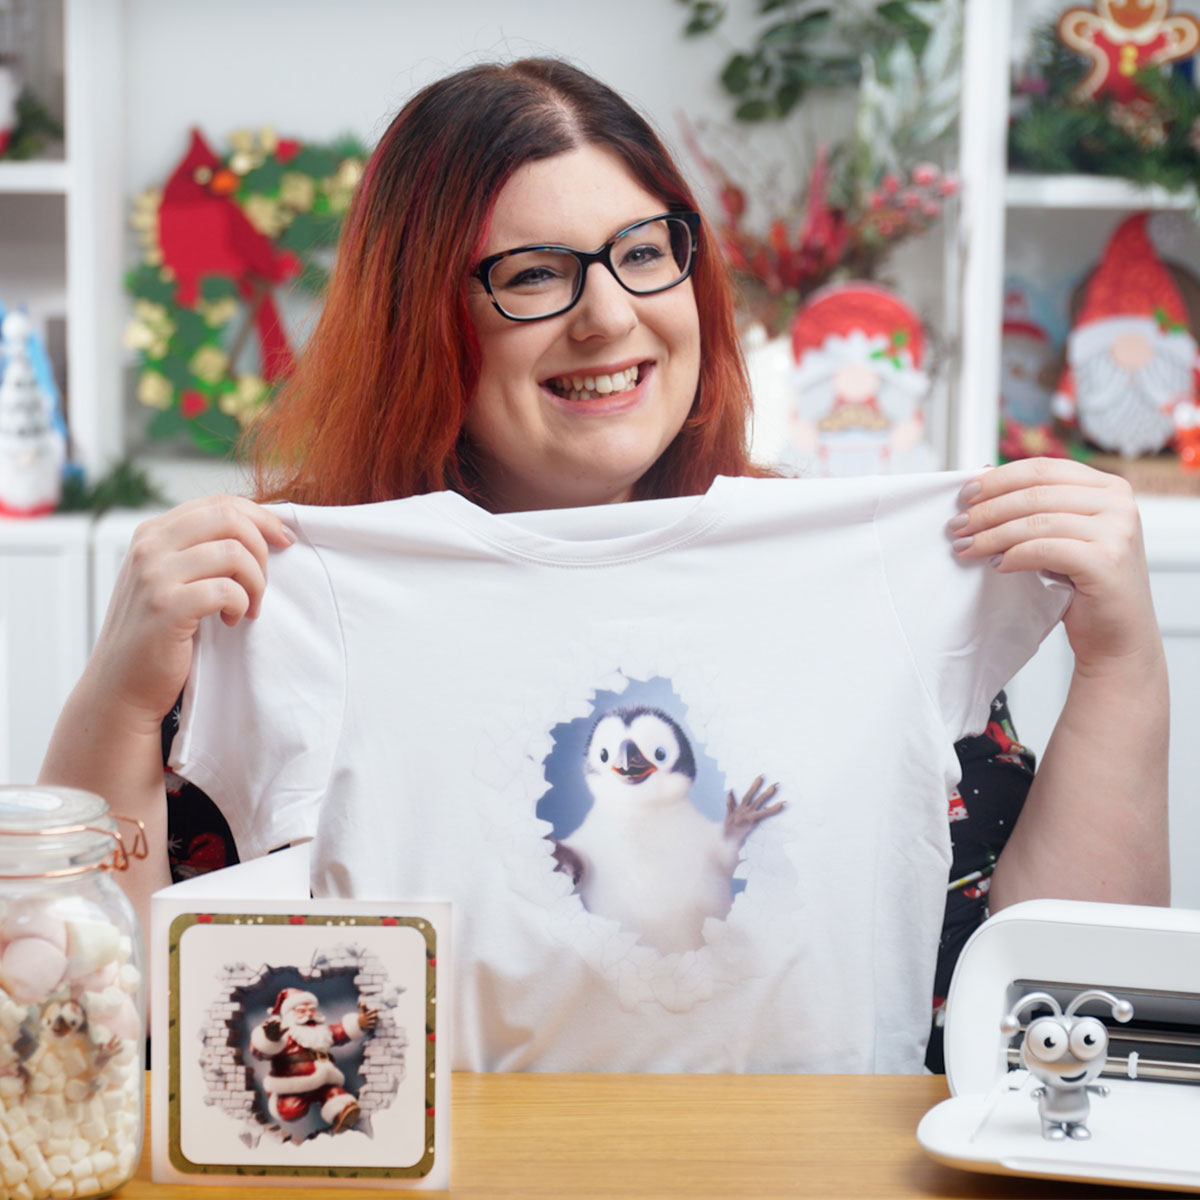
CCC 2023 Day 13 ☃️ Crafting with Printable Iron-On
If you haven’t used Cricut’s printable iron-on before, you’re missing out!
Here’s how easy it is to create custom apparel using your home printer.
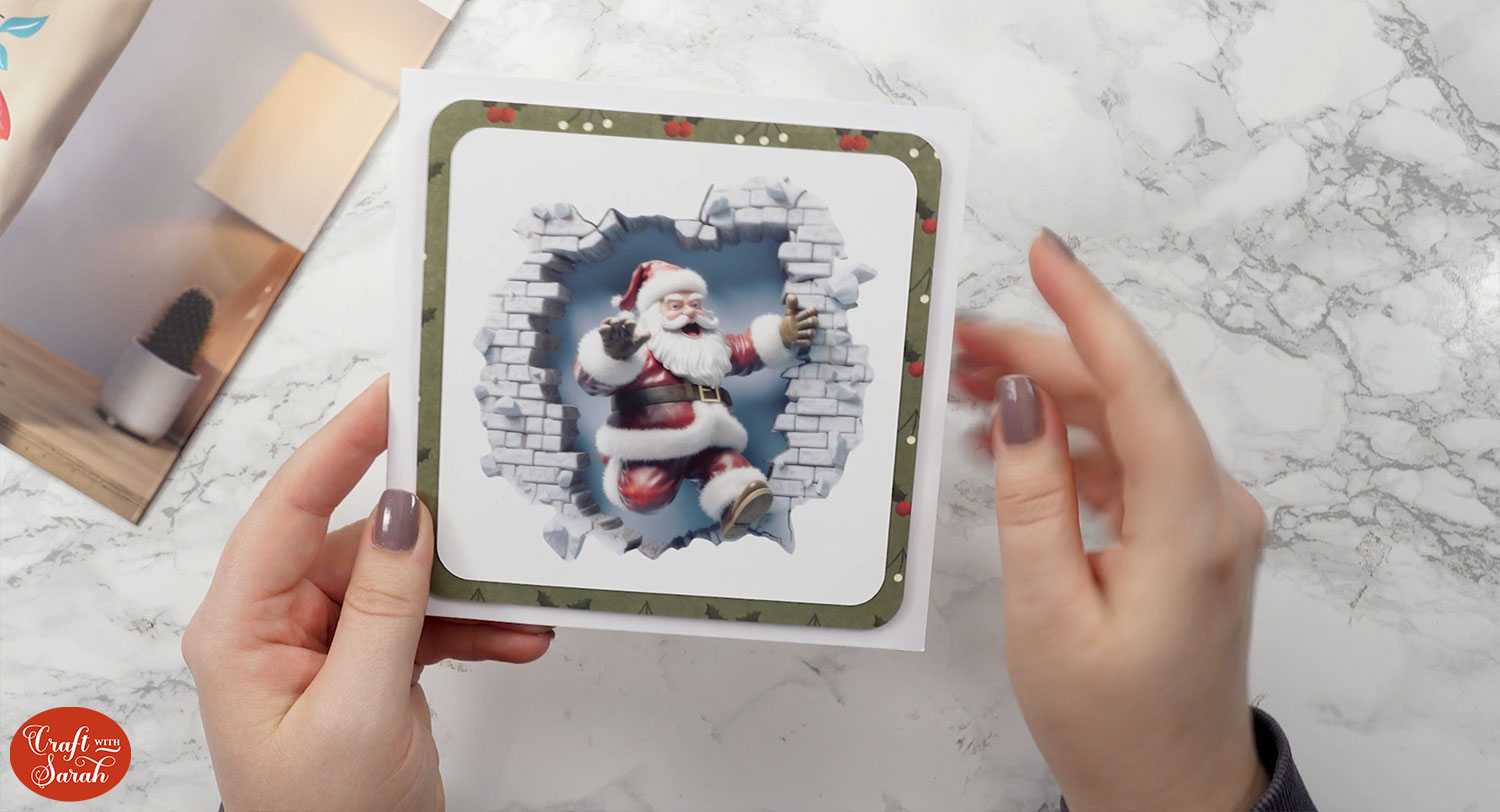
It’s Day 13 of the Christmas Craft Countdown and I’ve been using AI to make different “wall smash” images.
Using Cricut printable iron-on is a quick and easy way to put these designs on all sorts of different things like t-shirts, cosmetic bags, tote bags etc using print then cut.
You don’t need a sublimation printer for this project – just a regular inkjet colour printer.
There are lots of different designs to choose from or you can make them all!
If you don’t have any printable iron-on, no worries – the images can be printed on cardstock to make Christmas cards instead.
This Project was part of the Christmas Craft Countdown 2023
Materials supply list
Here is a list of the materials that are required to make this project.
Please note that some of the links included in this article are affiliate links, which means that if you click through and make a purchase I may receive a commission (at no additional cost to you). You can read my full disclosure at the bottom of the page.
- Cricut machine
- Light blue Cricut cutting mat
- Colour printer
- Cricut printable iron-on for light fabric
- Something to iron on – e.g. a t-shirt, tote bag or cosmetic bag
- Heat press
- Pressing mat
- Ruler
This project is suitable for the following types of Cricut machine: Explore Air 2, Explore Air 3, Maker, Maker 3, Venture and Joy Xtra. It is not suitable for the original Cricut Joy machines as those do not have print then cut functionality.

Video tutorial for printable iron-on
I love the way these images look like they’re bursting out towards you.
Watch the video below to see how to make this wall smash T-shirt or cosmetic bag.
If you prefer to read rather than watch, keep scrolling!
DIY t-shirts and bags with printable iron-on
Here’s how to make custom printed apparel with a Cricut machine.
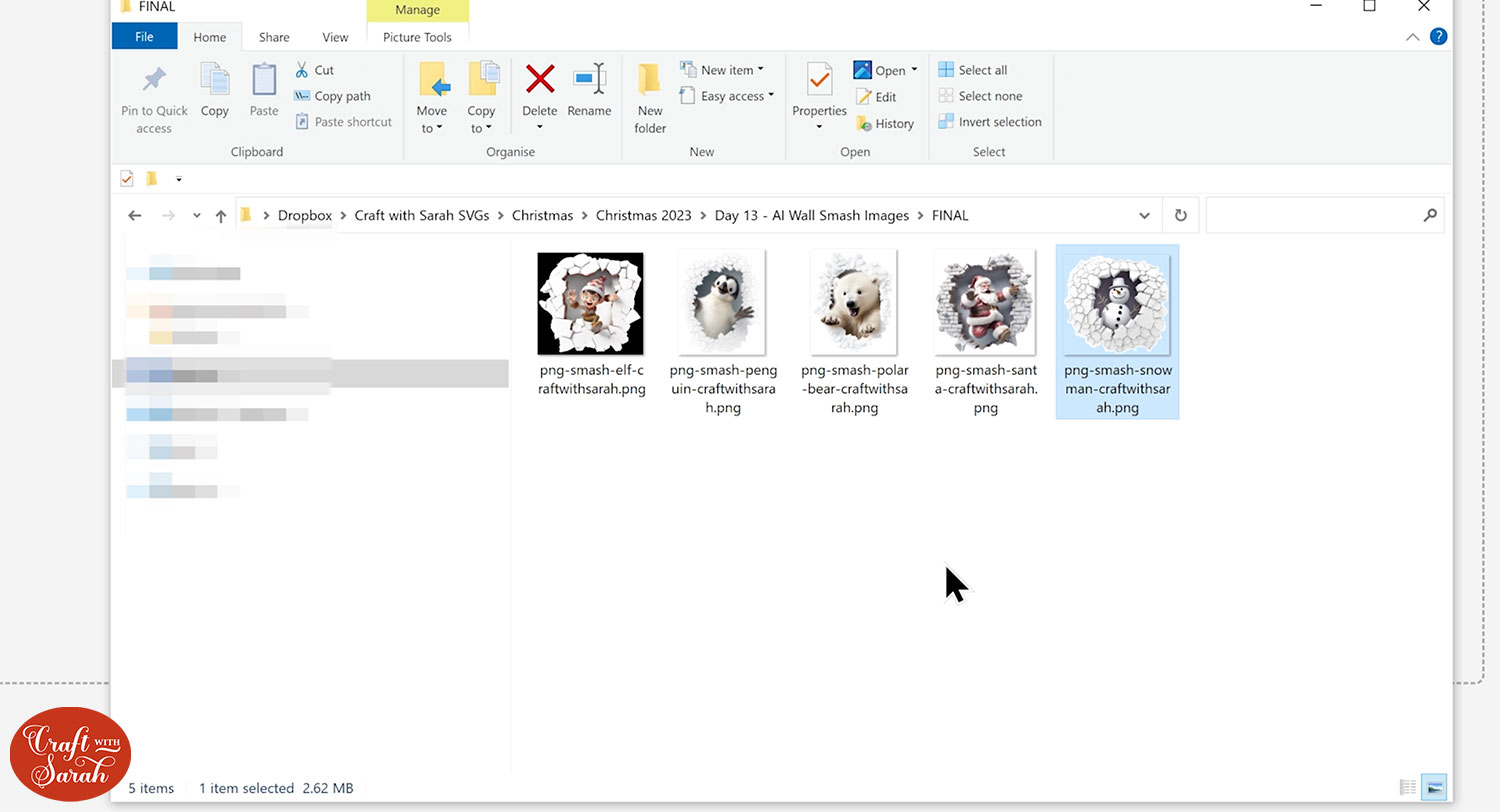
Step 1) Download the printable designs & unzip the downloaded folder
Download the files using the box below.
Or, you can use any printable images that you want.
Before you upload the designs to Design Space, you need to unzip the download folder that they come in.
Step 2) Upload the graphics into Design Space
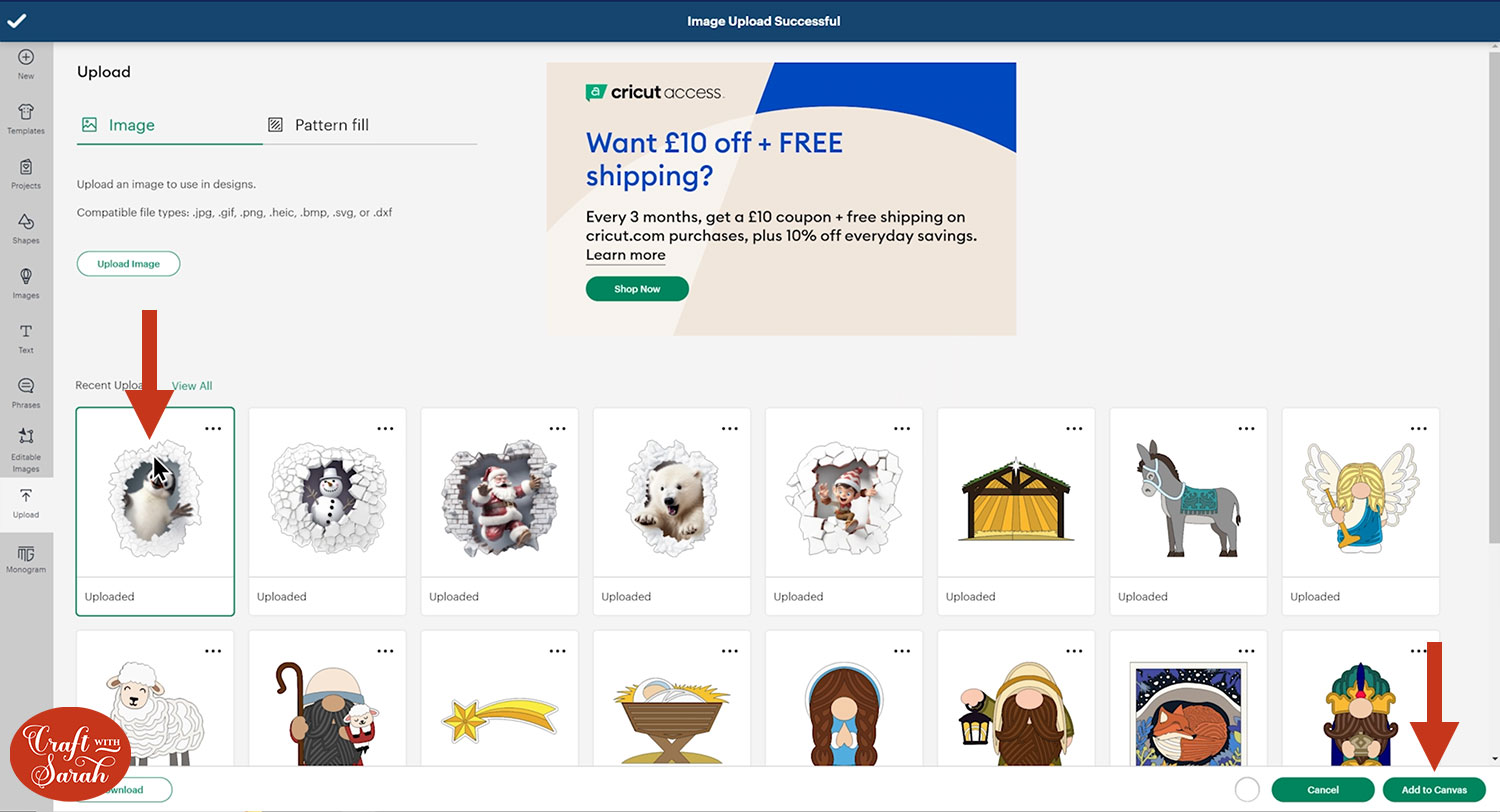
Go into Upload and Upload Image and choose your preferred image.
When loading in your image, choose Complex and press Continue.
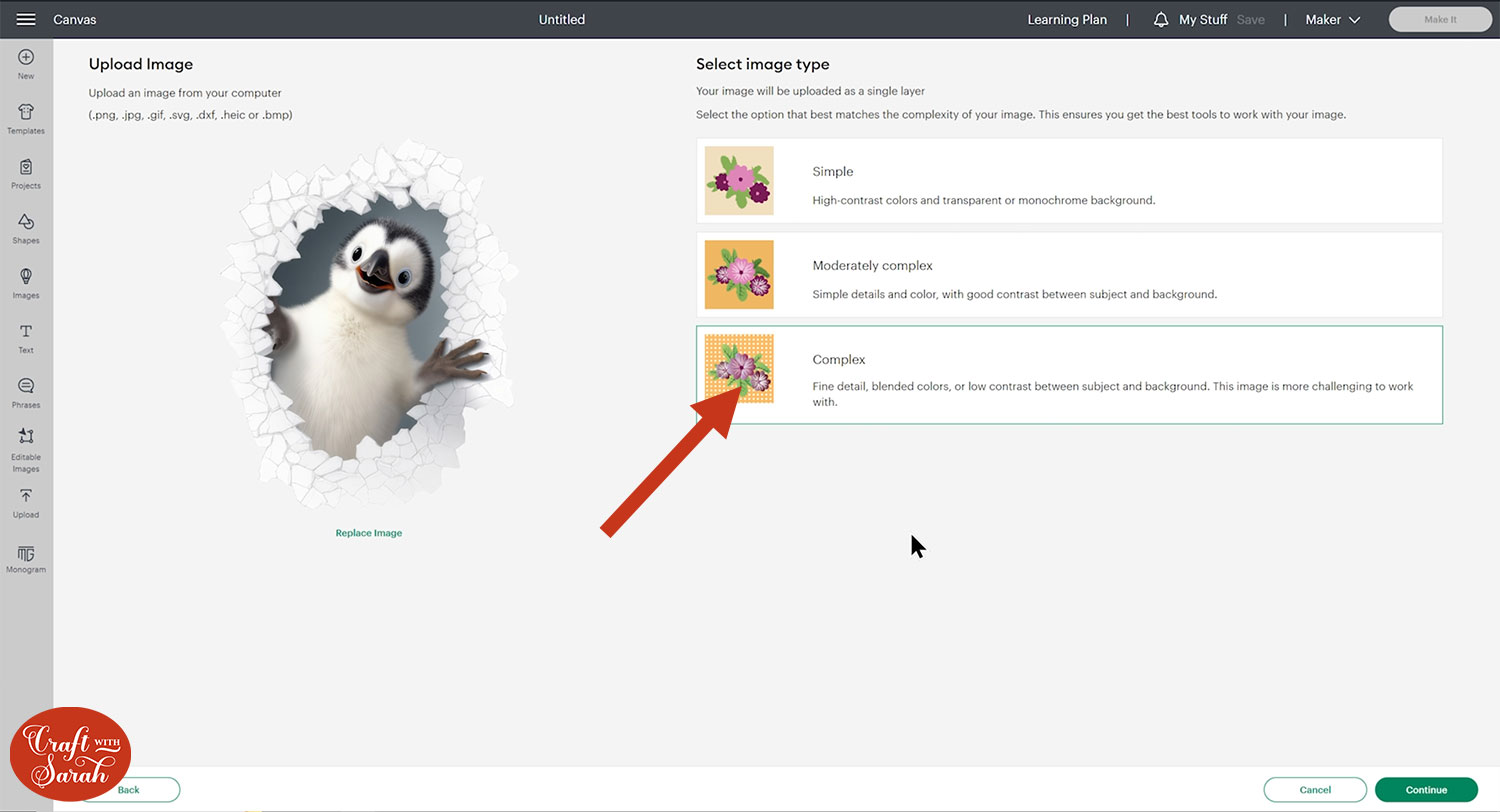
Press Apply and Continue on the next page.
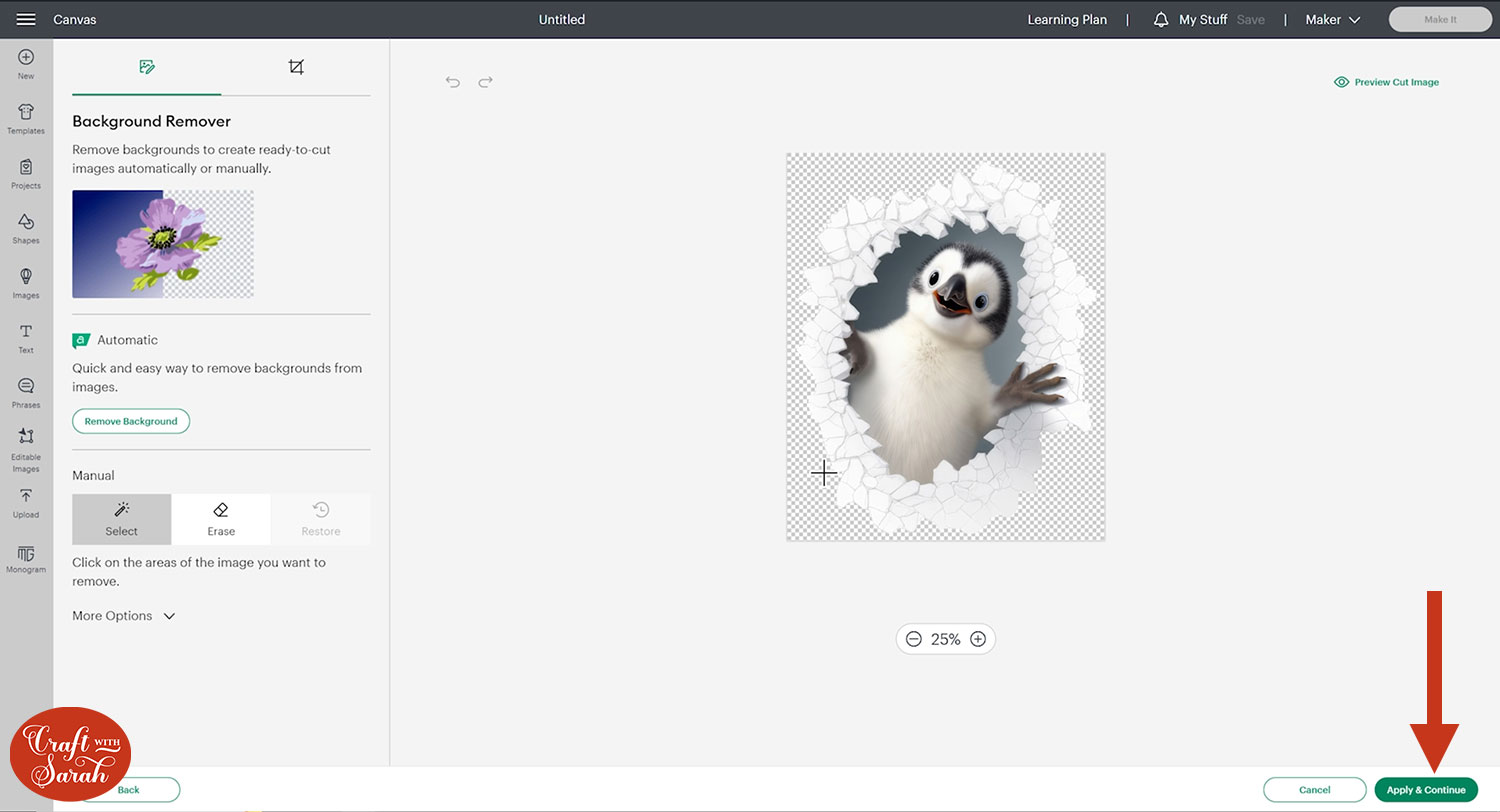
Choose Print then Cut Image and then Upload.

Click the image under your Recent Uploads and then press Add to Canvas.
Size the design to match your craft blank
To size the design correctly, you will need to measure the T-shirt, tote bag or whatever it is you are using so that you end up with a suitably sized image.
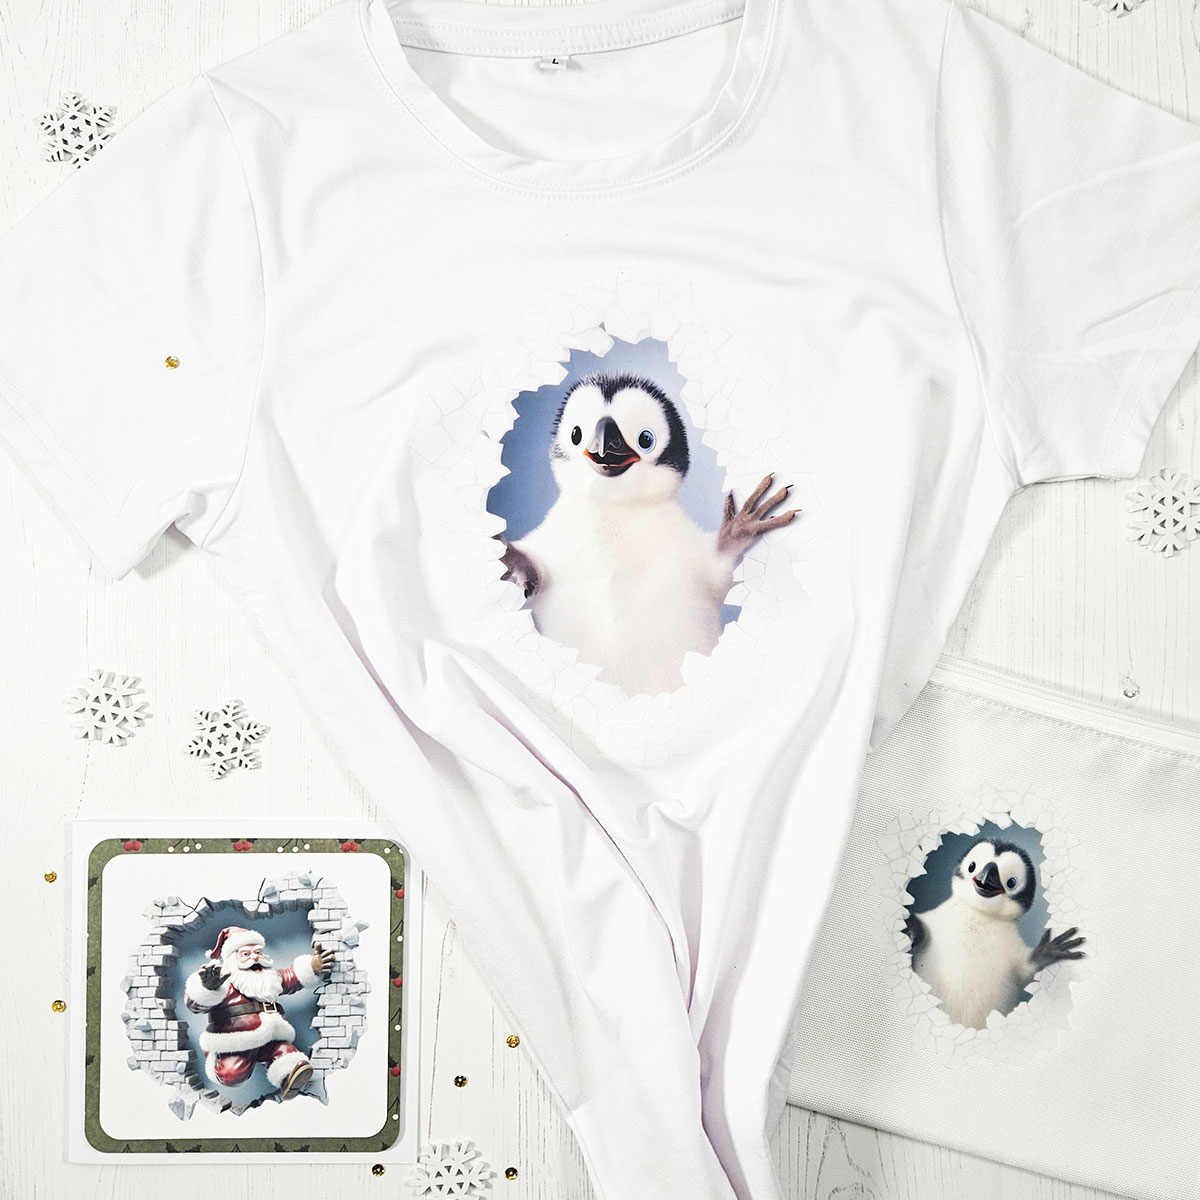
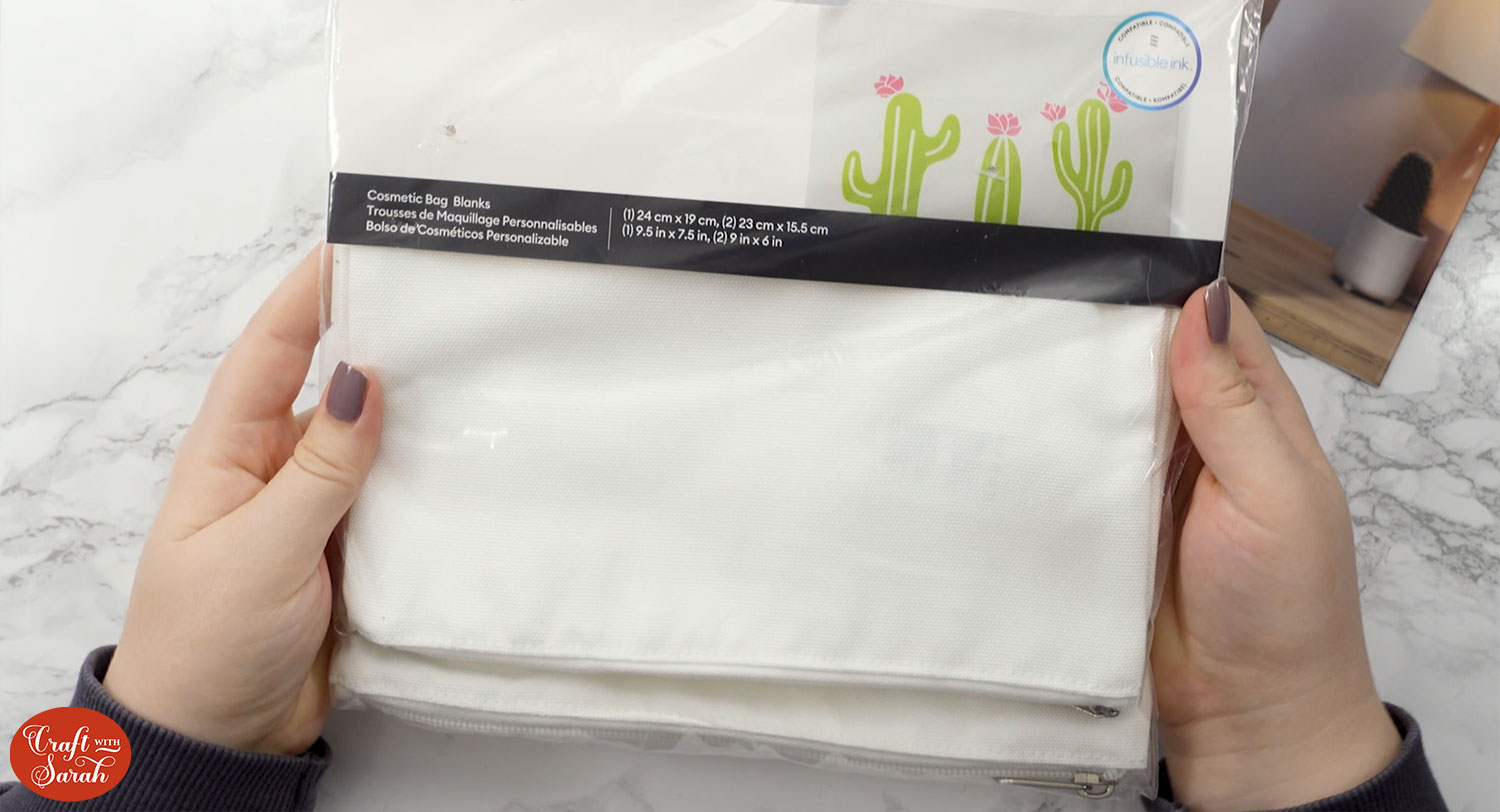
I used a Cricut brand cosmetic bag. These “wall smash” designs look best on a pure white blank so that it blends in nicely with the white of the ice.
Take a ruler to measure what sort of size you will want the design. You don’t want the design to go all the way to the edge otherwise it might crack when it’s being worn as Iron-On isn’t very stretchy.
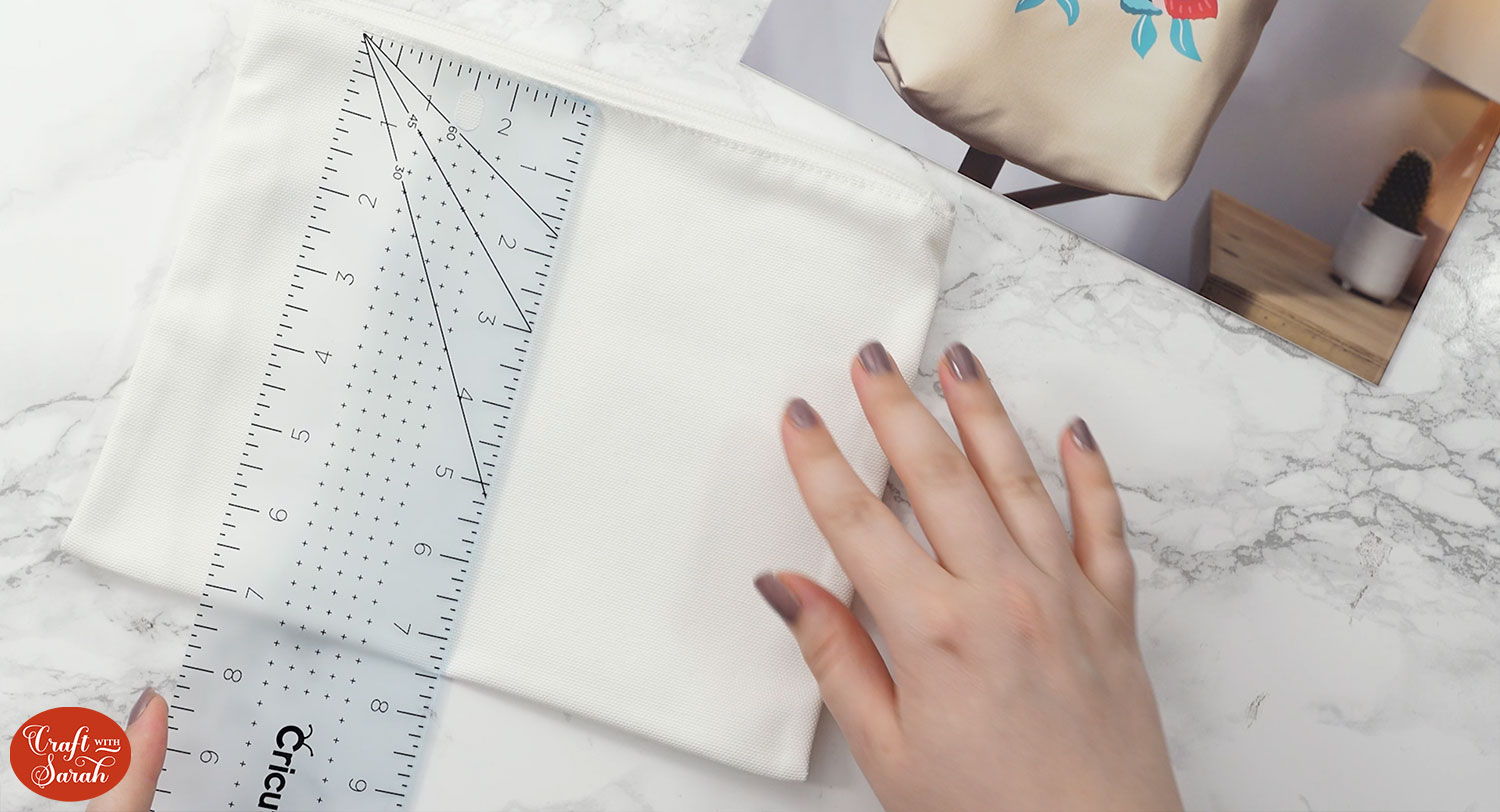
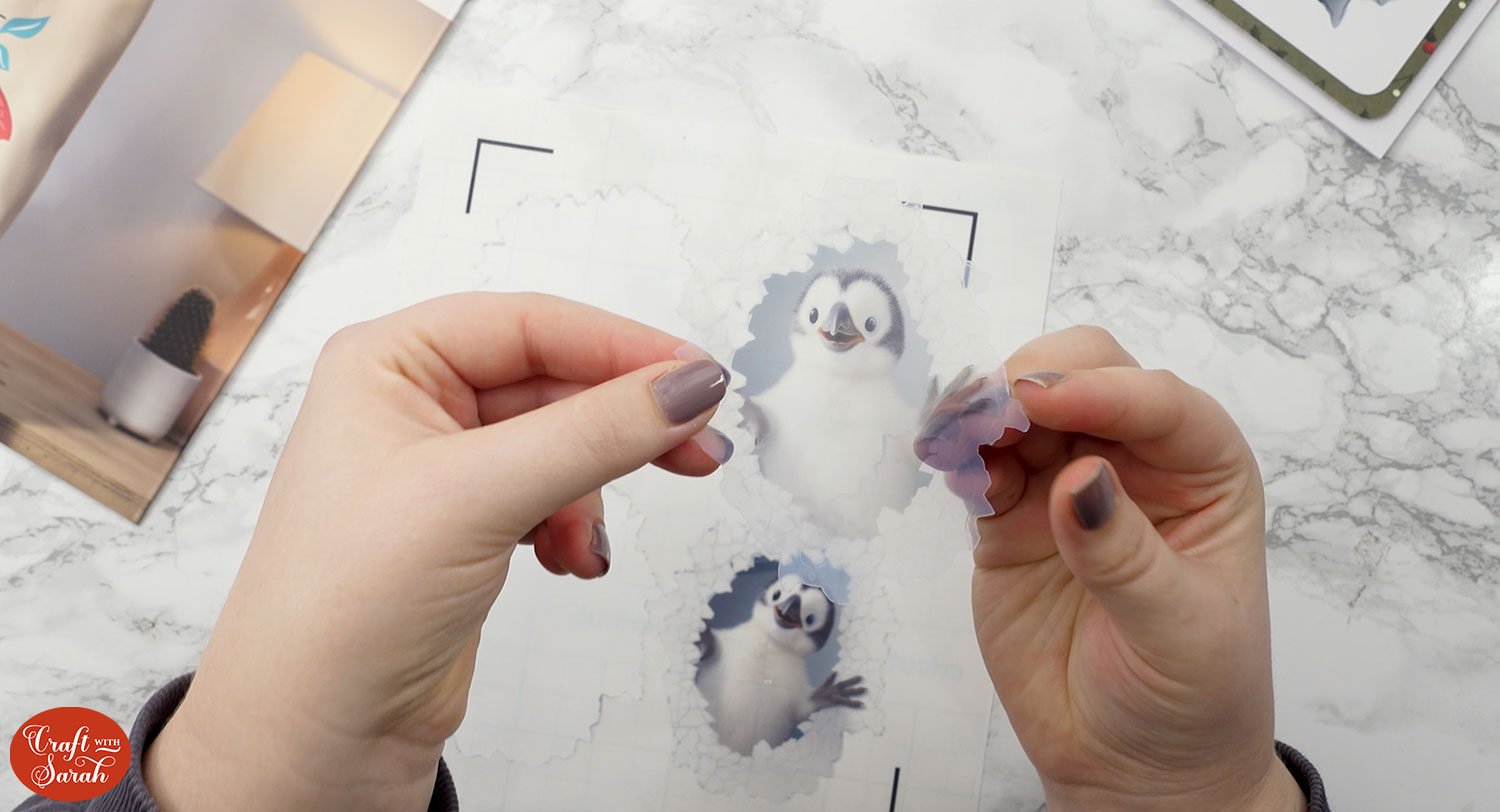
If you want it centralised, bear in mind that some of the images, like the penguin, are taller than they are wide. If you make it really wide it may end up too tall to fit on your blank. For this reason, you may want to measure with the height in mind rather than the width.
I decided that around 4.5-5 inches tall would fit nicely on my bag.
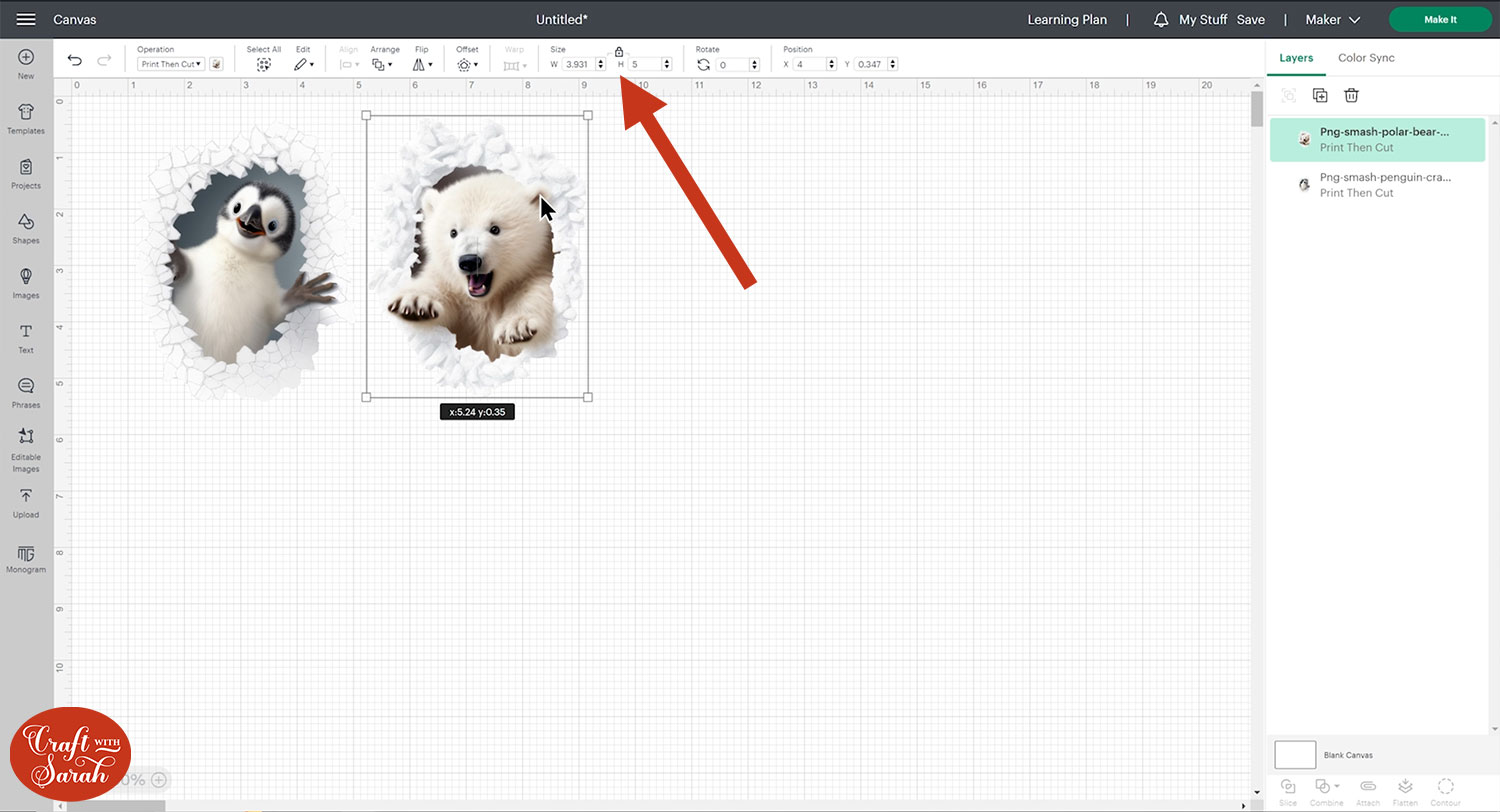
Once you have worked out a size that would work well for your blank, head back into Design Space.
Click on the design and make sure the padlock icon above the width/height boxes is closed. If yours is open, click it to close.
You can now size the design using the height or width and the other dimension will change in proportion.
Step 4) Print then Cut the design
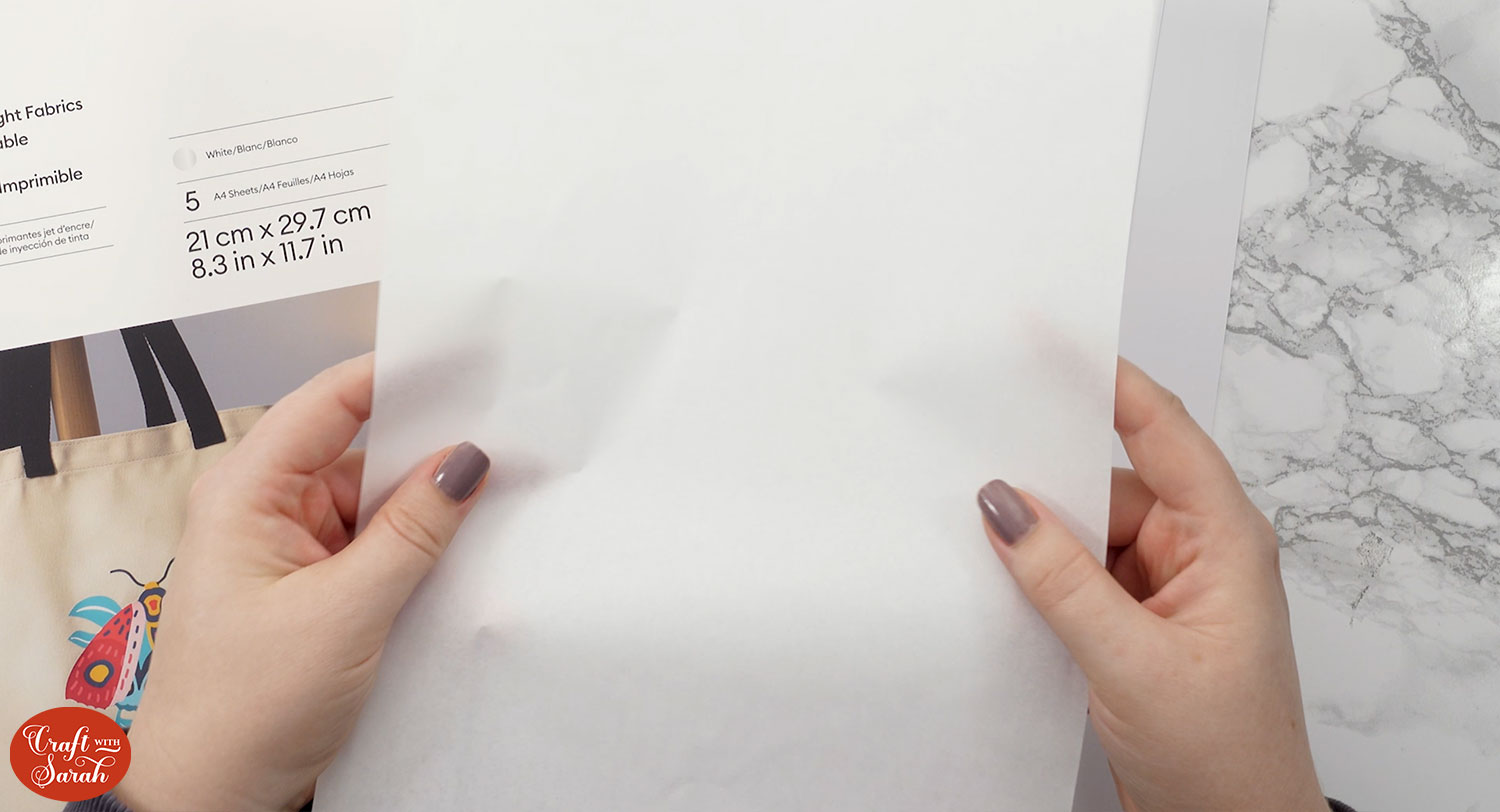
This is what the printable iron-on packs look like:
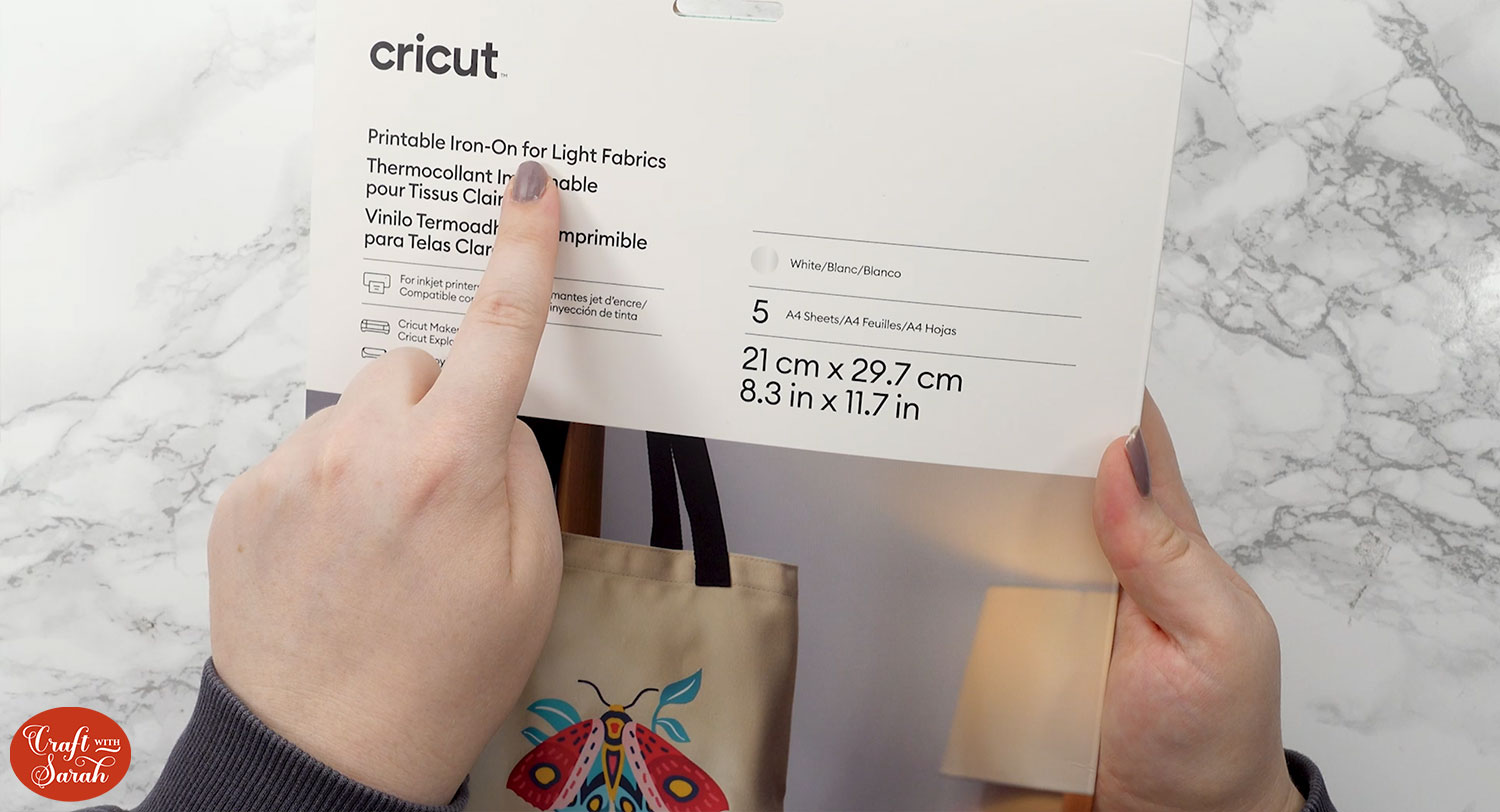
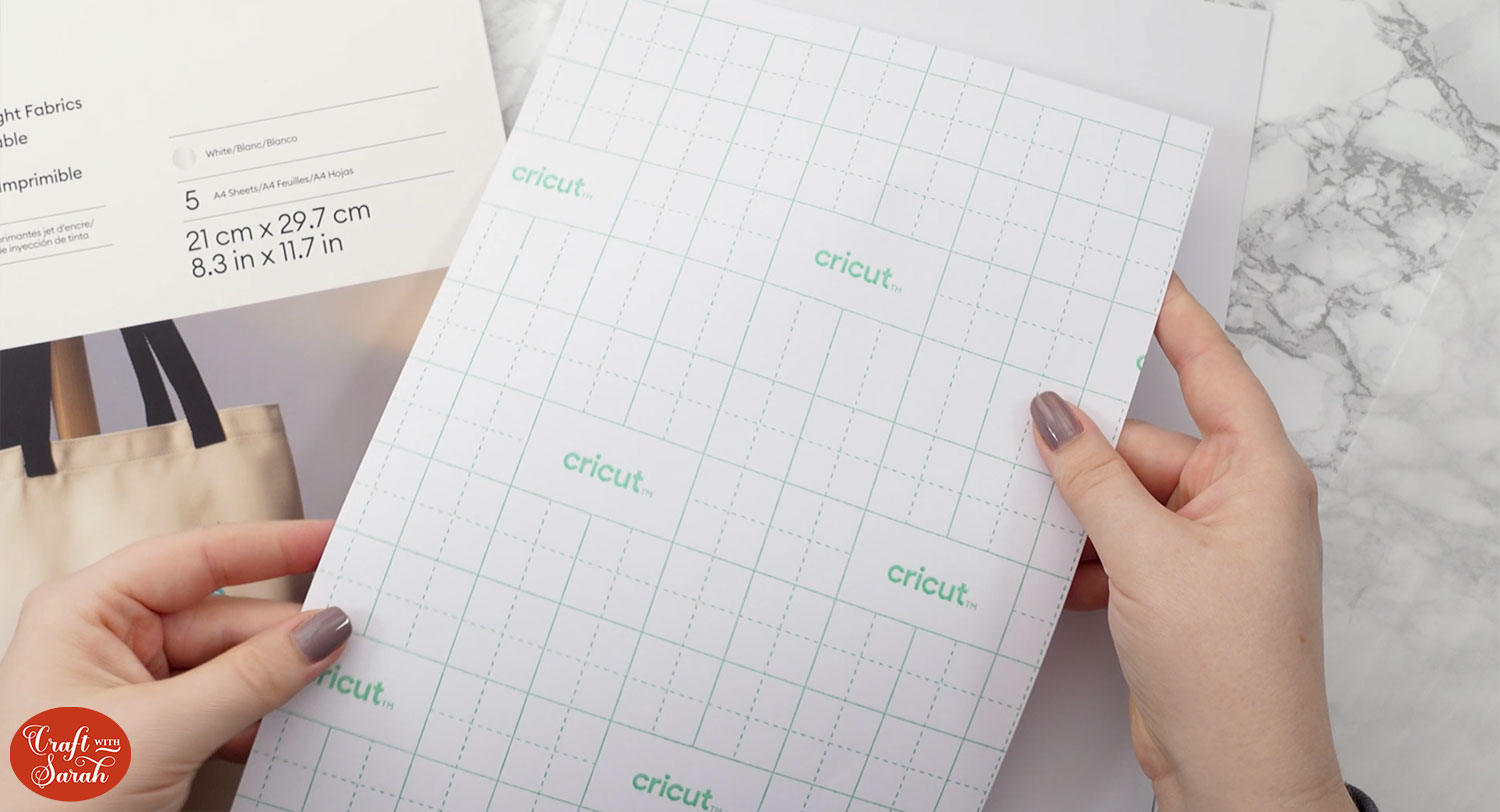
When you open up the pack of Cricut Printable Iron-On, you will see that it contains your sheets of the iron-on material which has the grid on the back.
You will also find a white, semi-transparent material which act as protection for your heat press.
Click Make It and make sure you have the paper size set to A4 or US Letter, depending on the size of the pack of paper you are using.
You do not need to mirror this material.
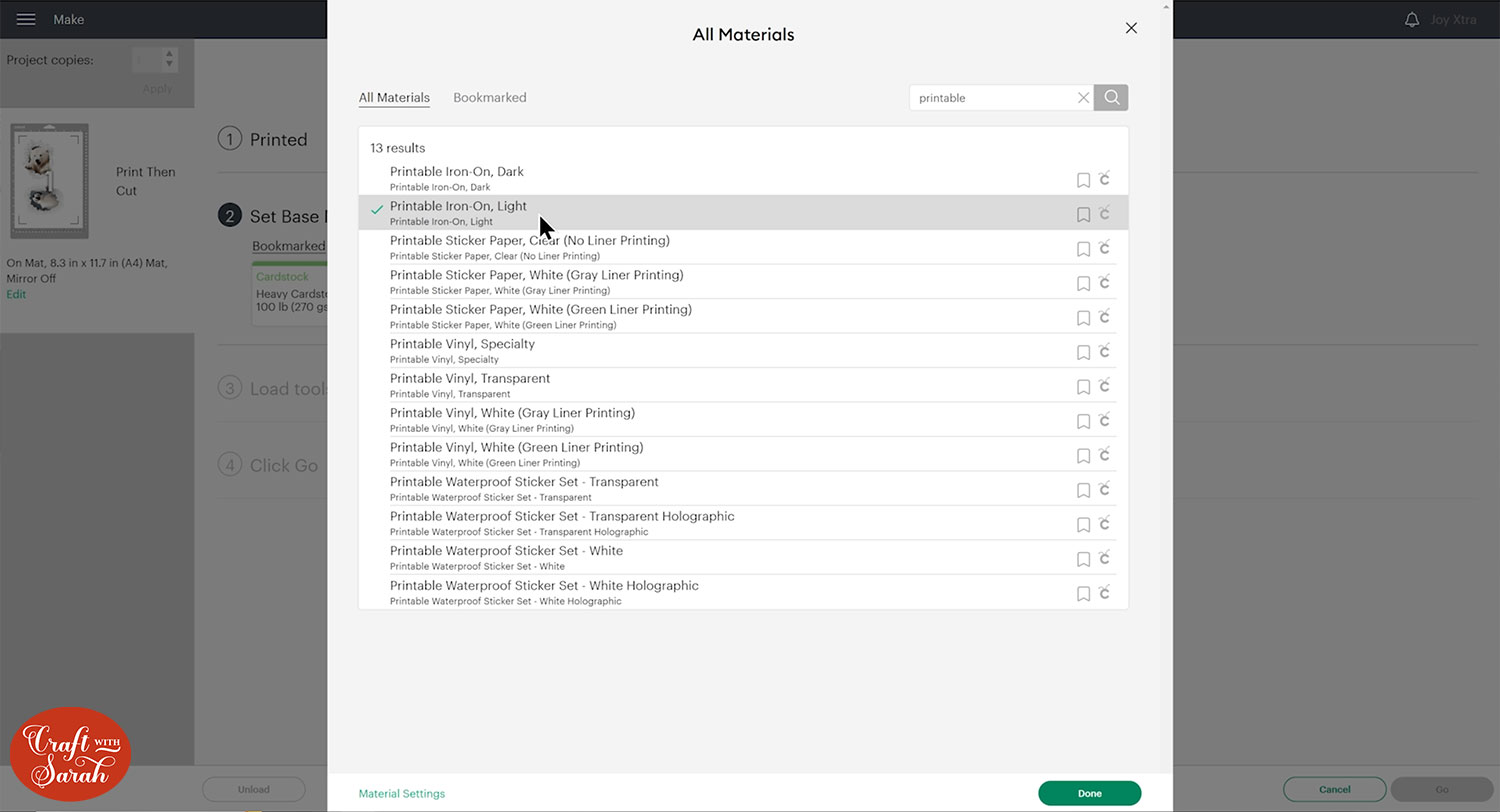
Click “Continue”.
Turn Bleed on and also turn on System Dialog which will open up your printer settings after you click “Print”. Change your printer settings to print at the best possibly quality.
Make sure you print on the white side of the paper and not on the grid side.
If you haven’t used Print then Cut before or need a refresher, you can find a step-by-step tutorial here.
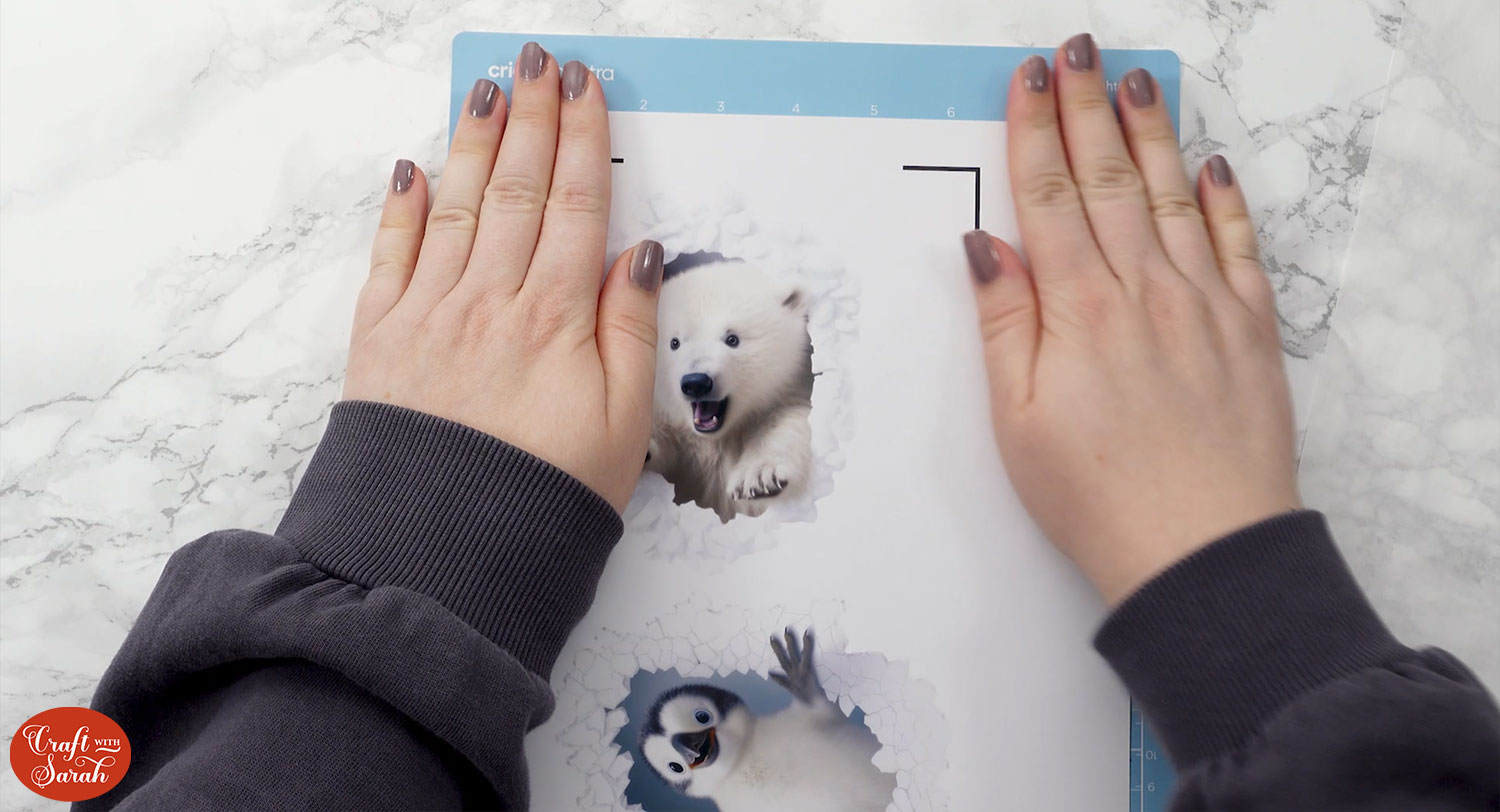
Once you have the design printed out, add the sheet to your Cricut mat and follow the on-screen instructions to get the image cut out. I used the Printable Iron-On Light setting in the materials list.
Step 5) Add the design to your blank
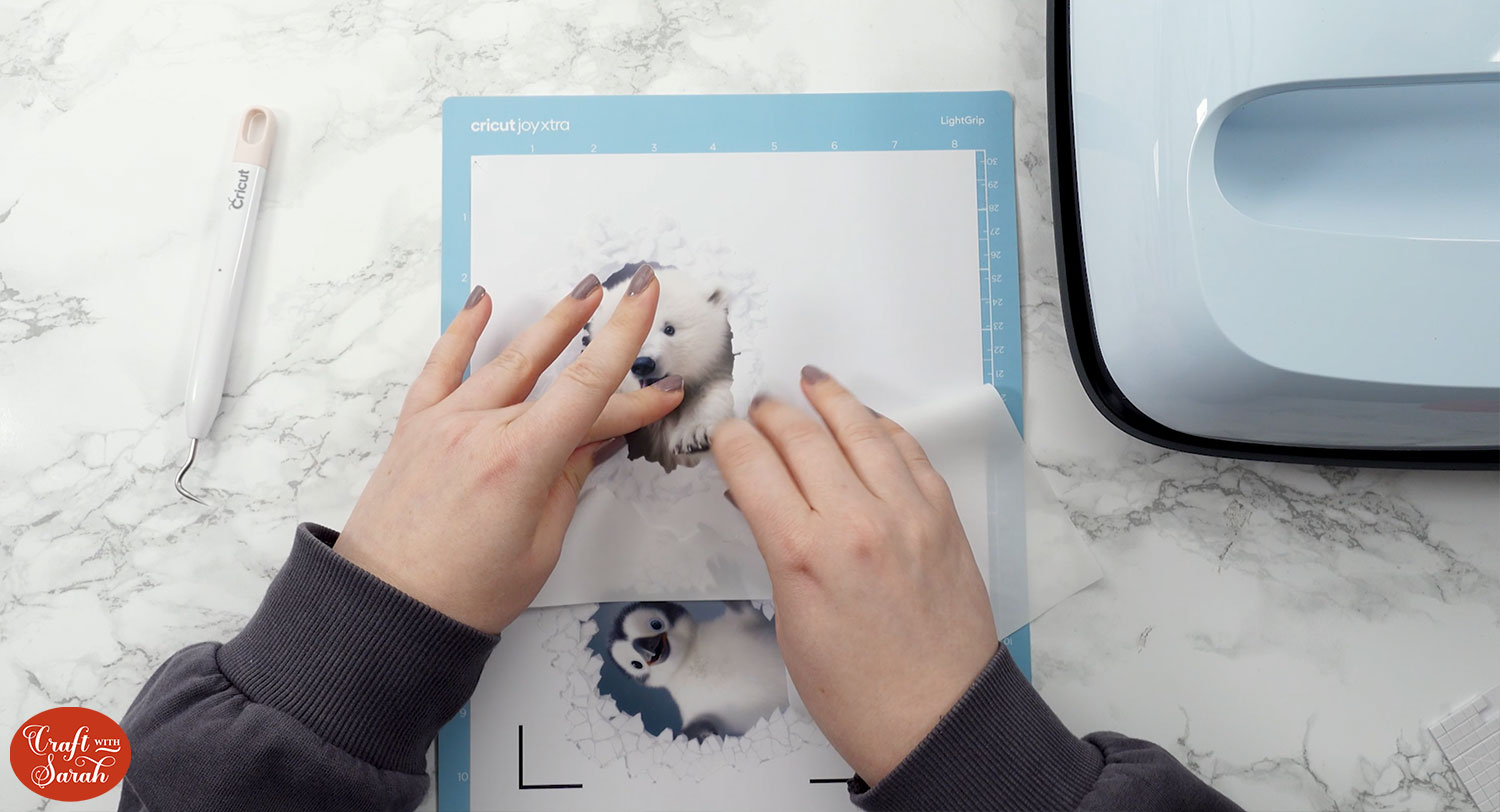
Take the design off the mat and use your weeding tool to help weed away any bits that you don’t need.
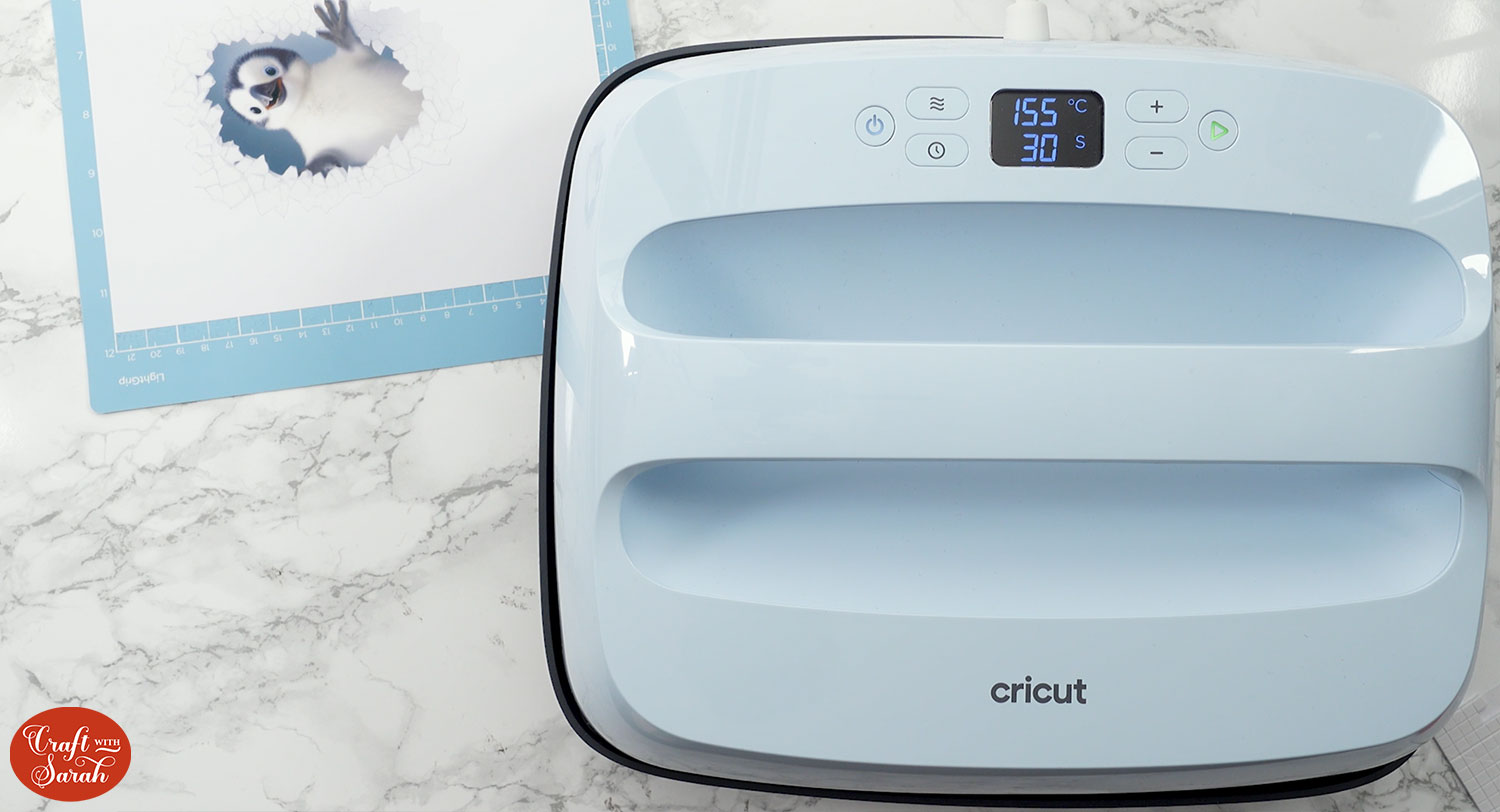
Set your heat press to 155 degrees celsius or 315 fahrenheit and give your blank a 5-second pre-press to get rid of any creases and moisture.
Note: You may want to place a piece of printer paper inside the blank just to make sure it doesn’t go through both sides when you press it.

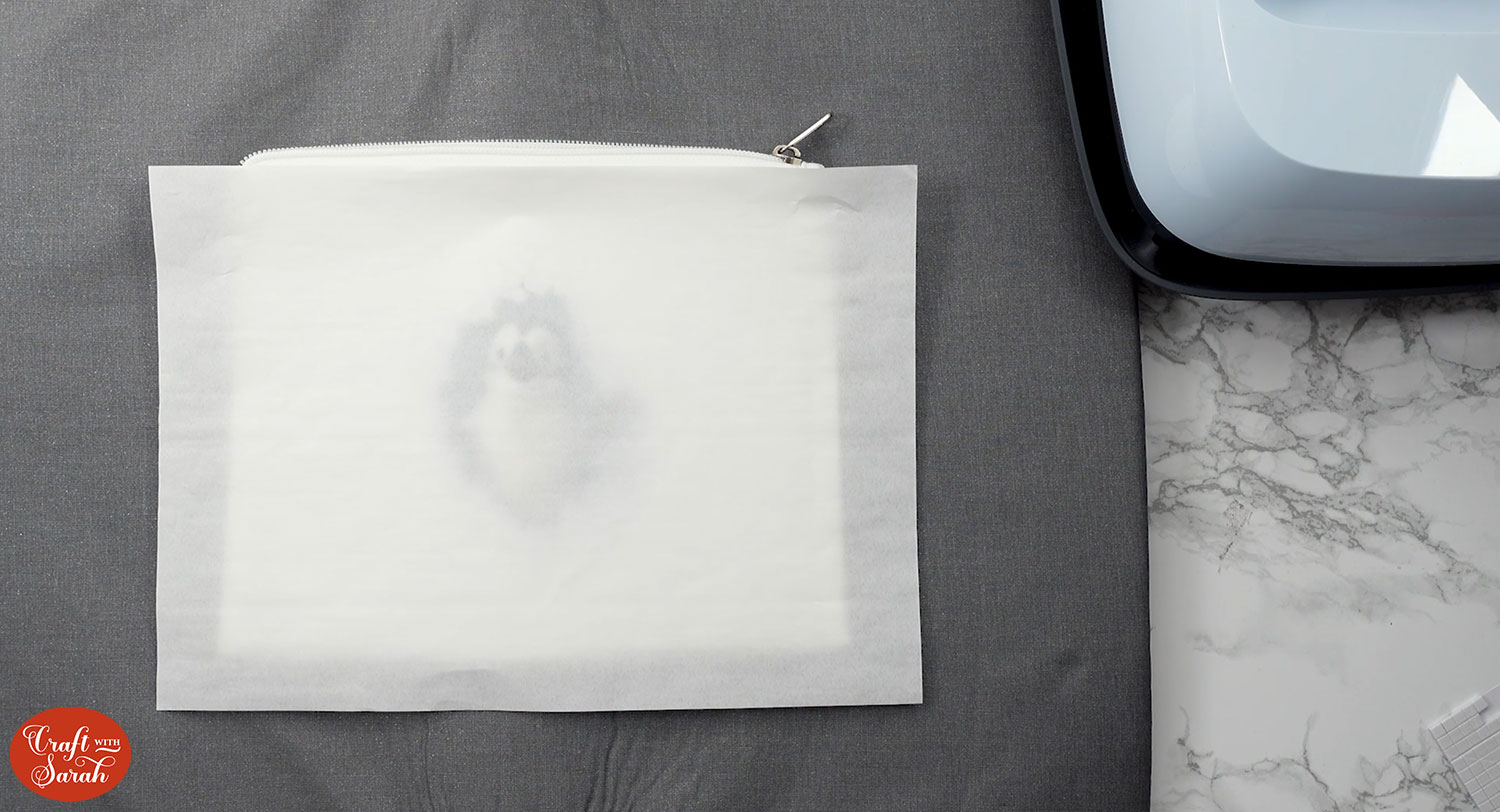
Carefully peel the design off the backing sheet. Be careful not to rip or stretch it.

Lay the design on top of your blank and press for 30 seconds using the protective sheet that was included in the pack.
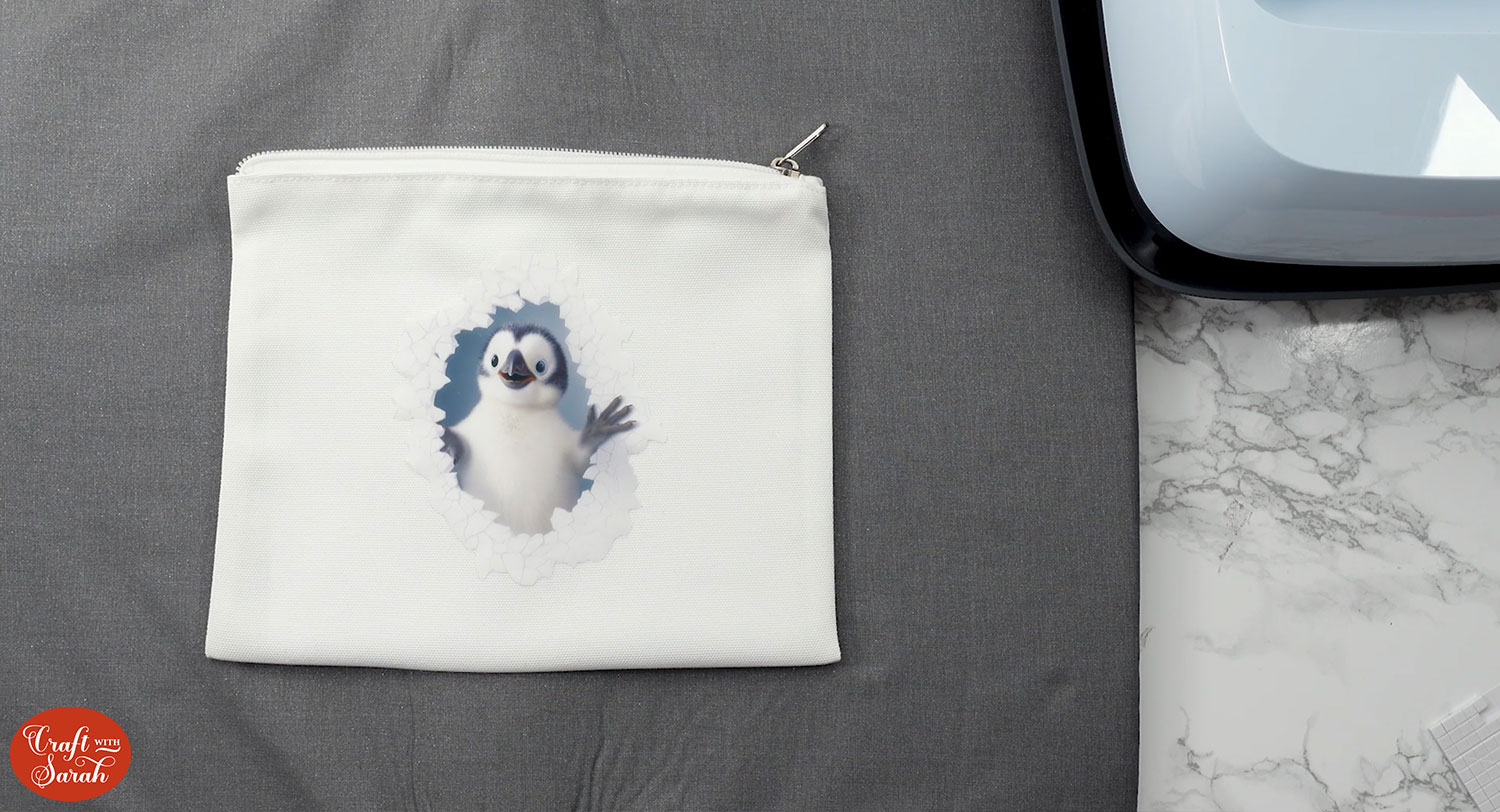
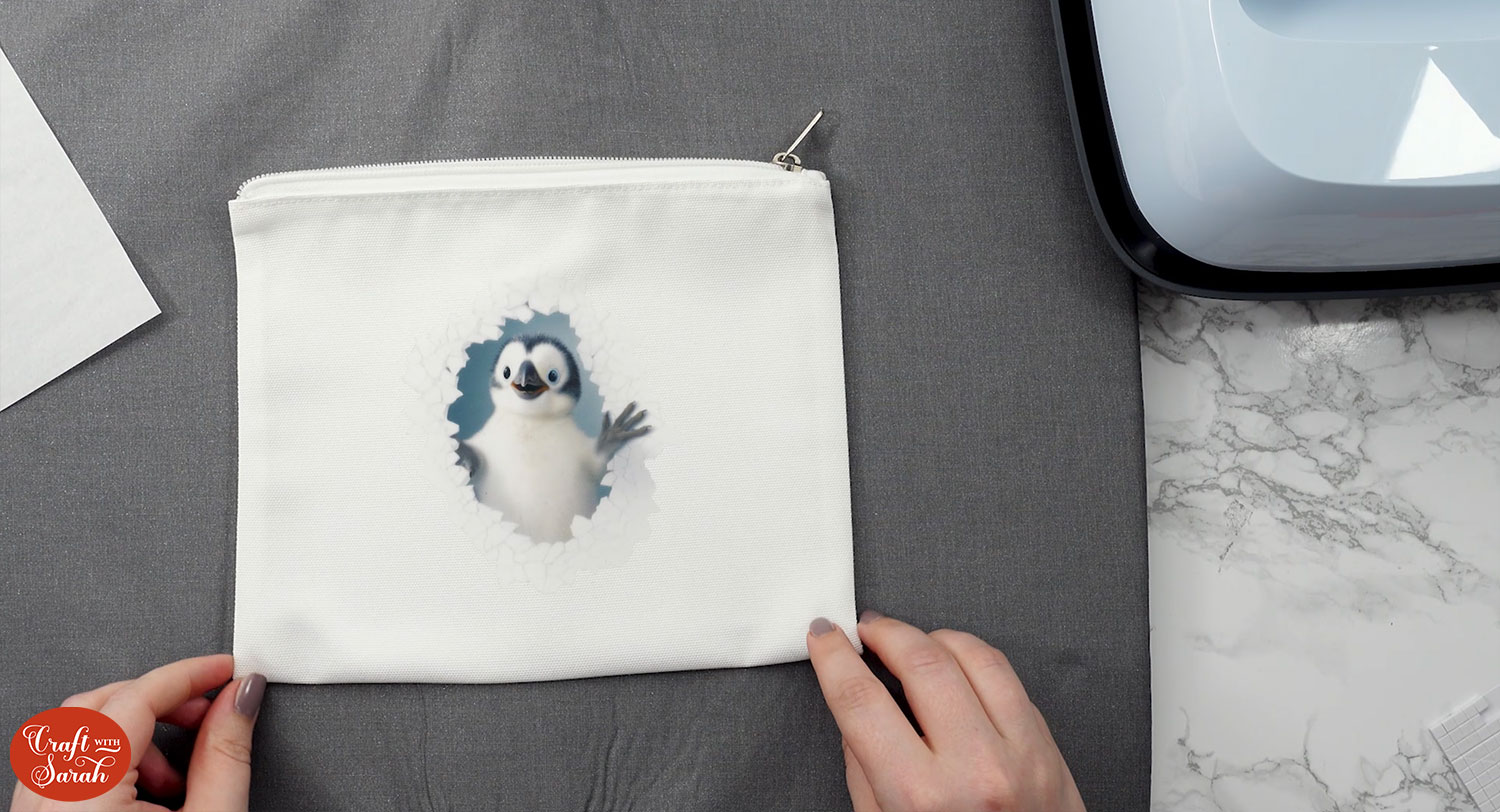
There you have your penguin or polar bear or whatever design you chose peeking through!
I love that there are other ways you can use the designs too! For example, I used photo paper to print out the image and place it onto a card. I placed the design on a white rectangle and flattened it so that it could be used for Print then Cut.
I also used a transparent sticker paper to Print then Cut the penguin to decorate a jar that I then filled with marshmallows.
Wall smash Christmas gift ideas
I hope you enjoyed following along with this Cricut Printable Iron-On tutorial using AI wall smash designs!
These designs would look brilliant on all sorts of different blanks. I think I’ll be kept busy making more of these as Christmas gifts.
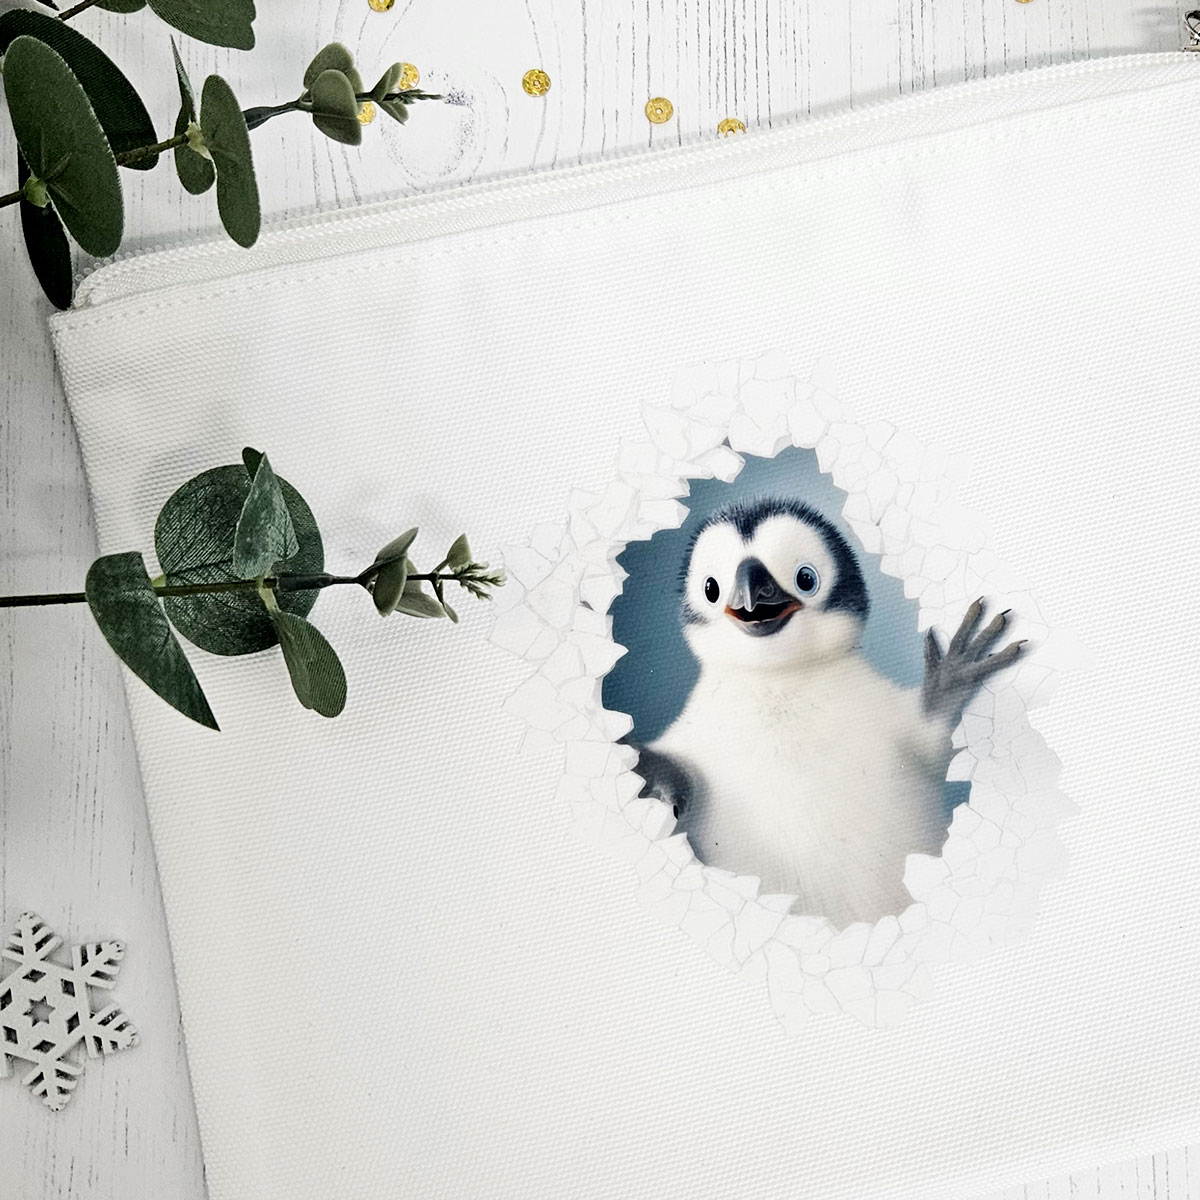
In the meantime, I’ll be putting this cosmetic bag to good use.
Happy crafting,
Sarah x

