HCC 2023 Day 05 🦇 Monster Face Treat Boxes
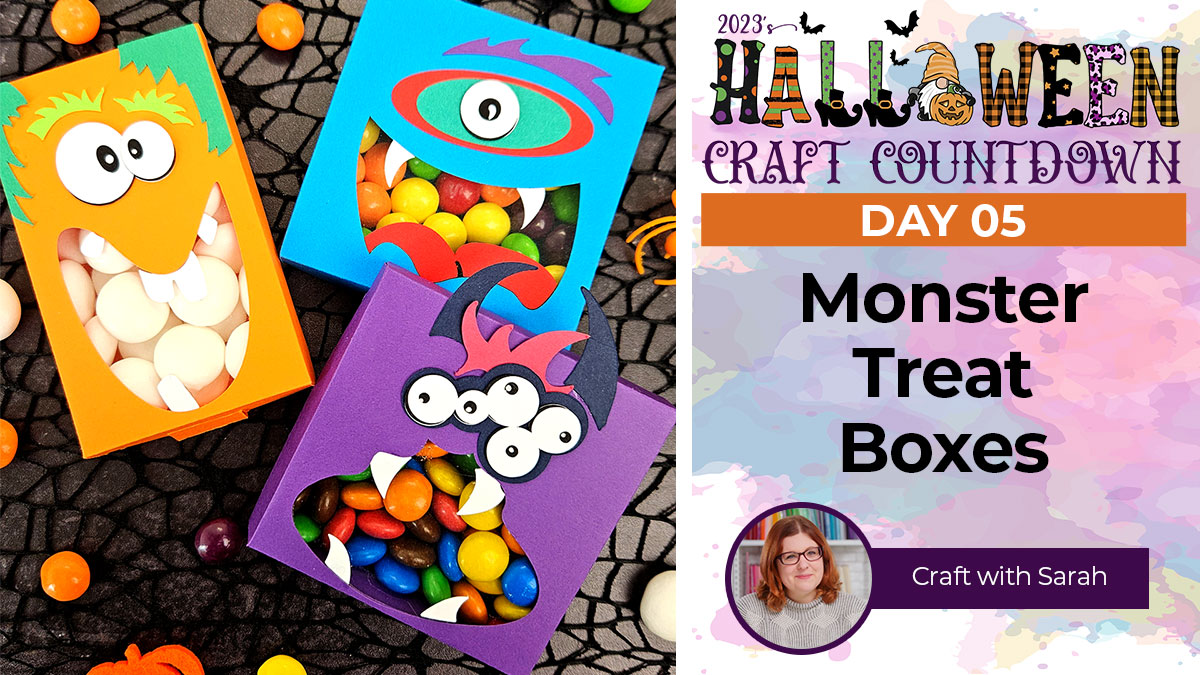
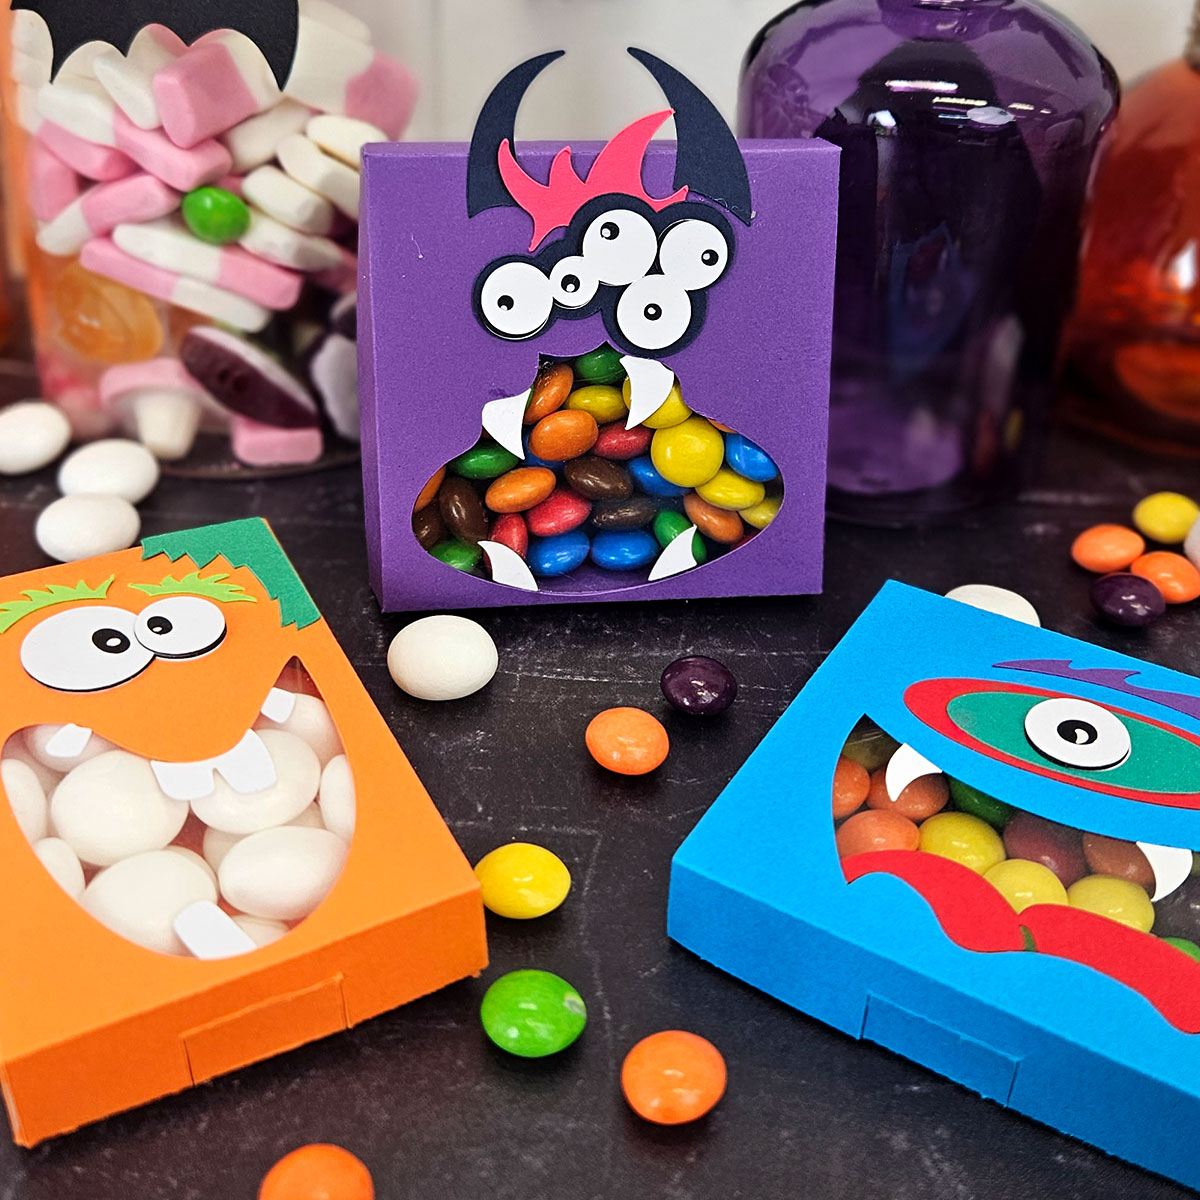
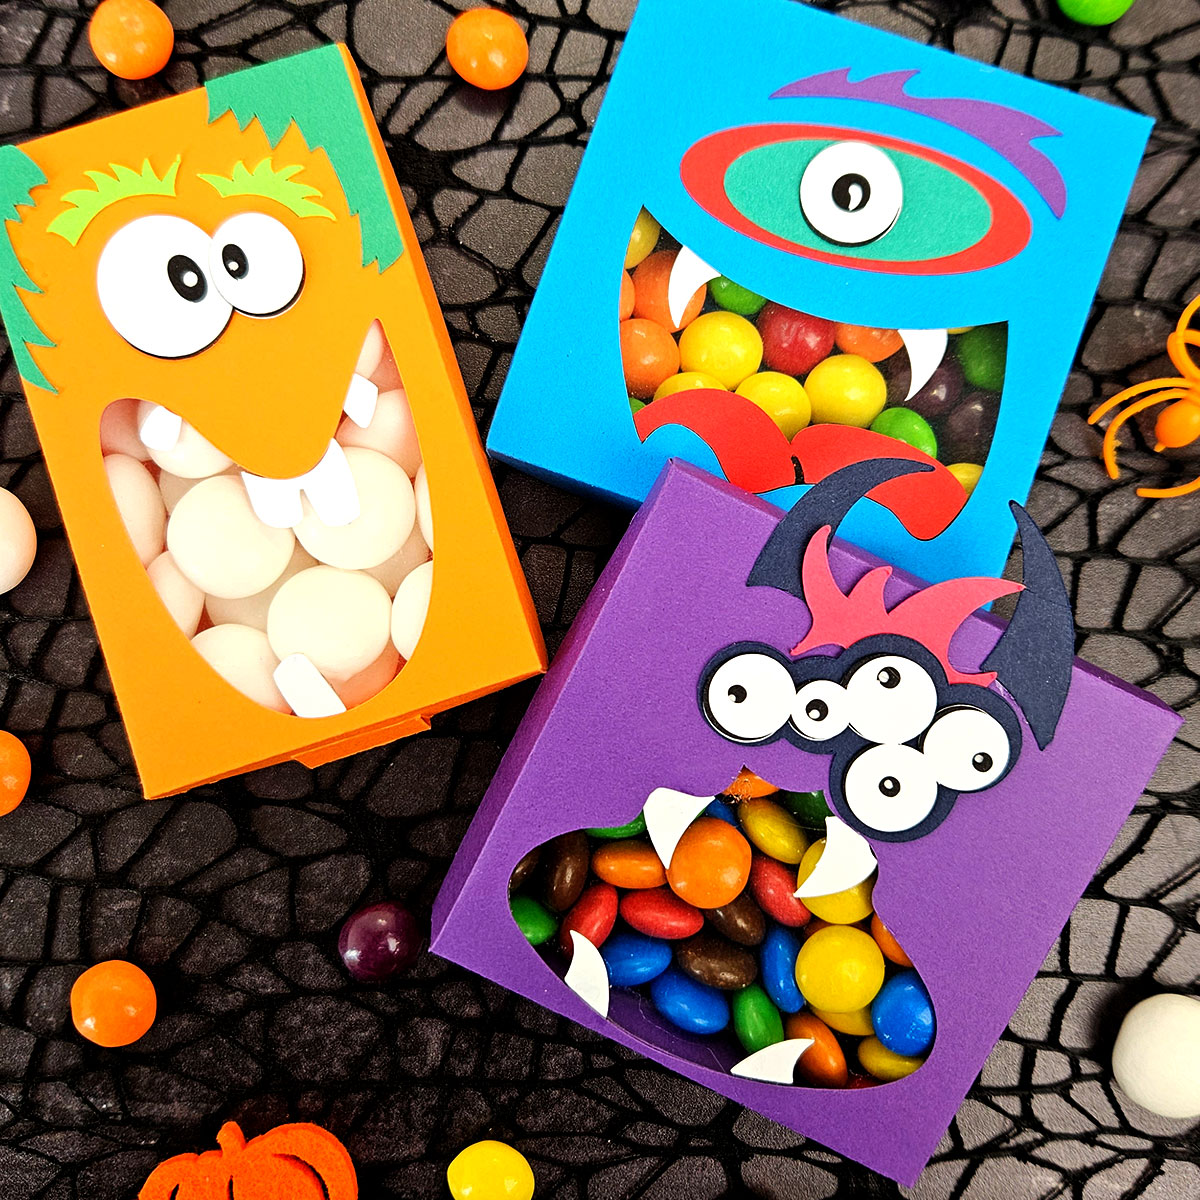
These little monster face treat boxes are filled to the brim with delicious Halloween candy!
There are three different designs to choose from. They look wonderful displayed all together, or just choose your favourite.
They would make excellent gifts for trick or treaters!
This Project was part of the Halloween Craft Countdown 2023
Materials supply list
Here is a list of the materials that I used to make this project.
Please note that some of the links included in this article are affiliate links, which means that if you click through and make a purchase I may receive a commission (at no additional cost to you). You can read my full disclosure at the bottom of the page.
- Cricut machine
- Light blue Cricut cutting mat
- Coloured Card
- Acetate
- Double sided tape runner
- Collall All Purpose Glue
- Needle Tip Applicator Bottle
- Cricut Scoring Wheel or Cricut Scoring Stylus
- Sweets to fill the boxes with
This project is suitable for the following types of Cricut machine: Explore Air 2, Explore Air 3, Maker, Maker 3, Venture and Joy Xtra. It is too large to cut on the original Cricut Joy machines.
Video tutorial
Watch the video below to see how to make this project. Keep scrolling for a written tutorial.
Written tutorial (with photos!)
Here’s how to make your very own Halloween treat boxes using a Cricut machine!
Step 1) Download the cutting file(s) & unzip the downloaded folder
Purchase the File(s)
This cut file is available as part of the Instant Access Bundle.
Or, purchase this design individually here
Before you upload the SVG files to Design Space, you need to unzip the download folder that they comes in.
- How to unzip a folder on Windows computer
- How to unzip a folder on a Mac
- How to unzip a folder on an iPad/iPhone
- How to unzip a folder on an Android device
Step 2) Upload the SVG files into Design Space
Open up Cricut Design Space and start a new Project.
Click “Upload” and then find your unzipped version of the downloaded files for this project.

The files to upload to Cricut Design Space are the ones which start svg- in the filename.
Each treat box design is a separate SVG file. You’ll need to upload them one-at-a-time.
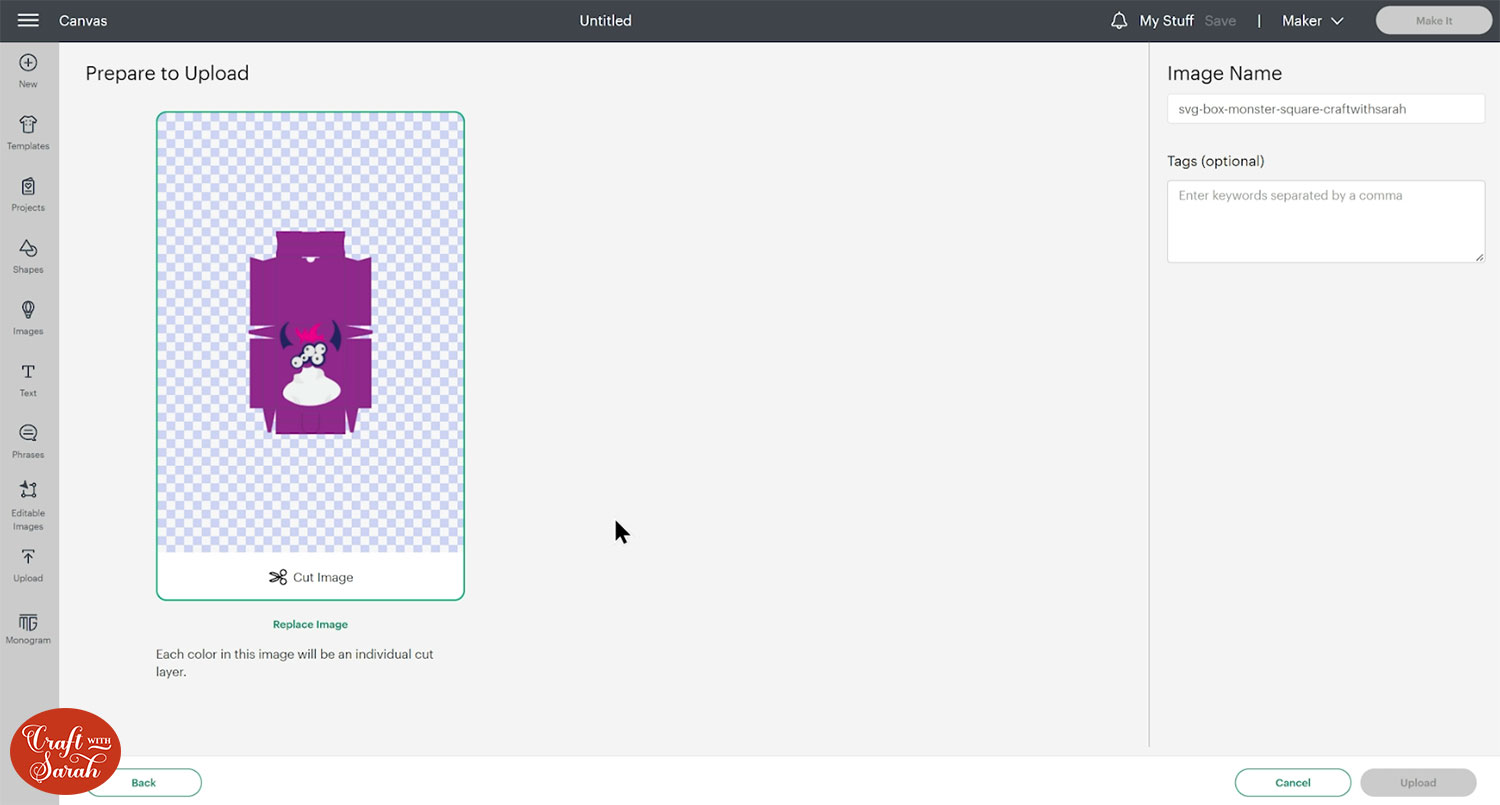
Make sure you upload the files which start svg- in the filename!!
After uploading, the designs will show in your “Recently Uploaded Images”.
Click on them and then press “Add to Canvas” to put it onto your Project.
Step 3) Size the treat boxes (optional)
If you want to resize the treat boxes, now is a good time to do it.
Click the design on your canvas and use the width/height boxes near the top of the screen to make it the size that you want to cut.
However, I decided to keep mine at the size that they loaded in at.
TIP: Make sure the padlock icon above the width/height boxes is CLOSED before you resize. If it appears “open”, click it with your mouse to close it.
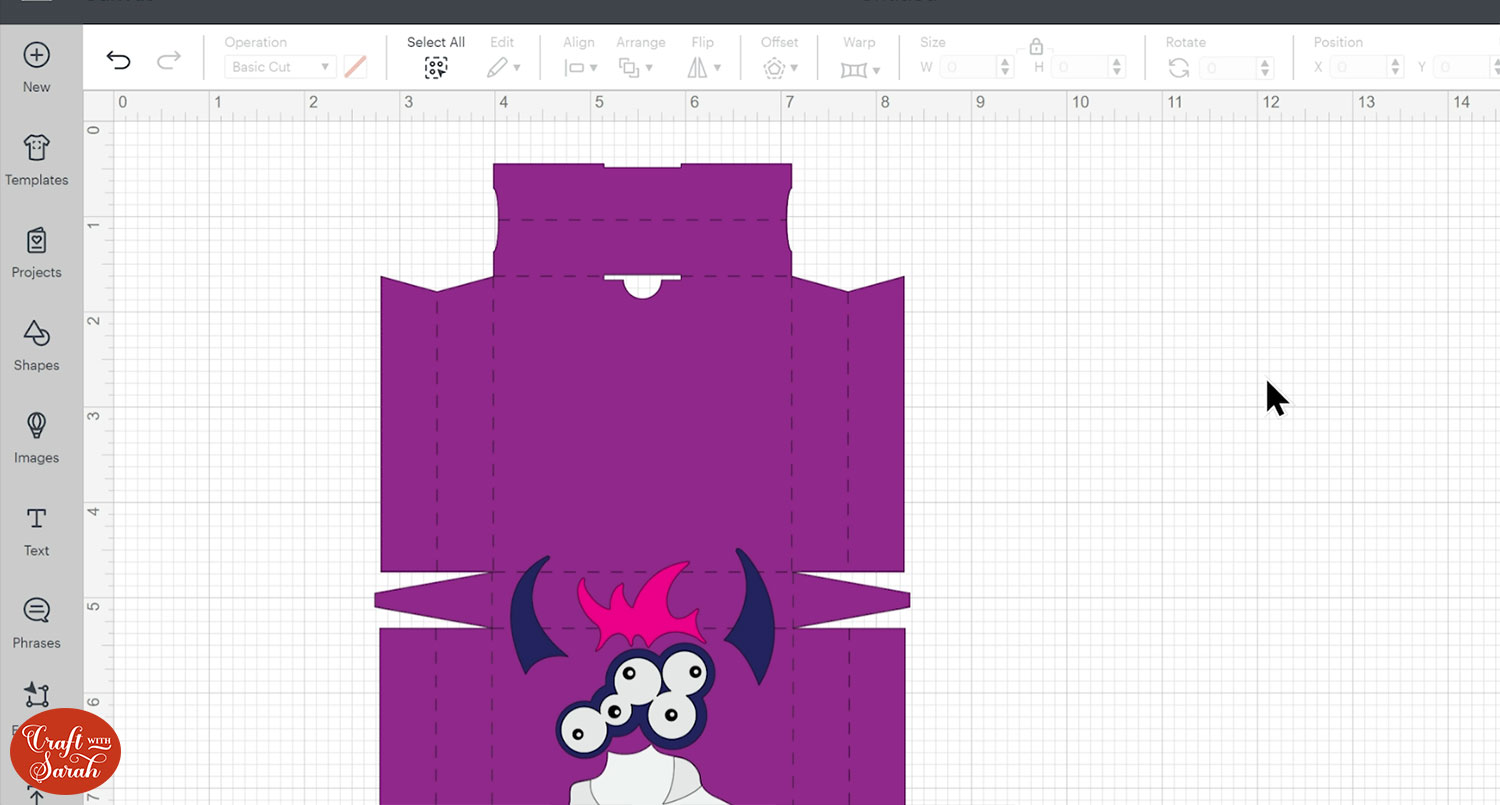
Step 4) Format the score lines
Design Space doesn’t recognise score lines on uploaded files, so we need to manually tell it which lines we would like it to score instead of cut.
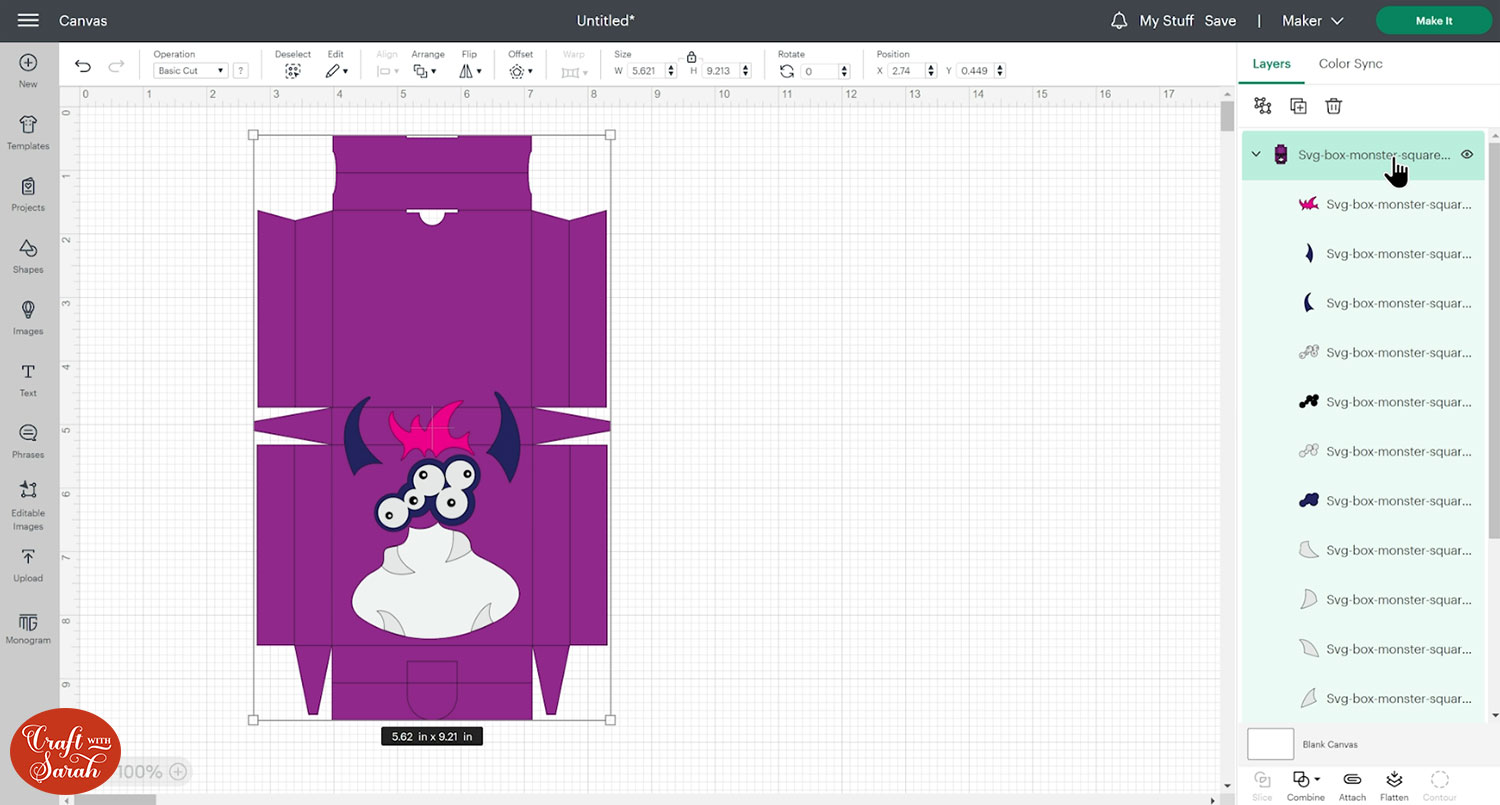
Click the treat box and press the Ungroup button at the top of the layers panel.
This separates out the layers so that we can work with them.
Look down the layers panel on the right of your screen until you find the main box layer, which will appear in a second group which contains three layers.
Click the layer (not the whole group!!) that shows the lines that we need to change to Score.
If you do not have a scoring wheel or scoring stylus for your Cricut machine then you can delete this layer, however that will make it hard to fold the box. I strongly recommend keeping the score lines in.
Change that layer to a “Score” layer in the Operations dropdown menu.
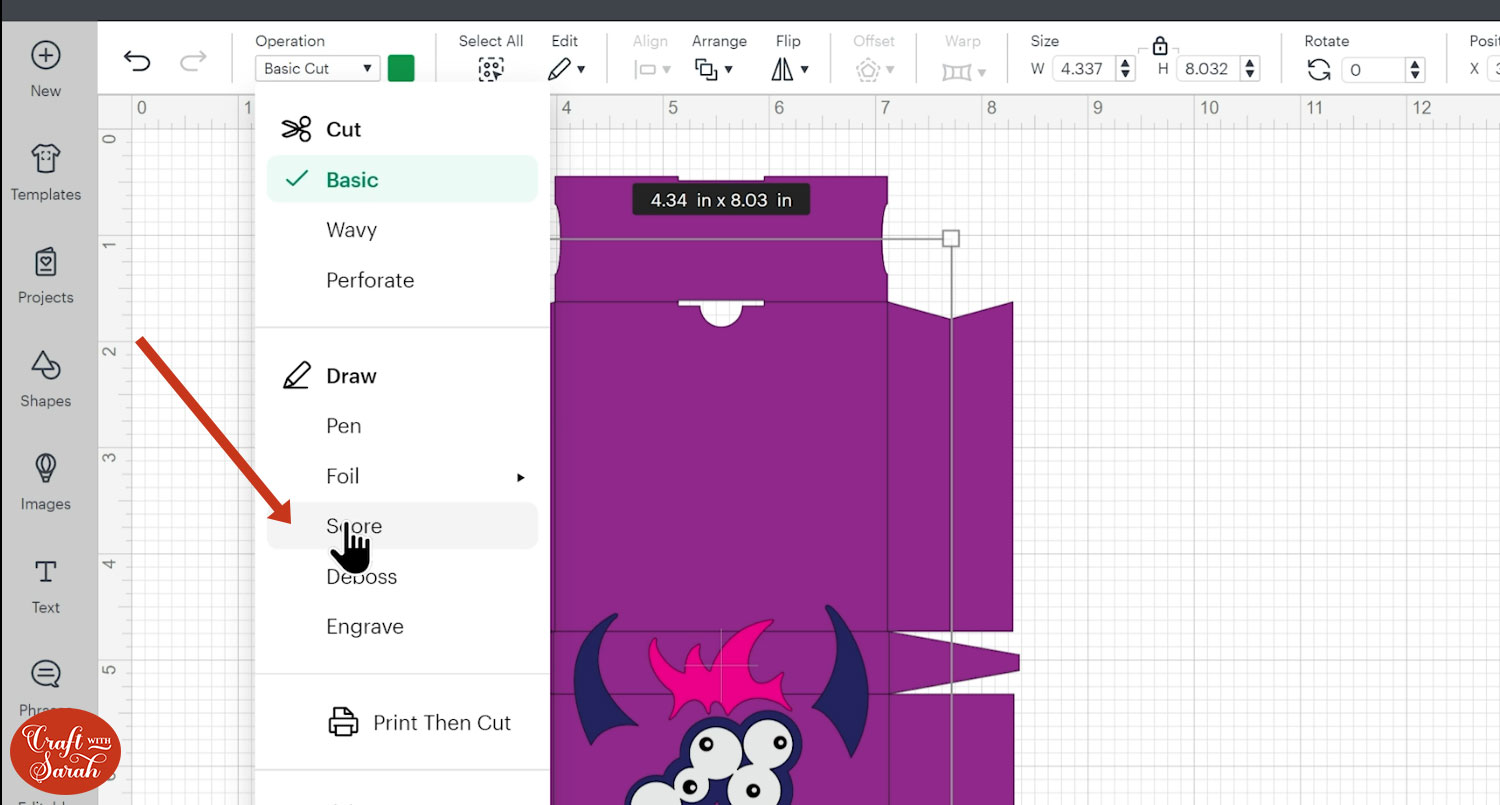
This will change the lines on the treat box to appear dashed instead of solid, which shows they are now score lines.
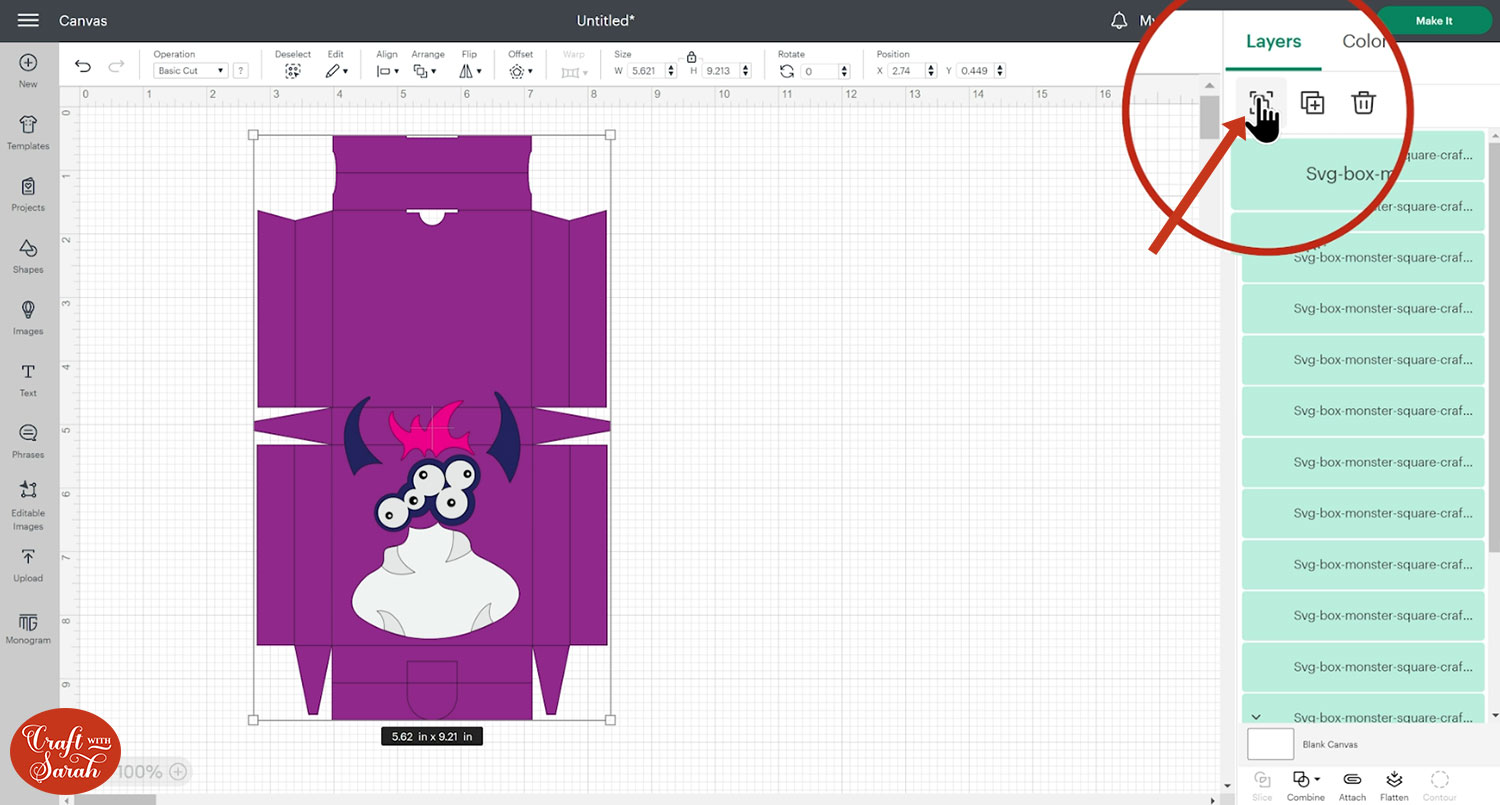
To finish the formatting, go back to the layers panel and click the Group that contains the three main layers of the treat box.
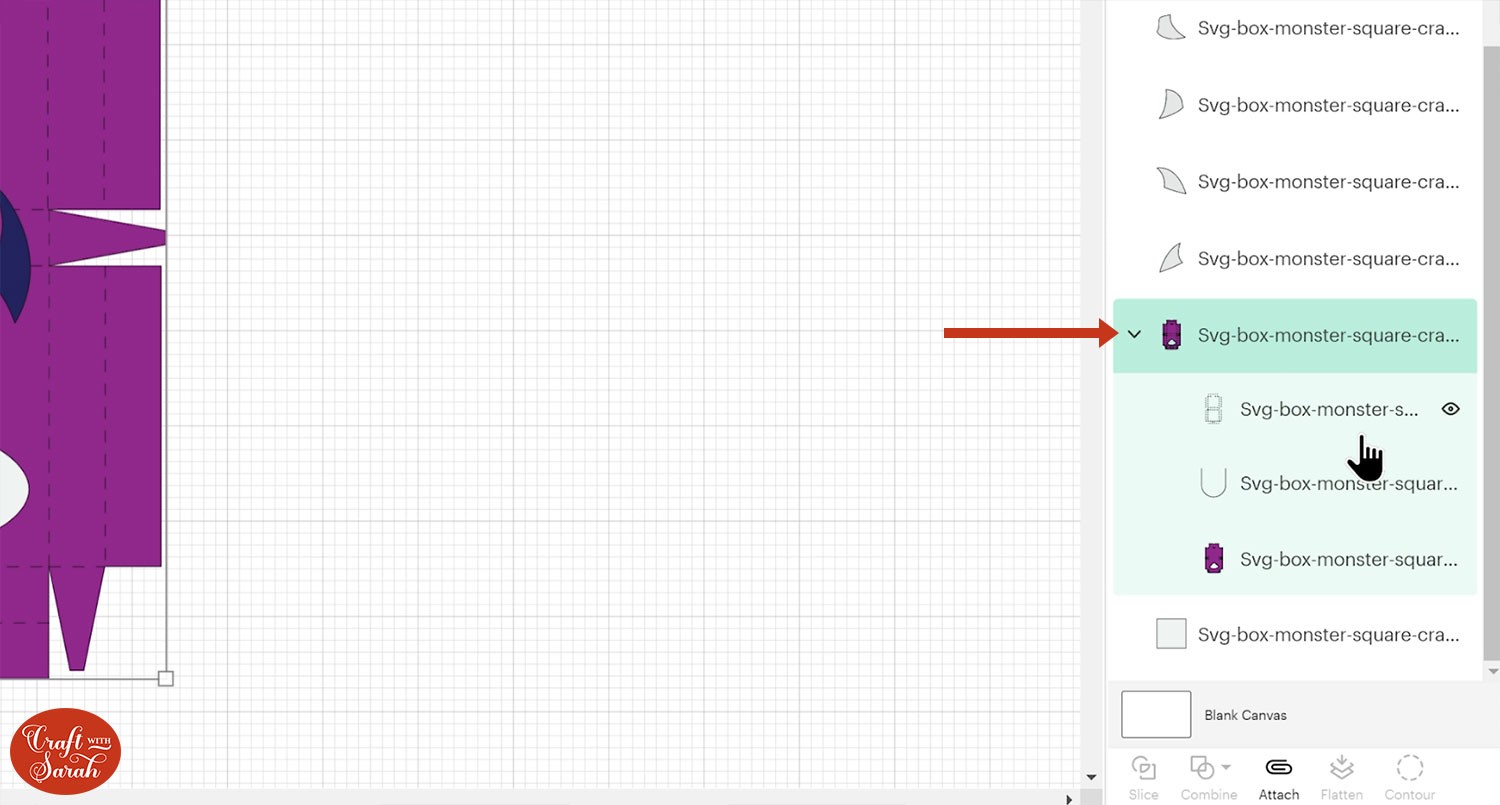
Click the “Attach” button at the bottom of the layers panel.
Attach is what tells the Cricut to do the score lines on the main treat box layer, rather than on a separate piece of card.
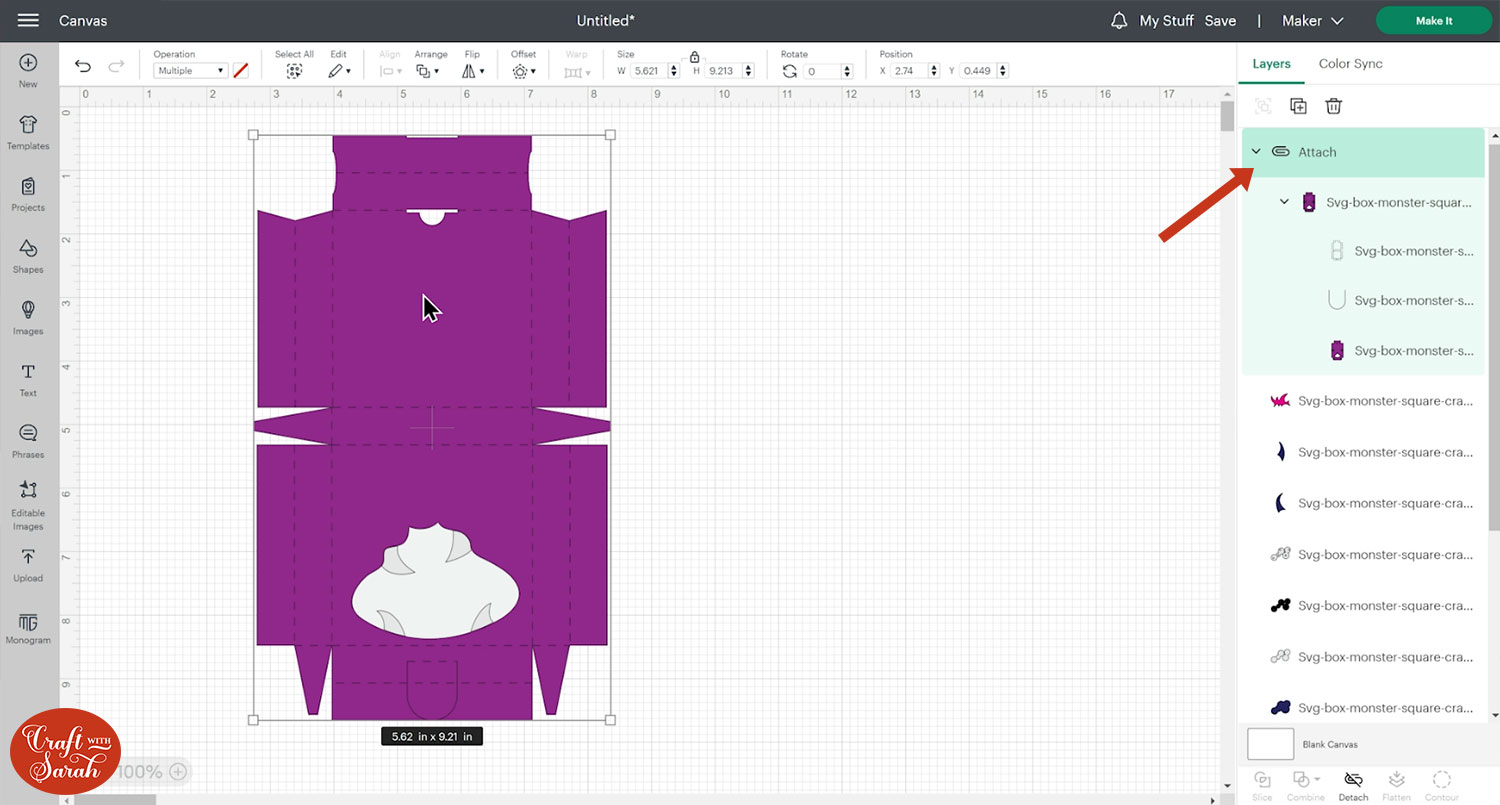
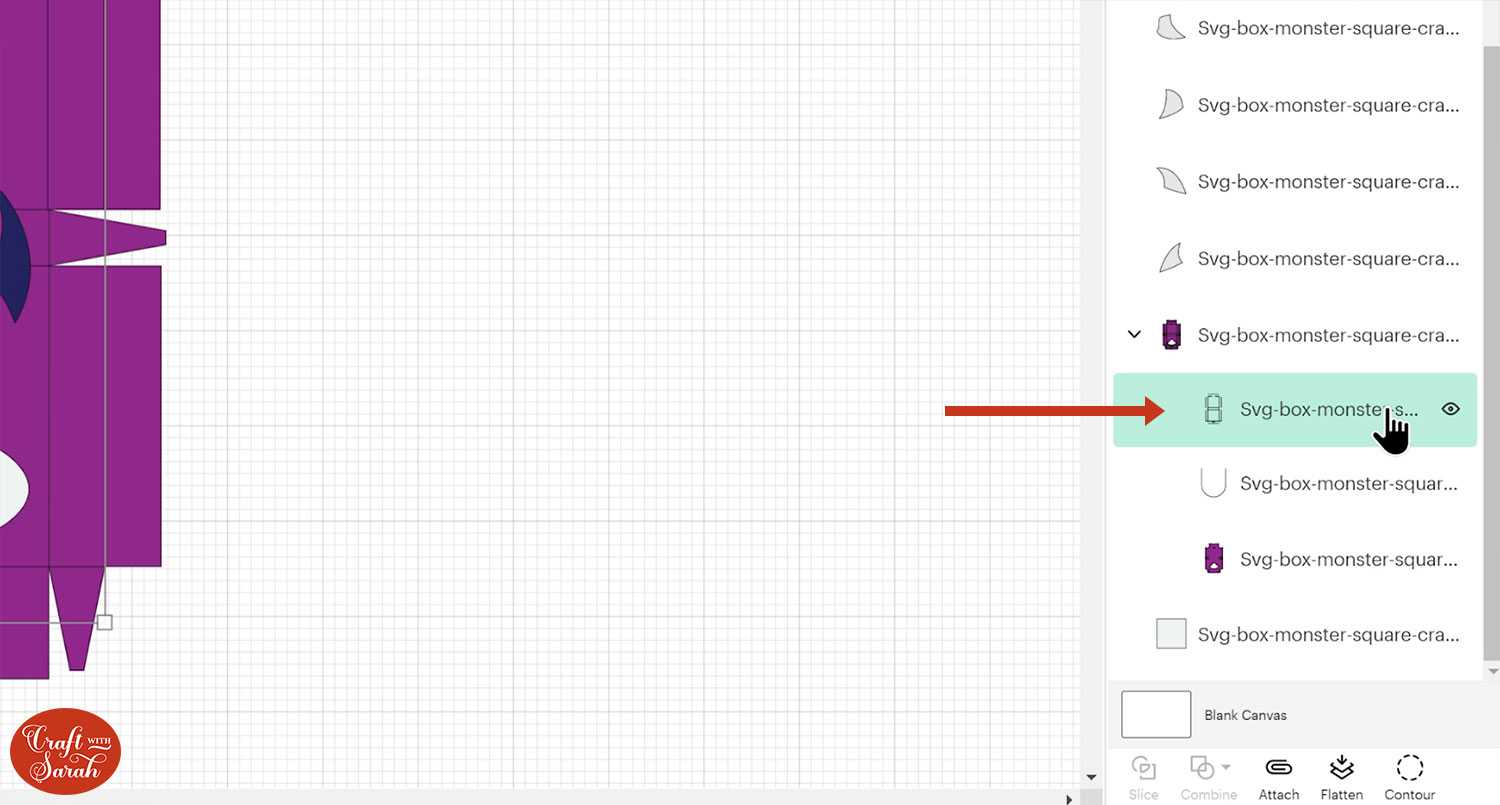
Attaching layers moves them to the top of the layers panel, which means you won’t be able to see the face details of the monster any more.
You can click-and-drag the box back down to the bottom in the layers panel to correct this.
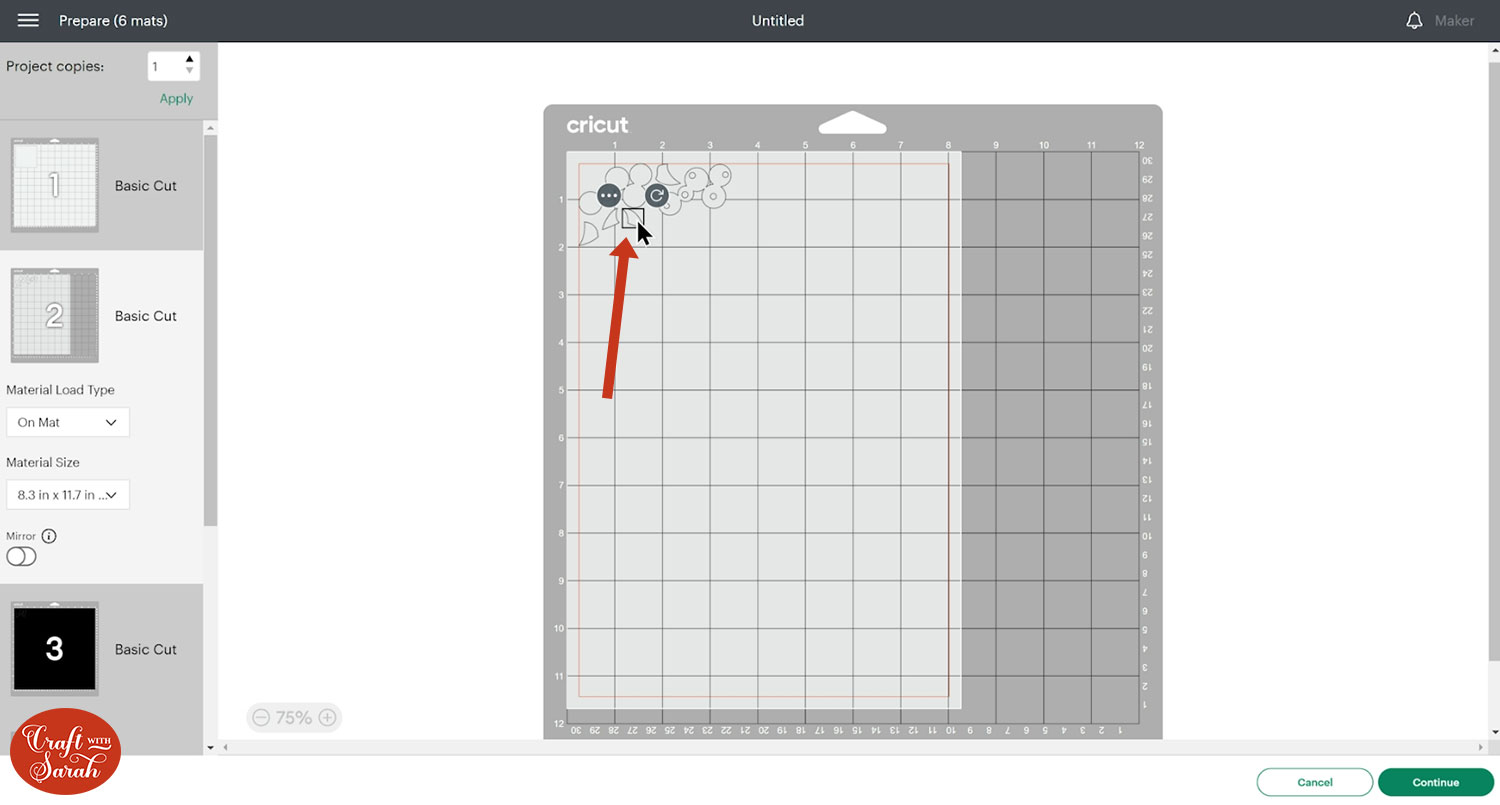
Step 5) Cut out all the pieces
The monster treat box designs have a white square or rectangle in them at the bottom of the layers panel.
It looks like this:
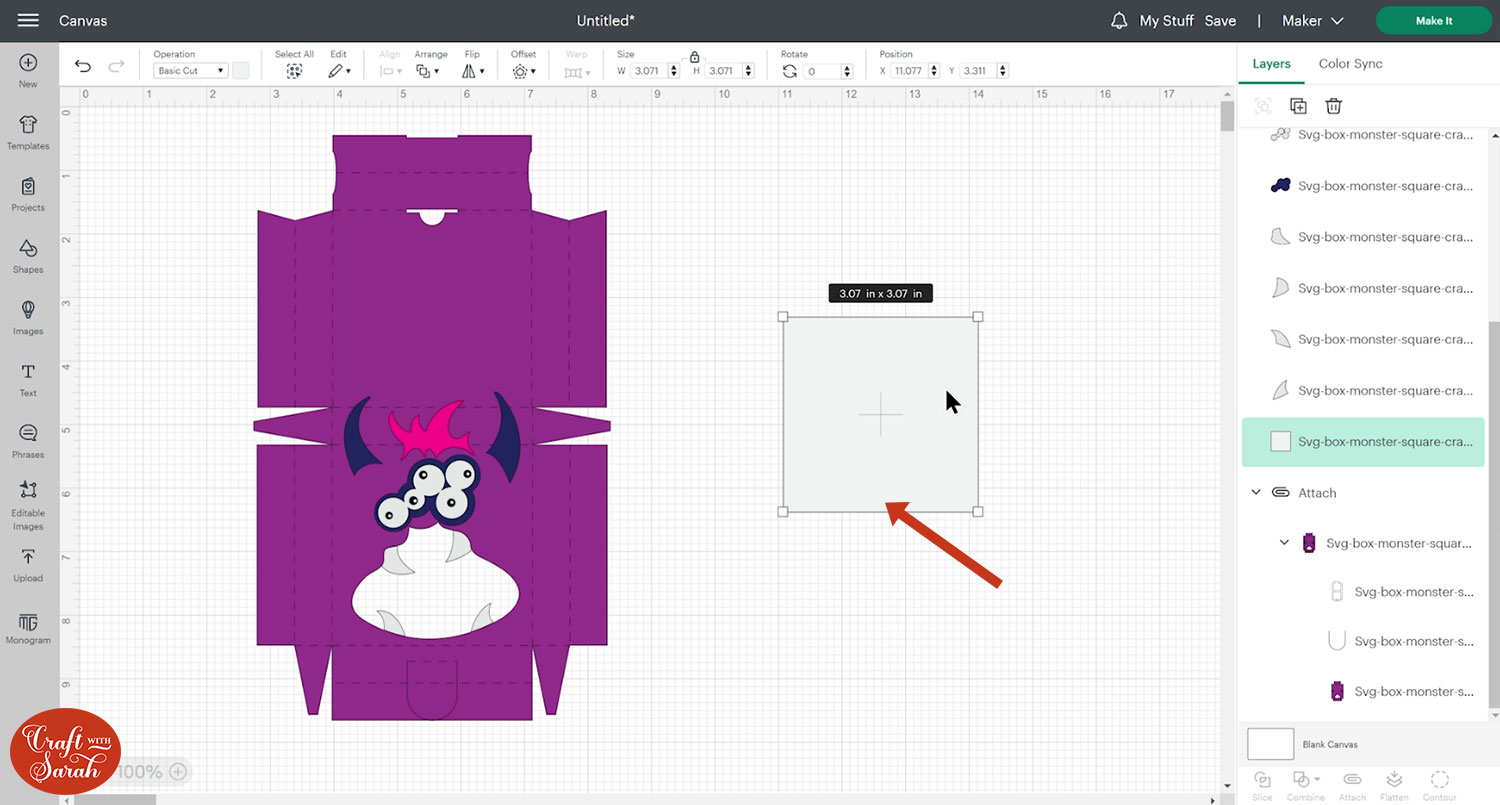
This layer is designed to be cut from acetate, so that it will act as a transparent “mouth” on the monster face to show the candy through.
When you’re happy with how the project is looking in Design Space, click “Make It” and follow the instructions on-screen to cut out all the layers.
To change the paper size, go into the dropdowns over on the left side of the screen and choose the paper size that you want to use. You need to change it for every single colour.
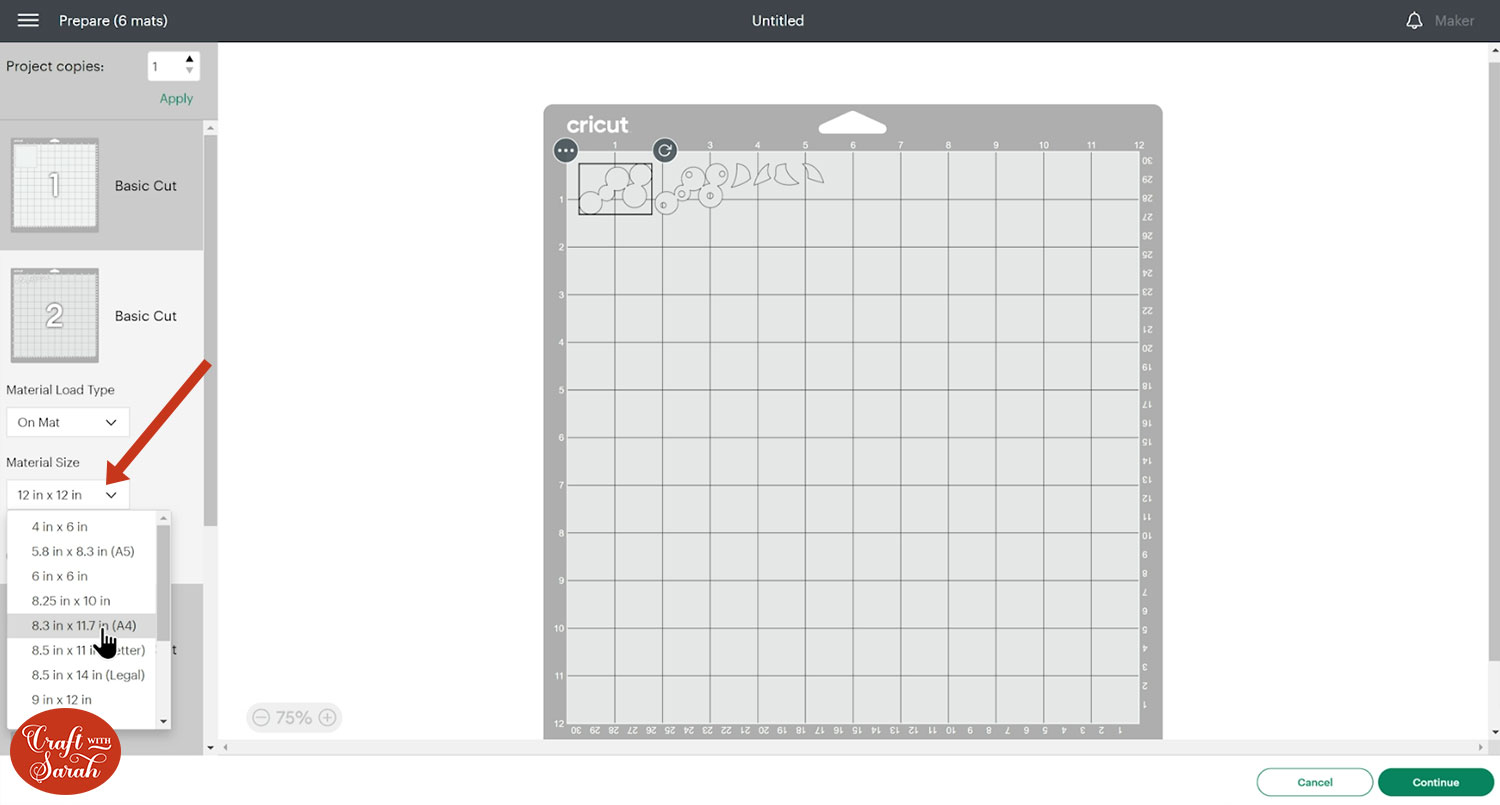
To save space on your cardstock, you can move things around by clicking and dragging. Make sure when you’re moving things about that nothing overlaps because otherwise, it won’t cut out properly
TIP: New to cutting cardstock with a Cricut? Check out this in-depth tutorial which goes through every step of the process, including tips for getting the best quality cuts from your Cricut.
For cutting the acetate, you might need to try a couple of different cut settings before you find one that works.
There is an “acetate” material type, however I find that it never cuts through my acetate! Instead, I tend to use the Kraft Board setting as that gives a much deeper cut. If you have a thin acetate then the “acetate” setting may suffice.
Step 6) Fold the boxes
Star by turning the box piece upside down and folding upwards along all of the score lines.
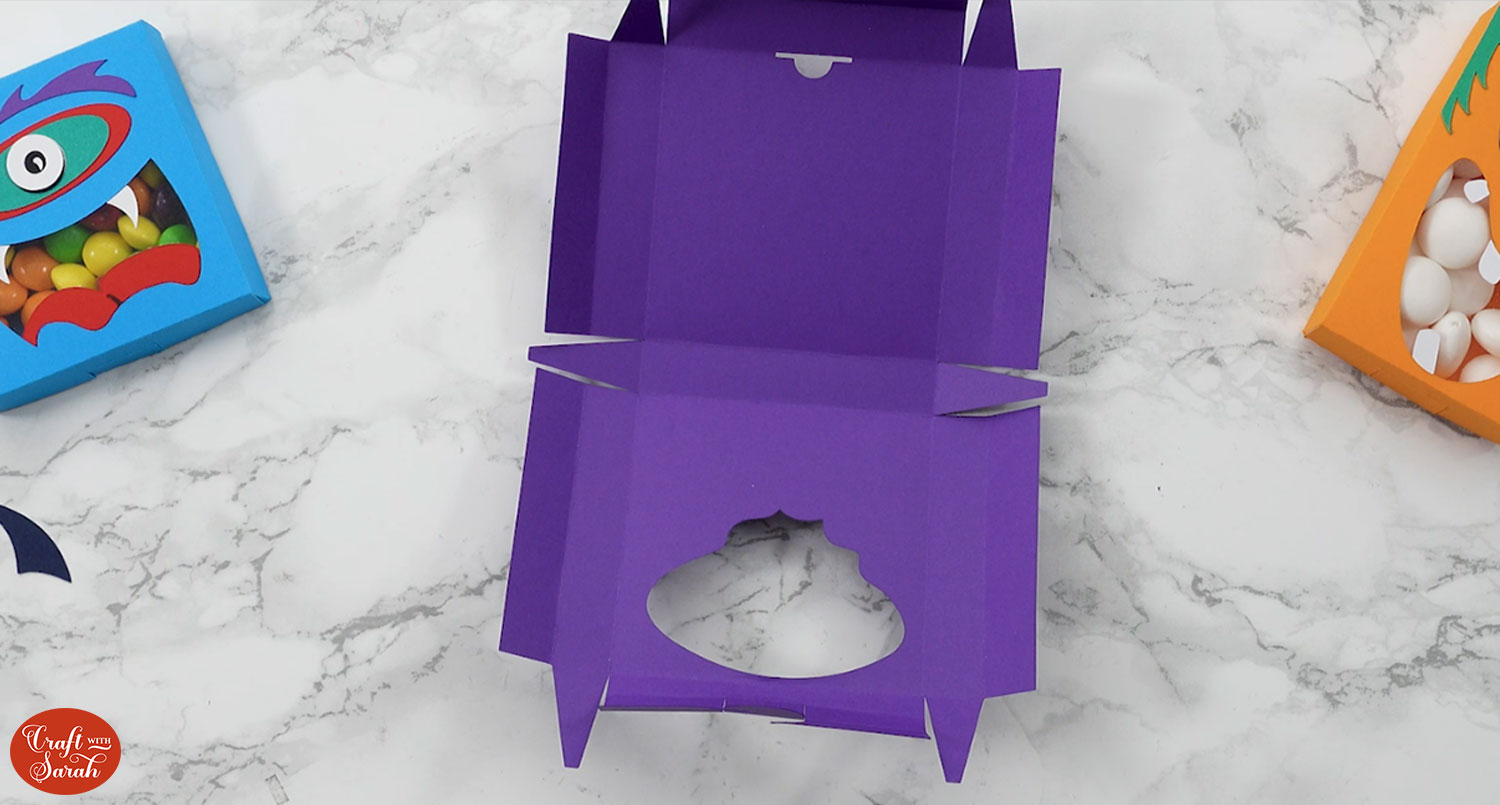
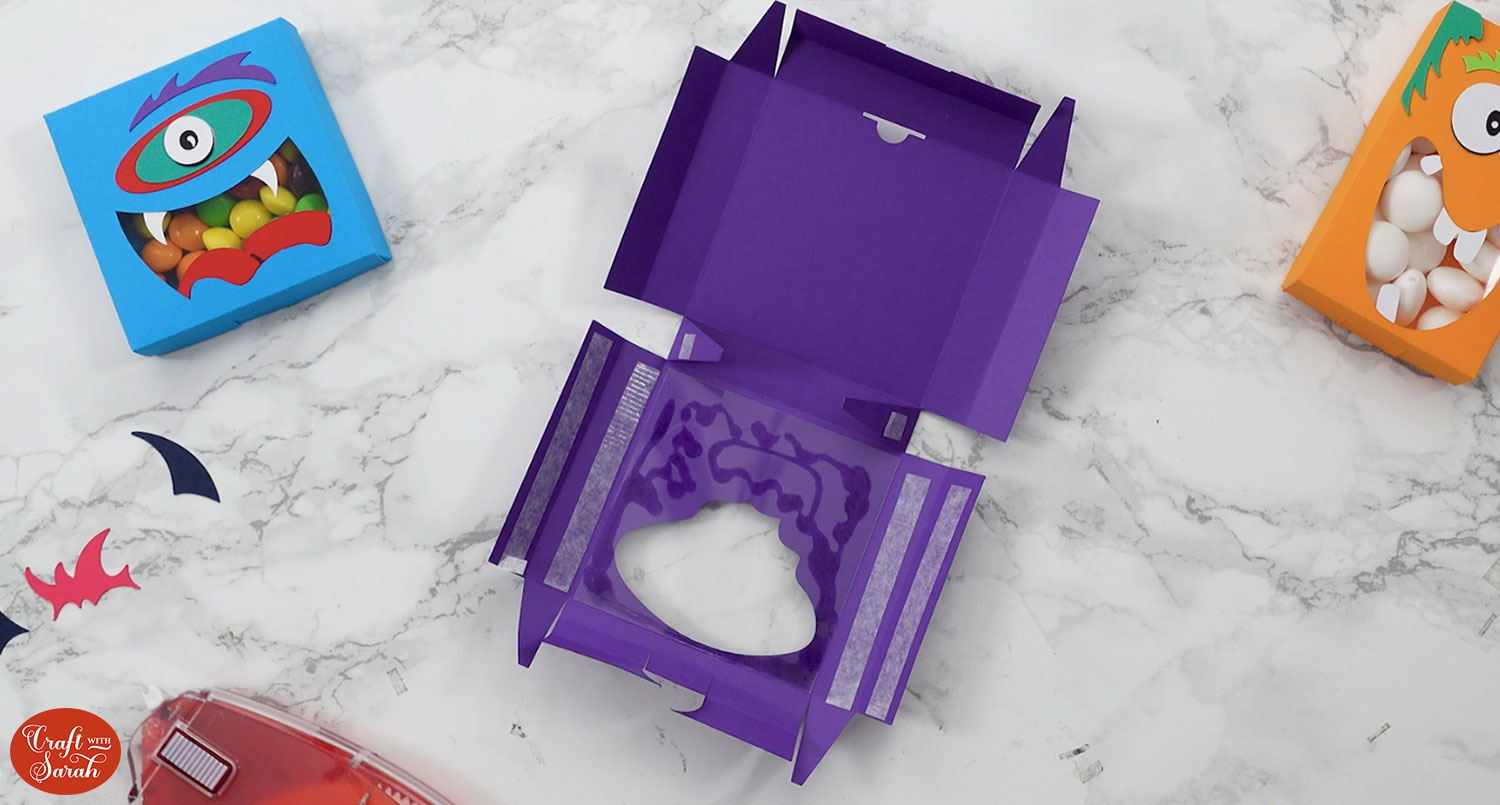
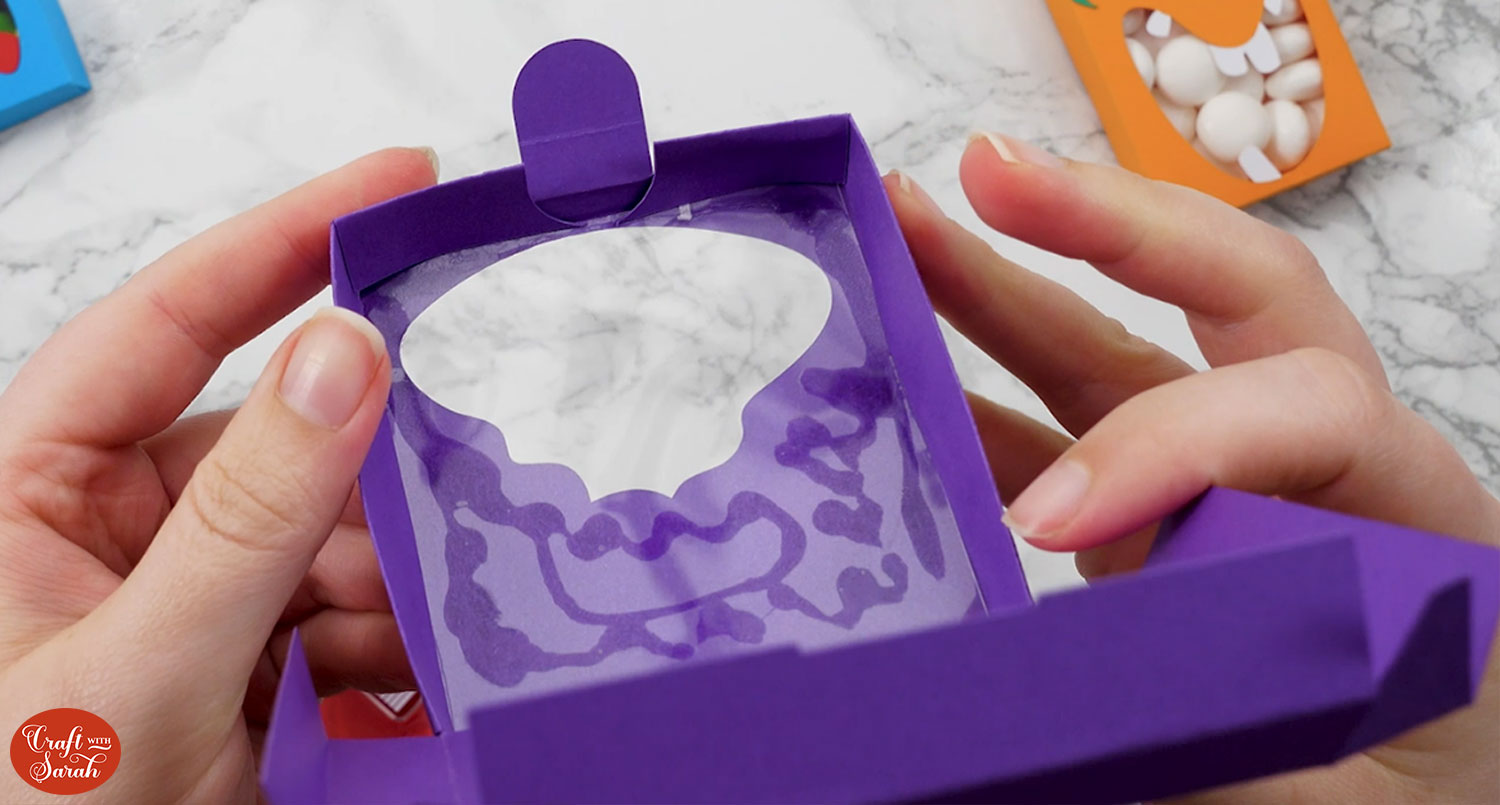
Glue the acetate to the back of the card box, making sure that it is securely glued all the way around with no gaps.
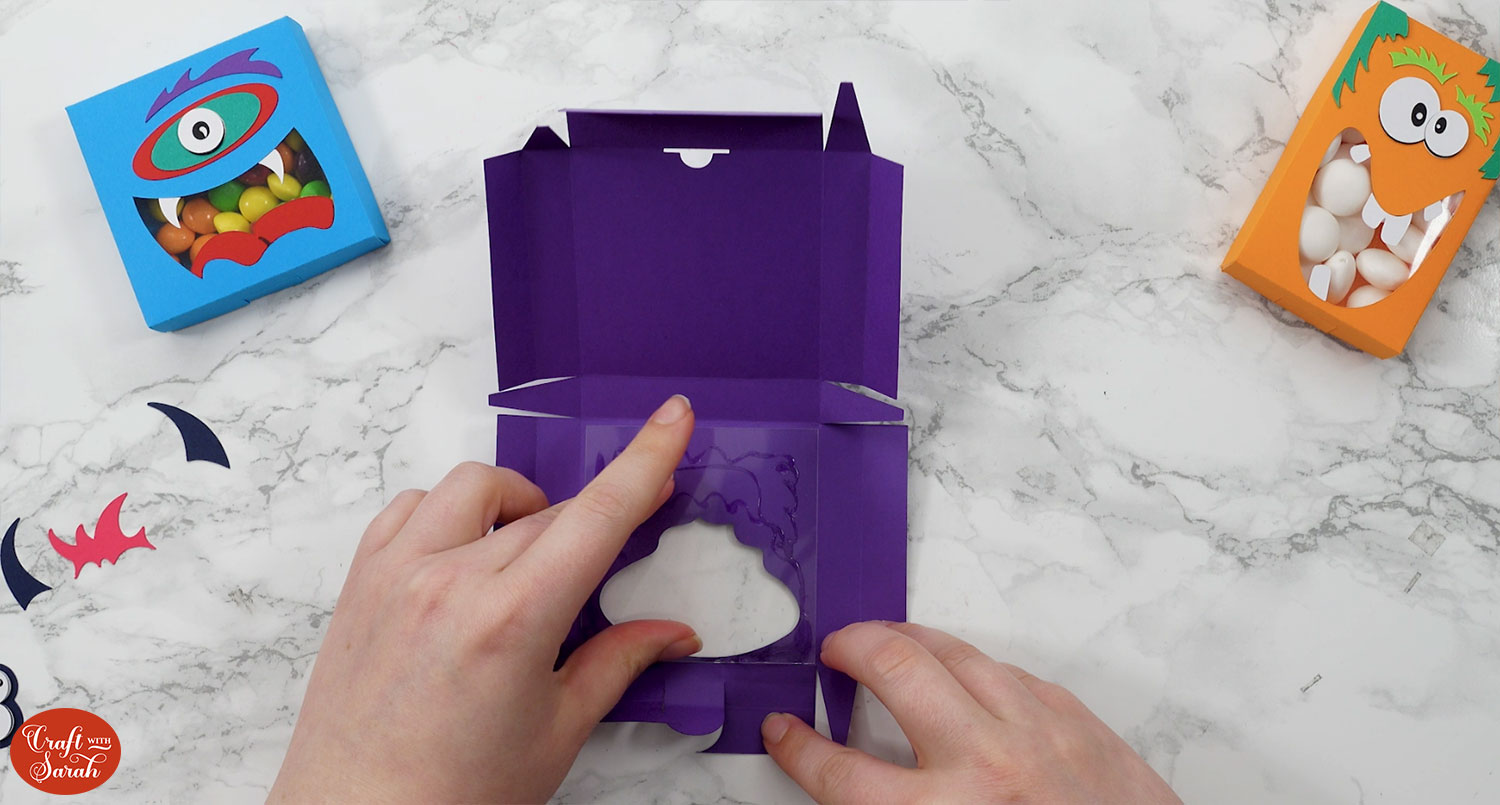
When the glue is completely dry, it’s time to create the box.
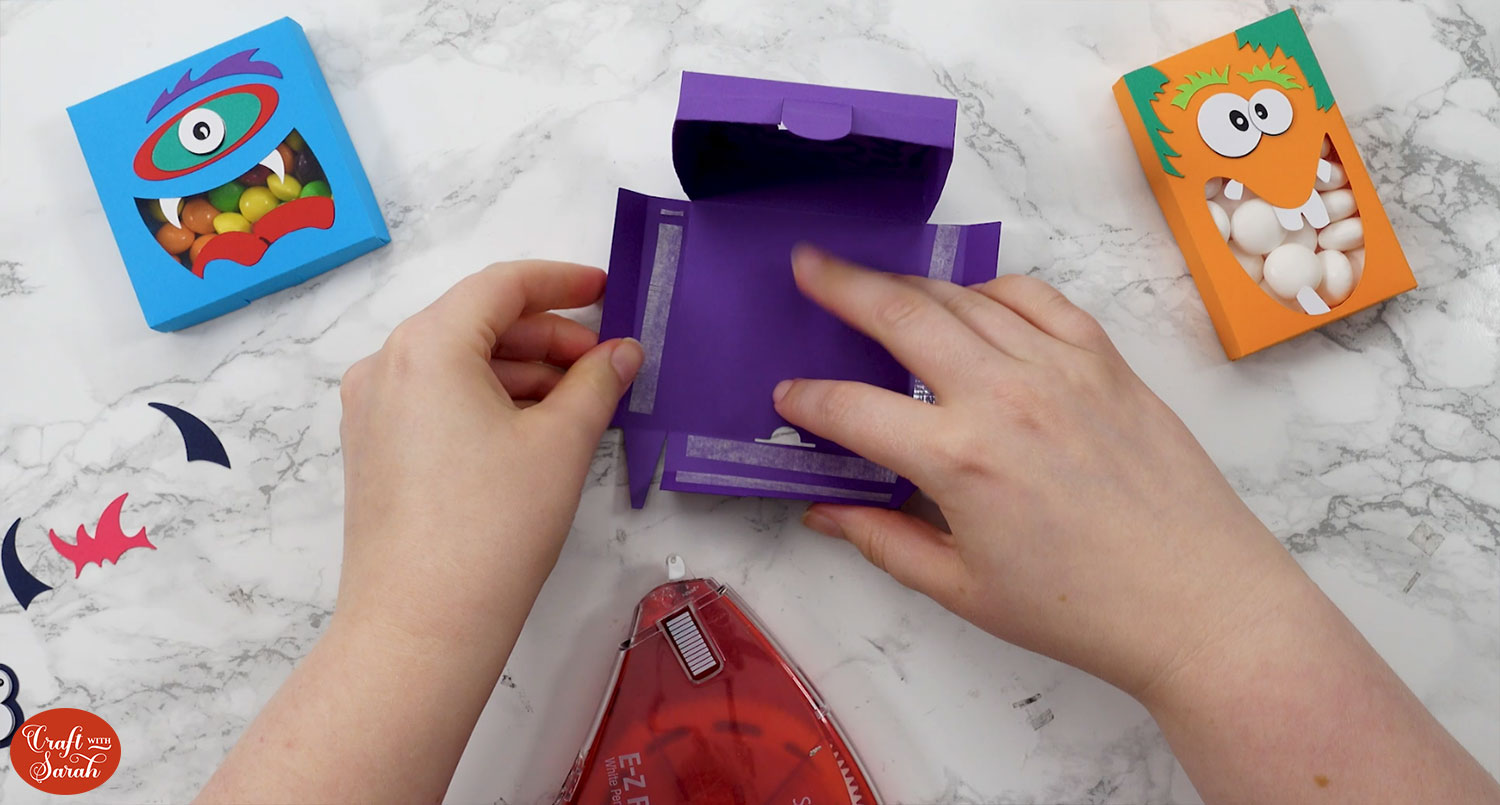
I like using double-sided tape instead of glue as then there is no need to wait for it to dry between stages.
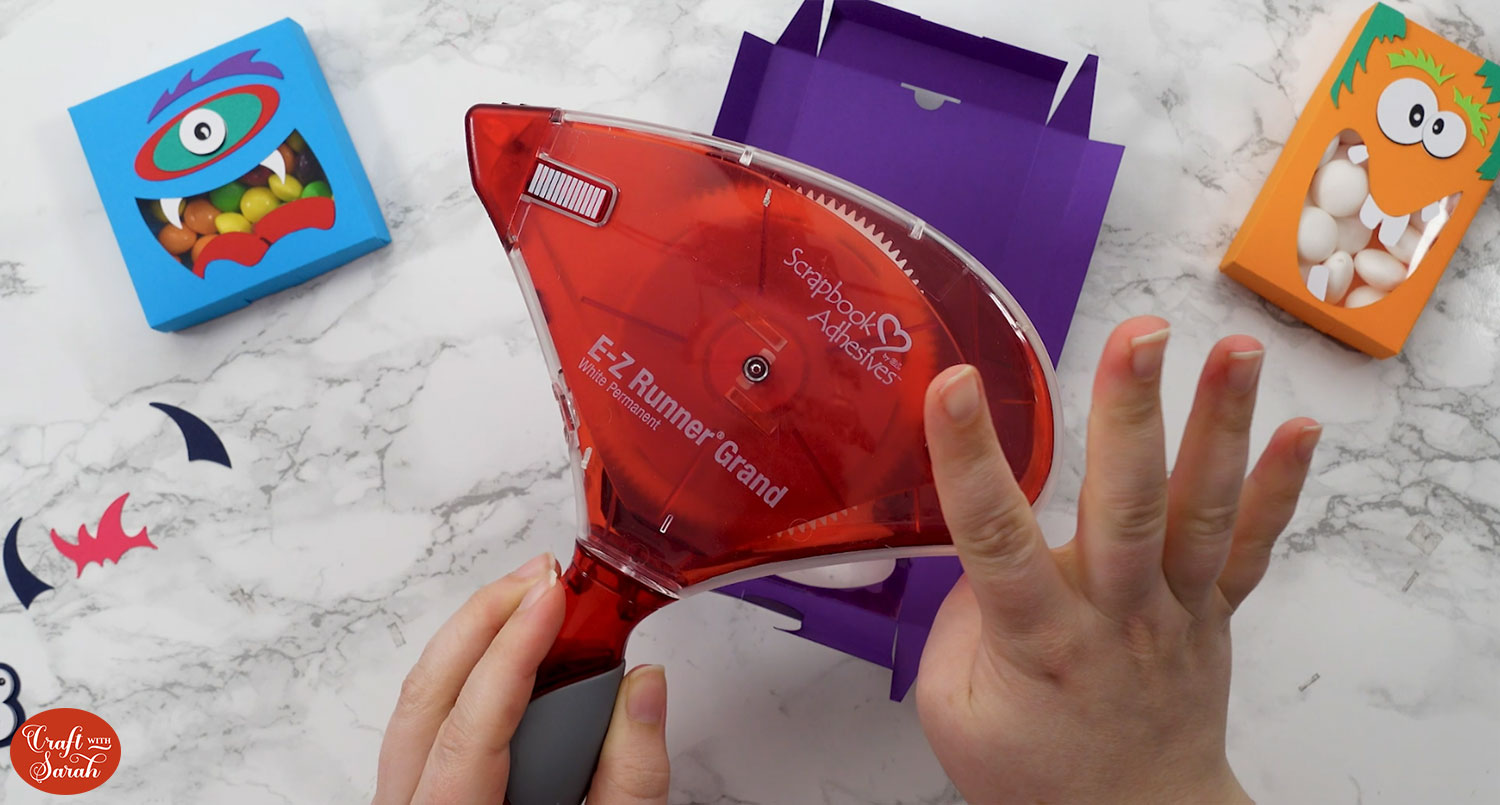
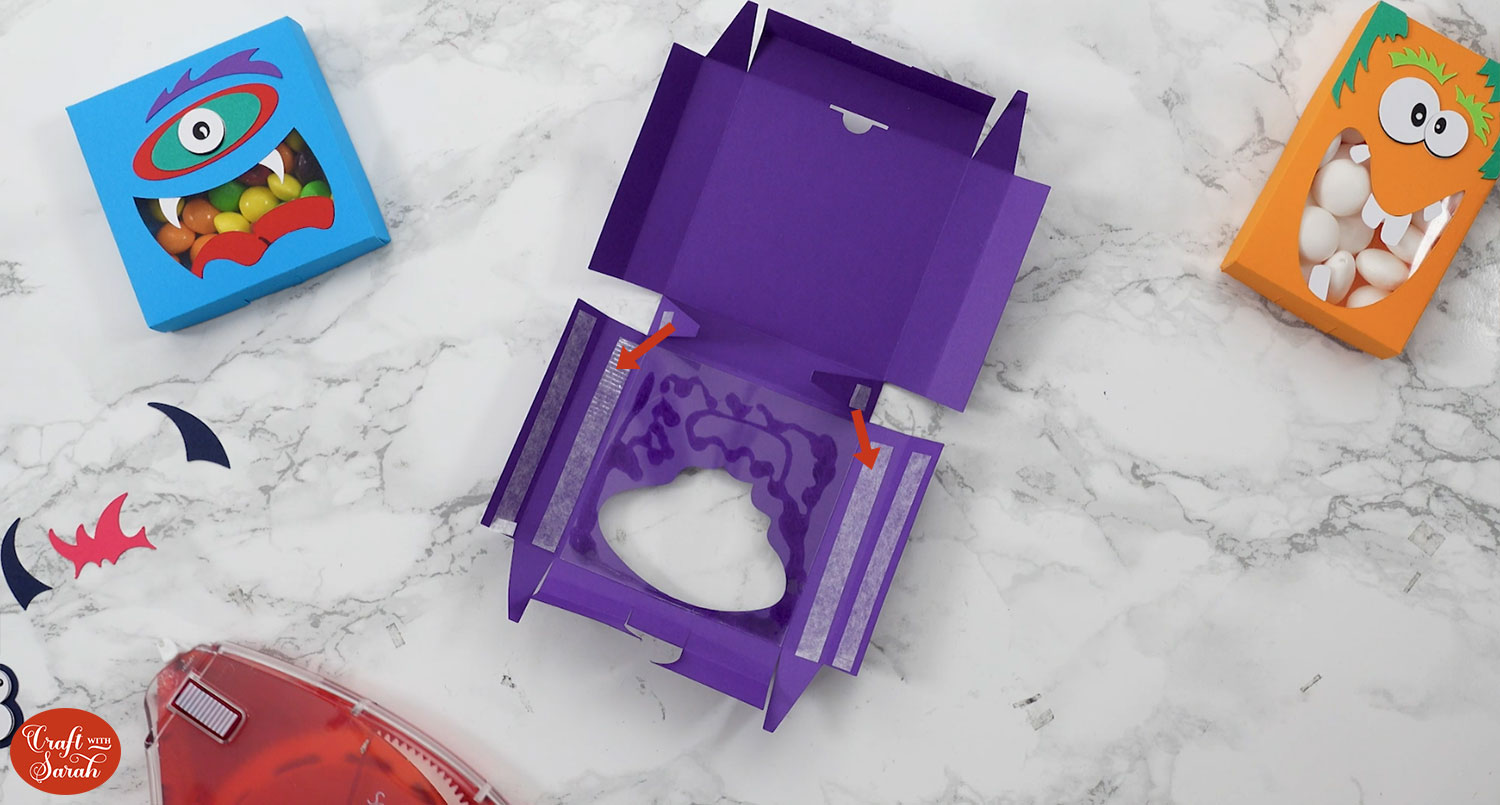
Start by adding double-sided tape to the flaps shown below.
Stick the triangle flaps to the bottom tabs and then fold the top tab over the top to cover it up and create the sides of the box.
It should look like this when done:
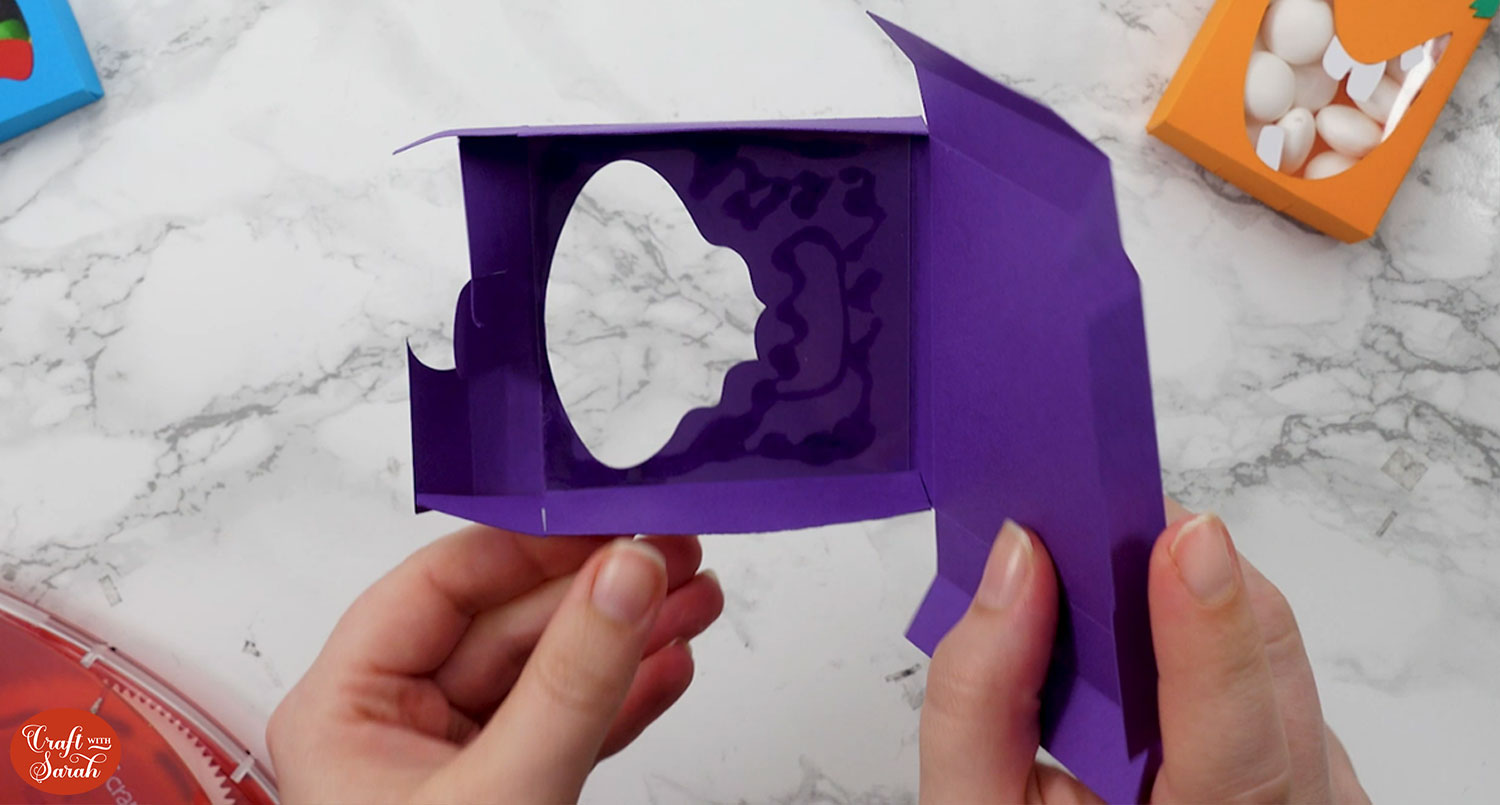
Do similar with the opening section of the box. Make sure you don’t stick the rounded oval tab as that’s going to be how we close the box and keep it secure.
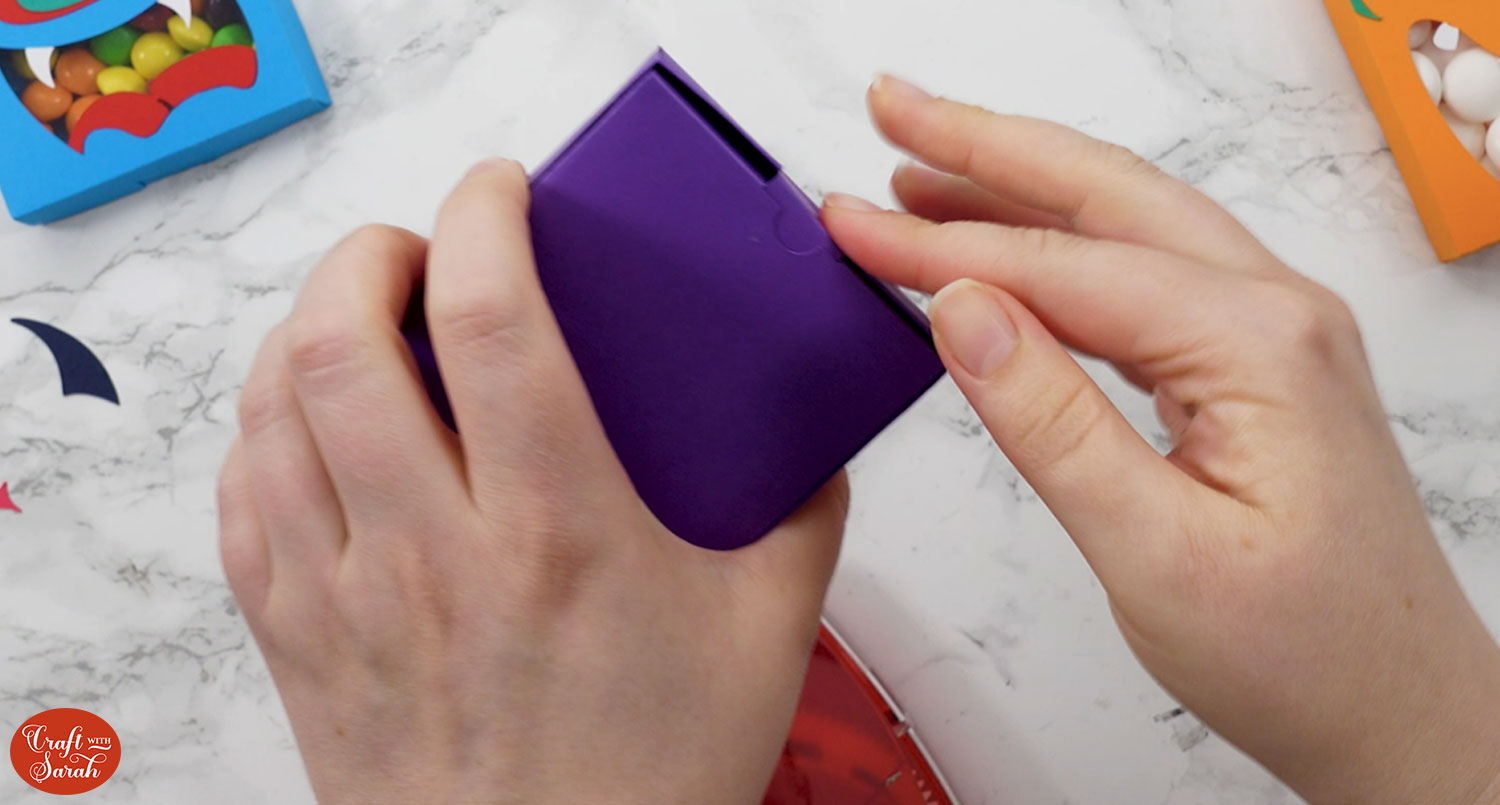
Add double-sided tape to the remaining flaps.
Fold the sides and stick the triangle tabs to form the edges of the box.
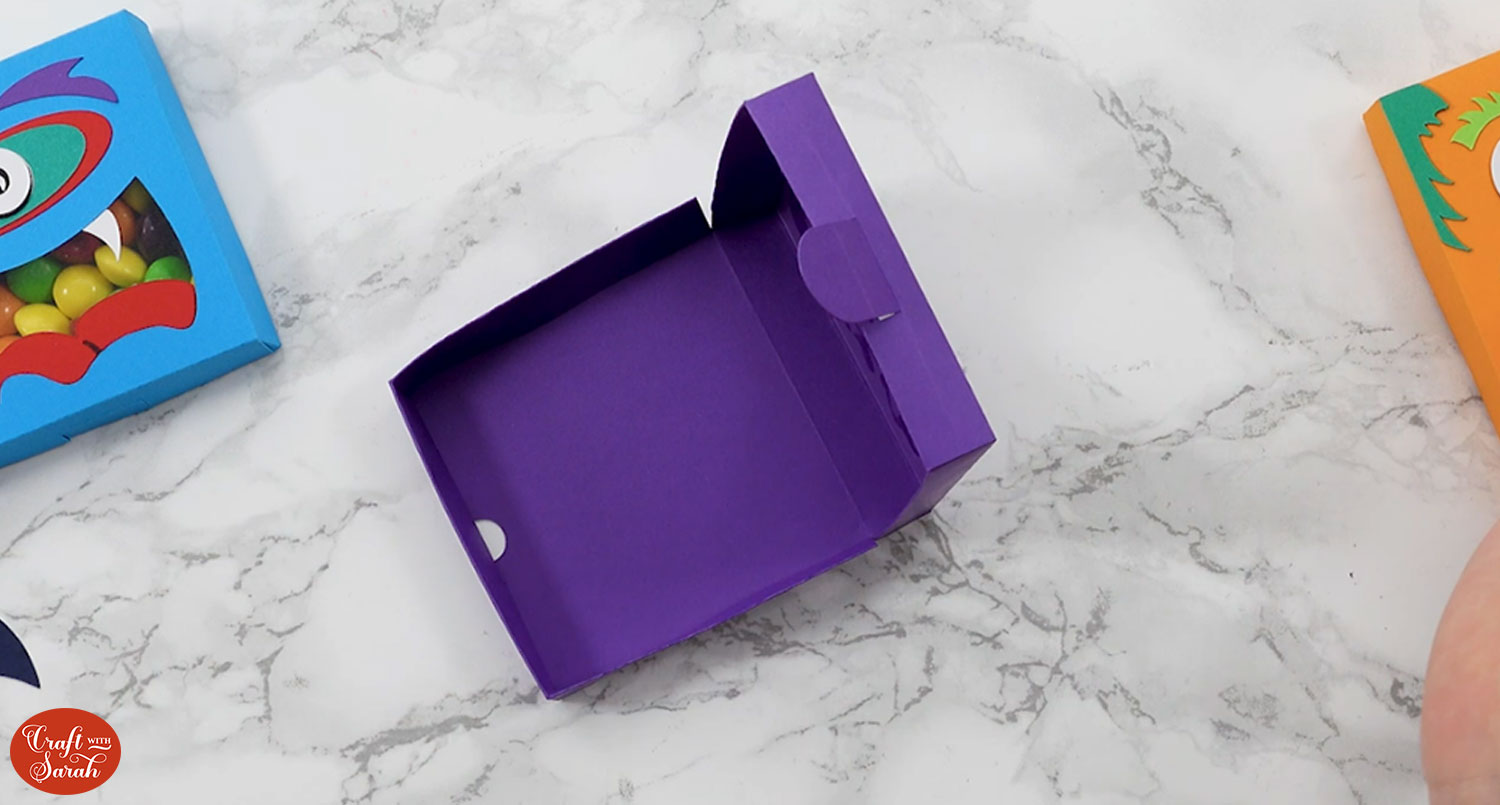
Your box should now open and close correctly. Thread the rounded oval into the small gap cut to hold it closed.
I decided to fill my box with M&Ms at this point, but you can also wait until the end of the crafting before you add the treats.
Step 7) Decorate the box
Now for the fun part! Glue all the monster features onto the front of the page.
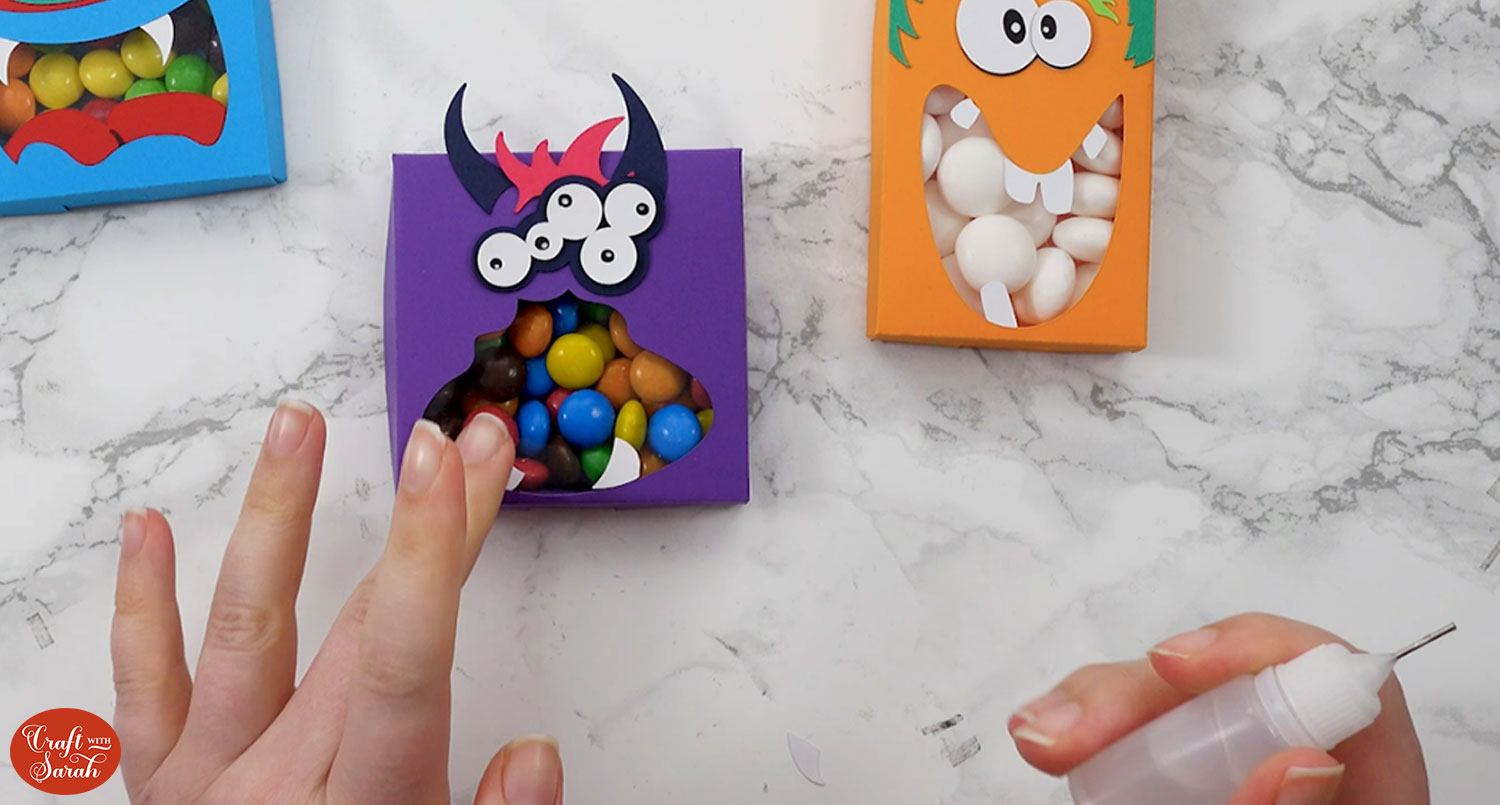
Continue sticking the faces together until your monsters are looking their spooky best!
Halloween monster face treat boxes
Once all the features have been glued onto the treat boxes and the glue has dried, they are all ready to be filled with your favourite sweets, candy or chocolate.
I hope you enjoyed this tutorial on how to make these Halloween monster treat boxes.

Happy crafting,
Sarah x

