CCC 2023 Day 14 ☃️ Merry Christmas Postbox Banner
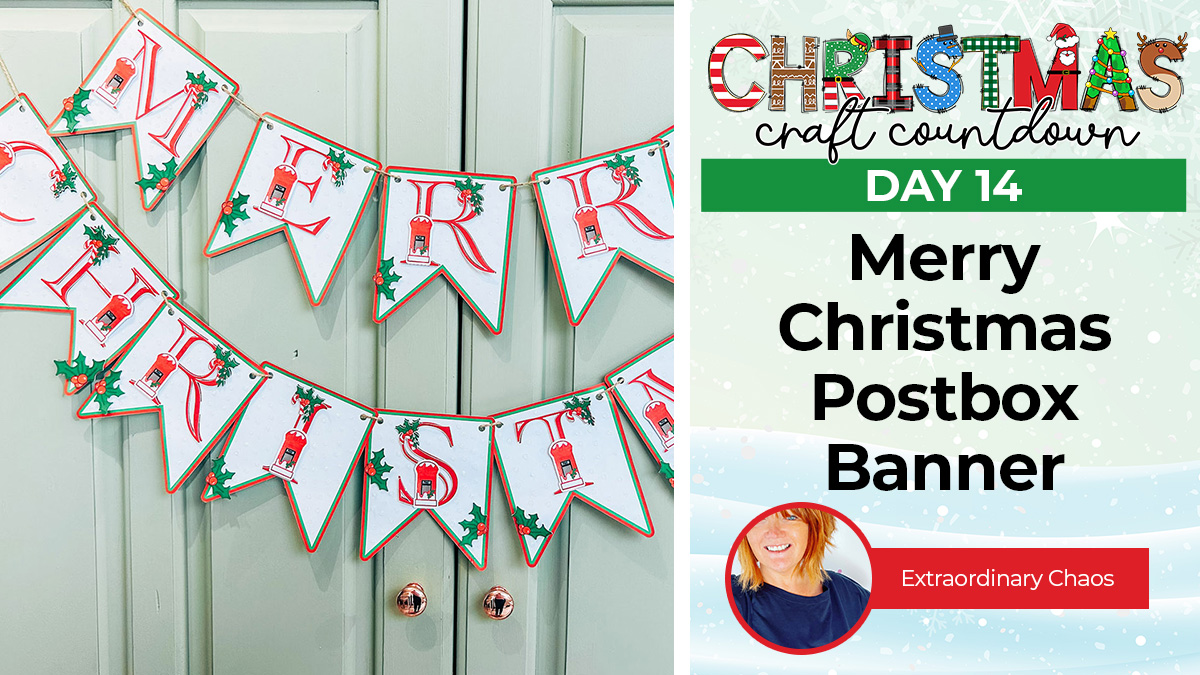
Make your own Christmas banner to hang as part of the festive decorations around your home.
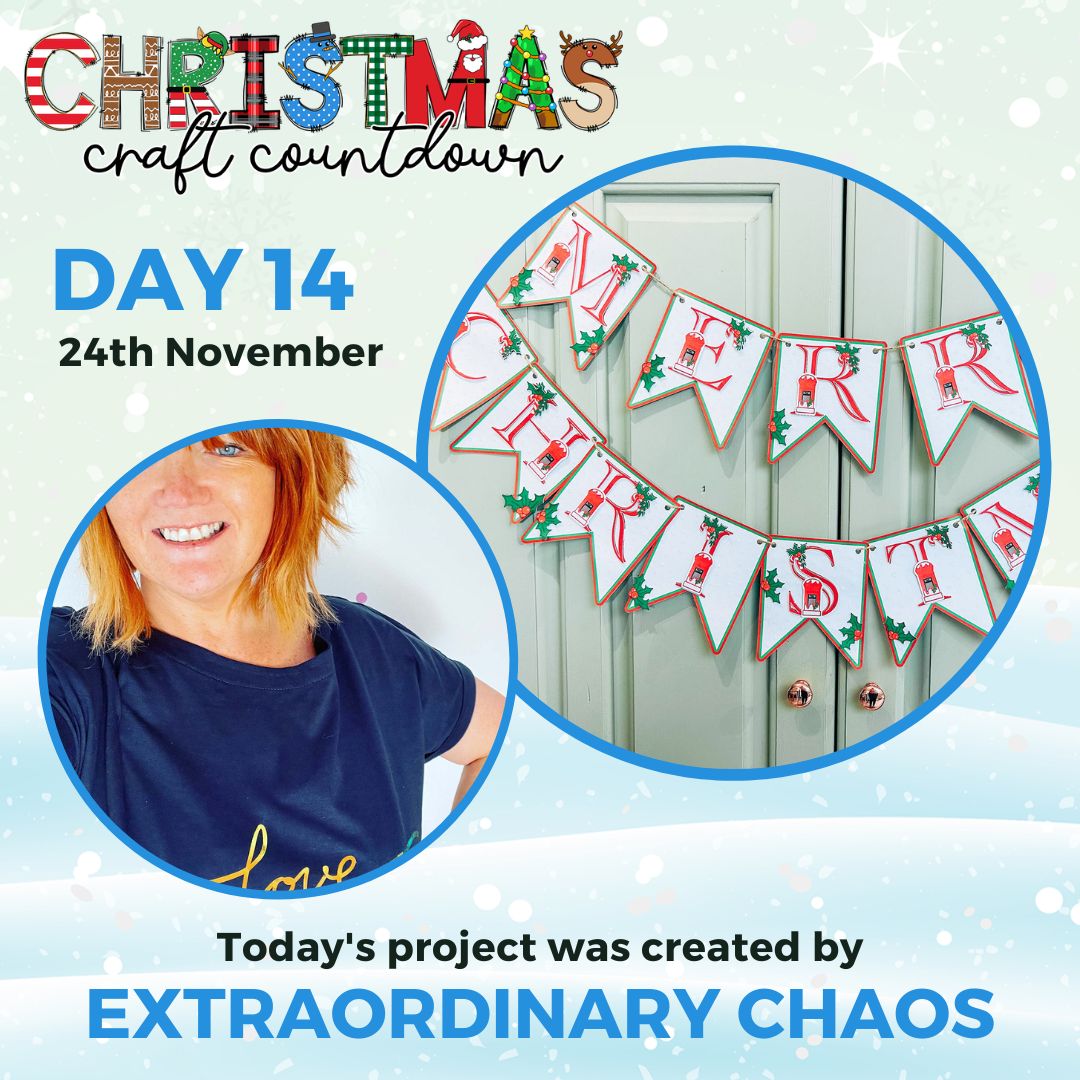
It’s Day 14 of the Christmas Craft Countdown and Sarah Christie from Extraordinary Chaos has made this beautiful Christmas banner with a traditional British postbox design.
Sarah uses Print then Cut to make this a quick and easy Christmas decoration that you can whip up even if you don’t have much time on your hands.
I love the added Nuvo Drops to give it a wintery, snowy feel. The banner will be a beautiful addition to your Christmas decorations this year.
This Project was part of the Christmas Craft Countdown 2023
Materials supply list
Here is a list of the materials that Sarah used to make this project.
Please note that some of the links included in this article are affiliate links, which means that if you click through and make a purchase I may receive a commission (at no additional cost to you). You can read my full disclosure at the bottom of the page.
- Cricut machine
- Light grip or standard grip cutting mat
- Colour printer
- White cardstock (make sure it’s not too thick for your printer) or photo paper
- Glue
- Twine or ribbon
- Scissors
- Foam pads
- Nuvo Drops (White Blizzard)
- Hole punch
This project is suitable for the following types of Cricut machine: Explore Air 2, Explore Air 3, Maker, Maker 3, Venture and Joy Xtra. It is not suitable for the original Cricut Joy machines as they cannot do print then cut.
Video tutorial
Watch the video below to see how to make this printable banner.
If you prefer to read rather than watch, keep scrolling!
This project was created by Extraordinary Chaos
Sarah Christie, author and designer at Extraordinary Chaos a family lifestyle and travel blog from a mum of boys, sharing Cricut Crafts Tutorials and Free SVG Files, Alphabets and Coloring Alphabets for home school and Educational fun.
Sarah is also the co-editor of Cruising With Kids Family Cruise Blog and Mini Travellers family travel blog sharing travel and cruise inspiration for couples and families.
Written tutorial (with photos!)
Here’s how to make a Christmas banner using a Cricut machine.
Step 1) Download the cut files & unzip the downloaded folder
Download the files using the box below.
Before you upload the files to Design Space, you need to unzip the download folder that they come in.
Step 2) Upload the cut files into Design Space
Open up Cricut Design Space and start a new Project.
Click “Upload” and then find your unzipped version of the downloaded files for this project.

Please note that these are PNG files as this is a print then cut project; they are not SVG files.
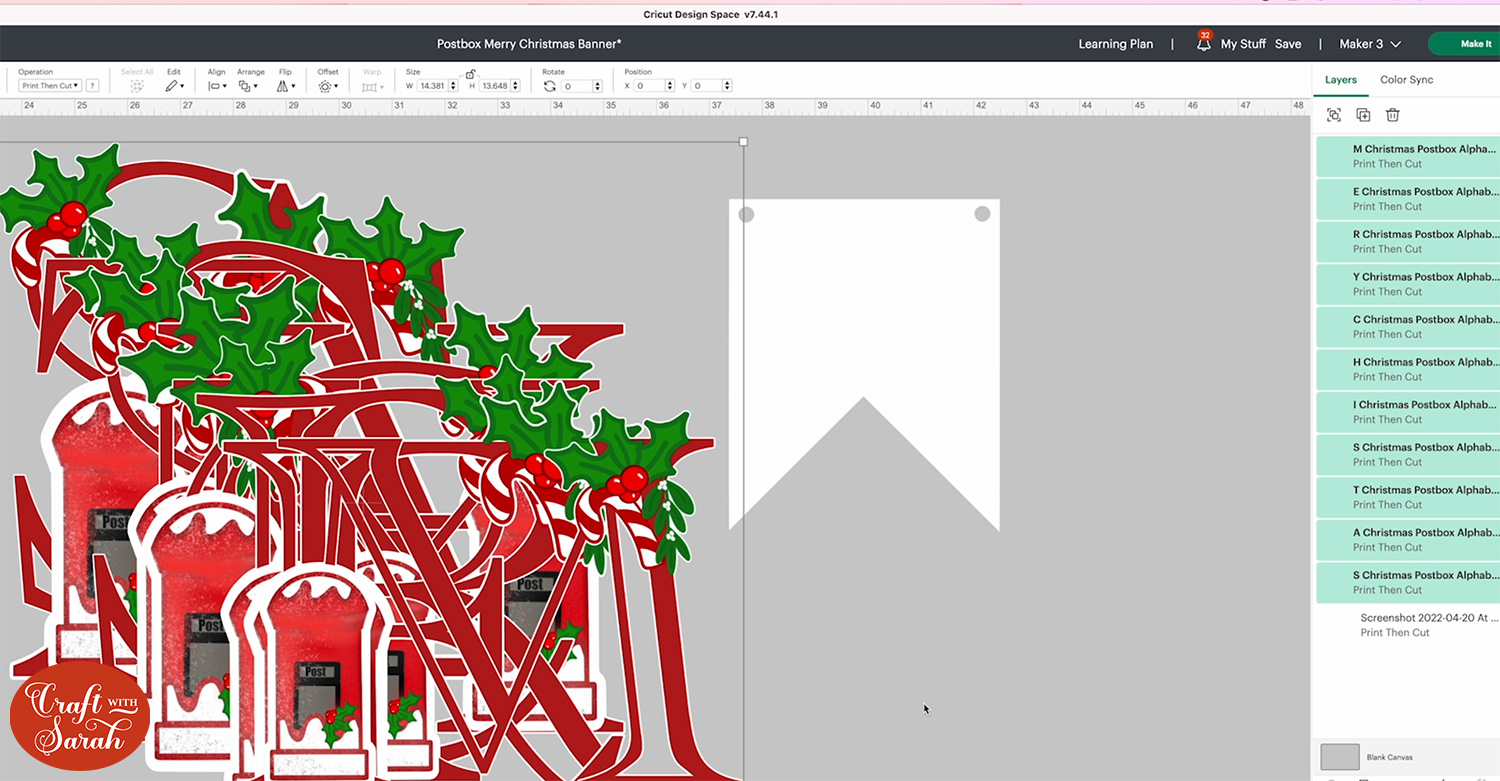
Load in each of the alphabet letters one by one along with the flag PNG.
Choose “Complex” as the image type.
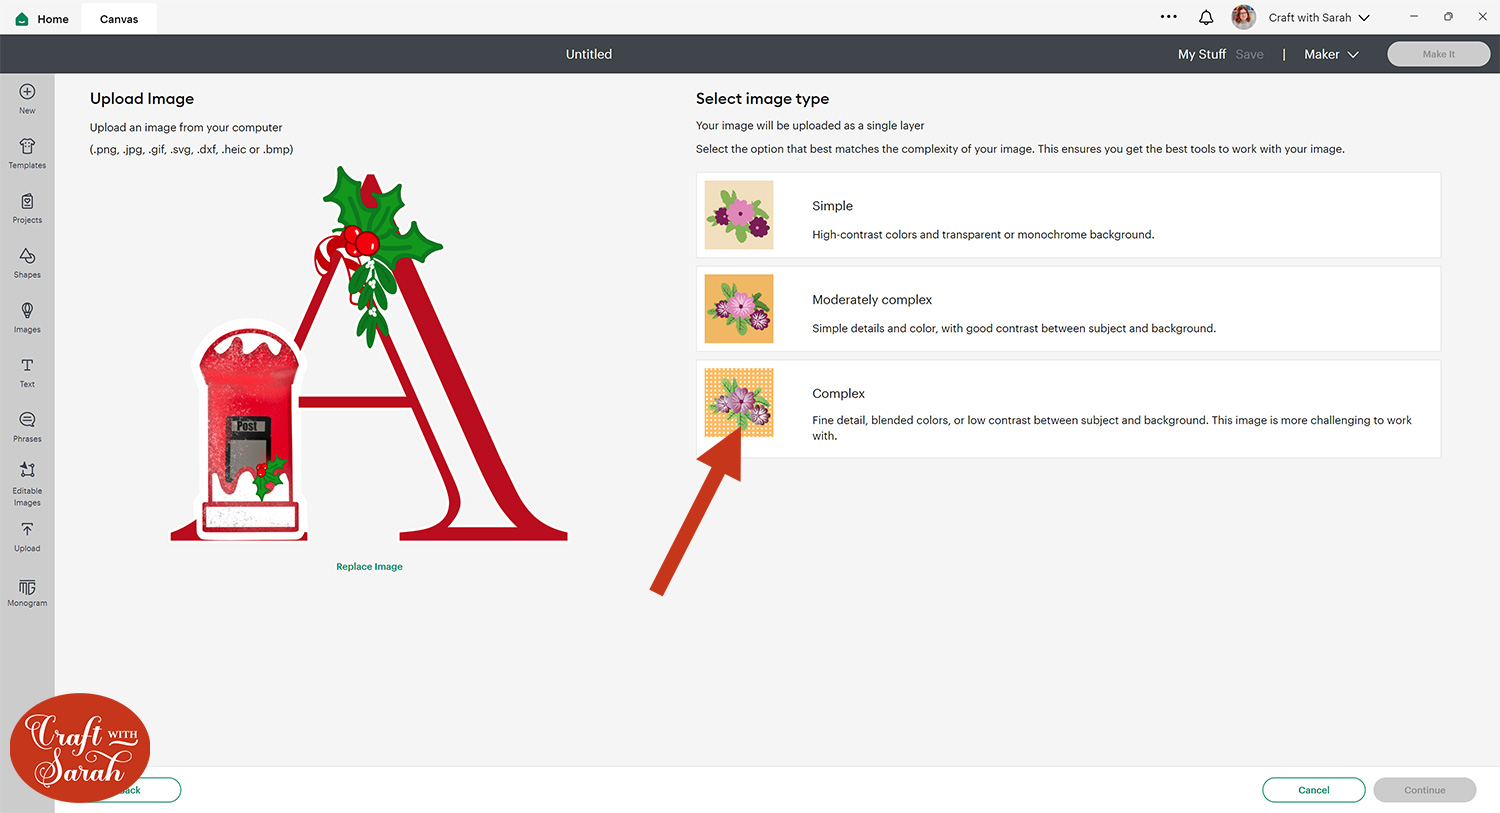
You don’t need to change anything on the next screen; just press “Apply & Continue”.
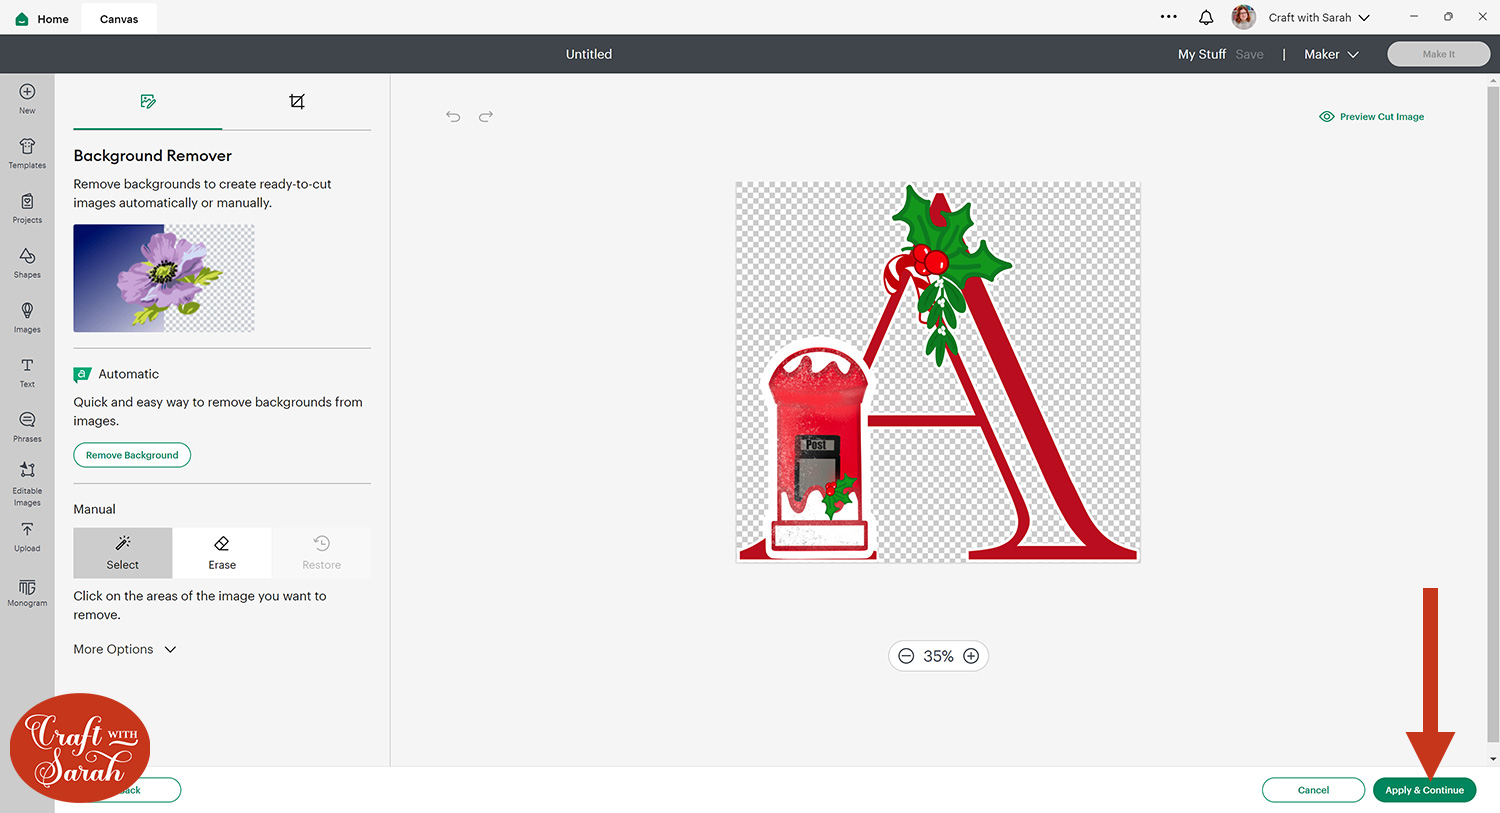
Select “Print then Cut” and then press “Upload”.
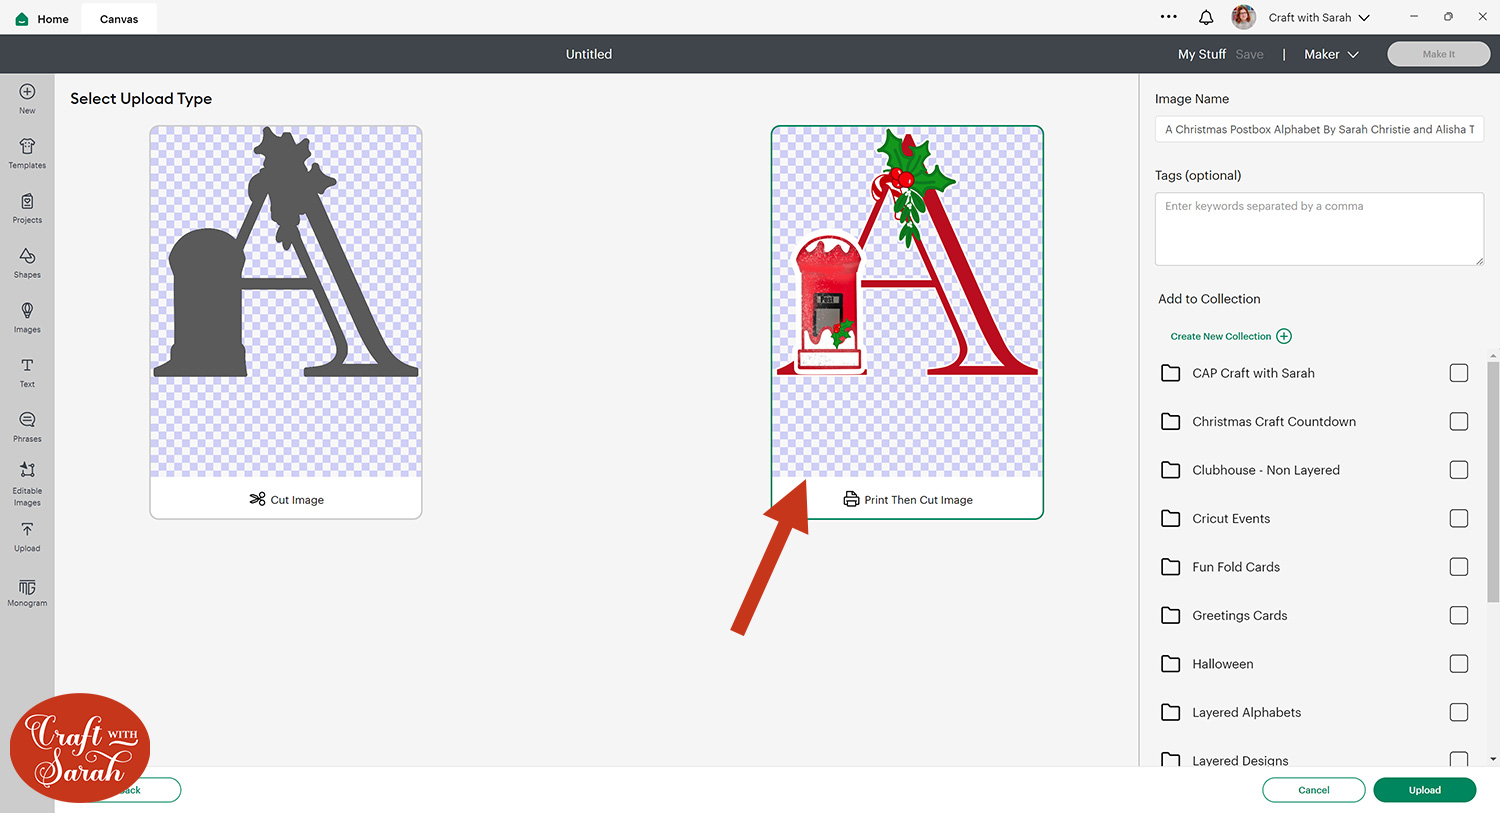
After uploading, the designs will show in your “Recently Uploaded Images”.
Click on them all and then press “Add to Canvas” to put them onto your Project.
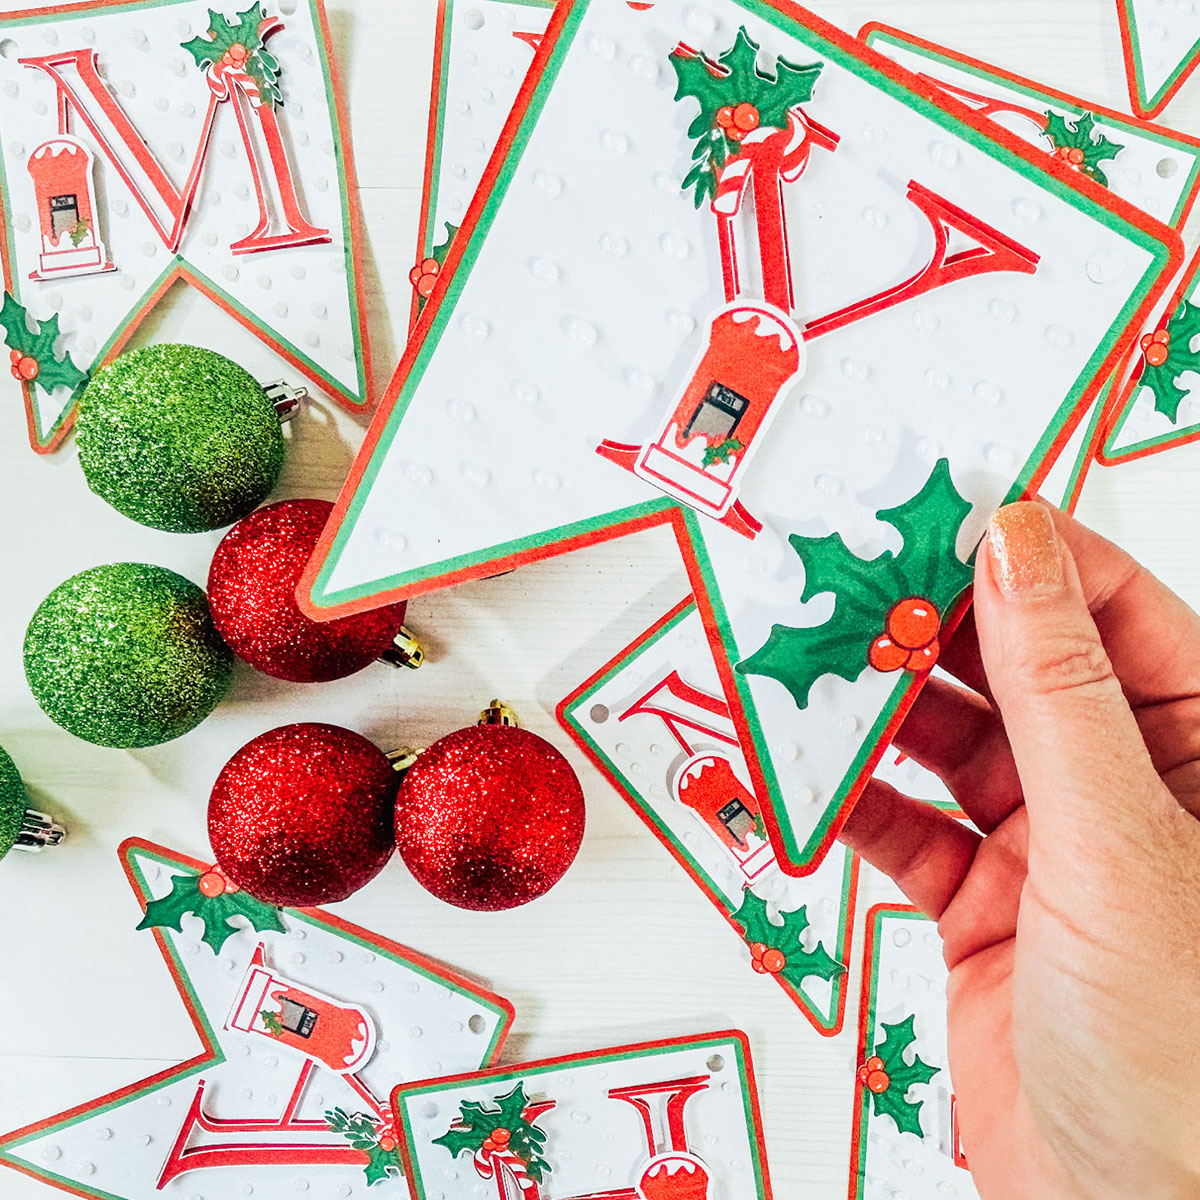
Step 3) Design the banner pennants
Click your flag and go into Offset and add a thin Offset of 0.125 to create a border.
Change this layer to the colour you want to make the border.

Go into Offset again and add another 0.125 offset to add a second border around your banner pieces.
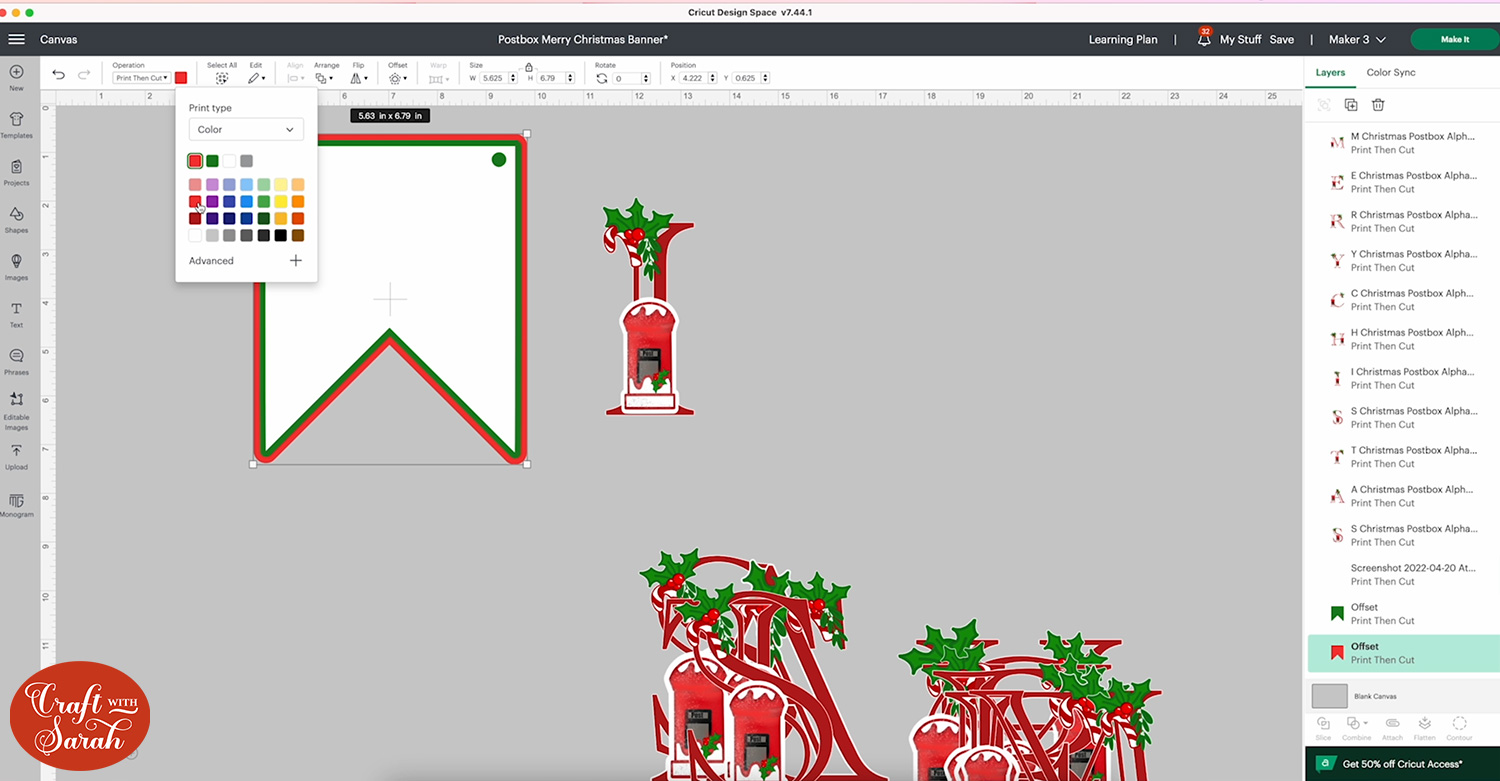
To add the holes in the offset layers, you can either use a hole punch on them once they are cut out, or draw some Circle shapes in Design Space and “Slice” them out of the offset layers so that your Cricut will cut the holes.
Select all three layers and click Flatten which will turn your banner piece into one flat layer design so that it can be used for Print then Cut.
You can then Duplicate the pennant for each letter of the banner.

Drag one of the letters from the alphabet onto one of the pennant pieces. If the letter is showing as underneath the pennant, click the letter and then Arrange > Bring to Front to move it on top of the pennant.
Position and size the letter.
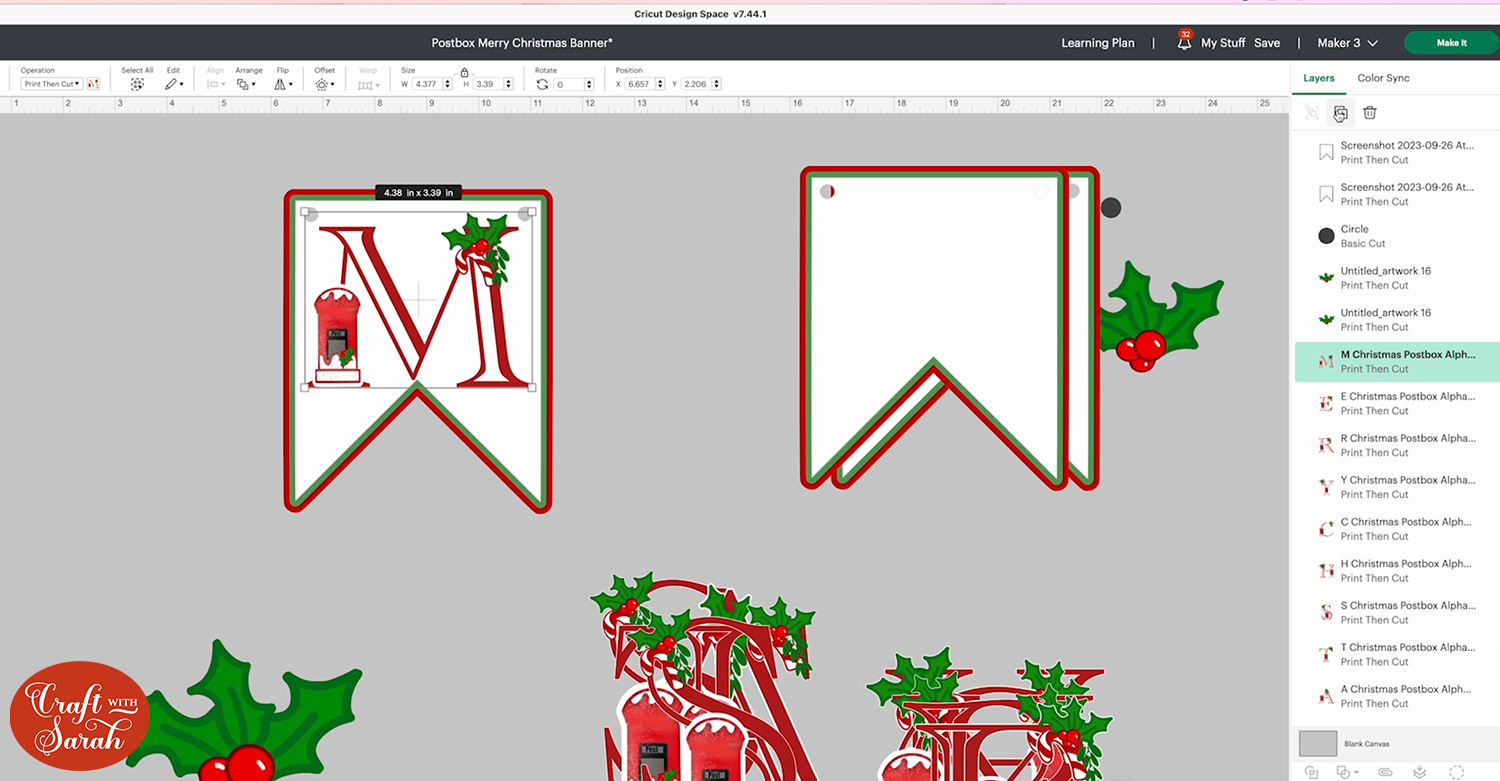
Duplicate the letter if you would like to layer your flag. That will allow you to attach the letter on with foam squares to give the flag depth.
Alternatively, you can select all of your flag and press Flatten so that it’s one flattened image, ready for Print then Cut with no layers.
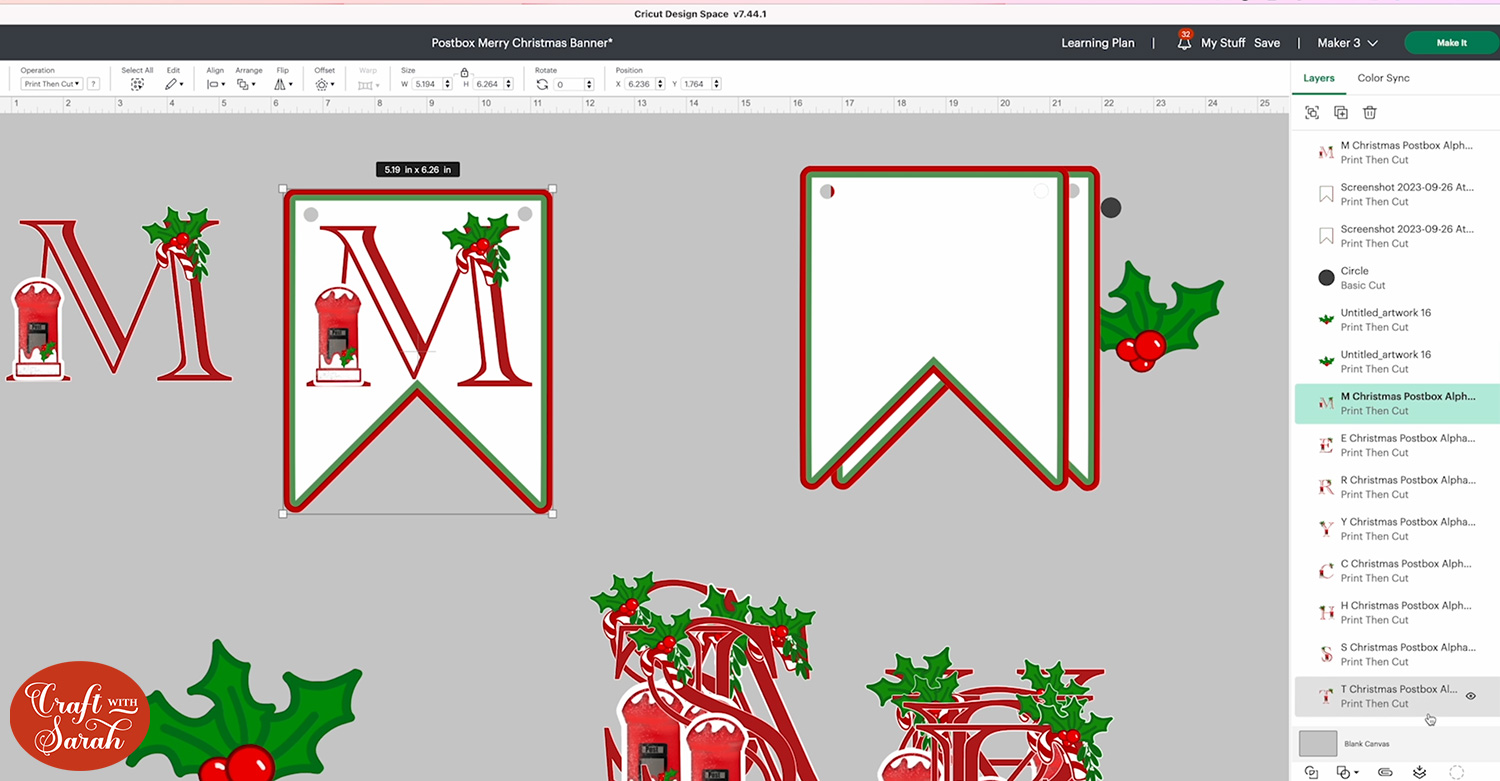
Repeat the process for each of the pennants until you have all of the letters to spell “Merry Christmas”.
You could also add extra layers with the holly leaves and berries image included in the download folder.
Step 4) Print and cut the Christmas banner
Save your project and then press “Make It”.
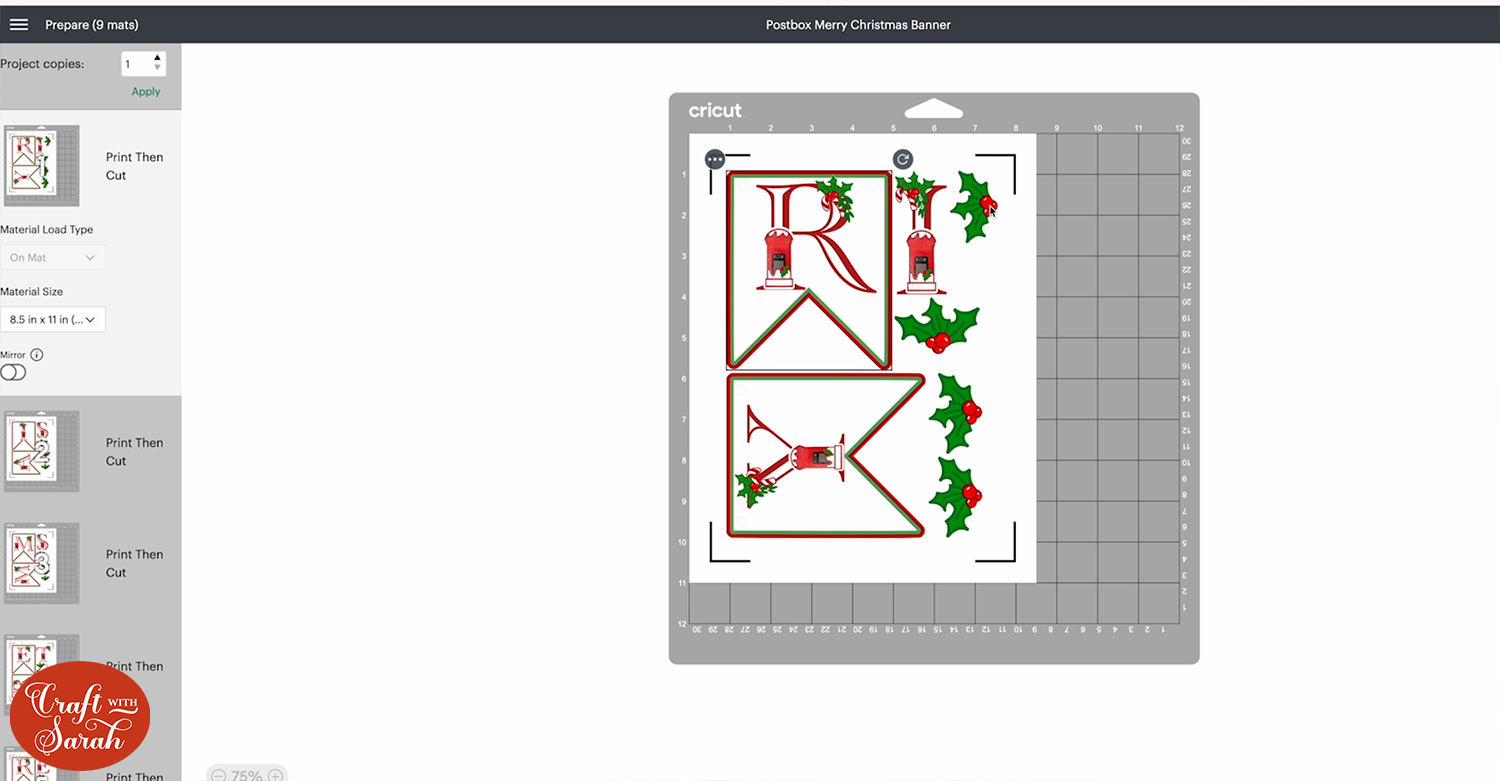
When you are printing, make sure “Add Bleed” is on along with “Use System Dialog” so that you can go into your printer settings, choose the paper type and change the quality settings to best.
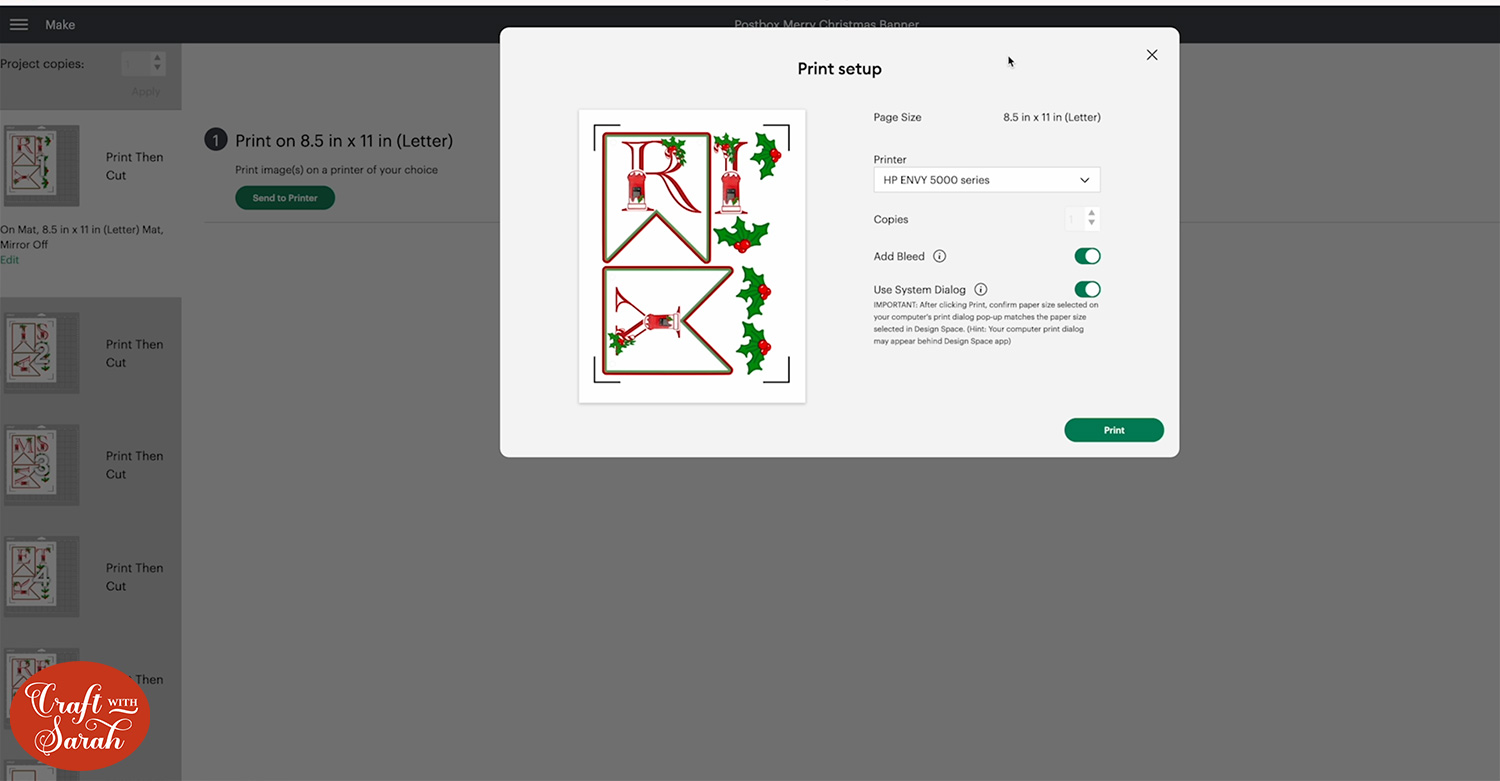
Once your banner is printed, stick it to your Cricut mat and get everything cut out using the on-screen instructions.
Step 5) Assemble the banner
If you have decided not to layer the letters then you can skip the next few steps.
If you are layering them use foam squares to stick the letters onto the banner pennants.
You may have to cut the foam so that it’s small enough to be hidden under the thin parts of the letters.
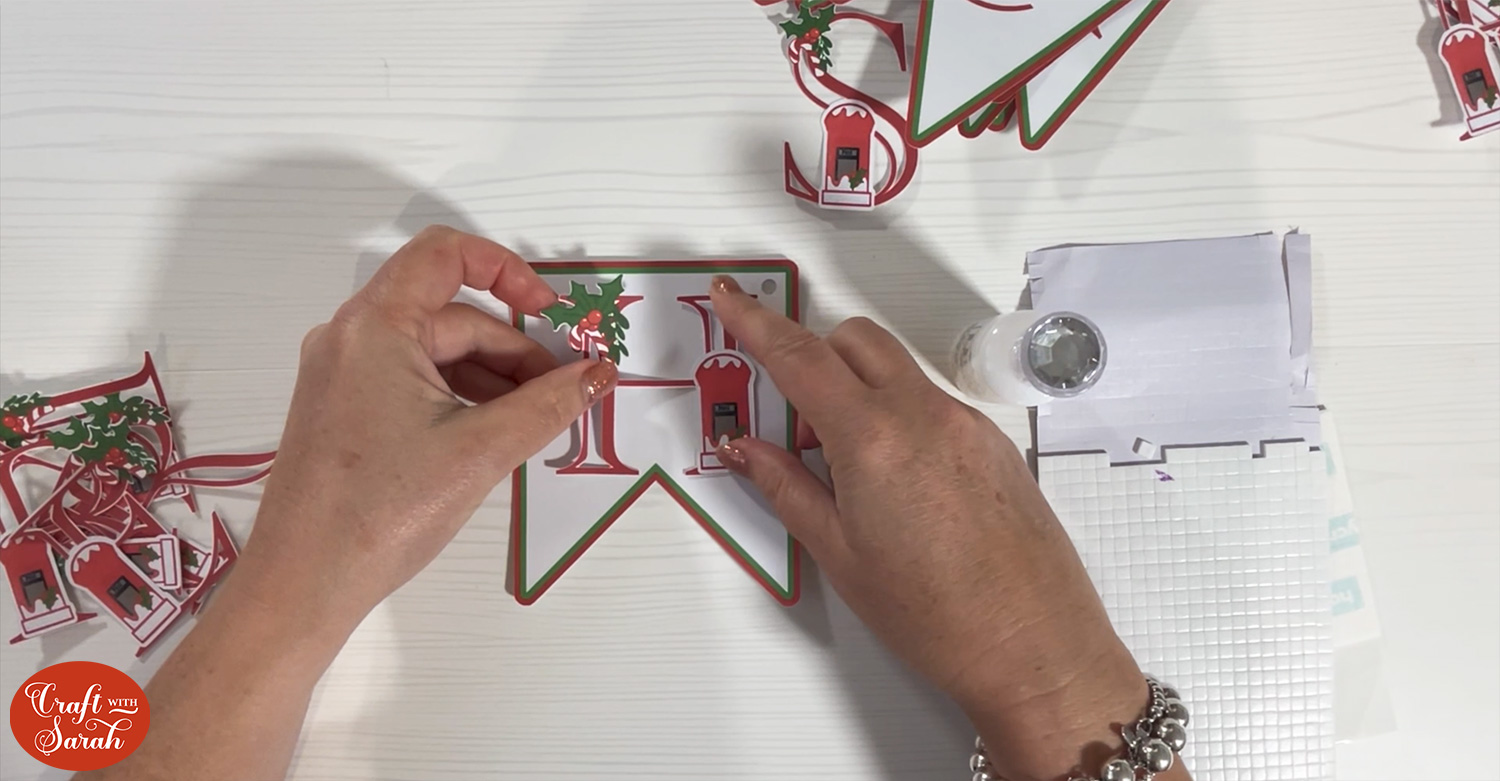
Stick the pieces of holly on and decorate the flags with Nuvo Drops, glitter glue, gemstones or similar.
These will take a little while to drop properly so be careful not to smudge them.

Hole punch the pennants if they need the holes adding.
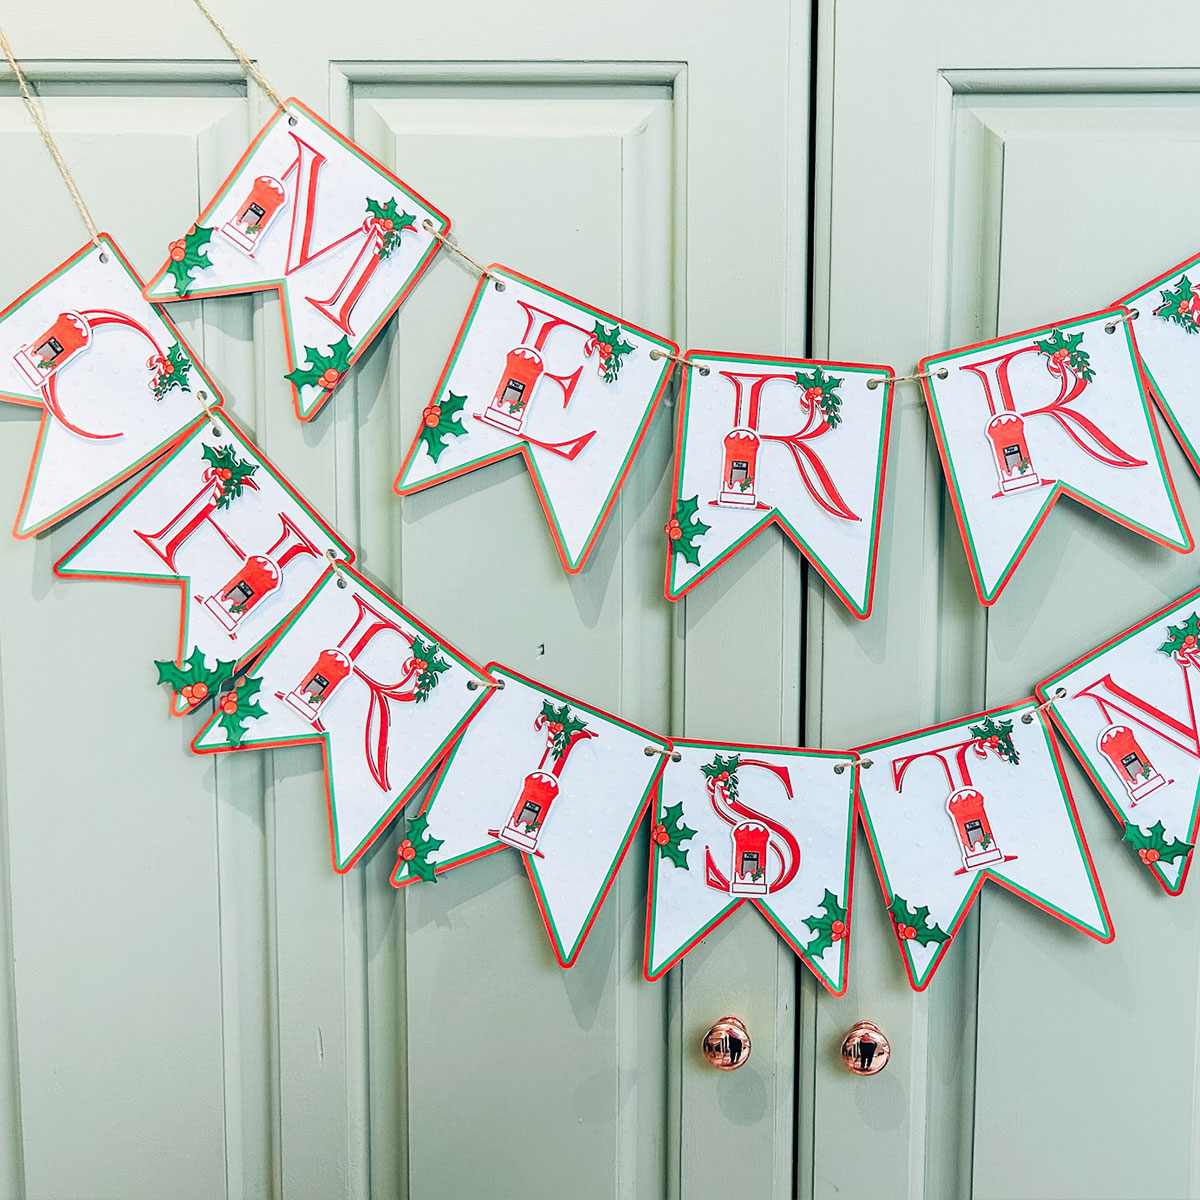
Once all the pennants are complete, take your twine or ribbon and build the banner by posting the twine through the left hole and back out of the right hole so that most of it is hidden around the back.
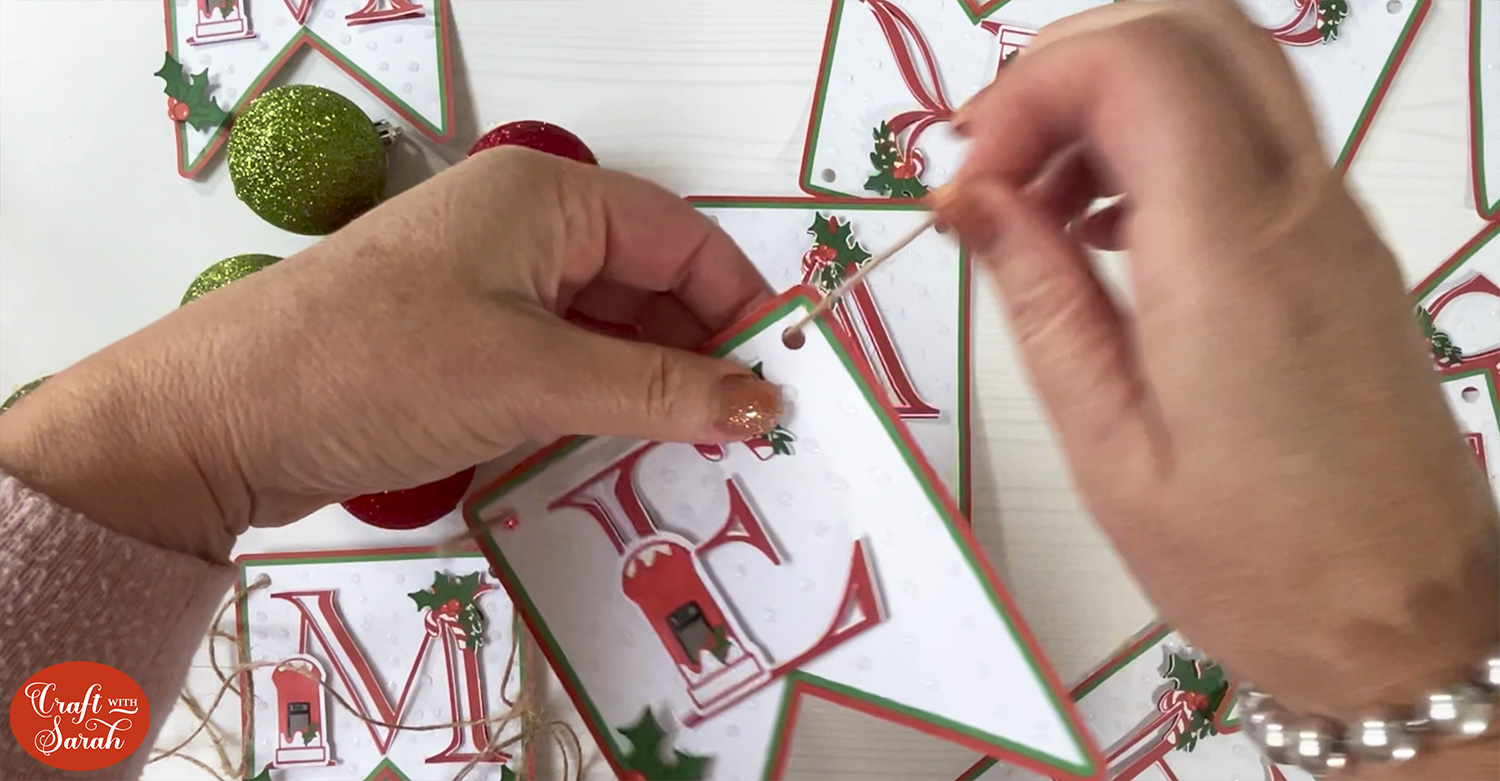
You can thread your flags so that they are all on one piece of twine, or put “Merry” on one level and “Christmas” on another.
You could also hang other decorations on your banner like baubles or candy canes to give it an extra Christmassy touch.
Christmas postbox papercraft banner
Now your DIY Christmas banner is finished! I love how the Nuvo Drops make this project extra Christmassy!

This was such a quick and easy Christmas project and the results are fabulous!
I can imagine this hanging from the mantelpiece along with stockings on each side.
Want the rest of the alphabet in the SAME postbox design? Sarah will be releasing the whole alphabet for FREE on 24th November. Click here to download it (it will show as “page not found” until the 24th November, so please check the link after that date).
Happy crafting,
Sarah x

