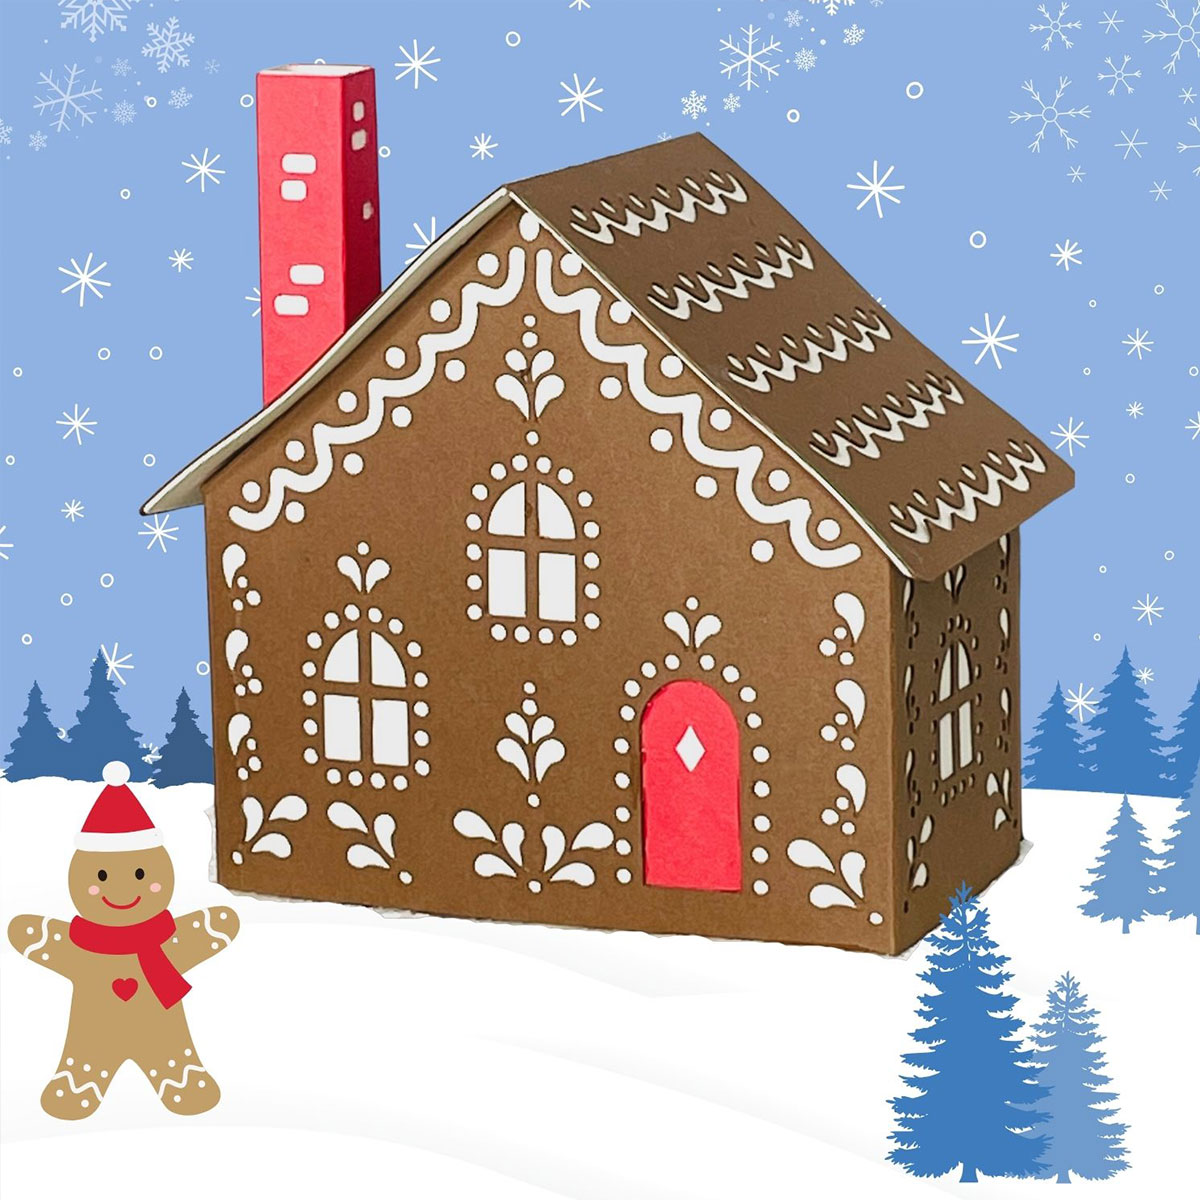
CCC 2023 Day 04 ☃️ Gingerbread Cottage
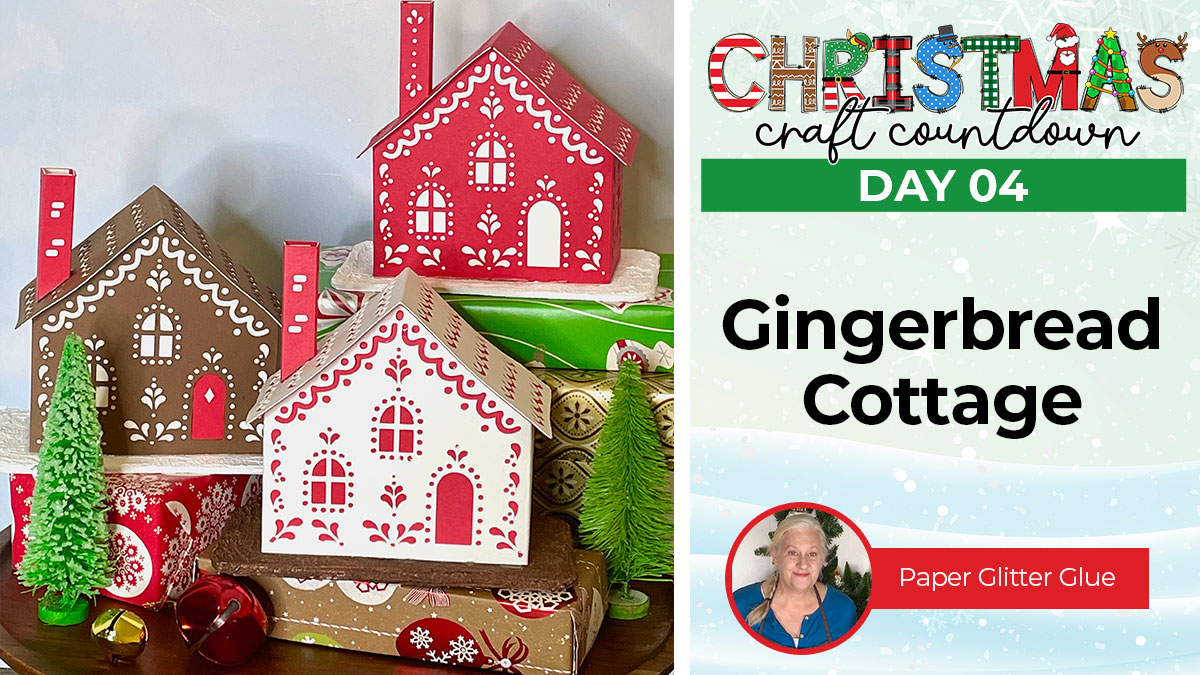
Make a 3D gingerbread cottage covered in beautiful patterns with this tiny house cut file.
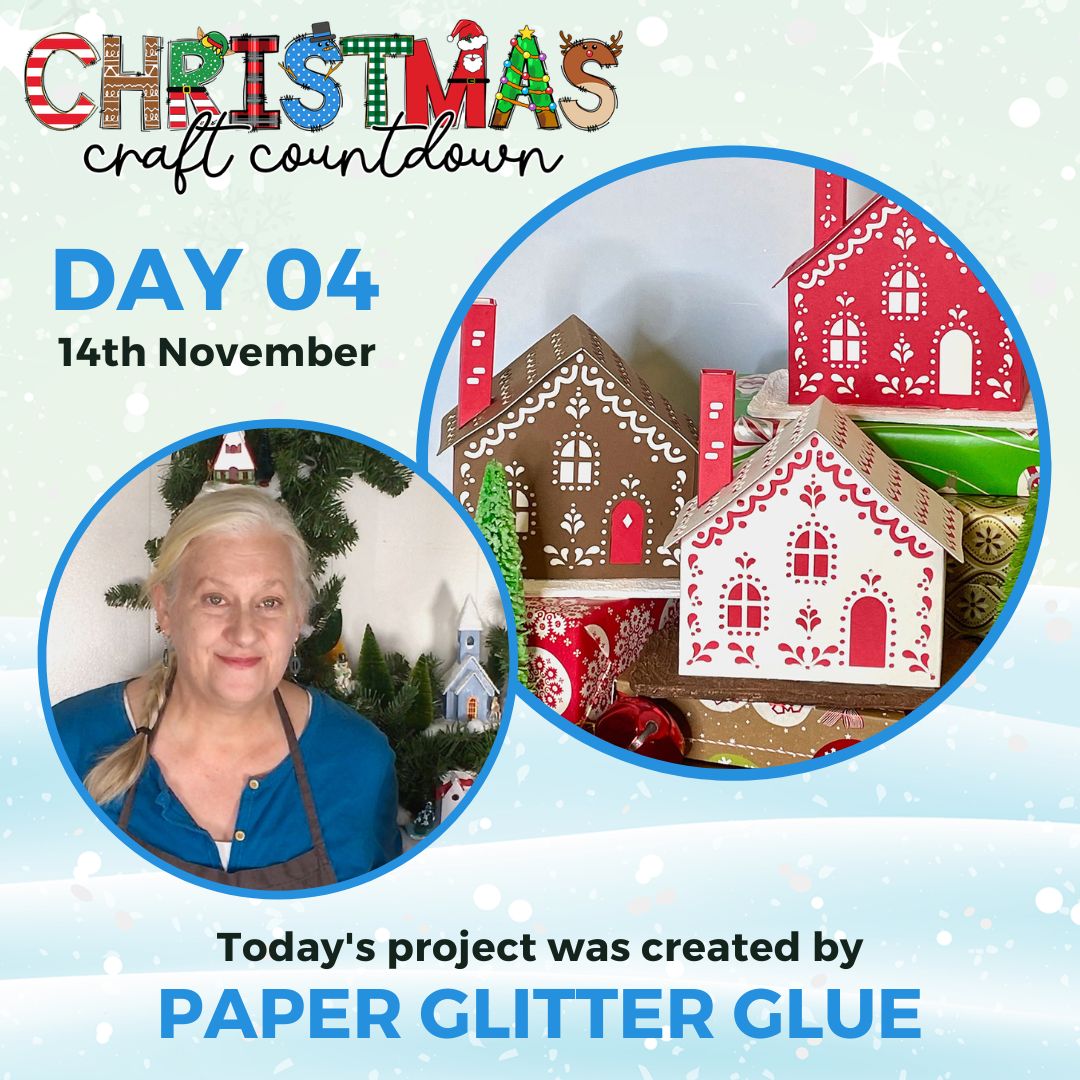
It’s Day 4 of the Christmas Craft Countdown and today’s designer project is by Lucy Foxworth of Paper Glitter Glue.
In this tutorial, Lucy takes us through all the steps involved in making this beautiful gingerbread cottage.
You could even use vellum on the inside and fill your little house with LED fairy lights or a battery tea light to give it an amazing glow!
Lucy goes through the different colour schemes to choose from and has even included a plain design for if you would like to cut out a house and decorate it using pens or paints. That would be a great children’s activity!

This Project was part of the Christmas Craft Countdown 2023
Materials supply list
Here is a list of the materials that Lucy used to make this project.
Please note that some of the links included in this article are affiliate links, which means that if you click through and make a purchase I may receive a commission (at no additional cost to you). You can read my full disclosure at the bottom of the page.
- Cricut machine
- Standard grip (green) cutting mat
- Cricut scoring wheel or scoring stylus
- Cardstock in various colours
- Glue
- Ruler
- Thin cardboard for the optional base
This project is suitable for the following types of Cricut machine: Explore Air 2, Explore Air 3, Maker, Maker 3, Venture, Joy Xtra and Joy.
Video tutorial
Lucy has designed this house so that you can even make it on the Cricut Joy.
Watch the video below to see how to make this gingerbread cottage.
If you prefer to read rather than watch, keep scrolling!
This project was created by Paper Glitter Glue
Meet Lucy Foxworth, the creative mind behind the captivating tiny house designs at PaperGlitterGlue.com. Often found covered in glue and cat hair and immersed in the details of her latest projects, Lucy is a crafting expert who loves sharing her knowledge so anyone can craft extraordinary creations.
Written tutorial (with photos!)
Here’s how to make your very own 3D gingerbread houses using a Cricut machine!
Step 1) Download the cutting files & unzip the downloaded folder
Download the files using the box below.
Before you upload the SVG files to Design Space, you need to unzip the download folder that they come in.
Step 2) Upload the SVG file into Design Space
Open up Cricut Design Space and start a new Project.
Click “Upload” and then find your unzipped version of the downloaded files for this project.

Upload the file called Gingerbread Cottage CCC paperglitterglue SVG.svg (or the one called Gingerbread Cottage CCC plain version paperglitterglue SVG.svg for the plain version).
This is what it looks like:
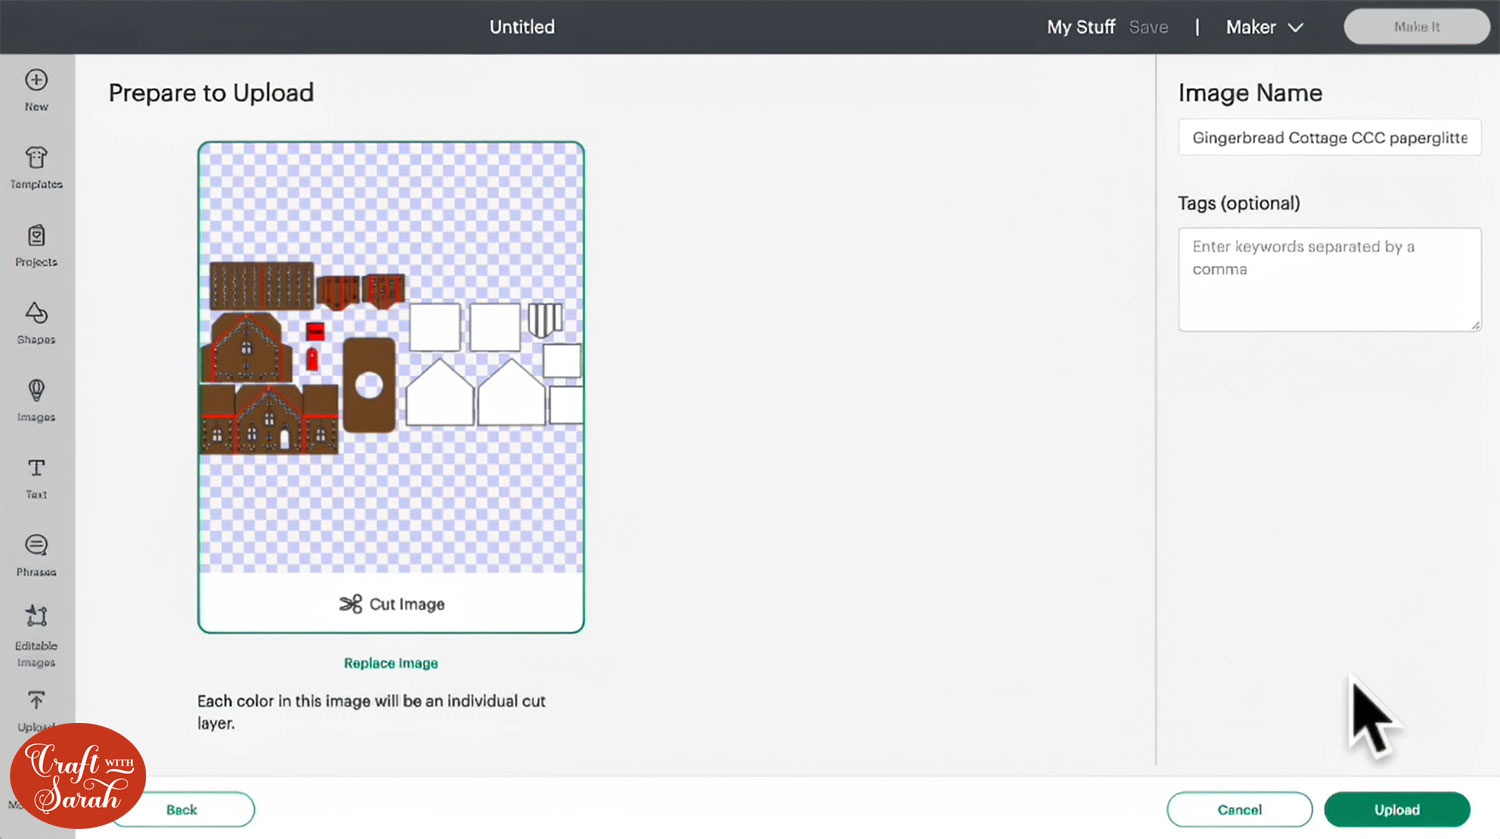
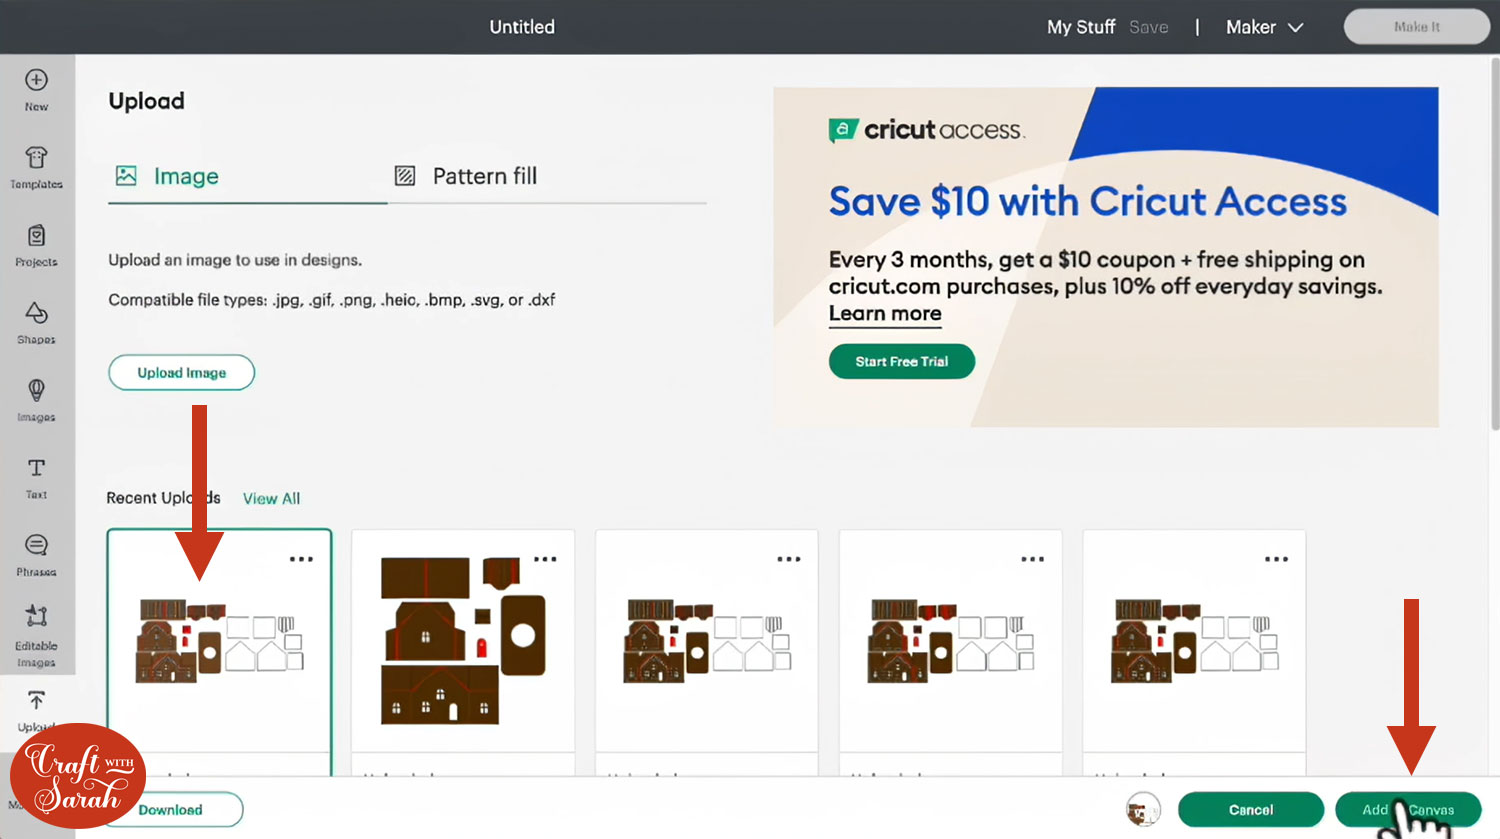
After uploading, the design will show in your “Recently Uploaded Images”.
Click on it and then press “Add to Canvas” to put it onto your Project.
Step 3) Format the gingerbread cottage
Check that the design has loaded in at the correct size by clicking Ungroup in the layers panel and clicking on the 1-inch scale square on the bottom right of the design.
If it has loaded in at the correct size, it should be 1×1 inches.
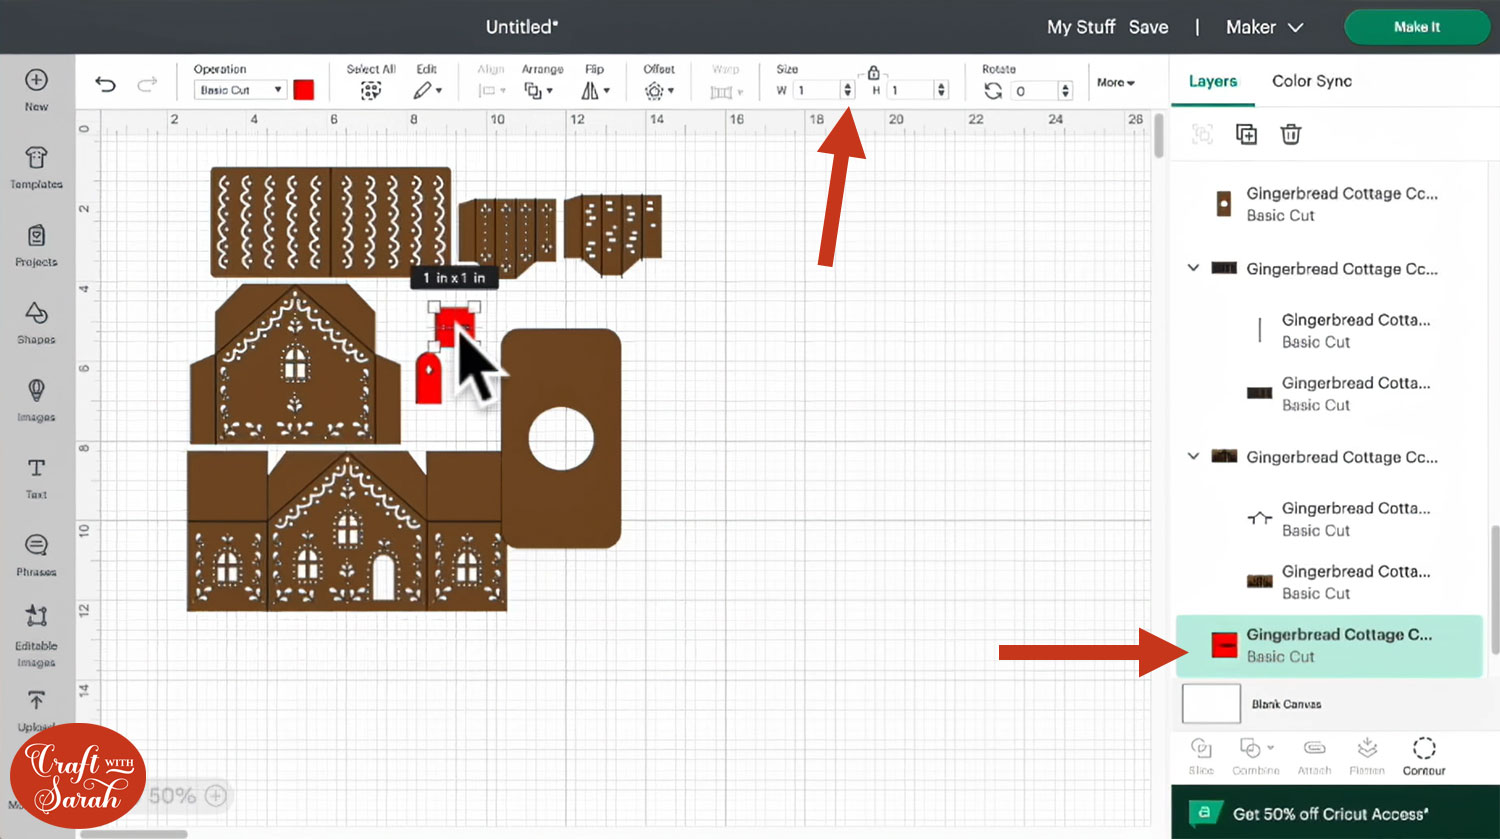
If it isn’t showing as 1×1 inches, here’s how to fix it:
- Re-group all the layers
- Create a “Square” and size it to 1×1 inches
- Resize the group of ALL the house layers until the scale square is the same size as your newly created square
- Check by Ungrouping everything and clicking the scale square to make sure it’s now 1×1 inches
The scale box (and additional square if you needed it) can then be deleted.
Making the gingerbread cottage any smaller may mean it doesn’t cut consistently due to the intricate design, so Lucy recommends cutting it at the size that it loads in at.
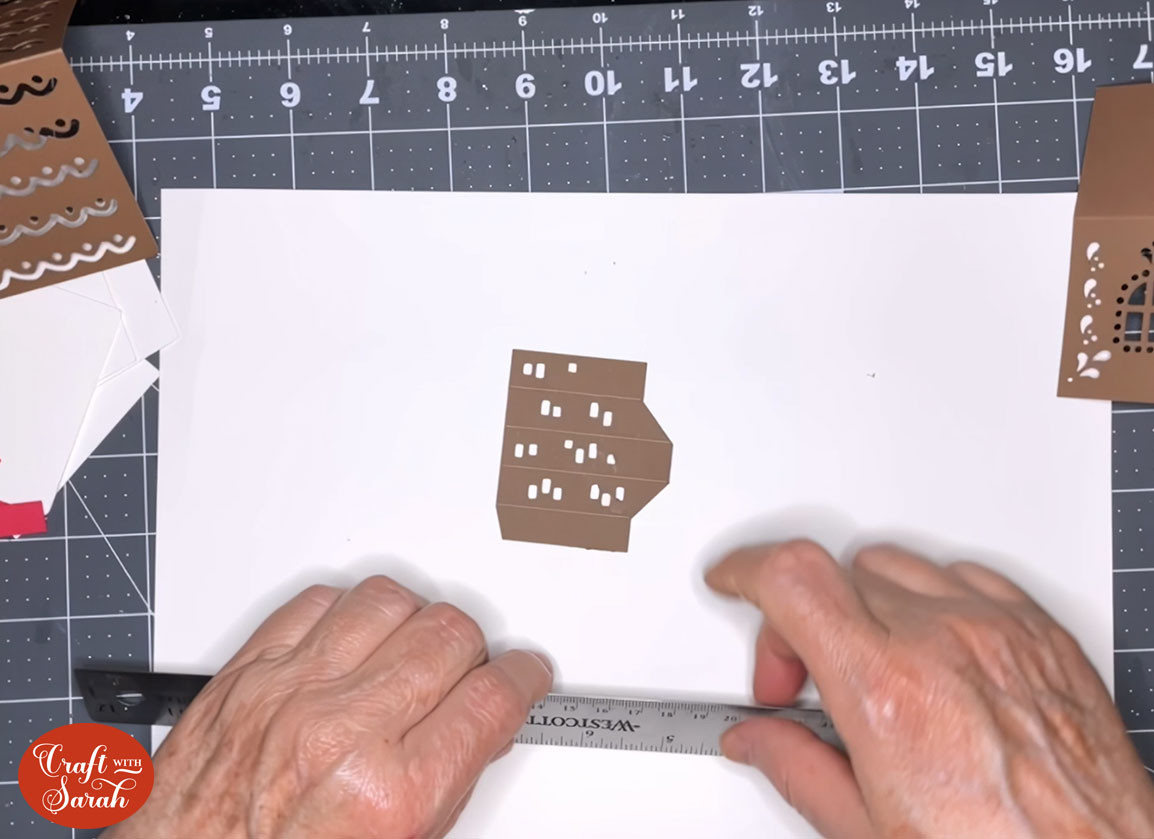
The white pieces are the ones which go on the inside of the cottage, behind the windows. In the image below, Lucy moved them apart from the rest of the pieces so you can see them:
The chimney is made using the smaller brown pieces, you can choose which out of the two that you would like to use.

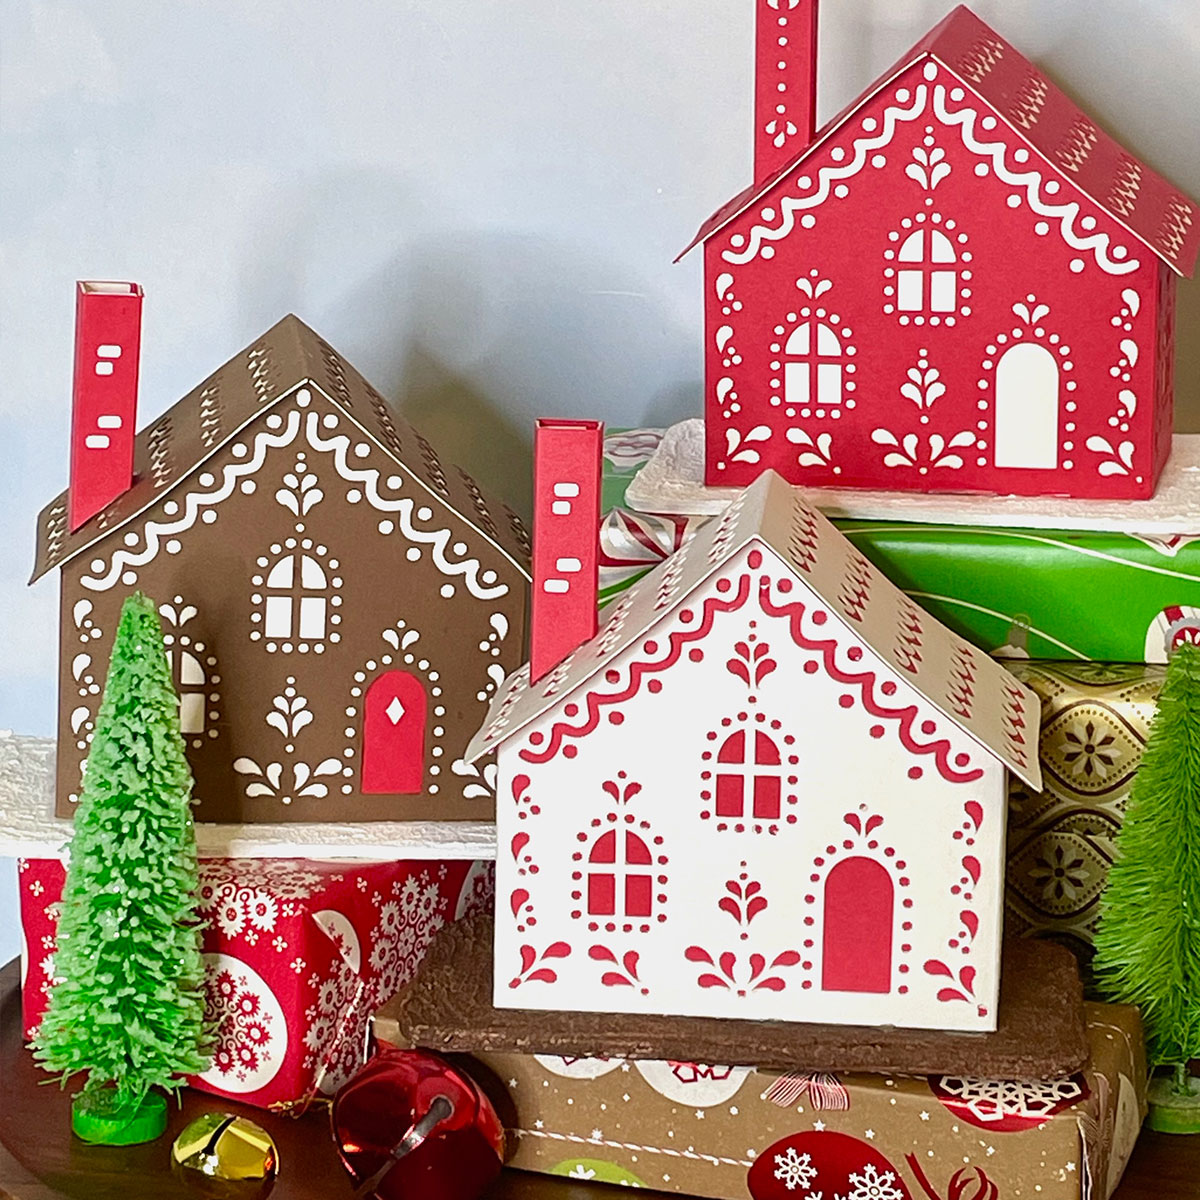
You can change the colours of the gingerbread cottage depending on which of the three colour schemes you would like. Of course, you could change the colours to something completely different if you wish.

You can cut the base piece (with the circle cut out) from multiple layers of thin cardboard which you could then paint. This makes a stable “stand” for the house to sit on, but it is free-standing without it too.
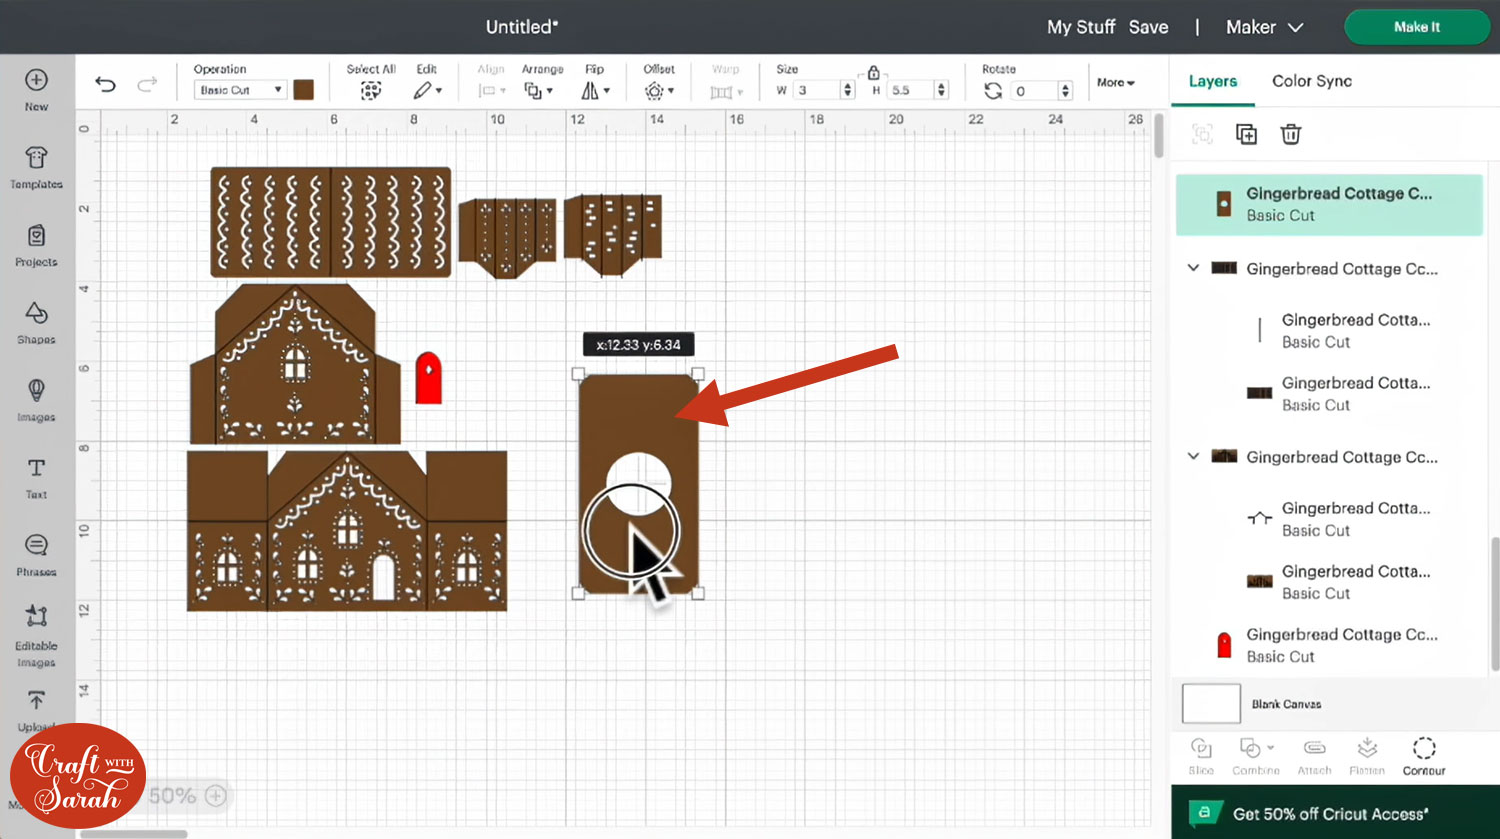
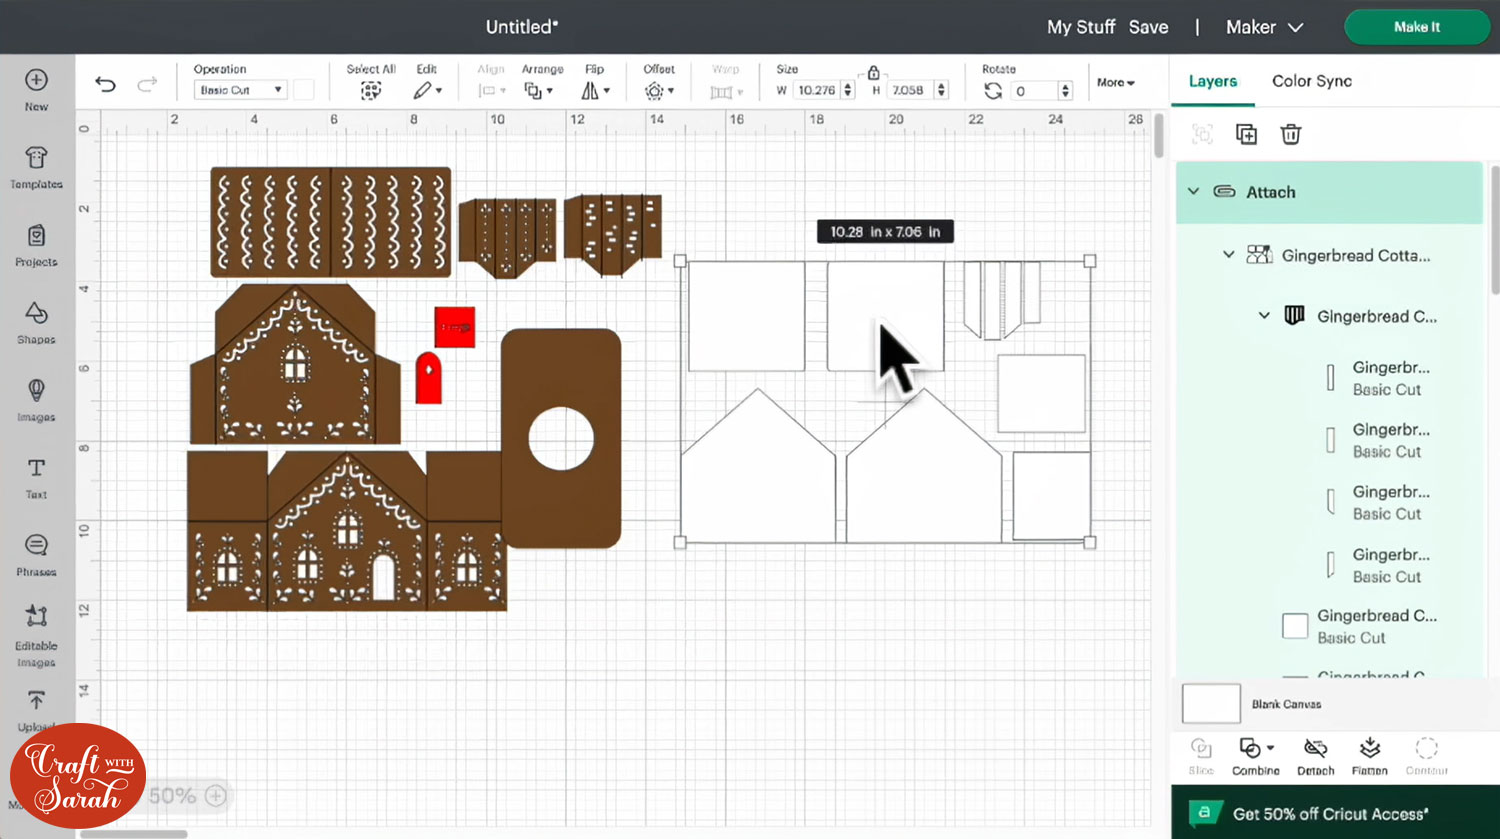
If you look down the Layers panel, you will notice lines making up some of the layers. These are the lines that we need to format to be scored instead of cut.
You will know if a layer should be changed to score lines as it will show as red in the colour box.
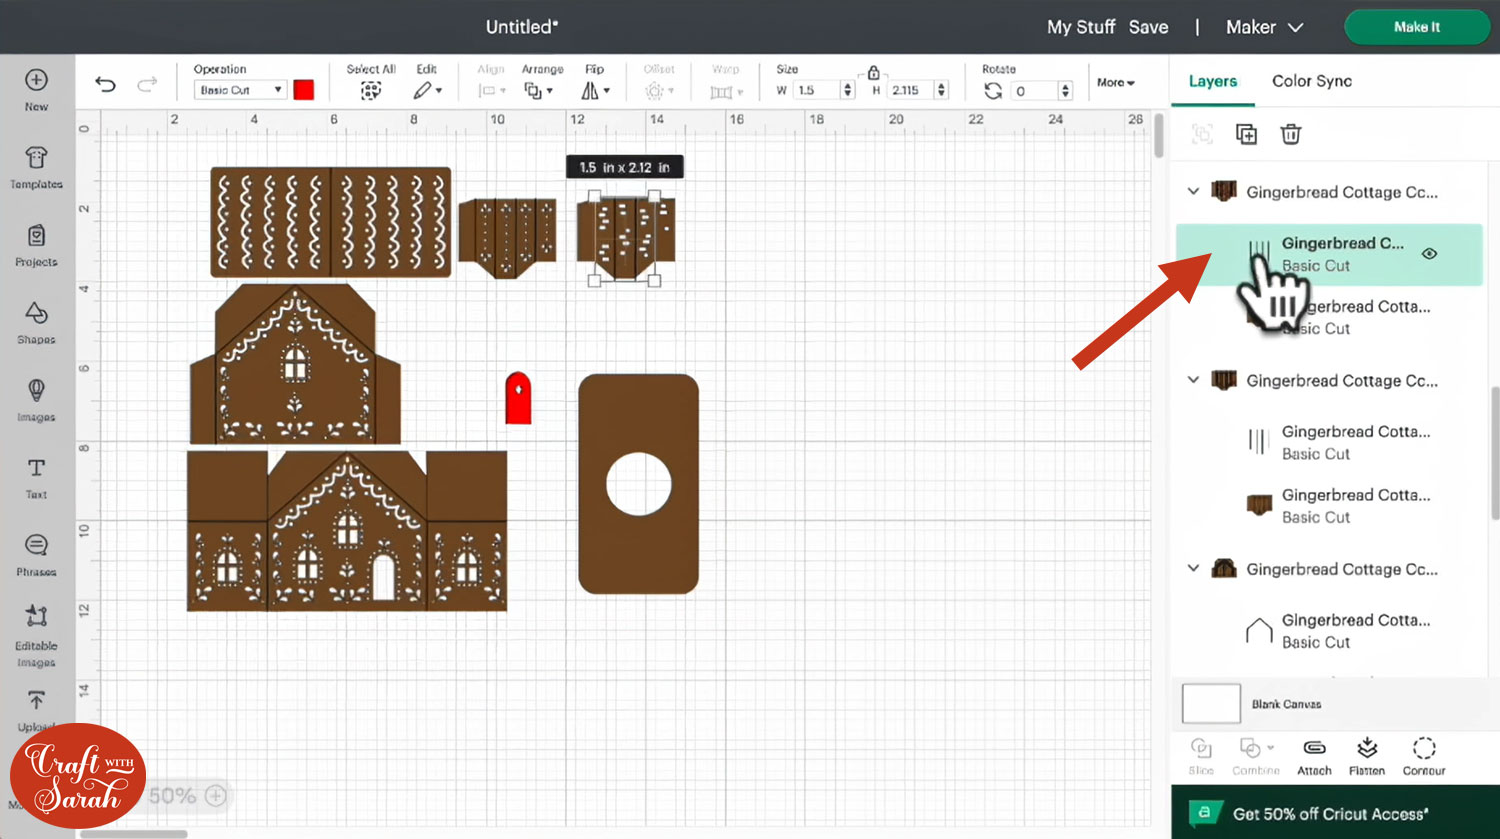
Click one of the line layers that need formatting and change it to Score in the Operations drop down.
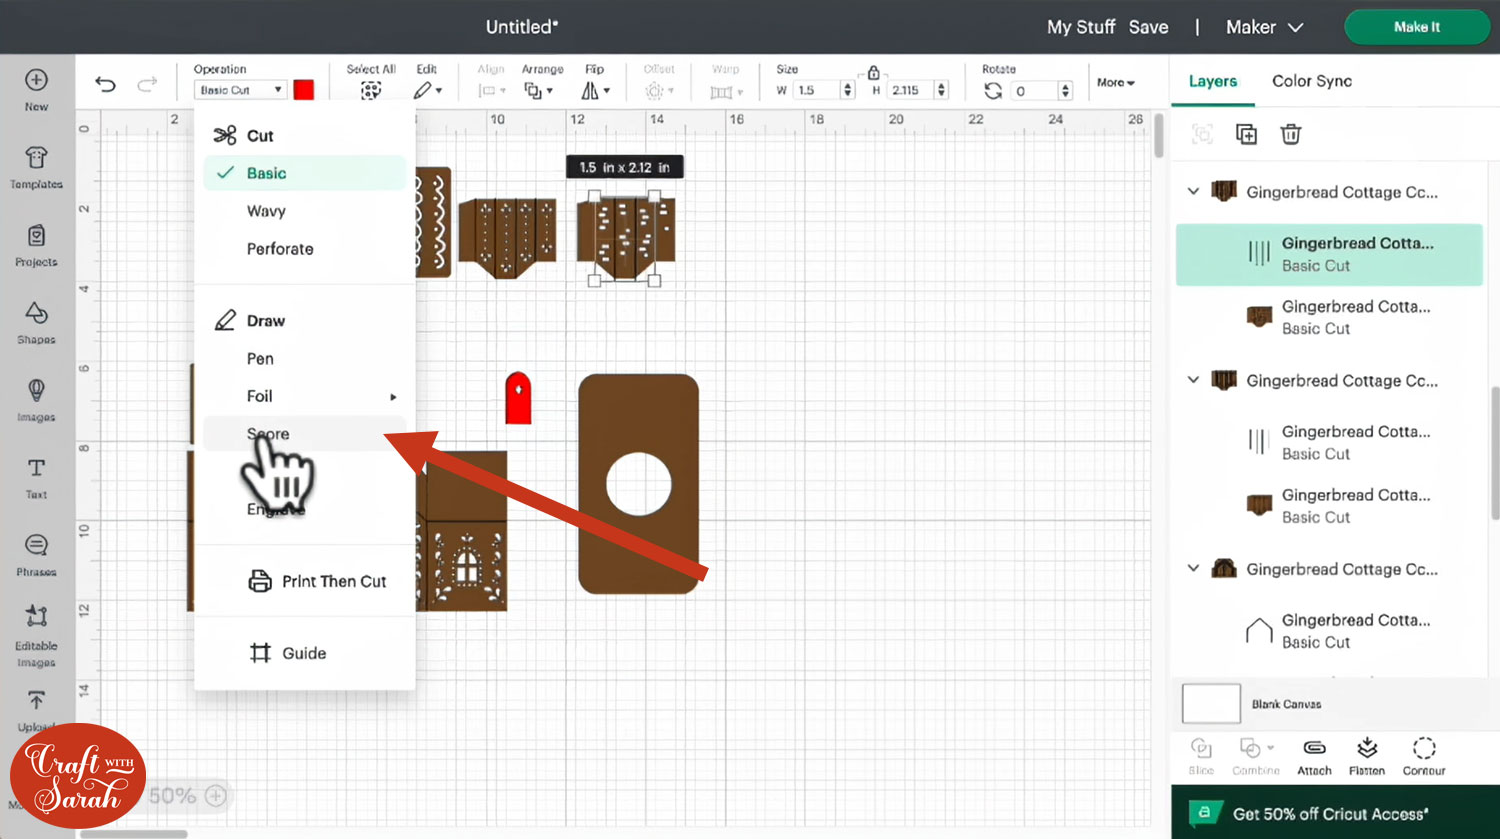
It will become a dashed line once it has been changed to score.
We then need to tell the Cricut where to do the score line so select both the score line and it’s matching shape that appears in the same group as it in the Layers panel and press Attach.
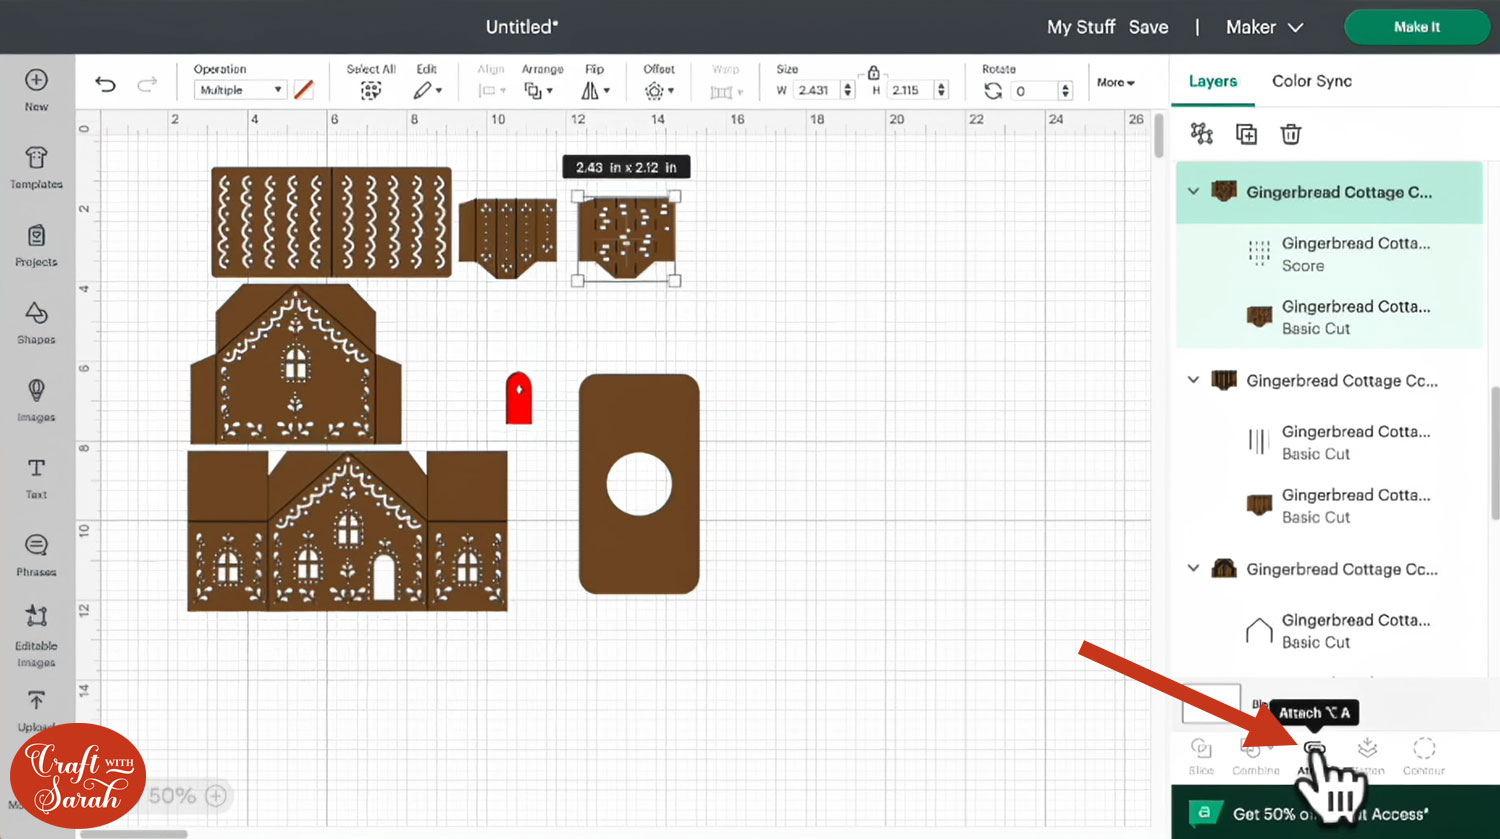
Repeat this for each of the lines that come up red in the colour box.
If you are using the Cricut Joy, you will need to change your score lines to foil and use the foil tip to do your scoring.
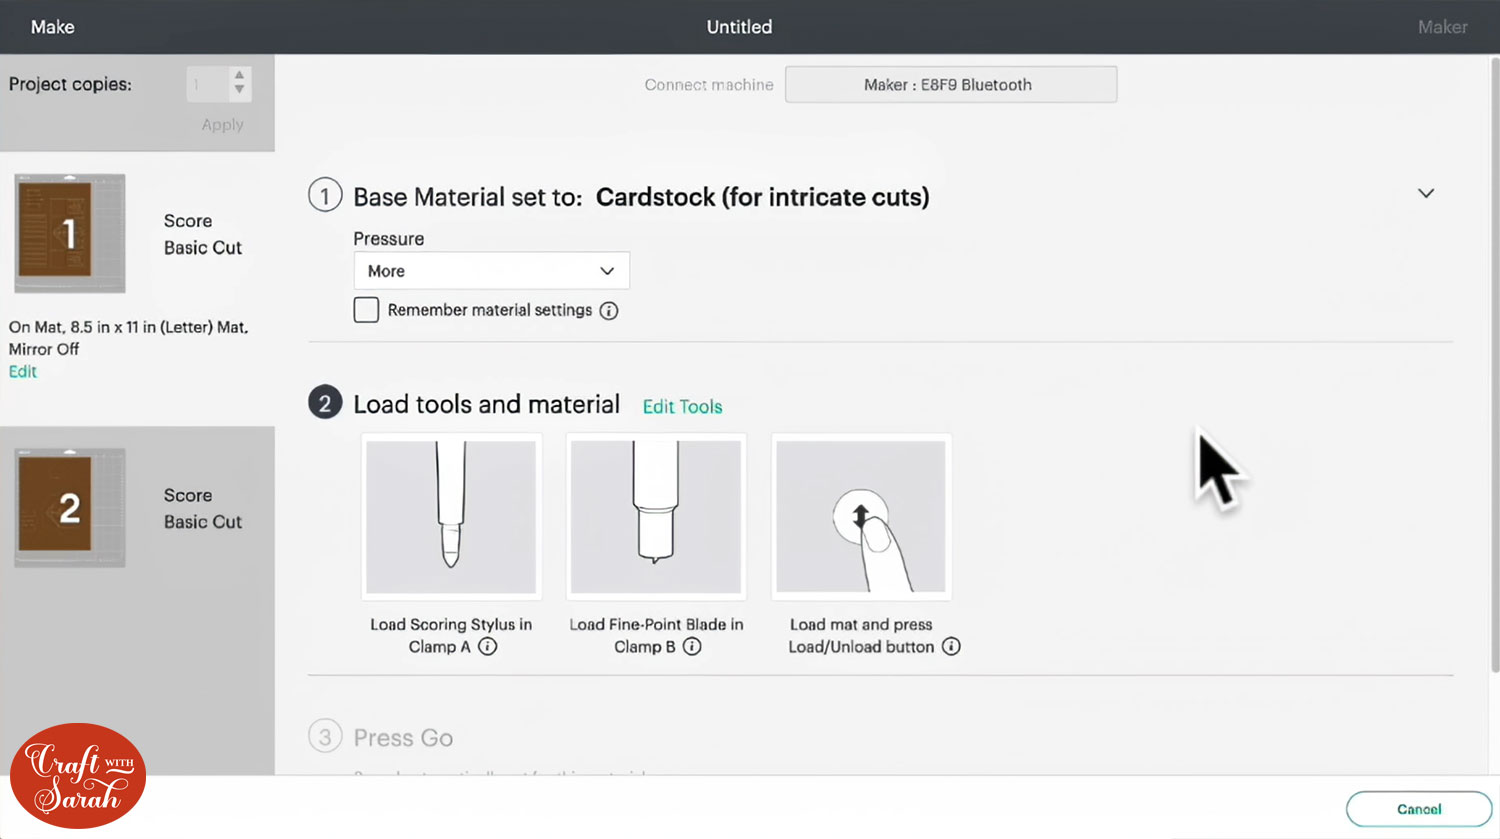
When you’re ready, click Make It and get everything cut out from cardstock.
These are the cut settings that Lucy used:
Step 4) Stick the gingerbread house together
Use a ruler to help you fold along all of the score lines. Fold towards yourself and then away.
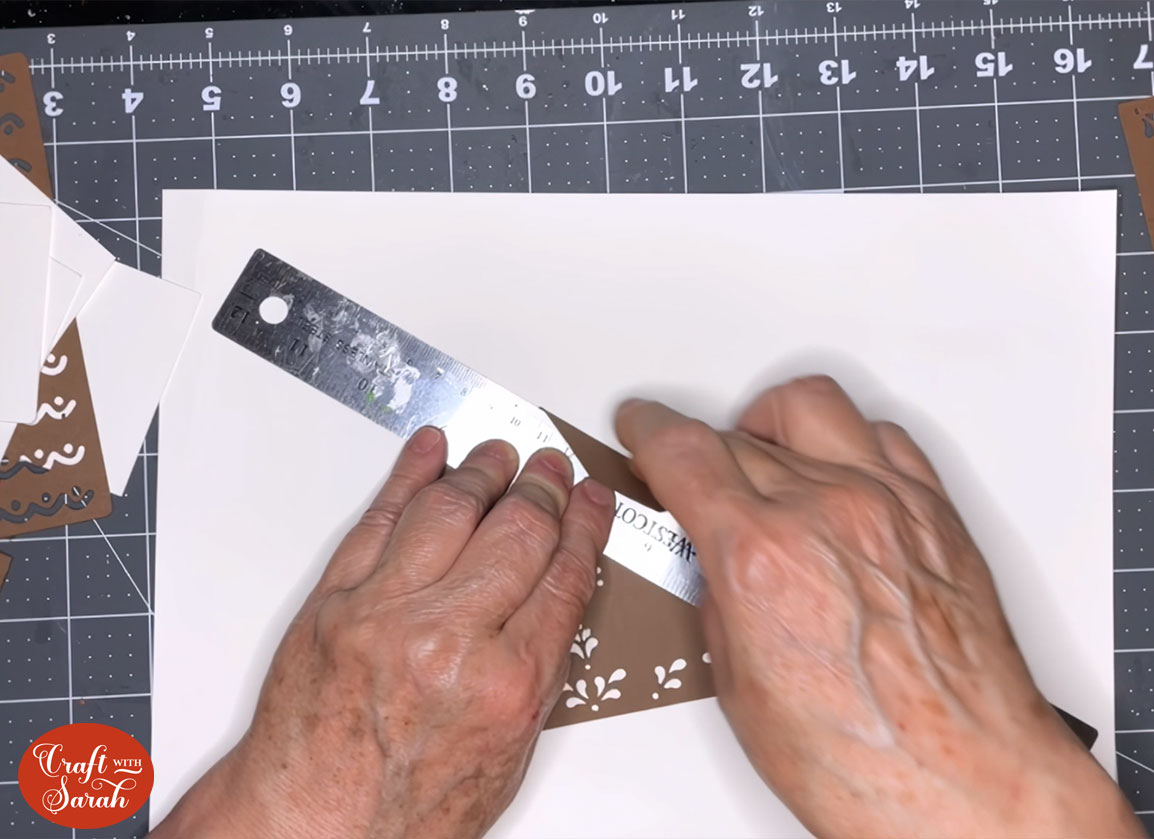
Take care on the angled score lines as they are a bit more delicate.
Before you fold your chimney piece, you may want to glue the strips of white which go behind it beforehand.
Glue it carefully so that it doesn’t obstruct your score lines when folding.
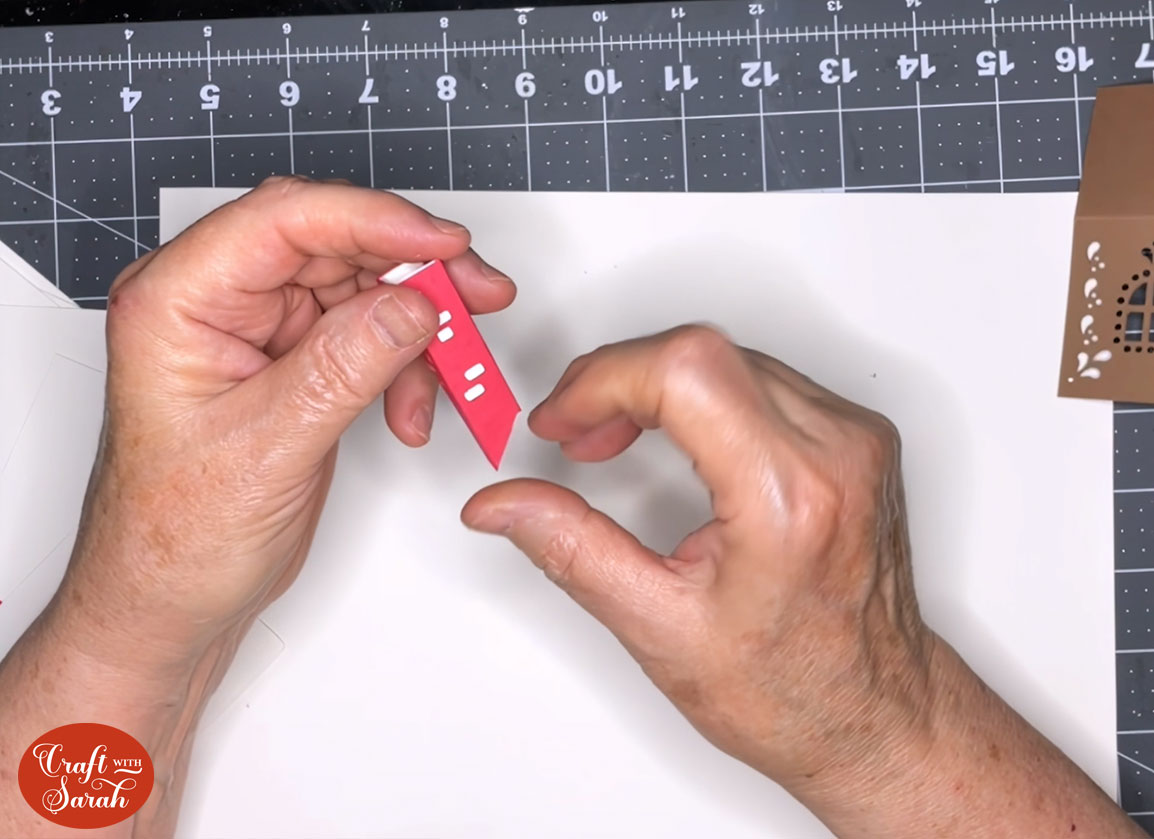
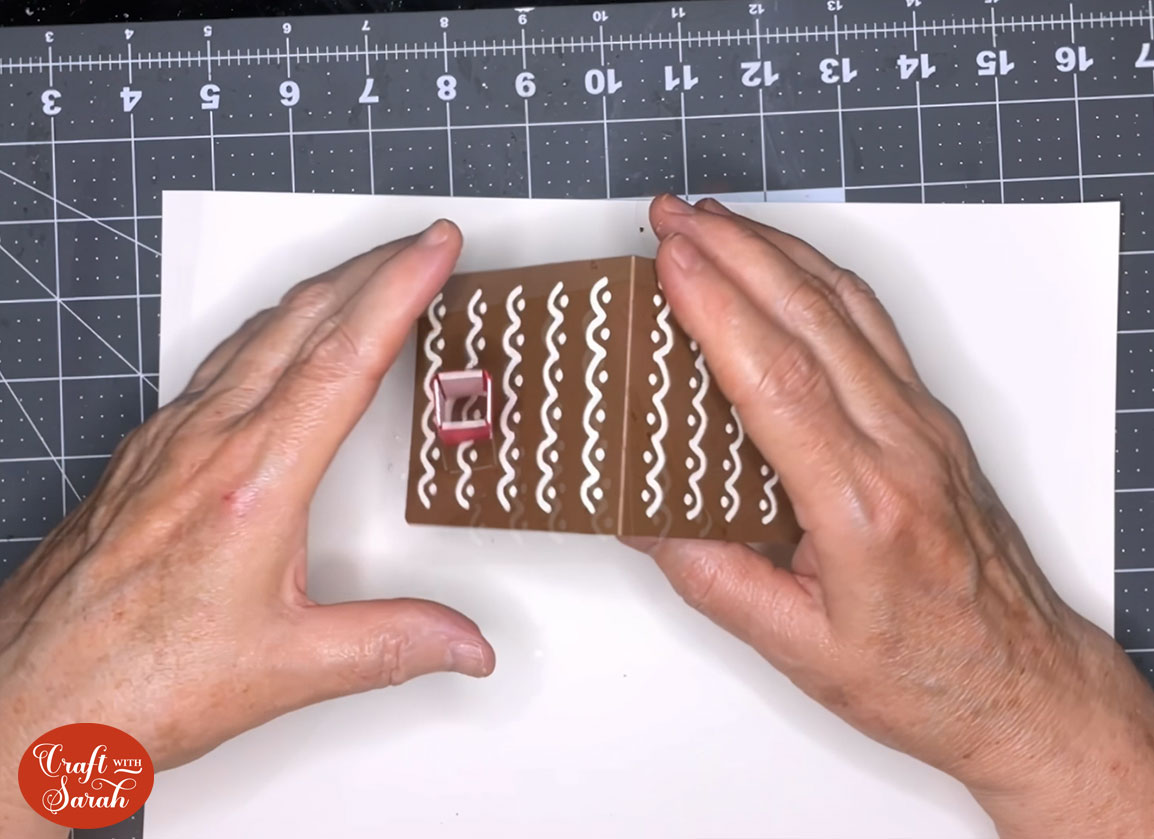
Take your chimney piece once the glue has dried and glue along the tab which you can then use to attach to the corresponding section to give the chimney its shape. Lucy is showing a red chimney in this picture.
Match up the white backing pieces to the outer cottage pieces.
Starting with the front piece, so that you don’t forget the door, glue the white pieces behind the matching outer pieces. It is best to apply glue to the backside of the outer house piece so that you don’t end up seeing the glue through the holes.
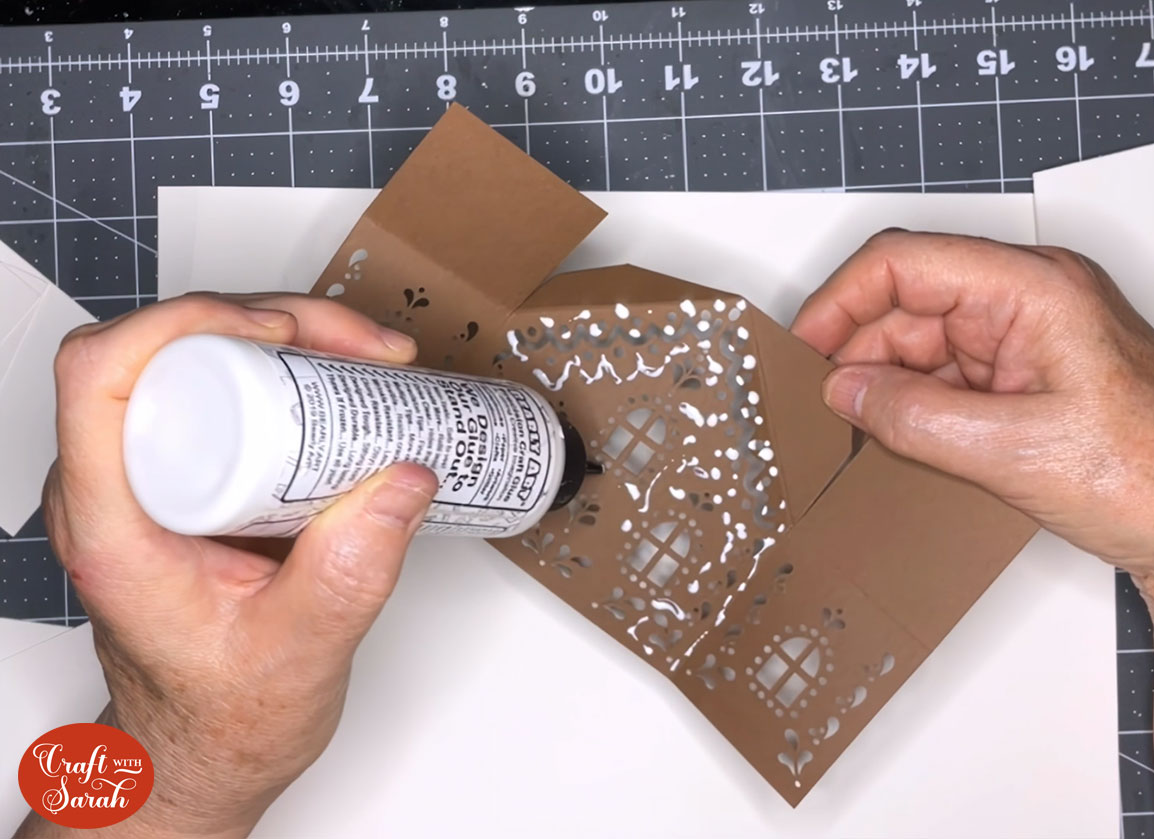
Glue the white square pieces to the backside of the windows using the same method.
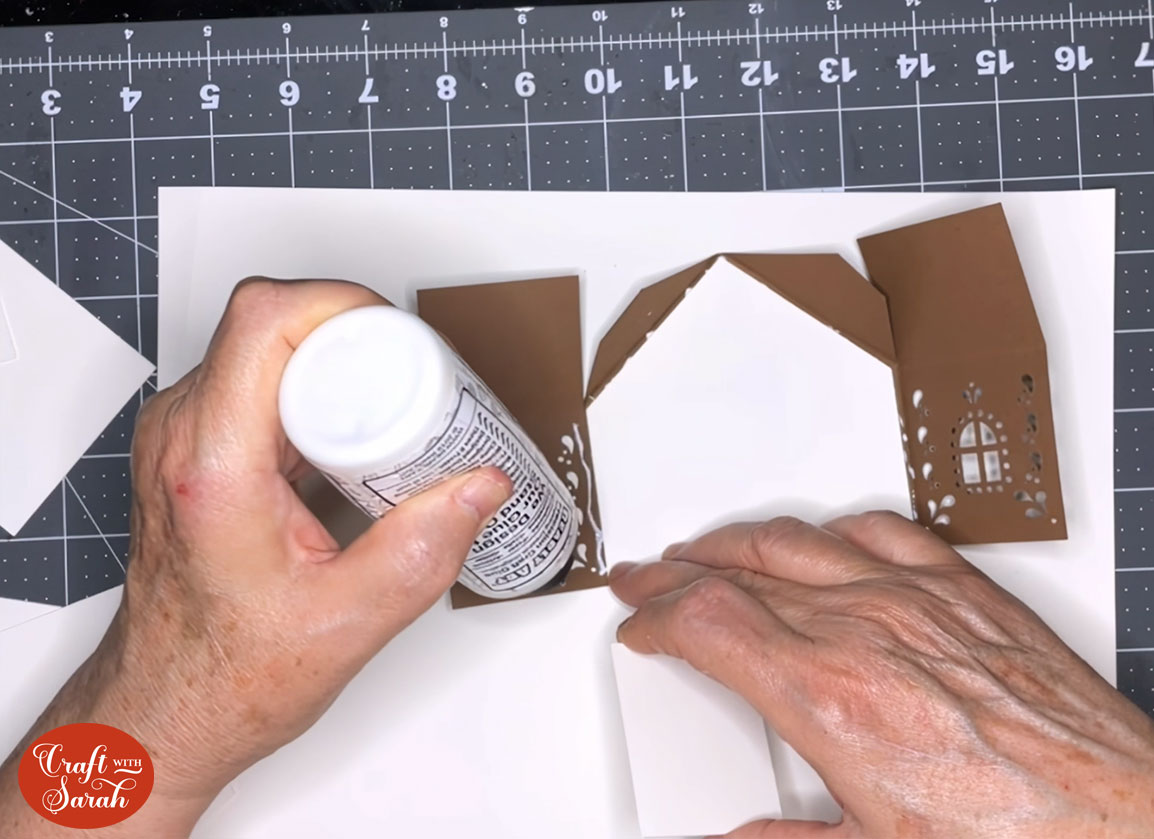
Take the back cottage piece and glue its matching white piece to the back side of it.
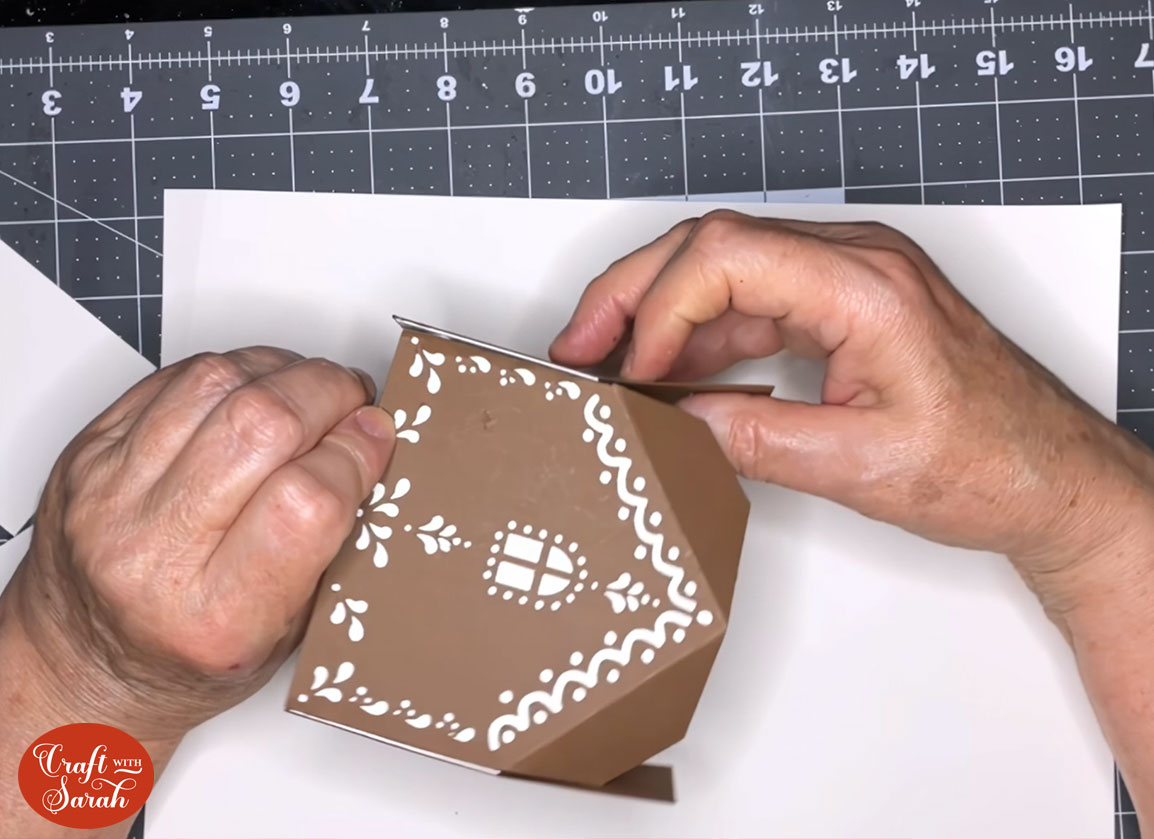
With the same back piece you were previously working on, apply glue to the outside of the side tab and stick it to the front piece. Don’t worry about the roof sections yet.
Line up the sections carefully as you do this, paying particular attention to the bottom edge so that the house will stand up straight.

Allow it to dry.
Apply glue to the outside of the other tab and stick to the other end of the house so that your cottage comes together into one piece.
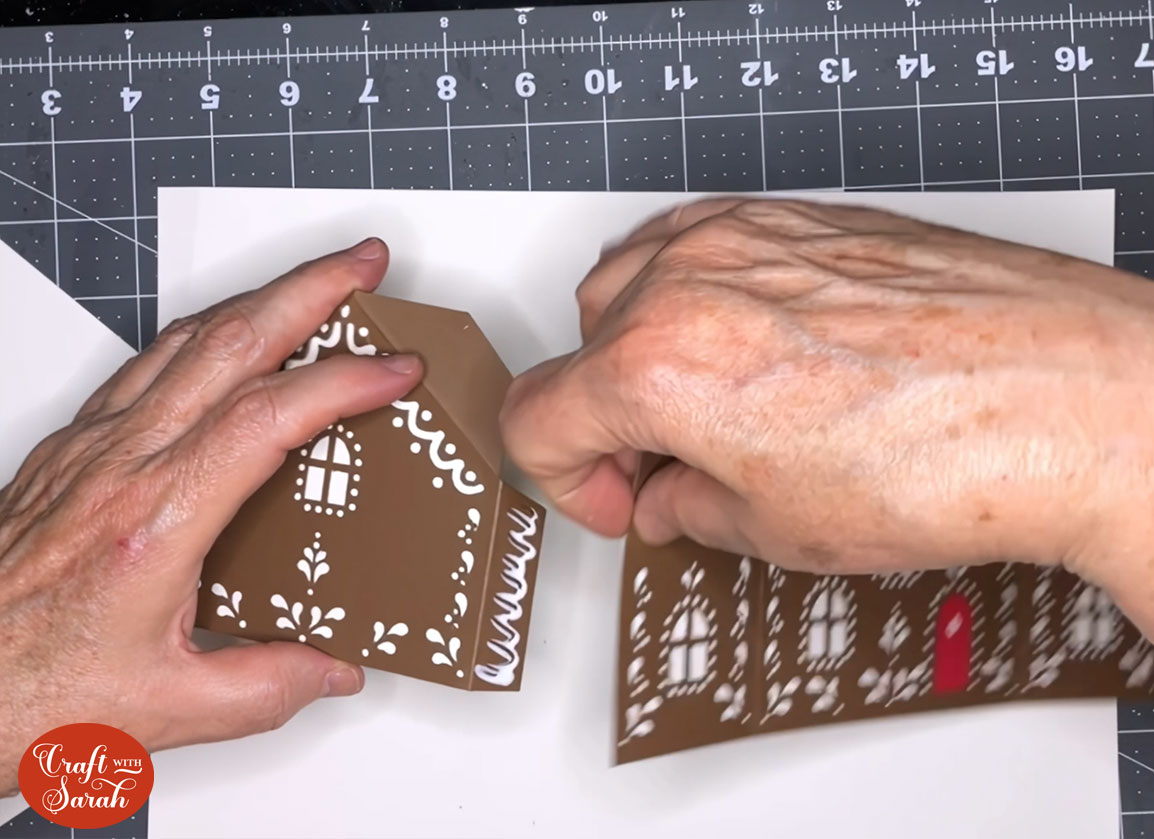
Stand the cottage up so that you can look down onto the roof section.
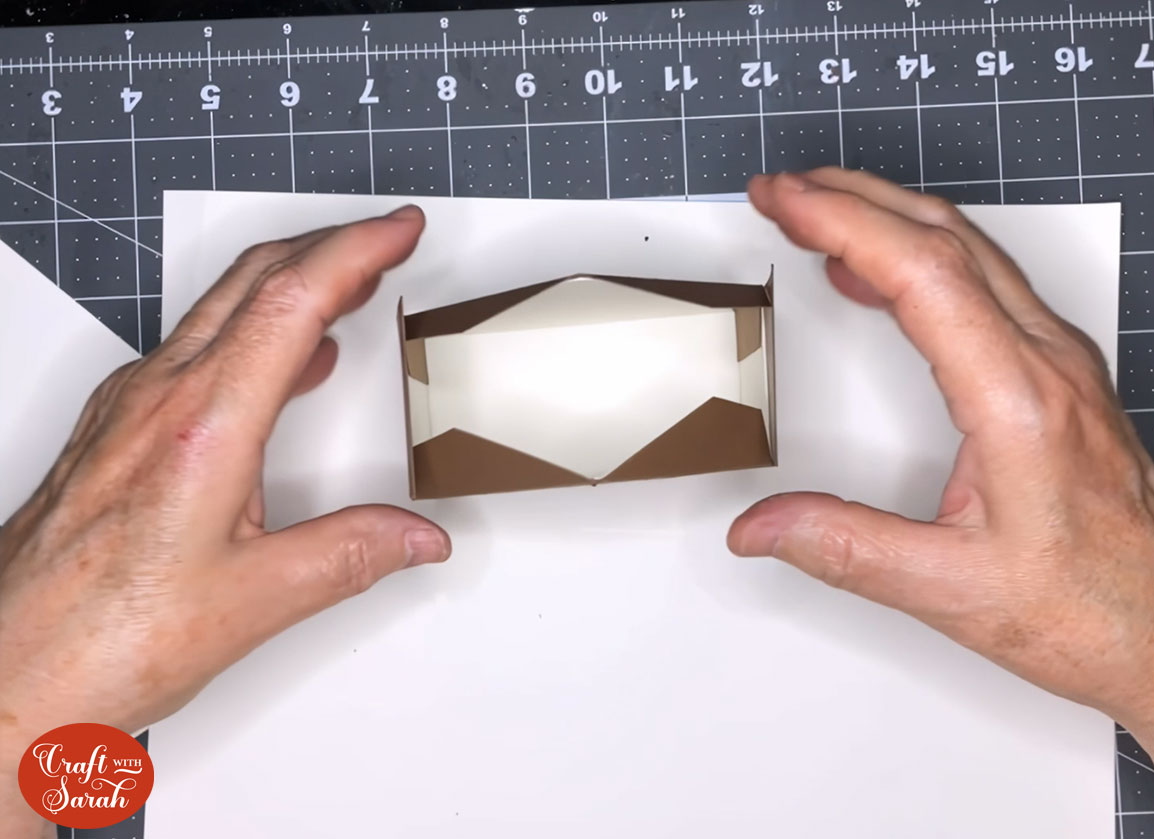
Fold the two square sides in and under the angled flaps.
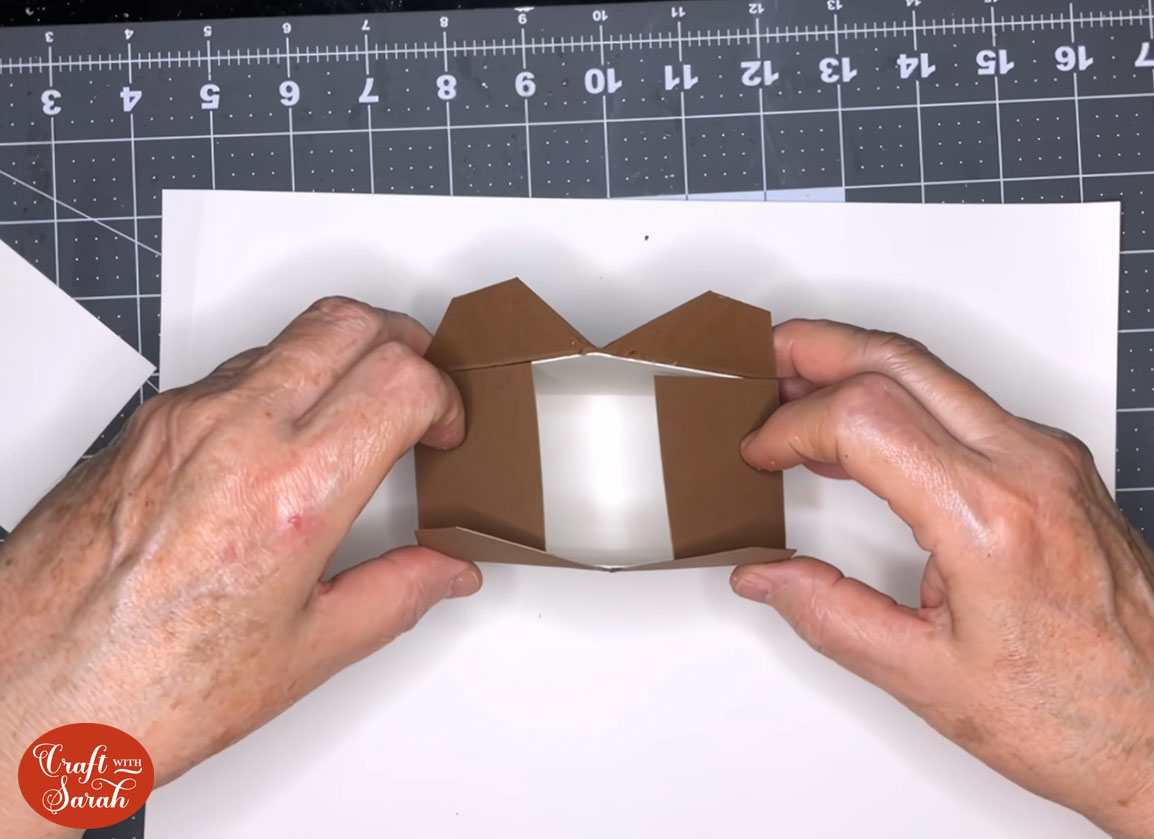
Glue the angled tabs to the inner square pieces and hold them as they dry so that they don’t come apart.

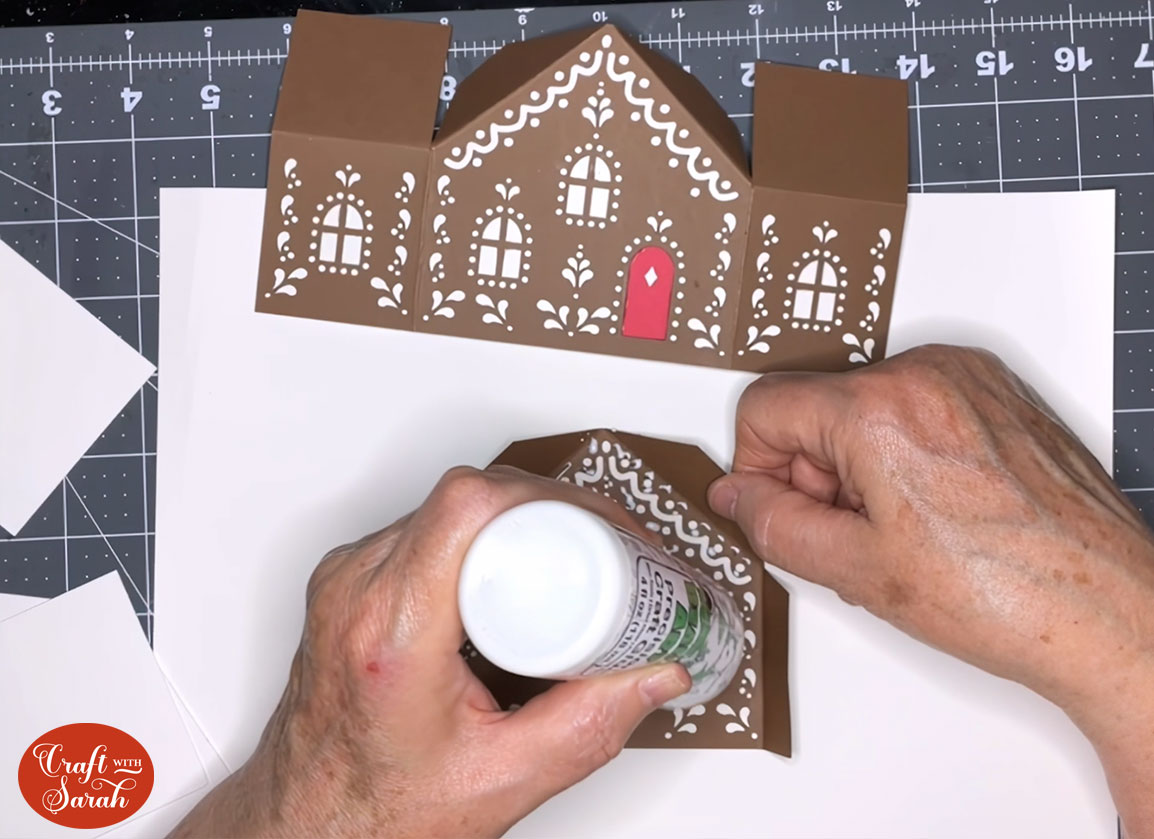
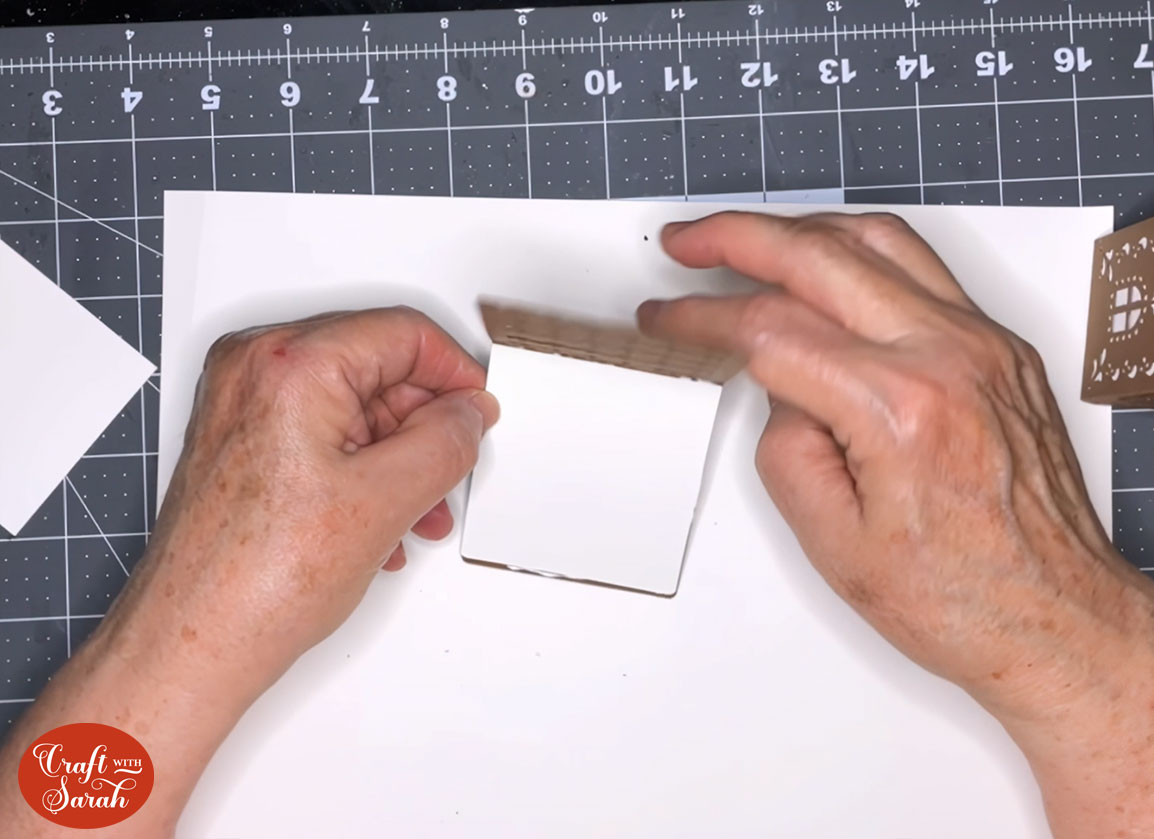
Take the outer roof piece and glue the backing square matching pieces to it.
Apply glue to the top of the gingerbread cottage and place your decorative roof piece on top.

Turn your cottage upside down so that you can centre the roof correctly so that it’s on evenly at the front and back.

Apply glue to the bottom angled edge of your chimney piece and glue to the roof.
If you made a base you can then apply glue to the bottom edge of your cottage and place it down onto the base.
The CUTEST little gingerbread house from cardstock
Now your beautiful gingerbread cottage is finished.

I love all the patterns on these cottages and using a range of colours can give the perfect Christmas feel.
This is a brilliant cardstock project which looks so impressive. It would look so special with fairy lights glowing the house from the inside.
Happy crafting,
Sarah x

