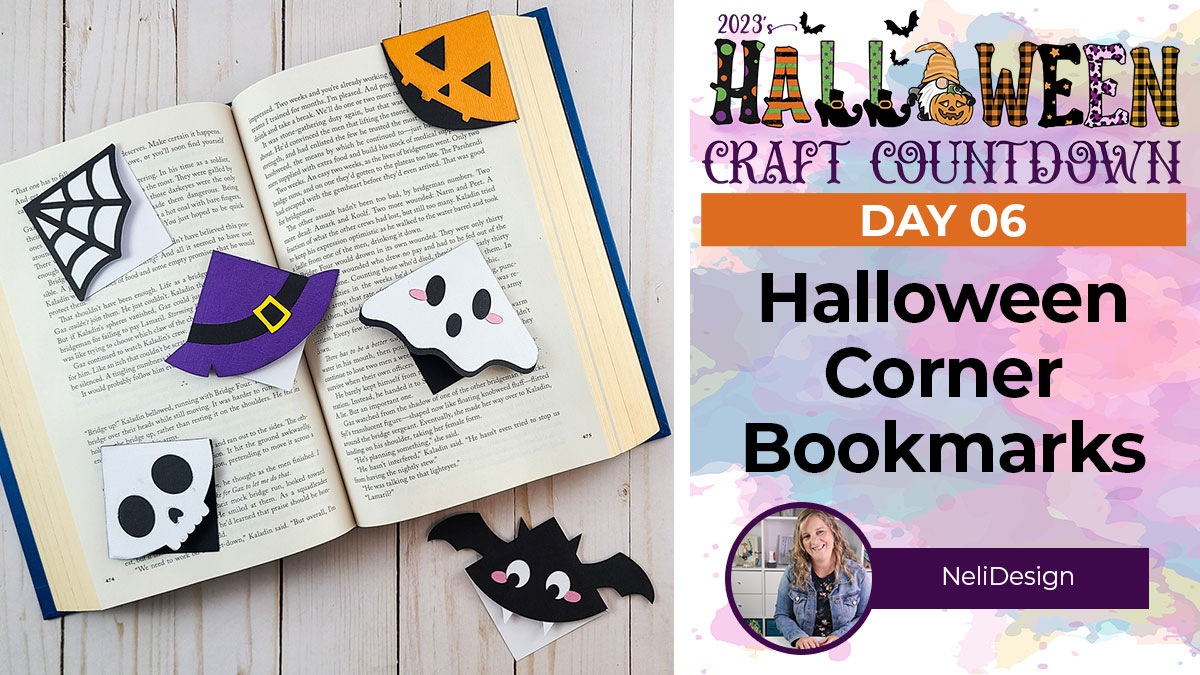
HCC 2023 Day 06 🦇 Halloween Corner Bookmarks
Calling all bookworms! Looking for the perfect spooky bookmark to make this Halloween? You’re going to love these.
It’s Day 6 of the Halloween Craft Countdown and Natalie from NeliDesign.com is here to help you create with confidence to make these adorable bookmarks.
She is sharing multiple corner bookmark designs which are perfect for adding a touch of Halloween to your favourite books. They would make such fun gifts too!
Natalie will take you through all the steps so that you can create three different bookmarks.
She has even included bonus designs for even more bookmark fun! Look out for where to find those towards the end of this tutorial.
This Project was part of the Halloween Craft Countdown 2023
Materials supply list
Here is a list of the materials that are required to make this project.
Please note that some of the links included in this article are affiliate links, which means that if you click through and make a purchase I may receive a commission (at no additional cost to you). You can read my full disclosure at the bottom of the page.
- Cricut machine
- Light blue Cricut cutting mat
- Cricut Scoring Wheel or Cricut Scoring Stylus
- Coloured Card (This project is great for using your scraps!)
- Glue
- Double-sided tape (optional)
- Black ink (optional)
This project is suitable for the following types of Cricut machine: Explore Air 2, Explore Air 3, Maker, Maker 3, Venture, Joy Xtra, Joy
Video tutorial for Corner Bookmarks
Watch the video below to see how to make these corner bookmarks.
If you prefer to read rather than watch, keep scrolling!
This project was created by NeliDesign
Natalie is the crafty girl behind the blog and YouTube channel NeliDesign.com where her mission is to help you create with confidence with your Cricut.
She loves to laugh and firmly believes that there are no problems only solutions. She still learns every day from crafting mistakes and shares them with you so you don’t make the same ones! She's there to simplify your crafting journey and get you creating with confidence with your Cricut.
Written tutorial (with photos!)
Here’s how to make your very own Halloween corner bookmarks using a Cricut machine!
Step 1) Load the designs into Design Space
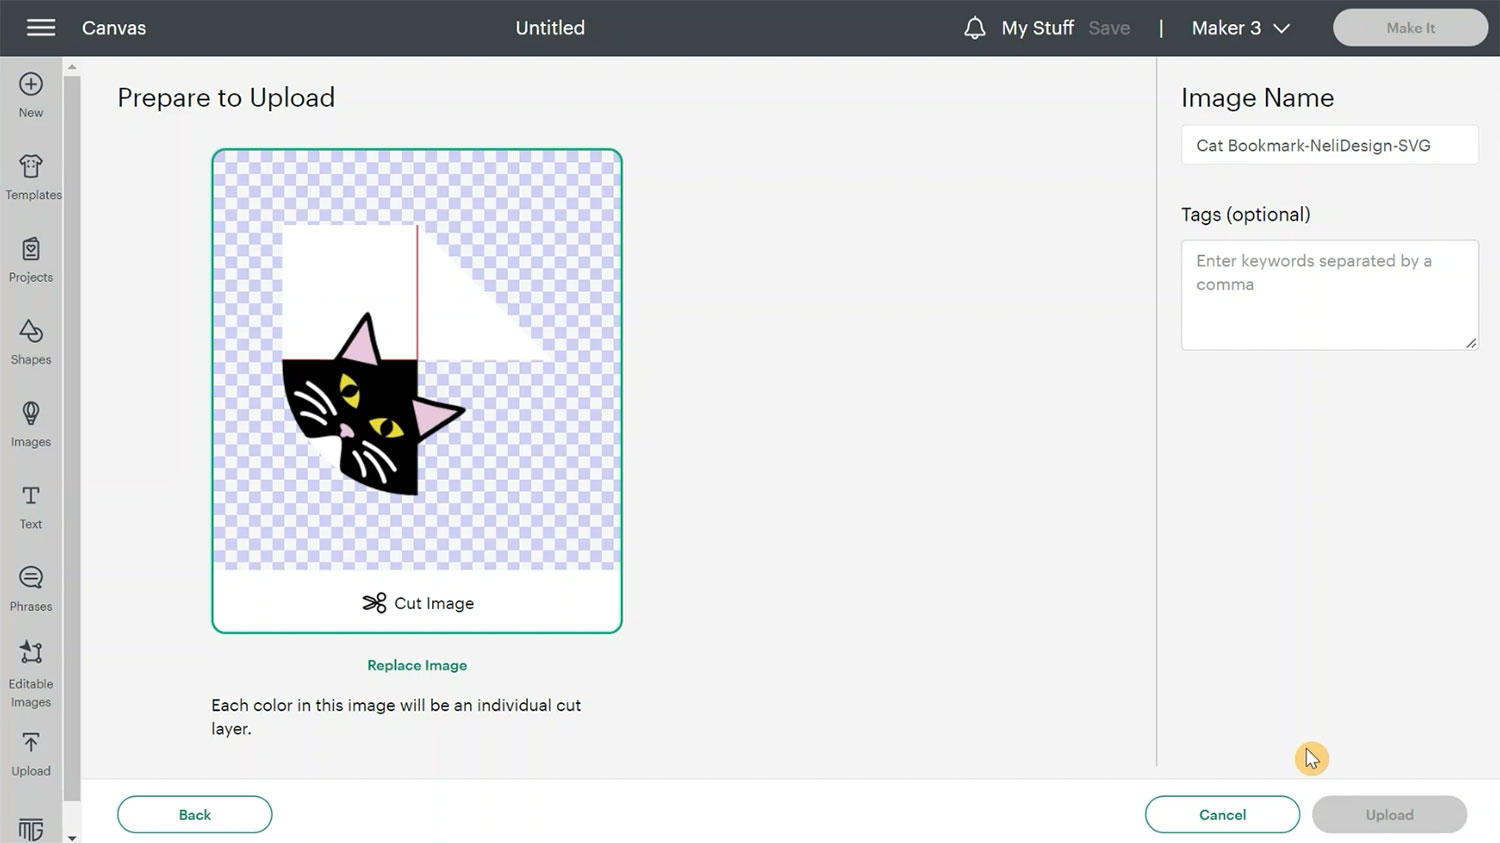
Download the files using the box below.
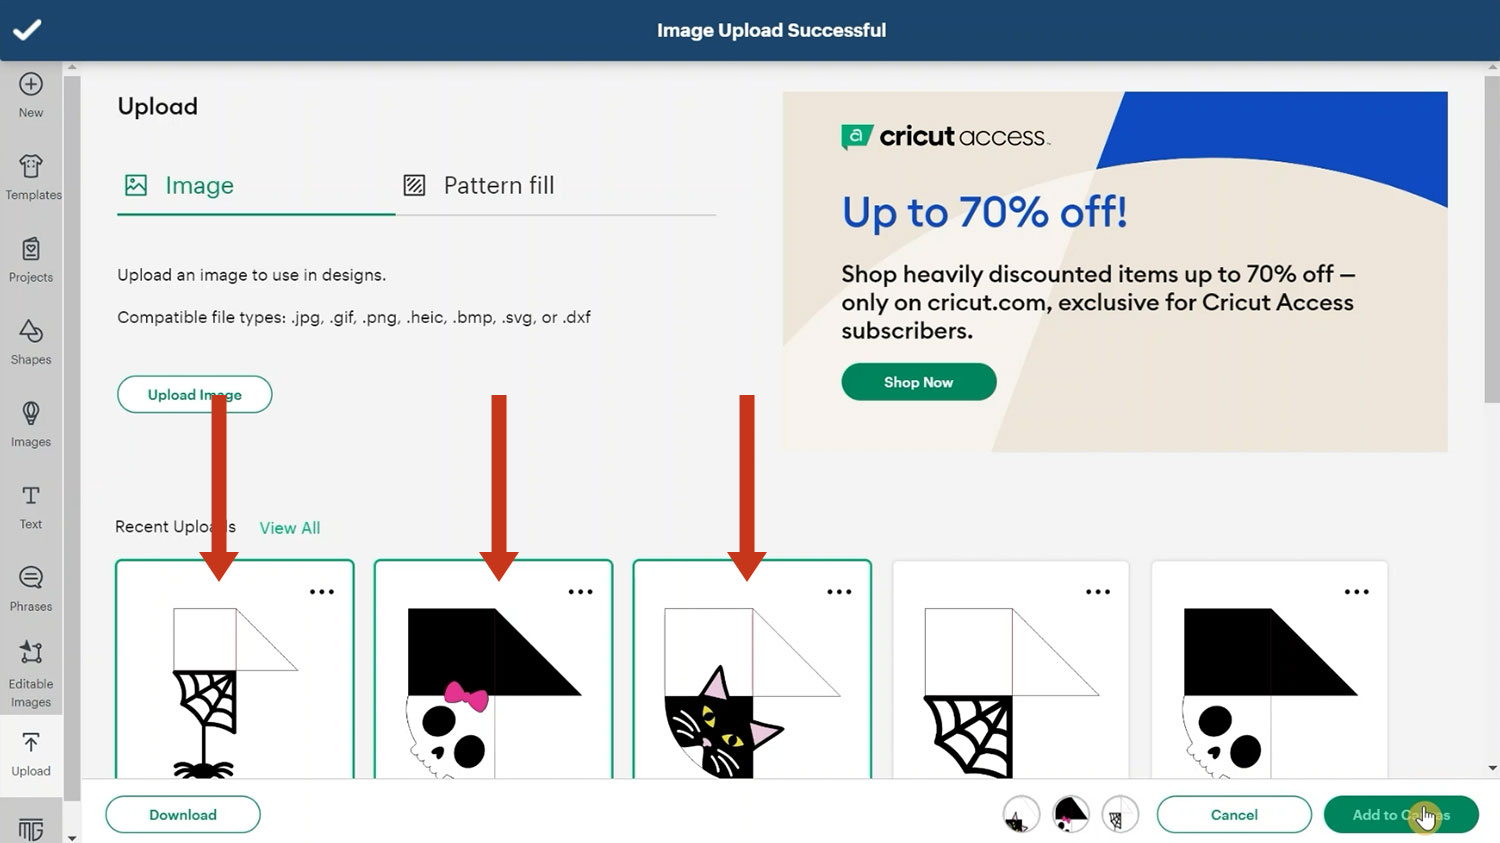
Open Cricut Design Space and start a new project. Click Upload, then Upload Image and drag and drop in your files or click Browse.
You will need to upload all the bookmark designs one-by-one.
Make sure you select the SVG files from your extracted zip folder rather than the PNG files or DXF files.
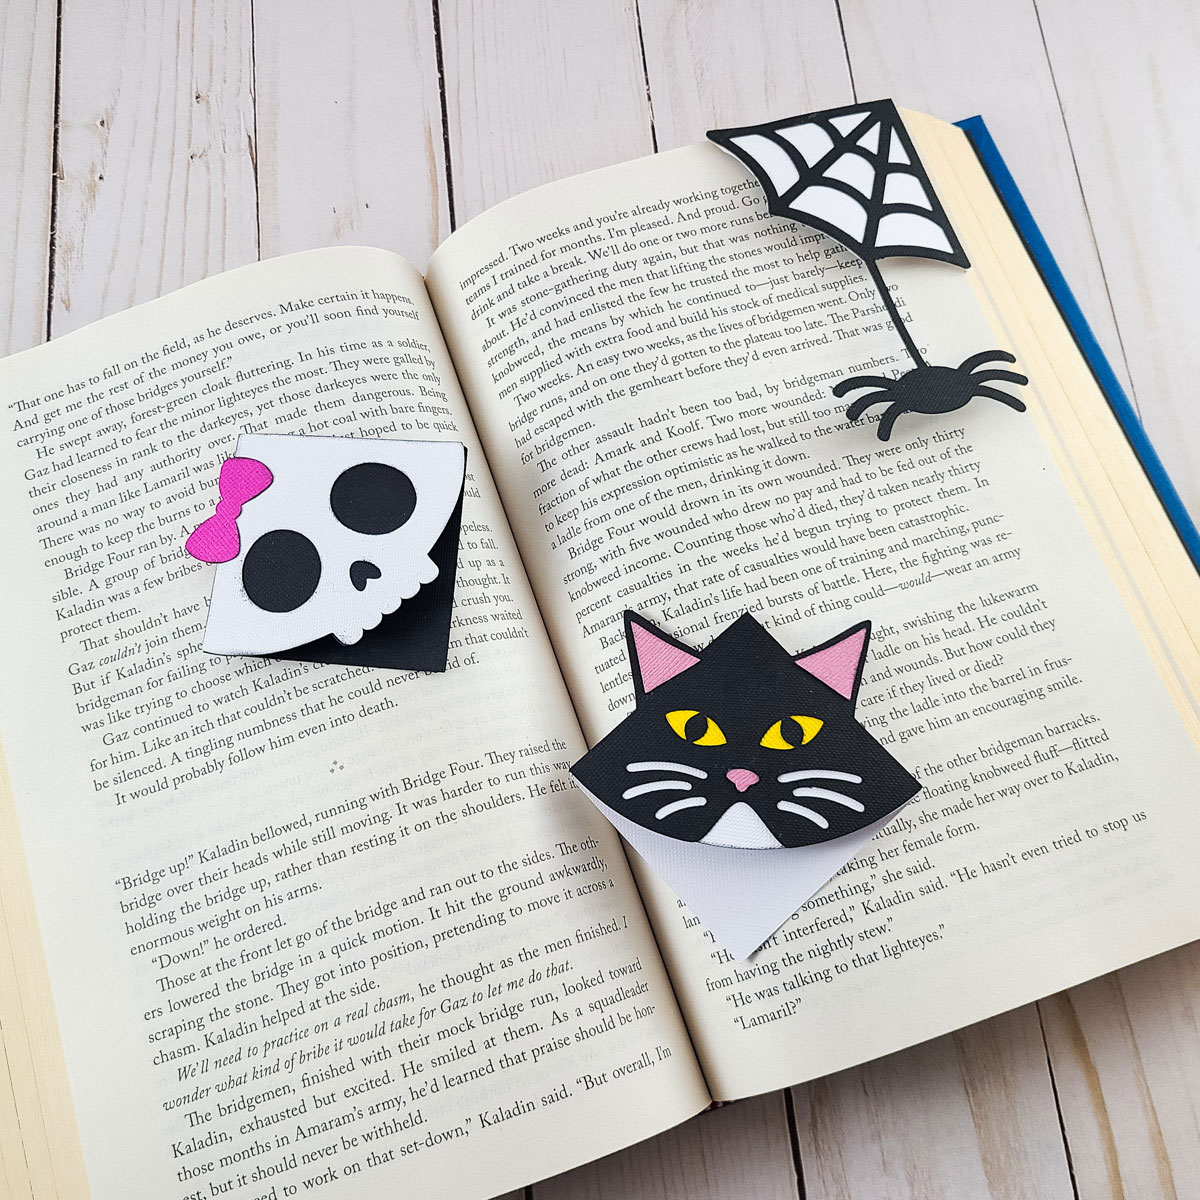
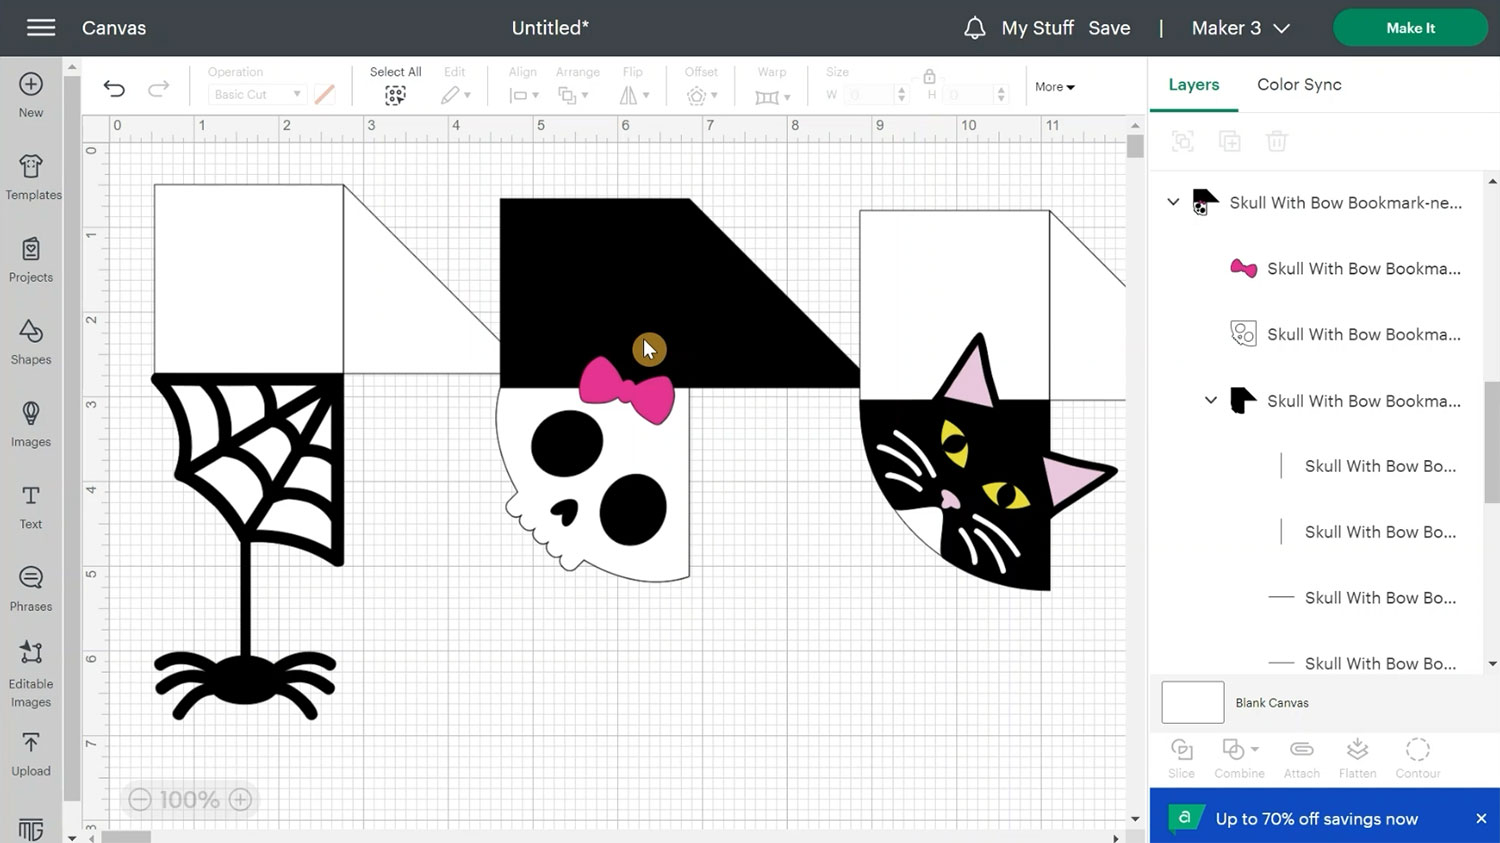
This tutorial focuses on making three of the Halloween corner bookmarks: the spider, skull and cat.
Select all three and click Add to Canvas.
Here is what they look like:
Step 2) Format the score lines
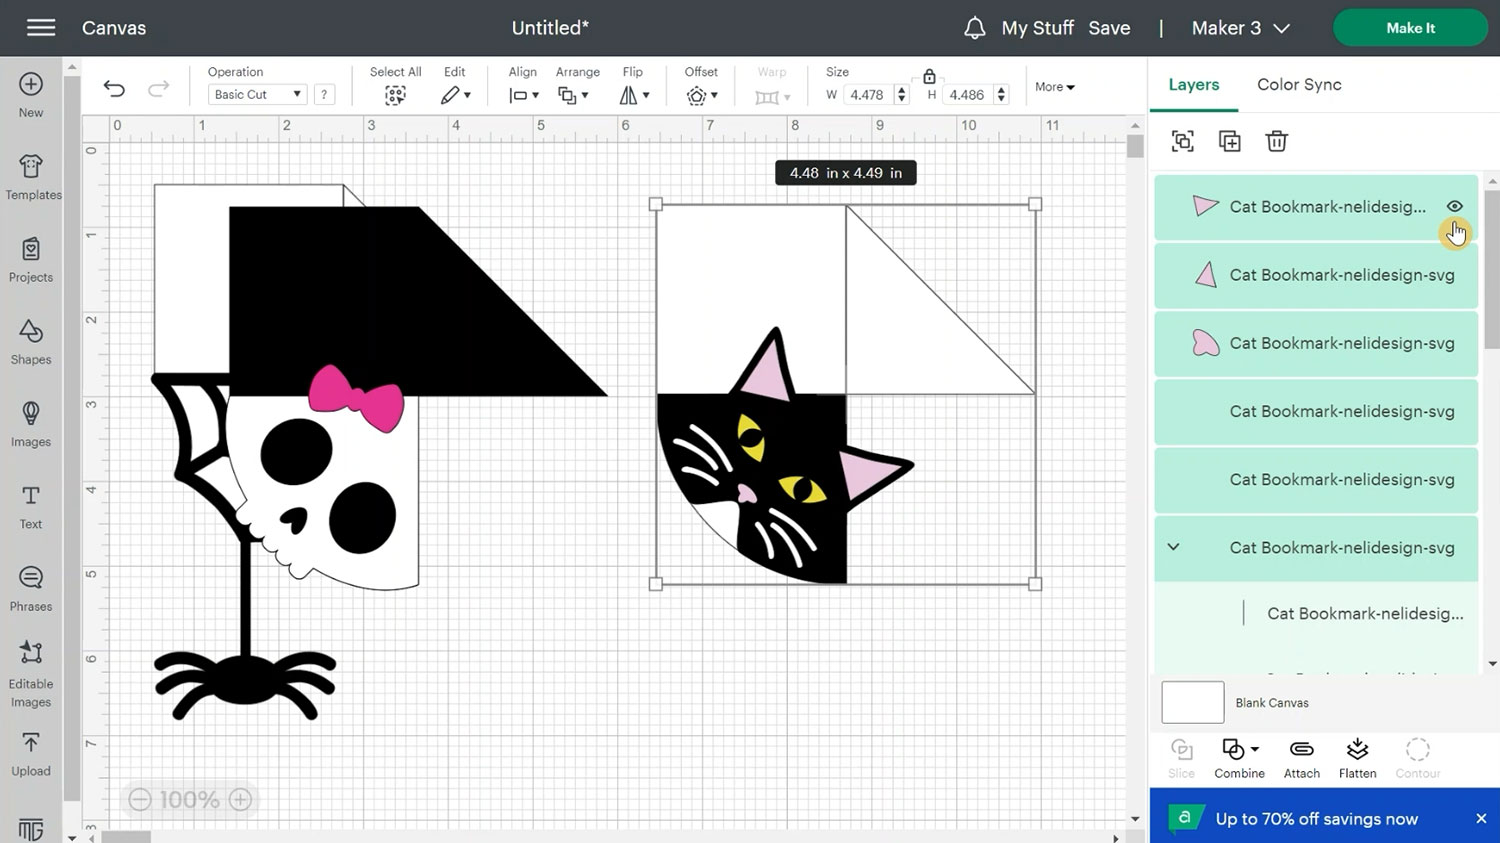
Starting with the cat design, you will see it is made up of multiple layers. Every bookmark will have a group inside a group. The bookmark includes 4 scoring lines and the design goes on top.
Ungroup the first group and you will see all the layers.
Select the scoring lines (you will identify them as they will be set to red when you look in the colour picker box).
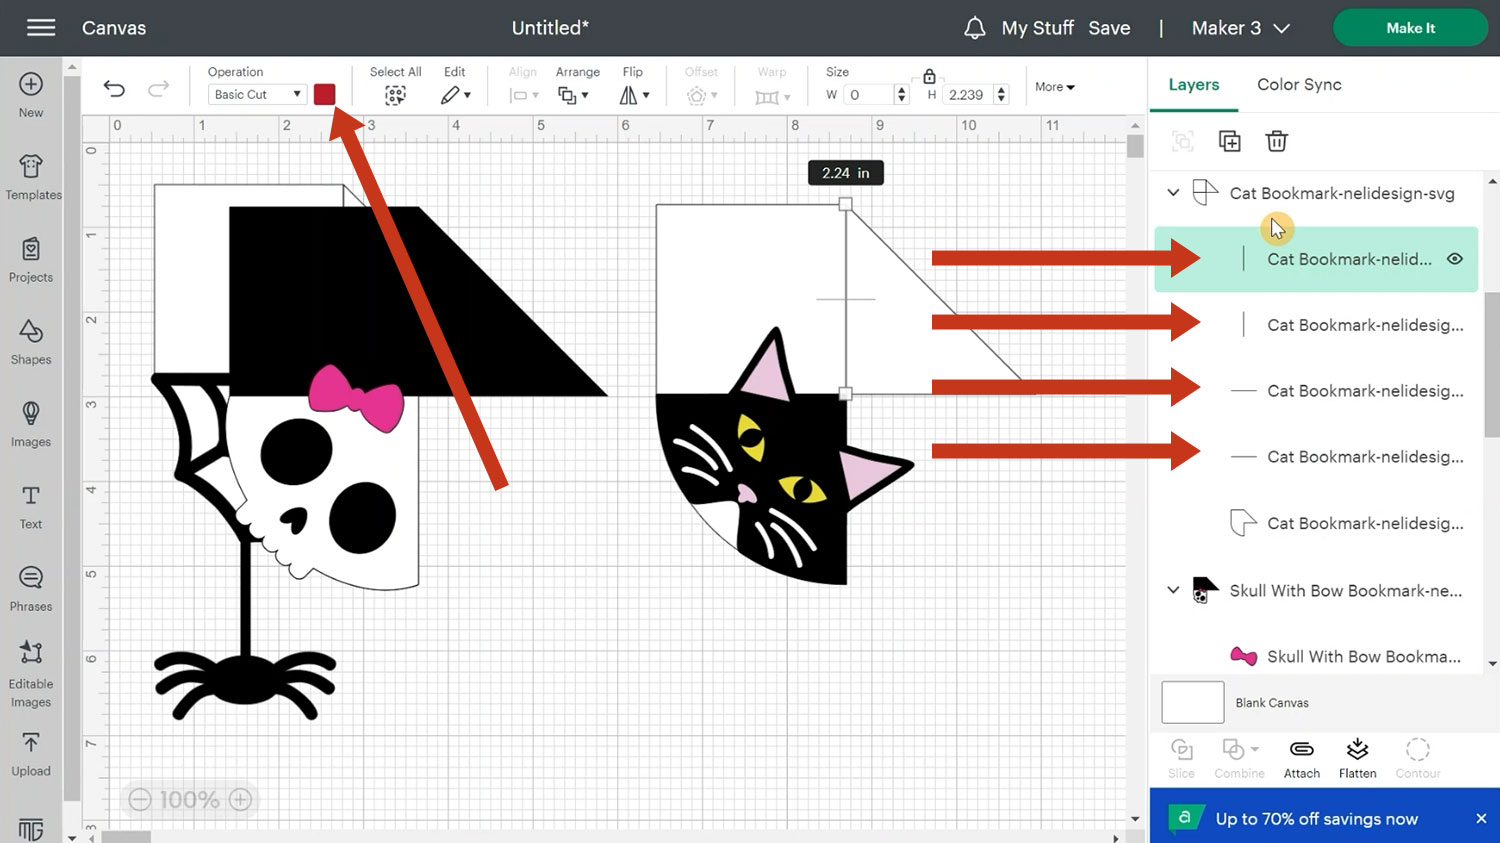
Click all 4 lines whilst pressing the shift key on your keyboard to allow you to select multiple layers at once.
Change them from Basic Cut to Score.
You may be wondering why you see two lines on top of the other. This is to give them a double score so that it scores really well.
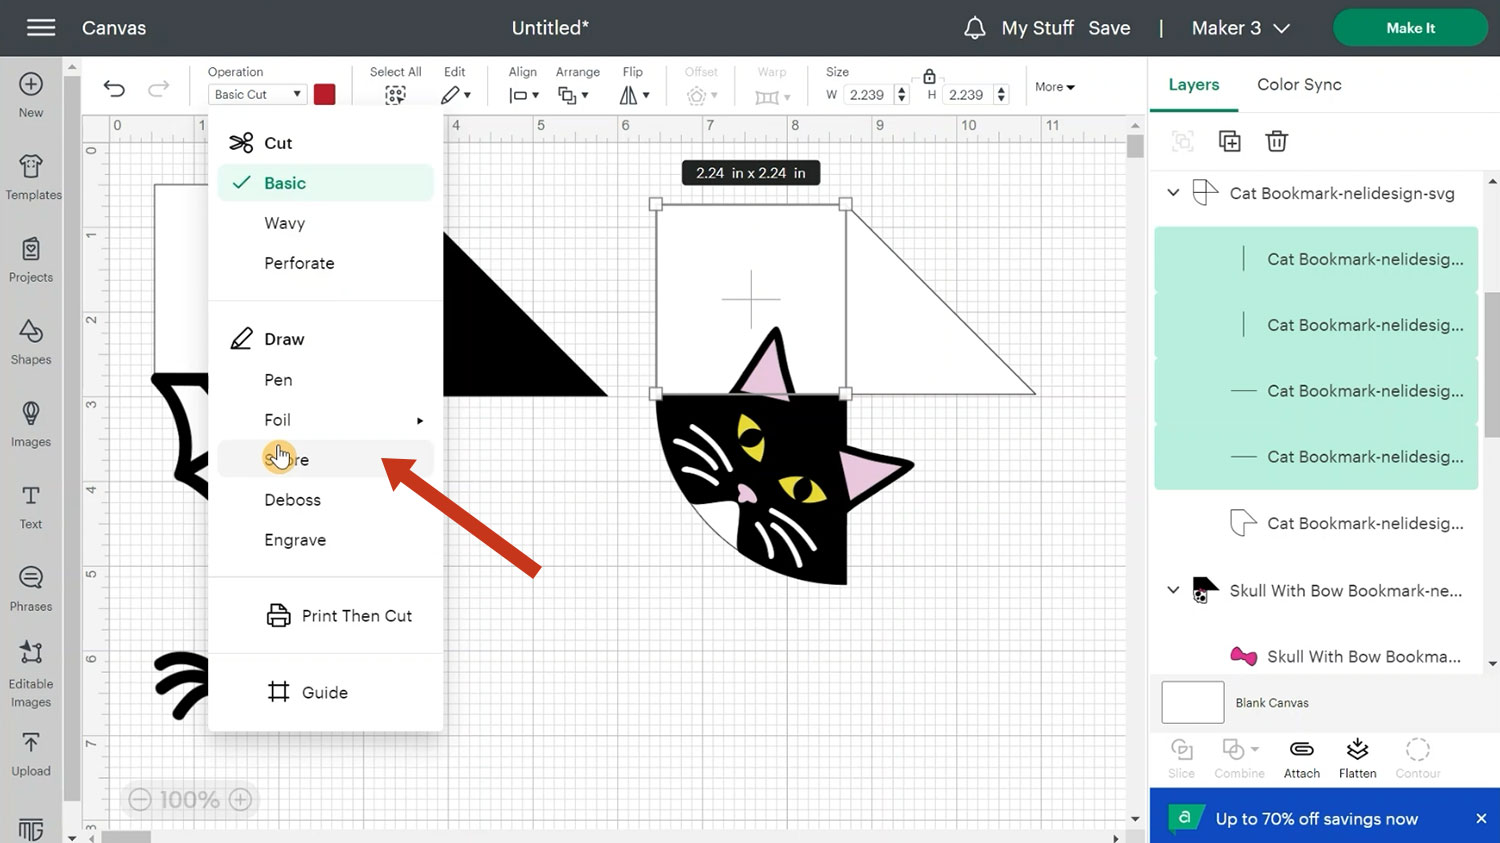
If you have a Cricut Joy you won’t have the Score option but instead, you can click Foil and use the foil tip to do the scoring for you. You will also have to resize the design to 4.25 along either the height or width but make sure the padlock icon is closed.
At this point, you will have your scoring lines but they won’t be attached, just grouped. To attach, select the group, and click Attach.
Attach is what tells the Cricut to do the score lines on top of the main bookmark pieces.
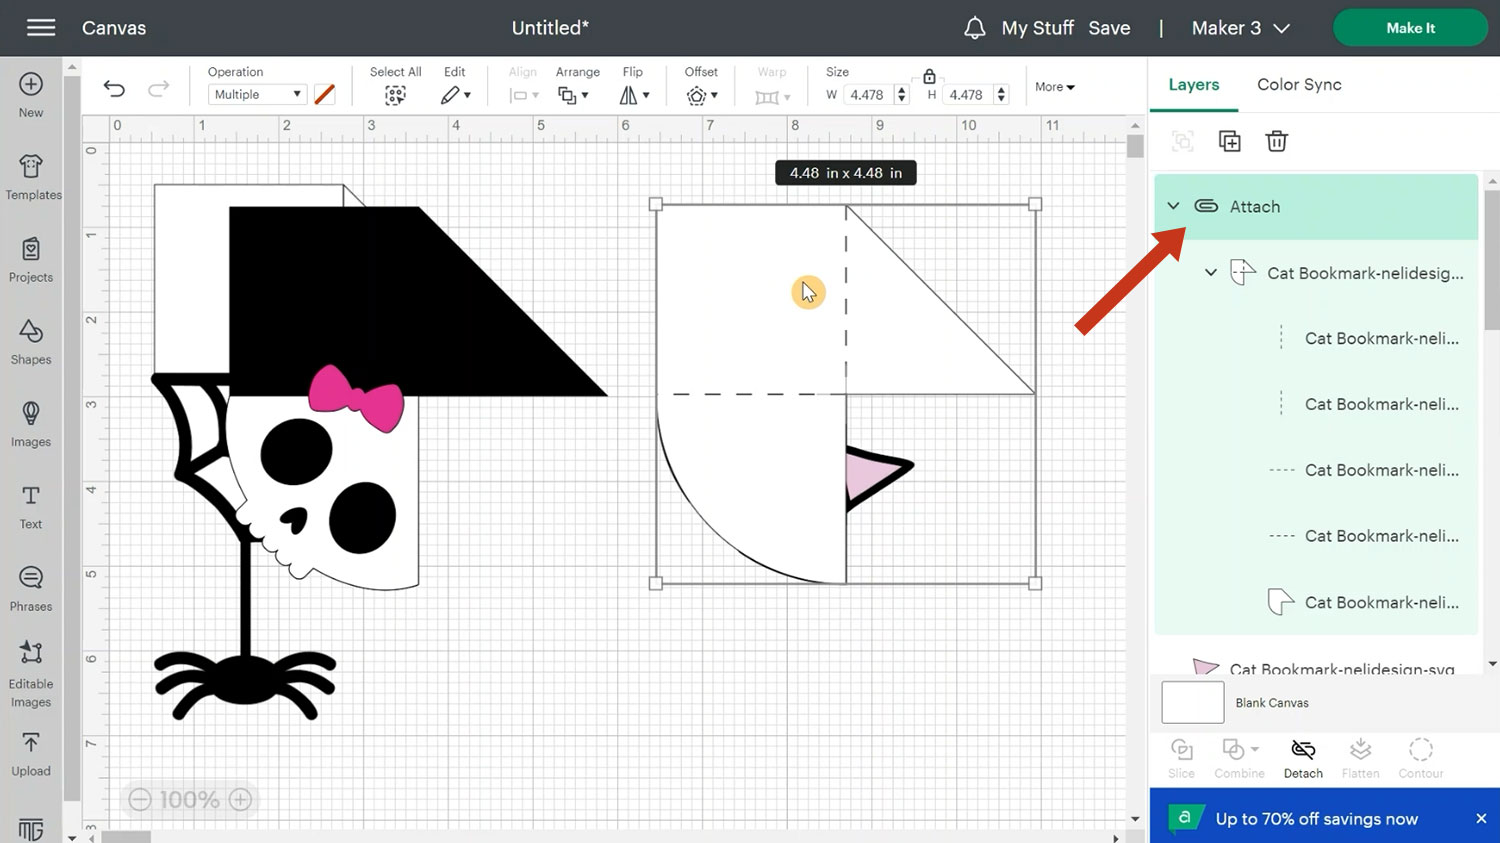
Your bookmark will be on top of your cat design so select the group, right click and Send to Back.
Select all the layers of your cat bookmark and click Group to keep everything tidy.
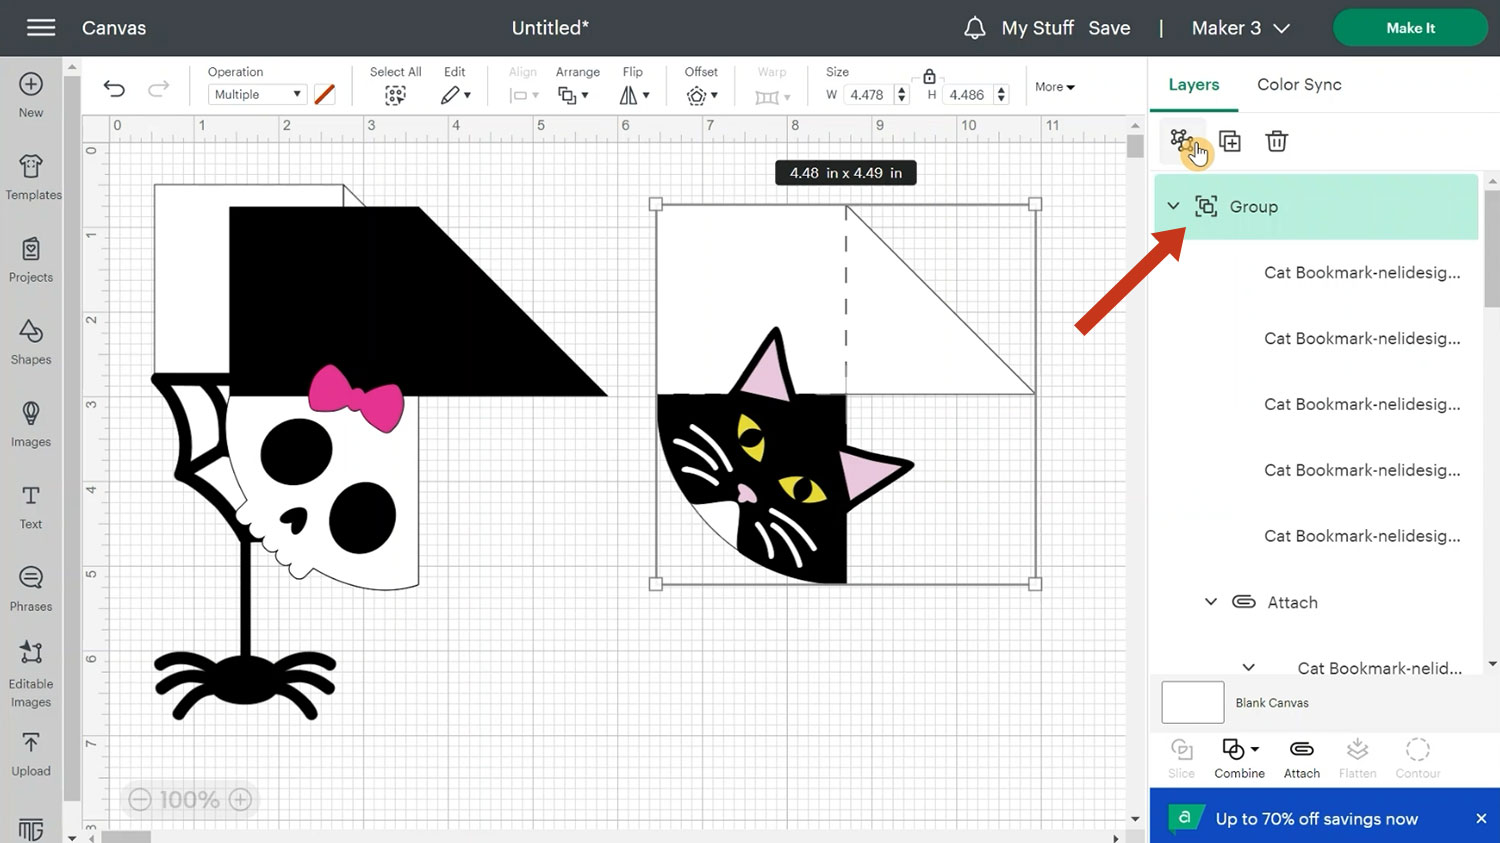
Close your group and rename it Cat so it’s easy to keep track of in the layers panel.
Repeat the process and format the score lines for the next two designs.
Step 3) Cut out the corner bookmarks
When you are happy with how everything is looking, click “Make It” on the top-right of your screen.
You may want to arrange the cuts on screen to save cardstock by clicking-and-dragging the pieces.
You can also rotate them to help them fit better.
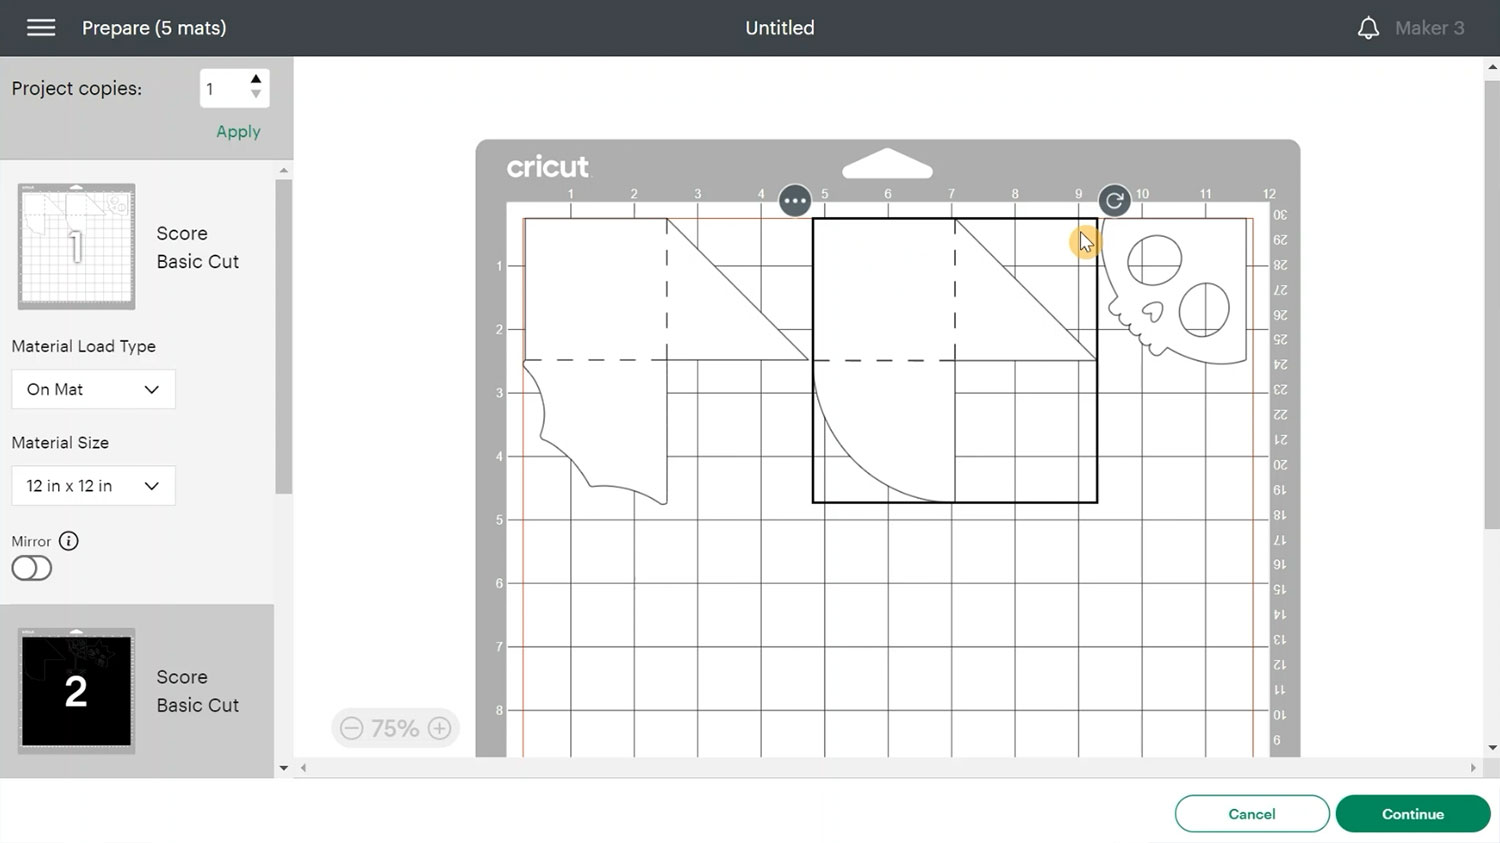
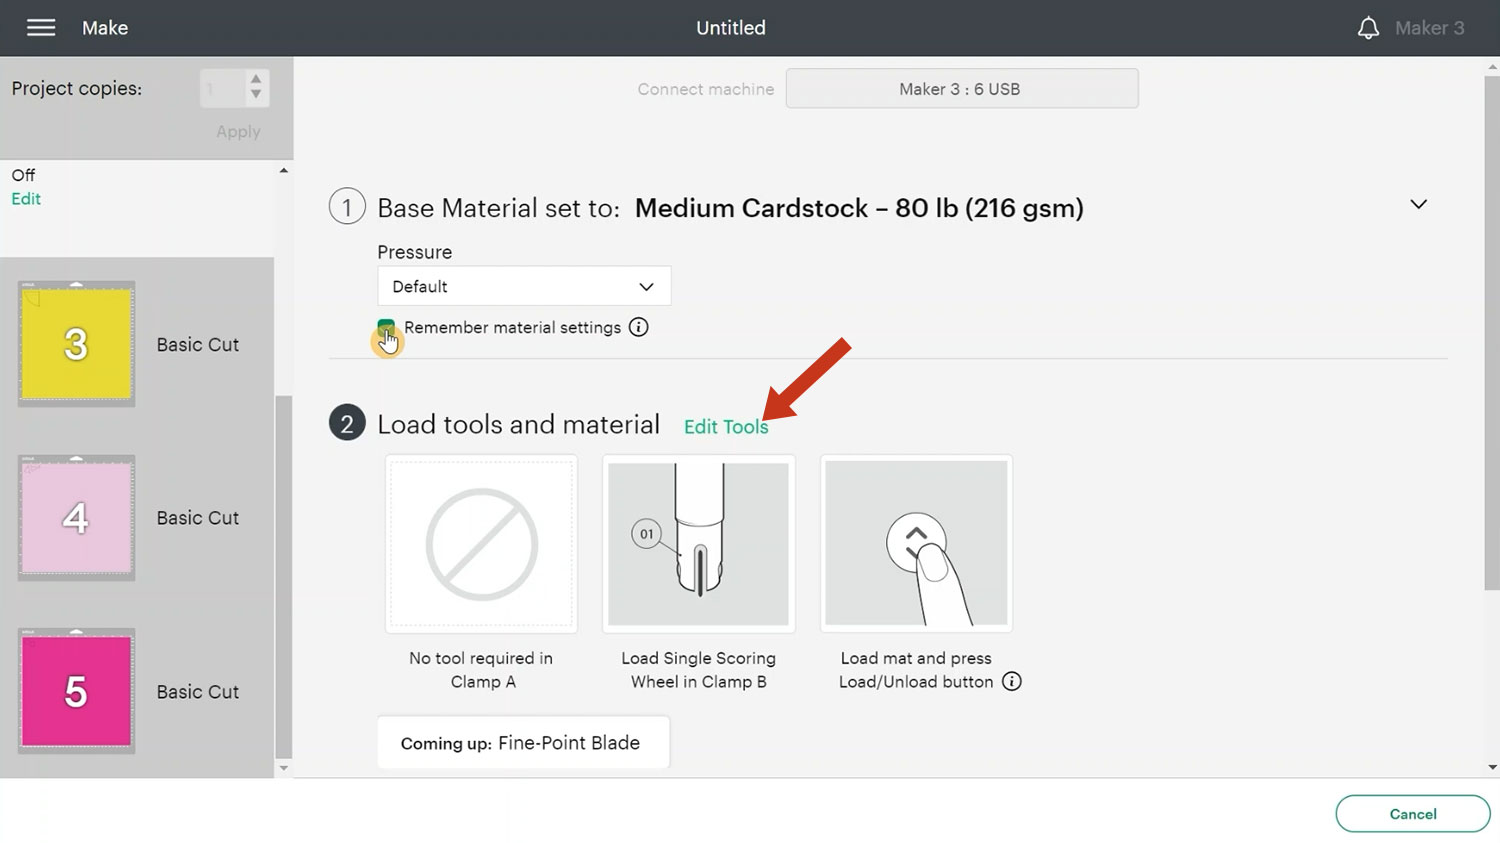
You will be prompted to select a scoring wheel or stylus in Design Space after you have arranged your mats on screen.
You can click “Edit Tools” to switch between the scoring wheel and stylus.
Place your cardstock on the cutting mat. If you have a brayer tool then use this to make sure the card is really well stuck to the mat.
You can also use a scraper tool to press the card firmly onto the mat.
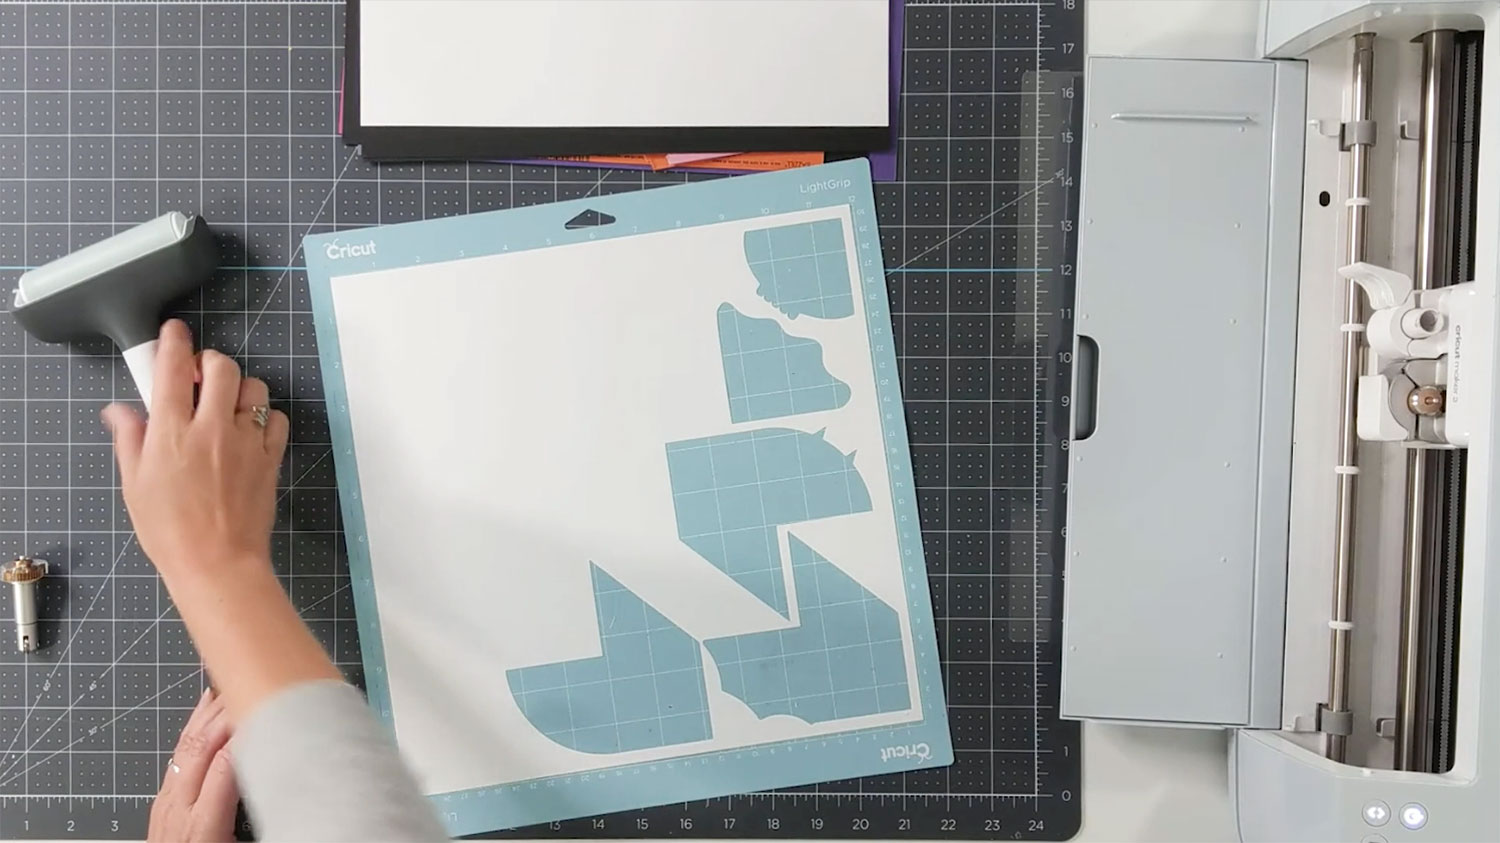
Take care when taking all your pieces off the mat, you don’t want to lose the tiny pieces!
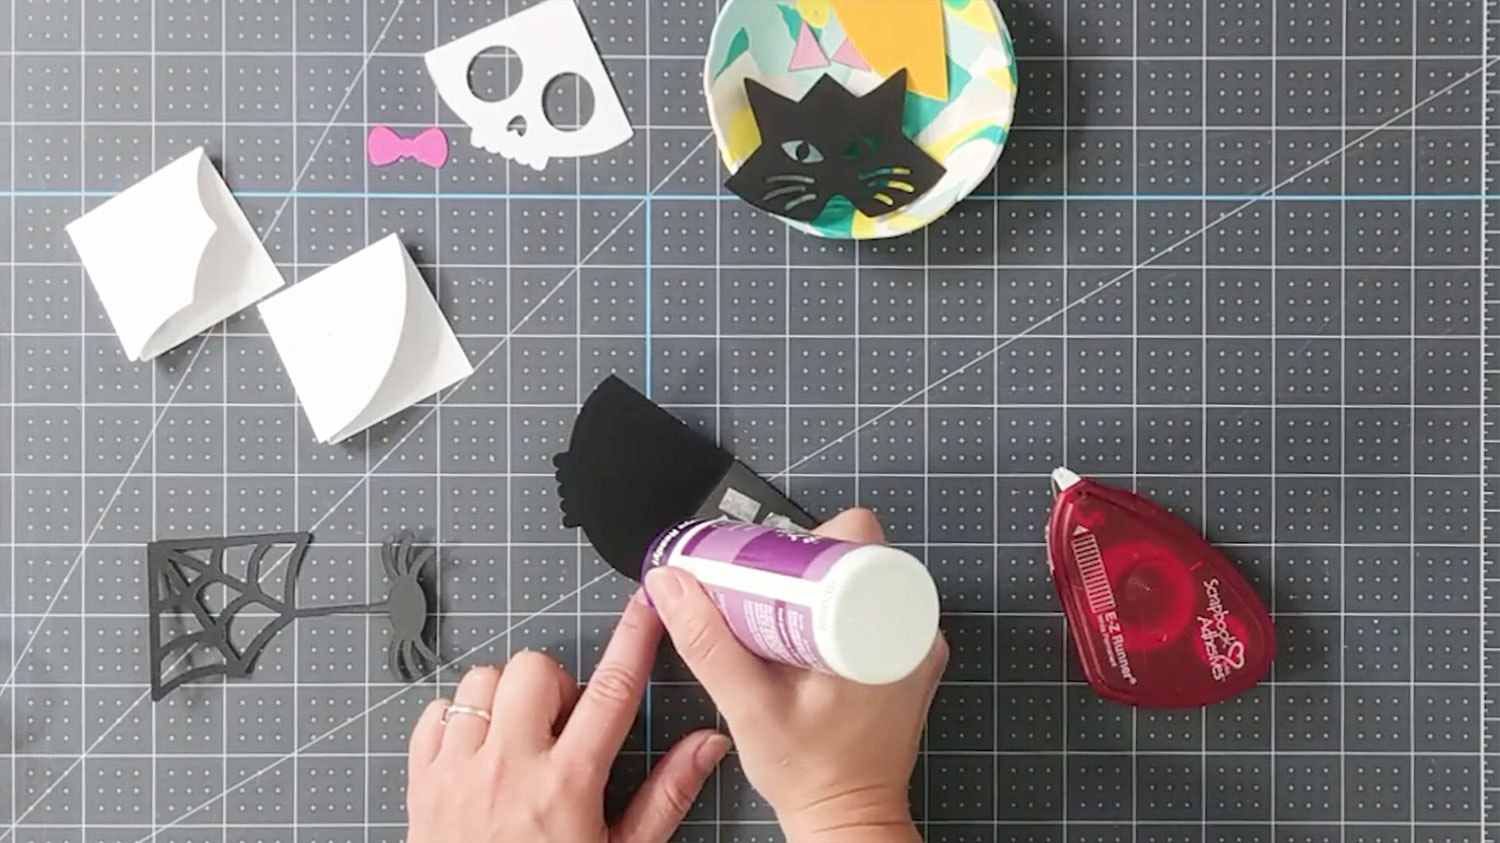
Step 4) Add ink to the cardstock (optional)
This step is optional, but it’s a nice way to add some extra detailing to the pieces of card.
Using a little sponge/dabbing brush, you can add some black ink to the borders of your cuts to bring depth to the designs before assembling them.
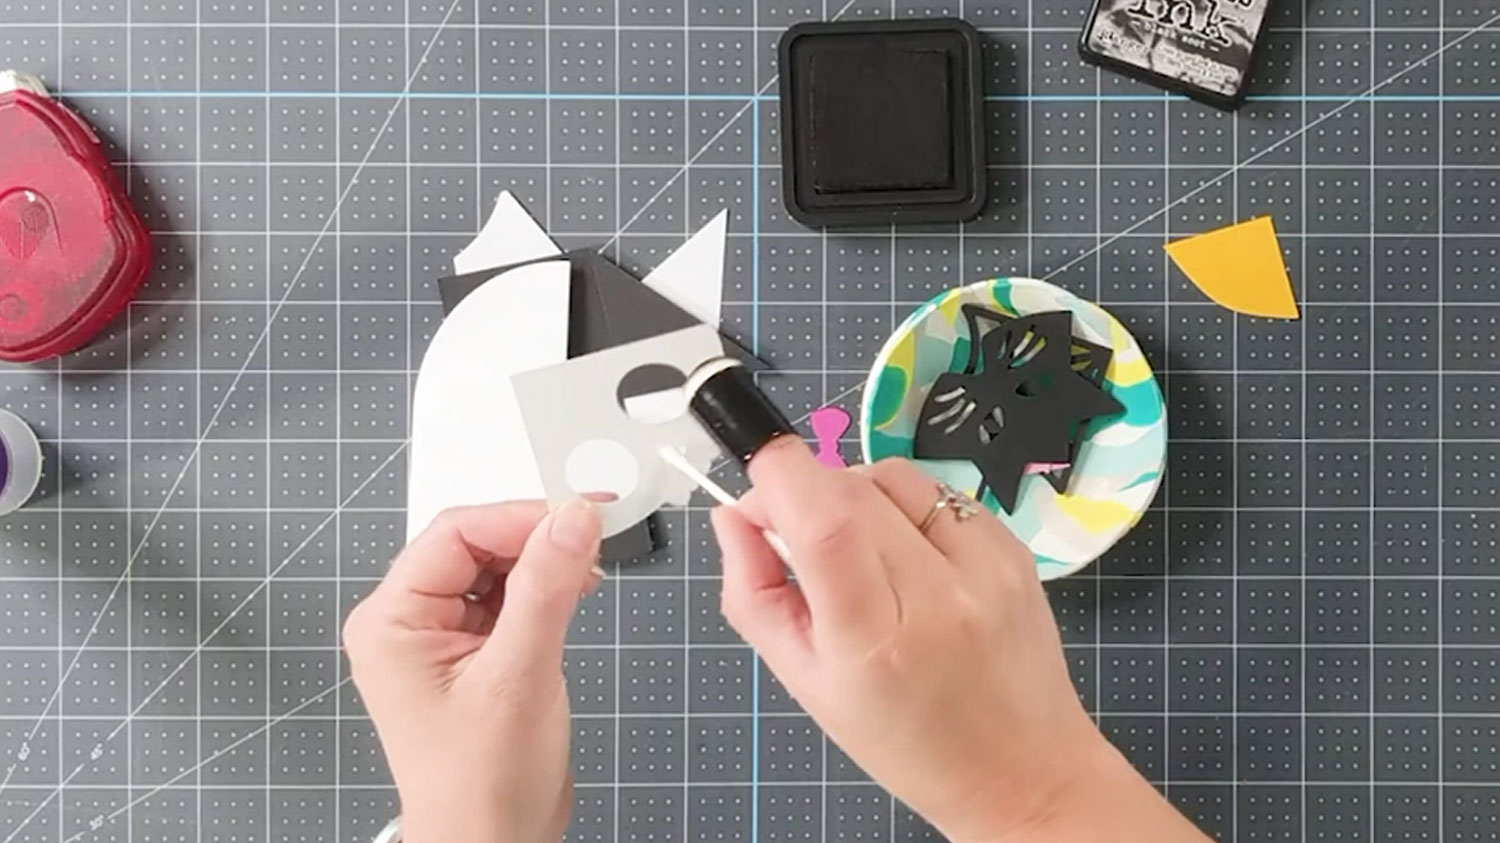
To help you do this, you can use a Q-tip to help you get the hard-to-reach areas.
Step 5) Assemble the bookmarks
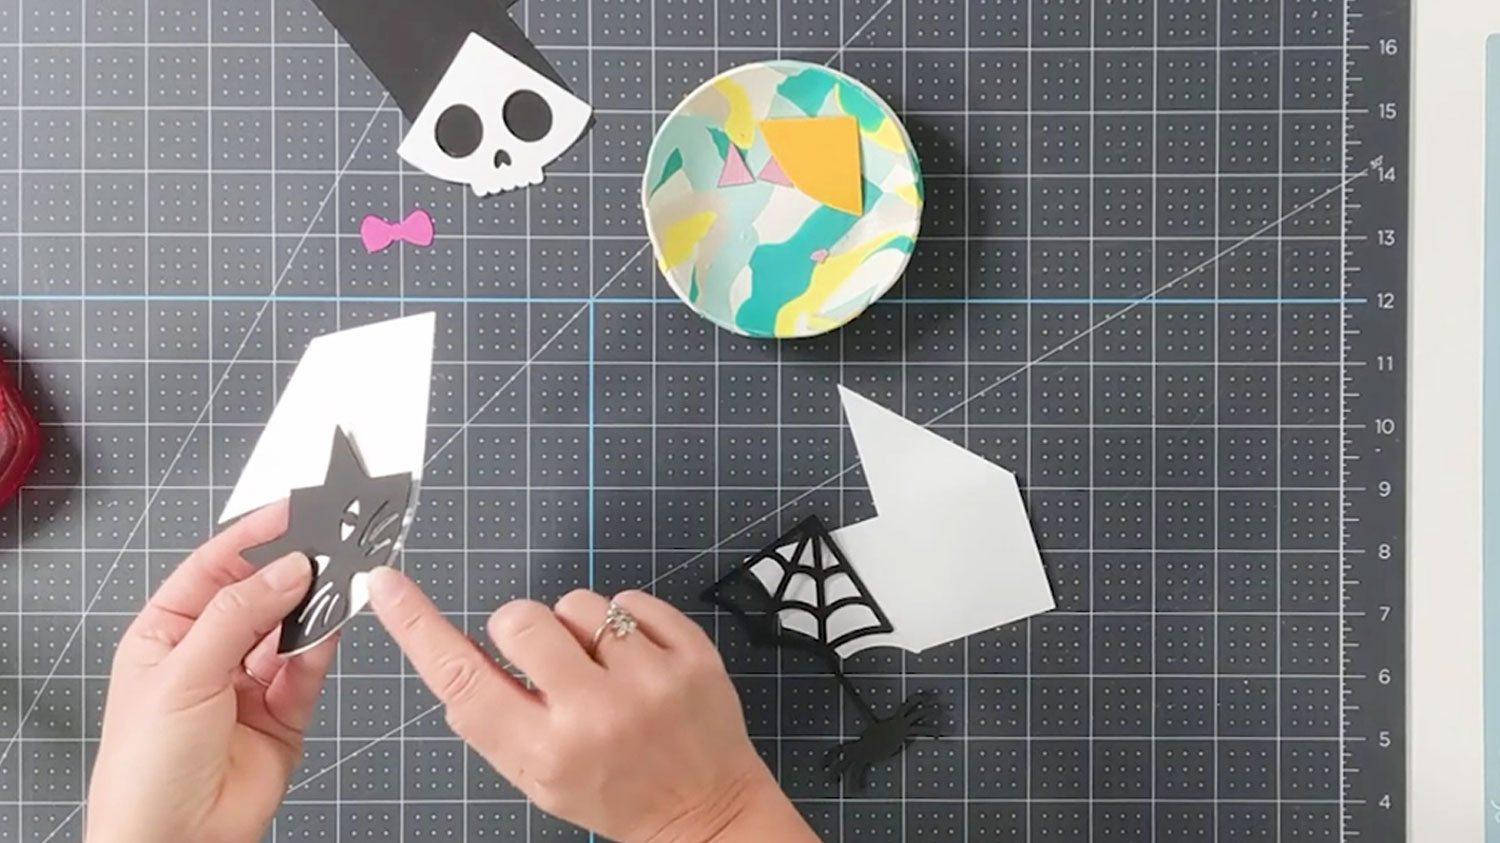
Organise your cuts into groups so that you know which bits go with each bookmark.
Look out for the larger black piece with the teeth that will go with the skull.
You’ll be left with two white larger pieces, the one with a wavy edge will go with your spider and the remaining piece will go with your cat.
Fold along your score lines, starting with the triangular shaped piece.
To secure it together, use adhesive tape or glue.
Glue the bow onto the skull and the triangular coloured piece behind the cat’s eyes.
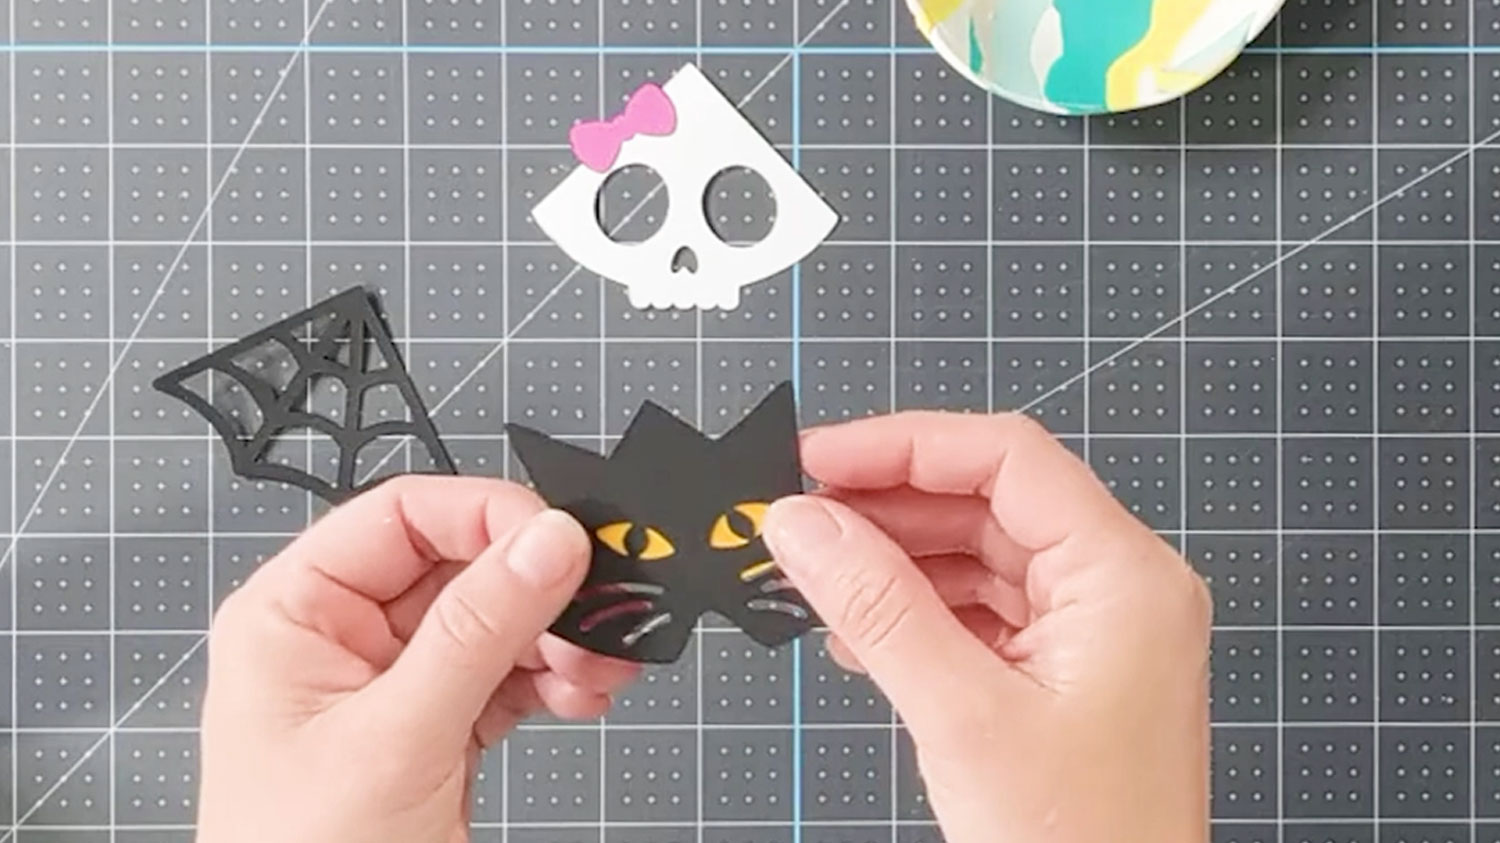
Glue on the pink ears and nose to the cat.
Glue the spider web design onto the base of the bookmark and place under something heavy to dry so that it sticks properly.
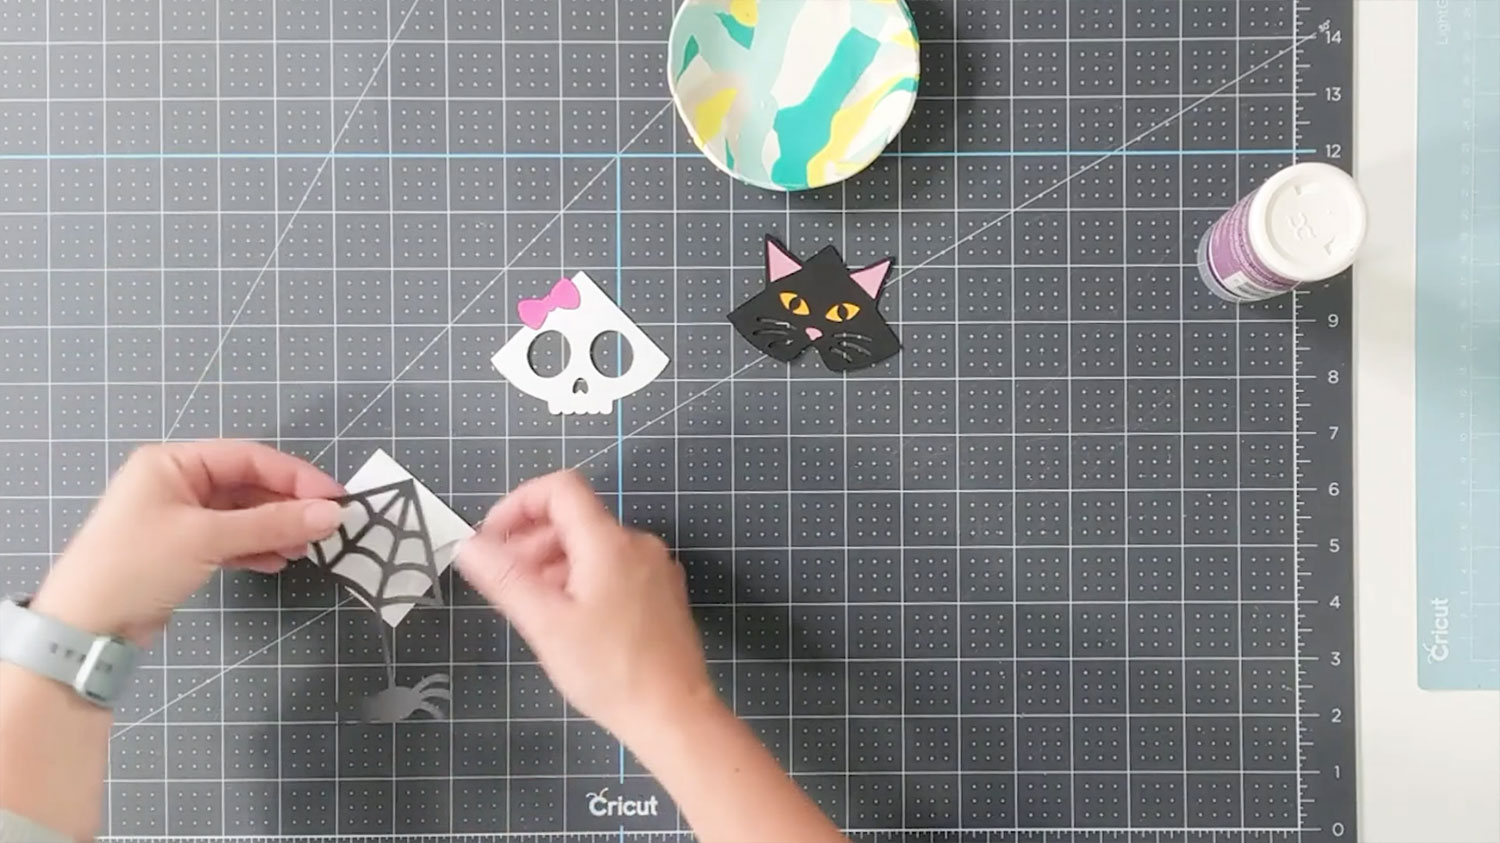
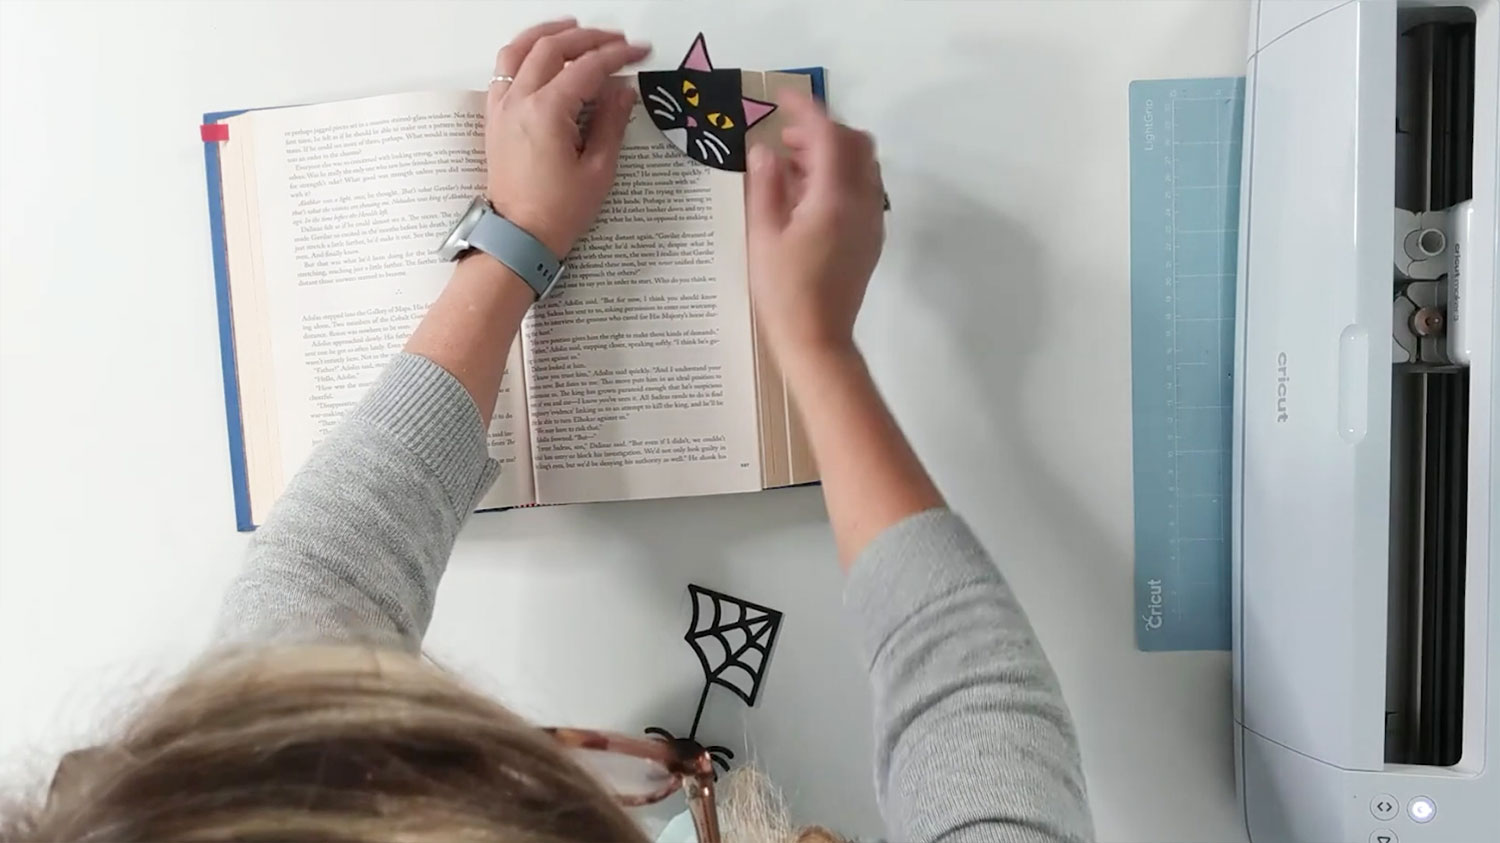
When all the glue is dry, the bookmarks will fit nicely on the edge of the pages of your book.
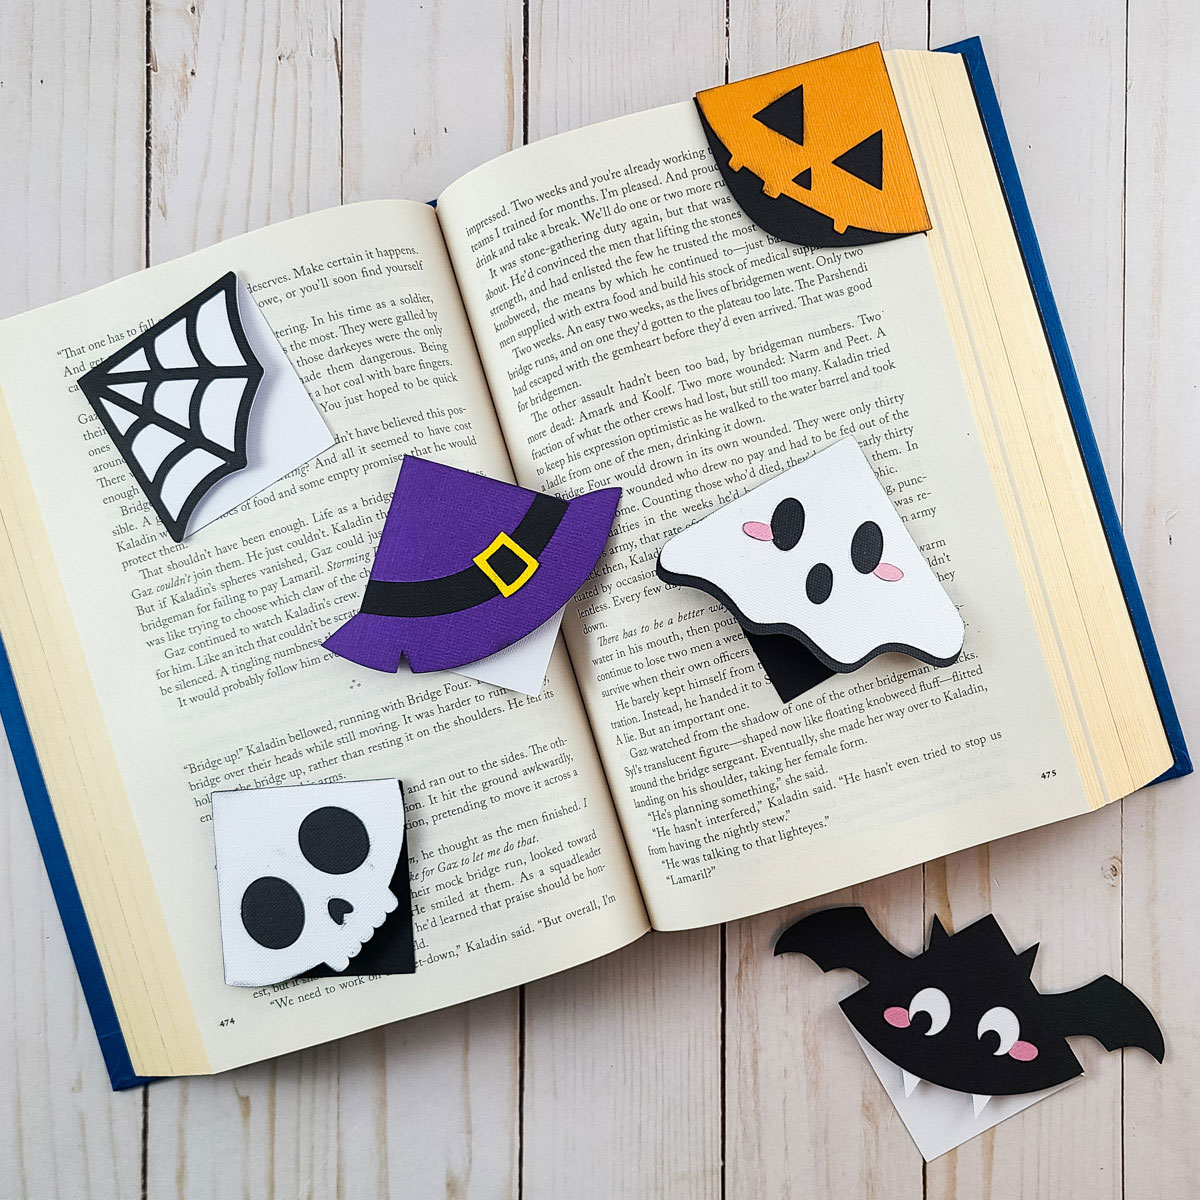
Want even more Halloween corner bookmark designs? Click here for EXTRA (free!) bonus files from Natalie which include a pumpkin, witch’s hat, spider web, skull (without a bow) and a bat!
DIY corner bookmarks with a Cricut
Now your Halloween Corner bookmarks are finished, I wonder which one is your favourite?
I hope you’re pleased with your corner bookmarks and enjoyed following along with this tutorial!

I can’t wait to use these as I enjoy my Halloween reading.
Happy crafting,
Sarah x

