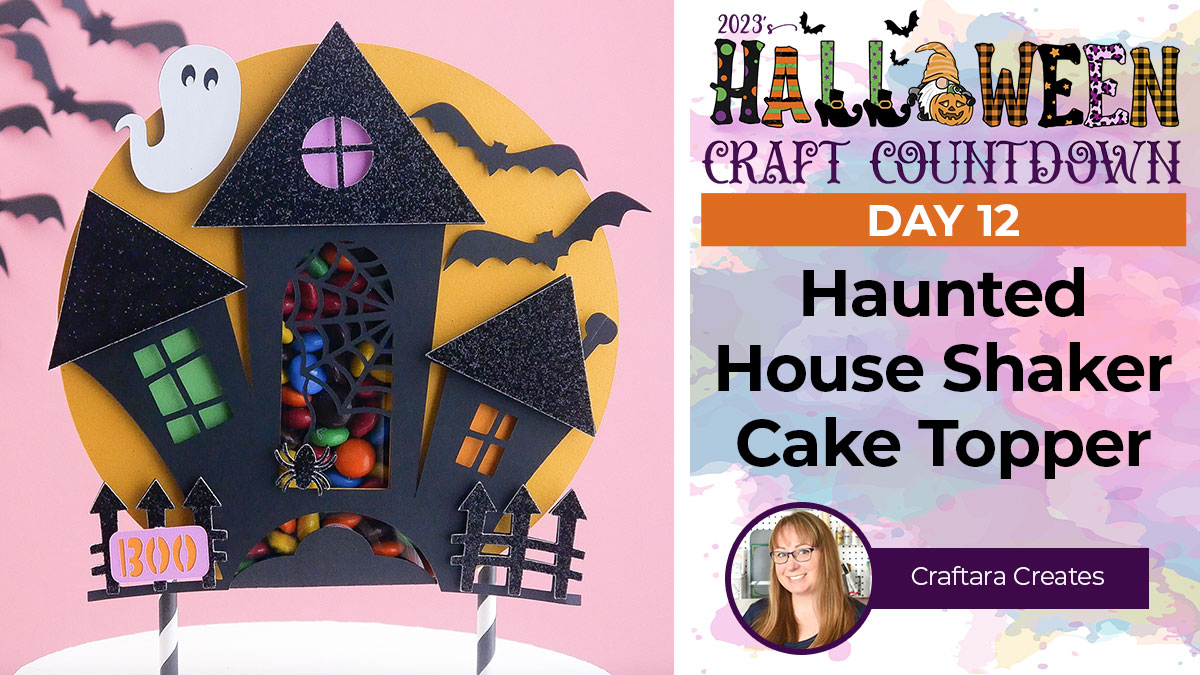
HCC 2023 Day 12 🦇 Haunted House Candy Shaker Cake Topper
Uplevel your Cricut cake toppers by adding CANDY to them!
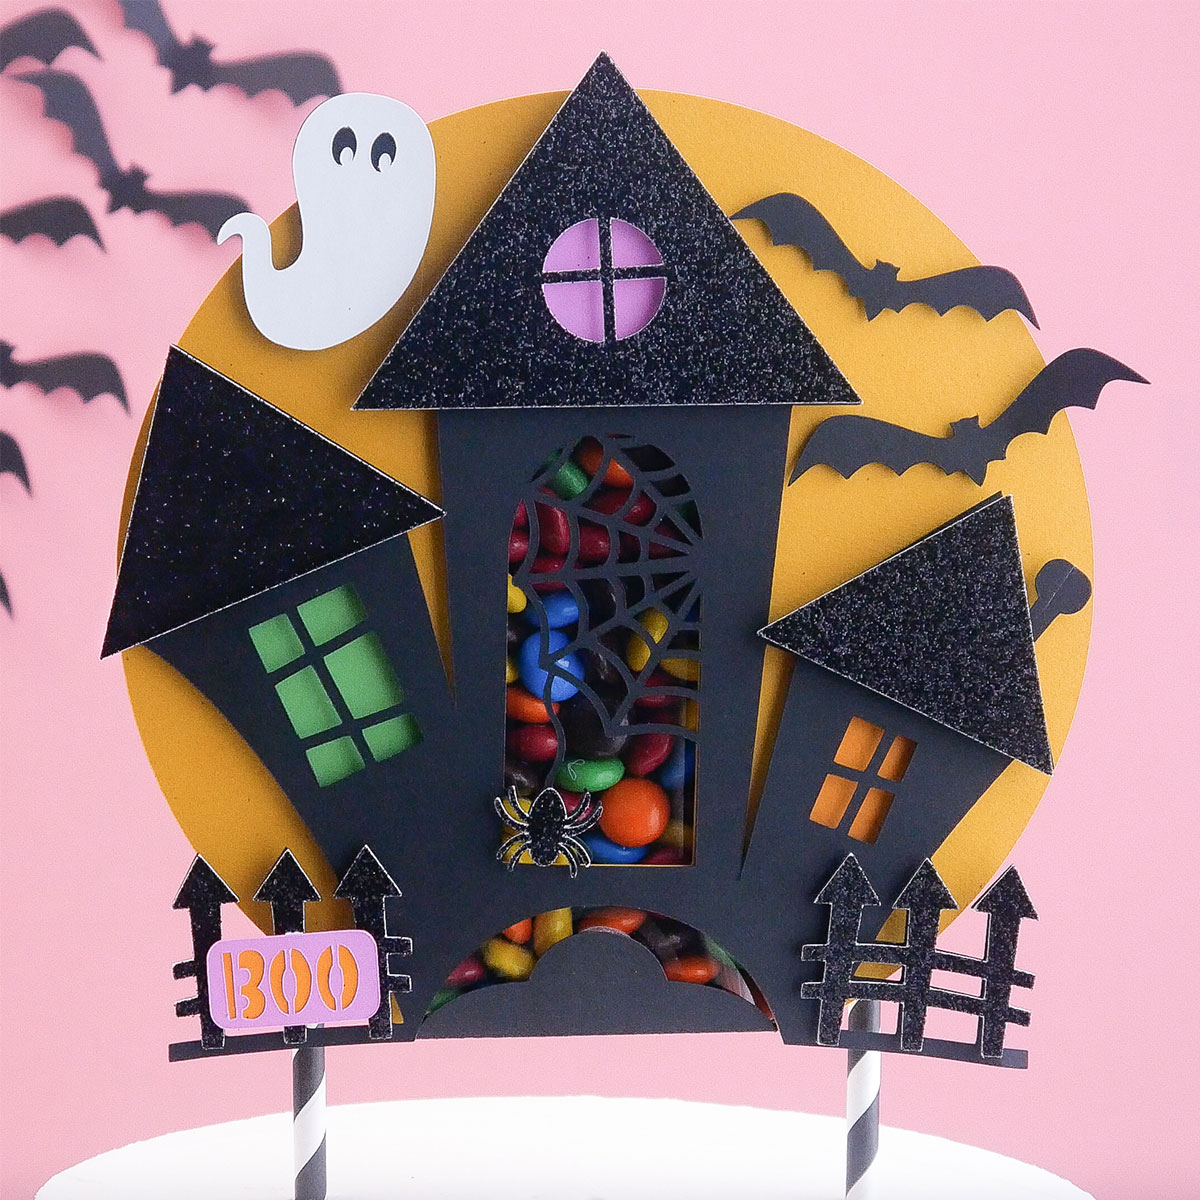
It’s Day 12 of the Halloween Craft Countdown and Tara from Craftara Creates is showing us how to make this Haunted House Shaker Cake Topper.
This is a showstopper for any Halloween event or party with all the little details and of course, the candy!
Tara’s step by step instructions will guide you from start to finish.
This Project was part of the Halloween Craft Countdown 2023

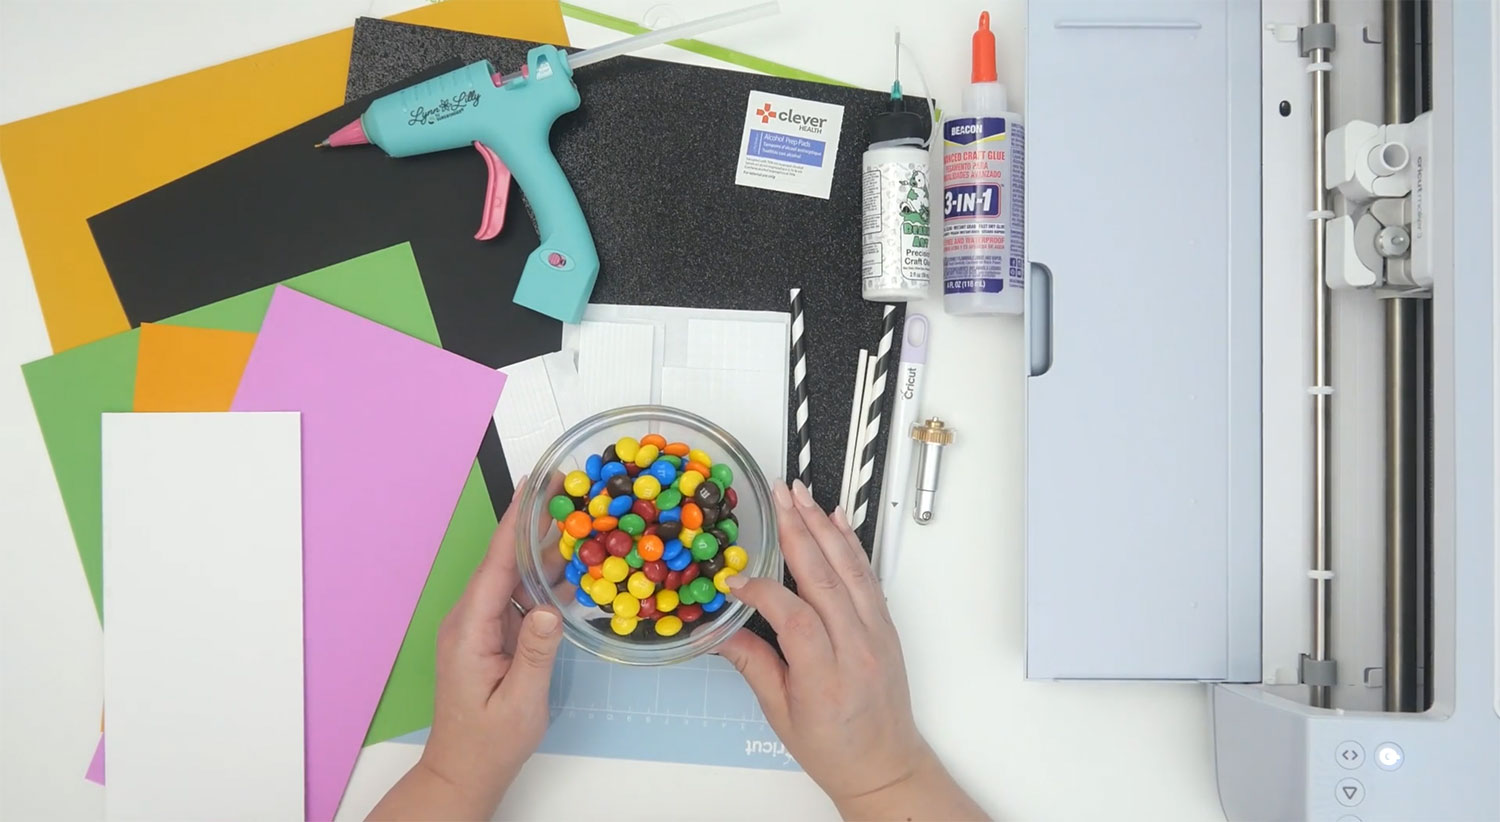
Materials supply list
Here is a list of the materials that are required to make this project.
Please note that some of the links included in this article are affiliate links, which means that if you click through and make a purchase I may receive a commission (at no additional cost to you). You can read my full disclosure at the bottom of the page.
- Cricut machine (not the Joy as it’s too small)
- Light grip (blue) cutting mat
- Glue and a hot glue gun
- Double sided tape
- Velcro (a small amount)
- Alcohol wipe or pad
- Foam tabs and tape
- Sticks or straws
- Candy
- Cardstock in various colours
- Acetate sheet
- Scoring wheel or stylus
- Scissors
- Candy e.g. M&Ms
This project is suitable for the following types of Cricut machine: Explore Air 2, Explore Air 3, Maker, Maker 3, Venture and Joy Xtra. It is too large to cut with the original Cricut Joy machine.
Video tutorial for Cricut cake toppers
Watch the video below to see how to make this spooky Halloween cake topper with a Cricut.
If you prefer to read rather than watch, keep scrolling!
This project was created by Craftara Creates
Tara is the creative owner and designer behind CraftaraCreates.com. Her mission is to help you master your Cricut machine through teaching you how to make cake toppers.
With Tara, you'll learn how to craft cake toppers that will add a special touch to your celebrations and everyday moments.
How to make a Cricut cake topper for Halloween
Follow Tara’s step-by-step instructions to make a layered papercraft haunted house cake topper, filled with M&Ms.
Step 1) Upload the design to Cricut Design Space
Before you upload the SVG to Design Space, you need to unzip the download folder that it comes in.
- How to unzip a folder on Windows computer
- How to unzip a folder on a Mac
- How to unzip a folder on an iPad/iPhone
- How to unzip a folder on an Android device
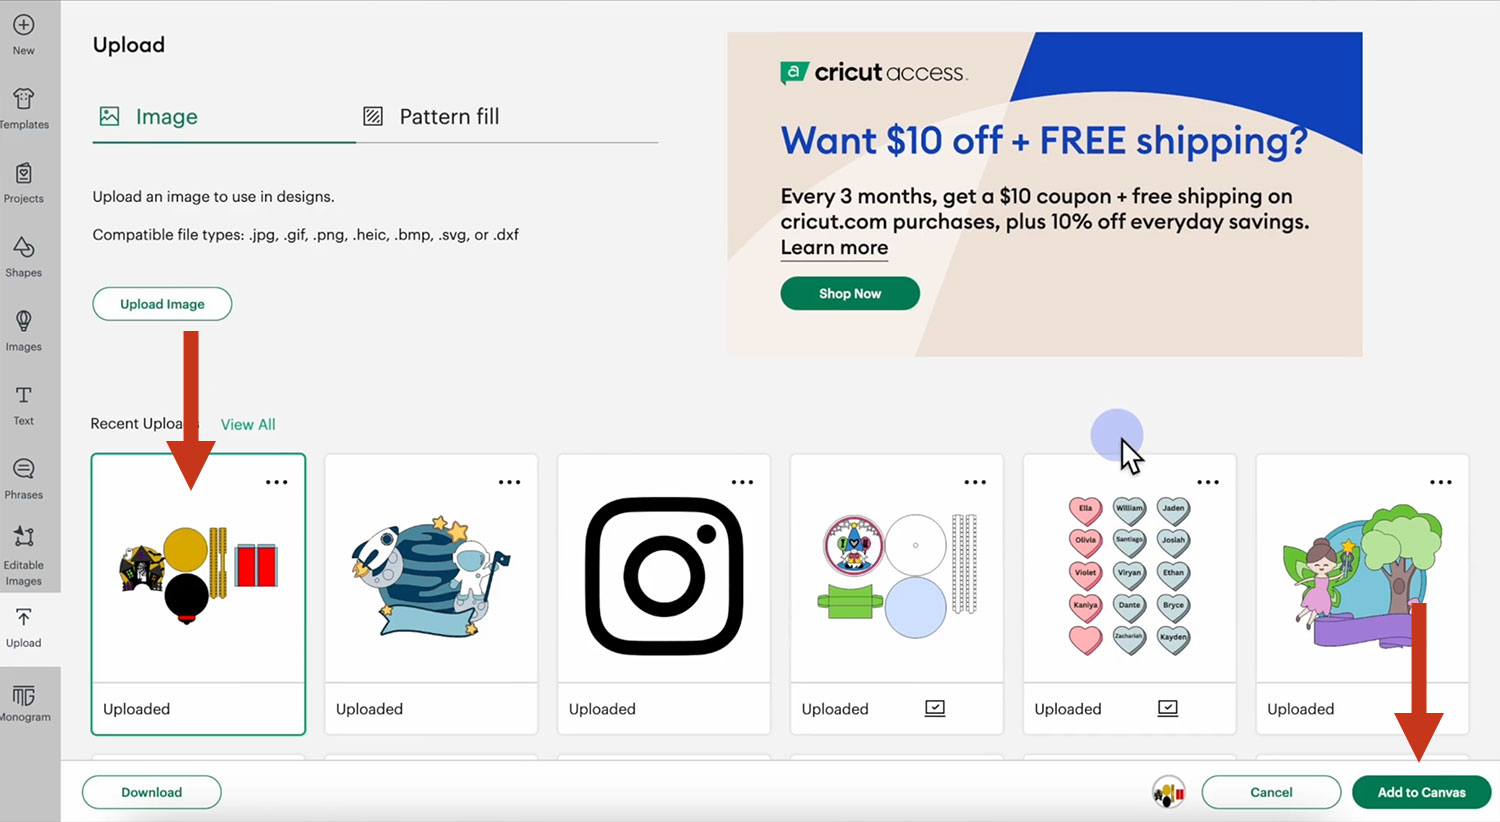
Open up Design Space and start a new project.
Click Upload, Upload Image and Browse.
Upload the file called SVG-HauntedHouseShakerCakeTopper.svg
Highlight the image and Add to Canvas.
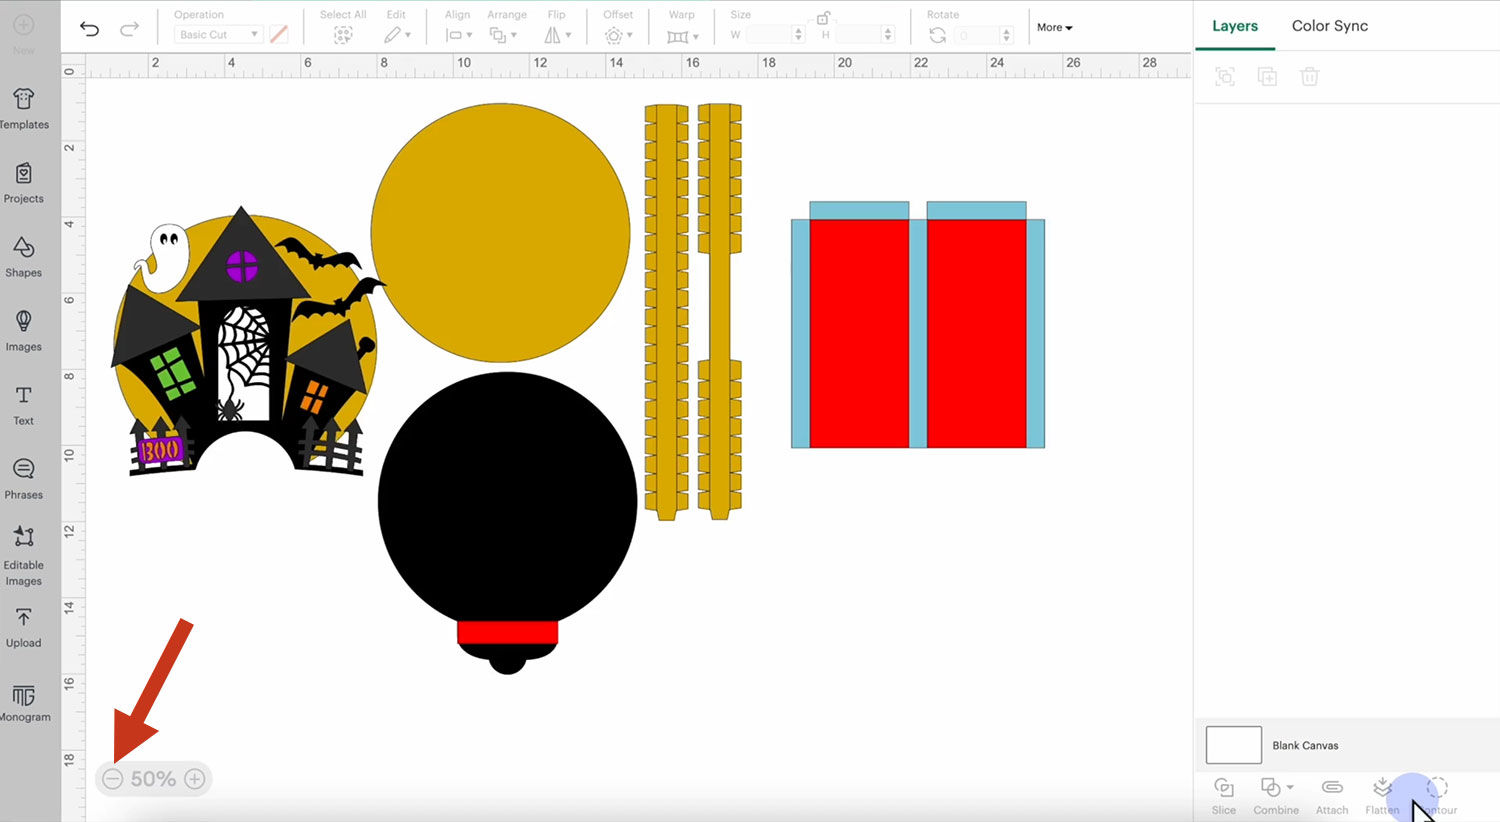
Zoom out using the “minus” button on the bottom-left of the screen so that you can see the whole design.
Step 2) Format the score lines
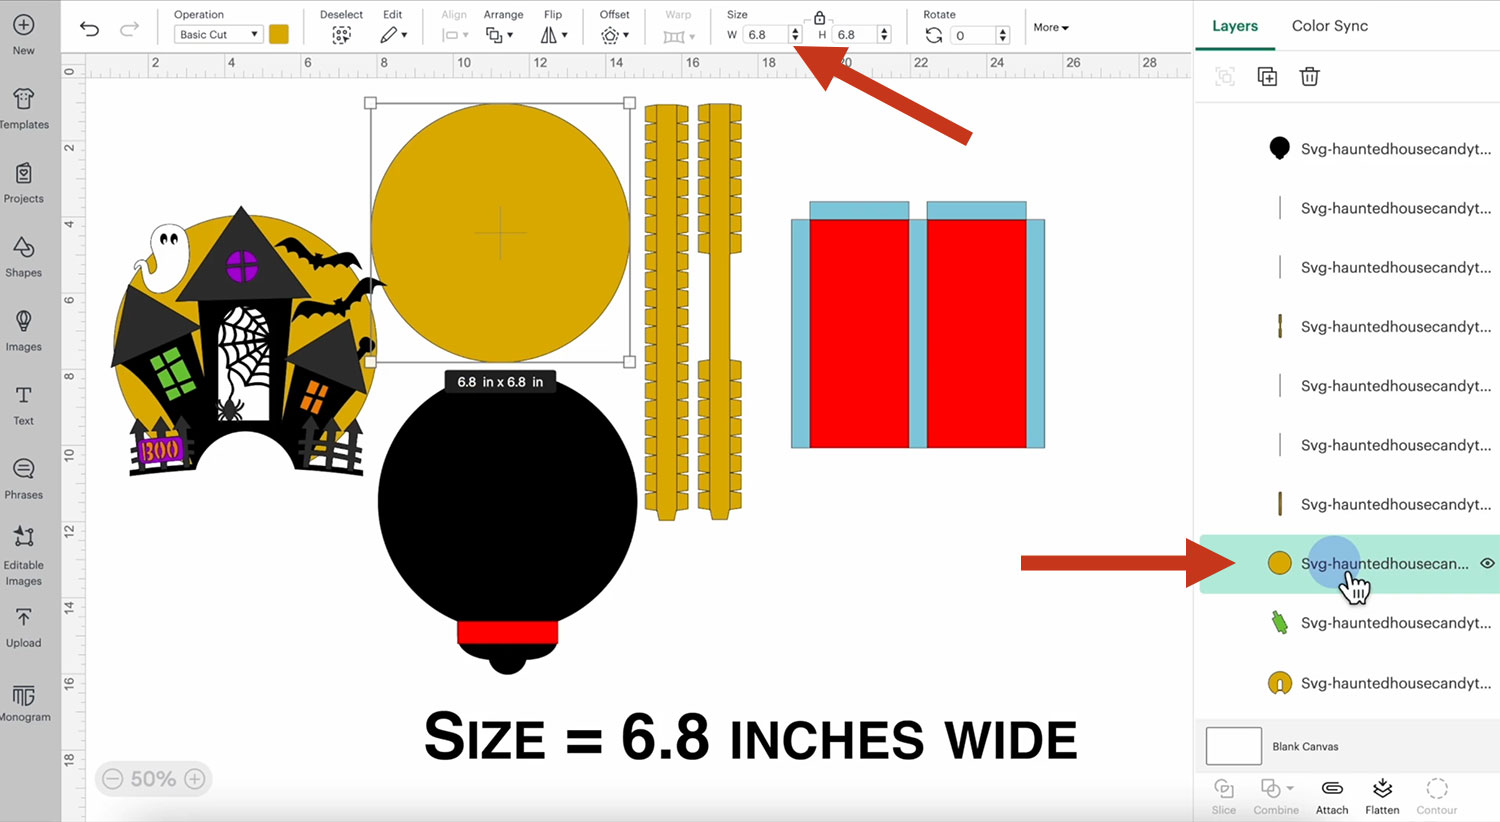
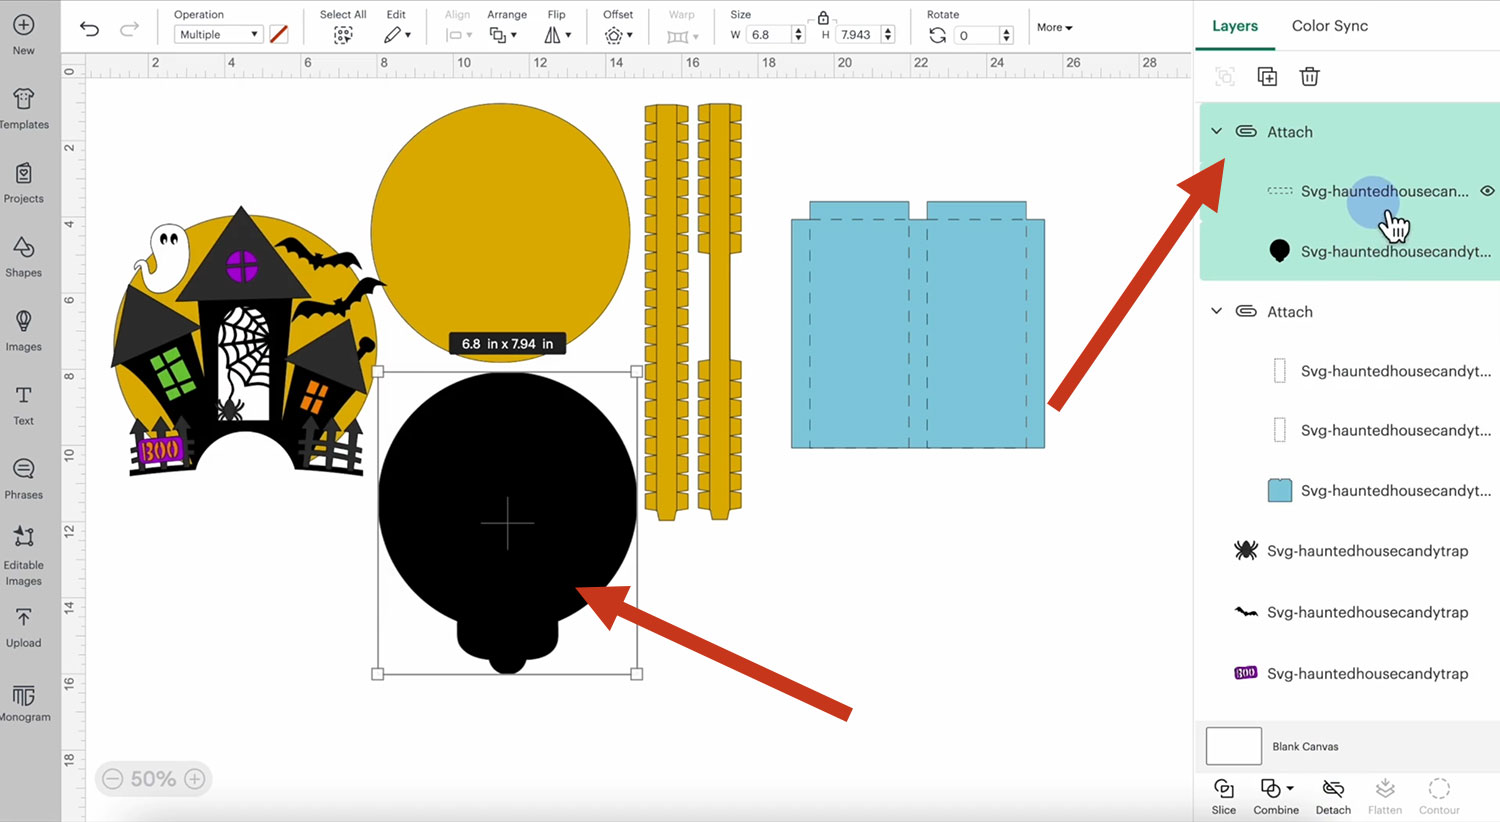
Scroll down the layers panel until you see the solid yellow circle and make sure that it is 6.8 inches wide. This will ensure that your design is the right size.
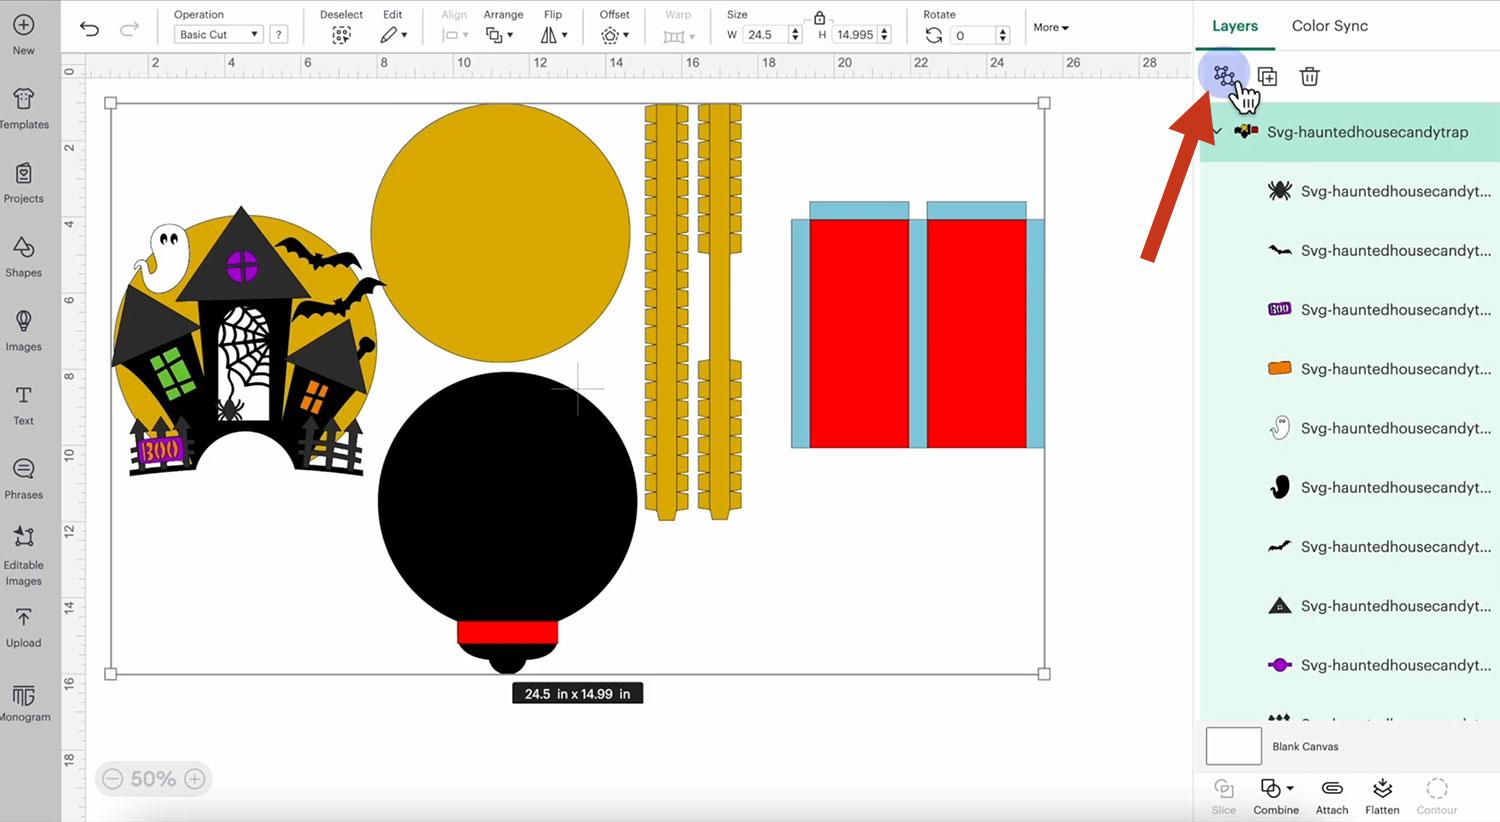
Ungroup the whole project so that we can change some of the cut lines to score.
Select the two matching-sized red rectangle layers and change them to a Score line in the Operations dropdown. You will now have dashed lines instead.
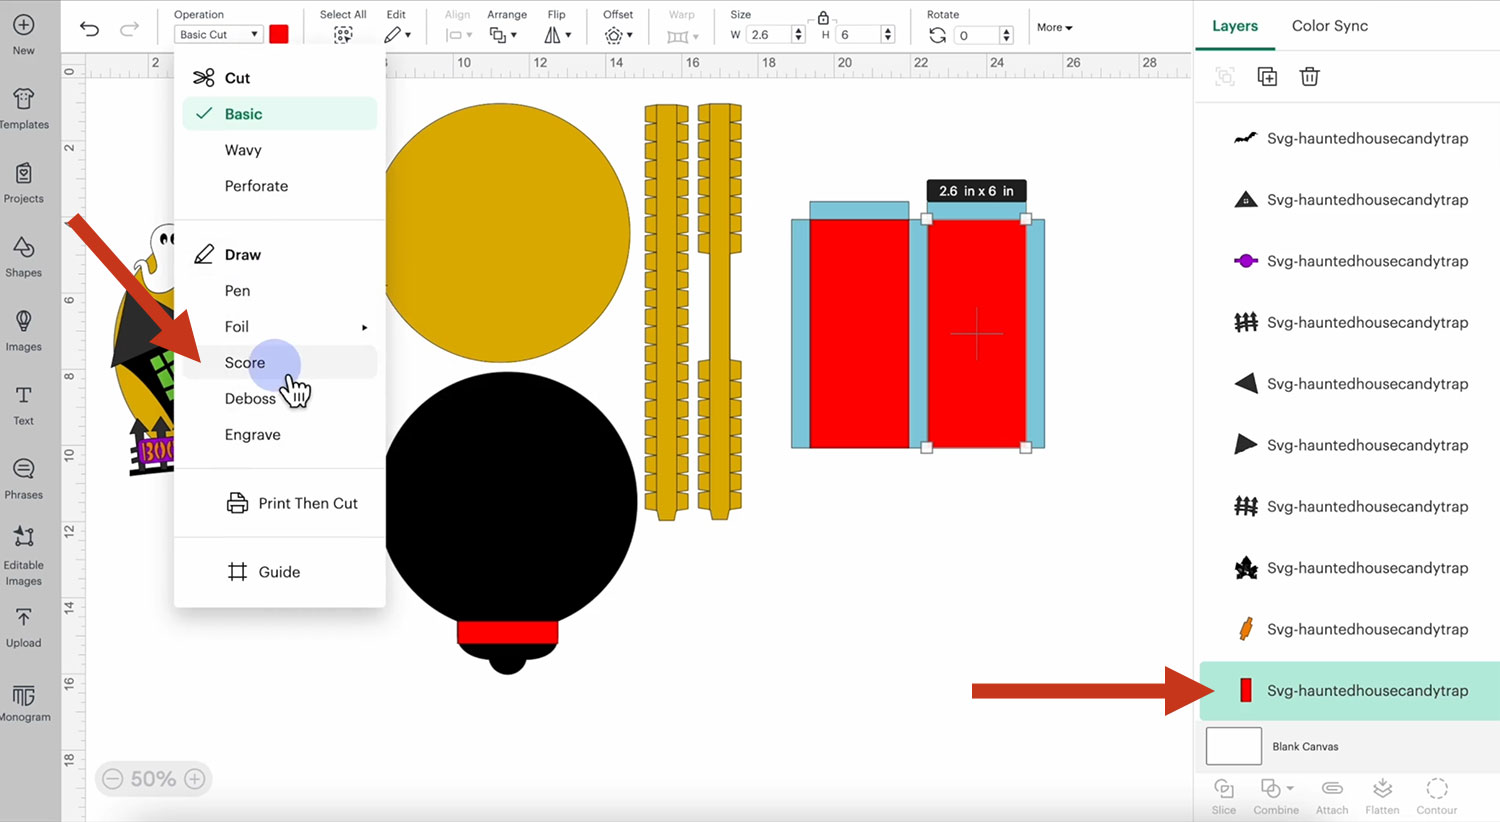
Select the rectangles that you’ve just set to “Score” and the blue layer underneath them. Press Attach to make sure the machine scores on top of the blue shape.

Repeat the step for the other red rectangle that’s on the black circle shape.
It will be hard to see the score lines once you’ve changed them as it’s black dashed lines on a dashed shape – but don’t worry, they are there!
Find the yellow strips and look for 4 vertical lines. You may need to zoom in when selecting them.
Select each of the lines using the shift key to allow you to select multiple and change the operation to Score.
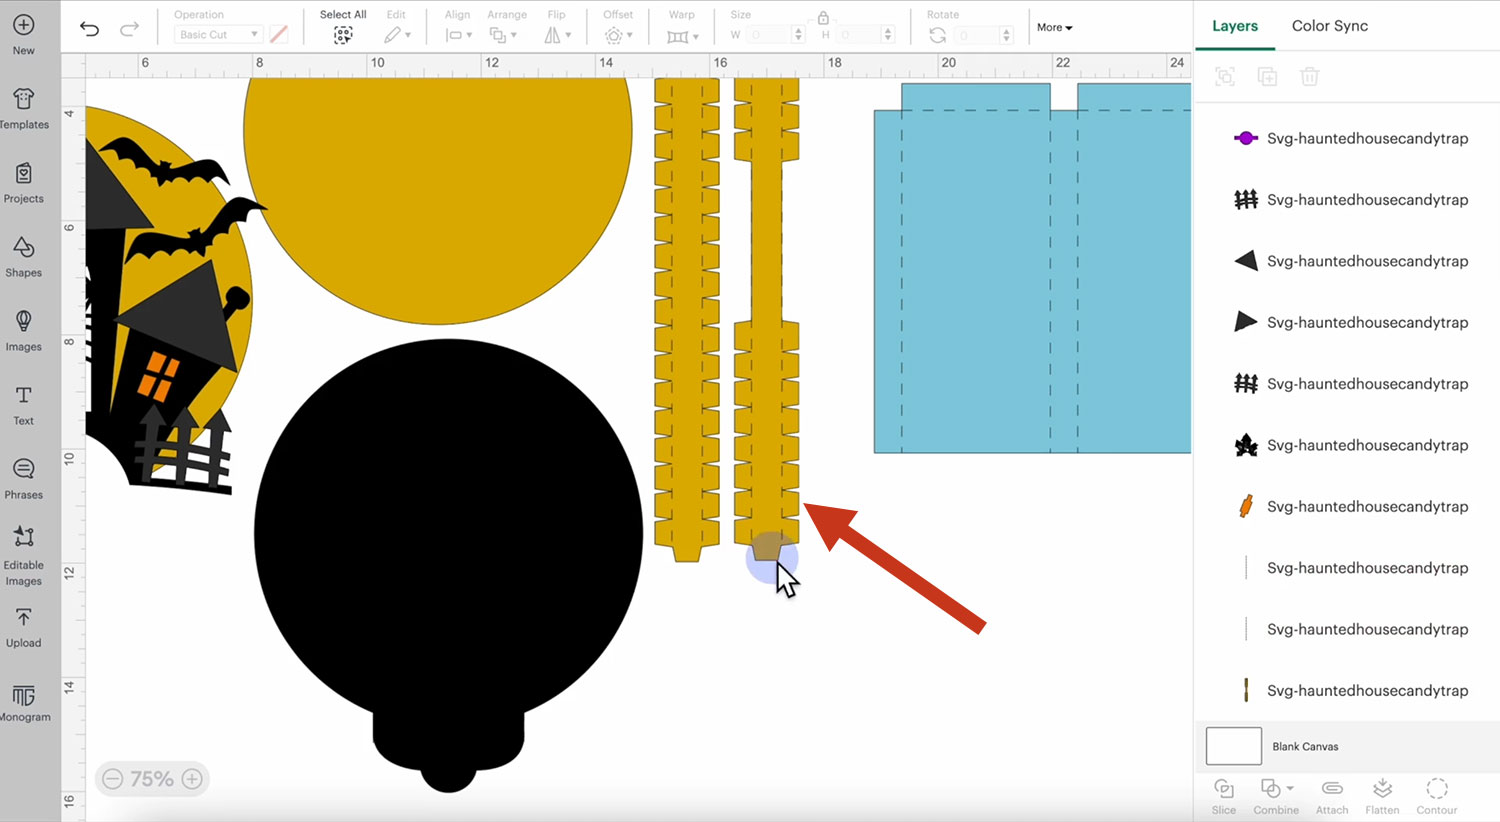
Select the yellow shapes and the score lines that sit on them and click Attach.

Step 3) Cut the cake topper
Click “Make It” and you will see the different mats with the different shapes on each mat.
You will see a blue mat with a square, this will be cut from acetate to form the transparent window on the cake topper.
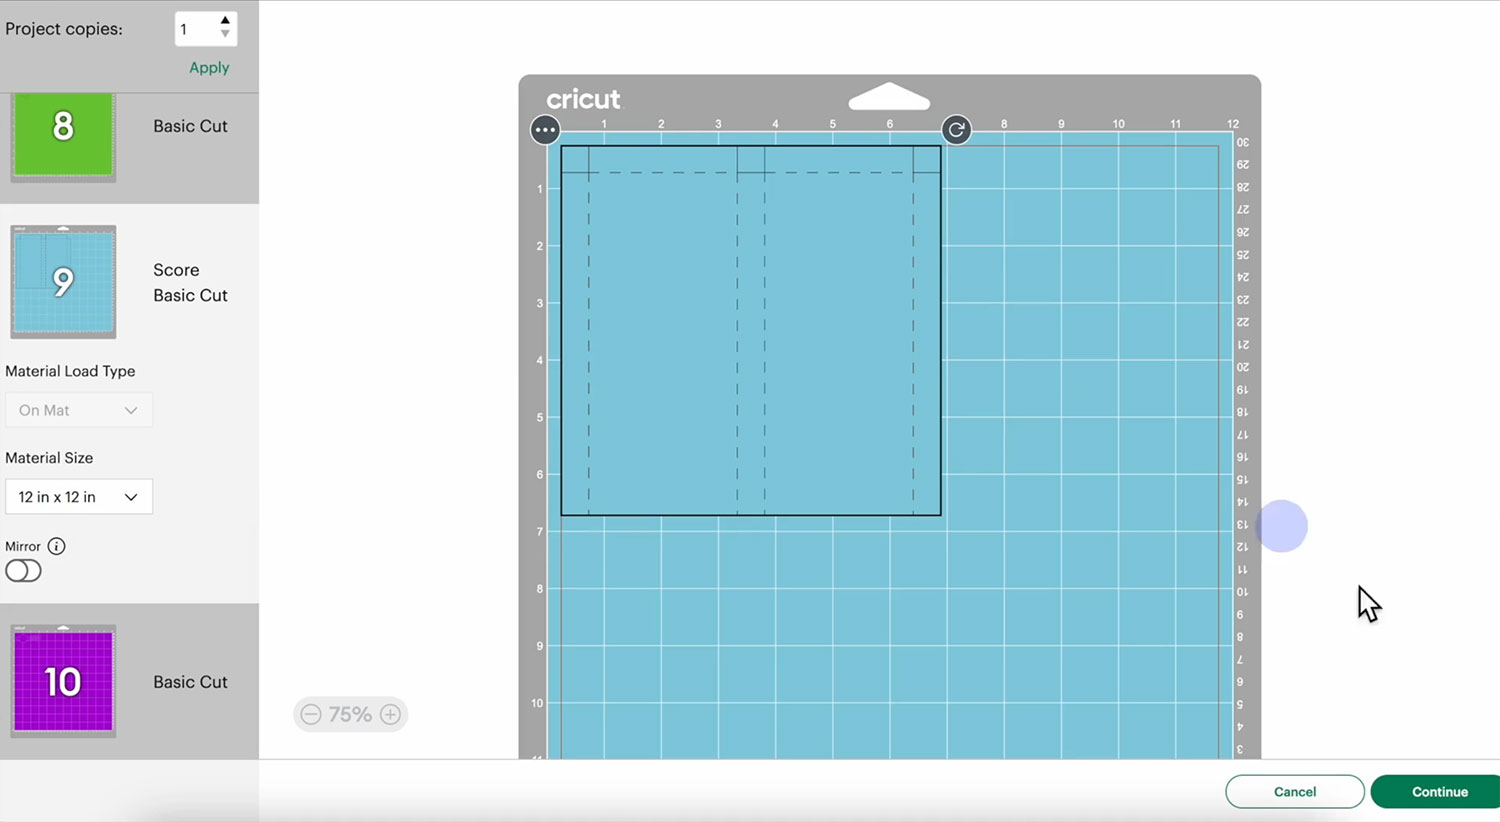
Double check the colours and that your score lines were attached correctly.
When you’re ready to select your materials for the blue square layer, search for acetate and use the default setting.
Select your scoring wheel or stylus when prompted. Click edit tools to change it from wheel to stylus if you need to.
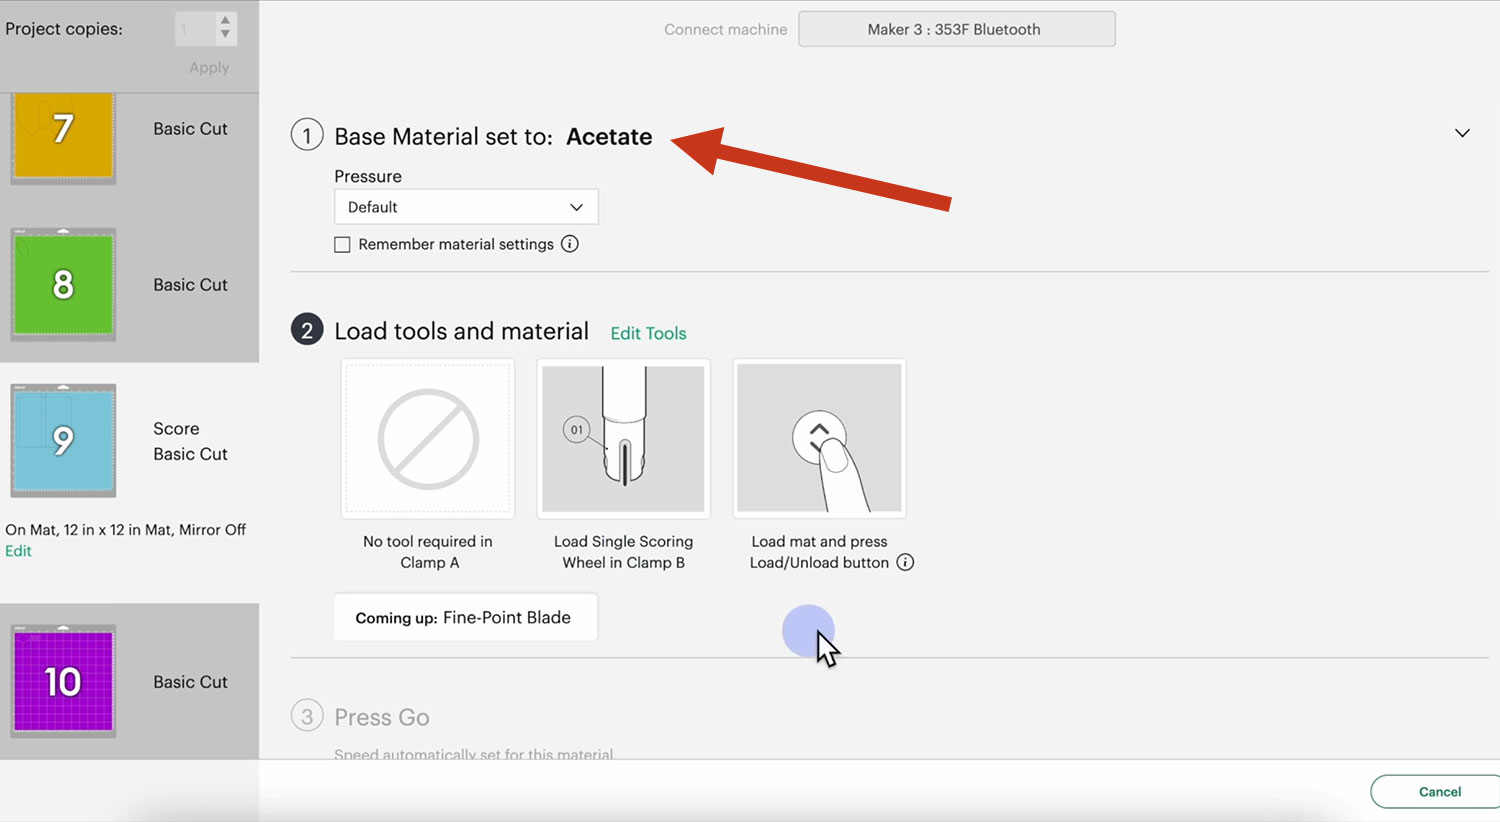
Follow the on-screen instructions and get everything cut out.
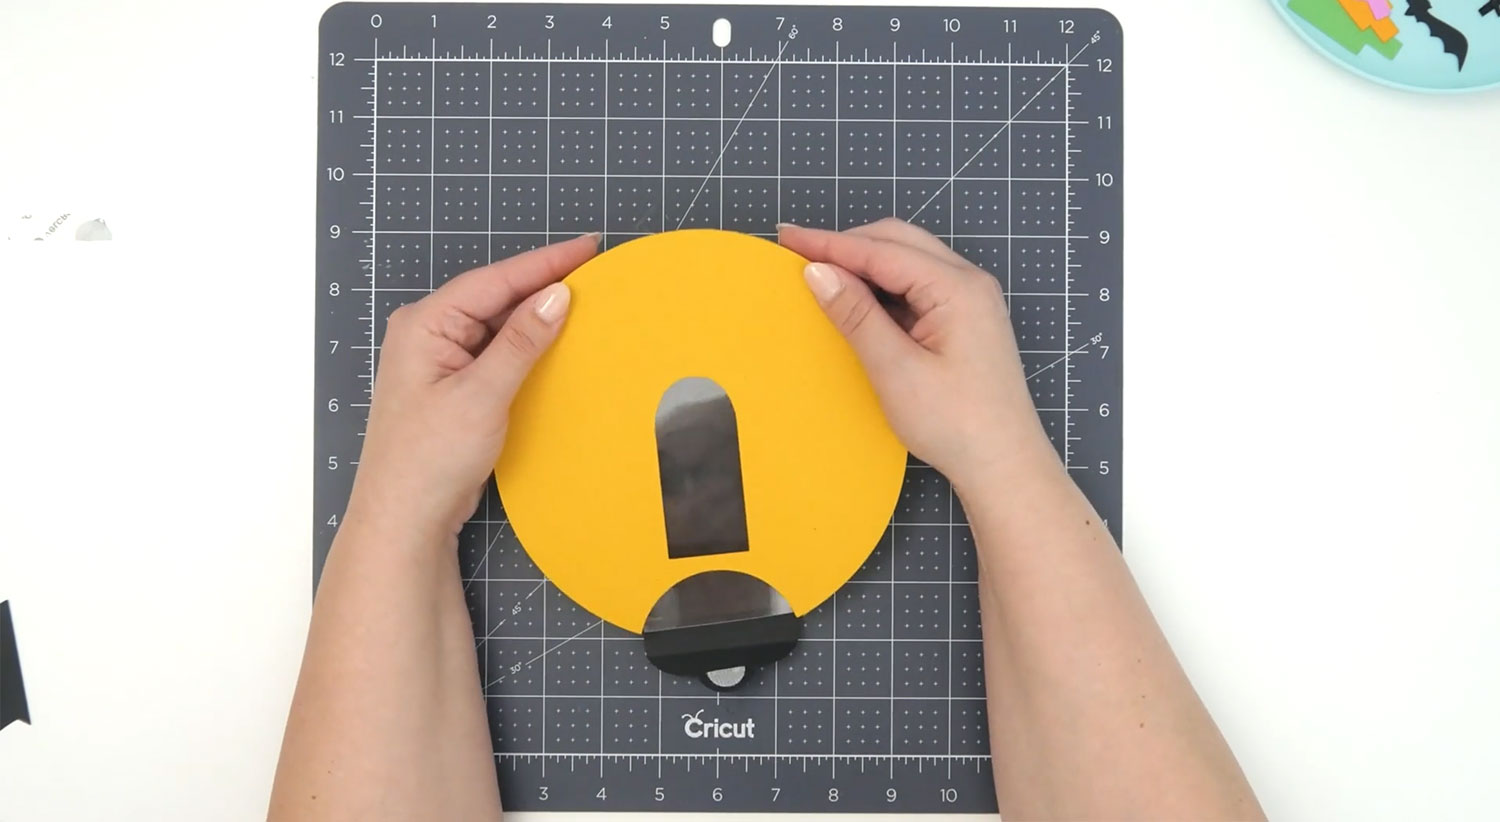
Step 4) Make the shaker cake topper base
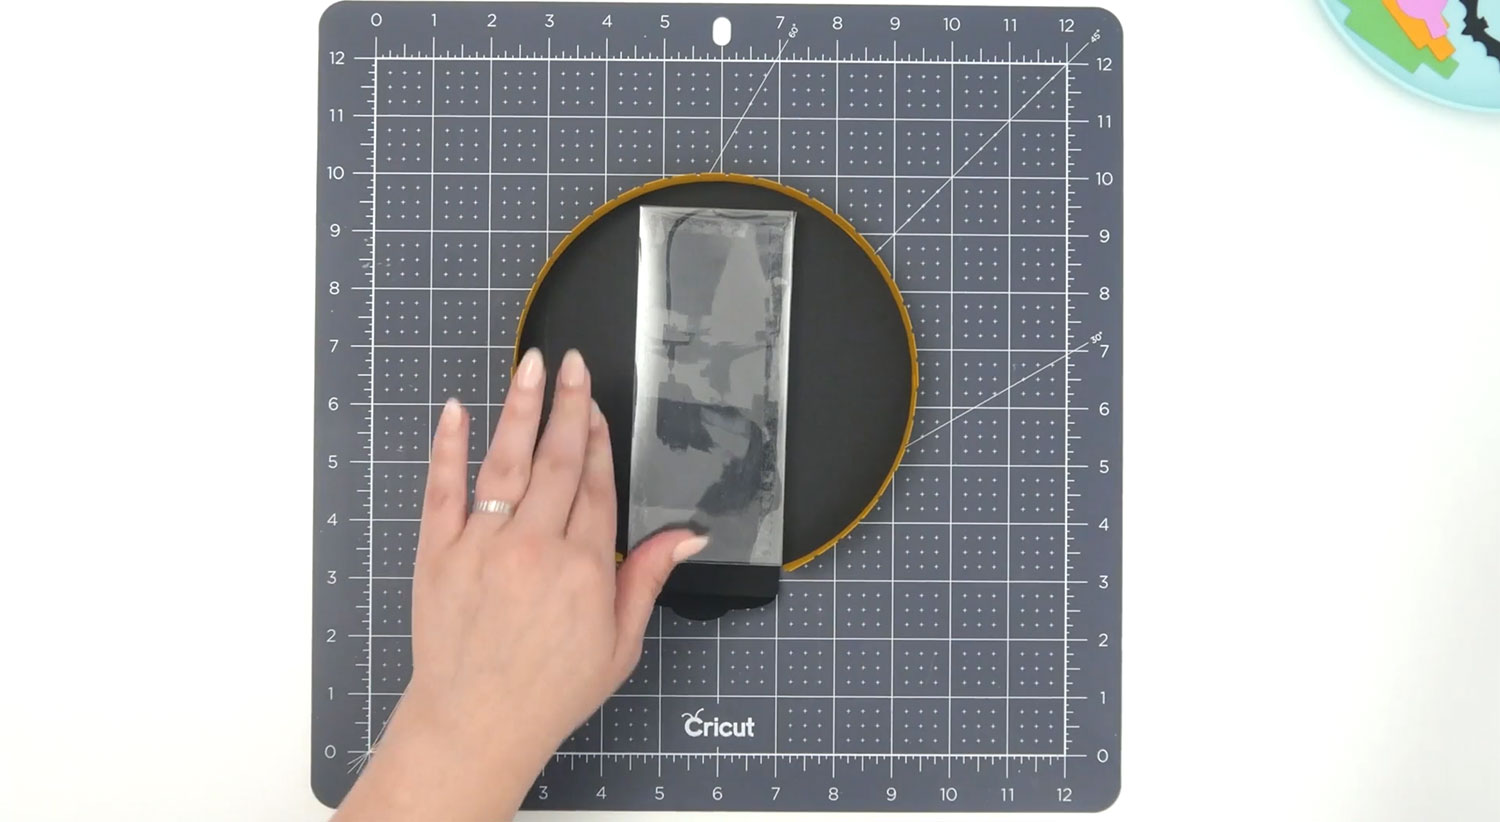
Starting with your paper strips, attach them both together using the little tab and some glue (they should be pretty side up).
You might want to use a Cricut mat or cutting board with guide lines to make sure they are lined up straight.
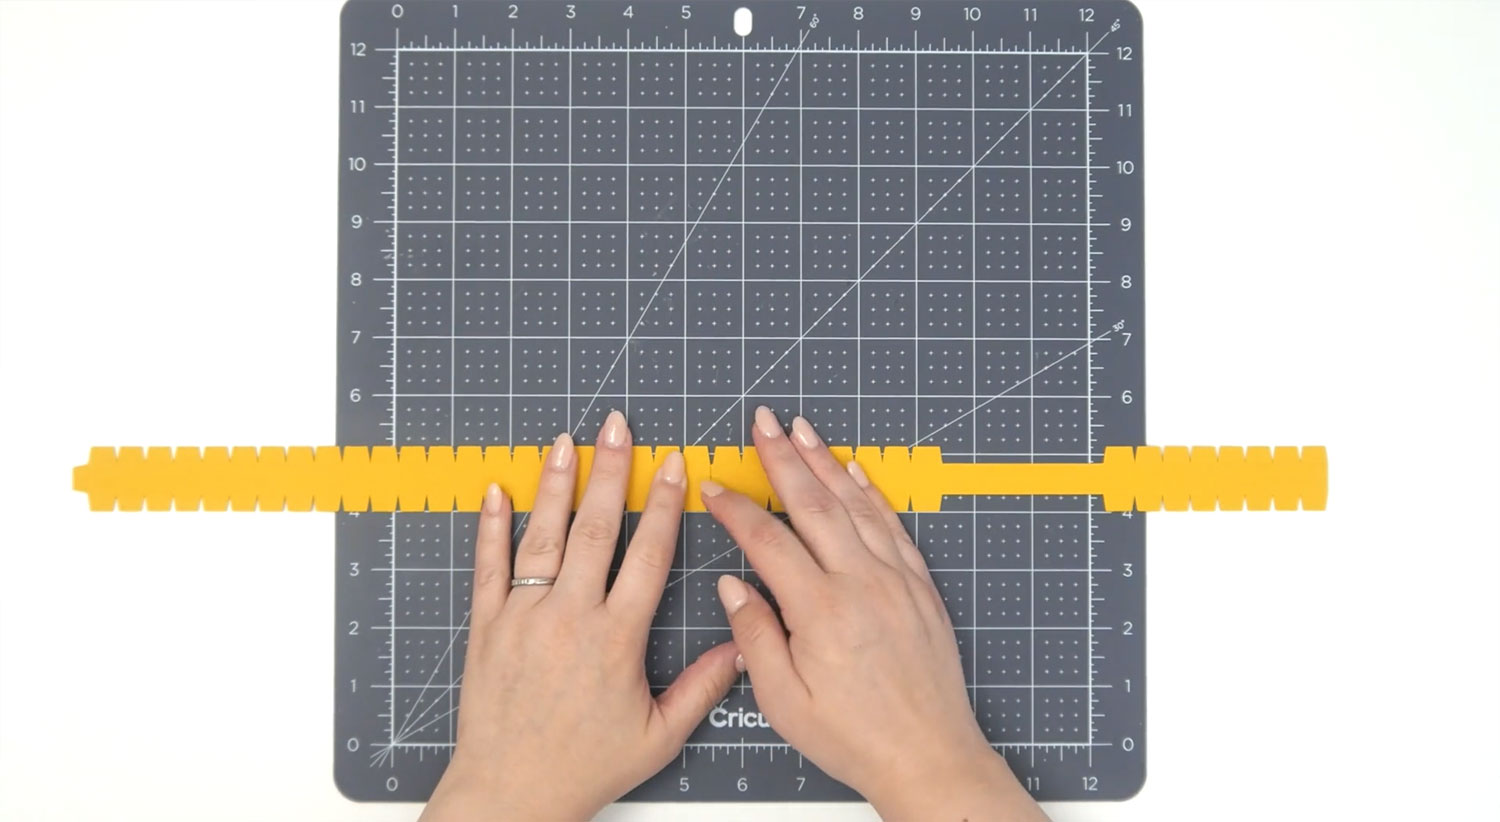
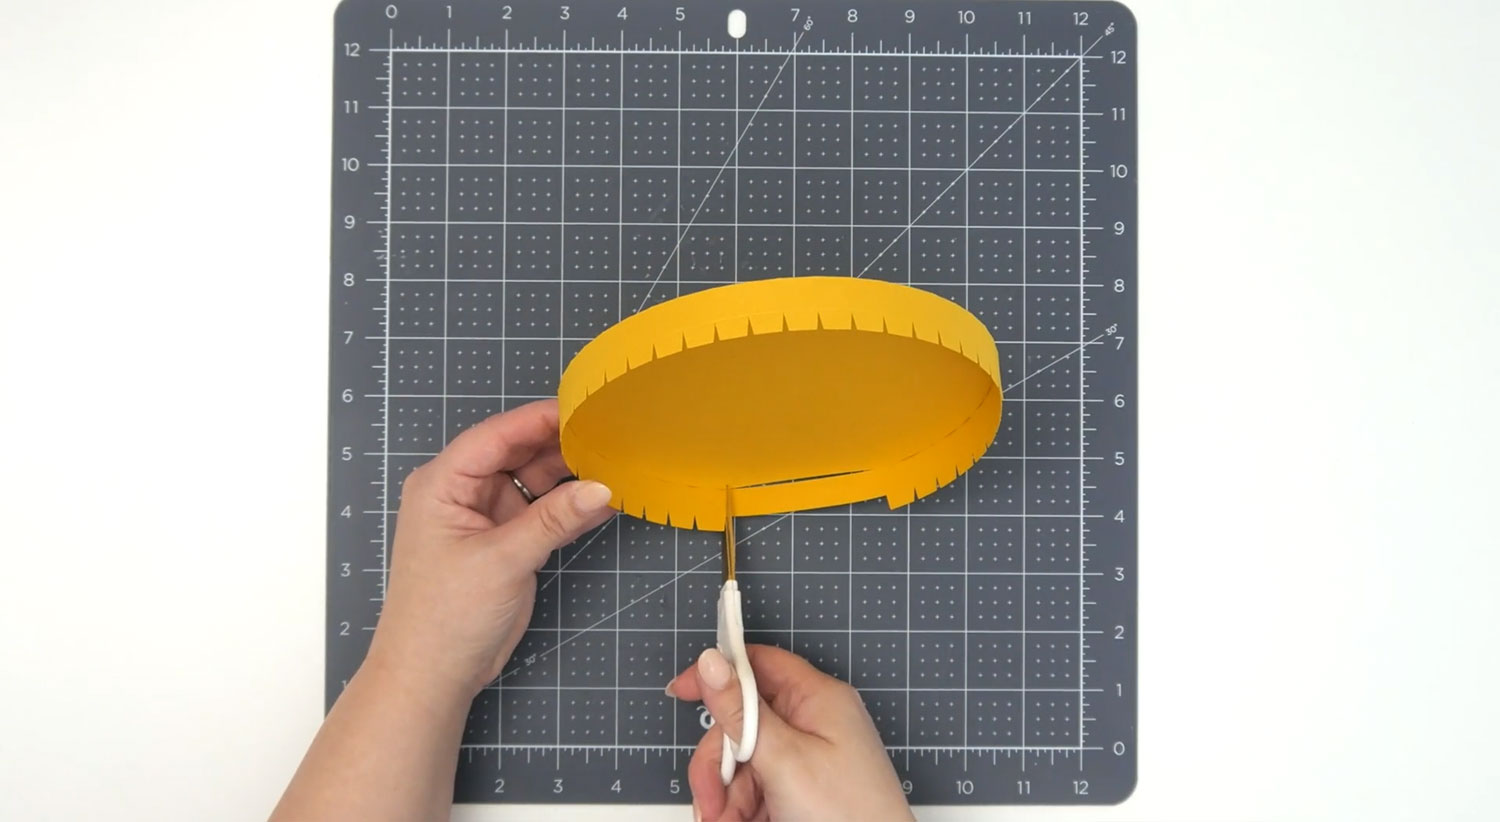
Once they have dried, fold all the tabs inward on one side only.
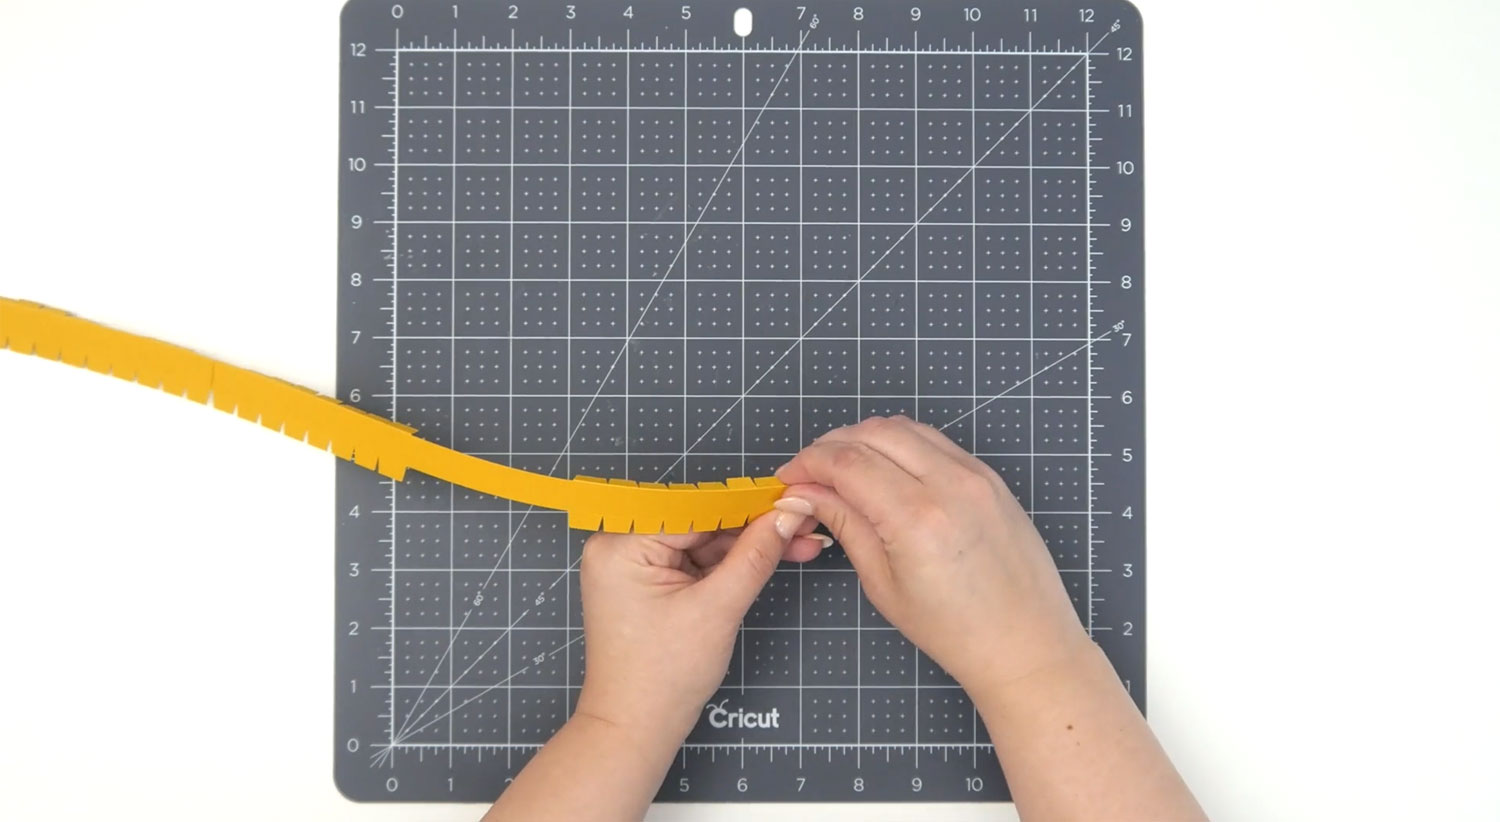
Curl your strip around to make a circular ring.
Add glue to the tabs on the other side and allow the glue to dry so that it holds its shape.
One side will be folded in and the other will have the tabs up.
Add glue (use slower drying than hot glue) around all of the tabs.
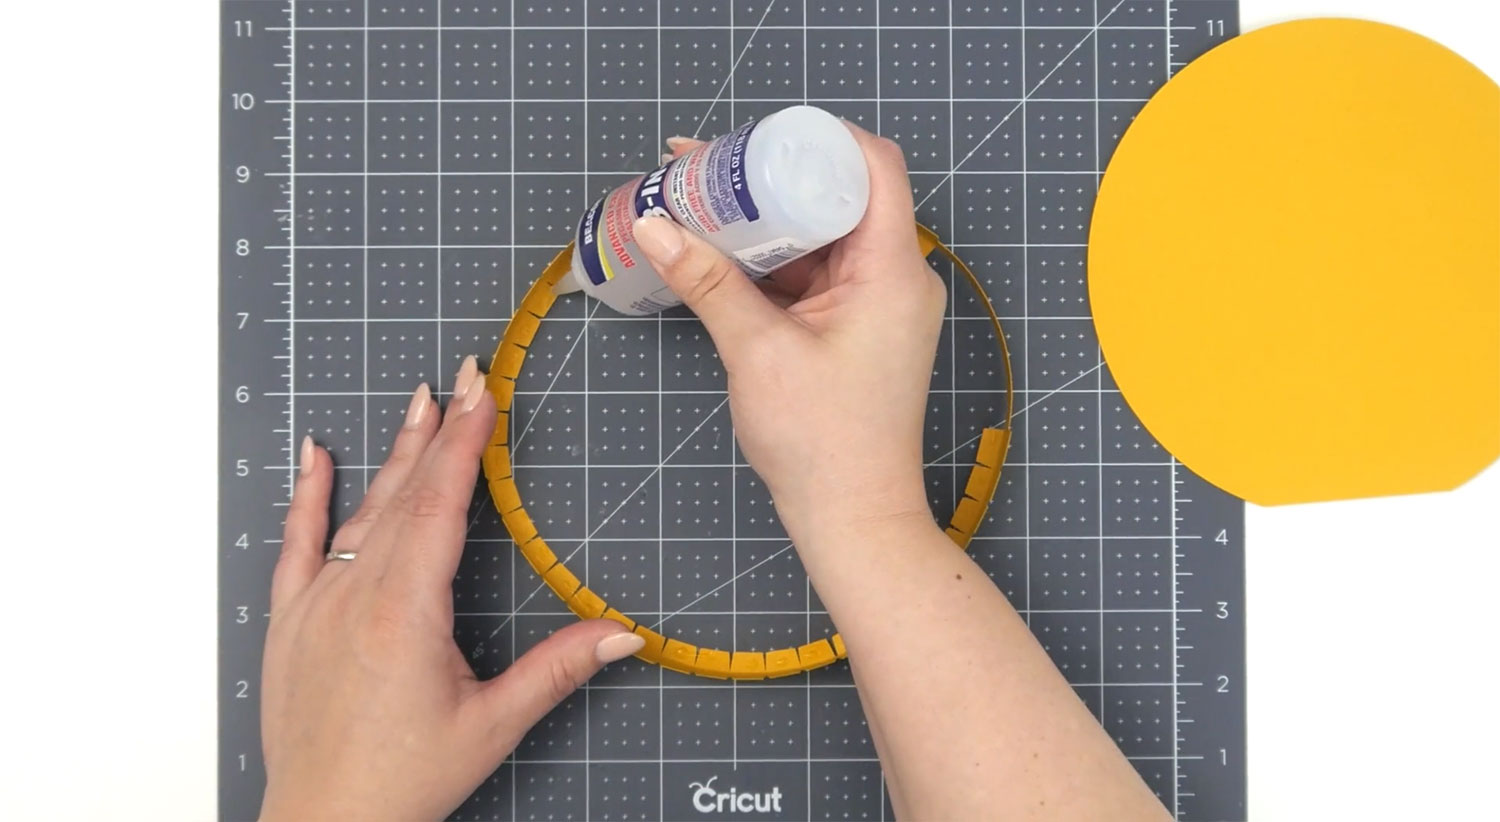
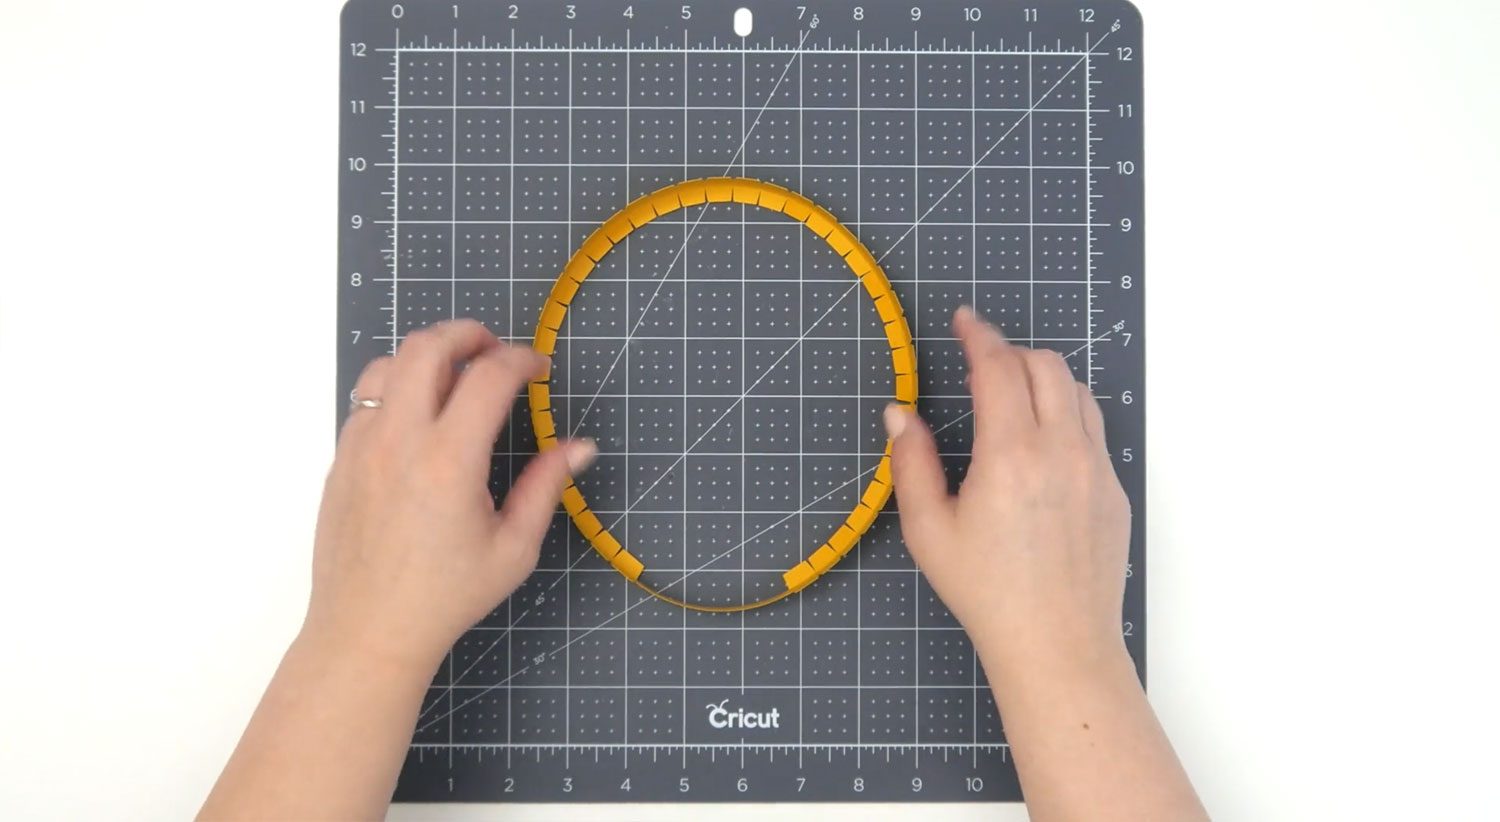
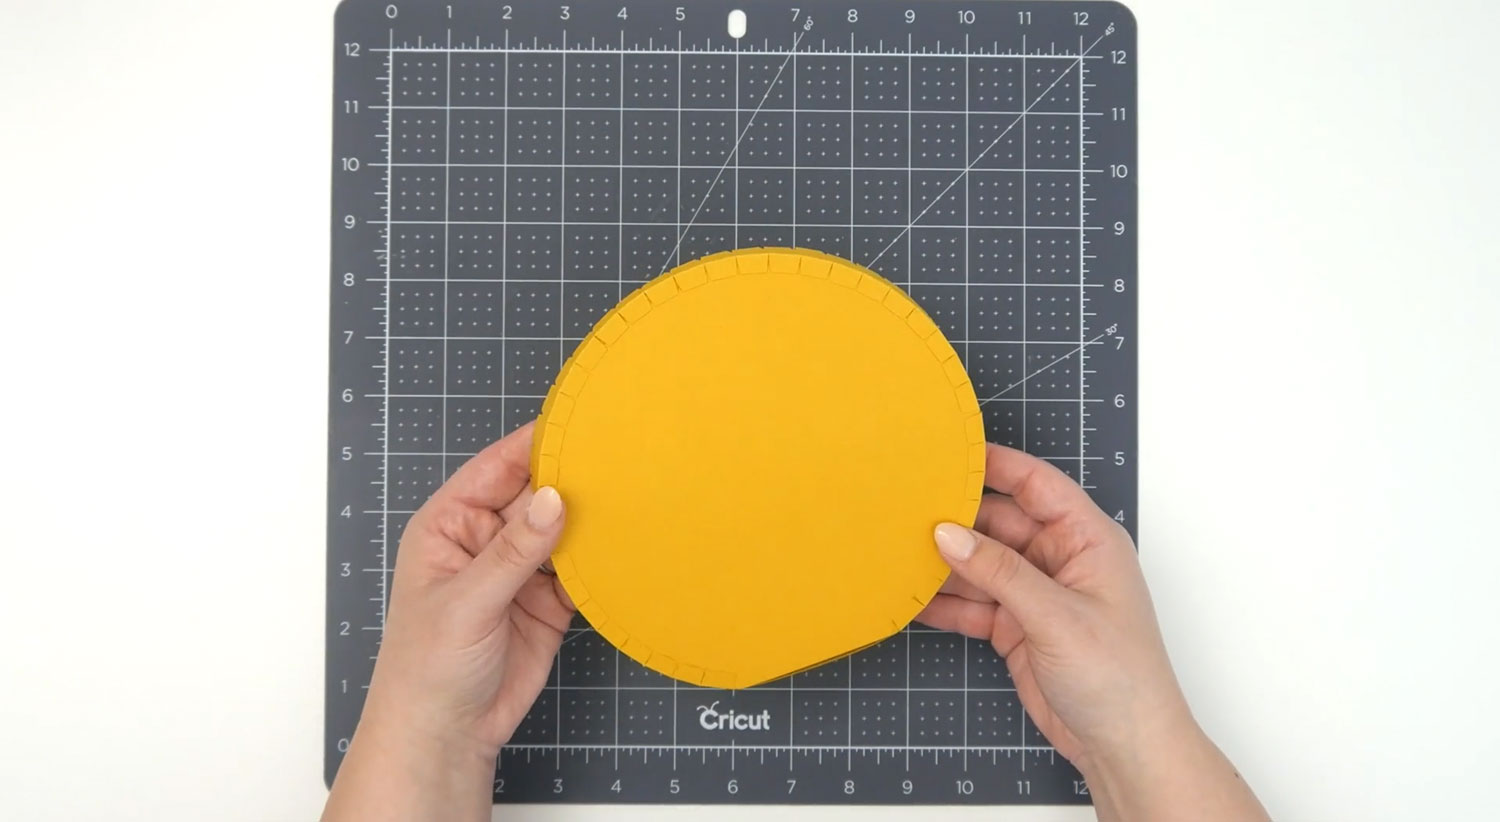
Stick the yellow circle on top. Use a bone folder or similar to make sure it’s really well stuck.
Turn it upside down to check that all the tabs/edges are stuck down flat.
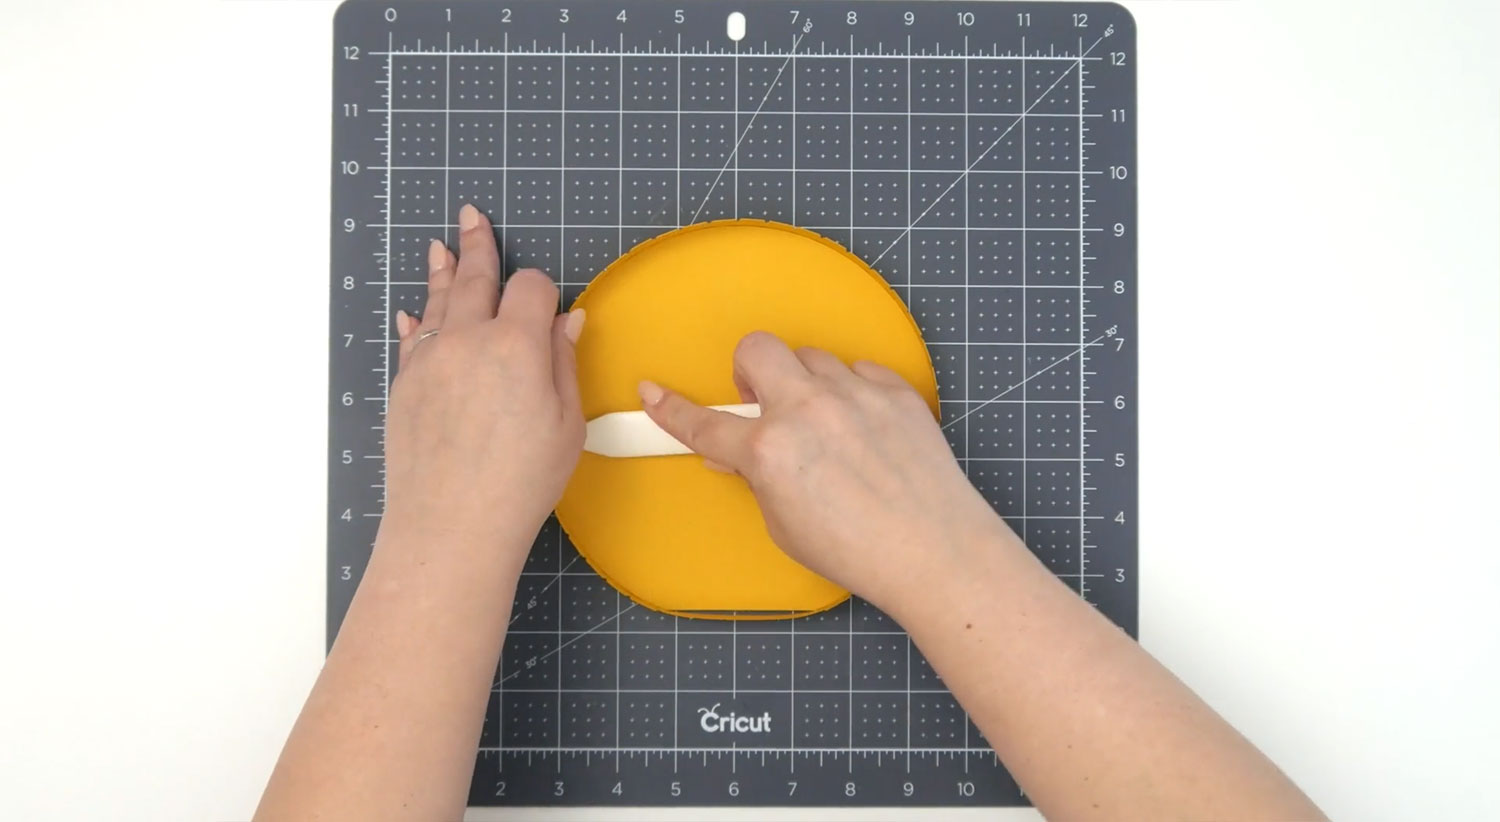
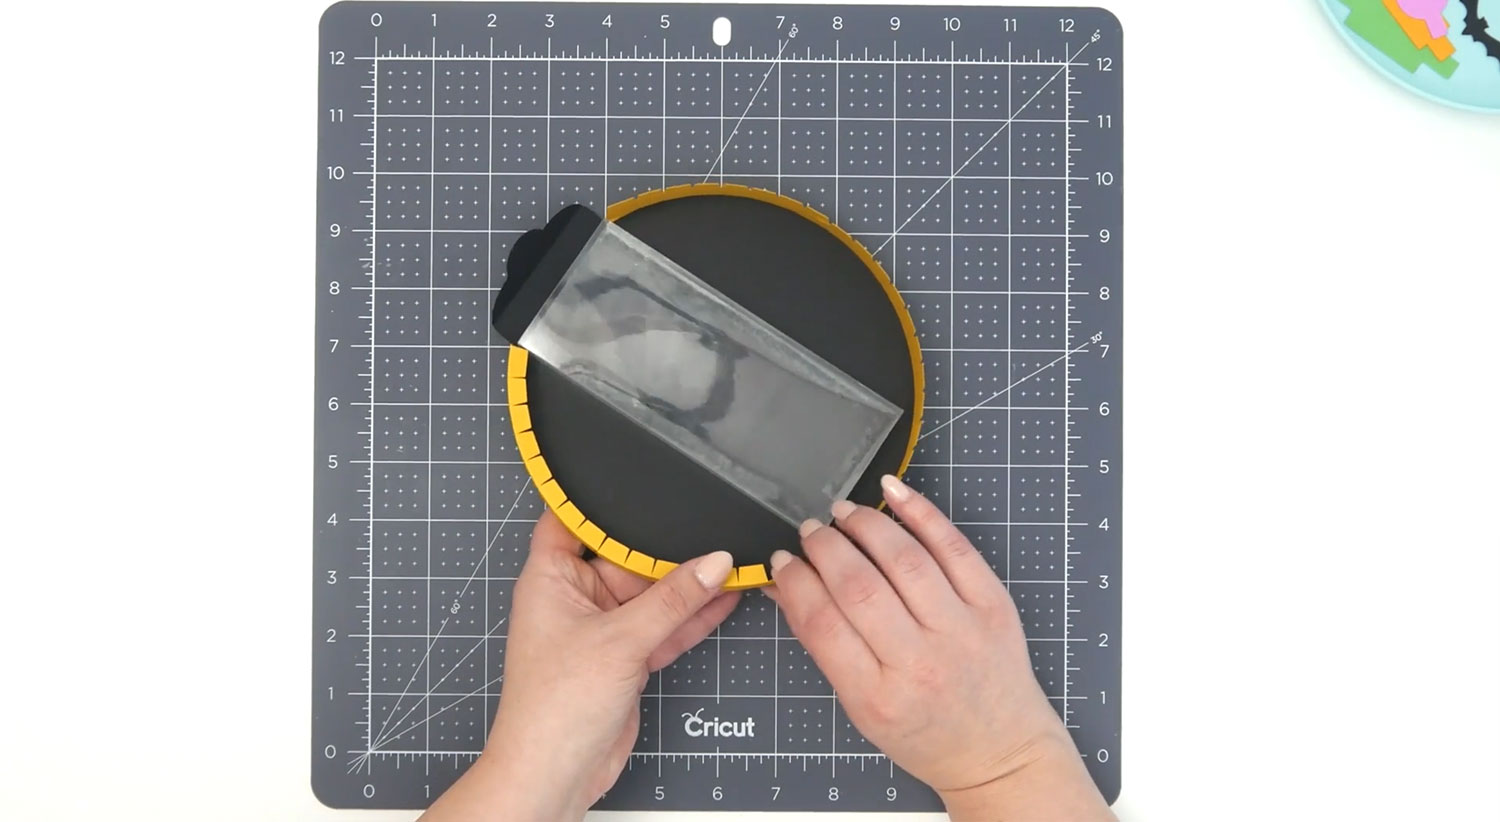
Grab your scissors and cut the straight, tab-less section in the strip on each side so that the piece comes away, leaving a gap. This is where your candy will be able to fall out.
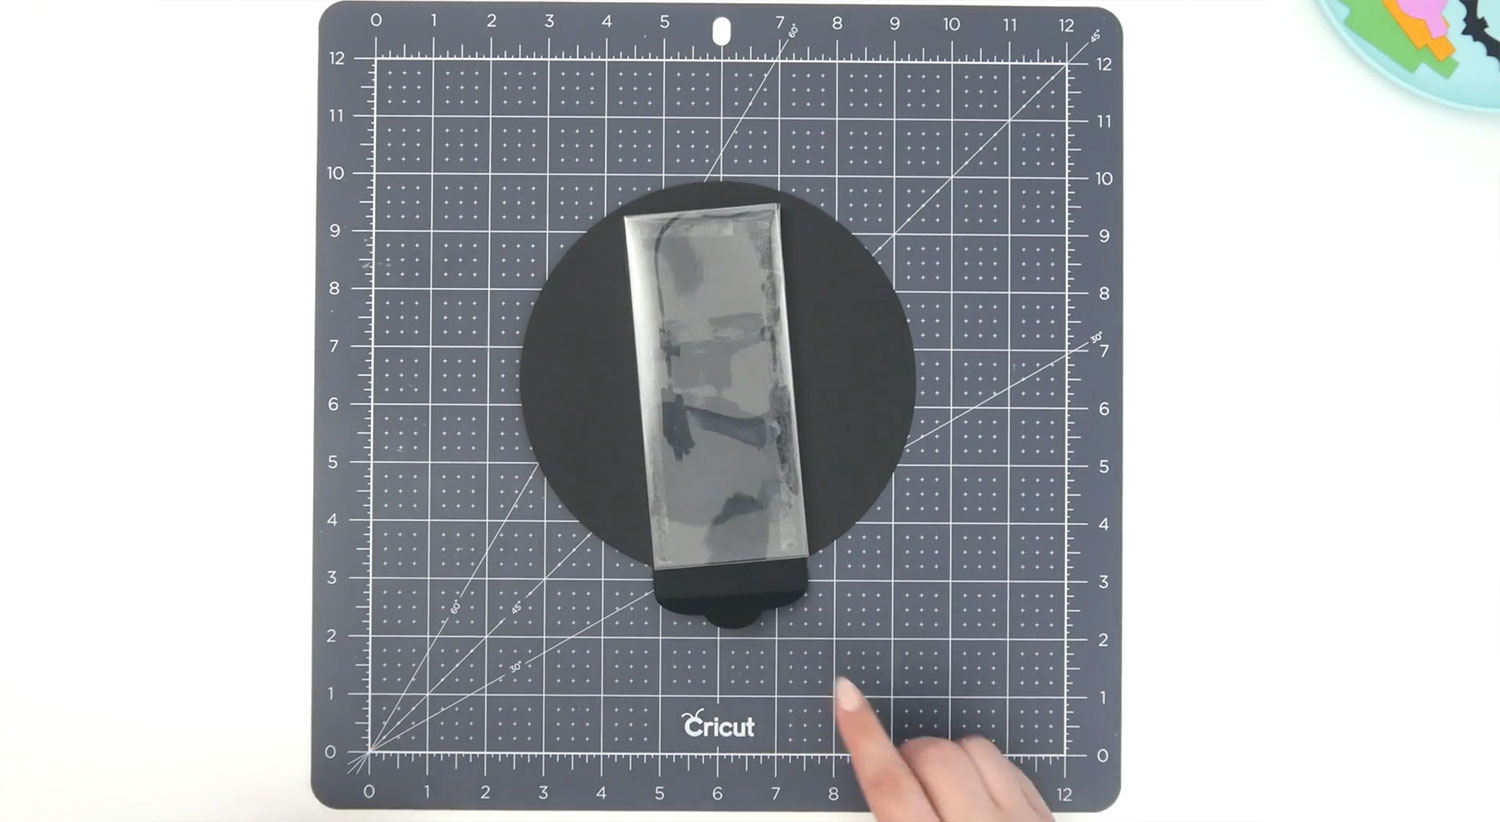
Get your acetate and fold the score lines which will start to make a little candy box. One side of your candy box will be open so that you can fill it up with sweet treats. We will cover the open side later.
Use your alcohol wipe on the inside of the box to clean it ready for the candy. This will also remove any residue from the Cricut mat.
Fold in all the edges and use double sided tape along the edges to attach it together. You can use glue but I wouldn’t recommend hot glue as it might distort the plastic.
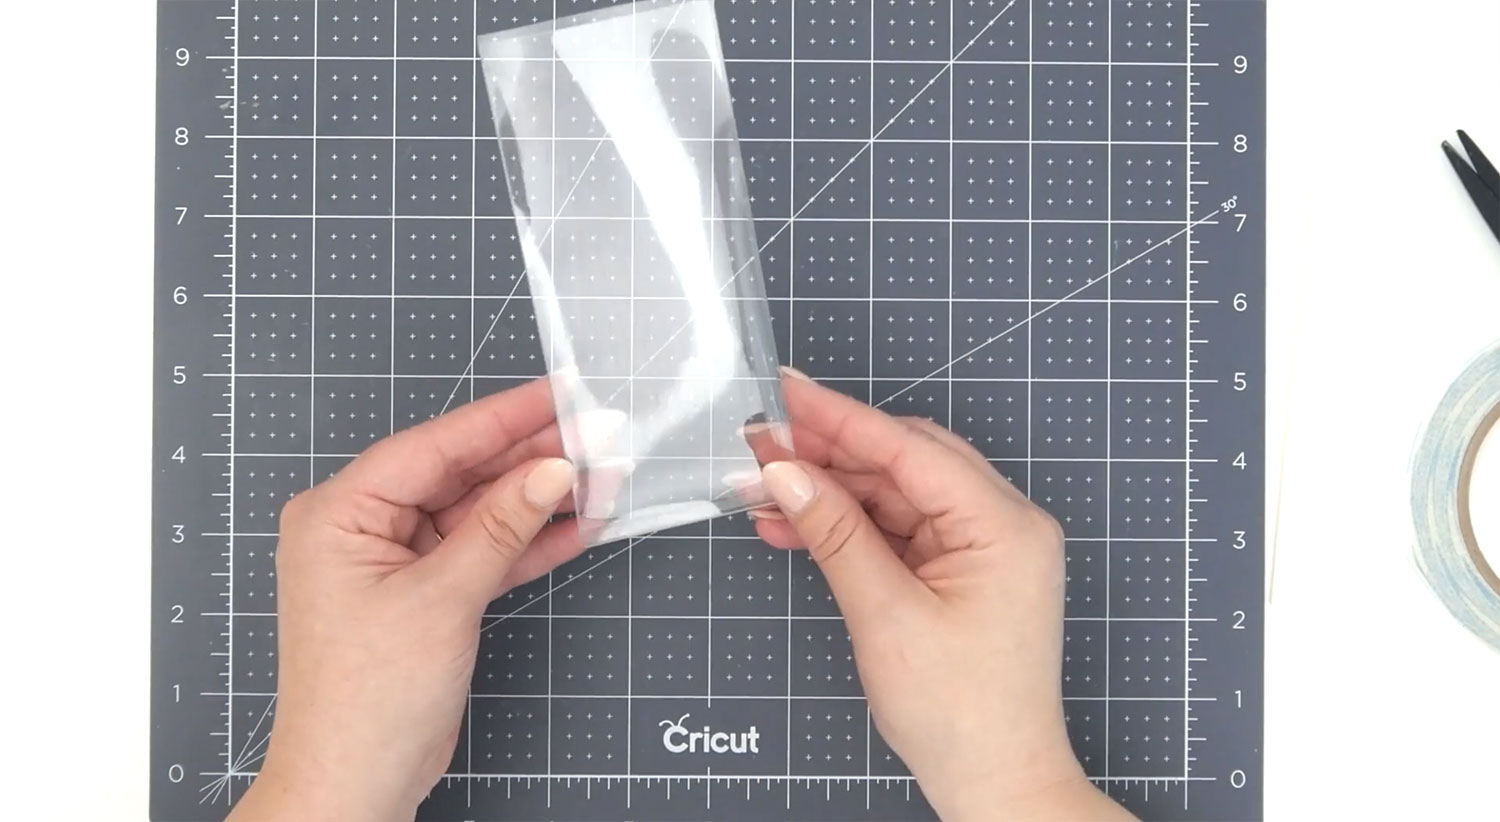
You will be left with a long, narrow and skinny box.
Find your black piece of card and fold along the score lines.
Add the acetate box directly to the cardstock by lining up the open end of the box with the score line at the bottom and taping it slightly above or on the edge of it.
Keep your tape/glue on the outside edges so you don’t see it through the little window of the haunted house.
This will hold the candy box in place inside the cake topper.
The latch at the bottom will be able to fold over to close the box later on.
Next, glue the black piece inside the yellow base.
Fold the remaining tabs inwards along your circle.
Cut a small piece of Velcro and attach a piece to the latch. You will add the other half of the velcro later on.
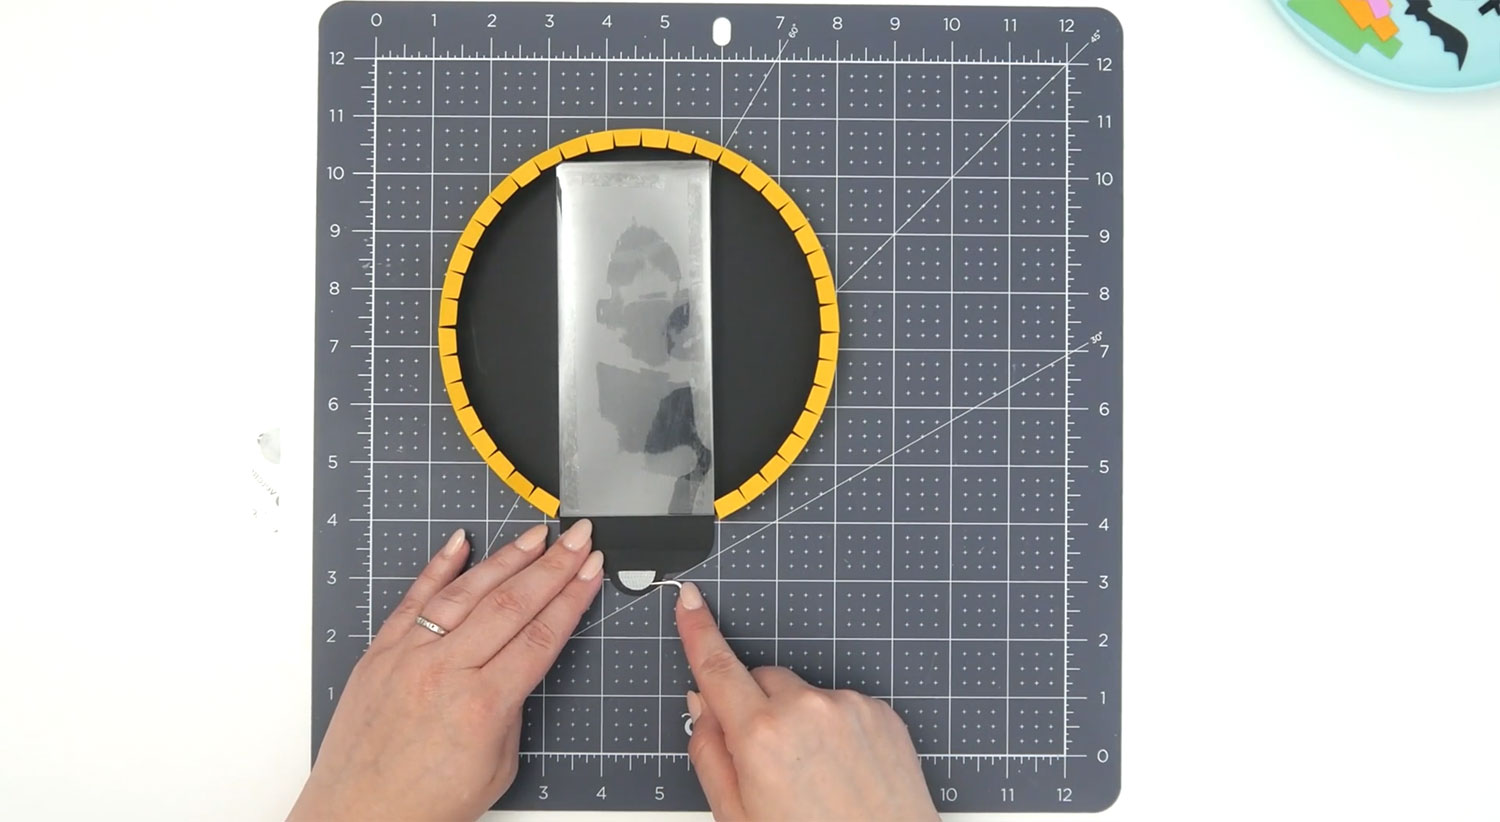
Glue all your tabs so that you can seal your candy box inside with the yellow circle.
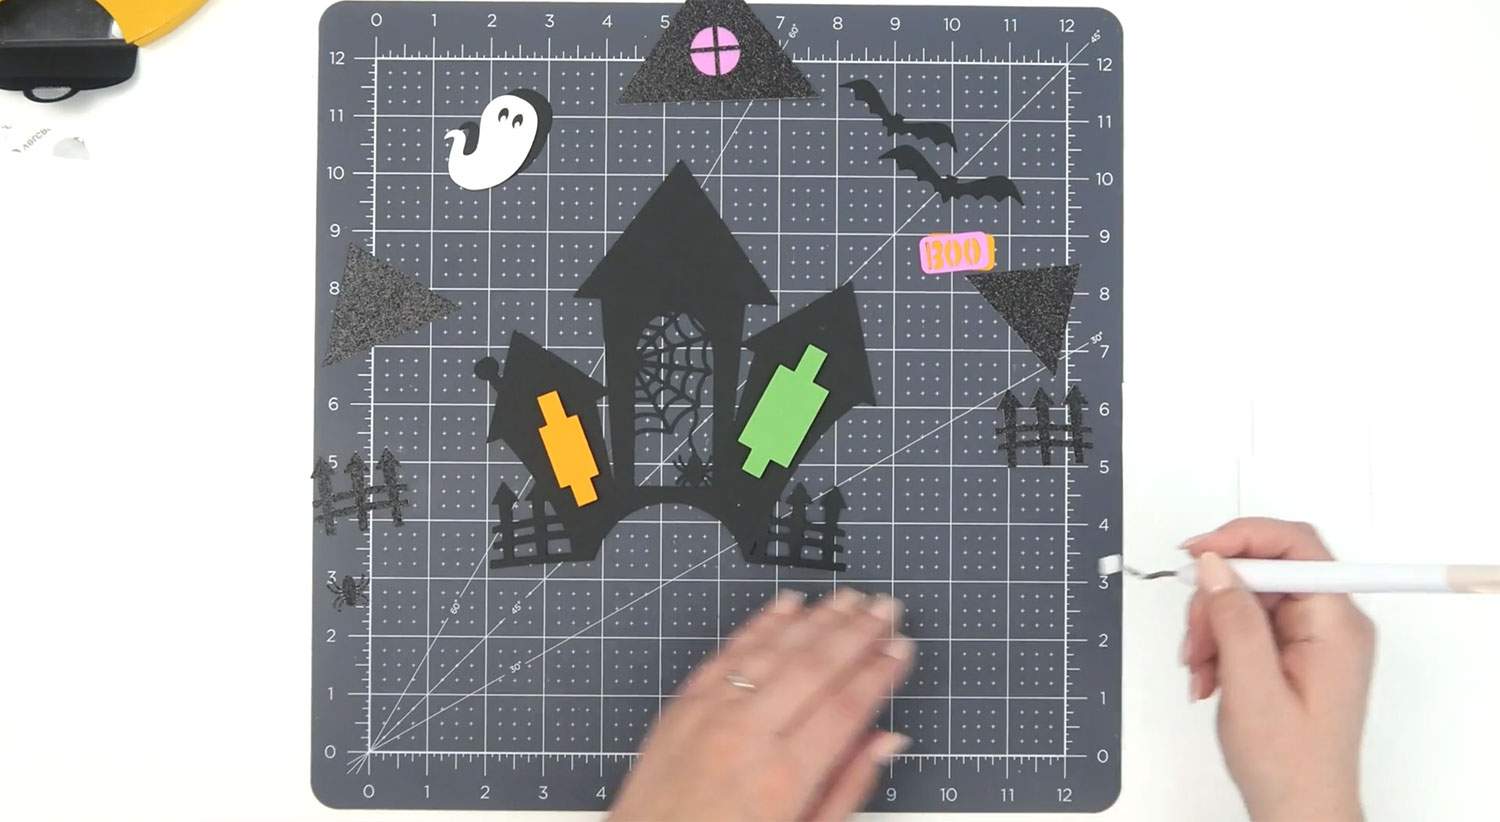
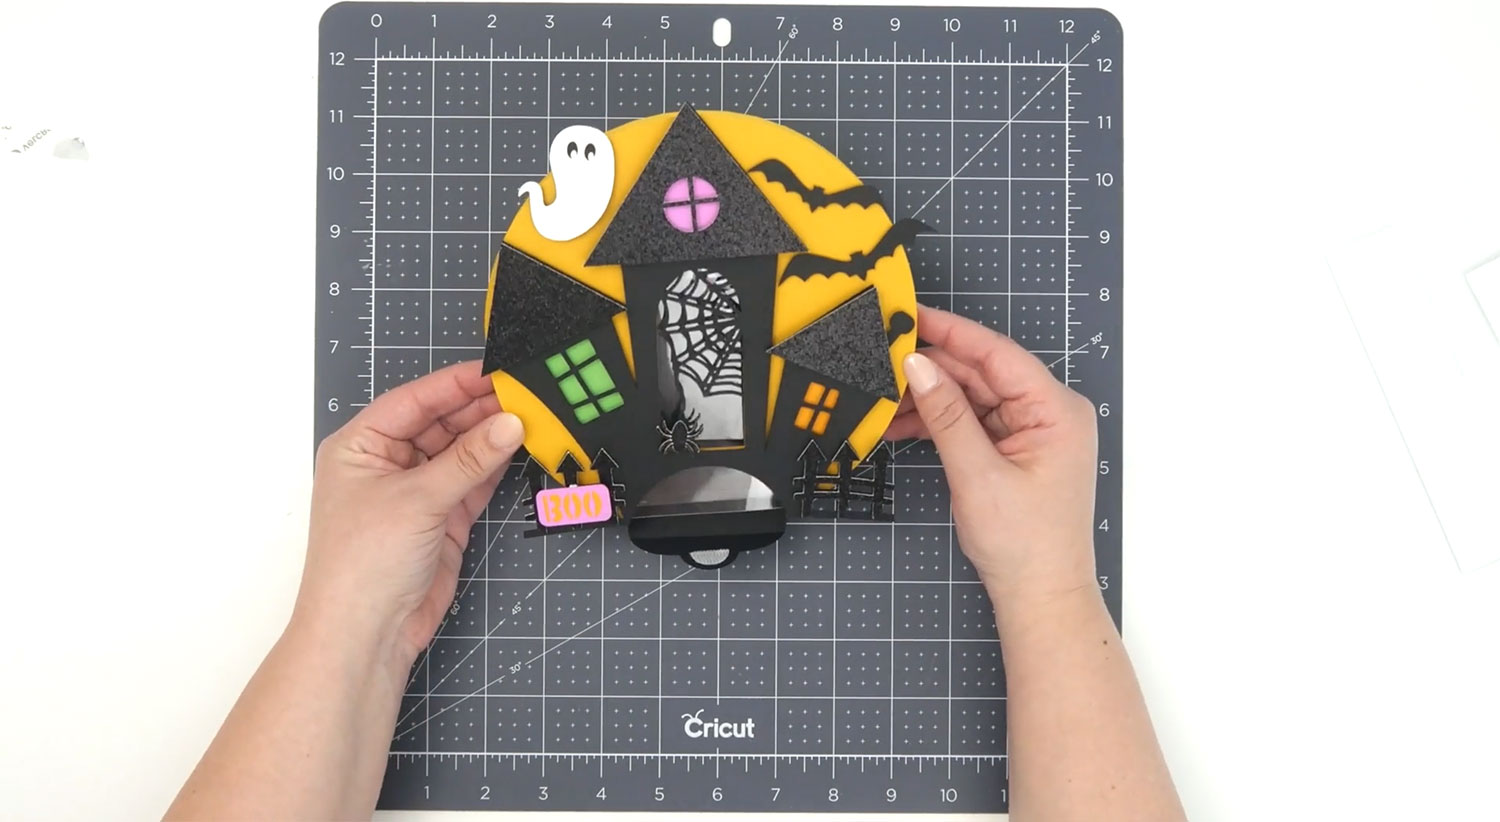
Step 5) Decorate the cake topper
Gather the pieces for your haunted house and dry assemble everything so that you are happy with all the pieces and where they go.
The coloured shape pieces go behind the windows and have little tabs on them for if you choose to use foam squares on them.

Glue or foam the coloured pieces to the back of each window.
Add foam squares to the back of the house and attach directly onto the base section with the candy box.
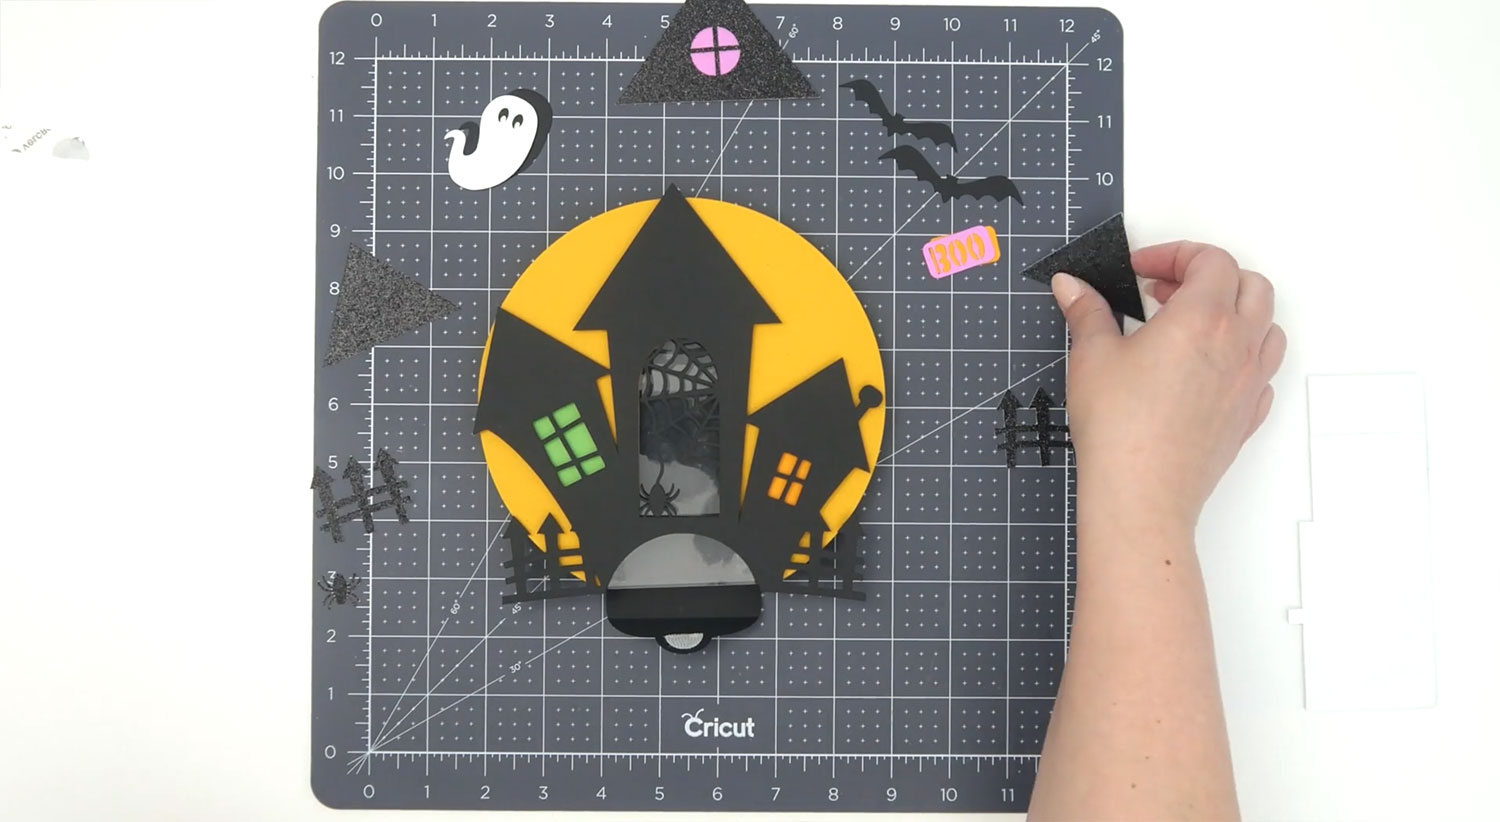
Foam the rooftops to the two outside tops.

Foam the spider at the bottom of its web on the middle house section.
Apply thin pieces of foam tape or glue to the fence pieces and add them to their spot.
Glue the ghost to its black back piece and foam it where you wish on your topper.
Glue the “BOO” sign to its backing piece and foam to the fence pieces (or somewhere else if you’d rather).
Foam or glue your bats to the space on the full moon base piece.
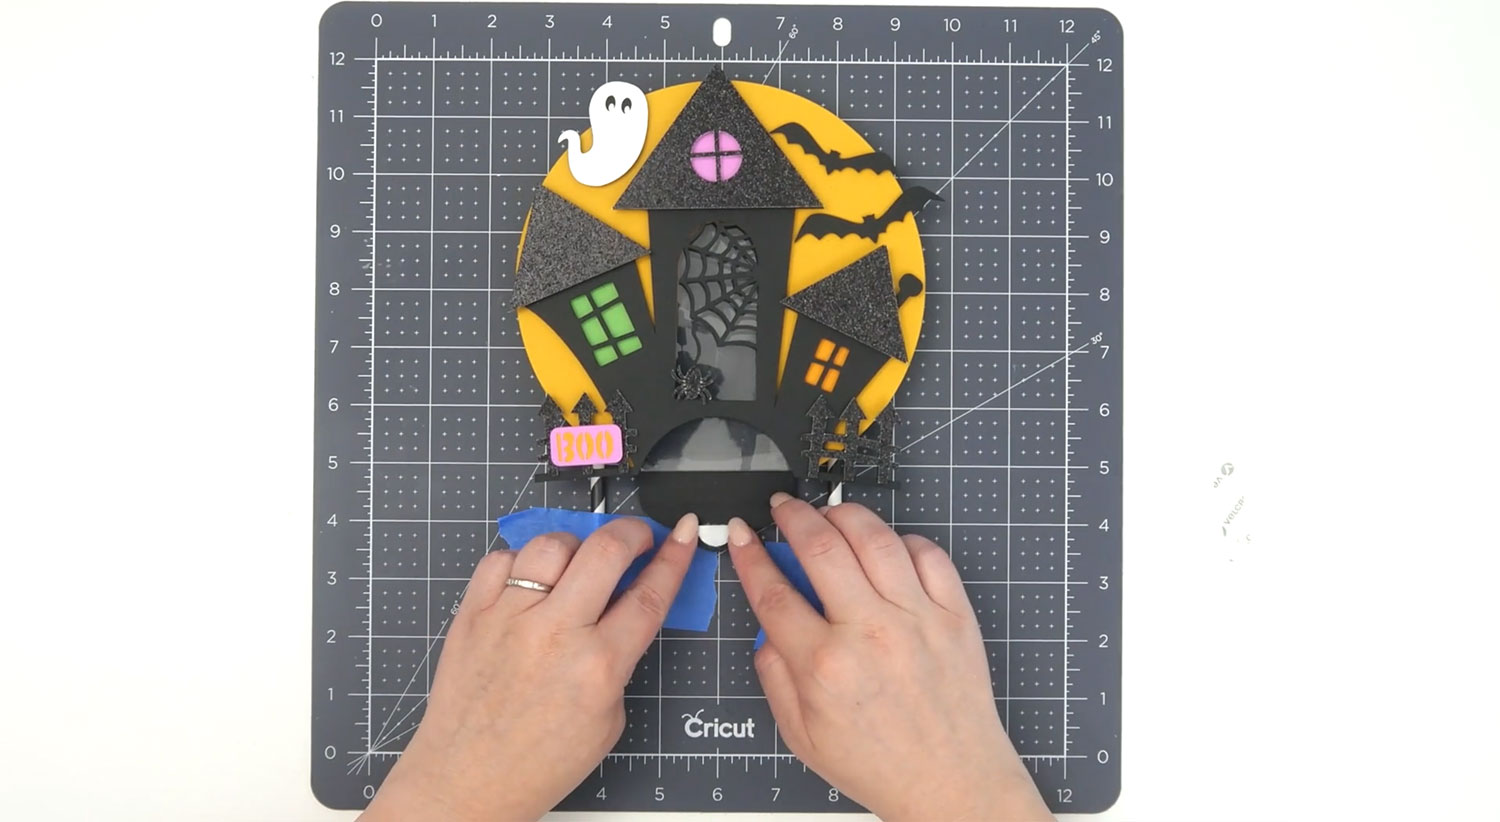
Step 6) Add sticks to the cake topper
To add the sticks to your cake topper, stick them to your craft surface 4 inches apart with a removable tape so that they are spaced correctly.
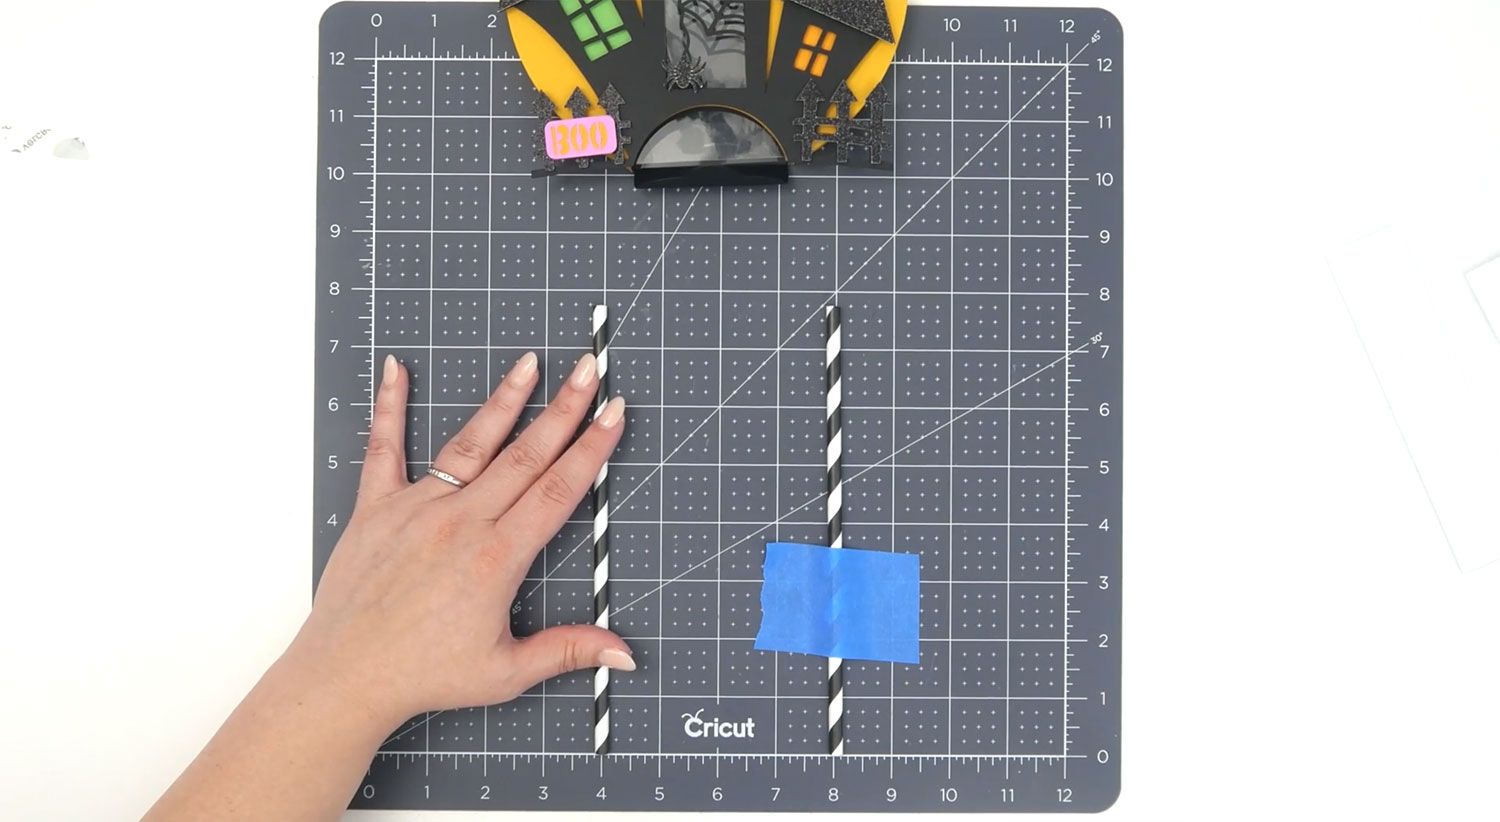
Use a hot glue gun to apply a line of hot glue to the straws and place your cake topper on top of the straws.
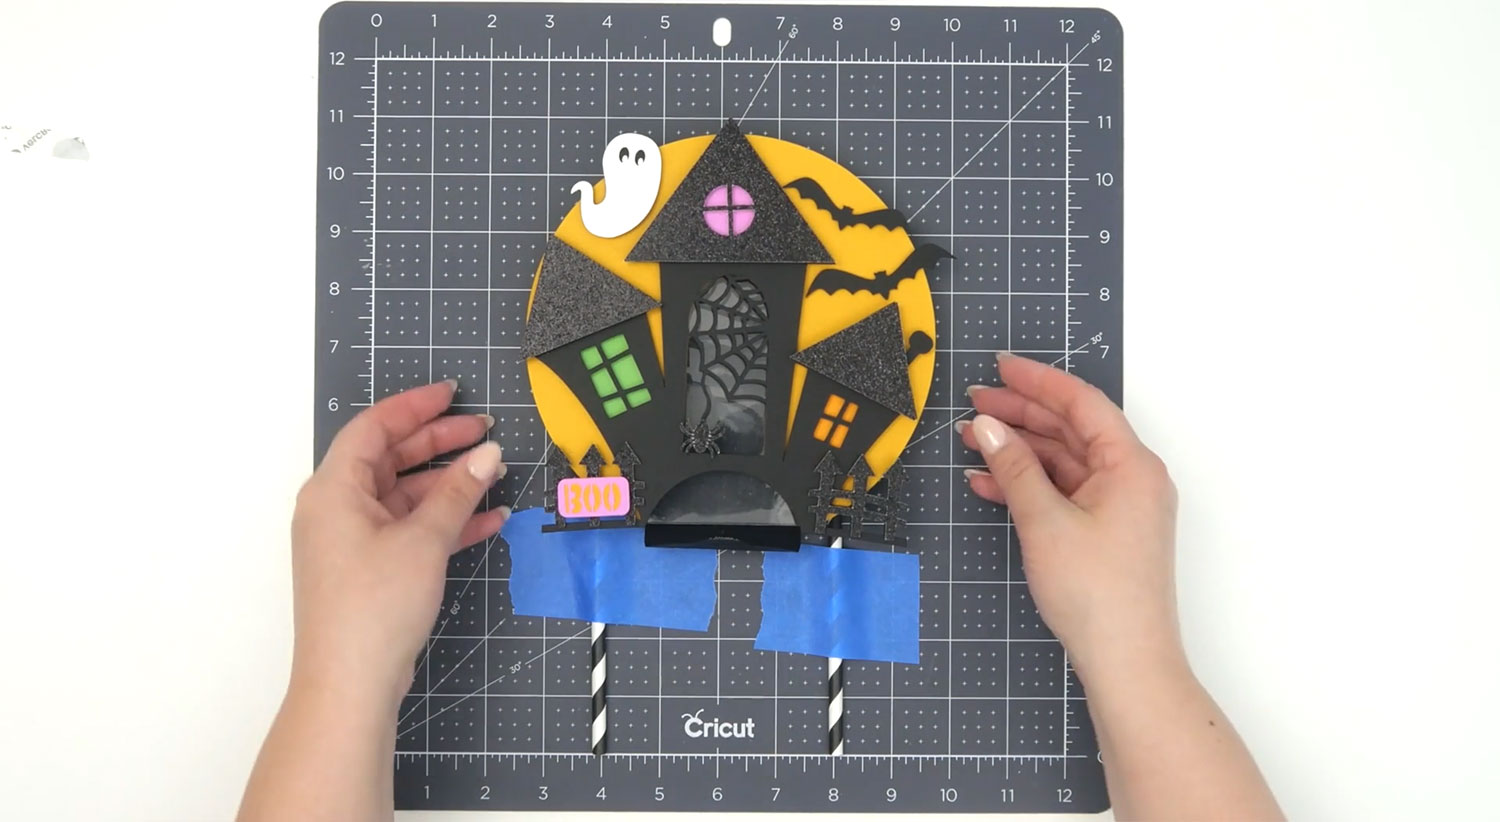
Whilst it’s drying, add the second piece of Velcro on its matching piece and remove the sheet so that it sticks to the acetate box as you fold the latch over.
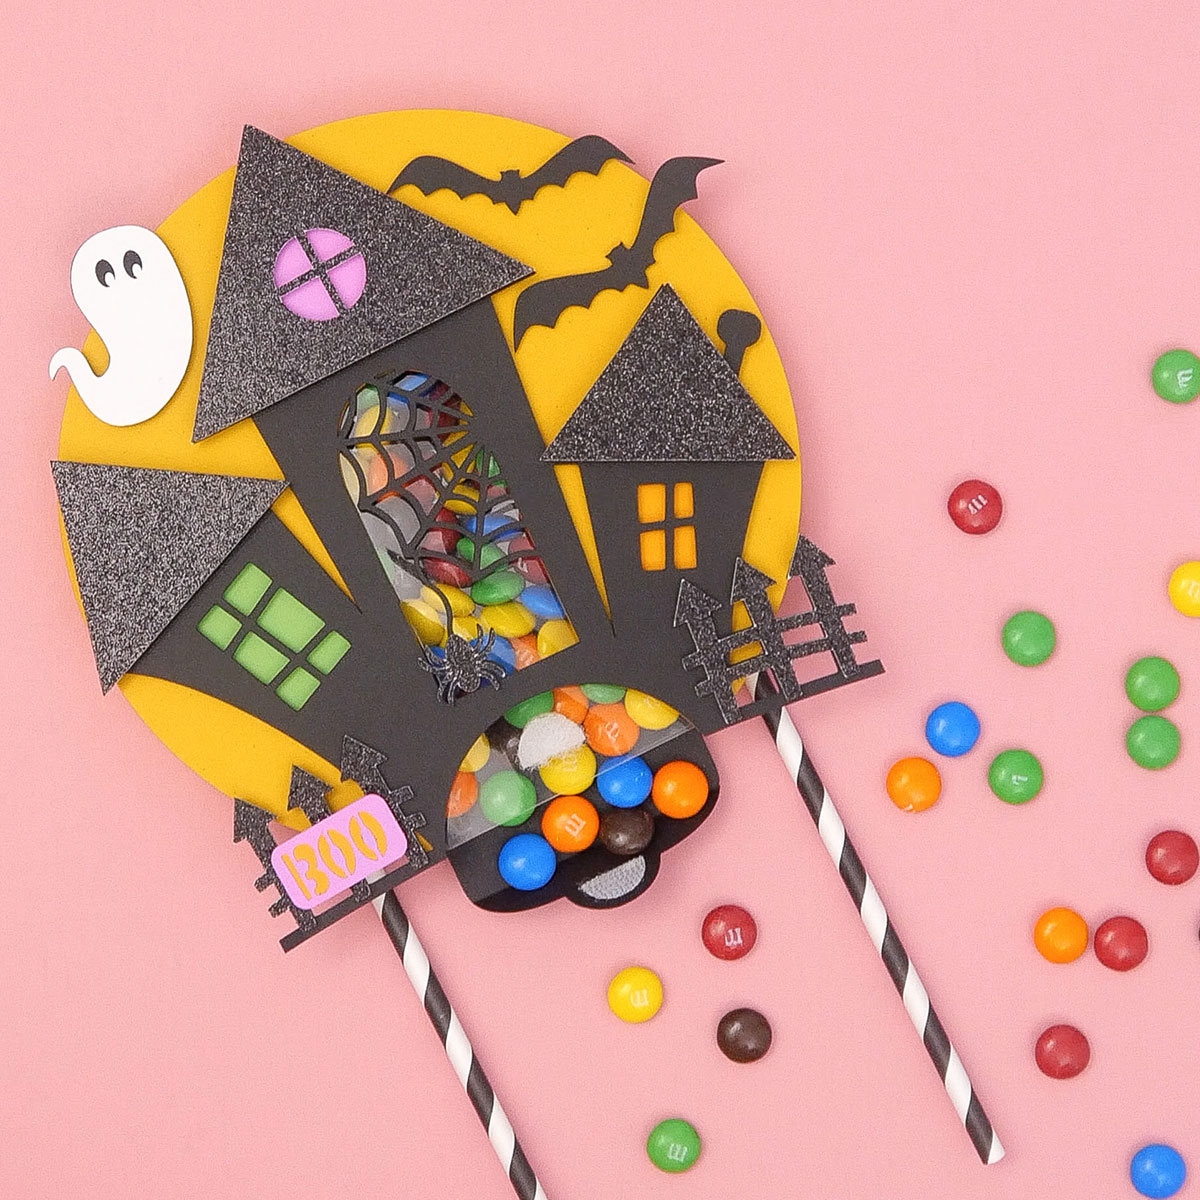
Step 7) Fill the shaker cake topper with candy
Fill your box with candy! M&Ms work really well for this box but you can use similar candy too.
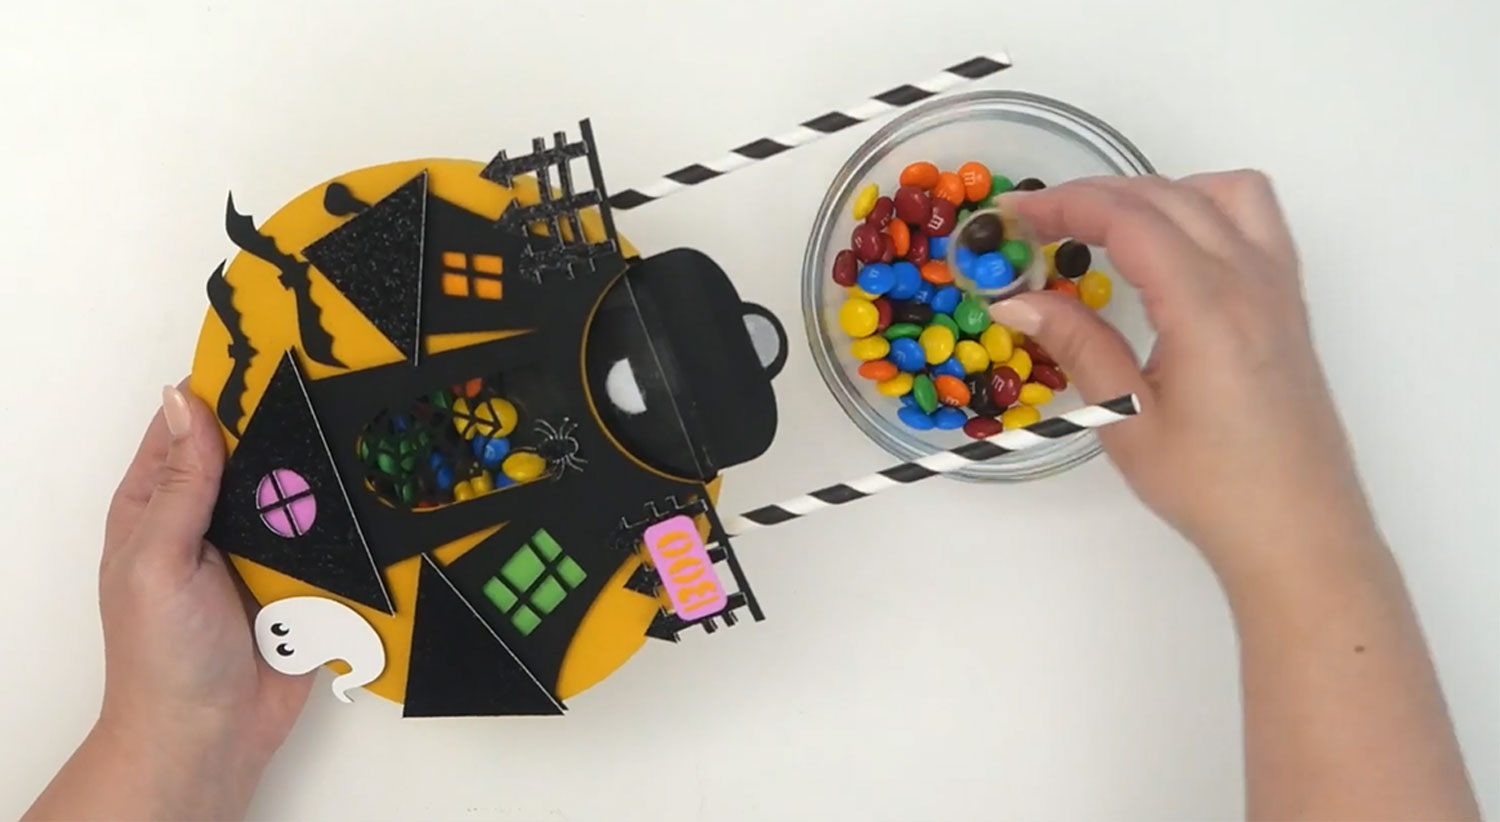
Now your Haunted House Candy Shaker Cake Topper is finished! That means you can eat up the remaining candy. Yay!!
How to make a cake topper with a Cricut machine
I hope you enjoyed this tutorial on how to make a Halloween shaker cake topper.
I don’t know how long it will last before I release the candy, it’s so very tempting!
Place your topper on your next Halloween bake to add an extra spooooky but sweet feel.
Happy crafting,
Sarah x

