HCC 2023 Day 04 🦇 Personalized Candy Bar Wrappers
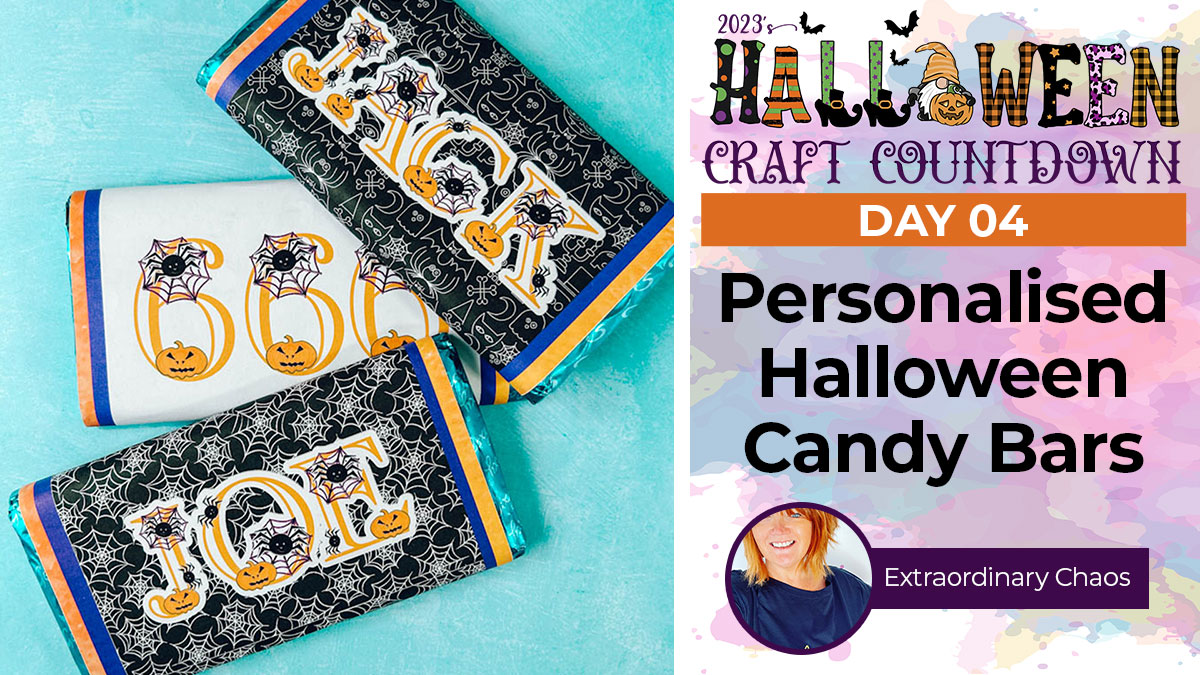
Looking for a way to upgrade your candy this Halloween? Here’s how you can do it!
It’s Day 4 of the Halloween Craft Countdown and Sarah Christie from Extraordinary Chaos is sharing her candy bar wrappers with us.
If you’re wanting to add a personalised touch to your Halloween candy this year, this is a great print then cut Cricut project for you to get going with.
Sarah takes us through all the steps, with different options along the way including some ink-saving ideas.
This Project was part of the Halloween Craft Countdown 2023
Materials supply list
Here is a list of the materials that are required to make this project.
Please note that some of the links included in this article are affiliate links, which means that if you click through and make a purchase I may receive a commission (at no additional cost to you). You can read my full disclosure at the bottom of the page.
- Cricut machine
- Light blue Cricut cutting mat (or green cutting mat)
- Colour printer
- Sticker paper
- Candy bar / chocolate bar
This project is suitable for the following types of Cricut machine: Explore Air 2, Explore Air 3, Maker, Maker 3, Venture, Joy Xtra. It cannot be used on the original Joy machine as it requires print-then-cut functionality.
Video tutorial for personalized candy bar wrappers
Watch the video below to see how to make these custom chocolate bar wrappers.
If you prefer to read rather than watch, keep scrolling!
This project was created by Extraordinary Chaos
Sarah Christie is the author and designer of Extraordinary Chaos a craft lifestyle and travel blog from a 50+ mum of boys, and Pug and a French Bulldog, sharing Cricut Crafts, Tutorials and Free SVG Files, she is passionate about crafts and designing SVG alphabets and colouring alphabets.
She also shares her family travels, recipes, reviews and country living as co-editor of Cruising With Kids Family Cruise Blog and Mini Travellers family travel blog.
Written tutorial (with photos!)
Here’s how to make your very own Halloween candy bar wrappers using a Cricut machine!
Step 1) Upload the alphabet to Cricut Design Space
Download the files using the box below.

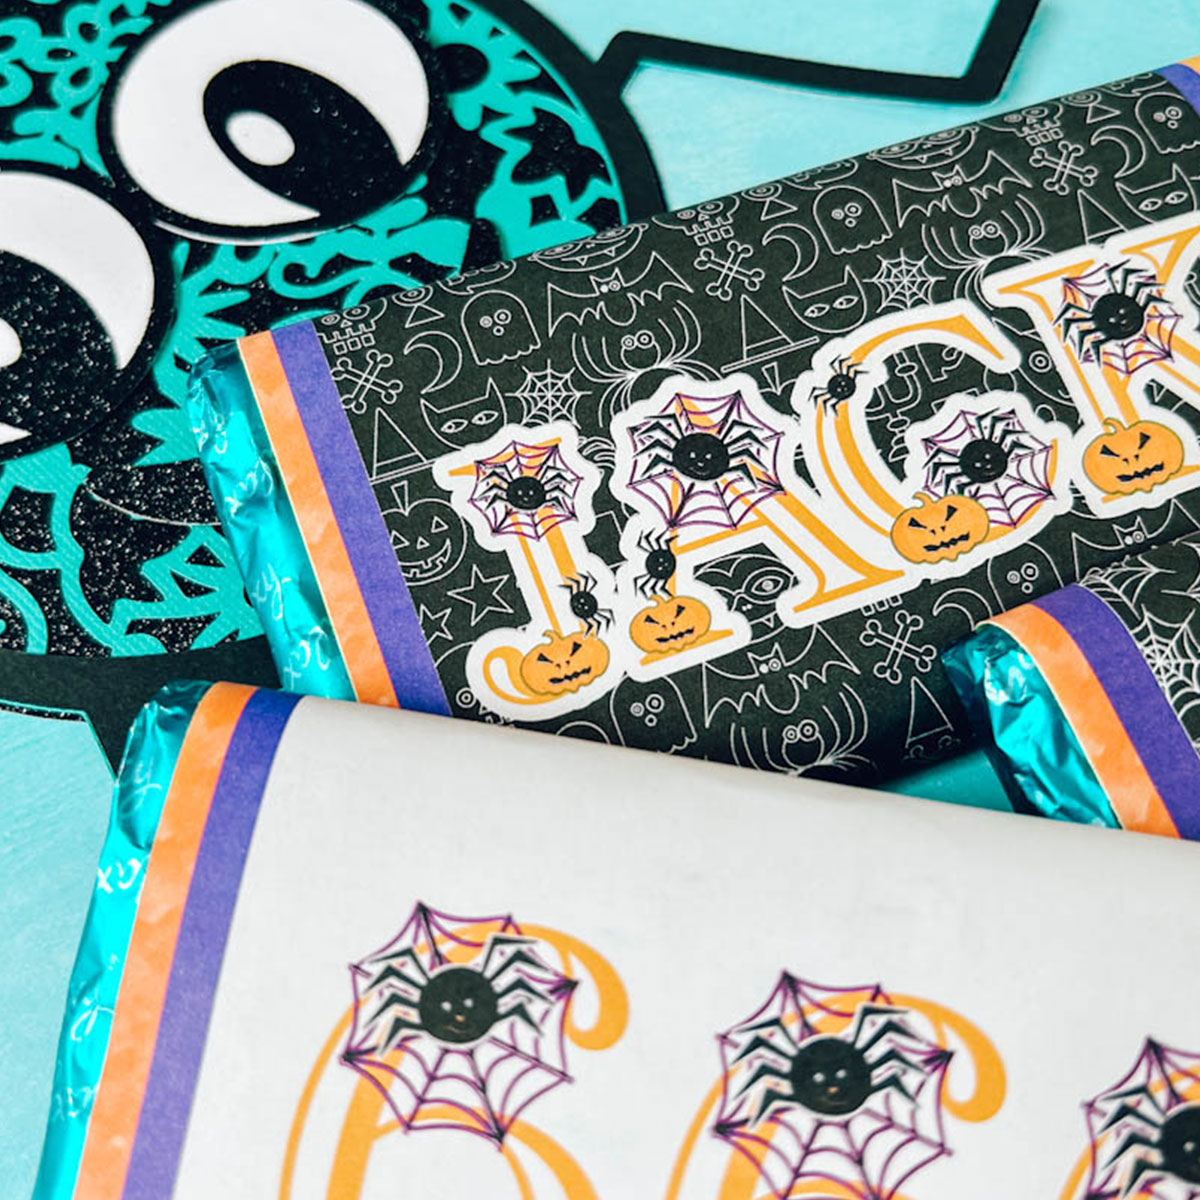
Once you’ve thought about what name or images you may want to have on your wrapper, you will need to upload the letters you need from the spider alphabet.
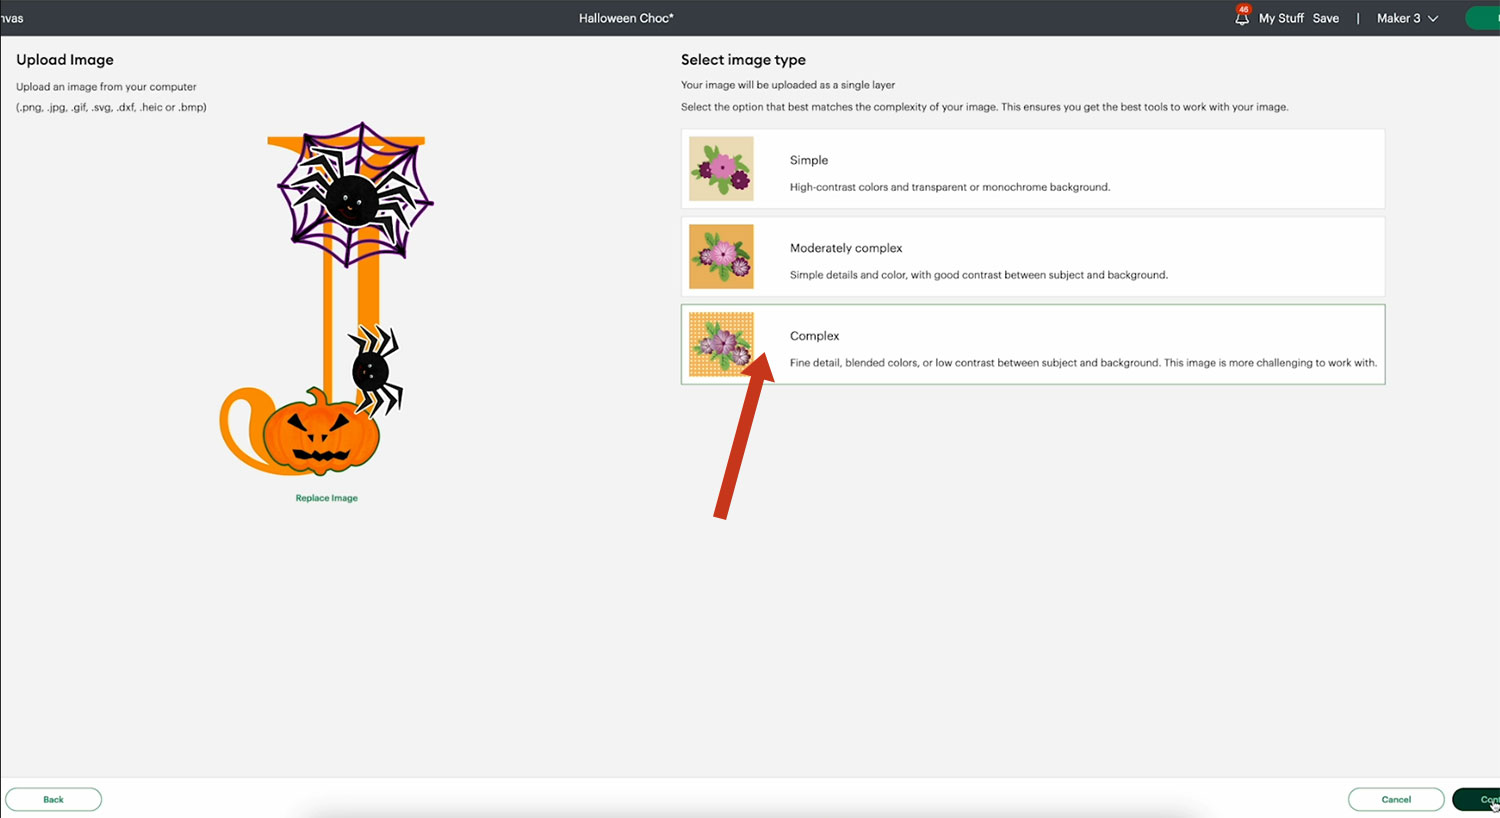
Go into Upload, click Browse and select your letters which will be in your download folder.
When uploading, you need to select the PNG version of the files (not the JPG).
Choose “Complex” as the image type.
Click Continue and choose Print then Cut Image in the following window.
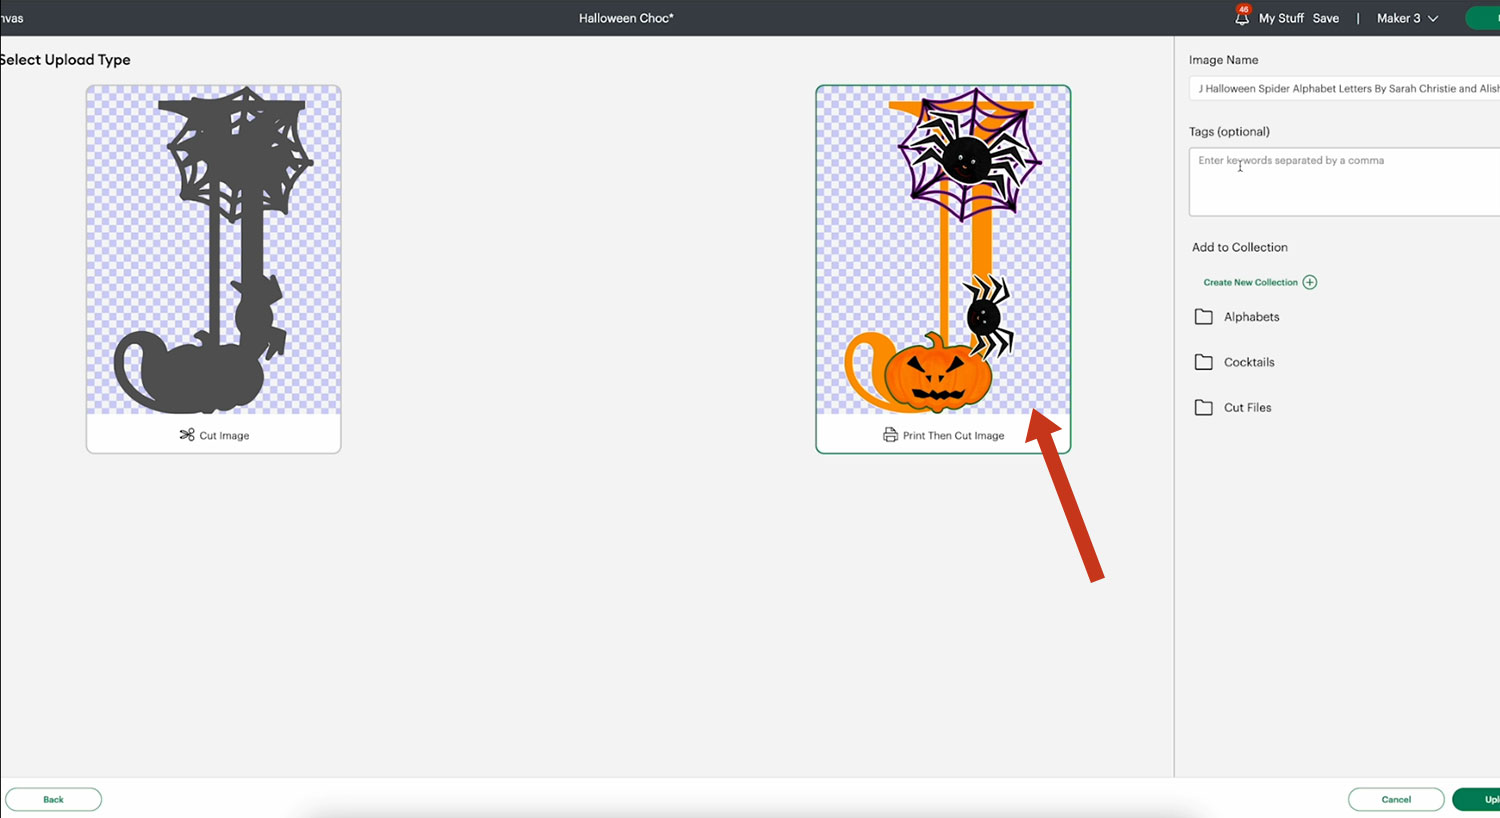
You will have to upload each letter that you will need for your wrappers individually.
Add your letters to your project.
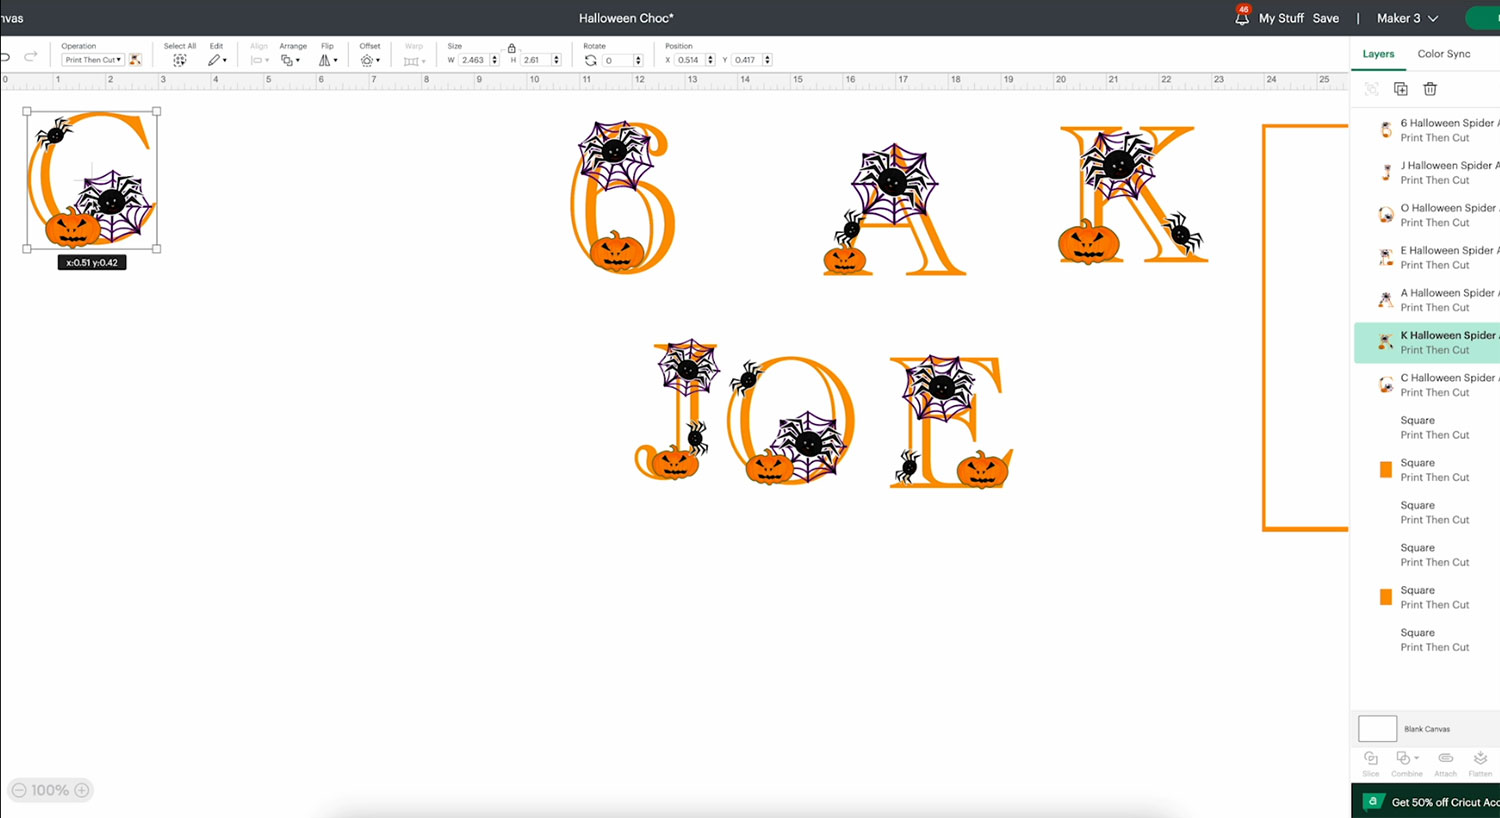
The download folder also contains a pumpkin and spider image that can be used for extra decorations.
If you would like to add numbers with the same spider alphabet design, you can download them for free at extraordinarychaos.com
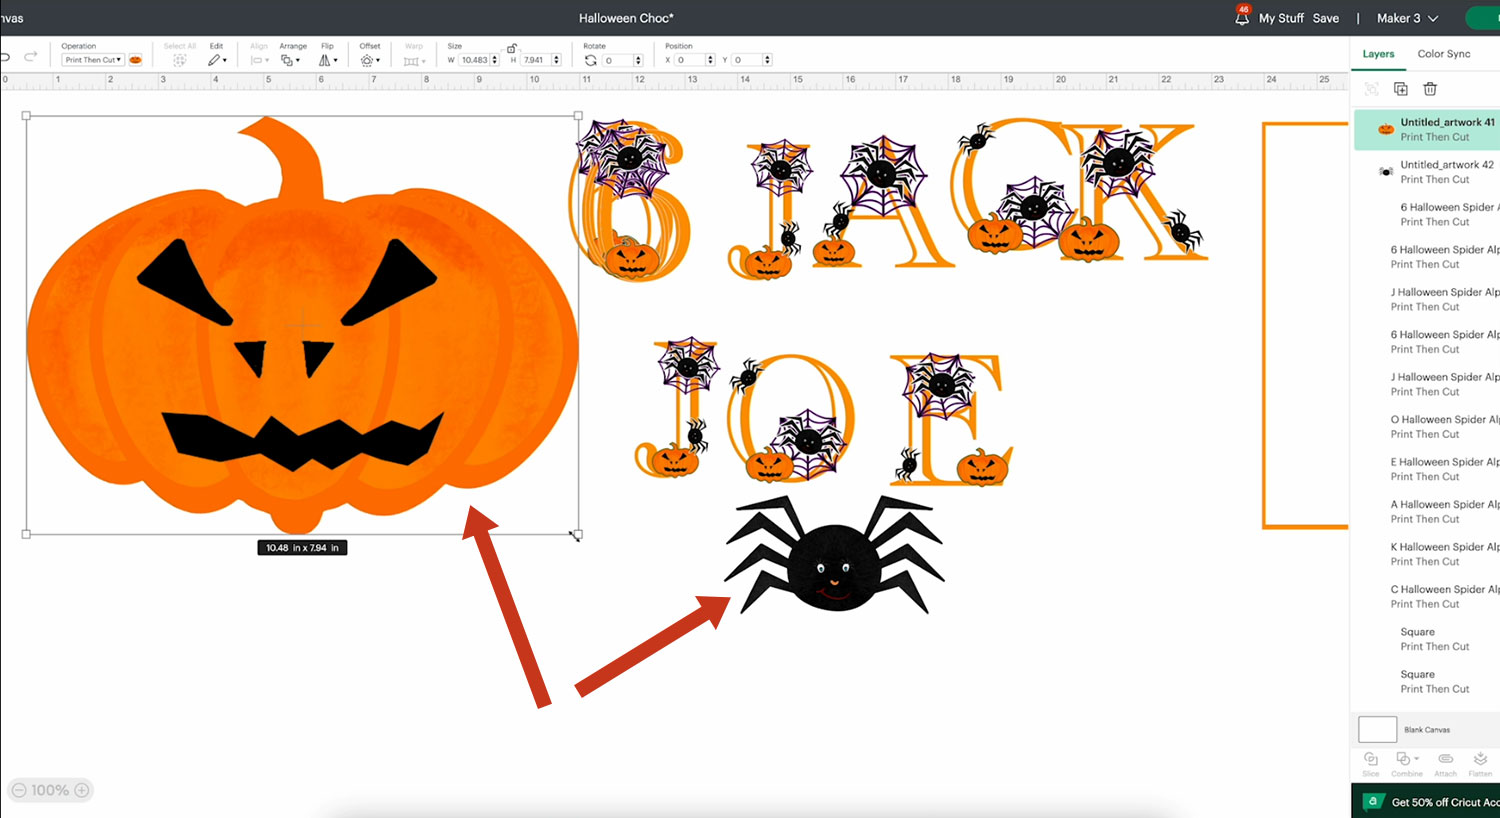
Step 2) Prepare your letters and images
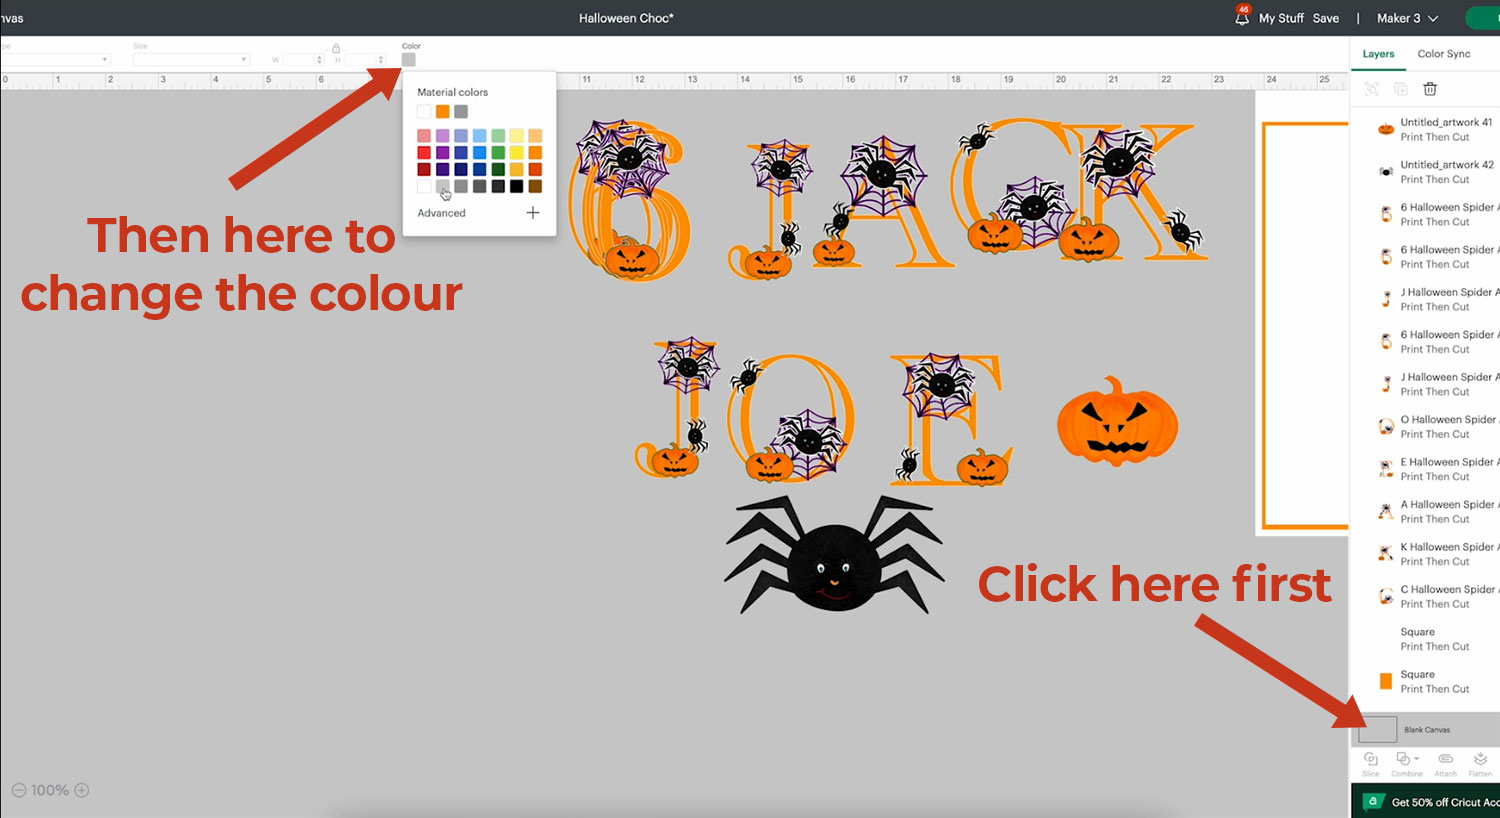
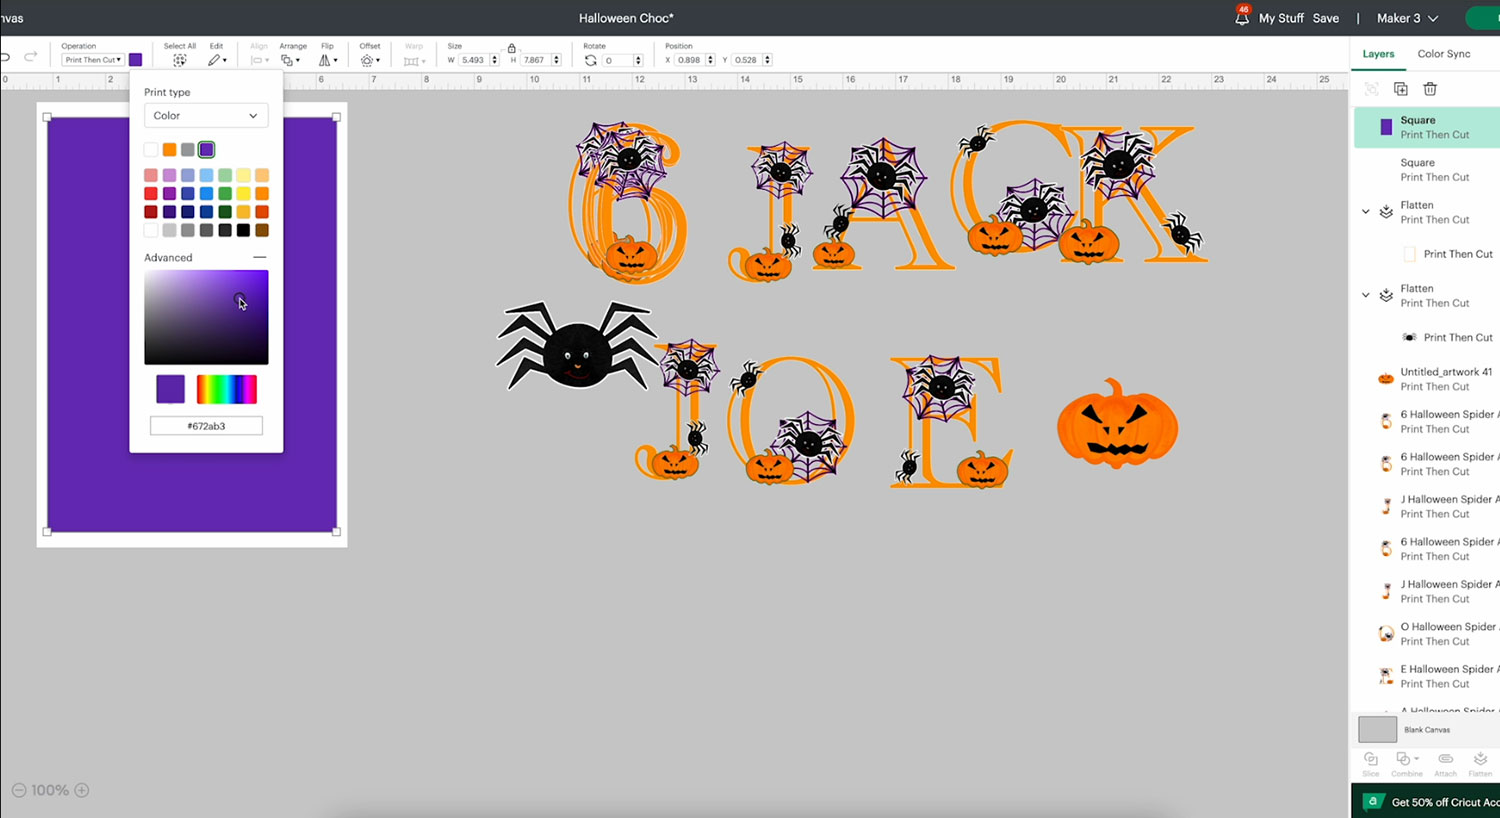
To help you see better when you’re working with white outlines, you can change the colour of your canvas by clicking the “Blank Canvas” button under the Layers panel and then choose your colour by clicking on the colour square.
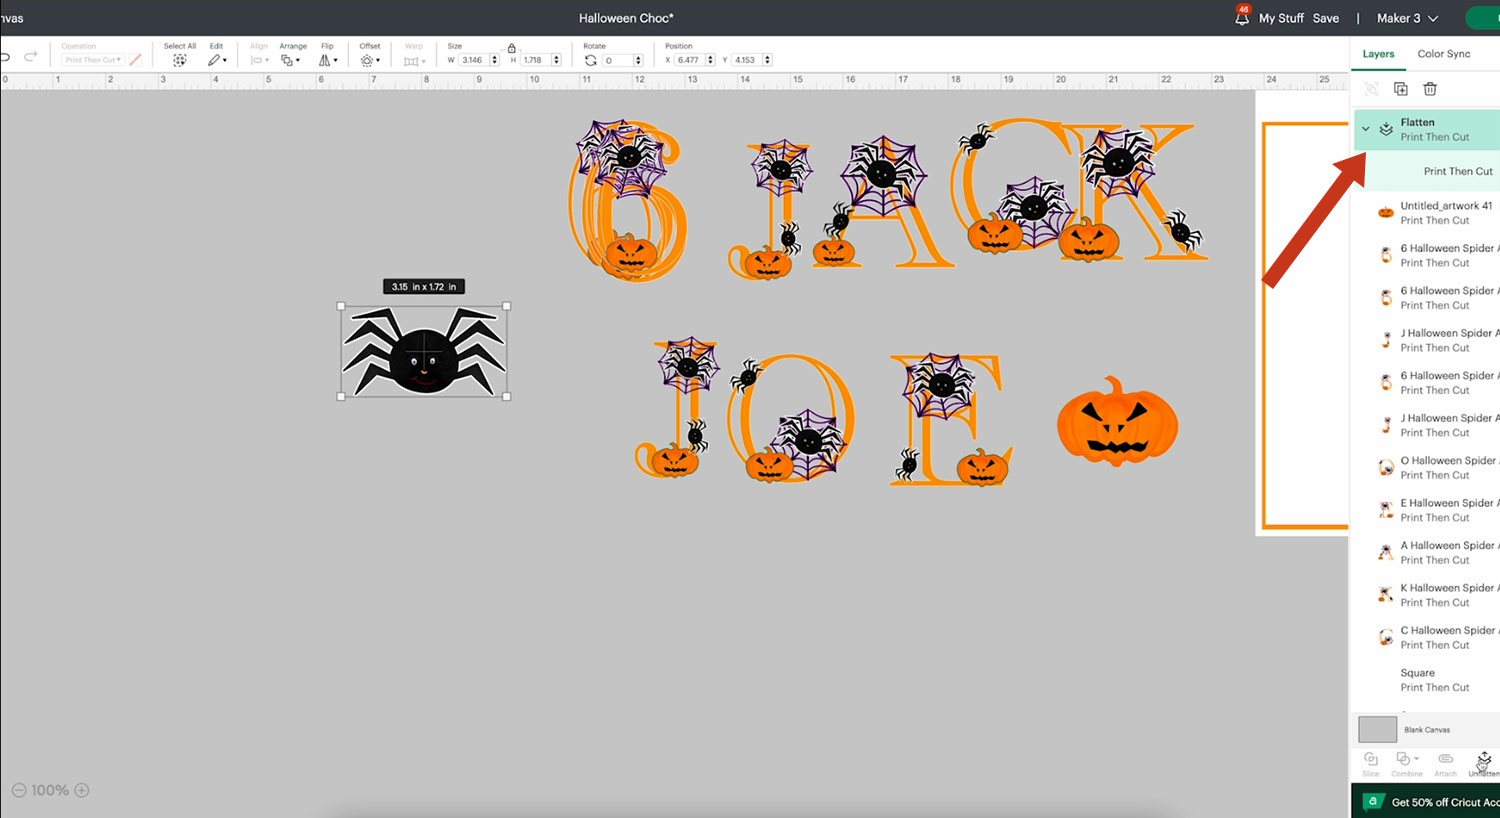
The letters have already got a tiny white offset so that it makes it easier to see them. You will need to create a tiny offset for both the spider and pumpkin.
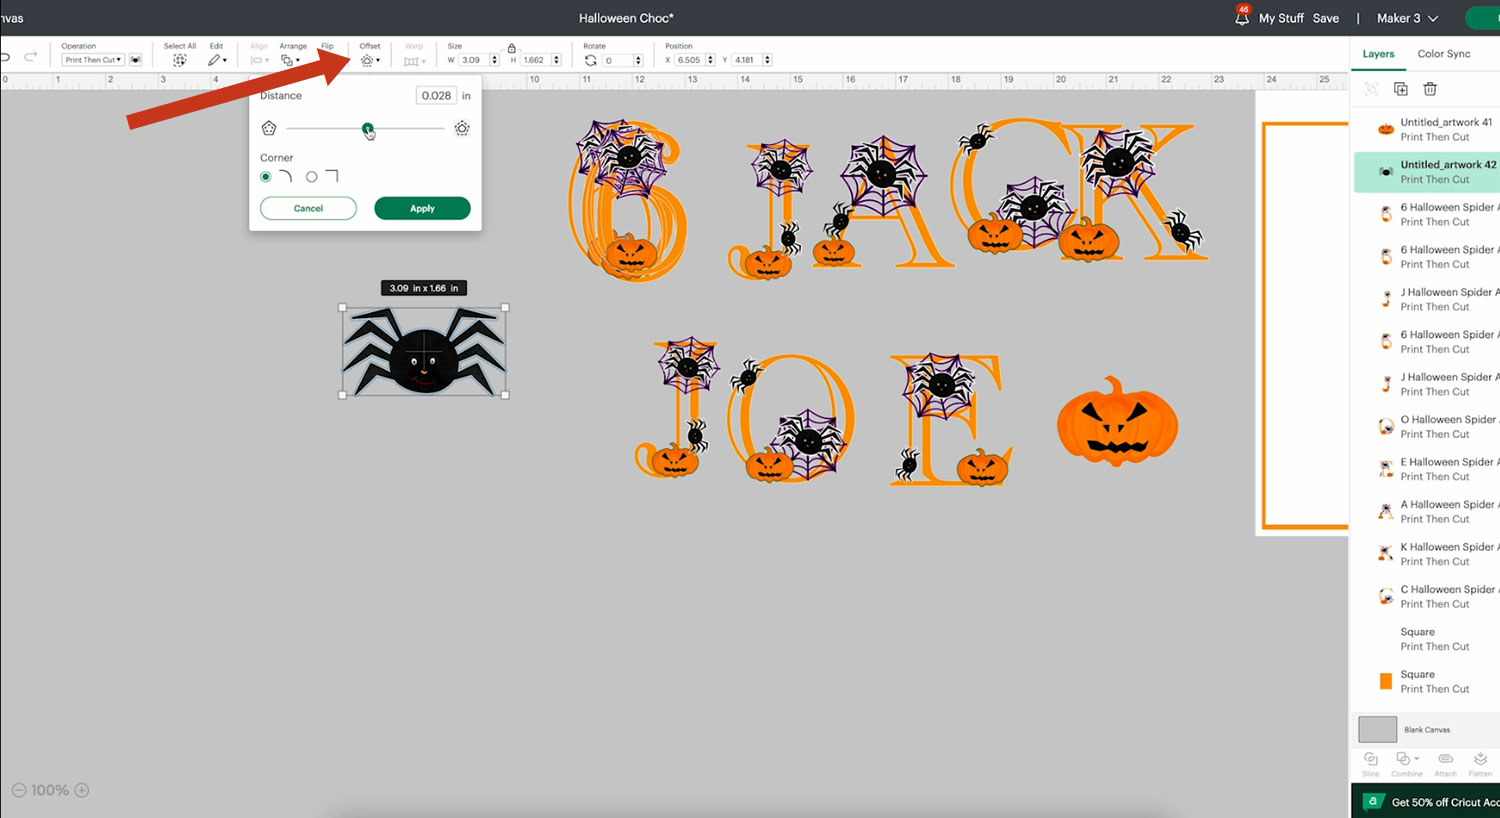
To do this, select the spider or pumpkin and click Offset and drag the toggle to 0.0028 and click Apply.
Click on the background of the offset and change the colour to white. Select the image and the offset and click Flatten to turn it into one solid image.
Step 3) Design the wrapper template
To make sure you create your wrapper the correct size, you will need to measure your candy bar.
Take the wrapper off your chocolate and use the measurements from that.
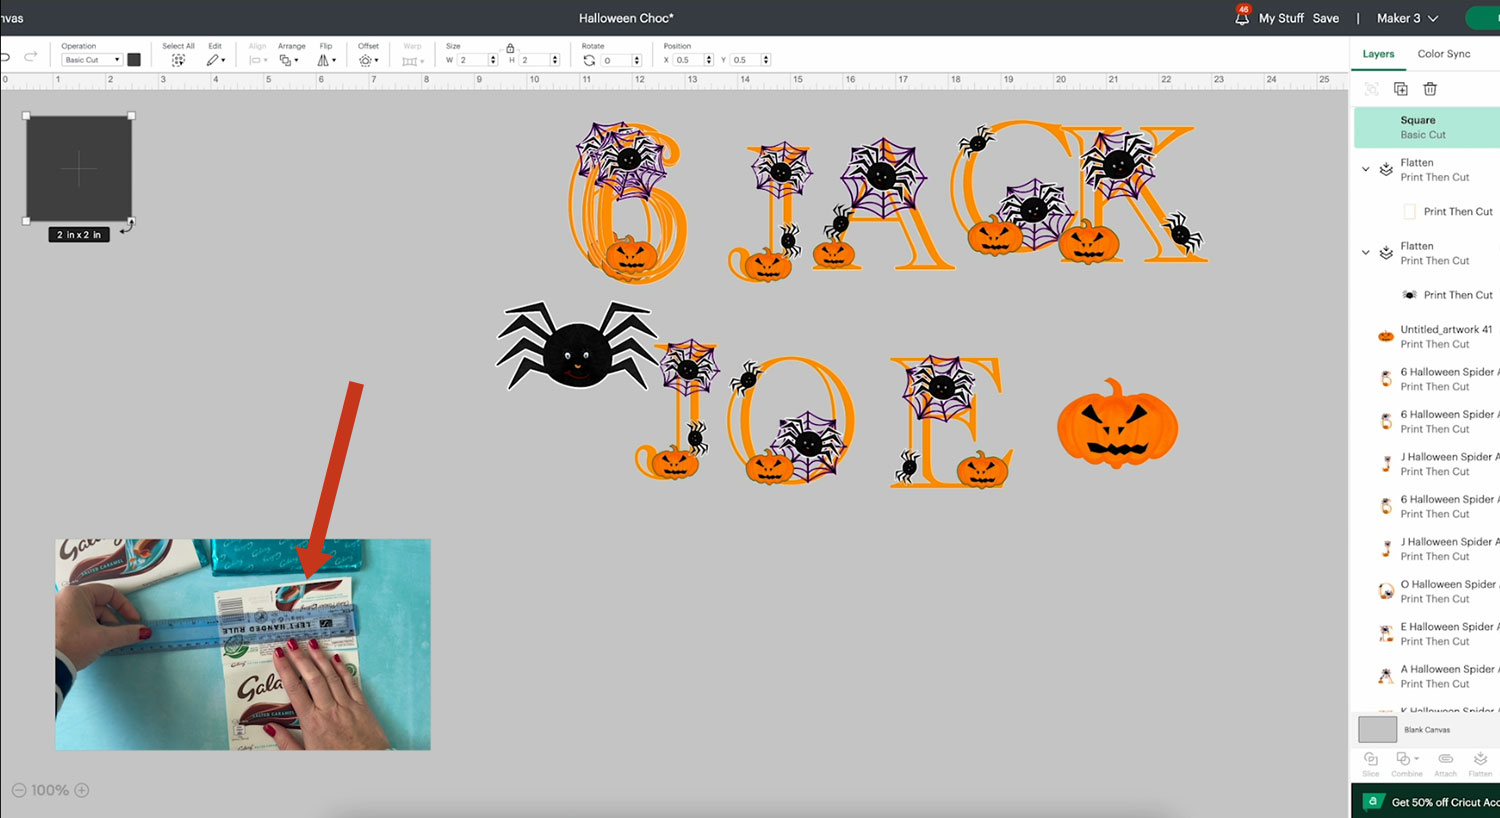
You can then add a square to your canvas, untick the padlock and change the shape to replicate your candy wrapper.
Note: Save your nutritional information as that may be important for those with food allergies.
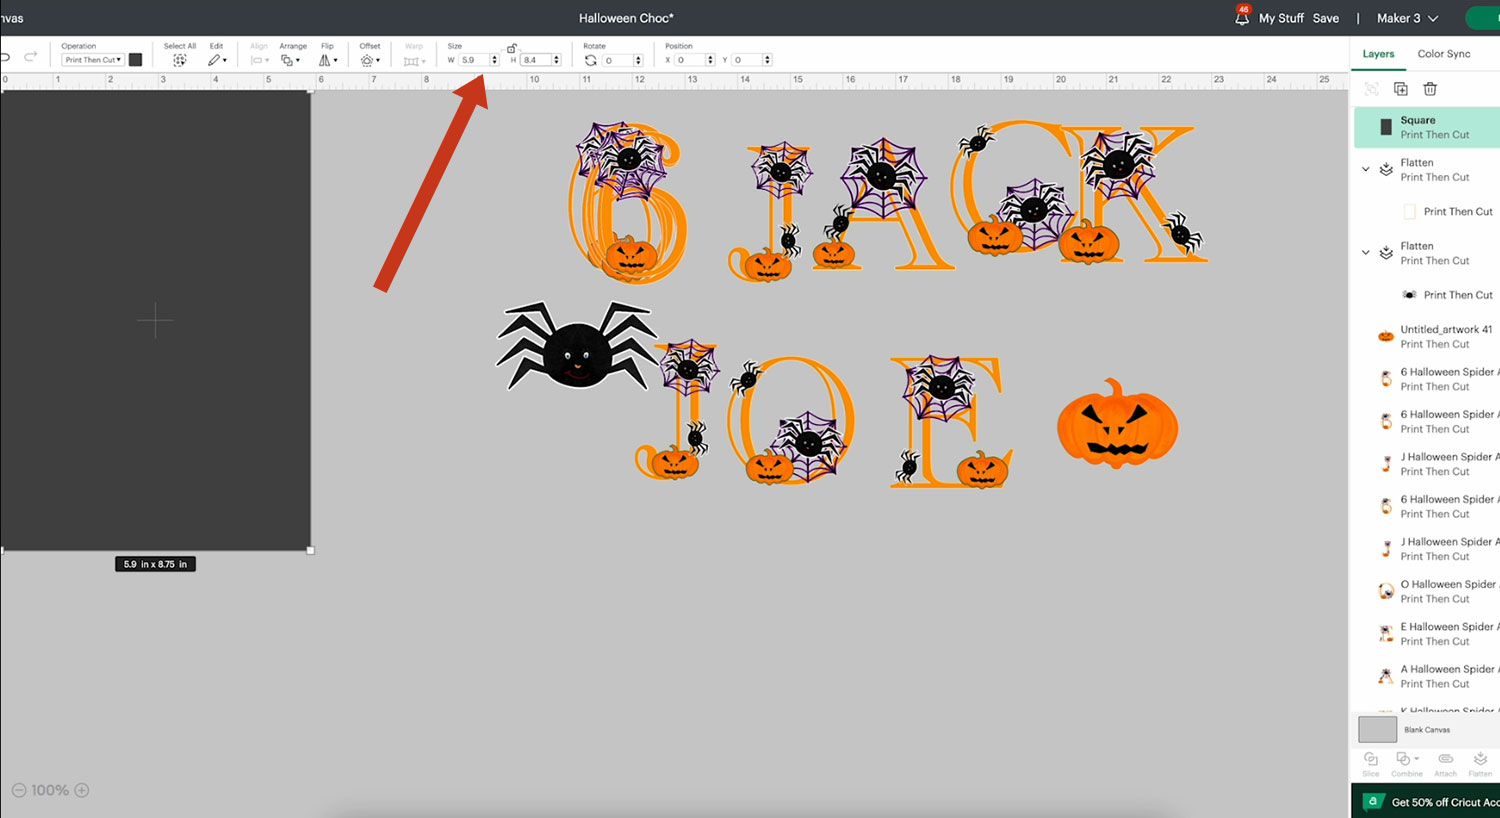
Make sure you have the square set to Print then Cut in the Operations drop down, change your colour to white and duplicate it.
Decrease the size of the duplicated layer slightly.
Select both rectangles and click Align and Center to put the smaller rectangle exactly in the middle of the larger one.
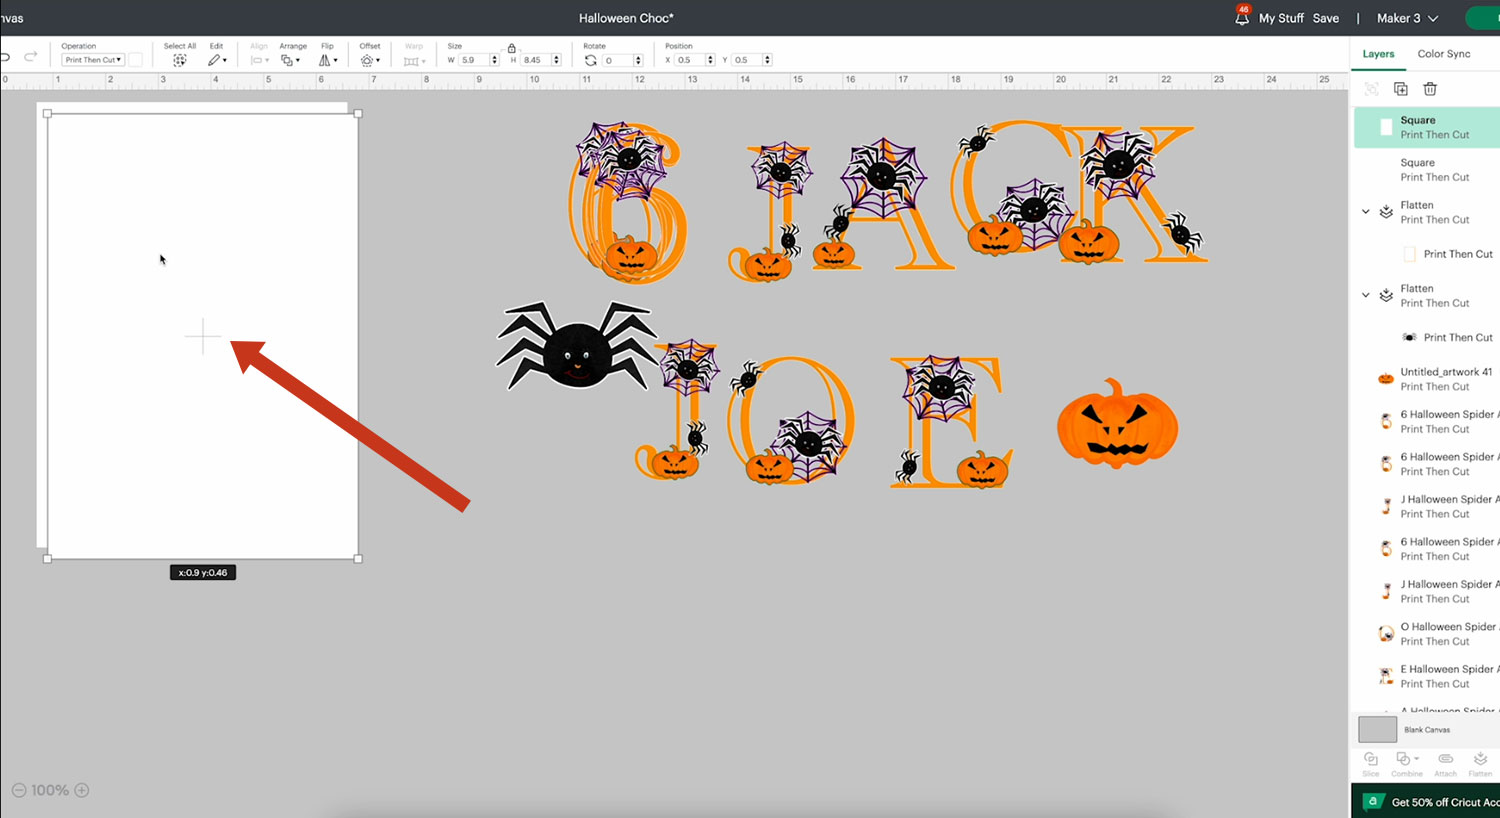
Choose a colour to be a strip of going all the way around your wrapper.
Duplicate the layer and decrease the size again as you did previously.
Choose whether you would like this rectangle to be white (an ink saving option), another solid colour, or a pattern.
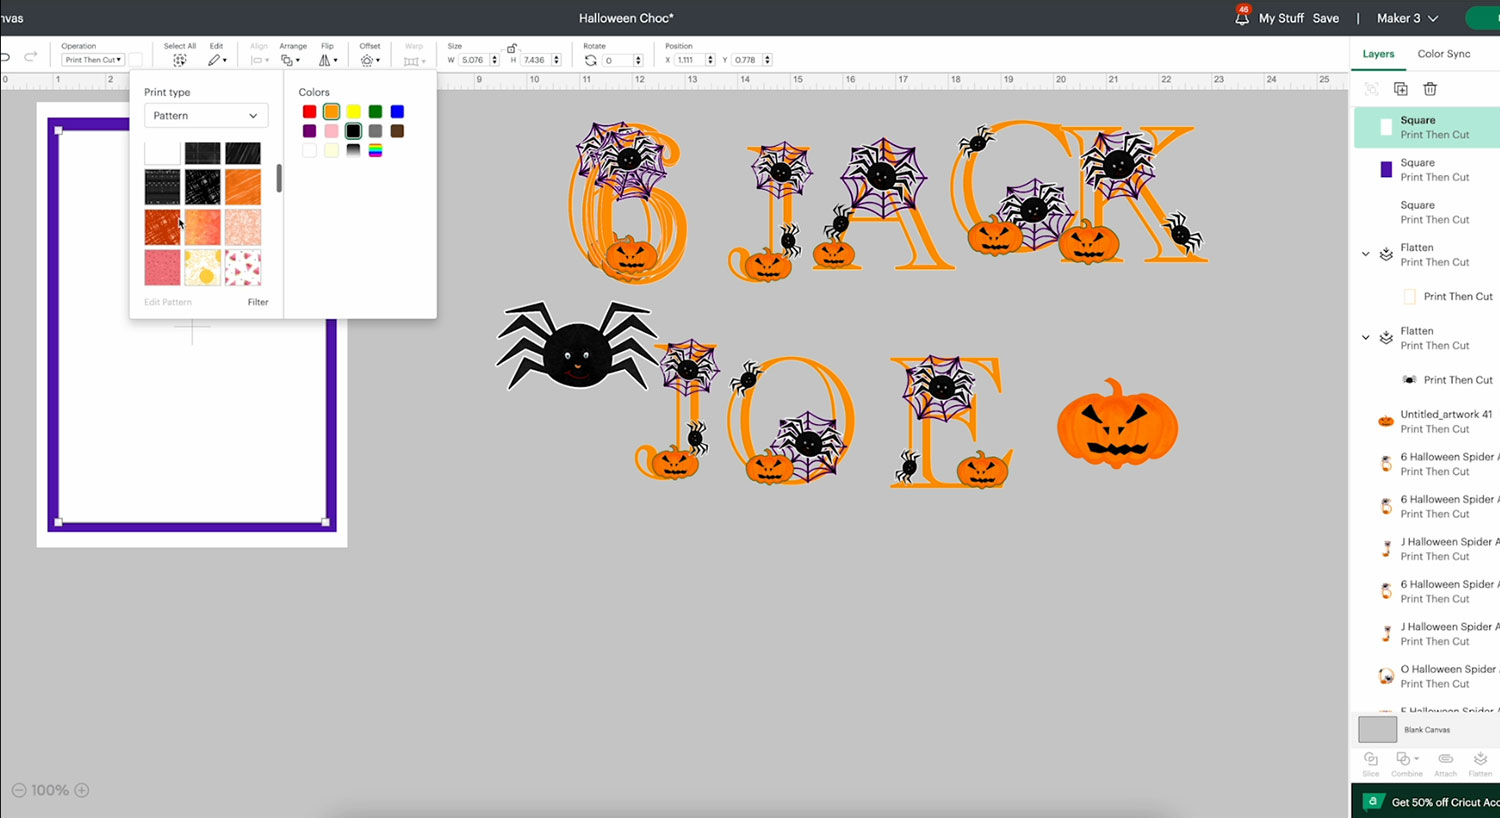
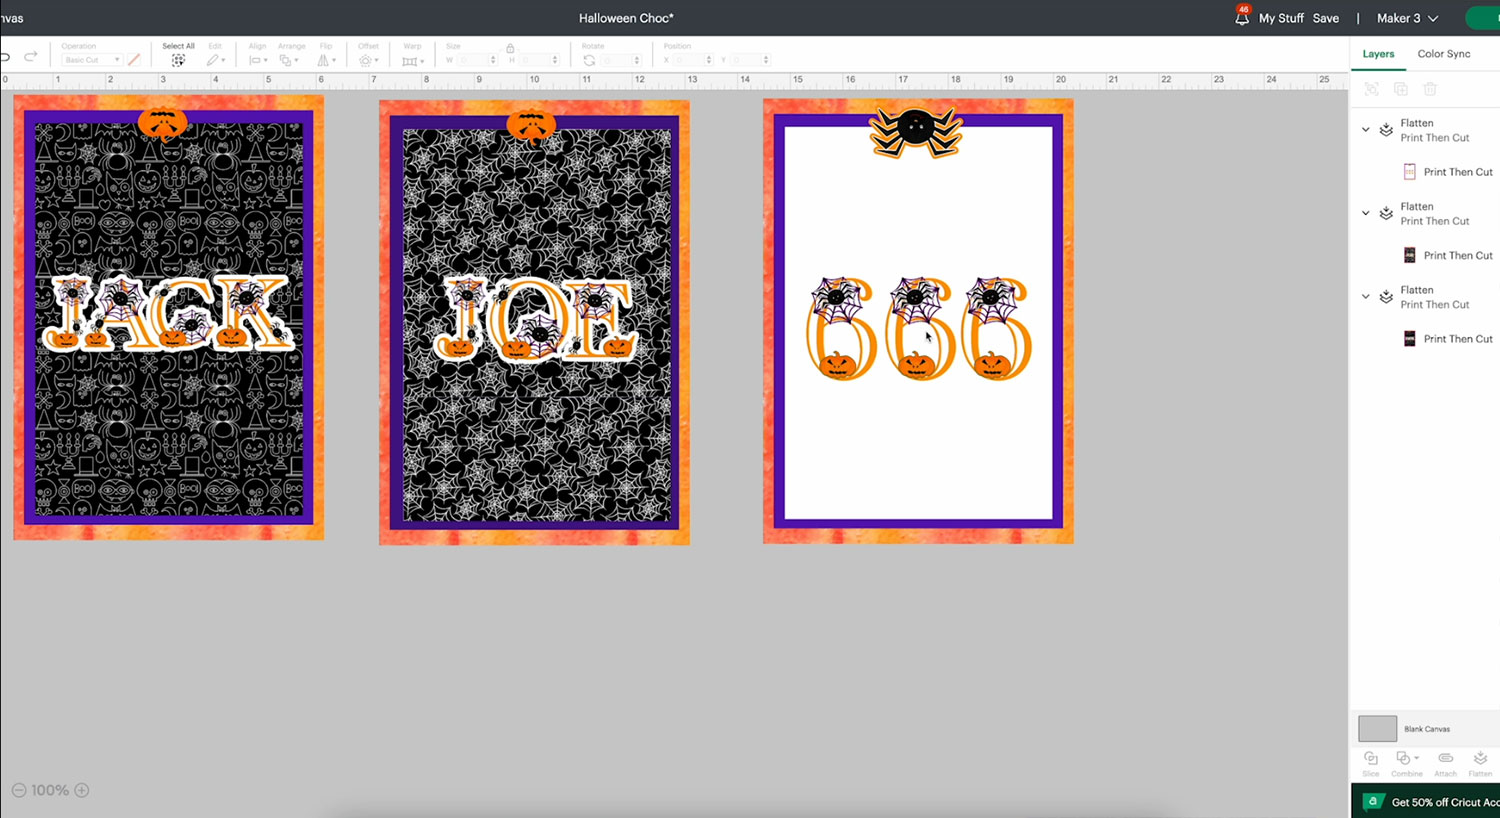
Here’s how it might look filled with patterns:

Select all the rectangles and press Flatten to then them into one layer.
Duplicate your template so that you can use it for another candy bar wrapper.
Step 4) Size and align letters
It may be helpful to turn the grid lines on to help make sure your letters are all at the same size.
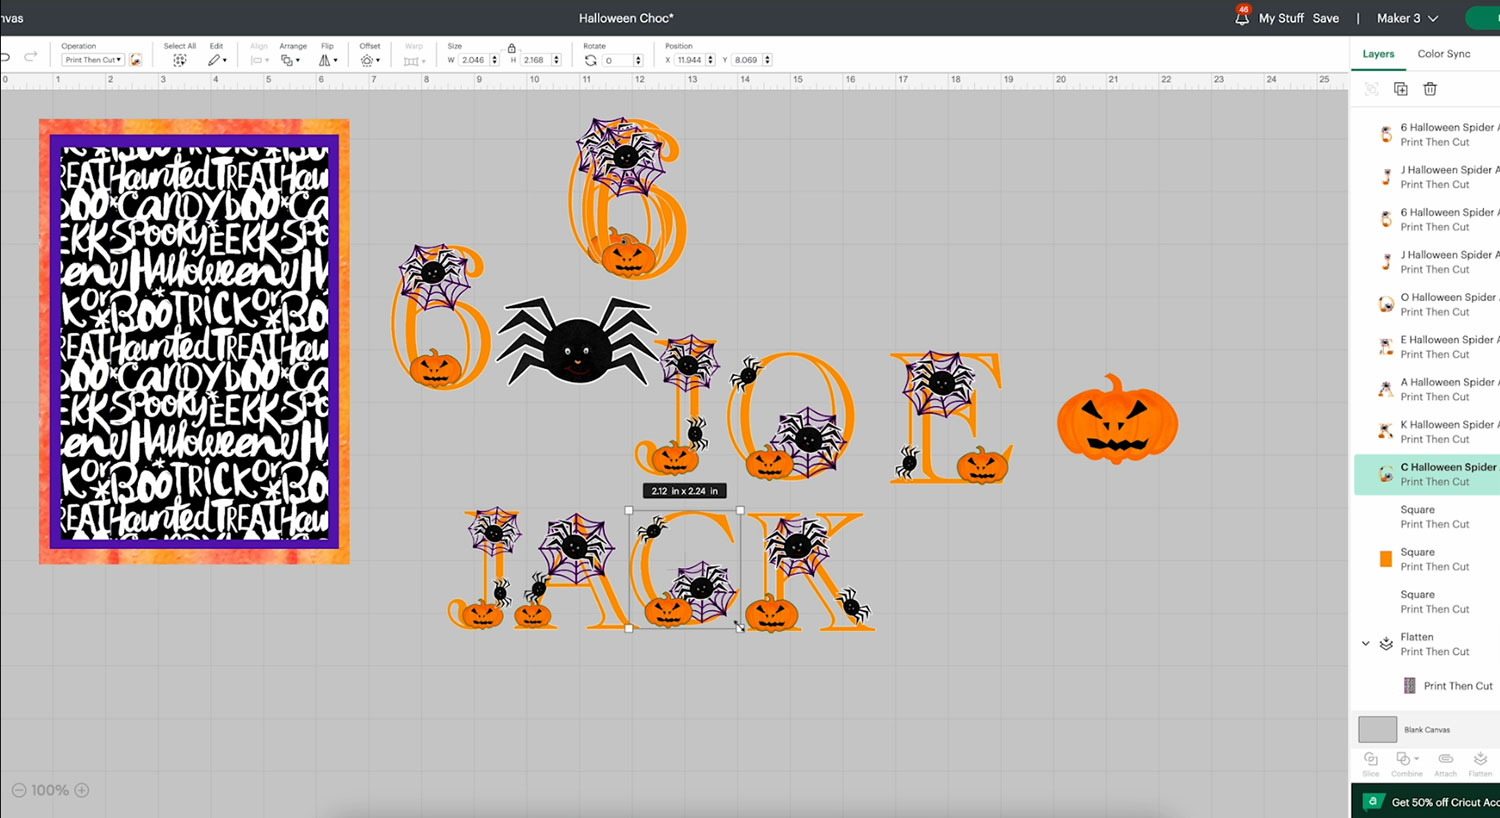
Select all the letters you want to use for your name or word then go to Align and Align Bottom to perfectly line them up with each other.
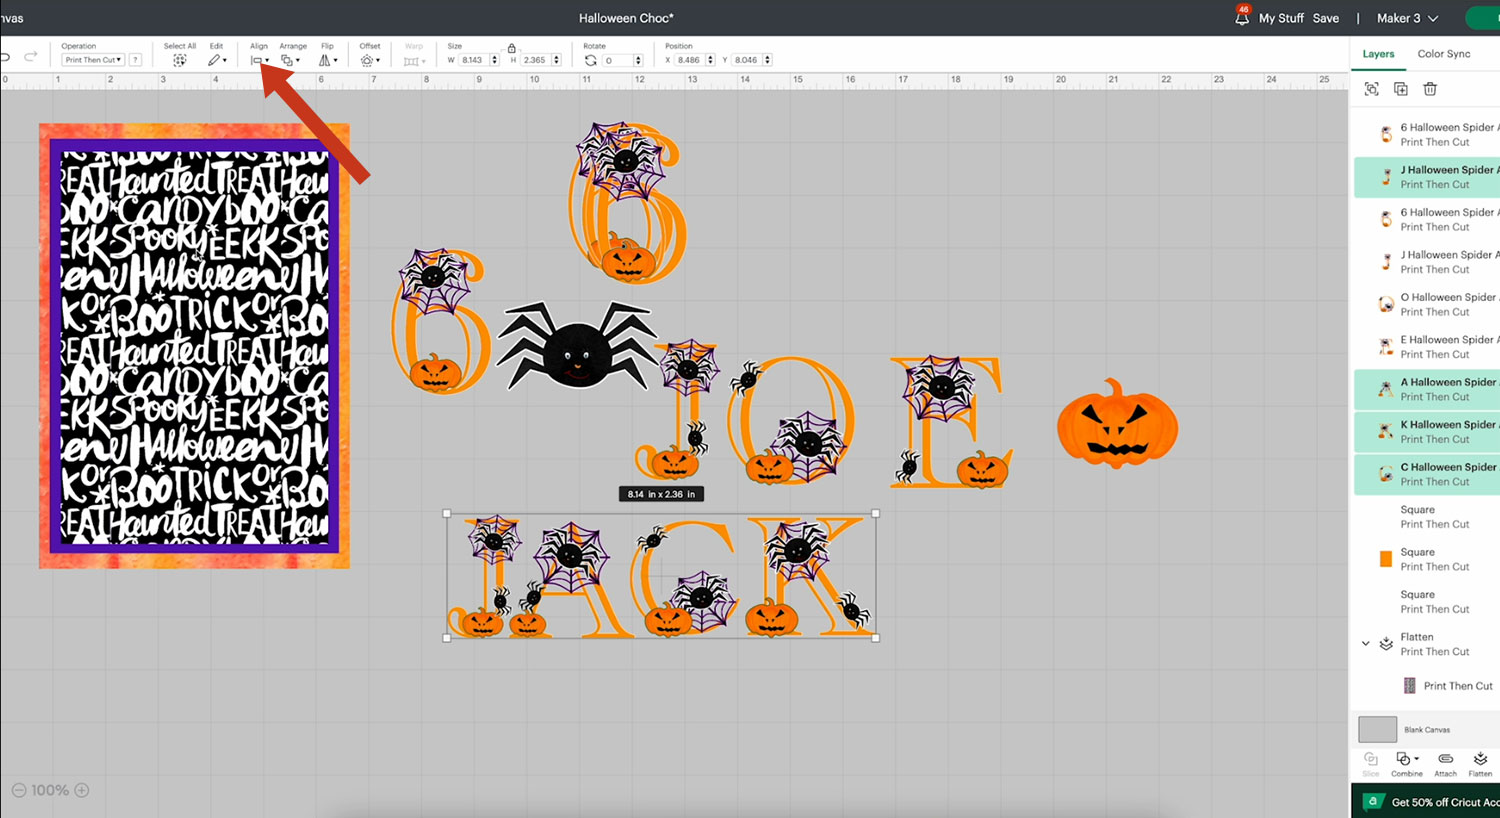
Select all the letters again and click Offset. This offset will need to be bigger than the last one at 0.139. Click Apply and choose a colour.
Select all the letters and click Flatten to make it one layer.
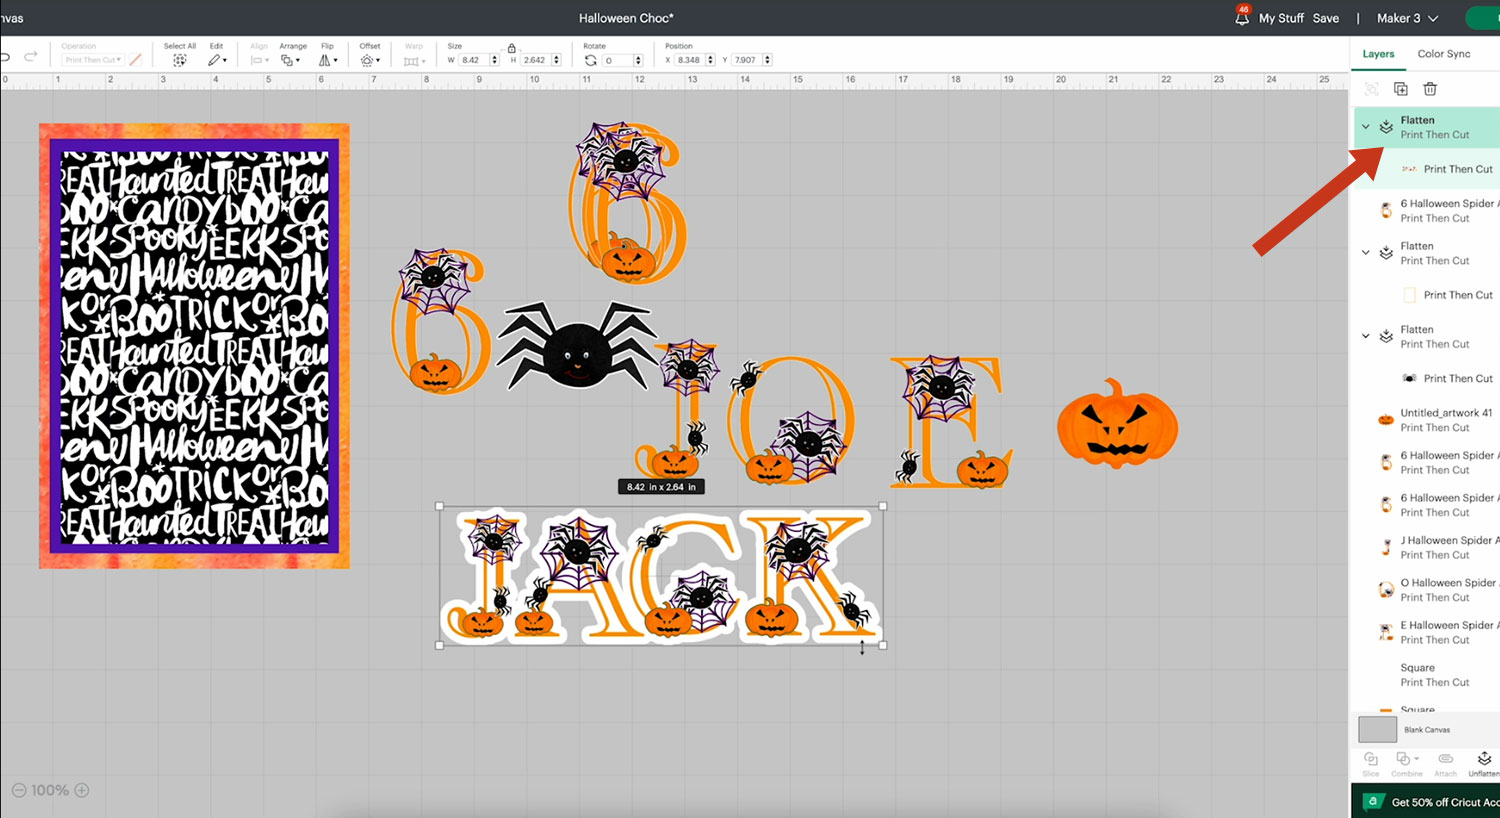
Place your image on top of your wrapper and send the template part of your wrapper to the back.
Select All and Center Horizontally and Vertically to make sure the word is in the middle of your wrapper.
Note: At this point you can see how well your writing and background go together. You can change the pattern if needed.
You can add your pumpkin or spider to the back of your wrapper as it folds round the candy bar but remember to Flip the image upside down so that it appears correctly when it’s folded around the bar.
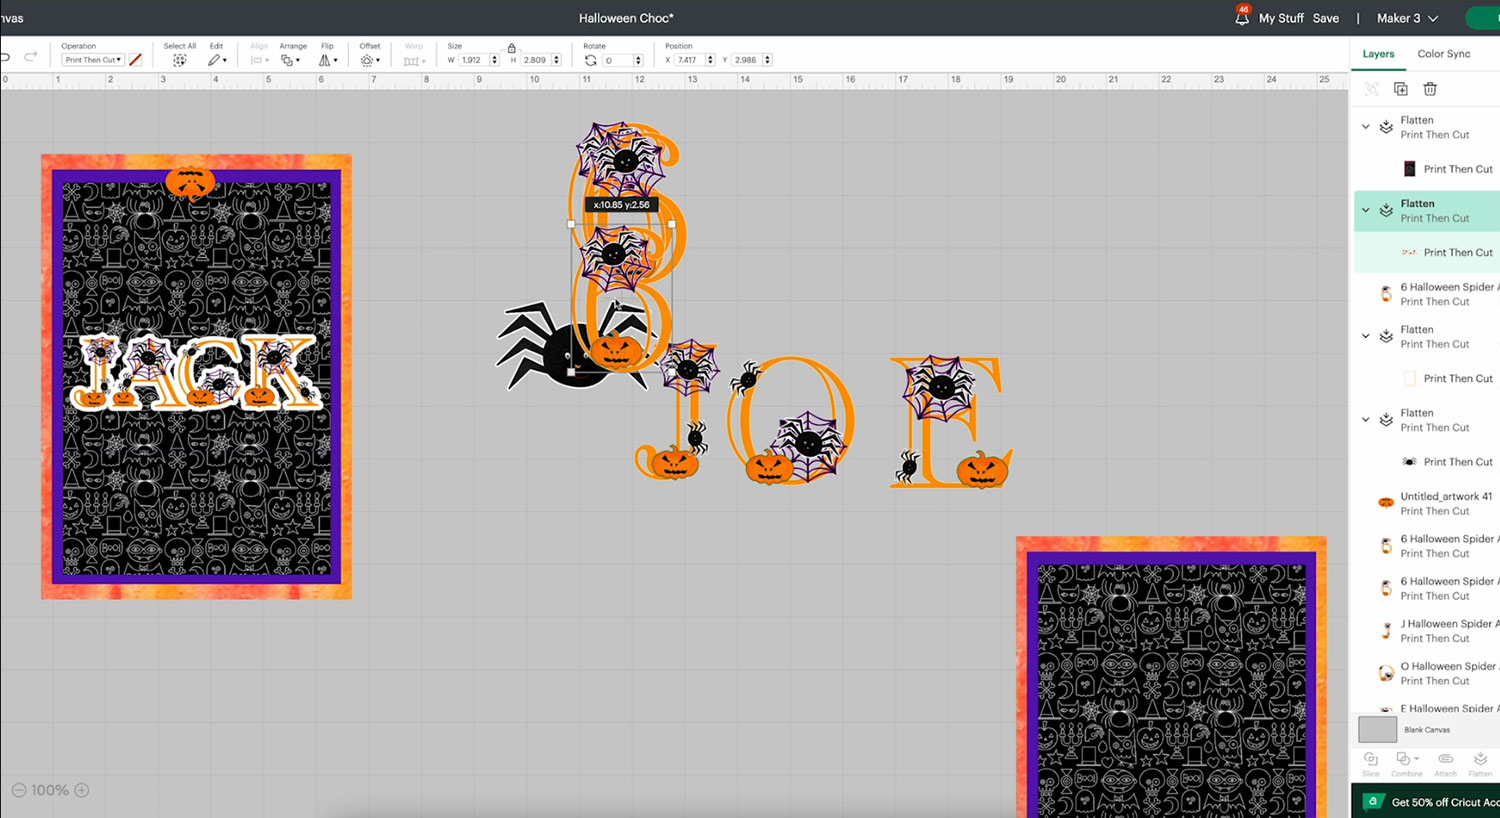
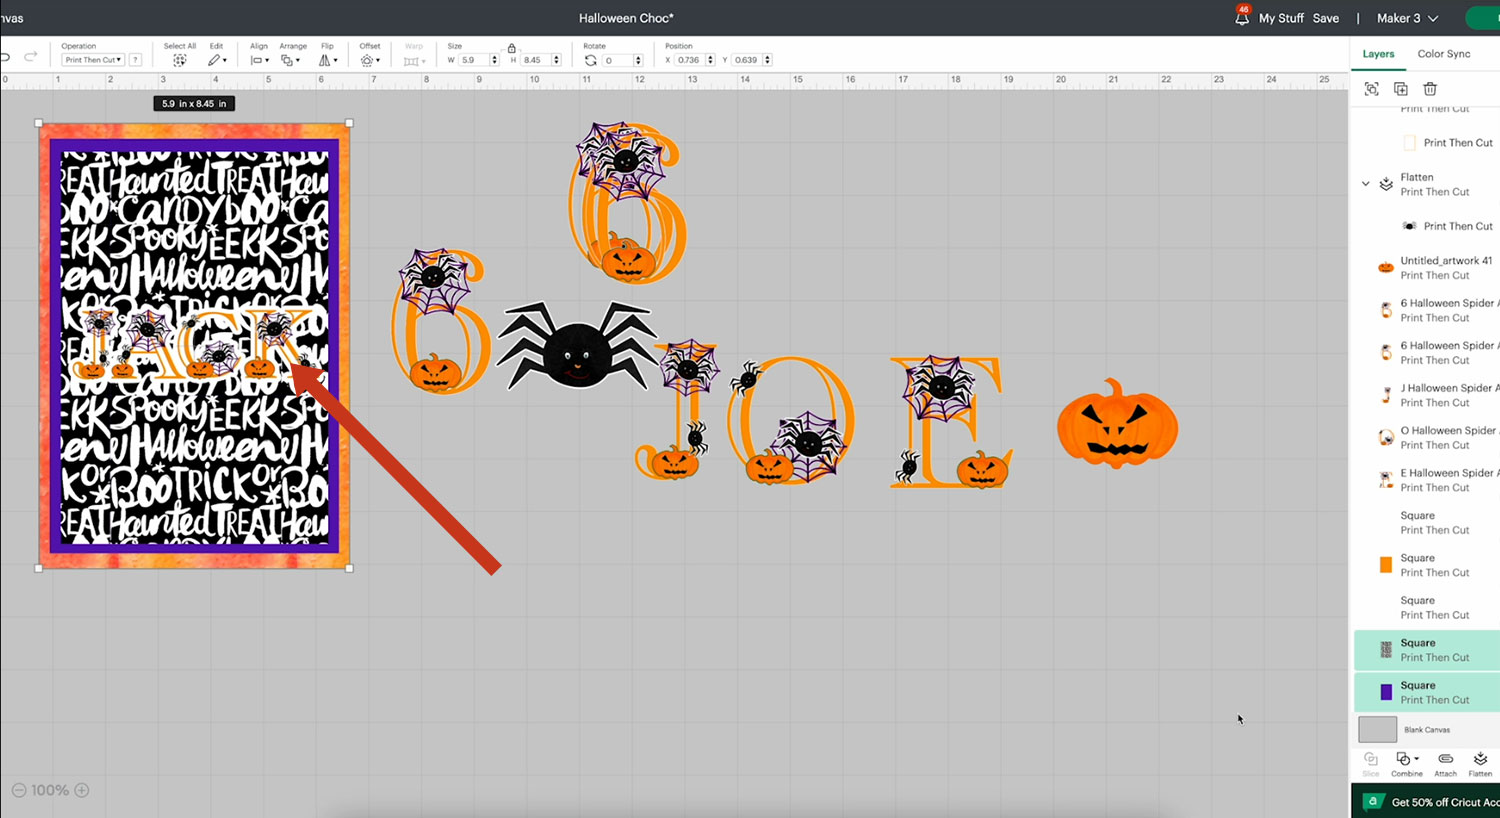
Select all layers of the candy bar wrapper and click Flatten.
This will merge them into one layer.
You can then create additional wrappers if you need to make more than one.
Step 5) Print then Cut the wrappers
Go ahead and click “Make It”.
As you send your design to the printer, make sure the “System Preferences” toggle is on.
That means that your printer settings will open so that you can change them for the best quality print.
Make sure you choose finest or best quality.
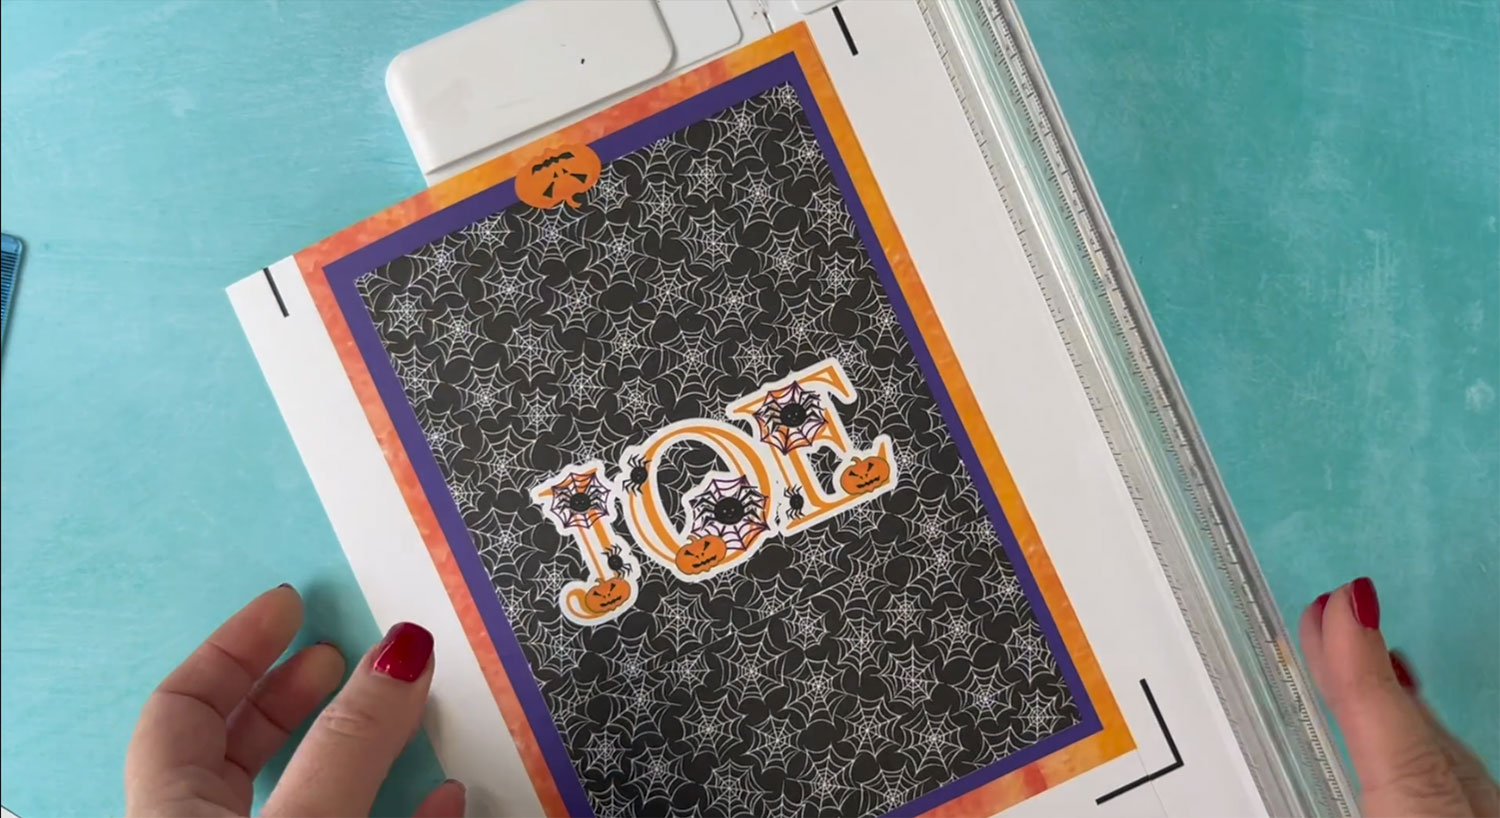
When your wrapper has printed, place it onto a light or standard grip cutting mat ready for cutting.
Select medium cardstock
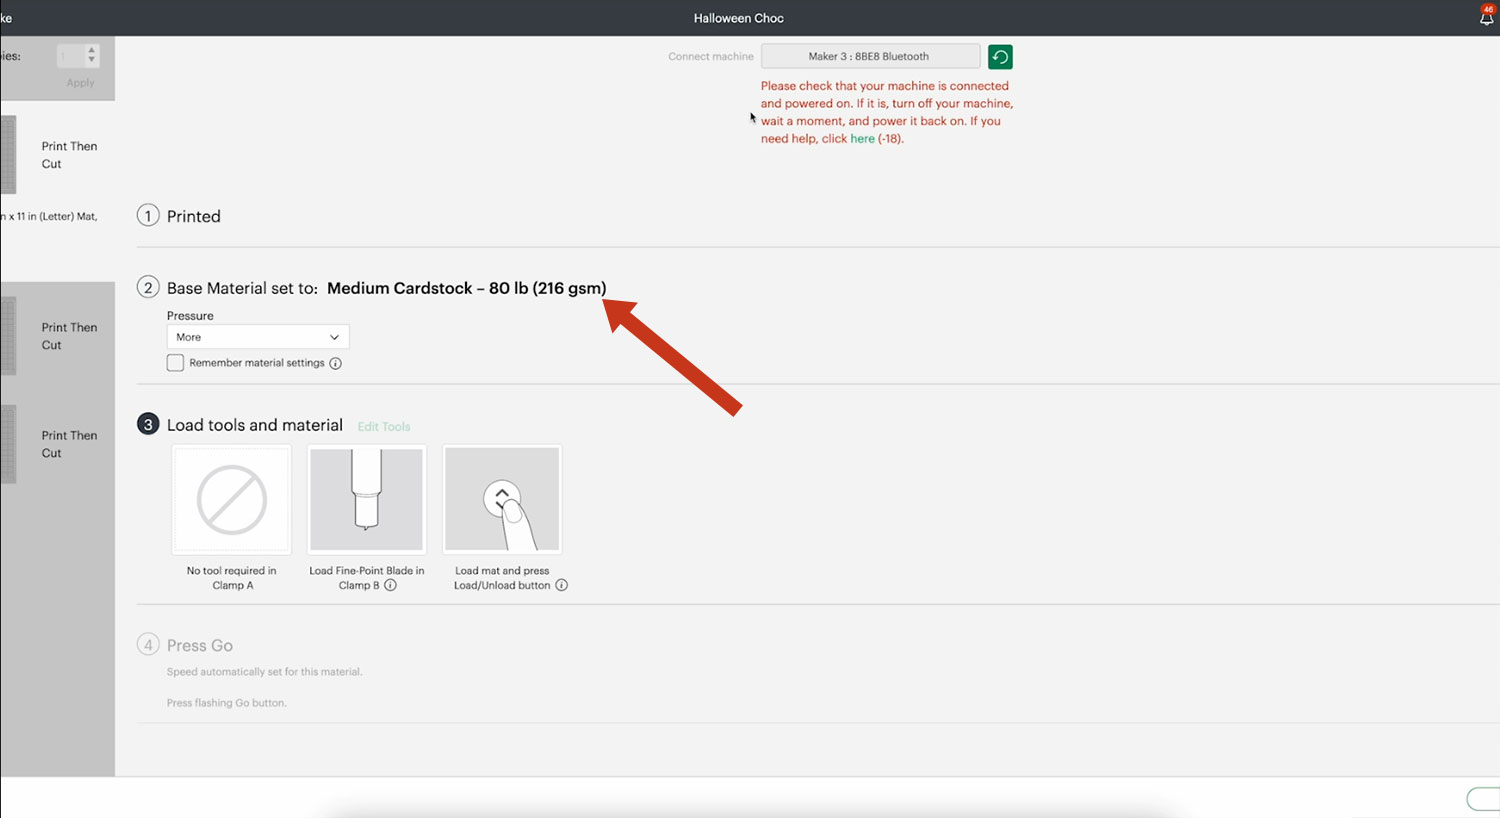
Follow the on-screen instructions to complete the print then cut process with the Cricut.
Alternatively, you can use a guillotine or paper trimmer to cut your wrapper by hand which can save time if you’re crafting under pressure.
Step 6) Wrap the candy bar
Find the nutritional information to attach to your bar before the wrapper goes on.
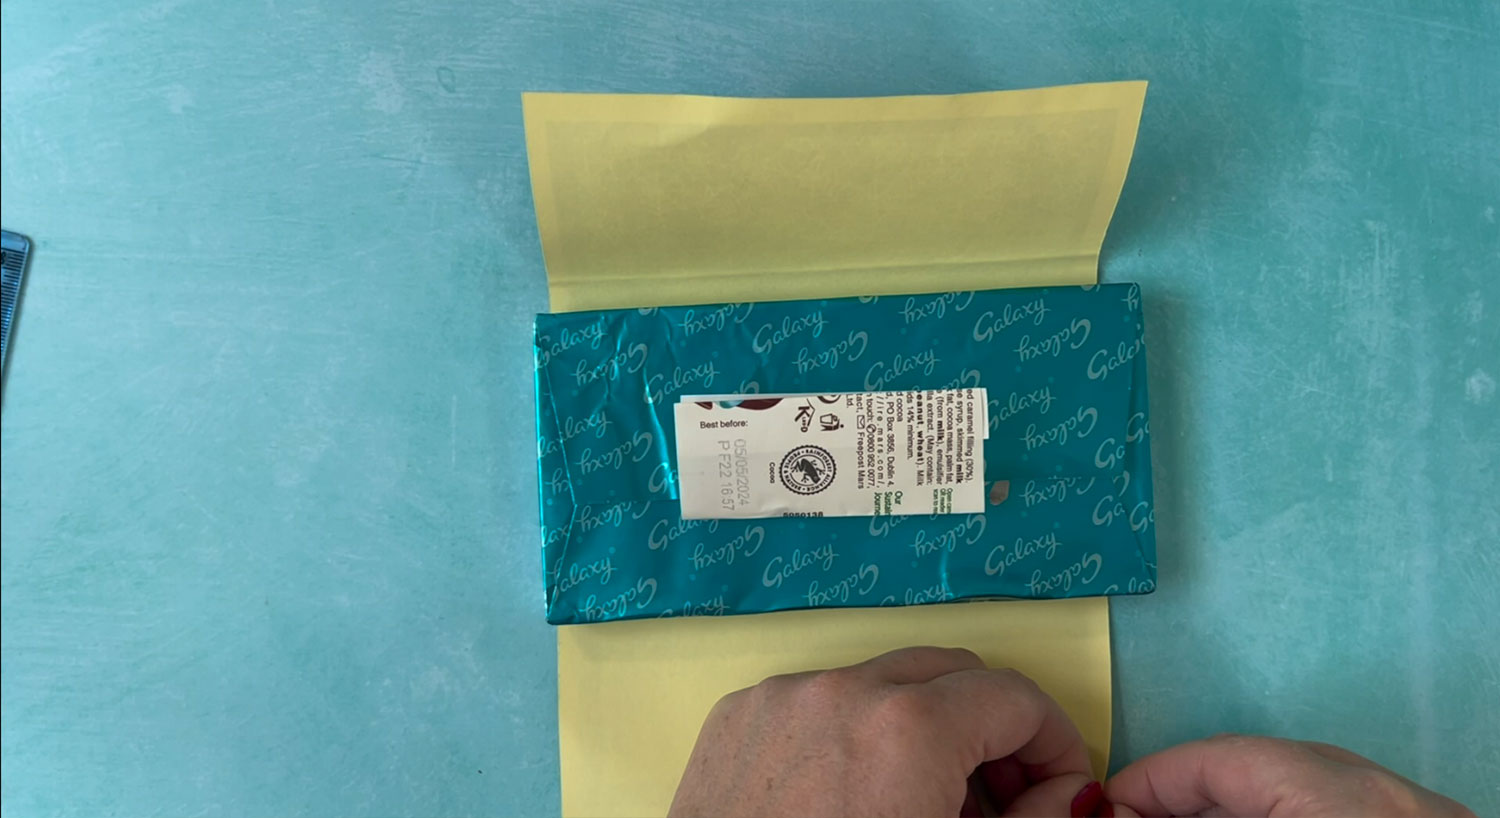
Fold your wrapper around the candy bar, keeping it tight and with your letters positioned as you wish.
Create some creases in the paper to make it easier to stick on.
Unfold it and peel back one end of the sticker paper to reveal the sticky side by about 1 inch.
Fold the backing paper back onto itself or cut the edges so that it doesn’t show behind your wrapper.
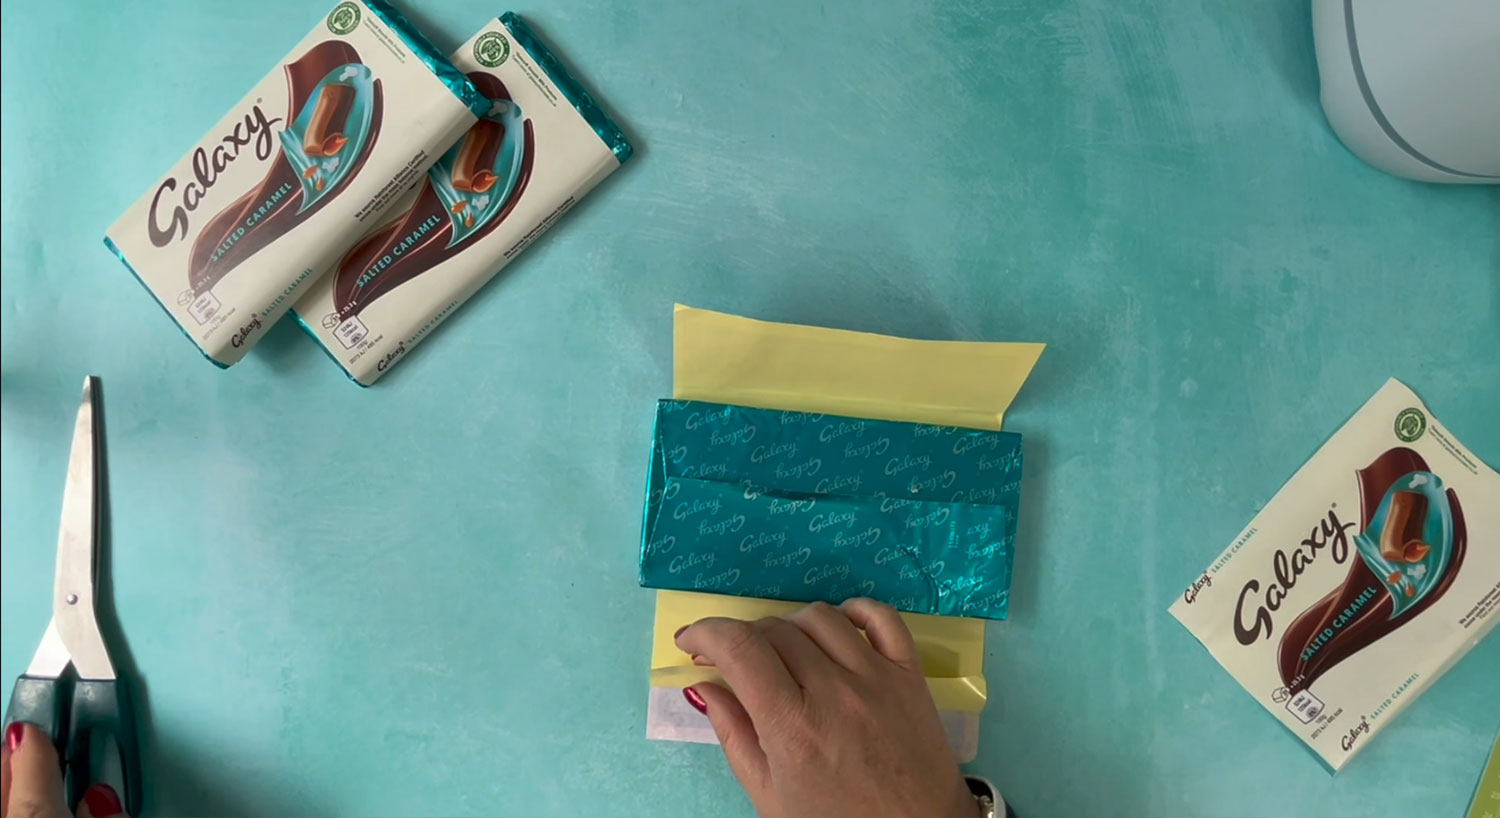
Pull tight and stick the adhesive edge to the other.
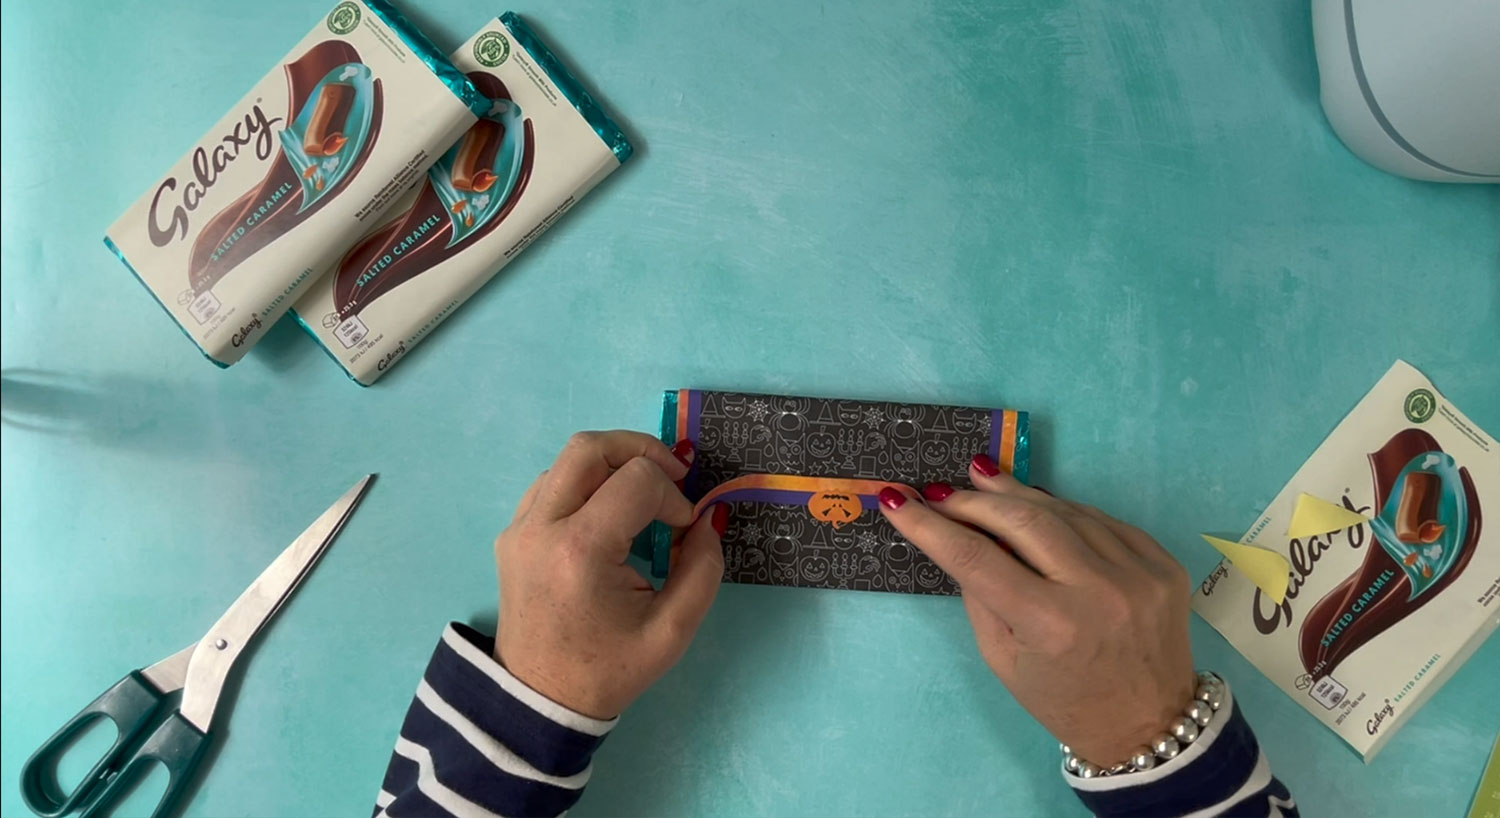
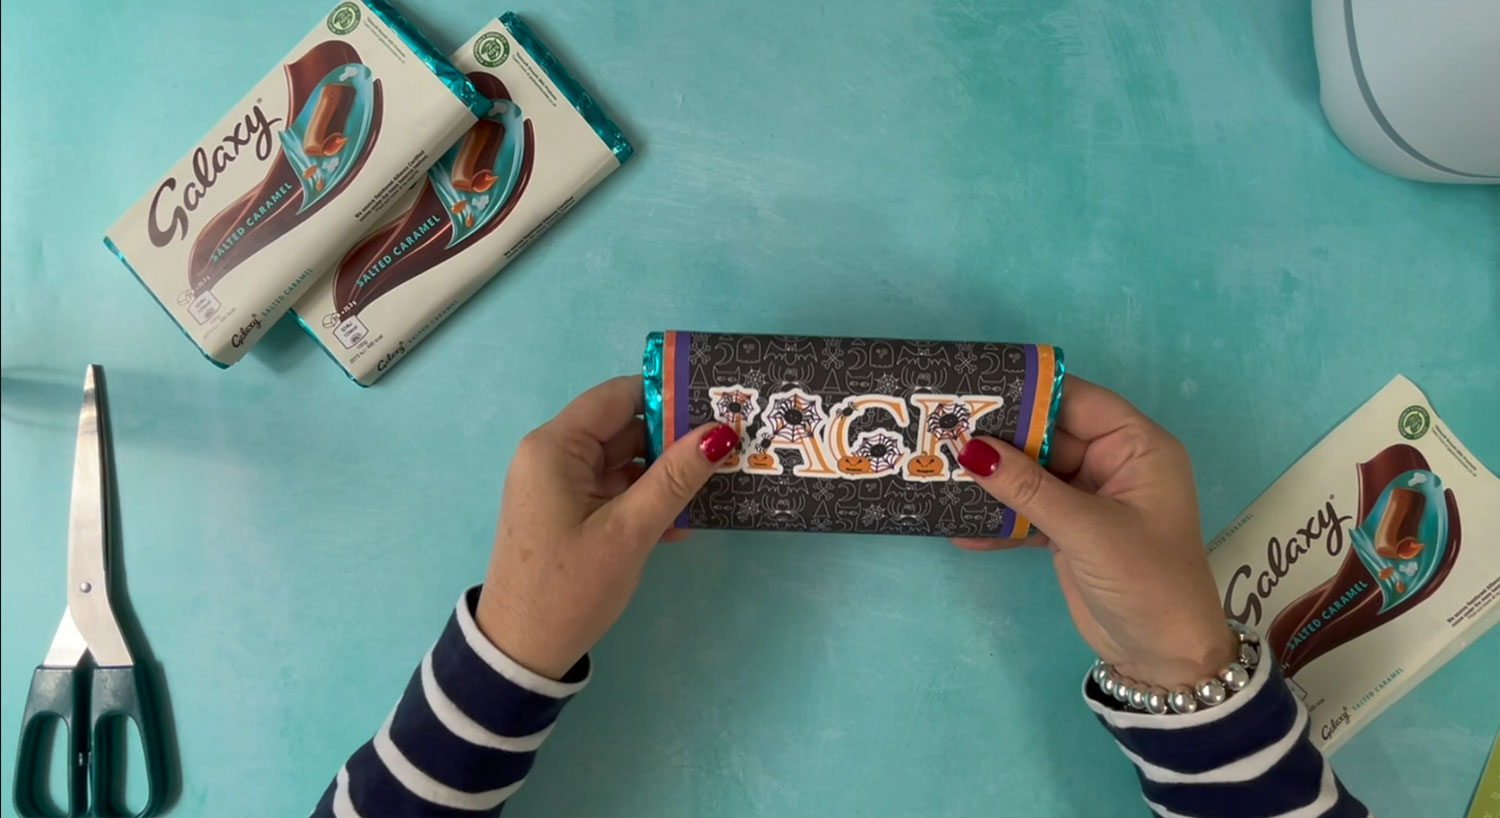
There you have it! Your personalised candy bar wrappers are all finished!
Custom candy bar wrappers with sticker paper
I hope you enjoyed following along with this candy bar wrapper tutorial!
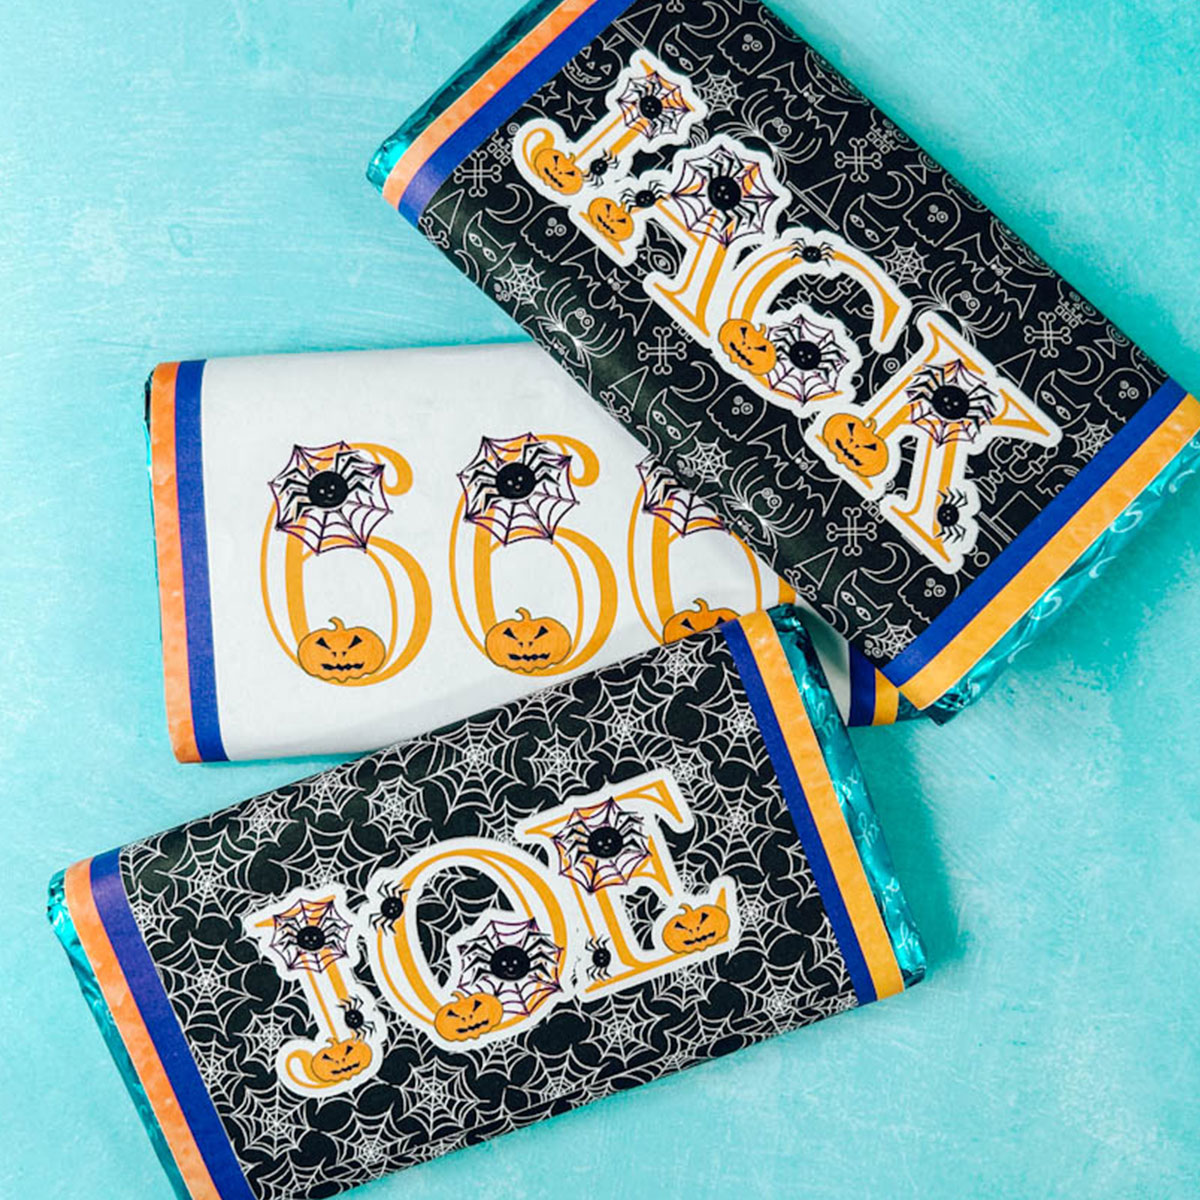
I never thought it could be so easy to make your candy bars stand out from all the rest and I love how you can customize them for each person.
Happy crafting,
Sarah x

