How to Make Eclipse Cards in Cricut Design Space
Make fun handmade cards that POP with the Eclipse card technique! Here’s how to design your own greetings cards in Design Space.
I love making papercrafts that have dimension to them so they “stand out”, which is why I’ve always loved eclipse cards.
This card making project combines two of my favourite hobbies – crafting and graphic design! First, we’ll create a custom printable card template in Cricut Design Space and then make the card, including adding the lovely eclipse effect.
[cws_halloween2021]
What is an eclipse card?
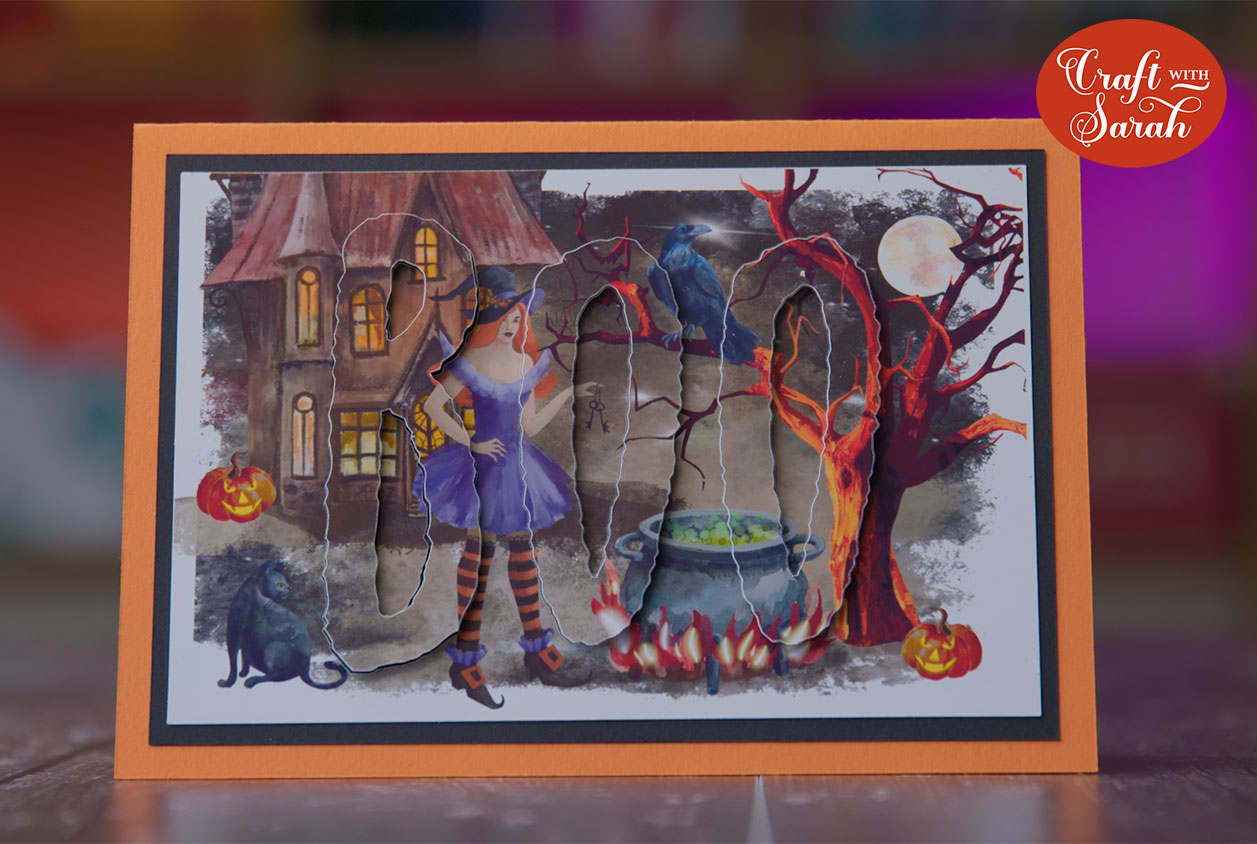
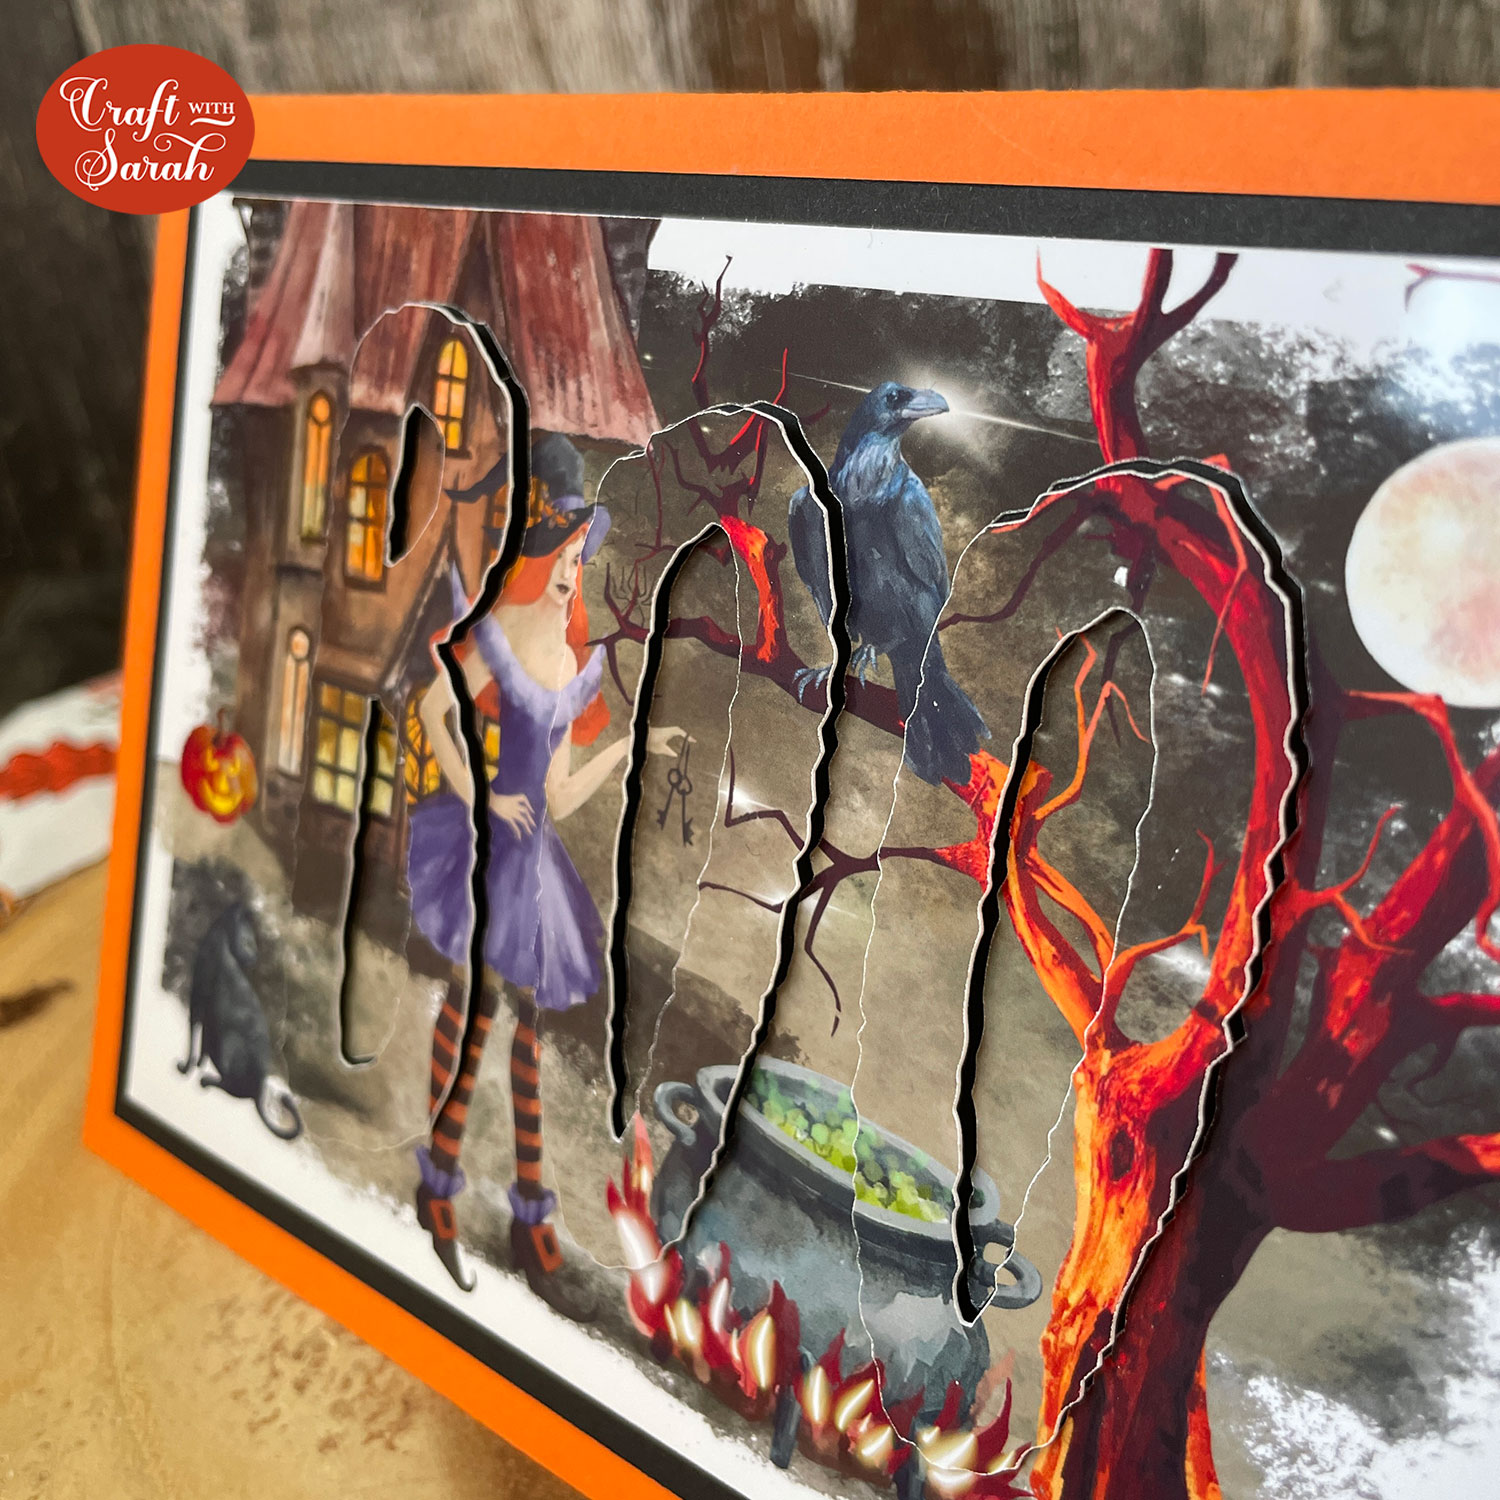
An eclipse card is when you cut a word or image (but usually a word) out of a decorated card front and then use foam pads to “raise” that cutout above the level of the rest of the card front, for a subtle dimensional effect.
In this tutorial I’ll show you how to use some of the amazing clip art / digital artwork from Creative Fabrica to design your own printable card front, then how to “print and cut” it with a Cricut to create the eclipse effect in the middle.
Please note that some of the links included in this article are affiliate links, which means that if you click through and make a purchase I may receive a commission (at no additional cost to you). You can read my full disclosure at the bottom of the page.
How to do the eclipse card technique
This video shows how to design a printable card template in Cricut Design Space and then turn it into an eclipse card.
Note: The video was recorded using Design Space version 6.12.227. Later versions may look or function slightly differently.
Video resources:
Eclipse card materials
Here is a list of the materials that I used to make this project.
- Digital clip art – I used this set
- Orange and black cardstock
- Glossy photo paper
- Collall All Purpose Glue
- Needle Tip Applicator Bottle
- 3D foam pads
- Printer – this one is amazing!
- Cricut Maker
- Light blue Cricut cutting mat
- Cricut scoring wheel (optional)
How to make a Halloween eclipse card
Here is how to design and make your very own eclipse cards.
Although I’m showing you how to make a Halloween card, you could use the same technique for any type of card or occasion!
Step 1: Choose your graphics
I’m using my FAVOURITE website to get graphics from, which is CreativeFabrica.com.
They have hundreds of thousands of graphics, SVGs, digital papers, fonts and so much more to choose from.

The BEST thing is, they offer a monthly subscription where you can pay a small monthly fee to get unlimited download from their website! This is so beneficial as it means you can download all the graphics you want, for one small monthly price.
I’m happy to say that I have a special promotion available with Creative Fabrica where you can get your first month’s subscription for just $1!!
That’s right, just $1 to access 100,000s of digital file goodness!
If you’d rather not sign up to a recurring subscription though, that’s absolutely fine. All graphics can be purchased individually instead, for a small one-off cost.
Head on over to Creative Fabrica and choose your Halloween graphics.
The set I chose is called “Magic Clipart Watercolor,Witch Halloween“.
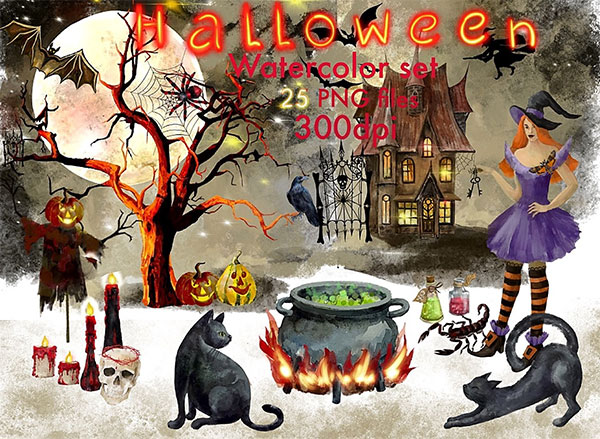
I love all the different images that are included and how well they “match” together, plus the watercolour effect works perfectly for eclipse cards.
Before you can use the graphics, you need to unzip the download folder that they comes in.
- How to unzip a folder on Windows computer
- How to unzip a folder on a Mac
- How to unzip a folder on an iPad/iPhone
- How to unzip a folder on an Android device
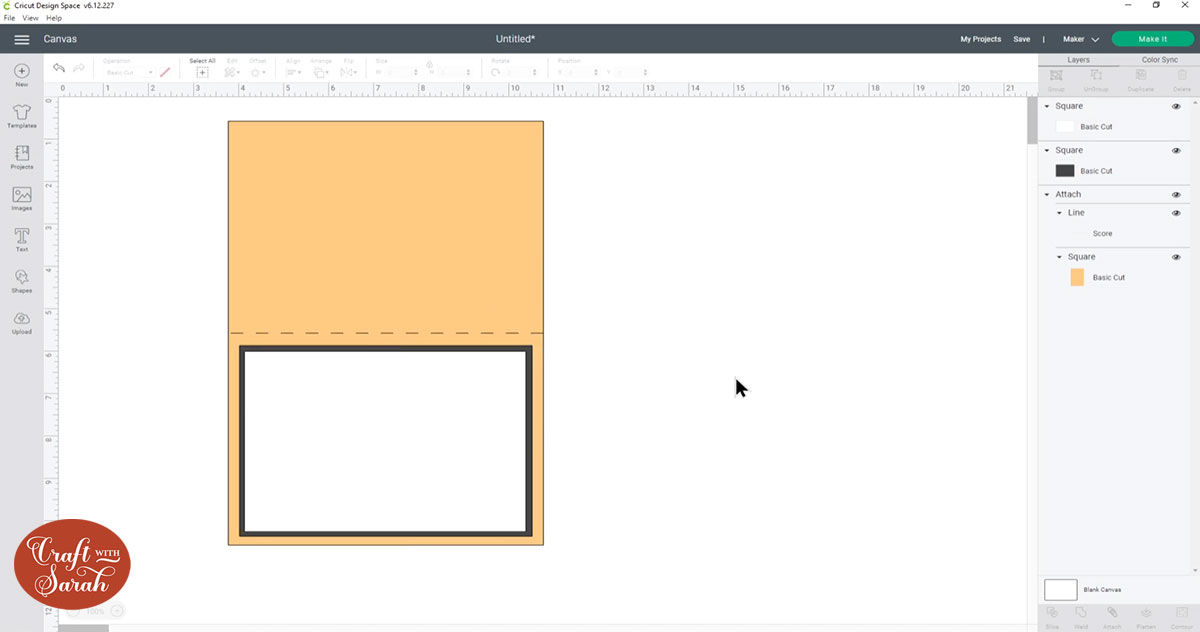
Step 2: Create the base card
For this project, you can choose to use a premade card blank, to make one yourself with a paper trimmer, or to make one in Design Space.
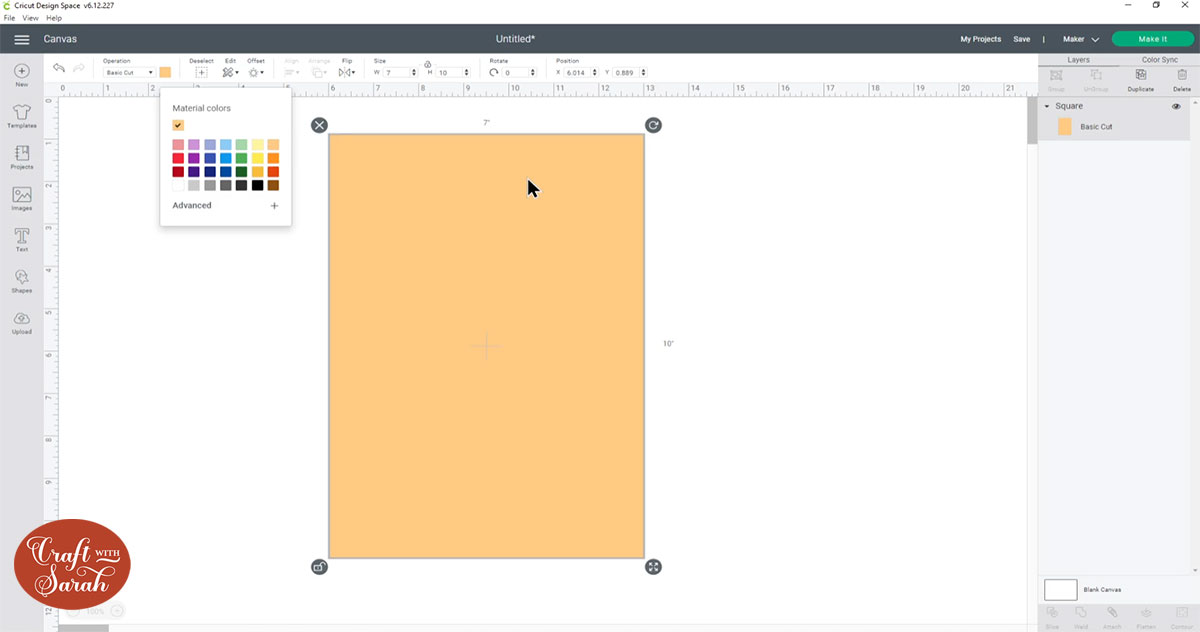
To create a card blank in Design Space, click “Shapes” and choose a square.

Click the pack lock icon to unlock it, then change the size using the width/height boxes along the top of the screen.
To make a 5×7 inch card front, my rectangle measures 7 inches wide and 10 inches tall (double the height of the card).
Change the colour to the colour you want to cut it from.
If you don’t have a Cricut scoring tool then you can skip straight to Step 3, but if you do then it’s nice to add the score line to the design as it will be easier to fold neatly.
Click “Shapes” again and choose a score line.
Make the score line the width of your card, so mine is 7 inches.
Click “Select All” to select the rectangle and score line.

Click “Align” and then “Center”.
This will put the score line perfectly in the middle of the rectangle.
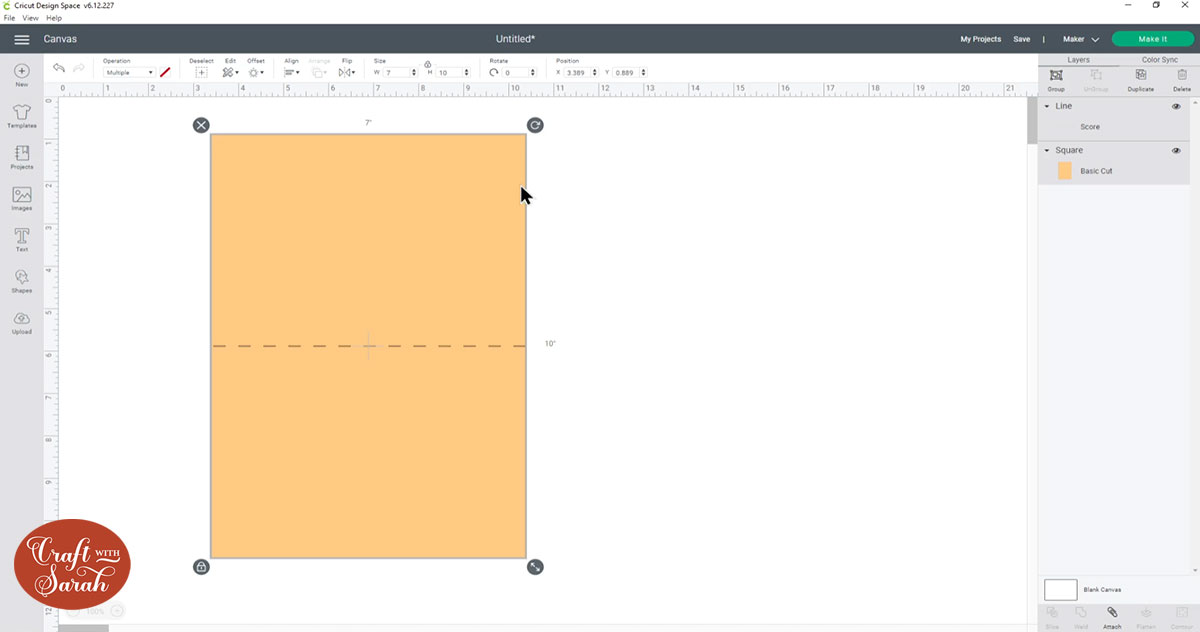
With both layers still selected, click “Attach” on the bottom right of the screen. This “joins” the score line to the base rectangle which tells the Cricut that you want the score line to be done down the middle of the rectangle.

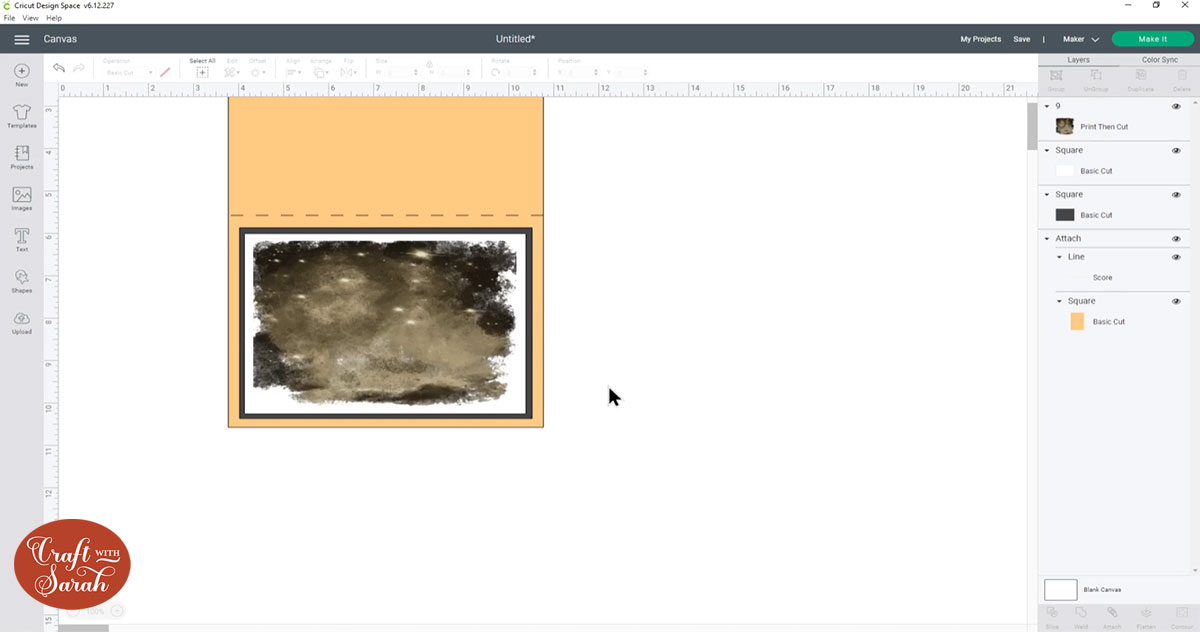
Step 3: Create some mats and layers
Add another Square and turn it into a rectangle that’s slightly smaller than your card front. Mine is 6.5 x 4.5 inches.
Press “Duplicate” and make the second rectangle slightly smaller (6.25 x 4.25 inches).
Roughly position them in the middle of your card front. We’re only using this as a visual guide, so it doesn’t matter if you don’t get it exactly in the middle.
Make sure your top rectangle is white as we will be using that for the print-then-cut card deign.
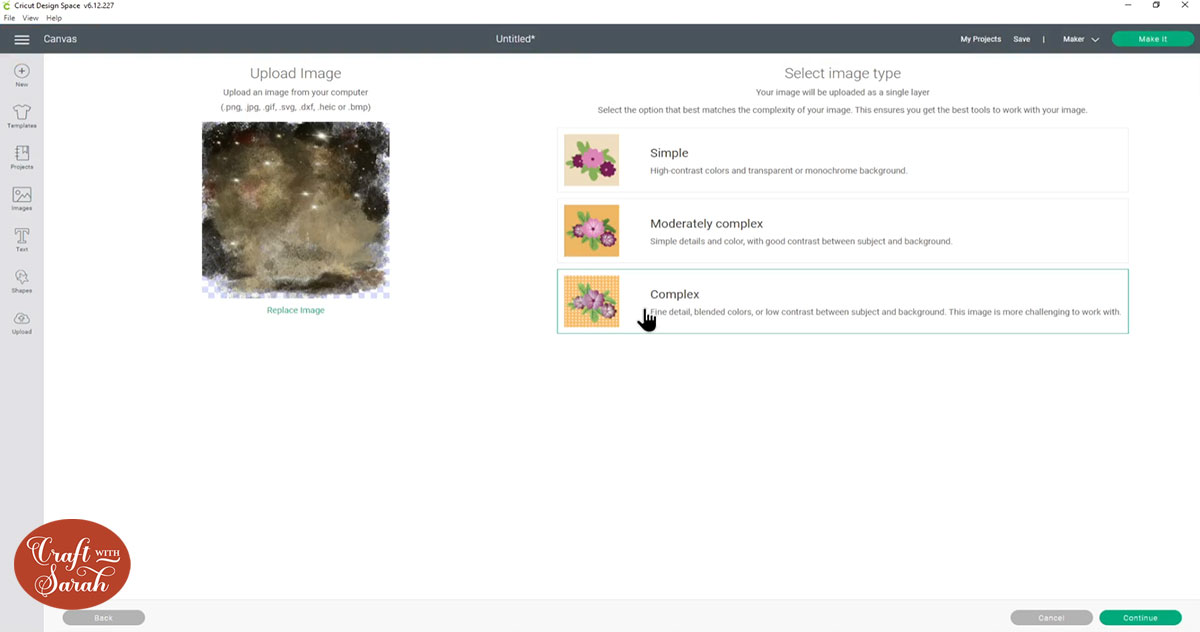
Step 4: Upload the graphics into Cricut Design Space
Click the “Upload” button.

Find the unzipped graphics folder on your computer and choose one of the images to upload into Design Space.
You will need to upload them one at a time, so it might take a little while but it is definitely worth it!
I started with the watercolour background graphic.
If you have the choice of a jpg or png image, choose the png.
As these are print-then-cut images, you need to do a few extra steps when uploading them.
Choose “Complex” at the image type.
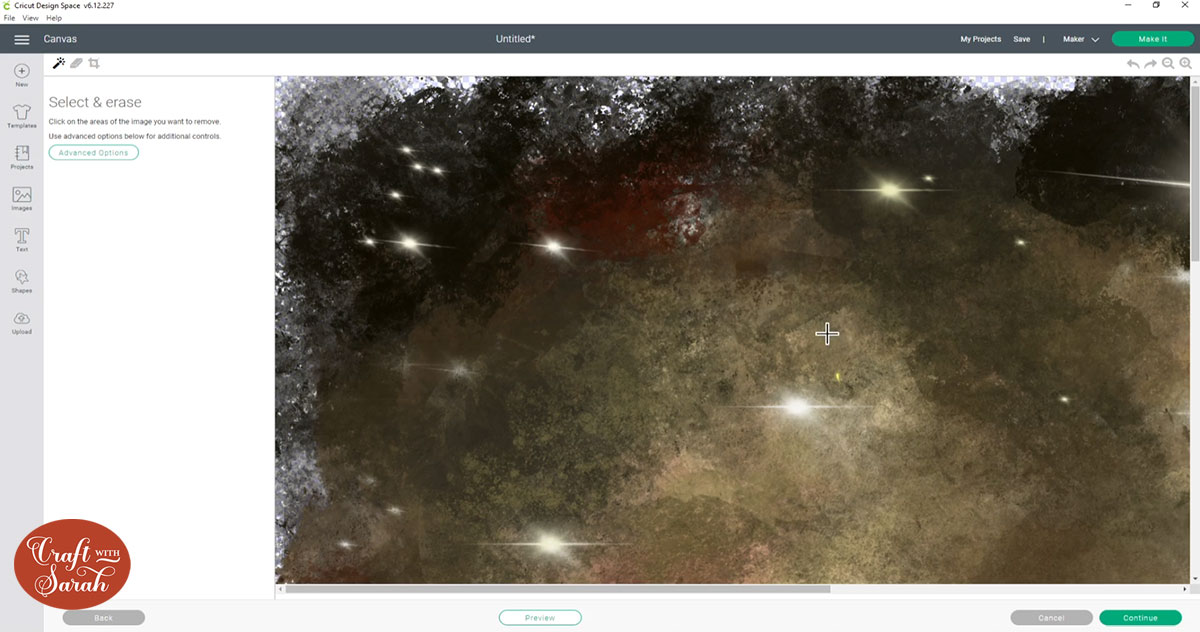
You don’t need to change anything on the next screen.
The white-and-grey checkerboard effect shows where parts of the image are “transparent”.
On this screen, simply click “Continue”.
Finally, choose “Print then Cut Image” and then press “Upload”.
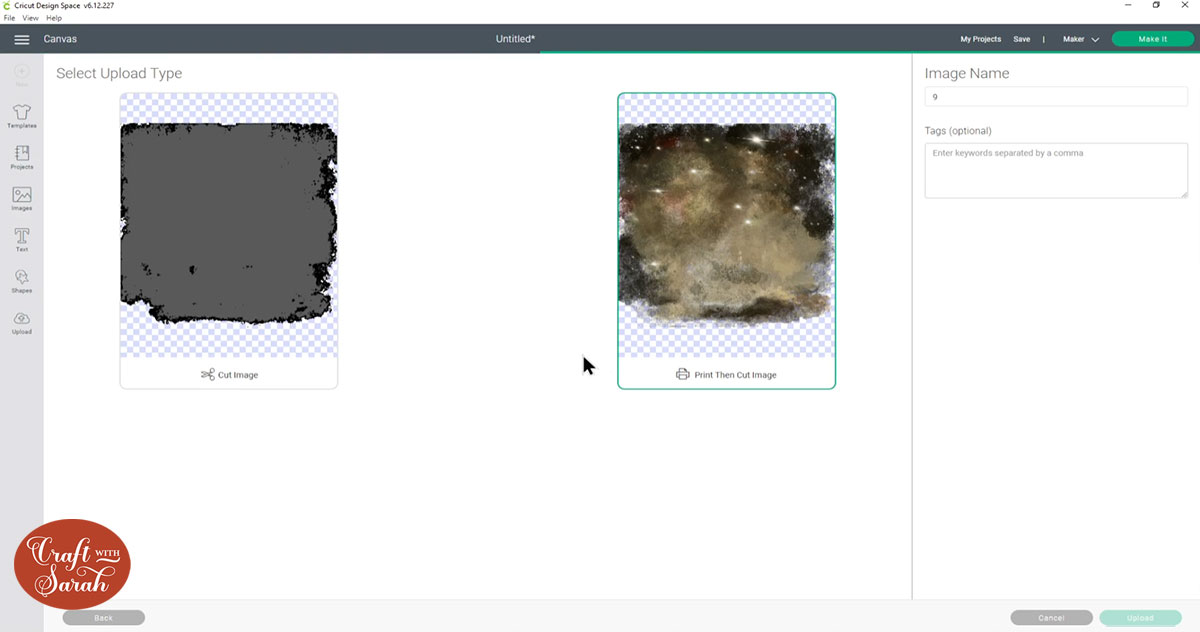
Click the graphic in your “Recent Uploads” and then click “Insert Images” to add it to your Project.

Step 5: Design your card front
You’ll probably find that the graphics come in really big, so make them smaller.
I “stretched” the background graphic by resizing it into a rectangle so that it would better fit my card front.
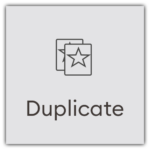
Now is the fun designing part! Upload more of the graphics set and position them on your card to build up a Halloween scene.
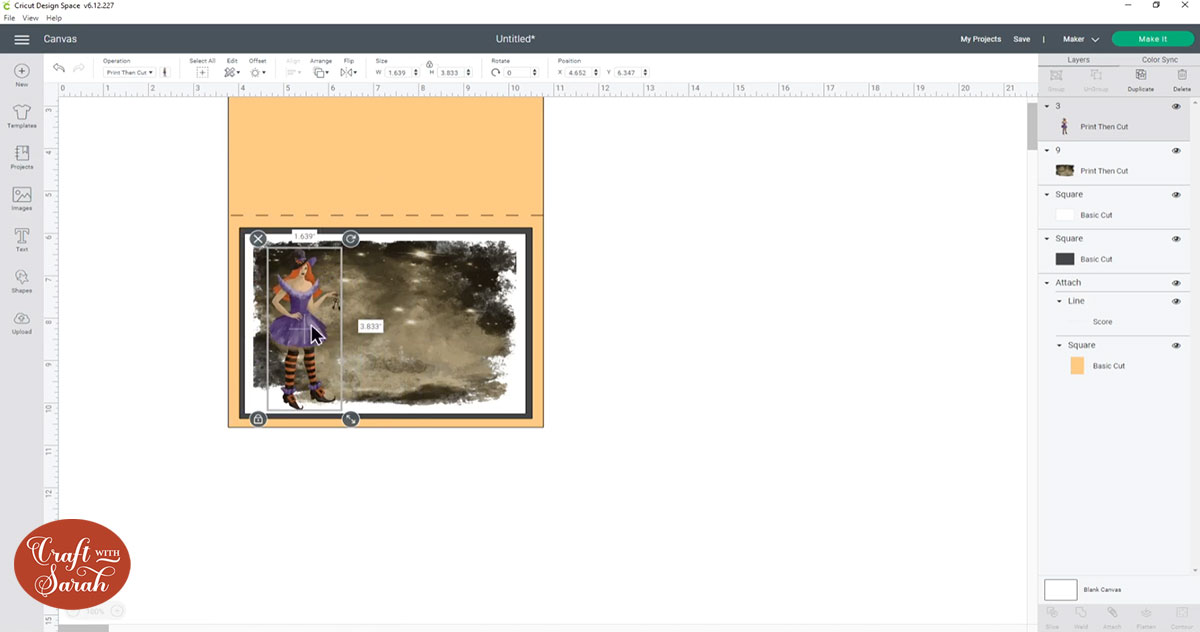
It doesn’t matter if parts of the graphics go “outside” of your white rectangle – we’ll fix that later.
This is how my spooky scene ended up:

Step 6: Cut away the excess images
We need to “trim” away any of the graphics that are going outside of the white rectangle.
Unfortunately, we need to do this one image at a time.
I did try “Flattening” all the graphic together into one layer so they could all be trimmed at once, but my “Slice” button disappeared when I did that, so I had to do it one-at-a-time instead.
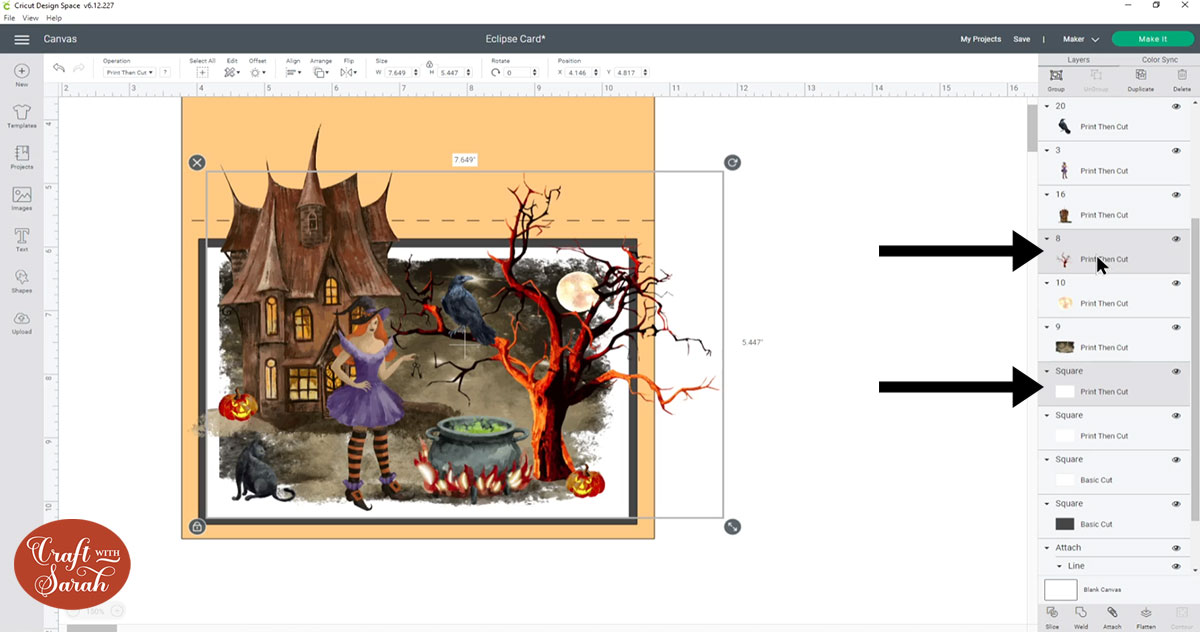
Count up the number of layers that go outside the white rectangle.
Click the white rectangle layer and press “Duplicate” to make a copy. Roughly drag it on top of the original white rectangle.
Drag the copy down in the layers panel so it sits on top of your original rectangle.
Repeat that until you make the same number of copies as you have layers that need “trimming”. For me, this was two – one for the haunted house, plus the tree.
You also need your original rectangle, so I had three in total.
Click one of the white rectangles in the layers panel, press “shift” on your keyboard and then click the other rectangles so they are all selected.
Click “Align” and then “Center” to make sure they are perfectly positioned one-on-top of the other.
Now it’s time to start Slicing (aka trimming).
Click one of the white rectangles, press Shift on your keyboard and choose ONE of the image layers that’s going outside the rectangle.
Click “Slice”.

This will move the layers you had selected to the top of the layers panel.
You now have four “Slice Result” layers. Delete the two pieces of white rectangle and the part of the image that goes outside the original rectangle shape.
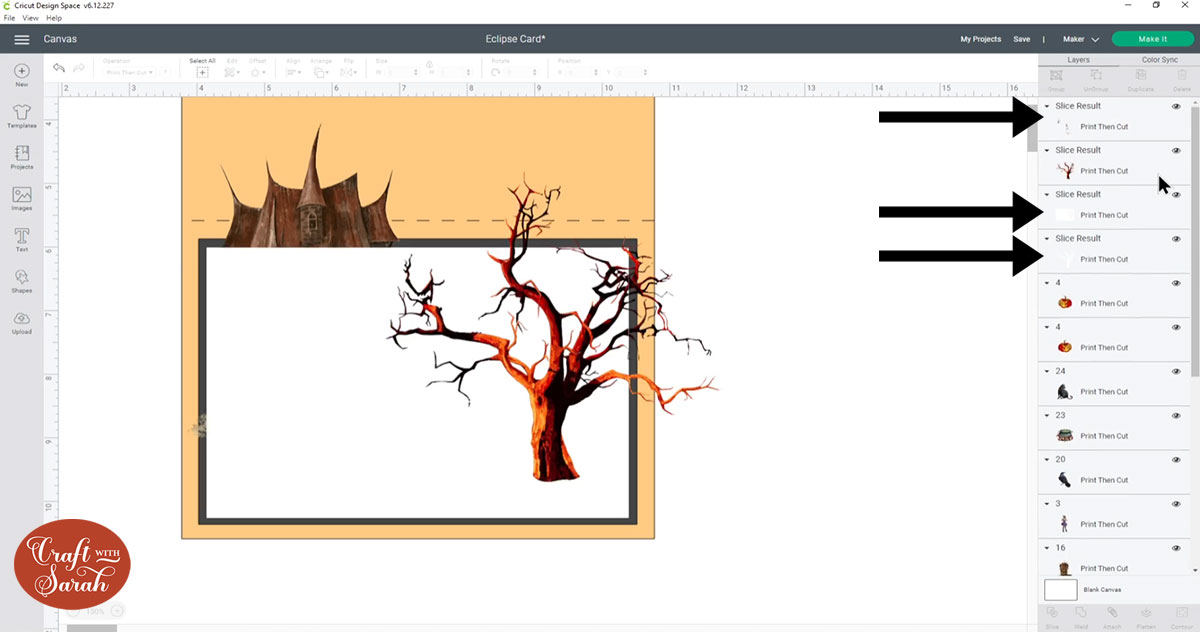
Click-and-drag the graphic layer back to where it should sit in the layers order.
Do the same thing for any other images that need to be Sliced.

Step 7: Flatten the graphics
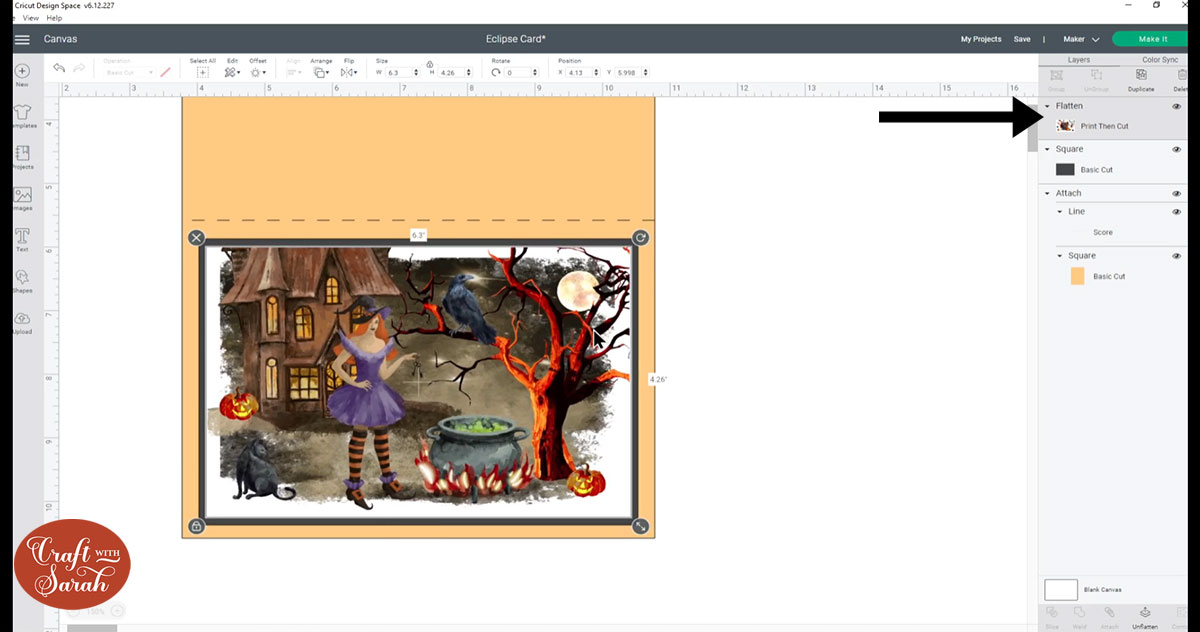
Select all your graphics layers and the one remaining white rectangle and click “Flatten” to turn them into one layer.

The reason we need to do this is because if they were all separate layers, the Cricut would try to cut each graphic/layer separately but we want it to just cut around the edge of the rectangle.
Step 8: Super important print-then-cut HACK!!
I have been having some problems with print-then-cut recently when trying to cut out a rectangle.
My Cricut was cutting weird diagonal lines through the rectangle that weren’t supposed to be there.
After lots of failed attempts, I eventually worked out a fix, so I now do this for all my print and cut projects where I’m cutting a solid shape.
Make a new rectangle and size it JUST bigger than your currently rectangle.
For me, this was 6.3 inches wide and 4.26 inches tall.
Make it white and position it below the flattened layer. Click “Align” and “Center” to position them and then click “Flatten” again.
I don’t know why it works, but creating this really thin white border around the edge seems to fix all the print-then-cut bugs!
The border is so thin that you won’t notice it when it’s been cut out, but it’s enough to “trick” the sensor into cutting correctly.
Step 9: Add the eclipse word
Eek, we’re on to Step 9 already and haven’t actually done the “eclipse” part of the card yet!!
Let’s fix that…
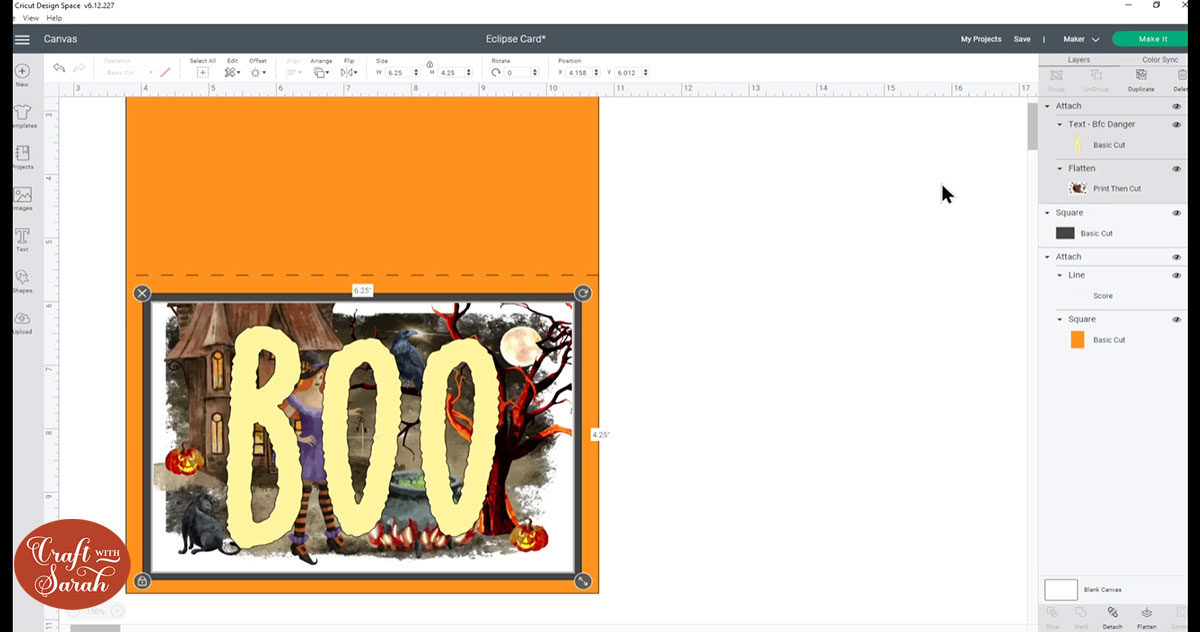
Click “Text” and type out the word that you want to cut from the card front. I chose “BOO”.

You can use any word, but the shorter it is, the better it will work as your letters will be larger.
Change the font to one that suits your card front. I used “BFC Danger” which is a Cricut Access font.
Position the word in the Center of your print-then-cut layer.
Click the text layer, hold down “shift” on your keyboard and click the print-then-cut layer.
Click “Attach” to join them together.
Step 10: Cut the eclipse card
Save your design and then click “Make It”.
When you look at the print-then-cut layer, it LOOKS from the preview like it’s going to print the word BOO in yellow, but don’t worry – it doesn’t!!
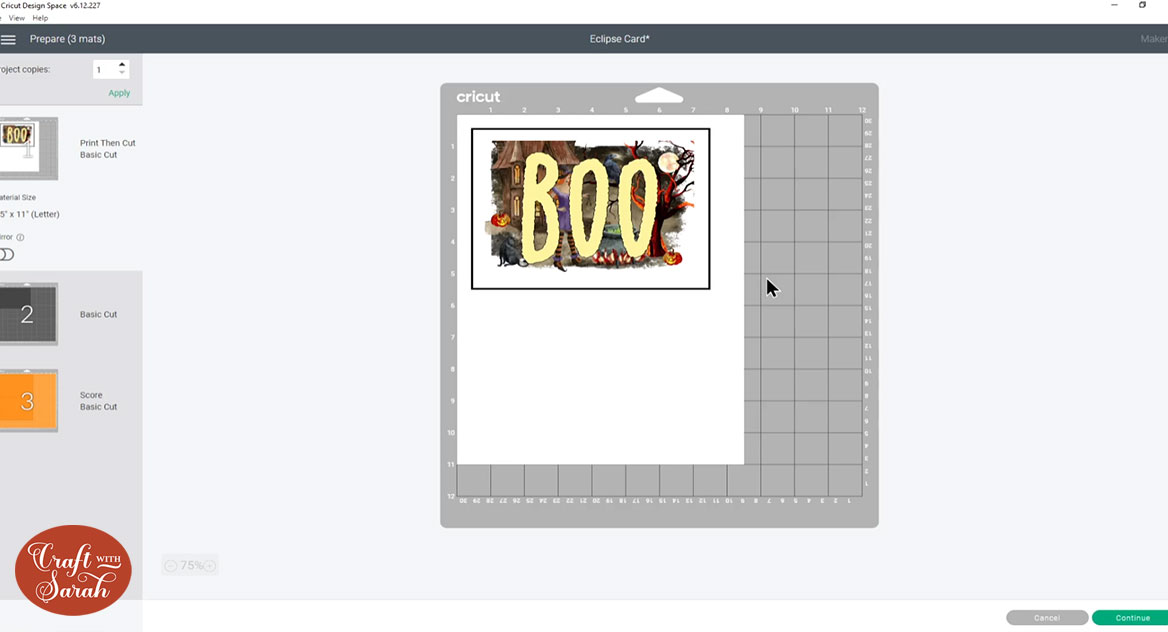
When you preview the print setup it will show you the card front without the word on, which is actually how it’s going to print.
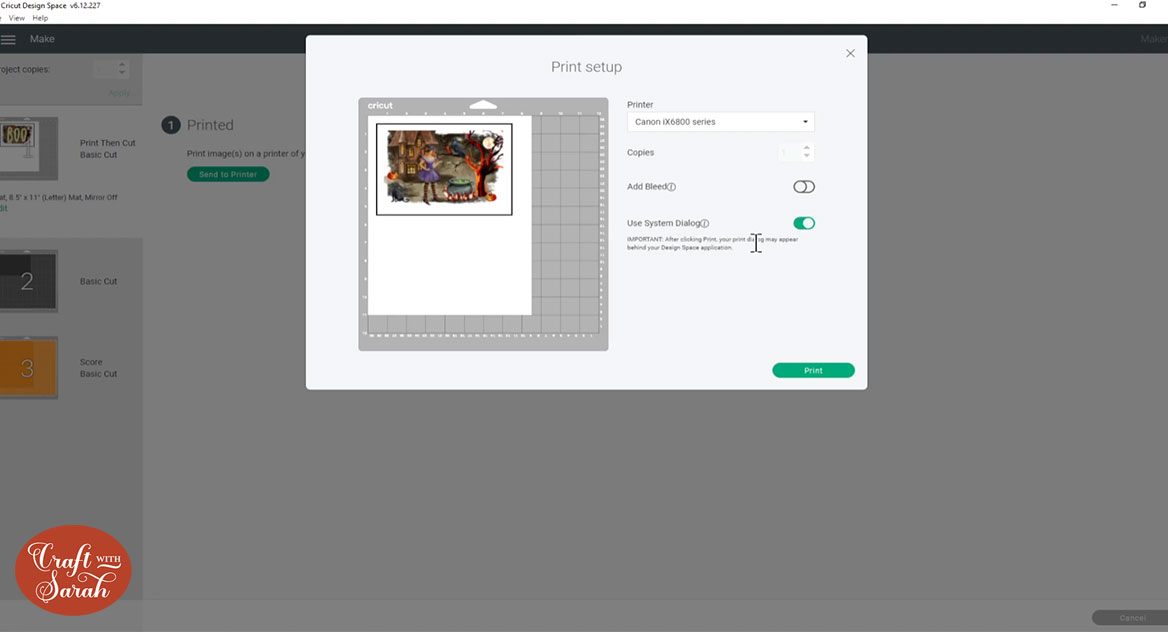
Turn off the bleed and turn ON the “user system dialog” option.
Click “Print” and it will open your printer settings.
Change it to glossy photo paper and “high” or “best” print settings to make sure it looks great when you print it!

Follow the steps on the screen to print and then cut the card front.
New to print and cut? Check out this print and cut tutorial.
Cut out all the other layers, and then we’re ready to stick the eclipse card together!
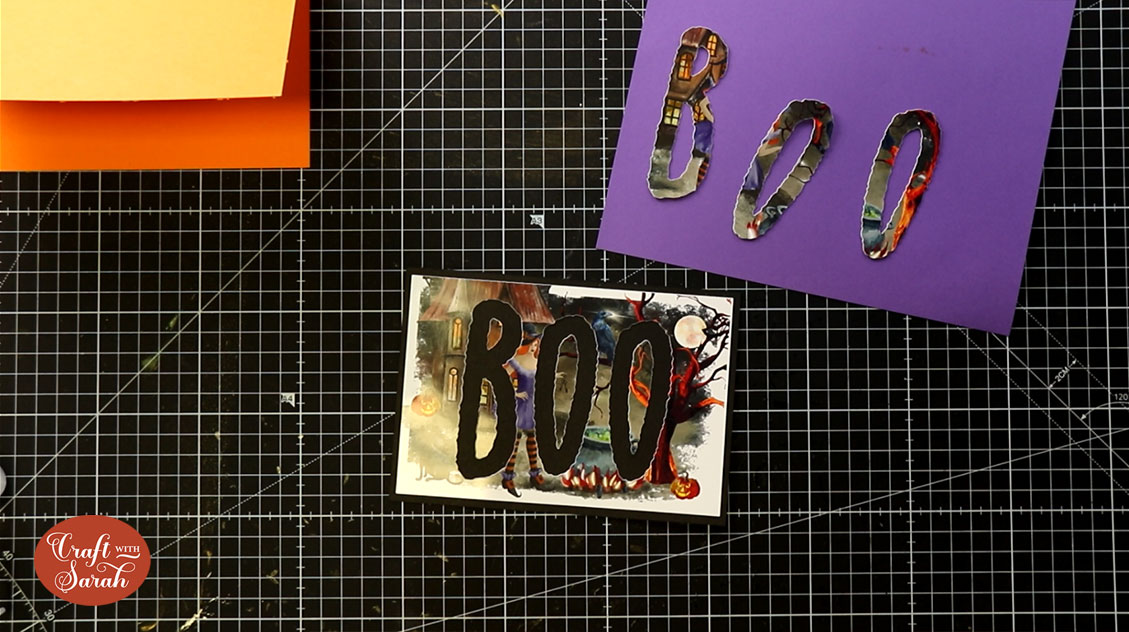
Step 11: Eclipse card tutorial
You should have the following cut out:
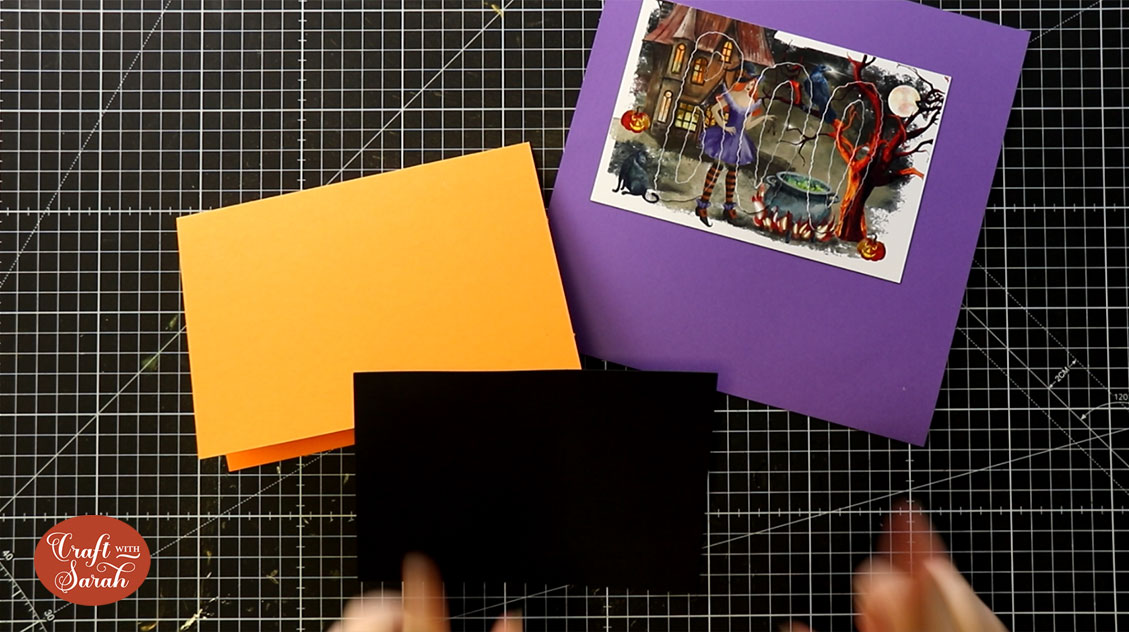
(apart from the purple card – I put that there to make it easier to see the “BOO” cutout on the card front)
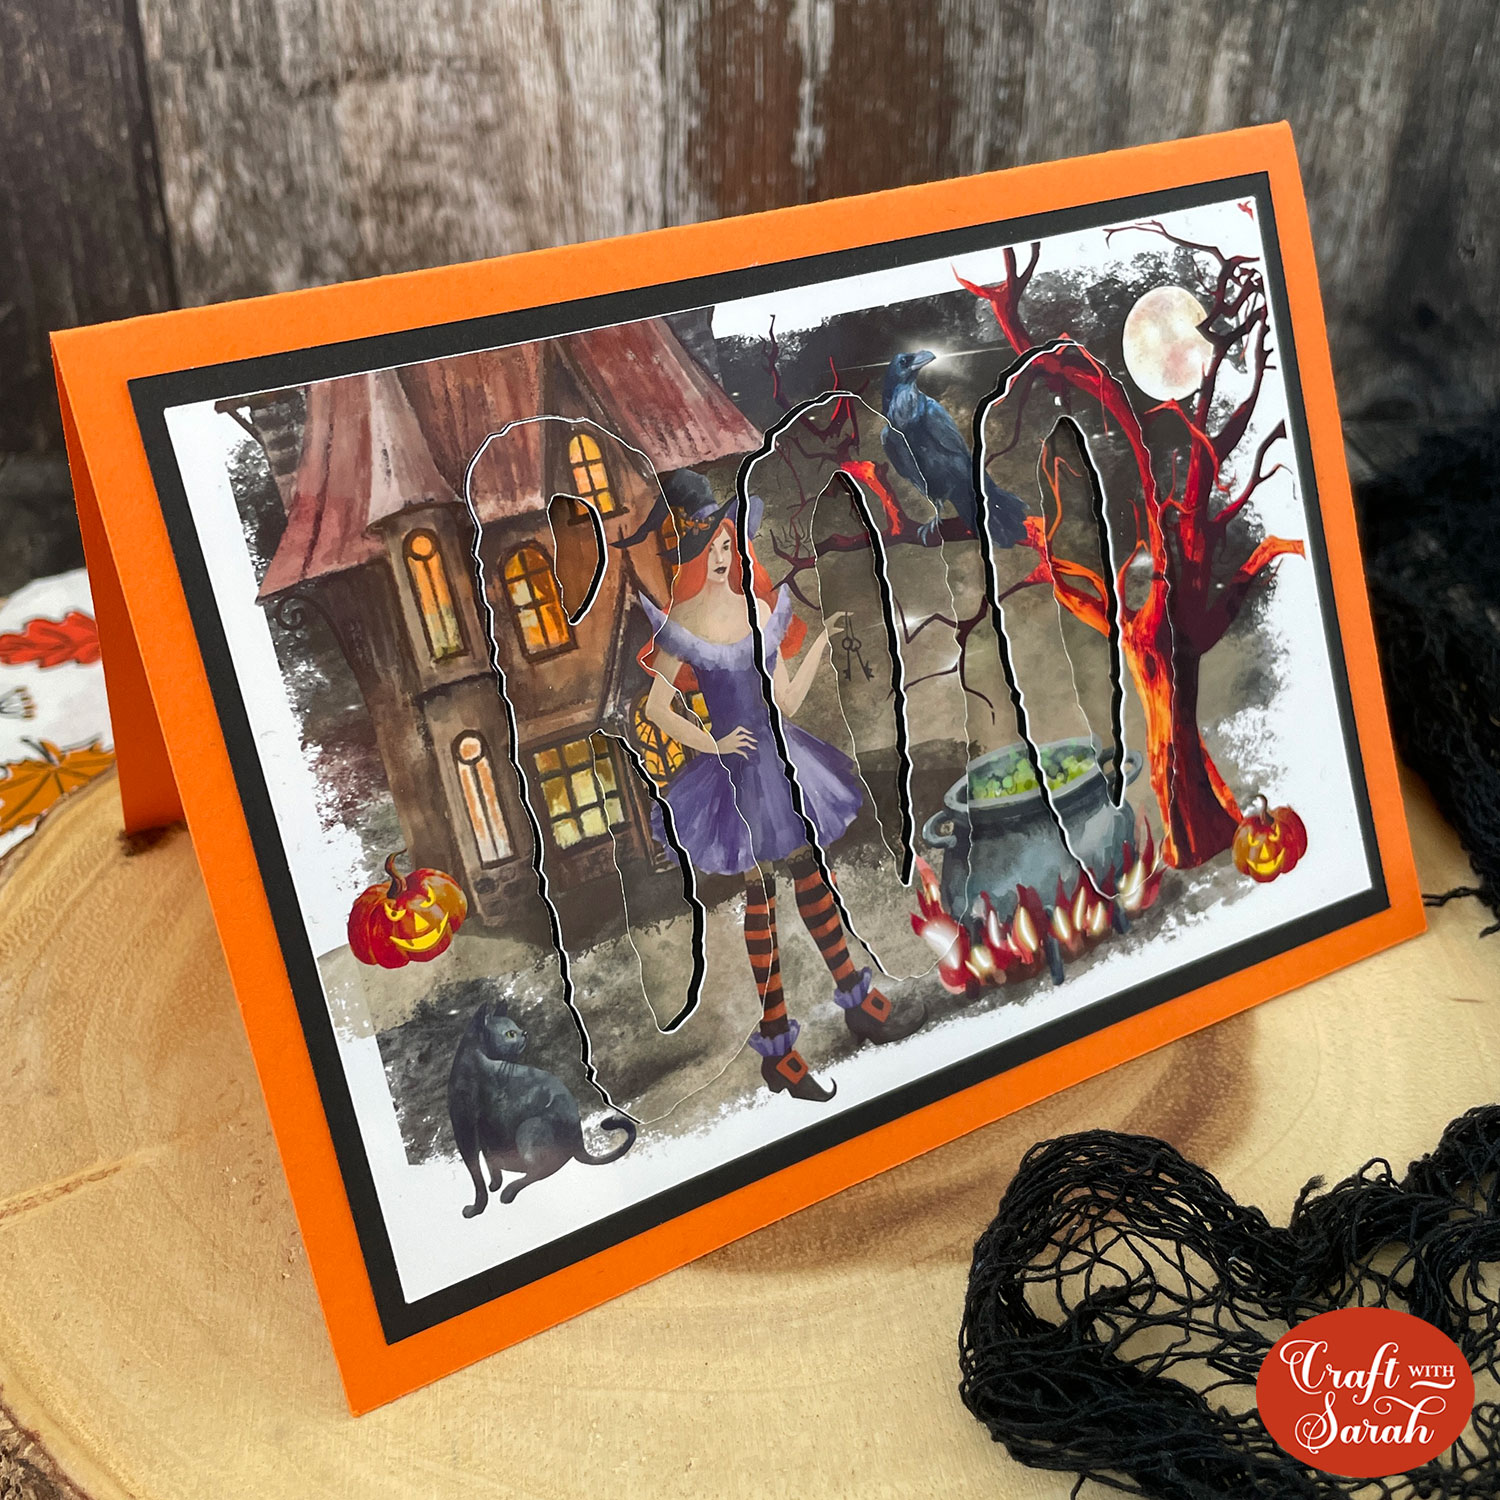
Glue the printed card front to the black rectangle of card.
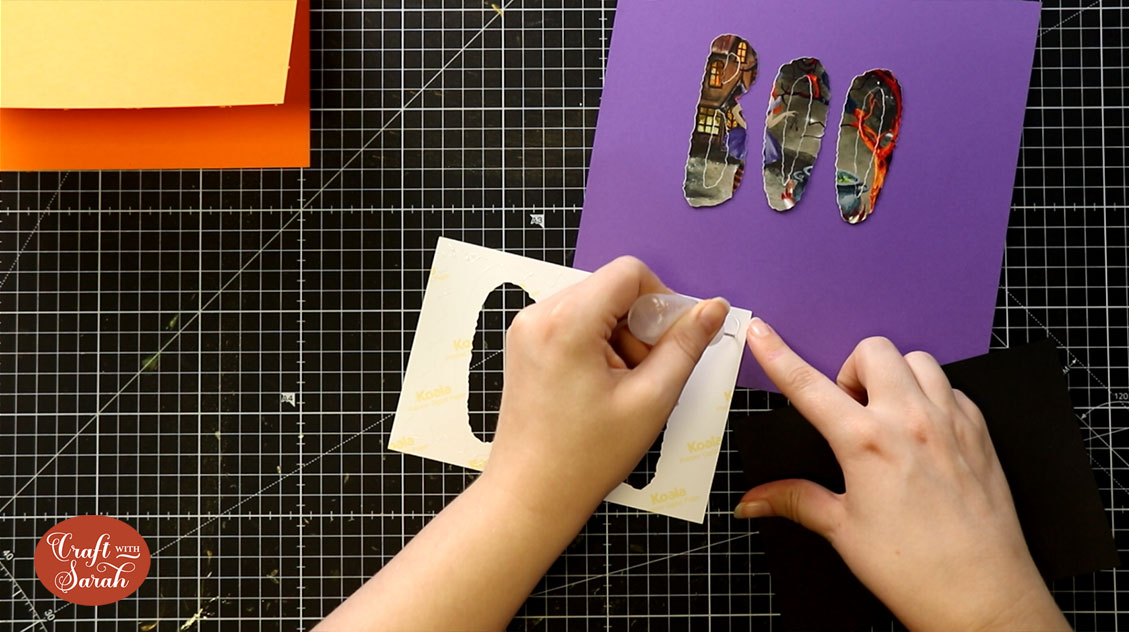
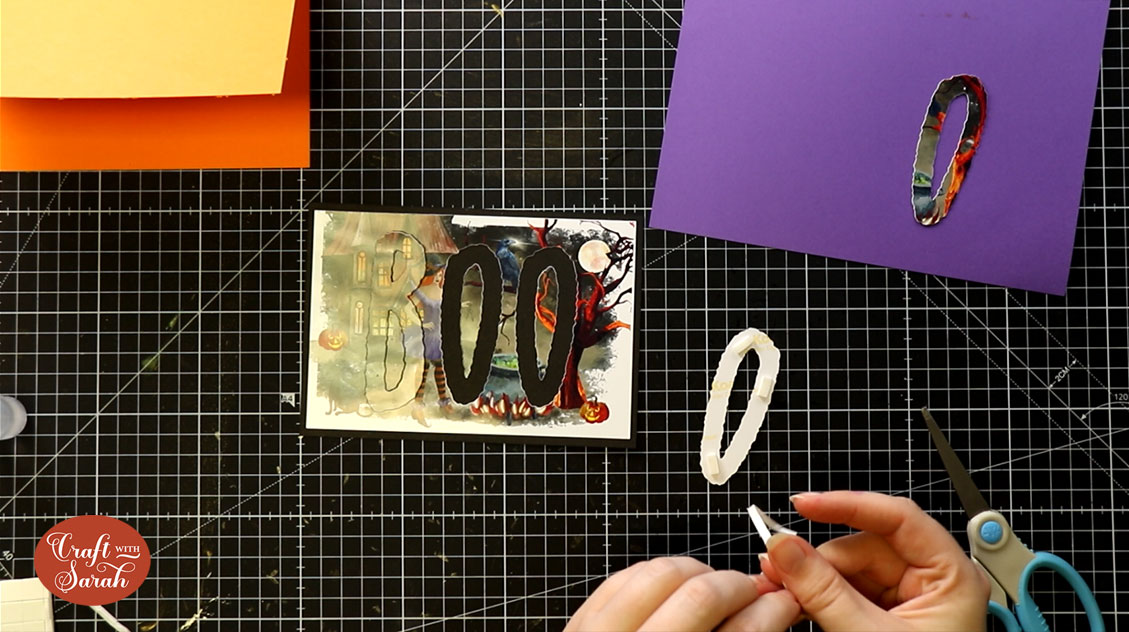
Place the letters inside but do NOT stick them down!!!
Use this as a guide to glue the middles of the letters in the correct place, then remove the main letters.
Use foam pads to stick the letters inside so that they are “raised” up from the surface of the rest of the card.
Stick the rest of the card together, and that’s it – your eclipse card is finished!

I hope you enjoyed this tutorial on how to design and make an eclipse card.
For more Halloween greetings card designs, be sure to join the Halloween Craft Countdown! I’m releasing 20 new Halloween crafts in 20 days, including several different greetings card ideas.
Happy crafting,
Sarah x

