How to use Digital Stamps for Card Making
Ever wondered how to use digital stamps or coloring pages in your handmade cards?
Here’s how to add digital stamps to make a patterned background for a greetings card and then how to pull out one image as a topper to create a focal point for the card.
Plus, learn my ultimate print-then-cut hack for ensuring a perfect cut with a Cricut machine!
[cws_halloween2021]
What are digital stamps?
Digital stamps, also known as line art, are digital illustrations that can be used on your graphic design or craft projects. They have a similar look to coloring pages as they are usually black-and-white with a solid outline to the image and white shapes inside.
The files get downloaded to your computer where you can use them in any graphics program.
They usually come in png or jpg format. I prefer the png format as this usually (but not always) means that the image has a transparent background around the edge which makes it easier to work with in graphics programs.
When printed out from the computer, they will look like a regular stamped image that you would do with ink – hence the name “digital stamp”!
You can then colour them in, just as you would with a stamped image, using whichever art materials you want!
How to use digital stamps in Cricut Design Space
This video shows how to design a coloring card in Cricut Design Space and then turn it into a completed greetings card.
Note: The video was recorded using Design Space version 6.12.227. Later versions may look or function slightly differently.
Video resources:
How to make a handmade card with digital stamps
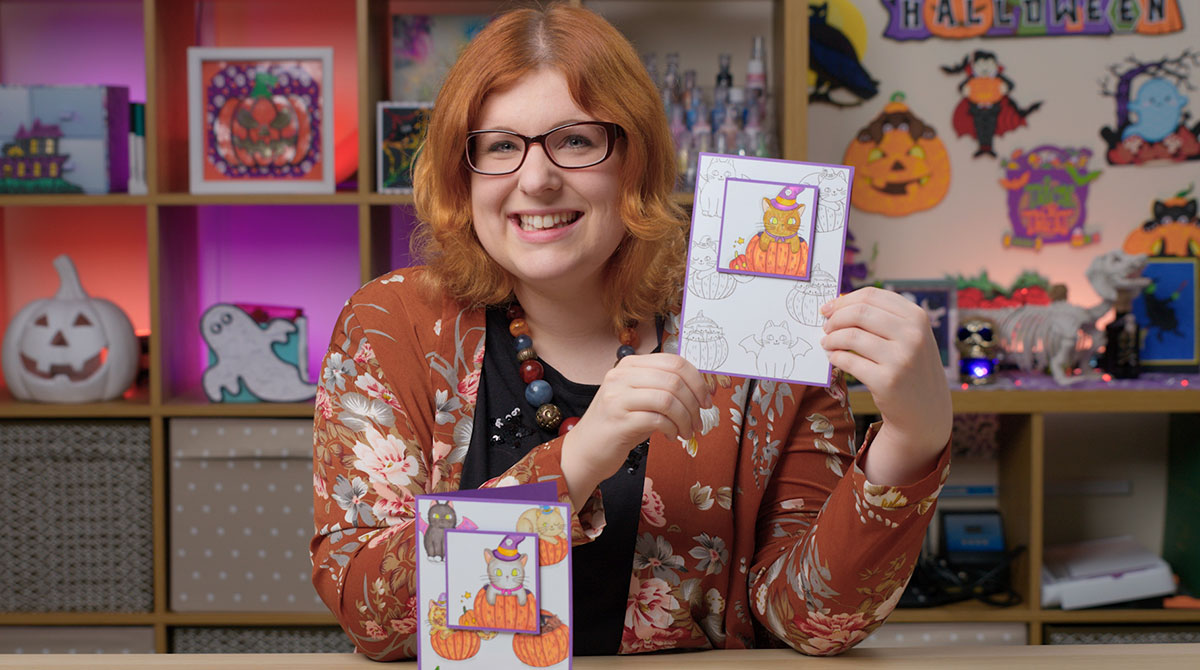
Here is how to design and make your very own coloring cards using digital stamps.
Although I’m showing you how to make a Halloween card, you could use the same technique for any type of card or occasion!
Step 1: Choose your digital stamps
I’m using my FAVOURITE website to get graphics from, which is CreativeFabrica.com.
They have hundreds of thousands of graphics, SVGs, digital papers, fonts and so much more to choose from.

The BEST thing is, they offer a monthly subscription where you can pay a small monthly fee to get unlimited download from their website! This is so beneficial as it means you can download all the graphics you want, for one small monthly price.
I’m happy to say that I have a special promotion available with Creative Fabrica where you can get your first month’s subscription for just $1!!
That’s right, just $1 to access 100,000s of digital file goodness!
If you’d rather not sign up to a recurring subscription though, that’s absolutely fine. All graphics can be purchased individually instead, for a small one-off cost.
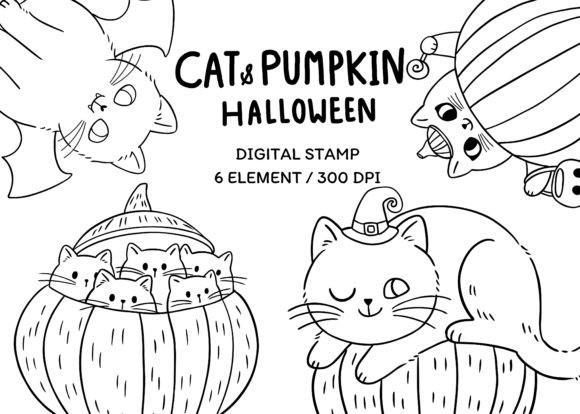
Head on over to Creative Fabrica and choose your Halloween graphics. Search for “digital stamp” to browse the different designs on offer, or try searching for “coloring” or “line art”.
The set I chose is called “Digital Stamp Cat and Pumpkin Halloween“.
Before you can use the graphics, you need to unzip the download folder that they comes in.
- How to unzip a folder on Windows computer
- How to unzip a folder on a Mac
- How to unzip a folder on an iPad/iPhone
- How to unzip a folder on an Android device
Step 2: Upload the graphics into Cricut Design Space
Click the “Upload” button.

Find the unzipped graphics folder on your computer and choose one of the images to upload into Design Space.
You will need to upload them one at a time, so it might take a little while but it is definitely worth it!
If you have the choice of a jpg or png image, choose the png.
As these are print-then-cut images, you need to do a few extra steps when uploading them.
Choose “Simple” as the image type as this is just a simple one-colour graphic.
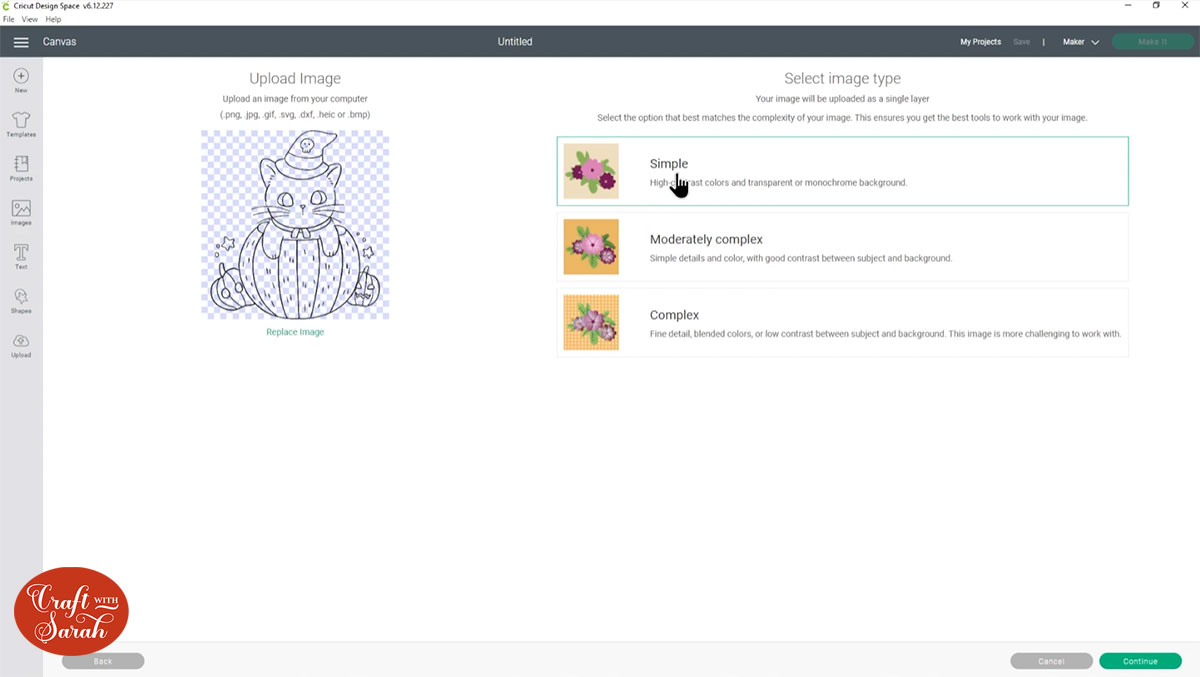
You don’t need to change anything on the next screen IF the background is showing as a checkerboard effect.
The white-and-grey checkerboard effect shows where parts of the image are “transparent”.
On this screen, simply click “Continue”.
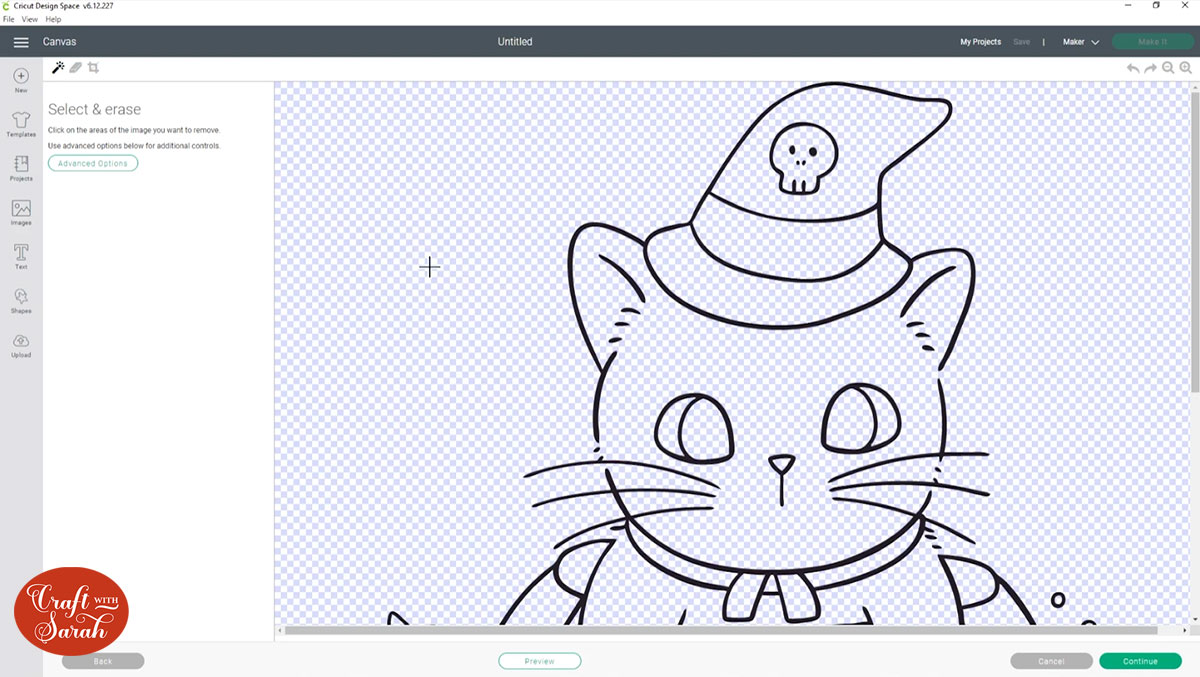
If the background surrounding the picture is showing as white instead of checkerboard then click the magic wand tool and then click onto the background to remove it.
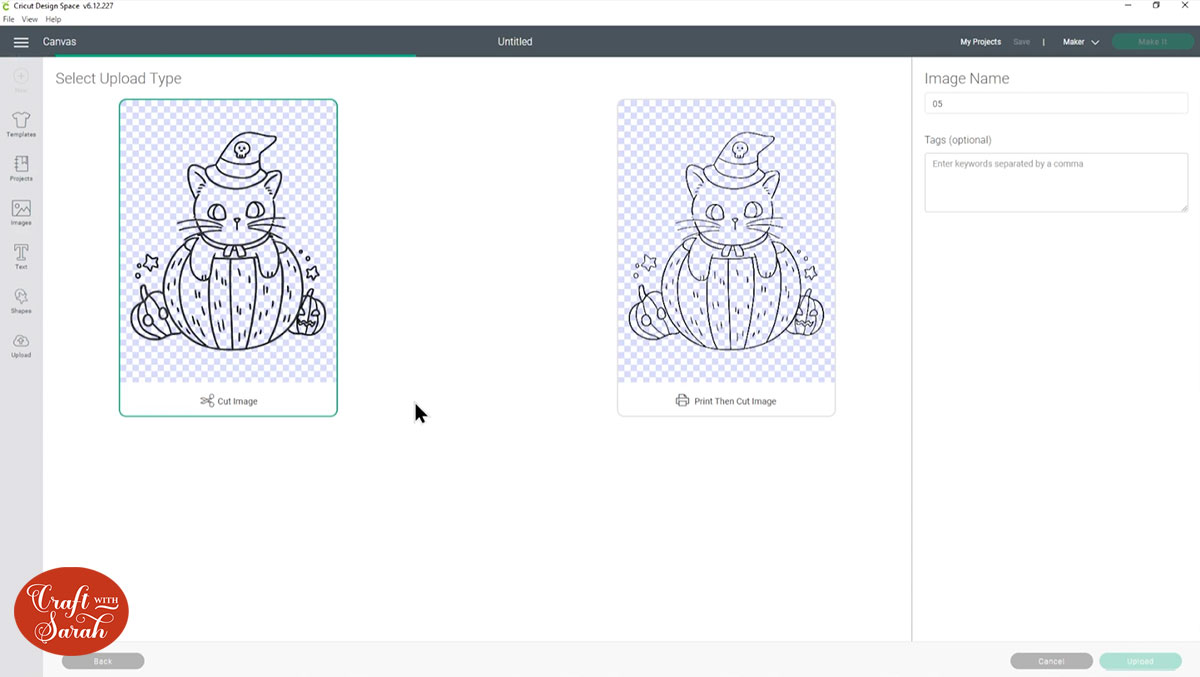
You can save them as a Print then Cut or a Cut image. I chose “Cut Image” as I think it’s a bit easier to work with the files that way. I’ll turn them into a “print then cut” layer on in this tutorial.
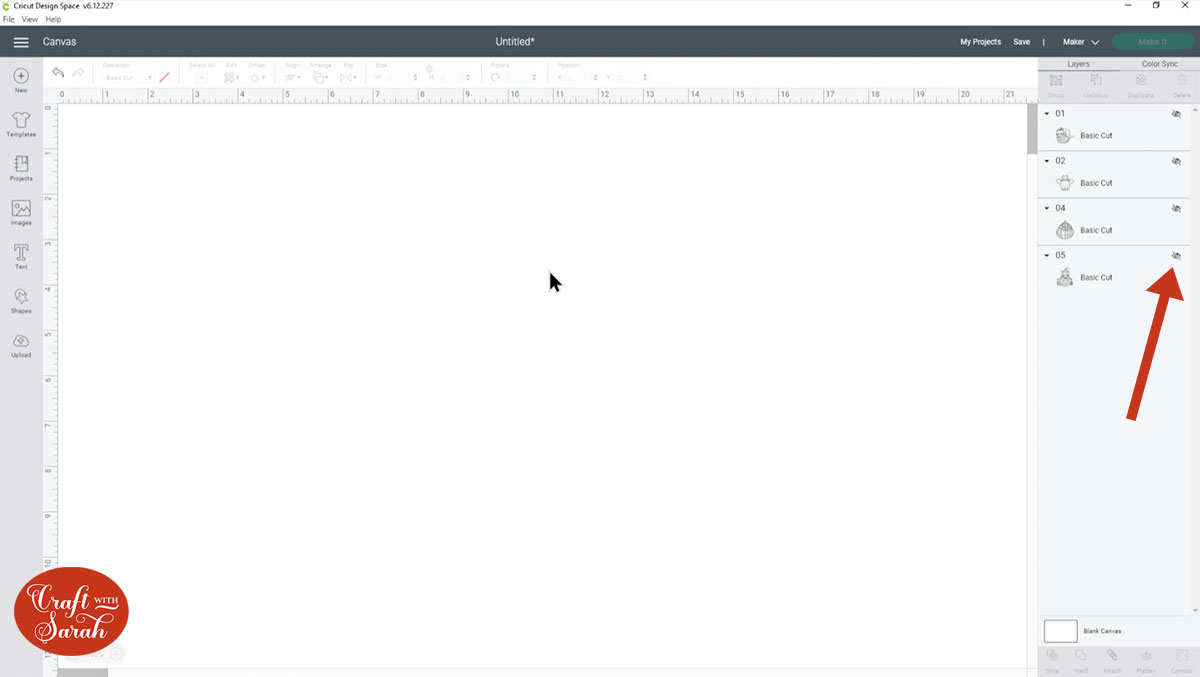
Click the graphic in your “Recent Uploads” and then click “Insert Images” to add it to your Project.
It will probably load in huge, so resize it to make it smaller to fit on the screen.
Add all the images you want to use on your card to the page, then click the “eye” icon next to each of them in the Layers panel to hide them for now.
Step 3: Create the base card
For this project, you can choose to use a premade card blank, to make one yourself with a paper trimmer, or to make one in Design Space.
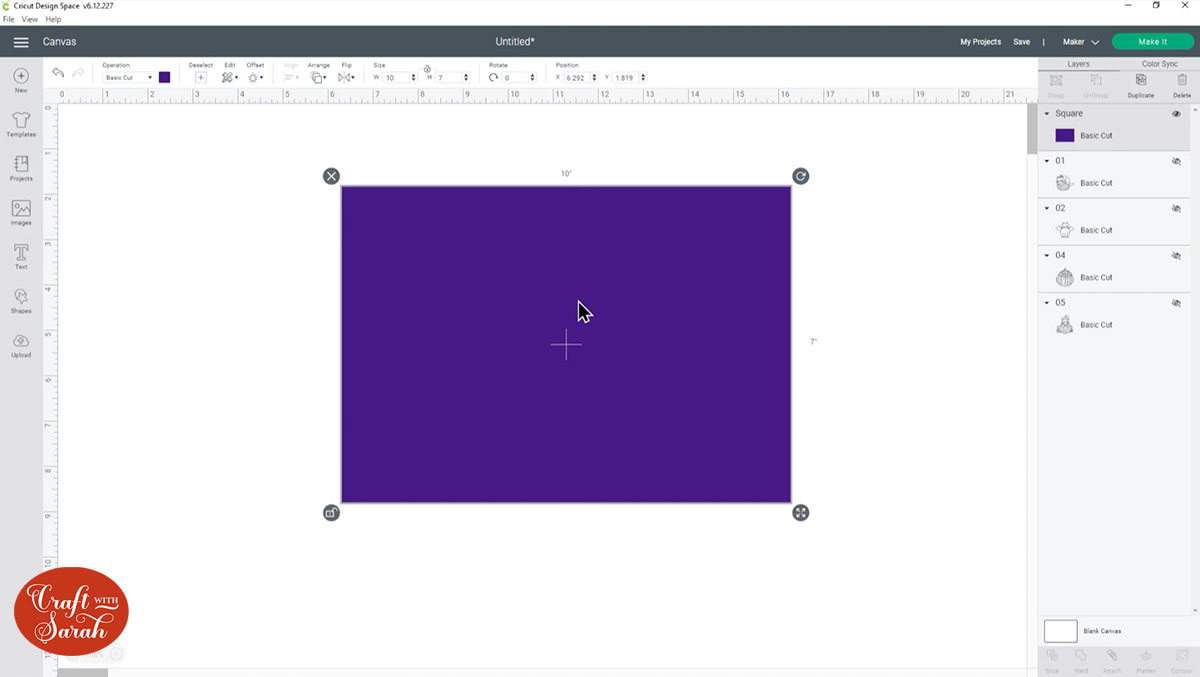
To create a card blank in Design Space, click “Shapes” and choose a square.

Click the pack lock icon to unlock it, then change the size using the width/height boxes along the top of the screen.
To make a 5×7 inch card front, my rectangle measures 7 inches tall and 10 inches wide (double the widthof the card).
Change the colour to the colour you want to cut it from.
If you don’t have a Cricut scoring tool then you can skip straight to Step 3, but if you do then it’s nice to add the score line to the design as it will be easier to fold neatly.
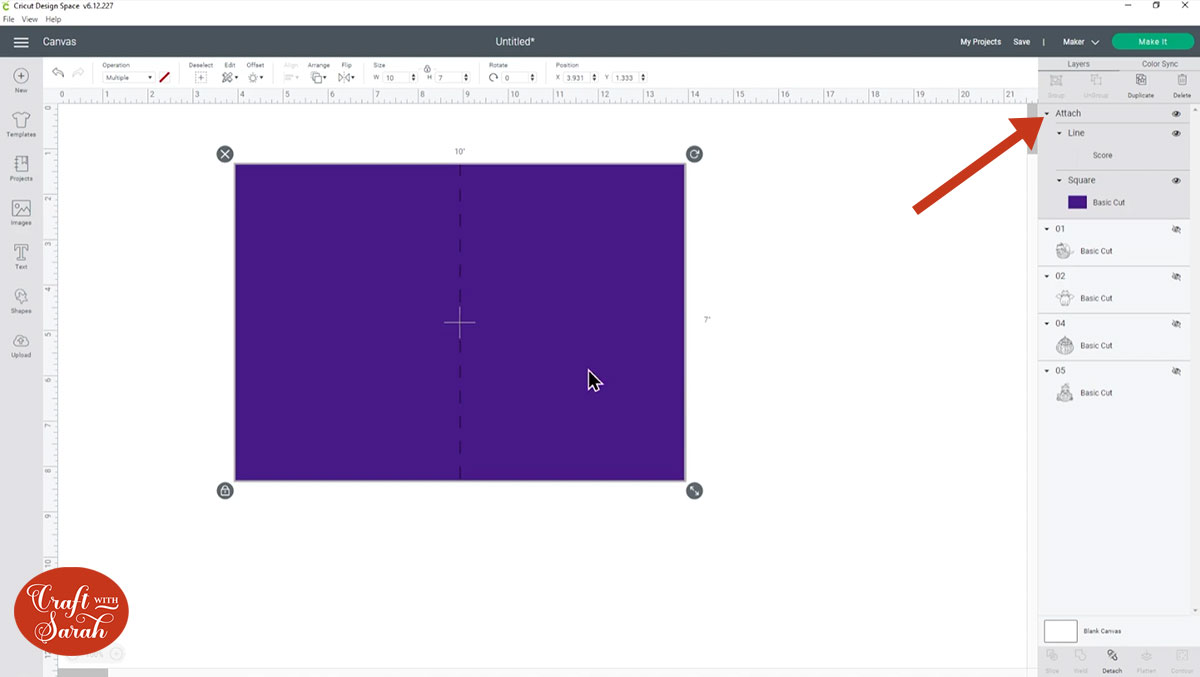
Click “Shapes” again and choose a score line.
Make the score line the width of your card, so mine is 7 inches.
Click “Select All” to select the rectangle and score line.

Click “Align” and then “Center”.
This will put the score line perfectly in the middle of the rectangle.
With both layers still selected, click “Attach” on the bottom right of the screen. This “joins” the score line to the base rectangle which tells the Cricut that you want the score line to be done down the middle of the rectangle.
Step 4: Create the card topper
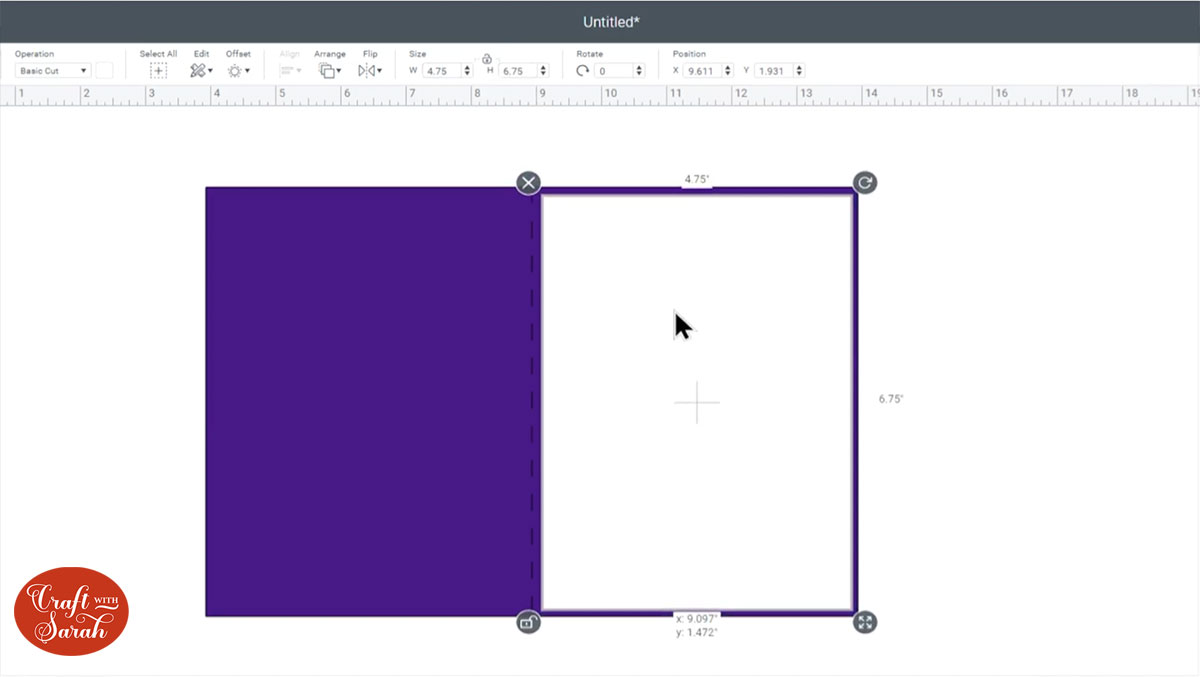
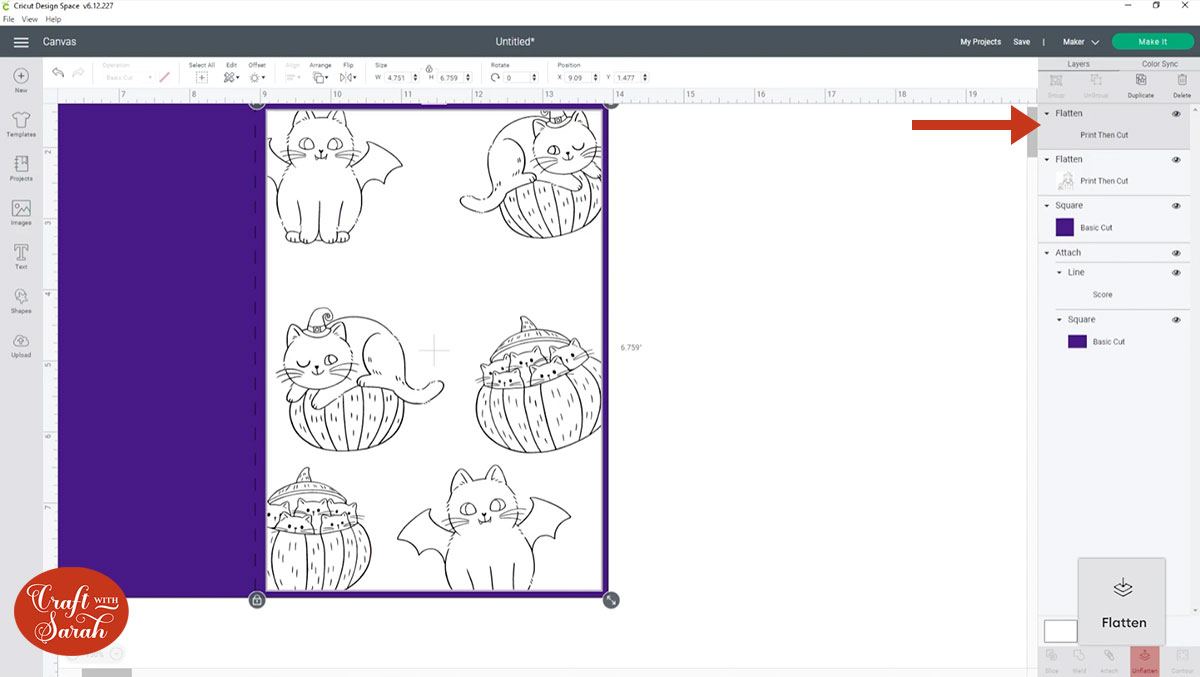
Go to “Shapes and choose a “Square” and then resize it so that it’s slightly smaller than your card front.
I’ve made mine 4.75 inches wide and 6.75 inches tall.
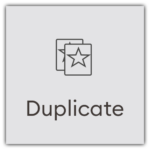
Make a copy of this rectangle with the “Duplicate” button.
Select both white rectangles and then click “Align” > “Center” to position them one-on-top of the other.
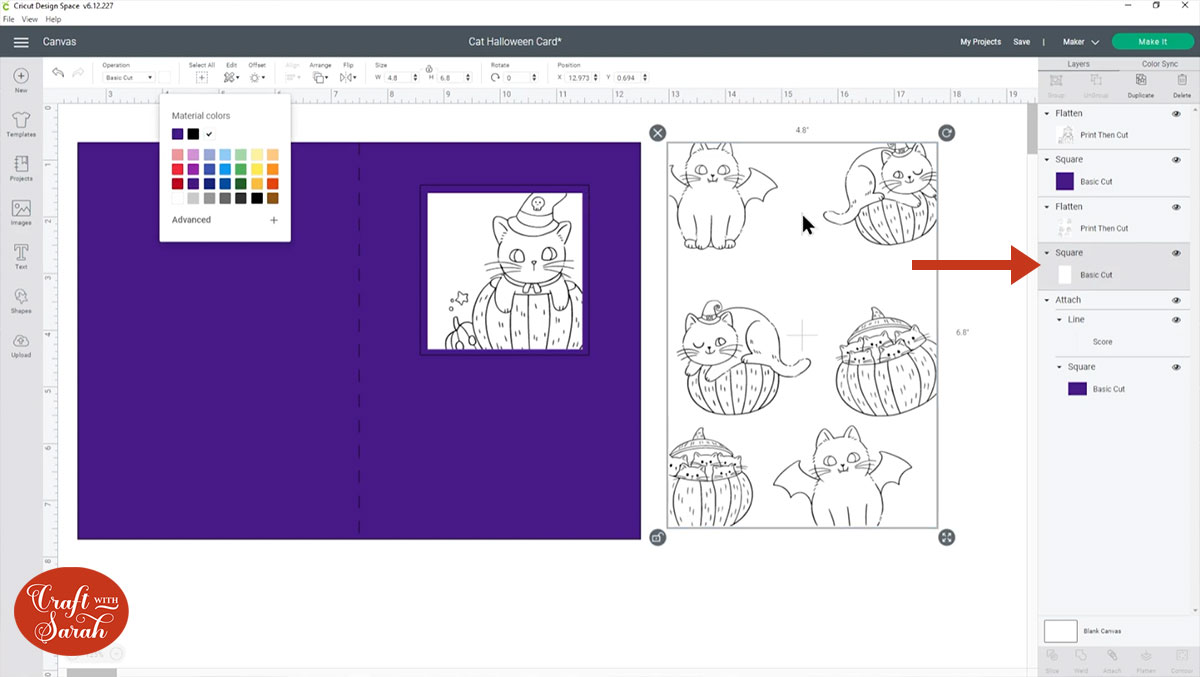
Add another square and make it the size of your topper and the same colour as your card base. I went for 3 inches and changed it to purple.
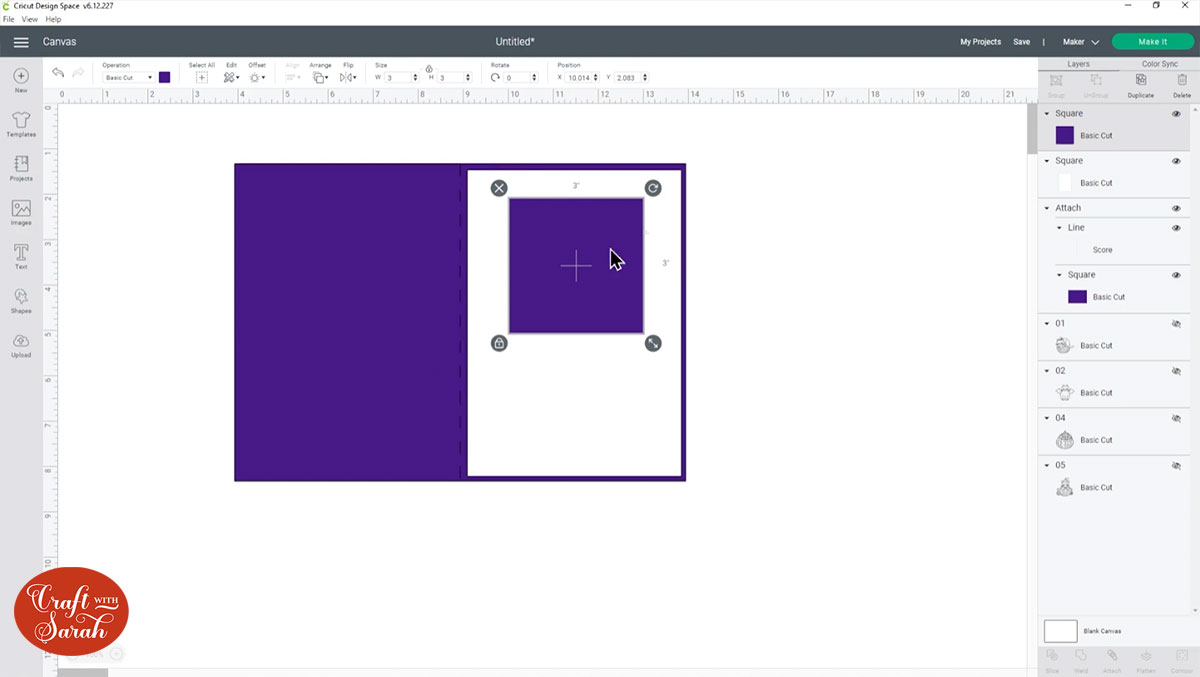
Make one more square and change it to white. Make it slightly smaller than the previous square. Mine is 2.75 inches.
Make a copy of this square with the “Duplicate” button.
Select both white squares and then click “Align” > “Center” to position them one-on-top of the other.
Click the eye icon next to the image that you want to use for the card topper to turn it back on.
Position it over the smallest square and resize it.
I wanted mine to “overlap” a little bit, so it’s bigger than the square.

To make it fit, we need to “Slice” away the excess that’s going outside of the square.
Select the digital stamp layer, press shift on your keyboard and click one of the white squares, then press “Slice”.
Delete the square “Slice Result” layer that now has your image cut out from it and also delete the excess of the image that’s outside of the square.
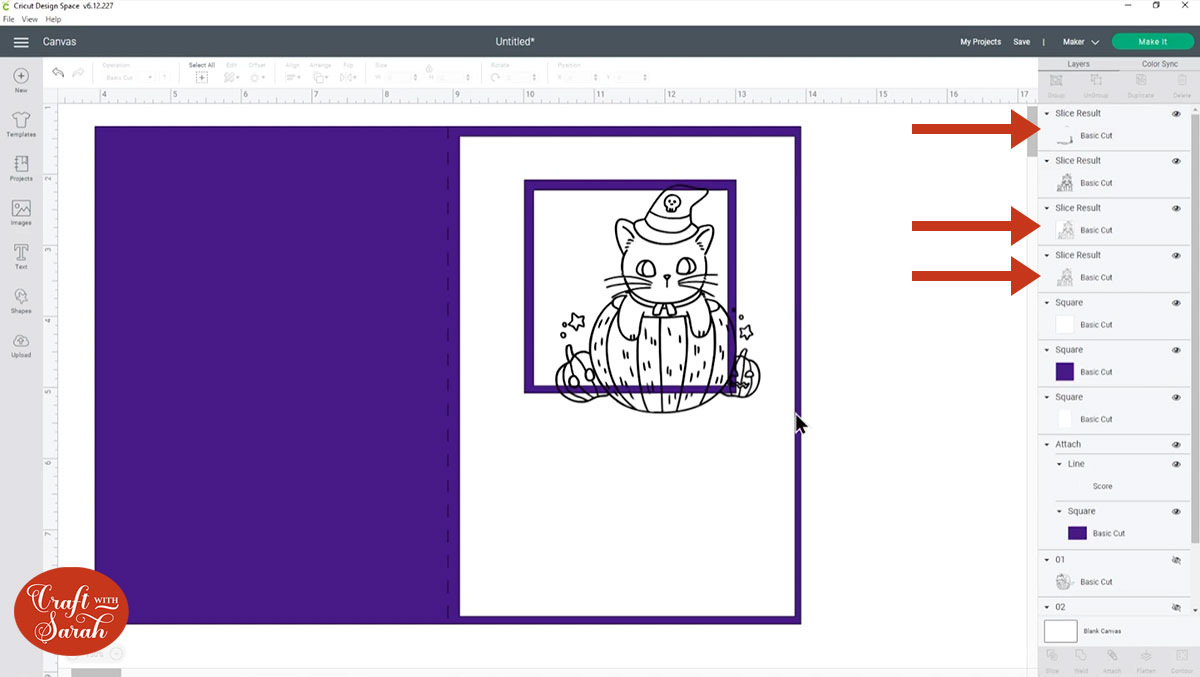
Click the remaining white square, press Shift on your keyboard and click the digital stamp image and press “Flatten”.
This turns it into a “print and cut” image where your Cricut will print the picture but only cut around the square shape, not the edge of the digital stamp.
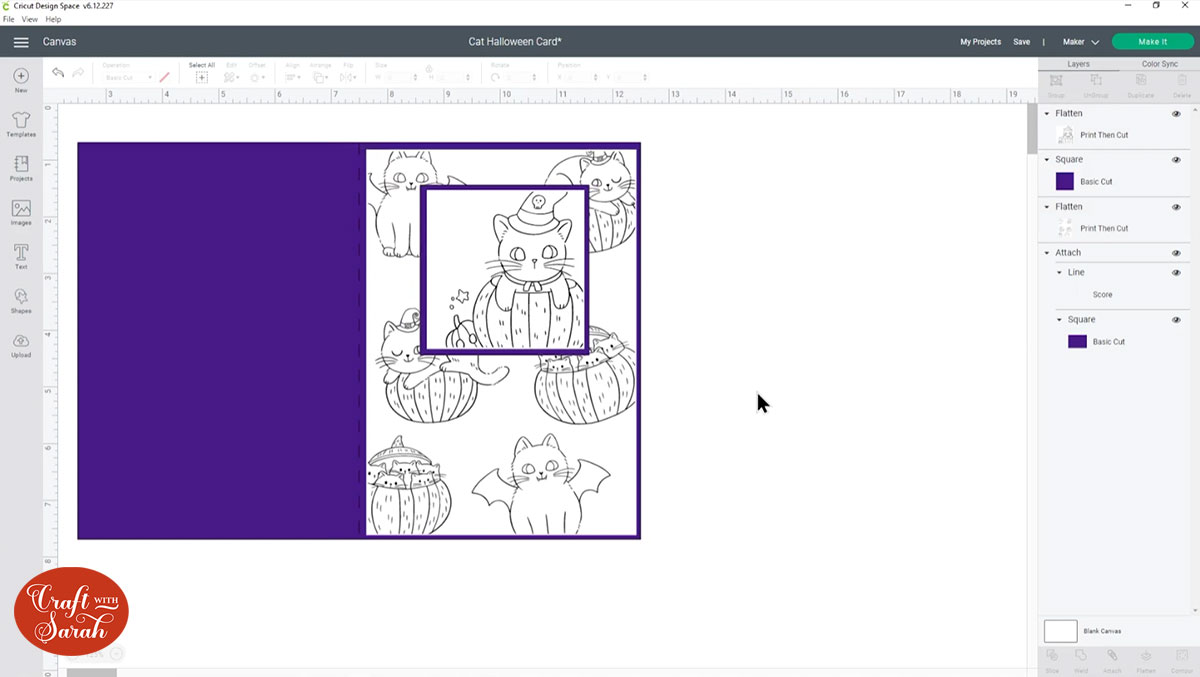
Step 5: Make the digital stamp background
Turn on the other digital stamp image by clicking the “eye” icon next to them in the layers panel and position them around the background.
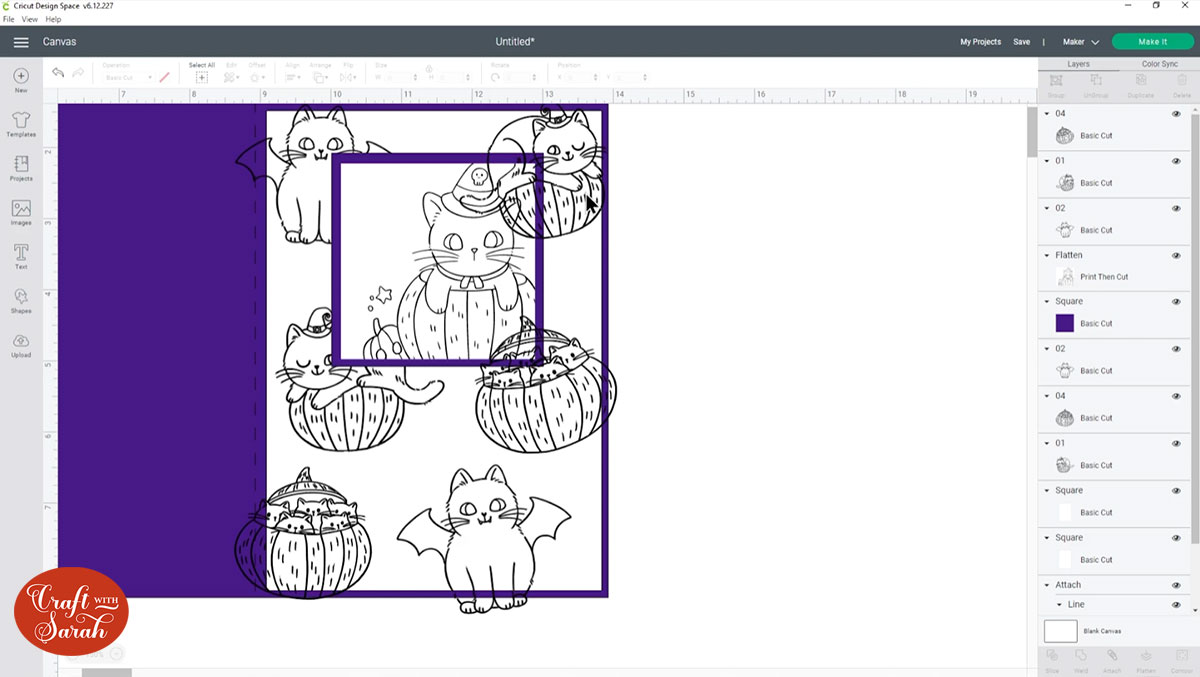
When you’re happy with how it looks, select all the background digital stamp layers and “Weld” them together.

This turns them into one layer.
Click this new layer, press Shift on your keyboard and select one of the white rectangles. Press “Slice” to cut off the excess from the images, then delete the Slice Result layers you don’t need.
“Flatten” the background digital stamp layer with the remaining white rectangle layer to make it a Print-then-cut layer.
Drag-and-drop the layer in the layers panel to put it back behind the topper layers.
Step 6: Super important print-then-cut HACK!!
I have been having some problems with print-then-cut recently when trying to cut out a rectangle.
My Cricut was cutting weird diagonal lines through the rectangle that weren’t supposed to be there.
After lots of failed attempts, I eventually worked out a fix, so I now do this for all my print and cut projects where I’m cutting a solid shape.
Make a new rectangle and size it JUST bigger than your currently rectangle.
For me, this was 4.8 inches wide and 6.8 inches tall.
Make it white and position it below the flattened layer.
Click “Align” and “Center” to position them and then click “Flatten” again.
I don’t know why it works, but creating this really thin white border around the edge seems to fix all the print-then-cut bugs!
The border is so thin that you won’t notice it when it’s been cut out, but it’s enough to “trick” the sensor into cutting correctly.
Do the same thing for the topper square.
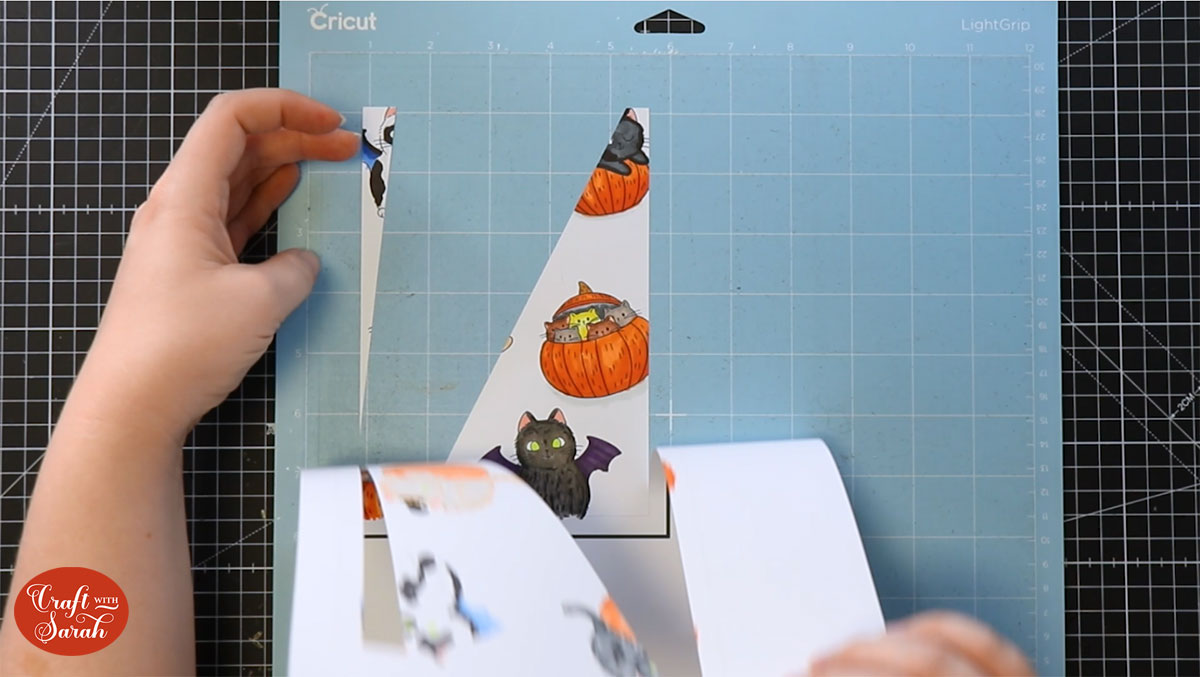
Step 7: Print and cut the card
Your card is now ready to cut!
Save your project, then click “make it” and follow the on-screen instructions.
New to print and cut? Check out this print and cut tutorial.
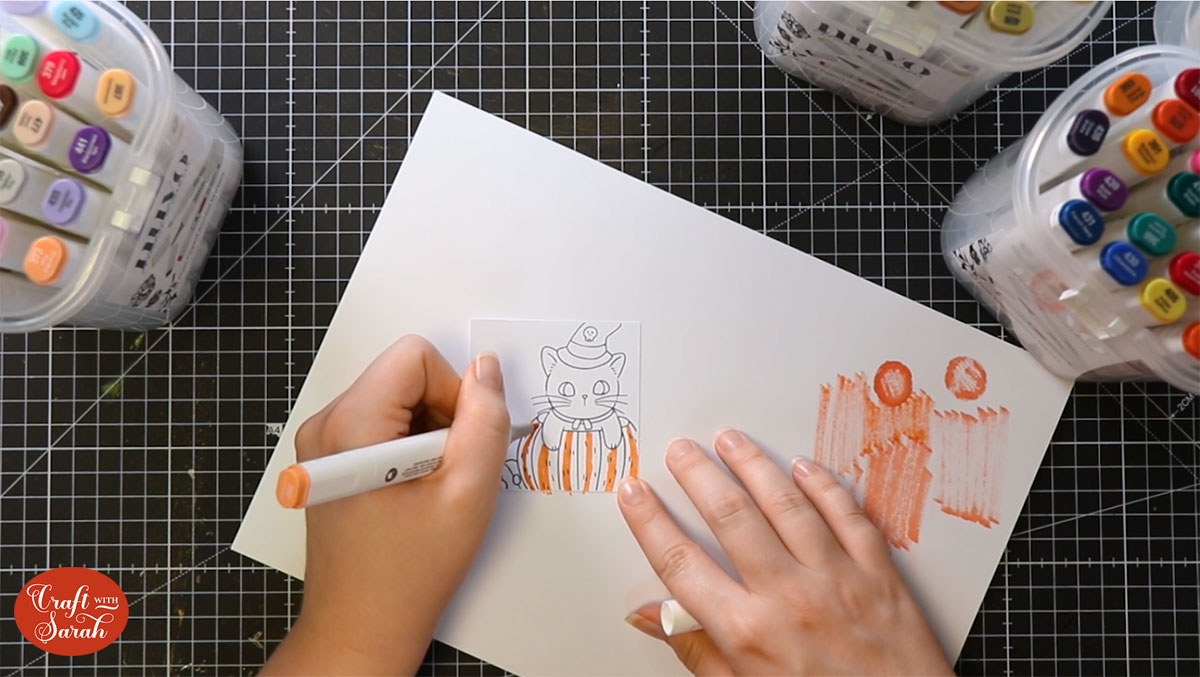
Step 8: Colour in the digital stamps
Once you have finished cutting everything out, it’s time to get creative!
I used alcohol markers from Tonic Studios to colour in the graphics.
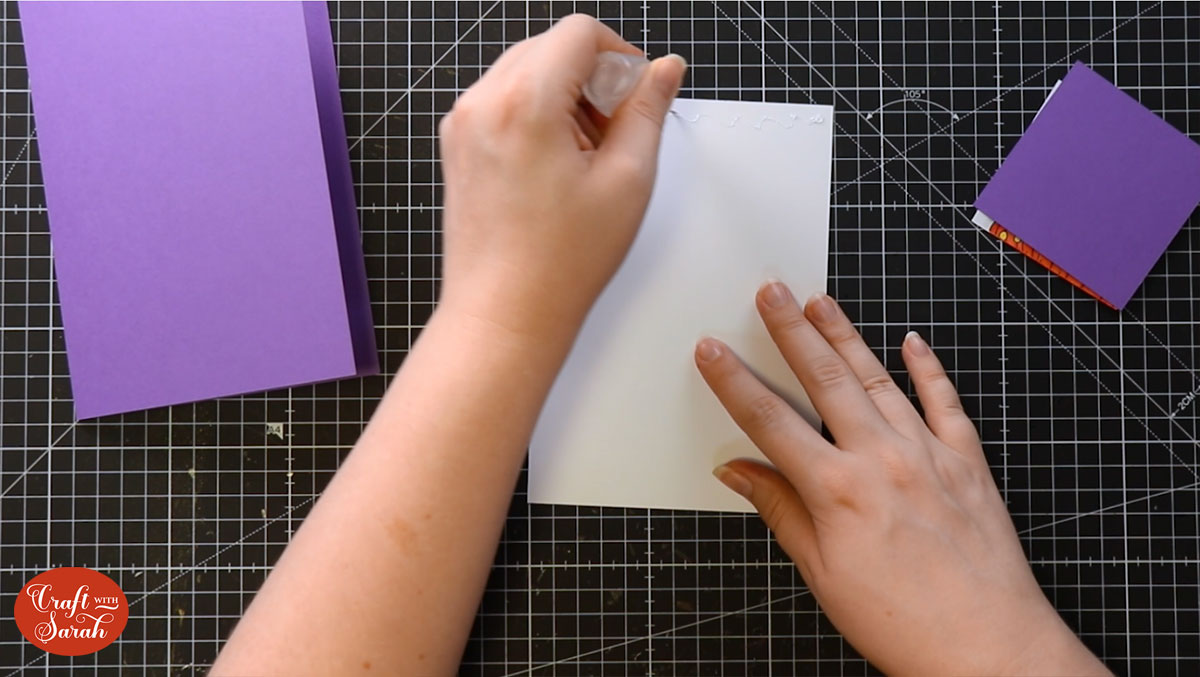
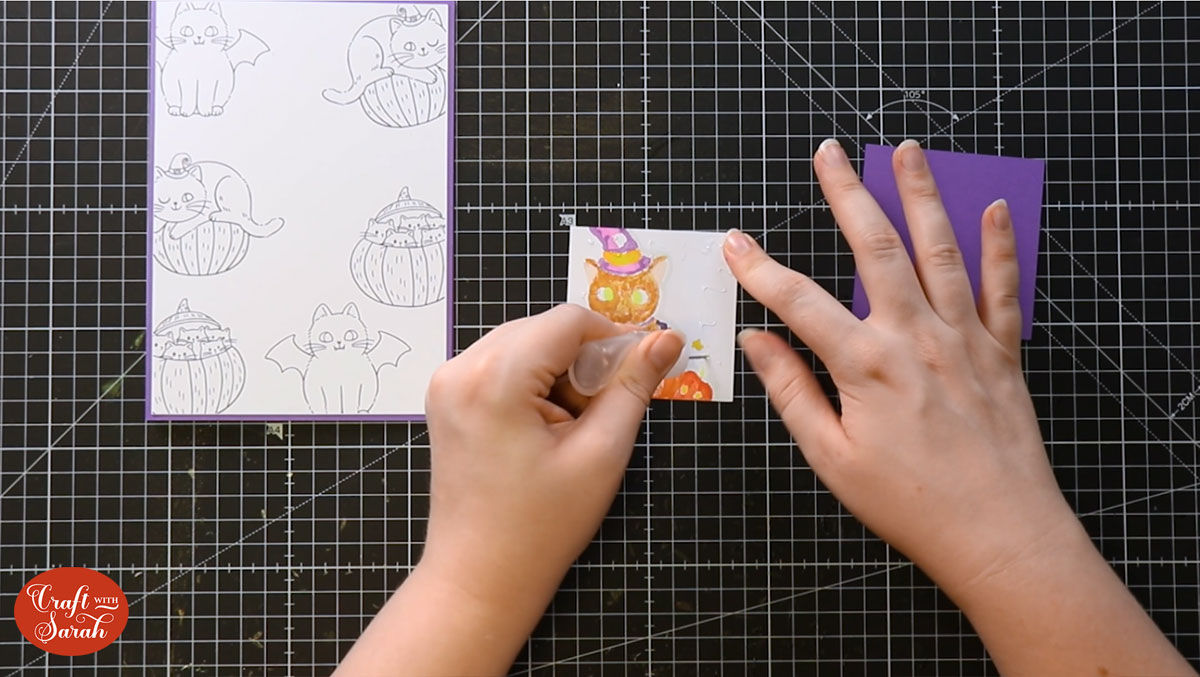
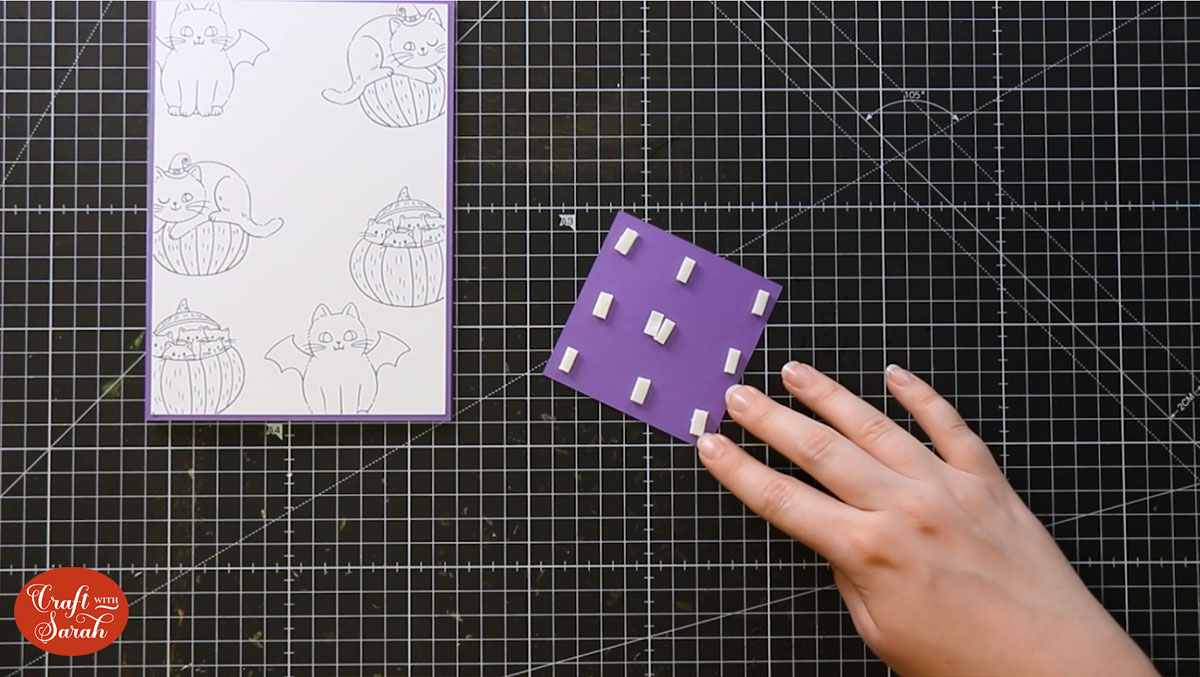
Step 9: Make the card
Glue your background layer to the card base.
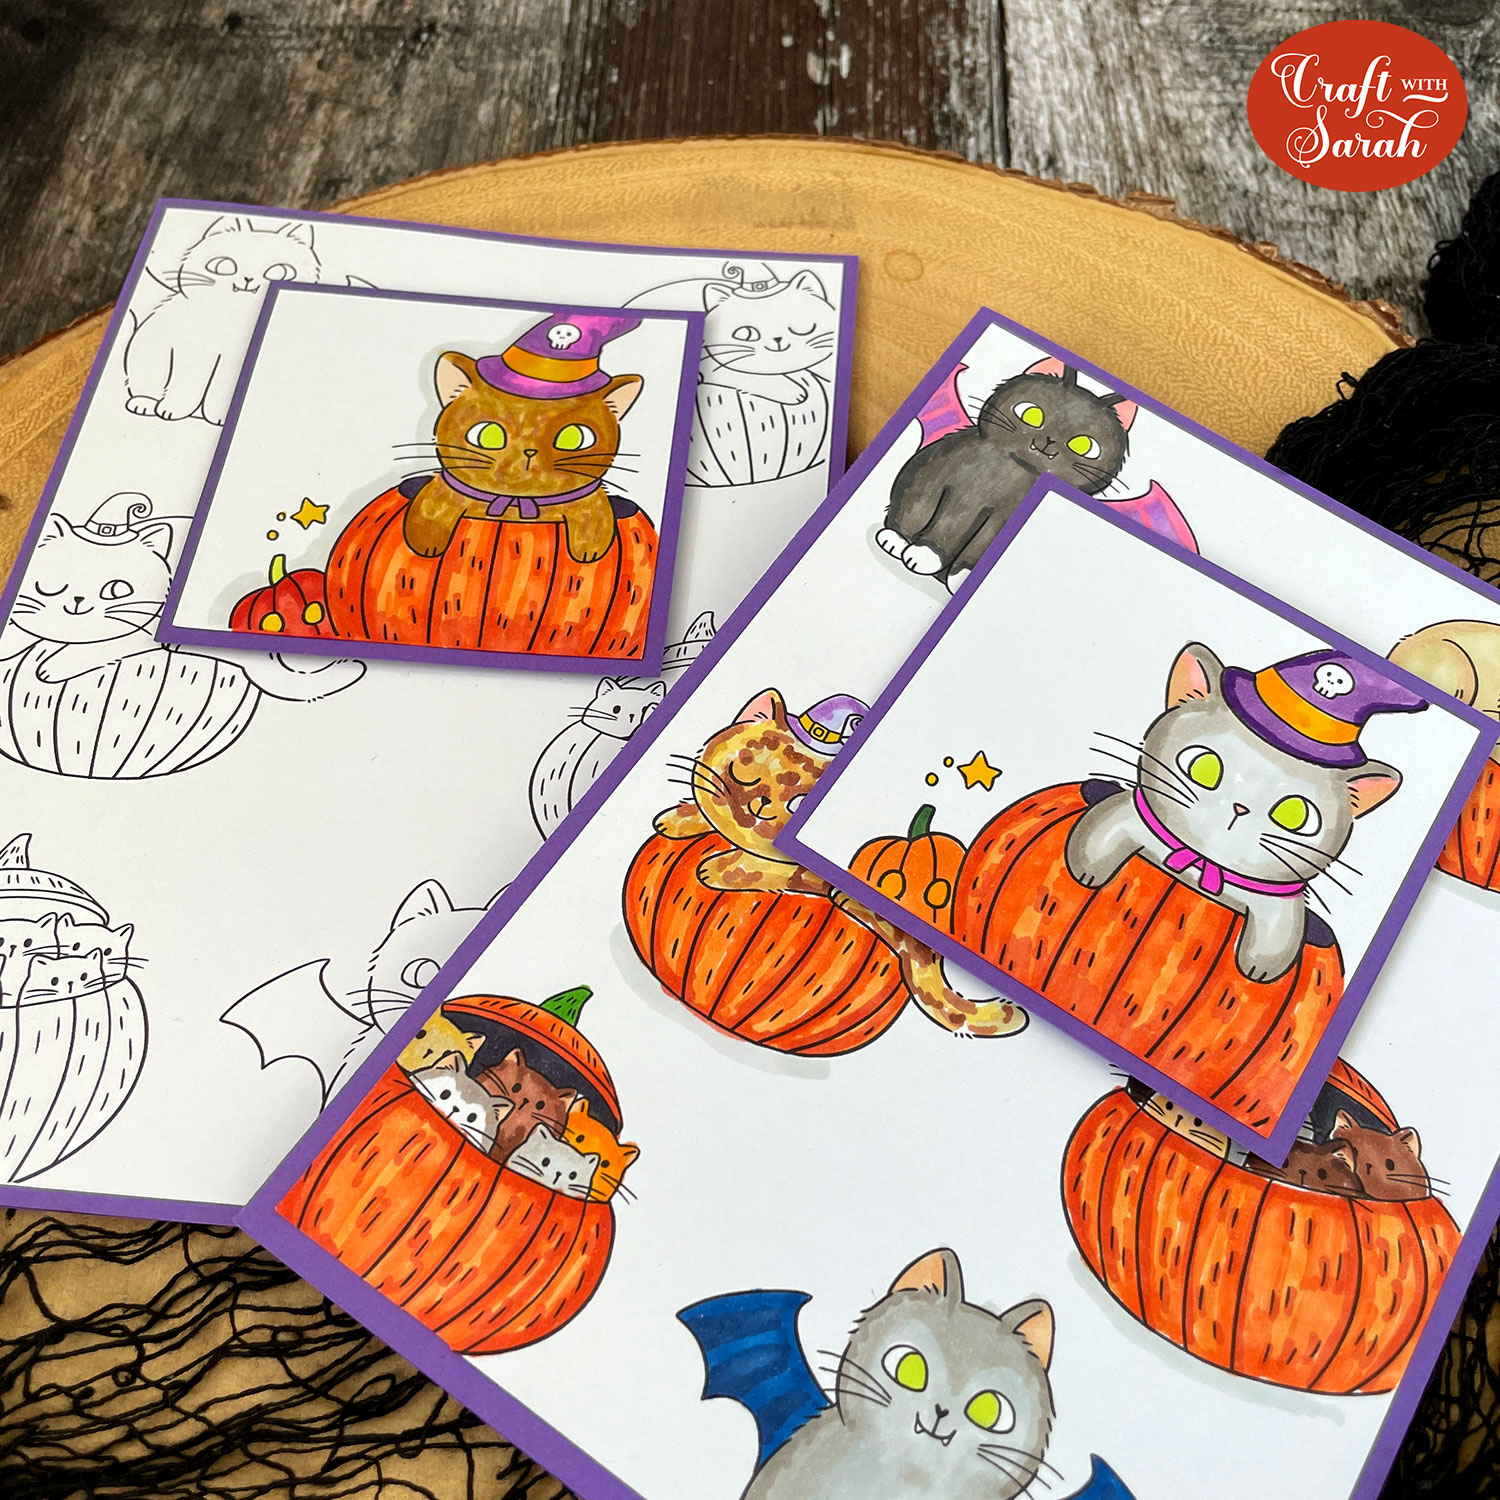
Glue the topper onto the coloured square.
Use foam pads to “raise” the topper up a bit from the base of the card for some dimension.
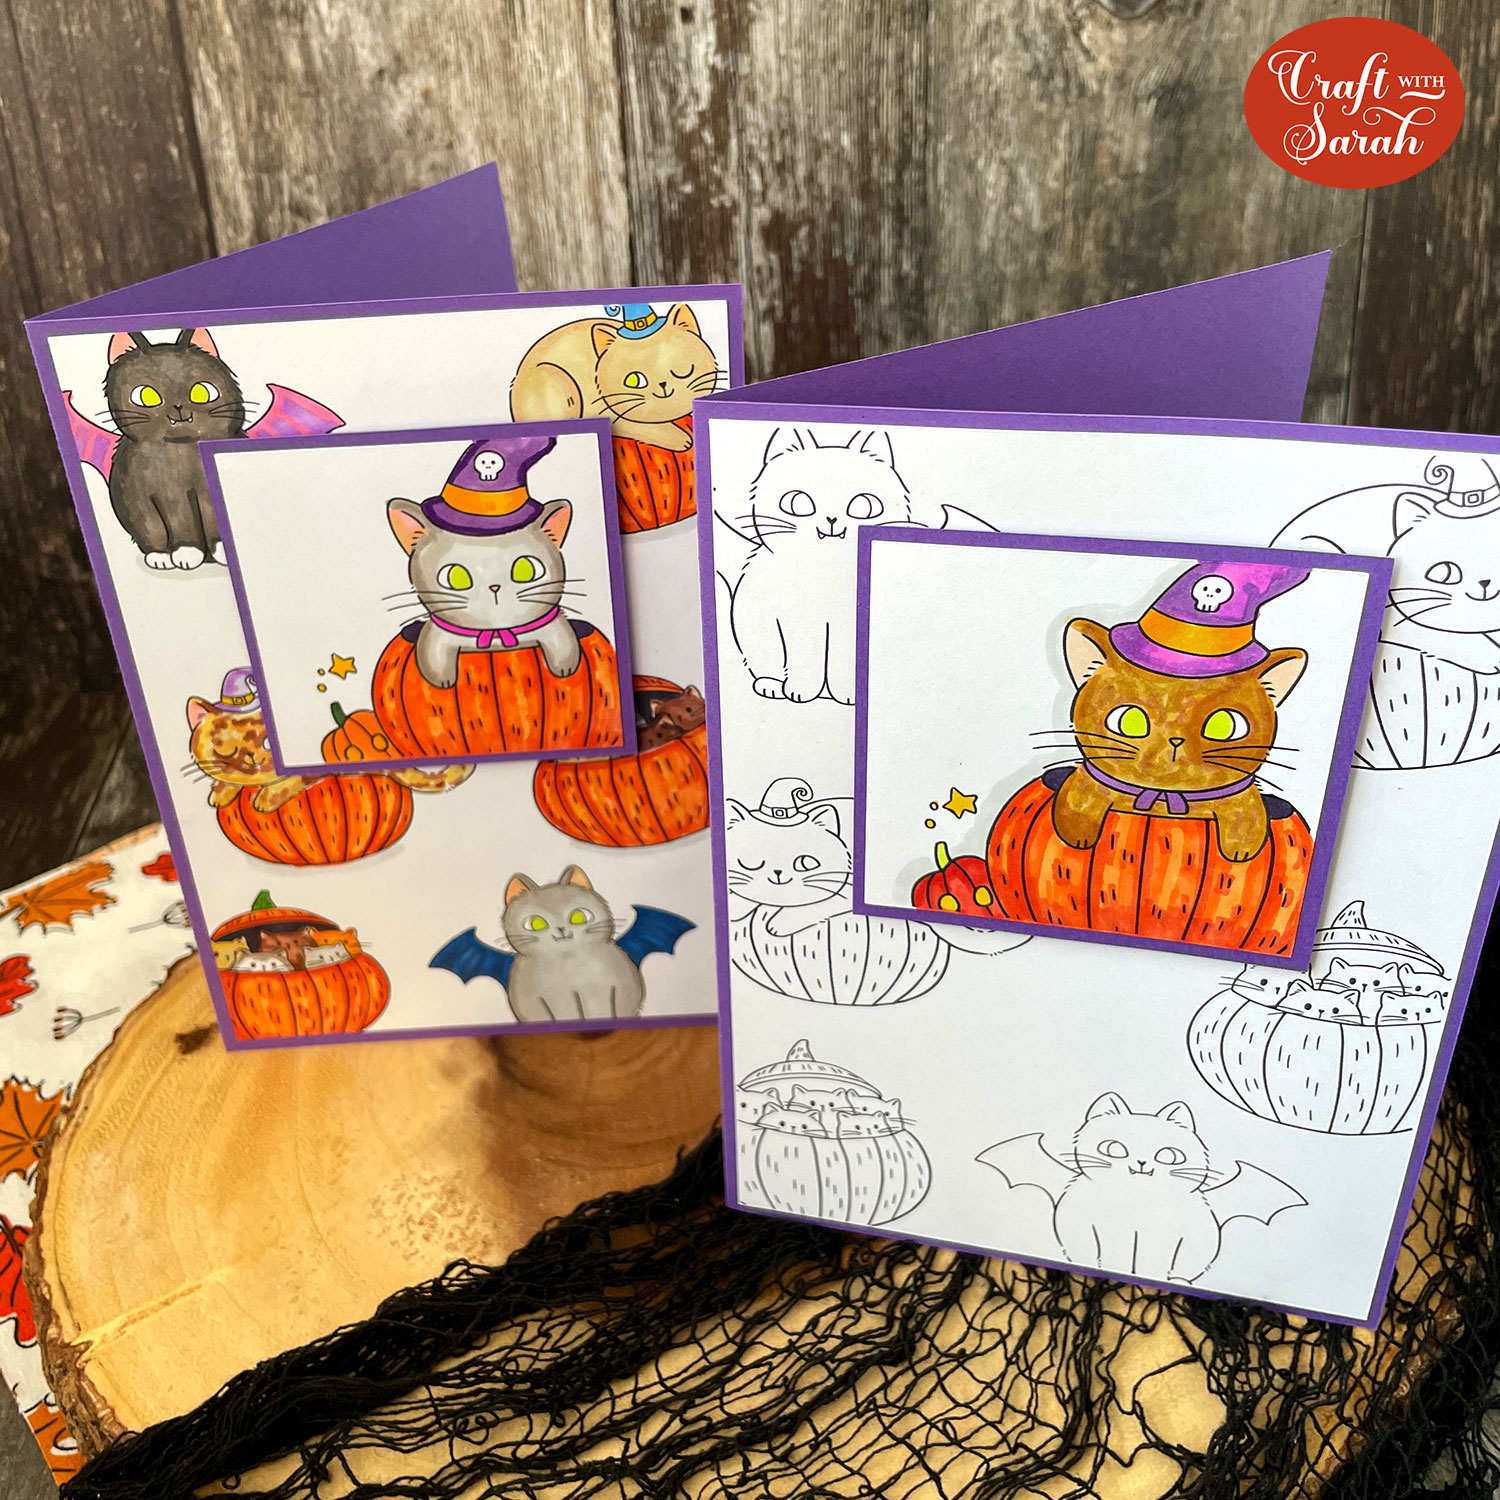
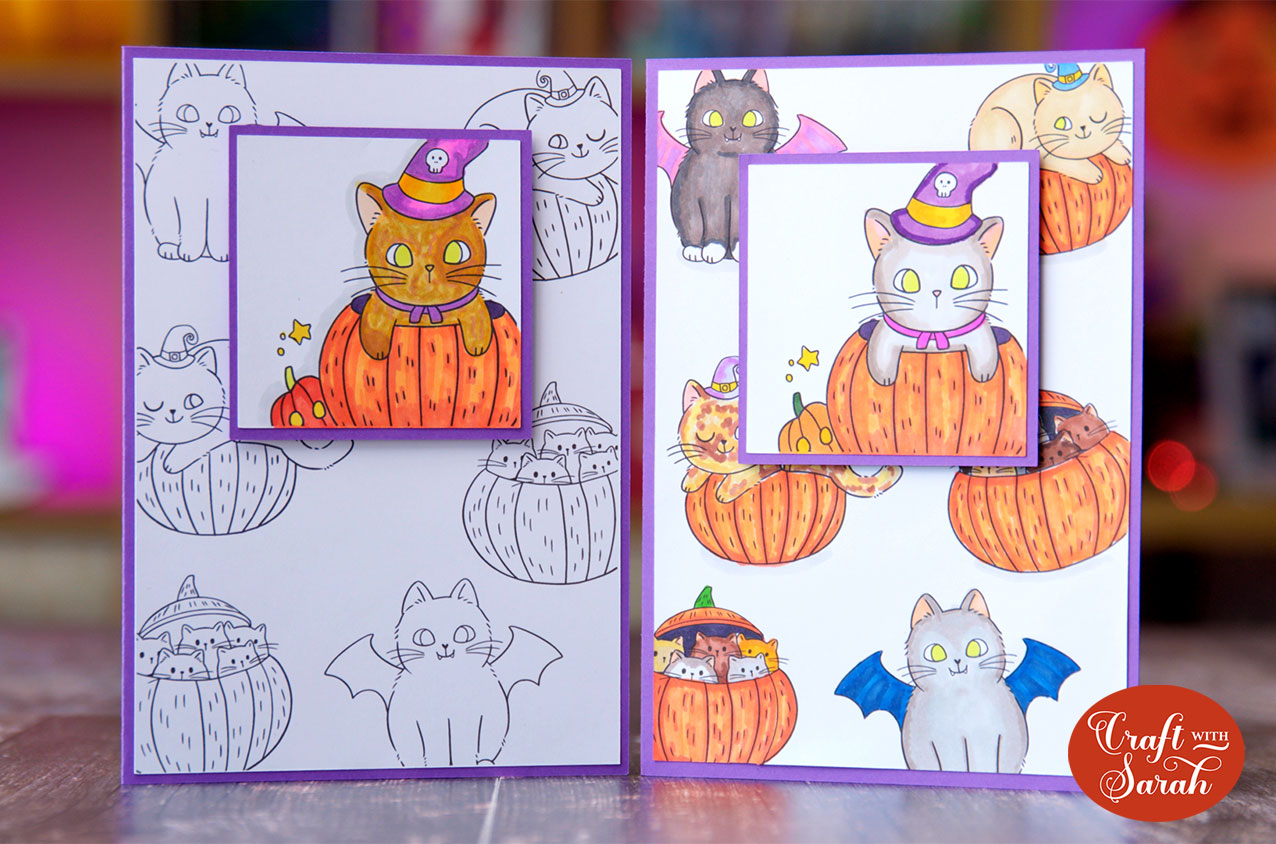
And that’s it – your digital stamp handmade card is finished!
I made two versions of this card. The first has the background digital stamps coloured in, and the other has them left in black-and-white to draw more attention to the topper image.
I hope you enjoyed this tutorial on how to design and make greetings card using digital stamps.
For more Halloween greetings card designs, be sure to join the Halloween Craft Countdown! I’m releasing 20 new Halloween crafts in 20 days, including several different greetings card ideas.
Happy crafting,
Sarah x

