How to Open SVG Files in CanvasWorkspace for ScanNCut Machines

If you’ve just downloaded a new SVG design for your ScanNCut machine and you’re staring at your computer screen wondering “how do I get this into Canvas Workspace?” then you’re in the right place.
In this easy-to-follow guide, I’ll walk you through exactly how to import SVG files into Canvas Workspace, which is the software used with Brother ScanNCut cutting machines.
If you’ve been trying to load SVG files and finding that your layers are changing to black and losing their individual colors then don’t worry – I’ll show you how to get the colors back!
I recommend using the desktop (installed software) version of CanvasWorkspace, not the online version.
Let’s get started!
Video Tutorial: How to Import SVG Files into CanvasWorkspace
Watch the video below to see how to open SVG files in CanvasWorkspace so that you can cut it with your Brother ScanNCut.
Scroll down for a written version of the video content.
Video timestamps:
- 00:00 – Introduction & overview
- 00:35 – How to unzip folders
- 03:12 – Importing SVG files in CanvasWorkspace
- 04:02 – How to add color back in to SVG files
- 09:57 – Another example of importing SVGs
- 15:46 – Summary & ending
Before you Start: Download & Unzip Your Files
When you download SVG files, you’ll probably find that they are contained within a zip folder.
This is a way for designers to send multiple files in one single download.
Before you can open the SVG files in CanvasWorkspace, you’ll need to unzip the folder. This is also known as “extracting” the folder.
- On Windows: Right-click the ZIP folder and select “Extract All”.
- On Mac: Double-click the folder to unzip it.
Once unzipped, you’ll see all the different files within.
If your SVG is from one of my newer designs, you’ll see folders like:
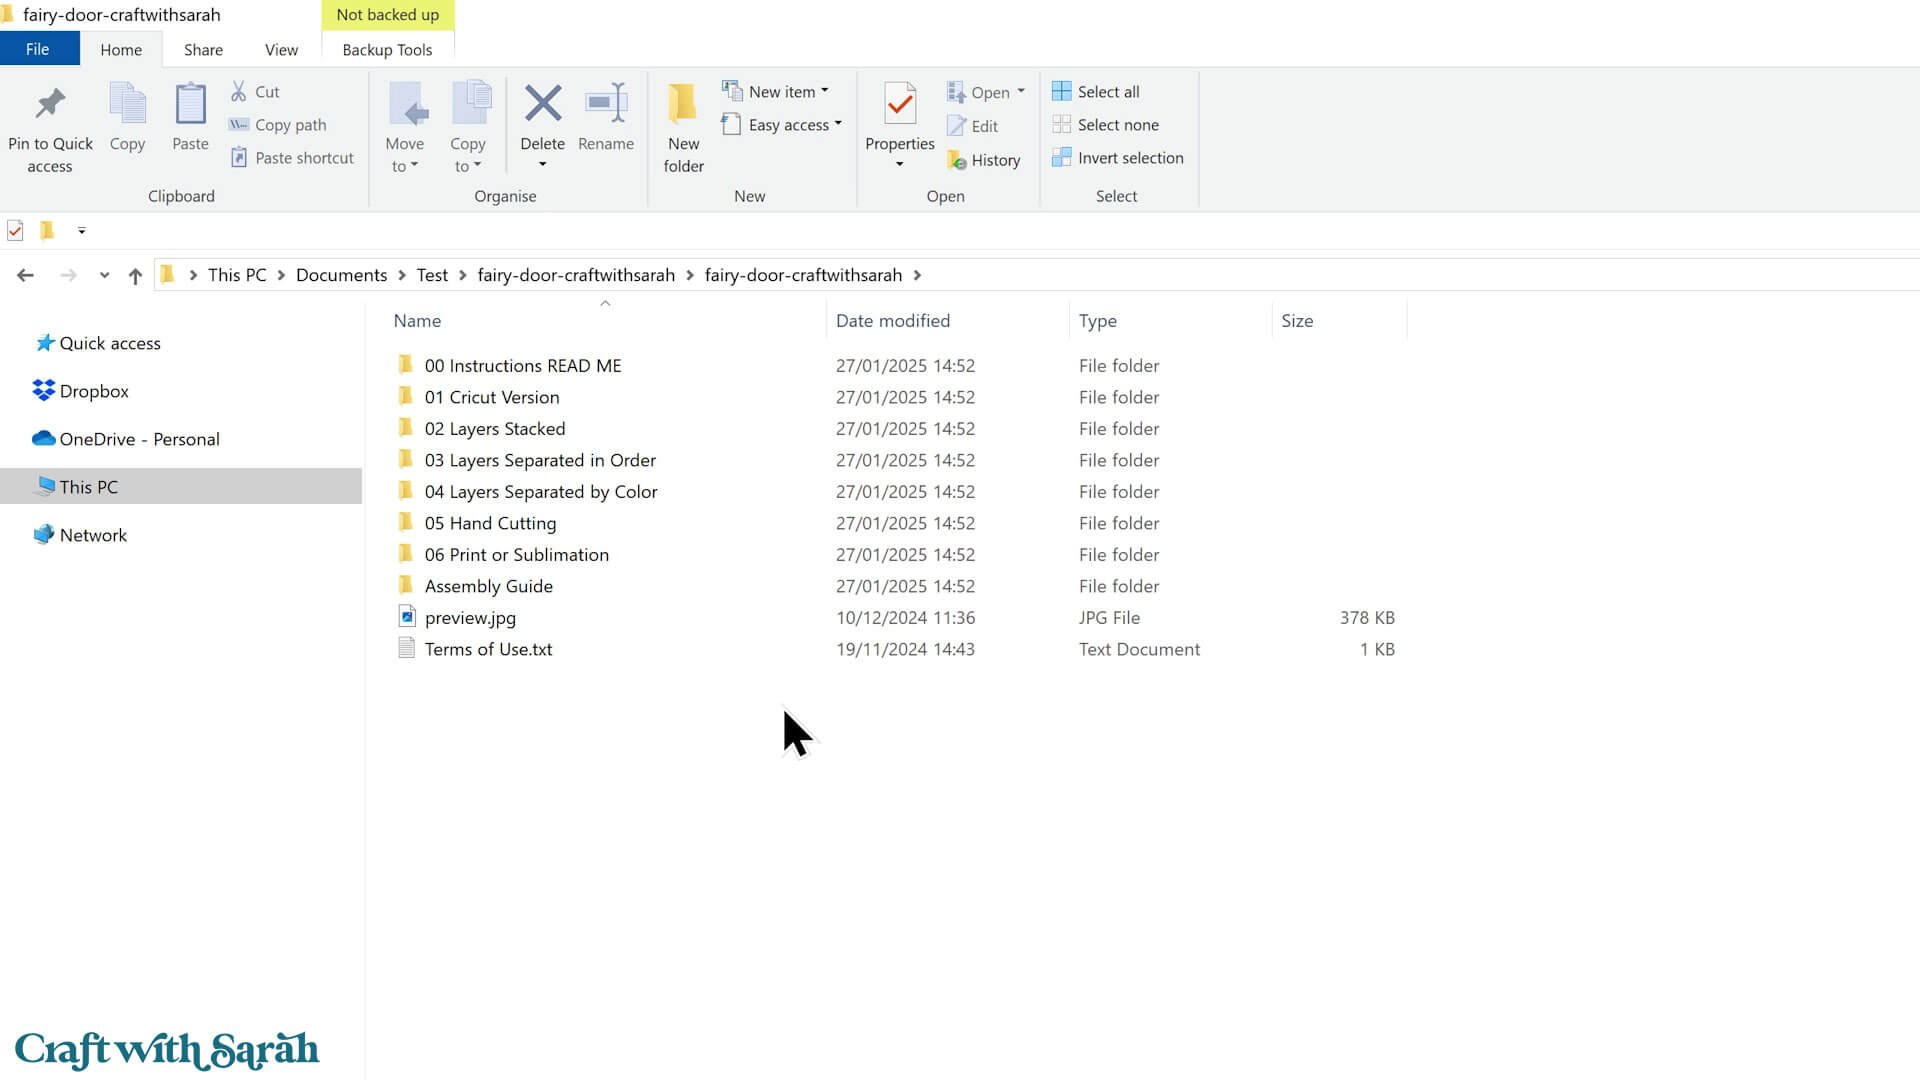
For ScanNCut users, I recommend “04 Layers Separated by Color” – it’s the easiest one to use with your type of machine.
If you don’t see folders like this, don’t worry. That just means you’re using one of my older designs.
You’ll still be able to use it, just with a few extra steps, which I’ll explain later on.
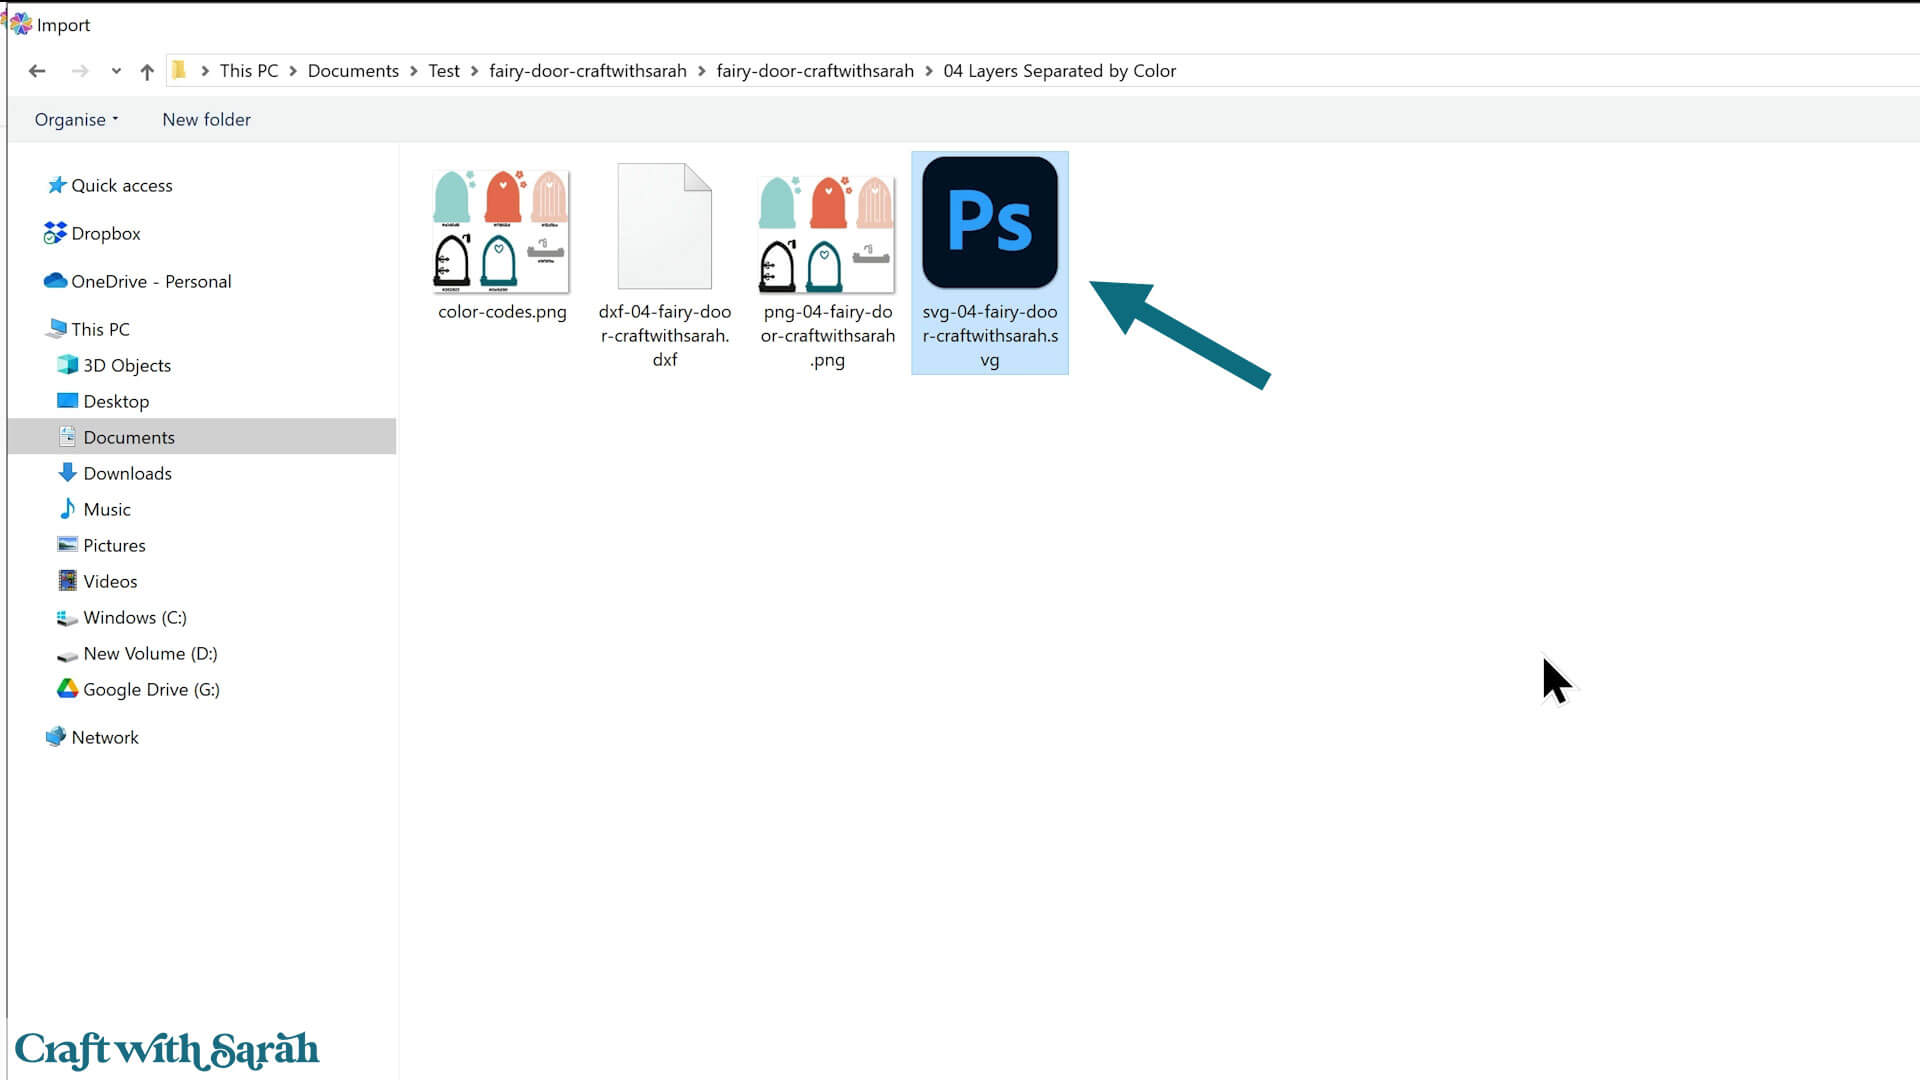
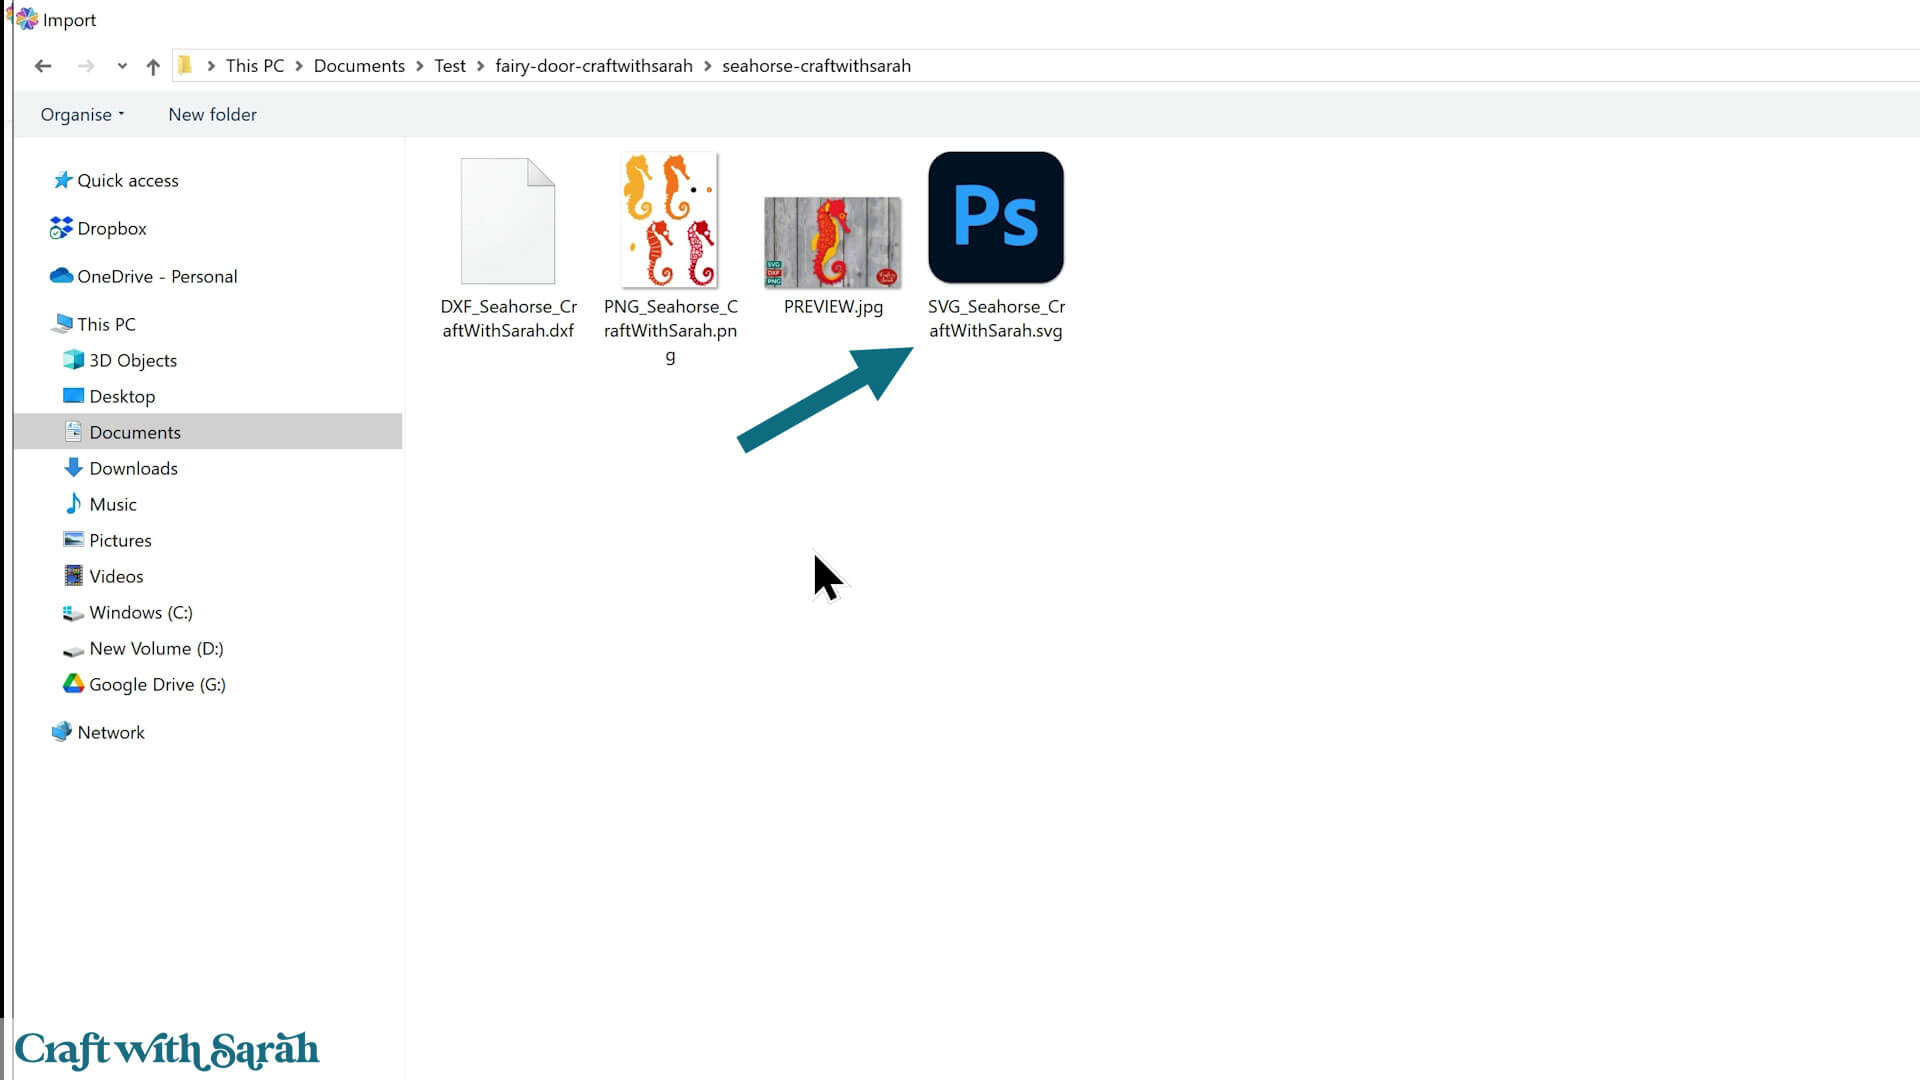
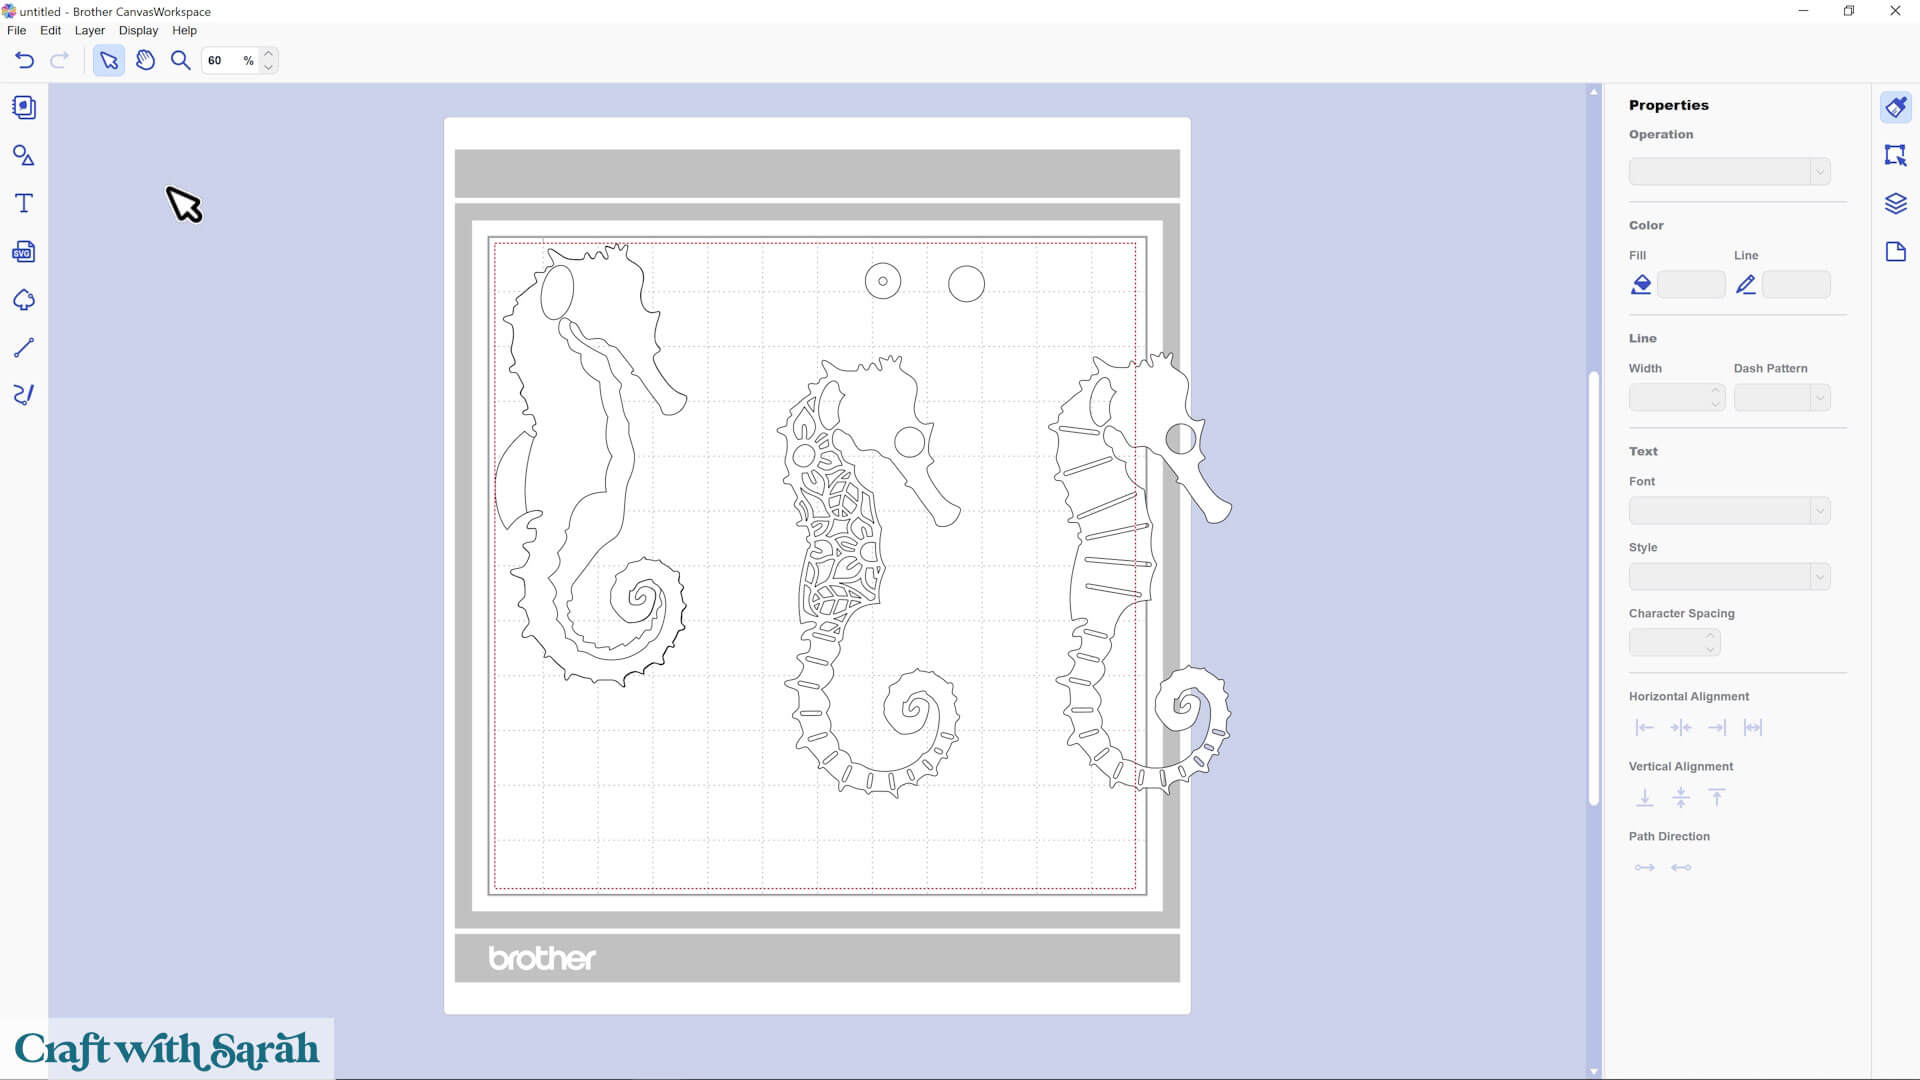
Import the SVG into Canvas Workspace
Open Canvas Workspace and click File > Import from Your Computer.
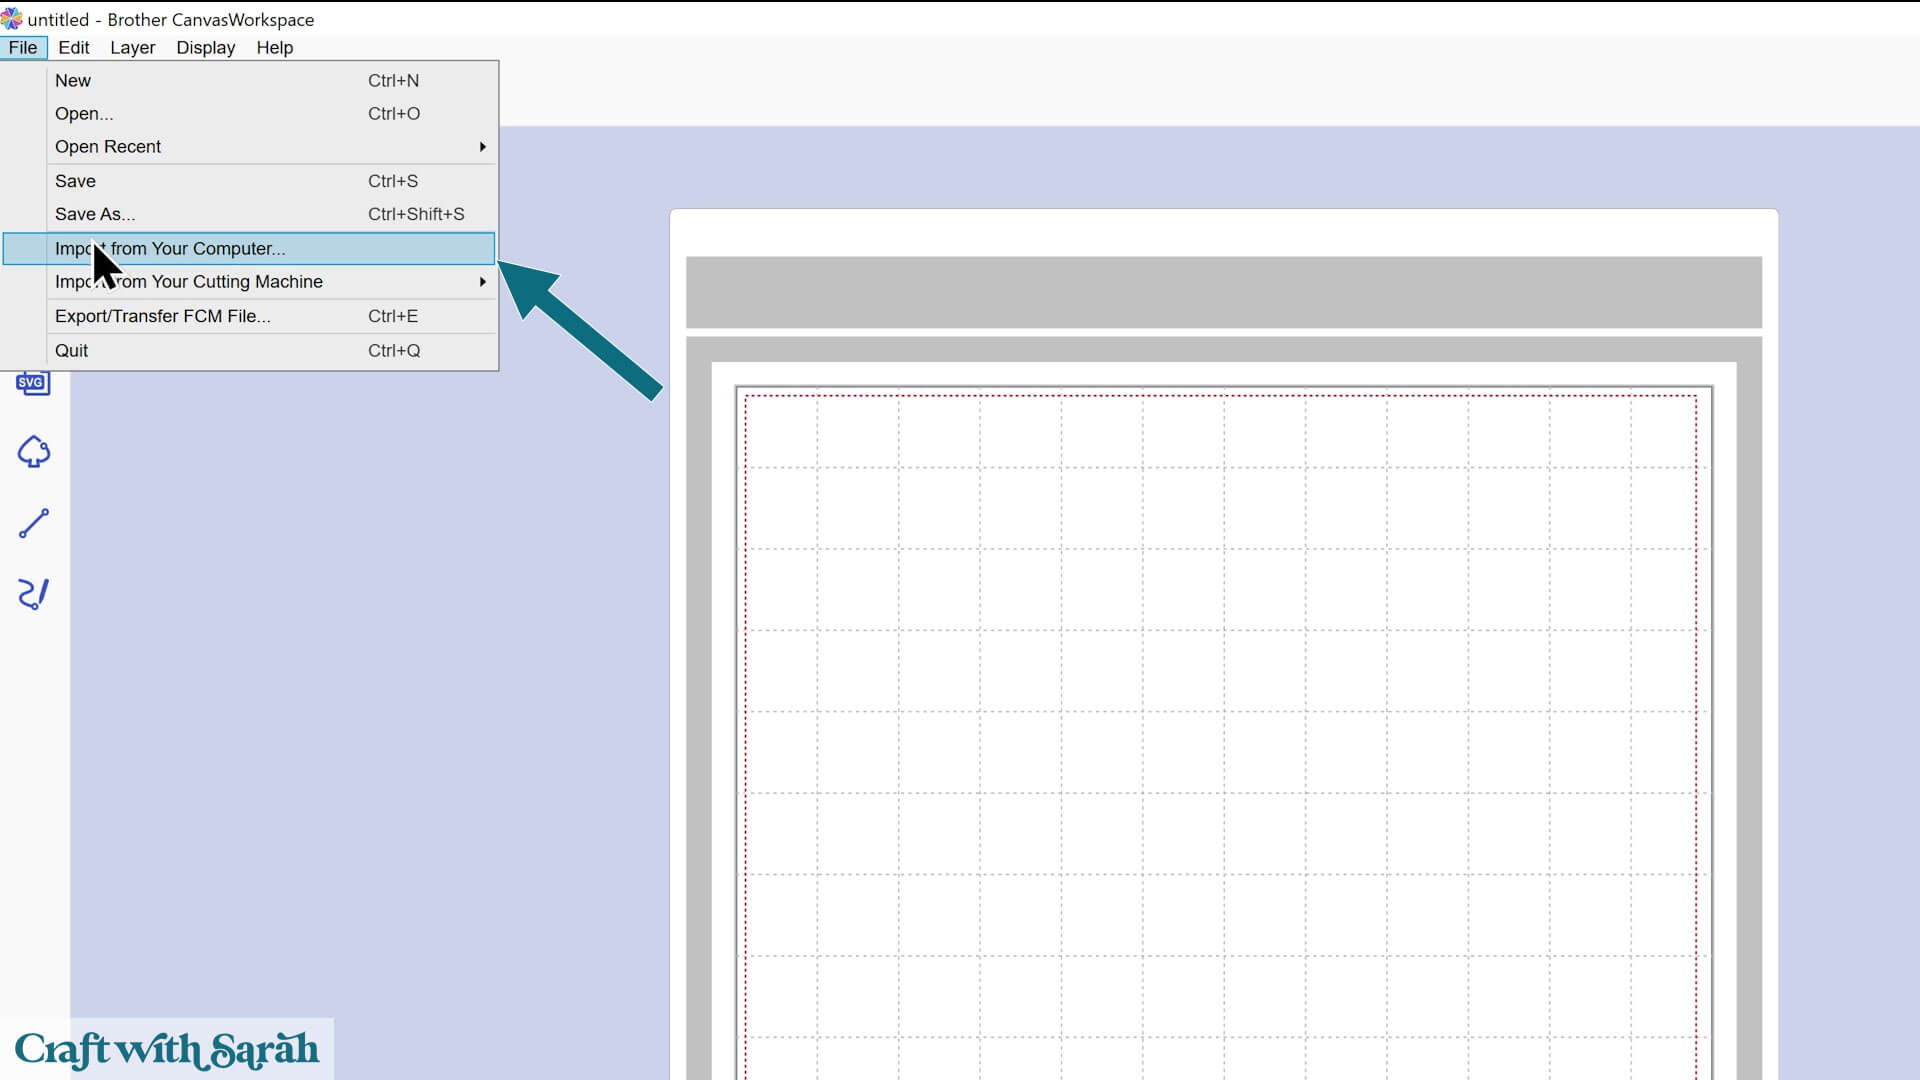
Navigate to your unzipped folder and open the folder called “04 Layers Separated by Color”.
Choose the file that starts with svg-04 in the file name.
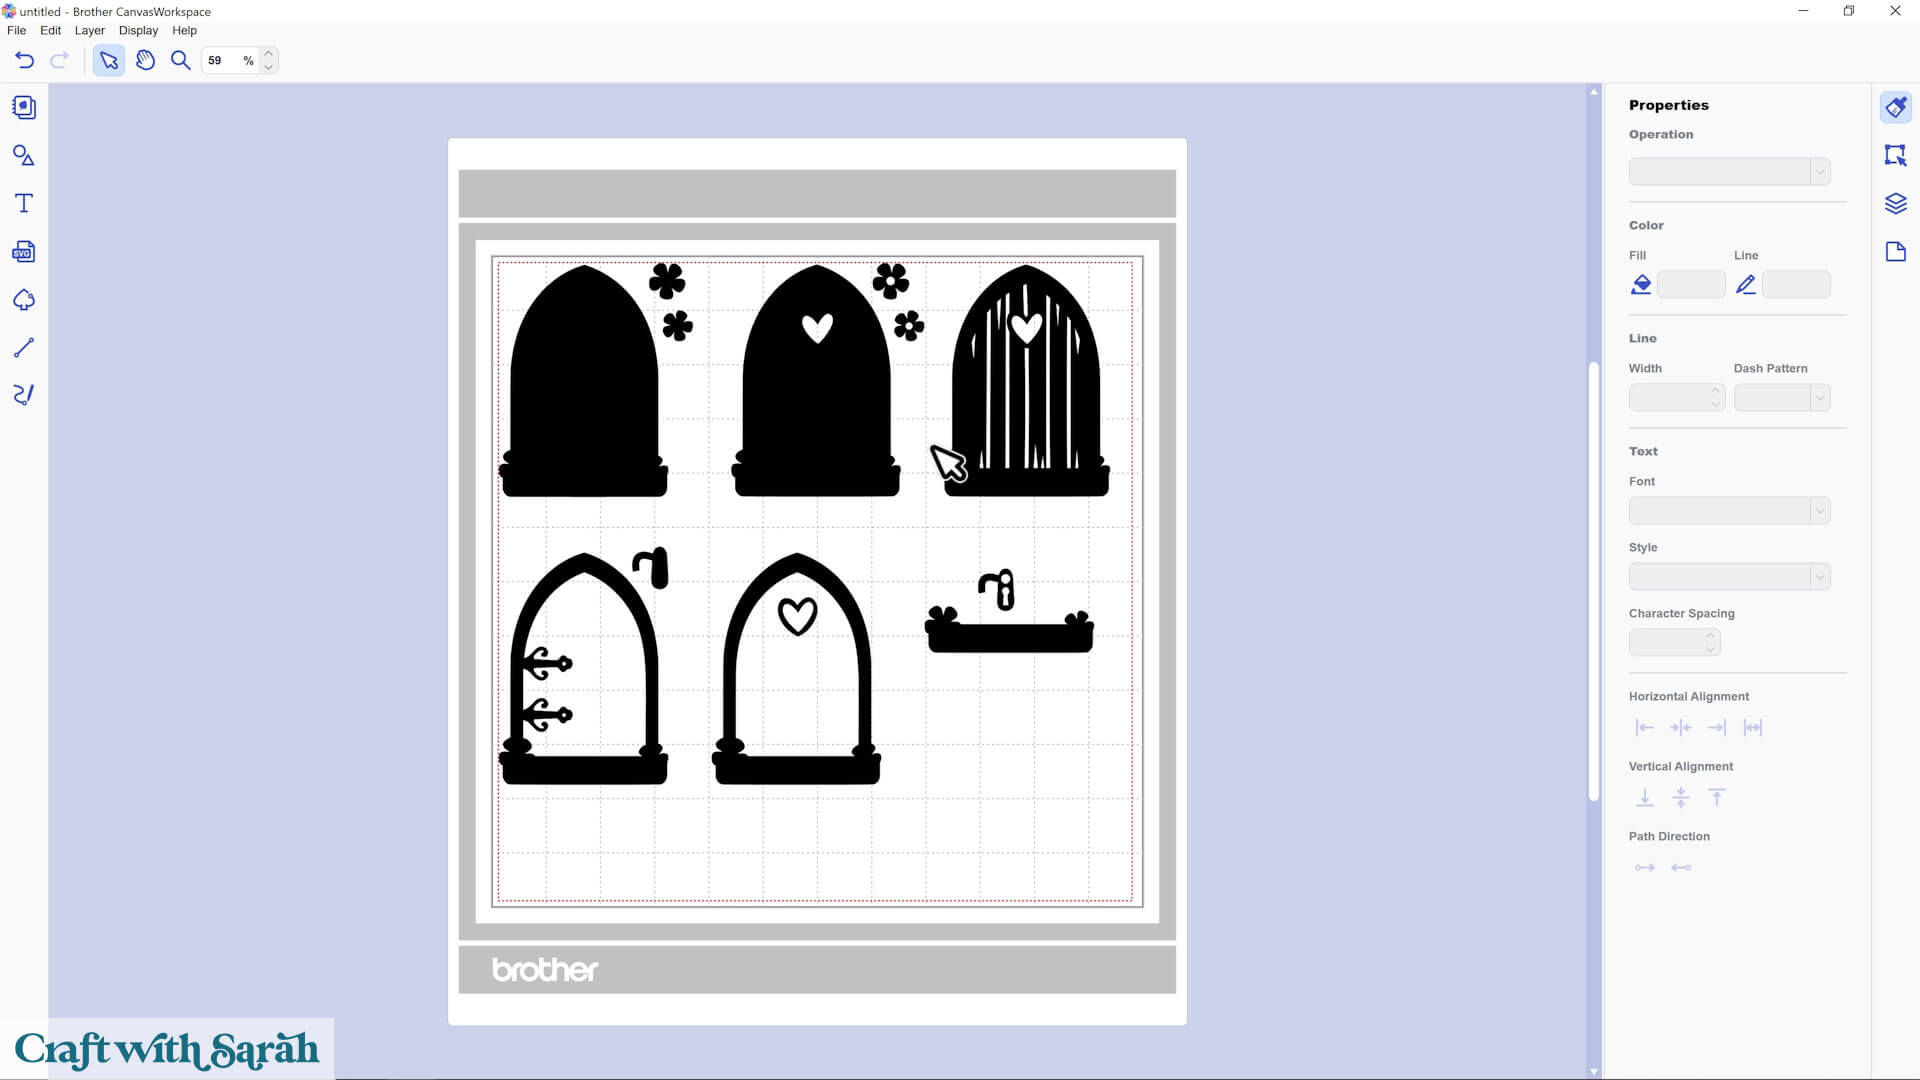
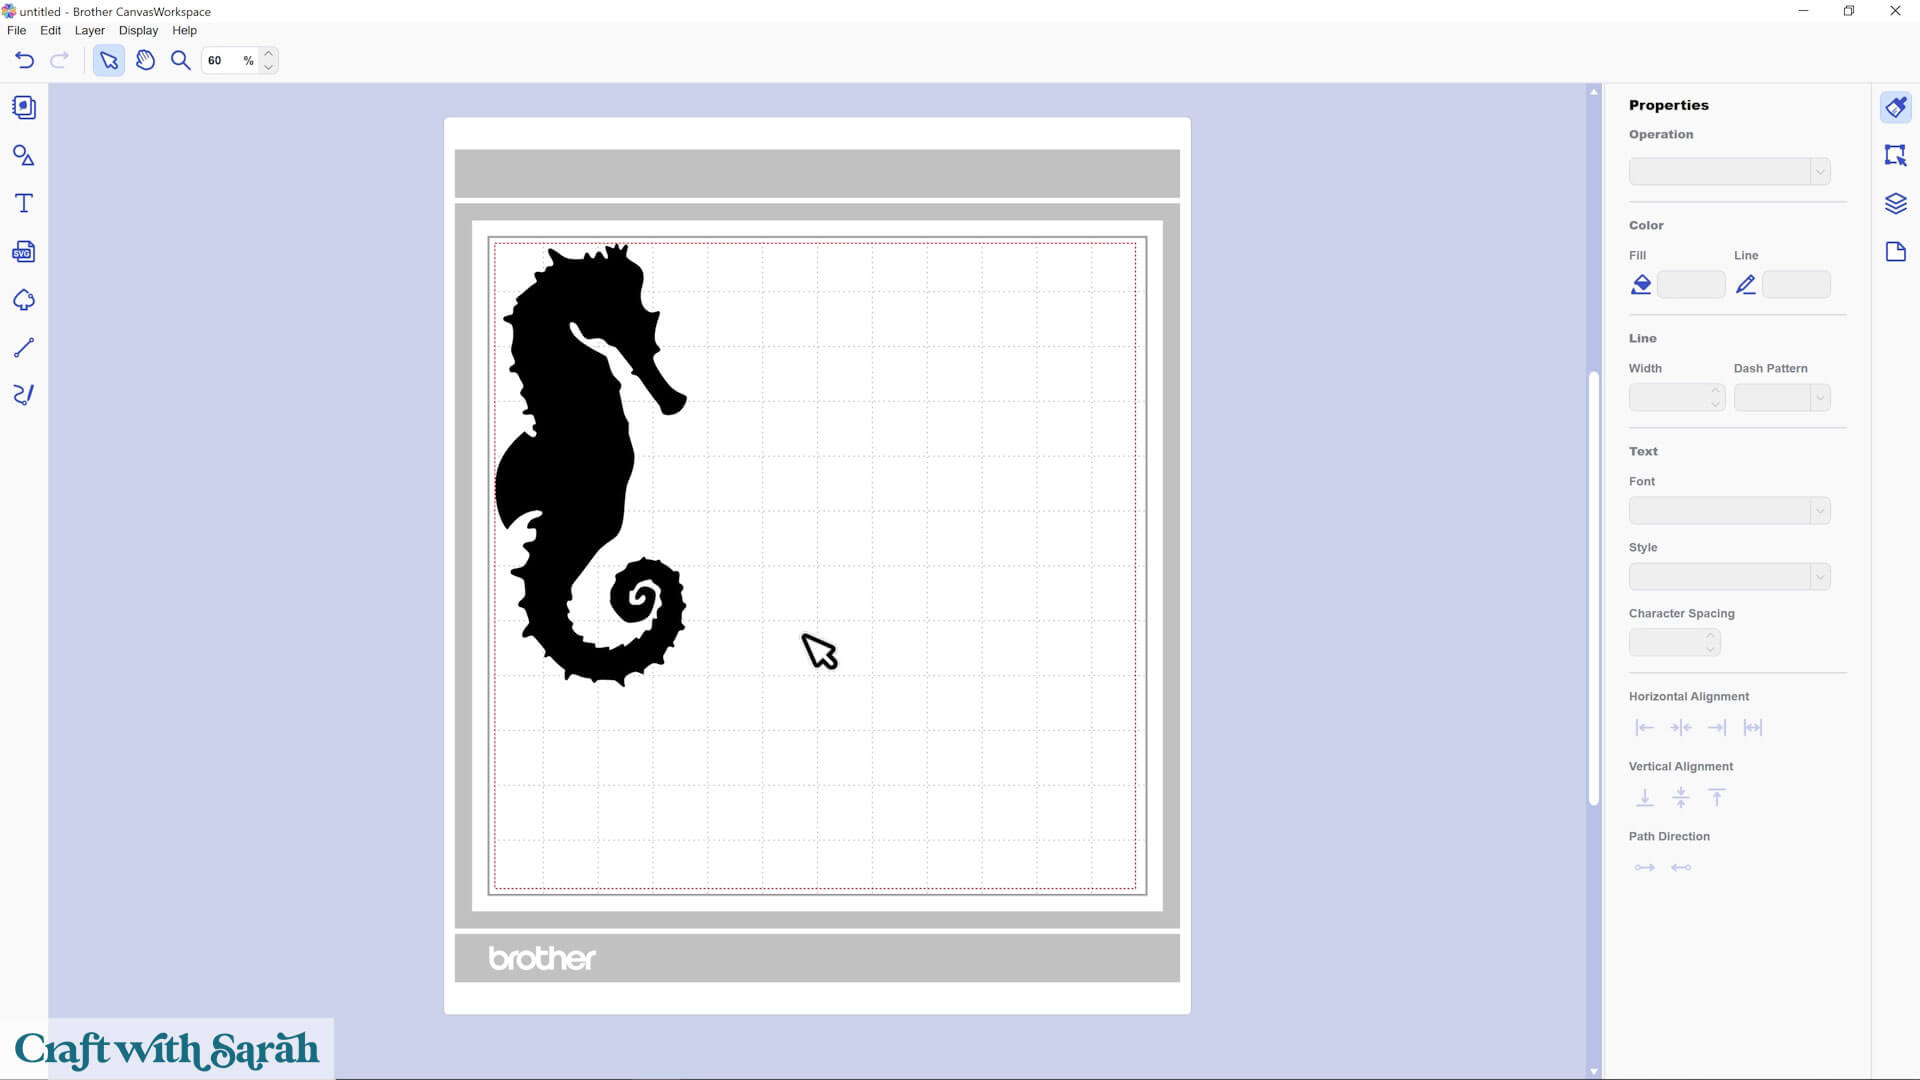
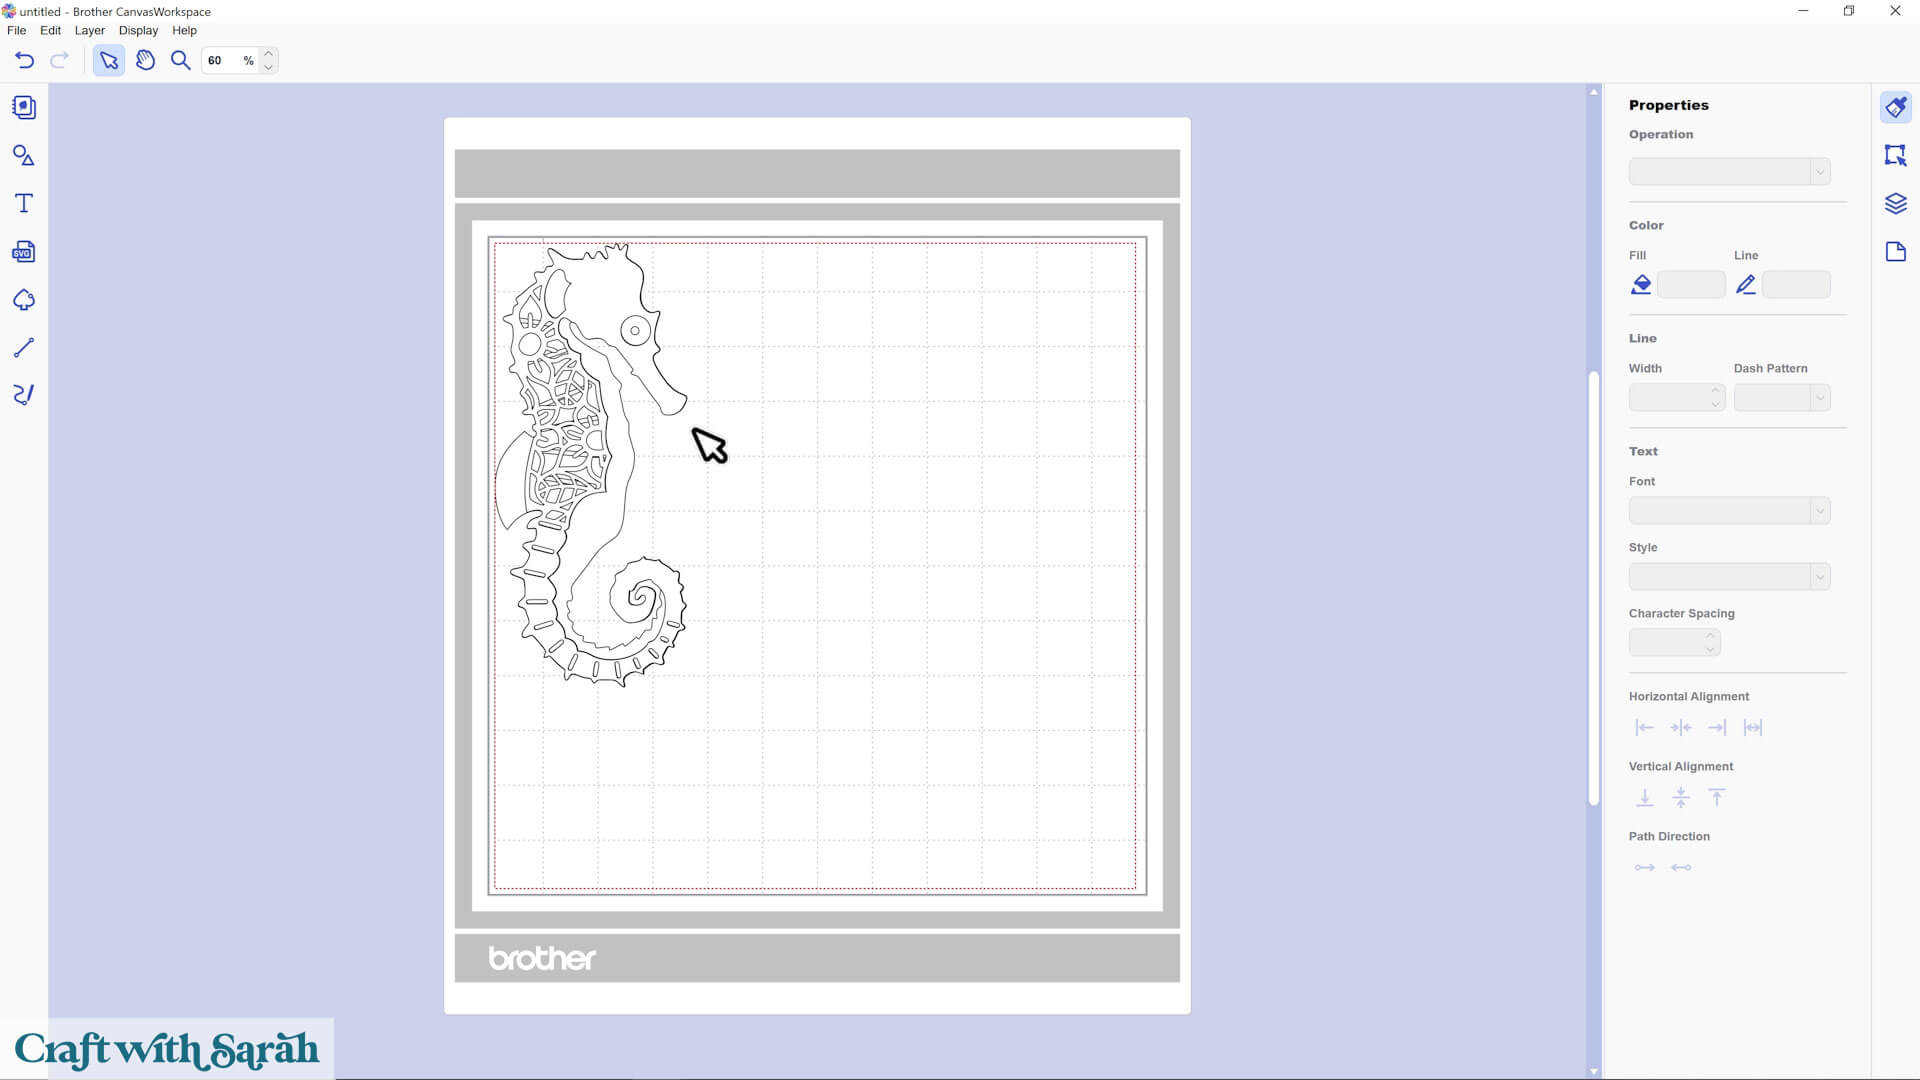
When your design loads, it might look a little… well, odd.
Everything shows up in black. That’s just how Canvas Workspace handles SVGs – it’s not your fault!
You’ll need to recolor each piece so it looks the way it’s supposed to.
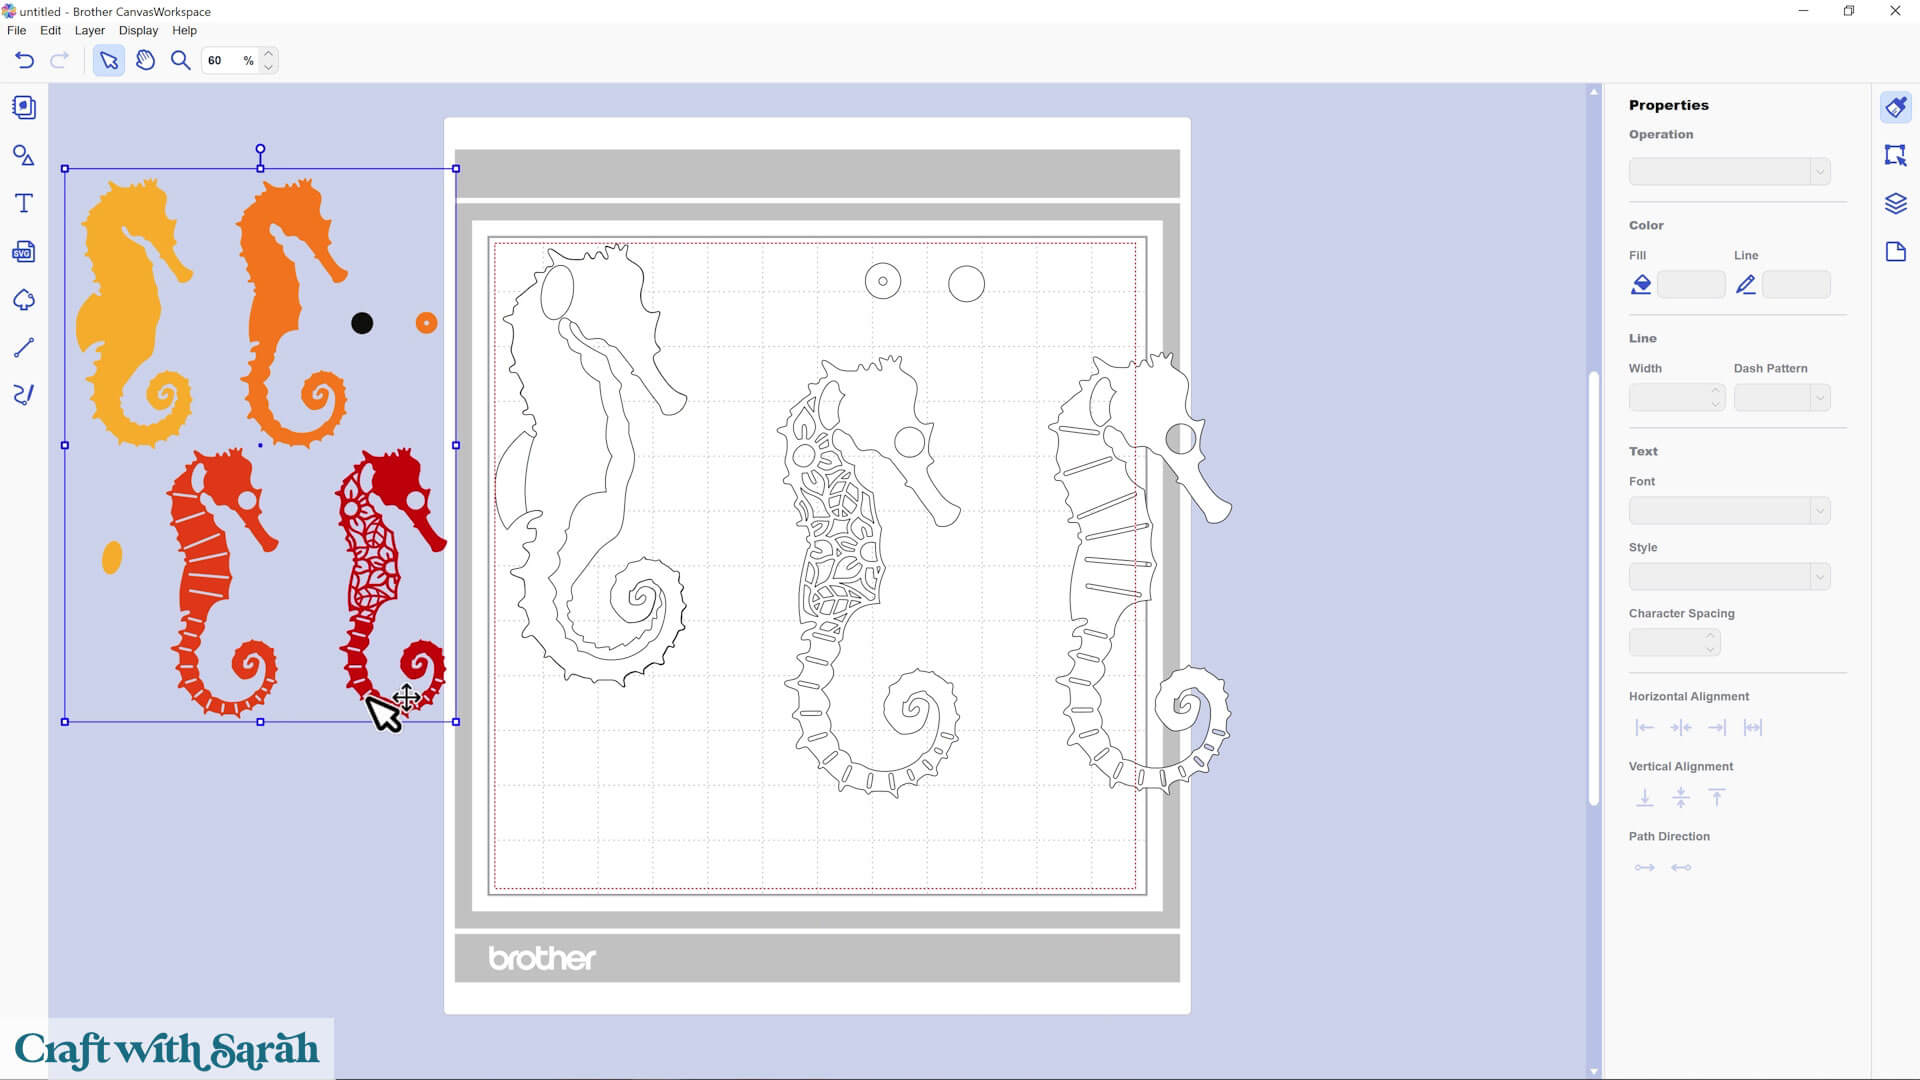
Import the SVG into Canvas Workspace
I’ve made this easier for you with a Color Guide PNG file to reference.
Go to File > Import from Your Computer.
In the same “04 Layers Separated by Color” folder, look for a file called “Color Guide” or “Color Codes” (it’s a PNG image, not cut ready).
This will load a picture of the design in color to help you match the colors.
If you are using an older design then import the PNG version of the file to get one with the colours showing.
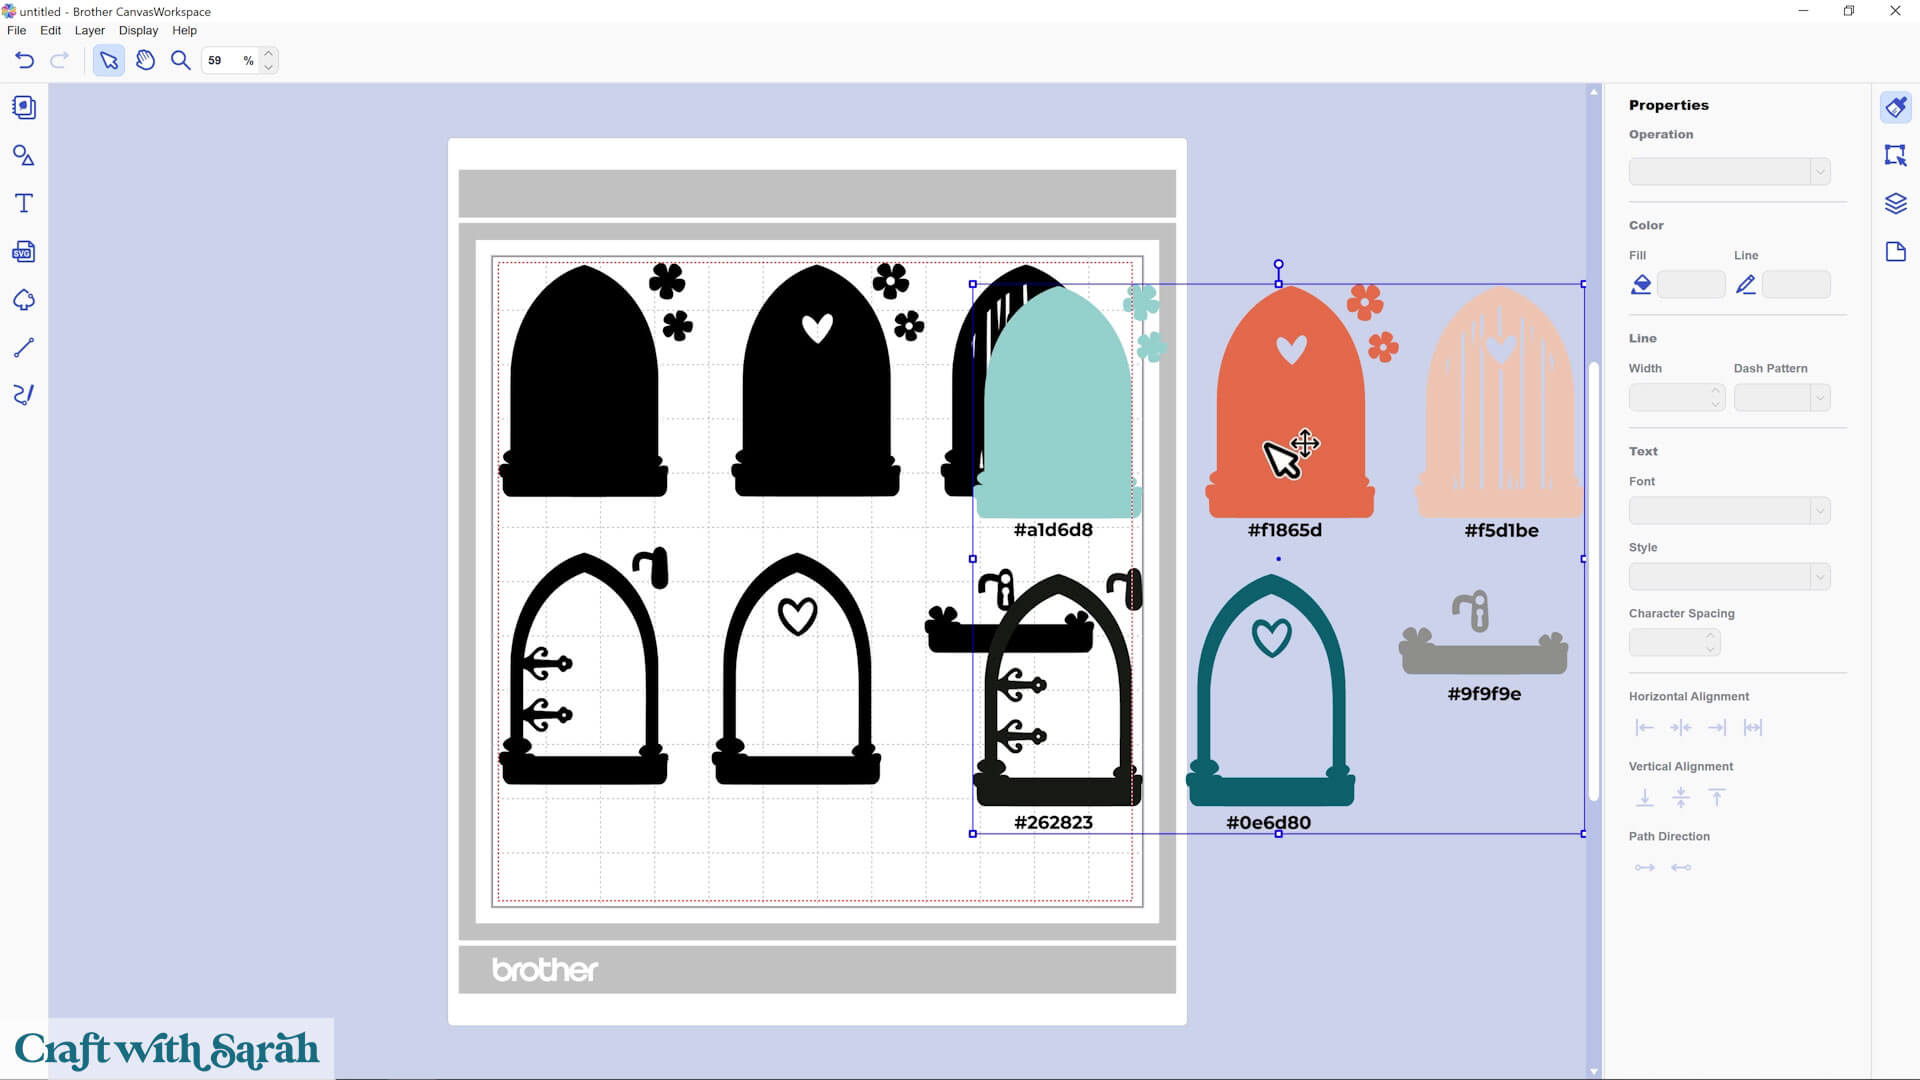
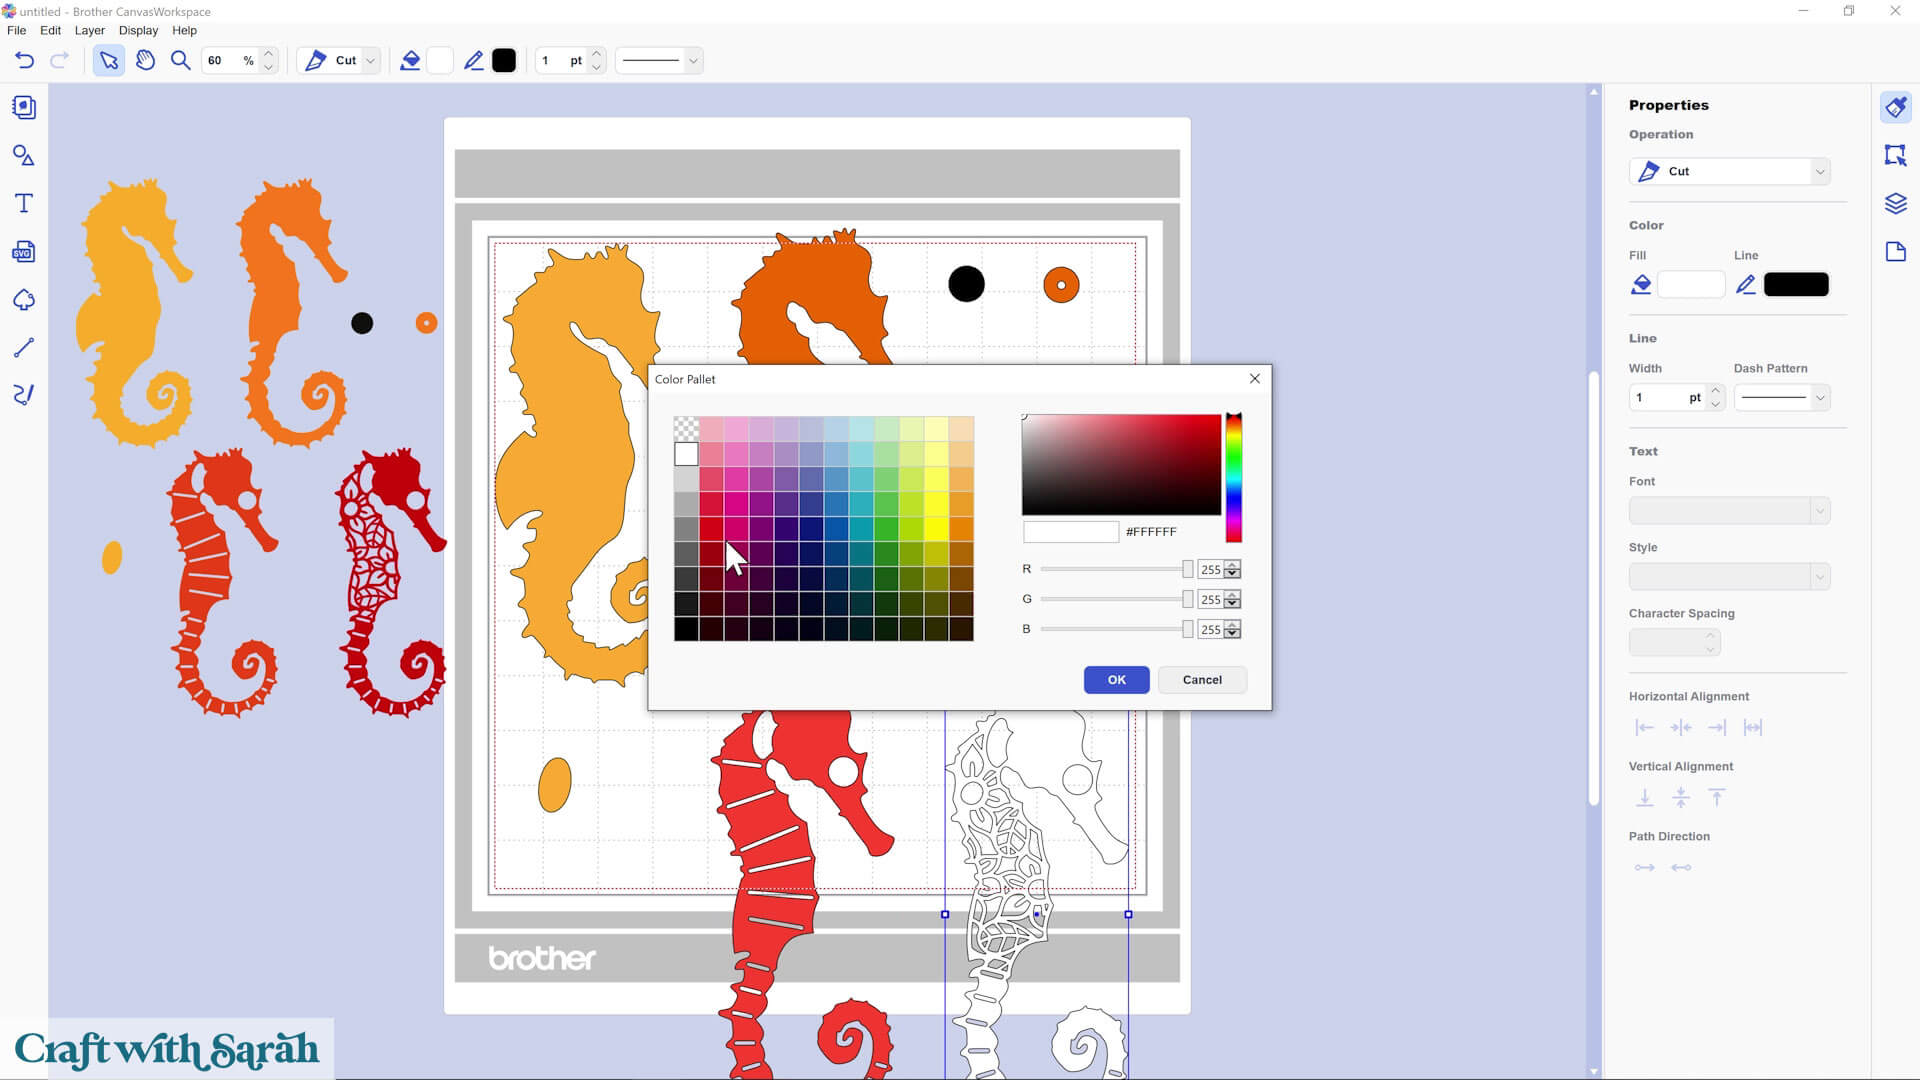
Click one of the black layers, open the “Color Fill” box (the paint bucket along the top of the screen), and enter the matching hex code from the guide (e.g., #FF66AA) or choose a colour manually that’s close to the one shown in the guide.
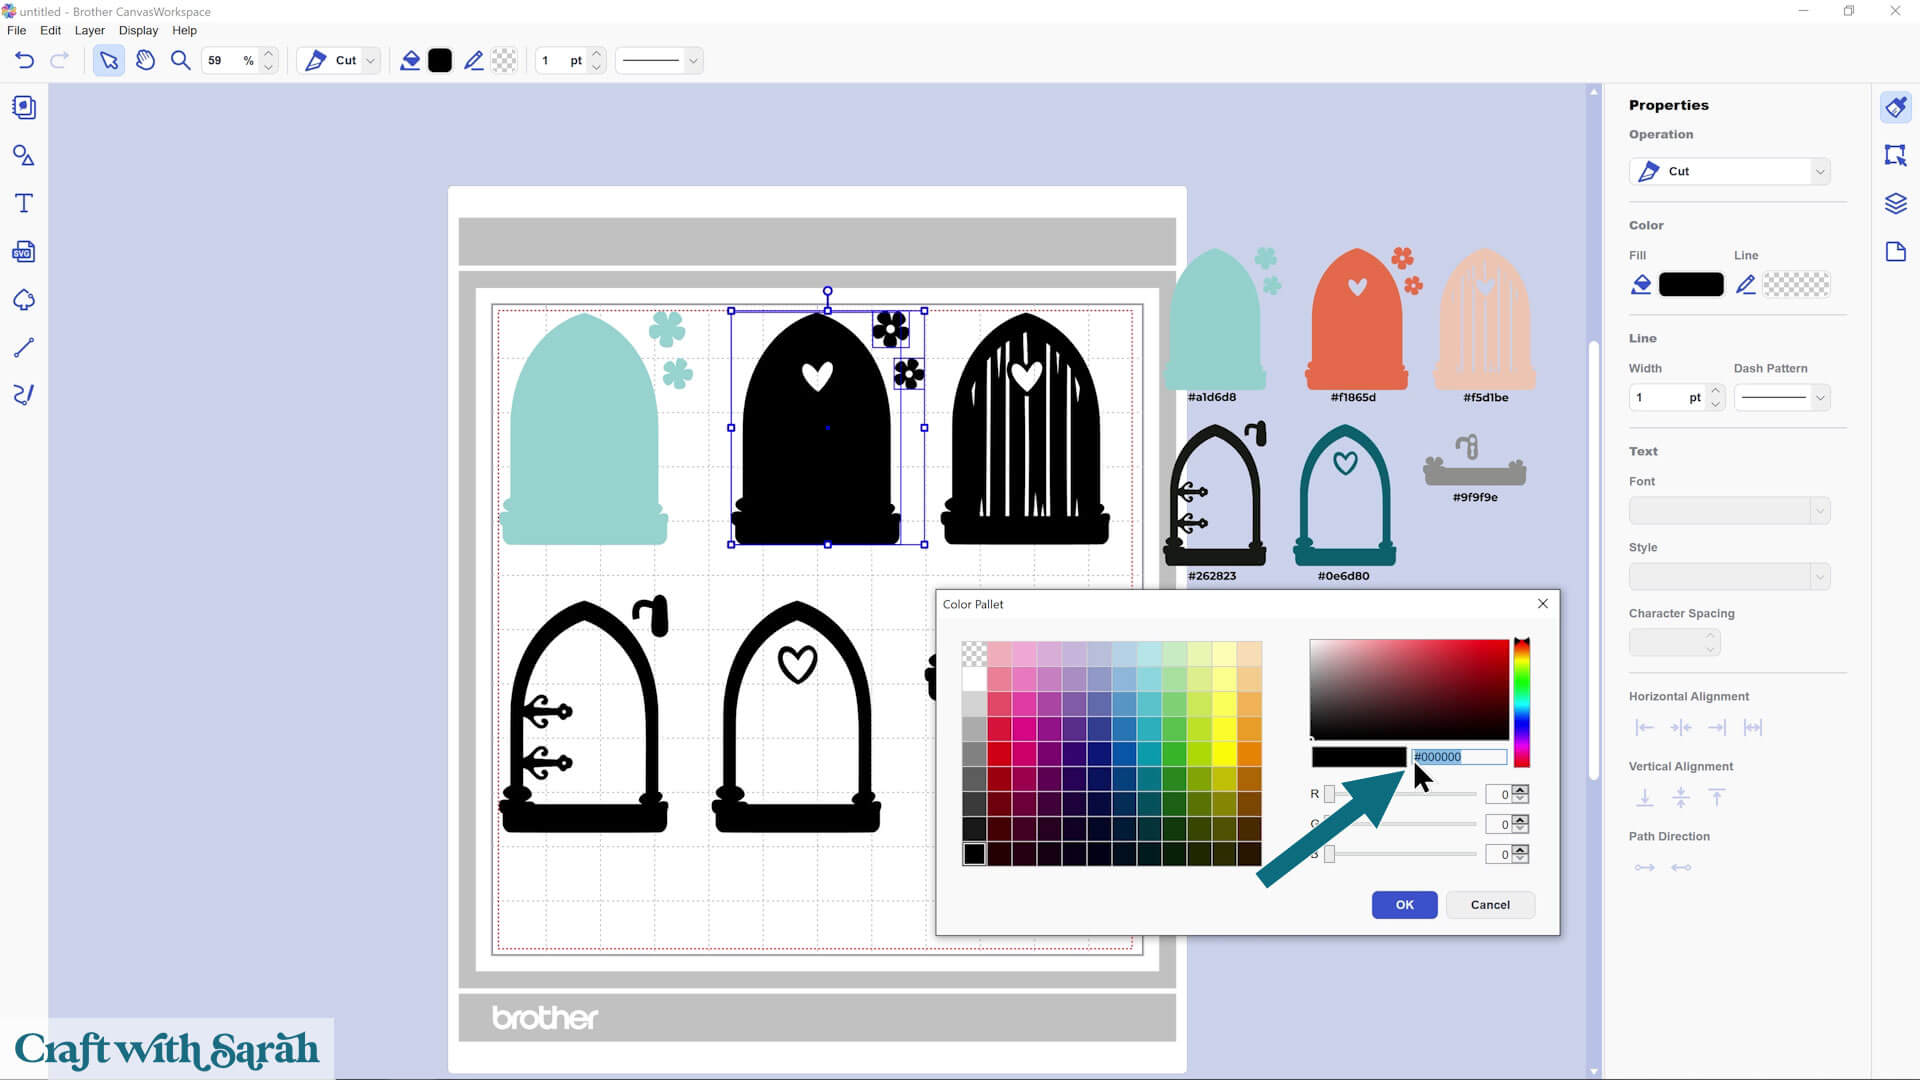
Repeat this until all of your layers are colored.
You can click-and-drag with your mouse to select multiple layers and change the colours of all of them at the same time.
Then, delete the Color Guide.
What If You’re Using an Older SVG Design?
No problem! You’ll still be able to use the SVG file – it just works a little differently.
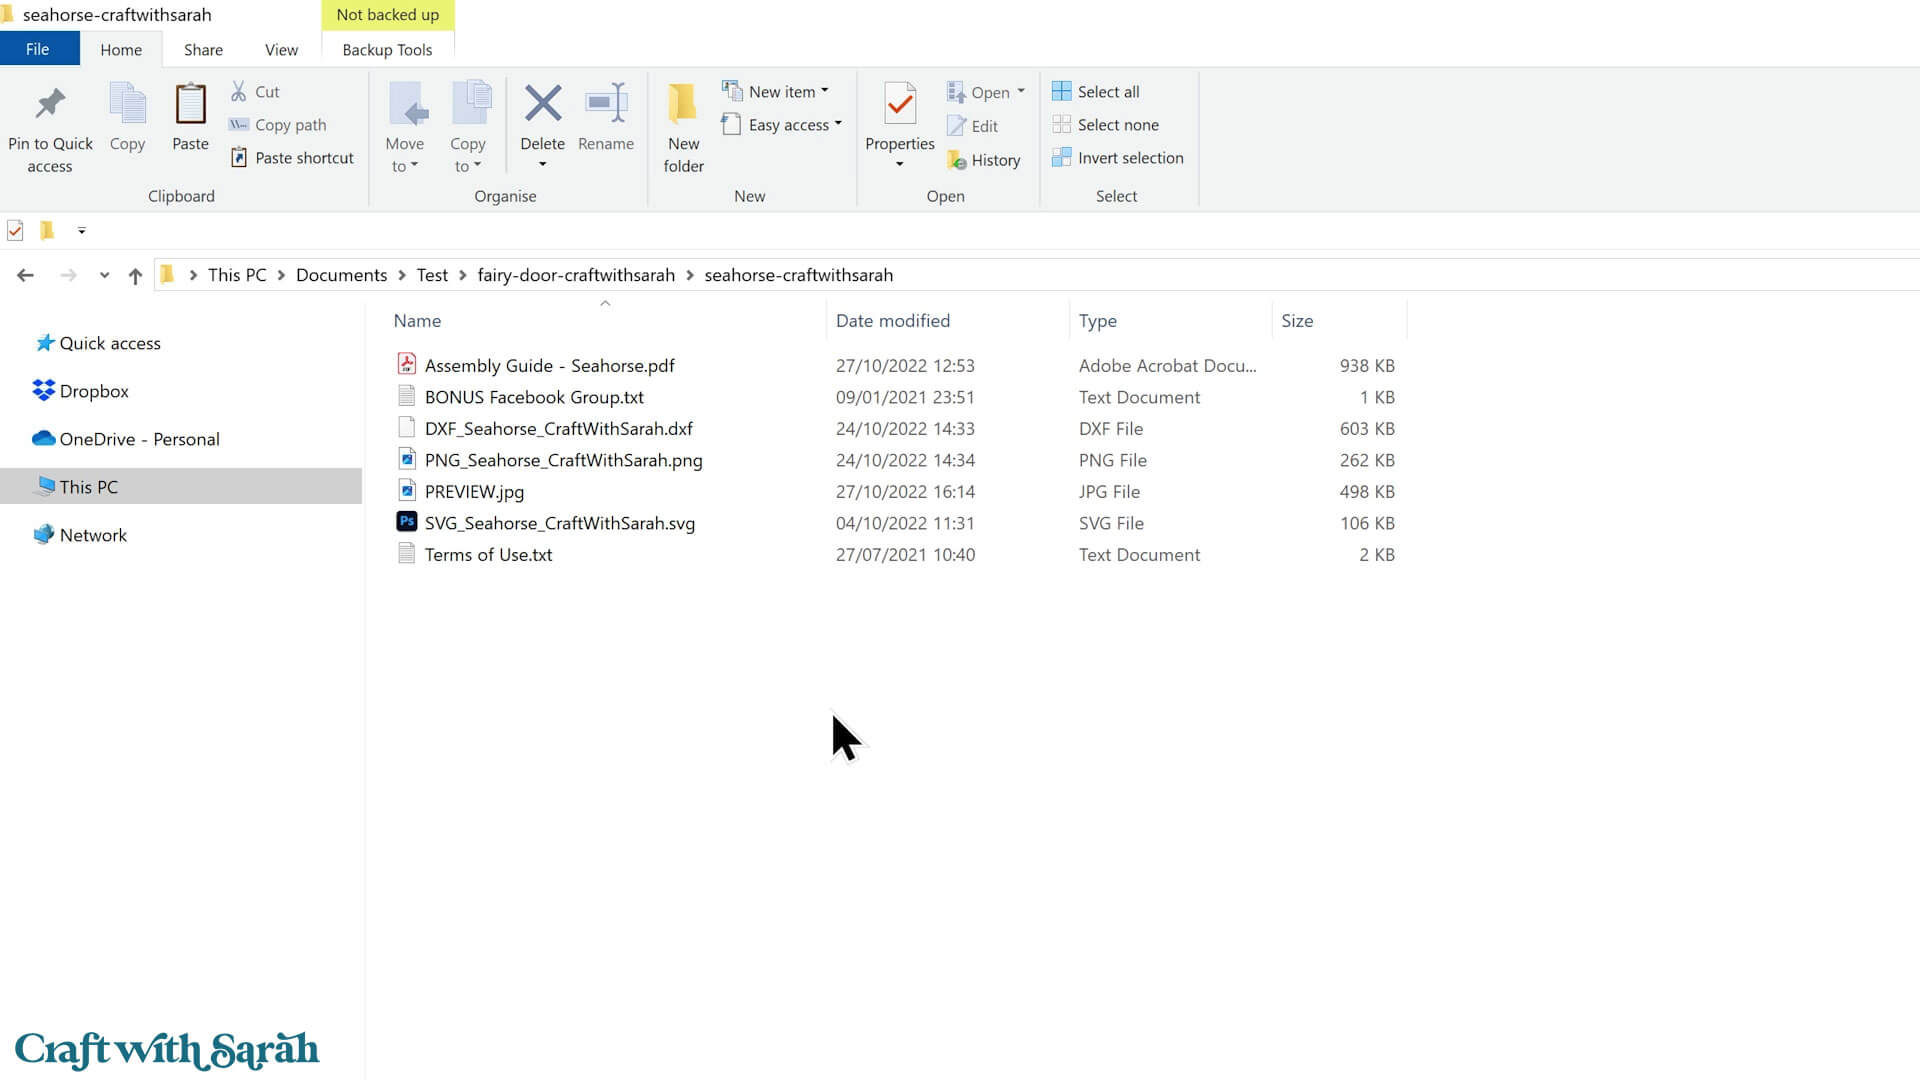
If you only see a few files (no folders), look for the one that starts with SVG in the name.
Import it into Canvas Workspace. Everything will be stacked on top of each other and in black.
Drag a box around all of the design and change the color of all the layers to white.
Add a black stroke so that it’s easier to see what you’re working with.
Drag all the pieces apart so you can see them.
Use the PNG file from the download folder as a visual guide
Note: we can’t use the PNG for cutting as it’s all flattened into one solid layer. The SVG file is the one you need to use for cutting.
You can then manually color each piece using the Fill tool. There won’t be hex codes shown on the older versions, so just match it as best you can.
Once all your layers are coloured, your design is ready to resize and cut.
That process is covered in the follow-on tutorial that shows how to cut cardstock with a ScanNCut machine.
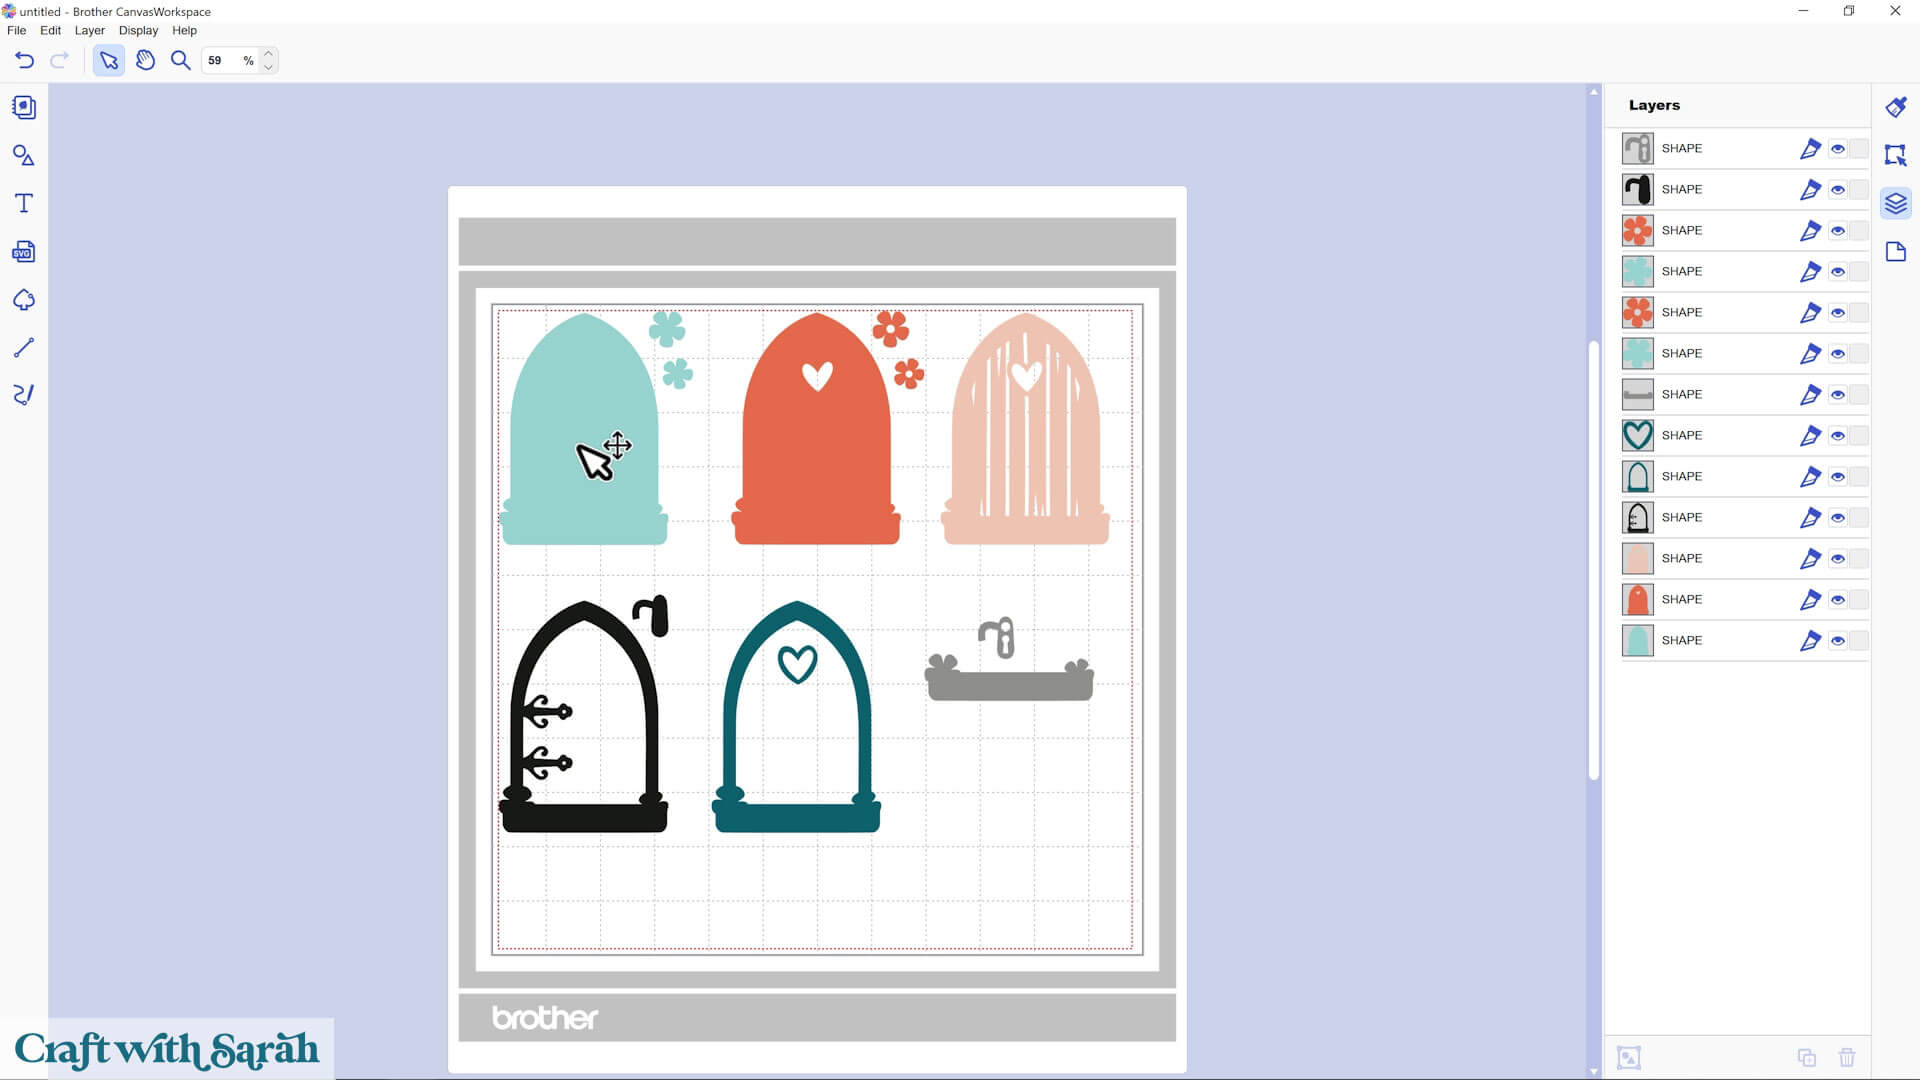
Why Not Use the DXF File?
You can open the DXF file instead of the SVG file, but I don’t recommend it. Here’s why:
Every little line becomes its own layer, making it really hard to work with.
Take a look at the layers panel in the image below to see what I mean.
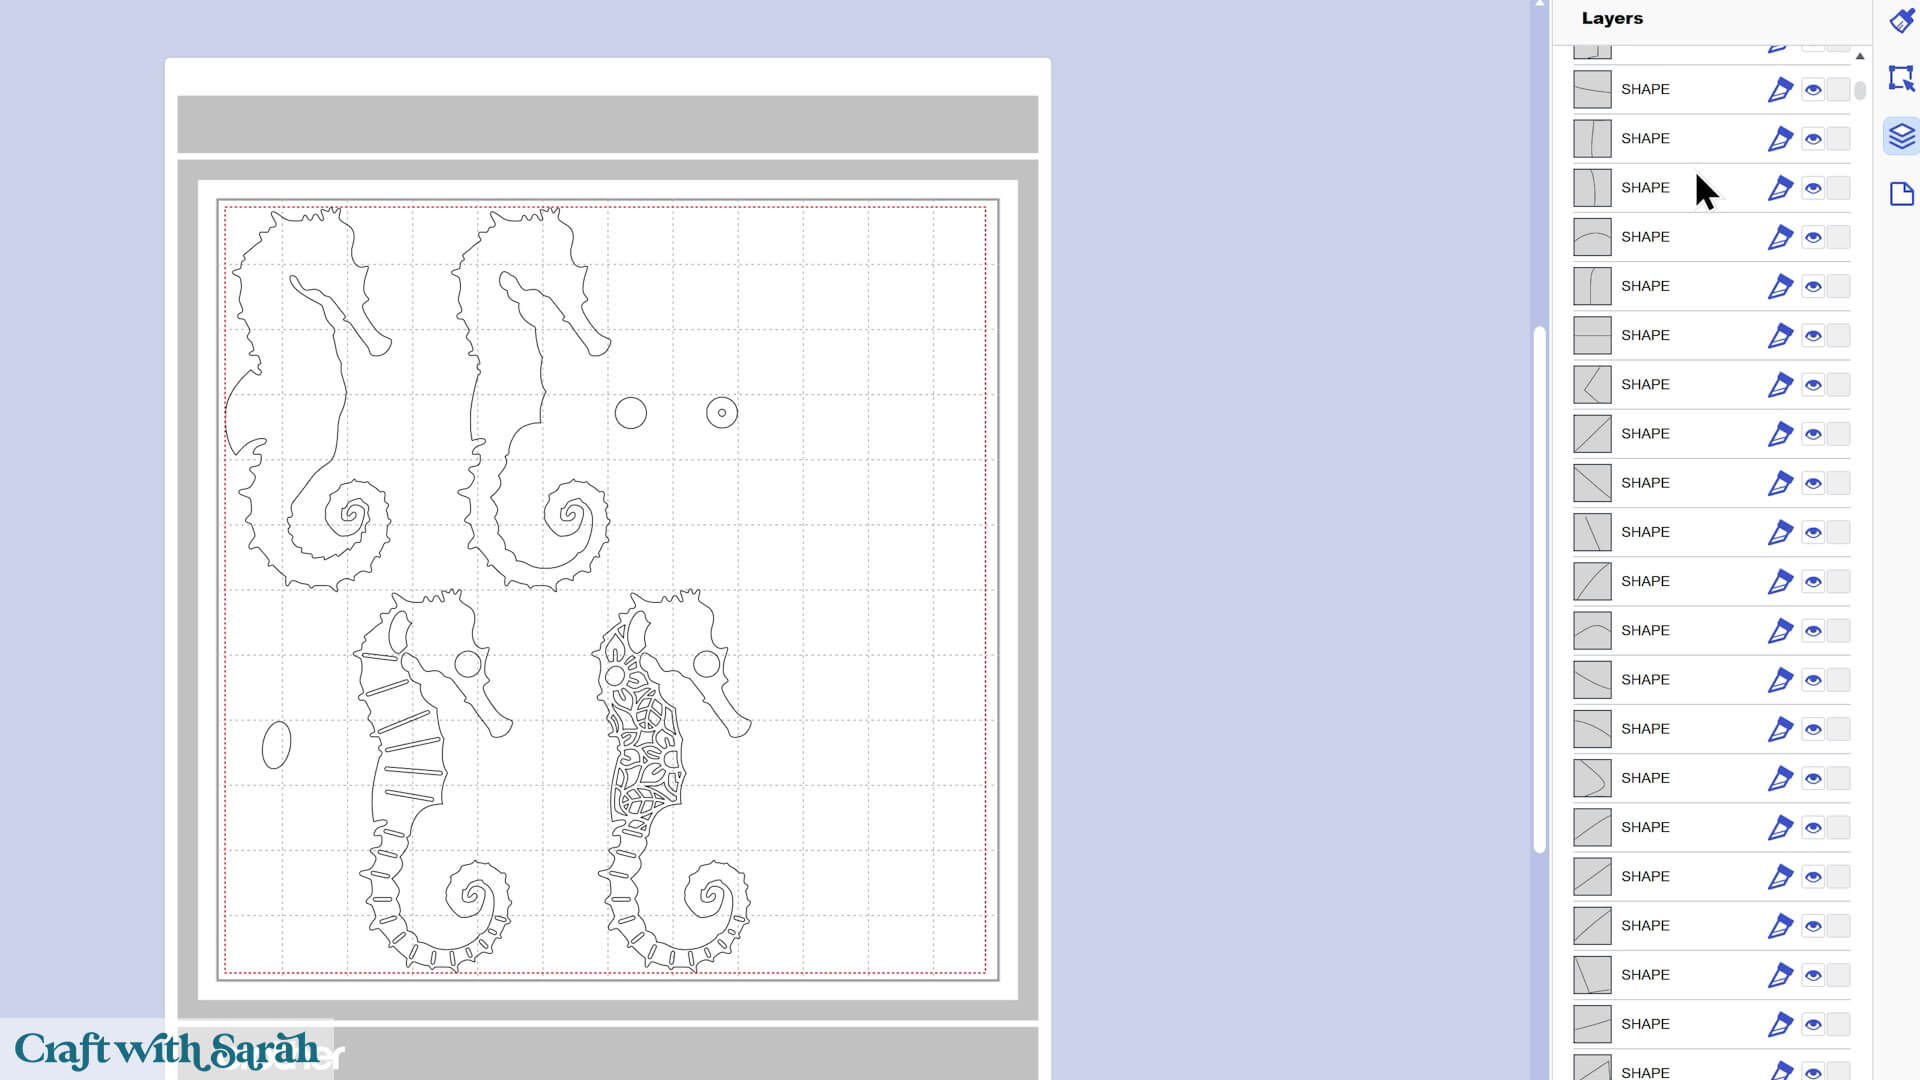
You’ll spend way more time trying to fix the DXF file than you would dragging the layers apart on the SVG version.
So stick with the SVG version, even if it means doing a little rearranging.
Opening SVG files in CanvasWorkspace doesn’t have to feel confusing or restrictive once you understand how the software works how to add the colors back into the layers.
Now that you know how to open SVG files in CanvasWorkspace, you’re ready to start crafting with confidence
Once you’ve done this process a couple of times, it becomes second nature, making it easy to jump straight into new projects and make the most of your ScanNCut machine.
What happens next? Check out this ScanNCut machine help page for additional CanvasWorkspace tutorials on resizing designs, changing the colours, modifying the layers and how to cut cardstock projects with a ScanNCut.
Happy crafting,
Sarah

