xTool M1 Engraving Tutorial: Wood & Slate Coasters

You won’t believe how easy it is to engrave on wood and slate with the xTool M1 laser cutter!
I’ve been busy putting my laser cutter to the test and can’t wait to show you the process of making these coasters.
If you’ve been wondering “can slate be laser engraved?” – the answer is YES, and it’s BEAUTIFUL!
We’ll take a look at how to engrave some of my favourite designs onto slate and wood. You’re going to start getting Christmas present ideas!
xTool very kindly sent me the M1 machine for free so that I could test it out and put it through its paces. All opinions and project ideas are my own.
Please note that some of the links included in this article are affiliate links, which means that if you click through and make a purchase I may receive a commission (at no additional cost to you). You can read my full disclosure at the bottom of the page.
Find out more about the xTool M1
xTool M1 Engraving Instructions
You’ll be pleased to know that it’s an easy process when preparing the machine to engrave on both slate and wood. There were some great features to the xTool M1 and the Creative Space software which simplified the process.
Watch the video below to see how to make custom coasters on an xTool M1.
If you prefer to read rather than watch, keep scrolling!
DIY Coasters with the xTool M1 Laser Engraver
If you drink as much tea and coffee as I do, then you’ll know just how important it is to have a good coaster!
It’s made even better by adding the designs you wish, especially when you can personalise them for yourself and others.
Here’s how to make them…
Part 1: Engraving on slate with a laser cutter
Step 1) Choose a design to engrave with the xTool M1
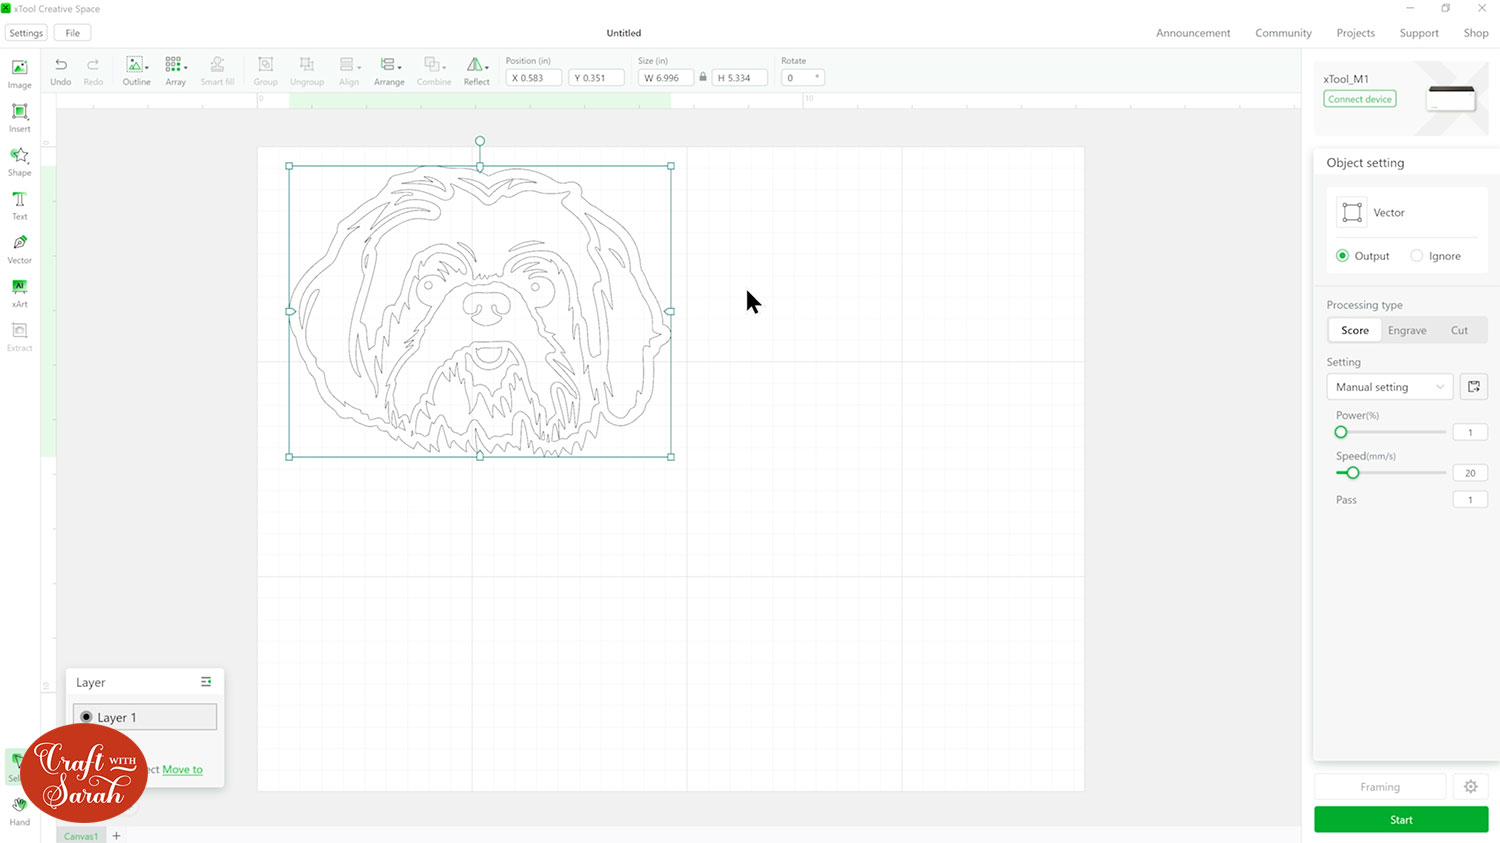
The possibilities are endless! Choose any SVG file, although it’s easier if it’s just a one-layer design.
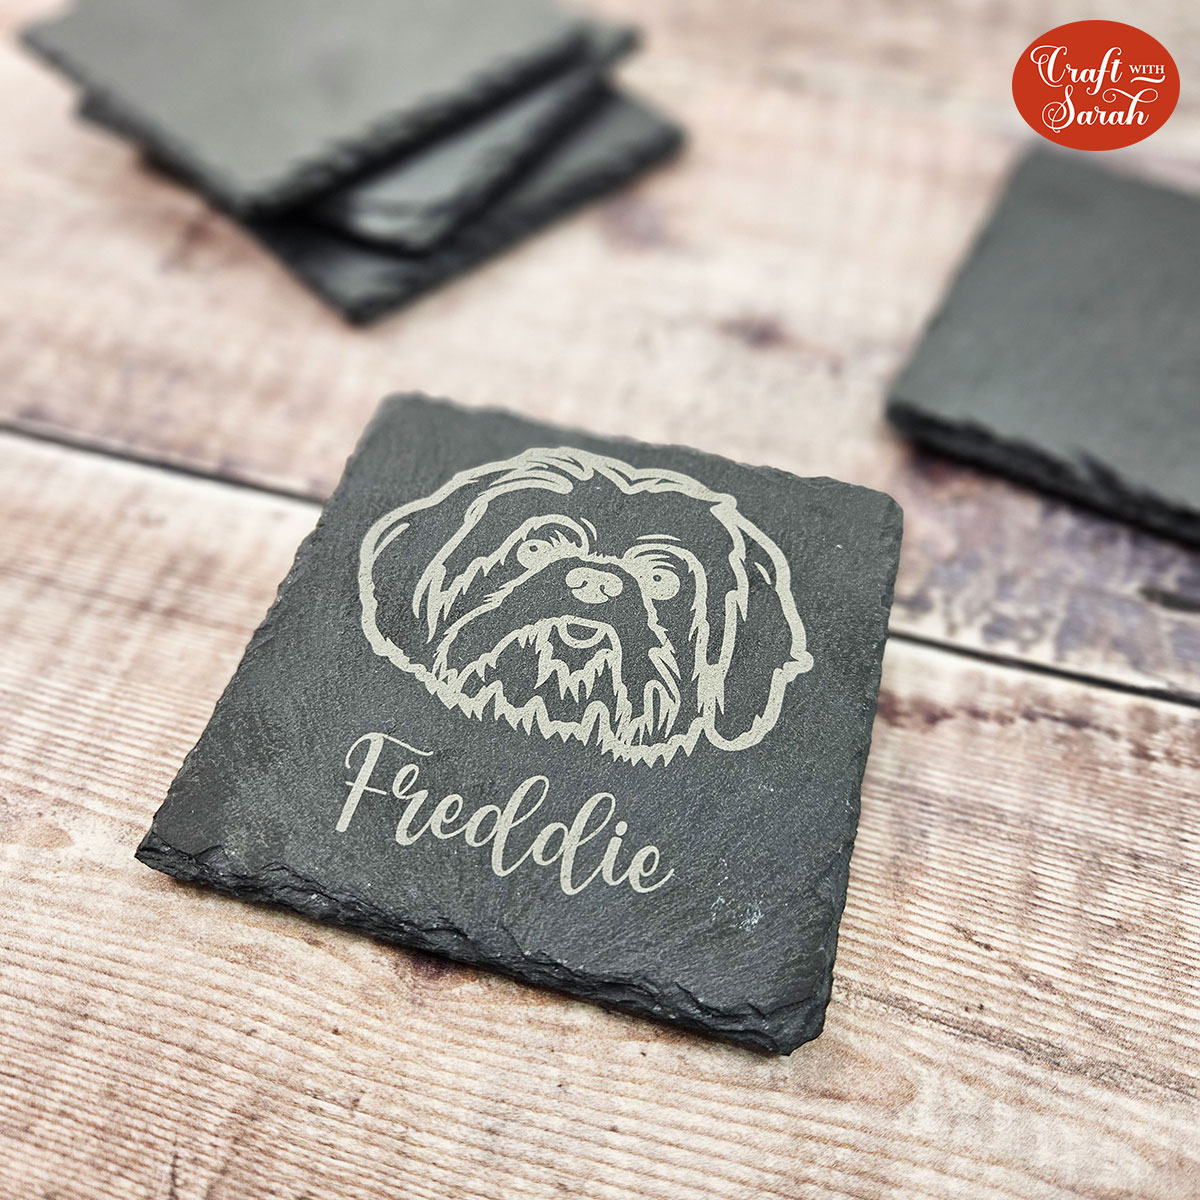
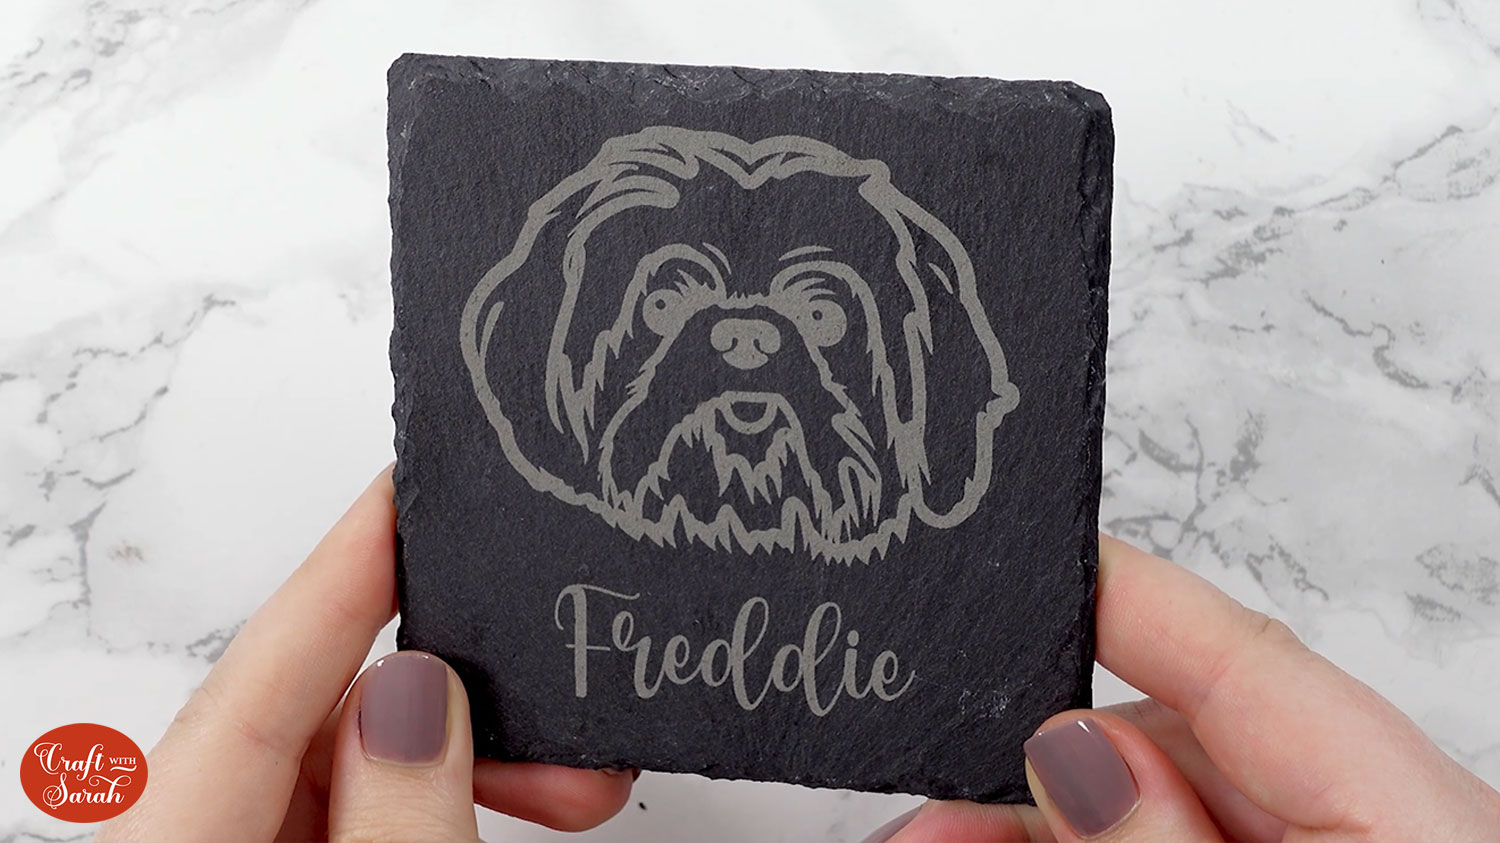
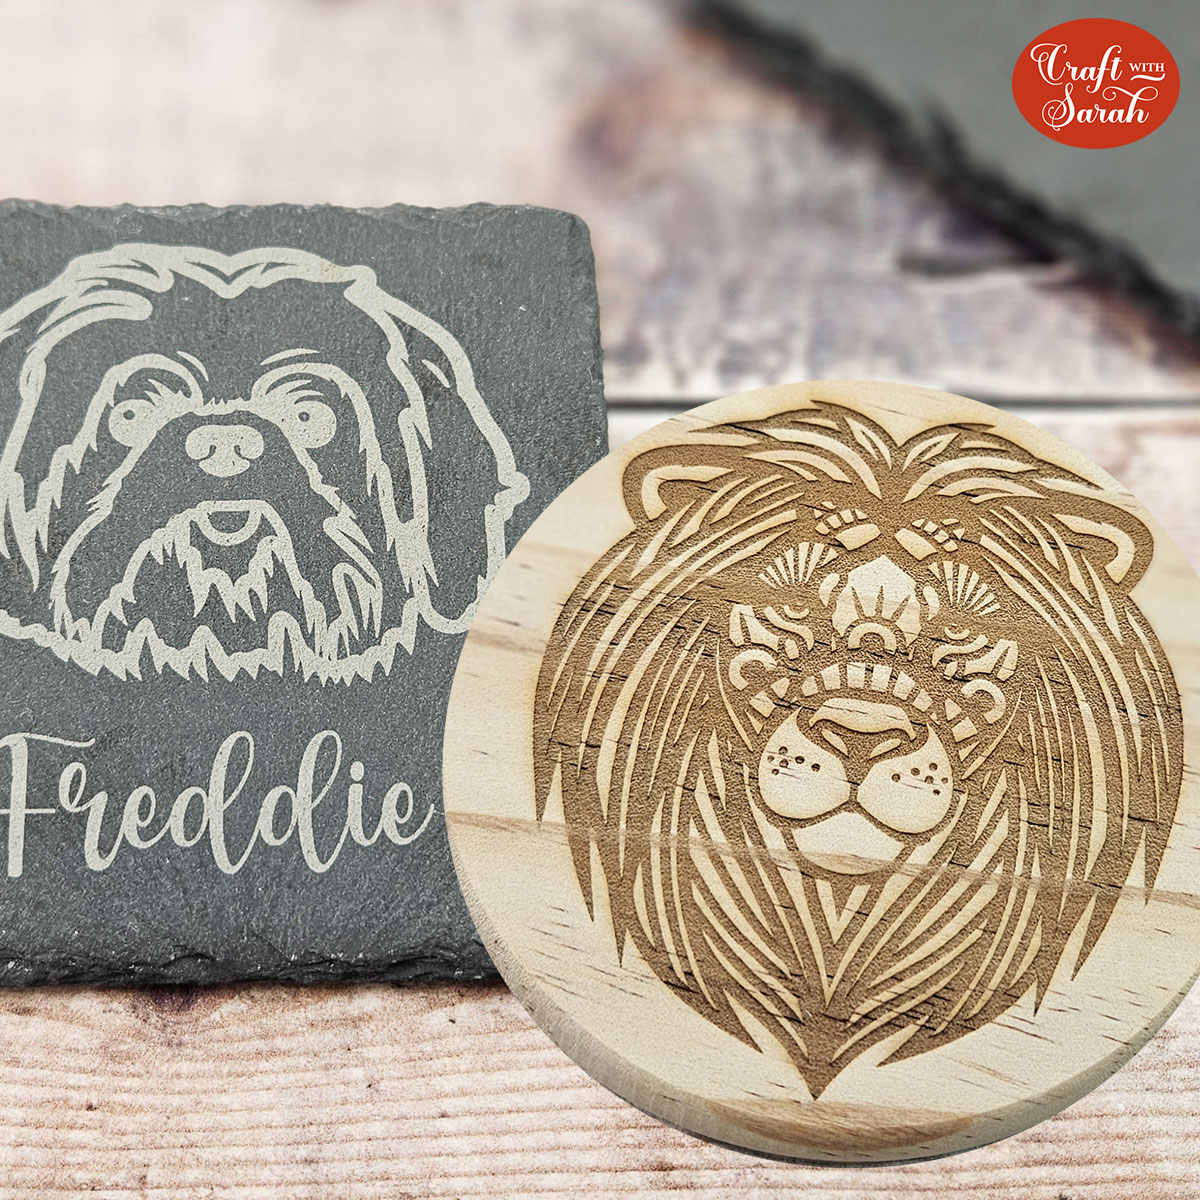
I couldn’t resist using my Shih Tzu dog head design, as I have two lovely little shih tzus of my own.
Once you’ve decided which SVG file to use, open the xTool Creative Space software and begin a new project.
Click File > Import to load in the SVG file.
Step 2) Prepare the machine and software
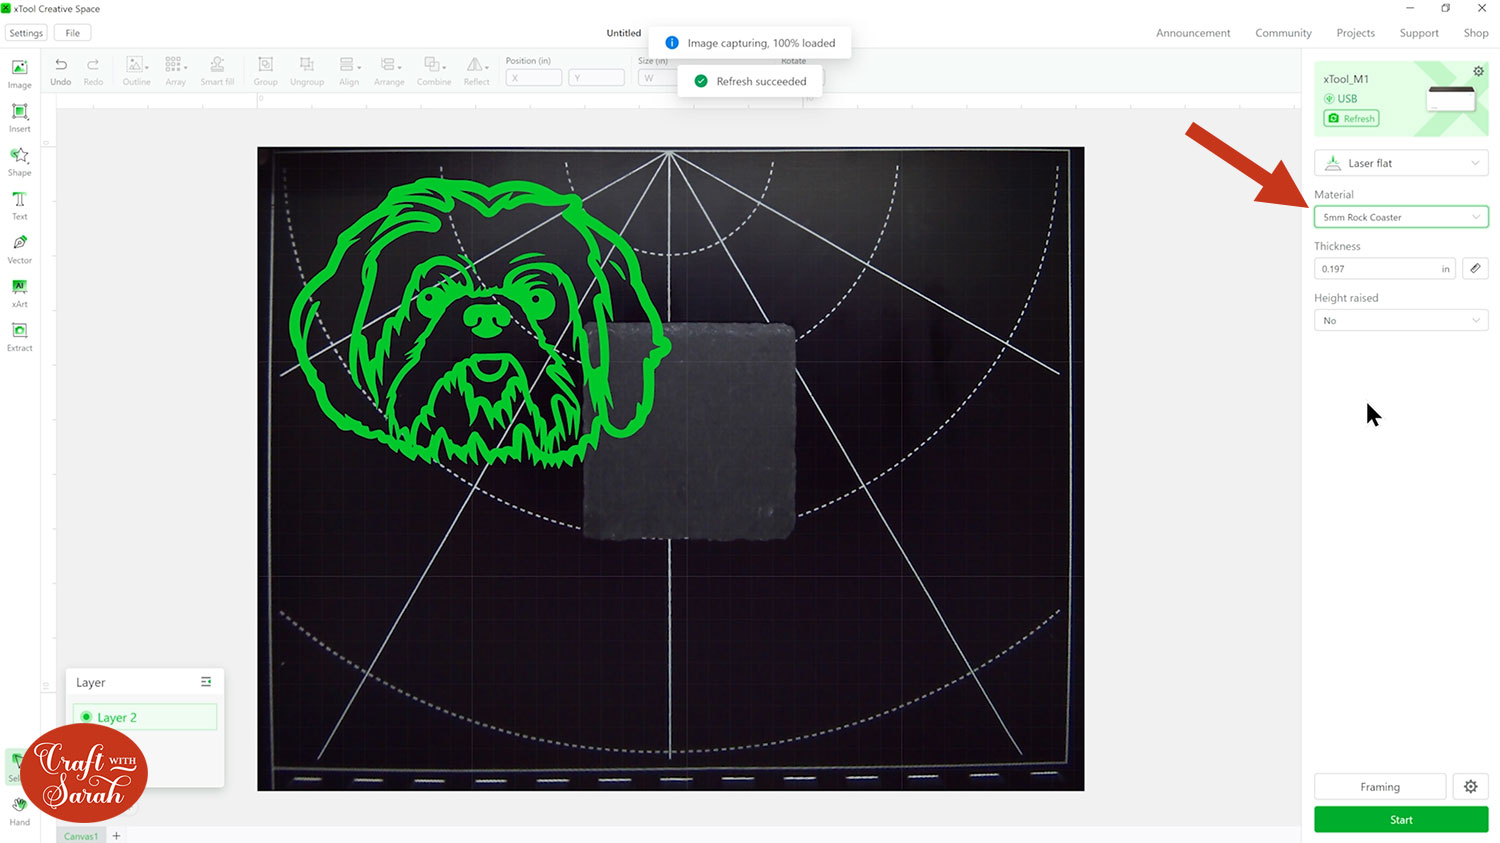
Connect your device so that you can get started with the settings.
Click your design and switch to engrave. Watch the design get filled in as you do this on screen.

I find it helpful to change the colour of the design so that you can see it clearly when you’re working on it. Right-click the SVG to change the colour.
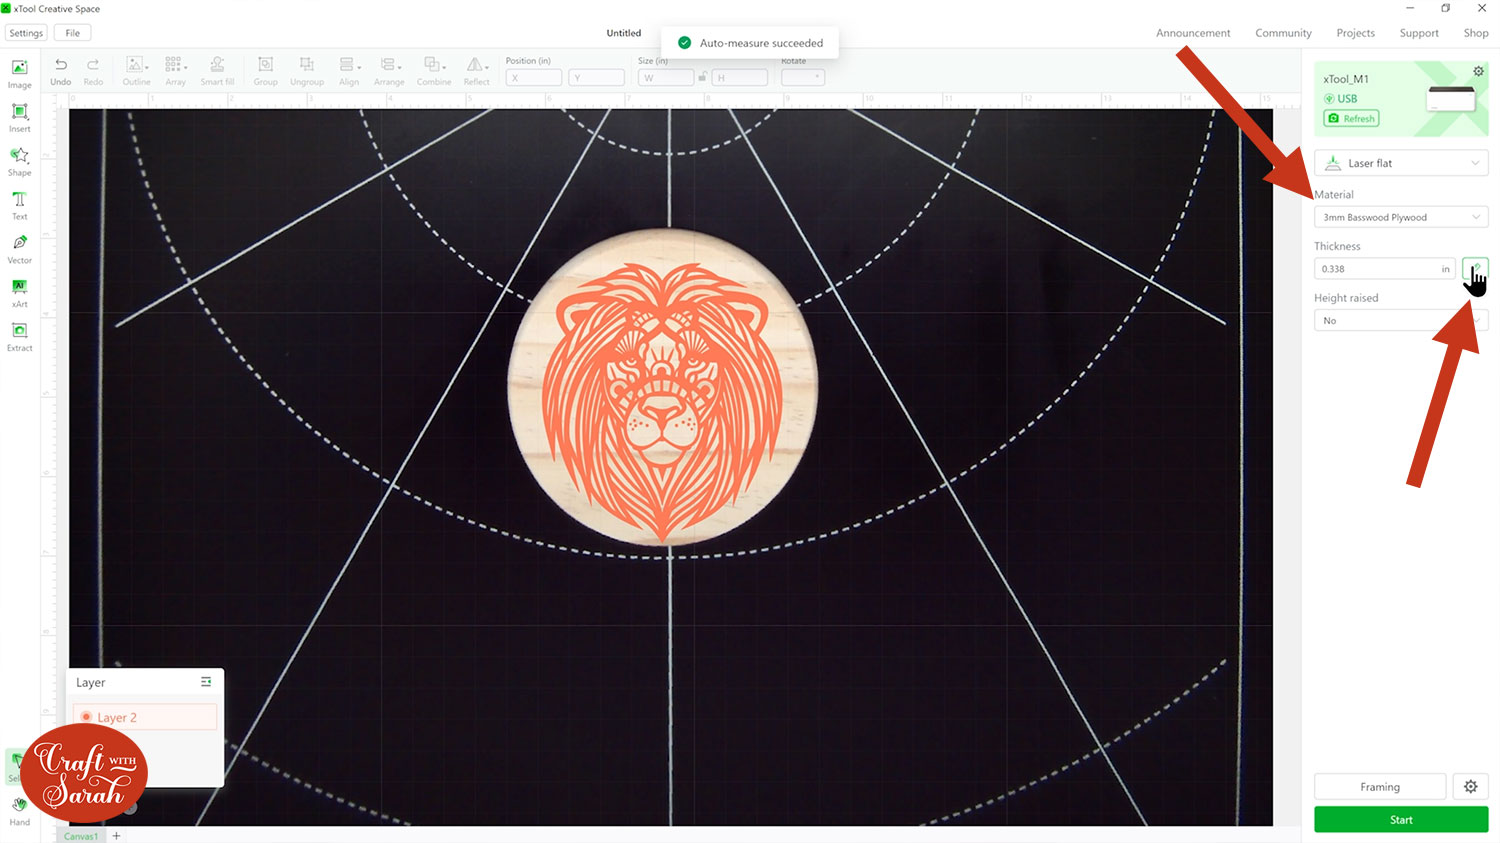
Scroll through the list of materials and select the preset ‘Rock Coaster’ setting if you’re using a slate coaster, Basswood Plywood (or similar) for a wooden coaster.
The slate coasters I’m using for this tutorial were purchased from Amazon. They are called “GOH DODD 4 Inch Black Stone Coasters“.
Place your slate coaster inside the box and refresh so that you can see your coaster on screen
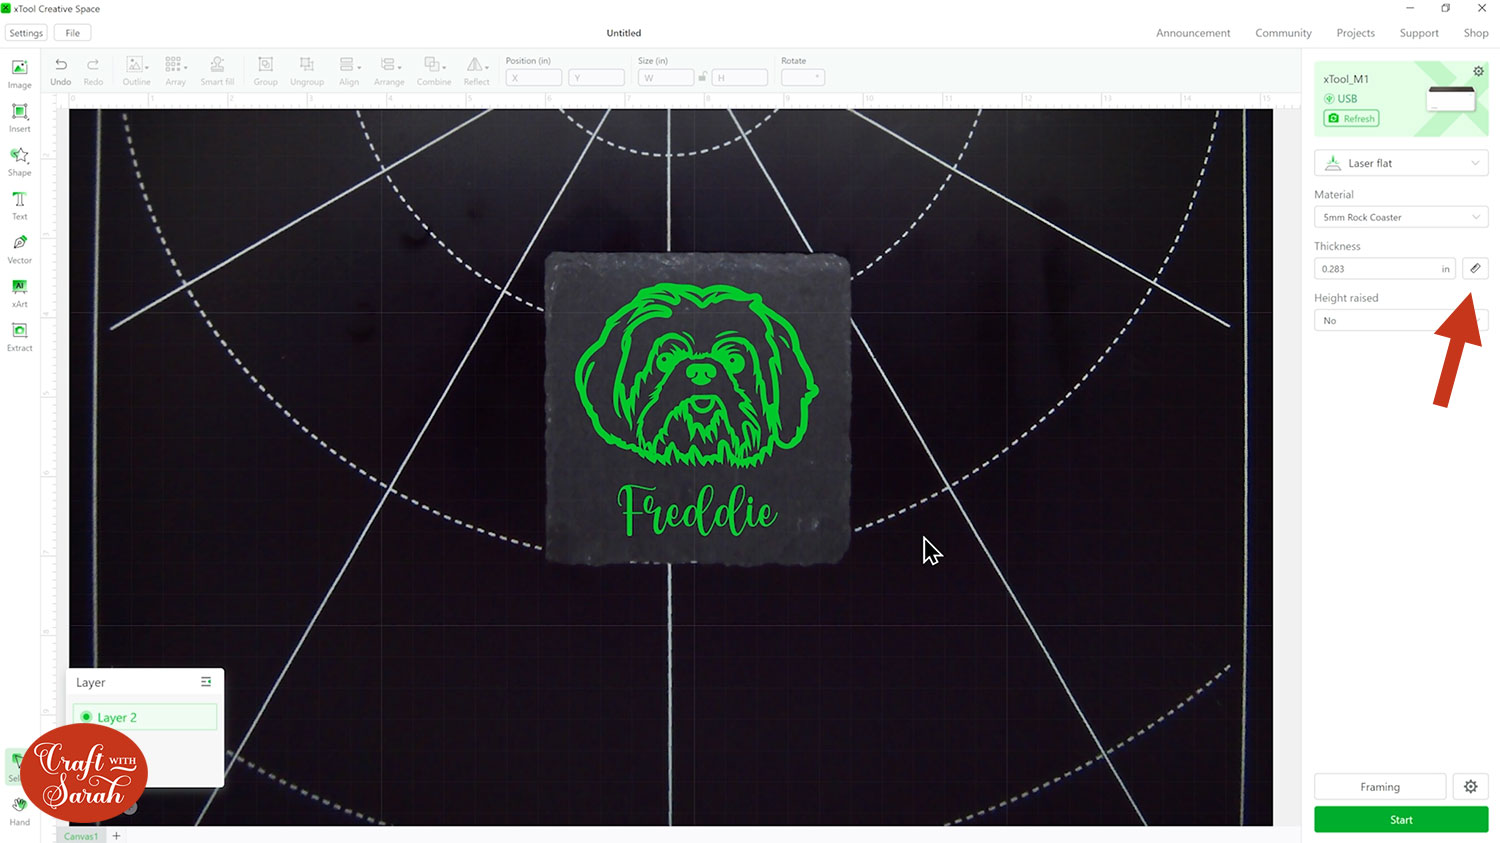
Measure the thickness of your material by clicking the button on the right hand side in case your material is thicker than the preset.
Step 3) Prepare your design
Resize your design to fit the coaster. I would leave some space around the edge so you don’t get too close to where the slate tapers off.
Add any text which you may want to include. For my coaster, I added my dog’s name, Freddie.
My favourite go-to font is Babybunny Script which I used for this design.
I love how you can see how everything looks on the screen, so you know exactly how it’s going to appear before you’ve even started engraving.
Important: To make sure your design is lined up horizontally you need to…
- Make a square the same size as your coaster (you may have to untick the padlock icon)
- Match your square to where the coaster and select everything
- Go Align, horizontal align, centre
- Now everything should be lined up and you can delete the square
Step 4) Frame your machine
Framing your machine is how your xTool M1 knows where it’s supposed to cut or engrave.
Press the button on your machine twice and allow your machine to whir away.
This is the final step of preparation before we put the machine to work on the engraving. You’ll know when the machine has finished framing as you will need to click ‘Framing Completed’.

Step 5) Engrave your slate coaster
Click start, press the button on your machine and let it get busy engraving your design.
This is the exciting bit! If you’re anything like me you’ll be peering through the window into the box every few seconds to watch the progress.
Once you hear your machine beep, it’s safe to open the lid and see how it’s looking.
Engraving this design on the slate coasters took just over 10 minutes which got me working out how many I can make in time for Christmas!
I’m so pleased with my first attempt, I wasn’t expecting it to go so smoothly the first time but look at that!
Part 2: Engraving on wooden coasters with a laser cutter
Step 1) Choose a design & position it
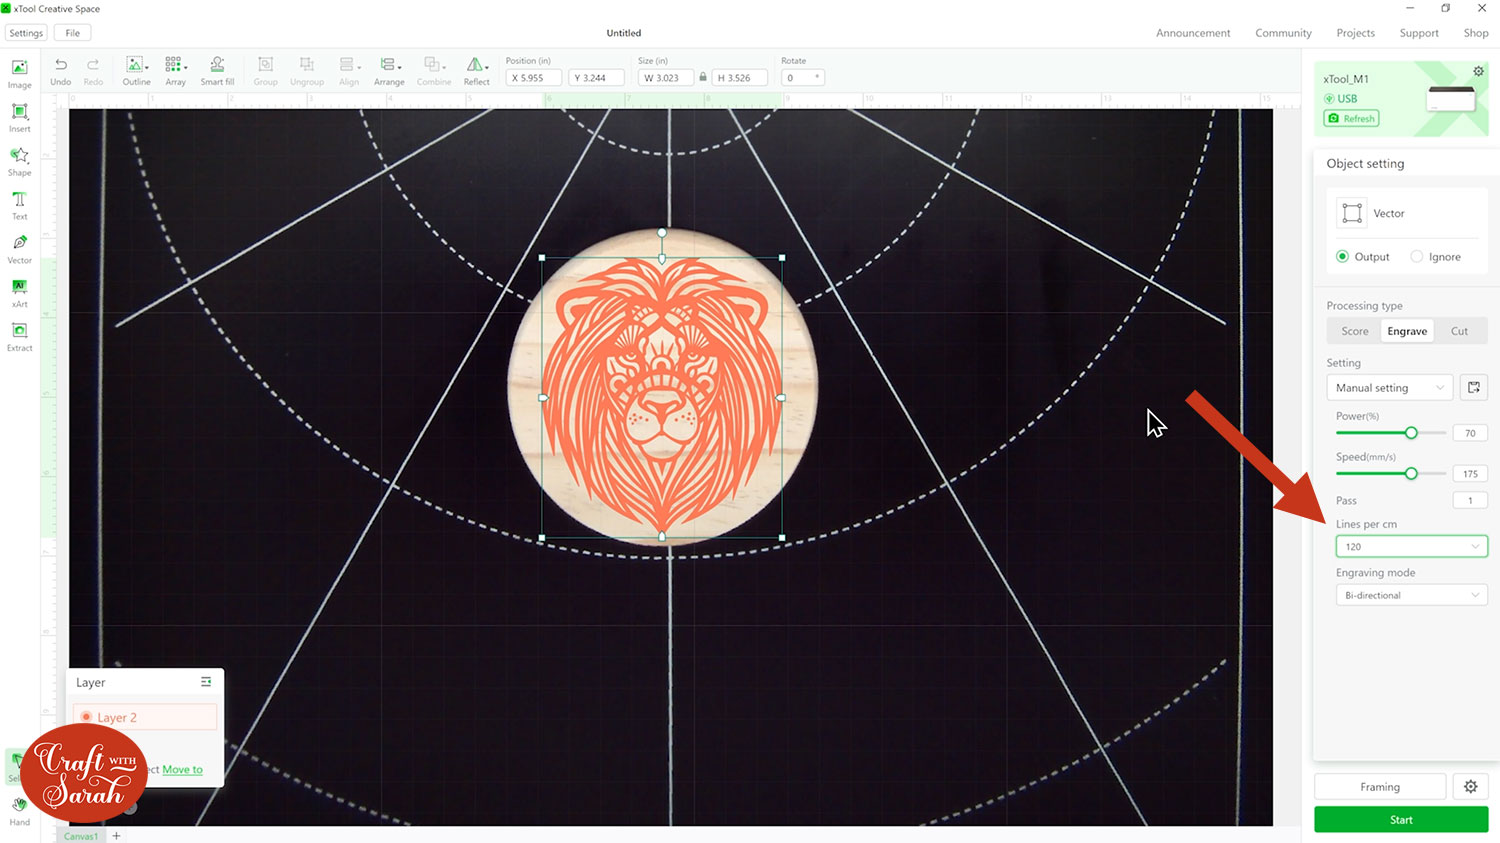
Start a new project and choose another design. I used my lion mandala head for this one.
The coasters I used are from Amazon: GOH DODD 4 Inch Round Blank Wooden Coasters Crafts.
Place your coaster in the laser machine, refresh the camera and position the design.
Step 2) Prepare the machine and software
Select the Basswood Plywood in the materials list.
Don’t forget to measure the thickness again in case your coaster is thicker or thinner than the preset.
This time around, I changed the lines per cm from 100 to 120 as I’ve found it engraves better on that setting.
Once you’re happy with everything, press the button on your machine twice to frame it and click ‘Framing Completed’ once it allows.
Press start and watch your xTool engrave away on your coaster.

xTool M1 engraving review
This was my first time engraving on coasters and I thoroughly enjoyed the project, it was just so easy! I let the machine do all the hard work whilst I sat back and watched it do its thing.
Being able to see the design on the coaster when you’re in the designing and preparing stage was so helpful. I could play around with it and then line everything up exactly where I wanted it.
I love how crisp the lines are on the slate, the coaster has really upgraded my coffee table. I love the colour of the engraved slate. It is a beautiful silver from where the top layer has been taken away which has a lovely effect.
You can feel the lines on the wood coaster which makes a beautiful texture.
It might be a good idea to seal the wood coaster so it doesn’t get water damage. I haven’t done this myself yet, but a clear polyurethane sealer would be one way to do it or a stained sealer if you’d like to add that to the look of your coaster.
I love using my SVGs in different ways and trying new ideas.
I hope you enjoyed this tutorial on how to engrave wooden and slate coasters with an xTool M1 laser cutter.
You can find more xTool M1 tutorials here, and there will be more coming soon!
Happy crafting,
Sarah x

