Cricut Vs. xTool M1 ⚡ Which Blade Cuts Better?
Which has the best blade cutting functionality, an xTool M1 laser cutter or Cricut Maker machine? Let’s find out!
I compared the cutting functionality of an xTool M1 laser cutter to a Cricut Maker to see which one turned out best.
The xTool M1 is primarily a laser cutter, but unlike most other laser cutters it also comes with a blade inside (just like a Cricut machine blade) to allow you to cut cardstock, vinyl and other materials on a cutting mat.
I thought it would be a fun idea to put the xTool through its paces by comparing it to a Cricut.
Keep reading to the end to find out which machine is crowned the winner.
xTool very kindly sent me the M1 machine for free so that I could test it out and put it through its paces. All opinions and project ideas are my own.
Please note that some of the links included in this article are affiliate links, which means that if you click through and make a purchase I may receive a commission (at no additional cost to you). You can read my full disclosure at the bottom of the page.
Find out more about the xTool M1
Cricut Maker vs xTool Video
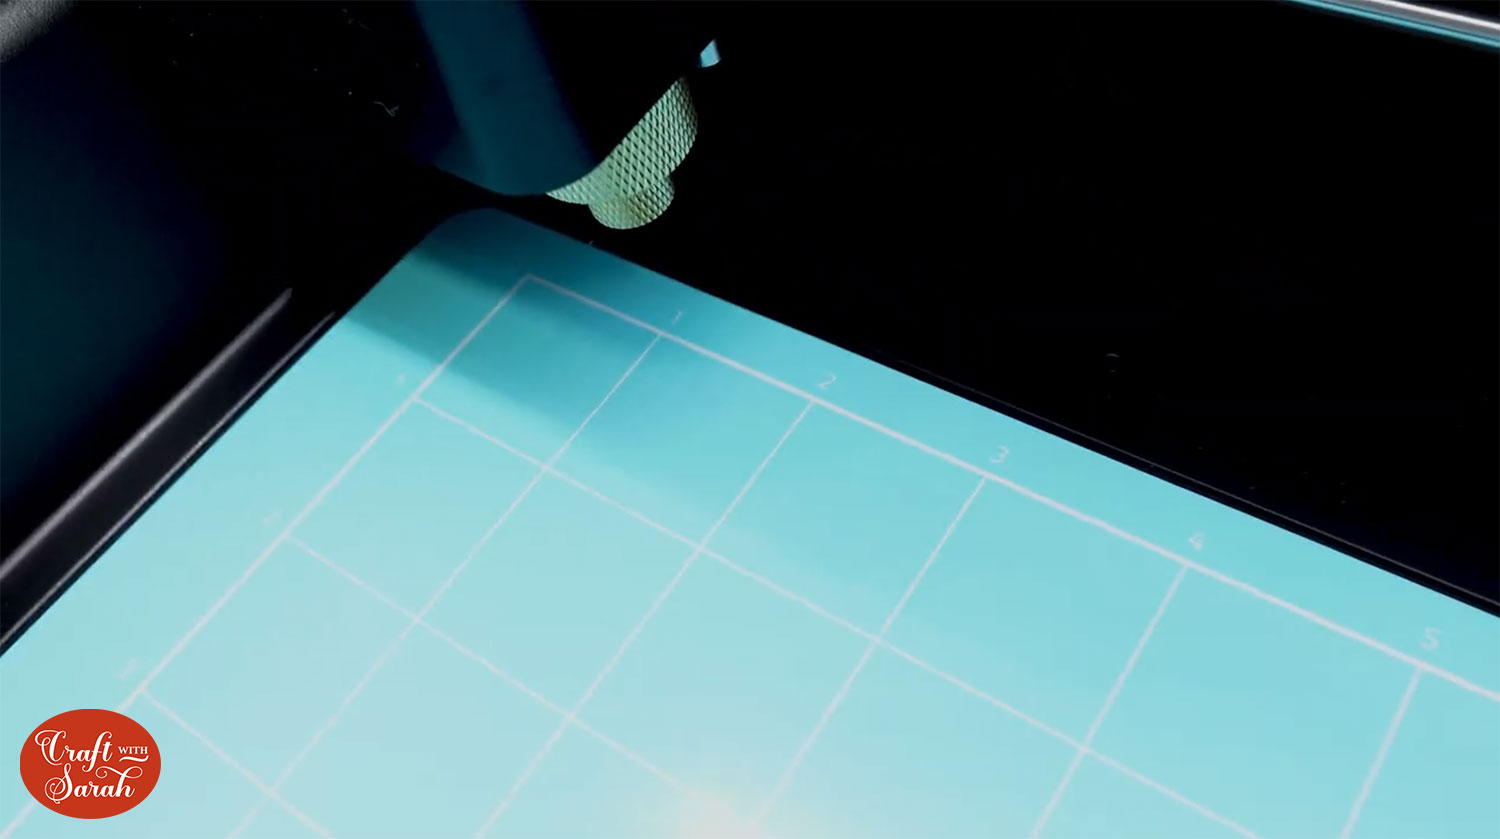
Similarly to the Cricut, the xTool M1 uses a cutting mat, however this mat is a little different to the mat you get for Cricut. These mats are sticky on the back as well as the front which keeps them from moving about inside the machine.
If you’ve got a Cricut, you’ll know it takes some playing around at the beginning to work out the best cut settings for the material you’re using. Follow along as I work out how to cut cardstock with the xTool M1.
Watch the video below to see whether the xTool M1 or the Cricut Maker machine won the cutting functionality crown.
If you prefer to read rather than watch, keep scrolling!
How to cut cardstock with an xTool M1: Simple design
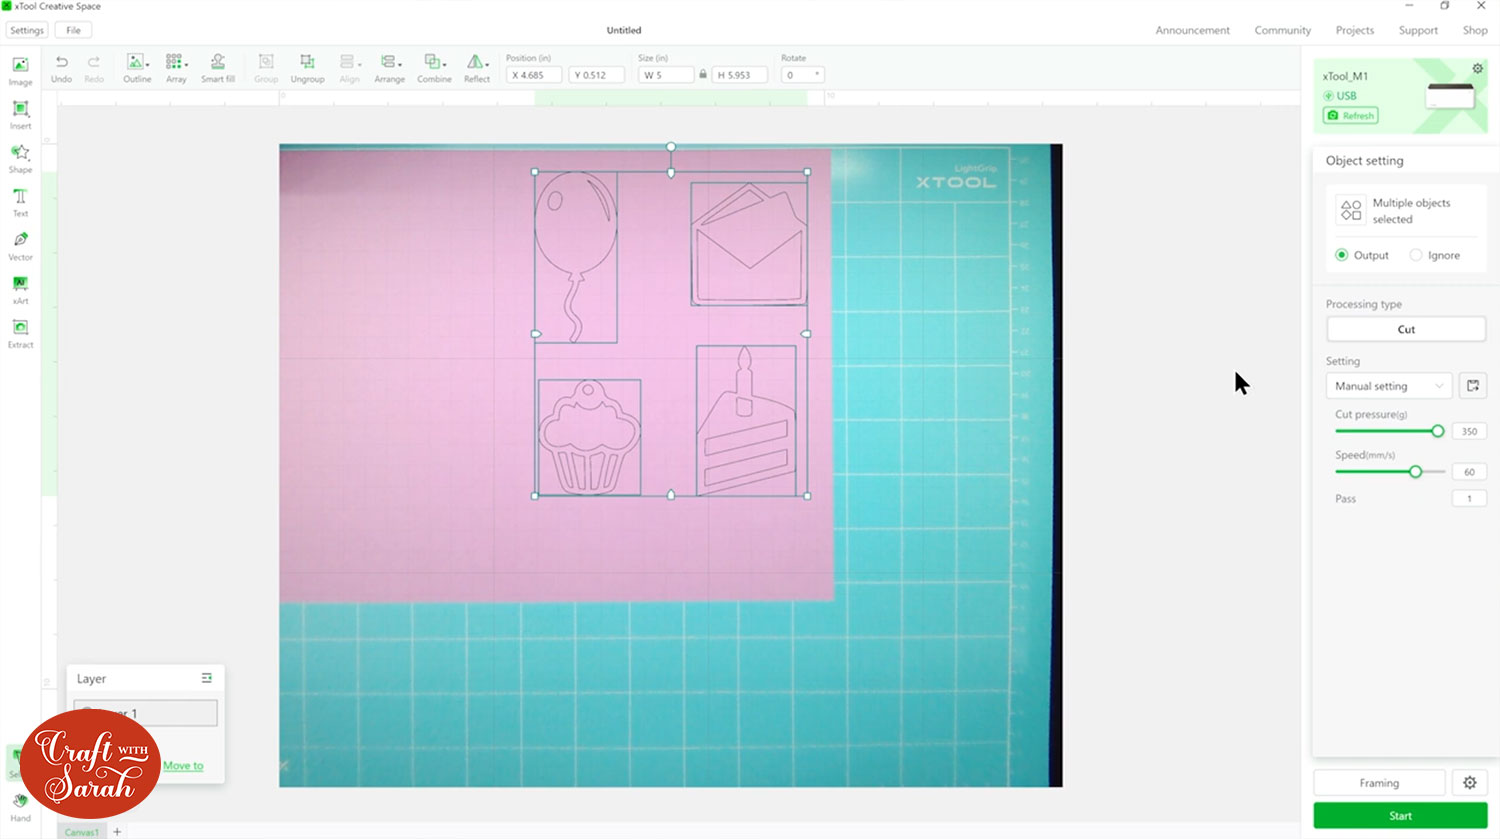
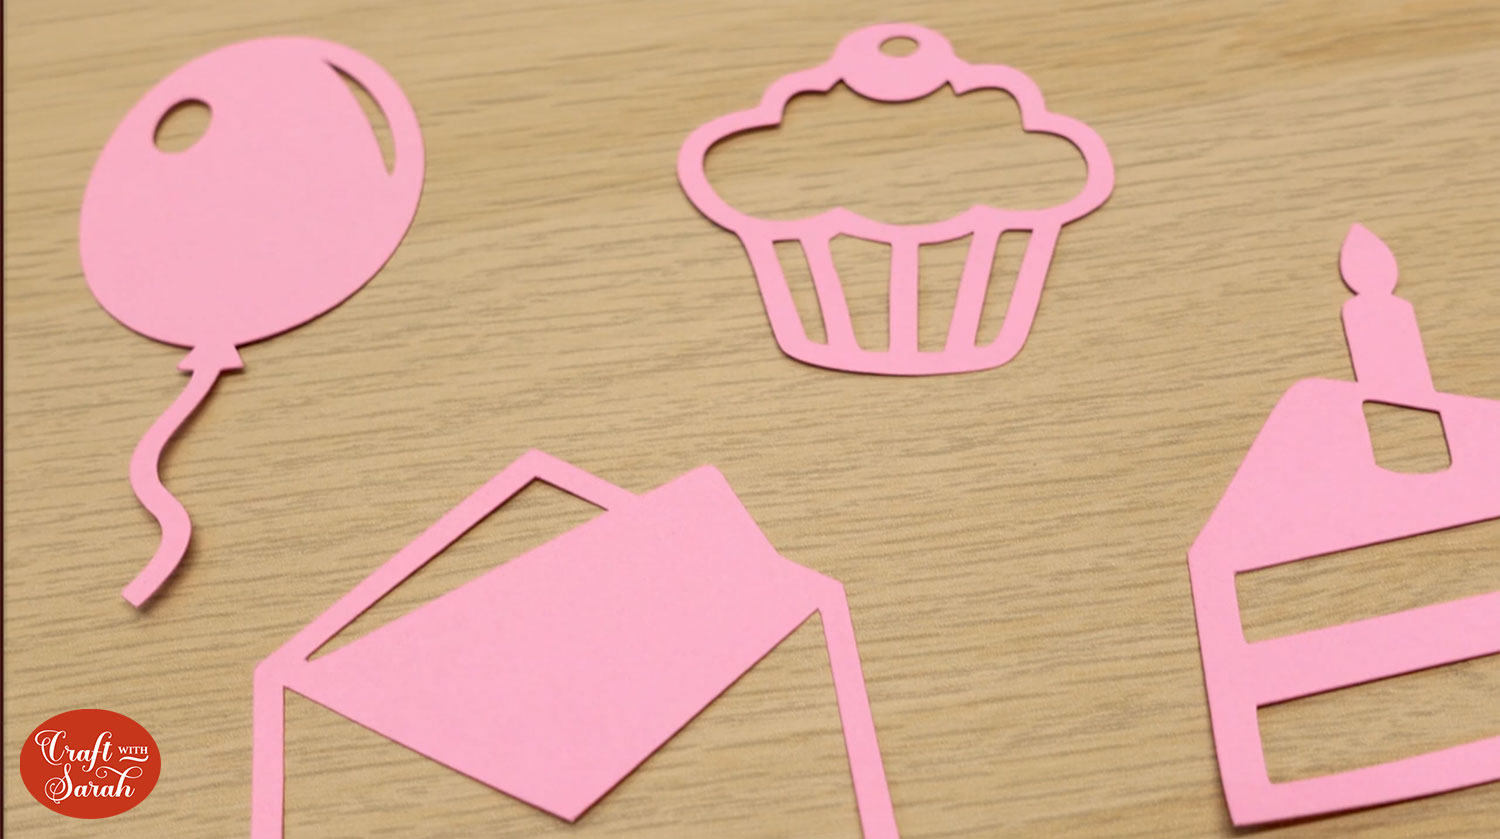
For the first test, I chose some simple birthday images for the xTool M1 and Cricut Maker machine to cut.
To ensure this was a fair test, I used a new light grip mat and the same type and colour of cardstock for both the xTool M1 and Cricut machine cuts.
In the xTool Creative Space software, you can see your mat on screen with the help of an in-built camera, which is a great feature. At that point I resized my birthday designs to 5 inches and lined them up where I wanted them on the mat.
In the top right corner of the screen I chose the option Blade Cut and searched for a cardstock setting in the materials list. I couldn’t find what I was looking for which I think was down to a glitch with my internet connection, but I chose the next best thing which was Brown Kraft Paper.
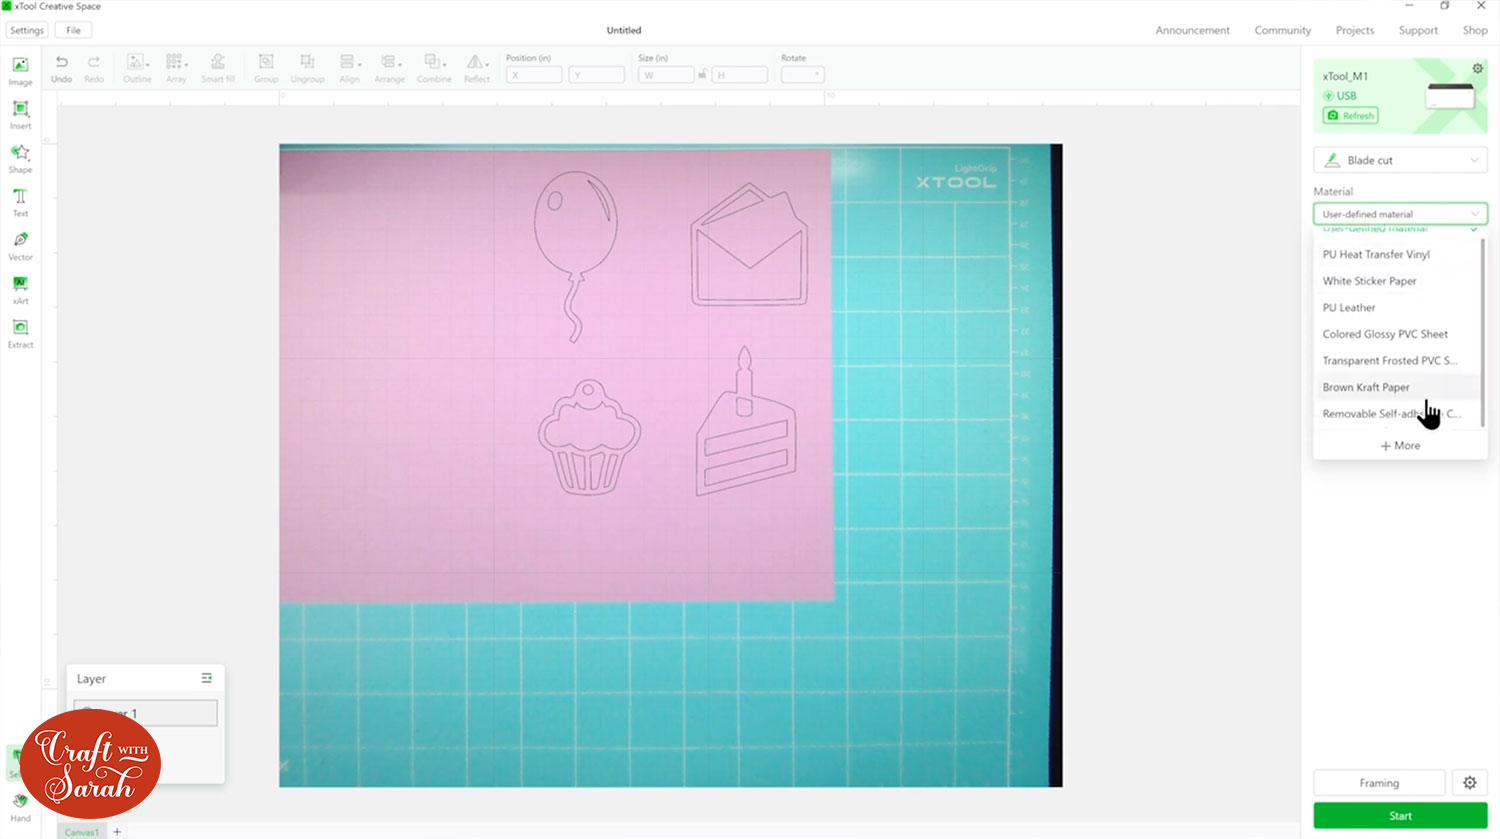
I increased the pressure to 300 in the settings as the default setting seemed low for cardstock and I kept it at full speed.
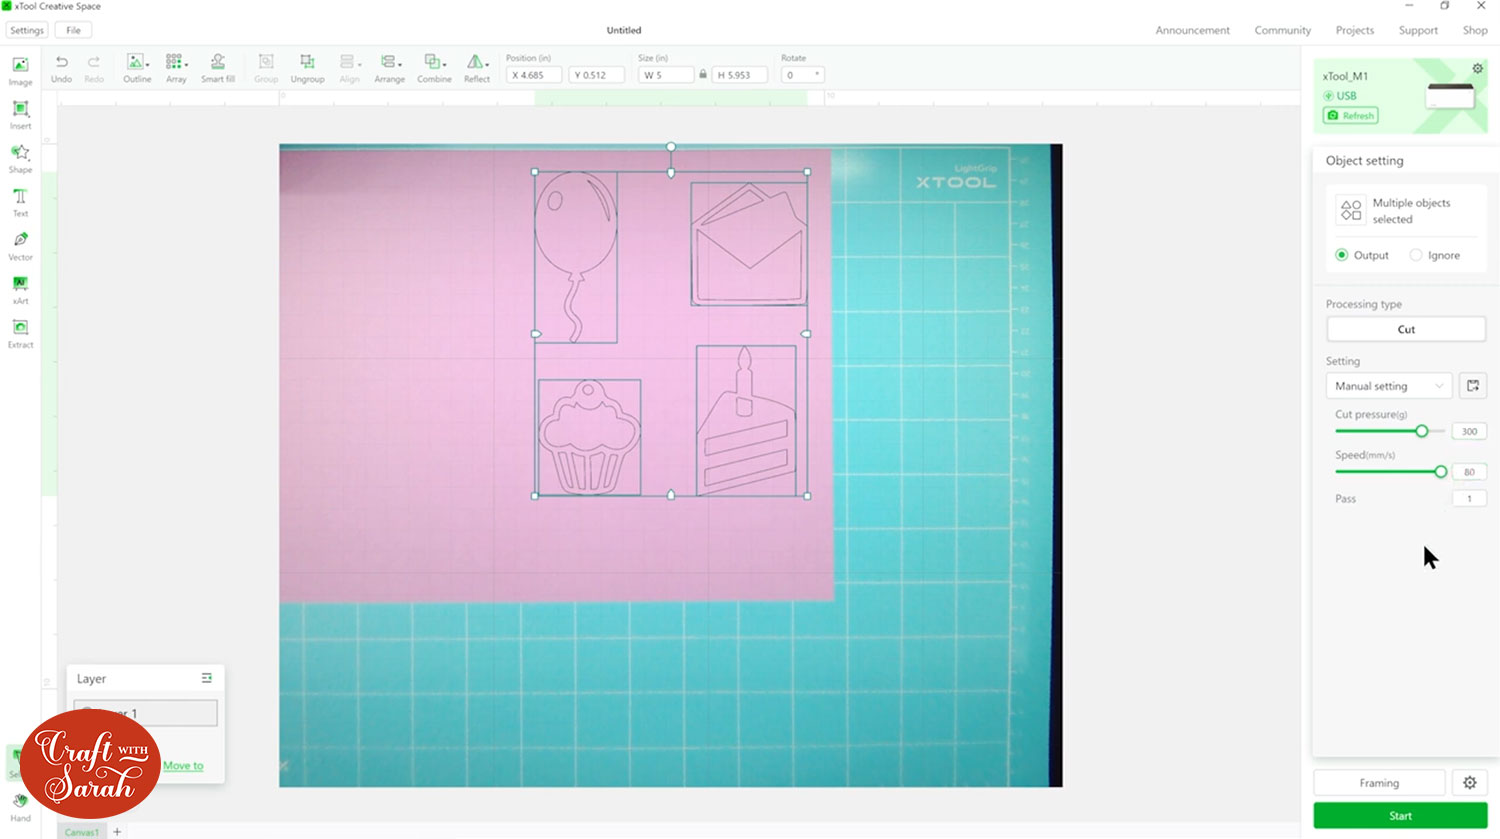
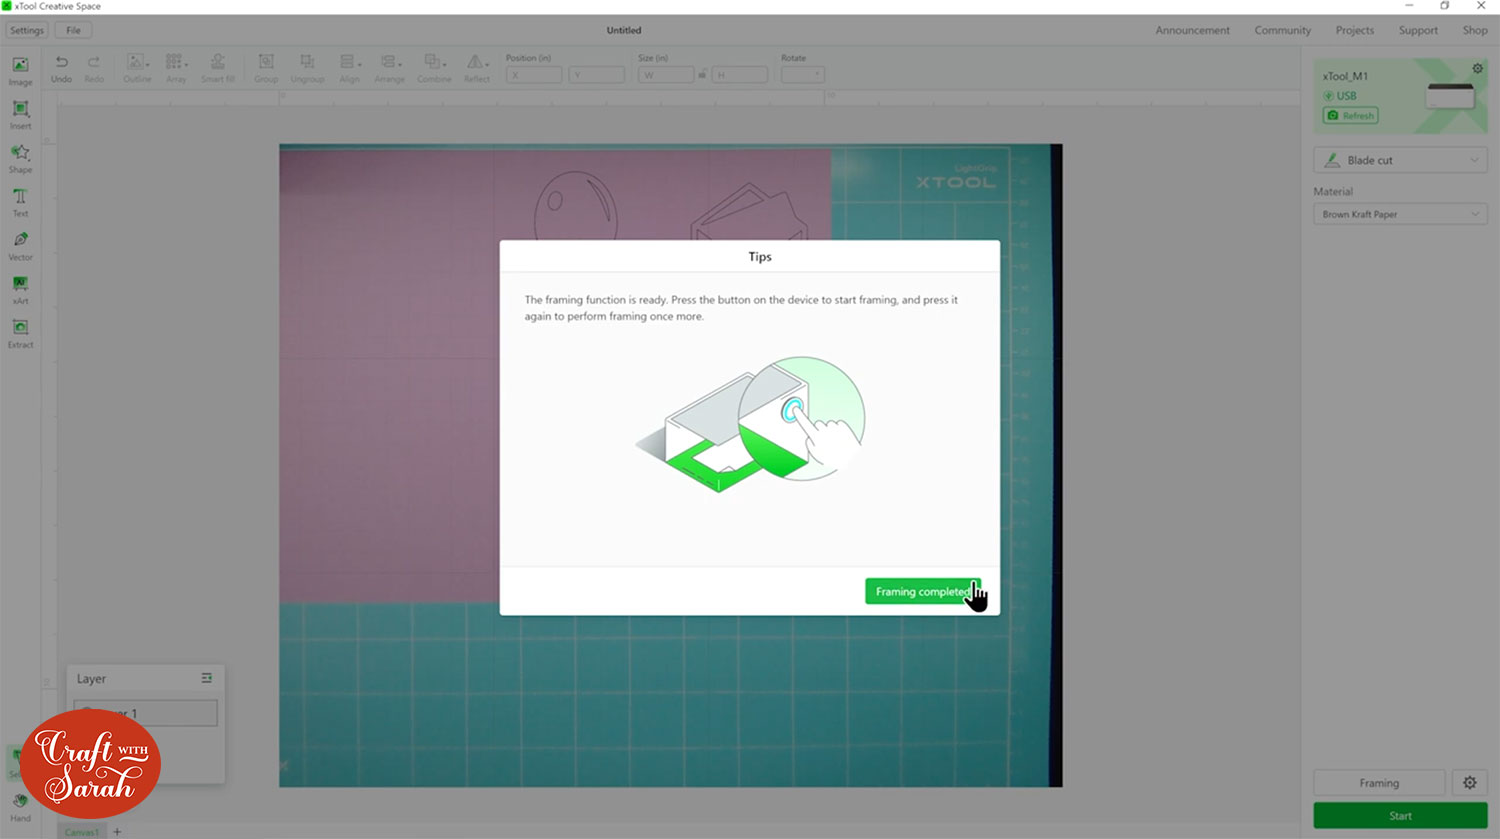
I framed my machine so that it knew exactly where to cut and pressed Start.
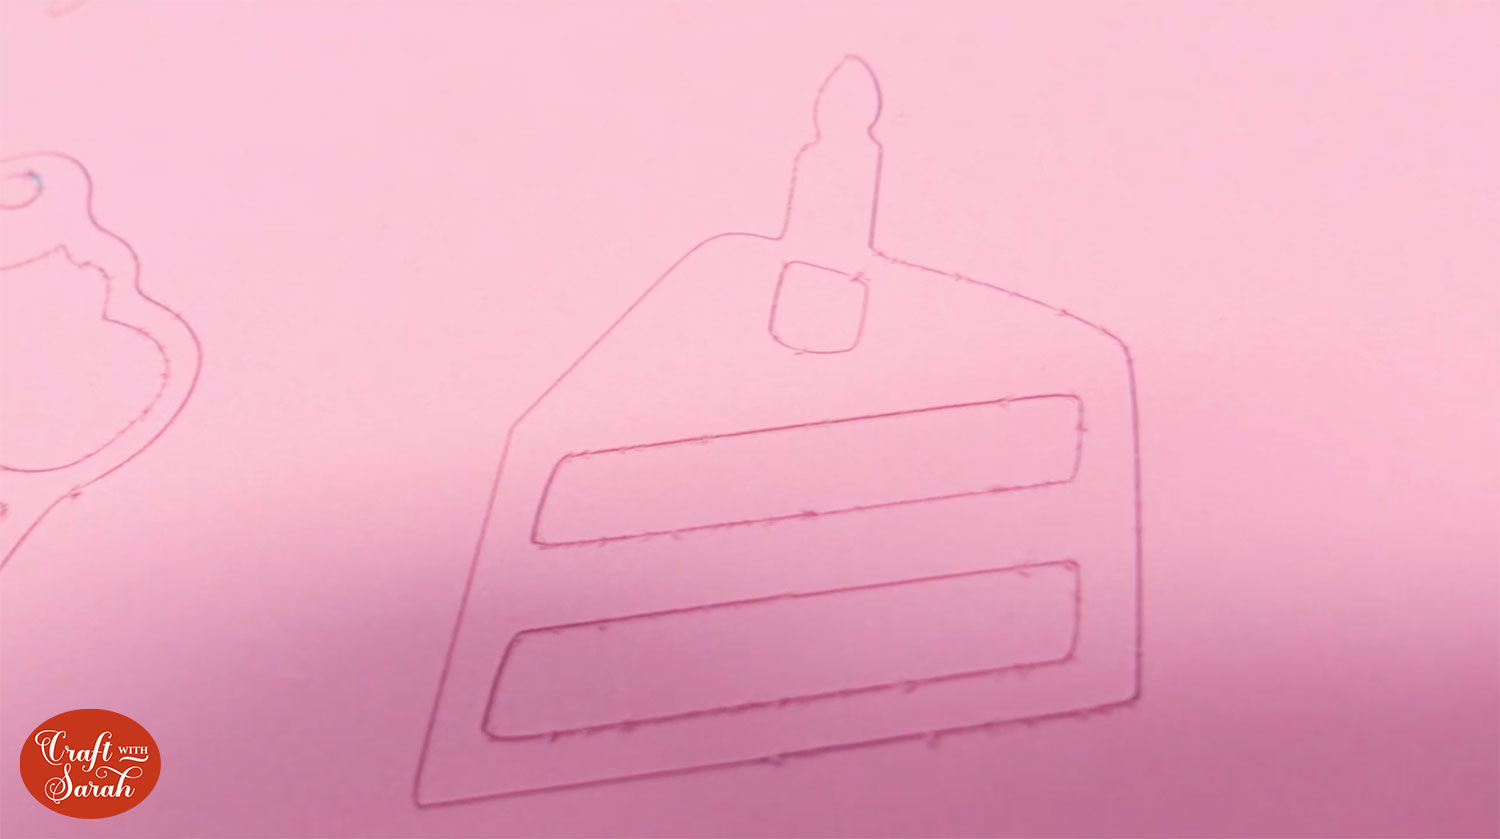
It took 1 minute 21 seconds to cut but as I opened the lid and looked inside I could see that the cut lines were jagged and blurry.
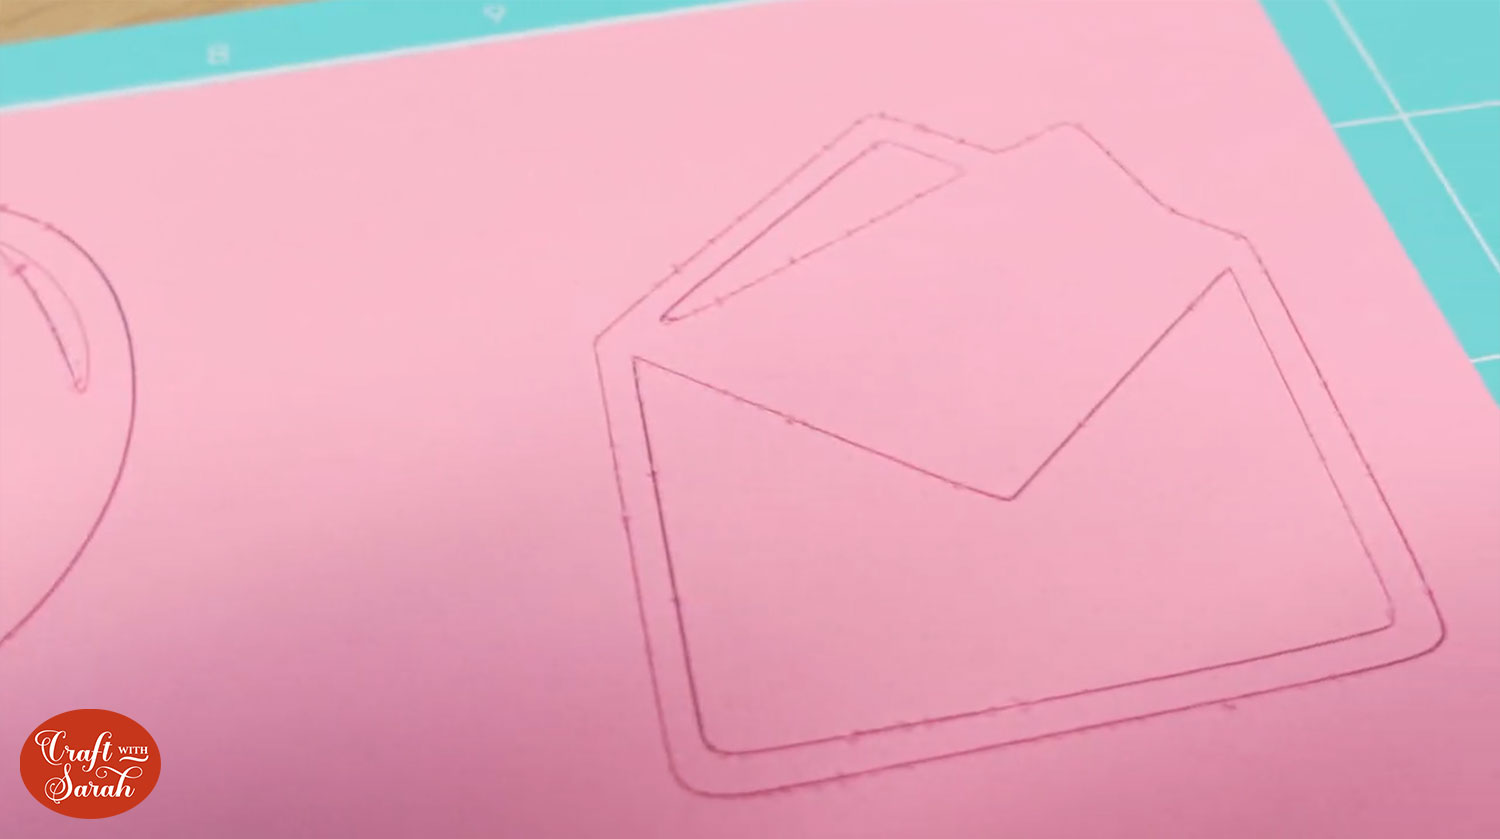
When I looked closer and took the cardstock off the mat, I could see that the edges were rough and there were sections where the cardstock was ripped where it hadn’t cut all the way through.
I assumed that this was down to the settings not being quite right, as this was my first time trying to cut cardstock on the machine. I thought it was only fair to play around with it a bit more, especially as any new digital cutting machine will take some time to play around with before you have it sussed.
The second time around I increased the pressure to 350 and slowed it down.
This cut took 1 minute 28 seconds (only 7 seconds slower than the first cut) and was looking slightly better on the lines but not perfect.
I gave it a third go and changed it to a user-defined setting. I increased the power to 360 and decreased the speed even more to get a better cut.
Sadly it failed… It didn’t cut all the way through and there was some major ripping. This cut took 1 minute 51 seconds but it just hasn’t done the job.
I was confused as to why the machine didn’t cut the card very well this time, and wondered if debris on the blade might have been the culprit. On inspection I could see that there was a tiny bit of pink card stuck on the blade which probably explains why this third cut was a bit of a fail.
However, at this point, I decided to move on to testing the images with a Cricut Maker to see how it compared.
How to cut cardstock with a Cricut Maker: Simple design
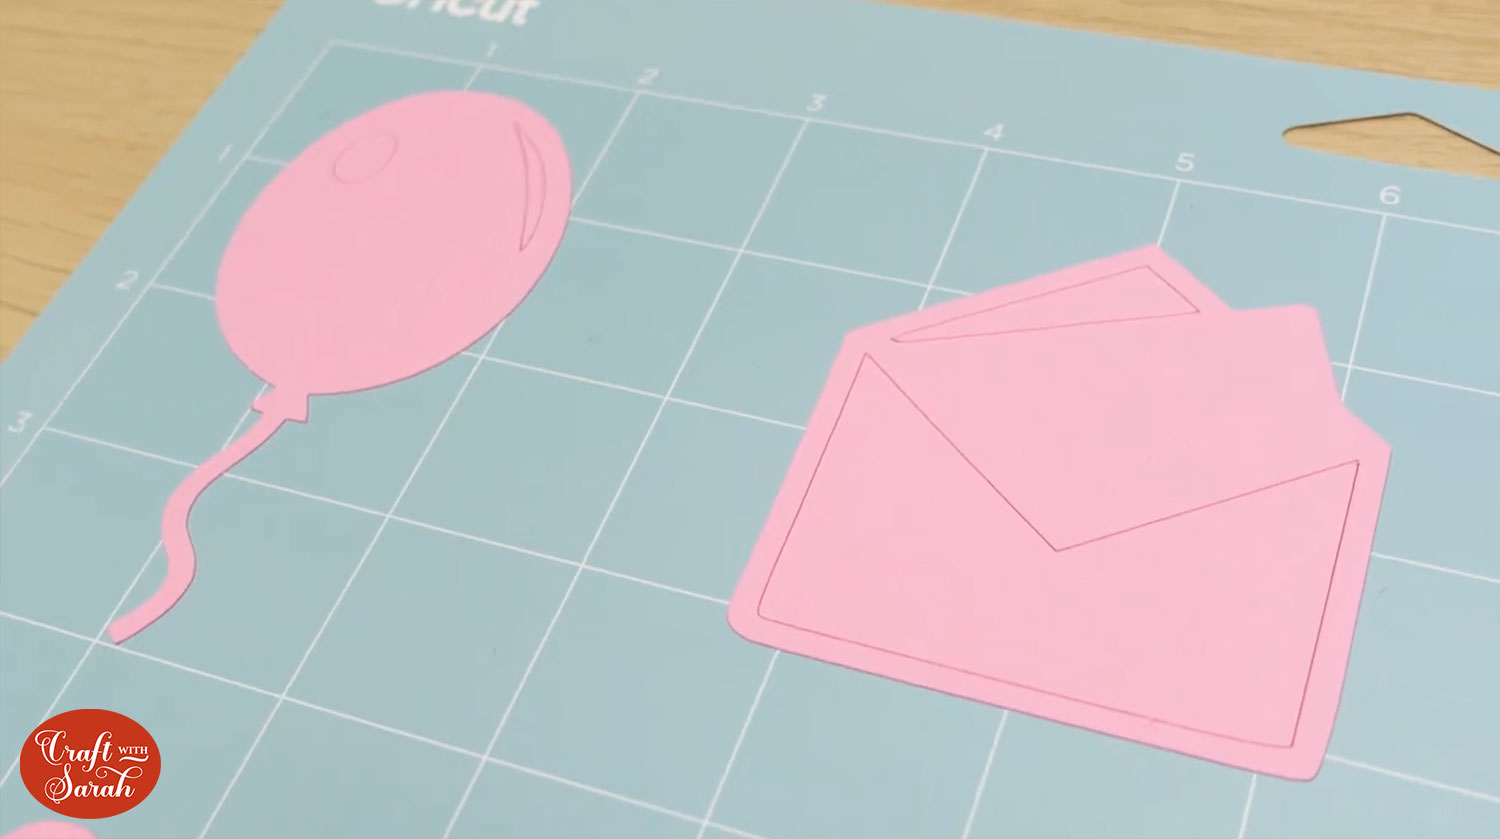
I loaded the same images into Design Space and cut the birthday images using the Cricut Maker.
I used the same type of pink card and the “Heavy Cardstock” setting.
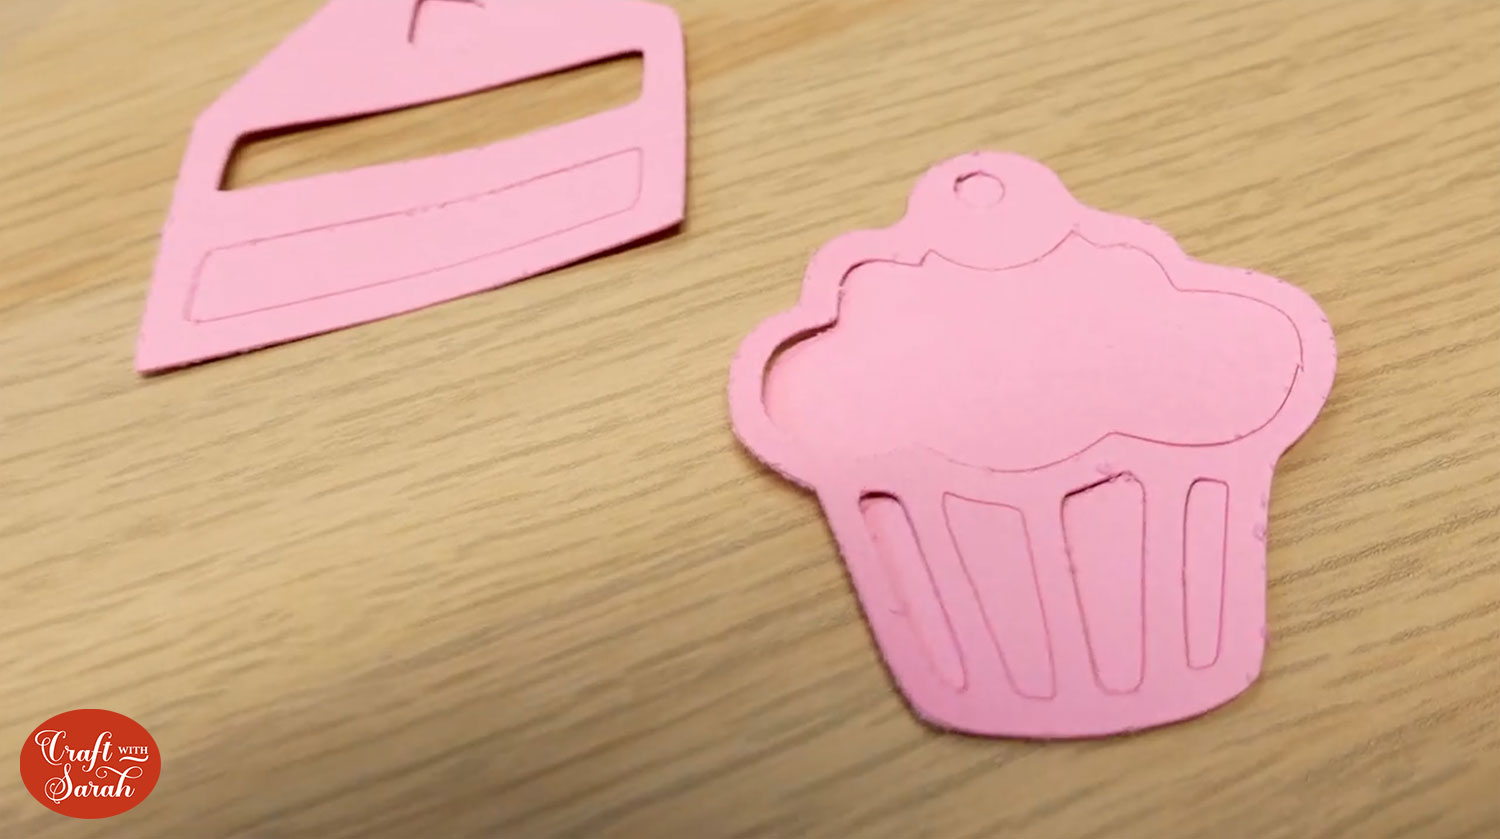
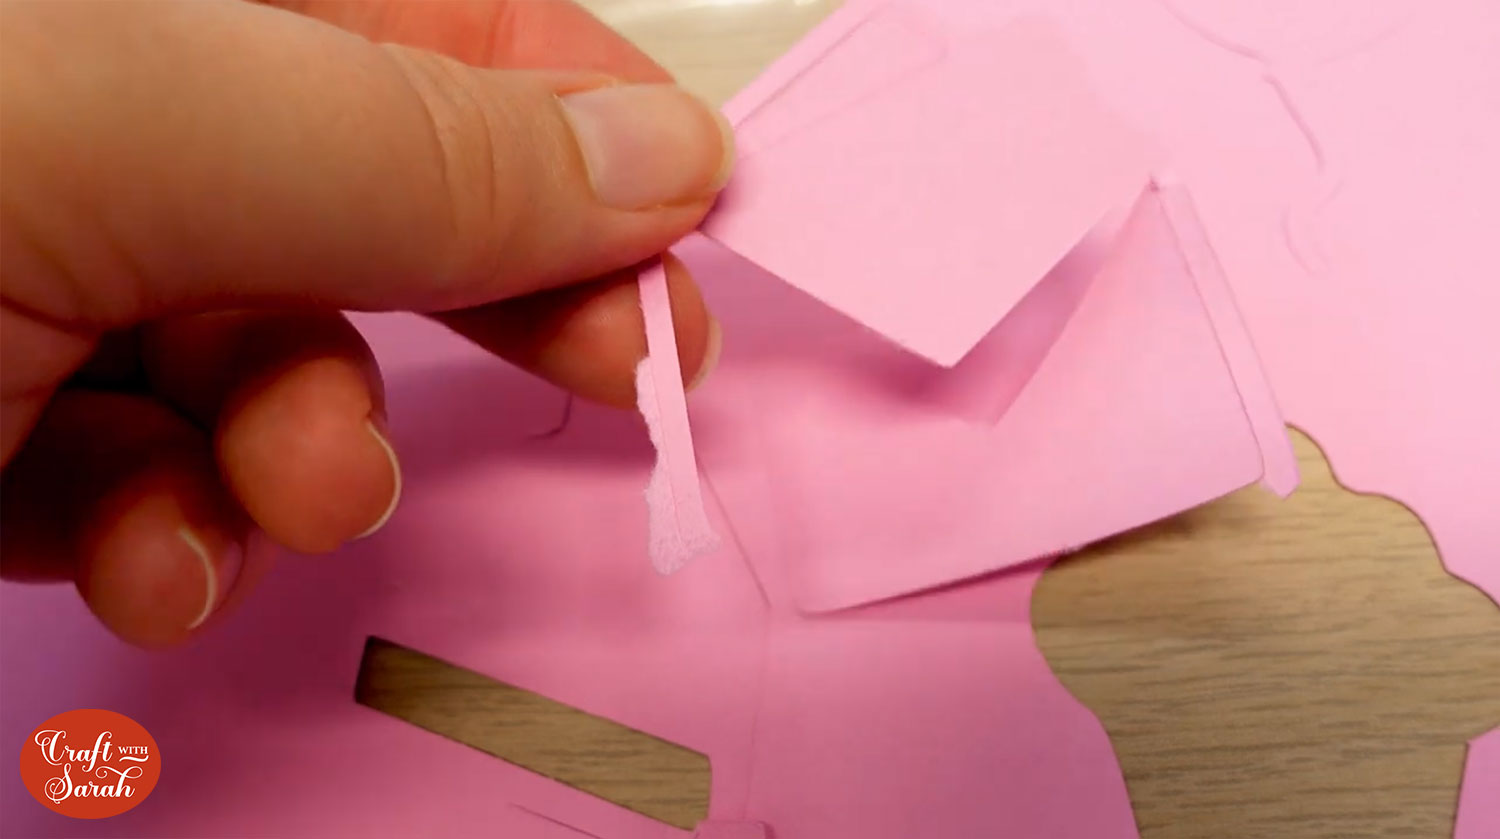
The cut looked very similar to the xTool cut at first but as I peeled off the excess and took the designs off the mat I could see that the Cricut had cut perfectly. The card was nice and smooth with no rips or rough edges.
The Cricut was a little slower than the xTool cutting the images at 1 minute 32 seconds but I’d much rather wait the extra 10 seconds and have a really good cut.
Cutting intricate cardstock designs on an xTool M1
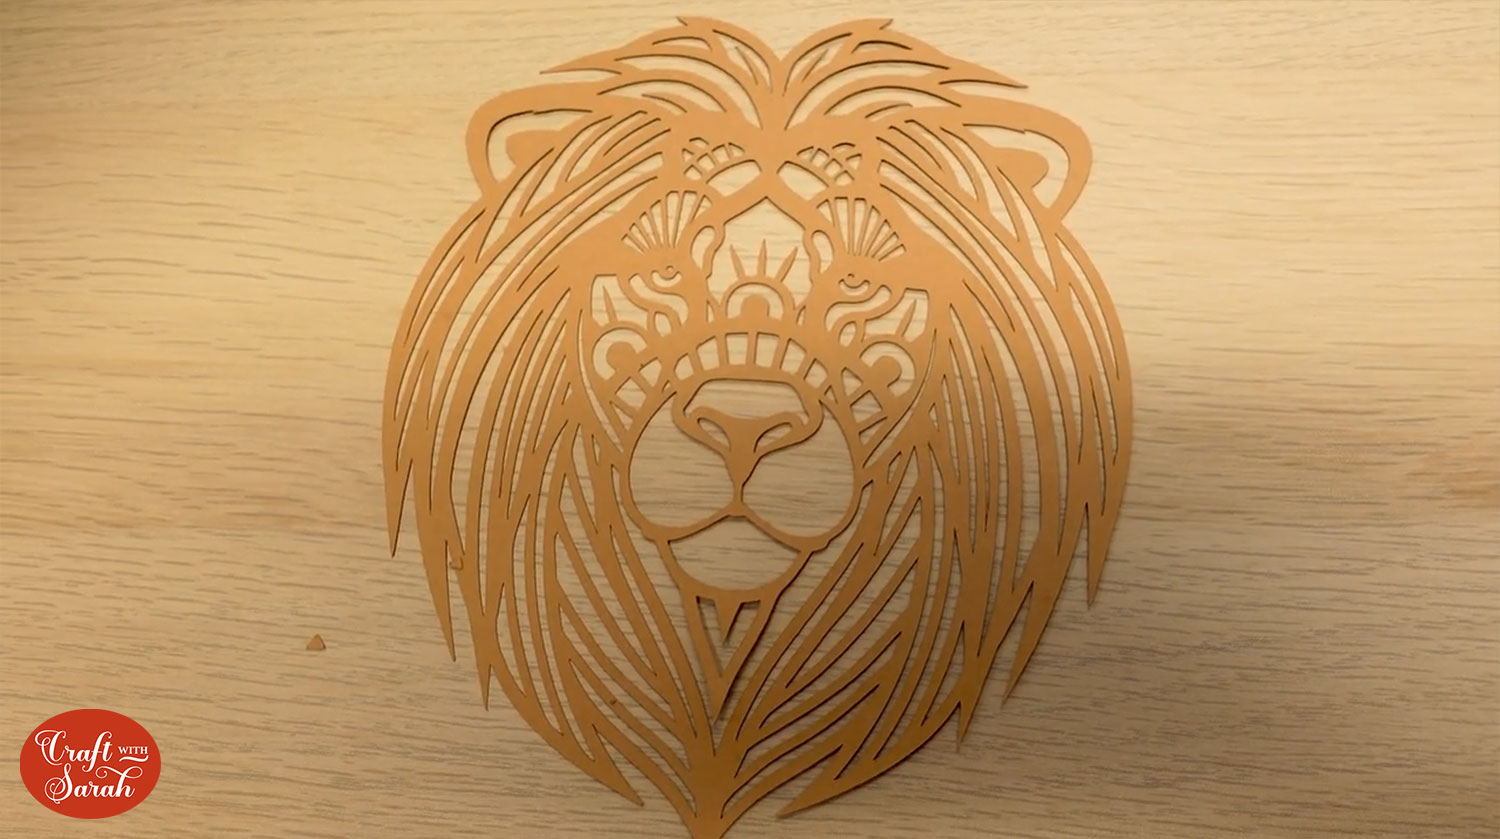
Let’s up-level the experiment with a more complex design!
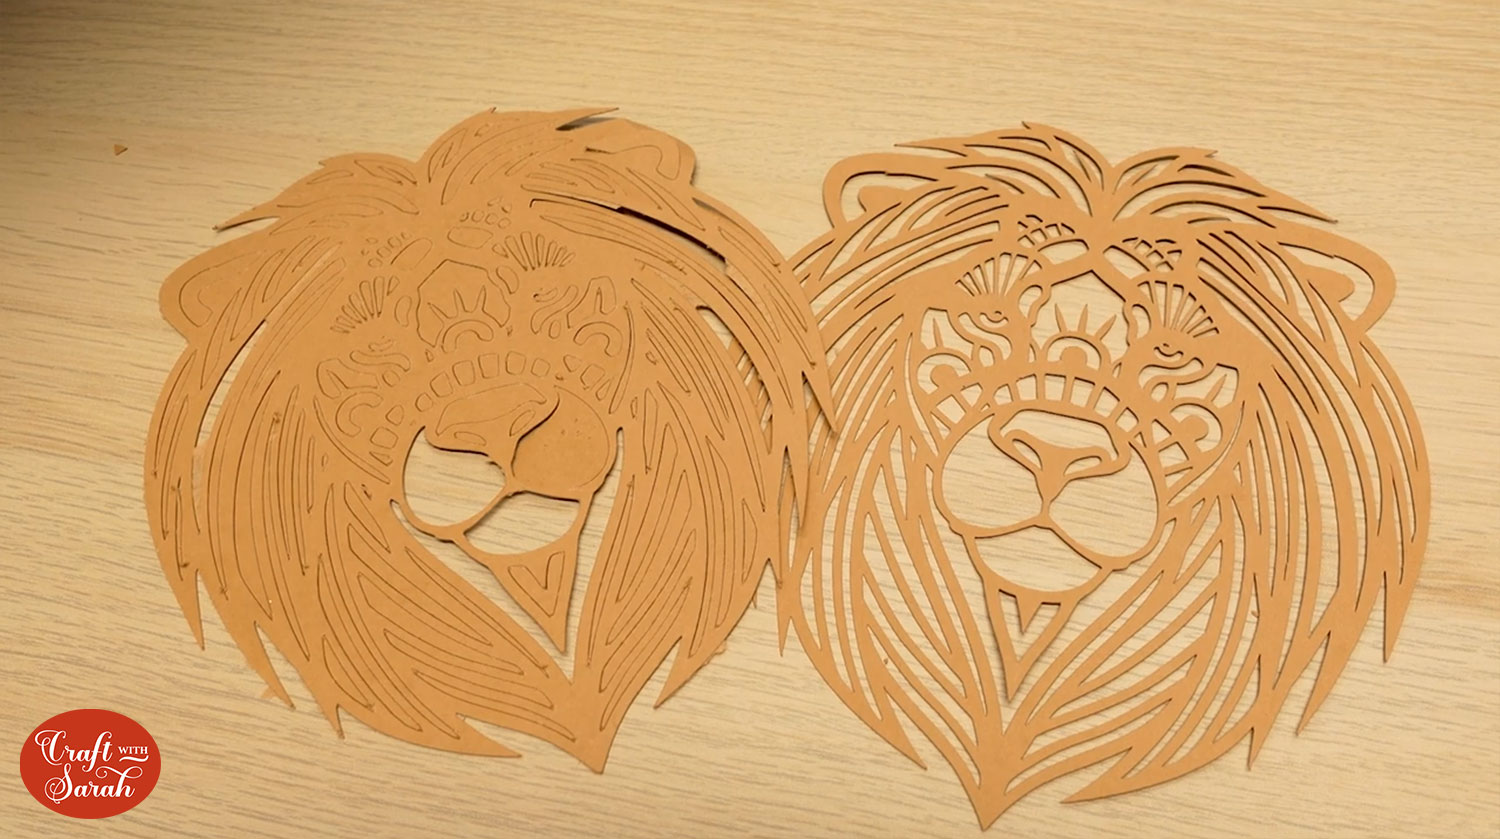
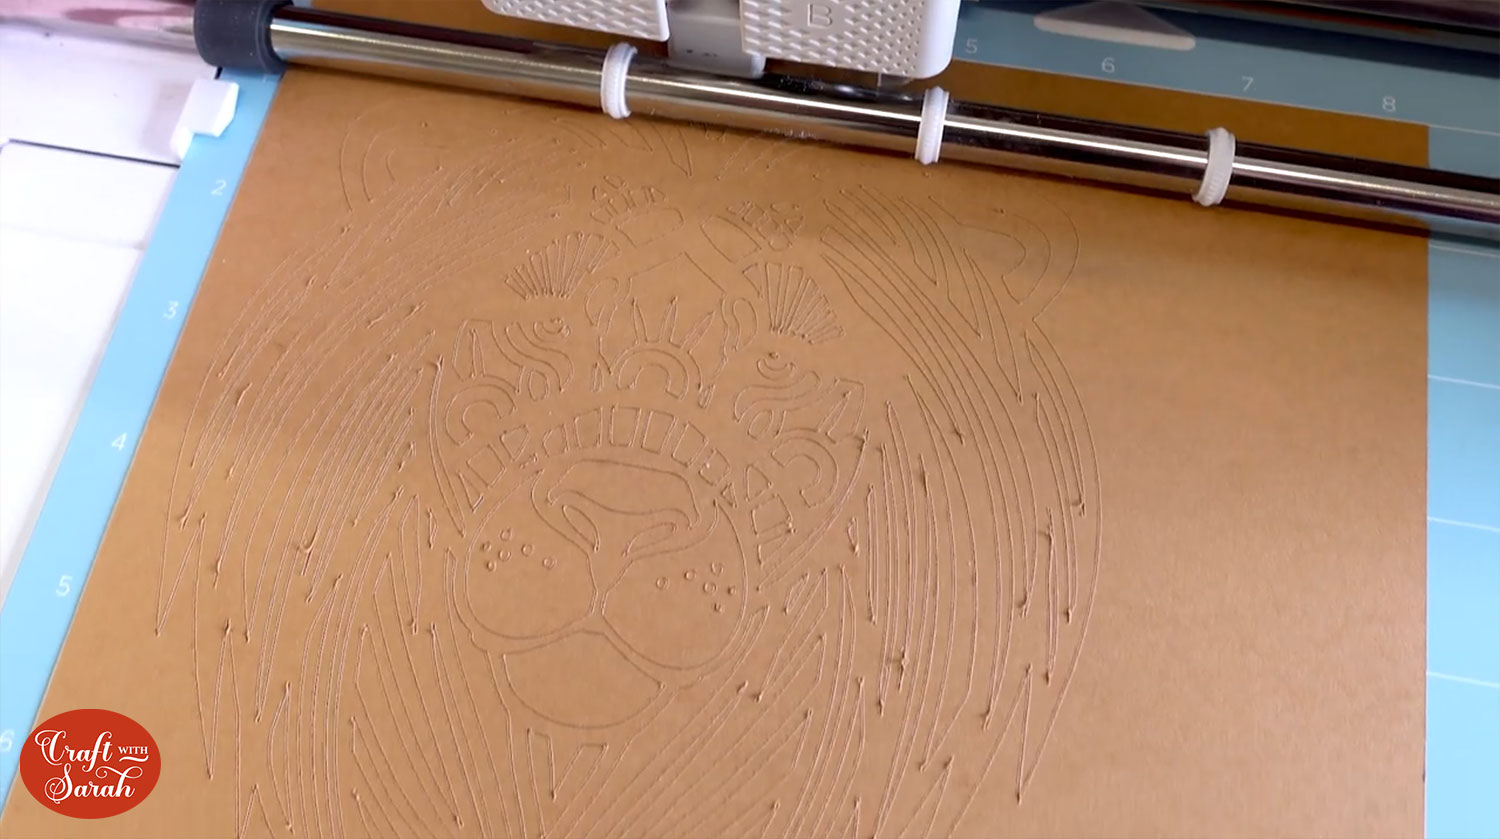
For this next test, I cut my lion mandala head SVG. It has lots of lines and details to put the xTool to the test.

I resized the design to 6 inches wide and decided to use a thicker cardstock to see if it can cut through especially as it is at the highest cut pressure in the settings. This means it should be able to cut through even the thickest kind of card.
I set the speed to 65 and the cut took 9 minutes and 17 seconds. This seemed like a rather long time although I did decrease the speed so I can’t really complain.
It was looking a lot better at first glance but when looking closer I could see that there were a few narrow, intricate parts which didn’t look as smooth. As I took it off the mat, I could see that it hadn’t cut all the way through.
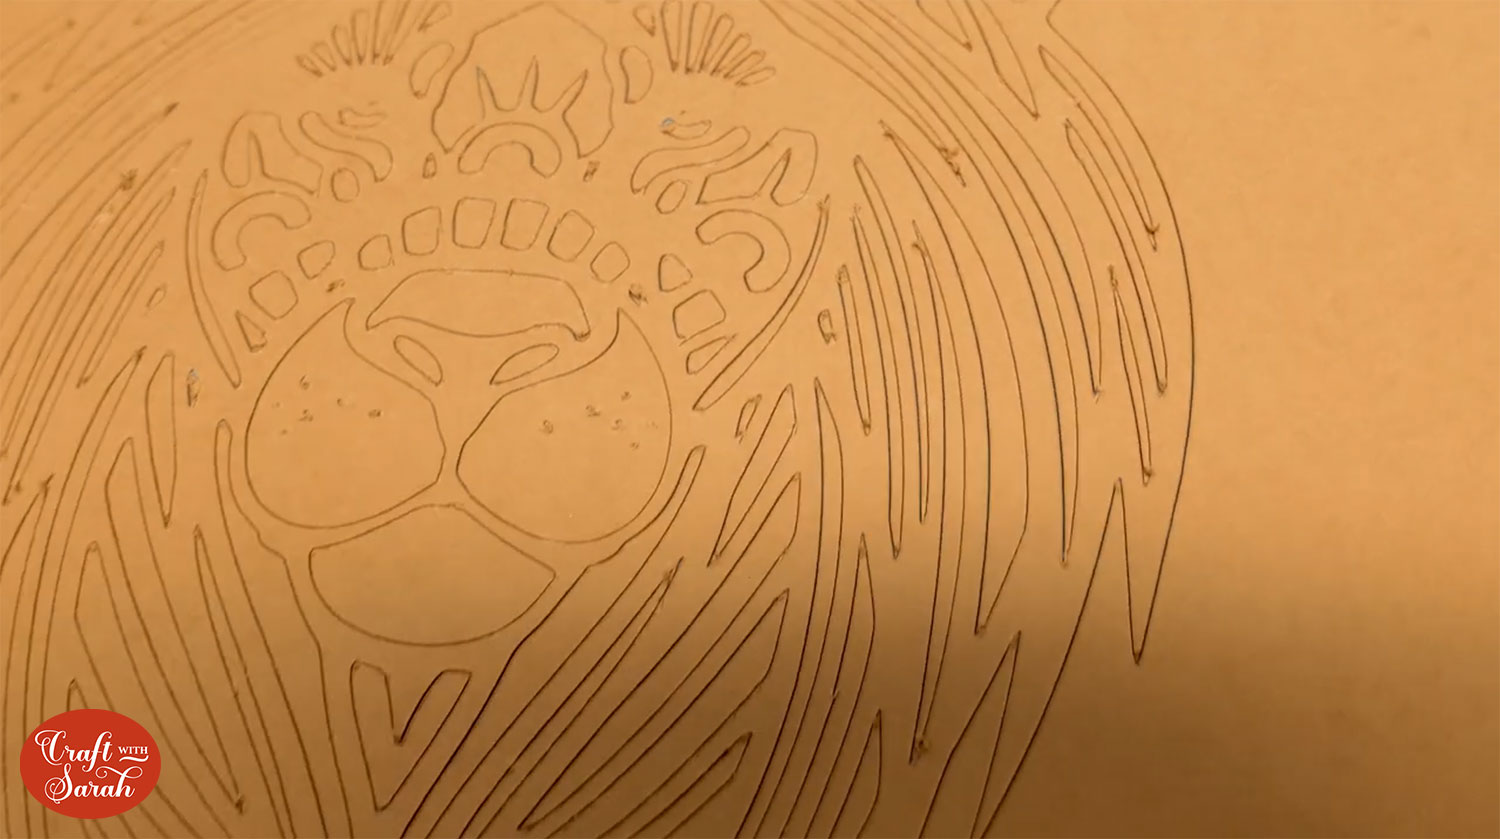
Looking at the back you can see how it’s not cut through the cardstock.
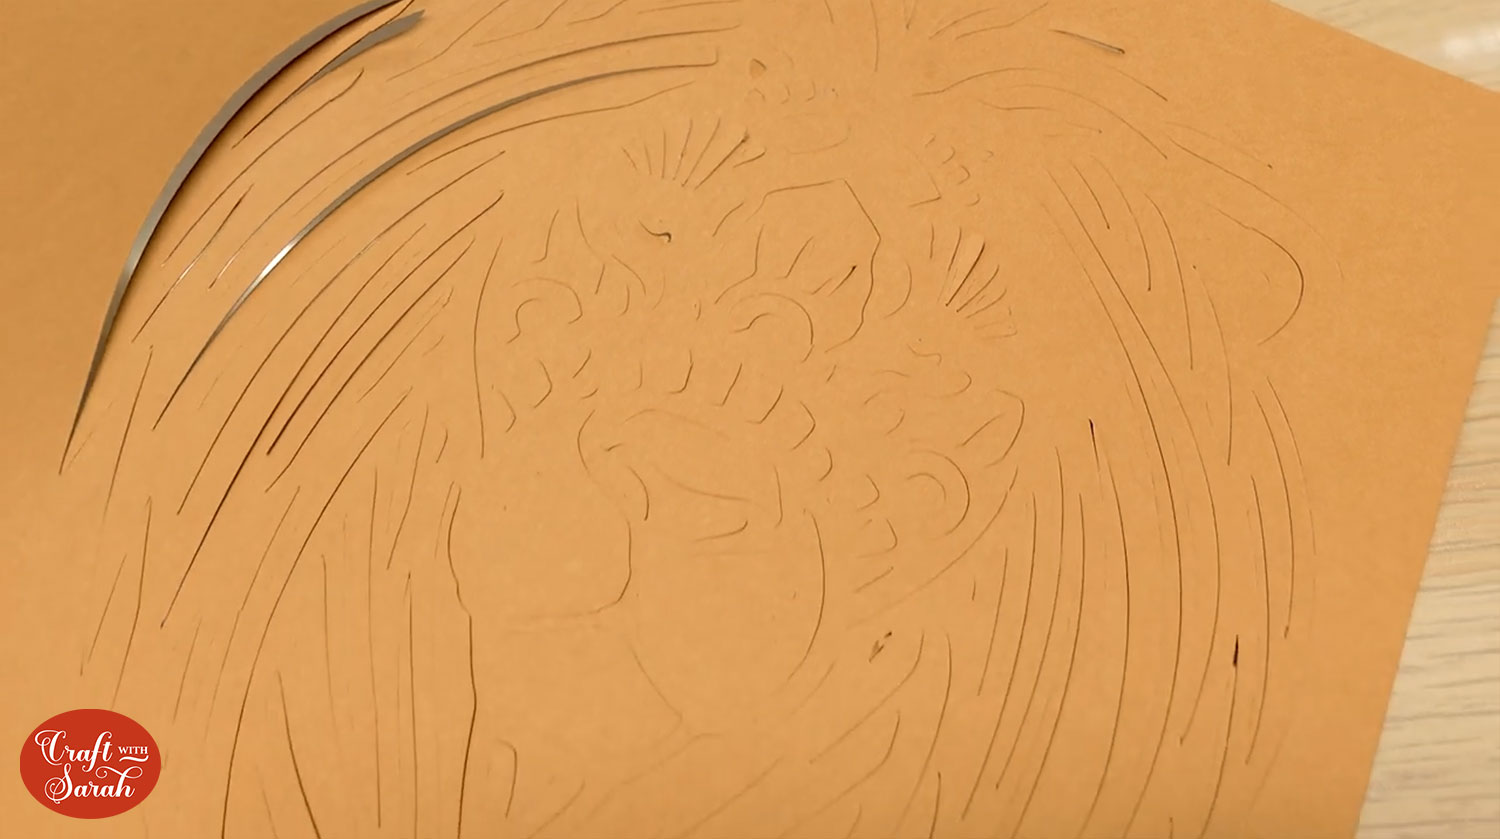
Unfortunately, this meant that the little details inside the design could not be removed without ripping the card.

Can the Cricut do better?
Cutting intricate cardstock designs on a Cricut Maker
Using the same thicker cardstock and the same lion design for the Cricut, I loaded in the mat and it finished cutting at 6 minutes 50 seconds.
As I ejected the mat, the cut looked very similar to the xTool cut and I wondered if the Cricut hadn’t managed to cut through this cardstock either.
When I took it off the mat, I saw that it had, in fact, cut everything perfectly.
xTool M1 vs Cricut Overview
The Cricut was the clear winner when it came to cutting cardstock, which I was fairly confident would have been the outcome as I cut cardstock on it every day.
I’ve had my Cricut for years so I know the machine and settings really well which may have played a part in why it cut so well in comparison to the xTool M1 which I have only had for a few months. I’ll have to continue to play around with the xTool settings and try again in the future.
Although the xTool M1 didn’t do so well when it came to cutting cardstock, it is brilliant at laser cutting.
I have seen other crafters cut cardstock with the xTool M1 laser functionality instead of the blade, but I’m a little wary to give that a try myself because of the (admittedly small!) fire risk.
Here are some projects I’ve made using the xtool M1 laser:
- xTool M1 Laser Cutter: setup & Review
- Cut Layered SVG Files from WOOD with the xTool M1 Laser Cutter
- xTool M1 Engraving Tutorial: Wood & Slate Coasters
- Engraved Metal Bookmarks with the xTool M1 Laser Machine
Overall, I’ve been amazed at what the xTool M1 laser cutter is capable of and it’s great to have a machine which can do lots of different things that the Cricut can’t, but I think I’ll be sticking to my Cricut for all my cardstock cutting needs.

I hope you enjoyed following along as I put the xTool M1 laser cutter and Cricut Maker machine to the test.
Happy crafting,
Sarah x

