How to Open SVG Files in Silhouette Studio

If you’ve ever tried uploading SVG files into Silhouette Studio and found yourself stuck, confused, or wondering why your file won’t open – don’t worry.
You’re not alone, and I’m here to help!
Whether you’re using the free version of Silhouette Studio (called Basic or Standard Edition) or a paid version like Designer Edition, Designer Plus or Business Edition, I’ll walk you through the steps to get your SVG or DXF files loaded so you can start crafting with your Silhouette machine in no time.
Free vs. Paid Versions of Silhouette Studio
Before we get started, it’s important to know that:
The free version of Silhouette Studio (known as Standard Edition or Basic Edition) cannot open SVG files.
If you’re using the free version of Silhouette Studio then you’ll need to use the DXF file type instead and do some extra steps to get it ready to use.
If you have any of the paid versions of Silhouette Studio (Designer Edition, Designer Plus or Business Edition) then you can open SVG files directly which is much easier and faster.
No matter which version you have, I’ve got you covered in this tutorial.
💡 Tip: Upgrading makes things much easier!
If you plan to use your Silhouette often, I highly recommend upgrading to Designer Edition (it’s usually around $40 as a one-time purchase).
It takes about 10 seconds to open a design with the paid versions of Silhouette Studio, compared to around 10 minutes of preparing a design with the free version.
The upgraded versions of Silhouette Studio come with many more features within the software which will make your designing process much easier.
The great thing about Silhouette Studio upgrades are that they are one-time payments for lifetime access. No monthly or yearly subscriptions!
Click the button below to see pricing options and compare the features within each different version.
Video Tutorial: How to Import SVG Files into Silhouette Studio
Watch the video below to see how to open SVG and DXF files in Silhouette Studio.
This video answers the following questions:
- Why is my SVG not supported in Silhouette?
- Can you use a SVG on the Basic Edition of Silhouette?
- How do you open a SVG file?
- How do I import designs into Silhouette Studio?
Scroll down for a written version of the video content.
Video timestamps:
- 00:00 – Introduction & overview
- 01:20 – How to unzip folders
- 03:56 – Opening SVG files in Silhouette Studio
- 09:11 – Opening DXF files in Silhouette Studio
- 19:43 – Summary & Ending
Before you Start: Download & Unzip Your Files
When you download SVG files, you’ll probably find that they are contained within a zip folder.
This is a way for designers to send multiple files in one single download.
Before you can open the SVG files in Silhouette Studio, you’ll need to unzip the folder. This is also known as “extracting” the folder.
- On Windows: Right-click the ZIP folder and select “Extract All”.
- On Mac: Double-click the folder to unzip it.
Once unzipped, you’ll see all the different files within.
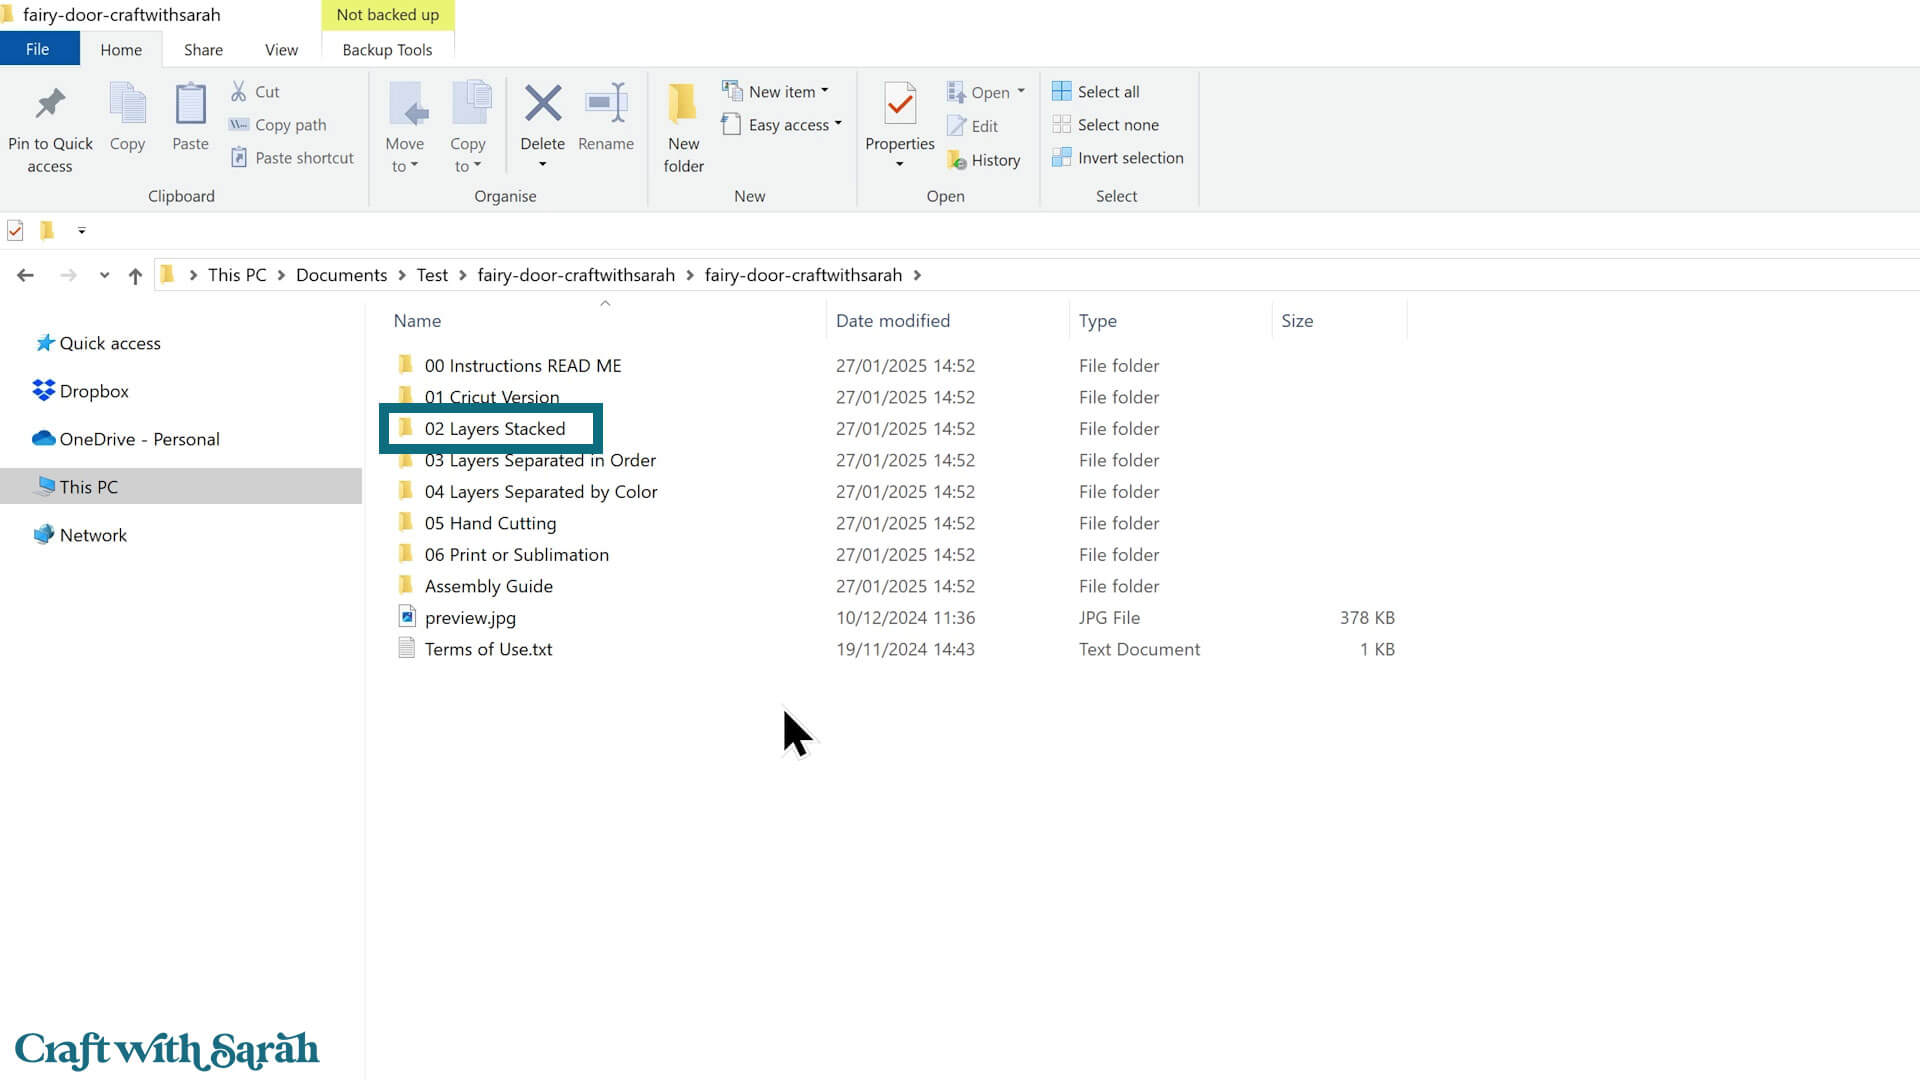
For “Craft with Sarah” designs, you’ll either see a folder structure like this:
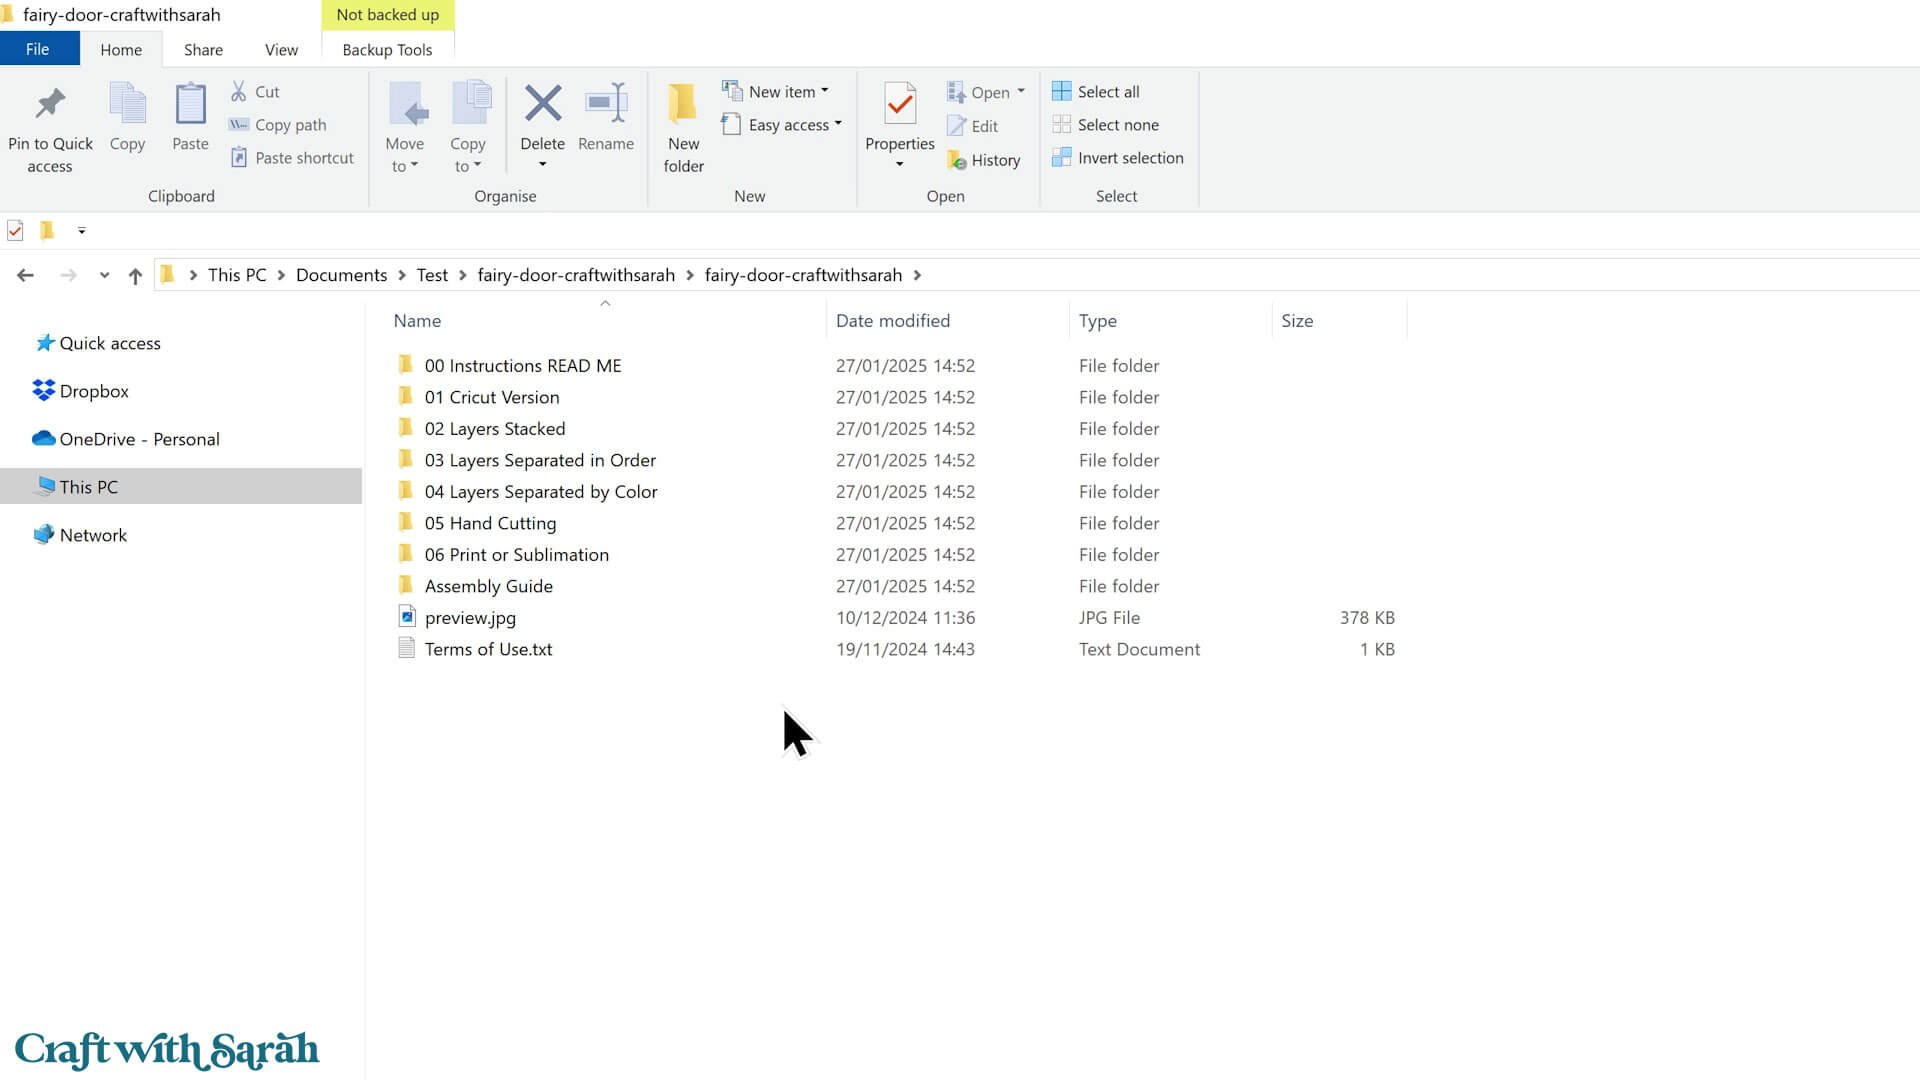
Or you’ll see all the files directly, like this:
For Silhouette Studio Designer Edition or Higher (Paid Versions)
Here’s how to open SVG files in any of the paid versions of Silhouette Studio. If you’re using the free version, keep scrolling until you find the next set of instructions.
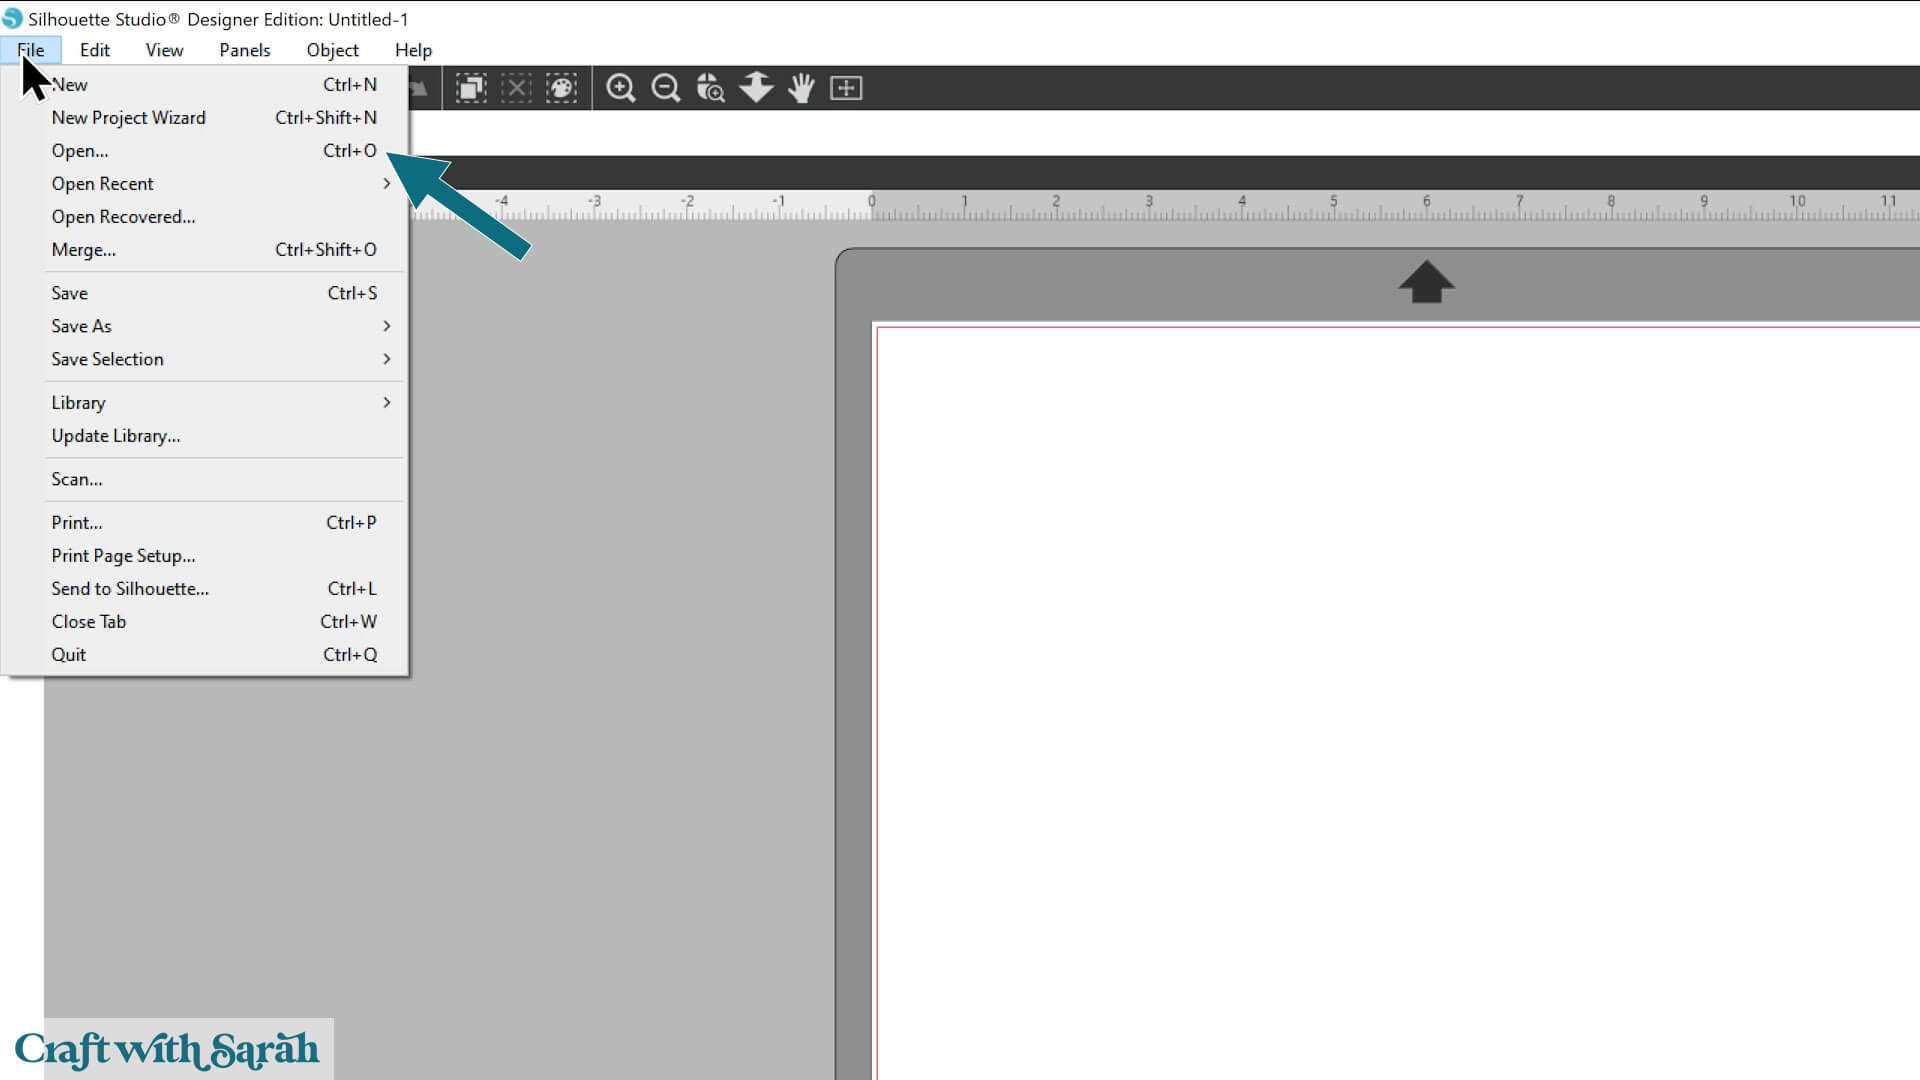
Open Silhouette Studio.
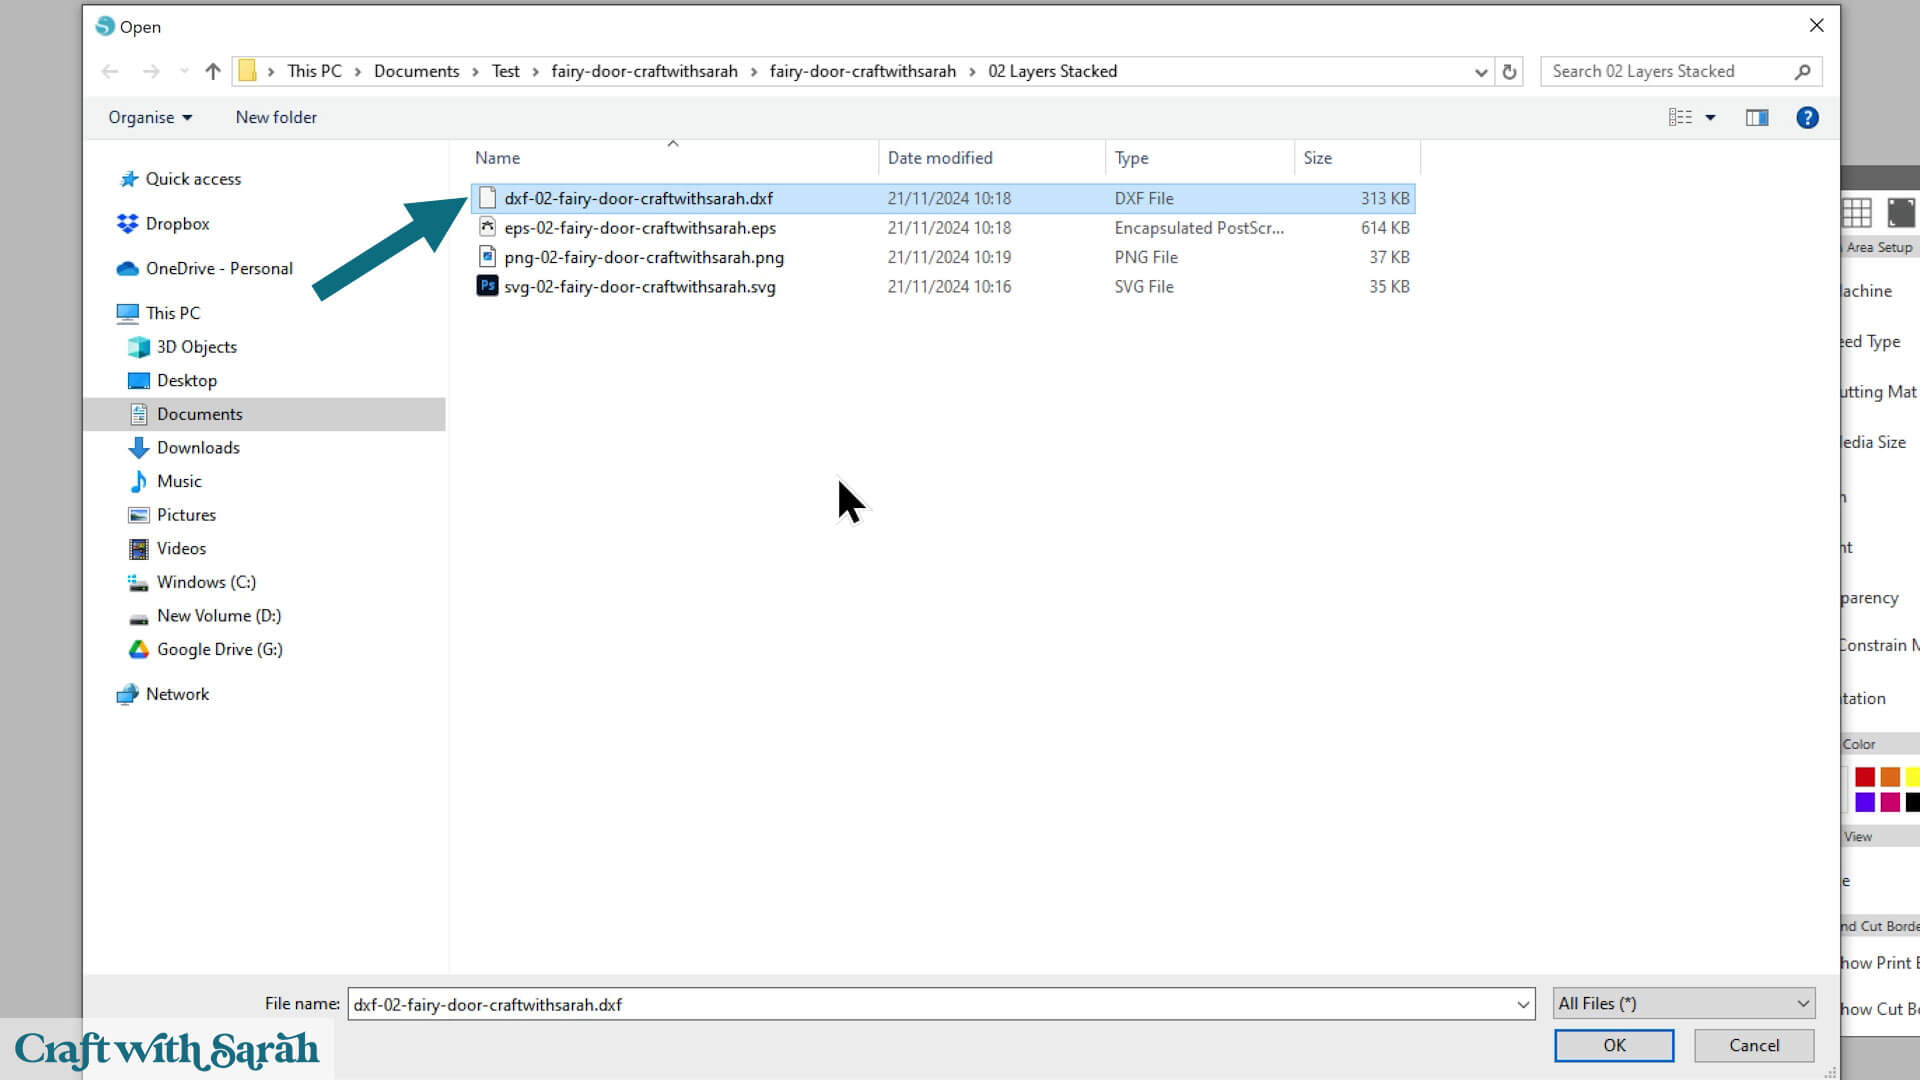
Click File > Open.
Navigate to the unzipped version of your download folder.
If you see numbered folders, open the one that says “02 Layers Stacked.”
Choose the file that starts with “svg-02…”
If you are using one of my older designs, choose the file that starts svg-… or SVG_…

If you are not using a “Craft with Sarah” design, look for the file that ends in .svg in the filename. It might appear as a HTML document or Edge/Internet file under the “file type”.
Double-click the SVG file to open it, or single-click it and then press the “Open” button.
You’ll find that the Silhouette mat automatically sizes itself to the design on the newer formatted designs.
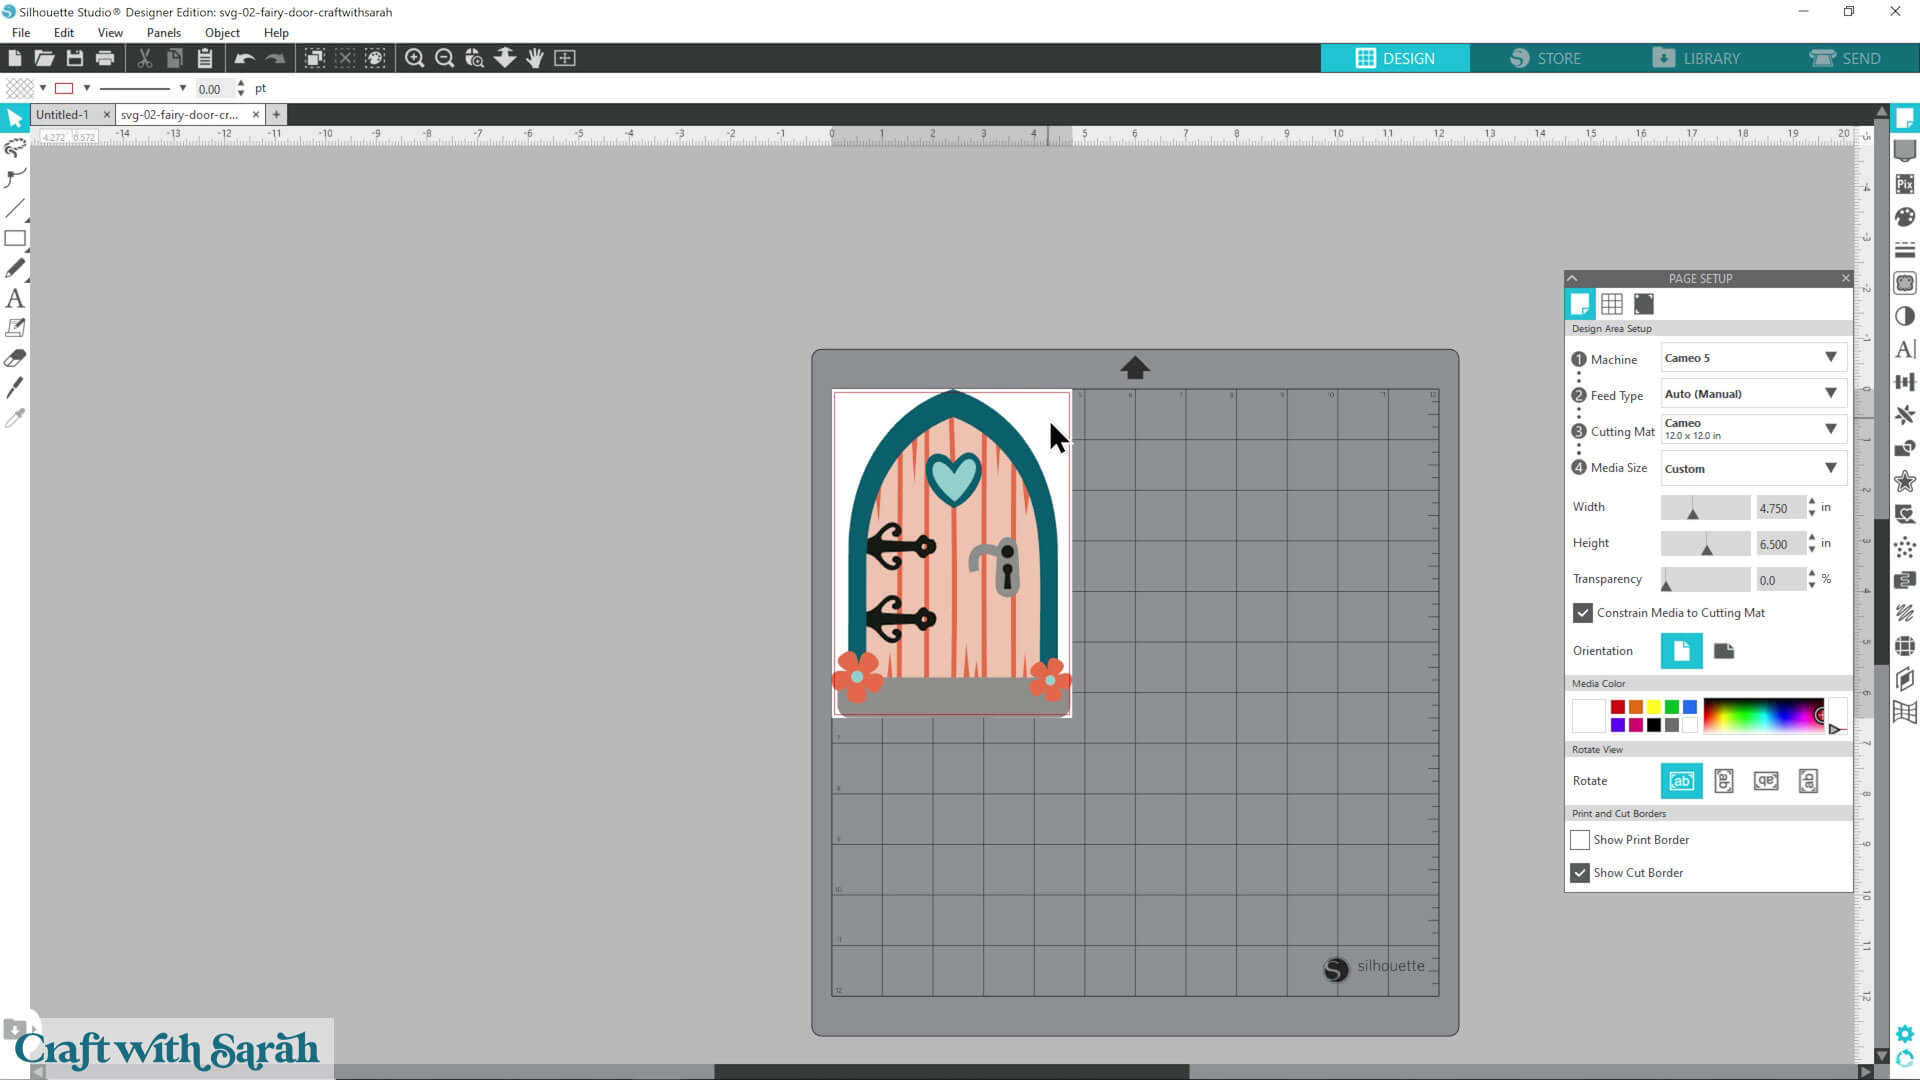
You can change that in the “Page Setup” menu.
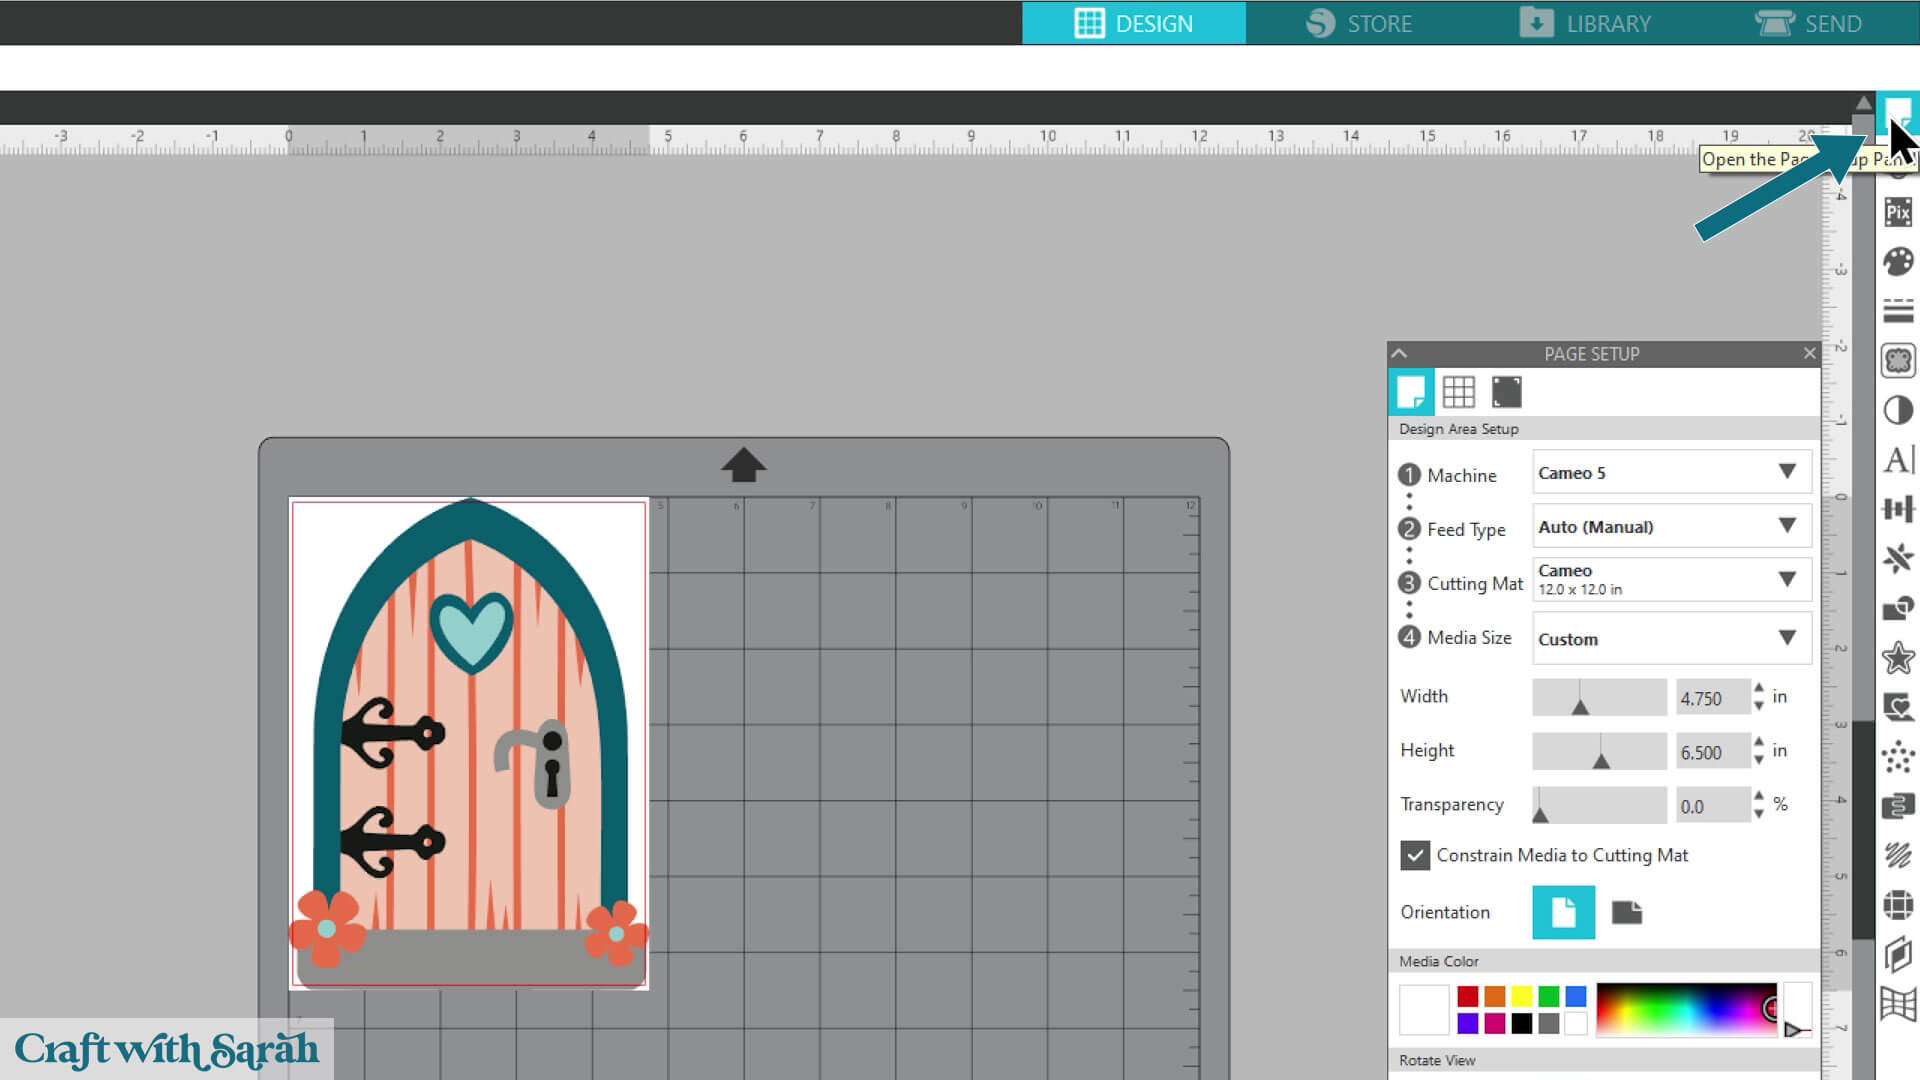
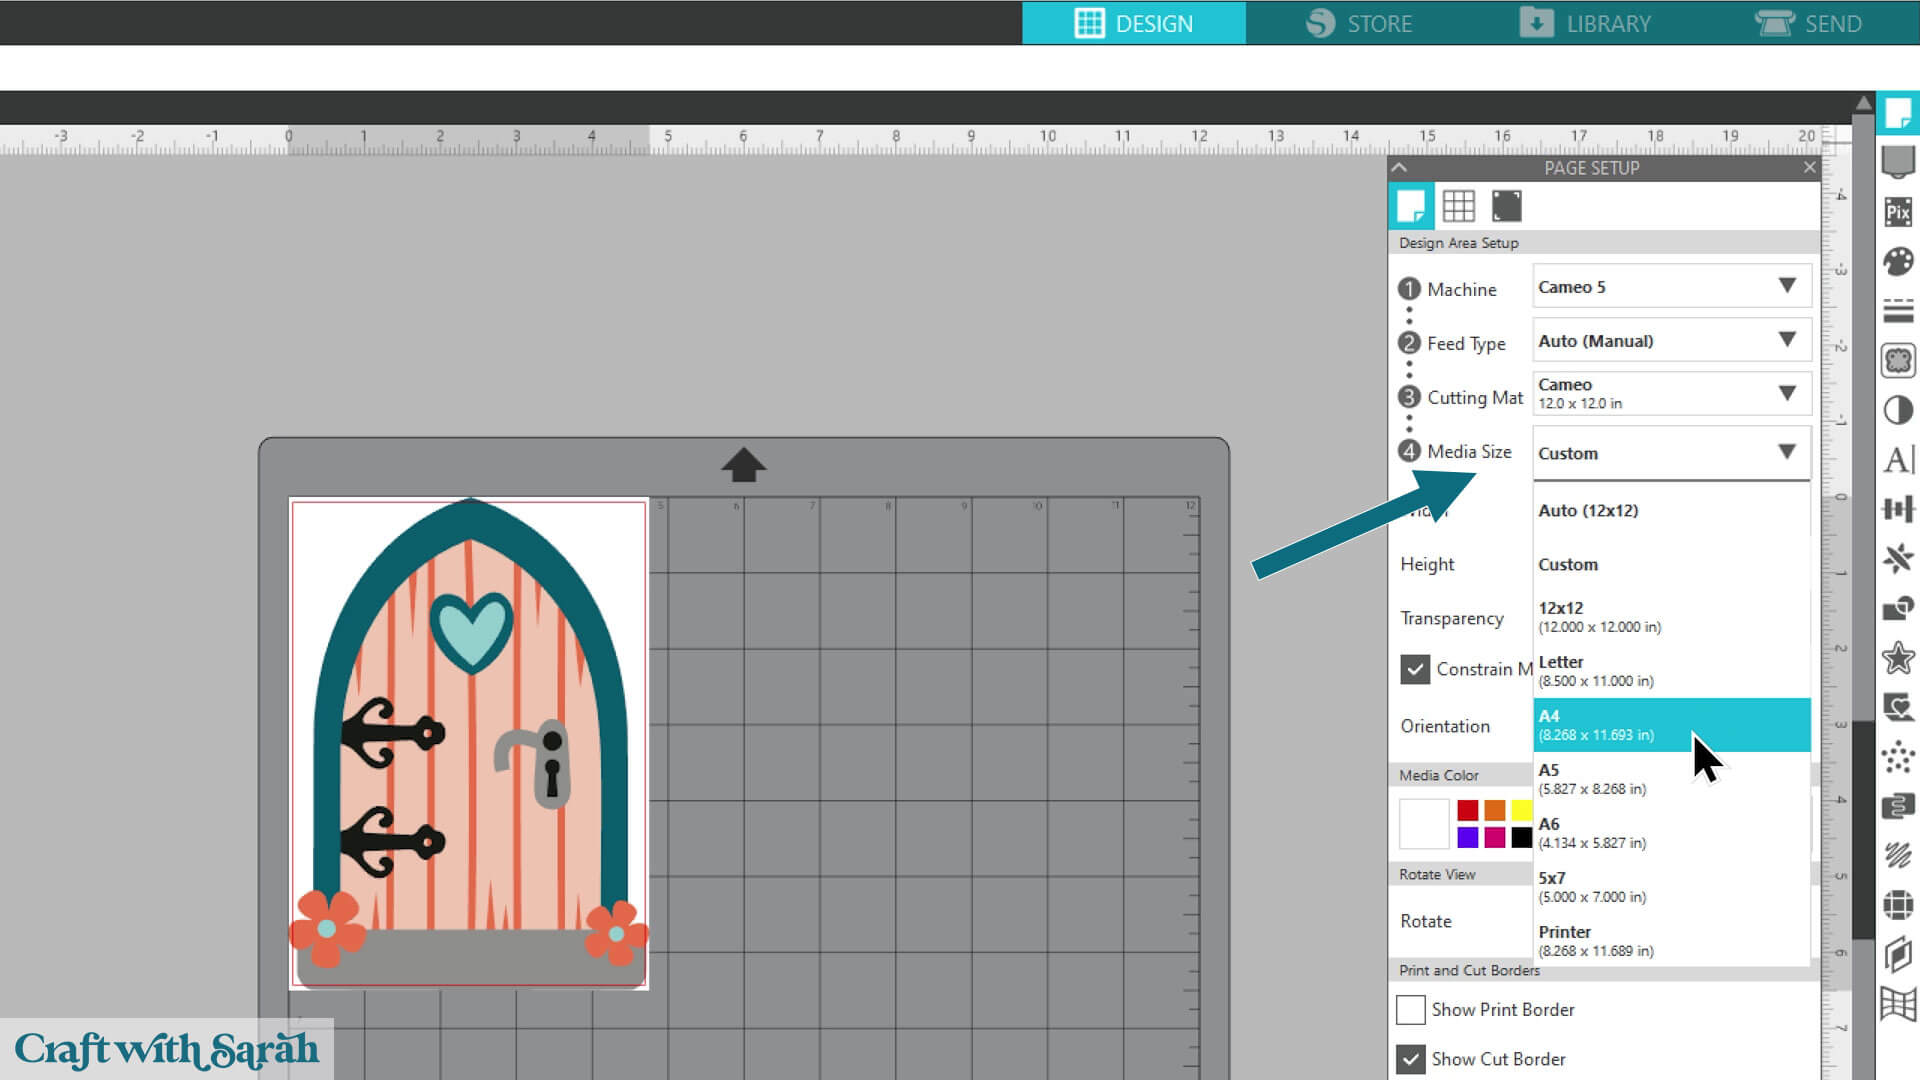
Under “Media Size”, choose the size you’d like. Match it to your intended cardstock.
I tend to use A4, as that’s our most common paper size in the UK, or 12×12.
Ta-da! You’ve now uploaded a SVG in Silhouette Studio! Wasn’t that easy?
Although it looks like a completed “picture”, it has all the colours and pieces as separate layers, ready for cutting.
To see this, click into the “Layers” menu.
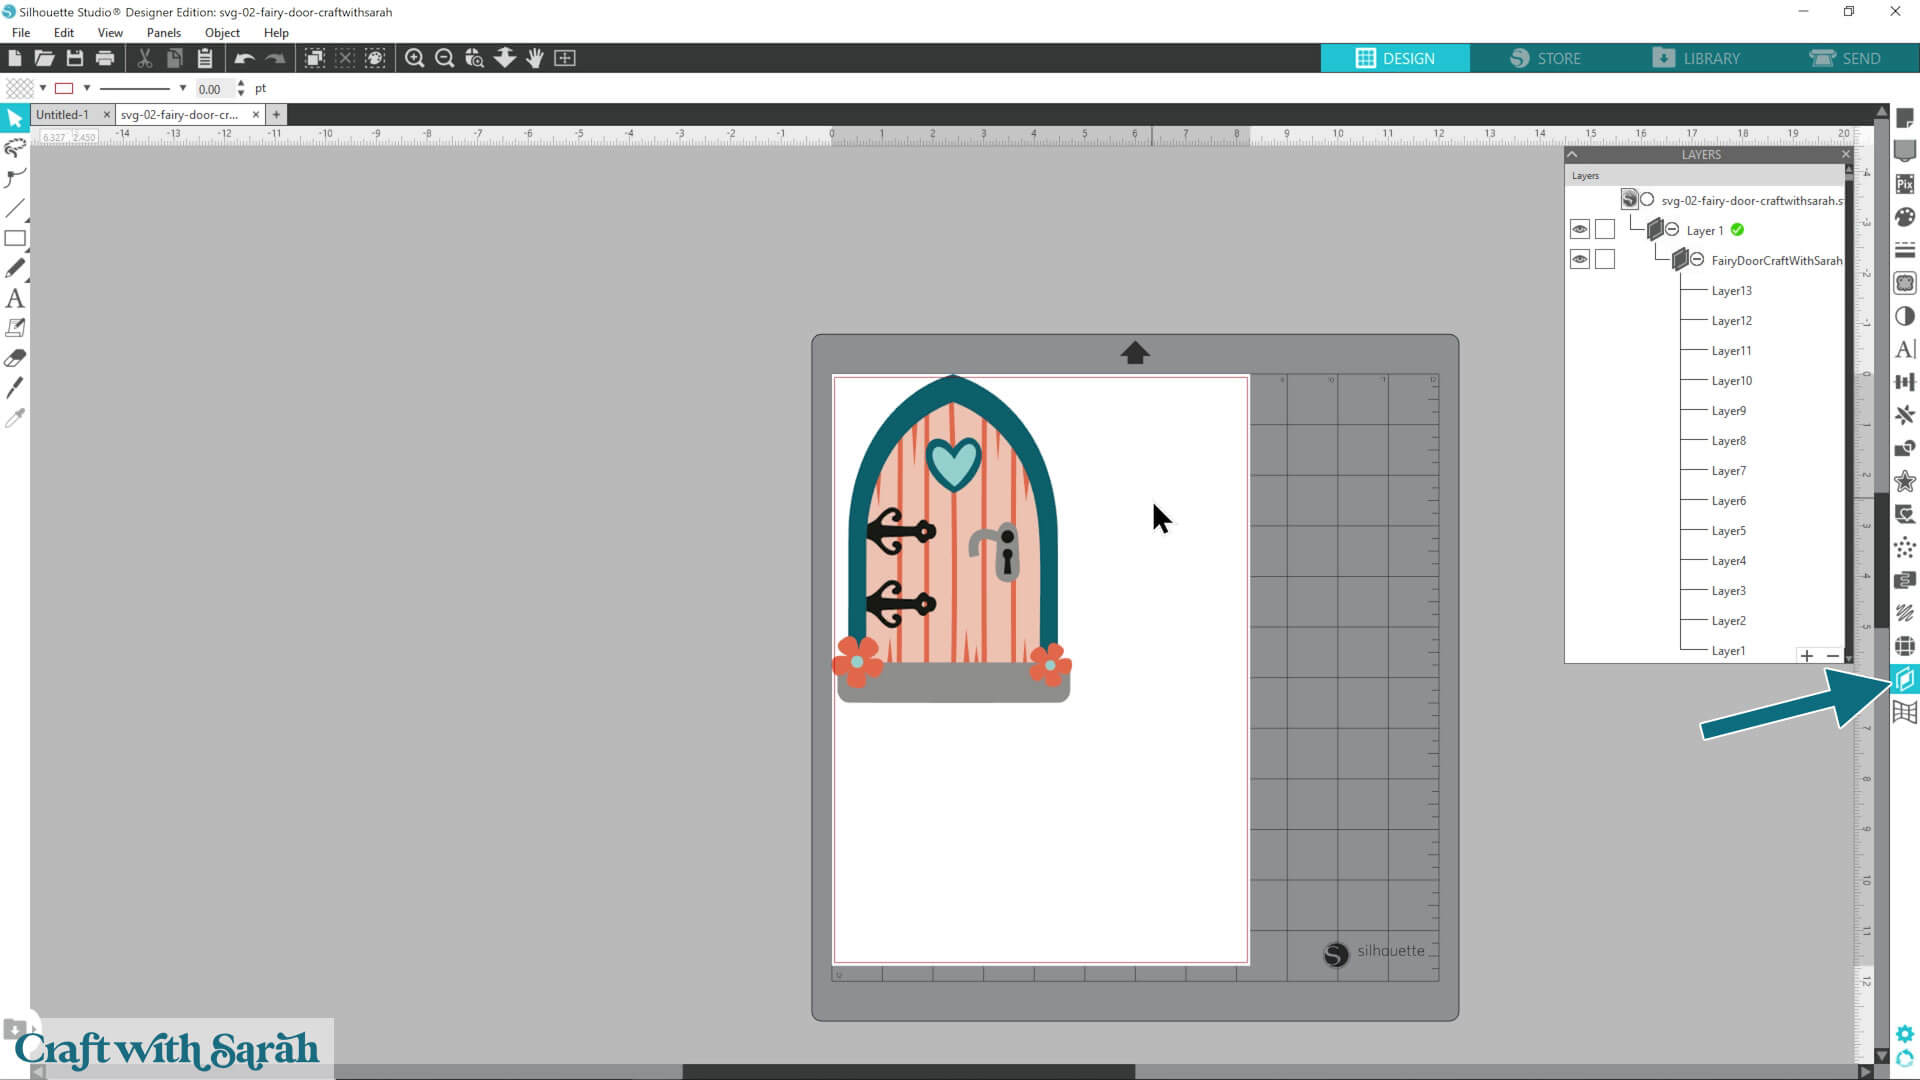
What happens next? Check out this Silhouette machine help page for additional tutorials on resizing designs, changing the colours, modifying the layers and how to cut cardstock projects with a Silhouette.
Using the Free Version of Silhouette Studio?
Unfortunately it isn’t possible to open SVG files in the free version of Silhouette Studio.
If you try, you’ll see an error message.

Instead of opening an SVG, you’ll need to load the DXF file type instead.
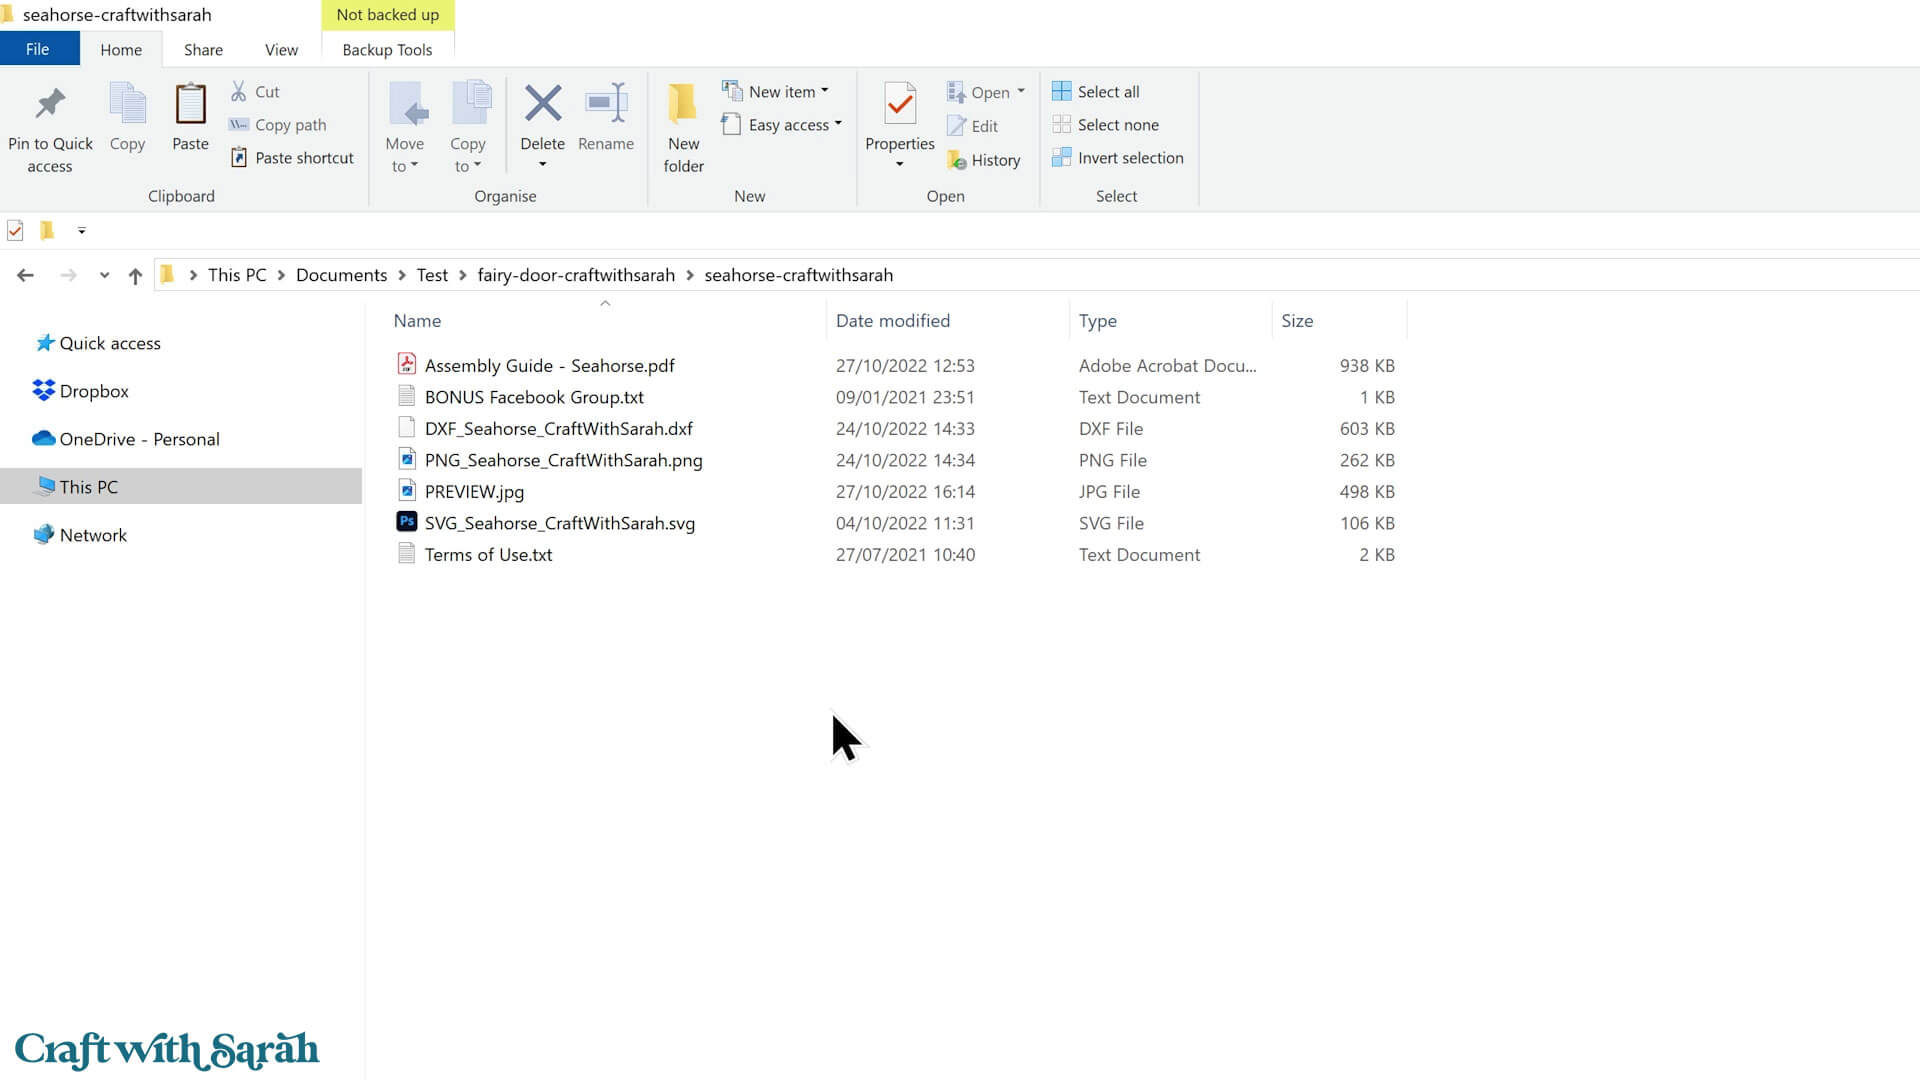
When choosing which file to open, avoid the “02 Layers Stacked” folder as it’s tricky to use stacked files in DXF format.
Instead, choose either “03 Layers Separated in Order” or “04 Layers Separated by Color”.
I find the “04 Layers Separated by Color” version easier to use, so I’ll choose that one for this tutorial. Open the DXF version of the file.

Your design will load in black and white outlines with all of the cutout pieces separate on the screen. This is normal when loading DXF files.
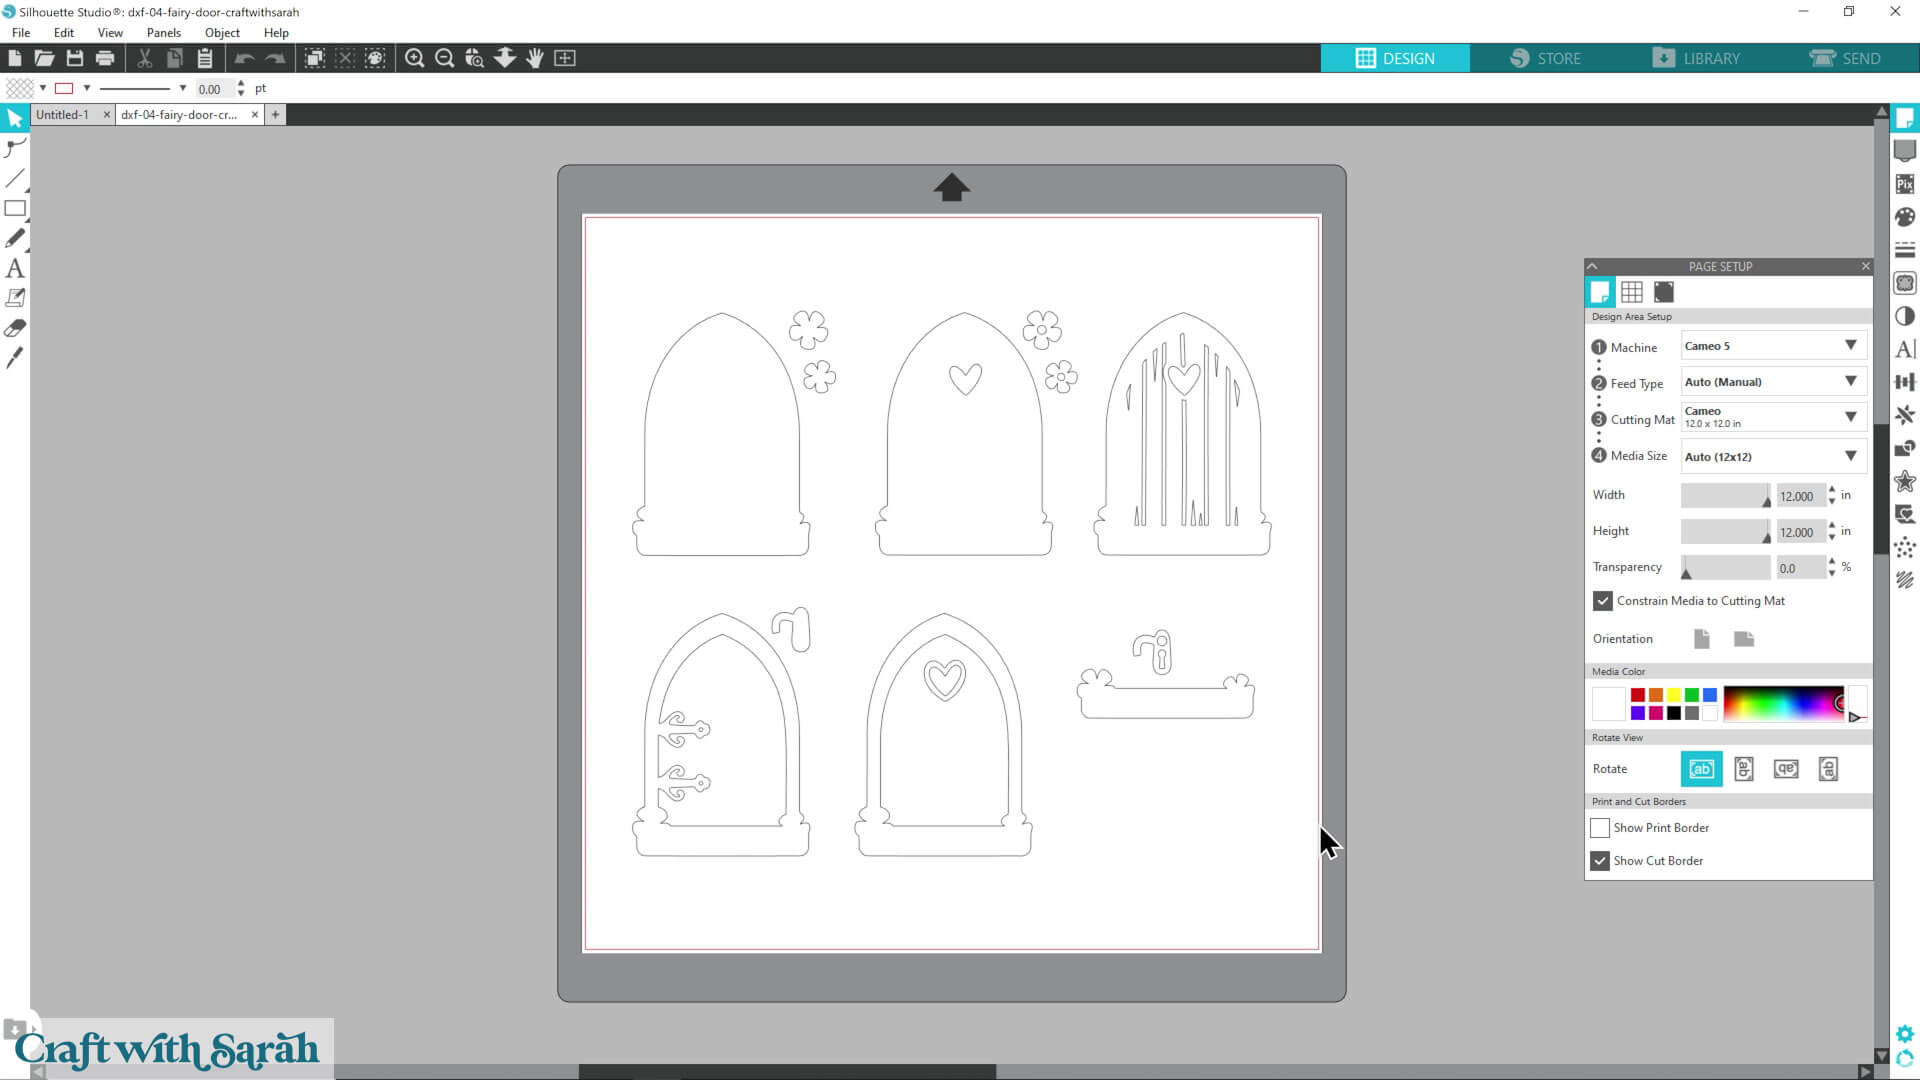
The pieces of the design are grouped by the original colours. It’s hard to tell that at the moment now, as DXF files have all the colour removed.
Important – this will be too small to cut at the size it loads in at. Follow the steps below to prepare it for cutting.
Join each Layer Together
DXF files load with all parts of each layer separate, rather than one cohesive piece. We need to join the parts that belong together to make the file easier to work with.
We’ll use Silhouette Studio’s “compound path” feature to do this.
Work through each layer of the design, one-at-a-time. It takes a couple of minutes, but it’s important to do this to make it easier to cut.
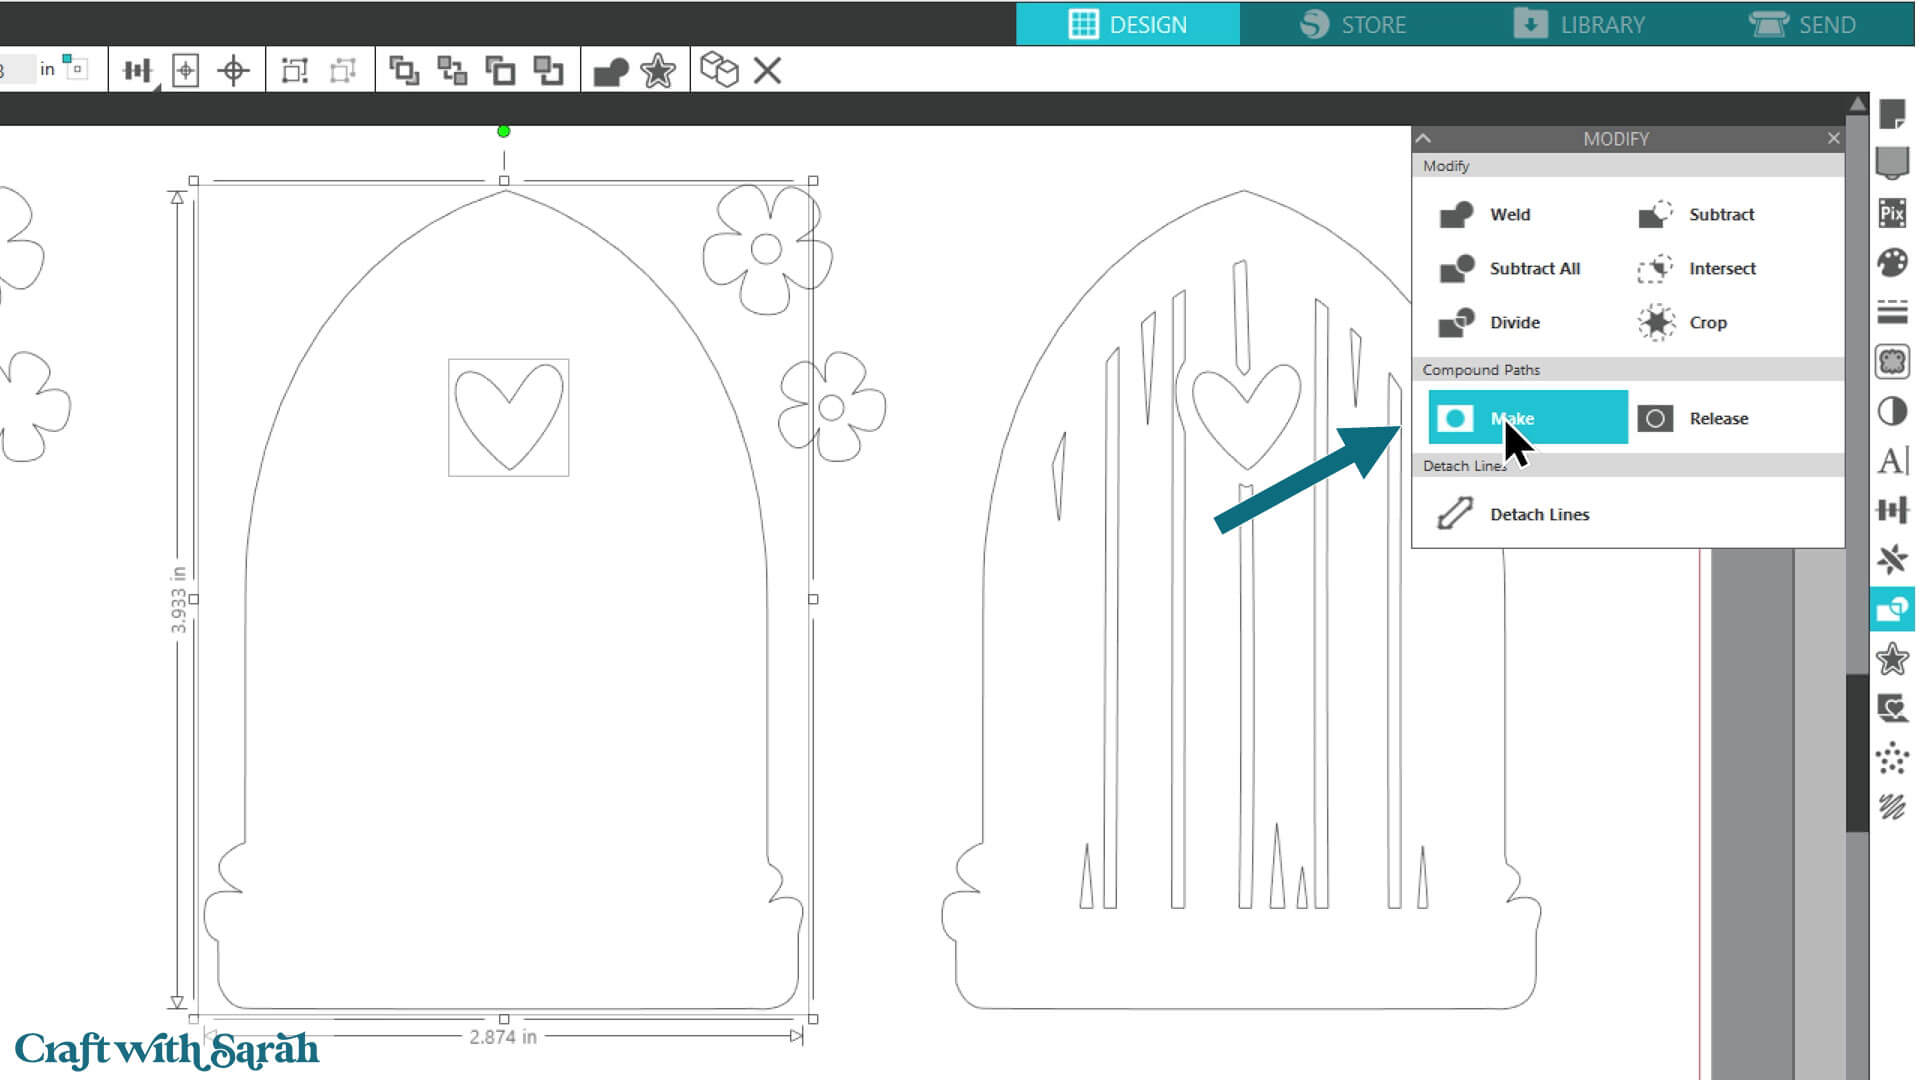
Click-and-drag with the mouse to select the outline and any small cutouts within a particular piece (like a heart in a door). Make sure you do NOT select any parts of any other layer.
In the example below, I only have the door outline and the heart selected, NOT the separate flowers.
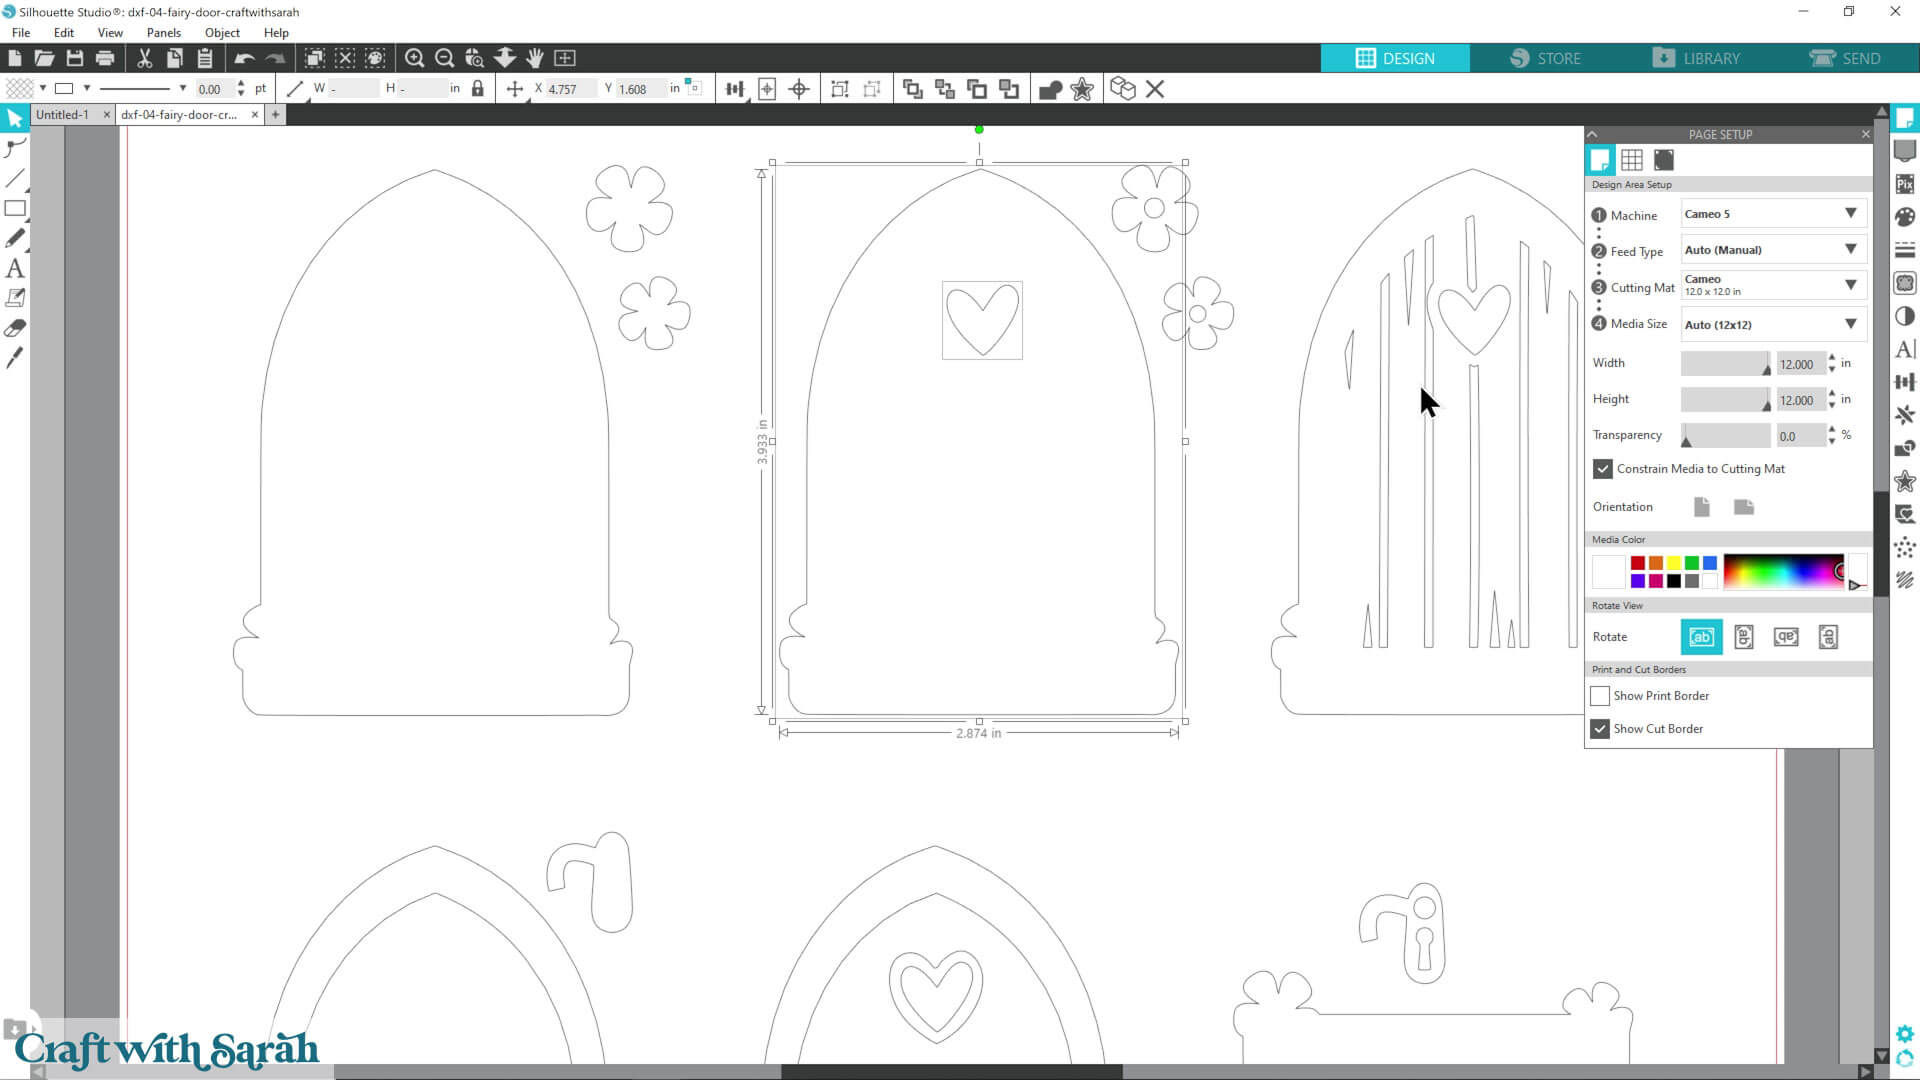
Click the Modify Panel on the right side of your screen – it looks like an overlapping rectangle and circle.
Look for the heading that says “Compound Paths” and click the “Make” button underneath the heading.
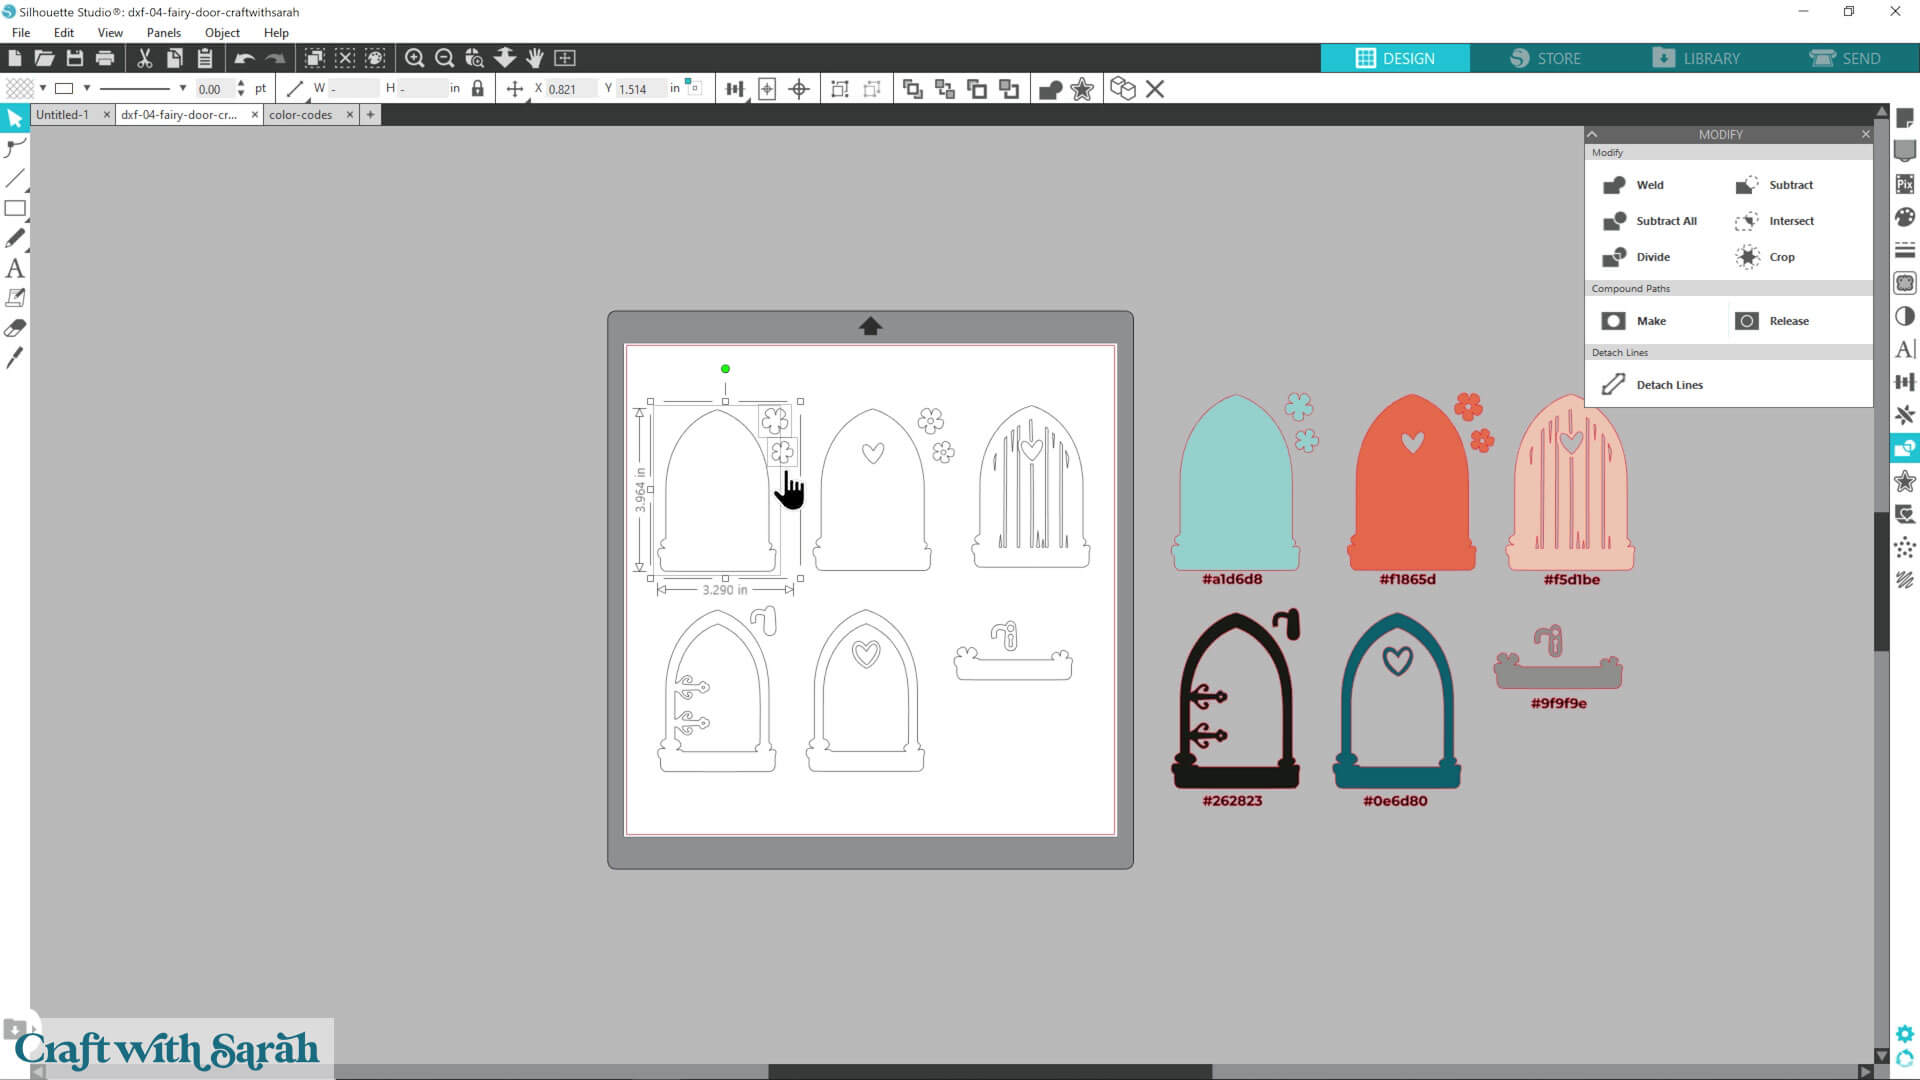
Repeat this for each piece that has cutouts.
It’s important to do each layer separately/individually, otherwise you will “join” them together which means you can’t cut them in different colours.
Color the Layers
Now the parts are joined, you can add color to them.
You don’t have to add the colours, but it makes it must easier to cut projects with multiple layers as you’ll then know which colours of card to load into your Silhouette at which point.
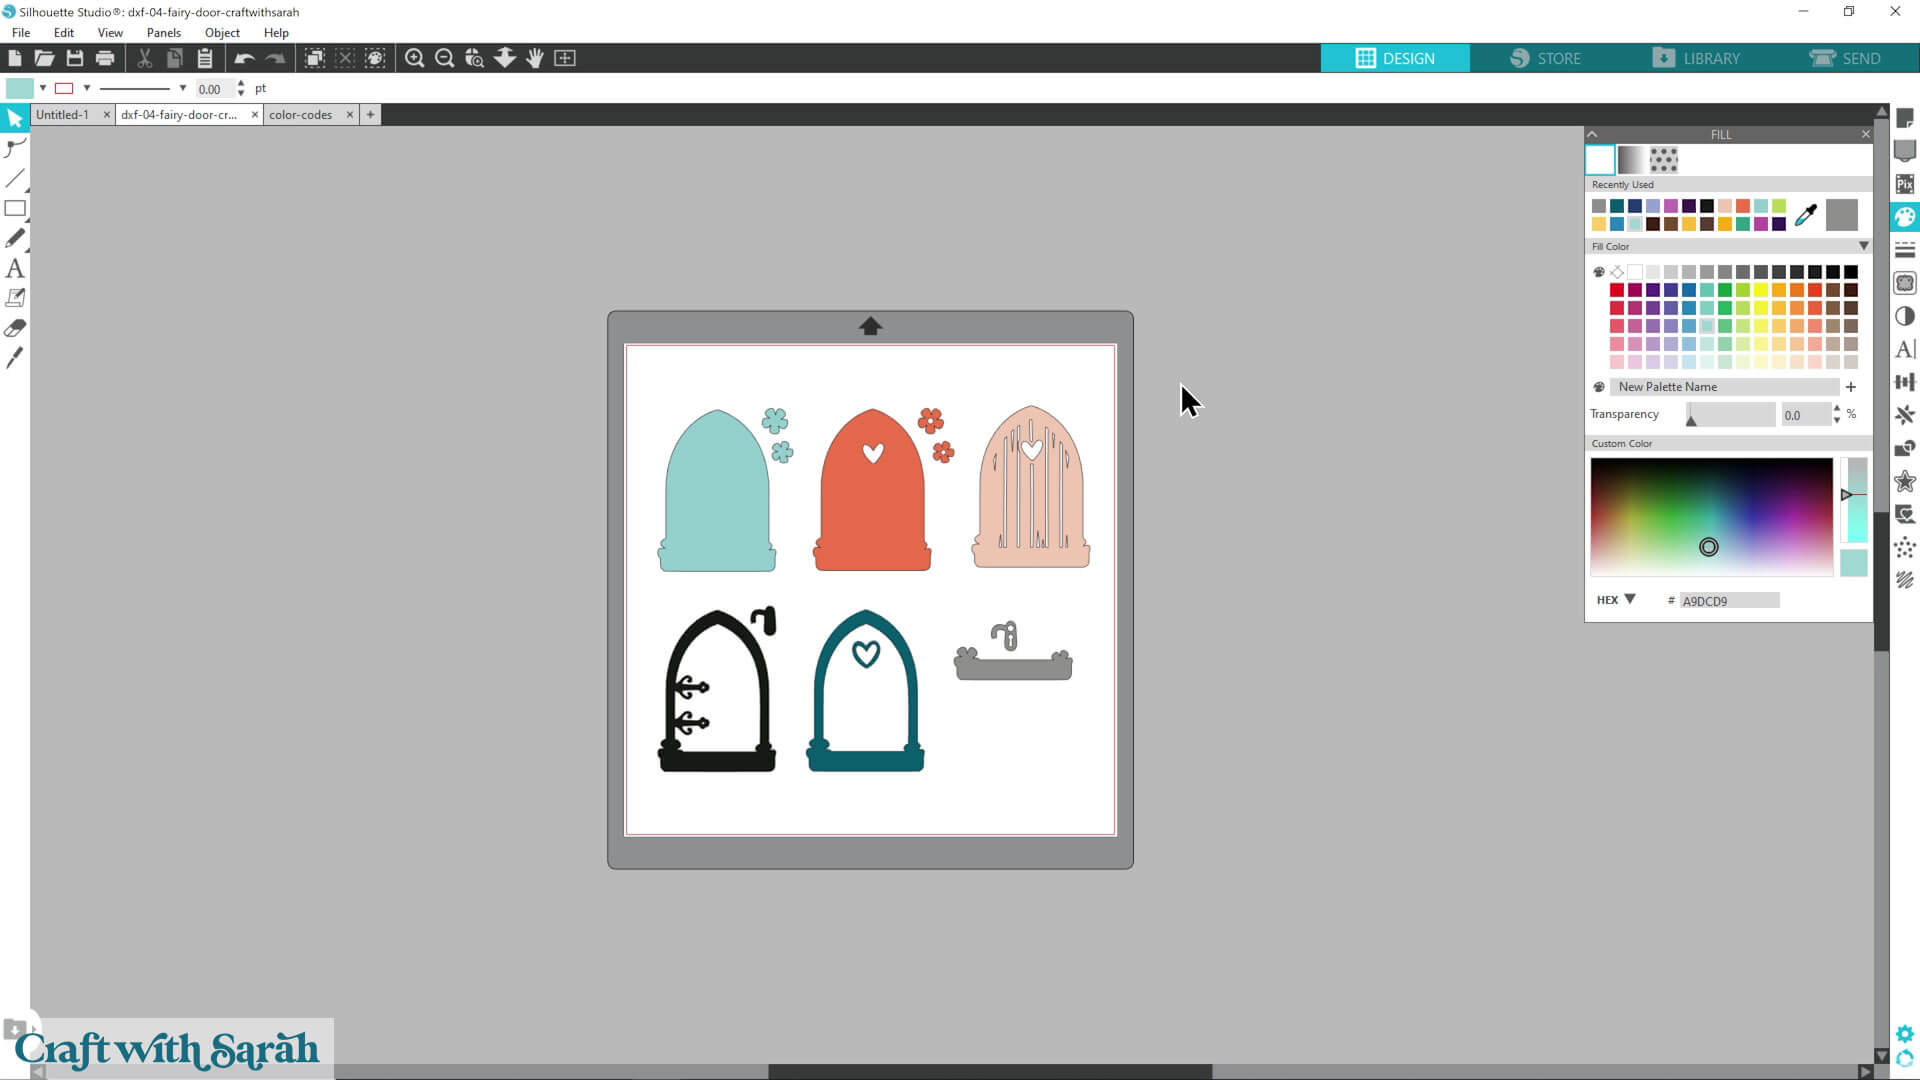
If you’re not sure which color goes where, open the PNG file called “Color Codes” or “Color Guide” inside the “04 Layers Separated by Color” folder. This shows exactly which colors to use for each layer.
Note – color guides are only present in our designs released after February 2025. If you’re using one of our older designs, you can open the PNG file which will work in the same way.
With both the DXF and the Color Codes file on your screen, zoom out so that you can see them both.
Drag a box around one of the layers of the DXF file.
Go into the “Color Palette” icon and choose the “Color Picker” tool.
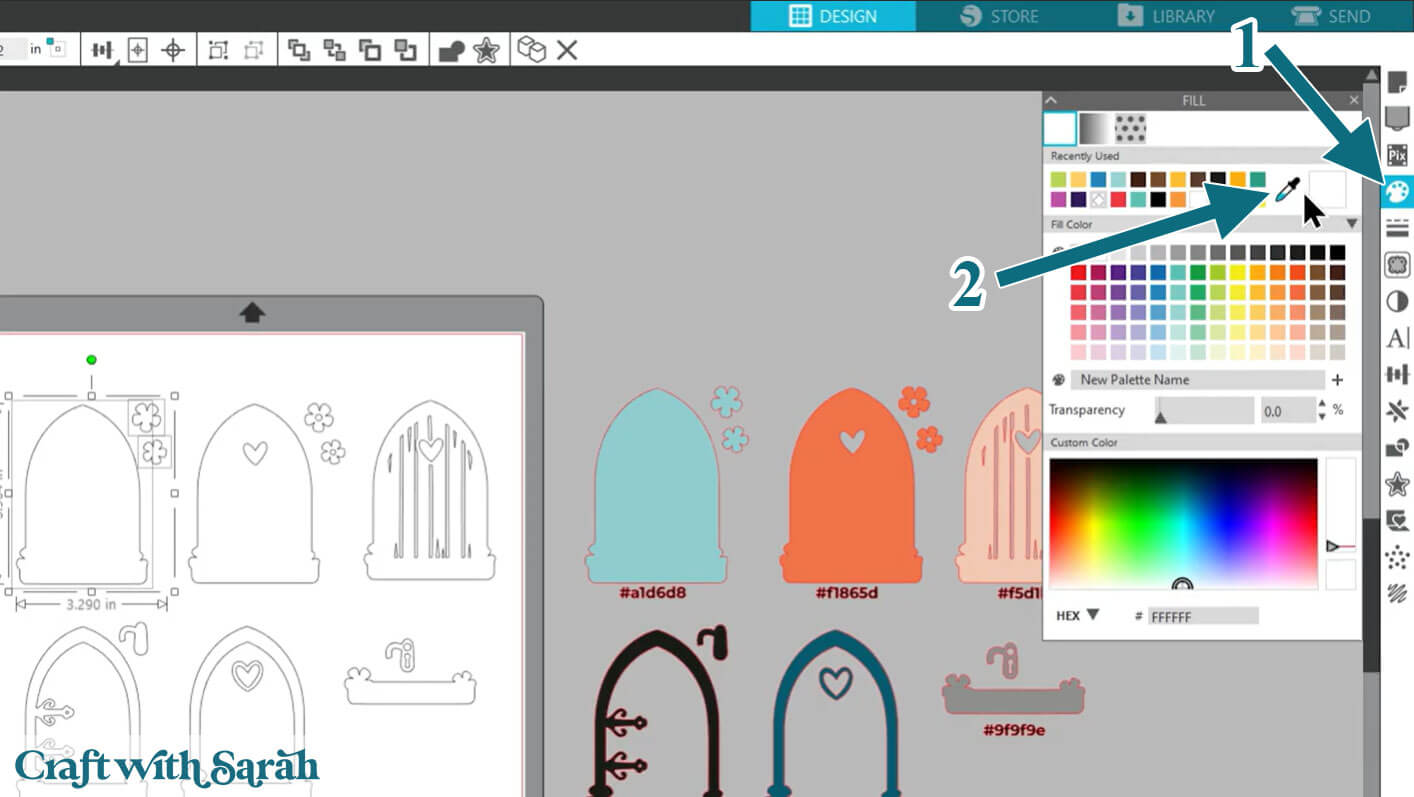
Click the color on the matching layer on the Color Codes version of the design and it will change your DXF version to match.
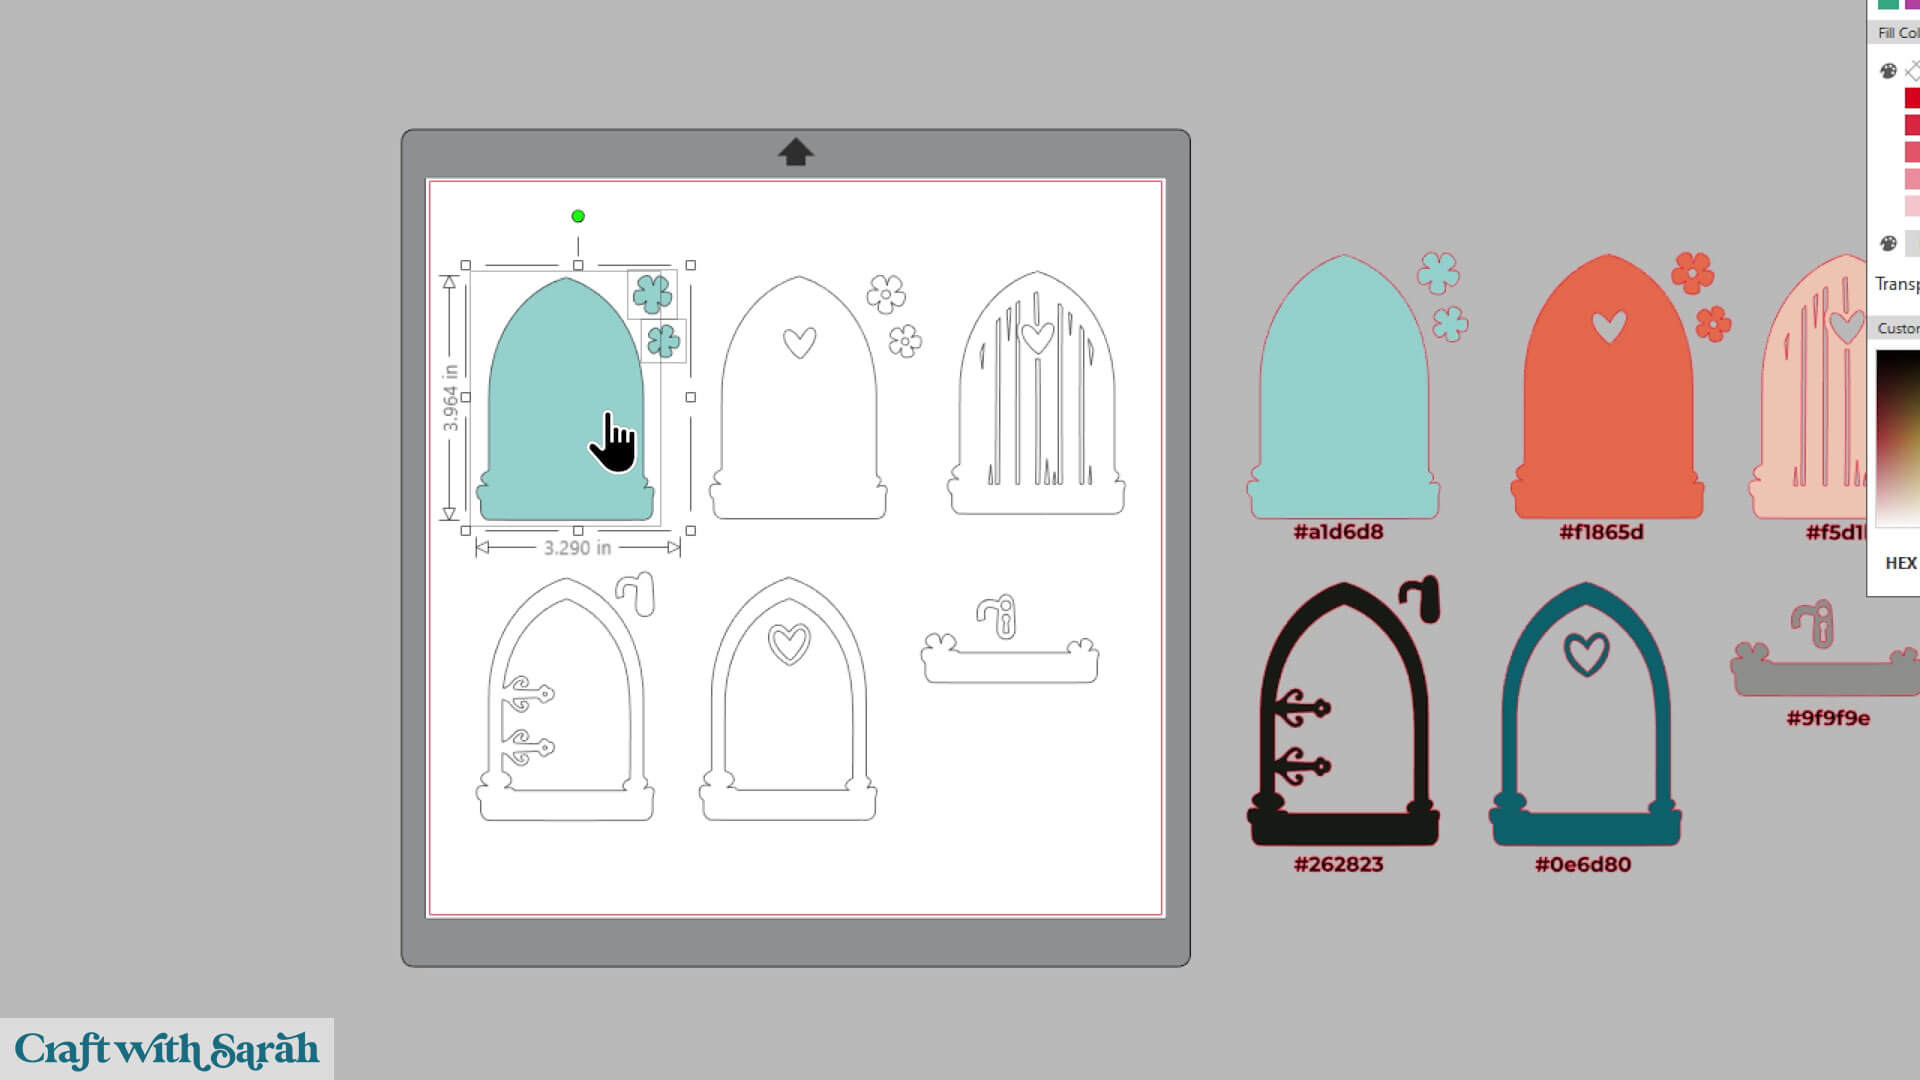
Repeat these steps until you have changed all the colors.
When all your pieces are colored, you can delete the Color Codes version.
Note – the Color Codes version of the file is not suitable for cutting with your Silhouette as it’s all joined together as one flat image – it does not come in layers. That’s why we have to use the DXF file.
Once all your layers are coloured, your design is ready to resize and cut.
That process is covered in the follow-on tutorial that shows how to cut cardstock with a Silhouette machine.
Opening SVG and DXF files in Silhouette Studio doesn’t have to feel confusing or restrictive once you understand how the software works and which file formats are supported by your version.
By choosing the correct file type, unzipping your downloads properly, and following the right import method, you can get your designs onto the canvas quickly and accurately.
Whether you’re using the free version of Silhouette Studio or a paid upgrade, you now know how to open your files successfully and which file type to choose.
Now that you know how to open both SVG and DXF files, you’re ready to start crafting with confidence!
Once you’ve done this process a couple of times, it becomes second nature, making it easy to jump straight into new projects and make the most of your Silhouette machine.
Happy crafting,
Sarah x

