How to Put Text Inside a Shape in Cricut Design Space
It’s SO quick and easy to combine names and shapes within Cricut Design Space. Here’s how to do it!
Once you start turning shapes and words into beautiful designs you will be able to use them for so many different things.
They are a great way to personalise gifts with vinyl or to cut from cardstock and add to your greetings cards or scrapbook layouts.
This tutorial is an update to my most-watched YouTube video on how to put text inside a shape in Cricut Design Space. The original video was recorded back in 2021 and Design Space has changed quite a bit since then.
Design Space’s current features and capabilities make it even easier to make custom hearts, stars and other shapes with a name inside them.
I’ll go through each of the steps below, so that you are left with several different designs which combine words and shapes.
Let’s get started!
How to combine words & shapes in Cricut Design Space
Watch the video below to see how to combine shapes and text in Cricut Design Space.
Prefer to read rather than watch? Keep scrolling for a written tutorial.
Part 1: How to put your name into a heart outline in Design Space
Step 1) Choose your text and font
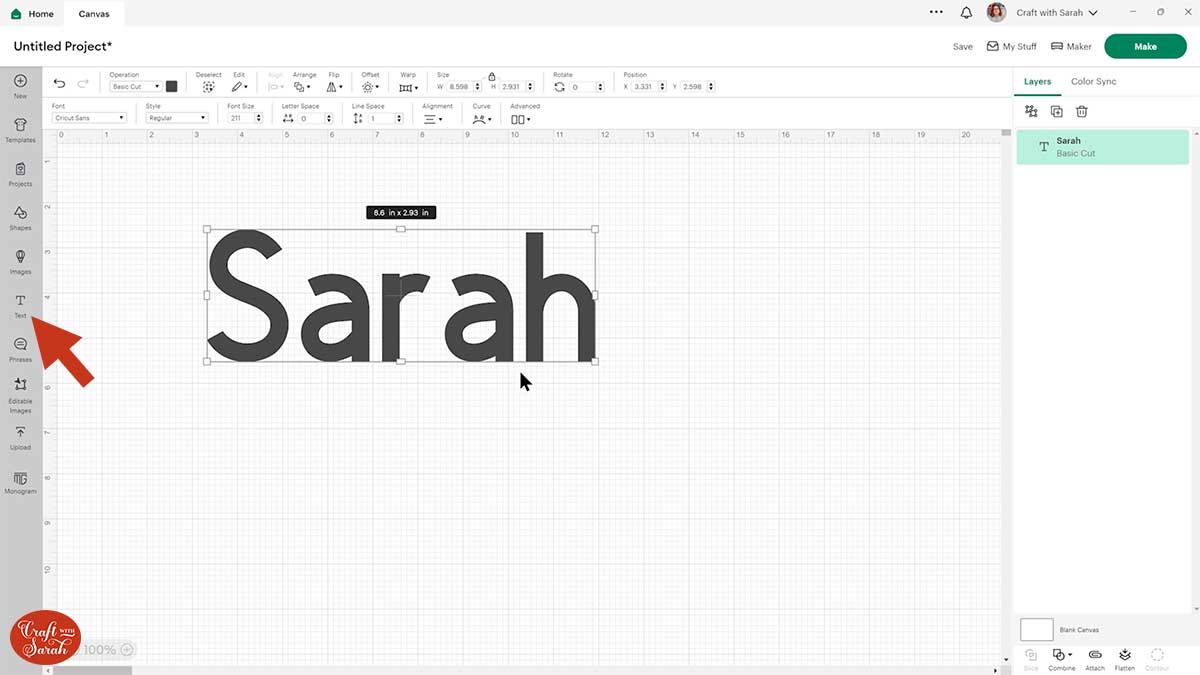
Open up Design Space and start a new project.
Click the Text button and add a word or name that you would like to add to a heart.
Change the font to one where all the letters are touching as this will make it much easier to add to the shape.
To make it easier to find the type of font you need, click the filter box and tick the box which says Kerned as this will show all of the ones which join up nicely.
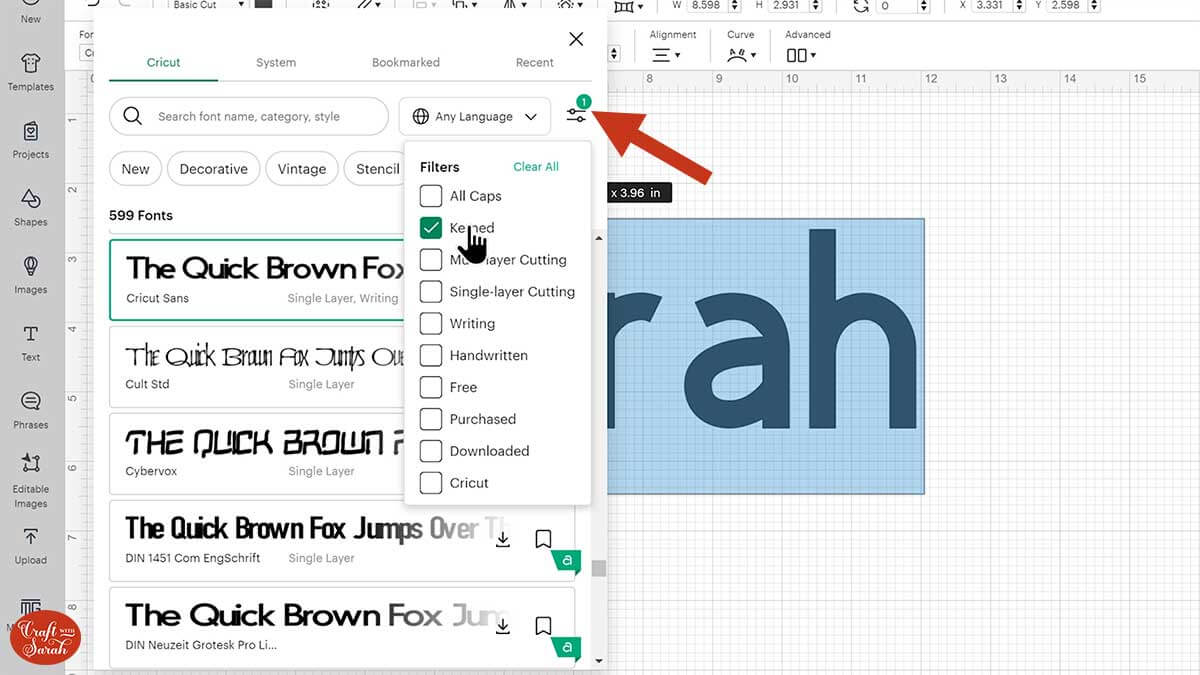
You will need the Cricut Access subscription to use the fonts which have the green “A” next to them for free.
Alternatively, use the fonts that are installed on your computer by clicking the “System” tab at the top of the font selector panel to change the list of fonts.
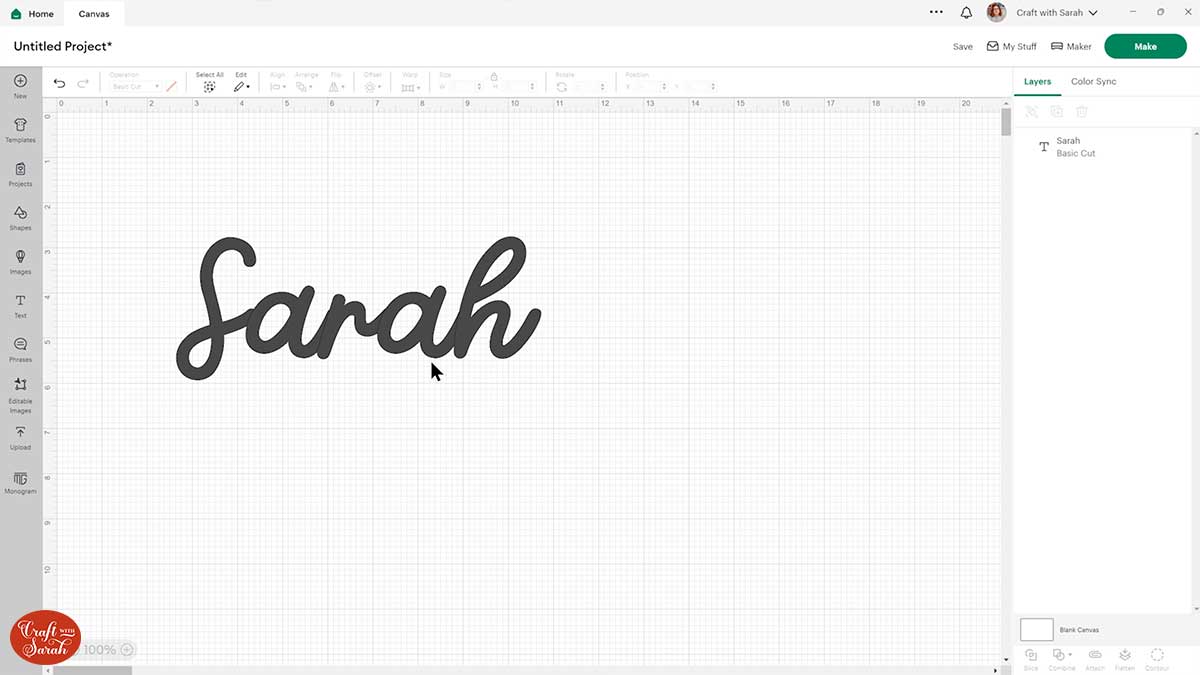
I used the font called BFC Bloomshine as the letters touch together nicely and they are nice and thick so it will be easy to weed when cutting from vinyl.
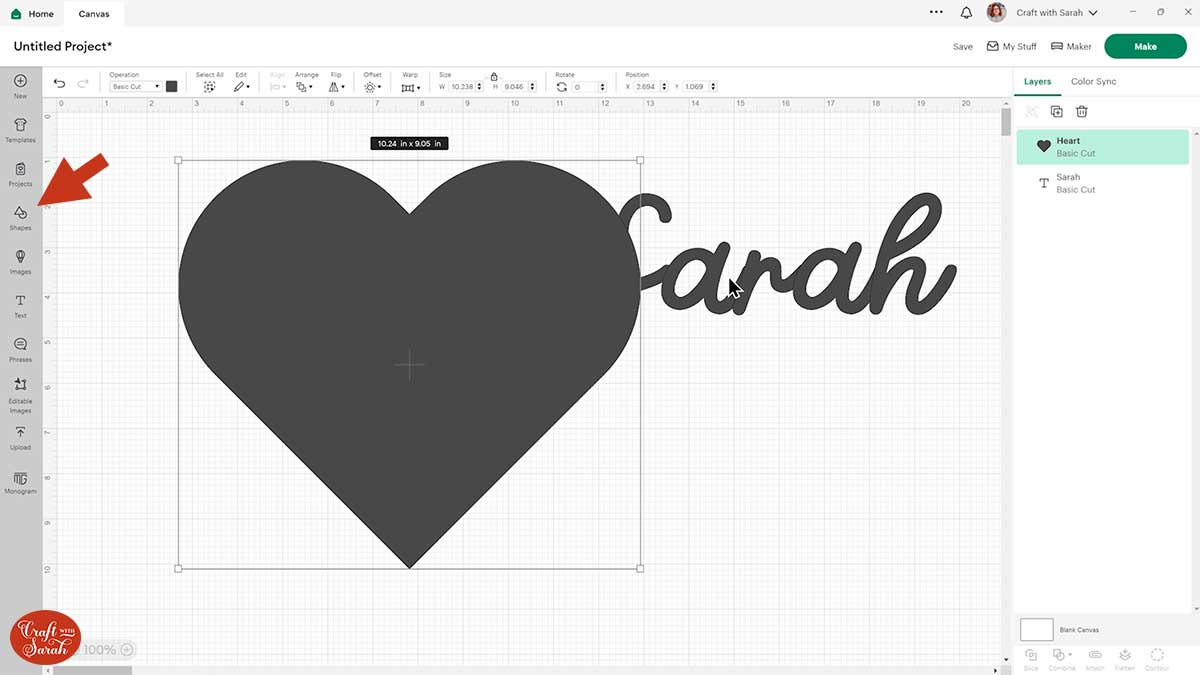
Step 2) Create a shape
Go into “Shapes” and choose a heart. Resize it a bit layer than the default size so that it’s easier to work with.
With the heart layer selected, go into “Offset” and add a thin offset so that when you see the little blue line, the gap you’ve got is about the same thickness as your text.
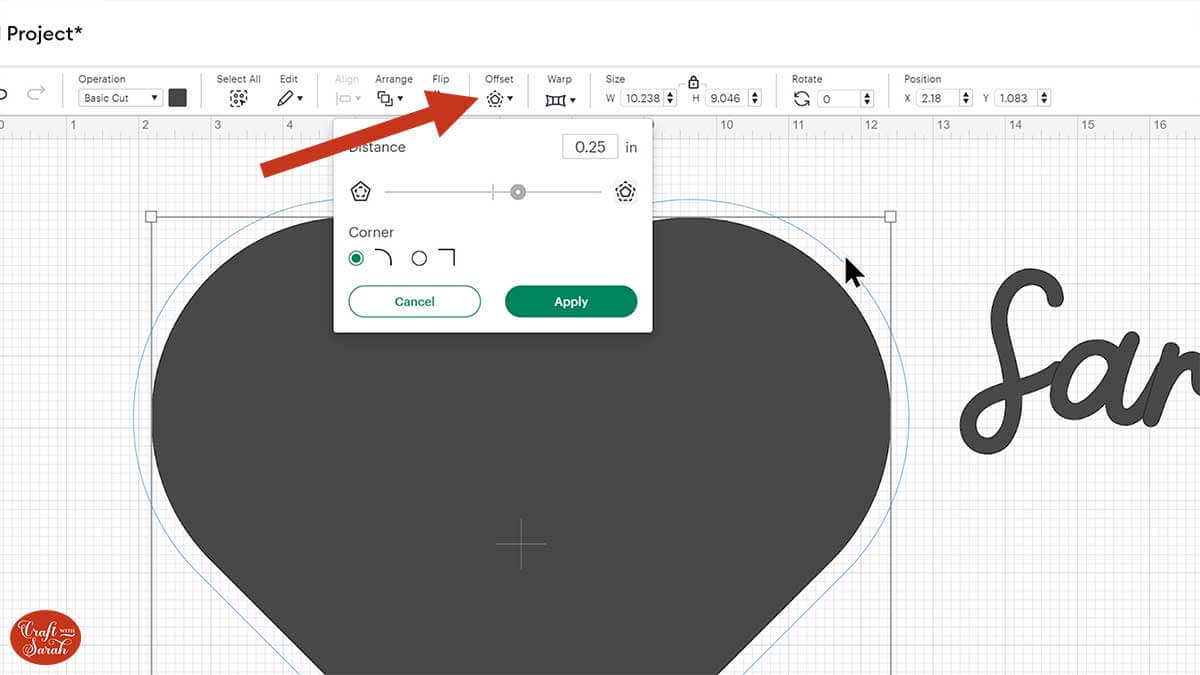
When you’re happy with the width, press Apply. This will add a larger heart shape around the existing one.
Drag a box around the two hearts to select both layers and press “Slice” down at the bottom of the layers panel.
This will “cut” the smaller heart out of the larger heart.
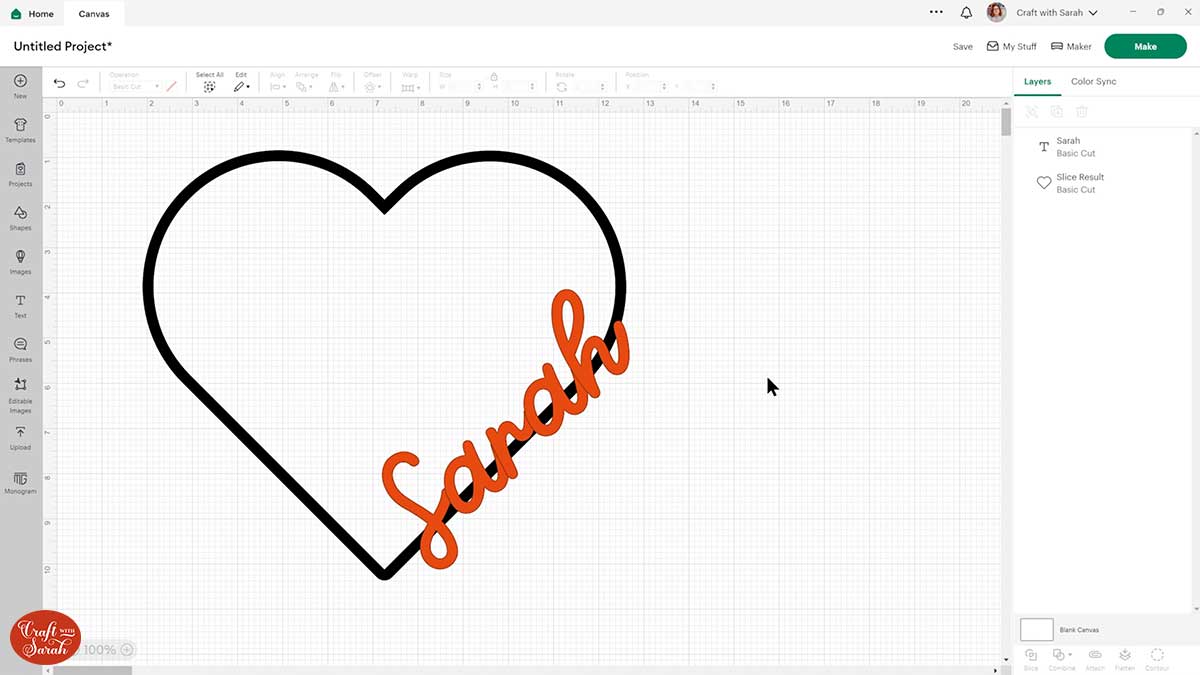
You’ll end up with three “Slice Result” layers:
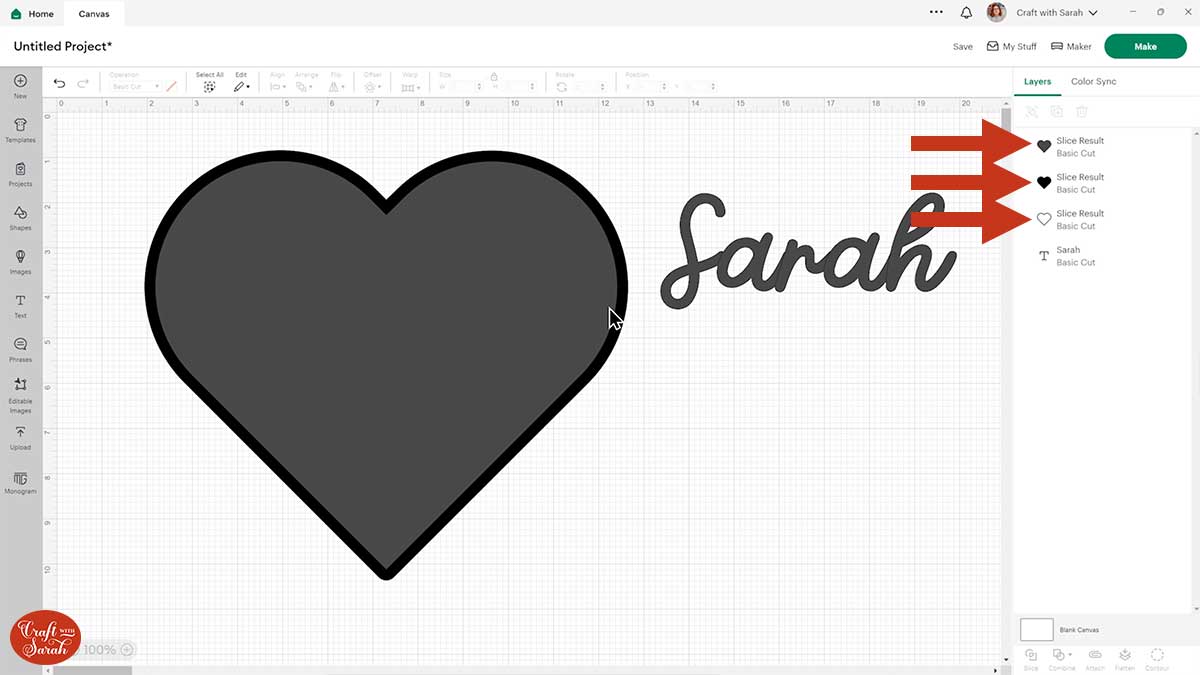
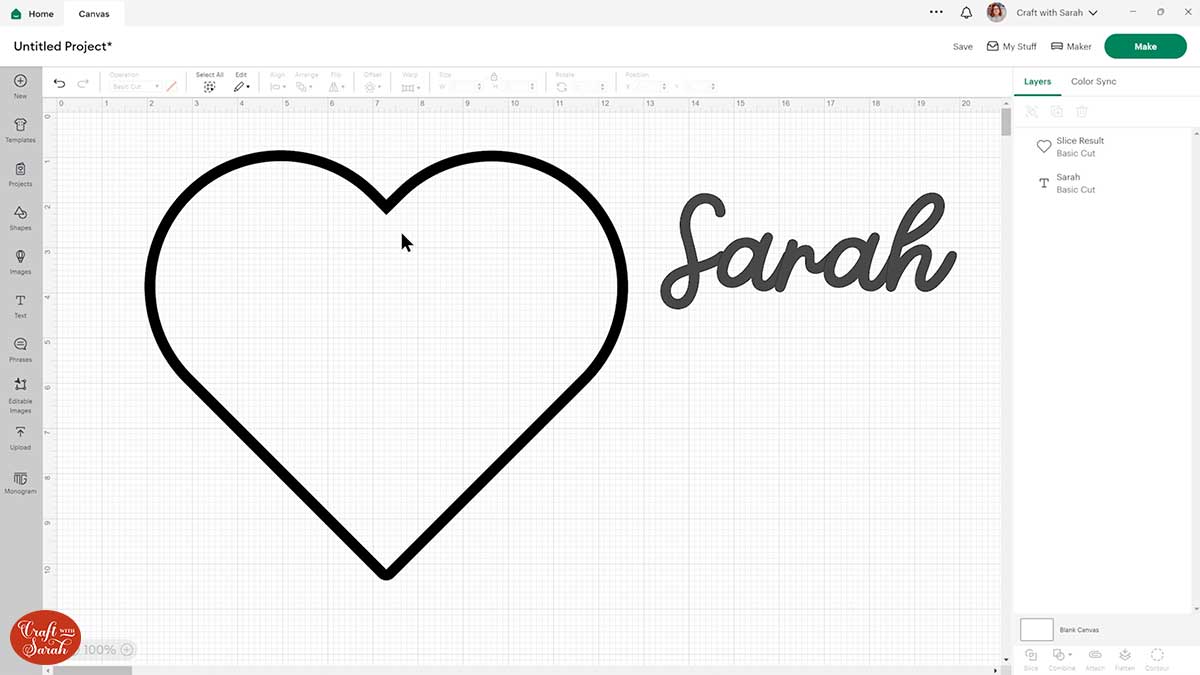
Delete the two filled-in hearts so that you are left with just the outline.
Step 3) Add the text into the shape outline
Rotate, position and size your text along one of the lines of your heart.
I’ve positioned it so that the end of the H joins up nicely with the heart to give a nice smooth line.
Change the text colour to something different from the heart colour so it’s easier to see.
Next, we will cut off all the bits of the heart that appear where we want our text so that it looks like the word is made from the outline of the heart.
Click the text and go Arrange > Bring to Front to move it on top of the heart layer, if it isn’t already.
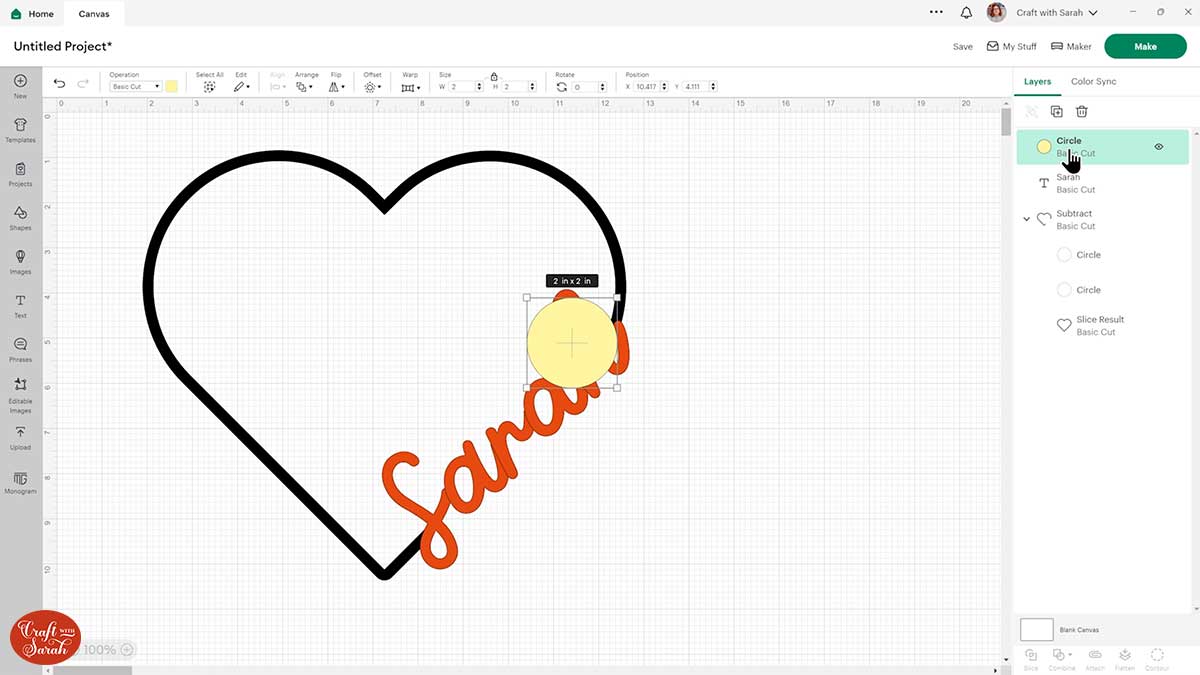
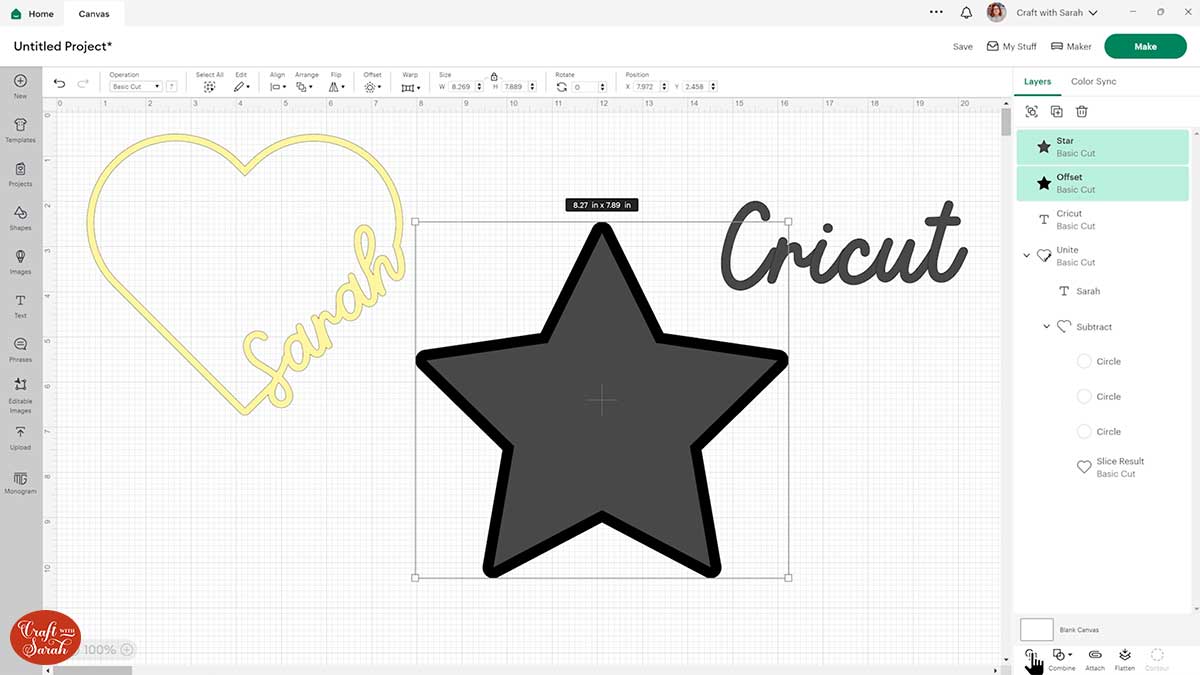
Go into shapes and choose any shape. Make it a different colour to anything on the screen so that it’s easier to see.
Position and size it so that it covers all of the bits of the grey heart that are showing between your word.
You may need to Duplicate the shape or add different ones and resize/position them so that all the grey between the letters is hidden.
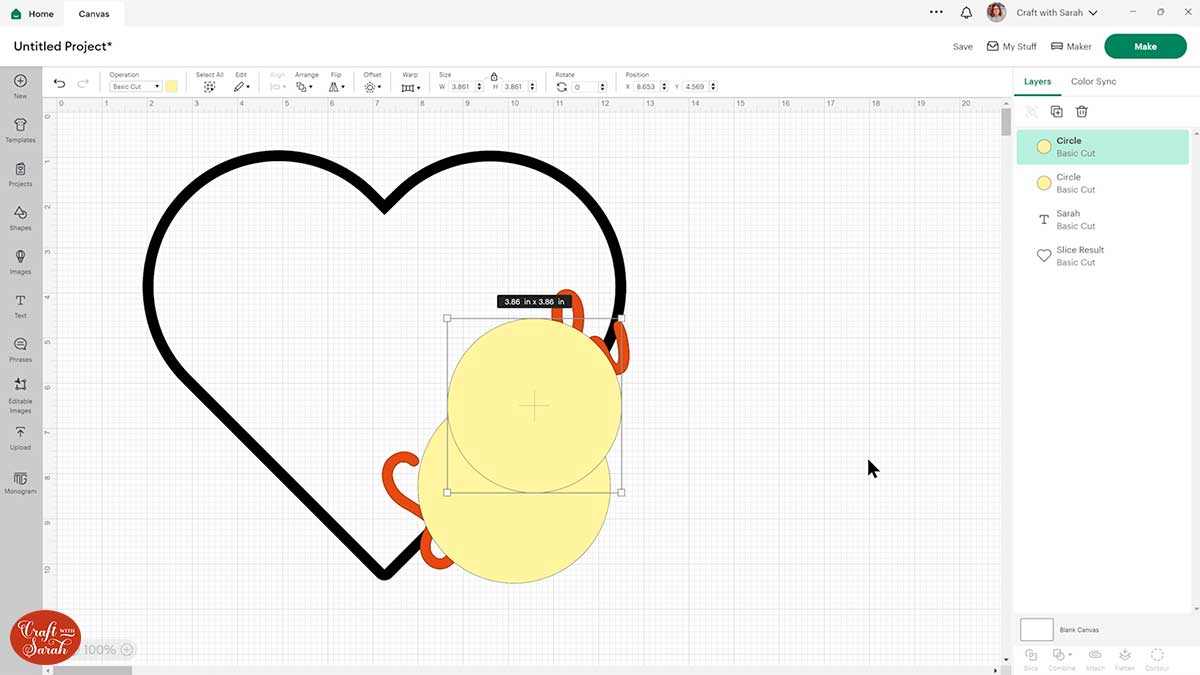
Select the new shapes and the heart outline layer and press Combine > Subtract.
This will “cut” the circles out of the heart outline.
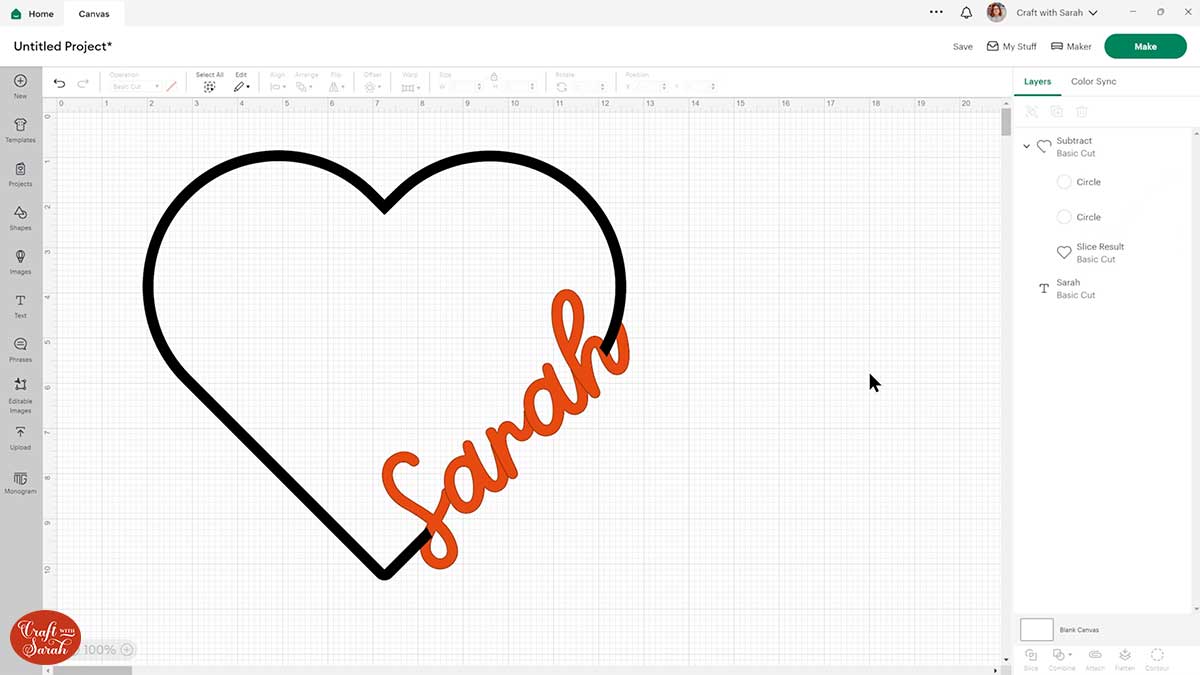
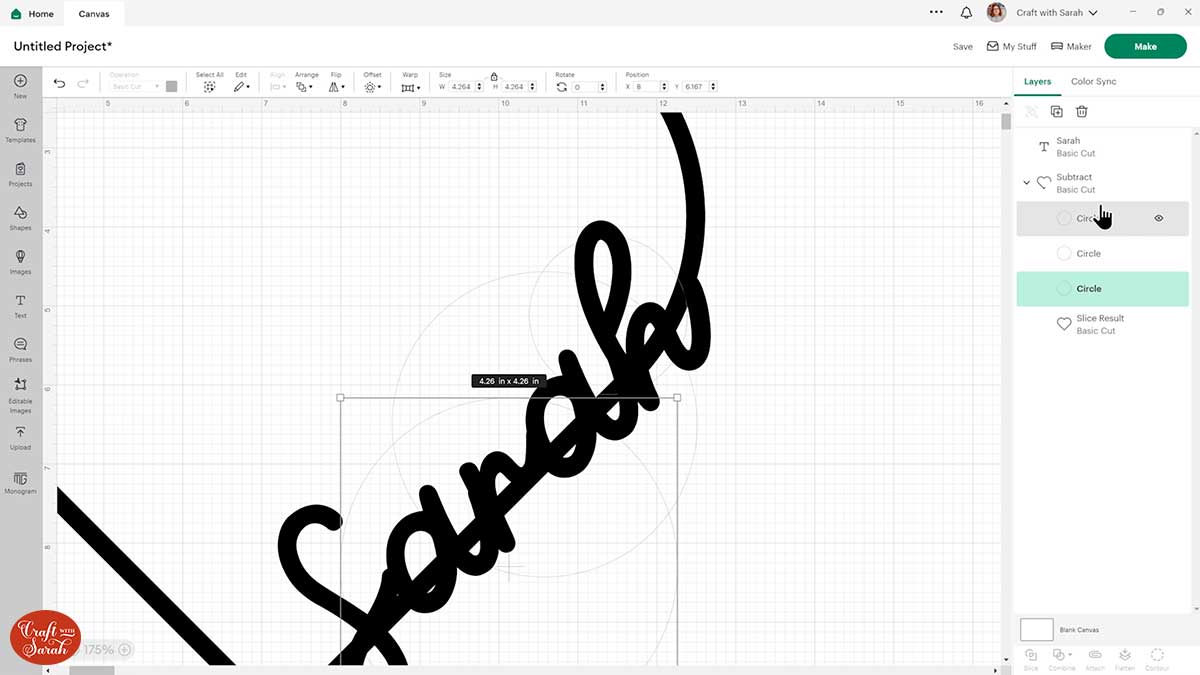
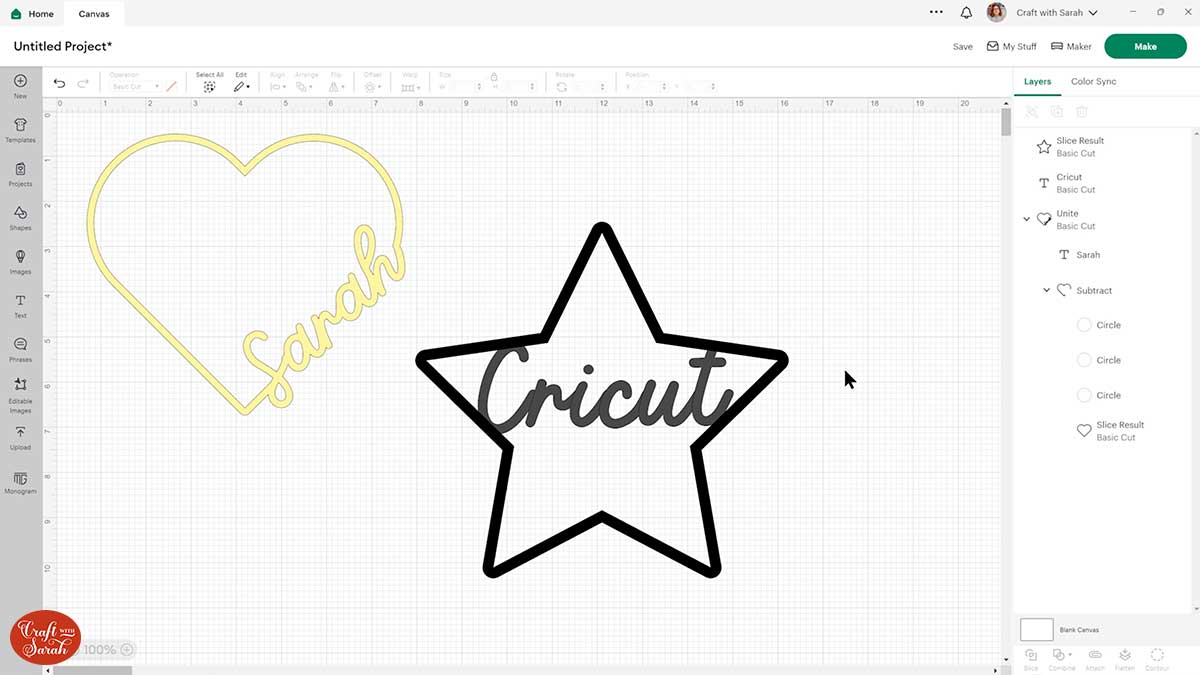
Move your text layer above the heart again to get a better idea of what it’s looking like. Select both the layers and change the colour to black so that you can see it better without the outer line.
I like it, but I’m not quite happy with the bit of the heart that’s coming out between the H. Let’s fix it!
Press undo to put your colours back.
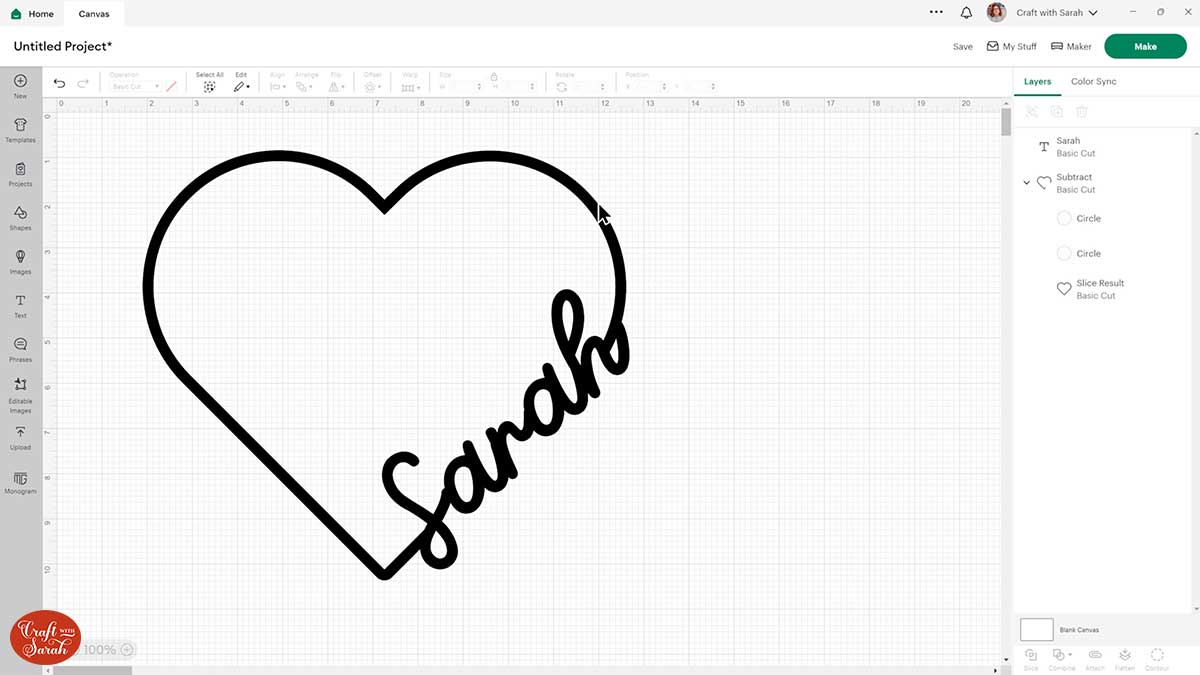
Choose another circle and follow the line of the H.
Drag the circle into the “Subtract” group.
You can tweak the parts that are cutout by clicking the circles in the layers panel and then dragging-and-dropping them about.
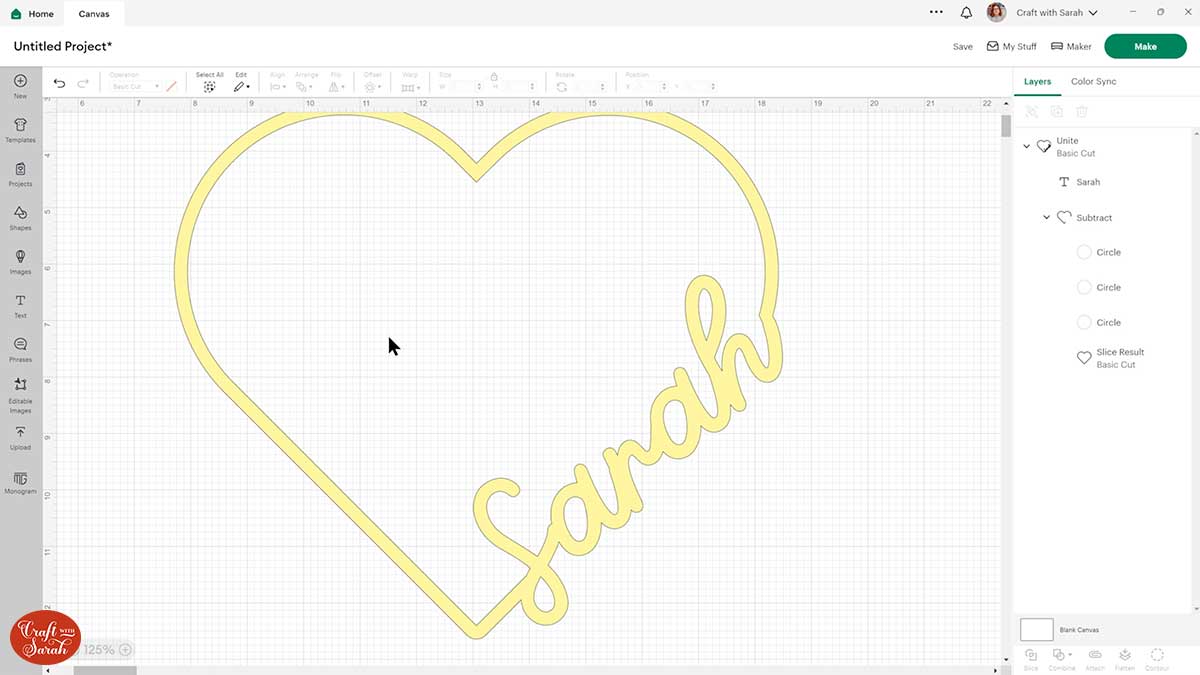
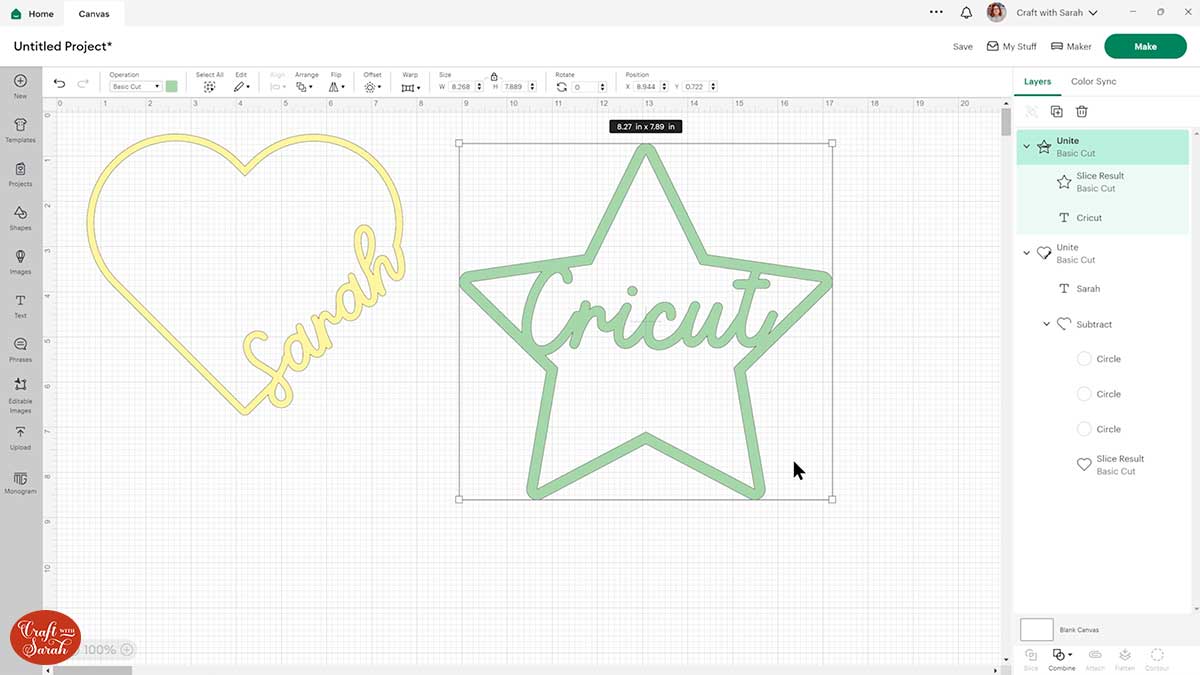
When you have finished the design, press “Select All” and then Combine > Unite. This joins the layers together so that the Cricut will cut it out as one single shape.
Check this has worked by changing the colour to something pale/light so that you can see the cut lines.
How easy was that?! Much simpler than it was a few years ago!
Part 2: Add your name into a star shape
It’s a similar process to add your name inside the middle of a shape, rather than combining it with the outline edge as we did above.
Here’s how to add a name inside a star in Cricut Design Space.
Type out your name, choose a suitable font and create a star under the “Shapes” button.
Select the star shape and click “Offset”. Give the start an offset that is a similar width to your word and press Apply.
Slice the two star layers and delete the filled-in star shapes so that you are left with just the outline.
Drag the name or word over the star and size it to fit.
Make sure that the word is touching the outline of the star on each side, but not going over the edge.
Select them both and press Combine > Unite to join the layers into one continuous shape.
Custom shapes in Cricut Design Space
I hope you enjoyed this tutorial on how to add words into shape outlines.
If you’ve been wondering “how do you put words in a heart shape”, then this should have answered all your questions!
Once you’ve tried it a couple of times, you’ll be whipping up custom designs in no time at all!
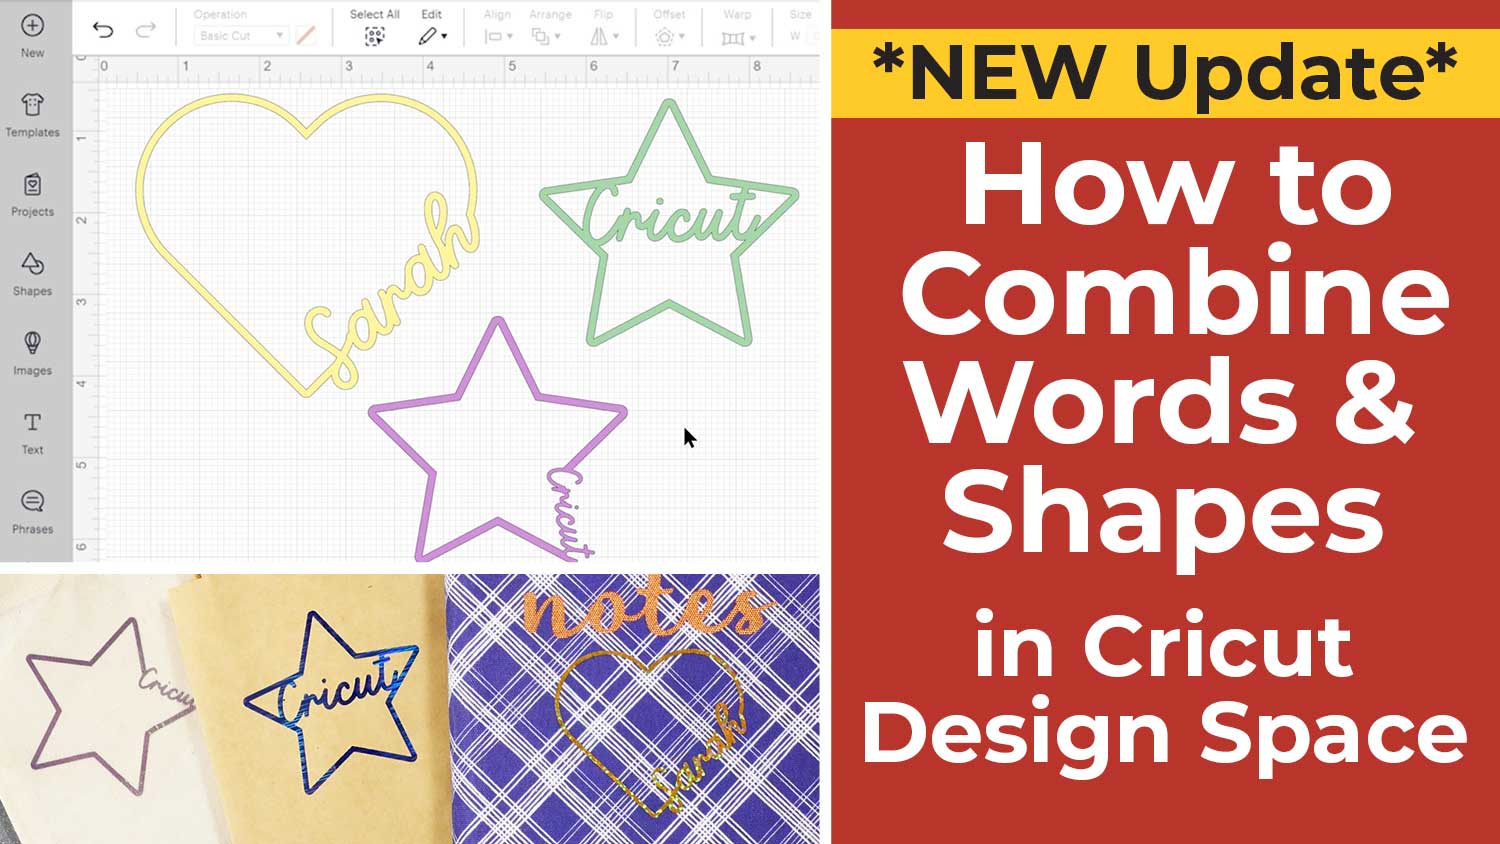
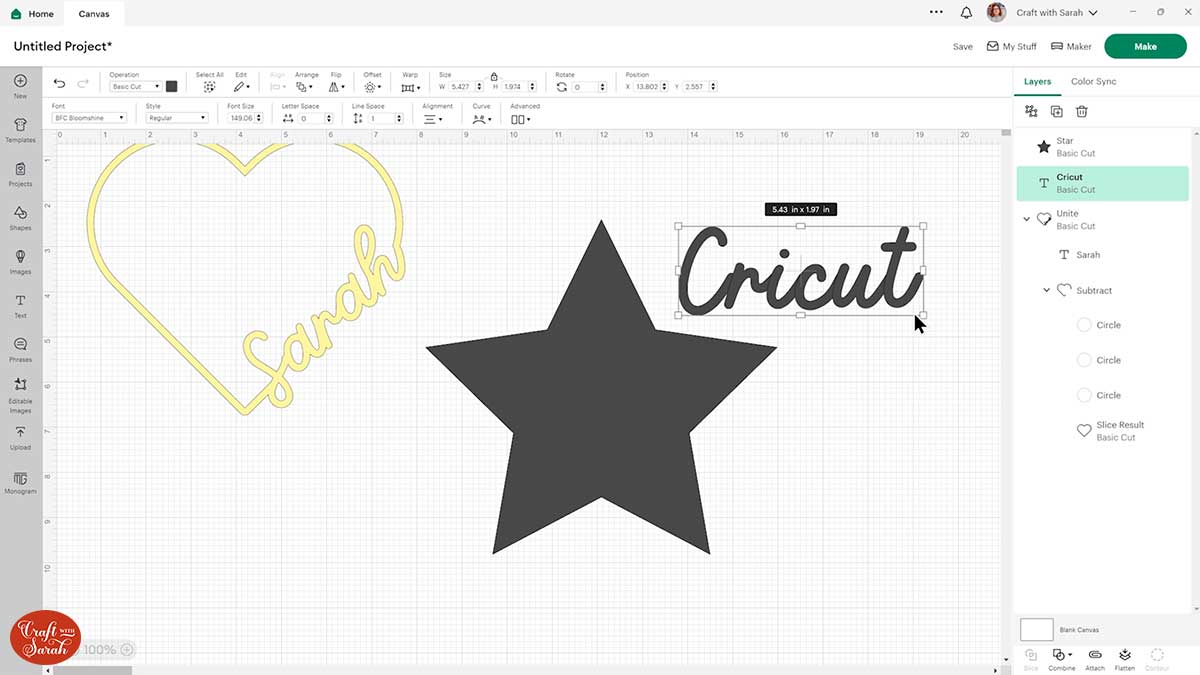
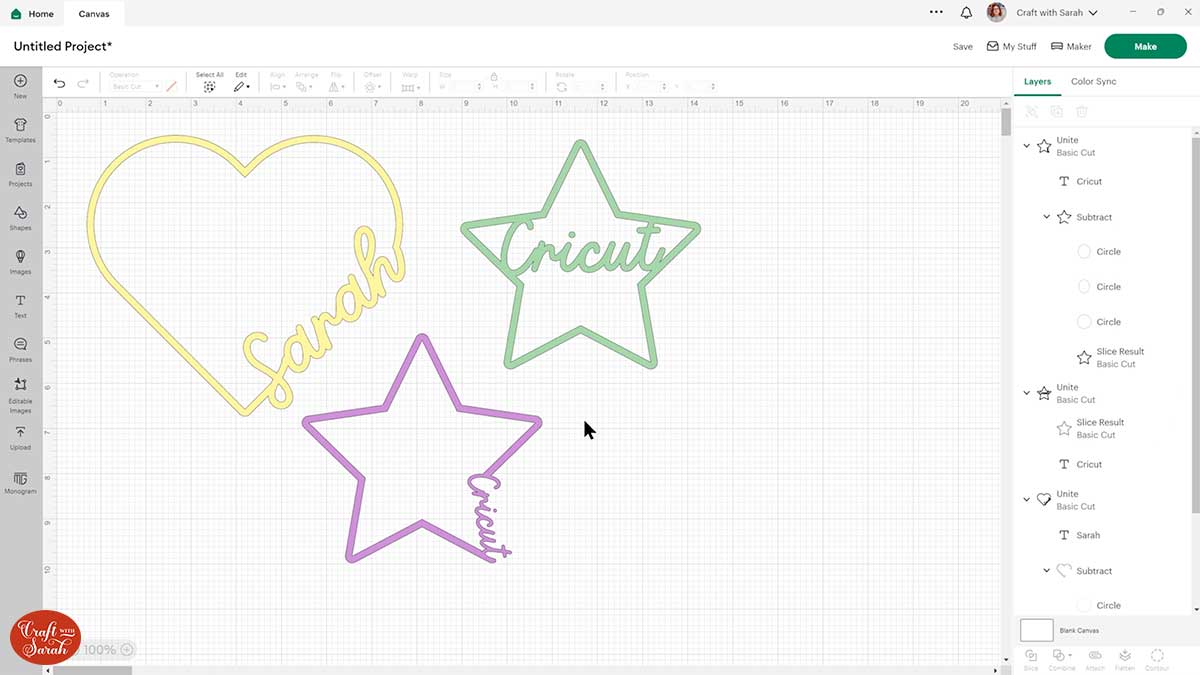
Here’s another example of how a word can be added into a shape outline, this time I put the word “Cricut” into the side of a star:
There are lots of things you can use these designs for.
For example, you could cut them from adhesive vinyl or heat transfer vinyl to add personalisation to tote bags, gift bags, clothing, notebooks and more.
Remember to check your vinyl instructions before cutting to see if you need to mirror the design.
Here’s how my name looks cut from gold holographic heat transfer vinyl.
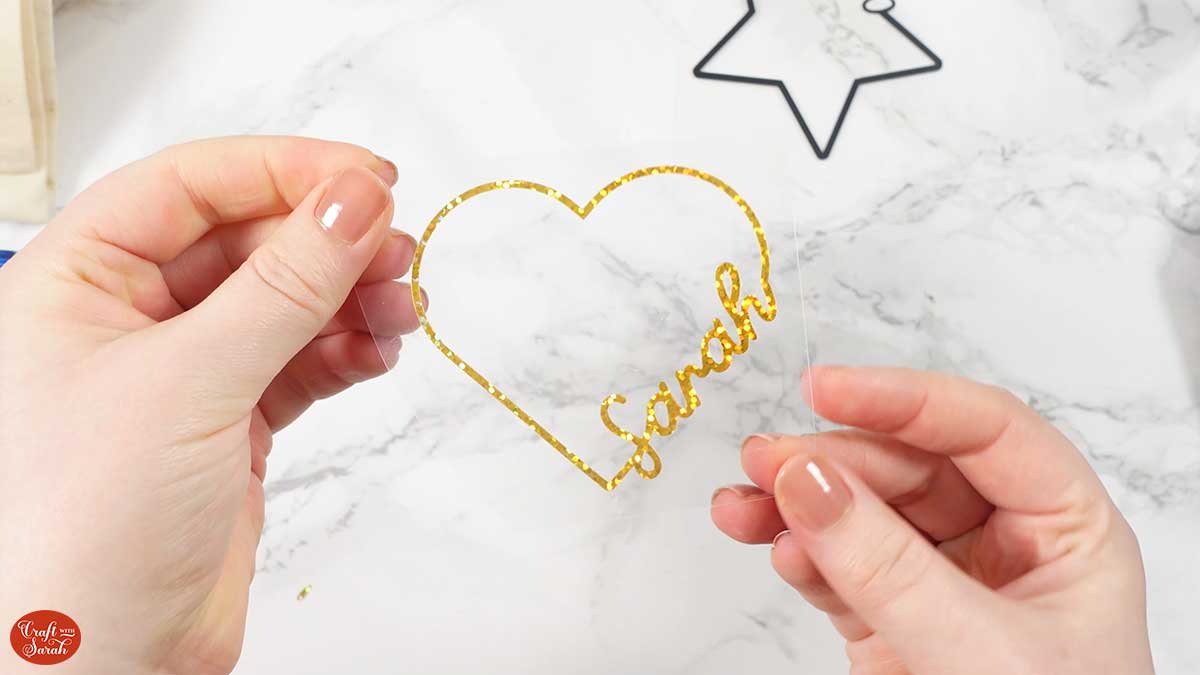
And here’s how it looks ironed on to my notebook. I’m not sure the colour I chose stands out too well – perhaps it would have been better with a thin white offset layer to iron on first, to make the gold show up a little more.

You could also cut the shapes from cardstock and use them for greetings cards or scrapbook pages for an extra personal touch.
Happy crafting,
Sarah x

