How to Design Shadow Box Backgrounds | Beautiful DIY Shadow Boxes
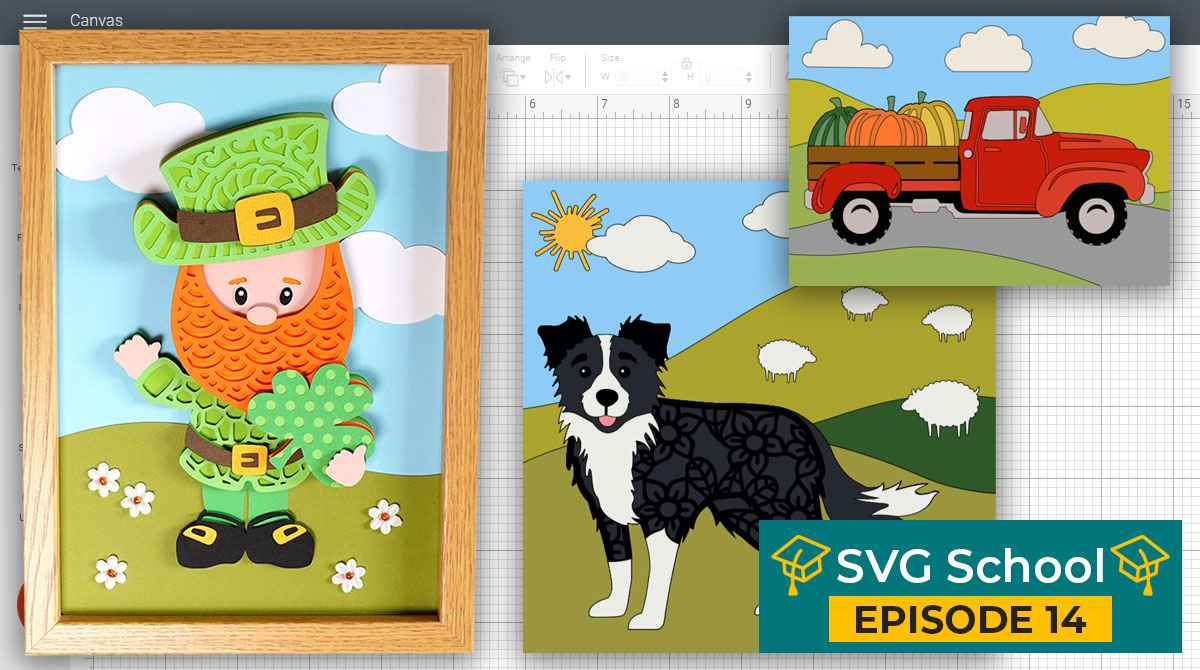
Learn how to design your own backgrounds for shadow boxes or photo frames using Cricut Design Space.
We’re going to replicate a lovely design with clouds in the sky and hills below. It’s really simple to do in Design Space, and you can use any of the Cricut Access images to do it.
[svg_school]
Please note that some of the links included in this article are affiliate links, which means that if you click through and make a purchase I may receive a commission (at no additional cost to you). You can read my full disclosure at the bottom of the page.
Design Beautiful DIY Shadow Boxes in Cricut Design Space
Shadow boxes are glass-fronted display cases that hold artwork or objects. They are the most popular way to display layered SVGs or other Cricut craft projects.
This tutorial will teach you to create your very own designs for shadow box backgrounds. Unleash your creative side, whether you’re creating a design for yourself or for a gift.
Note: This tutorial was recorded using Design Space v6.11.113. Later versions of Design Space may look different to the video/screenshots shown on this page.
Video Resources
- Free Leprechaun SVG file
- The other images are from Cricut Access
- Download Design Space
How to Design Shadow Box Backgrounds
The tutorial below shows the process of creating your own decorative backgrounds for shadow boxes or picture frames using Cricut Design Space.
Step 1) Open Design Space and let’s start making our pretty frame background
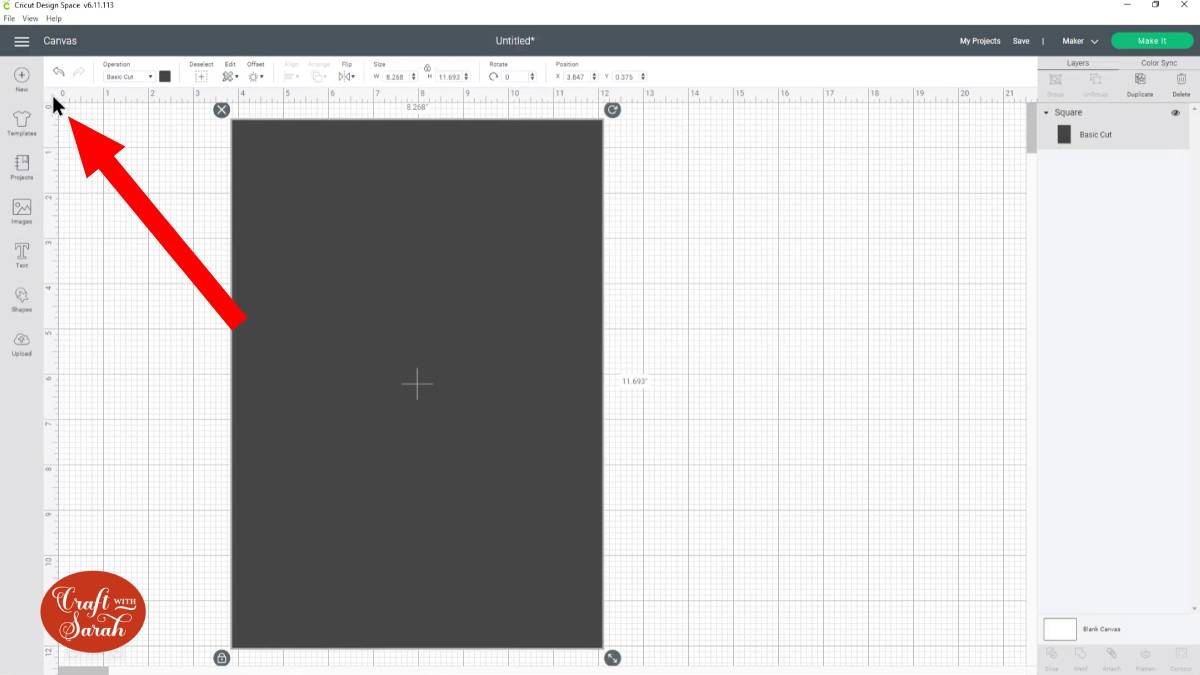
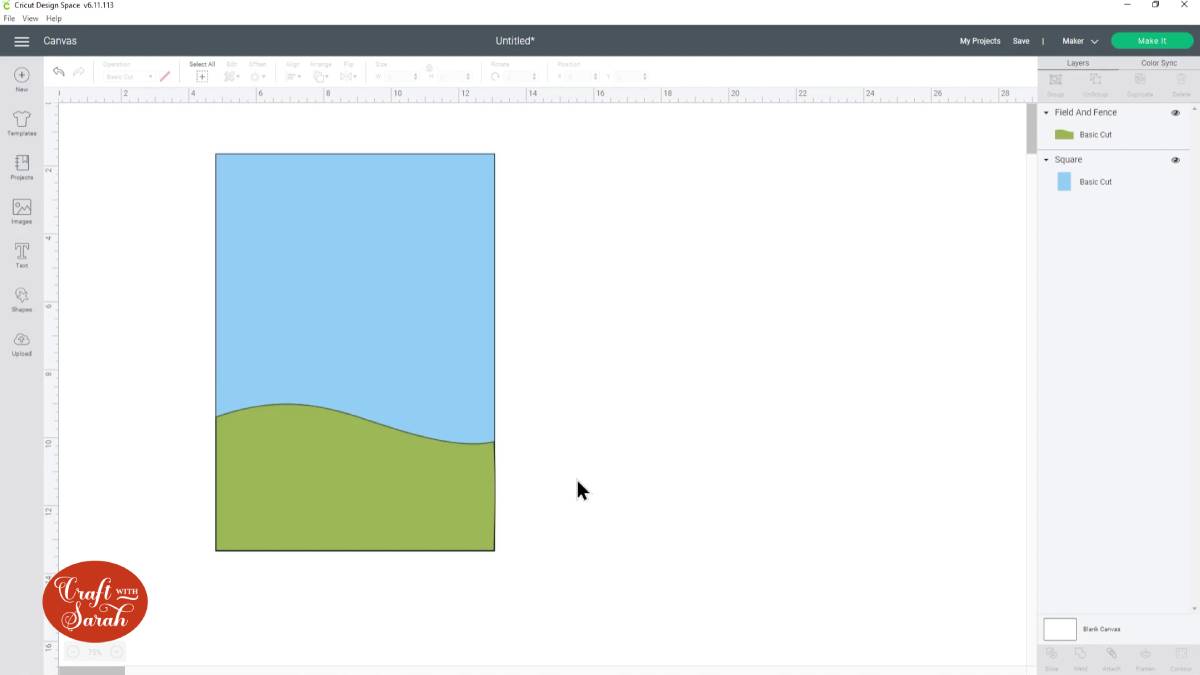
Select ‘Shapes’ and choose a square.

We’re going to make this the size of our shadow box frame so that we know how big to make the background.
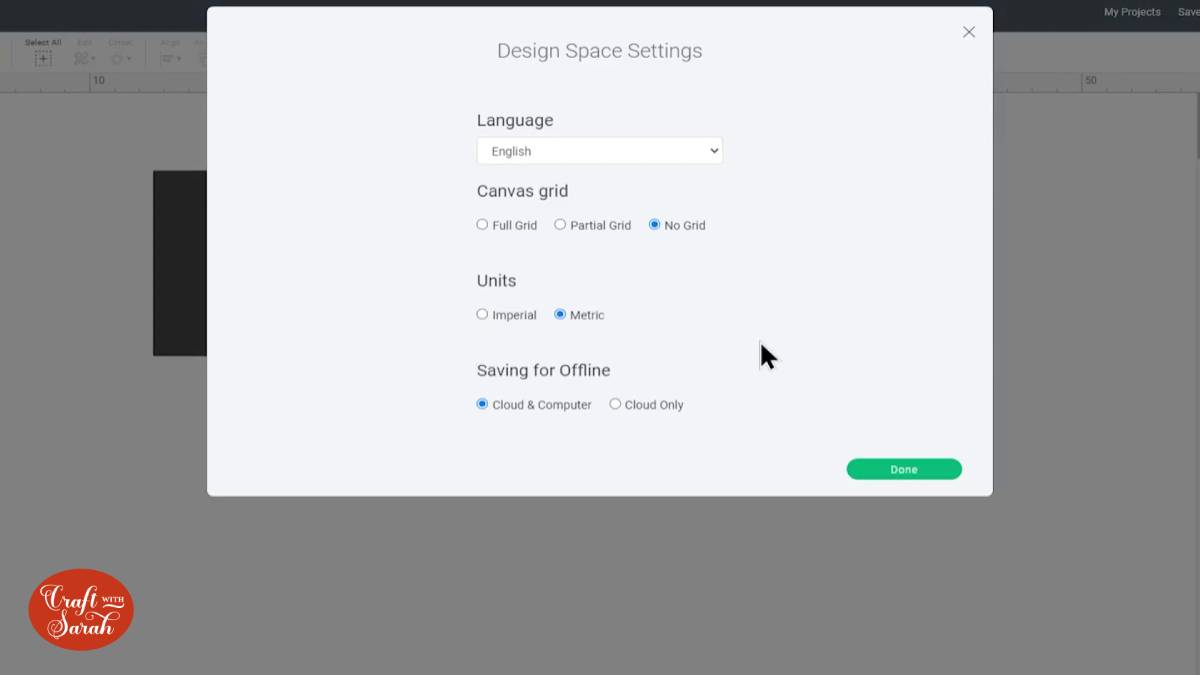
My frame is A4 size, so it will be easier for me to switch my Design Space to cm instead of inches for this part of the tutorial. If your frame is measured in inches, you can skip this step.
To switch Design Space into metric measurements, click the menu button on the top left of your screen. This is the button that looks like three little horizontal lines, one on top of each other next to where it says “Canvas”. After clicking the menu button, click the “Settings” link which appears.
Click “Metric” to switch into cm instead of inches, then click “Done”.
Once you’ve selected either imperial or metric, it’s time to resize the square to match your frame.
Click the padlock icon to open it up. This will allow you to size the width and height separately. Change the width and height to match your square.
I’m going to switch my Design Space back into inches for the rest of this tutorial as I find it easier to work in inches.
To hide the gridlines from the screen, click the little square shown by the arrow in the image below.
Step 2) Start your patterned background
The main background of the design is going to be the sky, so make it blue.
Let’s add our first image! Click on the ‘Images’ button.

The image in Cricut Access is easiest to find if you type ‘fence’ in ‘search’. The code number for the image is #M451C9.
Once you find the image you want, click ‘Add to Canvas’ to insert it onto your project.
Delete the fence by clicking it in the Layers panel and pressing Delete on your keyboard.
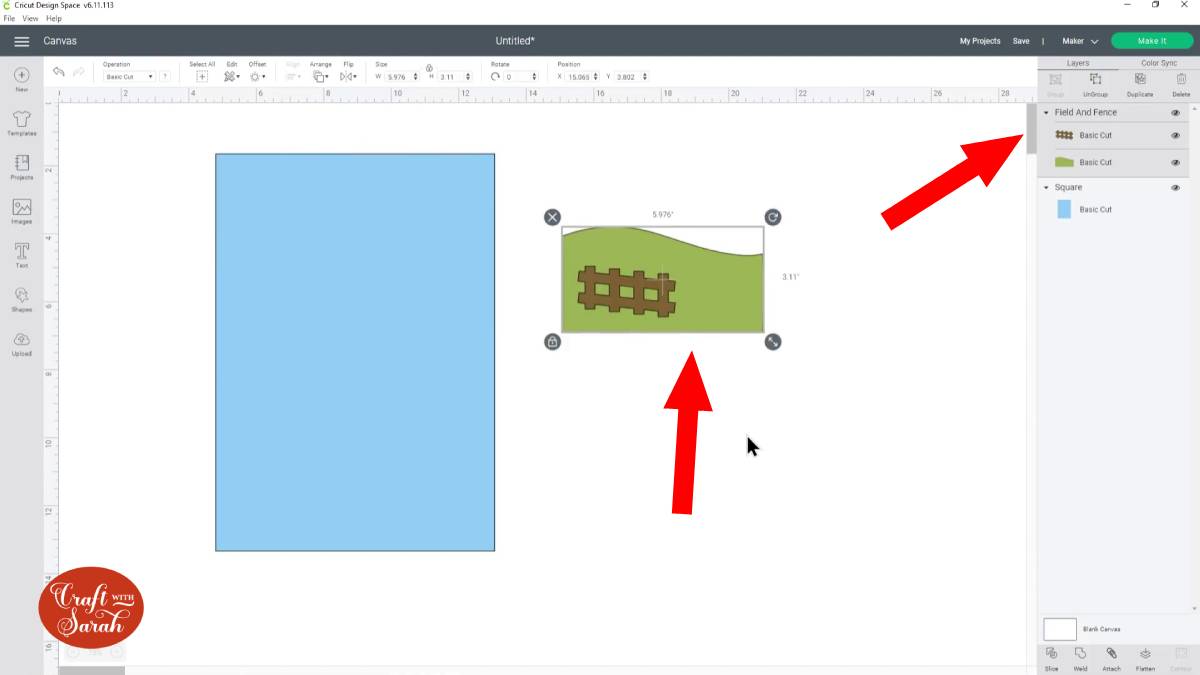
Choose the image you find right for the design. Once you find the correct image, make it the same width as the image of the sky by clicking on it, and then copy the width by dragging your mouse over the number in the width box, and then press ctrl and c if you’re on a Windows computer, or command c on a Mac, and that will copy the number.
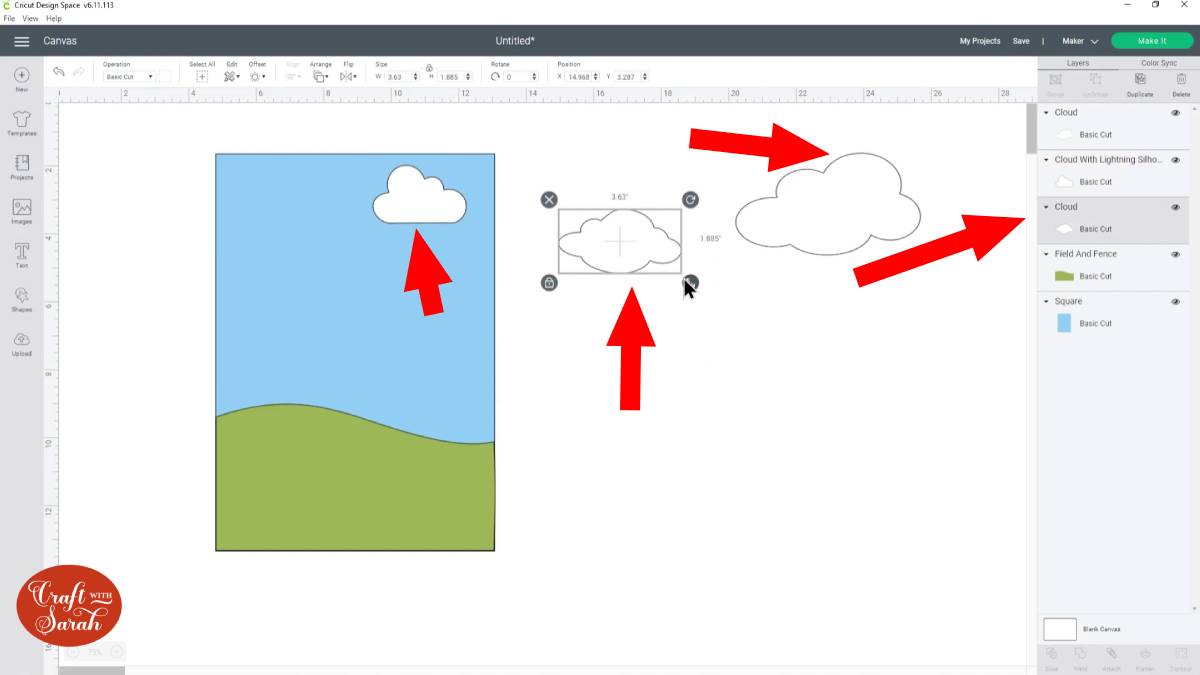
Step 3) Add some clouds
Let’s make the sky a little bit more exciting and add some clouds! Go back into “Images” and search for “cloud”.
Under “Operation Type”, choose the option “Cut Only” to help filter out the images that won’t be suitable for our project.
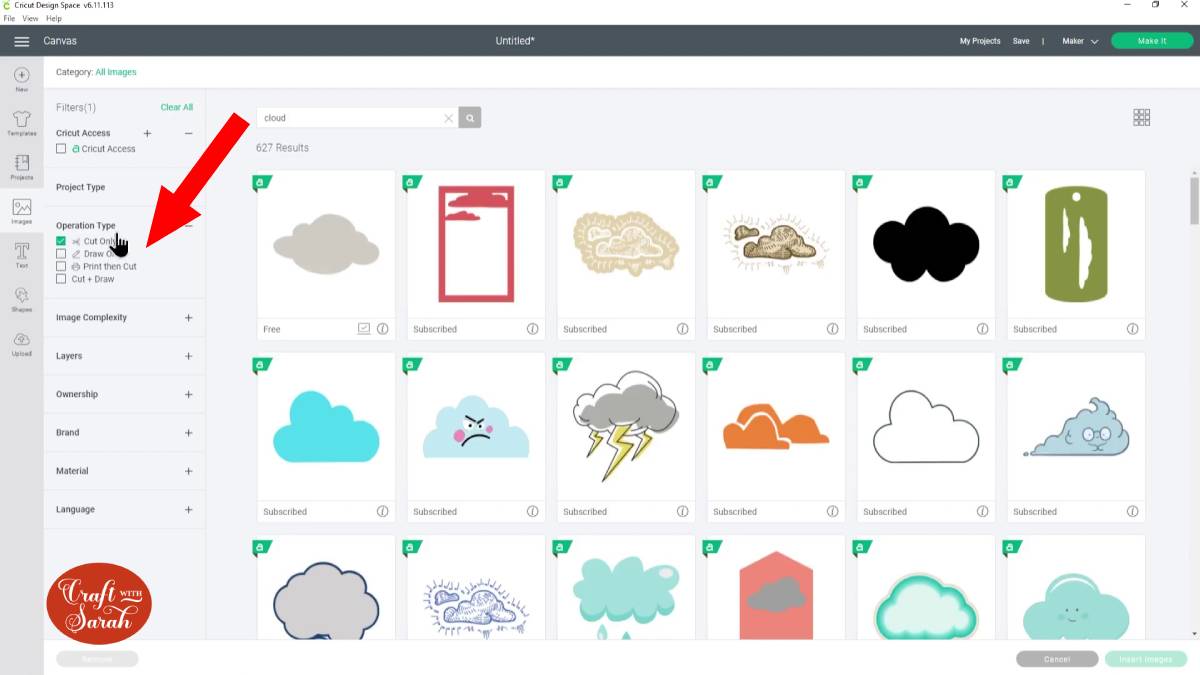
Choose a selection of cloud images and add them to your Project.
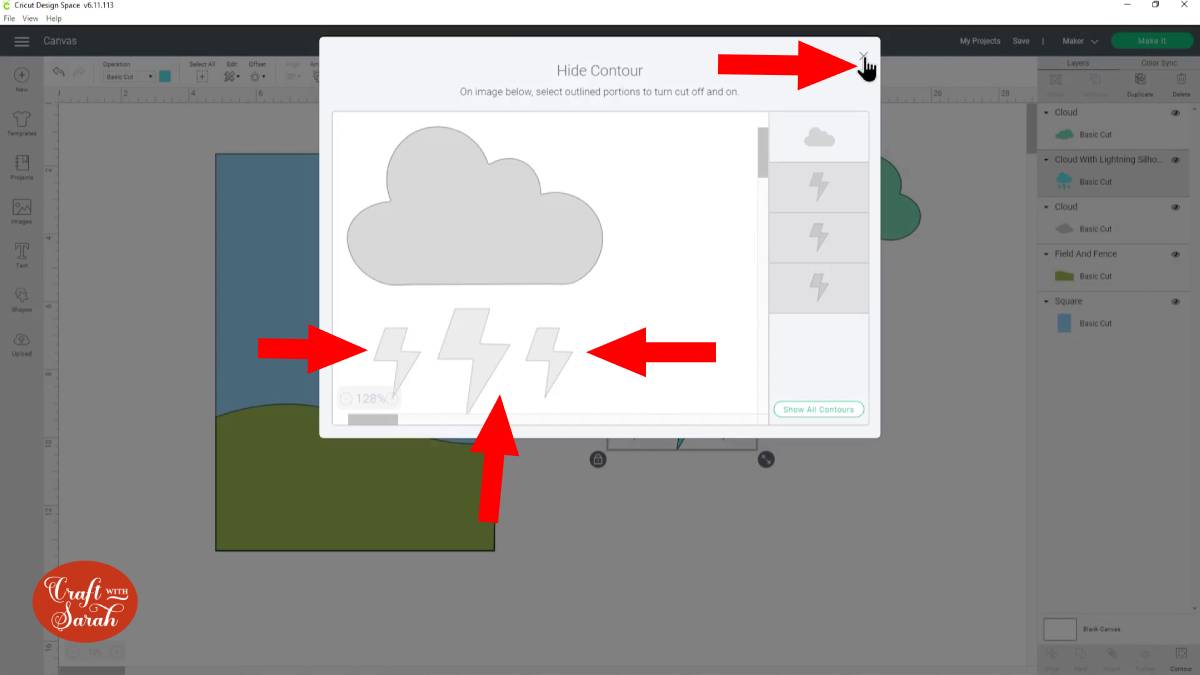
If you have got an image that you want to remove parts of, just click on it and then press ‘Contour’, which is down the bottom right of the screen.

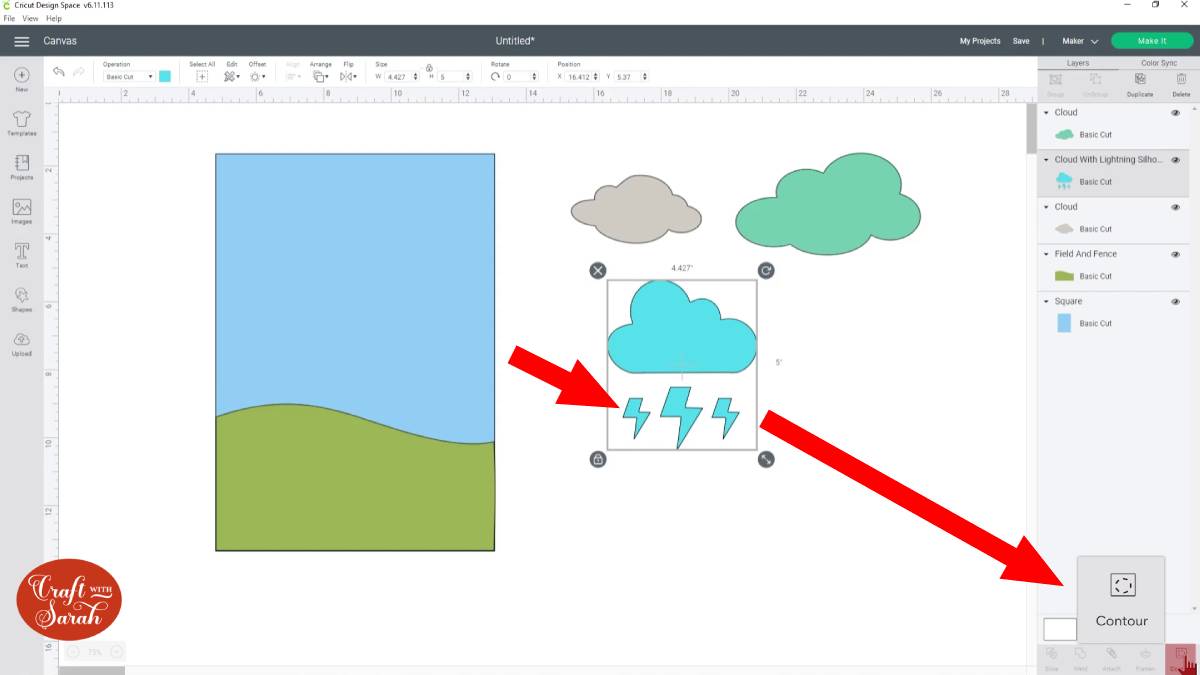
Click the bits you want to hide, then press the ‘X’ and they’ll be gone.
Resize and recolour the clouds to your liking.
Step 4) Add the layered SVG
Before you start adding too much detail, it’s a good idea to bring in the main picture that you’ll be putting on the front of the canvas.
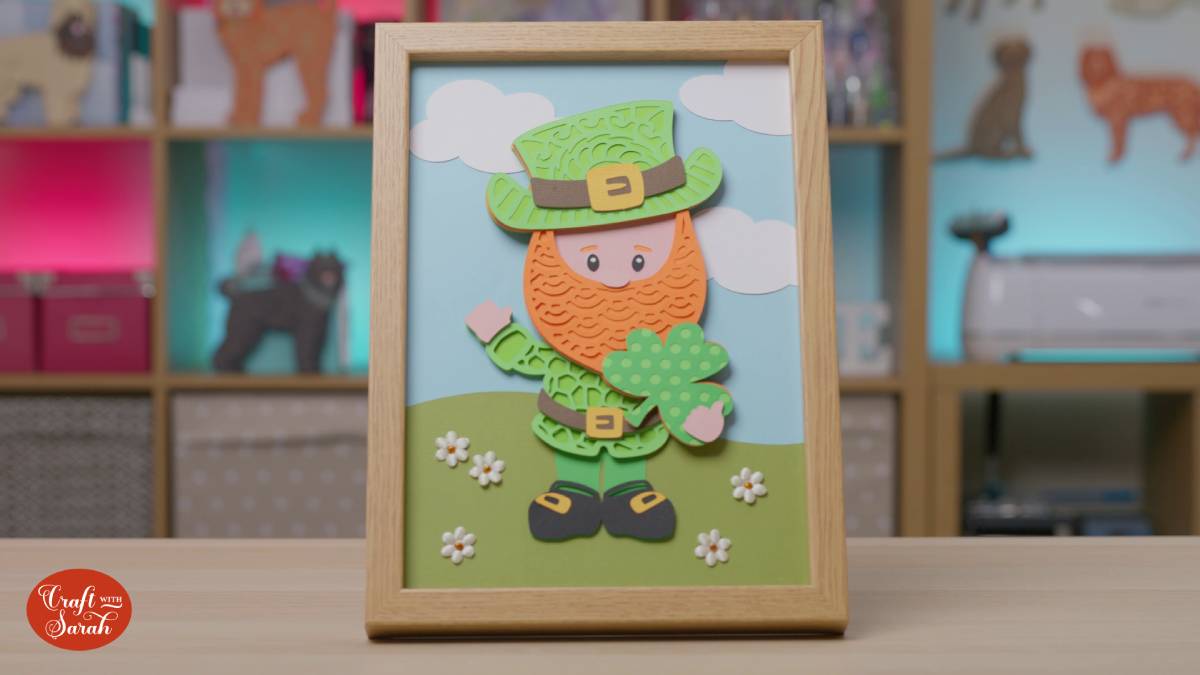
For this tutorial I’m using my free leprechaun SVG for St Patrick’s Day.
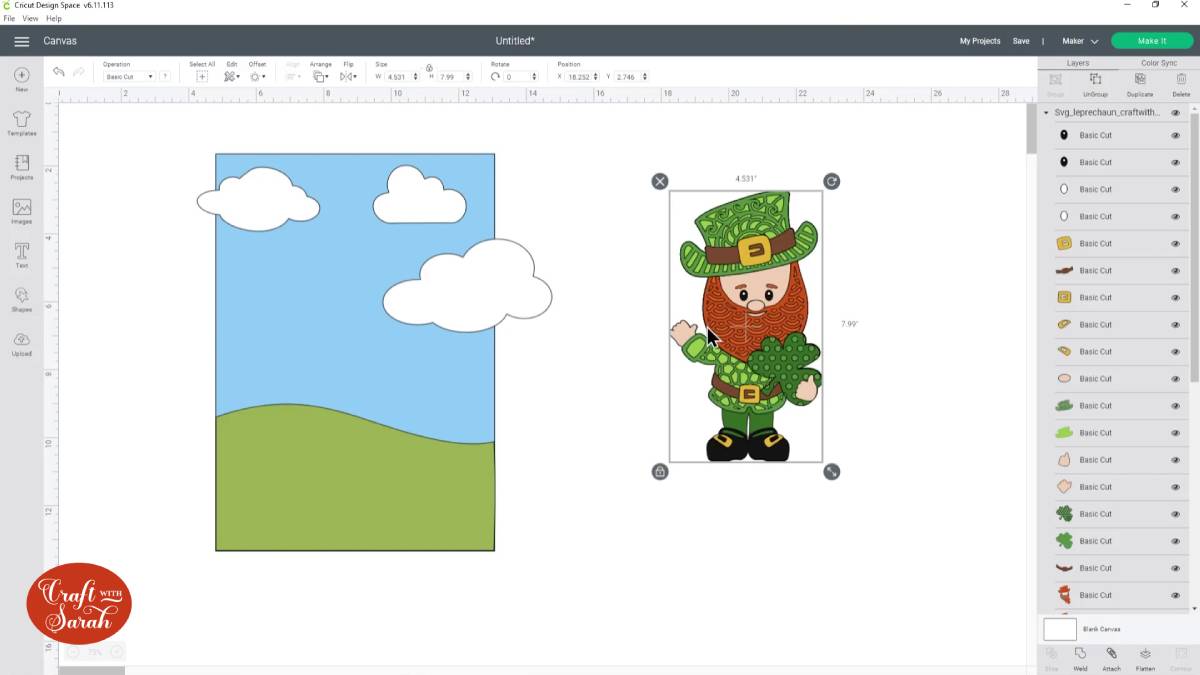
Insert the image and place it where it fits best, and size it the way you want to cut it.
If you aren’t sure how to upload my SVGs into Design Space, check out this layered SVG tutorial.
Resize the leprechaun and position him in the background. Don’t go too close to the edges of the background as they may end up being covered by the front of your photo frame.
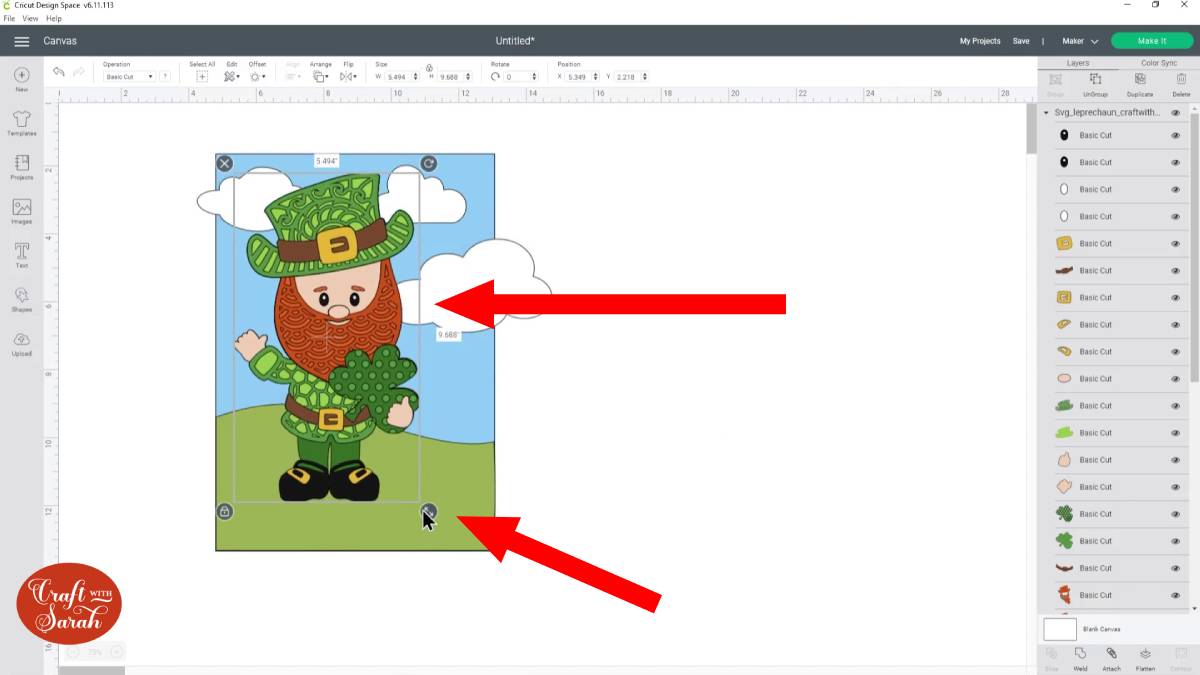
There are a couple of different ways that you could cut the clouds. You could cut out the entire clouds and then glue them onto your background layer and then just take a pair of scissors and trim them down against the line of your base card so it’ll fit in your frame.
Or, you could crop the cloud images directly in Design Space, which is what we’re going to do.
To do this, hide the leprechaun first by clicking the little “eye” icon in the layers panel.
![]()
Click on your base rectangle and “Duplicate” it three times (once for each cloud).
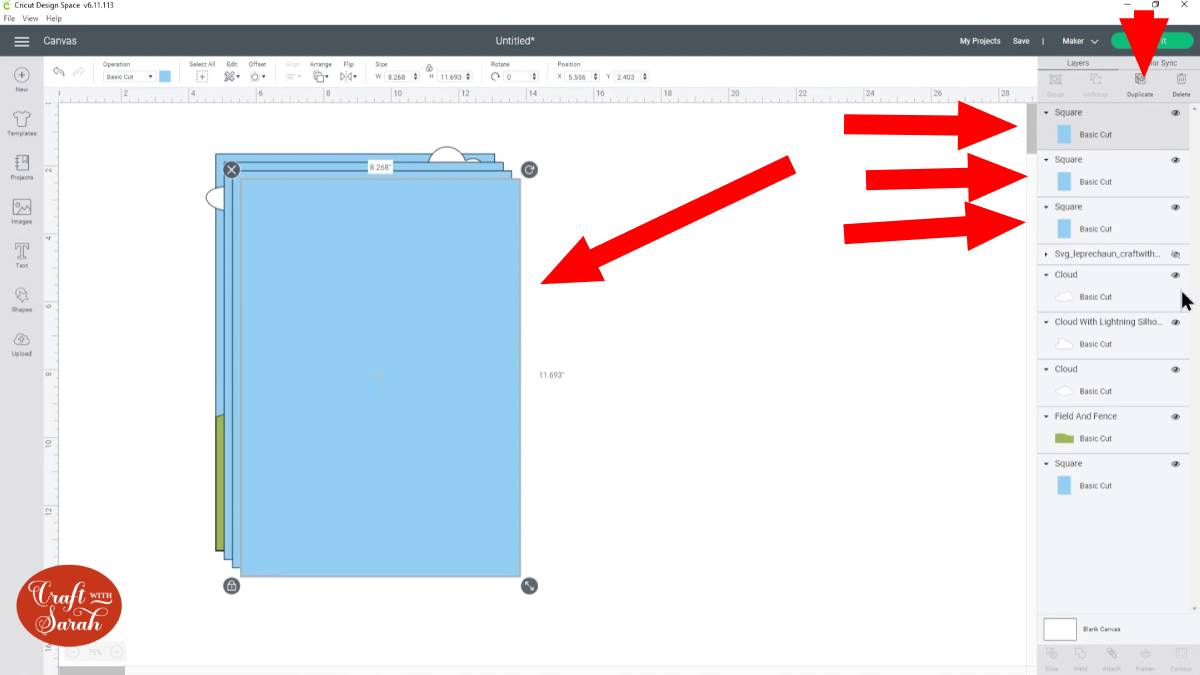
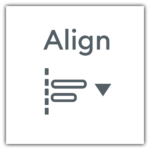
Once this is done, hide the clouds and the grass layers and then press “Select All”, “Align” and then “Center”. 
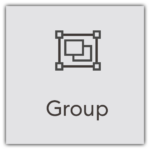
That will place all of the squares on top of each other. With all the layers selected, click “Group”. This will allow us to move them all at the same time.
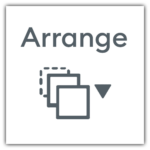
As these need to be at the bottom, choose “Arrange” > “Send to Back”.
Turn the cloud layers back on by clicking the ‘eye’ icon next to them in the layers panel.
Step 5) Moving objects around and navigating layers
Click the blue rectangles and then click ‘Ungroup’ to separate the layers again.


Recolour the duplicated rectangles so they are all different colours. This will make it easier to see what we are doing for the next few steps.
Click the first cloud layer in your layers panel, press ‘shift’ on your keyboard and choose the top rectangle.
With both of those selected, click “Slice” at the bottom of the Layers panel.
That will cut the shapes out from each other and you’ll end up with several “Slice Result” layers in the layers panel. Remove the ones you don’t need by selecting them and pressing “Delete” on your keyboard.
You want to keep the white cloud that’s covering your background rectangle and delete the other “Slice Result” layers.
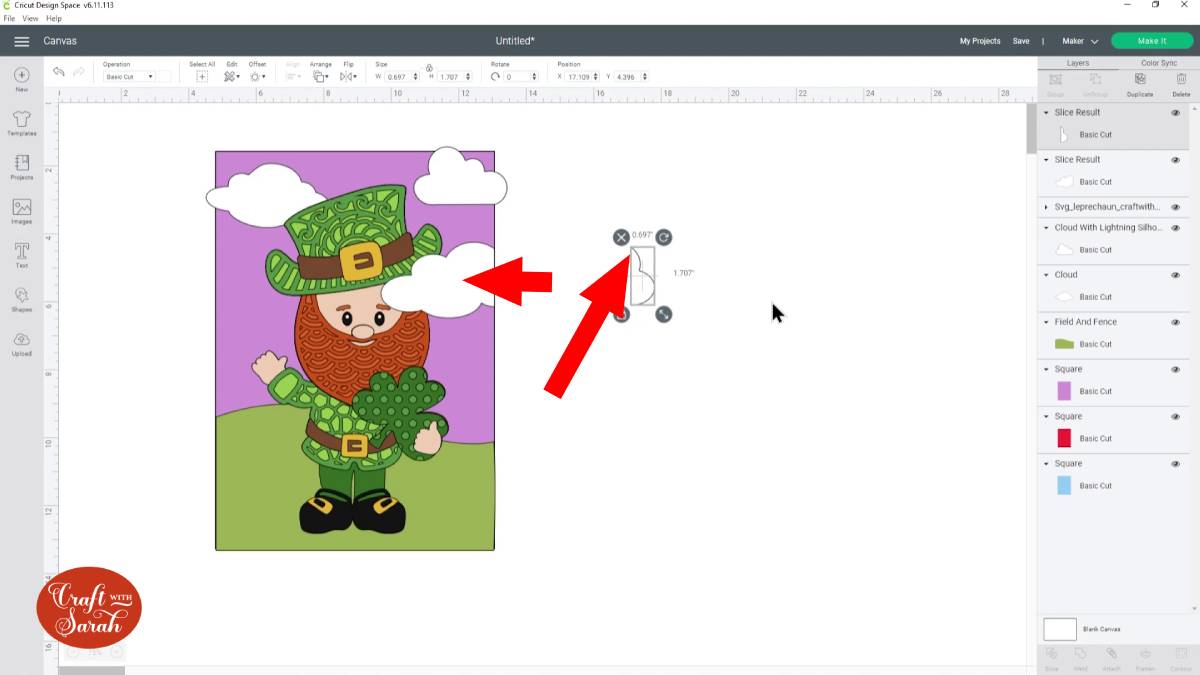
Follow the same steps with the other two clouds.
After you have Sliced all the clouds, click-and-drag the leprechaun layer to the top of the layers panel, so it’s back above the clouds.
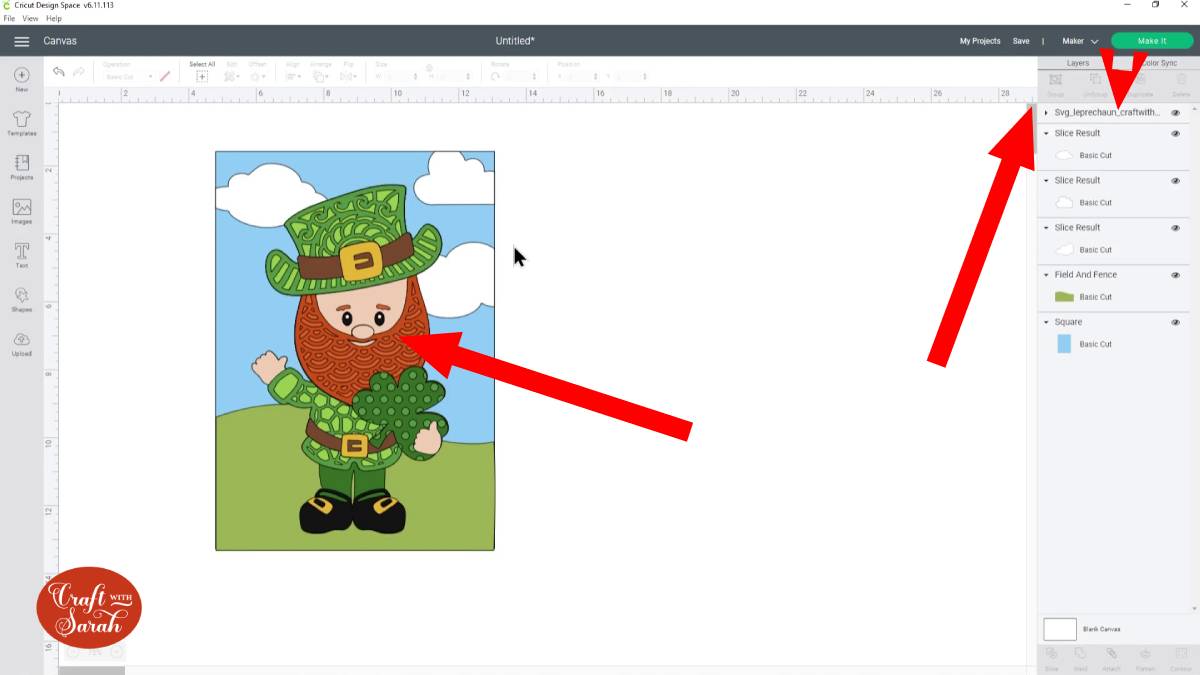
This is now almost ready to cut, we just need to check the colours of all the different layers.
Step 6) Check the layer colours
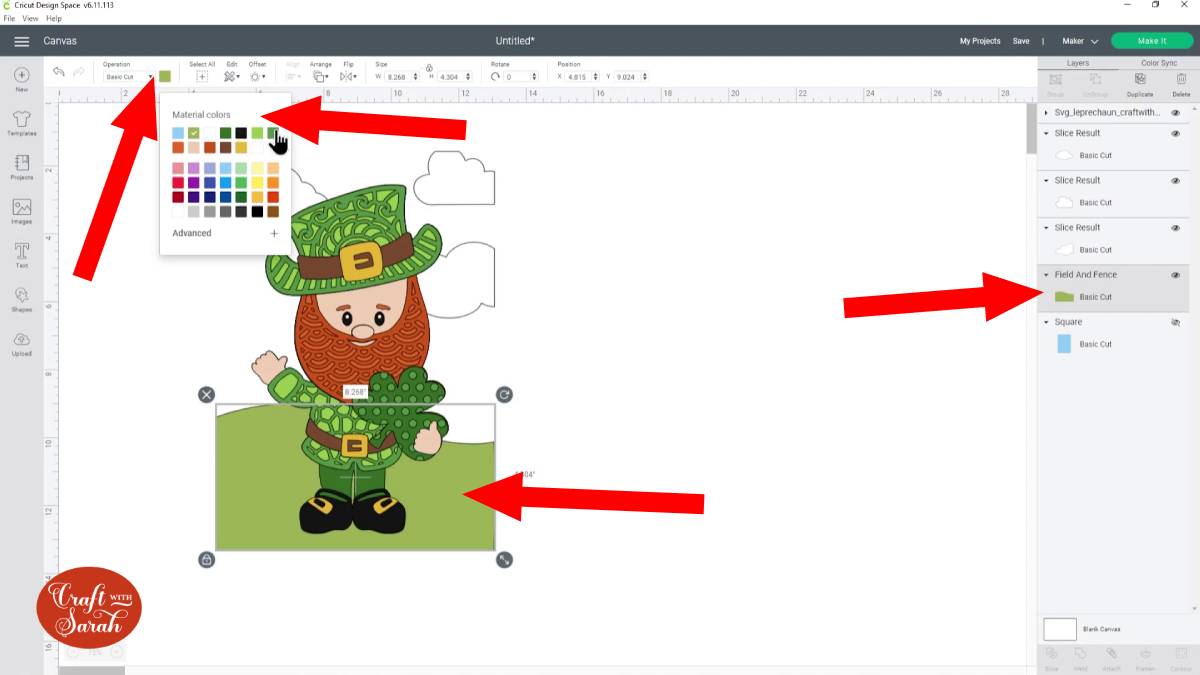
One last thing to change is the colour of the grass. The leprechaun has quite a few different shades of green, and at the moment the grass is another shade on top of that. I don’t have that many shades of green card, so I need to make the grass the same green as one of the leprechaun colours.
Click the grass layer and then go into the “Colour” drop down. This will show you all the colours that you’ve already used in your design under the “Material Colors” heading.
Choose a different green from the project to change the grass to.
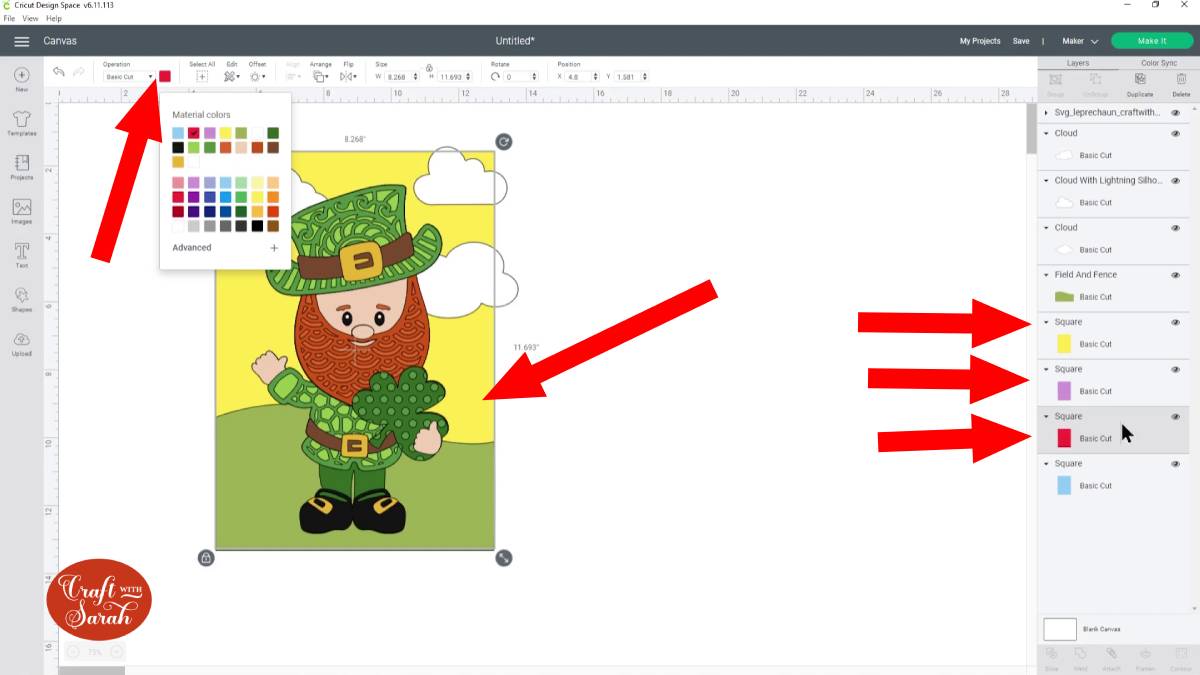
Another way to check the colours that are being used in the project is by clicking the “Color Sync” link underneath where it says “Make It”.
This shows all the layers arranged into their individual colours.
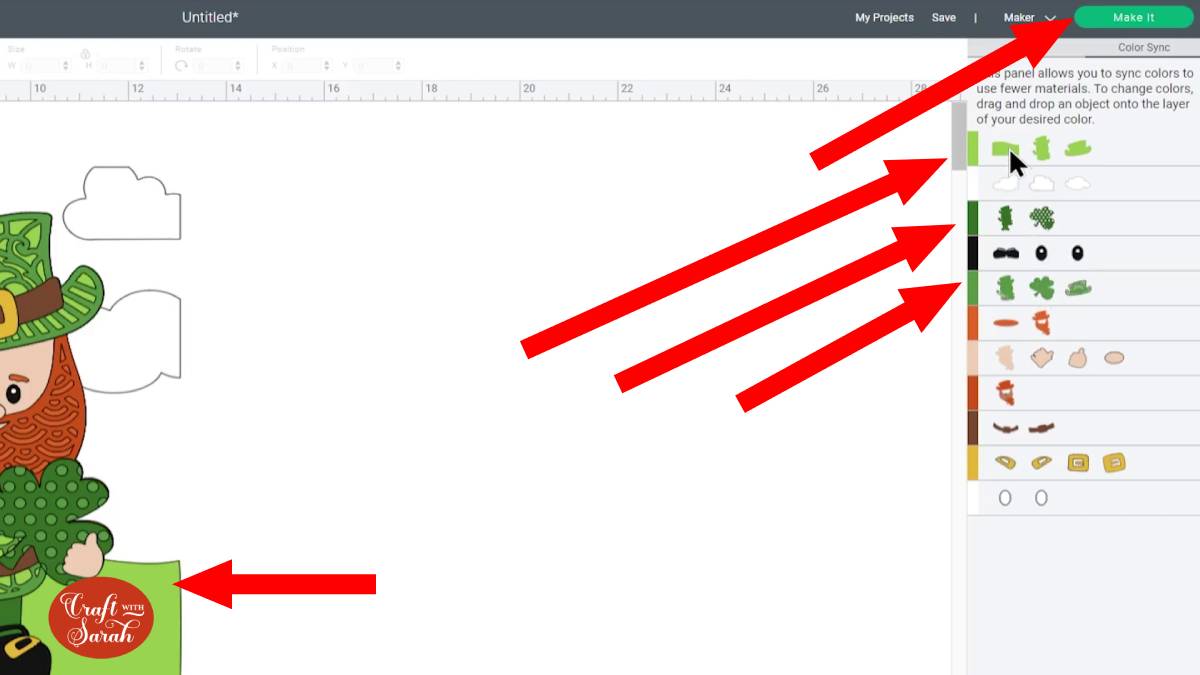
I love the Colour Sync tool because it makes it easy to see if there are any “improvements” we can make to the colours so that it will cut on less mats.
For example, on the image above clouds are a slightly different white to the eyes of the leprechaun which means the Cricut will split them into two separate mats when I go to cut it.
I want to cut them from the same sheet of card, so to fix it, click-and-drag the eyes onto the colour of the clouds to recolour them.
Step 7) Finishing and saving your project
Our design is now ready to cut – woohoo!
I am not going to cut the blue rectangle because it’s A4 sized and my paper is already A4 size so it doesn’t need cutting. If this is the same case for you, hide the background rectangle by clicking the eye icon next to it in the layers panel.
Save your Project and then click “Make It” on the top-right of the screen.
Follow the instructions to cut the Project with your Cricut machine.
Once it is cut out, glue together the blue A4 card, the white clouds, and the green hill. Don’t use foam pads as you want it to still be nice and flat for when you stick the layered design.
My favourite glue to use on paper craft projects is Collall All Purpose Glue.
It’s SO good because it doesn’t “warp” or bend the card stock as some glues do. You can use as much of it as you want, and the card stays perfect – and it dries perfectly clear too!
To make it even easier to apply glue to layered card projects, I highly recommend getting some of these needle tip applicator bottles to put the glue into.
Finally, assemble the layered design and glue it onto the background.
I hope you enjoyed this video on how to design your own backgrounds in Cricut Design Space. Now that you know the basics of arranging your images and cropping them to fit the size of your frame, the possibilities you’ve got for creating your own custom backgrounds truly are endless!
You can add more layers, more colours or more details to your backgrounds to make them as detailed and exciting as you want.
Here is another background that I designed for my free pumpkin truck SVG.

[svg_school]
Happy crafting,
Sarah x

