Cricut Design Space Updates: August 2025
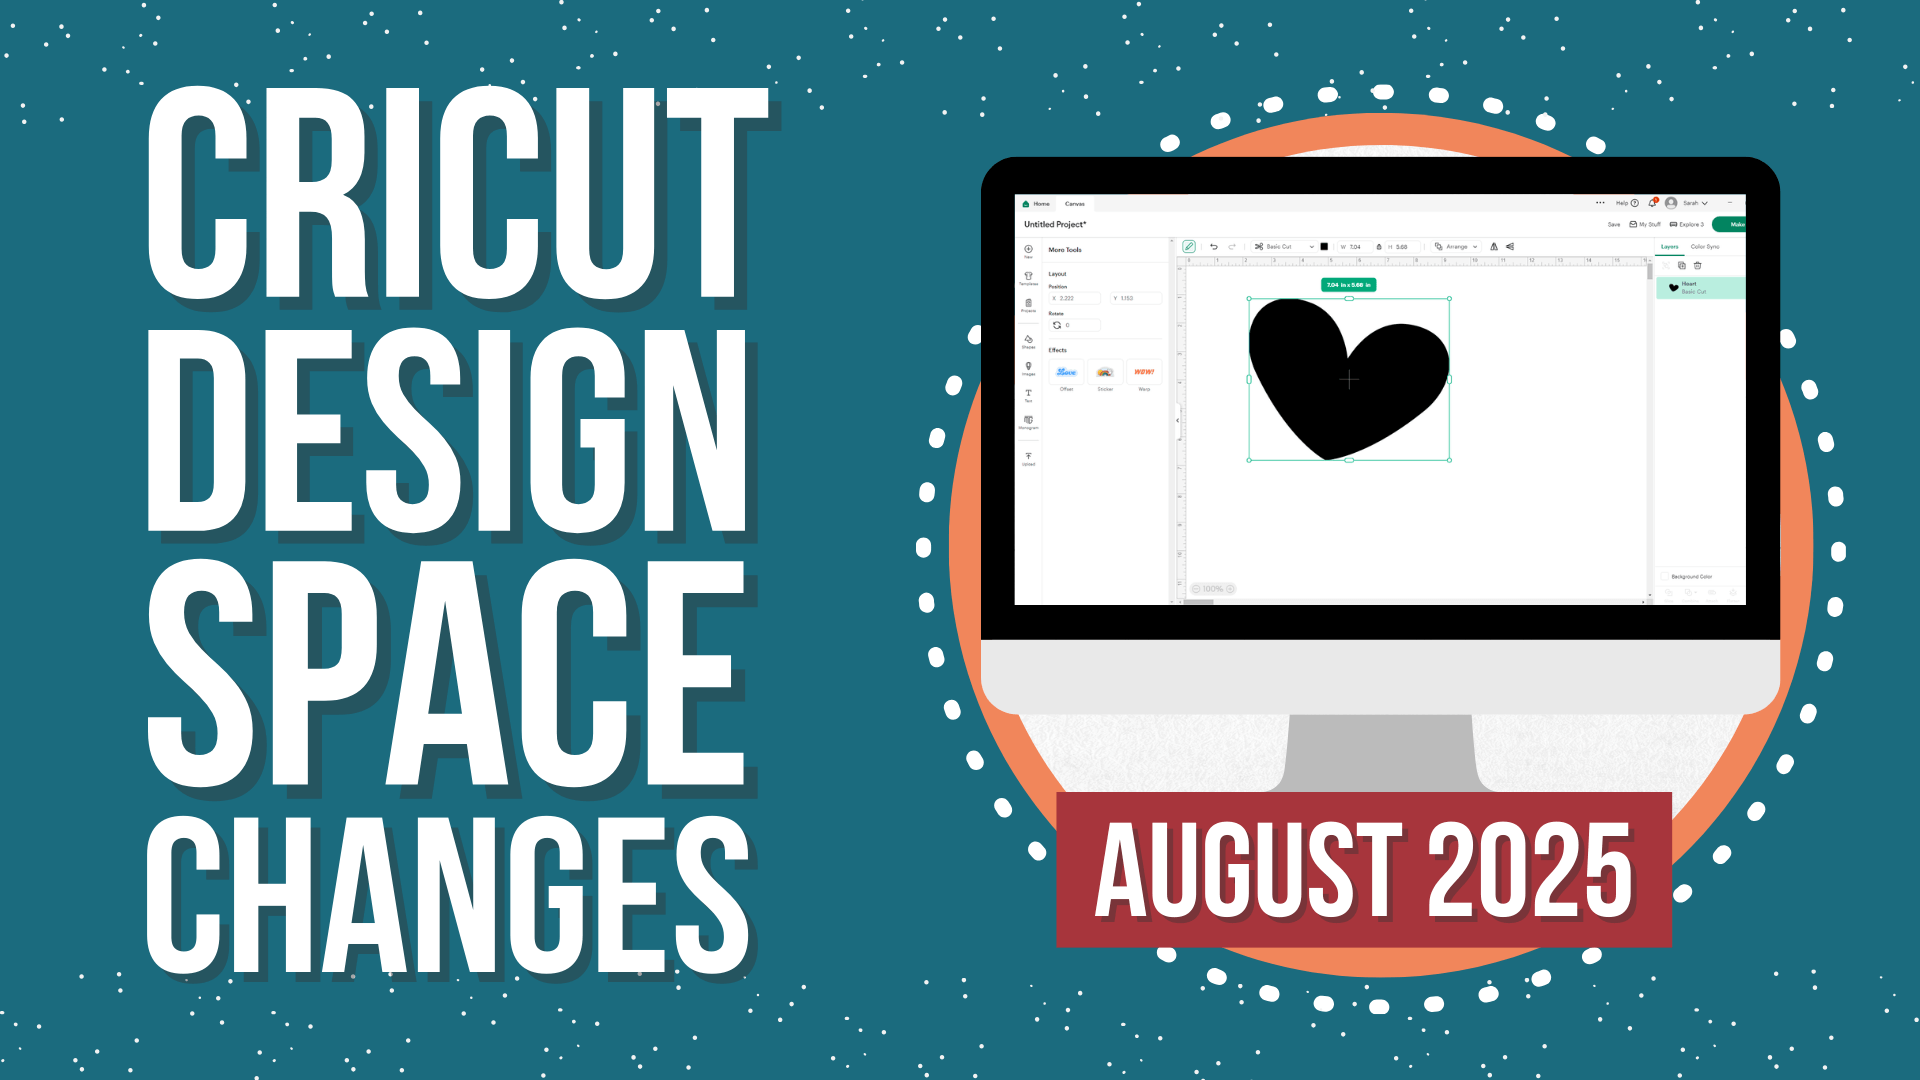
Confused by recent Cricut Design Space updates? Here’s an in-depth look at changes released in August 2025.
You’ve probably noticed a big change to your Design Space screen over the past few weeks. Cricut are rolling out an update that removes some of the features from the horizontal menu bar and moves them into a new slide-out menu that’s accessed by clicking the new “pencil” icon.
If you’ve got questions like: “where have all the top buttons gone?”, “where’s the Select All button?” or “how do I spellcheck text in Cricut Design Space”, this tutorial is what you need!
I’ve broken down all the changes into short, easy to understand chunks so that you can see all the changes and what you need to do to make sure you know how to use everything and where everything is now living within Design Space.
We’ll also take a look at some new features that will be coming out soon, including (finally!) a way to spellcheck text – yay!
This post relates to updates in Cricut Design Space version 9.30.65 (Live) and 9.35.85 (Beta). This is the computer/desktop version of Design Space, NOT the mobile app.
Looking for help with buttons disappearing from the layers panel? Check out this tutorial for September 2025 Design Space updates.
Contents List:
- Video Walkthrough of Design Space Updates
- Home Screen Updates
- How to Check Your Design Space Version
- Design Space Layout Changes in August 2025
- Select All Button Removal & Alternative
- Working with Text
- Layers Panel Changes
- Layers Panel Bug When Moving Layers
- Duplicate in Place
- Sizing Bug with Large Uploads & Projects
- Switching to “Beta” Mode
- Spellcheck on Text
- Color Sync Changes
- Changelog List of Recent Updates
- Summary & Final Thoughts
Video Walkthrough of Design Space Updates
The easiest way to explain the August 2025 Design Space changes is to show you all the new and changed elements of the software in a video.
The video below walks through all of the updates and answers some of your most-asked questions about how to use Cricut Design Space.
However, if you prefer to read rather than watch, scroll down for a written summary of each change.
Home Screen Updates
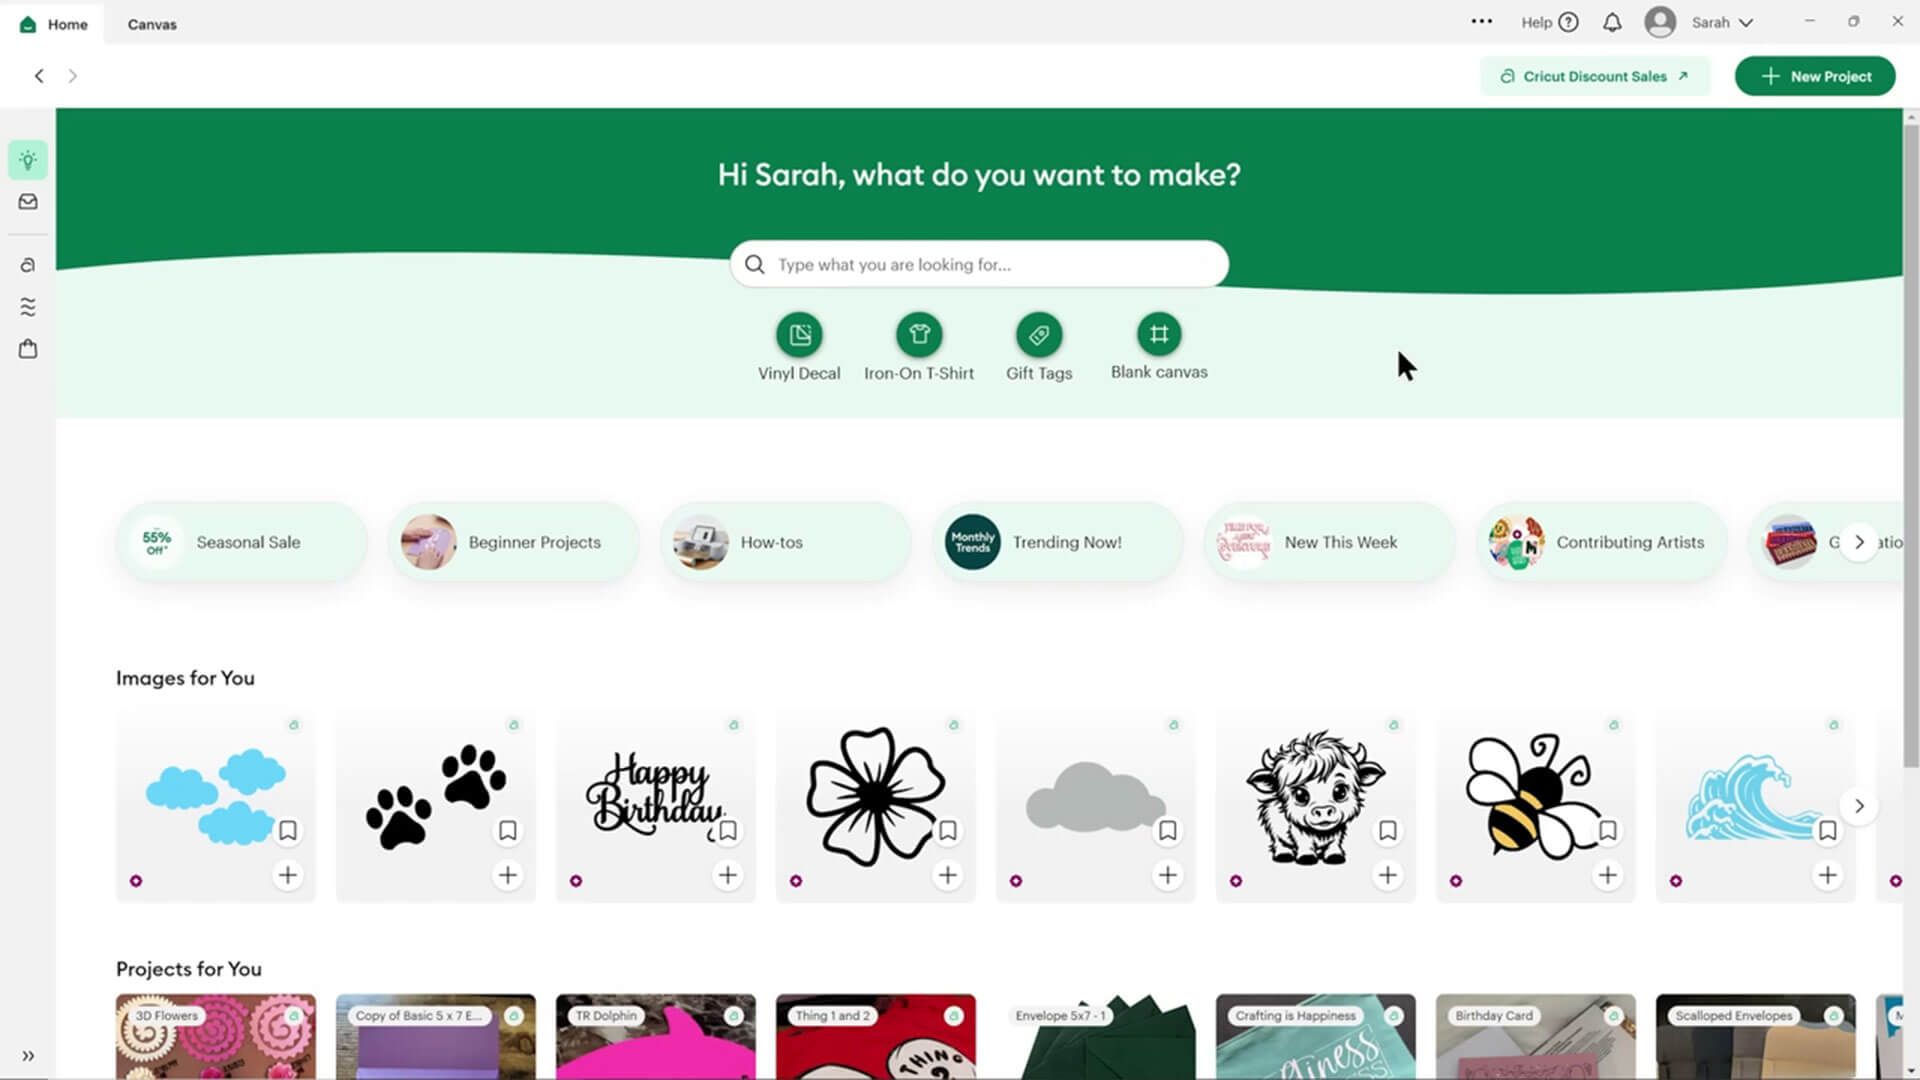
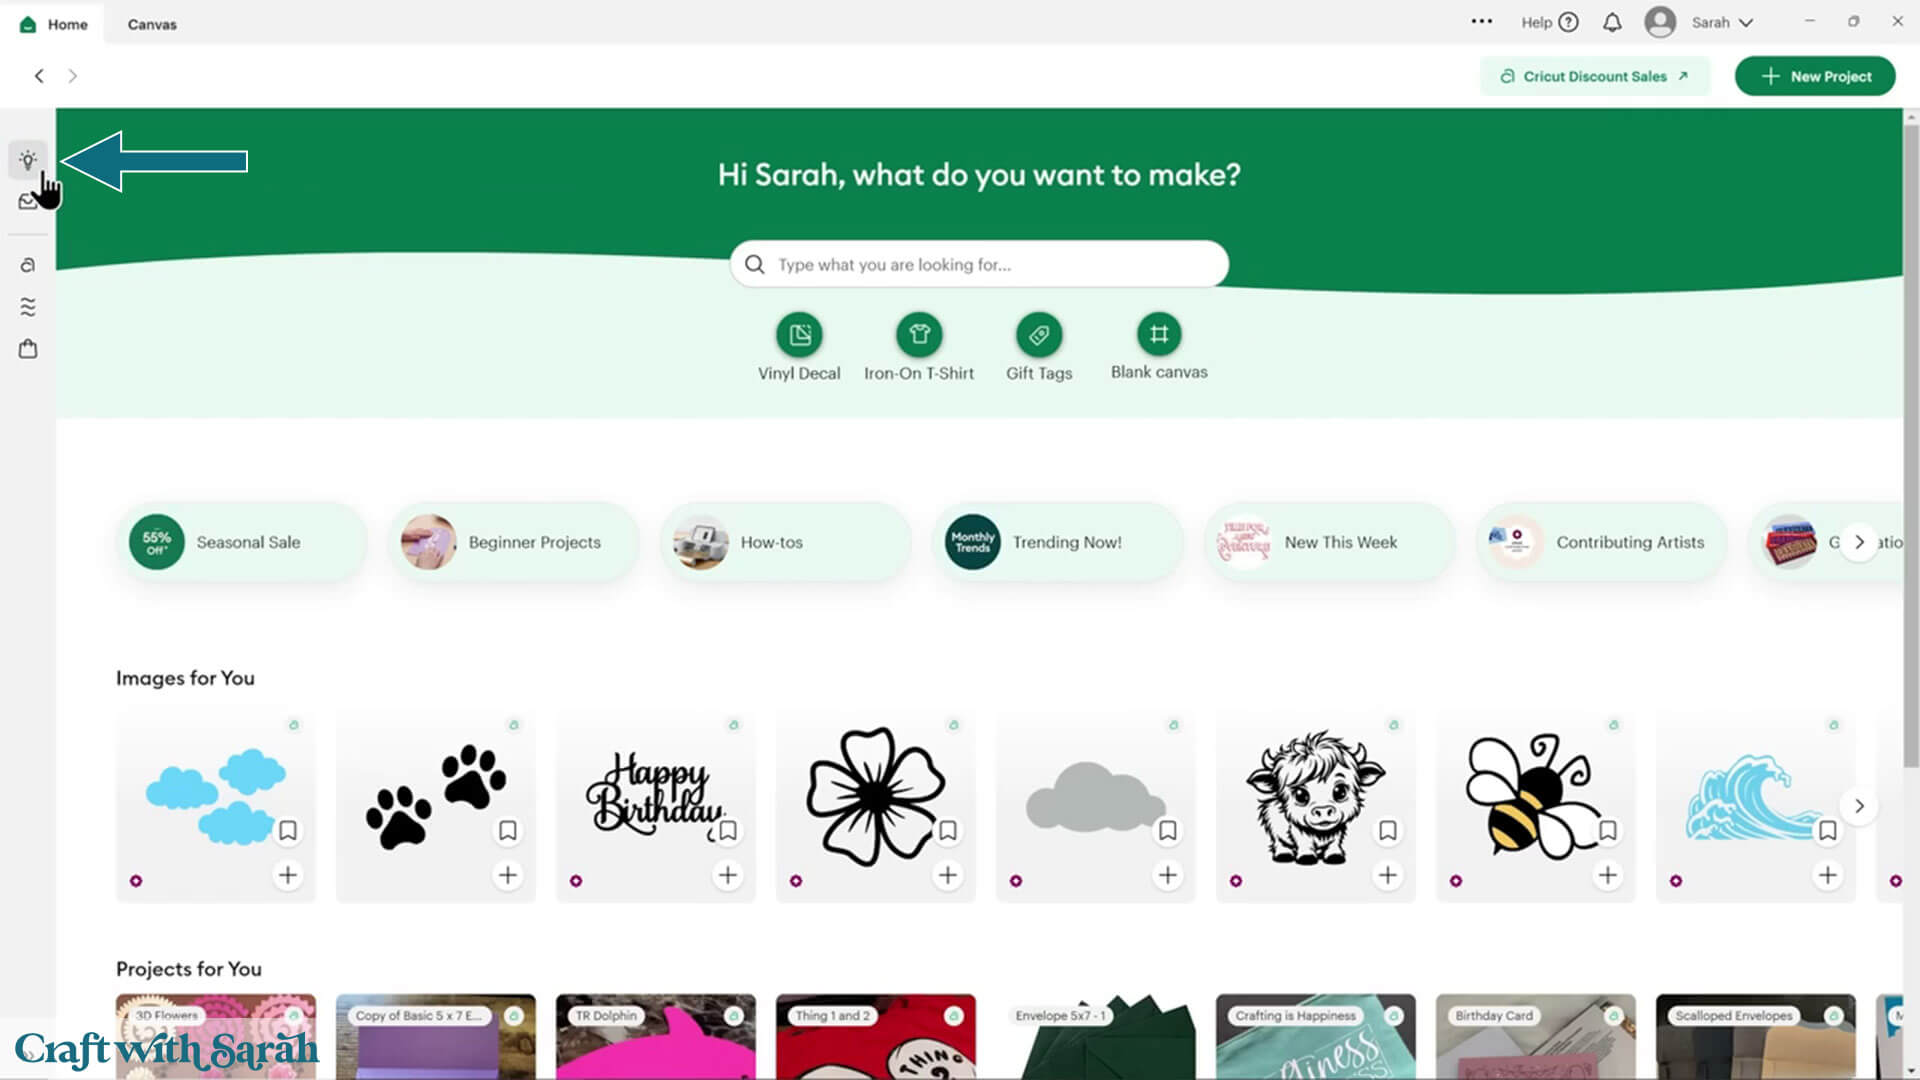
Here’s what the Design Space home screen is currently looking like as of the 24th of August, 2025.
Yours may look slightly different depending on what version of Design Space you’re on.
This is Design Space version 9.30.65 (Live).
Note: if you are on this version of Design Space (or a later version) but do not see these changes, don’t worry – sometimes it takes a little while to “catch up”. Be patient, and eventually the changes will come through. There is no way to “force” it to update quicker.
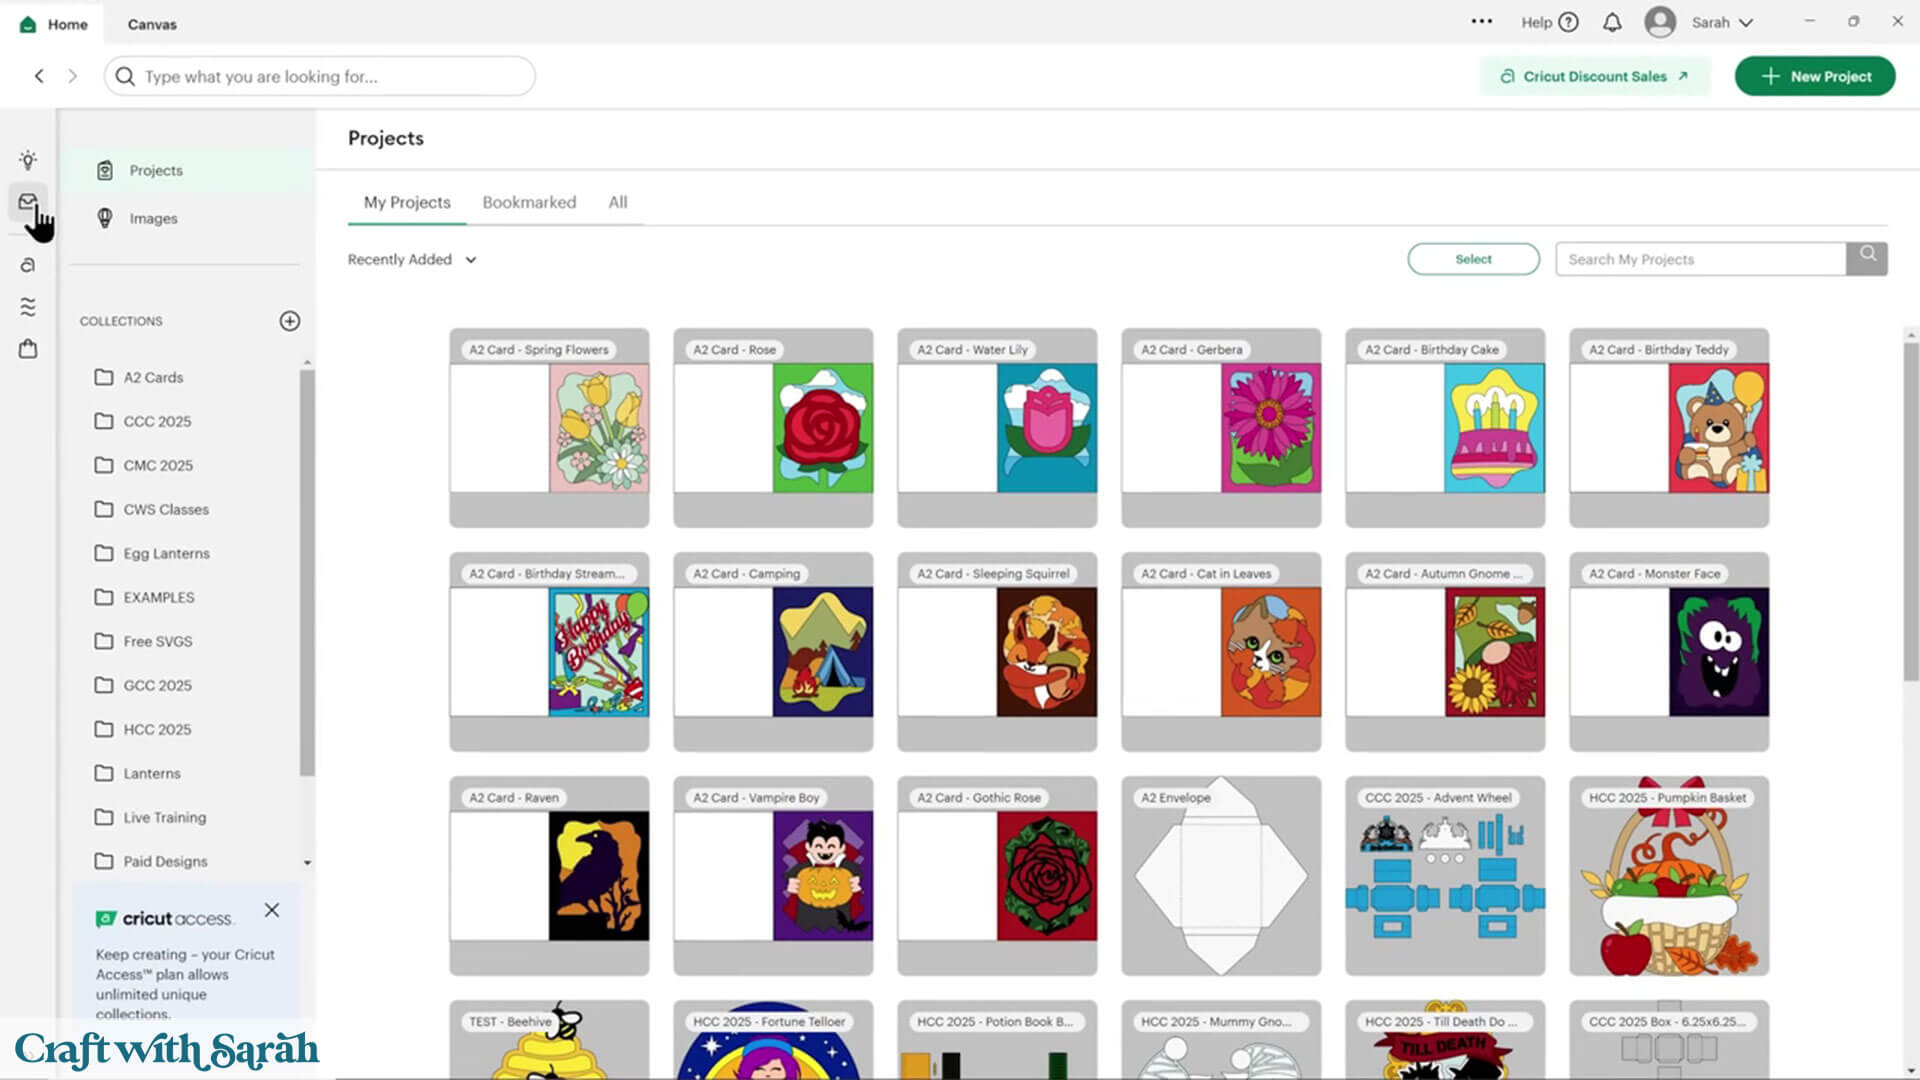
Saved projects and bookmarks
To find your saved Projects and Bookmarks, click the “My Stuff” icon down the grey vertical bar on the upper left hand side of your home screen.
The button has an envelope icon on it.
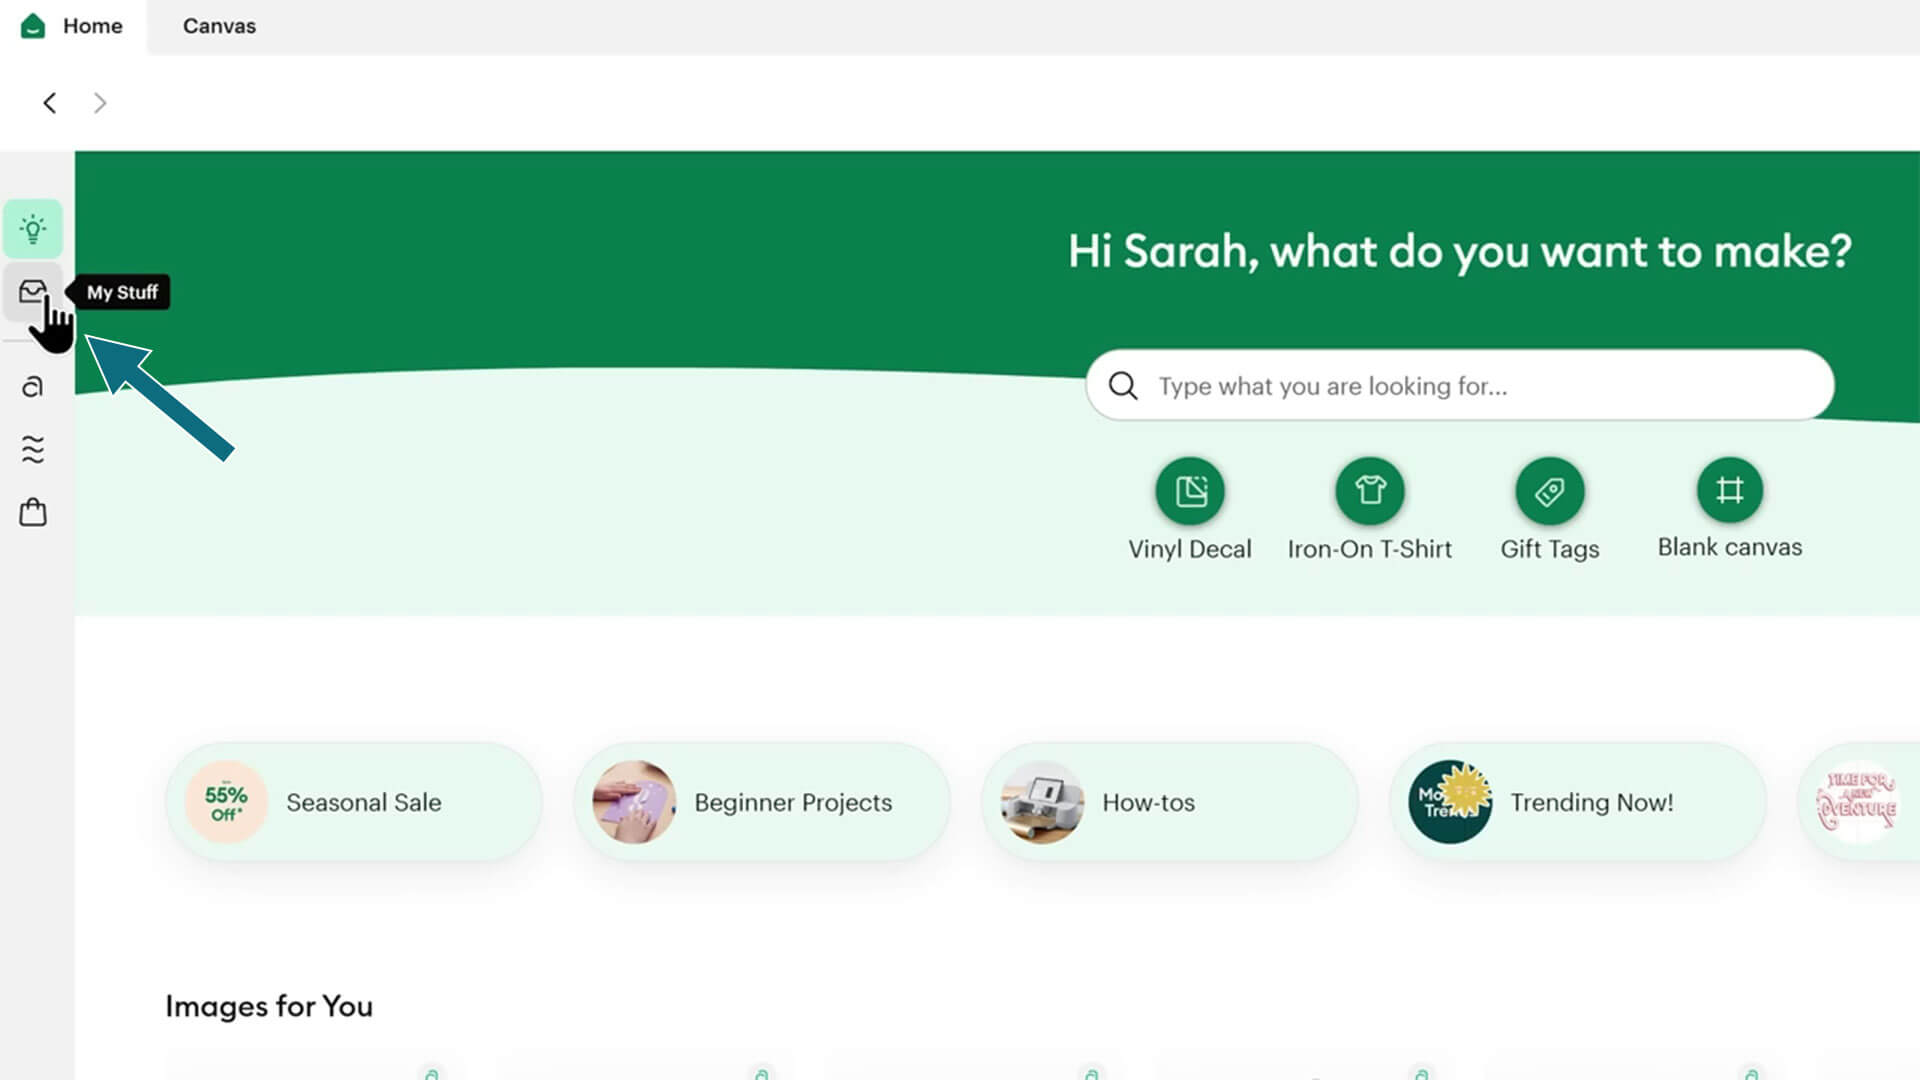
Now you should be able to see your projects and bookmarked images.
Click the light bulb icon to take you back to the home screen.
How to start a new project
To start a new Project from the home screen, you can either click “Blank Canvas” underneath the search bar, or click the green “New Project” button on the top-right of the screen, followed by the “Blank canvas” option in the dropdown menu.

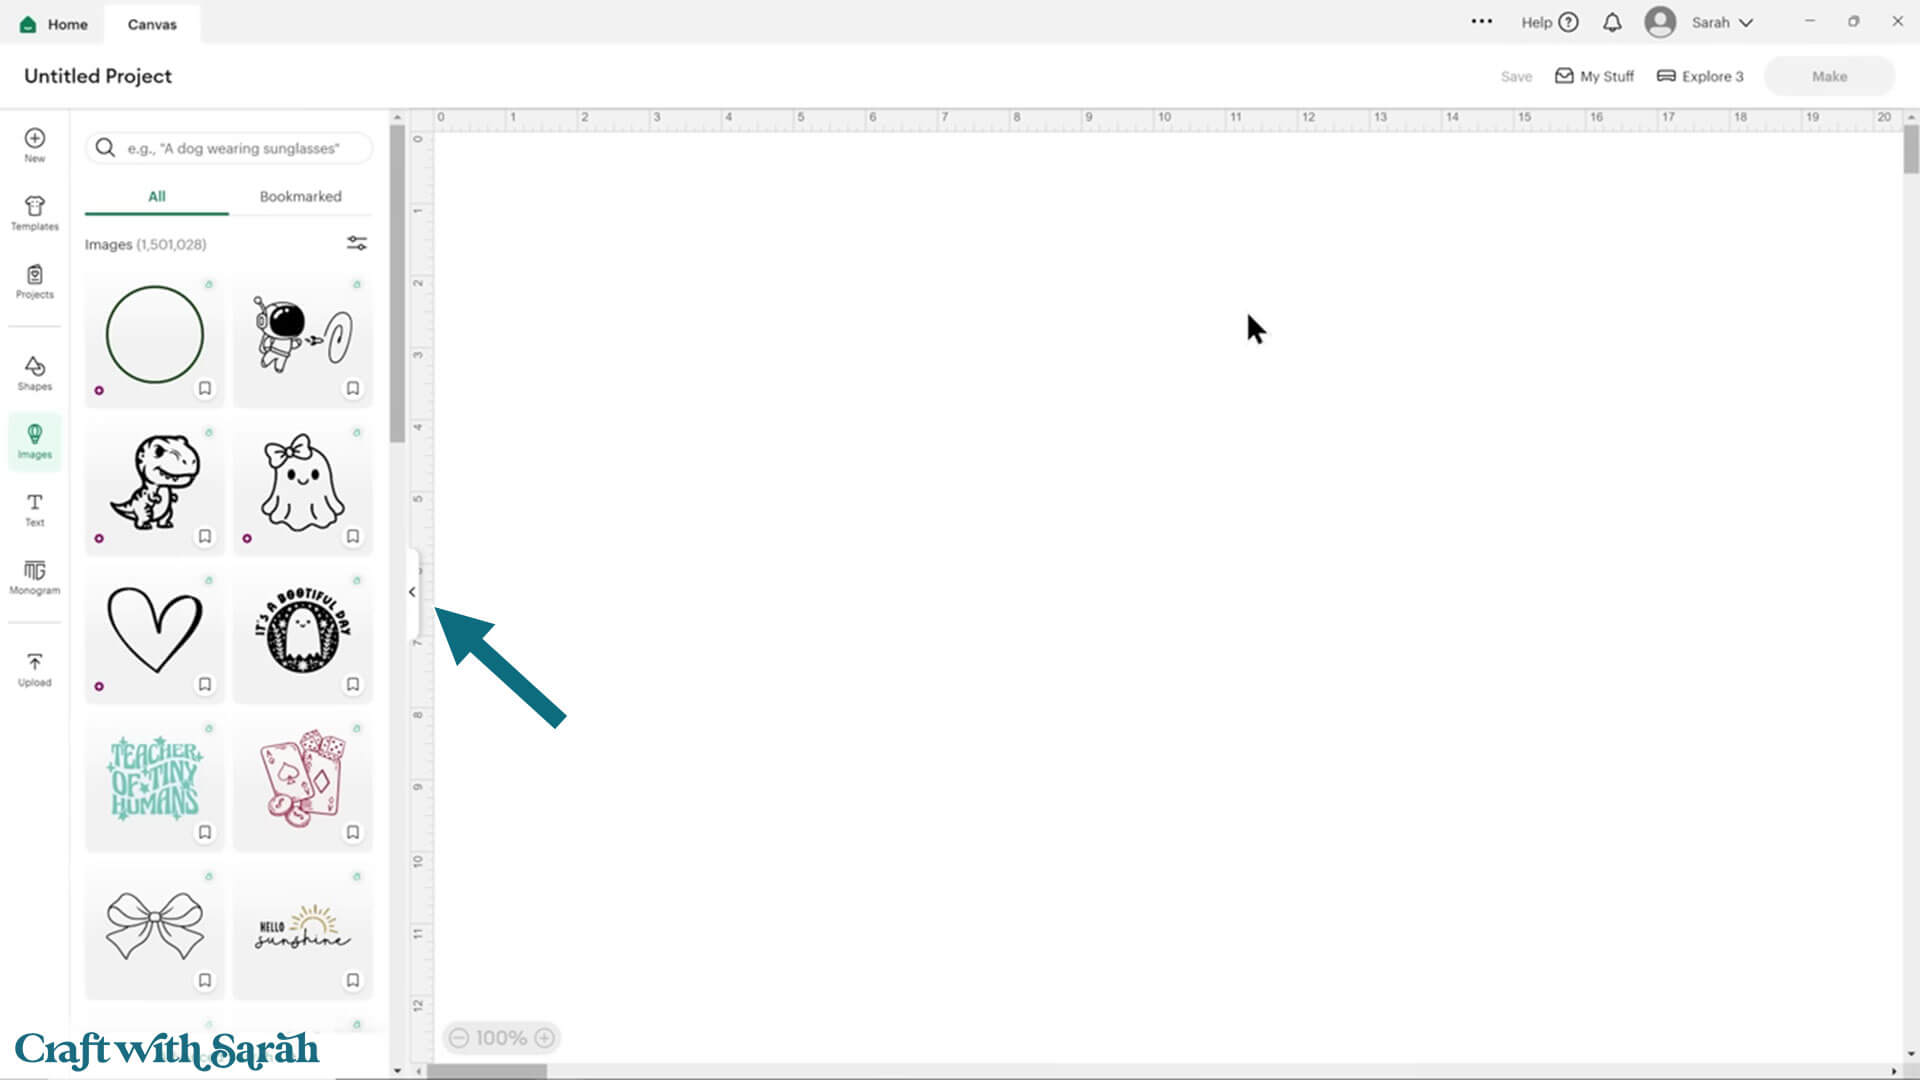
A fairly new feature is this window on the left that automatically appears upon creation of a new Project.
This shows suggested images from Cricut Access that you may wish to add to your project. Please note that if you don’t have the Cricut Access subscription then there may be a charge to use the images.
To get rid of the image sidebar so you’ve got more space to design, click the arrow that appears halfway down the page.
How to Check Your Design Space Version
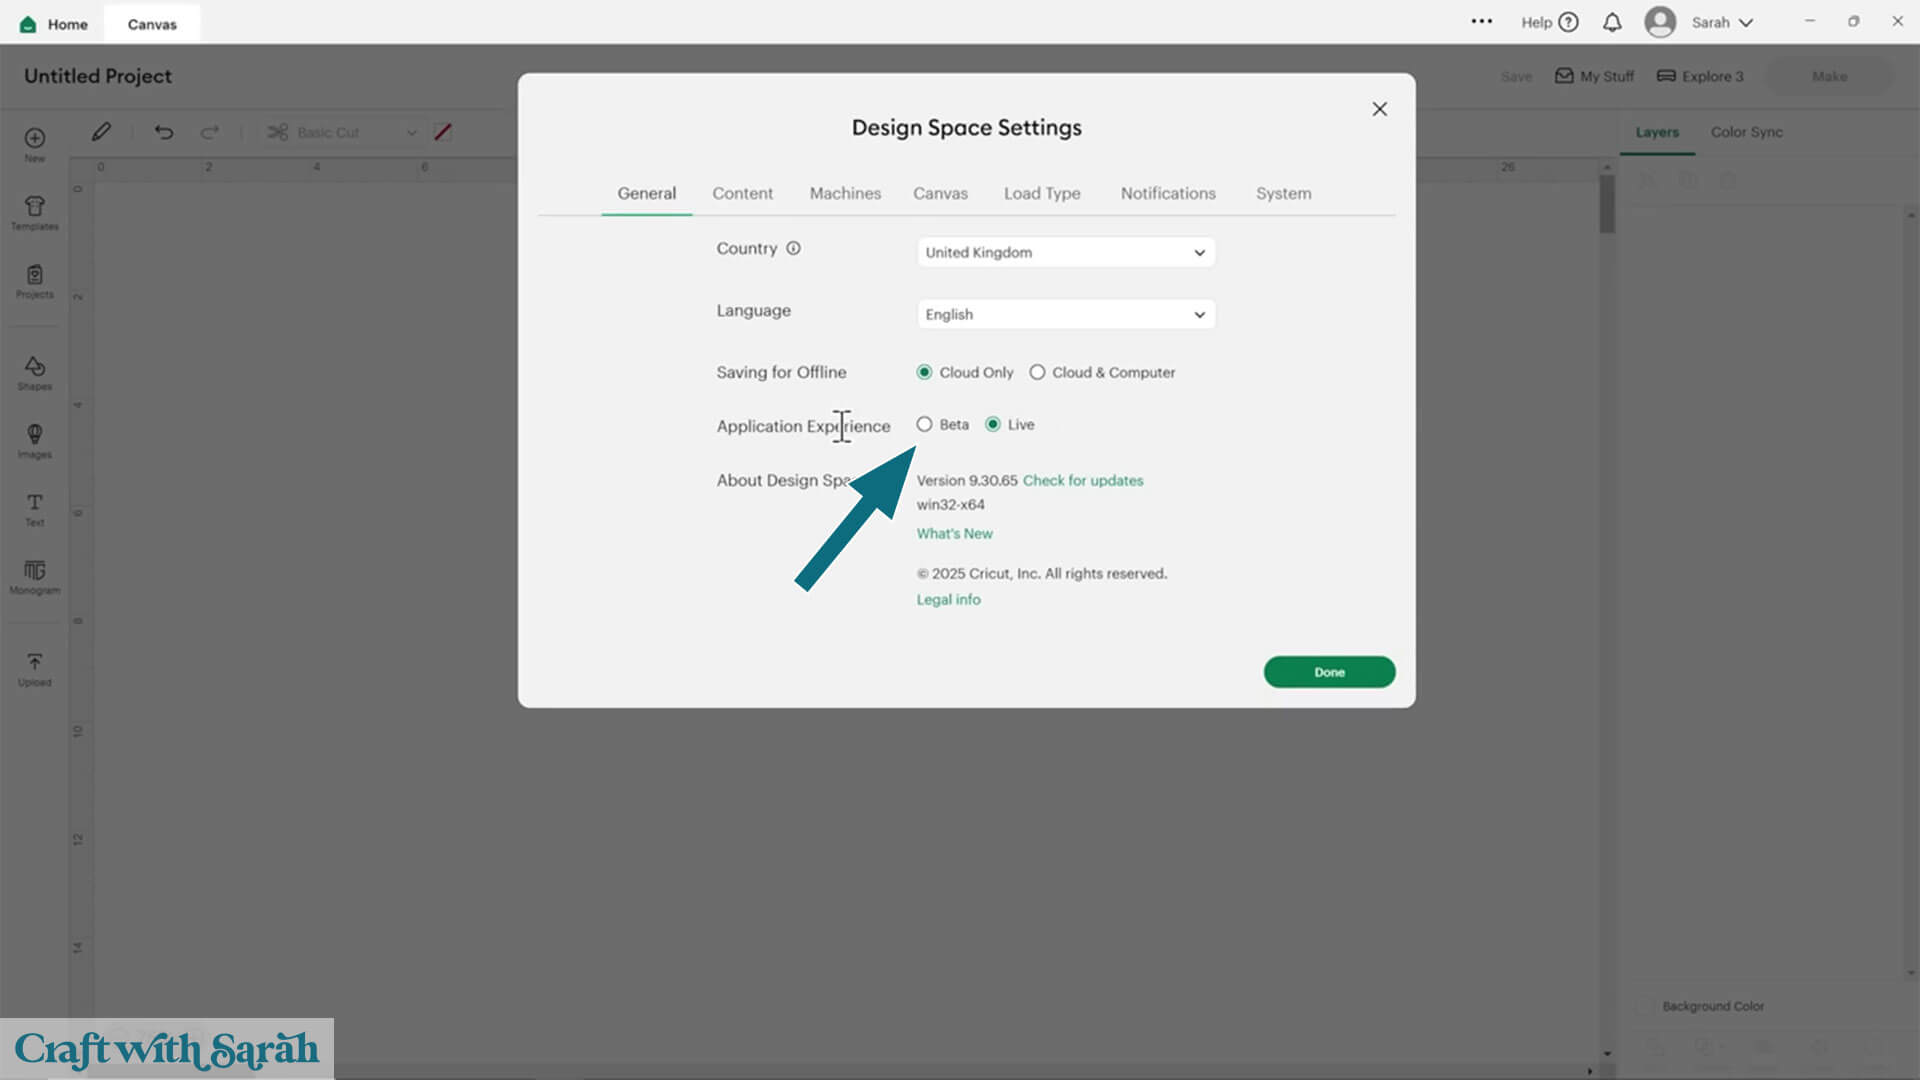
To see what version of Cricut Design Space you’re currently on, or to check if there are any updates available, click the arrow next to your name on the top right of the screen and then click into settings.
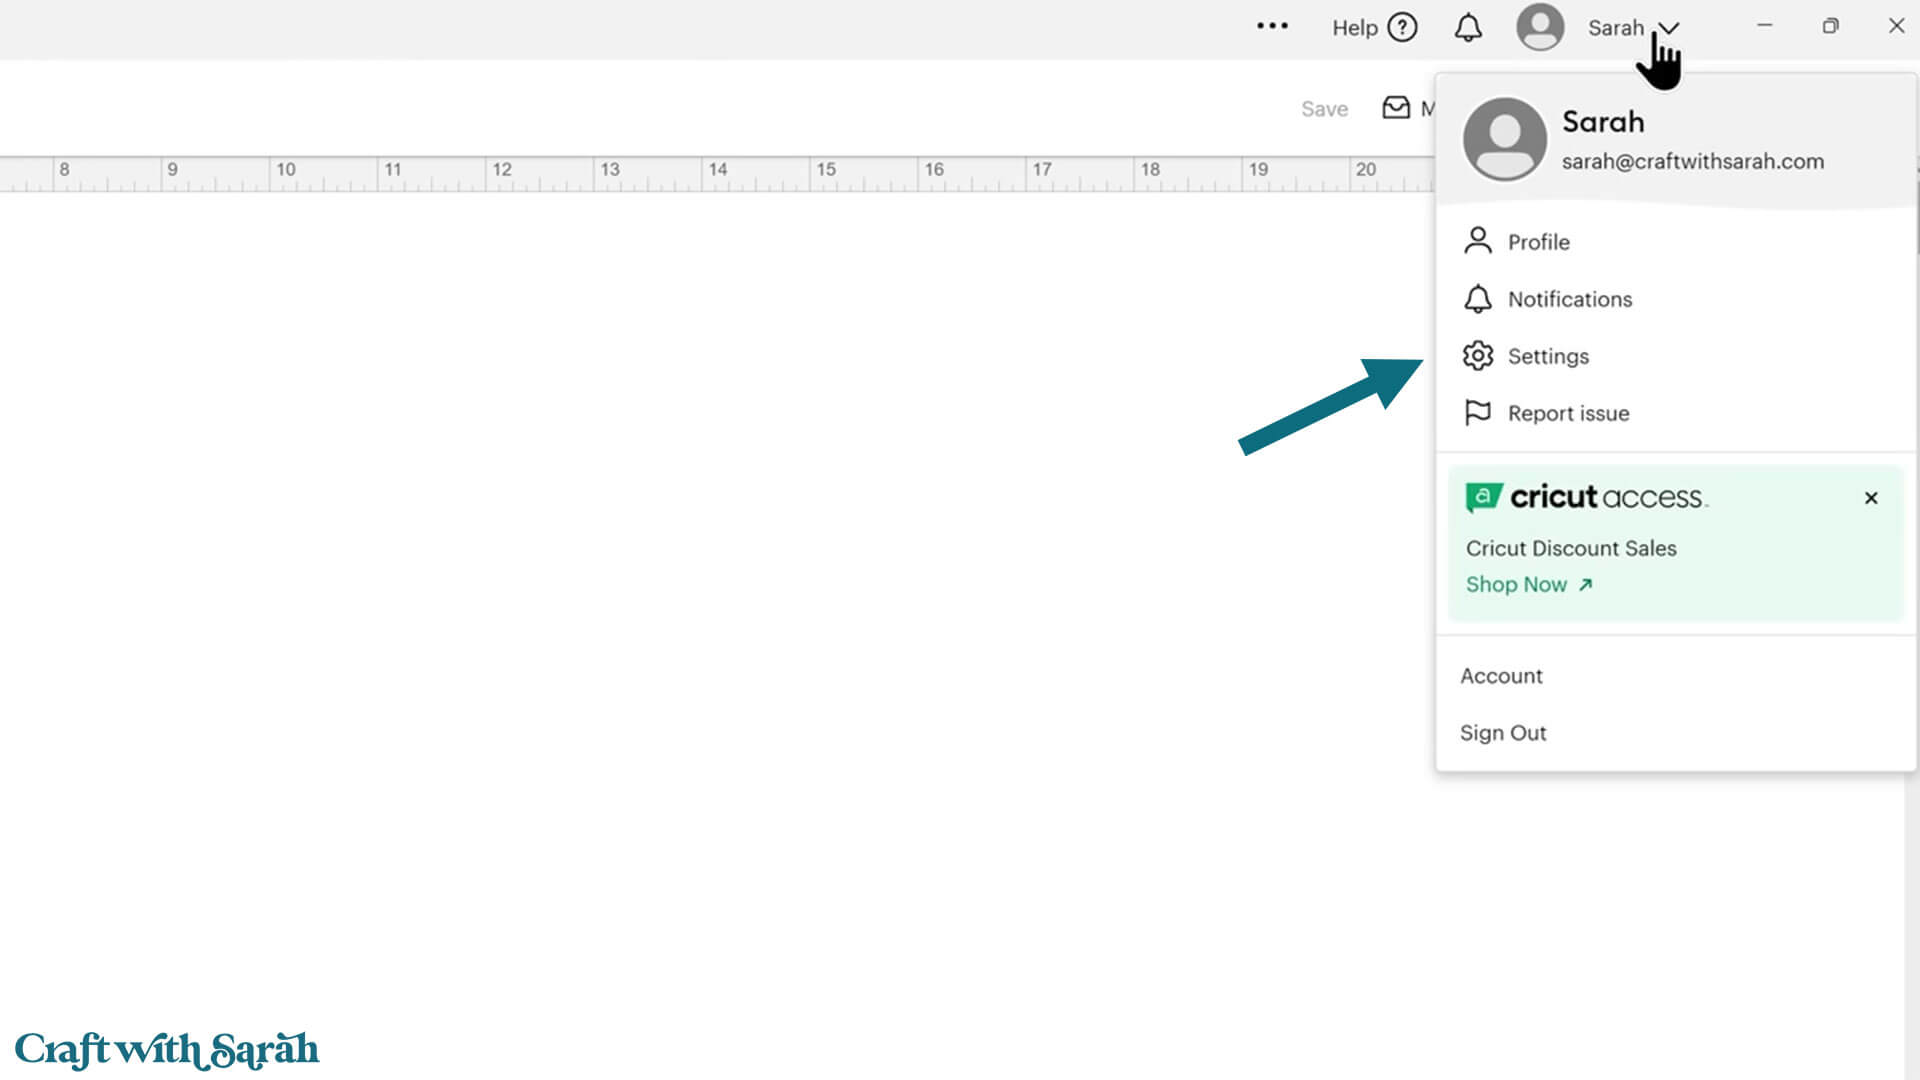
Under the “General” tab, look for “Application Experience”.
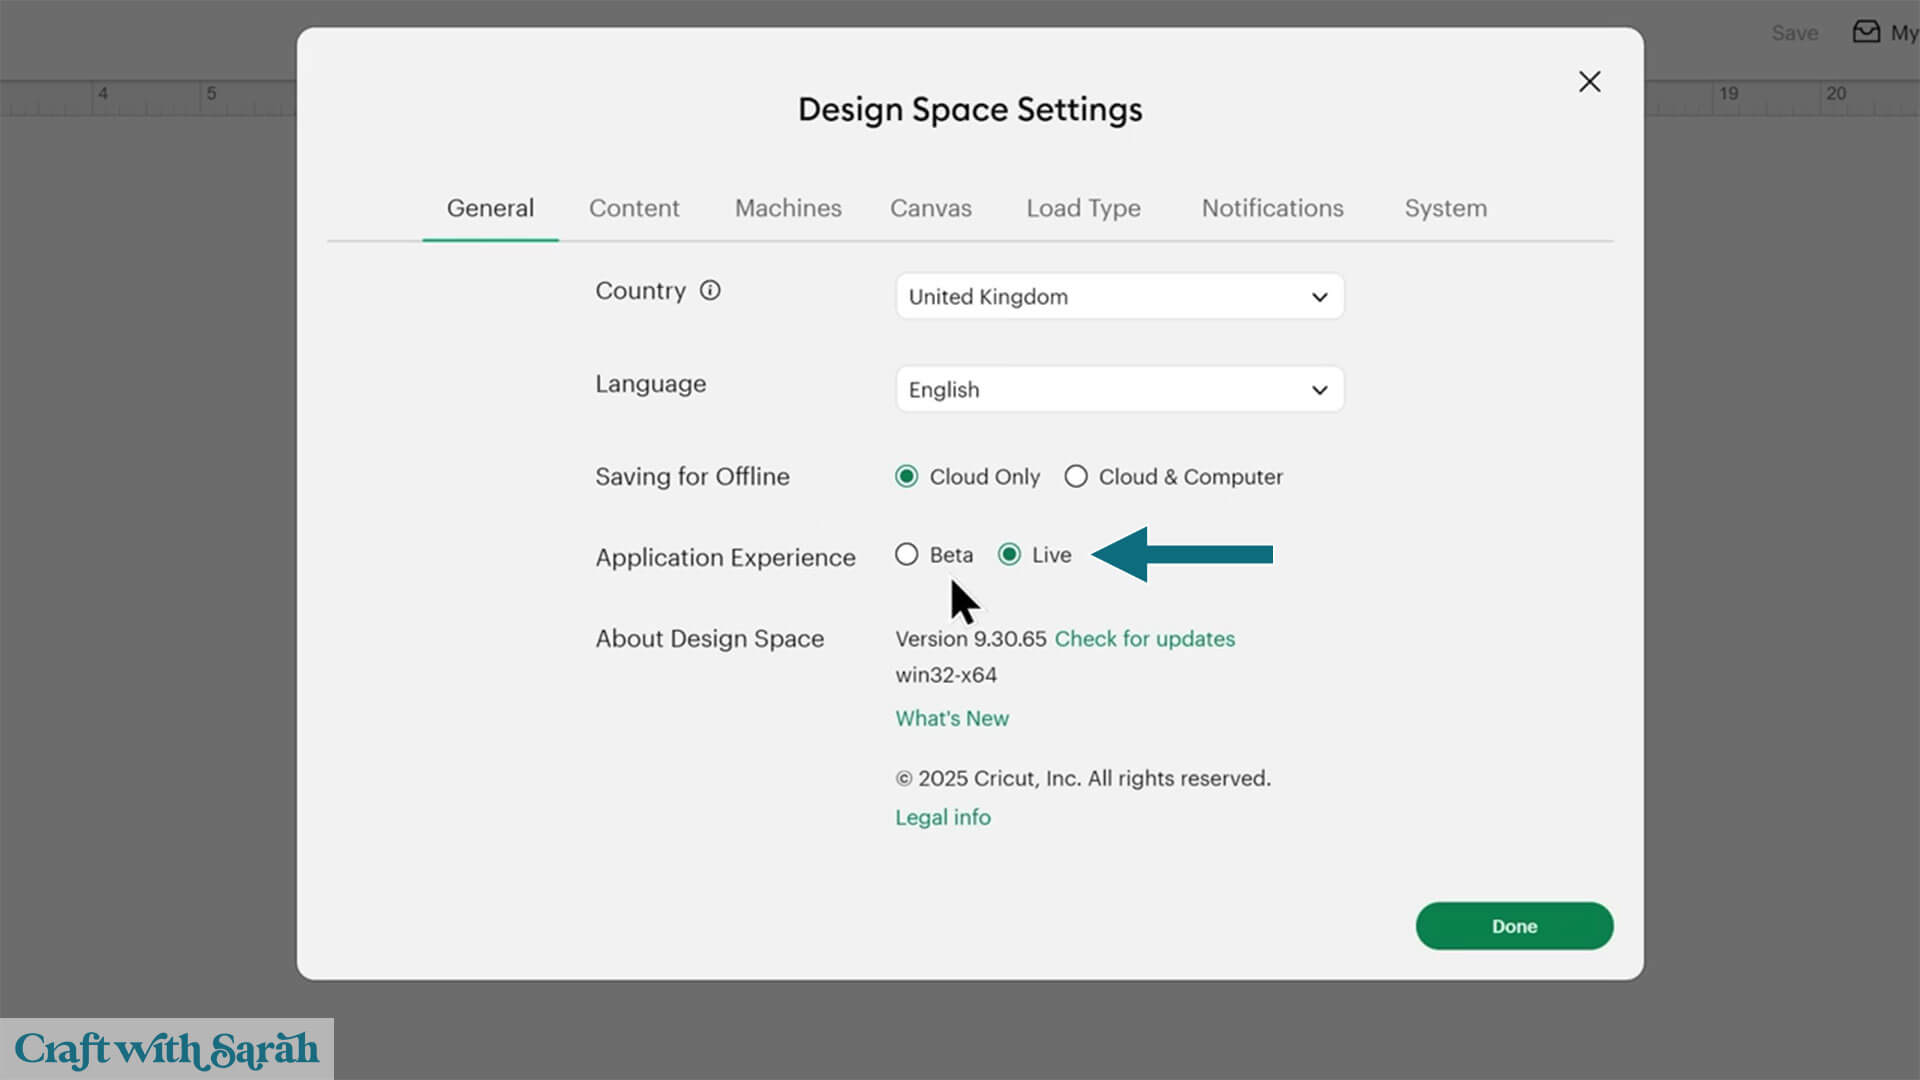
There are two options in here: Beta and Live.
The Live version is the current “stable” version of Design Space.
You might find that you don’t have the very most recent version because Cricut drip releases to avoid overloading their servers with everyone downloading at the same time.
This means that it can take a few days or even a few weeks until everybody has the same new version.
The Beta version is sort of like a test ground or a playground of new features.
If you’re happy to load a version of Design Space that will get new features quicker, but might be a little bit buggier than you’re used to, you can switch to the Beta version.
If you’d prefer a more stable version, keep with Live.
The “About Design Space” part of this screen tells you the current version that you’re on. You can check for new versions by clicking the “Check for updates” link.
If there is an update available, you’ll then get a link here where you can click to start the download.
For the purpose of this video, I’m using Design Space version 9.30.65.

Click the “What’s New” button to open a page on Cricut’s website that provides notes of recent changes that have been made.
I’ll cover this page in more detail in the “Changelog” section of this tutorial.
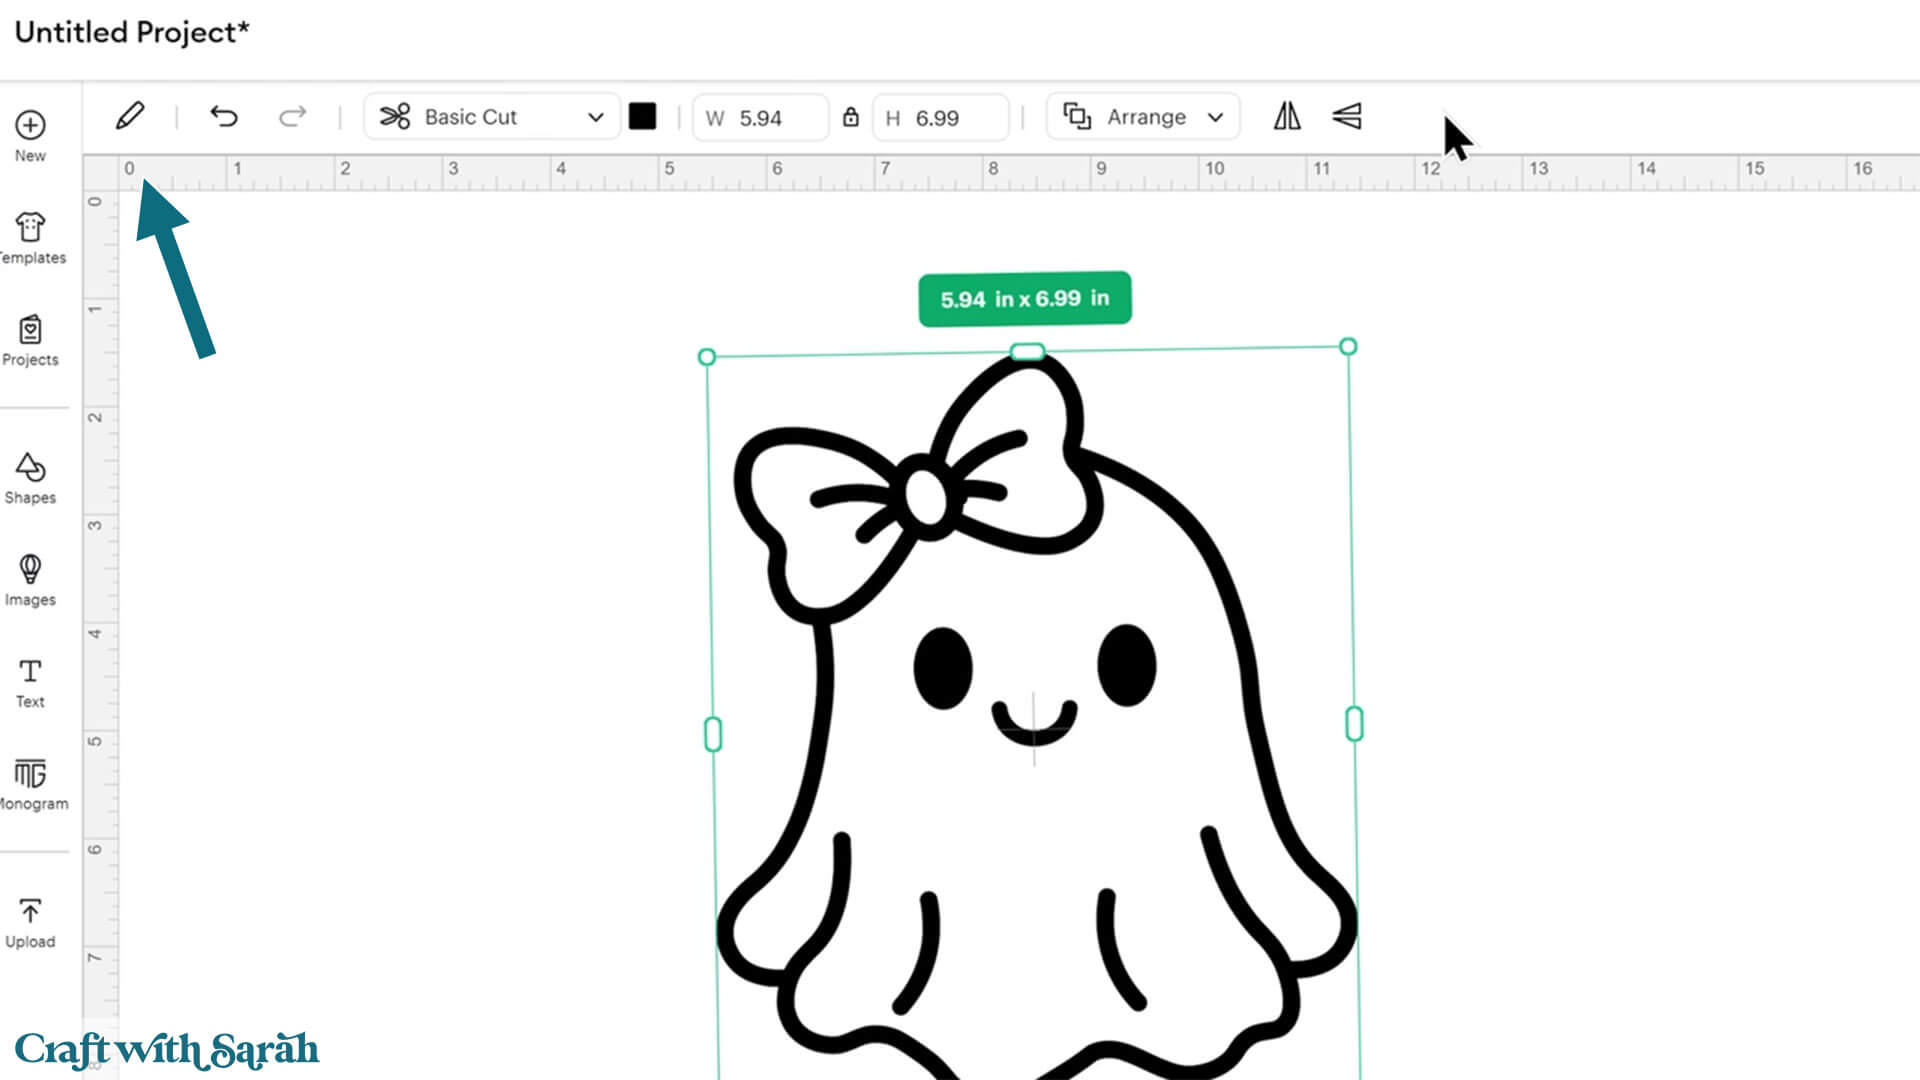
Design Space Layout Changes in August 2025
When your Canvas first loads, it doesn’t look much different to the last few versions.
The layers panel on the right hand side has been gone for a while upon load, as have all the buttons along the top when you first load the project.
The tools and buttons will appear once you add an image, shape or text to your project.
For example, now I’ve put an image on the Canvas there are more options appearing on the screen.
However, a few things look different to what you may be used to.
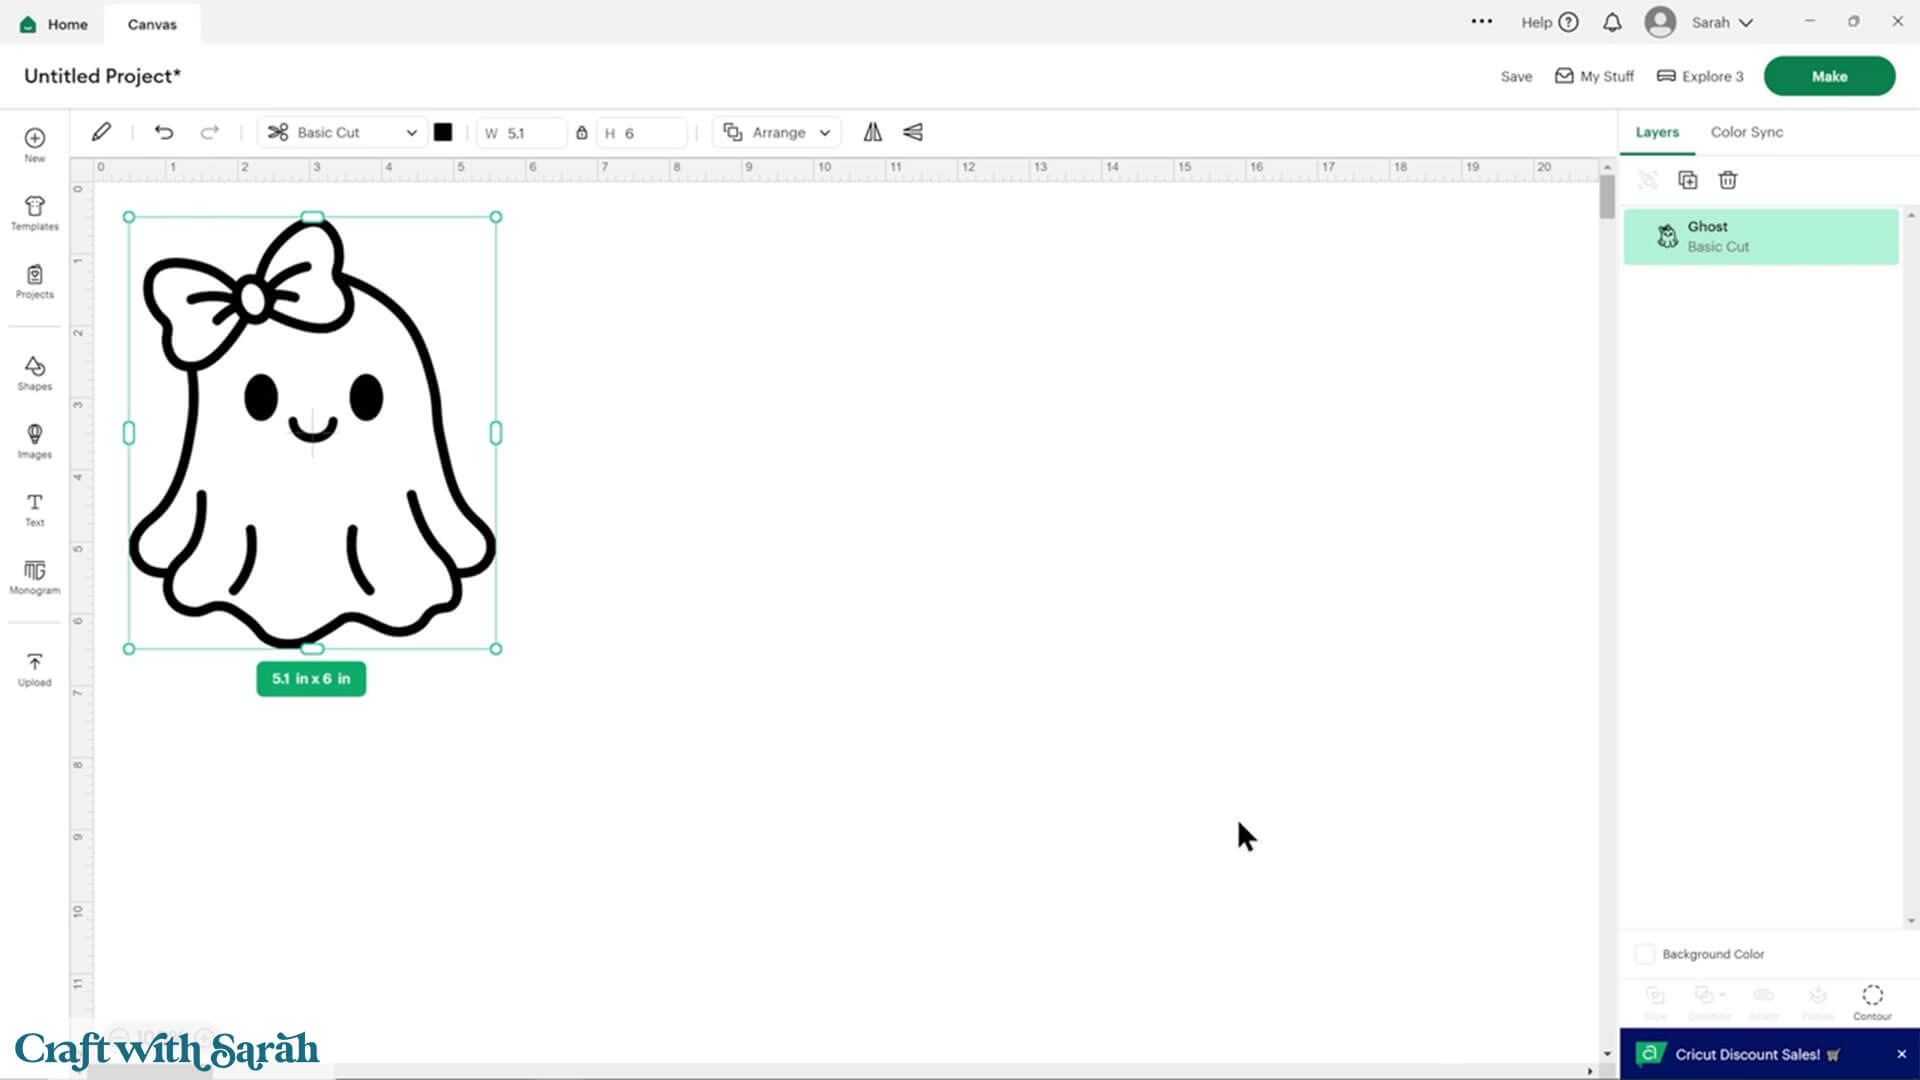
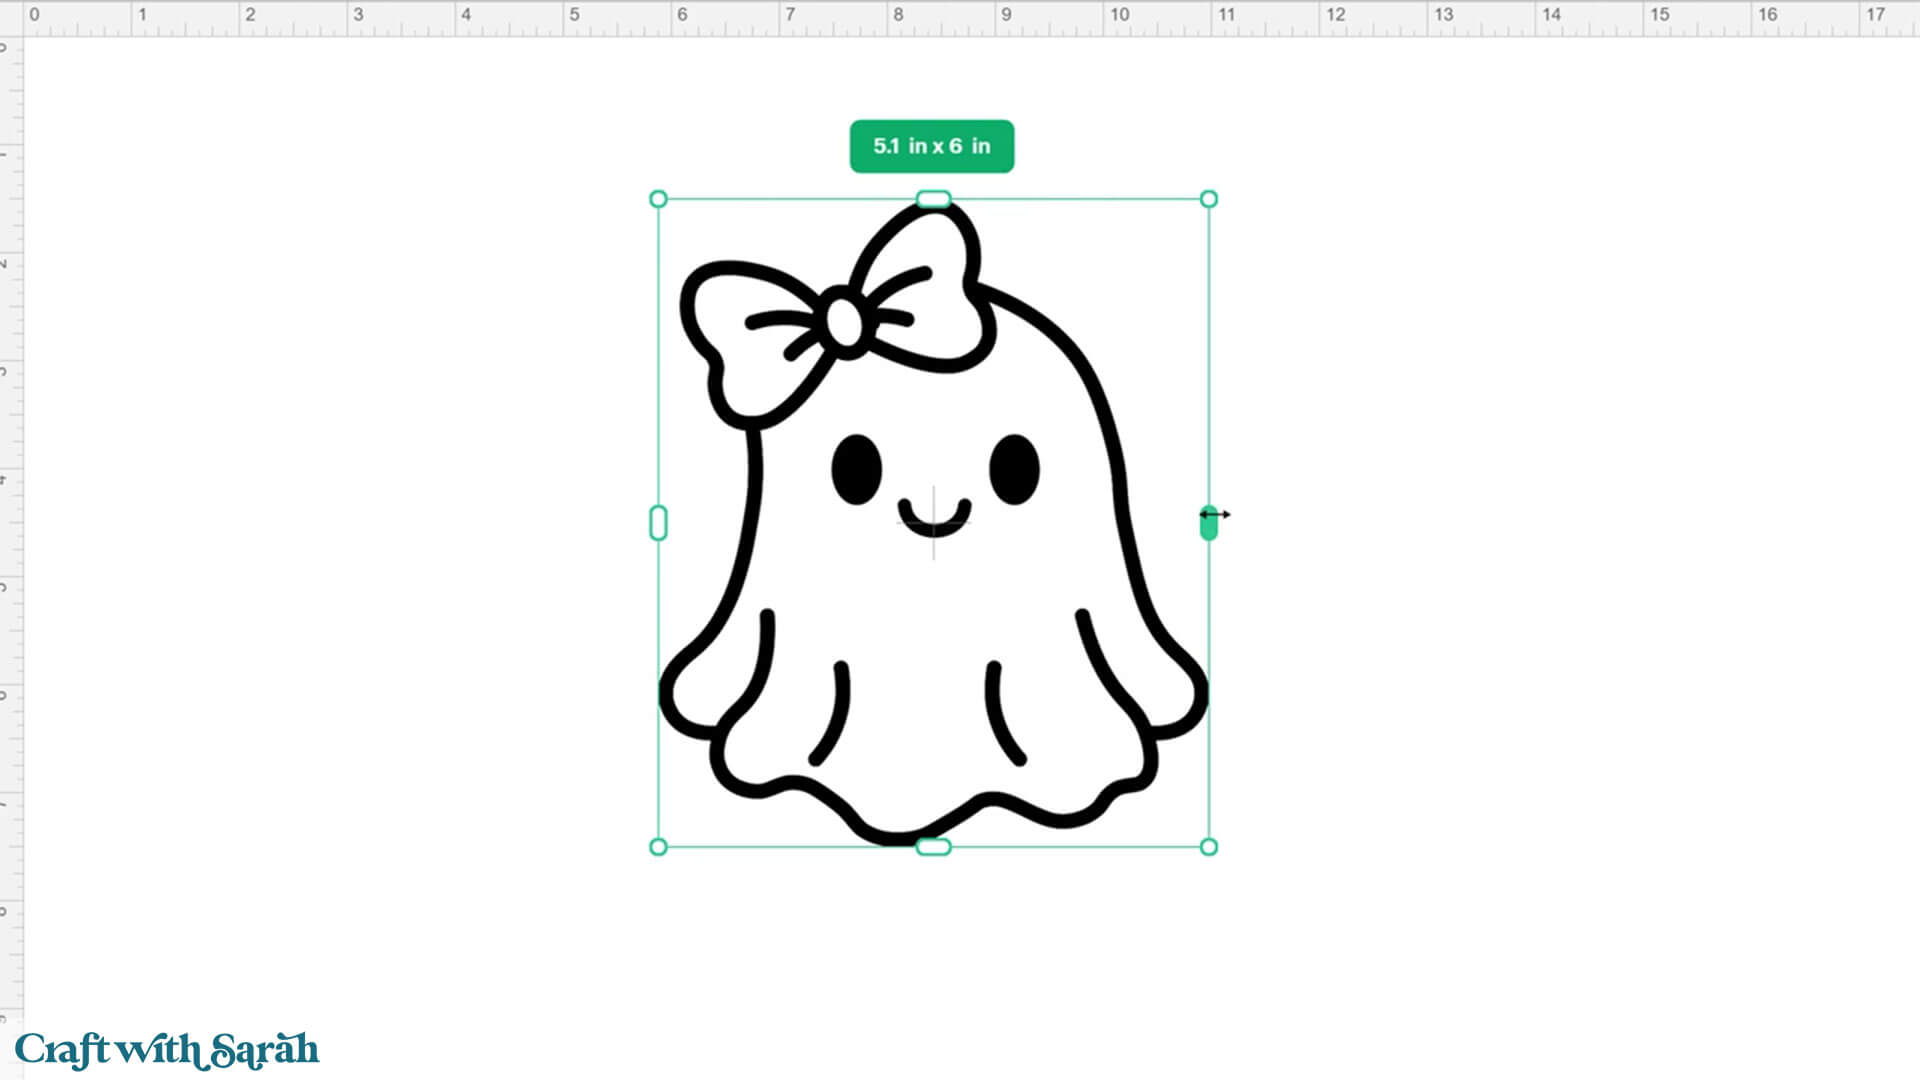
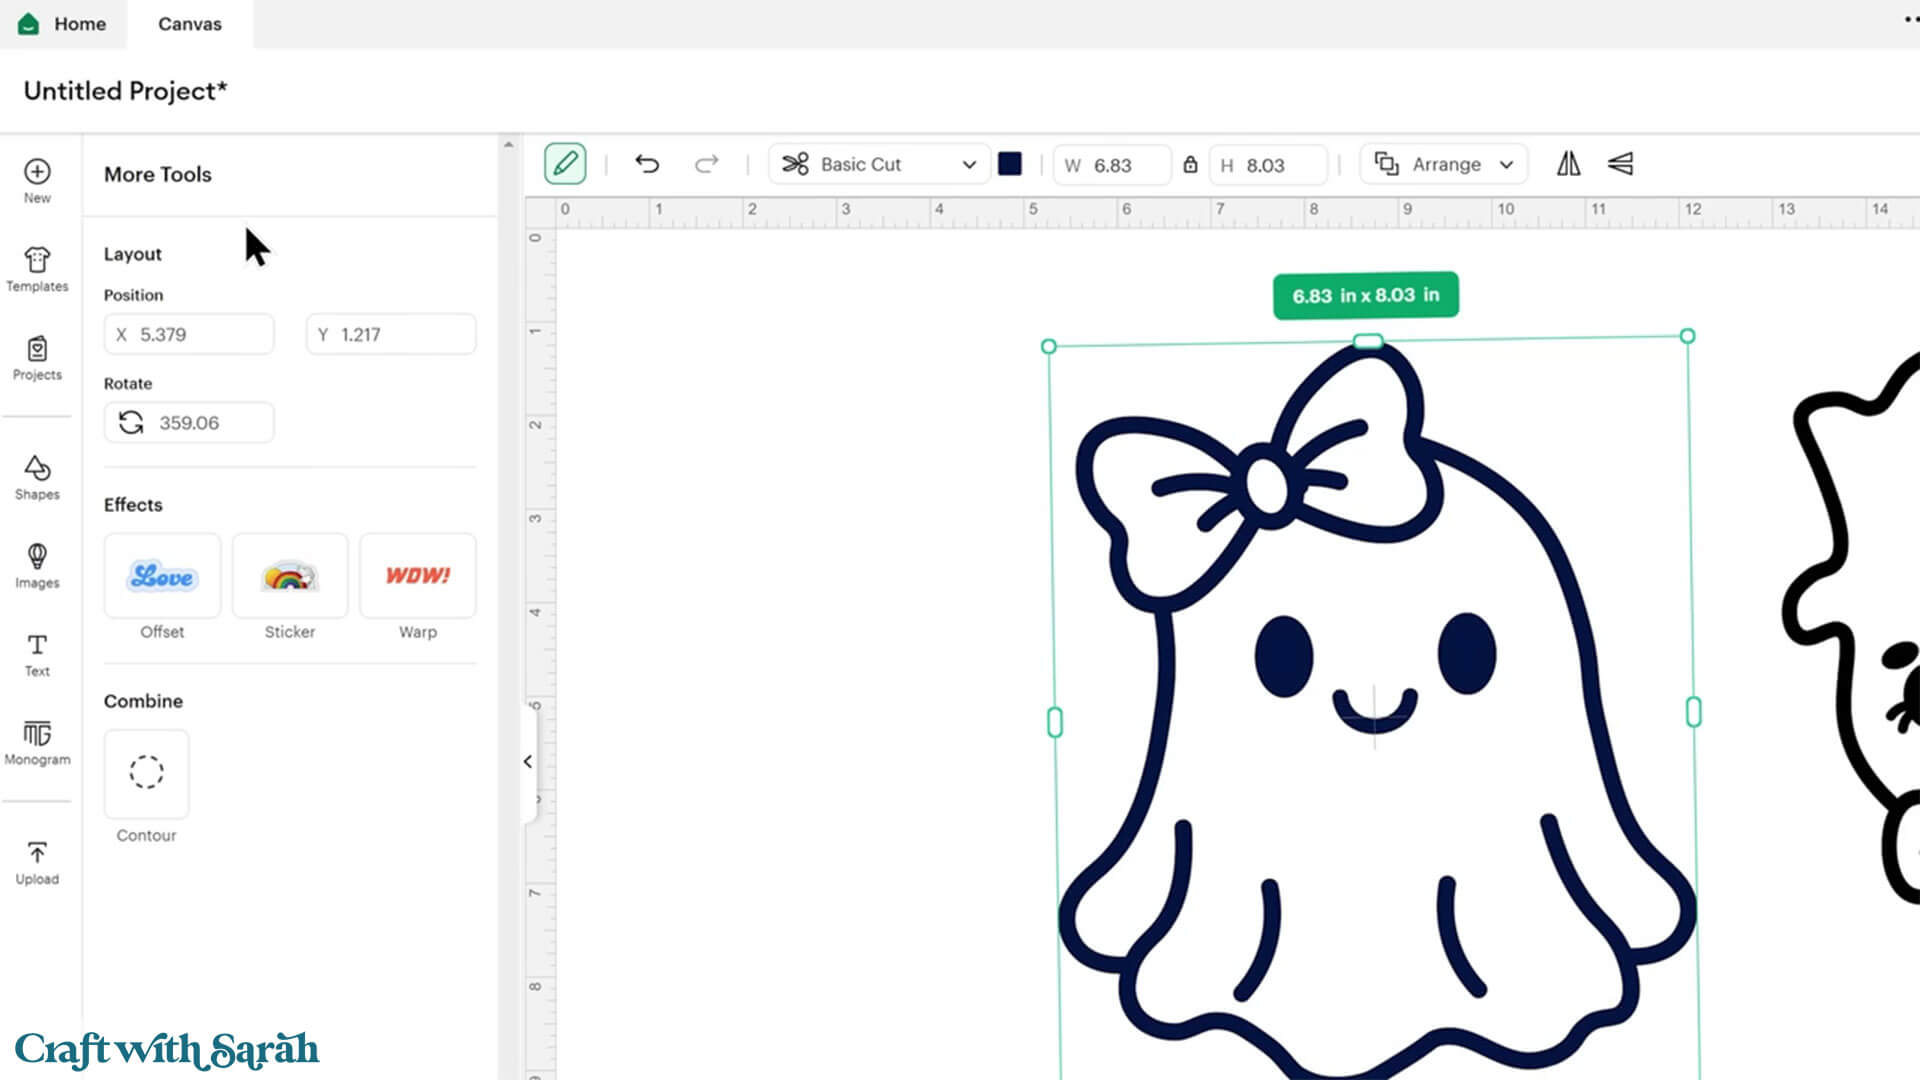
One of the first things you may notice is that the bounding box around the image looks different. It still works the same.
The most significant change in this version is all of these buttons along the top. They now look and function differently.
Some buttons that you previously used have been moved away from the top menu – for example, the Offset tool, Sticker Maker tool, Warp tool, and various other options.
These options are now all hidden under the “More Tools” button, which looks like a pencil.
If you’re just starting out playing in this version of Design Space, you’ll probably see that you’ve got a circular pulsating icon here under this brand new pencil. This is to draw your attention to it, but it can be a little bit annoying.
If you want to get rid of that pulsing icon, click on it. It’ll give you a pop-up menu explaining what this pencil tool is and how to use it. Once you close out of the menu, the pulsing icon will be gone.
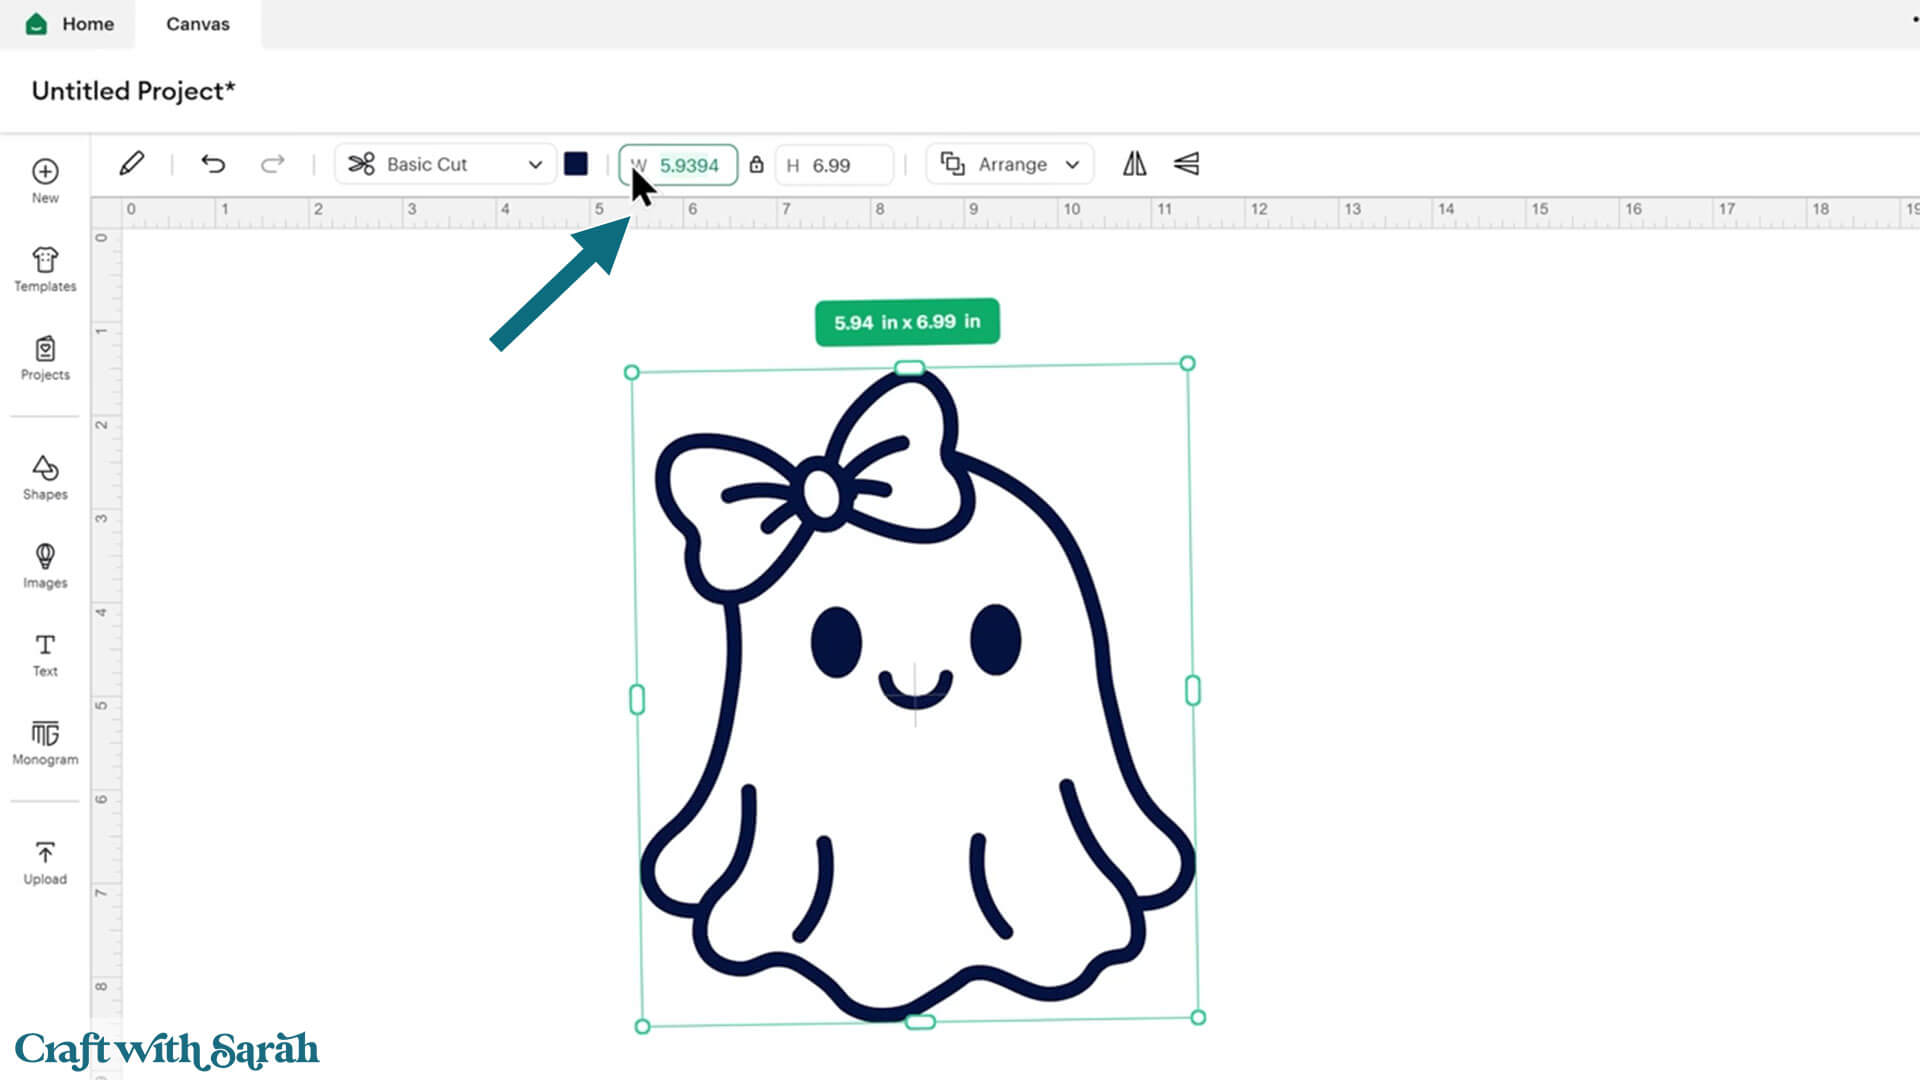
You’ll notice that there are still some of the usual tools along the top like the undo/redo, operation drop down, color box, resizing boxes, arrange and flip which word in the same way as they did previously.
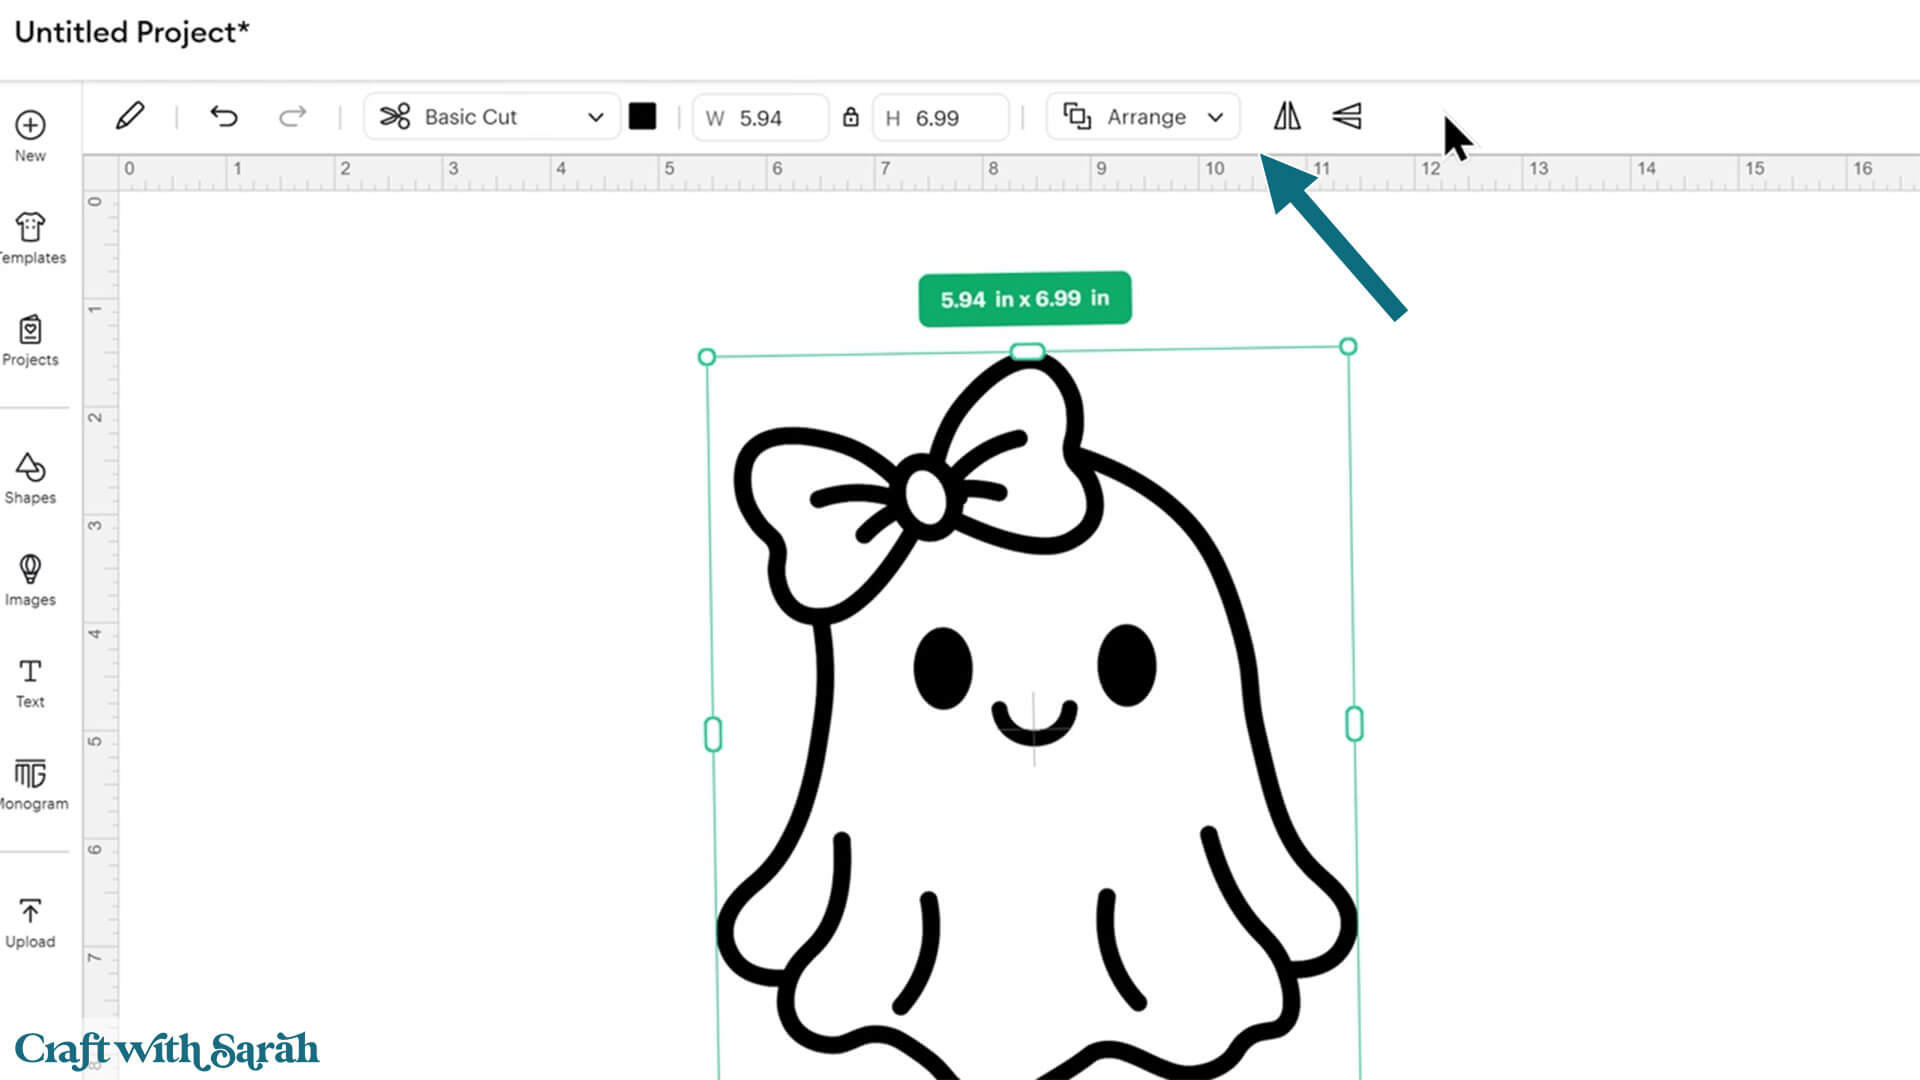
One thing to note is that the width and height box will show up to 2 decimal places by default, but when you click into the boxes they change to show 4 decimal points.
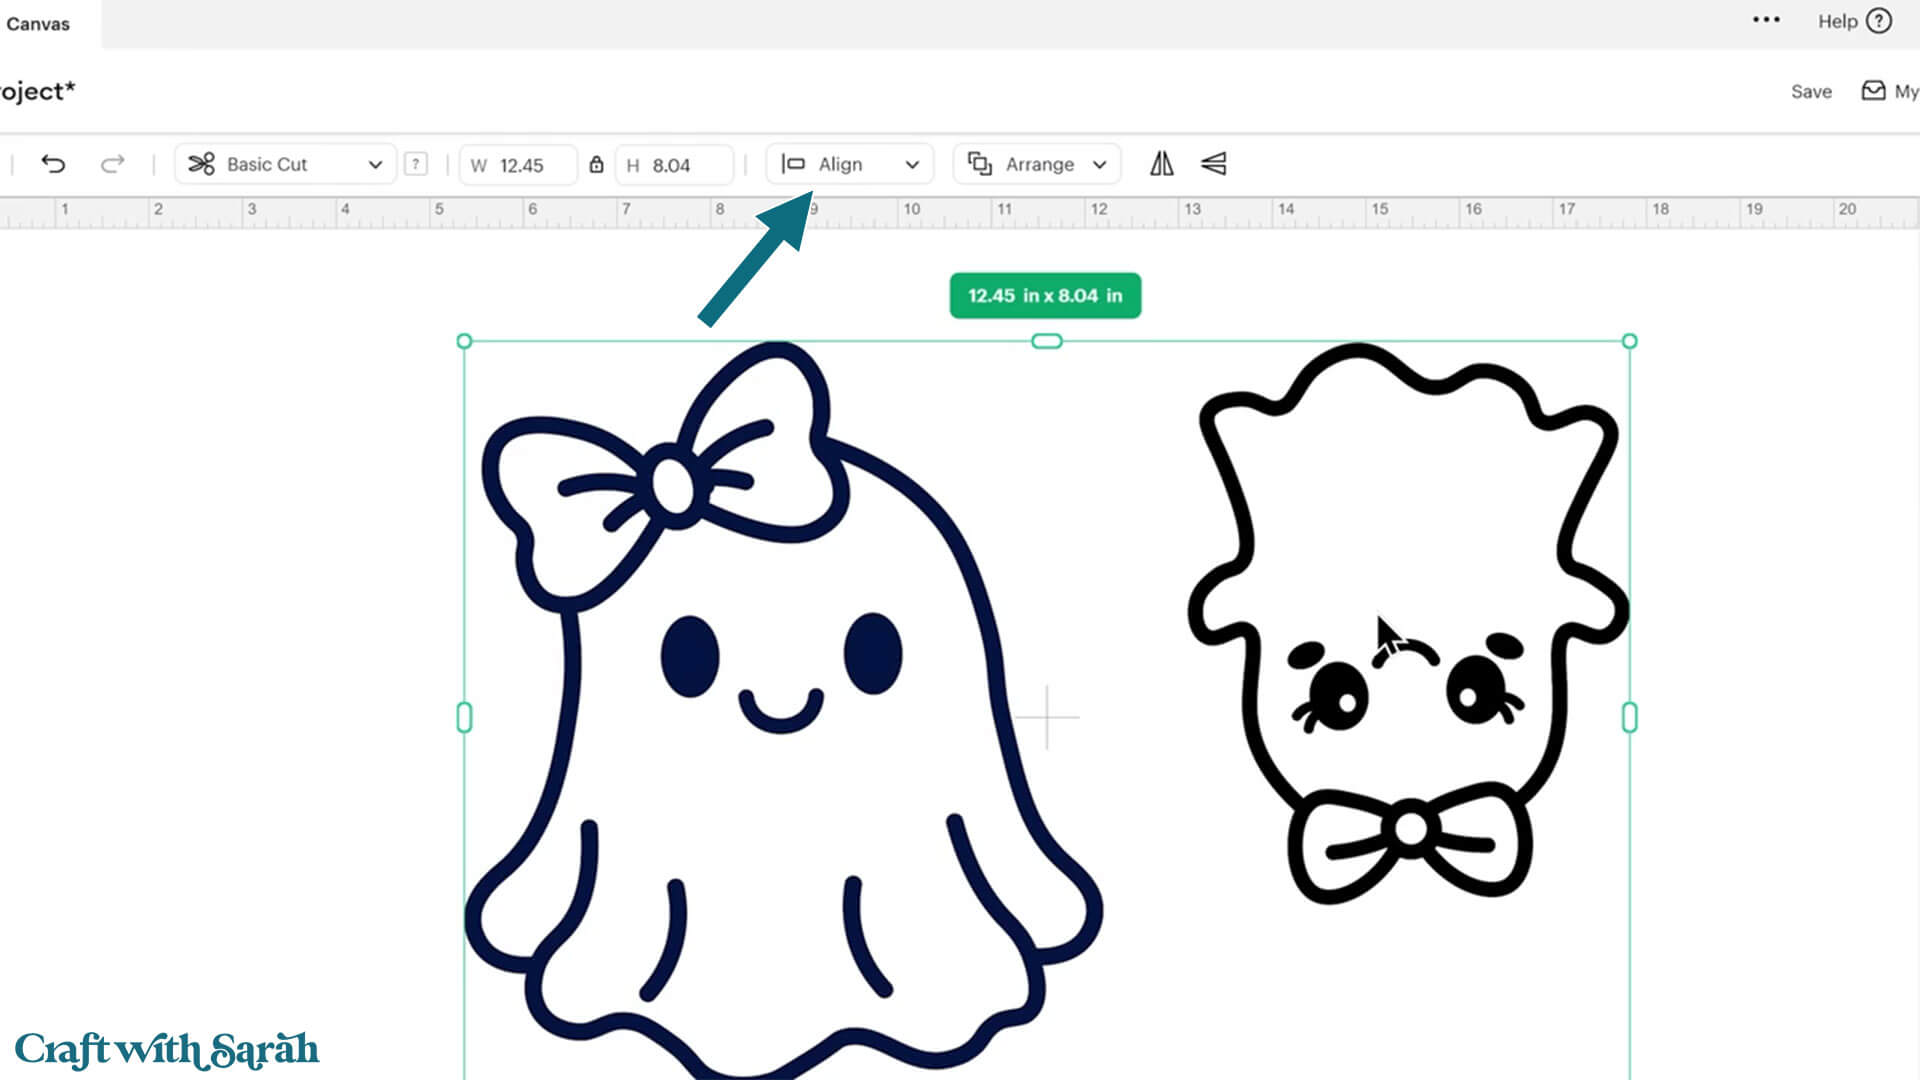
Once you add another image onto your Canvas and select them both, you will notice that the Align options appear.
But what about all the other tools that we know and love that are now missing from this top menu?
When you click on a layer or group, you can go into the “More Tools” pencil icon, and then it will show you more options.
We’ve got the X and the Y axis where we can change the position on the screen, along with rotate.
Underneath is where we’ve got the Offset, Sticker Maker and Warp tools. As you click on them, the relevant option menus will appear.
You will also see the Contour button below, under the “Combine” heading.
This is where tools such as Combine, Slice, Weld and Flatten will appear. However, rather than always displaying, they will now only appear if you are allowed to use them based on what elements on your project are currently selected.
For example, with only one layer selected, it won’t show me the Slide, Combine, Attach or Flatten tools.
When you’ve got multiple layers selected, then all of the other tools become available.
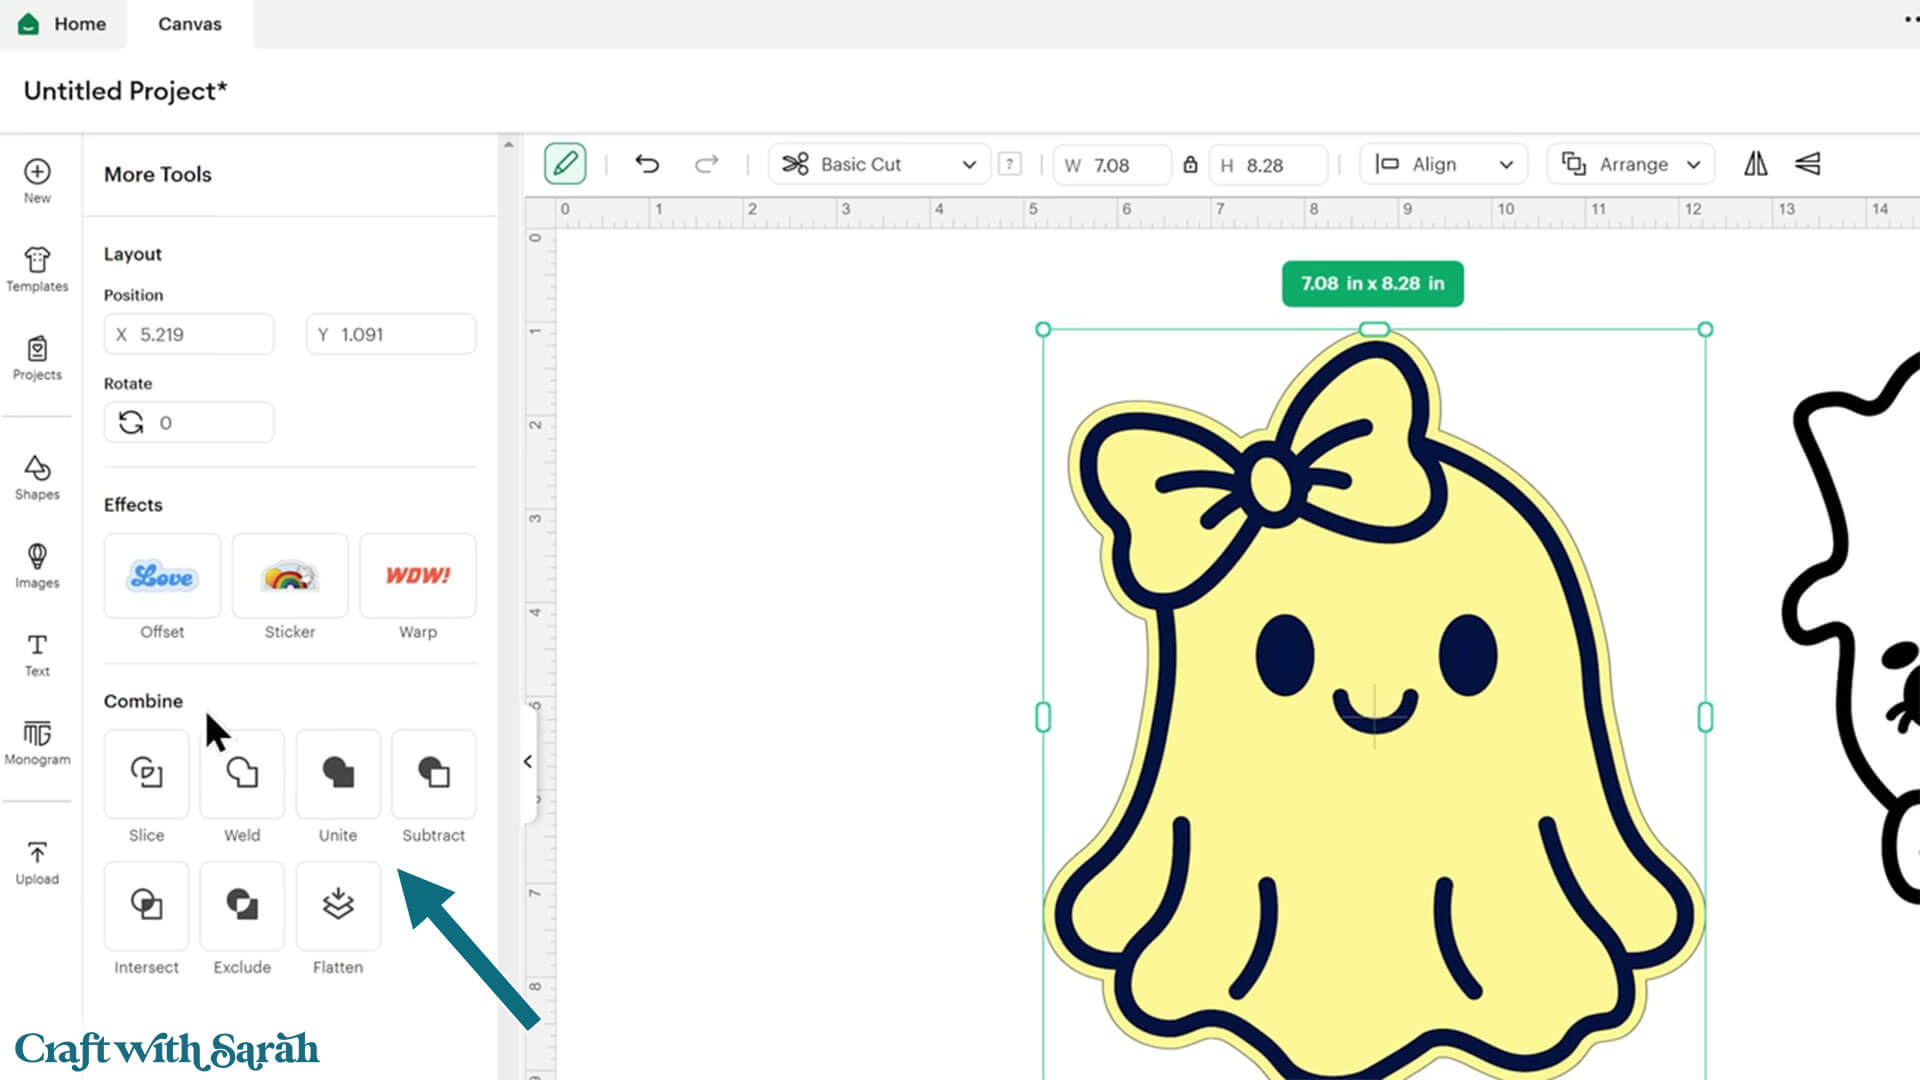
The only one that doesn’t seem to appear in there is Attach. I’m not quite sure why it doesn’t, but you can still find it at the bottom of the layers panel.
NOTE: Another update in September 2025 has moved the “Attach” button from the bottom of the layers panel. It now appears underneath whatever layer/group you have selected on the Canvas.
Select All Button Removal & Alternative
One button that is now missing in Design Space is the “Select All” button.
This button has not been moved – it has been removed.
However, there are a couple of workarounds to perform the same action.
The first is that you can click-and-drag to select everything.
If you’ve only got a couple of layers and images, that’s not so bad. But if you’re working on a very big involved project, that can be quite difficult.
An easier way to select everything is with keyboard shortcuts.
On a Windows computer, press Ctrl and A to select everything on your canvas. If you’re on a Mac, it’s CMD and A.
Working with Text
Let’s take a look at those same changes to the menu when we’re working with text instead of images.
Just like before, you can go into text and type out whatever it is that you want to write.
As you type, you see you get some of the options appear along the top bar.
Once again, we’ve got Undo and Redo, the Operations dropdown and Color box. There is also the Fonts selector dropdown.
If you click the Fonts dropdown, it will open so that you can select the font you’d like to use.
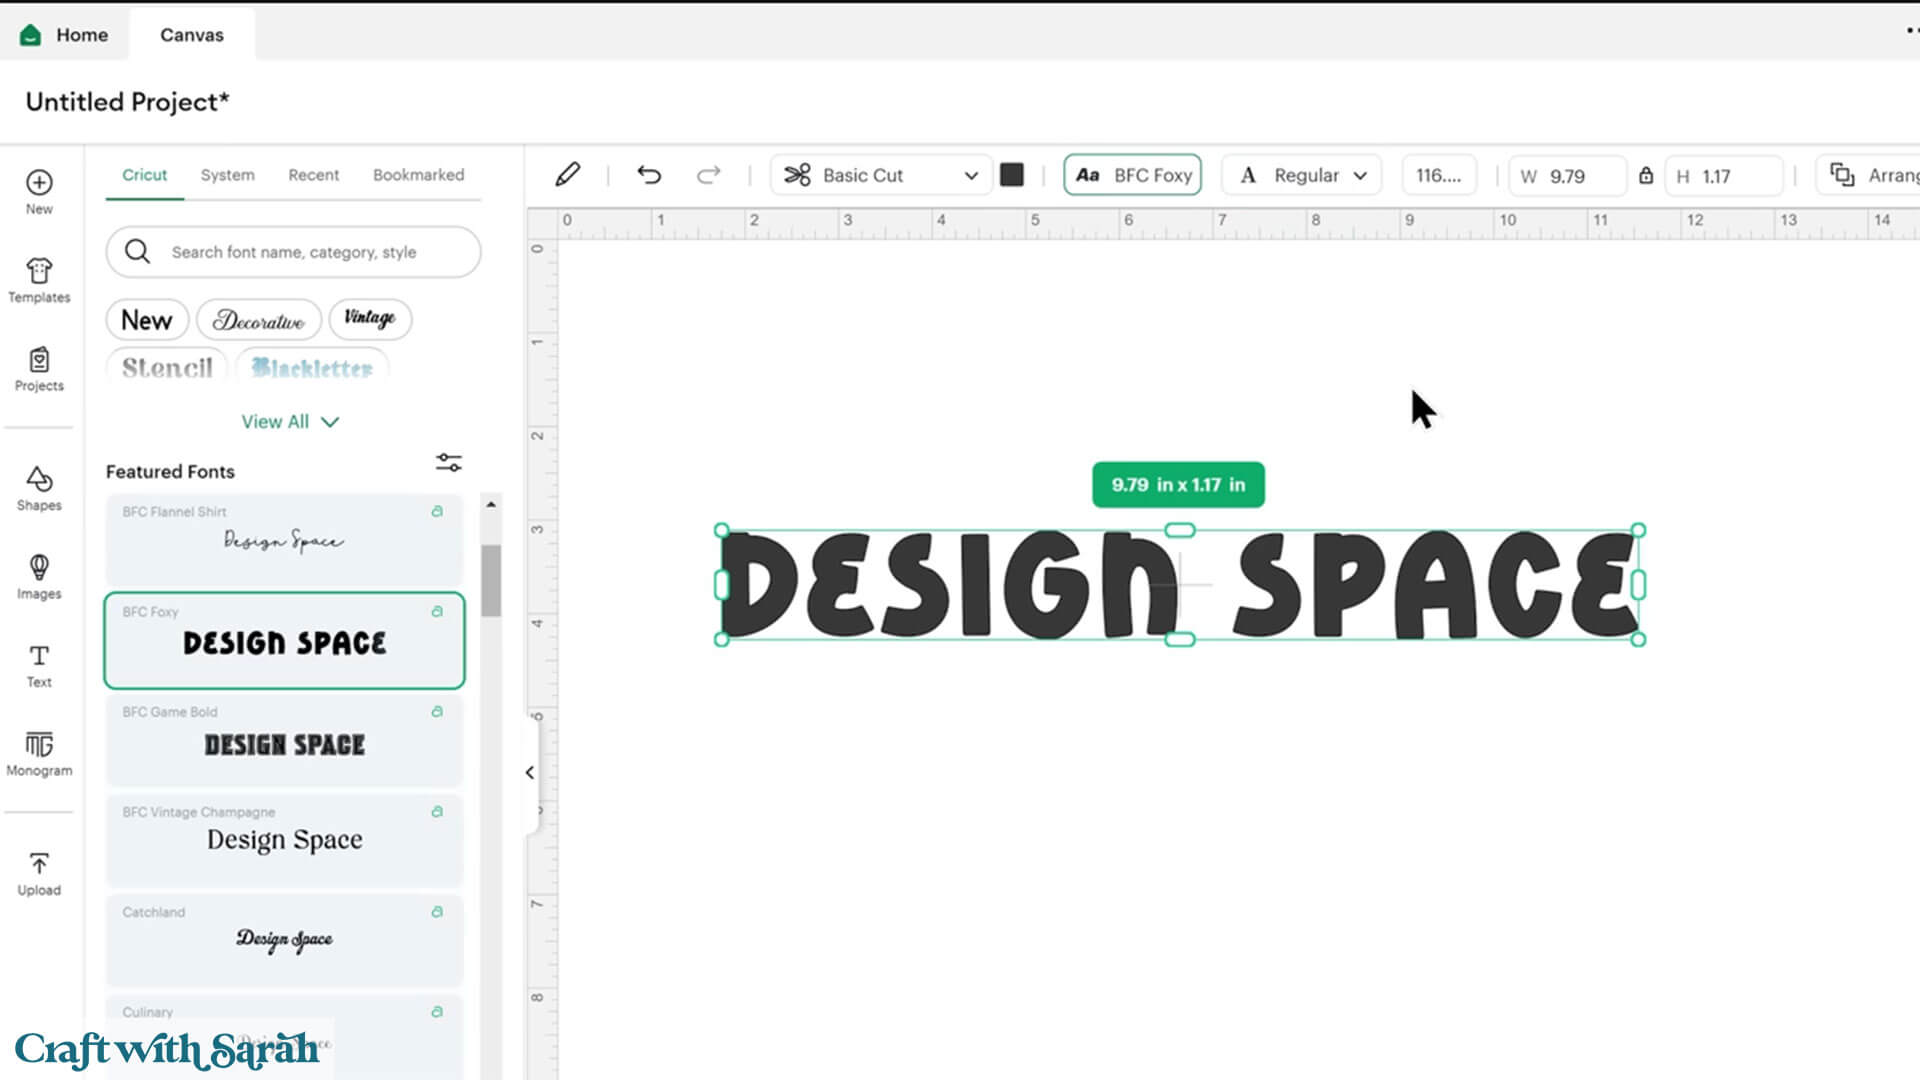
You’ll also see the box where you can change the Text layer between regular and writing fonts, as well as other options such as guide and foil.
There’s a new font size option in a small box with a number inside.
It’s a little bit hard to use this because the box is so small.

You can also use the width and height boxes to change the size.
The line height and letter spacing options are now found under the “More Tools” pencil icon.
Layers Panel Changes
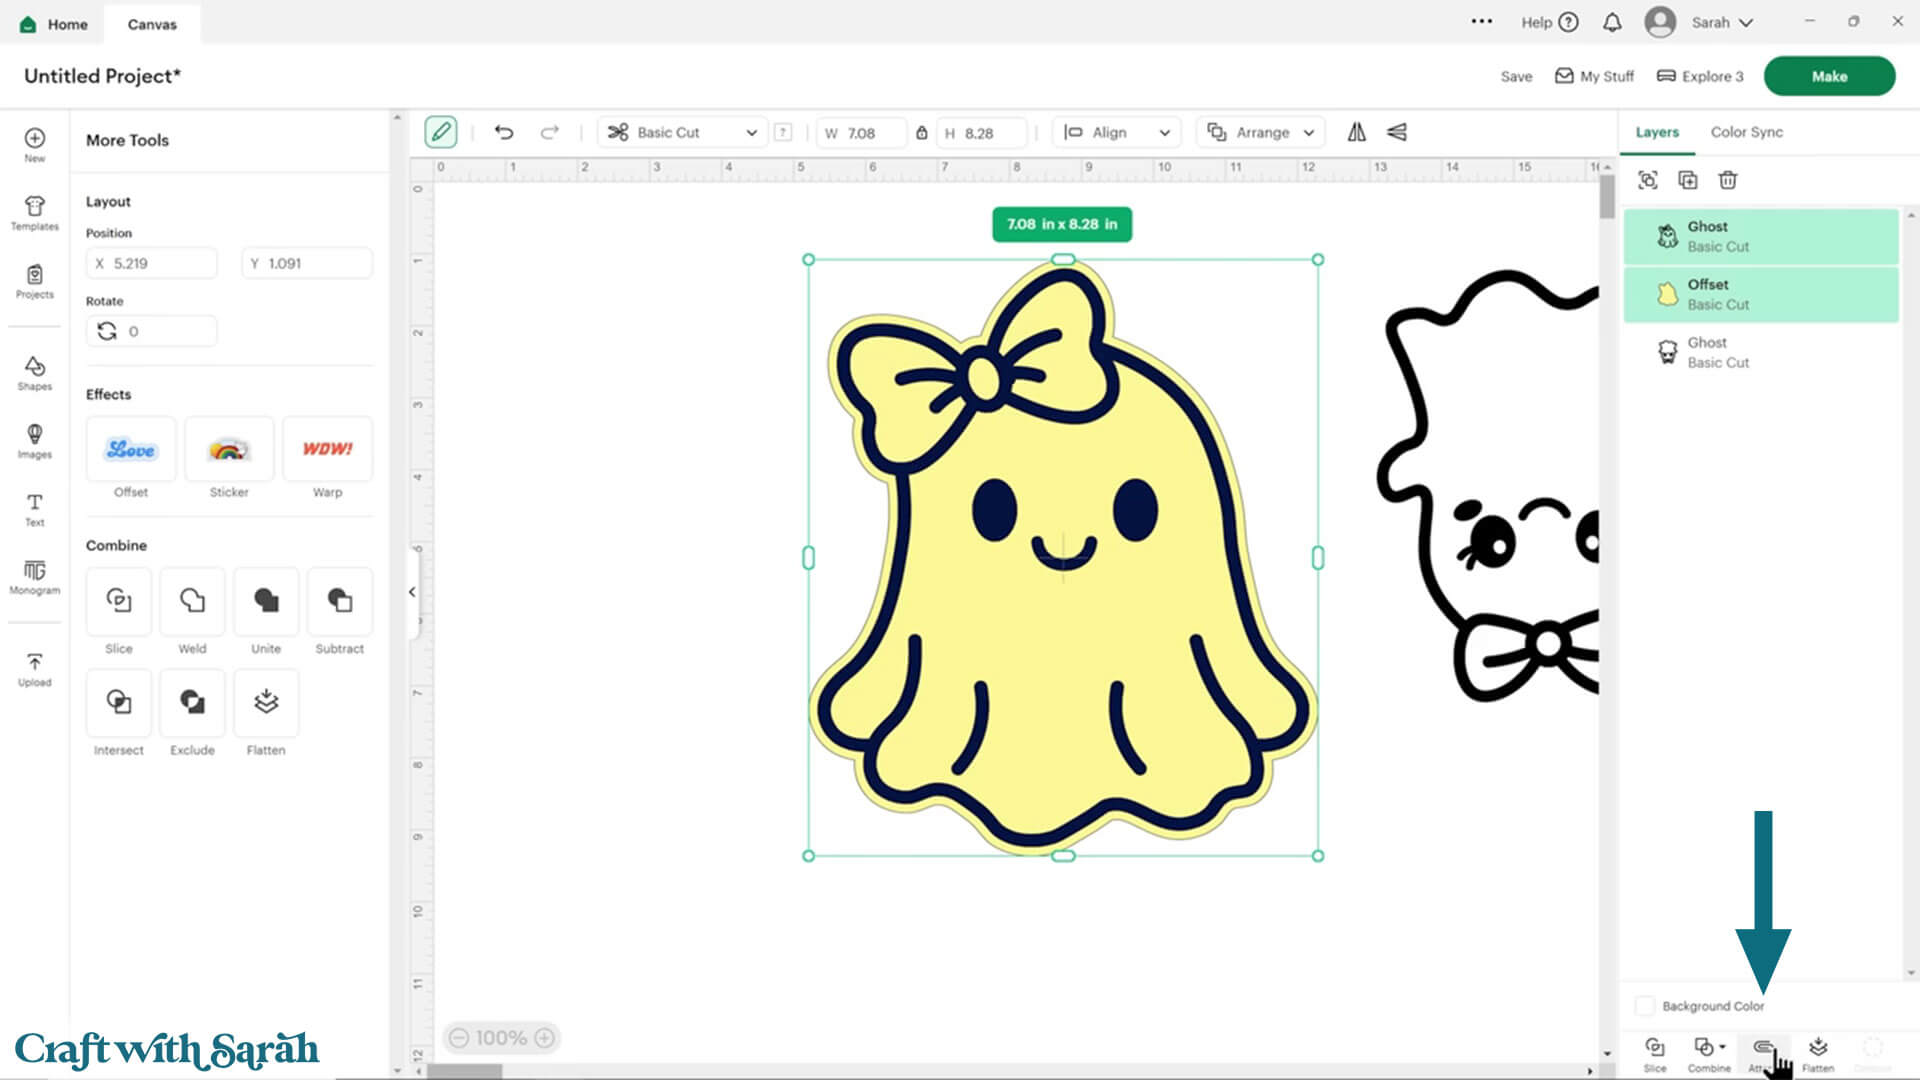
Cricut have made some changes to the layers panel, which now means that the things work a little bit differently when you’re using tools such as Slice, Combine and Attach.
Let’s take a look at an example.
I’ve got lots of snowflakes here on my screen.
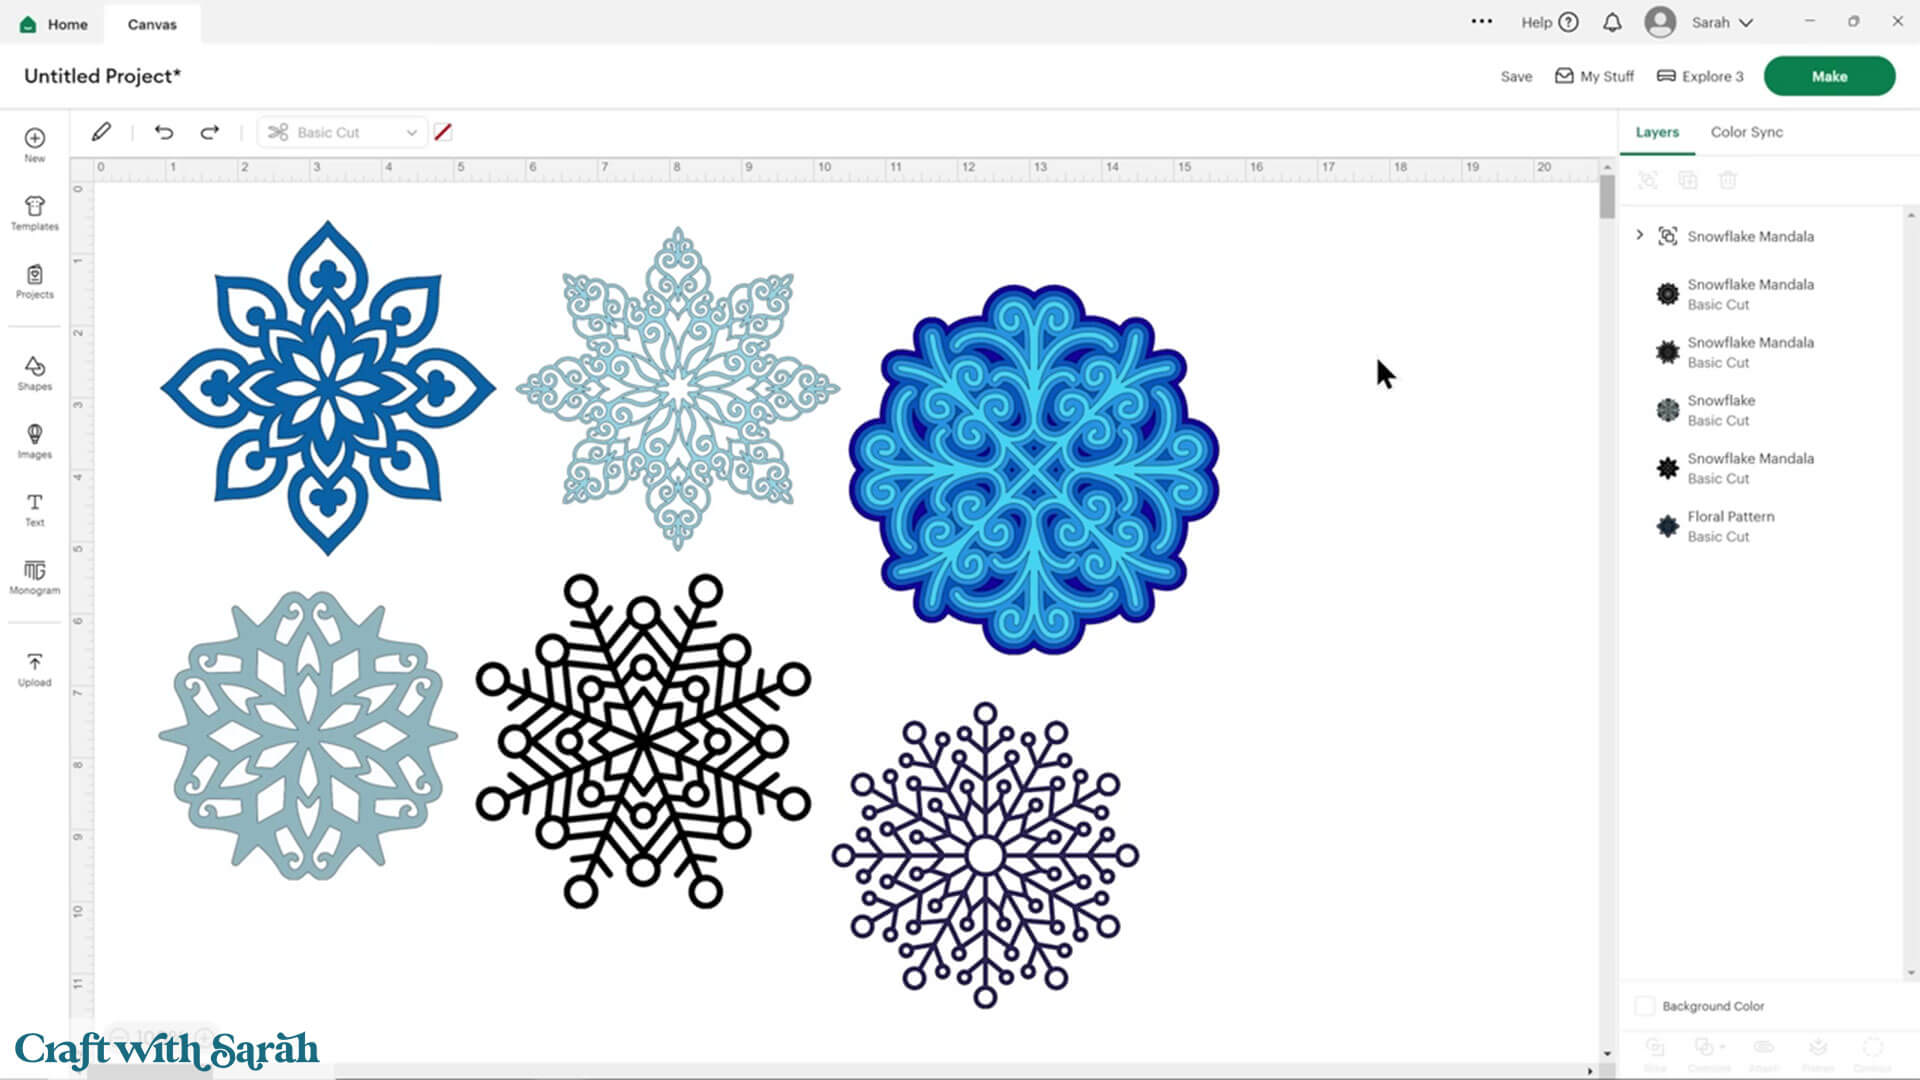
I’ll click on one of them (the bottom one in the Layers panel), hold Shift and then click on the one below, which is the third one up in the Layers panel.
They’re not next to each other in the layers panel, and they’re not at the top. Let’s say that I want to combine them and weld them together.
Go to “Combine” and then “Weld”.
You’ll notice that the Welded layer no longer jumps to the top of the Layers panel like it used to. It keeps it in the place of whatever the top layer was that you selected.
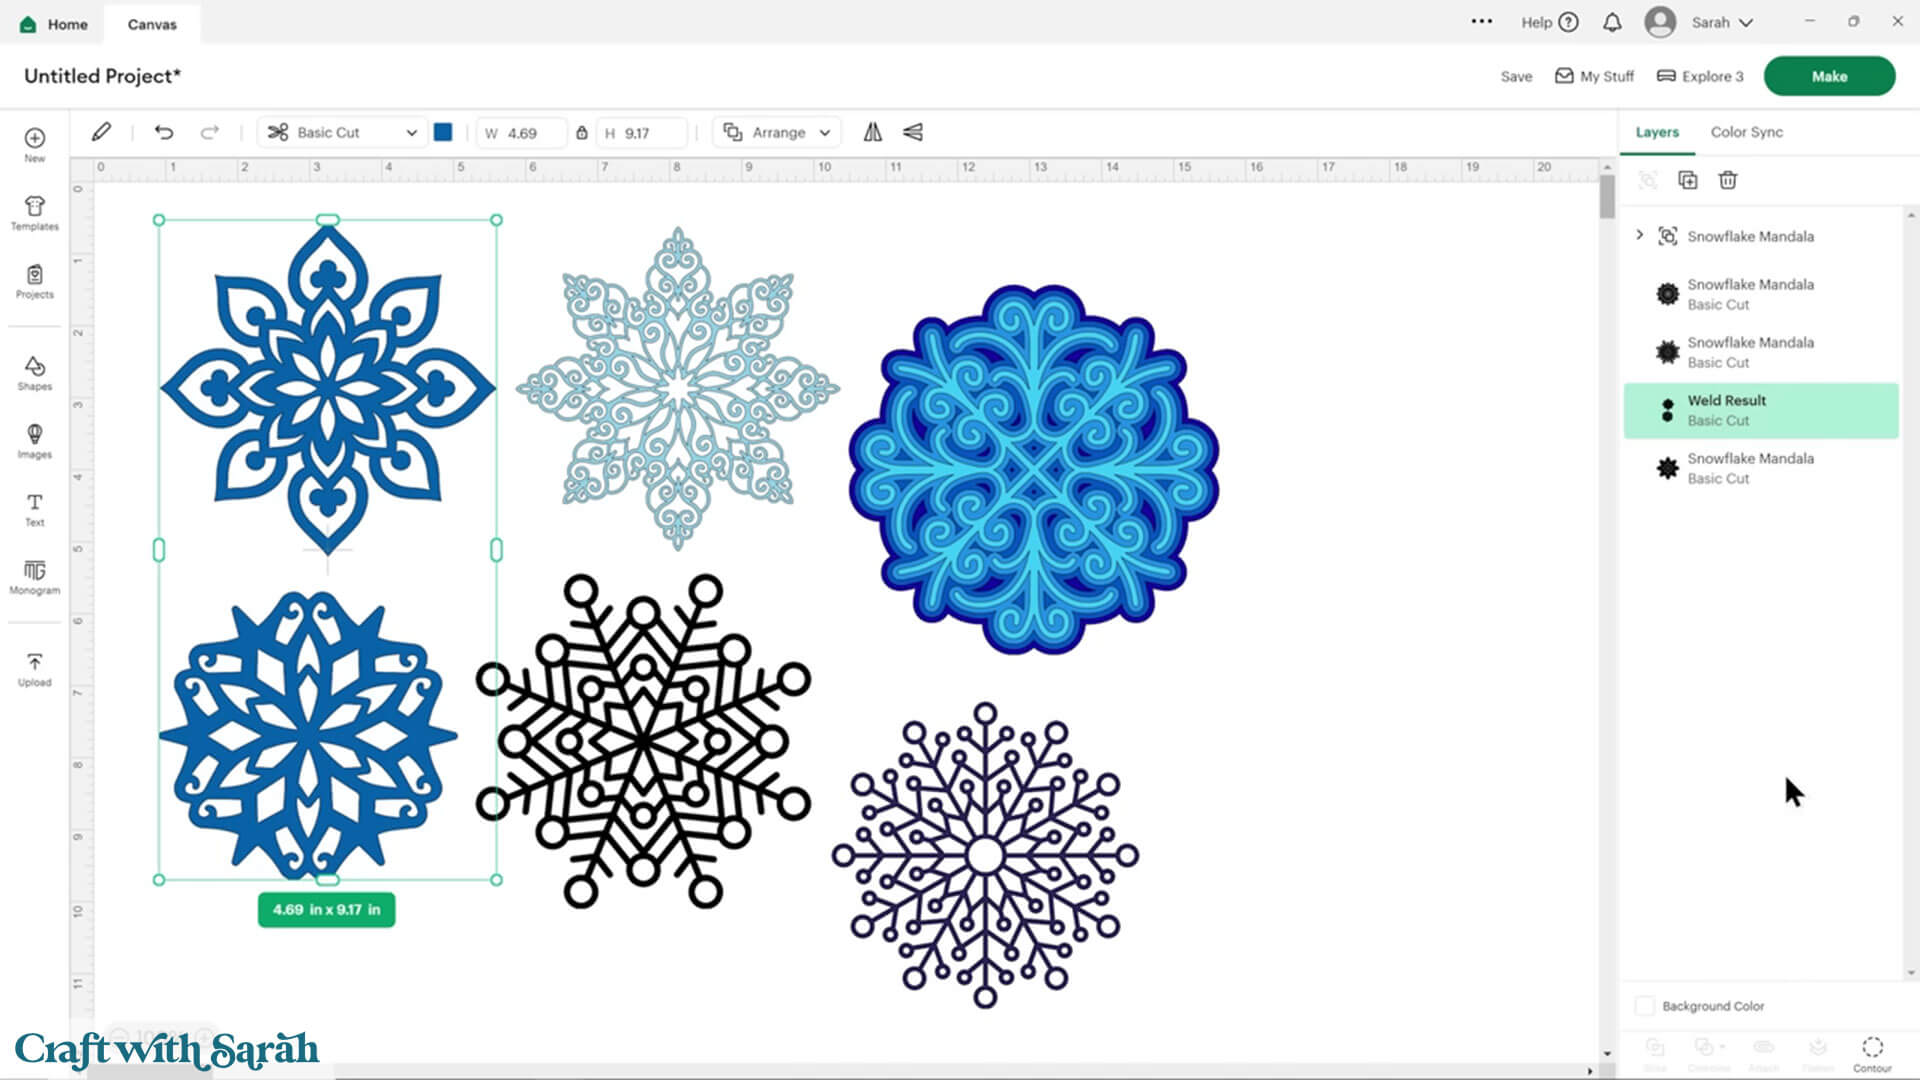
I think this is a really, really helpful change, especially if you’re working with a project where you’re doing lots of changes or if you’ve got lots and lots of different layers.
The same thing happens with all of the other different tools too. Everything stays in the correct place after making changes.
Layers Panel Bug When Moving Layers
There is a bug in the layers panel at the moment when you are moving layers by dragging-and-dropping in the layers panel.
If you move a layer, then go to move it again straight after, it will not move on the second time.
To resolve this, click another layer and then click back to the one you want to move. Now, it should let you drag-and-drop again.
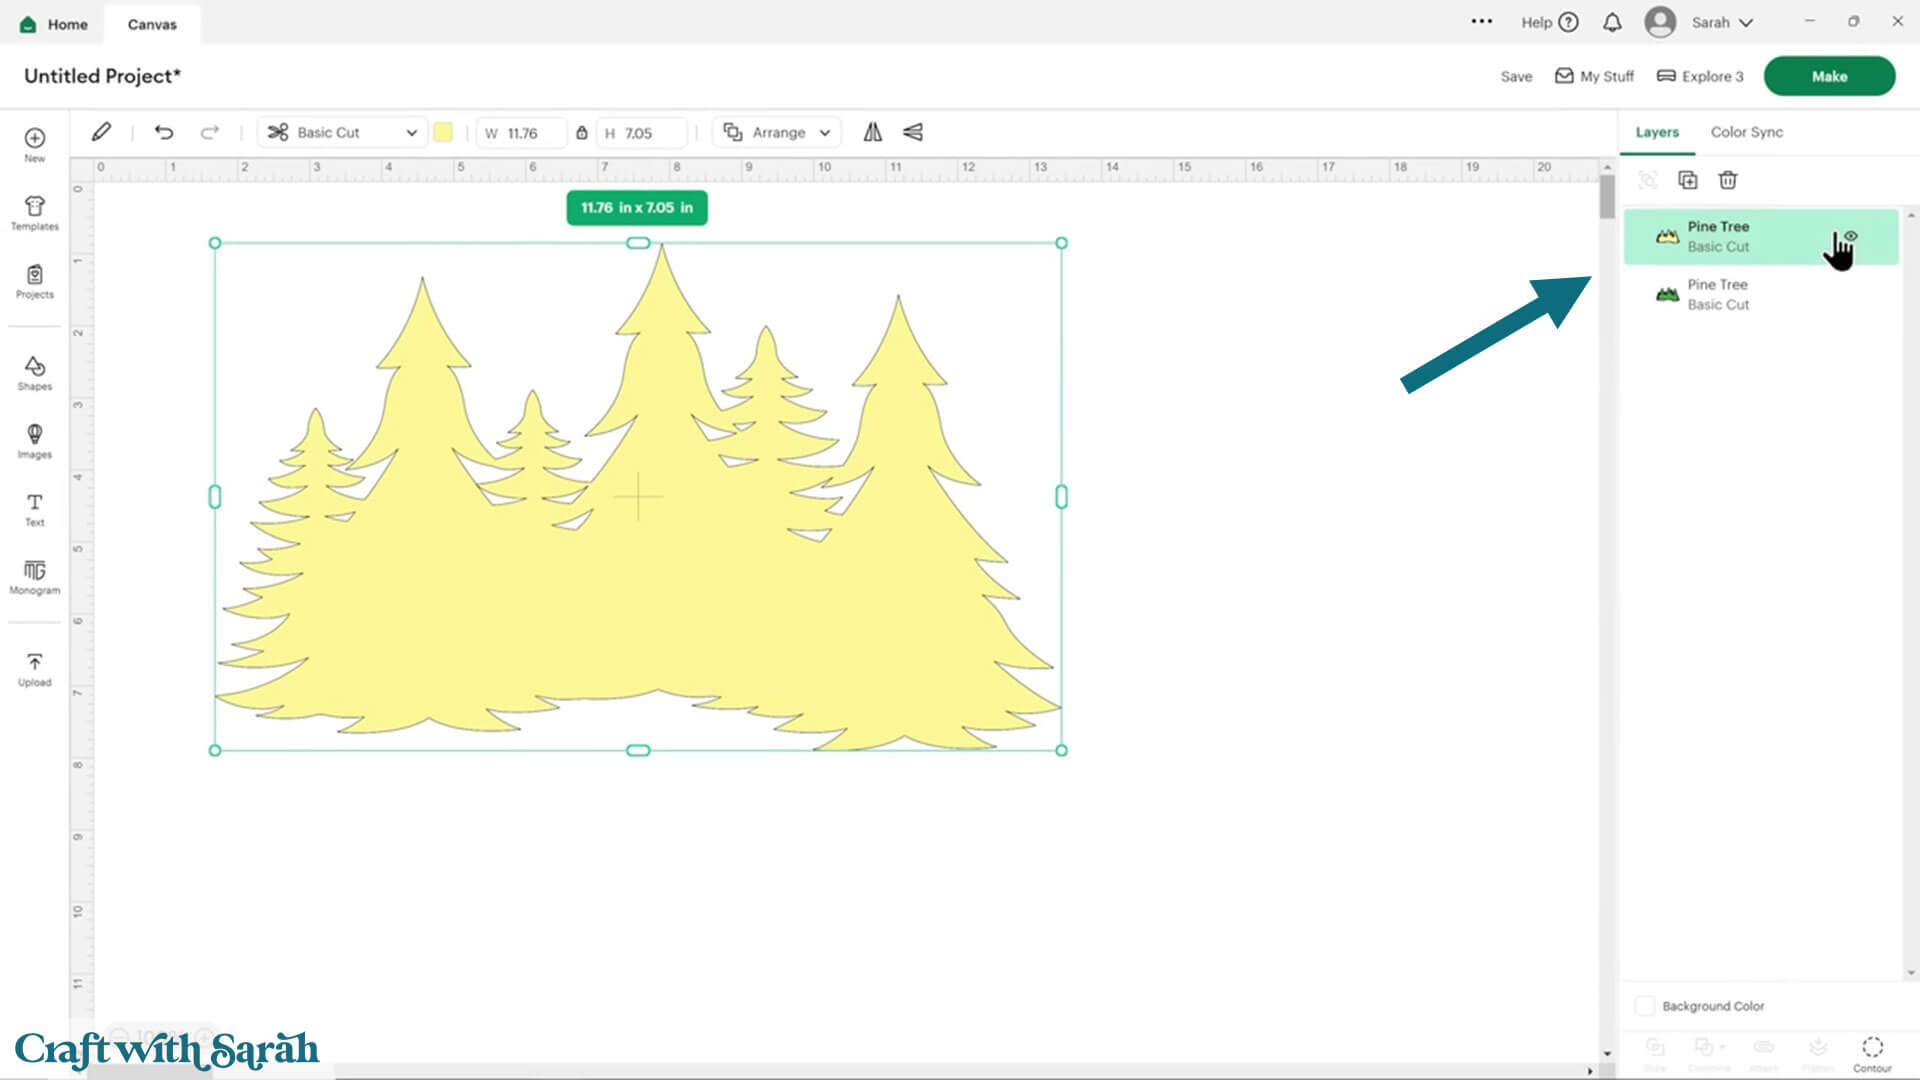
Duplicate in Place
Note: The missing “plus” icon described below has been fixed/corrected in the September 2025 Design Space update.
One of my most used features in Design Space when I’m designing is “duplicate in place”.
It’s a way of making a copy of a layer where the copy is in exactly the same place on the screen.
The reason we need this feature is that if you click the “Duplicate” button directly, it doesn’t keep the same position. That can make it difficult to design projects with multiple layers.
Yes, you could select a box around the original and the duplicated layer and press “Align > Center” to align them, but if this is part of an existing design and you’ve got lots of other things relying on the exact positioning, then you might not want to risk moving the original.
That’s where duplicate in place comes in.
It does still exist in this version of Design Space, but it’s a little bit different.
To duplicate in place, click on the layer or the group that you want to duplicate. If you’re on a Windows computer, press the Alt key. If you’re on a Mac, press Option.
Previously, you could then wiggle your mouse slightly and a “+” icon would appear on your mouse cursor.
That plus icon now does not appear, but the function still works.
You still need to move your mouse ever so slightly and then click. I’ve now got a copy in exactly the same place.
It will no longer put the duplicated version at the very top of the layers panel which makes things much easier when working on projects.
Instead, it appears directly above the layer you just duplicated
Sizing Bug with Large Uploads & Projects
If you’re working with uploaded files that are very large, for example, one of my giant signs or an off-the-mat project, then there’s a little bug to be aware of.
I’ve loaded in my giant Chinese New Year dragon. This is a really, really big project. You can see it’s loaded in at 20 inches wide and 23 and A4 inches tall.
It can still be cut on your regular size cutting mat from regular size card stock because all of the big bits are separated into different pieces.
You can kind of see some of those join lines along there and then you put all the bits together. You glue them together once it’s cut out.
Currently, Design Space is having a little bit of a problem realizing that big designs can still be cut on regular paper.
What it’s doing is calculating the full size of the project 20 inches wide and it’s putting an exclamation mark in the layers panel and saying it’s too big to cut.
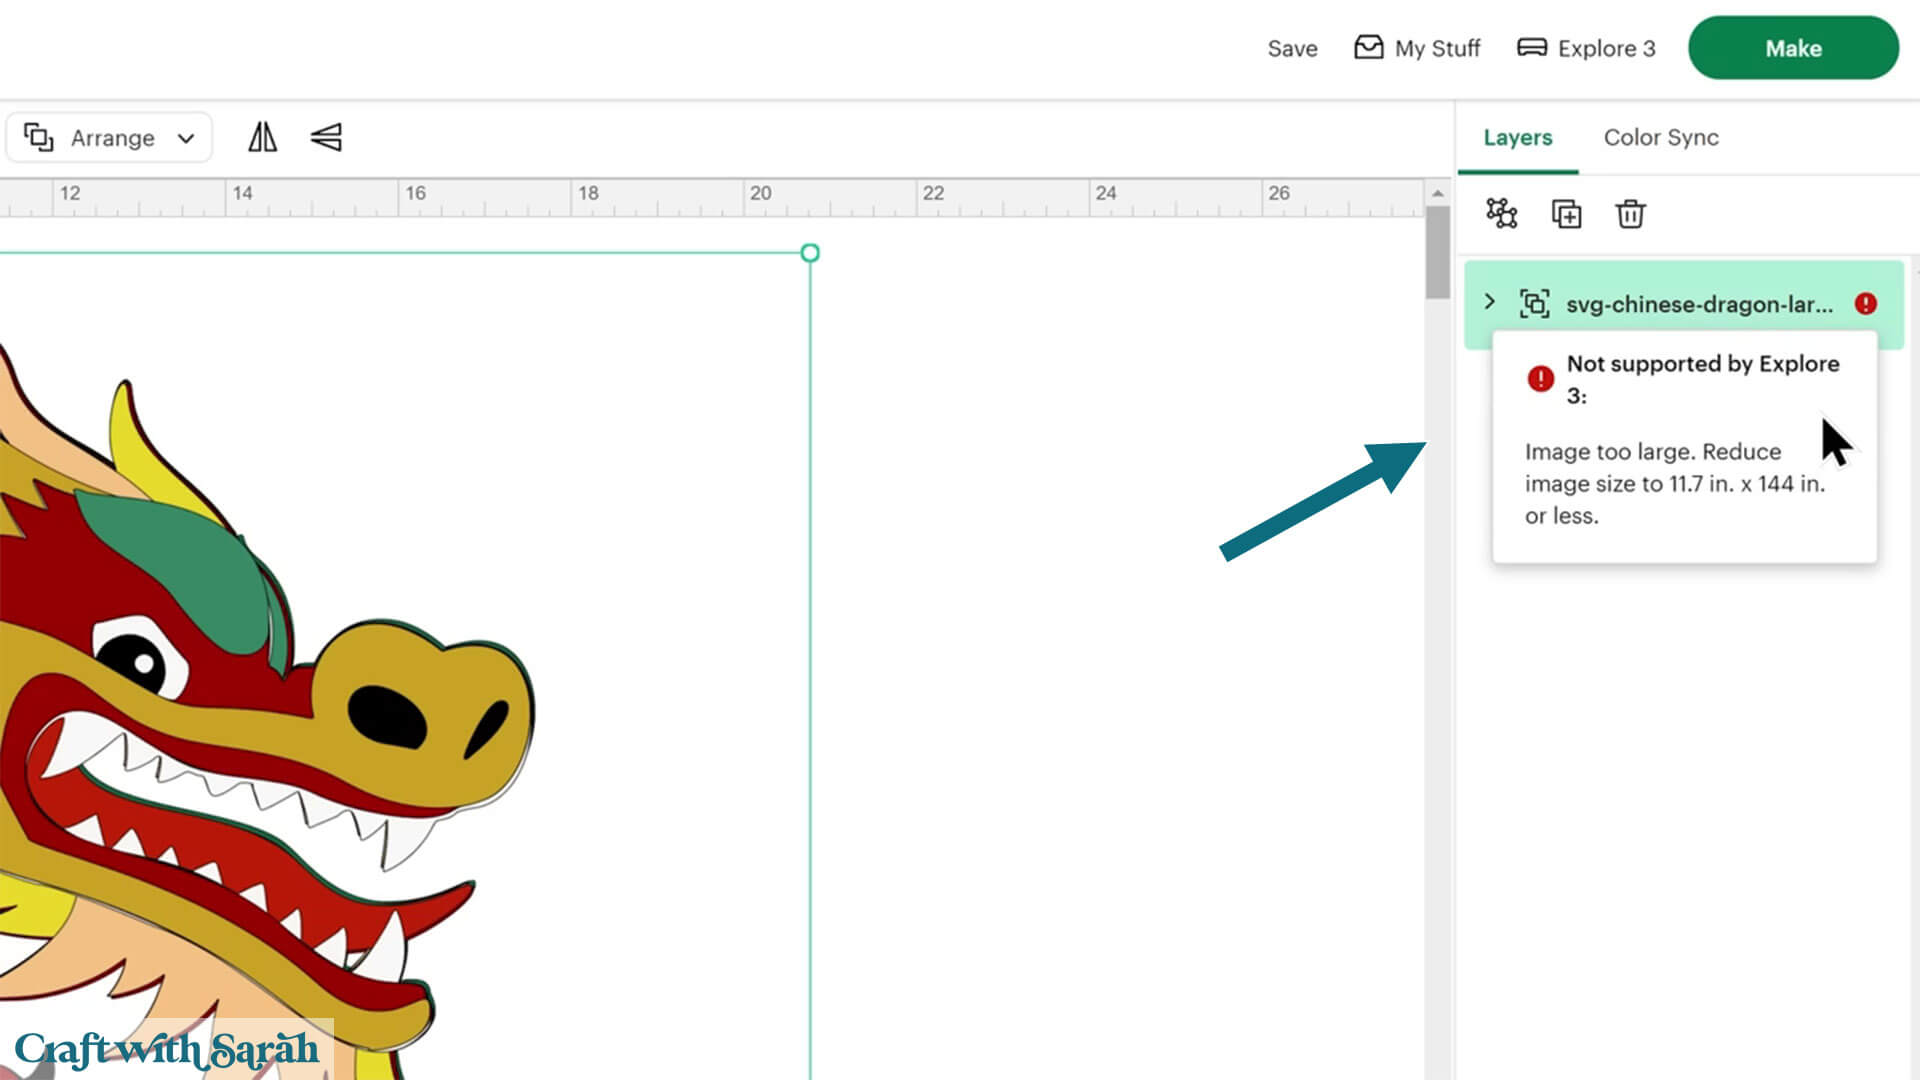
This error is wrong, because the individual pieces in the design are small enough to cut.
Luckily, it’s a really easy fix. We’ve just got to ungroup the layers by clicking the design and pressing “Ungroup”.
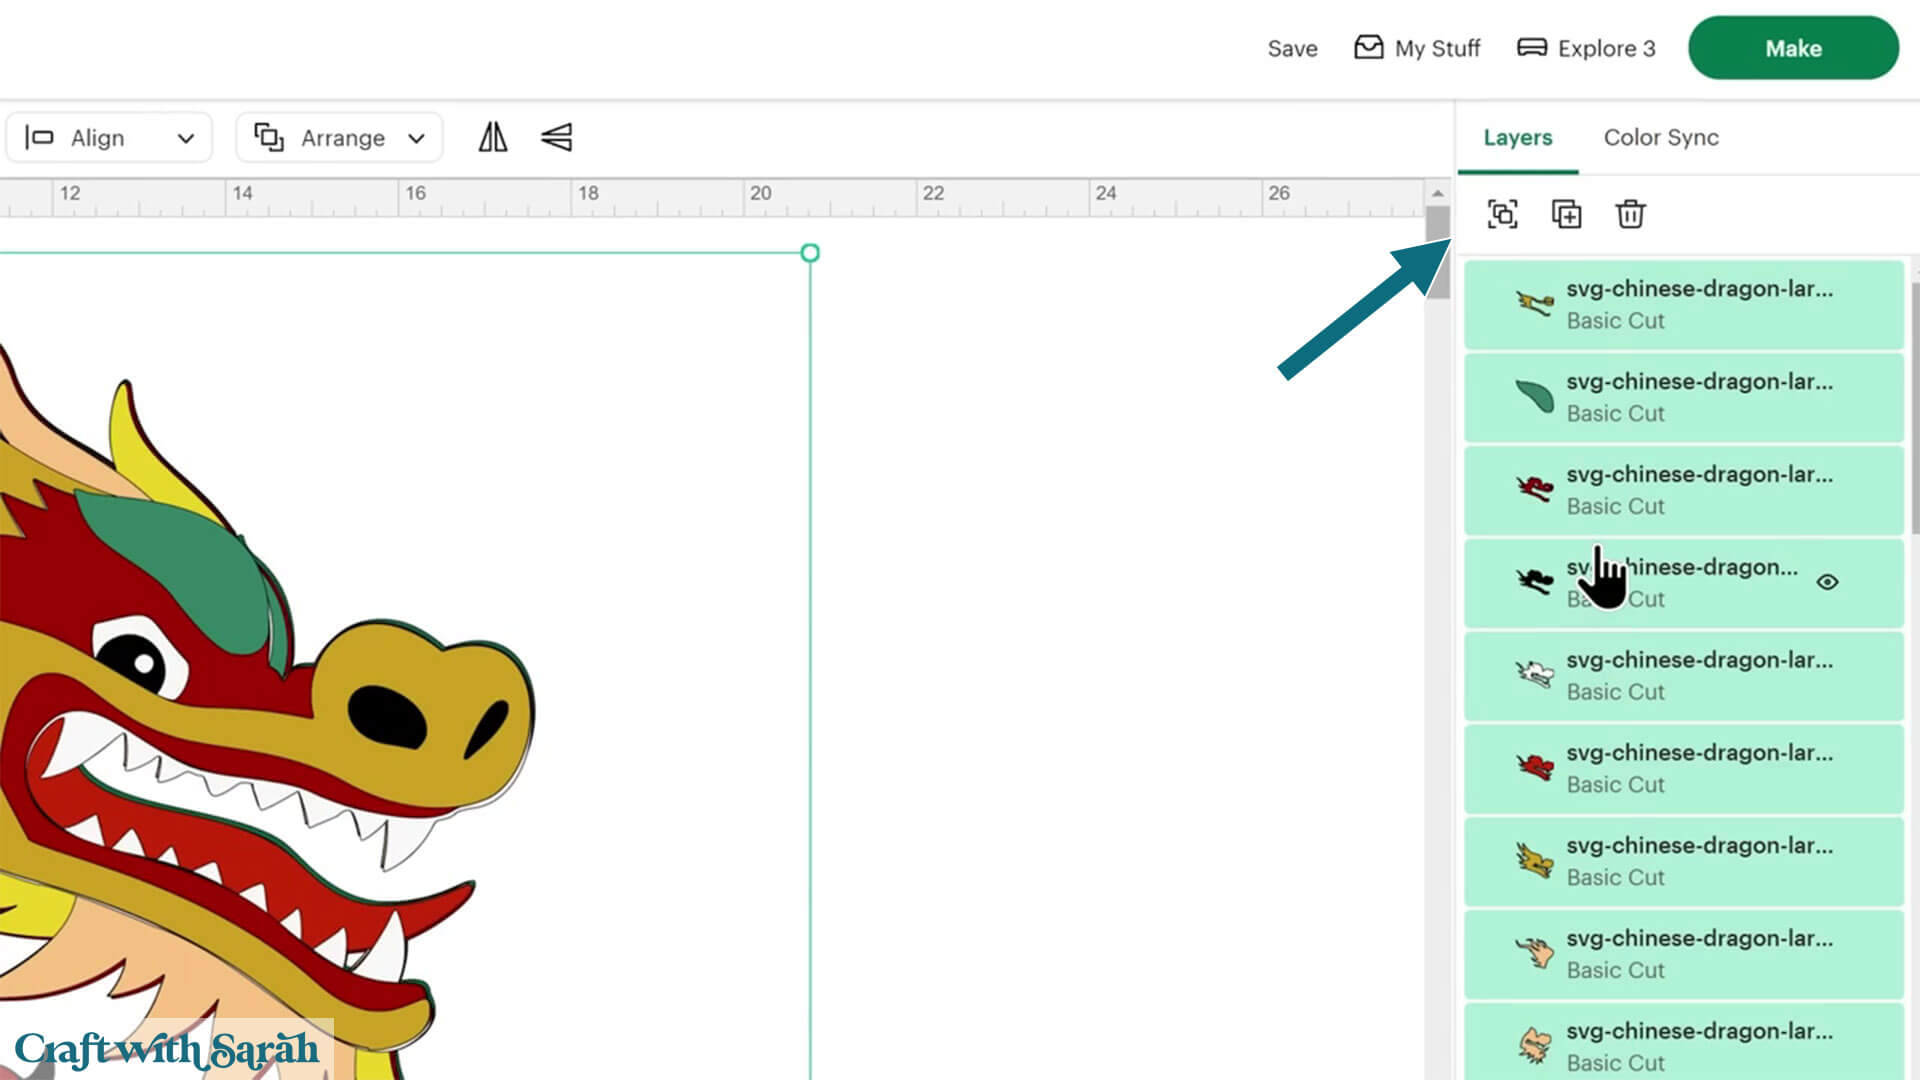
If you see that error, it won’t let you cut your project until you Ungroup the layers.
Depending on the project you’re working on, if it’s got other groups within that original group, you may also have to ungroup those, too.
Switching to “Beta” Mode
There are additional new changes, but these are not in the “Live” version of Design Space yet.
They can be accessed by switching to the “Beta” version of Design Space.
To change your Design Space to the Beta version, click your name in the top right and then click “Settings”. Under “Application Experience”, click “Beta”.
That will then install the beta version on your computer which may take a few minutes.
You can switch back to live at any time.
Note: The remainder of this tutorial uses Version 9.35.85 (Beta).
Spellcheck on Text
Something that is very exciting is the new text spellcheck feature.
This is something I have hoped would come to Design Space, as I tend to type things out very quickly and then make mistakes because I don’t go back and check.
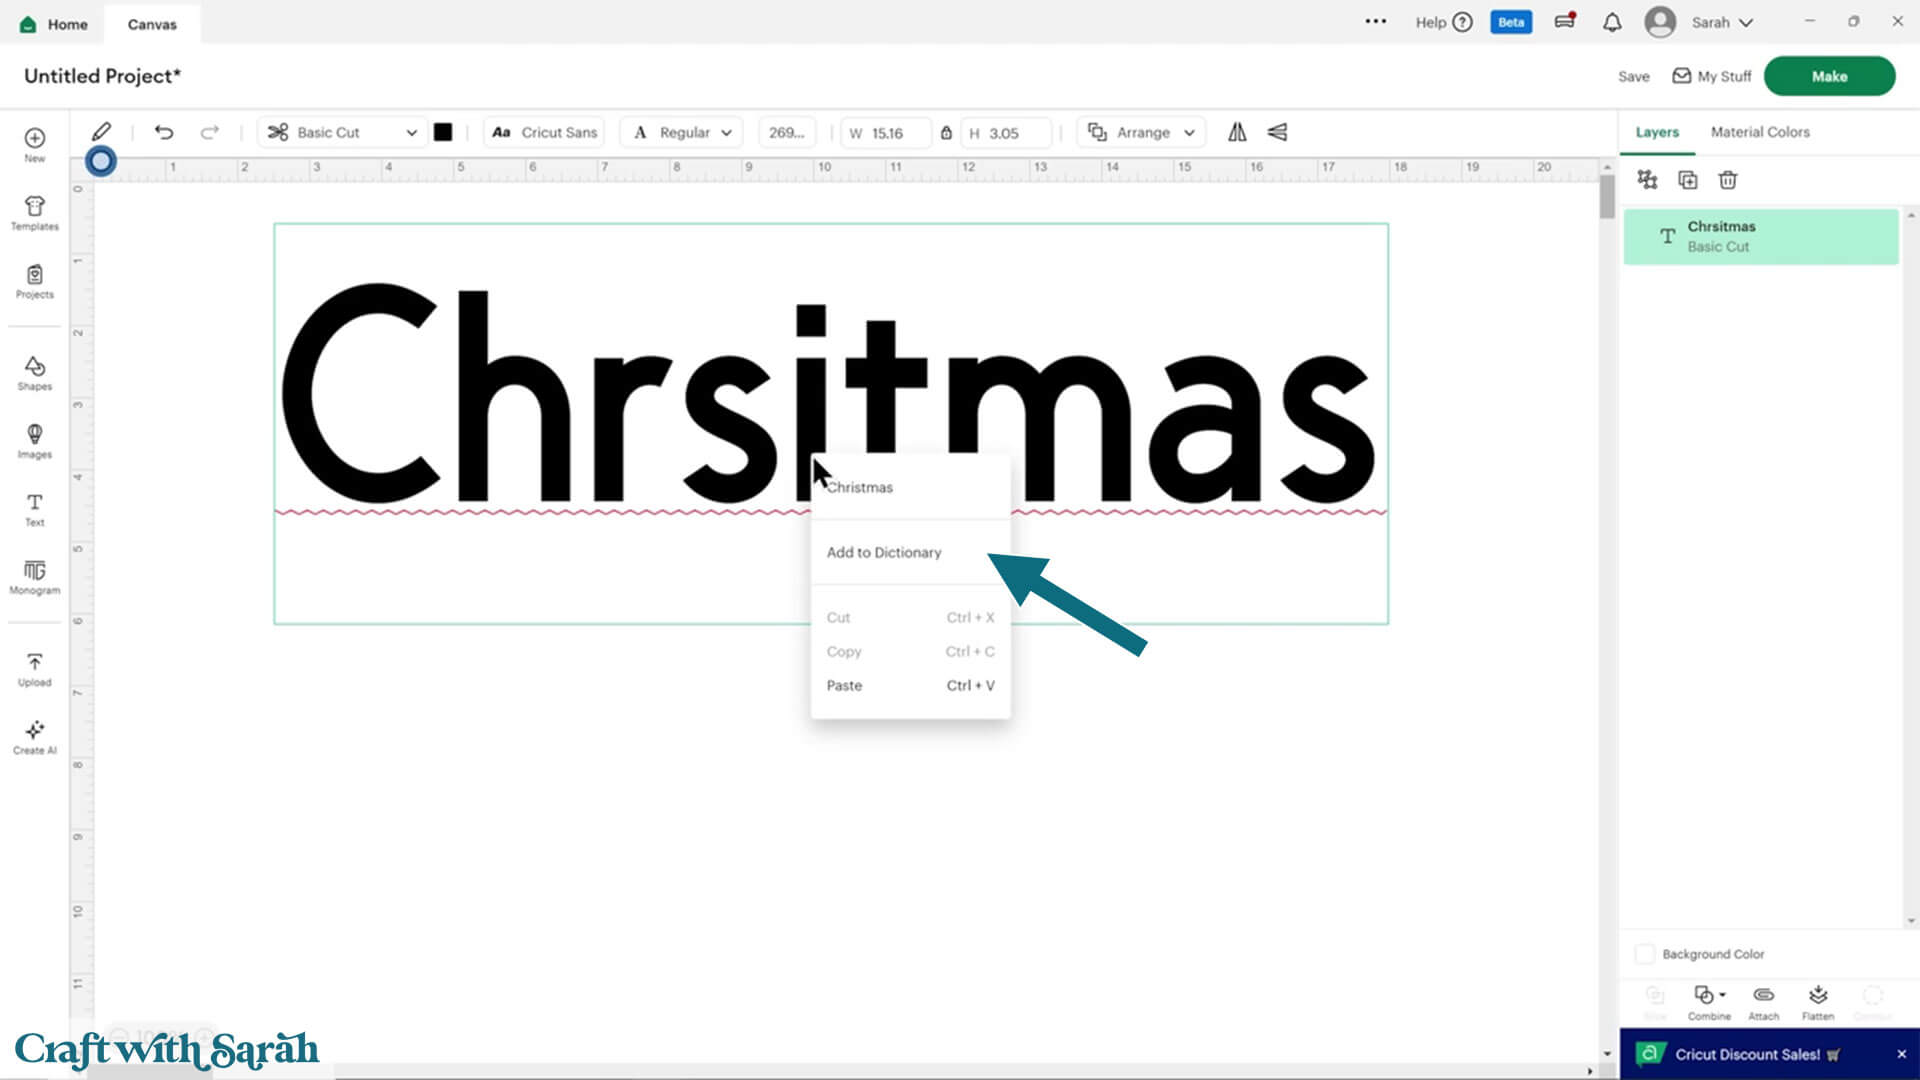
Let’s type Christmas but purposefully spell it wrong.
It now knows and it’s telling me it’s wrong because it’s got that red line underneath it.
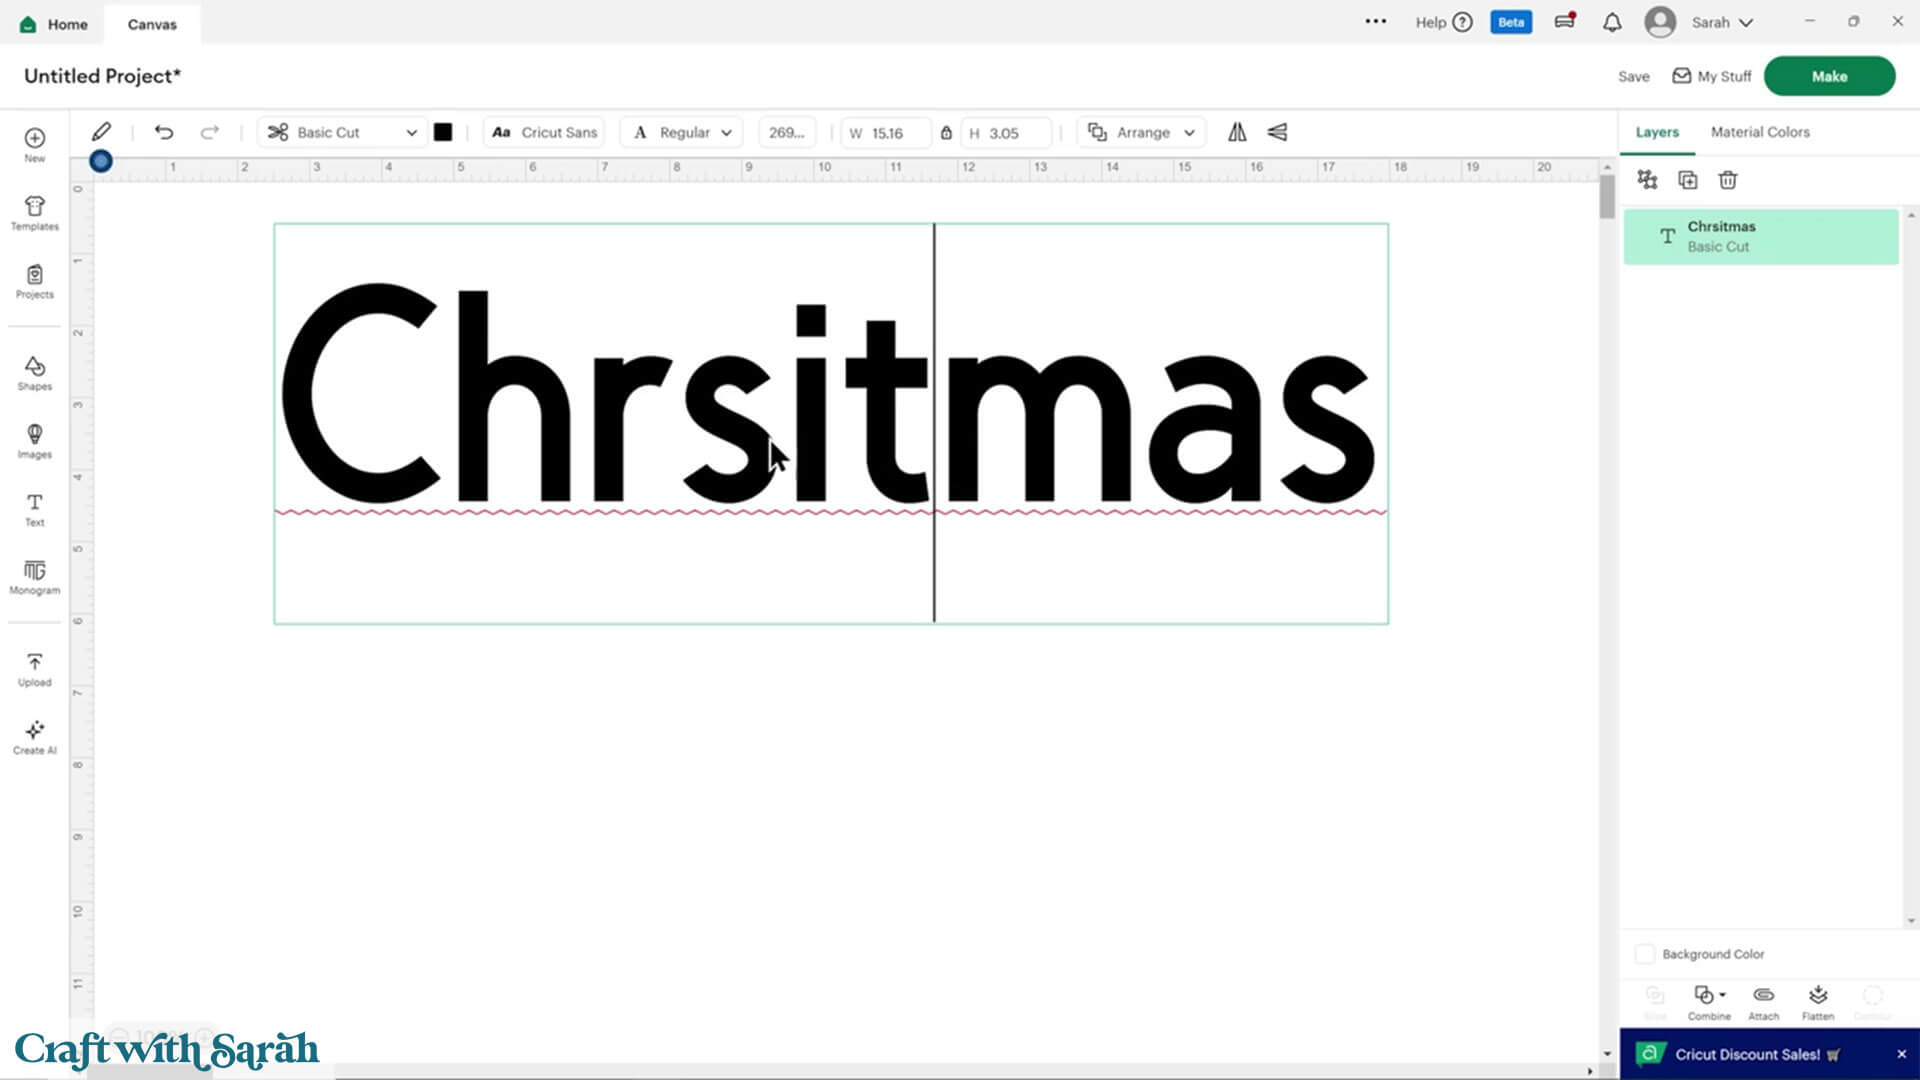
I can right click and then it’s going to tell me the correct spelling.
If this was a word I specifically wanted to be this way, I could add it to the dictionary and then it would remember and realize this was a correct spelling.
Color Sync Changes
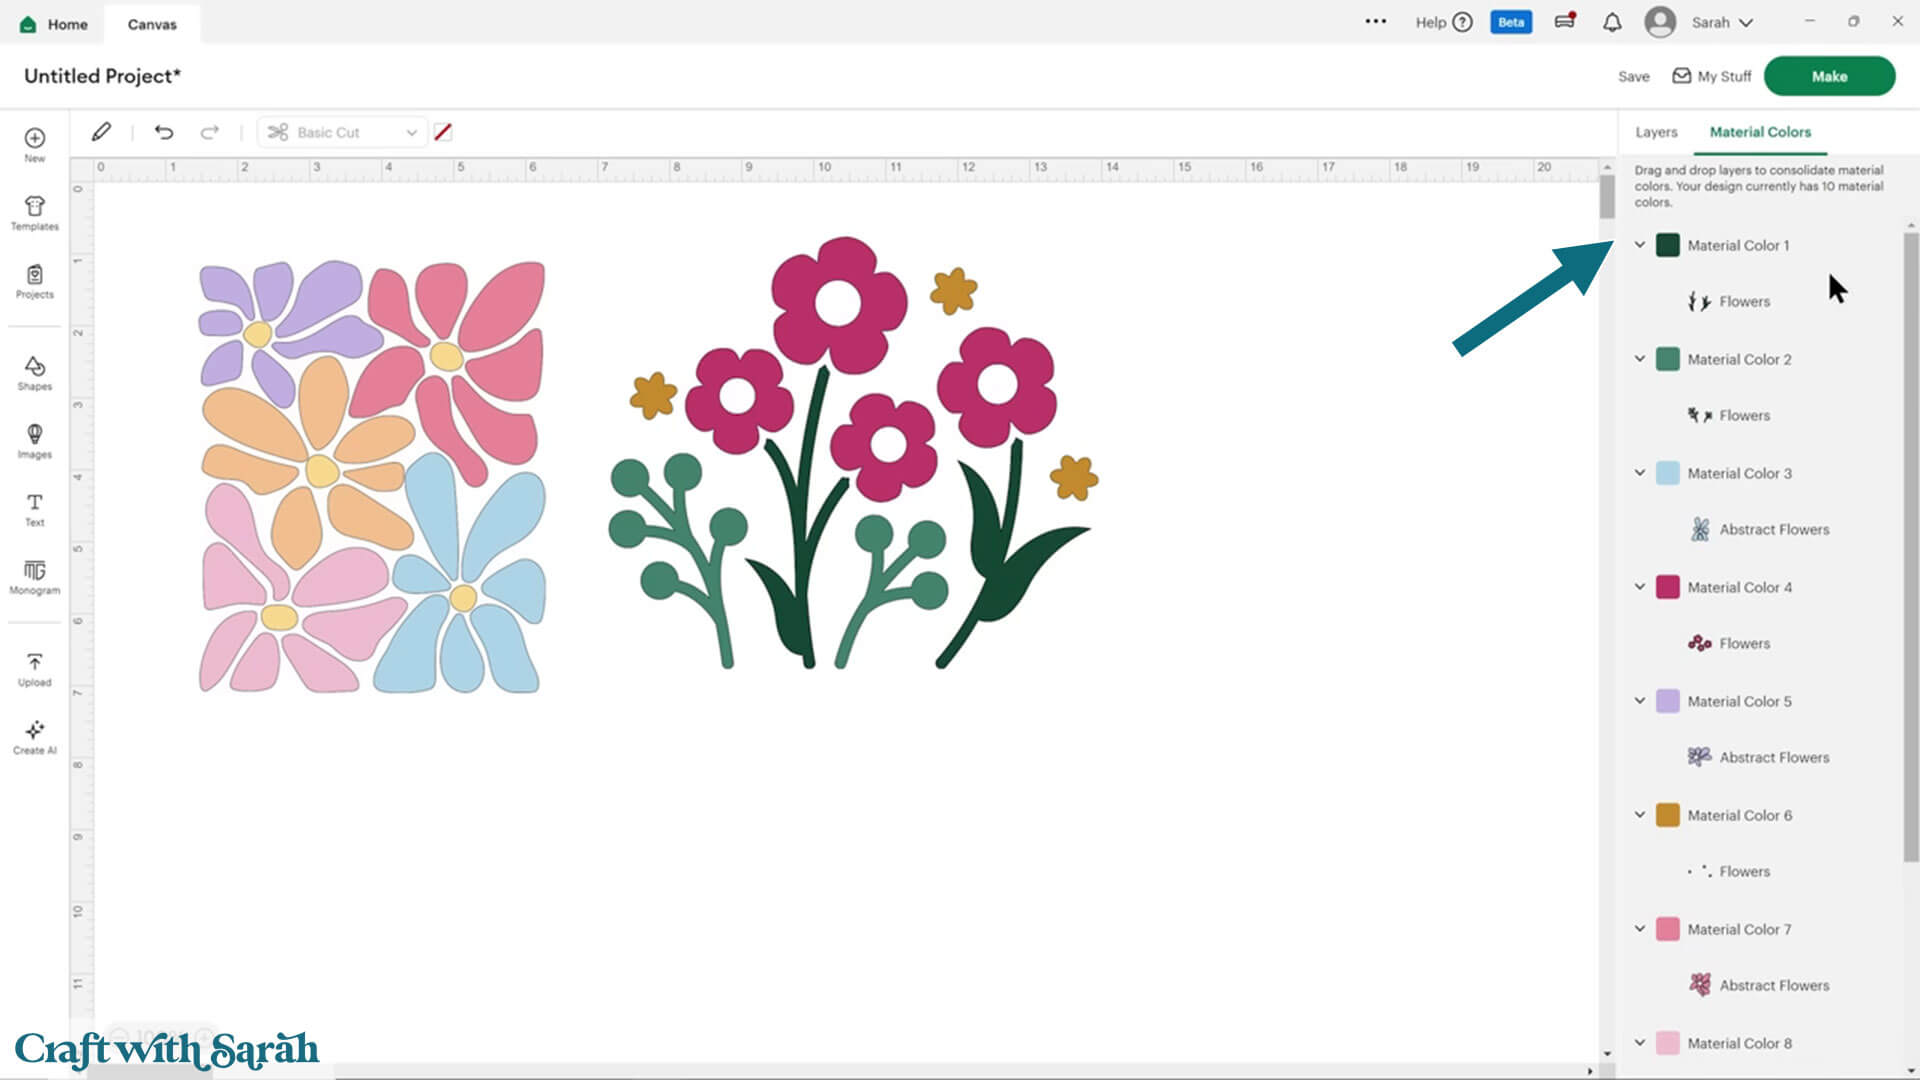
Another change in this Beta version of Design Space is that the “Color Sync” option at the top of the layers panel has been renamed to “Material Colors”.
There are a couple of other changes relating to this feature too.
I use this all the time. It’s a way to easily drag and drop multiple layers to change the color to something else in your design.
You can also use it to check that you haven’t accidentally put very similar versions of the same color that would then come up as a different mat to cut on.
Let’s click on “Material Colors”. That changes the layers panel to look like all of the different colors split out.
The Color Sync used to give you the computer codes for each of the colors, called hexadecimal codes, which as a designer I found very helpful because I could work out when I’m testing new designs if I’d accidentally put the wrong color in there somewhere.
However, I know that for some Cricut users that was a little bit confusing because there was kind of the question of “what are these weird codes” and if they related to a particular brand of cardstock or vinyl (which they did not – it’s just the computer color).
So now, it is simpler by listing out the colours with a simple 1/2/3 numbered list instead.
You can still click and drag to change the color by dropping it into another.
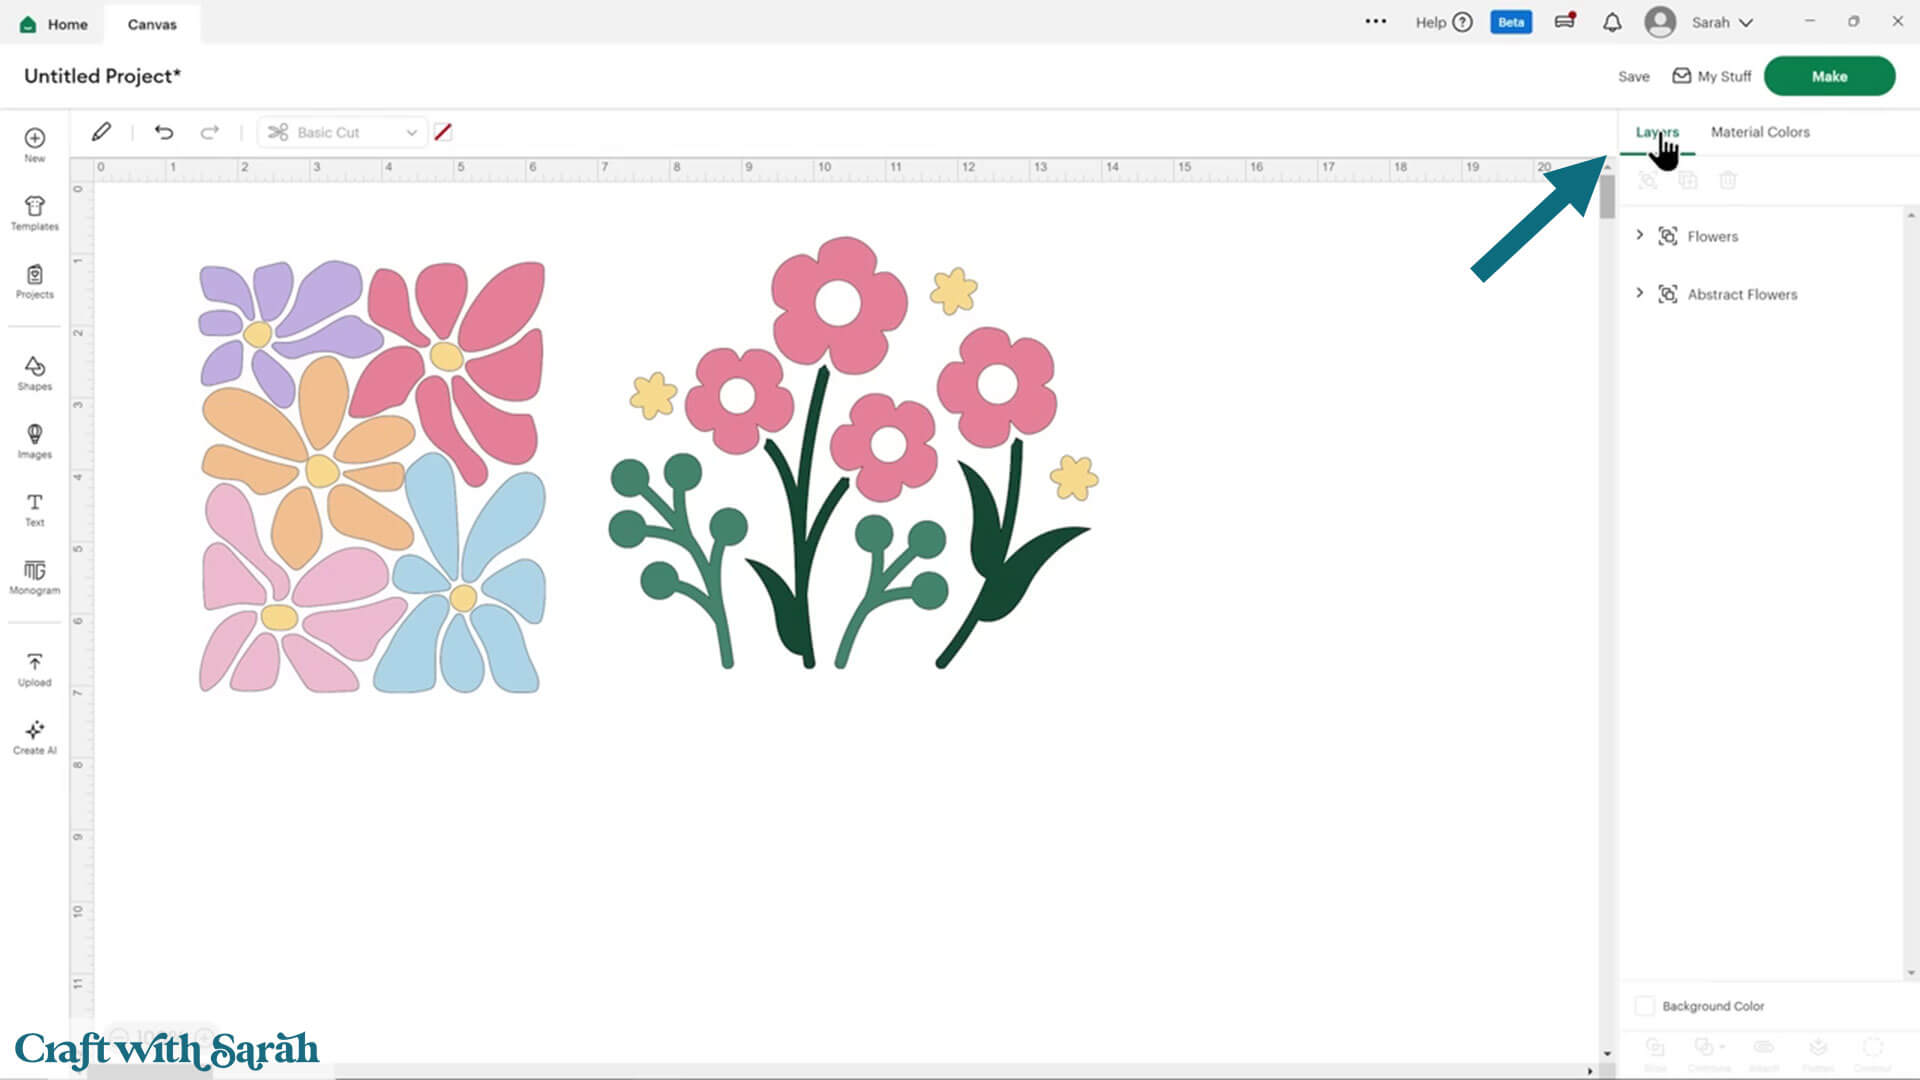
You can change back to the normal layers panel at any point by clicking on the “Layers” tab.
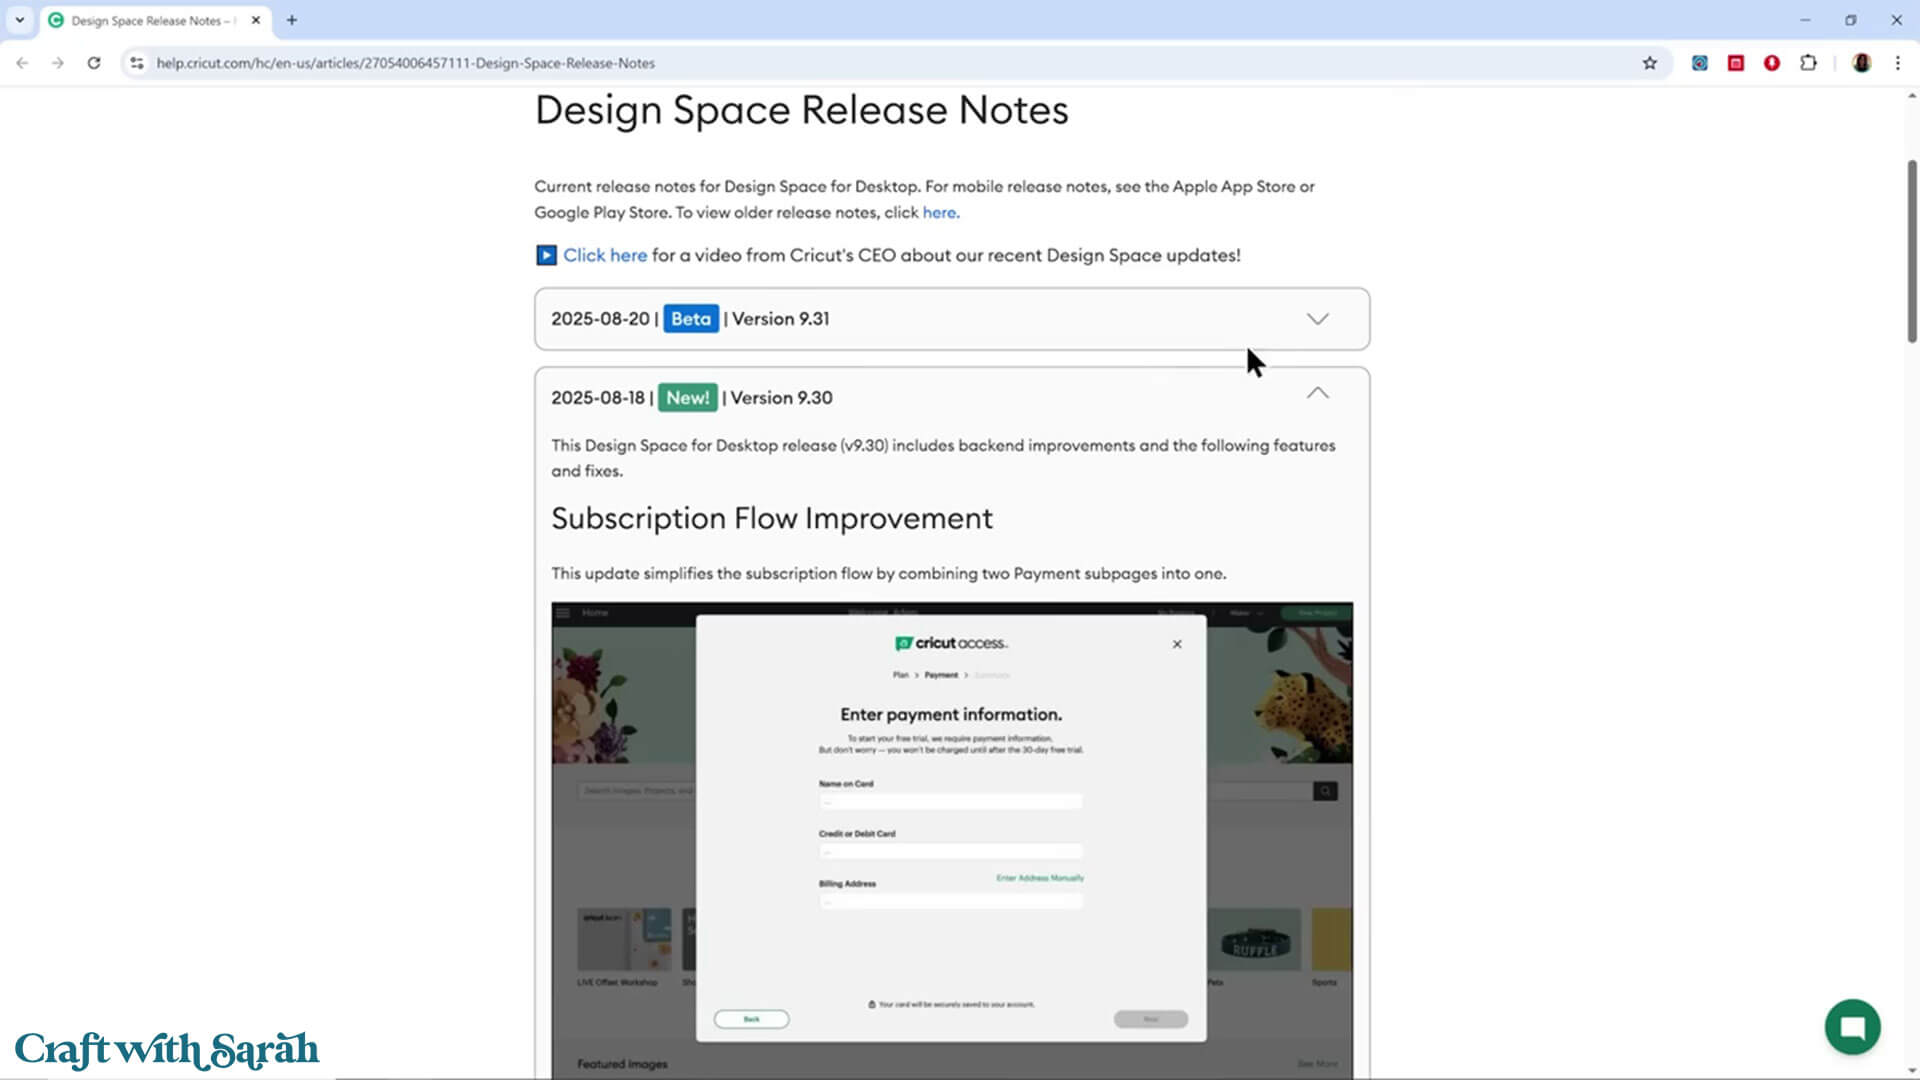
Changelog List of Recent Updates
To keep up to date with anything new that’s coming out, or any recent changes already released, you can look at Cricut’s changelog, also known as “Release Notes”.
View the Cricut Design Space Changelog
This page tells you any new updates that are on the way, including ones that you may not have yet.
If you don’t have the option to update your Design Space version, but there is a new one showing in the Release Notes, then don’t worry – you’ll get it soon.
It can take a few weeks for new updates to be released to all Cricut users.
Summary & Final Thoughts
That comes to the end of this Design Space walkthrough of the updates made in August 2025.
Big software updates like this can feel overwhelming, especially when buttons move and menus change.
But once you get used to it, many of these updates make designing easier and more organized.
I recommend taking a little time to explore the new menus.
Try out Beta if you’re curious about spell check and other upcoming changes.
Cricut Design Space is evolving, and while it takes some getting used to, these changes are designed to make crafting smoother in the long run. 🥰
If you have questions about Design Space that were not answered in this tutorial, email [email protected] and I will do my best to help!
Happy crafting,
Sarah x

