Design Your OWN Side-Edge Cards 😍 Cricut Design Space Tutorial
Design your own side-edge greetings cards for any occasion in Cricut Design Space!
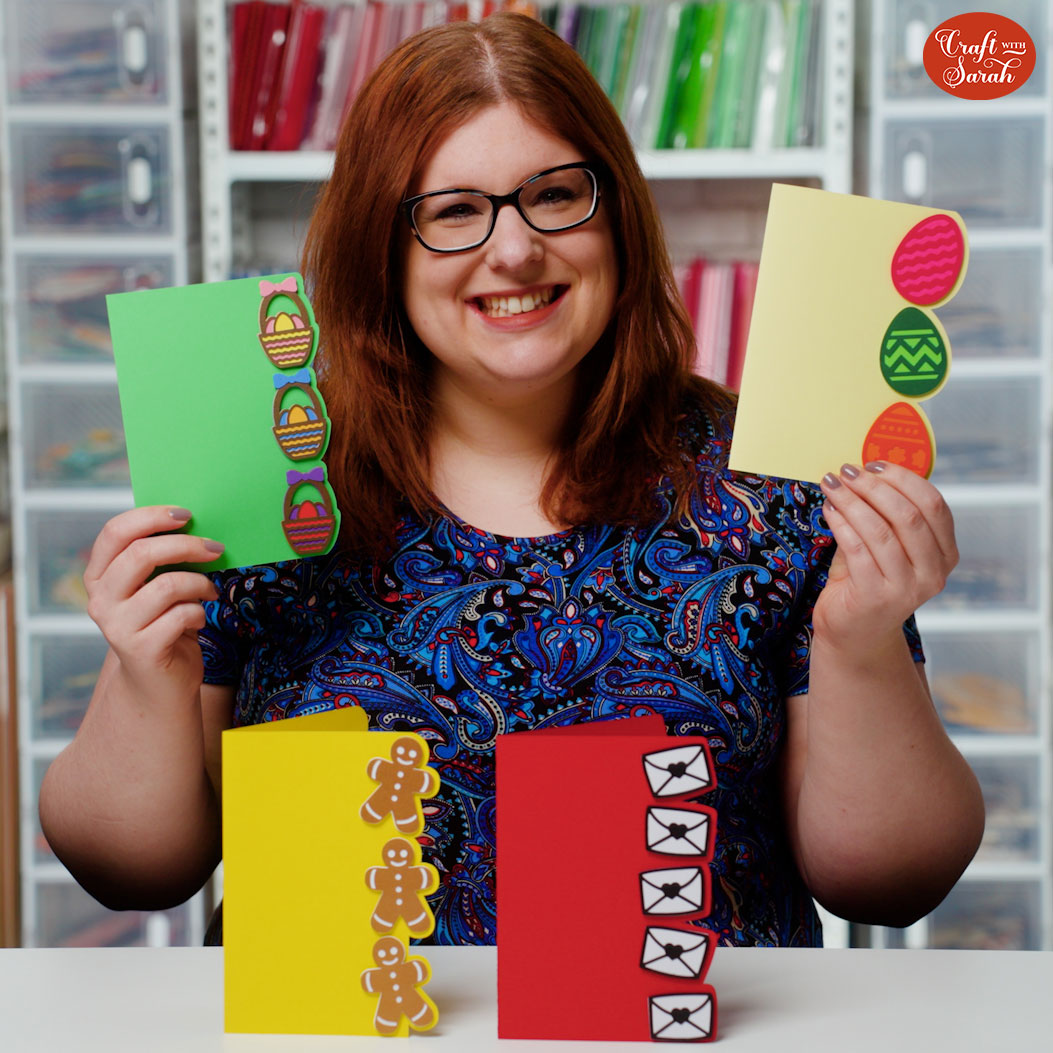
Side edge cards are a quick card making technique, perfect for last-minute cards. Best of all – the Cricut makes them SO easy to make!
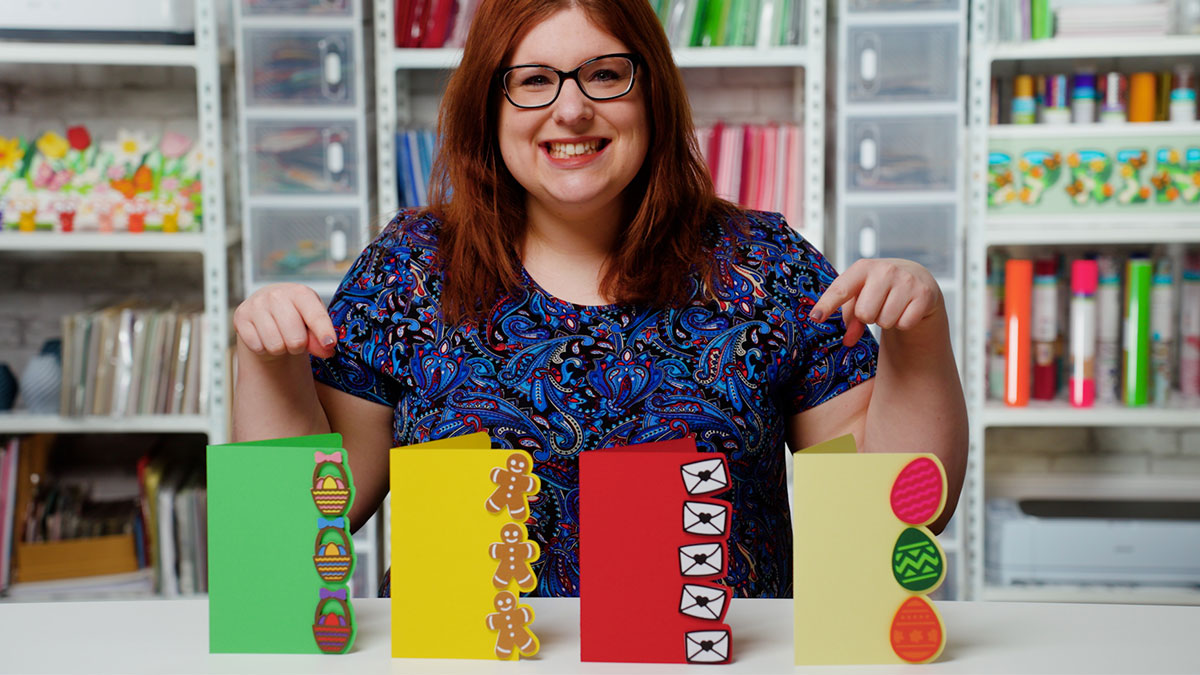
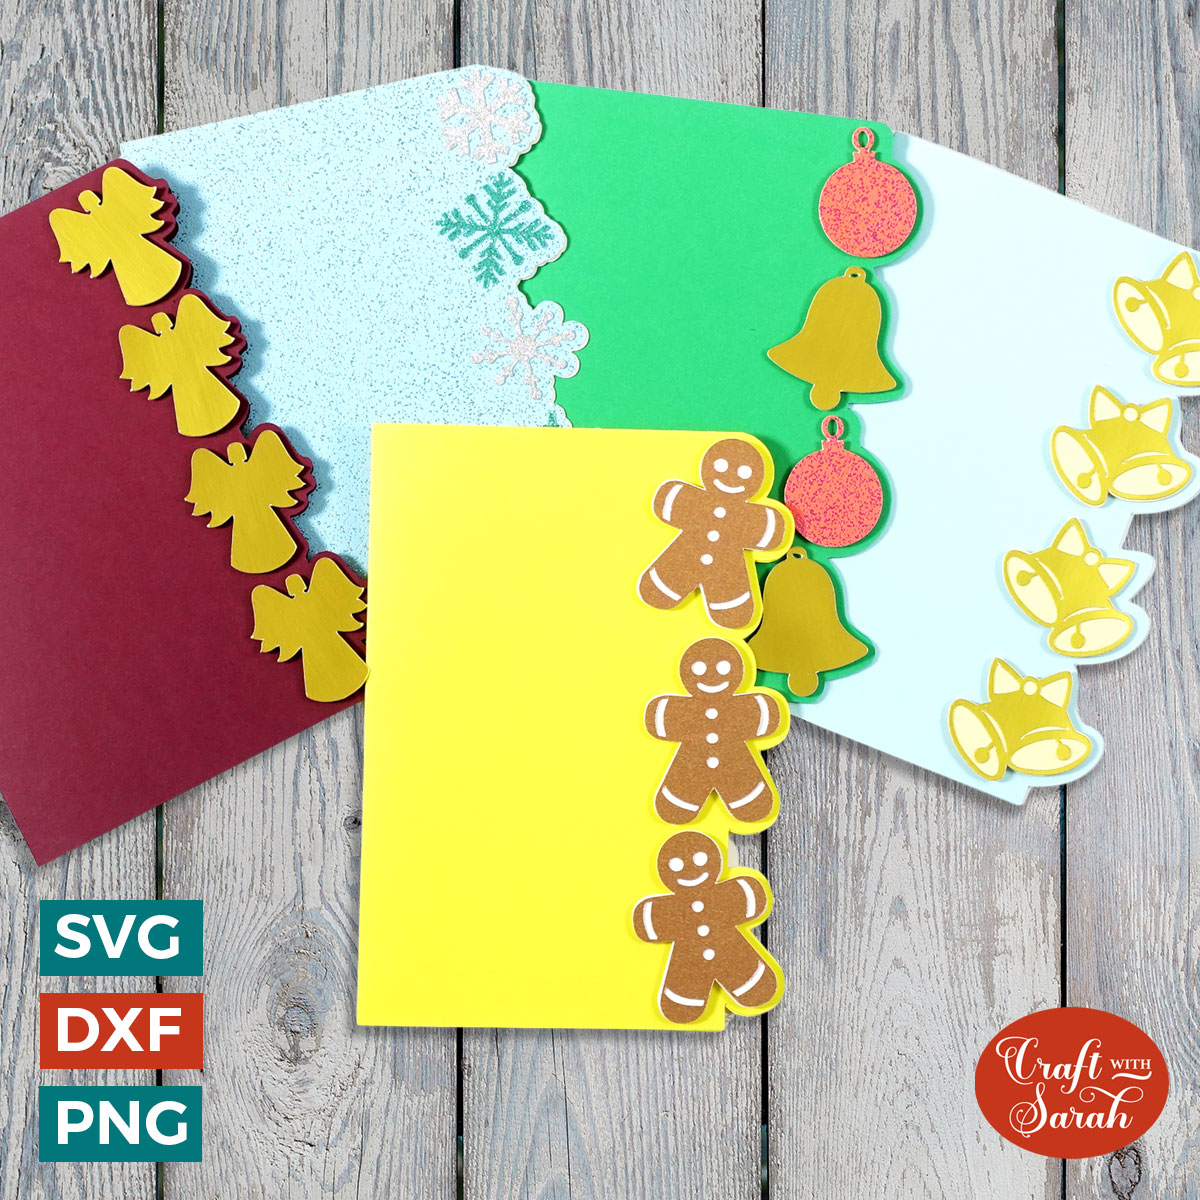
This tutorial is something that I’ve been asked for a few times, since I released my pre-made Halloween and Christmas Side Edge cards, as well as the newer designs in Craft Clubhouse for Easter and Valentine’s Day.
But what if you want to make your own? What if you want to choose your own pictures to go down the side and then cut the card into the shape of them?
Well that’s why you need to keep reading… 😉
Video tutorial
Watch the video below to see how to design your own cards in Design Space. Keep scrolling for a written tutorial.
Written tutorial (with photos!)
Here’s how to design your very own side-edge cards in Design Space, cut them on your Cricut machine and then stick them together.
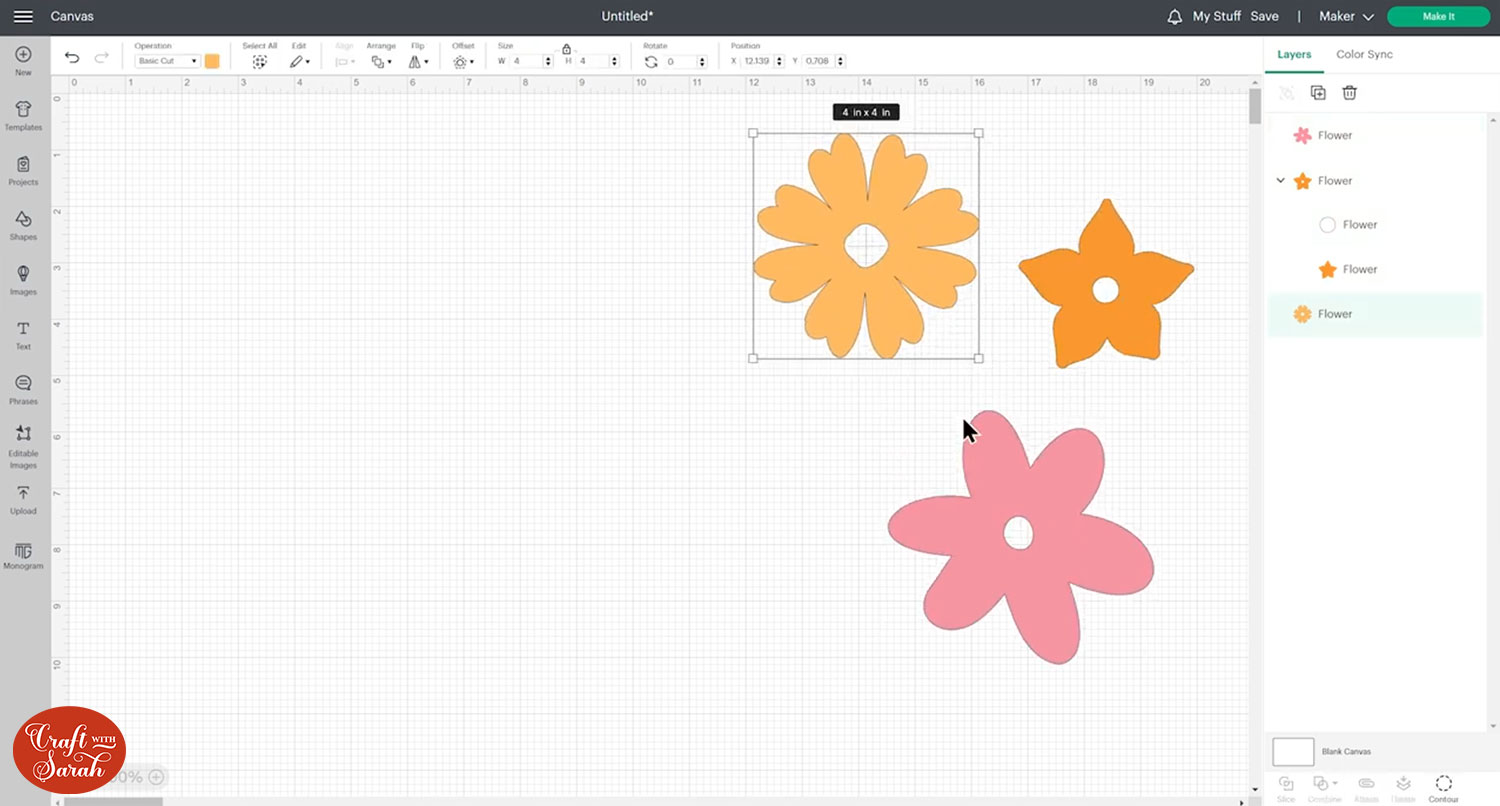
Step 1) Choose your images
Open up Design Space and start a new project.
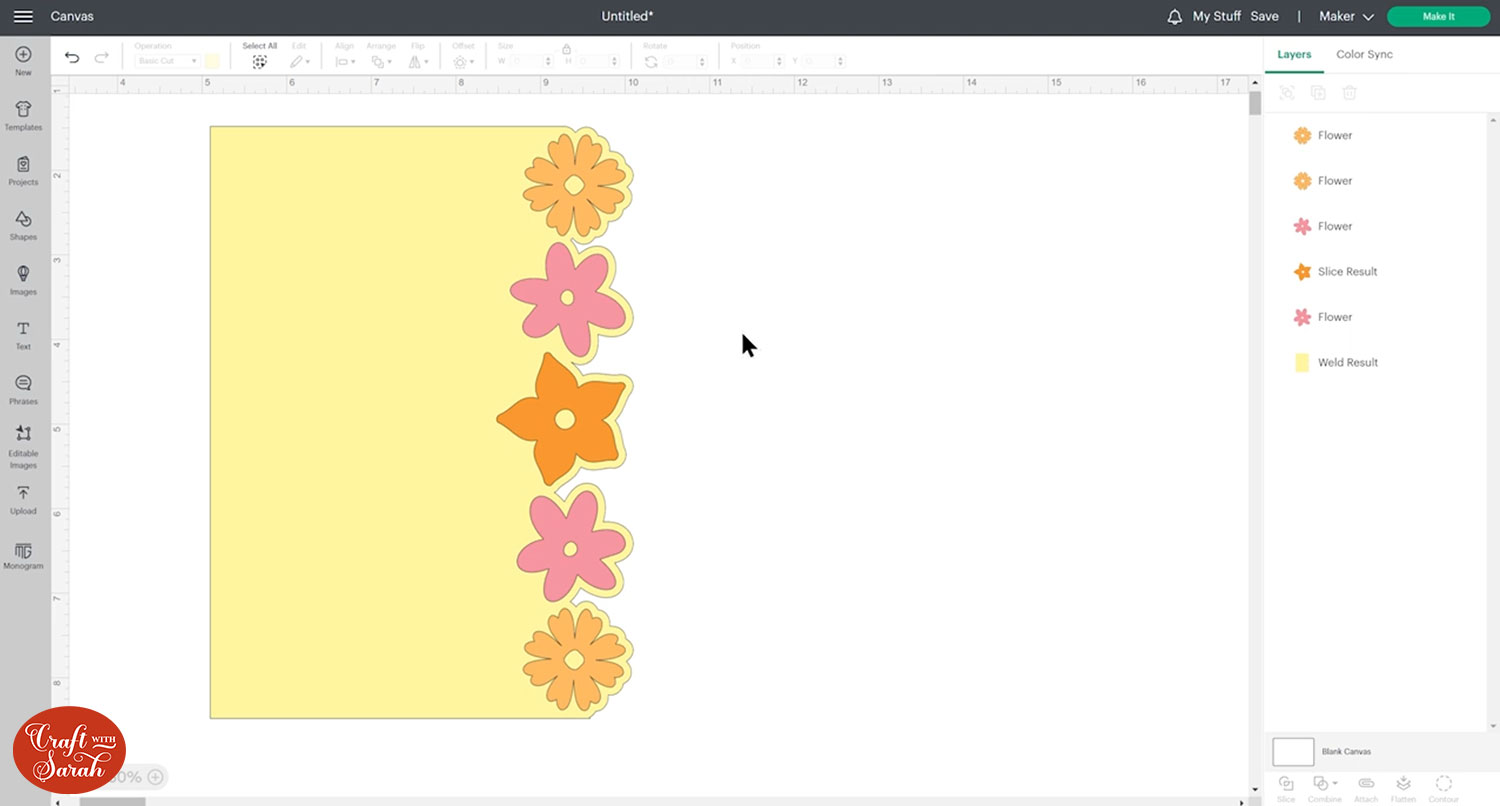
The first thing we’re going to do is choose the images to use on the side edge card.
We’re looking for very simple images with maybe just a couple of colors on them or just one color, and something that we’re going to be able to cut small from cardstock.
The three flowers I chose are from Cricut Access by a Cricut Contributing Artist called Wispy Willow Designs. If you want to find them then you should be able to just type her name into the search and hopefully they’ll come up.

Move your chosen images over to the side of the screen so we can work on the left for the next step.
Step 2) Create the front of the card
Now we need to make the shape for the front of the card.
Go into Shapes and choose a square. I’m making a 5×7 inch card so that’s the size I need to make my square.
To turn a square into a rectangle, click the padlock icon above the width/height boxes to open it up.
Change the colour to something light as it will make it easier to see things when we start putting the images on top of the card.
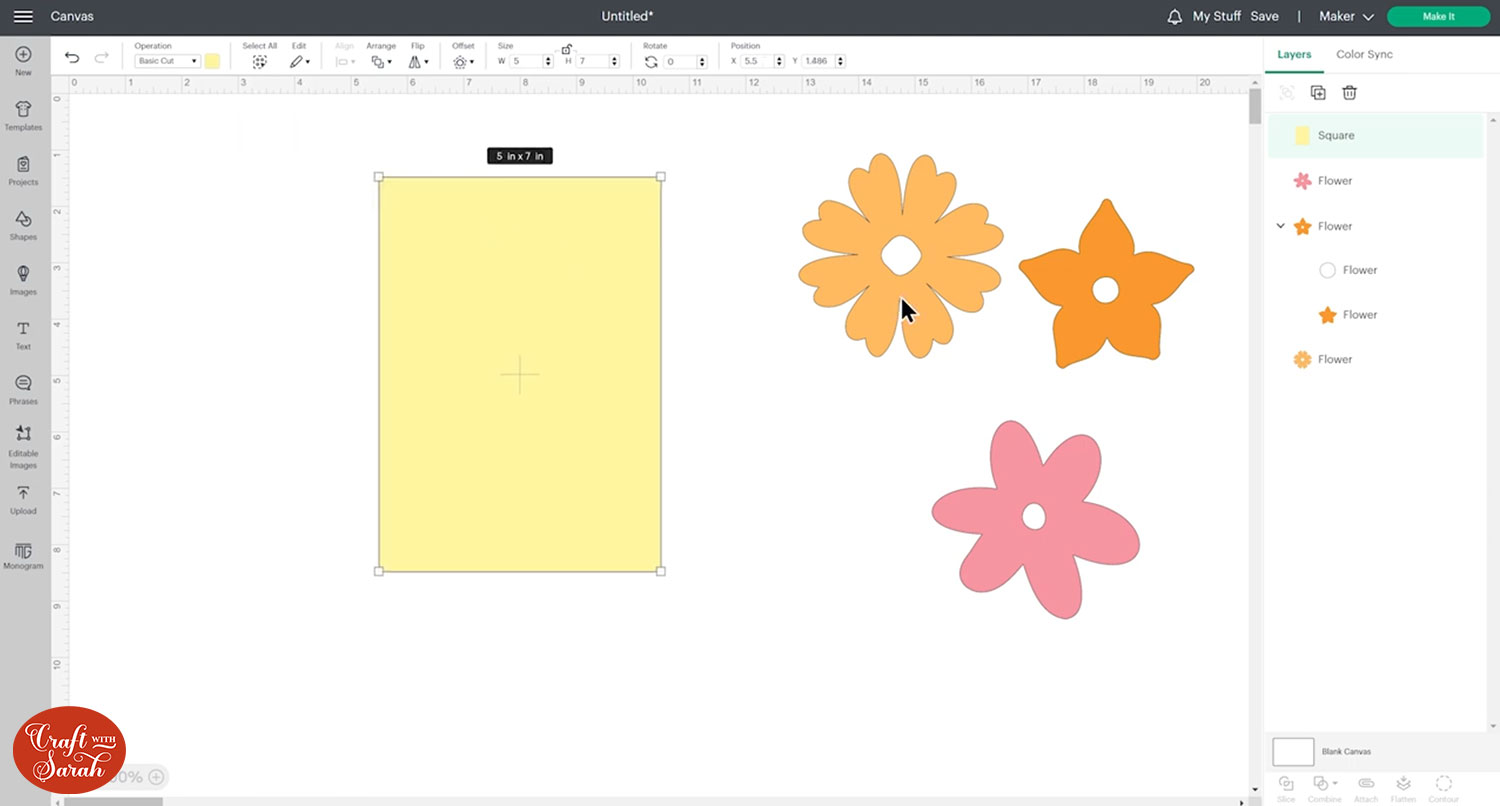
Click the card and press Arrange > Send to Back to move it below your images.
Step 3) Format layers of the images
This step is optional, depending on the images that you have chosen.
For my bright orange flower, it’s made up of two layers at the moment.
I want it to just be one so that it matches the other flowers.
To do this, Ungroup the layers and Slice them out from each other, then delete the “middle” circle Slice results.
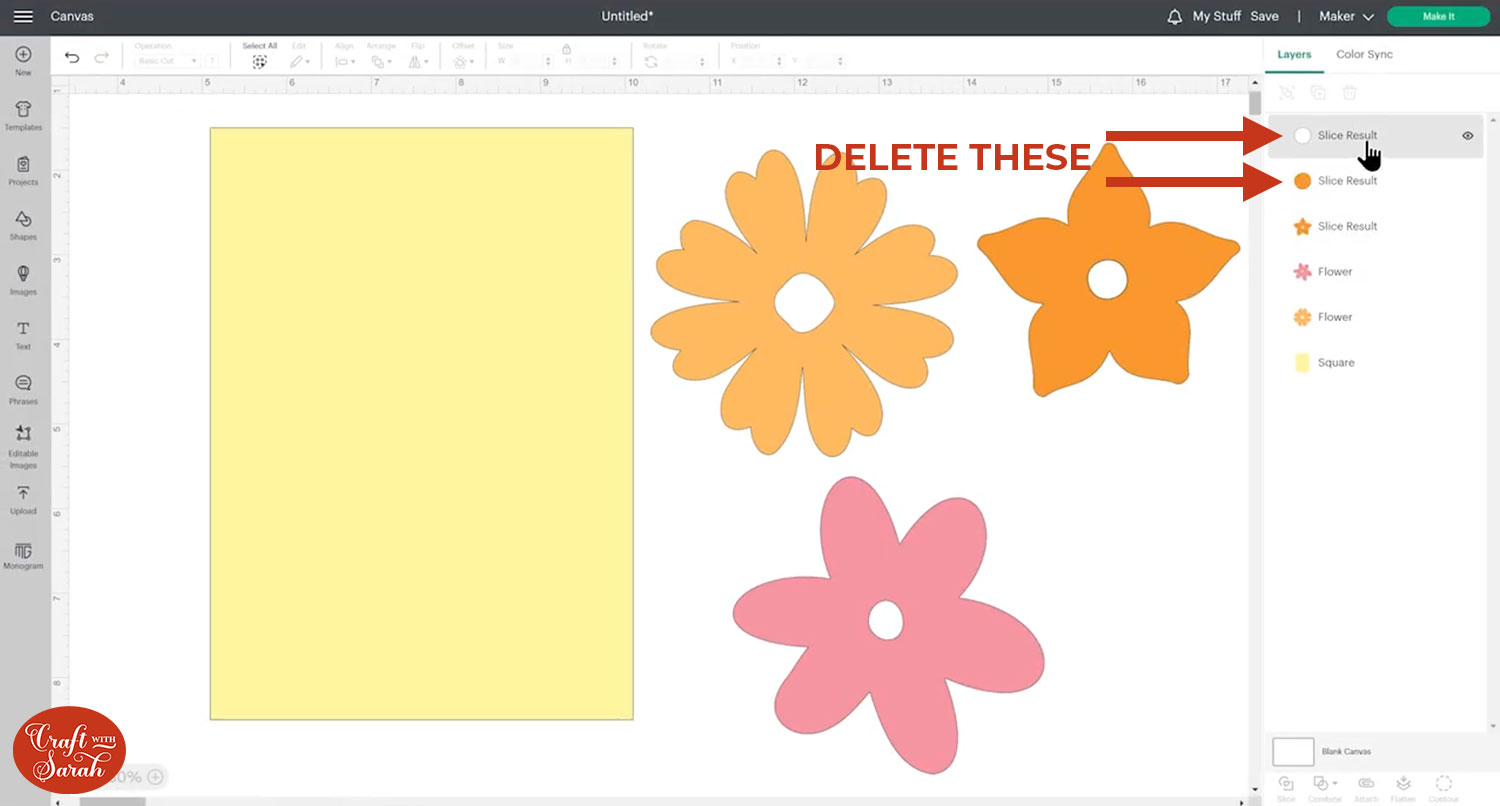
If you have images with multiple layers, you may wish to combine them as I did here, or perhaps to remove some layers if there are quite a few, to make the images easier to cut small.
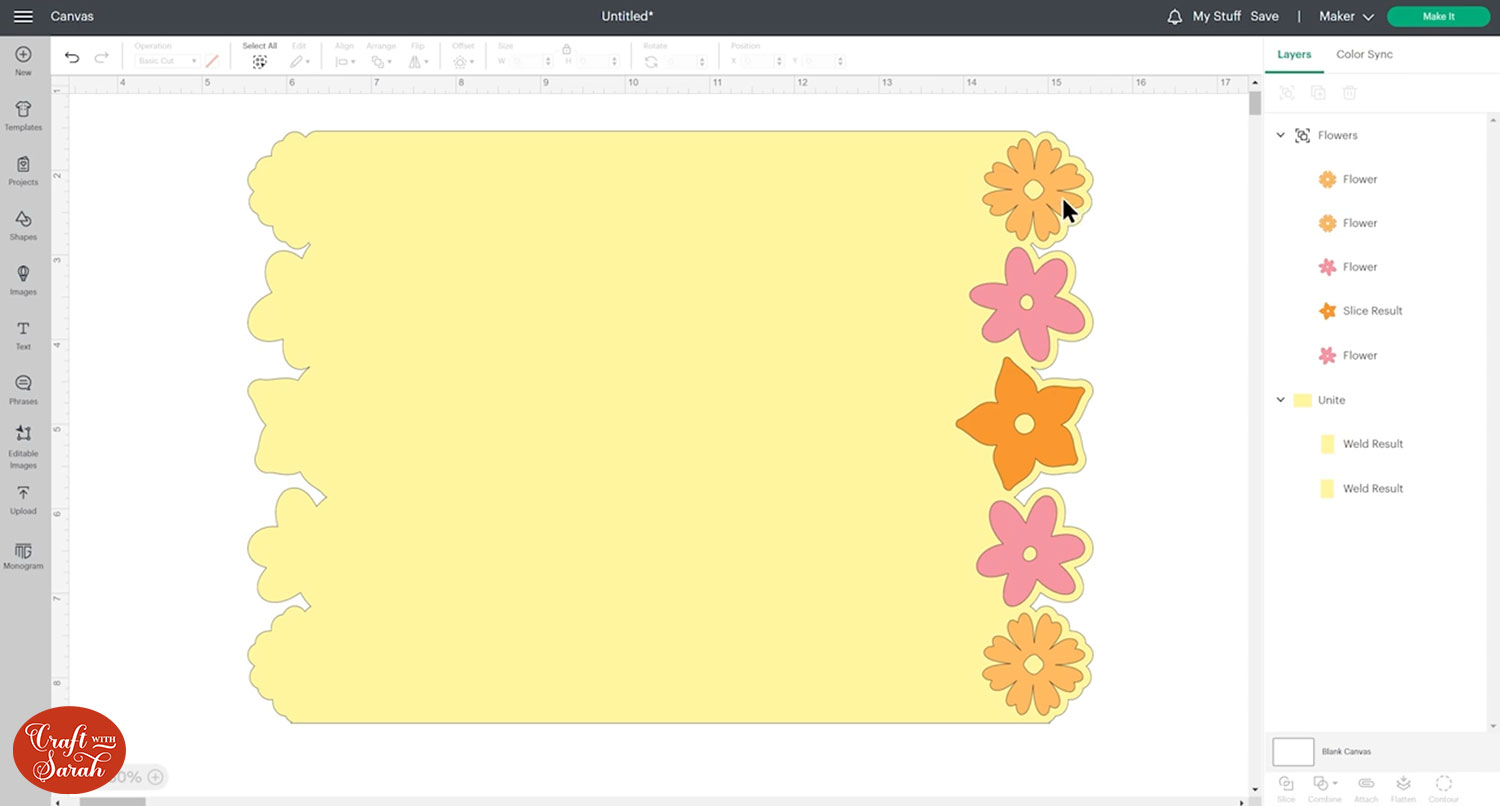
Step 4) Position the images
Position your images along the edge of your card.
At this point we are just getting them roughly into position.
The reason we are adding them now is so that when we make the “Offset” to create the “shaped edge” effect, we can make it the same size for all the images so that it looks in proportion.
If we did the Offset before sizing the images, it would distort/get smaller when we made the images smaller, which wouldn’t look as good.
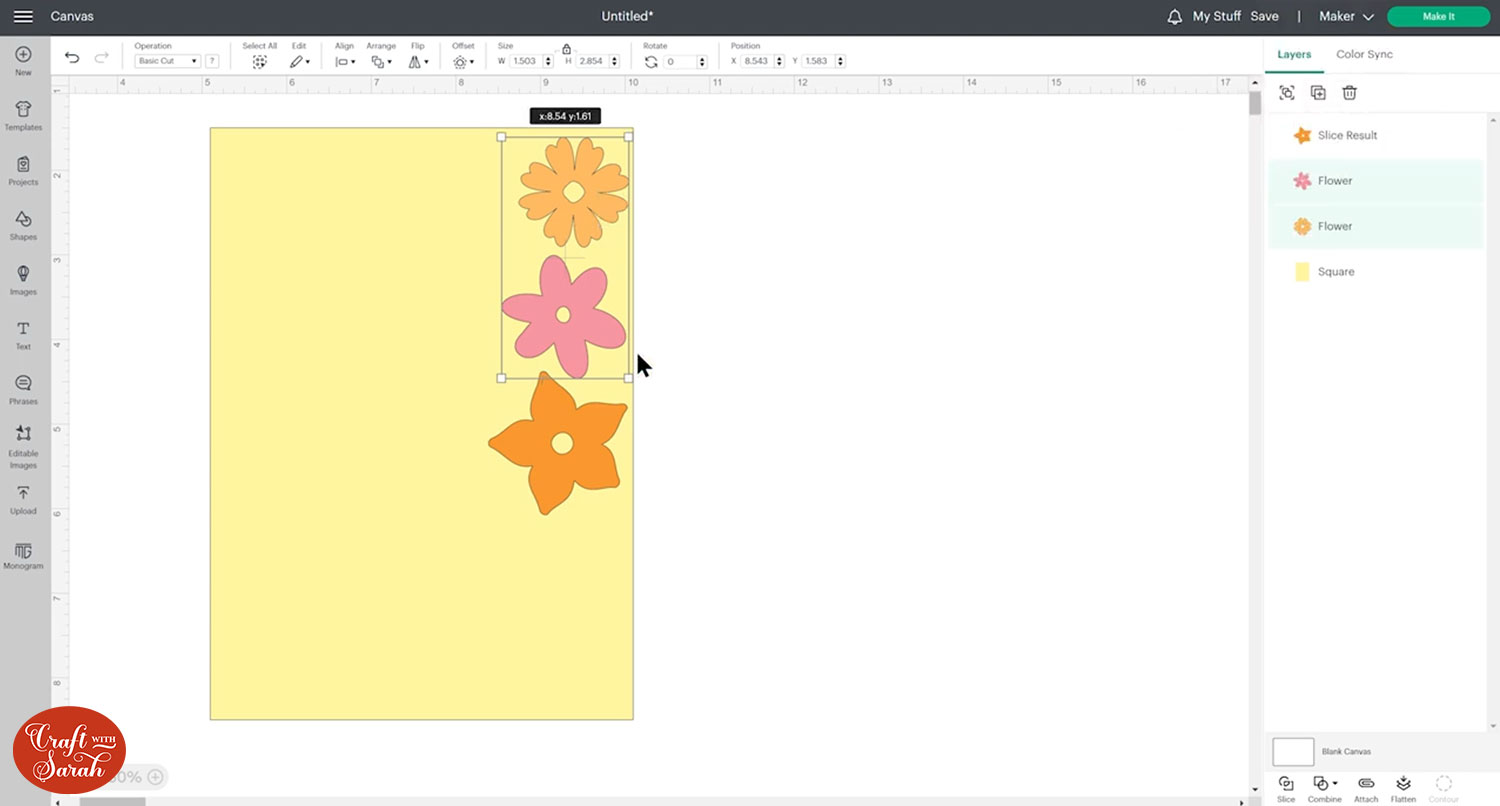
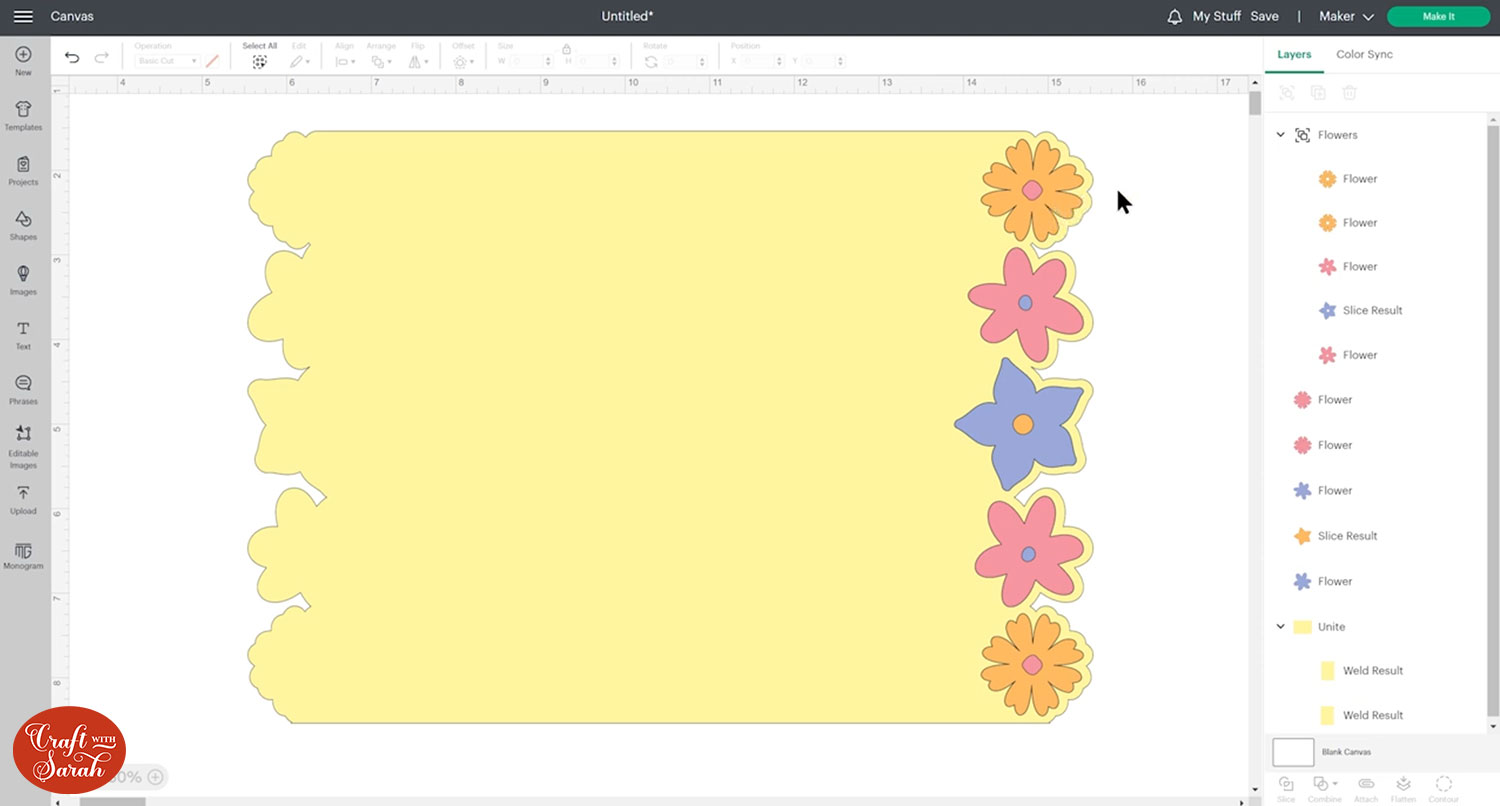
I decided to add extra flowers to the card, so I duplicated the top 2 flowers and then flipped them horizontally using the “Flip” tool to make a mirror image.
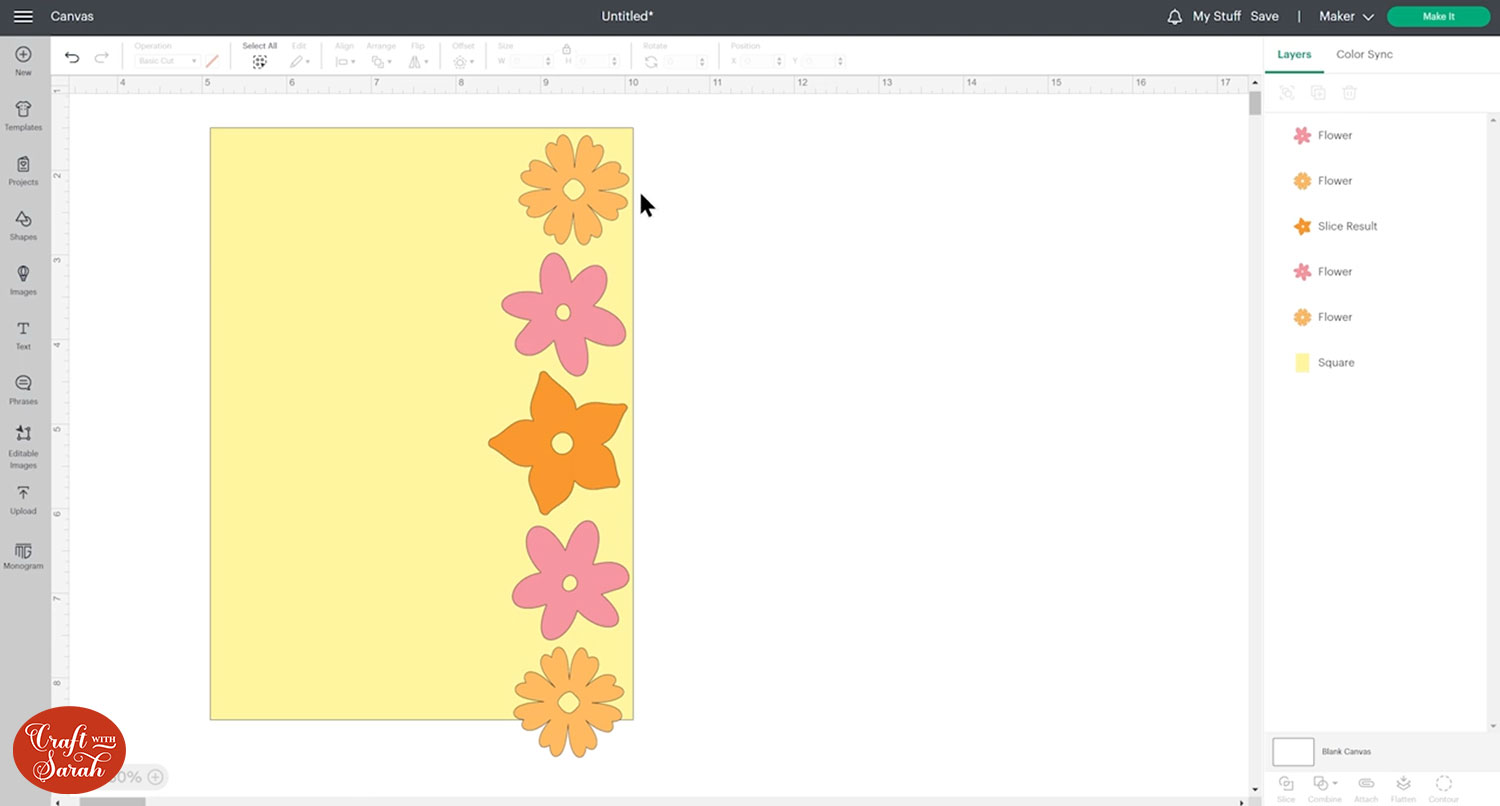
My images will need to be made a bit smaller at the end, but at this point it is close enough that I can begin making the shaped edges.
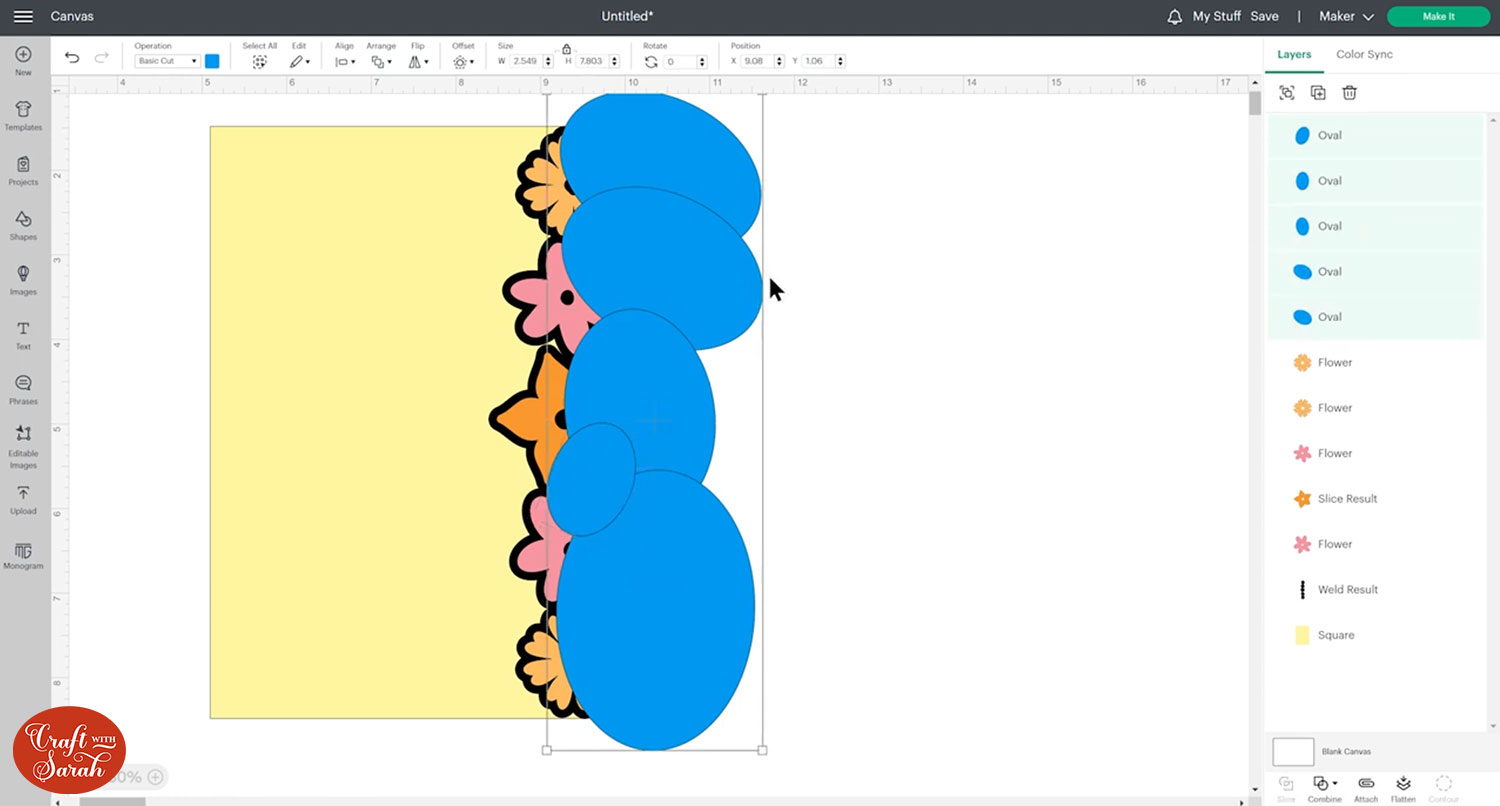
Step 5) Add the Offset layers
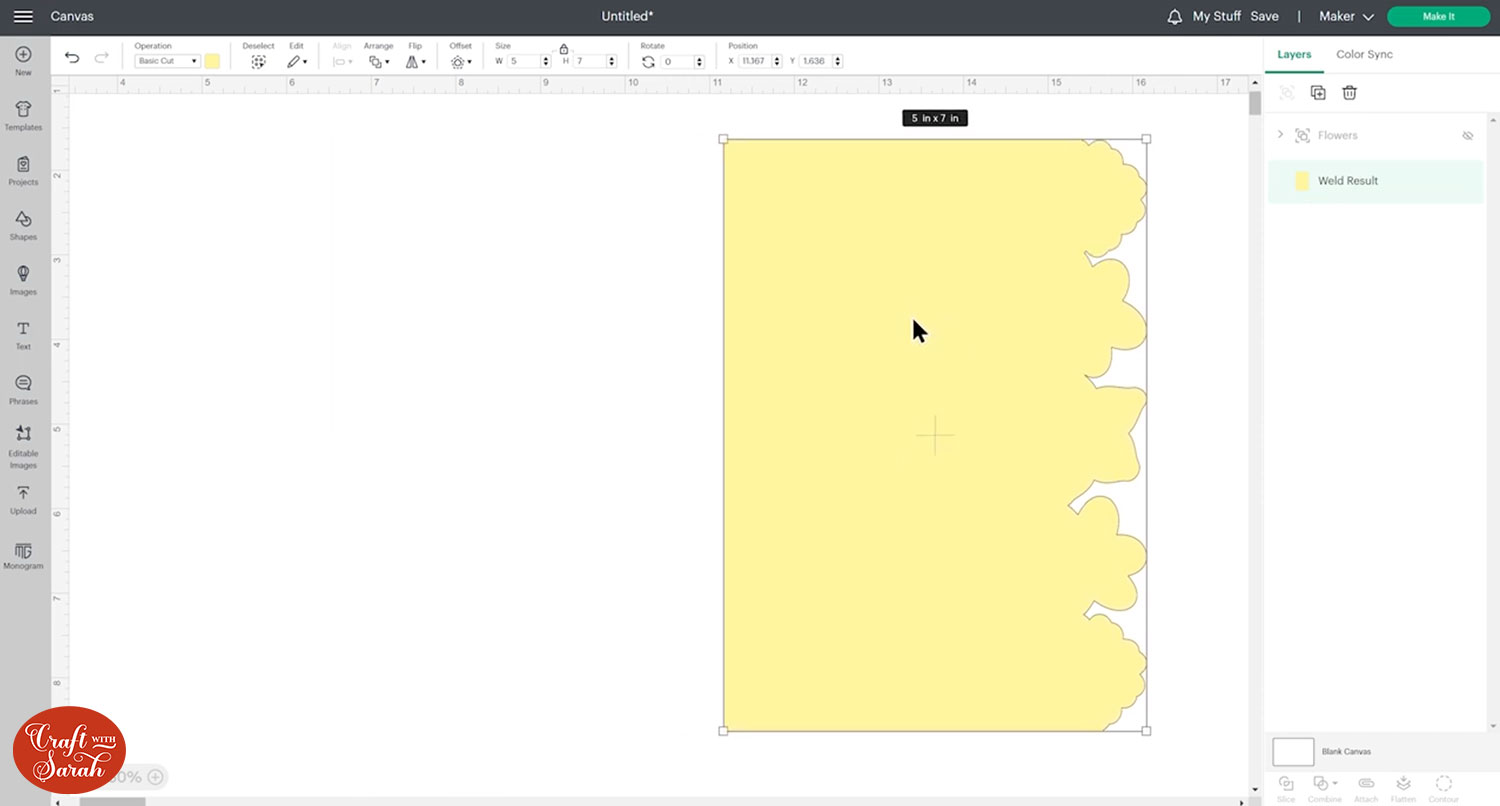
Click one of your images and then go into the Offset tool.
Add a small Offset to the edge of the image.
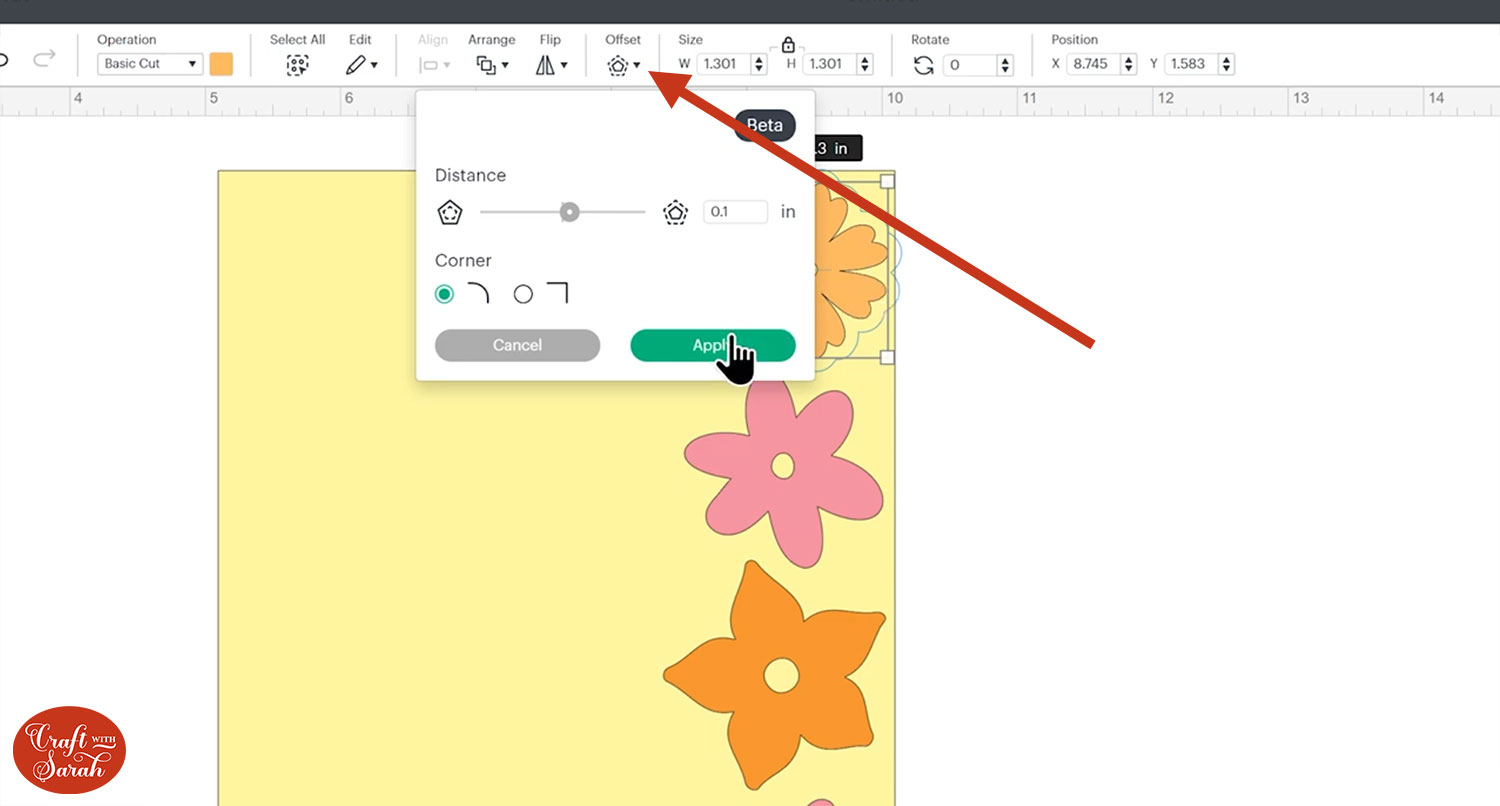
Repeat this for all images.
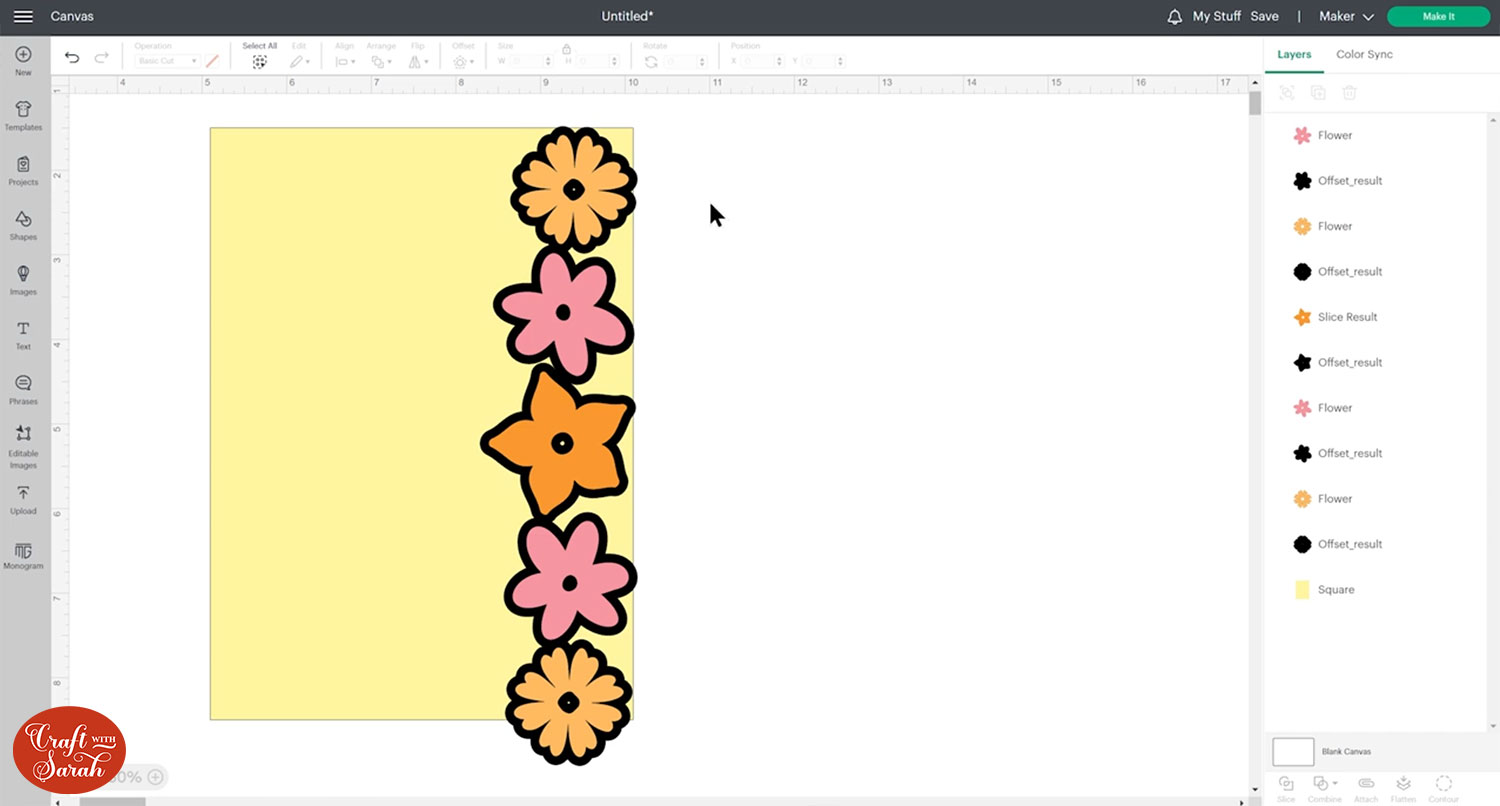
Step 6) Position the images and Offset layers
Select each image and their matching Offset and group them (so each image + Offset is it’s own Group).
Resize the images so that they match the height of your card.
Make sure the Offset layers between each image are touching/overlapping slightly. We will be joining all the Offset layers together in a moment, to create one solid shape.

Press “Select All” and then Align > Align Right to make sure the Offset layers are touching the right side of the card base.
Make sure the top and bottom image Offsets do not overlap the top/bottom of the base card.
TIP: Watch the video at the top of the page for more detail on this step. Start at about 7 minutes in to skip to this part.
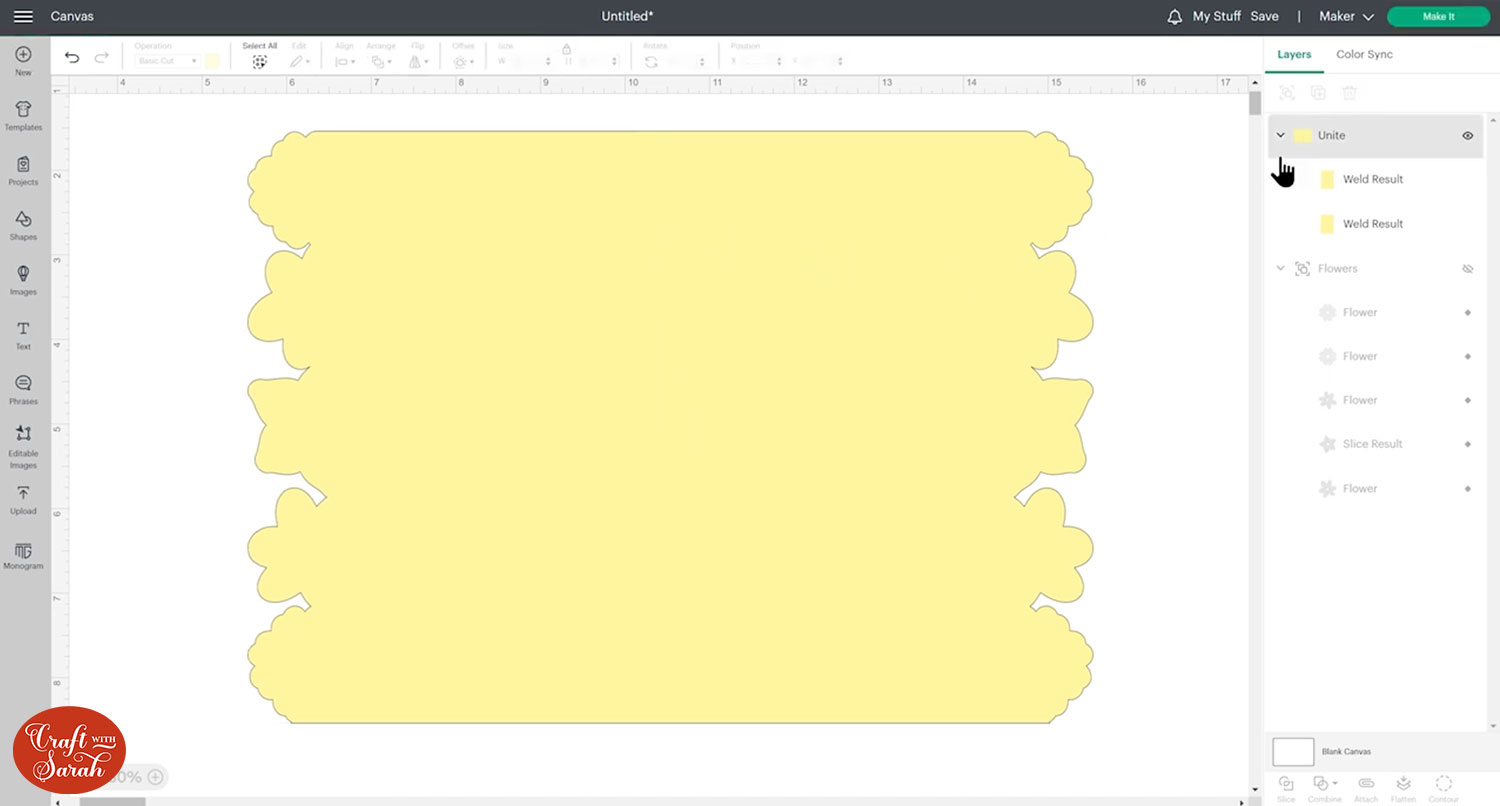
Step 7) Created the shaped edge of the card
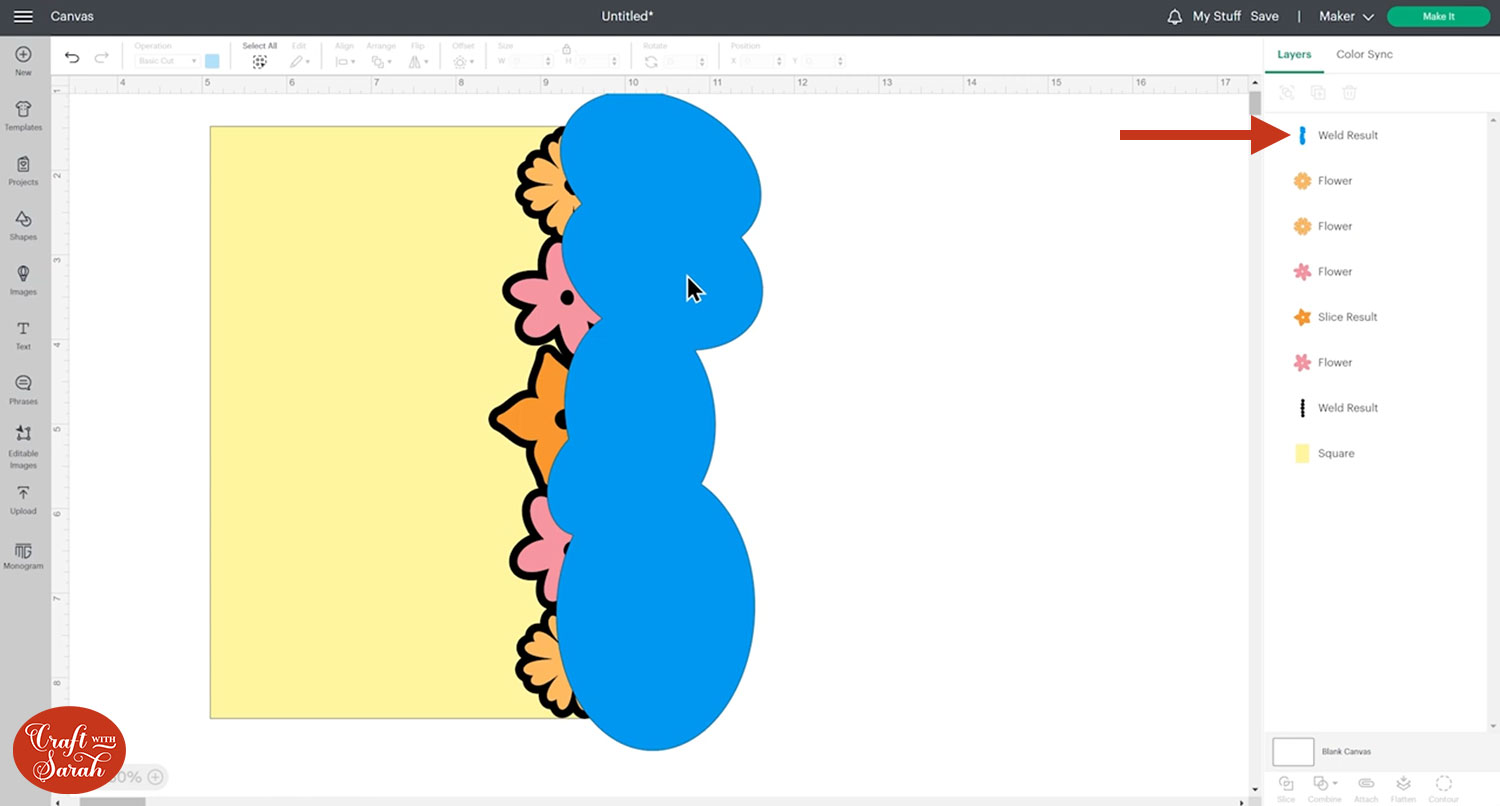
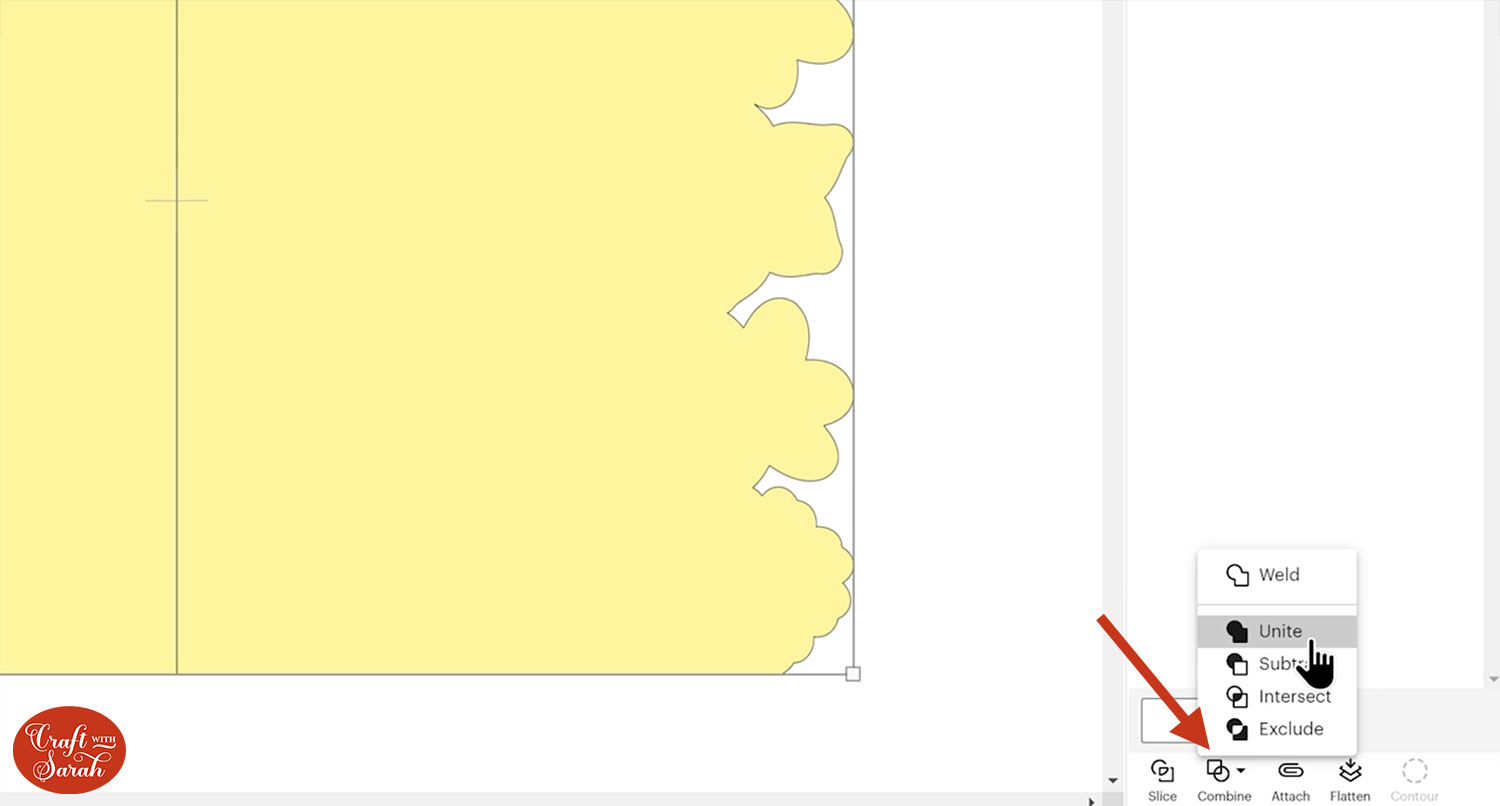
Ungroup all of the images from their Offset layers.
Select all the Offset layers and click Combine at the bottom of the layers panel, then Weld.
This joins them into one layer.
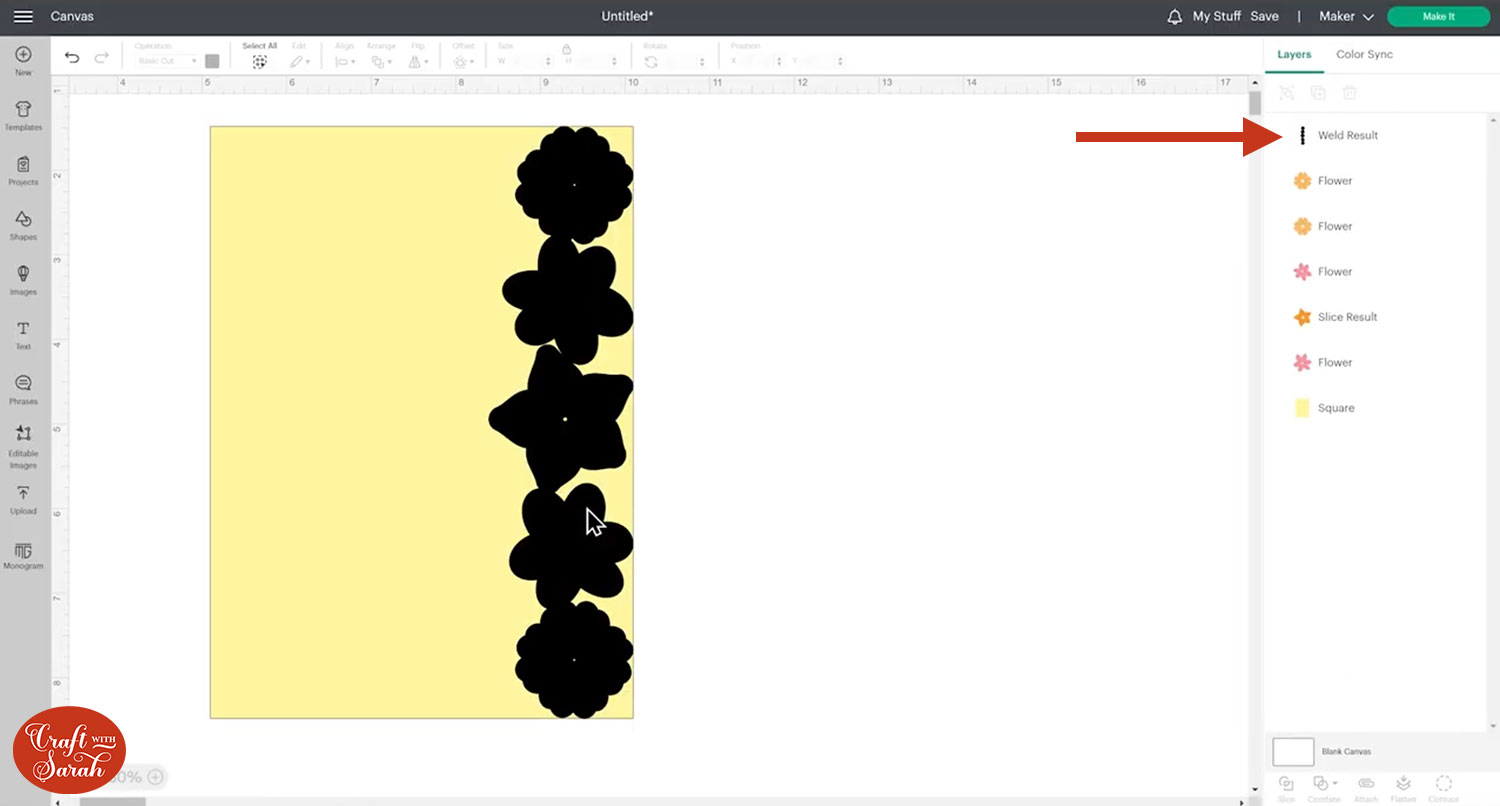
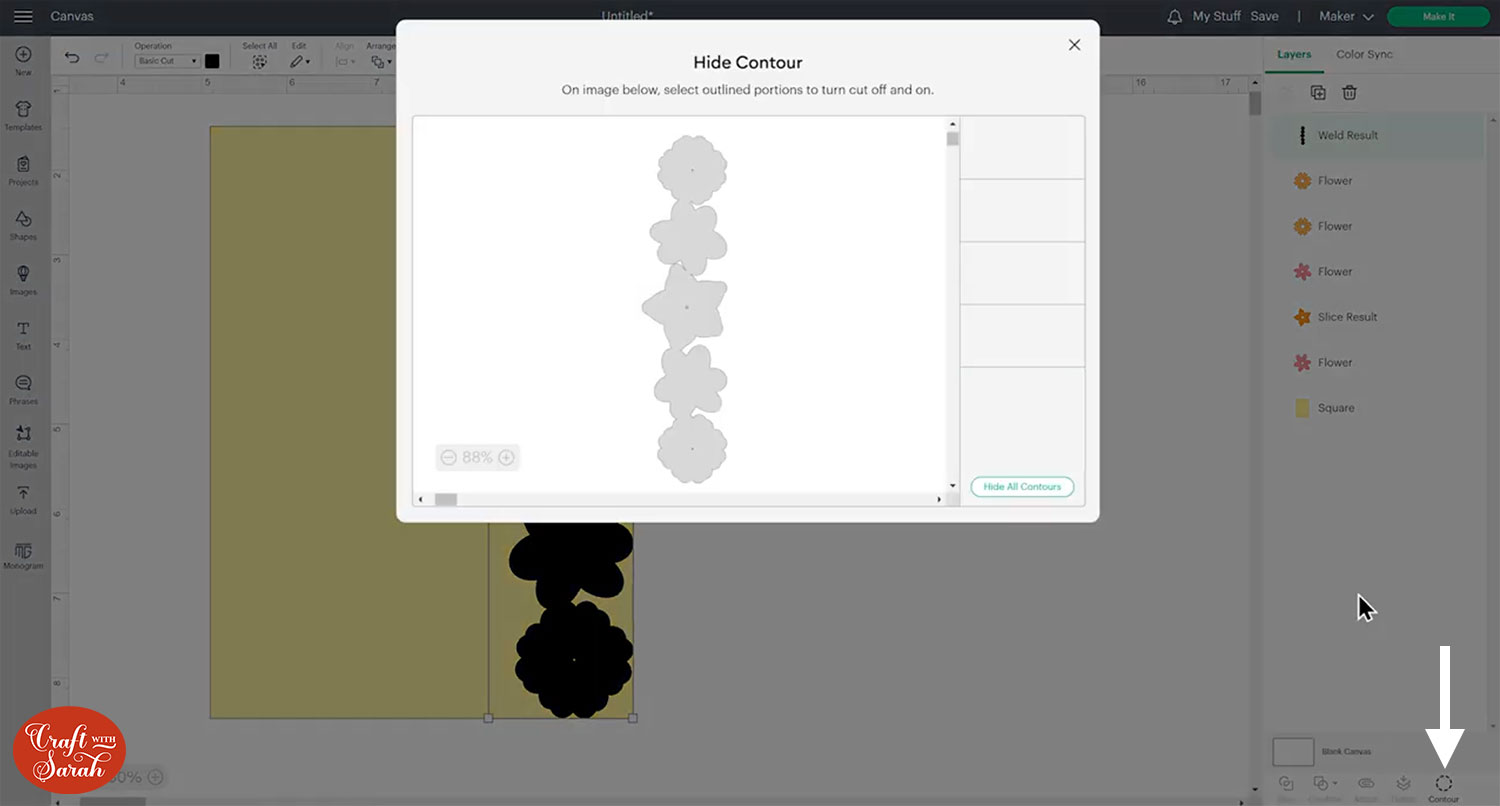
If your Welded layer contains small gaps/holes, click it and then press Contour.
Click into the gaps in the Contour window to hide them.
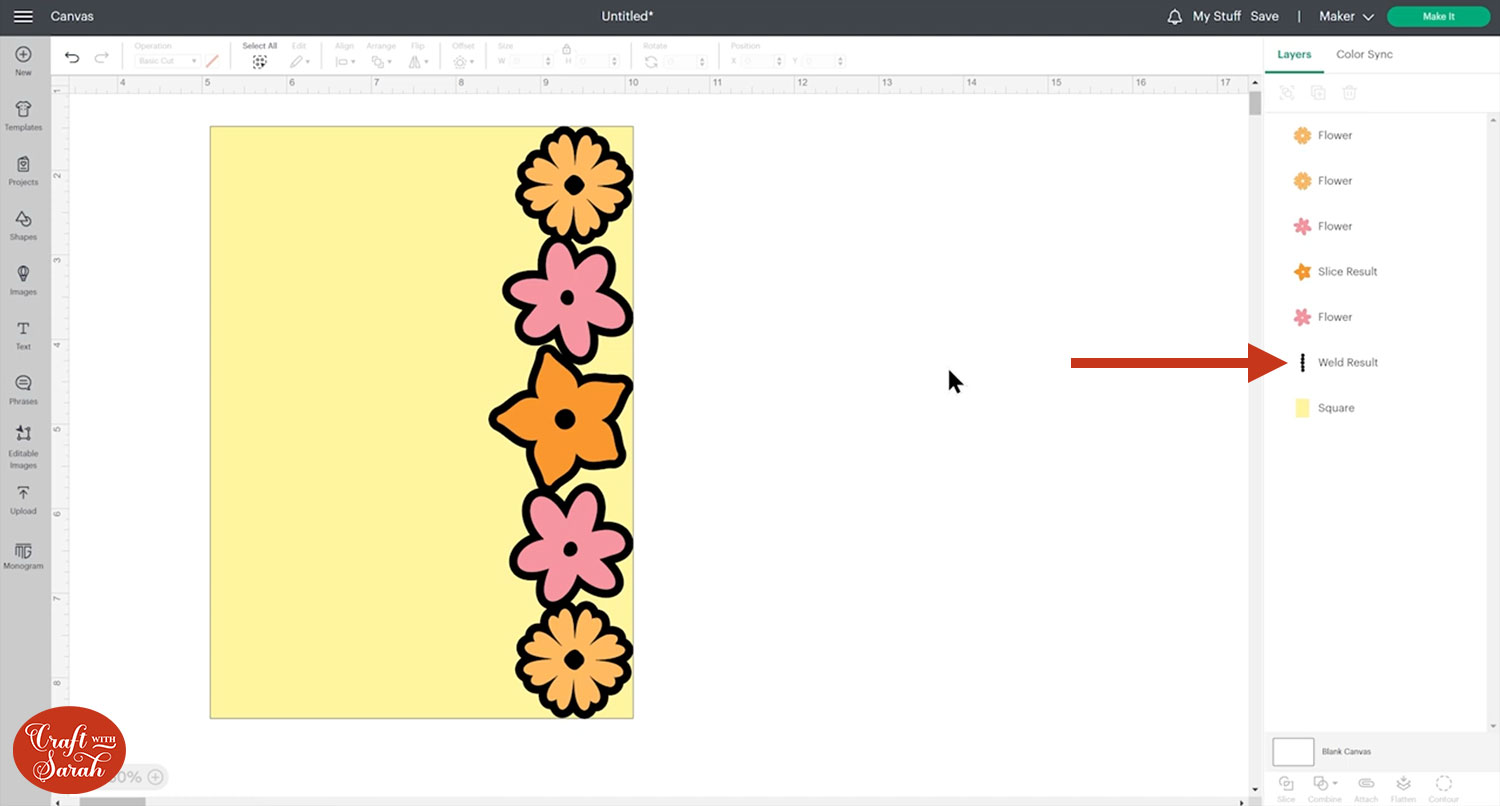
In the layers panel, move the Welded layer underneath your images, but above the base card.
Use Shapes to cover up any parts of the base card that you can see to the right side of the Welded layer.
Select all the Shapes and Weld them together so that they turn into one layer.
Select the welded shapes and the base card and use Slice to cut them out from each other.
Delete all of the pieces of the shapes layer, and the parts of the card that have just been Sliced away, until you end up with something like this.
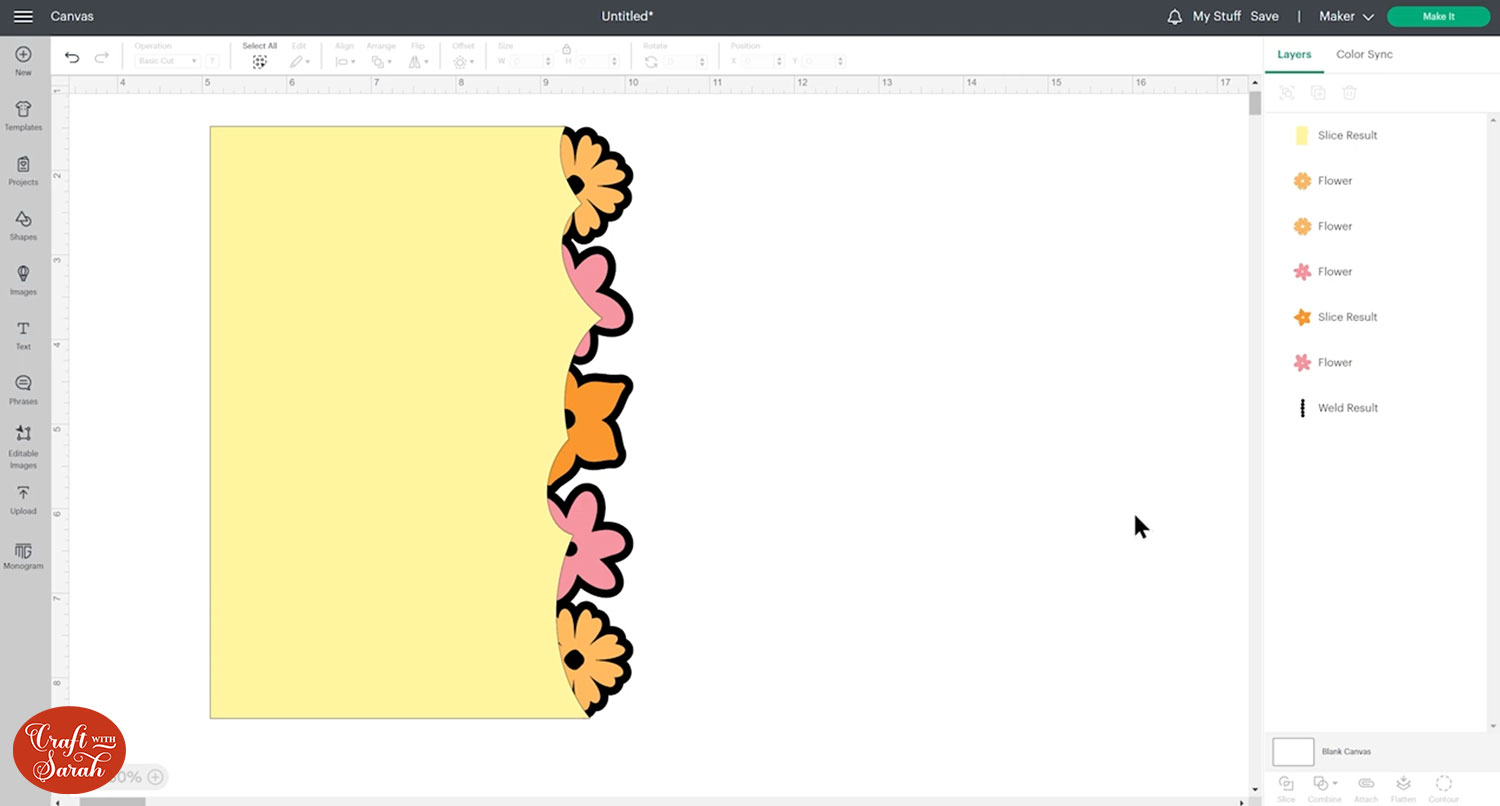
Weld the remaining piece of the base card with the original Offset layer from the images.
Move it to the bottom of the layers panel and re-colour if needed.
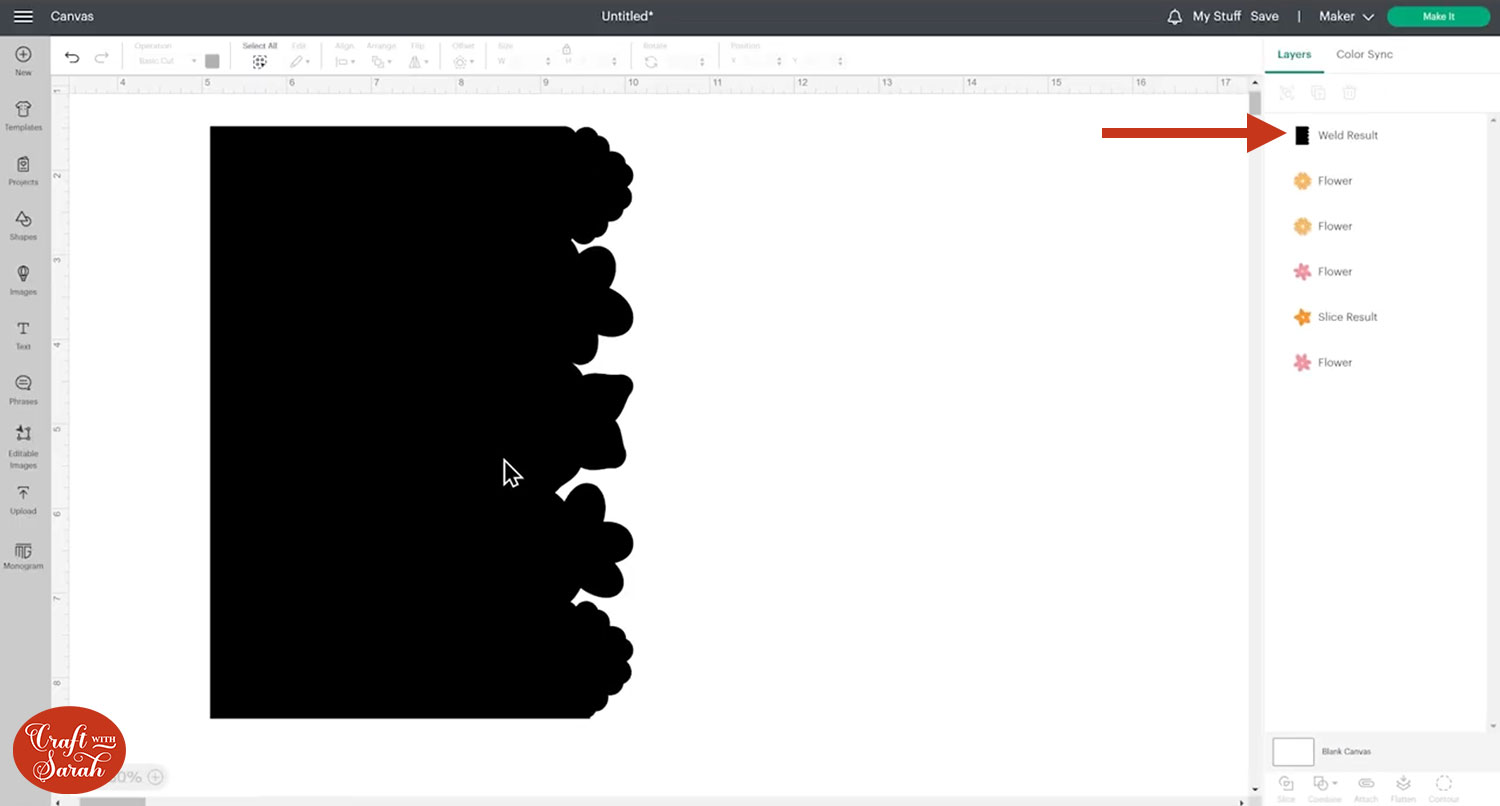
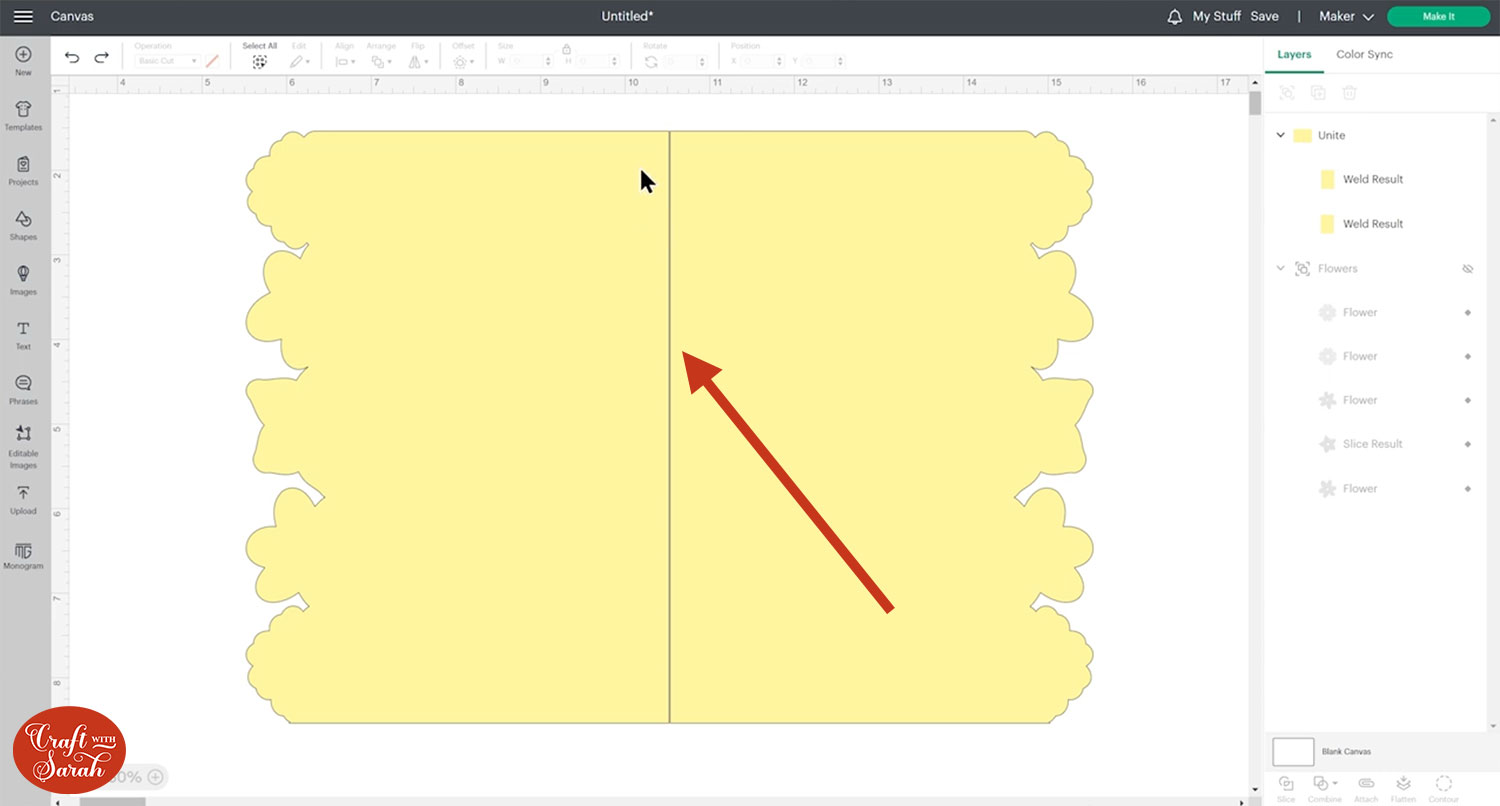
Step 8) Create the back of the card
I like it when the back of the card follows the same shape as the front, as it means it lines up nicely when the card is closed up.
Group all of your images and then hide the group from view by hovering over the group name in the layers panel and clicking the eye icon that appears.
Move the base card over to the right of your screen.
Use the Duplicate button to make a copy of the base card.
Click Flip > Flip Horizontal to make a mirrored version of it.
Flipping horizontally is an important step – otherwise the front and back of your card won’t line up!

Move the two pieces so that they are touching in the middle.
Select both card pieces and click Align > Align Top to make sure they are positioned correctly.

With both layers selected, click Combine > Unite to join them.
The reason for Uniting these layers instead of Welding them is so that they can be moved around if they aren’t quite touching.
If you can see a vertical line down the middle of the card, that means your front and back pieces aren’t quite touching yet.
Click one of the card shapes in the layers panel and shift it using the arrow keys on your keyboard.
The shapes will “Re-Unite” after you press the key, so you can see if they are touching.
Do this until it looks like one cohesive shape.
Move your card to the bottom of the layers panel and turn the images back on by clicking the eye in the layers panel.
Drag them into position.
Step 9) Format images to add extra layers
At this point, you may wish to add extra layers to your images.
In my example, I wanted to make a “bottom” layer to each flower that had the gap in the middles filled in so that I could see different colours poking through.
To achieve this, I duplicated the images, used Contour to fill in the gaps and then re-coloured the new layers and moved them underneath the originals.
Step 10) Add a score line
If you have a scoring wheel or stylus for your Cricut machine, it’s helpful to add a score line to make it easier to fold the card once it’s cut out.
Click the base card and then press Unite > Merge Layers.
Go into Shapes and choose a score line.
Make it the same height as the card.
Select and card layer and the score line and press Align > Center to put the score line in the middle of the card.

Select the score line and card again and press “Attach” at the bottom of the layers panel.

Attach is what tells the Cricut that we want it to score on the card layer.
You may need to re-align your images after doing this.
Don’t forget to save your project!
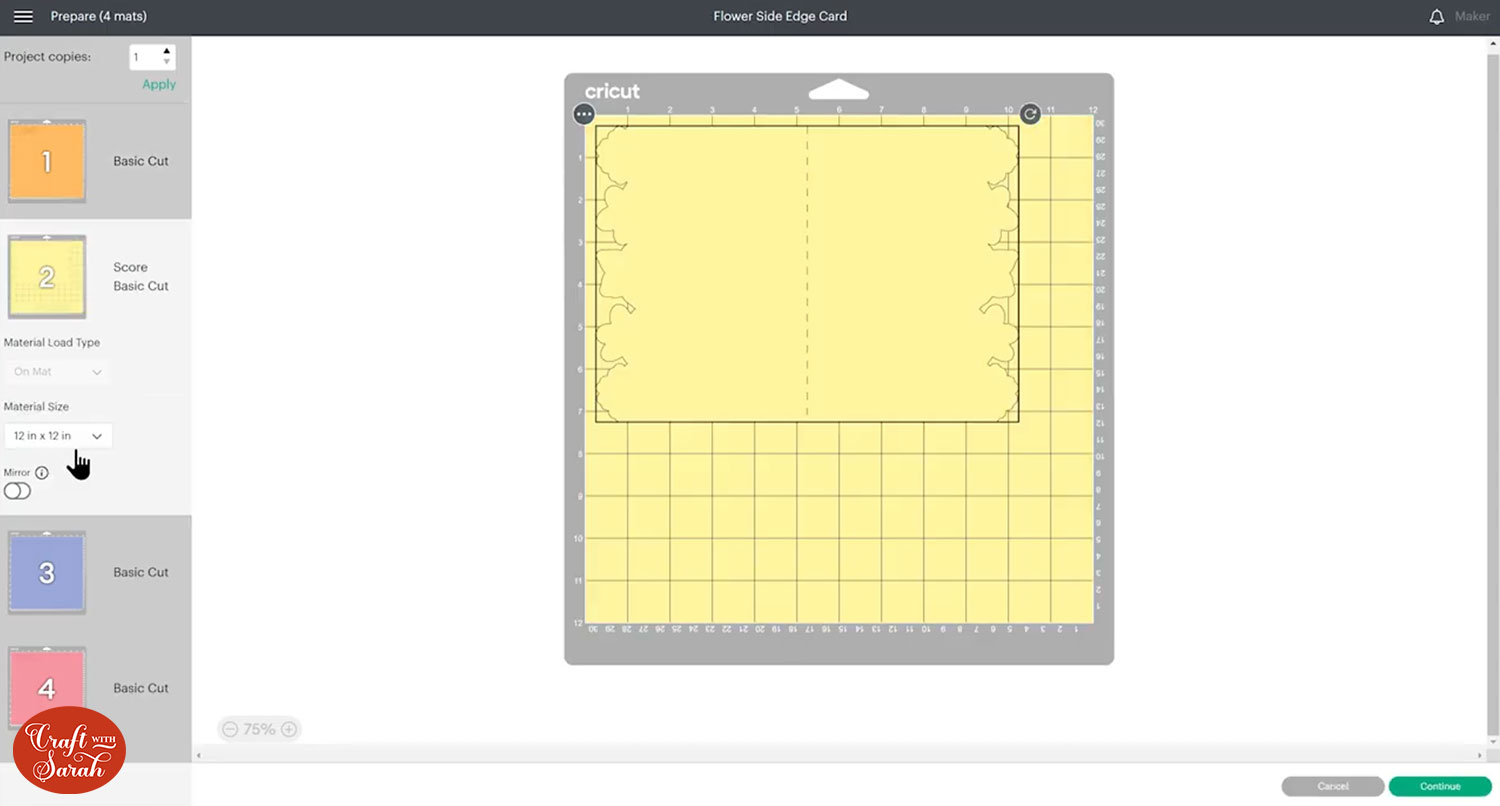
Step 11) Cut out the card
Click “Make It” and follow the instructions on-screen to get everything cut out from cardstock.
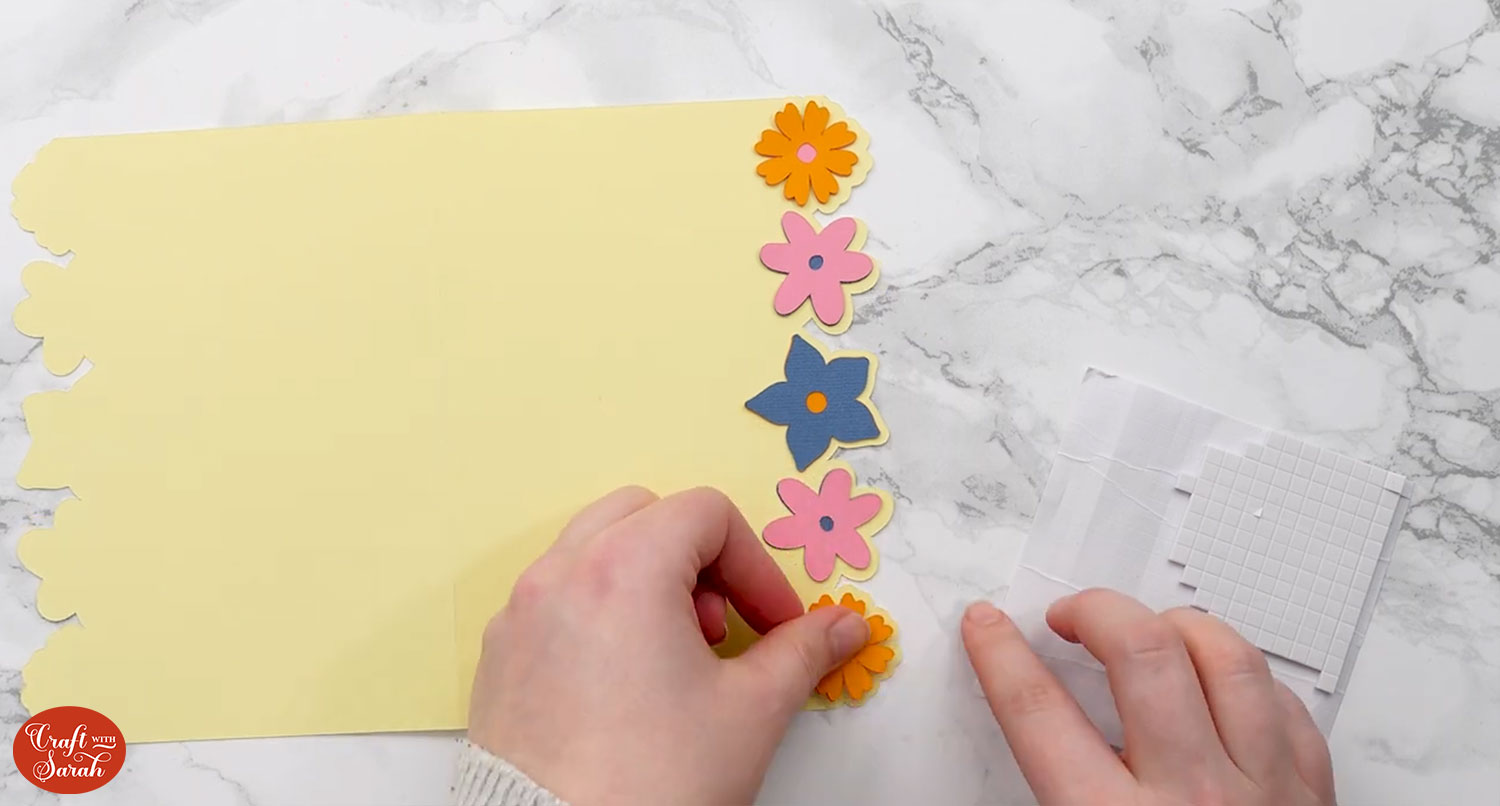
Step 12) Stick the card together
Sticking the card together is really simple!
Fold the card in half along the score line.

Then, add your images.
I like to use foam squares for the “bottom” layers to give a bit of dimension to the card, then glue the other pieces on top.
It can be easier to open the card back out and lie it flat when adding the images.
And that’s it!!
You could decorate the left-side of the card if you want to, or leave it blank – it’s completely up to you!
I hope you enjoyed this tutorial on how to design side edges cards in Cricut Design Space.
Check back soon for even more Design Space and card making tutorials!
Happy crafting,
Sarah x

