Layered Cricut Shadow Boxes Using Offset & Inset

Design your own Cricut shadow boxes with this easy to follow tutorial which uses the Offset feature in Design Space to make a wonderful layered design.
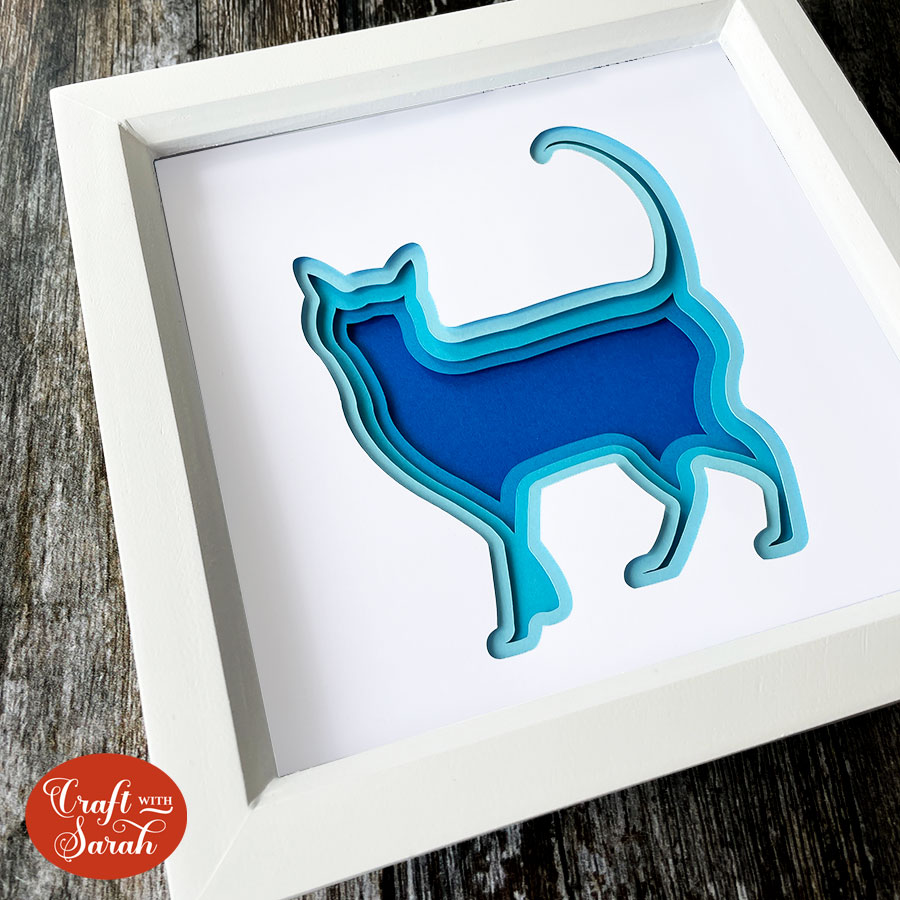
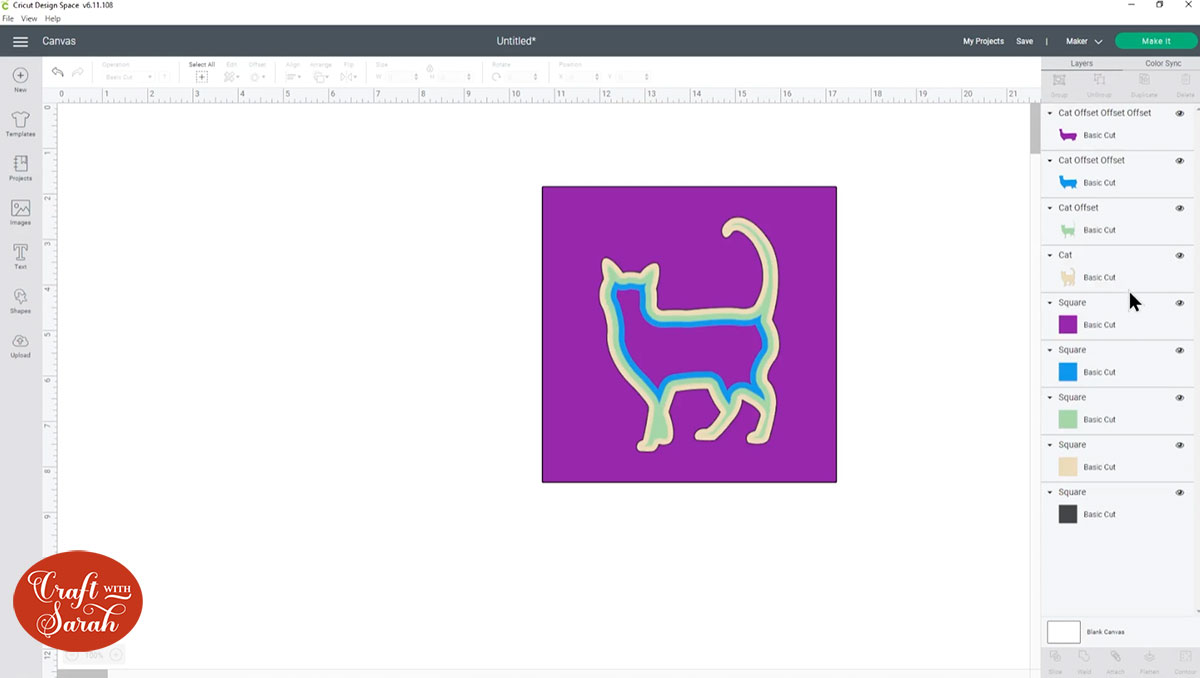
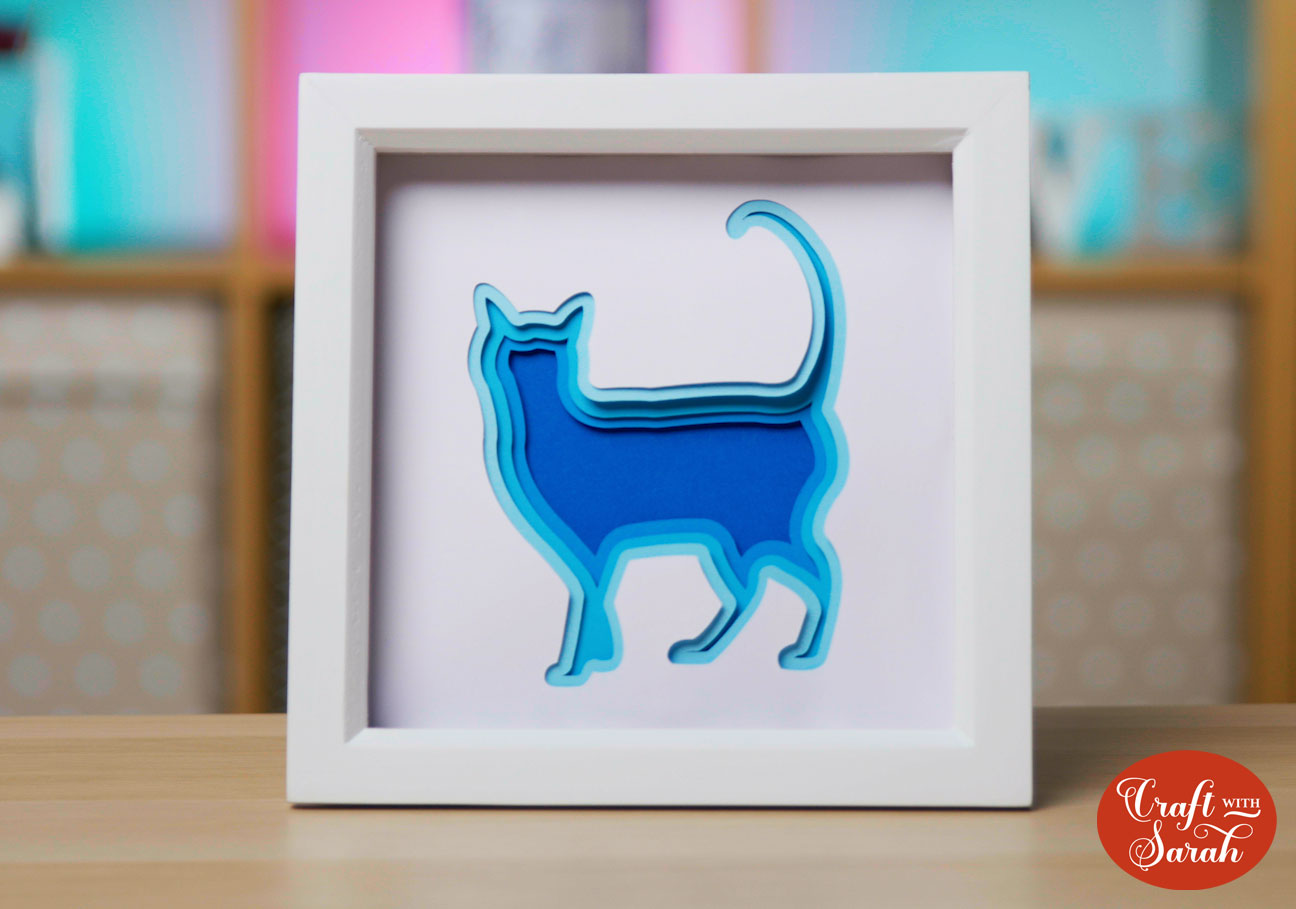
Learn how to make layered Cricut shadow boxes with silhouette images such as the cat shape shown in the photo below.
Keep reading to the end for how to use a similar technique to make shadow boxes with text instead of images.
How to design Cricut shadow boxes in Design Space
These beautiful Cricut shadow boxes look impressive but they are very easy to design!
The possibilities are endless as you can use any silhouette image (or text) to add the layers into.
Cricut shadow box tutorial
Step 1: Choose your image
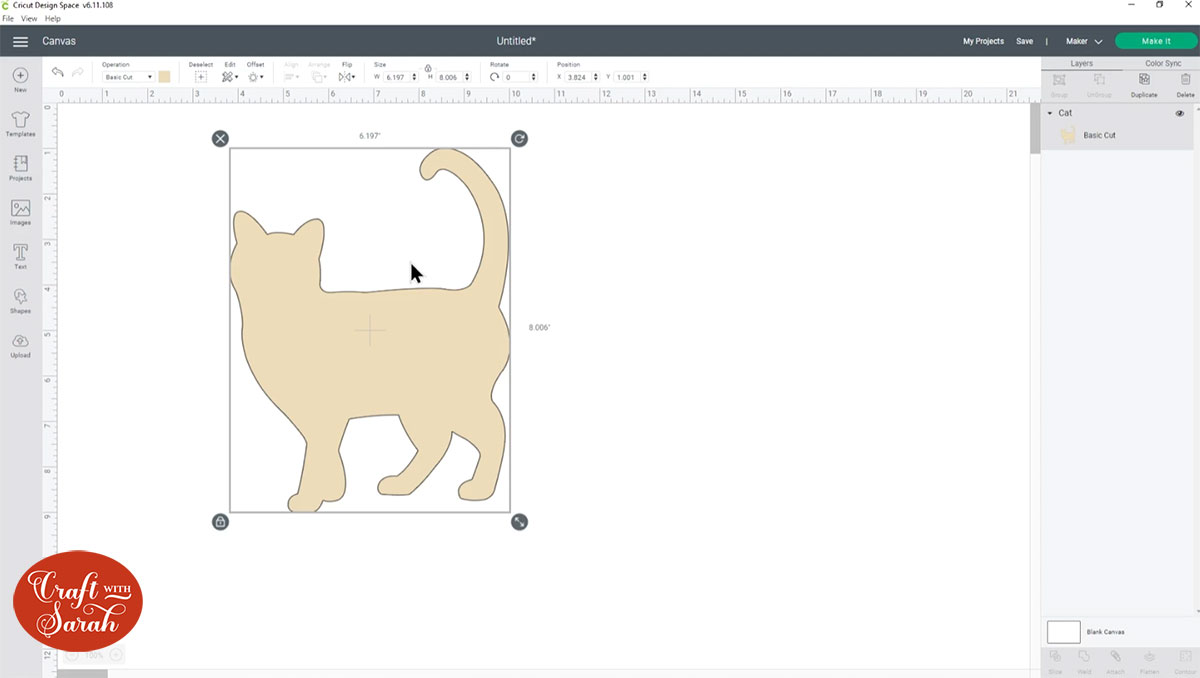
Choose the image that you would like to use for your Cricut shadow box.
I used a cat image from Cricut Access, but you can use any image or SVG that is one layer and looks like a silhouette without any details inside the main shape.
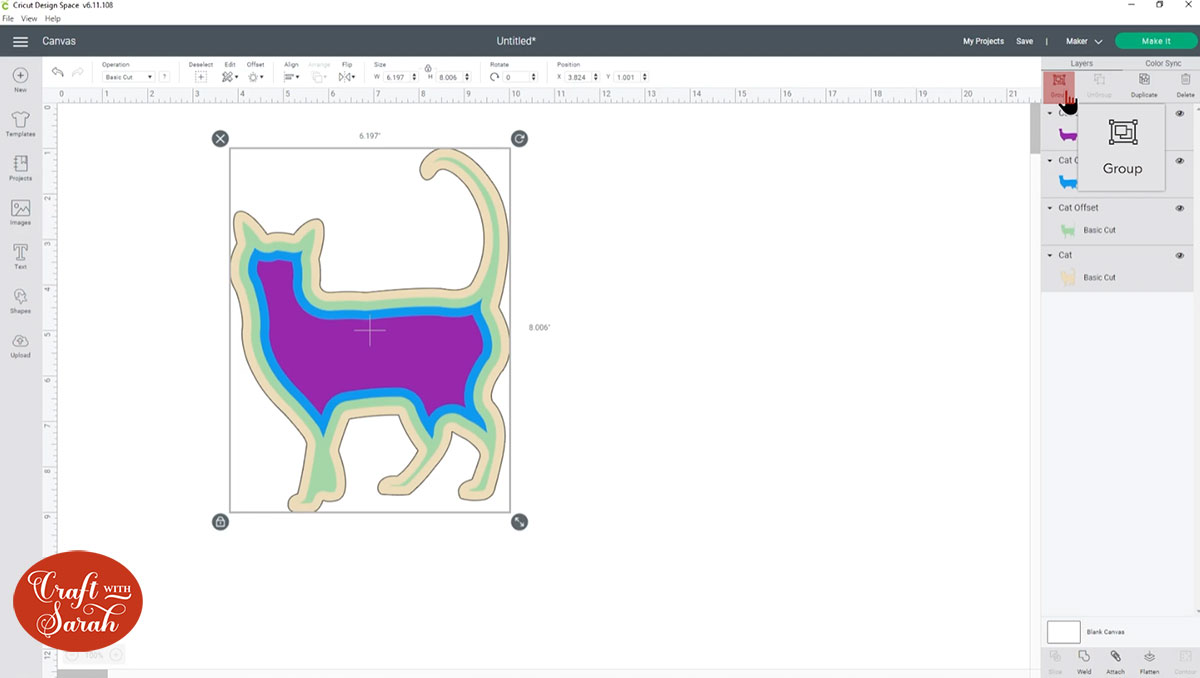
Step 2: Create the “inset” layers
Click your image and then go to the Offset tool.

Drag the slider down into the negative numbers to create an “inset” that goes inside your image. I used -0.2 for the setting on mine.
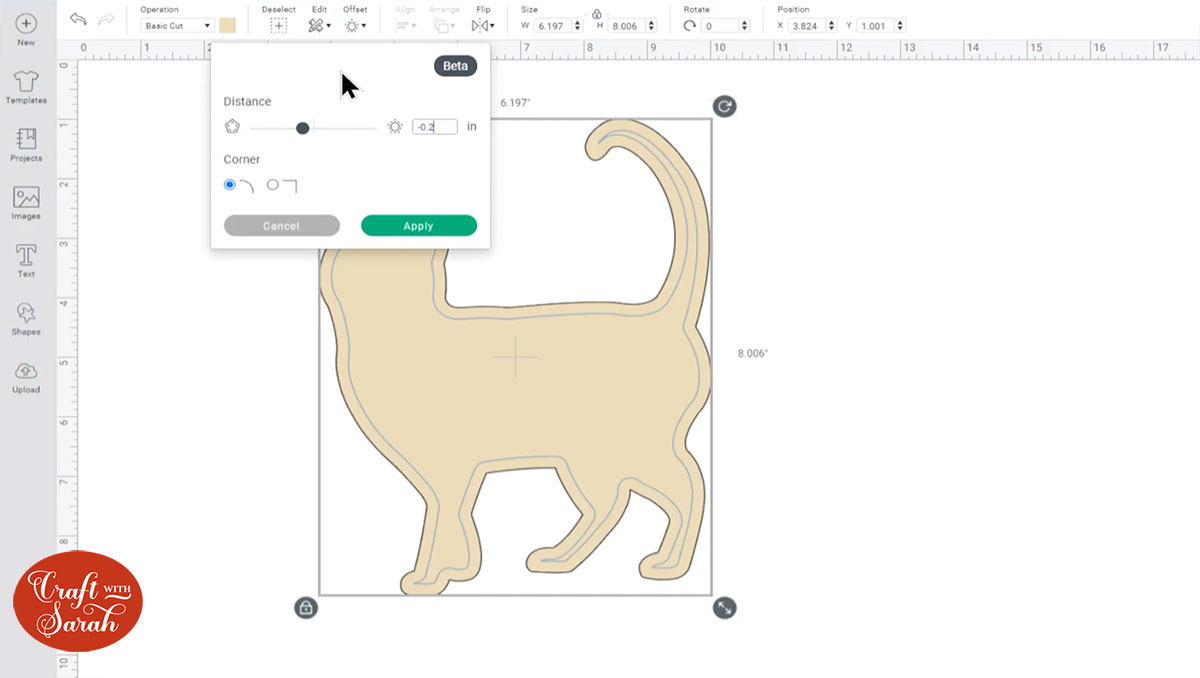
Press “Apply” and this creates your first inset layer.
Click on the new layer and then go into Offset again and create another “inset” layer with the same number (-0.2).
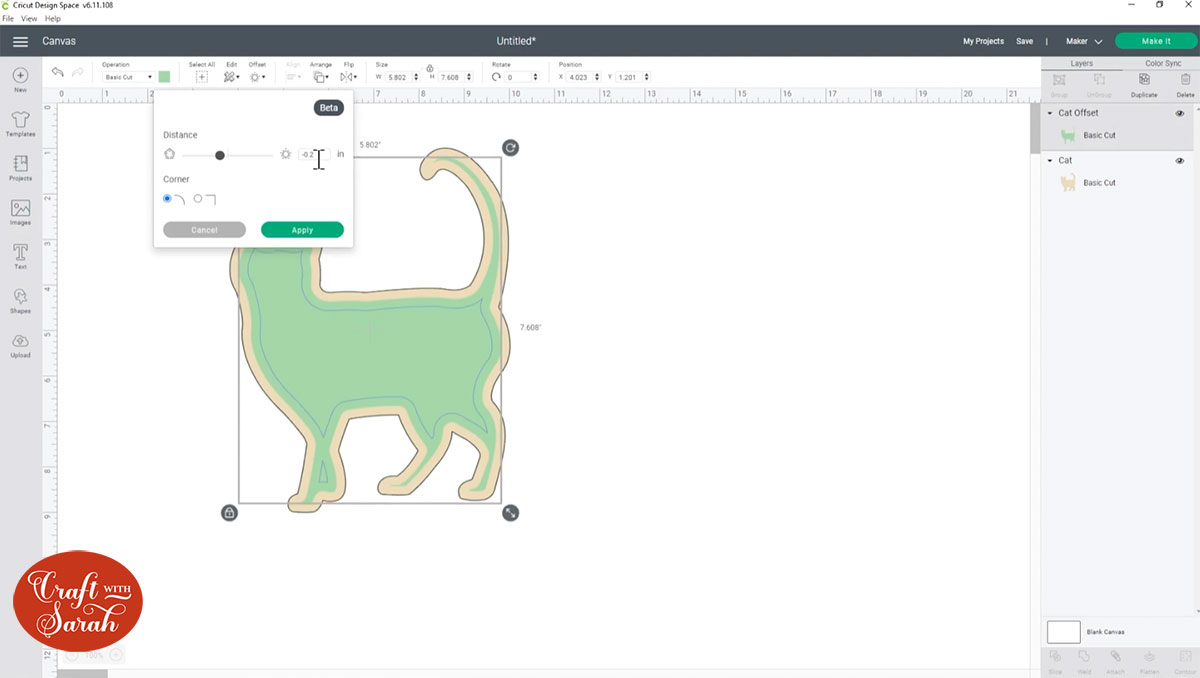
Repeat this step to make as many layers as you wish to have in your shadow box and then recolour the layers so that each one is a different colour.
Select all the layers by dragging a box around them with your mouse, then press “Group” to group them together. This will make it easier to move the layers later on.

Step 3: Create the square layers
Measure the wooden spacer inside your shadow box from one edge to the other to get the exact size that you need to make your layers.

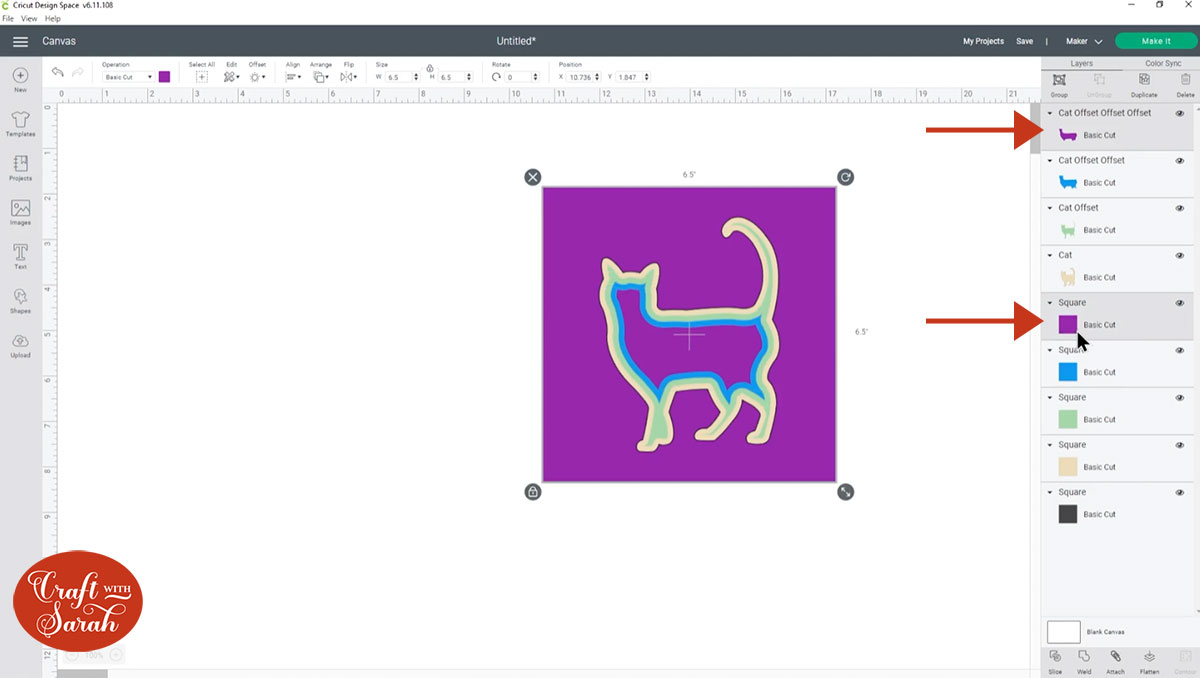
In Design Space, go to “Shapes” and choose a square. Resize it to the same size as your shadow box. Mine is 6.5 x 6.5 inches.
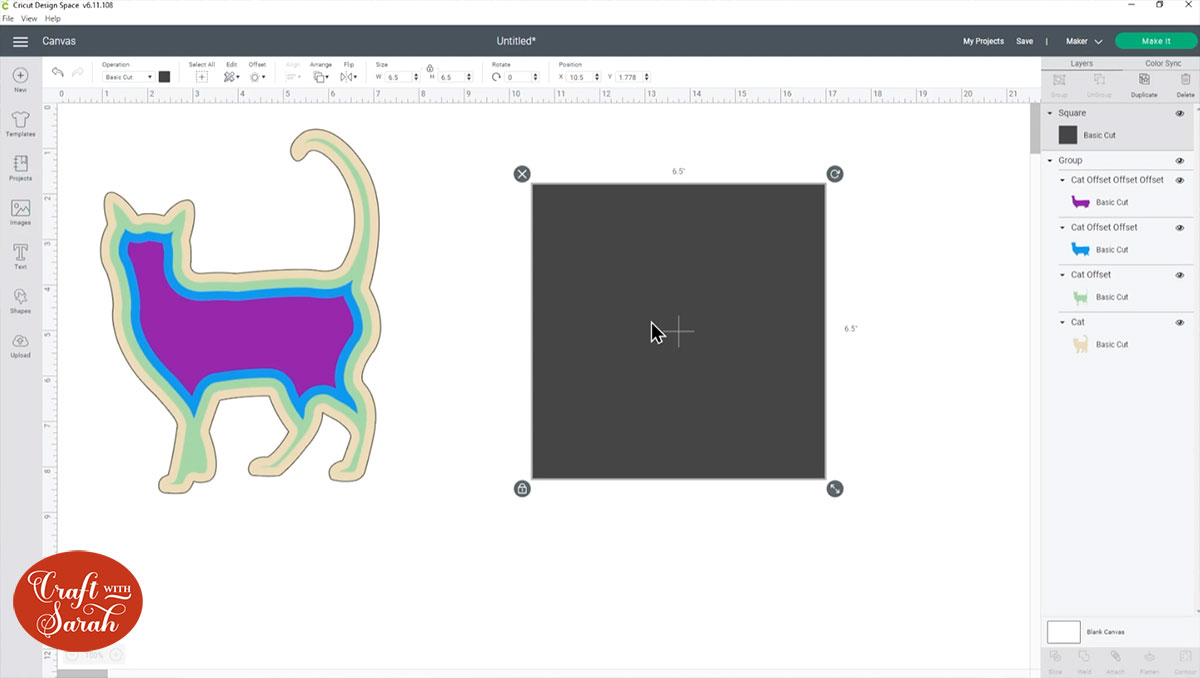
Click the square layer and then press “Duplicate” to make copies of the square. You need the same amount of squares as you have image layers, plus one extra which will be the bottom layer of the design.
Recolour the squares to match your image layers. You will have one “extra” square which can be any different colour that you haven’t used yet.
Select all the square layers by dragging a box around them with your mouse and then go to Align > Center to put them one-on-top of the other.

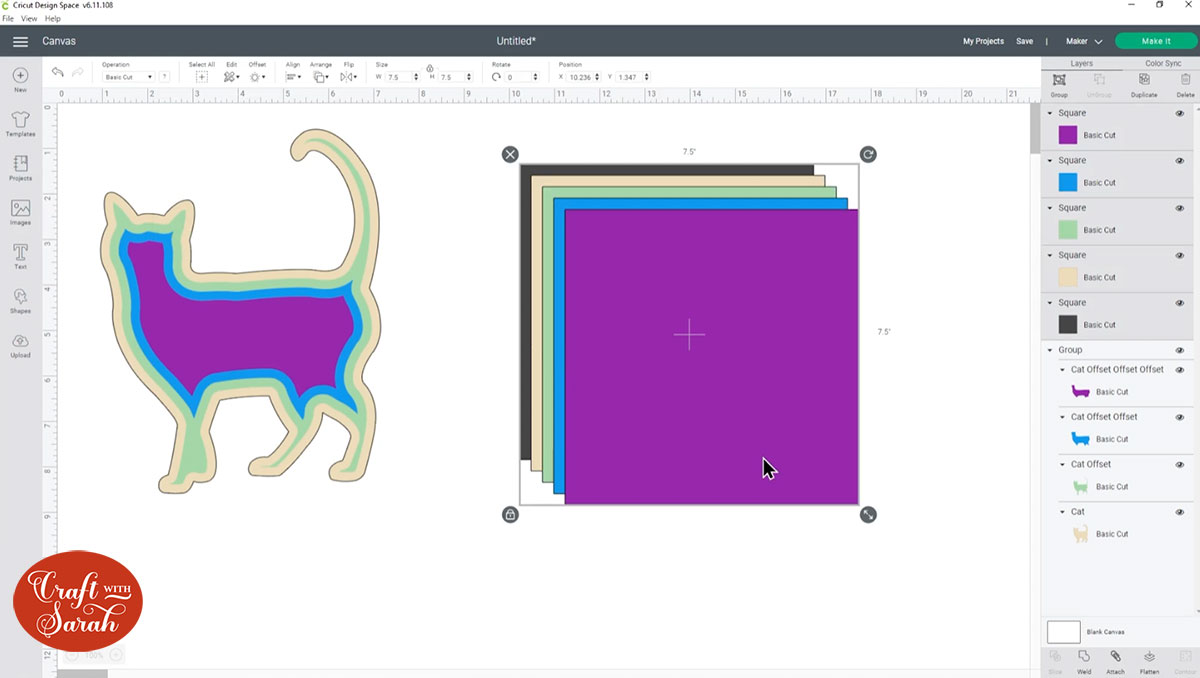
Step 4: Slice the images from the squares
Click your image Group and drag it on top of the square.
If your images are showing underneath the square, go to Arrange > Send to Front to move it in front of the squares.

Resize the images to the size you want to cut them from the squares. Press “Select all” and then go to Align > Center to make sure your images are exactly in the middle of the squares.
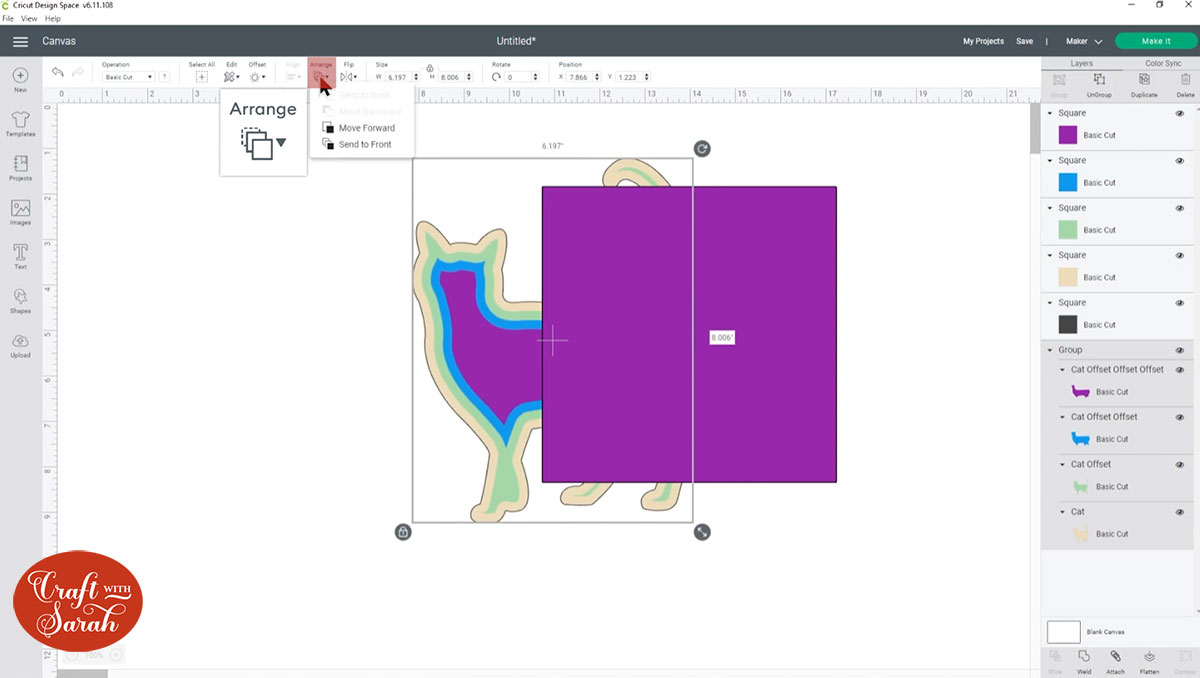
Click the image Group and then click “Ungroup” to separate all the layers again.

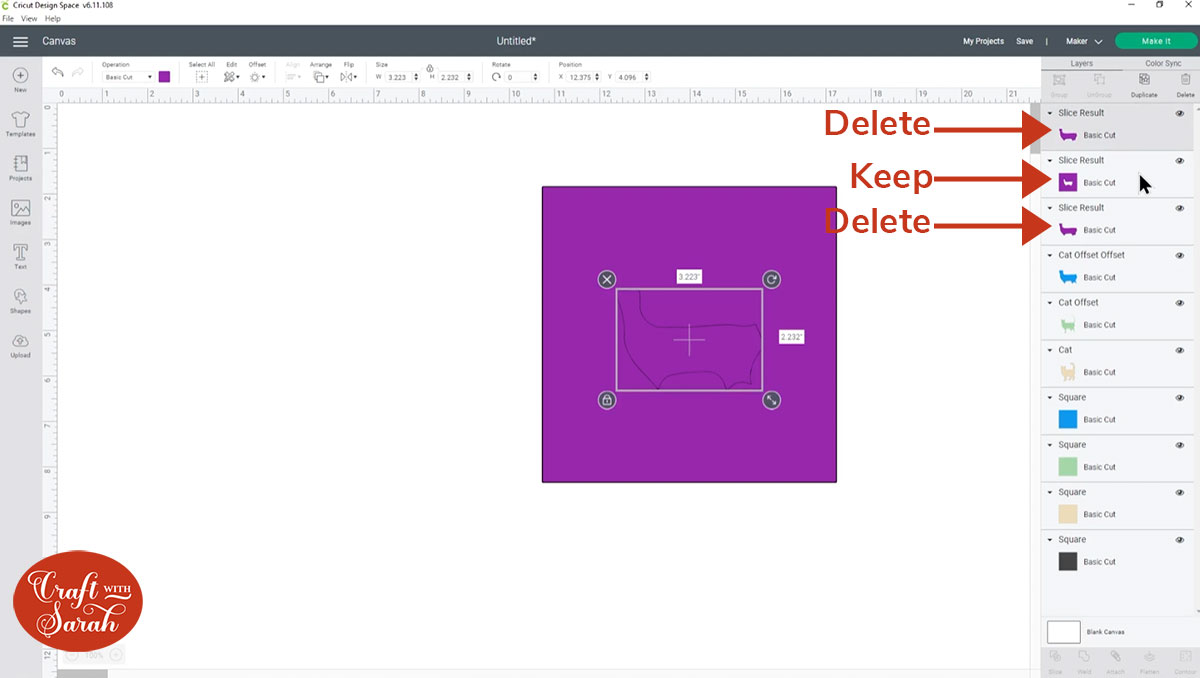
Now it’s time to cut the shapes of the cat out from the squares.
In the layers panel, click one of the cat layers and then press Ctrl or Shift on your keyboard and select the square layer in the matching colour.
Press the “Slice” button at the bottom of the layers panel to cut the shapes out from each other.

This will give you three “Slice Result” layers.
Click on the two layers that still look like the shape layer (e.g. for me it’s the cat layer) and delete them. Keep the layer that shows the outline of the square with your shape now cut out from the middle.
Repeat this for all the different colours. Once finished, you may need to drag-and-drop your layers in the layers panel to put them in the correct order.
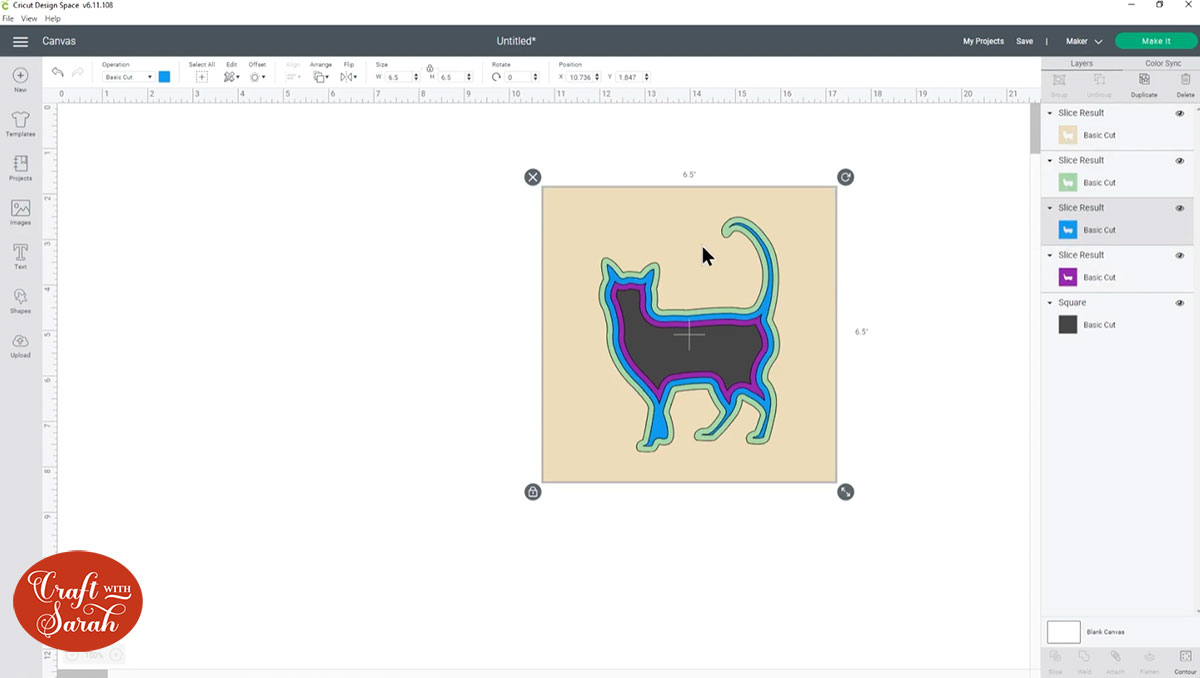
Click each layer and recolour them to the real colour you want to cut them out from.

Don’t forget to save your design!
Step 5: Cut out the card layers
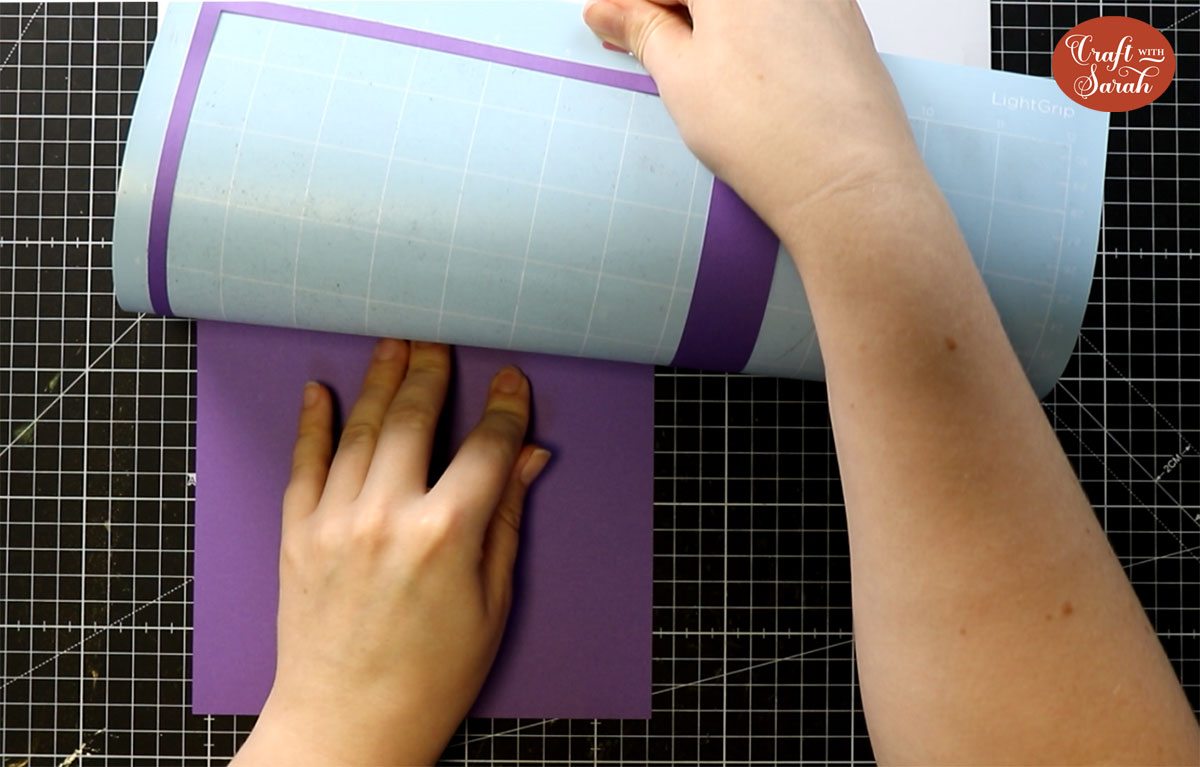
Now it’s time to cut out the cardstock layers.
Click “Make It” and follow the on-screen instructions to cut out the design.
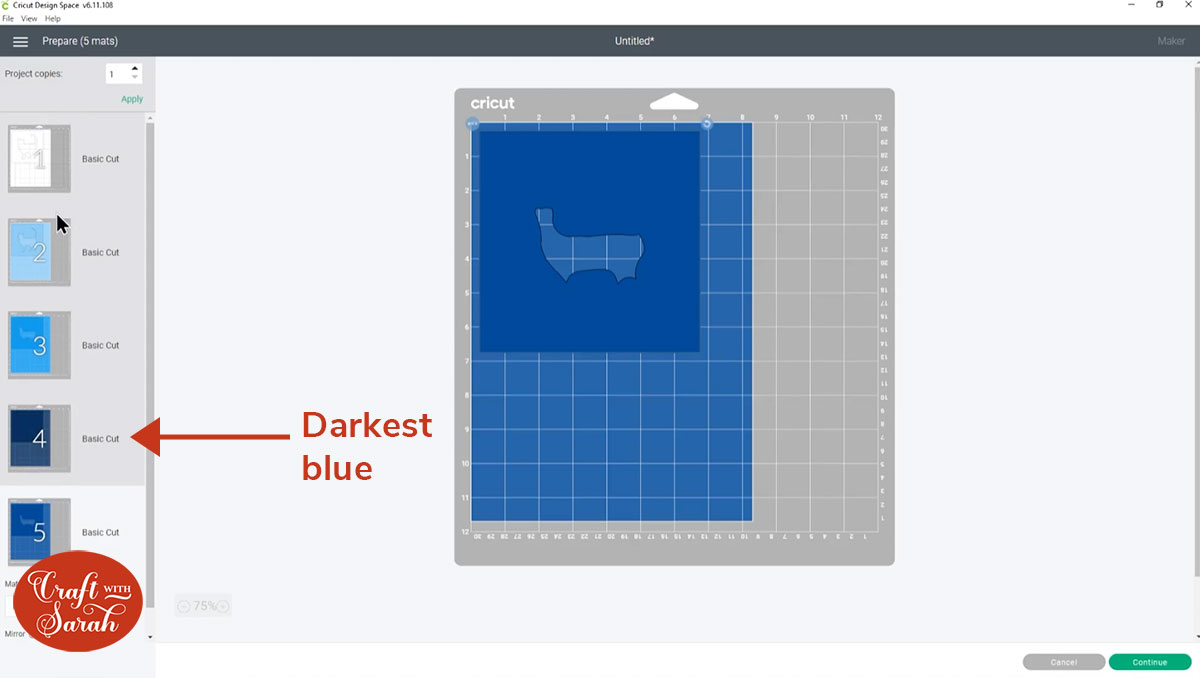
Be careful when loading your colours onto the cutting mats as Design Space can show the mats in a bit of a strange order. For example, you can see on mine that the blues don’t go in order down the list, so I need to make sure I’m putting the right colours into the Cricut at the right time.
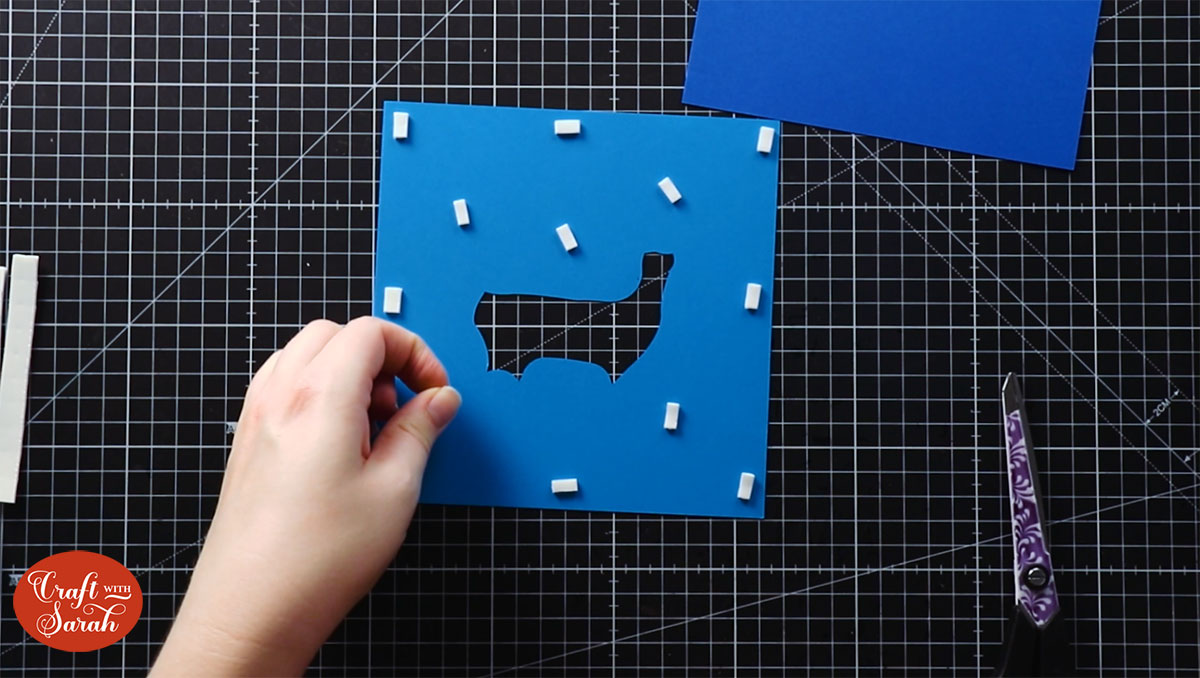
Tip: When taking the card off the mat, turn the mat upside down and peel the mat away from the card. Use one hand to keep the card pressed flat against your work surface. This ensures the card stays flat when it comes of the mat.
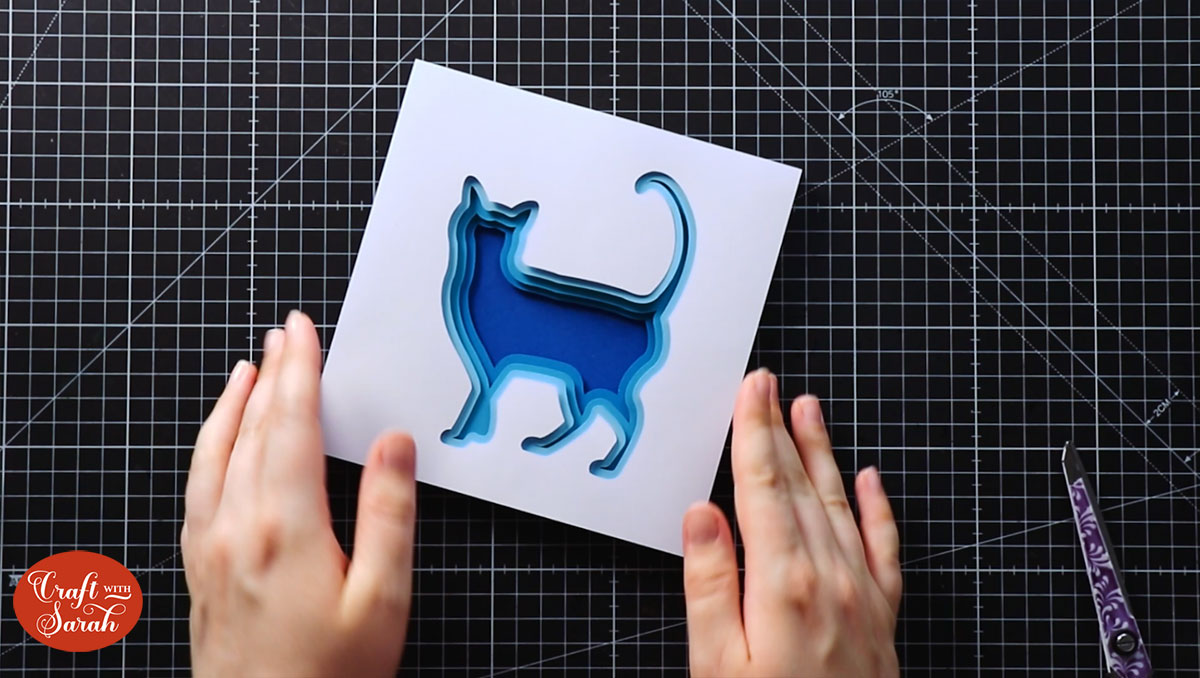
Step 6: Assemble the layers with foam pads
Working from the bottom layer upwards, place 3D foam pads on the back of each layer and stick them together.
Make sure you have a good amount of foam pads so that the layers stick well together along the edges. Placing foam pads in the middle of the card gives it more stability so it won’t “sag” under the weight of the other layers that will sit on top of it.
When all layers are stuck together, it will look something like this:
It’s now ready to go in your frame. You may want to add some extra space to move the design further back from the front of the frame.
I did that by adding some little blobs of Blu-Tak around the edge of the frame. The white version of Blu-Tak would be better as you’d be less likely to see it when looking at the frame on an angle.
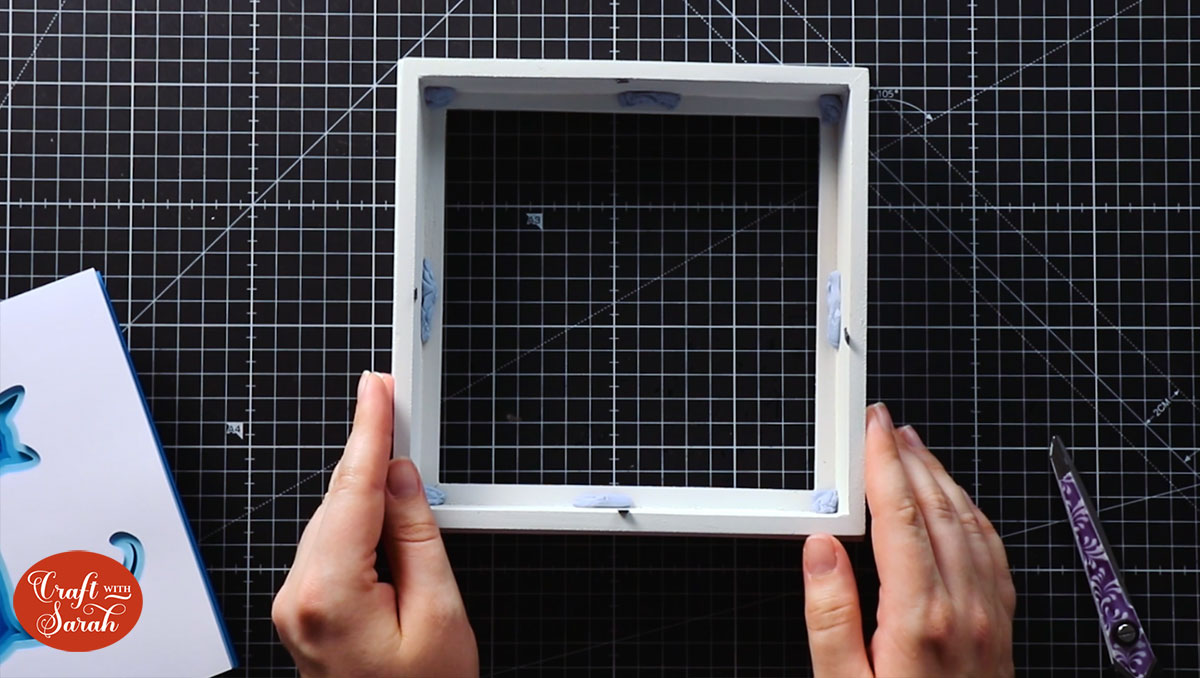
You could use foam pads instead for the same effect, or perhaps even cut some frames from craft foam that will go around the whole of the frame. This would certainly look the neatest, but it’s a bit more effort than the other suggestions!
How to make layered text Cricut shadow boxes
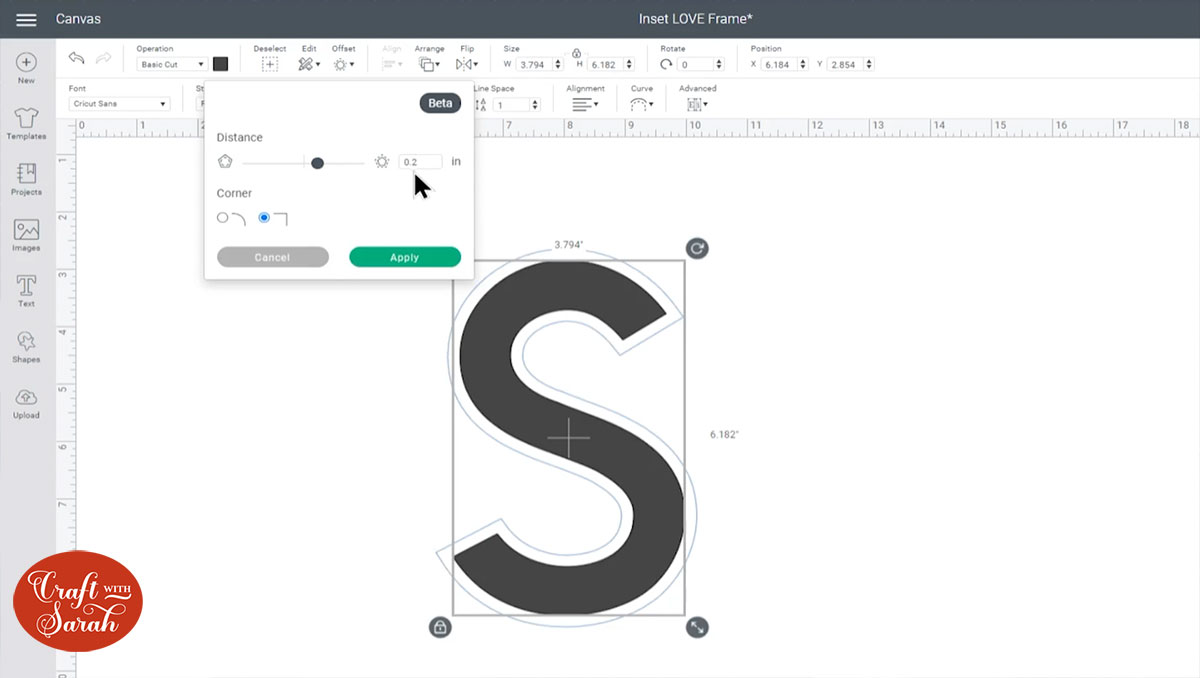
Making inset Cricut shadow boxes with text instead of images follows a very similar process, with one key difference.
With text, instead of adding a negative offset (a inset), make a positive offset instead that is larger than the original text layer.
Here, you can see I’m adding an offest of 0.2 for the letter, whereas with the cat I used a negative number of -0.2.
Keep the edges of the offset set to “square” for the best effect when working with text.
When you’ve made all the layers, it will look something like this before you slice each layer out of the squares:
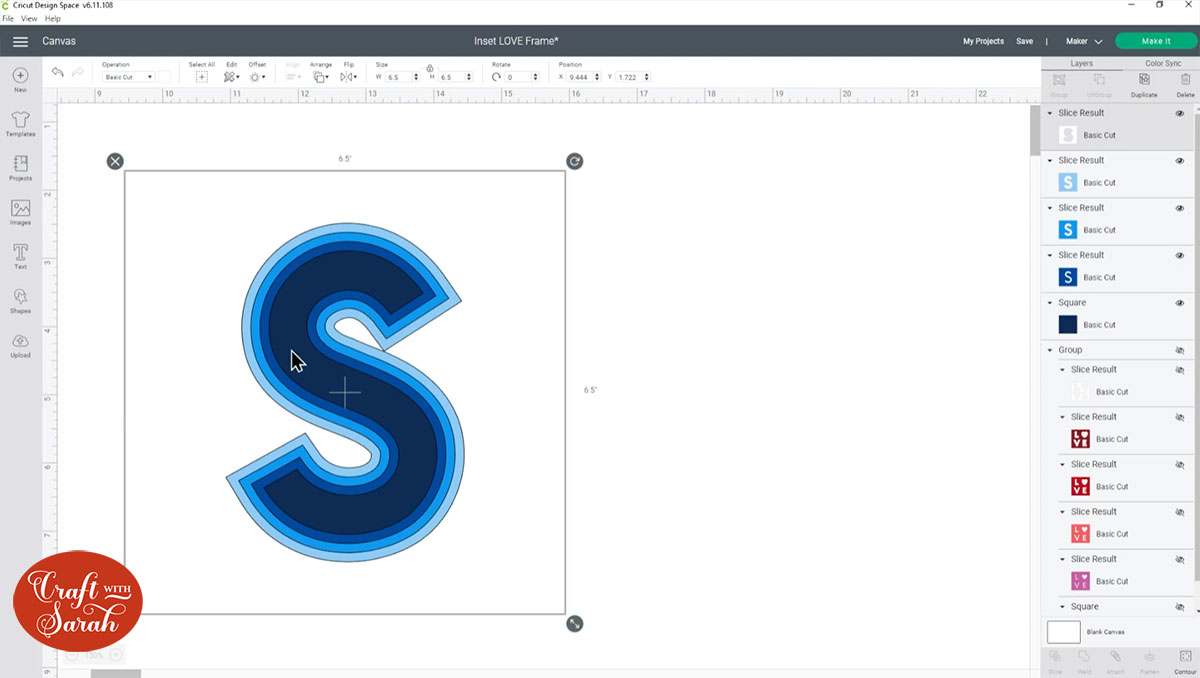
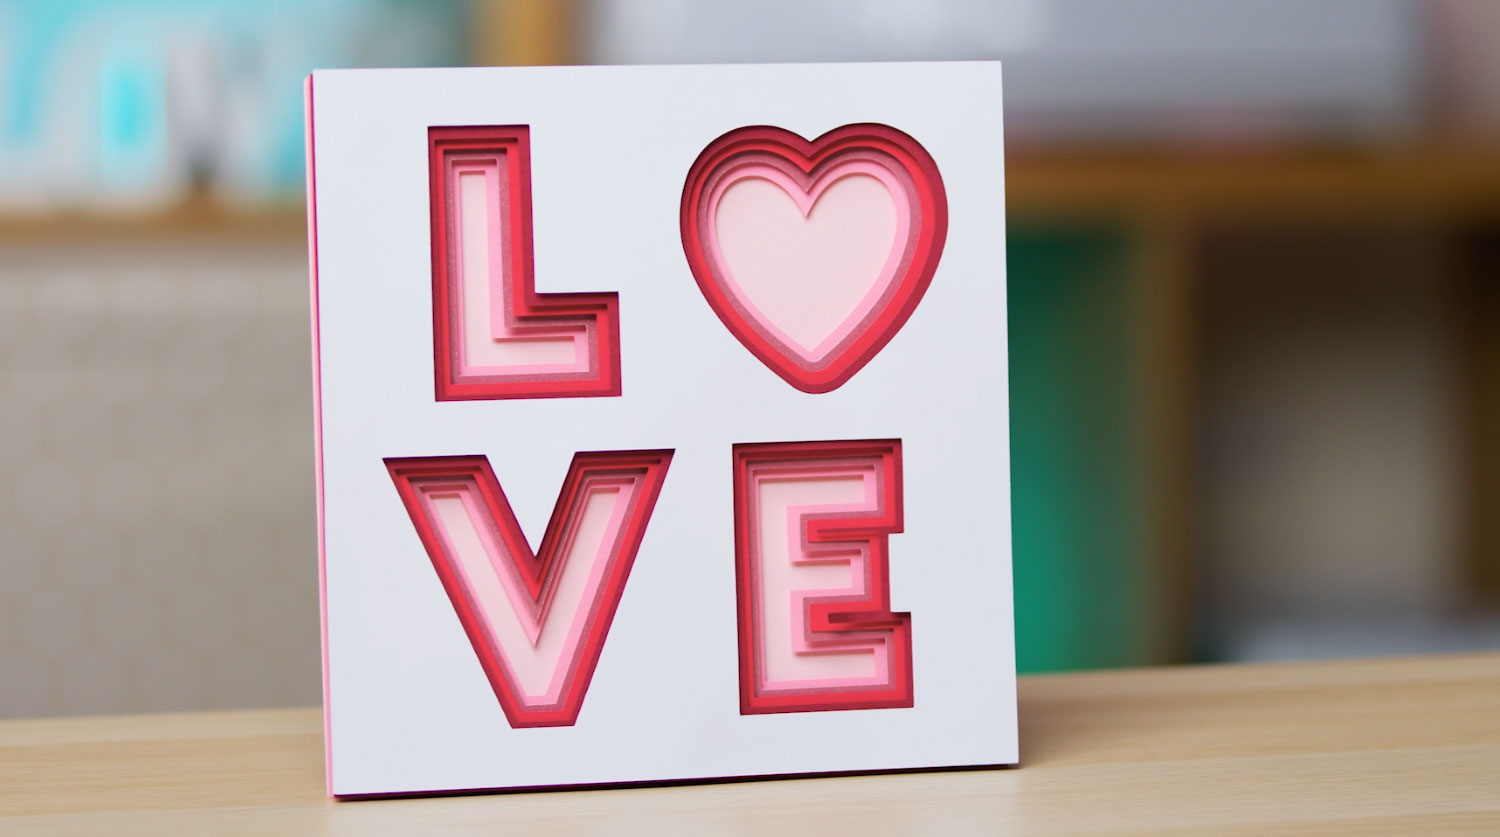
Here’s a design I made with text for the L, V and E plus a heart shape for the “O”. I used the same technique of adding a positive offset number to the heart so that it would match the layers.
I hope you’ve enjoyed this tutorial on how to design layered inset Cricut shadow boxes!
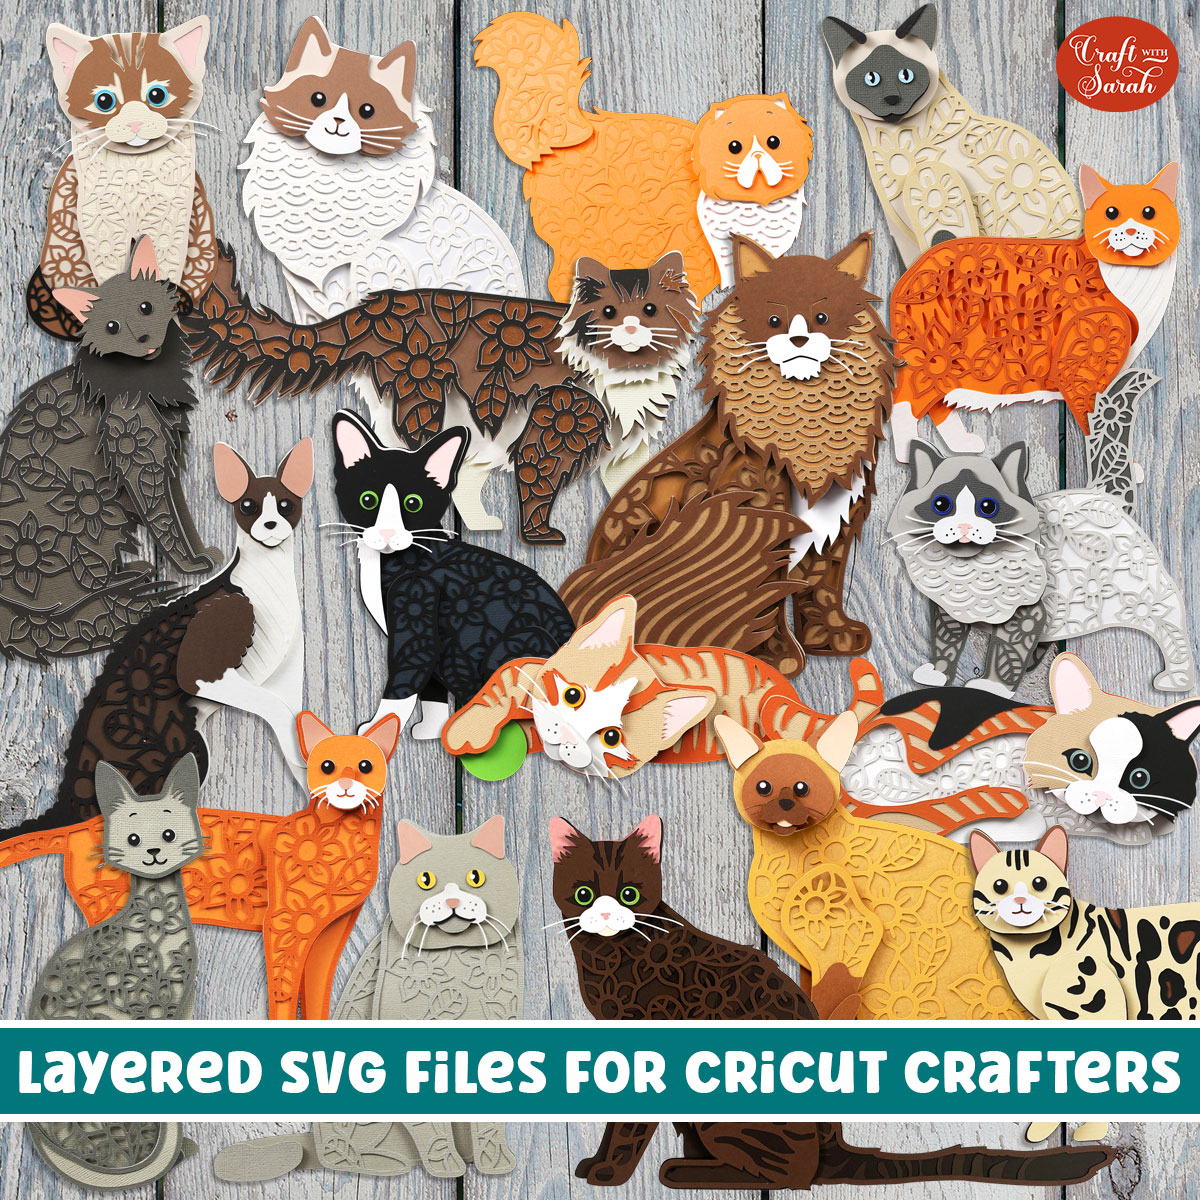
If you’d like more cat craft projects then check out these layered cat SVGs on Design Bundles.
My favourite is the Ragdoll cat design.
Happy crafting,
Sarah x

