The Best Halloween Fonts & How to Use Them

Halloween themed fonts are so much fun to design with in Cricut Design Space.
Here’s how to install custom fonts, as well as how to get the fancy “glyphs” or “swooshes” on the letters.
Plus, see my favourite Halloween fonts to design with!

[cws_halloween2021]
Please note that some of the links included in this article are affiliate links, which means that if you click through and make a purchase I may receive a commission (at no additional cost to you). You can read my full disclosure at the bottom of the page.
Craft with printable background papers in Cricut Design Space
Here’s how to use custom fonts in Cricut Design Space.
Note: The video was recorded using Design Space version 6.12.227. Later versions may look or function slightly differently.
Video resources:
- Sign up to Creative Fabrica for $1
- Font Cloud
- All fonts mentioned in the video are linked below
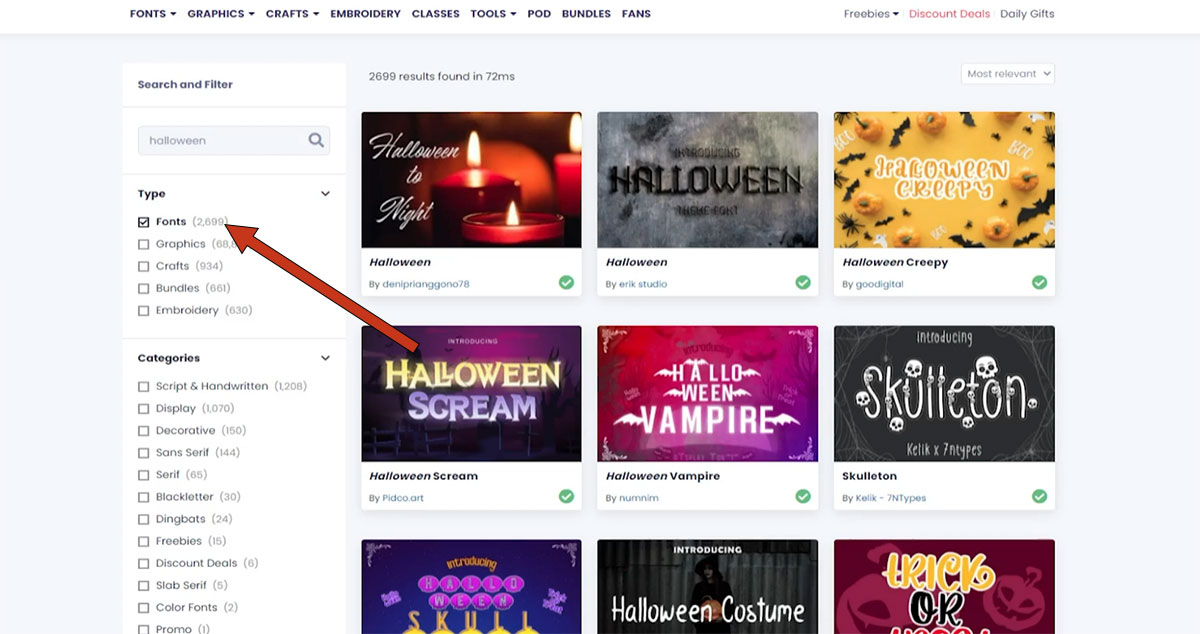
Where to find Halloween fonts
My FAVOURITE website to get fonts from is CreativeFabrica.com.
They have hundreds of thousands of graphics, SVGs, digital papers, fonts and so much more to choose from.

The BEST thing is, they offer a monthly subscription where you can pay a small monthly fee to get unlimited downloads from their website! This is so beneficial as it means you can download all the fonts and graphics you want, for one small monthly price.
I’m happy to say that I have a special promotion available with Creative Fabrica where you can get your first month’s subscription for just $1!!
That’s right, just $1 to access 100,000s of digital file goodness!
If you’d rather not sign up to a recurring subscription though, that’s absolutely fine. All fonts and graphics can be purchased individually instead, for a small one-off cost.
Head on over to Creative Fabrica and click the “Fonts” link in the navigation to browse all their fonts. To find Halloween fonts, type “Halloween” or “gothic” into the search box.
The best Halloween fonts for Cricut
Here are my top 5 Halloween fonts that I LOVE to use in my craft projects!
1) Halloween Pumpkin
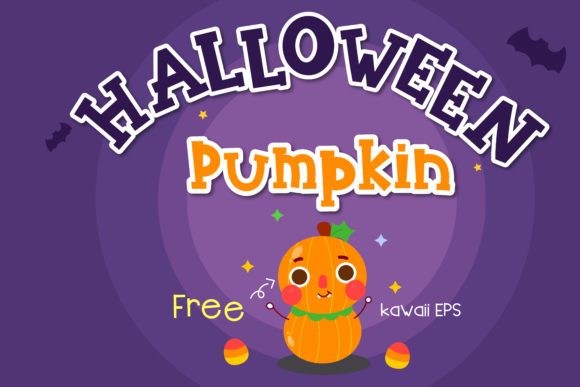
This is my favourite Halloween font! I love how cute and cartoony the letters are, but they still give off a fantastic Halloween vibe.
I used this font for my video on how to make family t-shirts for Halloween, and on various other projects too.
2) Night Mare
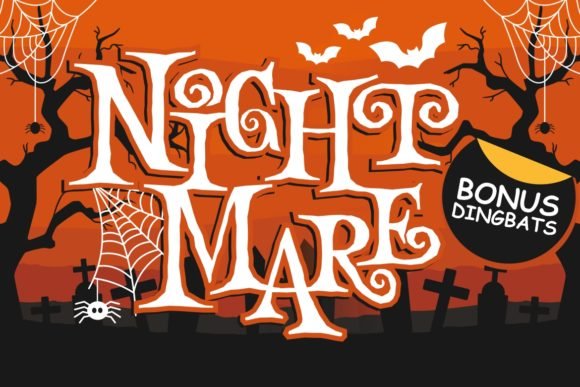
This is more sort of spooky and Halloweeny than the first one. I really like the swirls on the edge of the letters and also elongated tips on the letters.
It also comes with some little Halloween images too for if you want to add them to your designs.
3) Dripping Zombie
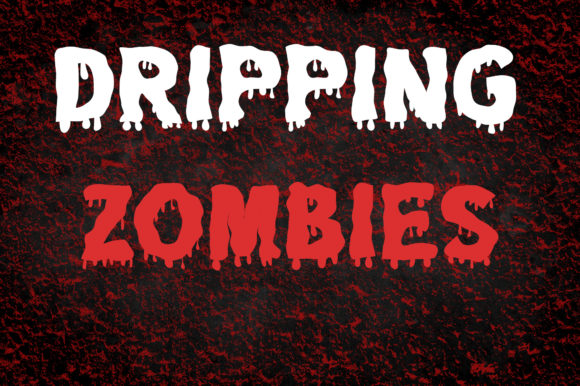
What Halloween is complete without zombies? I love a good zombie movie or TV show and this font is perfect for zombie themed craft projects!
It has a great drip effect, and although there are quite a lot of drip effect fonts on Creative Fabrica, the reason I like this one the most is because the drips are quite thick which means it will be easy to cut with the Cricut.
It includes a second version which is just the outline of the letters, so if you wanted to have a border effect instead of the filled in letters you have that choice.
4) Autumn Lover
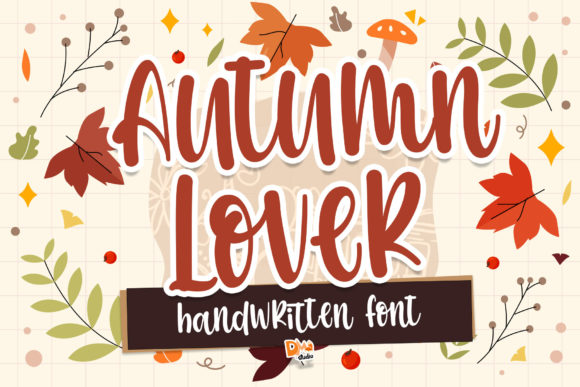
The next font I’ve chosen is more of an autumn or Fall themed font rather than Halloween, but it’s just really pretty.
I love script fonts where all the letters are connected with each other. It looks like a really nice handwriting and it’s perfect for your Fall themed crafts.
This would be a lovely font to choose from my Giant Fall Wall Art sign that I shared on Day 3 of the Halloween Craft Countdown.
5) Old Biker
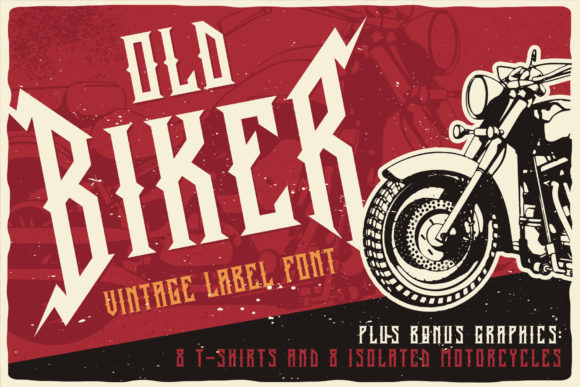
My final choice for the best Halloween fonts is this one called Old Biker. Although it hasn’t specifically been designed as a Halloween font, I think because it looks quite gothic in how the letters are shaped it works well for vintage style Halloween craft projects.
For example, maybe you’re making a wall art sign or a door mat or something like that where you want to have that vintage look – this would be a lovely font to choose!
How to install custom fonts
Using custom fonts in Cricut Design Space is different to using SVGs.
Unlike with an SVG, you don’t use the “Upload” button to get fonts into Design Space.
Instead, you have to install them on your computer or device.
To start, close Design Space if you already have it open.
Then, download the font you want to install.
Font files usually come into two different file types: .otf and .ttf
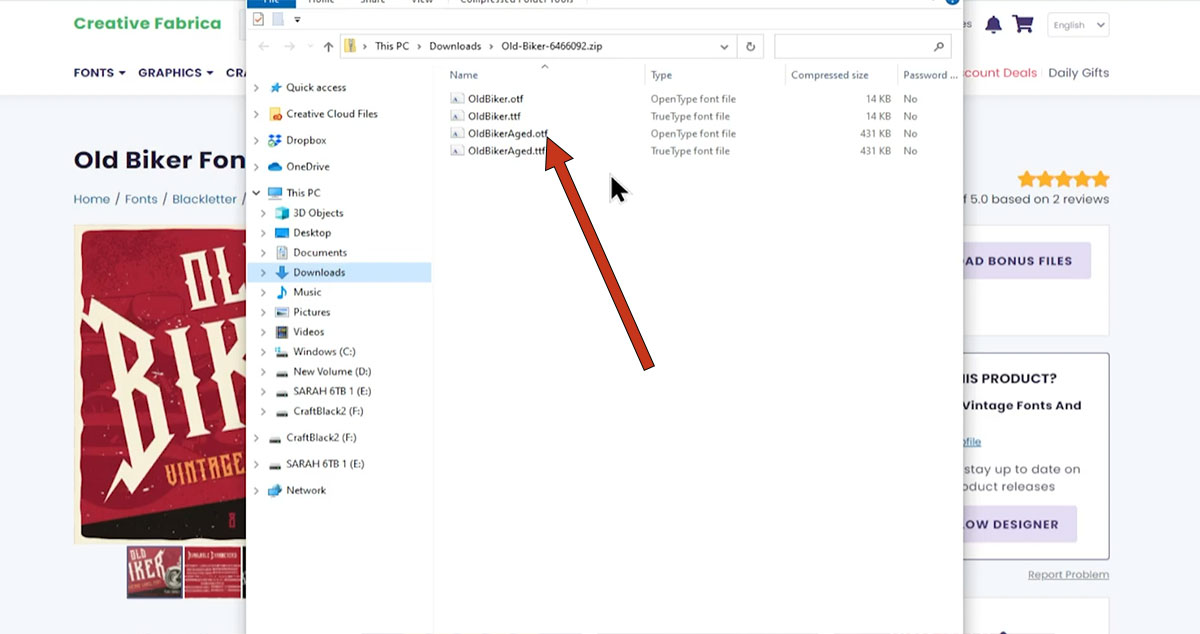
It doesn’t really matter which one you install, but I prefer .otf as it’s a newer file format.
An easy way to remember which to use is OTF = “open this font” and TTF = “trash this font”.
Double-click on the font file and it will bring up a window like this:

Click “Install” and the font will get installed on your computer.
Next time you open up Design Space and use the “Text” tool, your new font will be waiting for you in there!
How to use special font characters in Cricut Design Space
Sometimes when looking a custom font, you might see that it has special characters, also known as flourishes, glyphs or swooshes.
Here’s an example:
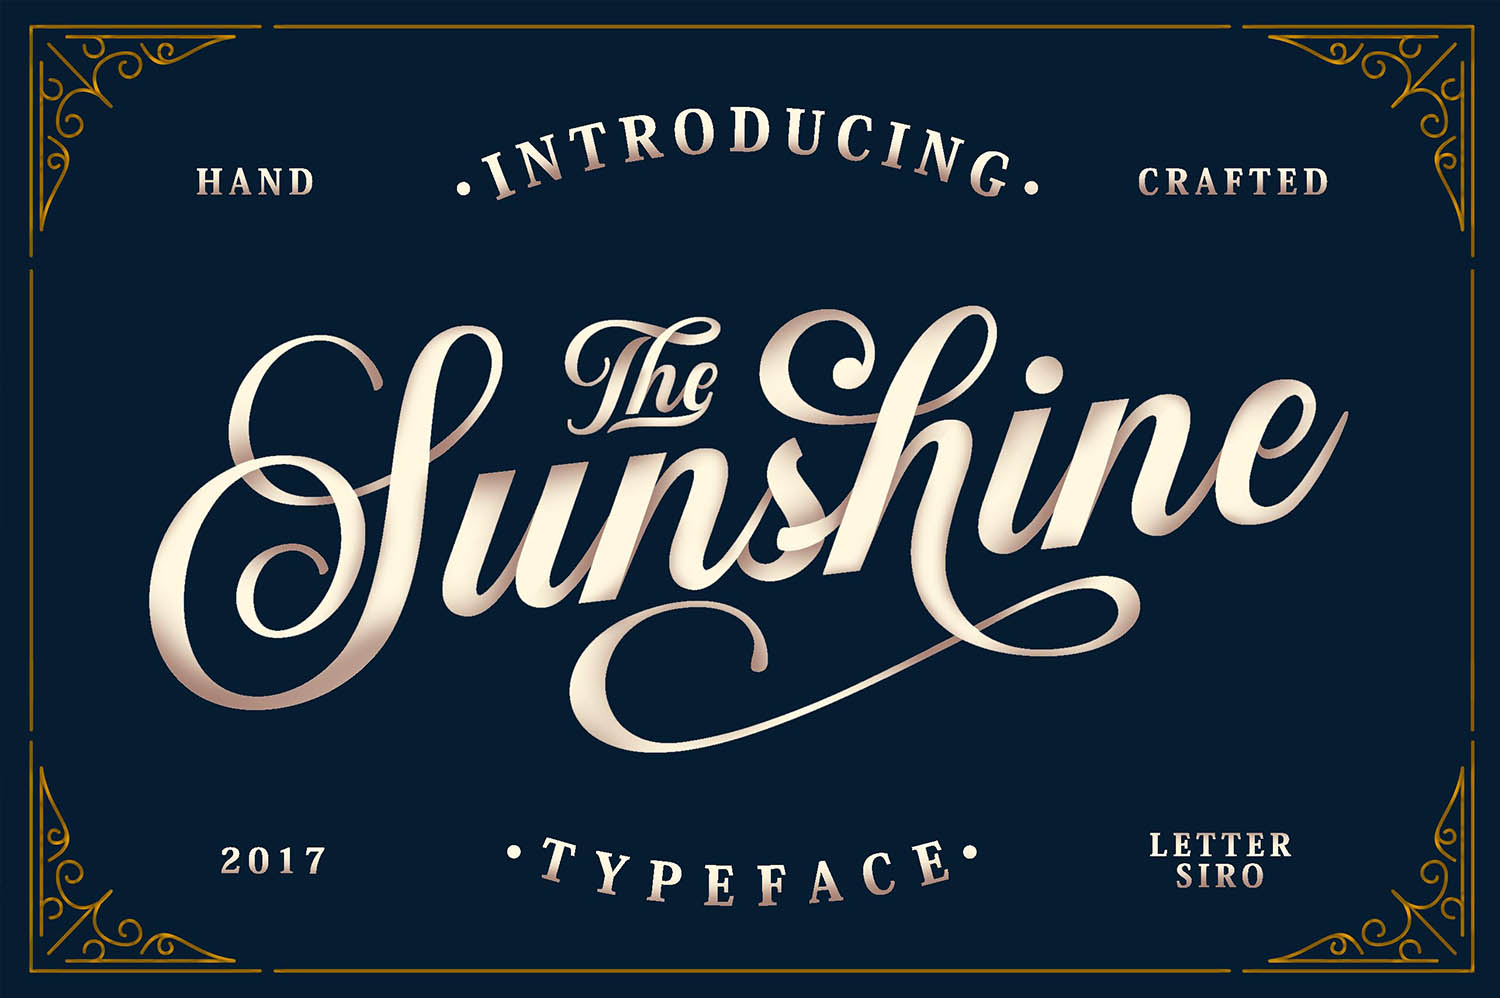
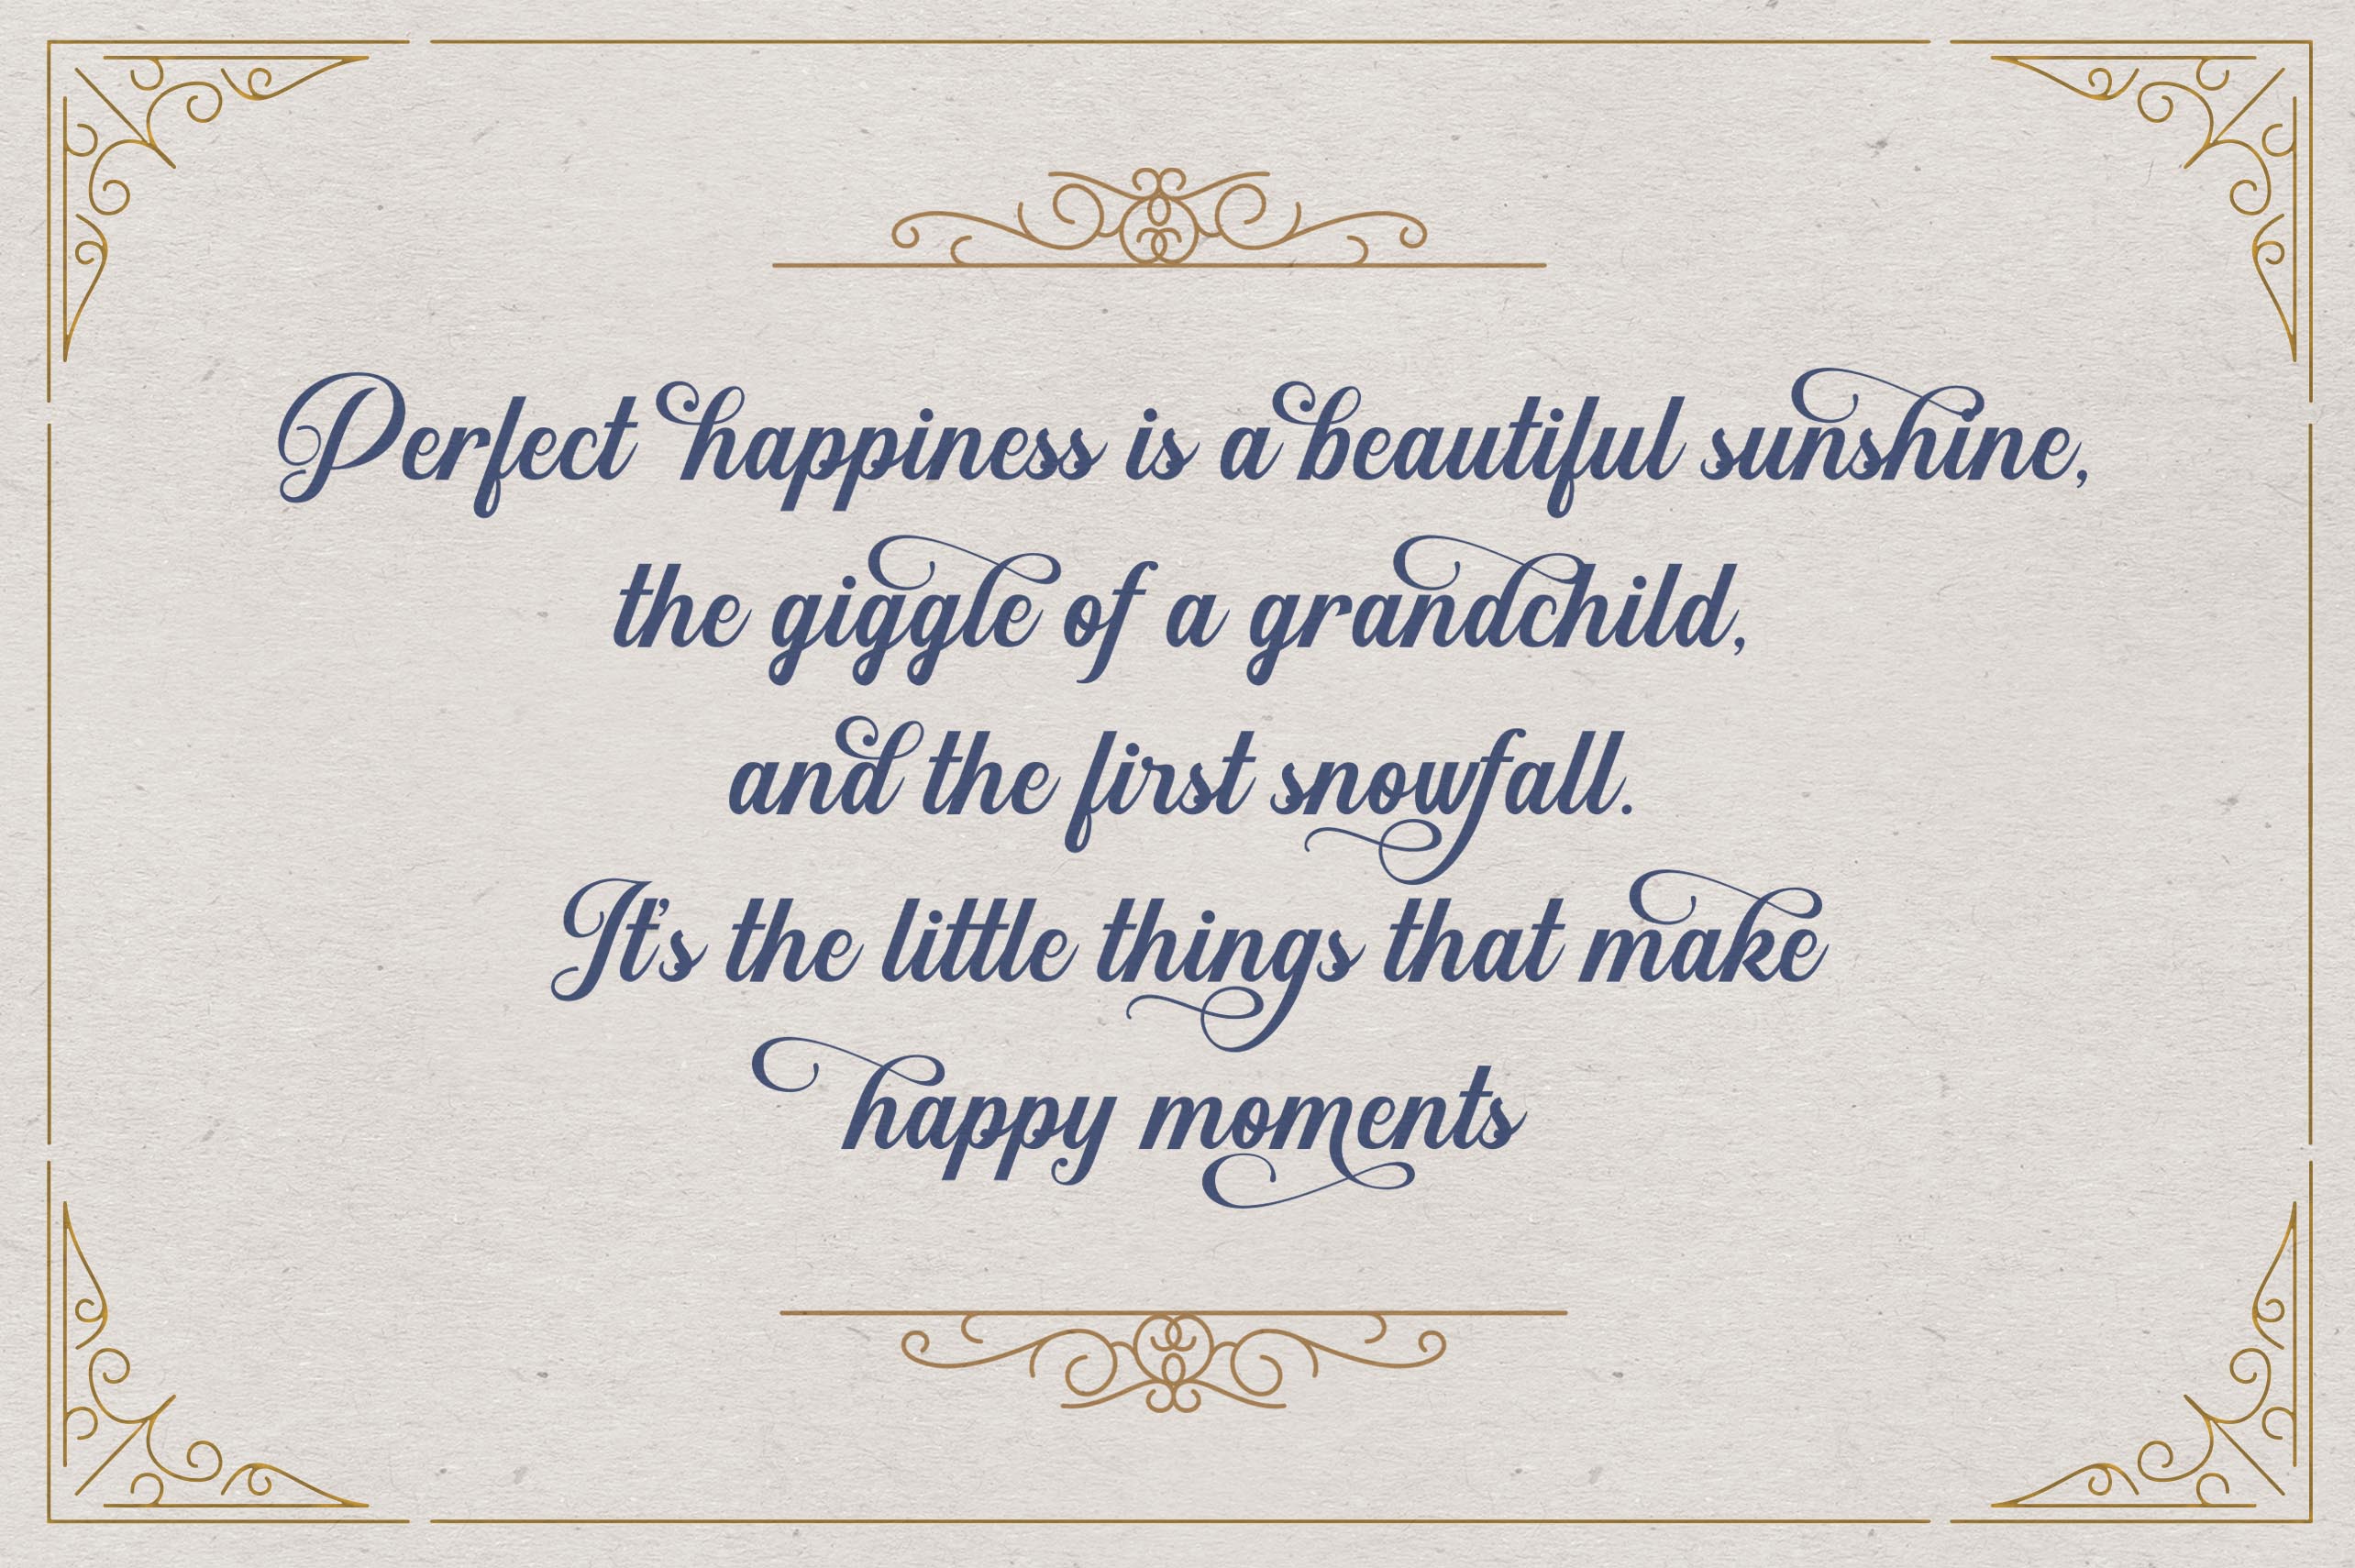
This is called “Sunshine & Vintage Ornaments Font” and it comes with two font files to install. The first is the Sunshine font with the letters and the second is an “Ornament font” which means that instead of letters, when you type on the keyboard it inserts an image onto the screen instead.
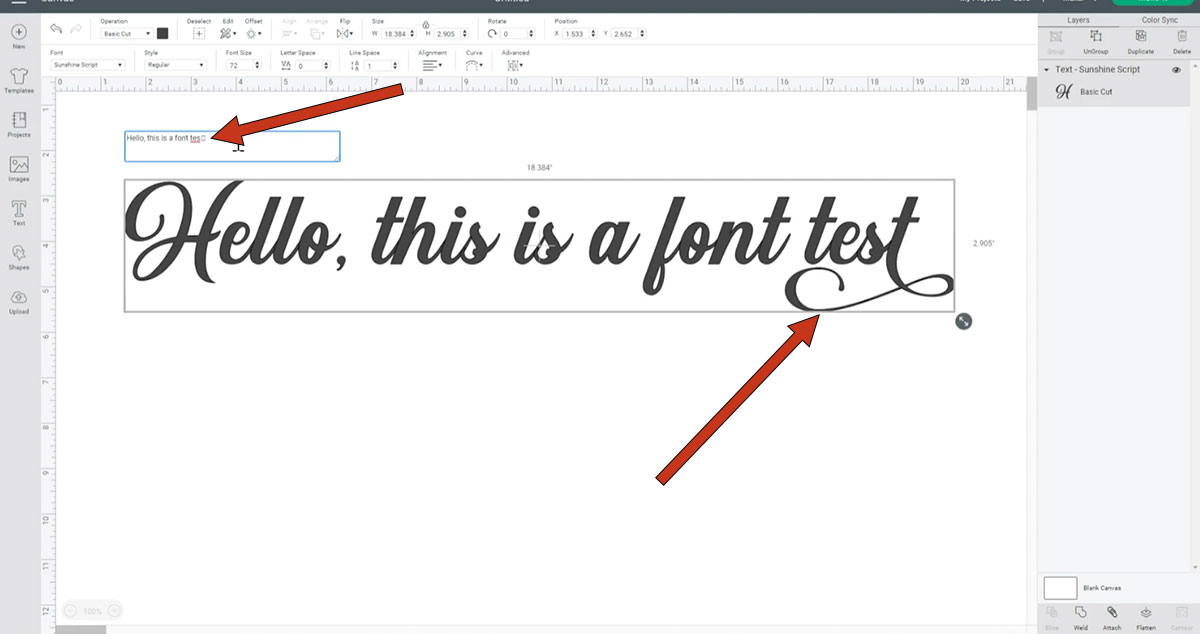
However, if you were to type a sentence in Design Space, the letters would look “normal” and not have the extra swirls on the bottoms.
IMAGE
We need to do a couple of extra steps to add the swirly parts to the letters.
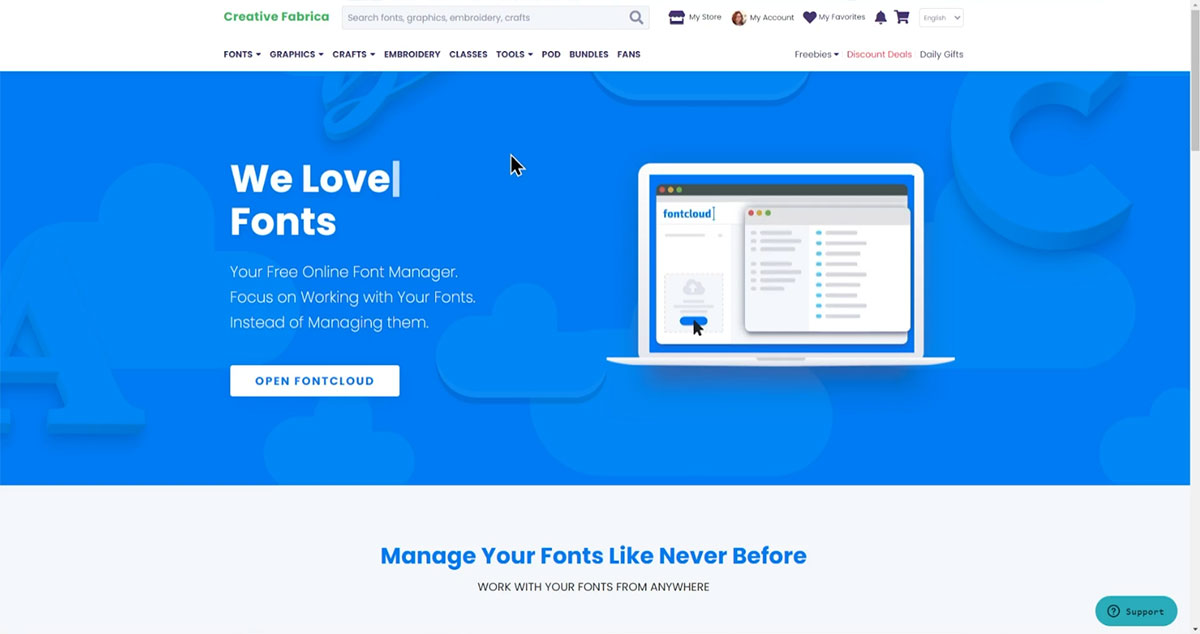
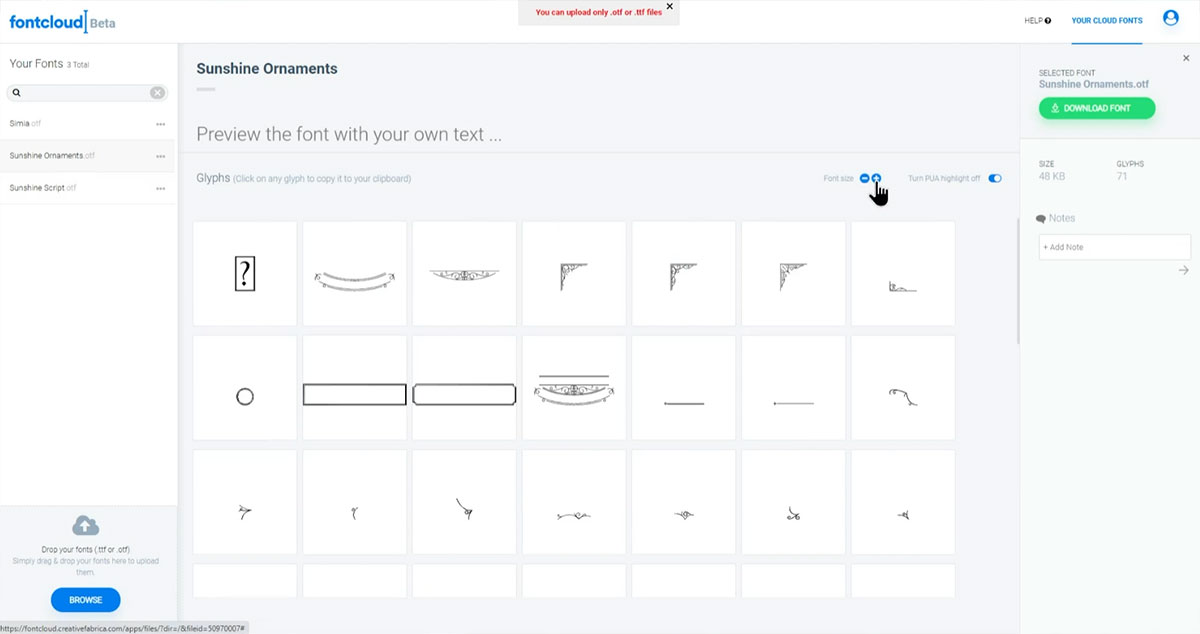
How to use Font Cloud by Creative Fabrica
Luckily, Creative Fabrica has a free tool called “Font Cloud” that makes this really easy.
It looks like this:
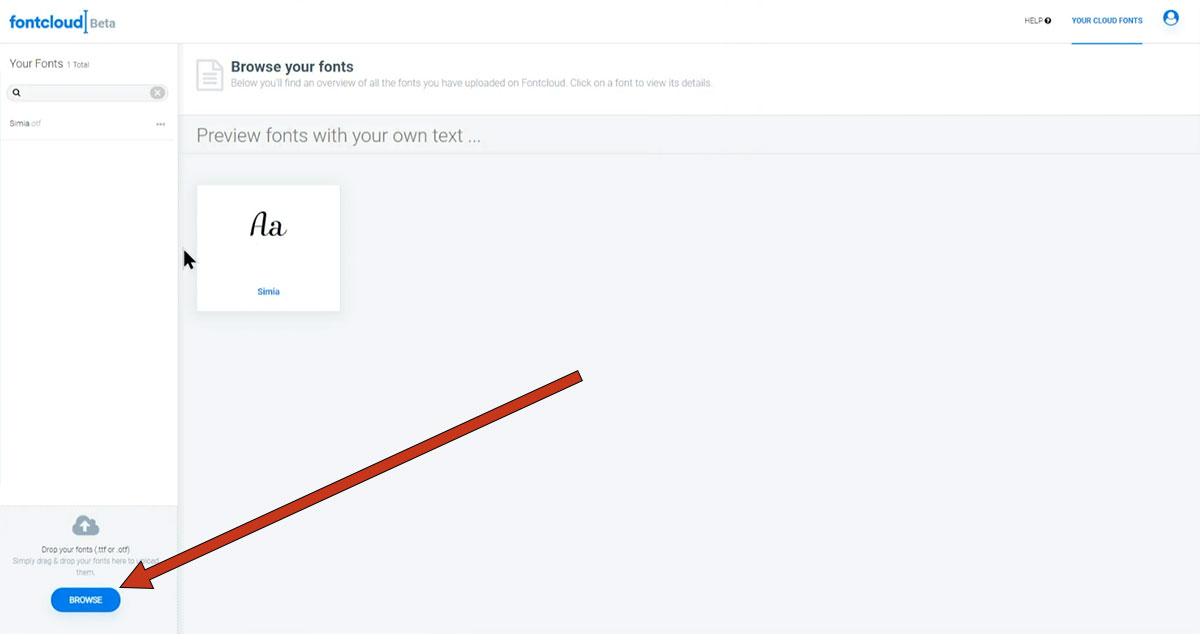
You will need to register a free account to be able to use Font Cloud. This is so that it can “save” your fonts to remember them for the next time to log in.
Use the menu on the left of the screen to upload the .otf or .ttf font file.
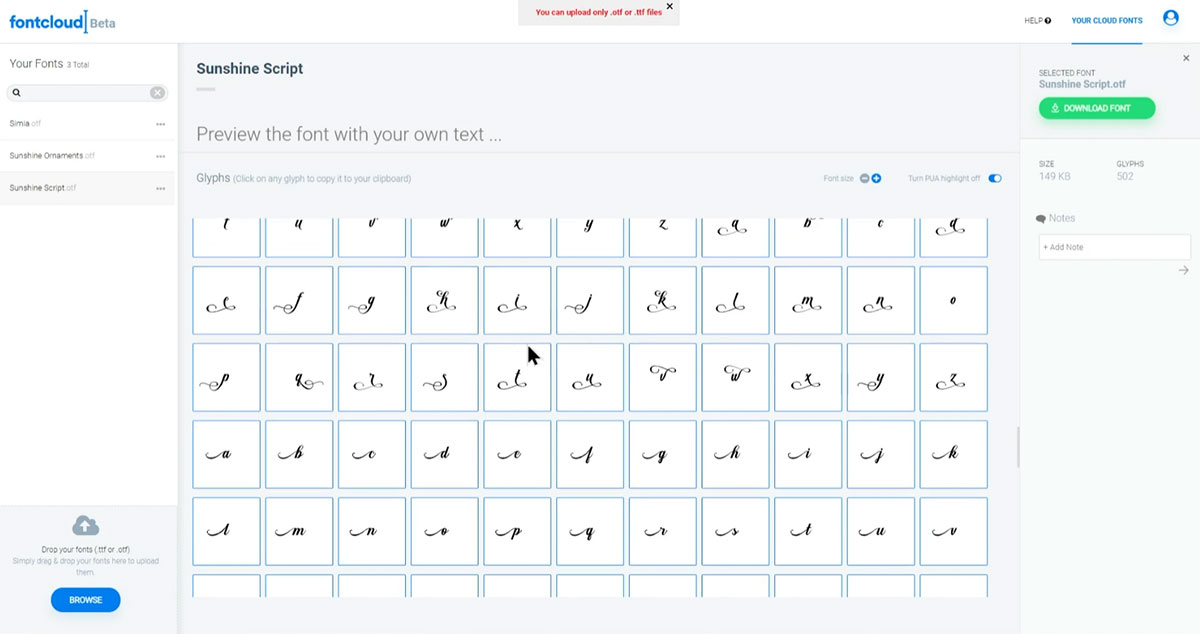
Once it’s loaded, click the name of the font to view all the characters.
Look for the letter/glyph/swirl you want to use, then simply click on it to copy it to your computer.
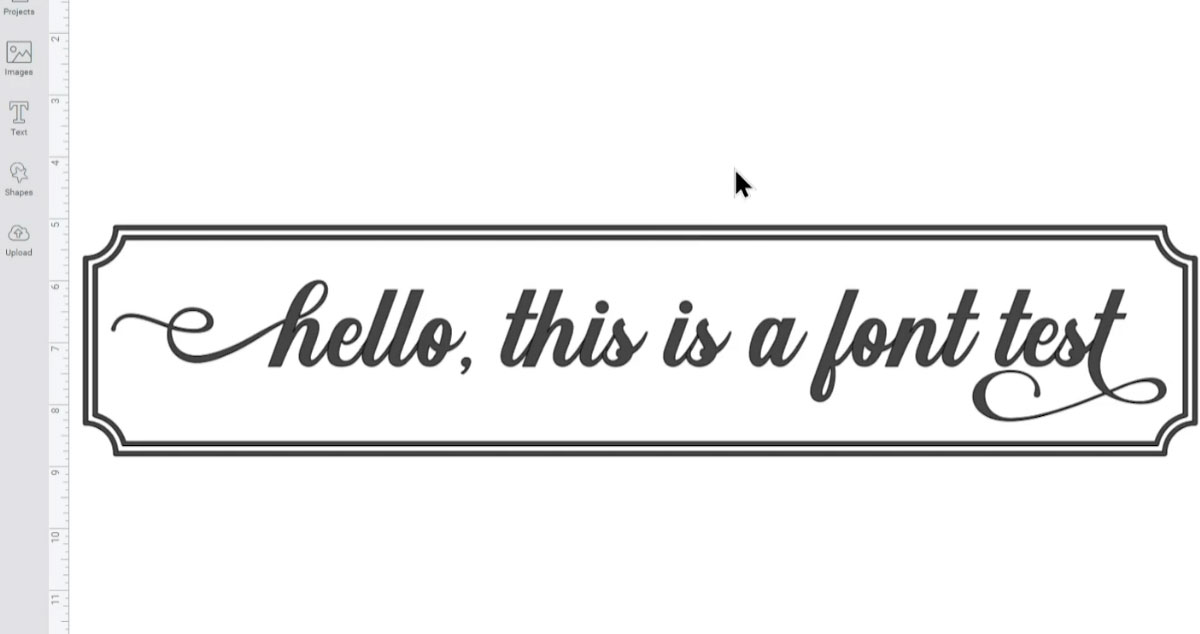
Go back into Design Space and click into your text at the place you want to instead the new letter.
Press CTRL and V on your keyboard (or CMD + V on a Mac) to paste in the letter.
It will look like an empty rectangle on the bit where you type in Design Space, but it should look correct on the actual cut image on the screen.
The ornament font that I showed earlier works in a similar way, apart from Font Cloud will show all the images that come as part of the font instead of letters.
To use any of these in Design Space, simply click the picture you want to use and then paste it in to a Text box, just the same as you did with the letter above.
I hope you enjoyed my selection of the best Halloween fonts, and that this tutorial has been helpful to see how to use special font characters in Cricut Design Space.
Happy crafting,
Sarah x

