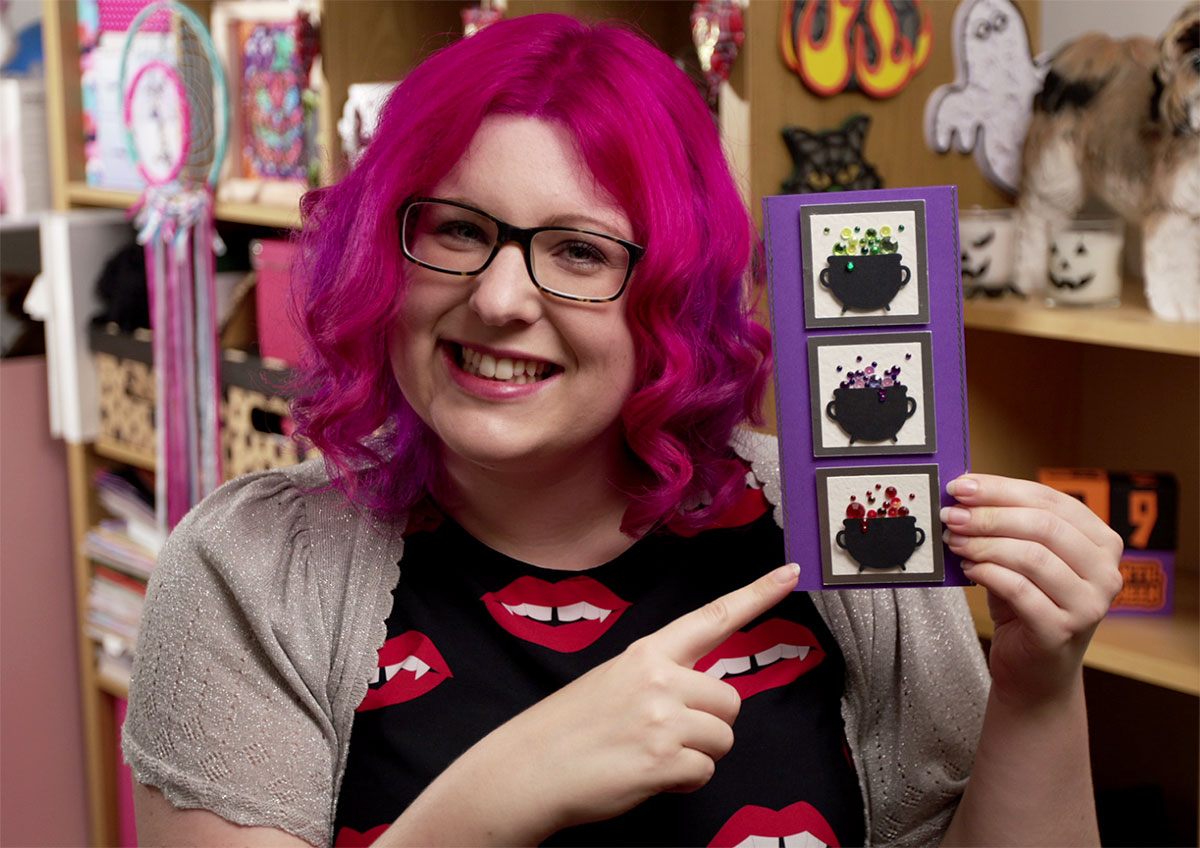
Make a Witch’s Cauldron Slimline Card

Use gemstones, sequins and other sparkly goodies to create this cute witch’s cauldron slimline handmade card that’s perfect for Halloween.
I saw a similar card on Instagram a few weeks ago, with one cauldron on it, and just HAD to make a similar one as I thought the idea was brilliant!
If you’re like me and you tend to hoard gemstones, sequins and other tiny embellishments, then this is a great card to get you to finally use up some of your supplies!
Please note that some of the links included in this article are affiliate links, which means that if you click through and make a purchase I may receive a commission (at no additional cost to you). You can read my full disclosure at the bottom of the page.
How to make a gemstone slimline card for Halloween
Watch this video to find out how to make this sparkly witch’s cauldron handmade card for Halloween.
[cws_halloween2020]
How to make a slimline card
Step 1) Cut out all of the pieces
First, cut out the main card (or use a premade card blank), the cauldrons and the squares to go on the card.
If you’re using Cricut Design Space, click the button below to open up a Design Space project with all the pieces created for you.
[cws_clubhouse design=’1110′]
If you don’t have a Cricut or aren’t a member of the CWS Clubhouse then you can create the shapes yourself using these dimensions:
Card front: 9.5 cm wide x 21 cm tall (if you’re cutting the whole card to fold it down the middle, make the width 19cm)
3 Silver squares: 2.5 inches each (approx 6.5cm)
3 White squares: 2 inches each (approx 5cm)
3 cauldrons
For the cauldrons, you could use a punch/die cutting machine if you have a suitable image, or perhaps search online for a cauldron image that you could print out and then cut with scissors.
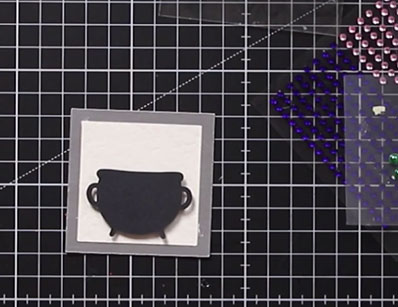
Step 2) Stick the squares together
Stick the smaller white squares into the middle of the silver squares.
I used glue because it sticks best to mirror card.

Step 3) Attach the cauldrons
Attach the cauldrons to the bottom of the white squares.
I used 3D foam pads to give a bit of depth to the card.
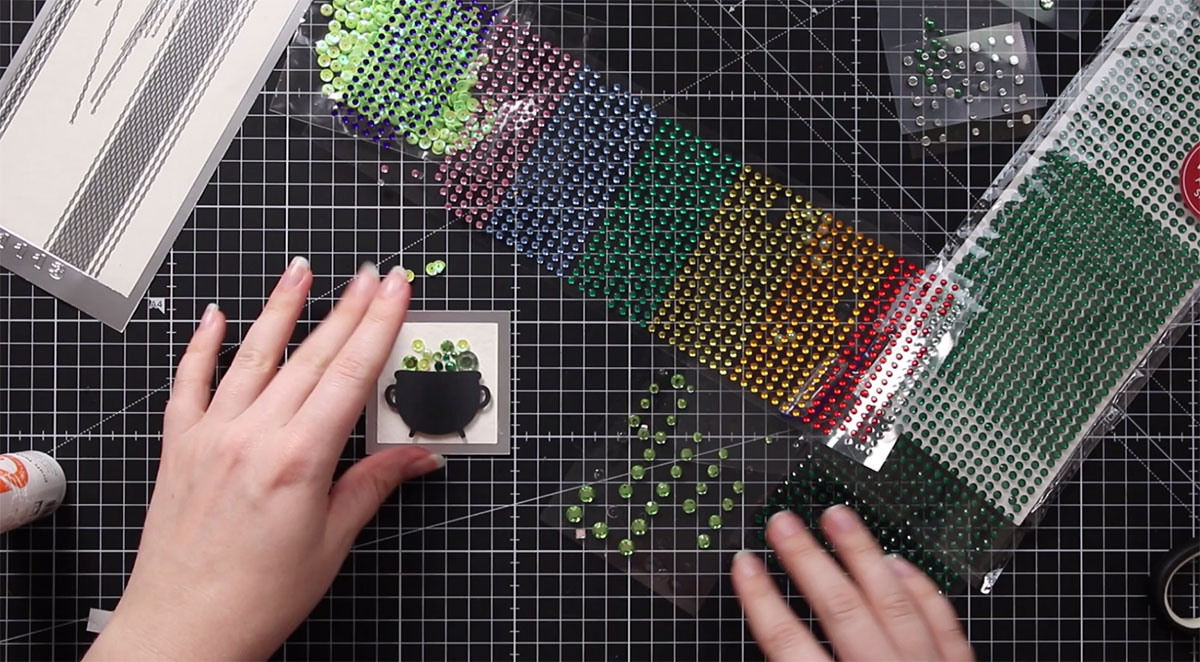
Step 4) Add the cauldron potion
Use gemstones, sequins and other embellishments to create the “potion” bubbling out of the cauldrons.
You could even use a hole punch to punch tiny circles of card to create the bubble effect.
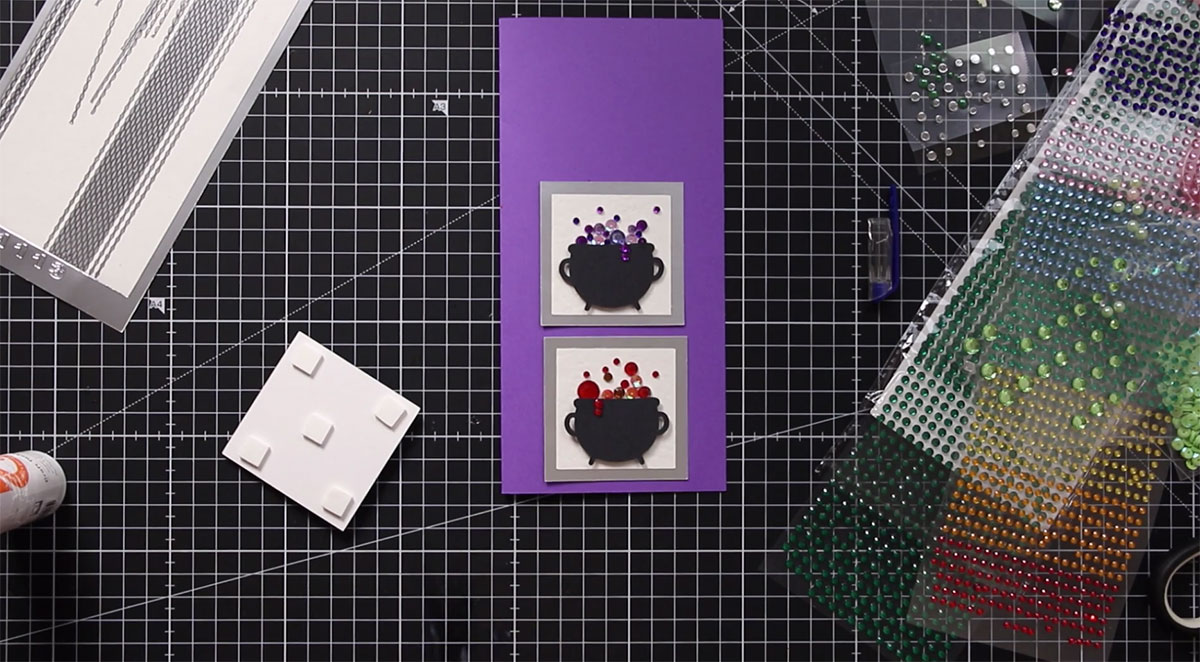
Step 5) Attach the squares to your card
Use glue, double-sided tape or 3D foam pads (I used pads) to stick the squares to your card.
I find it’s easiest to line them up on the card front before you start sticking, just to make sure they are all going to fit!
Step 6) Add some finishing touches
Add any final touches or embellishments that you want on your card.
I put some silver peel-off stickers down each of the longer sides of the card front for an extra bit of glitz.
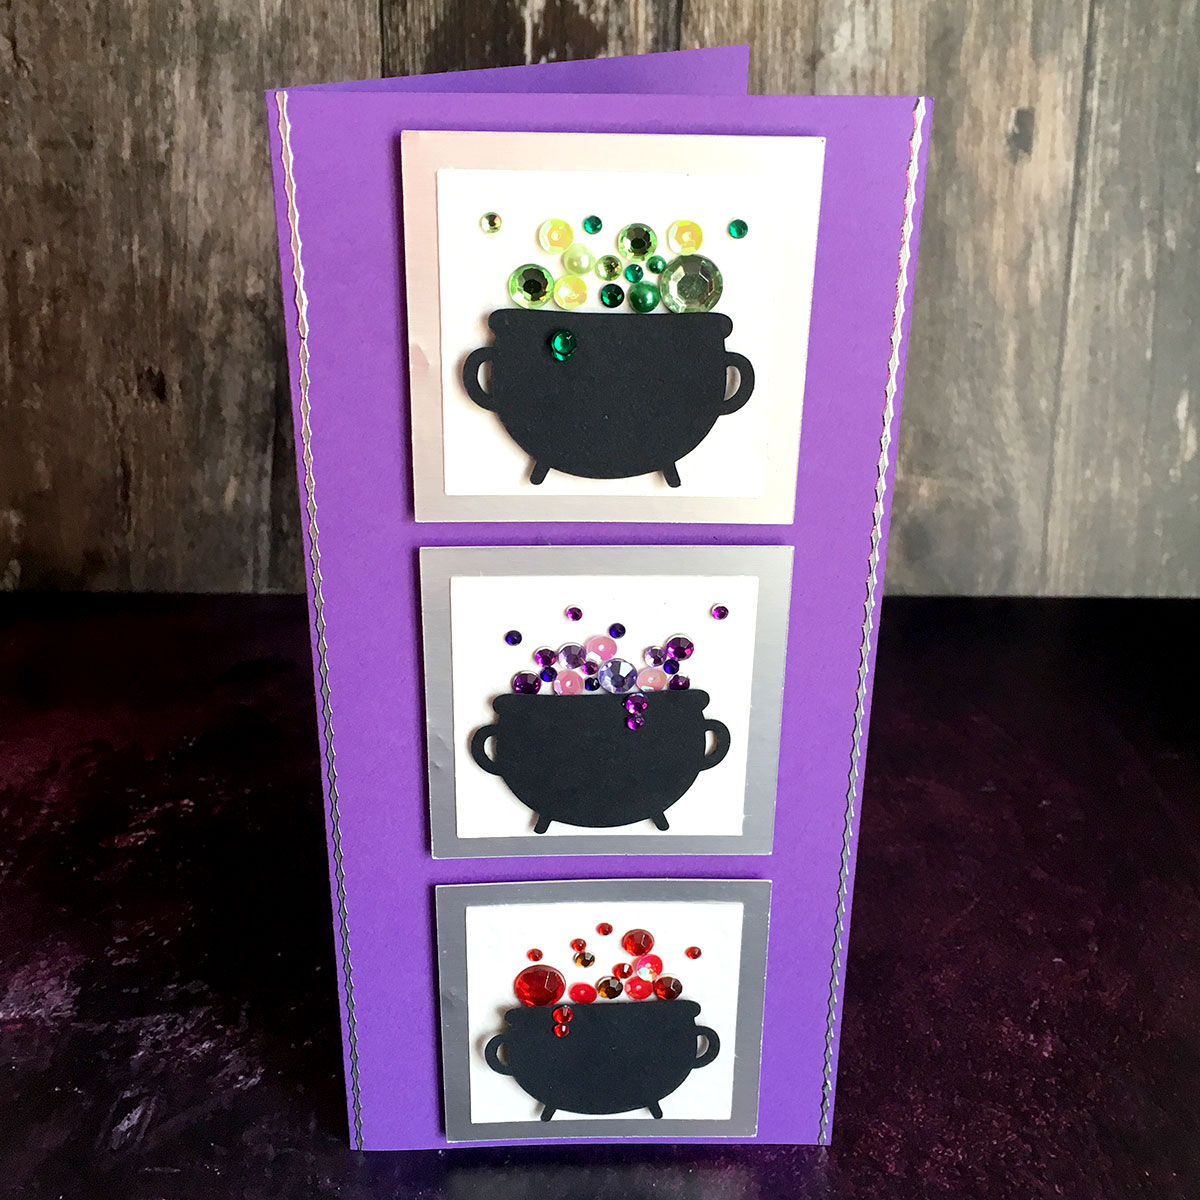
And that’s it – your witch’s cauldron handmade card, complete with sparkly bubbling potions is all finished!
I hope that you enjoyed this slimline card tutorial.
Happy crafting,
Sarah x

