Make a Paper Wreath for Fall // DIY Sunflower Wreath
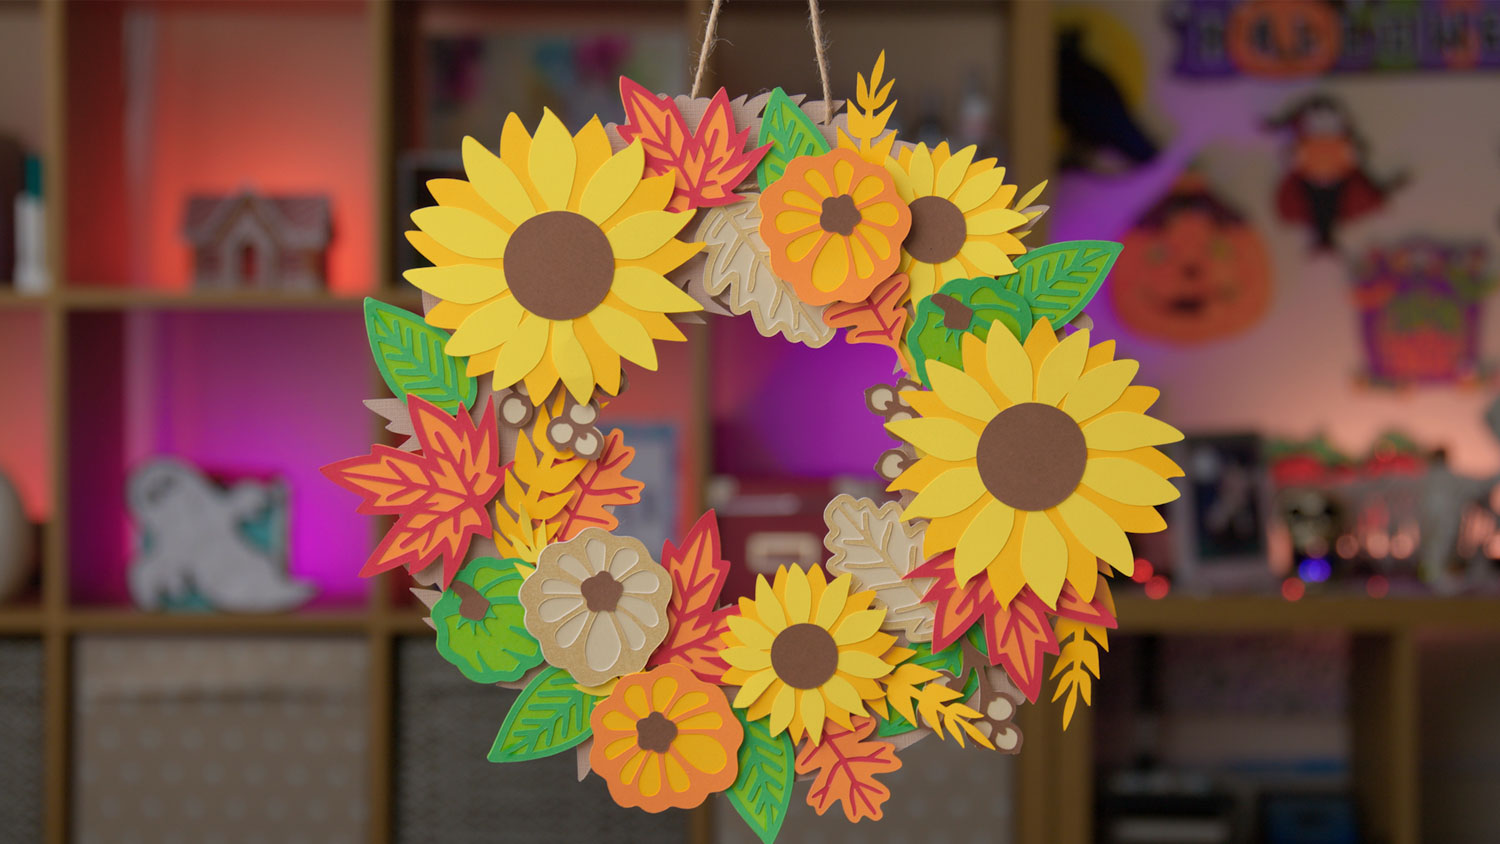
Make a beautiful paper wreath for Fall that’s full of sunflowers, pumpkins, autumn leaves and foliage.
The images on the design all come separately so you can decide how many you want to use and how big each picture will appear on your wreath. Or, use the pre-designed version to make one exactly like mine.
How to make a paper wreath for Fall
Watch the video below to find out how to cut and assemble this fall themed paper wreath. Or, keep scrolling for a written tutorial.
The link to download the free SVG is a little further down this page. Look for the pale green box 🙂
Note: This video was recorded with Design Space version 6.12.227. Later versions might look a little different.
Layered autumn wreath craft materials
Here is a list of the materials that I used to make this project.
Please note that some of the links included in this article are affiliate links, which means that if you click through and make a purchase I may receive a commission (at no additional cost to you). You can read my full disclosure at the bottom of the page.
- Cricut Maker
- Light blue Cricut cutting mat
- Coloured Card (I used 160gsm weight of card)
- Collall All Purpose Glue
- Needle Tip Applicator Bottle
- 3D foam pads
How to make a DIY Sunflower Wreath
This fall wreath design comes in two different versions.
The first is a “DIY” version where all the pictures come separately to the base of the wreath so you can design your own wreath.
The second is a “premade” version where the pictures have already been sized and positioned to created a wreath that looks like the one in my photos.
Step 1: Download the cutting files
To start this project, download both versions using the box below and upload your chosen design into Design Space.
Download the Free Cutting File
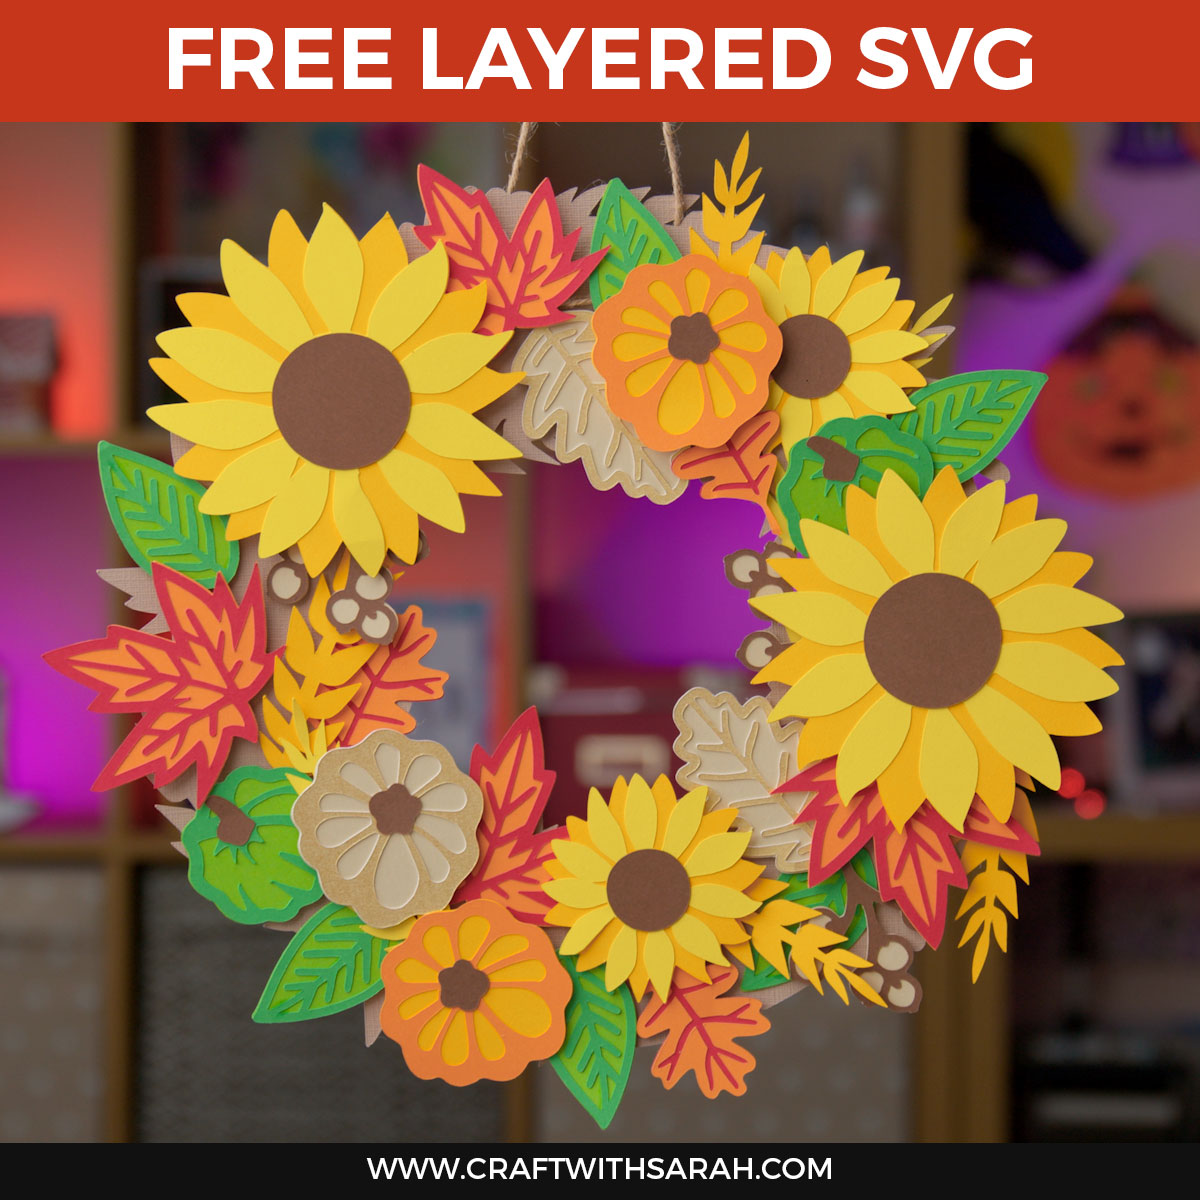
Please note that this file is only available in SVG format, not DXF or PNG.
Please login to your account to download this file.
TERMS OF USE:
You may sell finished, handmade physical craft items that you have made using this product but must not sell or share the digital files. Read full terms of use
Before you can use the files, you need to unzip the download folder that they come in.
- How to unzip a folder on Windows computer
- How to unzip a folder on a Mac
- How to unzip a folder on an iPad/iPhone
- How to unzip a folder on an Android device
IMPORTANT – if you open the SVG file in a program that is NOT Design Space then it might appear “cut off” and you won’t see the whole image. Don’t worry – when you open it Design Space, it will show correctly.
Step 2: Decide which version to make
Decide whether you want to design your own autumnal wreath or if you’d prefer to use the premade design.
For the DIY version, it should load into Design Space at 19.011 inches wide.
If not, use the width box at the top to change the size.
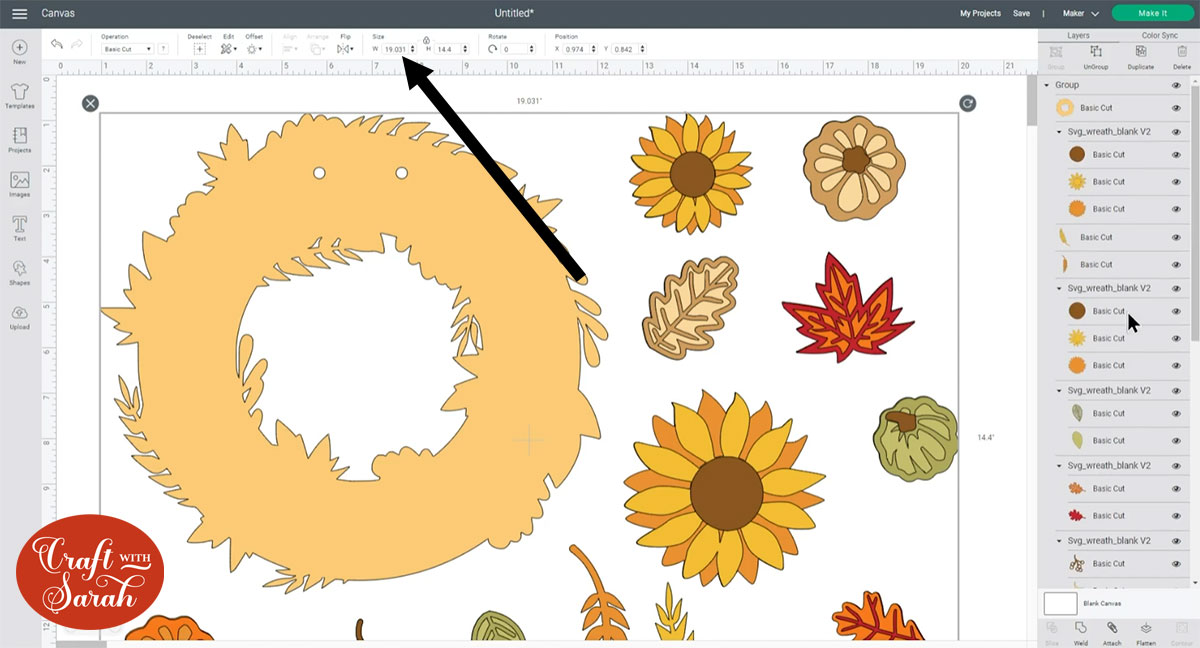
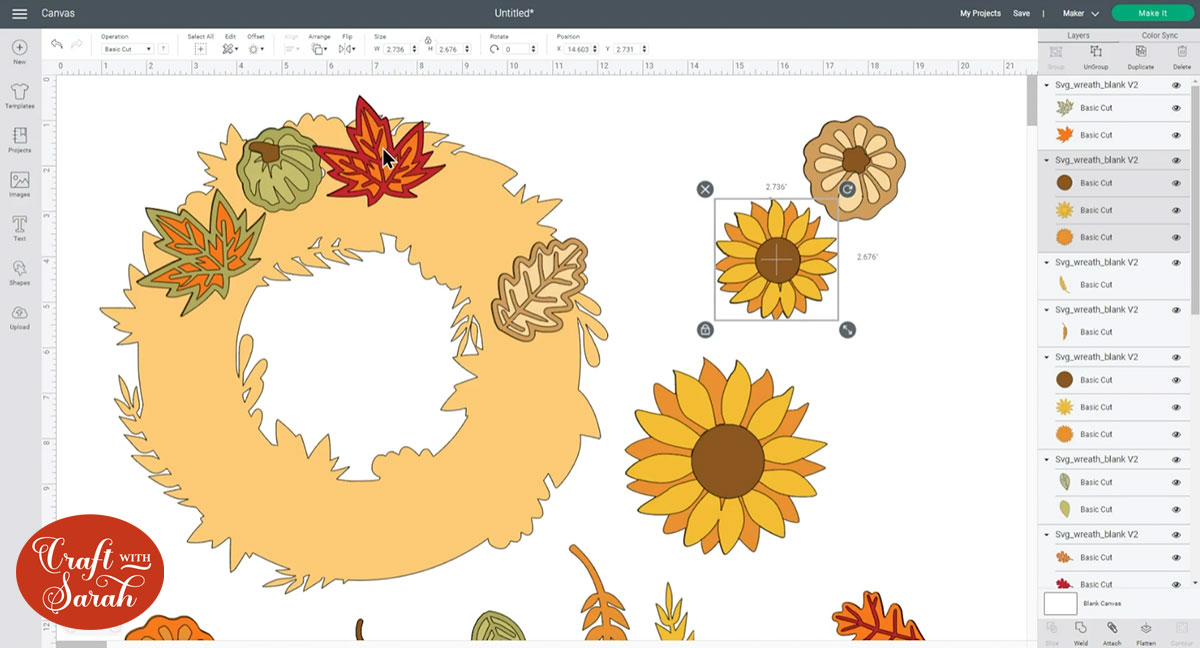
Click the image and press “Ungroup”.

This will separate the base layer of the wreath from the images.
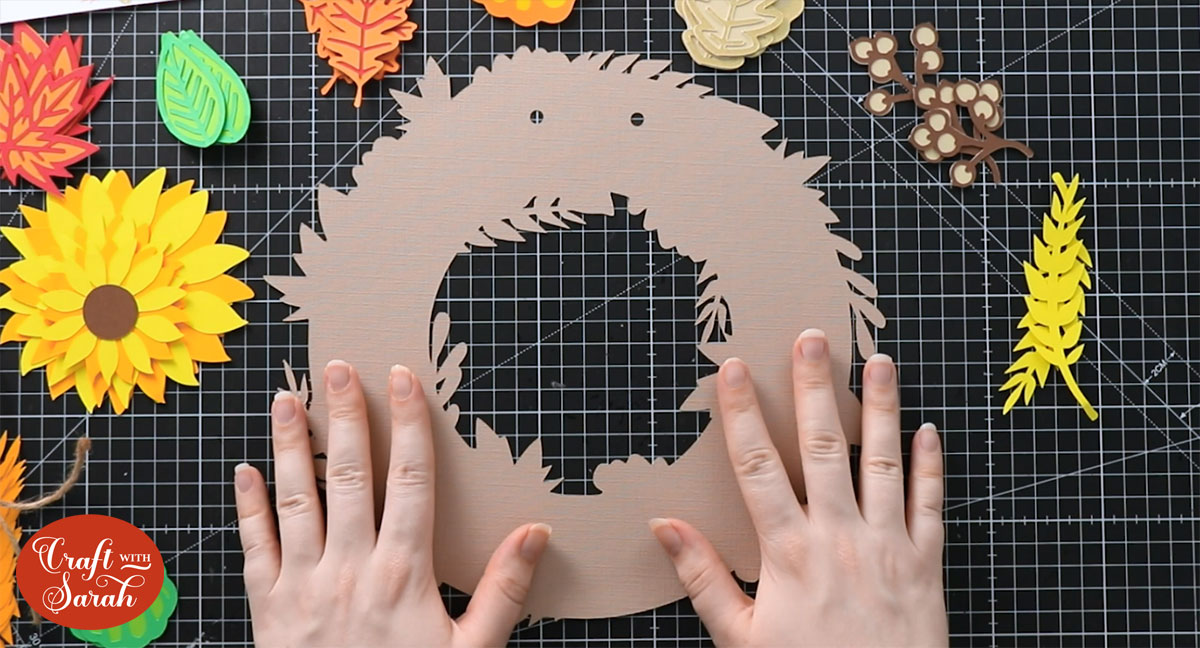
Click the base wreath layer and then click “Arrange” and “Send to Back”.
This will move the wreath base underneath all the image layers so that you can decorate it.
Drag the images over the wreath layer and resize them to how big you want to cut them.
If you want to add more than one of particular images, click on it and then press “Duplicate” to make a copy.
Keep adding images until you are happy with how it looks on the screen, then click “Make It” and cut everything out.
Don’t forget to save your Project before you cut everything out. You’ll need it to refer back to so that you know where to stick everything 🙂
Alternatively, you can use the pre-made design. This is the one that I’ll use using for the rest of this tutorial.
Design Space doesn’t quite load in the SVG at the correct size, so be sure to resize it to 12.3 inches wide before cutting.
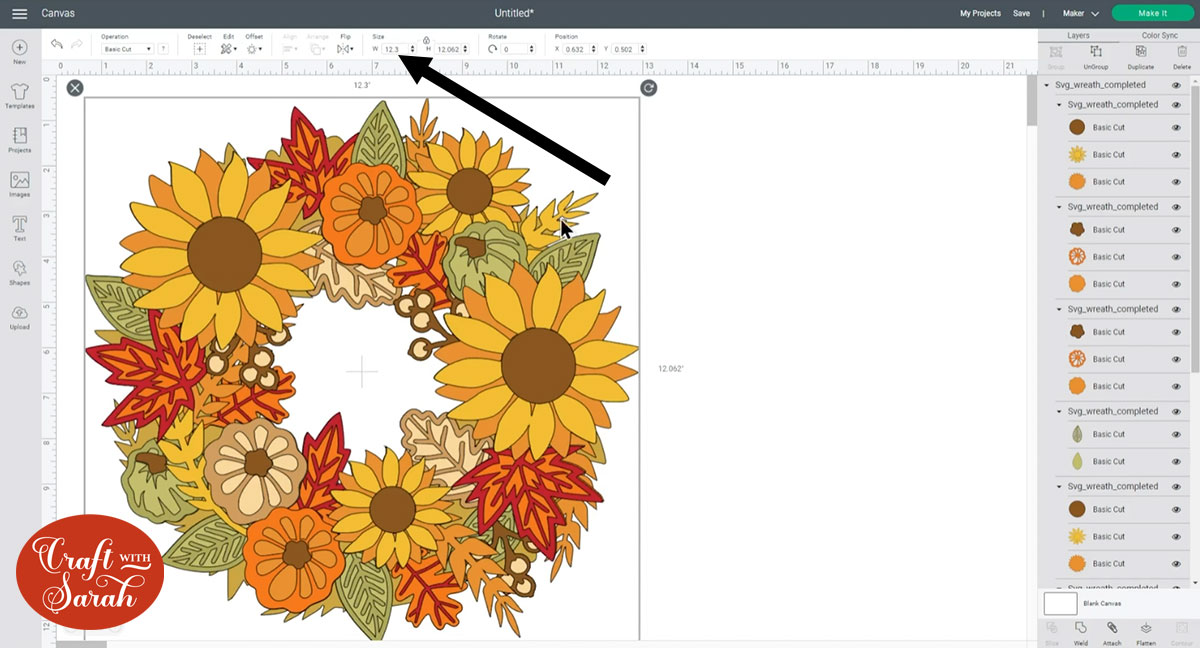
Once it’s resized, go ahead and cut everything out.
Step 3: Stick the image layers together
Use glue to stick together the layers of each of the images (pumpkins, sunflowers, leaves, etc).
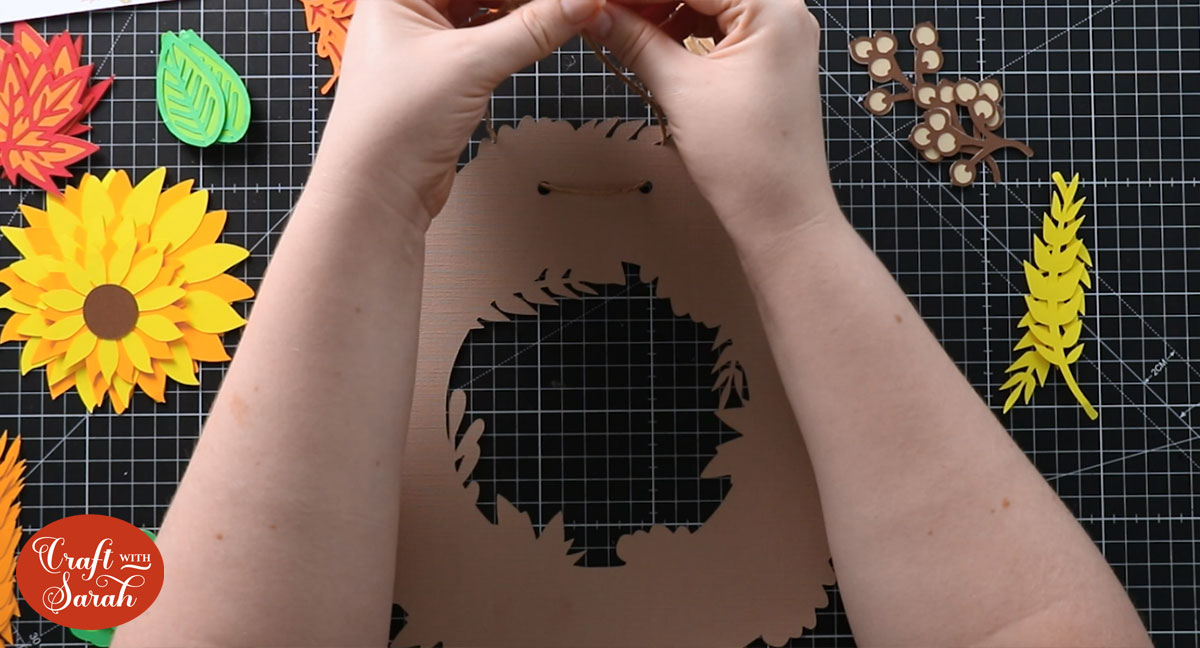
Step 4: Add some string or twine
Thread a piece of string or twine through the holes in the wreath base and tie it into a knot. This is how you will hang the wreath.
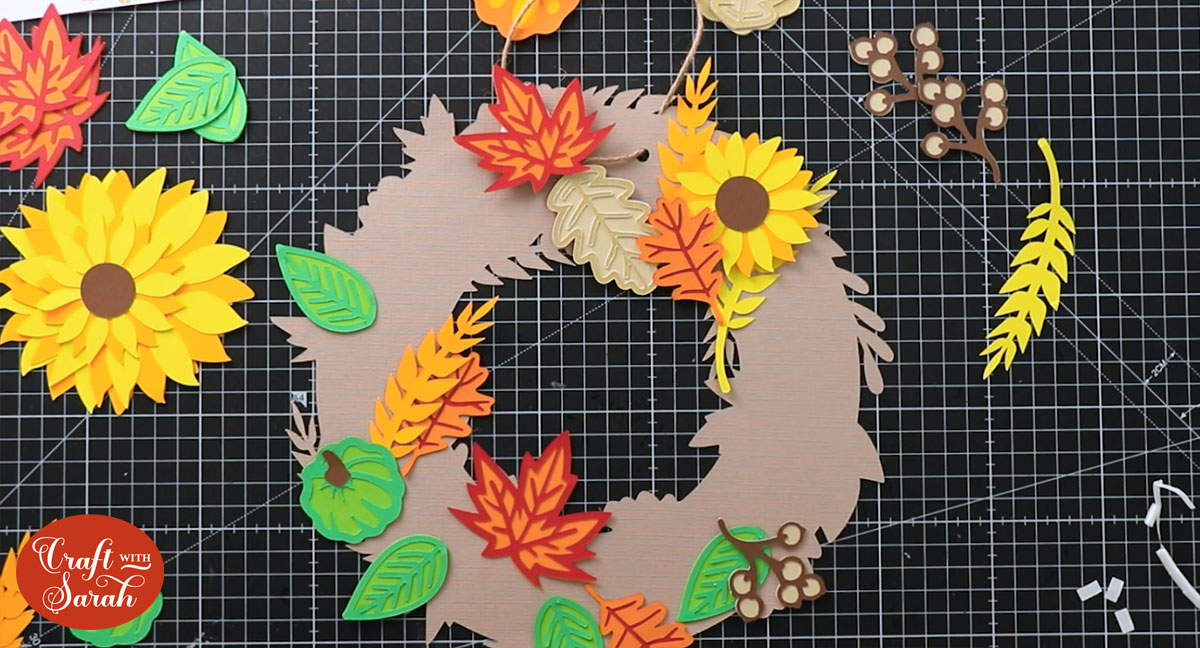
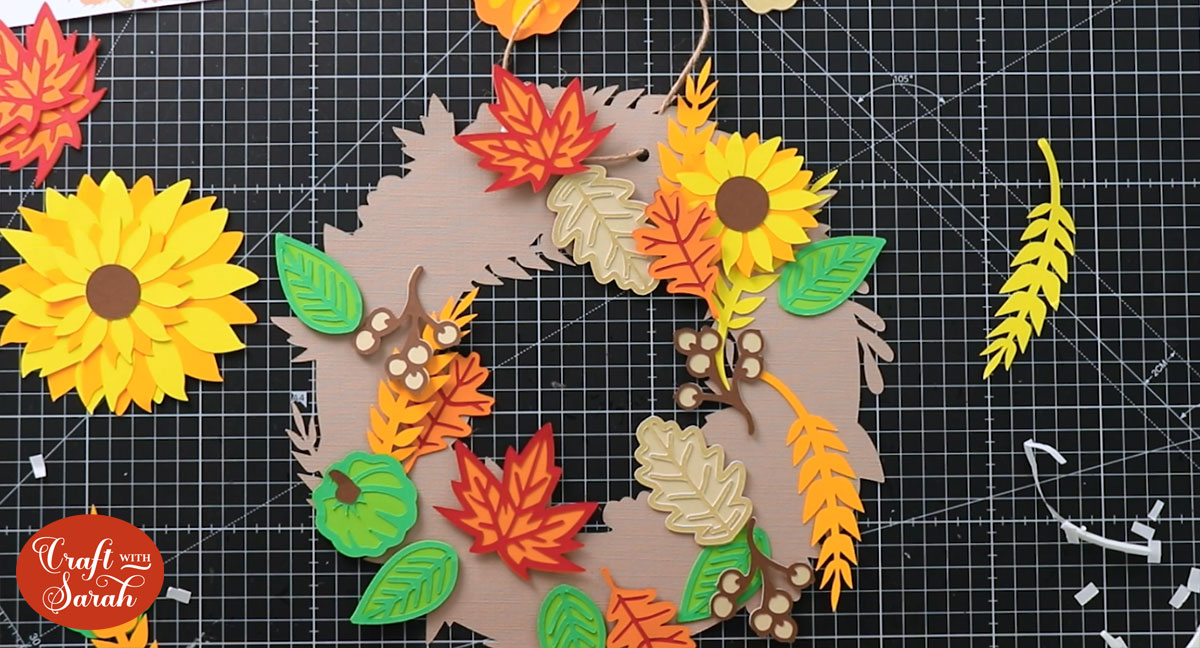
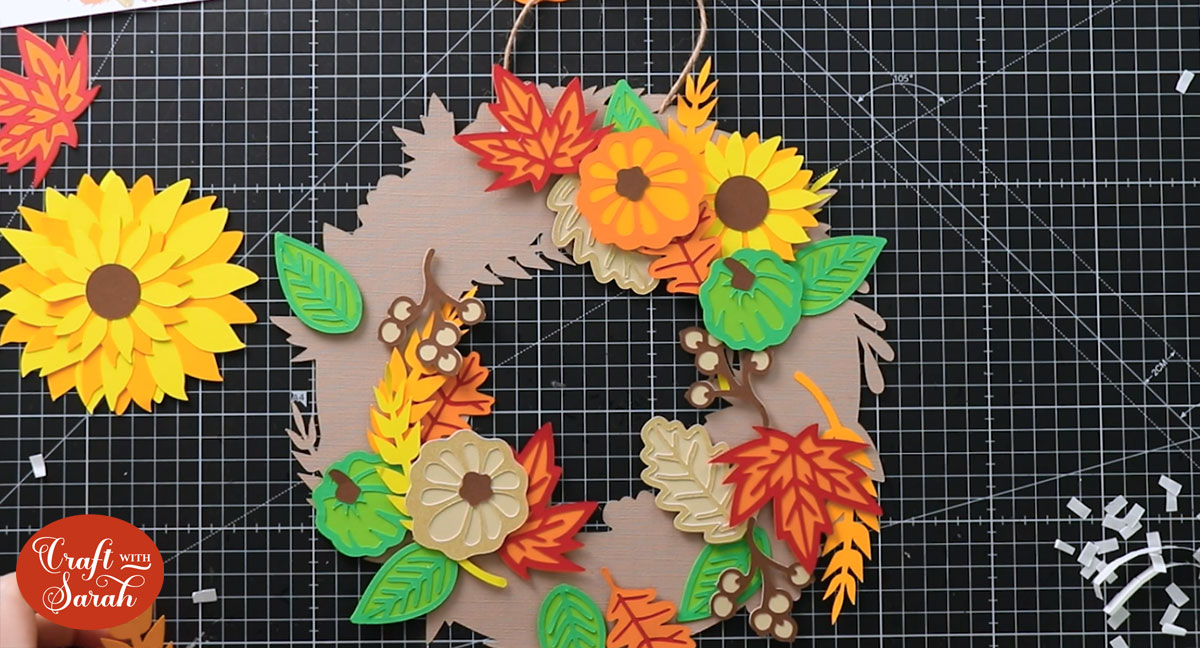
Step 5: Assemble the wreath
Glue the bottom images to the base of the wreath.
If you want to make one exactly like mine, here is how I stuck mine together.
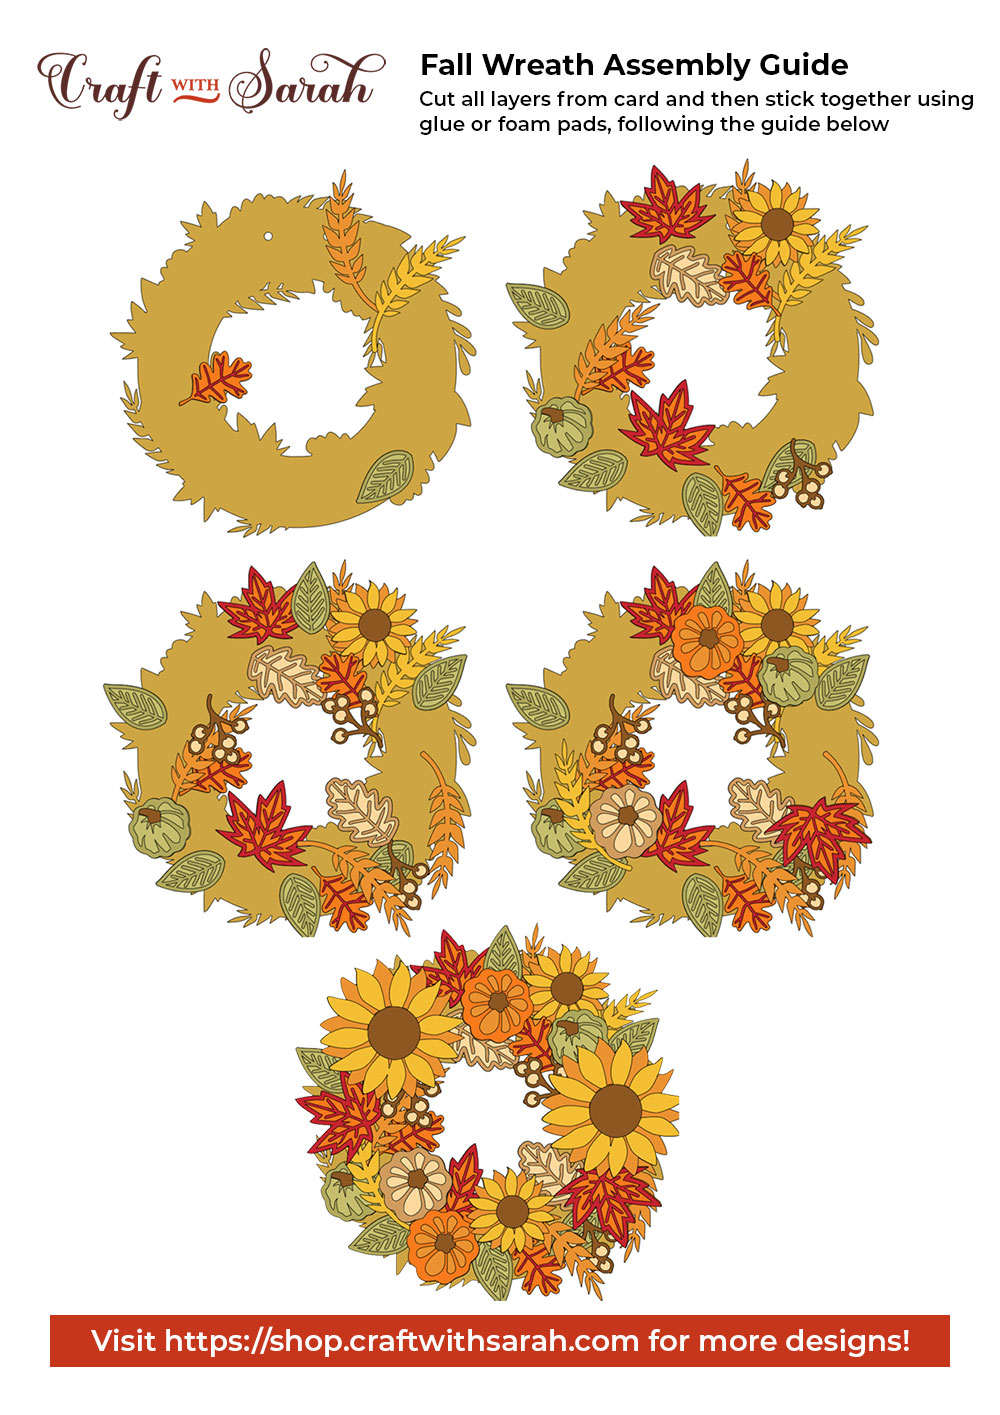
A larger version of the Assembly Guide is included in the zip folder when you download the free designs.
First, I stuck these parts with glue:
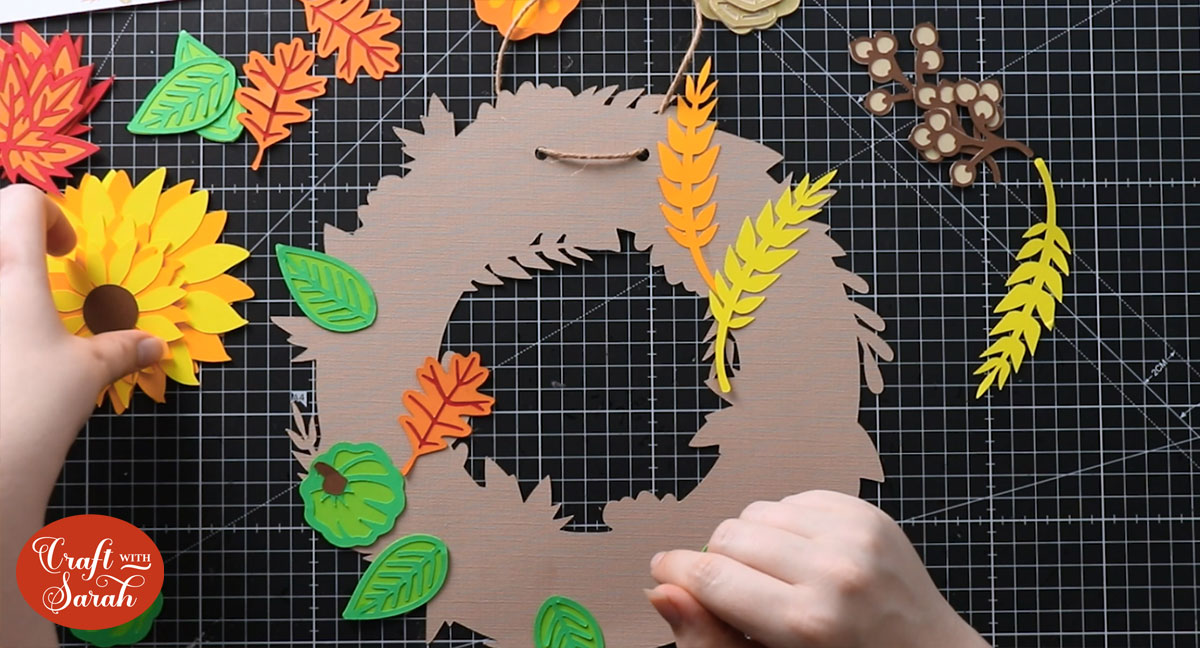
Then I added the rest of the parts using 3D foam pads to give it some depth and dimension.
Watch the video at the top of this page for a detailed guide on how each image was stuck, or the order that they were put together in.
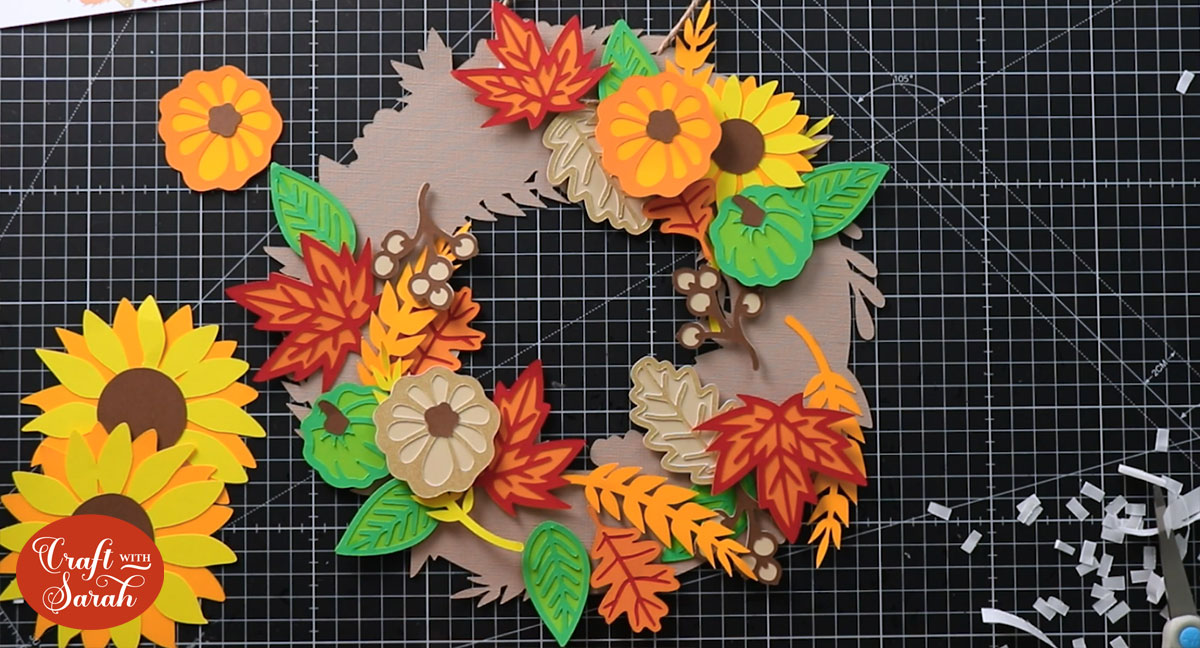
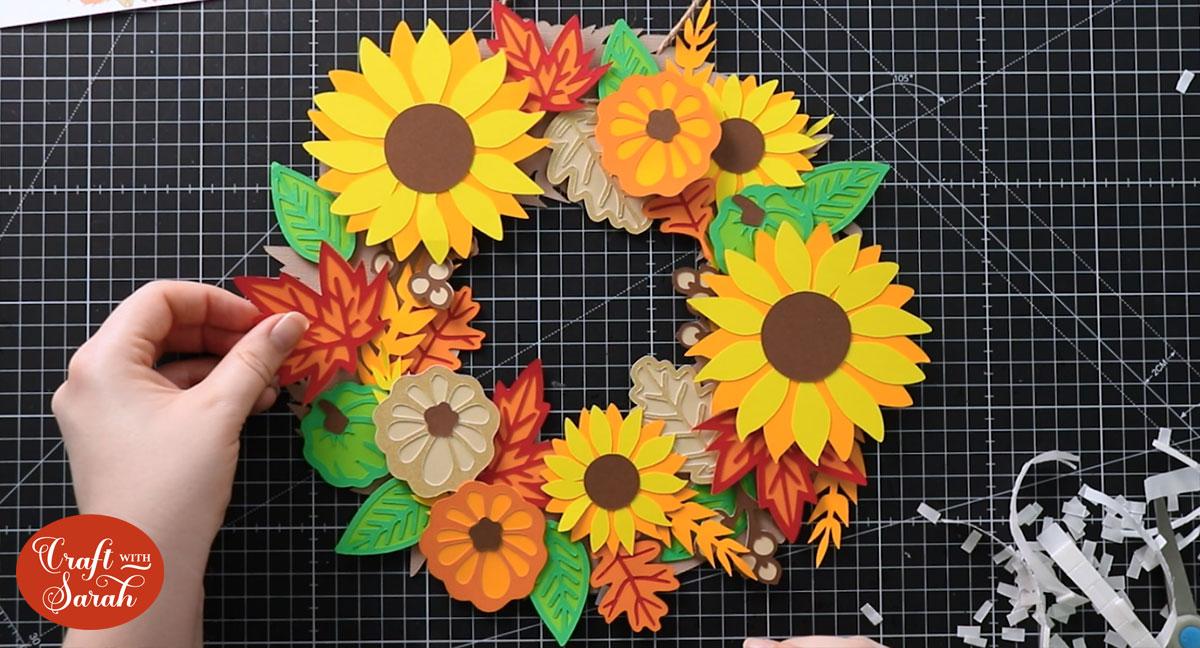
And this is how it ended up!

I hope you’ve enjoyed this tutorial on how to make a paper wreath for autumn and fall.
I don’t recommend putting the wreath outside as it will get damaged by rain. I’ve put mine on the door handle to my craft studio and it makes me smile each time I go through the door 🙂
Love layered SVGs? Check out my other free layered SVG files
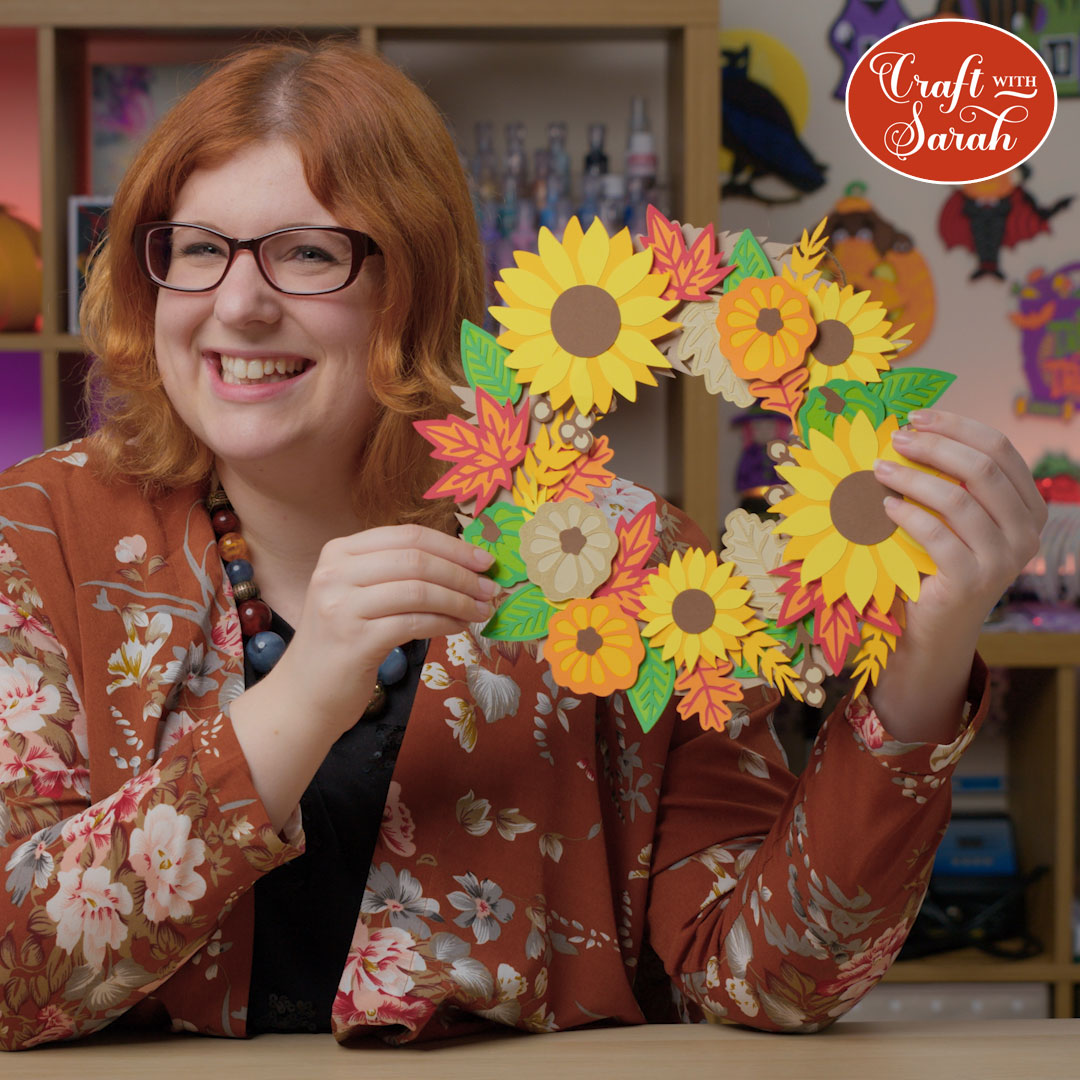
Happy crafting,
Sarah x

