Make Beautiful Freestanding “Stained Glass” Displays with Window Cling
Looking for a Cricut project that’s elegant, beautiful and easy to make? This freestanding “stained glass” window is the perfect project for fall.
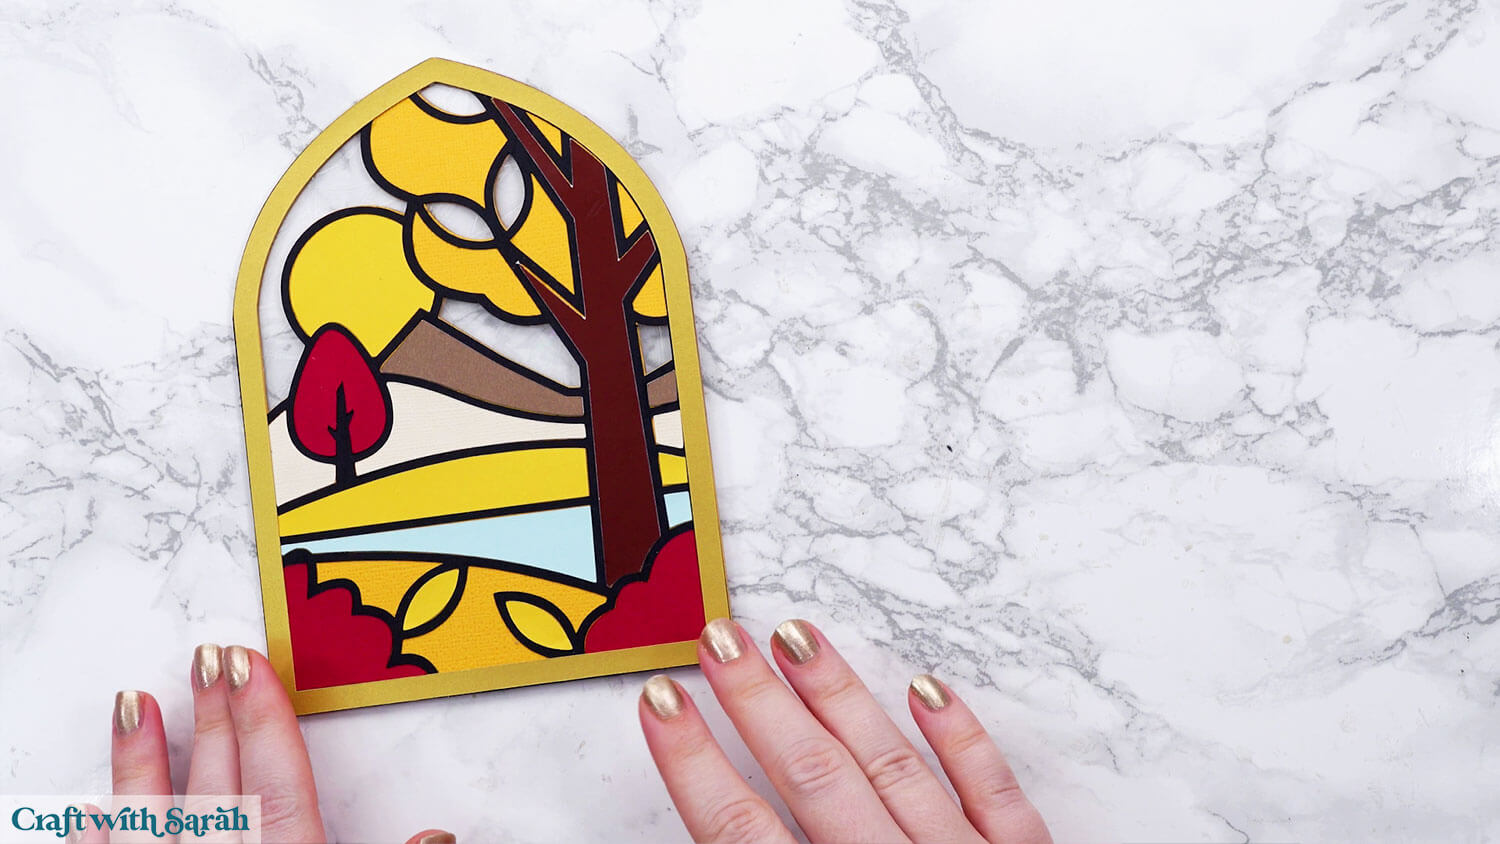
Using cardstock, a touch of glue, and a sheet of window cling, you can create a colorful autumnal scene that shines beautifully in the sunlight.
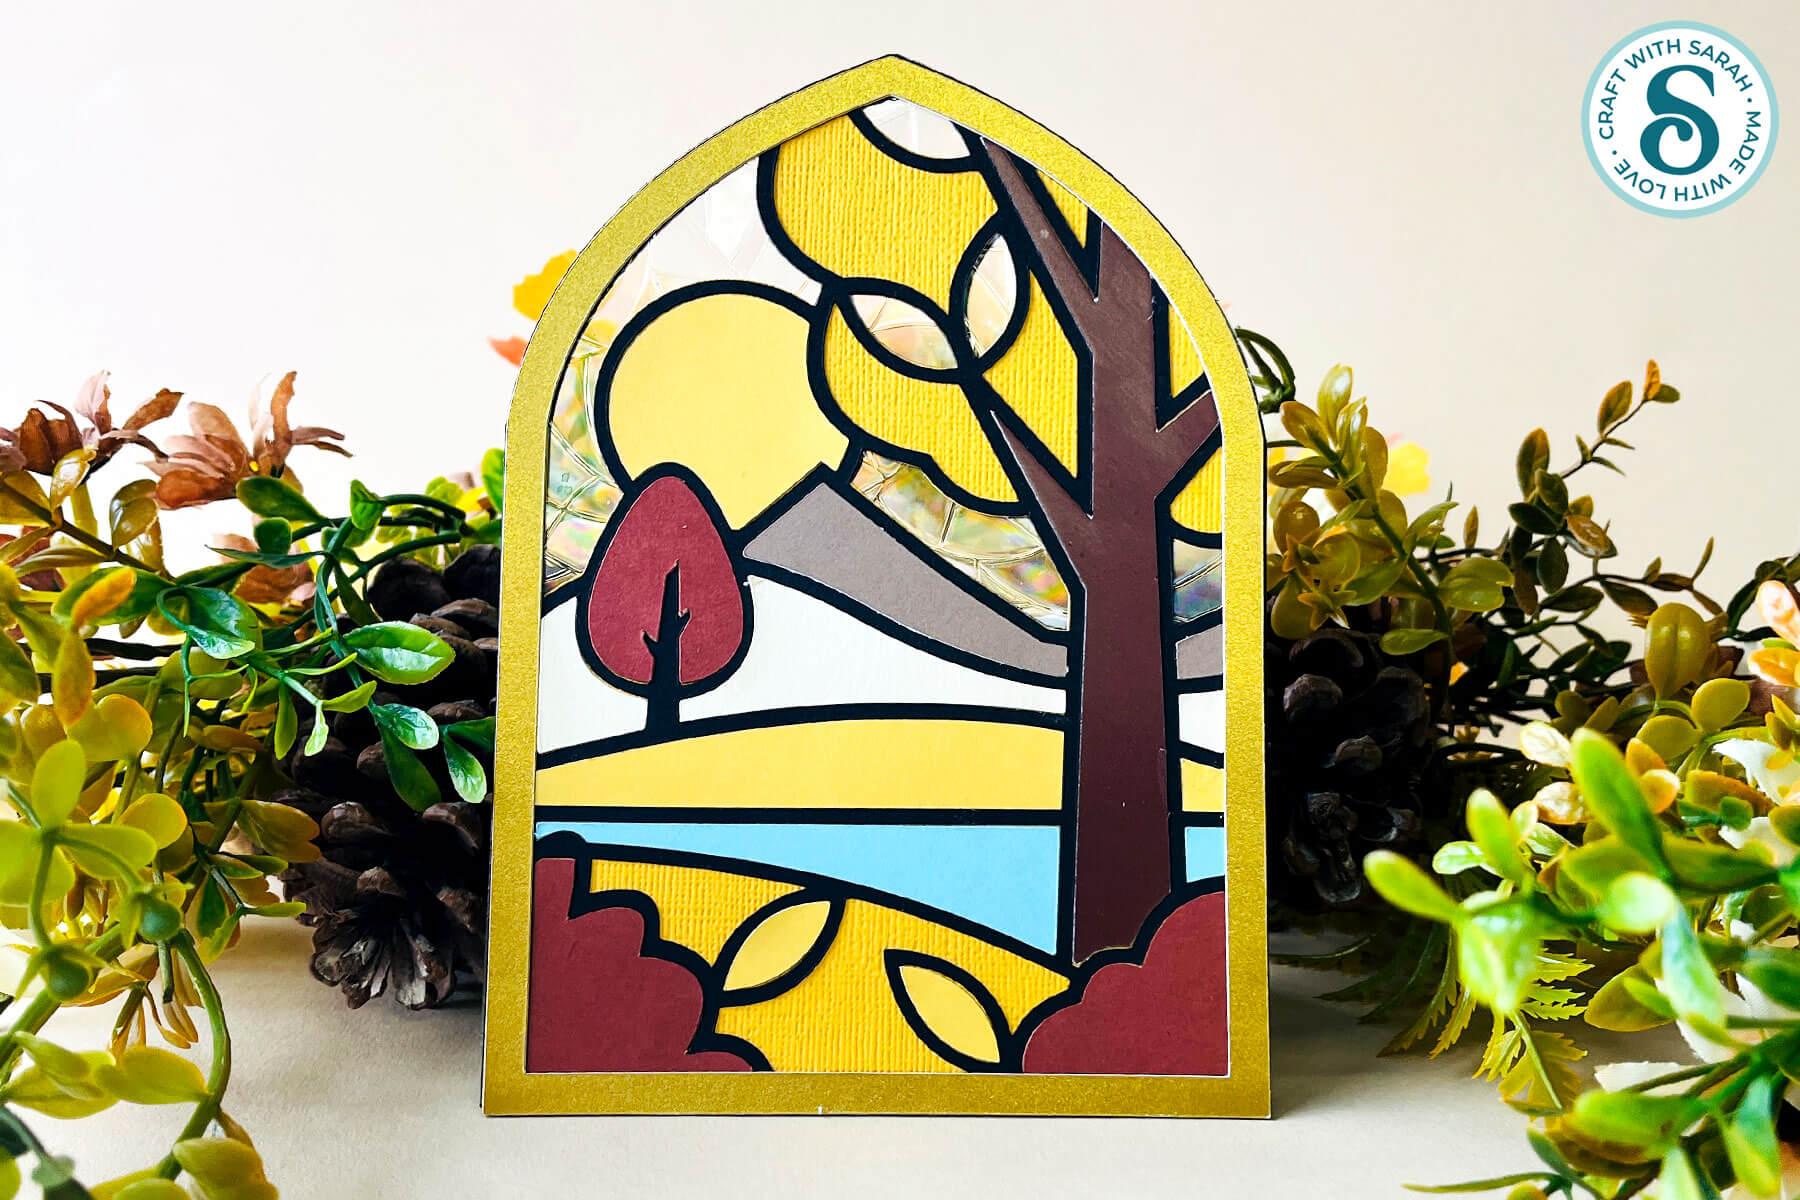
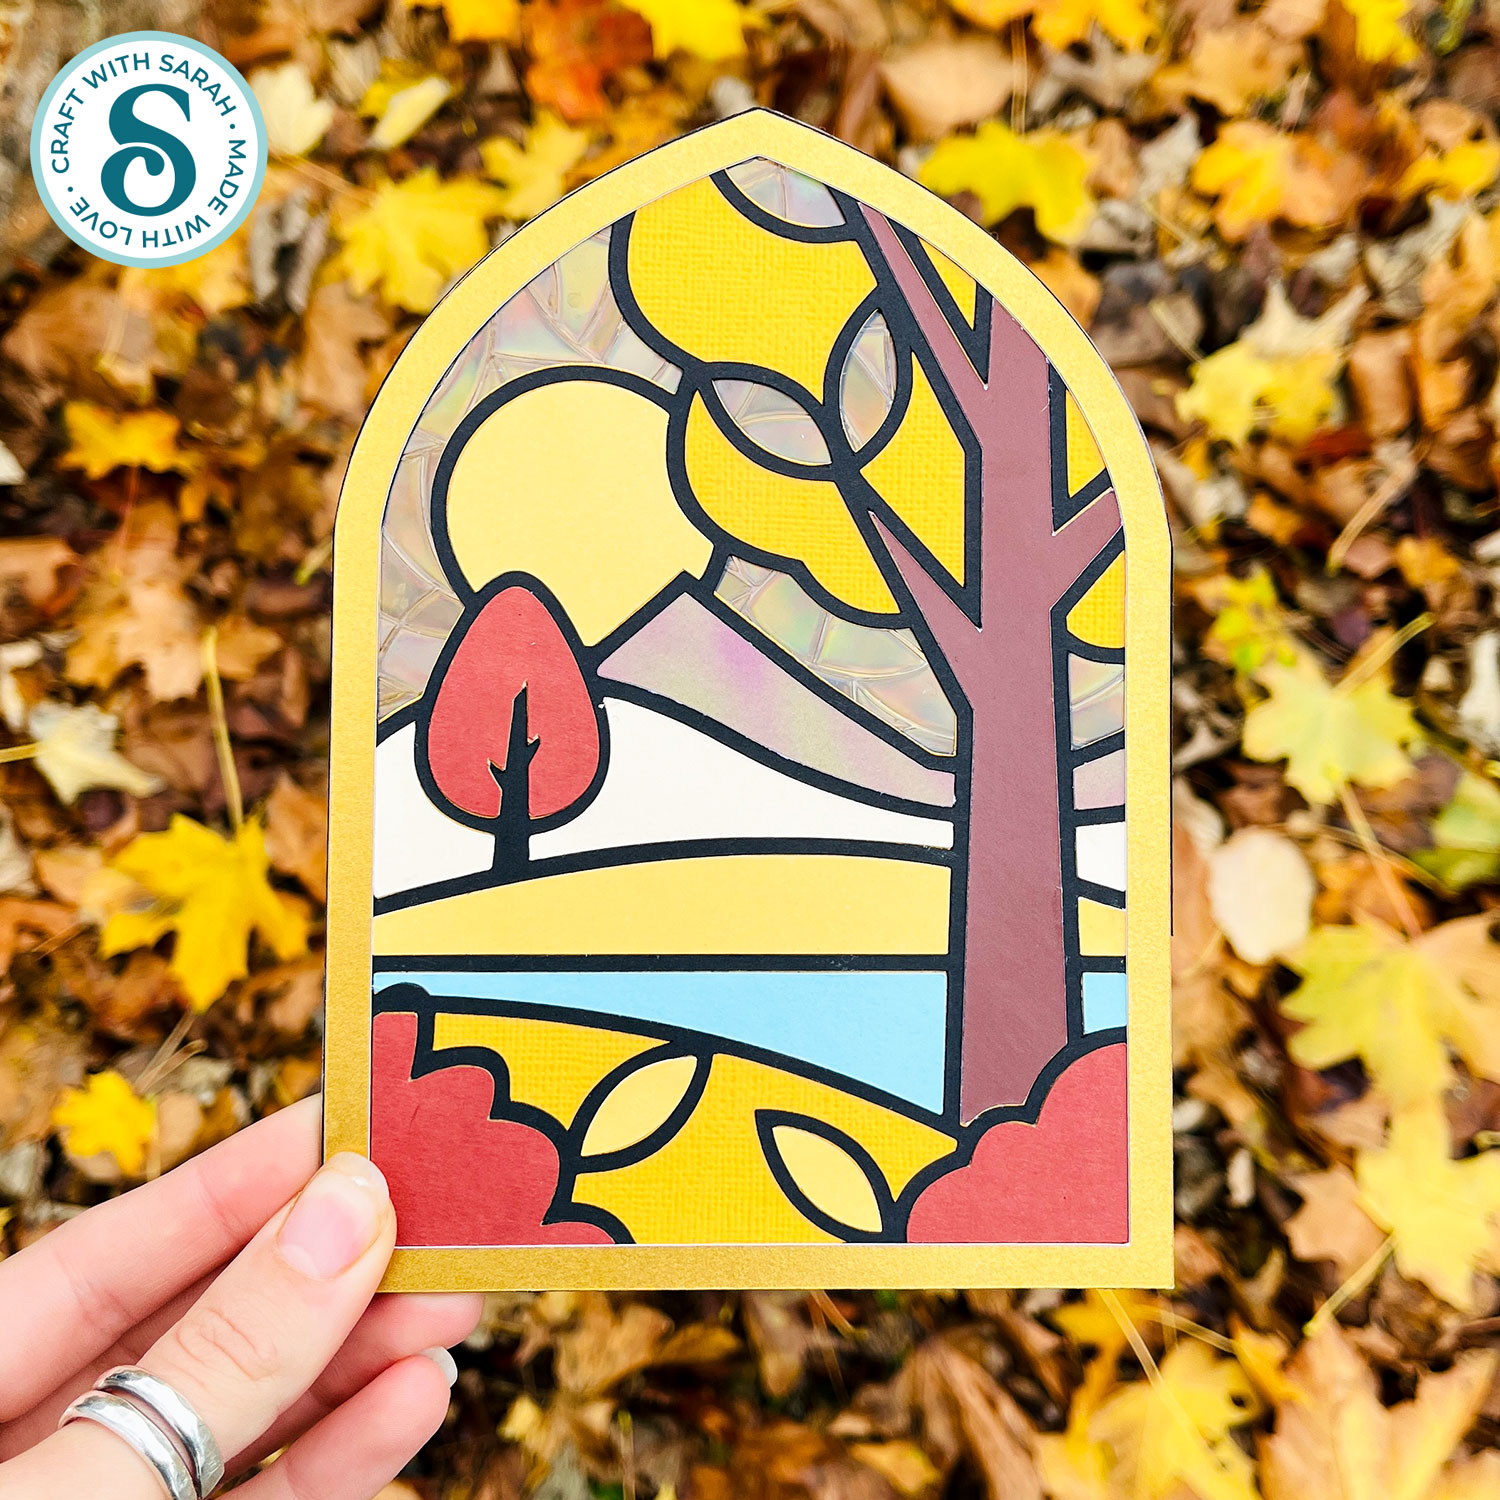
The front of the design features pretty fall shades — golds, yellow and browns — arranged like a stained glass window with thick black “leading” around each of the colours.
When the autumn sun filters through the window cling at the back, it creates a soft rainbow effect that changes as the day goes on.
This tutorial walks you step-by-step through everything you need to make your own shimmering autumn display.
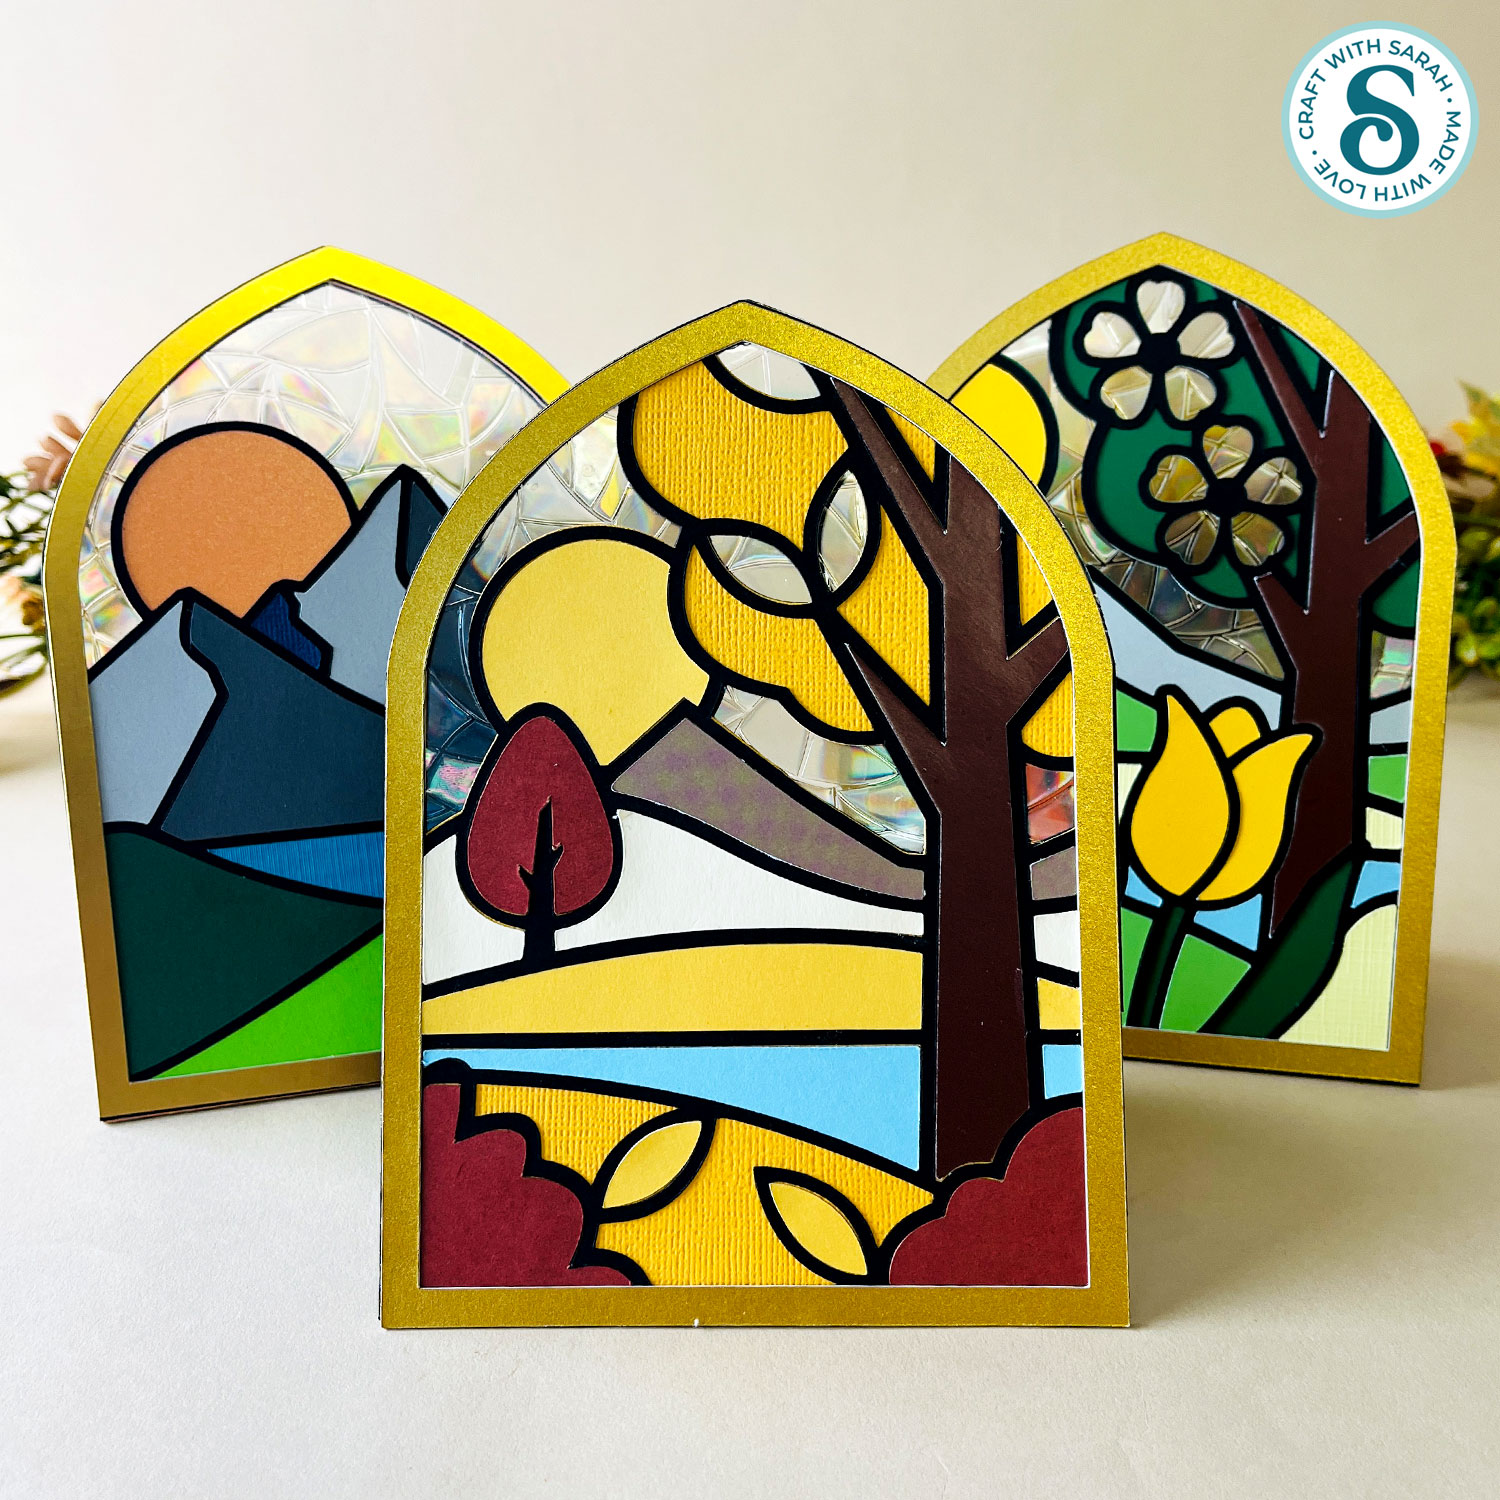
Keep reading to the end for more matching window designs for all seasons, plus Christmas and landscape designs.
While this tutorial shows the free Autumn window, the same steps can be followed for all of the window designs in this style.
Video tutorial for stained glass window design
Watch the video below to see how to make this craft project. Keep scrolling for a written tutorial.
Materials list for stained glass panels
Here is a list of the materials to make this project.
Please note that some of the links included in this article are affiliate links, which means that if you click through and make a purchase I may receive a commission (at no additional cost to you). You can read my full disclosure at the bottom of the page.
- Cricut Machine
- Light blue Cricut cutting mat
- Coloured Card, including black and gold
- Collall All Purpose Glue, Bearly Art Glue or similar
- Cricut Kraftboard in any colour (or thick cardstock of around 300gsm / 110lb)
- Window Cling
The Kraftboard is used to make a build-in stand on the back of the window.
You can leave these pieces off if would prefer to display the windows in another way.
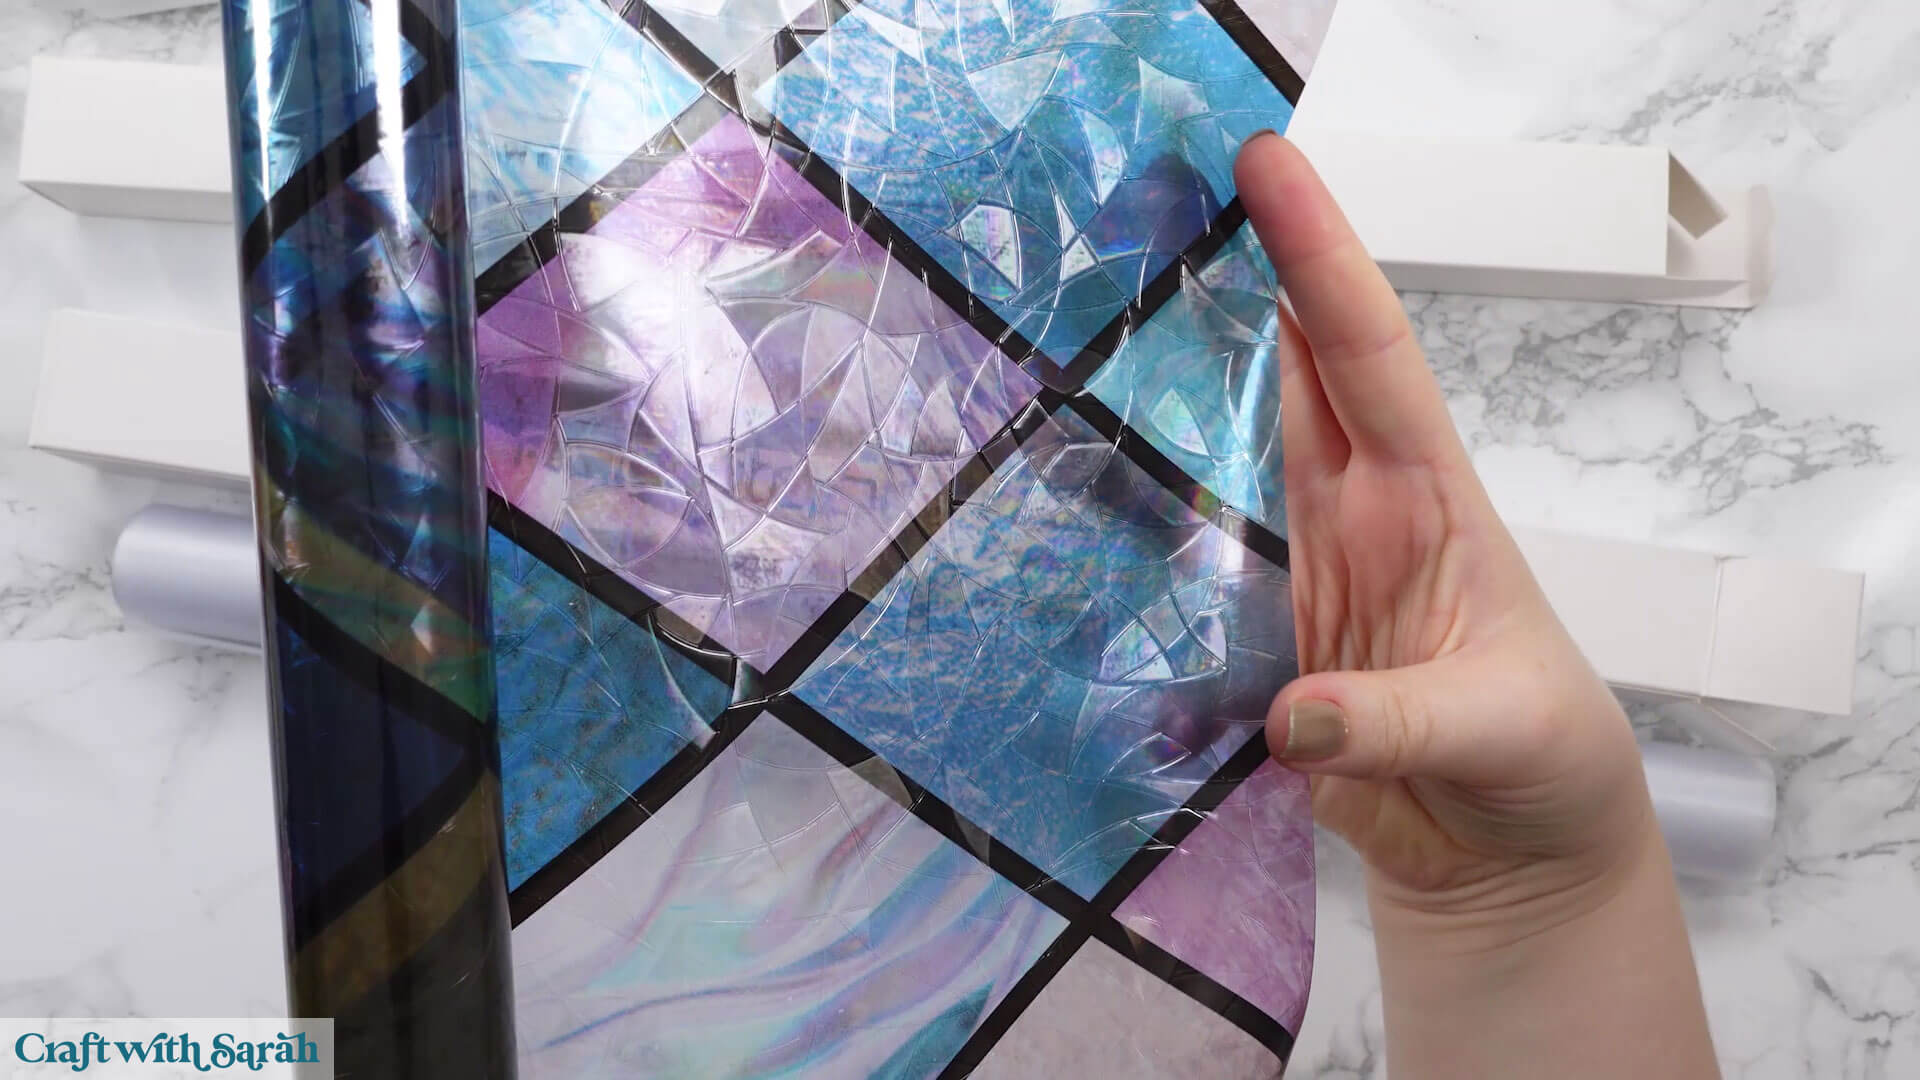
Choosing your Window Cling
Window cling comes in lots of colors and patterns. The one I used has a stained-glass effect that shows rainbow colors when the light shines through. You can also find silver versions or even printed patterns.
Here’s one that’s more colorful and detailed than the one I ended up using, just to show the variety of designs that are available.
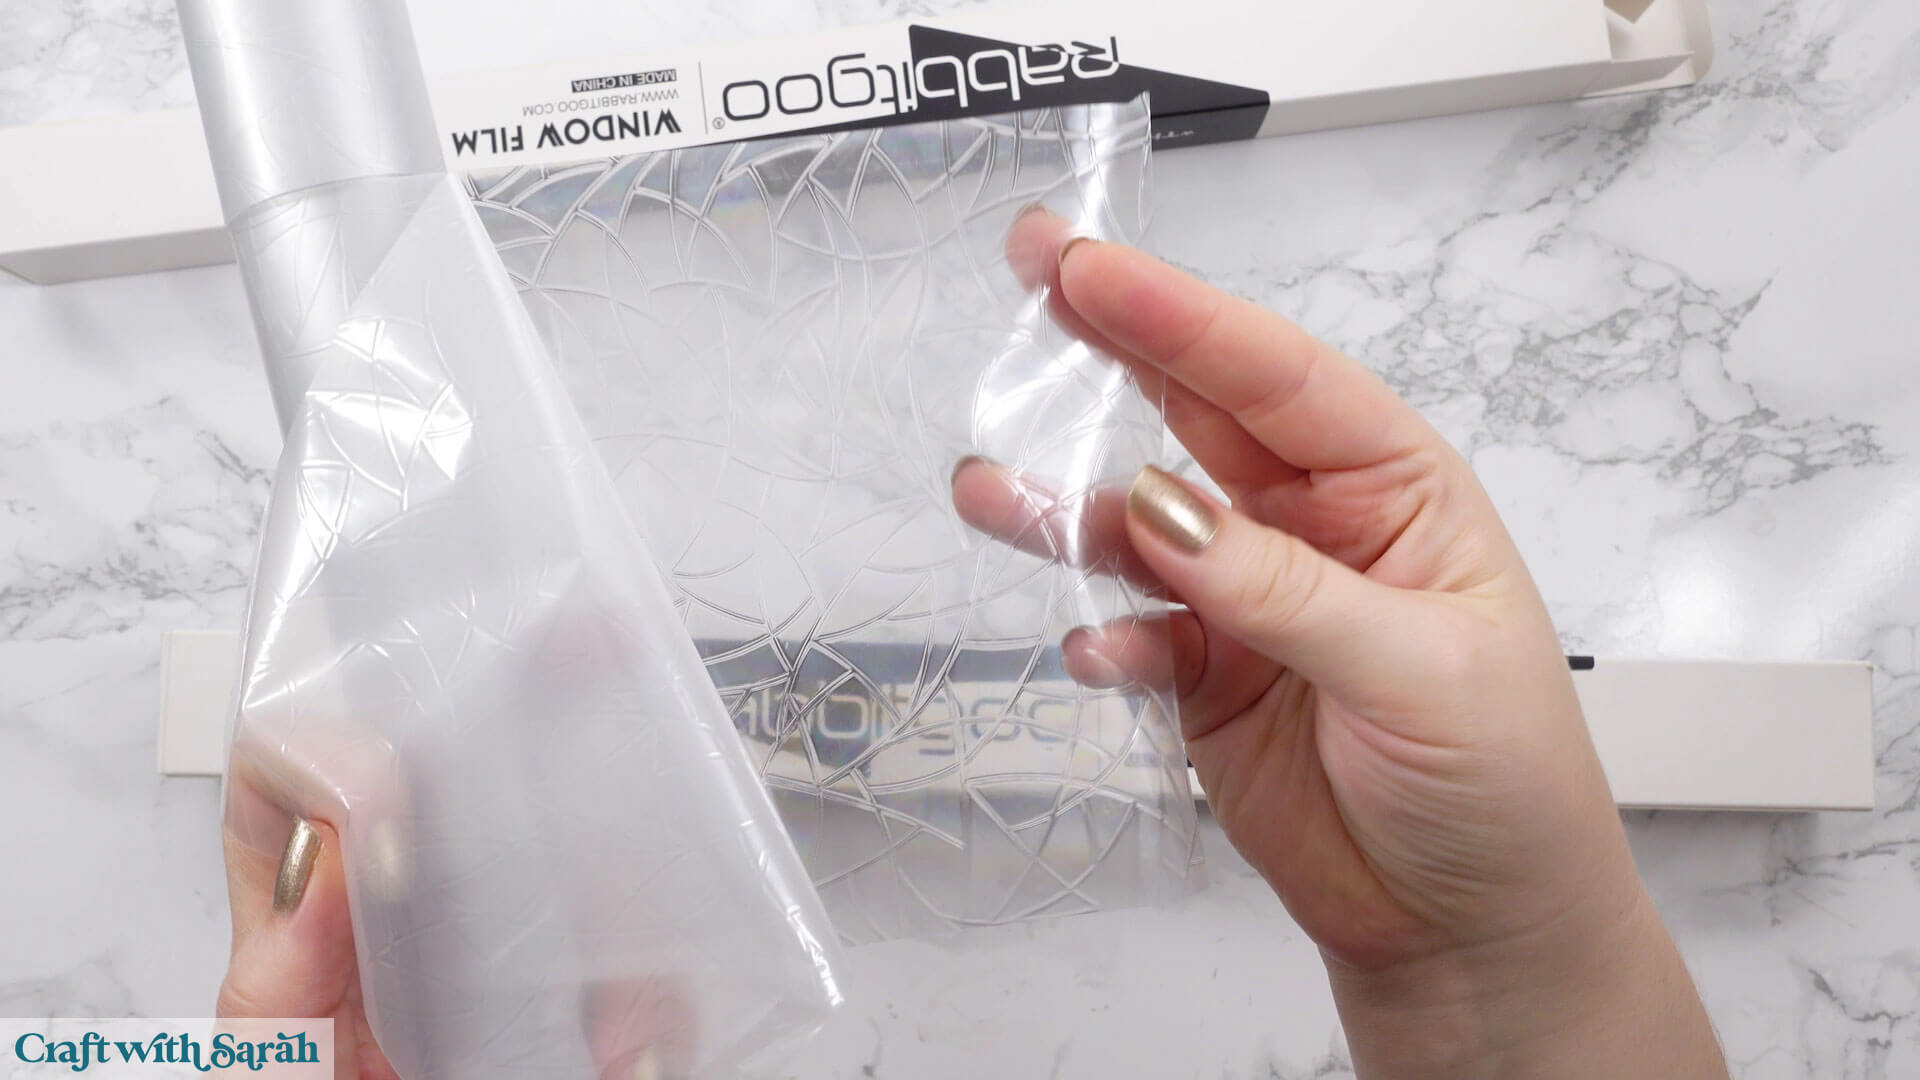
For Cricut cutting, cut the cling down to about 12×12 inches so it fits on your mat. You can place it cling-side up or flip it over and cut through the backing sheet if that works better for your blade.
I usually use the Heavy Cardstock setting, but if your machine struggles then try the Kraftboard setting instead.
The backing helps keep it clean and preserves the tackiness.
Free stained glass window SVG assembly instructions
Here’s how to make this fall themed craft project using a Cricut machine.
Step 1) Download the free file & unzip the downloaded folder
Download the Free Cutting File

Please login to your account to download this file.
TERMS OF USE:
You may sell finished, handmade physical craft items that you have made using this product but must not sell or share the digital files. Read full terms of use
Before you upload the SVGs to Design Space, you need to unzip the download folder that they come in.
- How to unzip a folder on Windows computer
- How to unzip a folder on a Mac
- How to unzip a folder on an iPad/iPhone
- How to unzip a folder on an Android device
After unzipping, upload the SVG file(s) into your cutting machine software.
Not sure how to use cut files with your type of machine? The following links lead to videos on how to open cut files in:
- Cricut Design Space
- Silhouette Studio
- CanvasWorkspace (for ScanNCut machines)
The download folder also contains printable PDF versions of the templates for hand cutting.
Step 2) Upload the SVG file into Design Space
If you are using Cricut Design Space, start a new project and then click the “Upload” button on the left of the screen.
You can then either click “Browse” to find the file on your computer, or drag-and-drop it.
Upload the file in the “01 Cricut Version” subfolder called svg-01-stained-glass-autumn-craftwithsarah.svg
This is how it should look after you have selected the file:
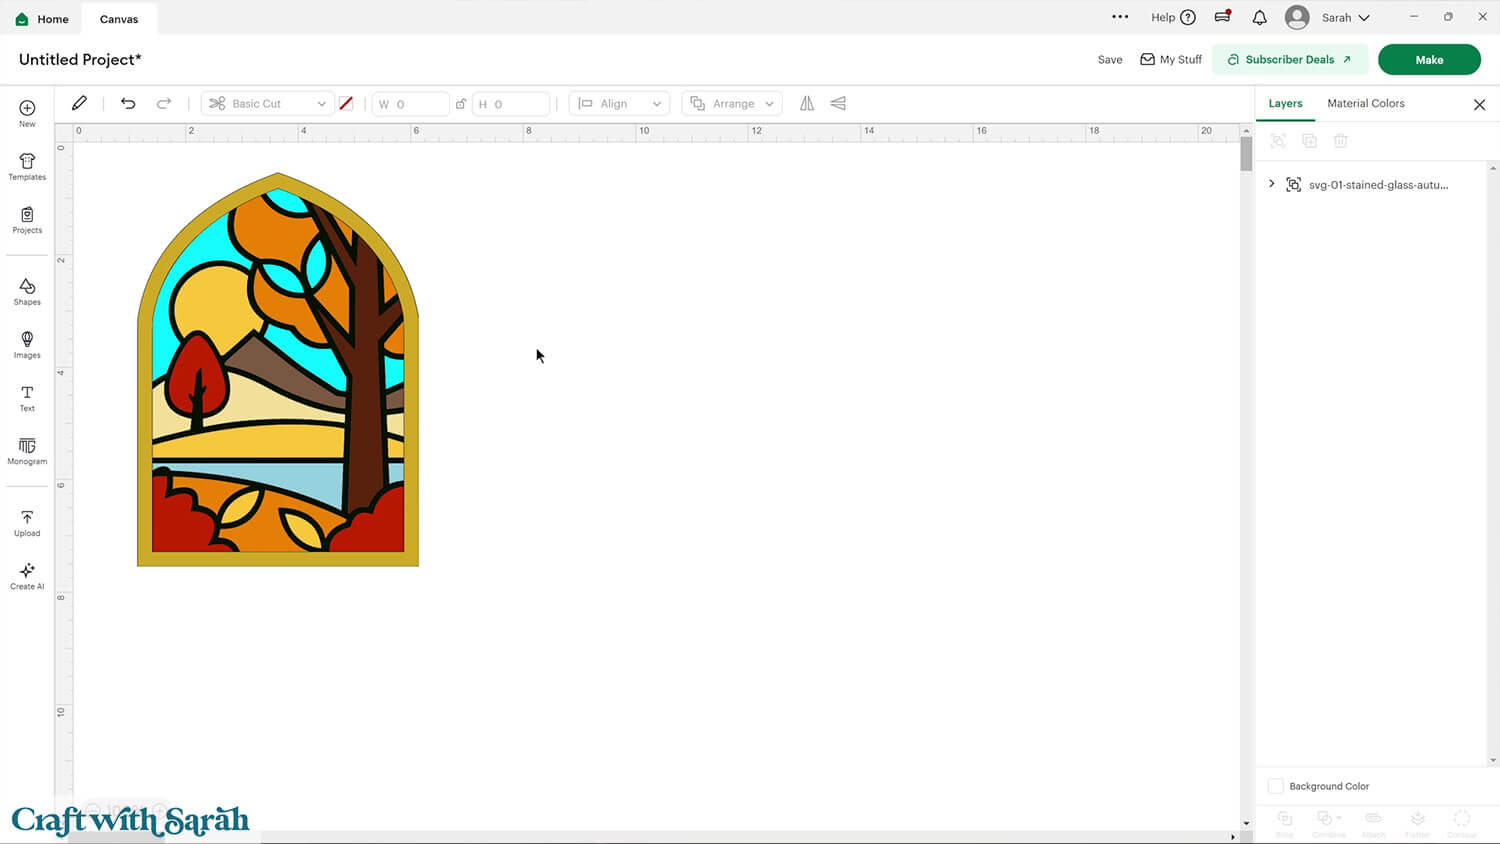
Don’t worry if the image preview appears blurry – it will show in full quality once it’s inserted onto your project.
Press “Upload” on the next screen.
After uploading, the window design should be automatically inserted onto your Canvas.
To hide the left sidebar (to give you more space for designing!), click the arrow that’s about half way down the page.
If the design doesn’t get inserted onto your Canvas, it will show under “Uploads” in your “Recently Uploaded Images”. Click on it and then press “Add to Canvas” to put it onto your Project.
The windows will load in a 5×7 inches, but you can make them larger or smaller.
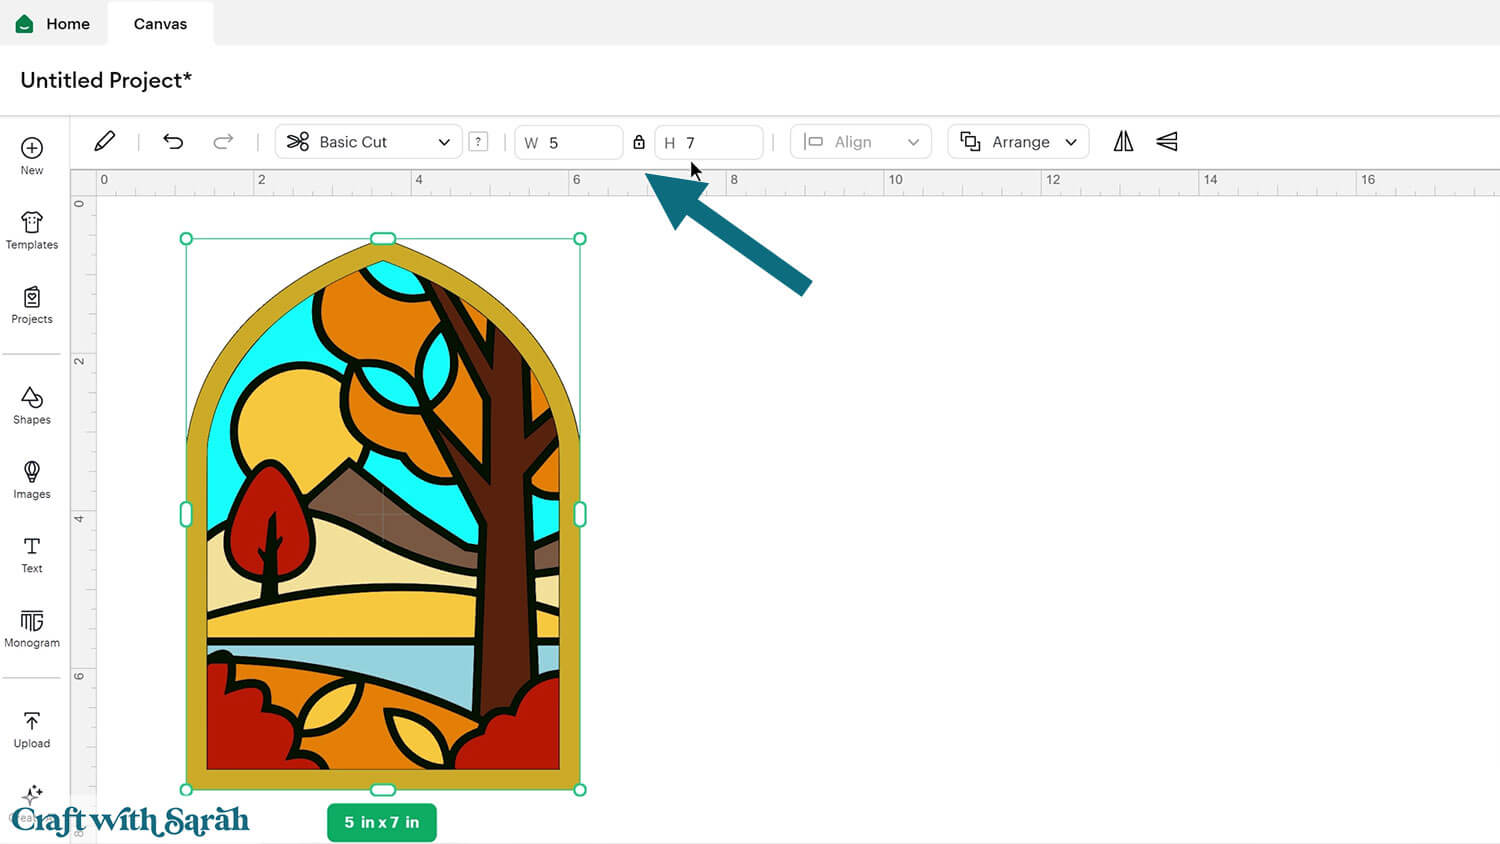
Click the design on your canvas and use the width/height boxes near the top of the screen to make it the size that you want to cut it.
Make sure that the padlock icon is closed when you are resizing so that all the pieces stay in proportion.
Step 3) Cut the design
Once you upload the file into Cricut Design Space, it will appear ready to cut — no changes needed!
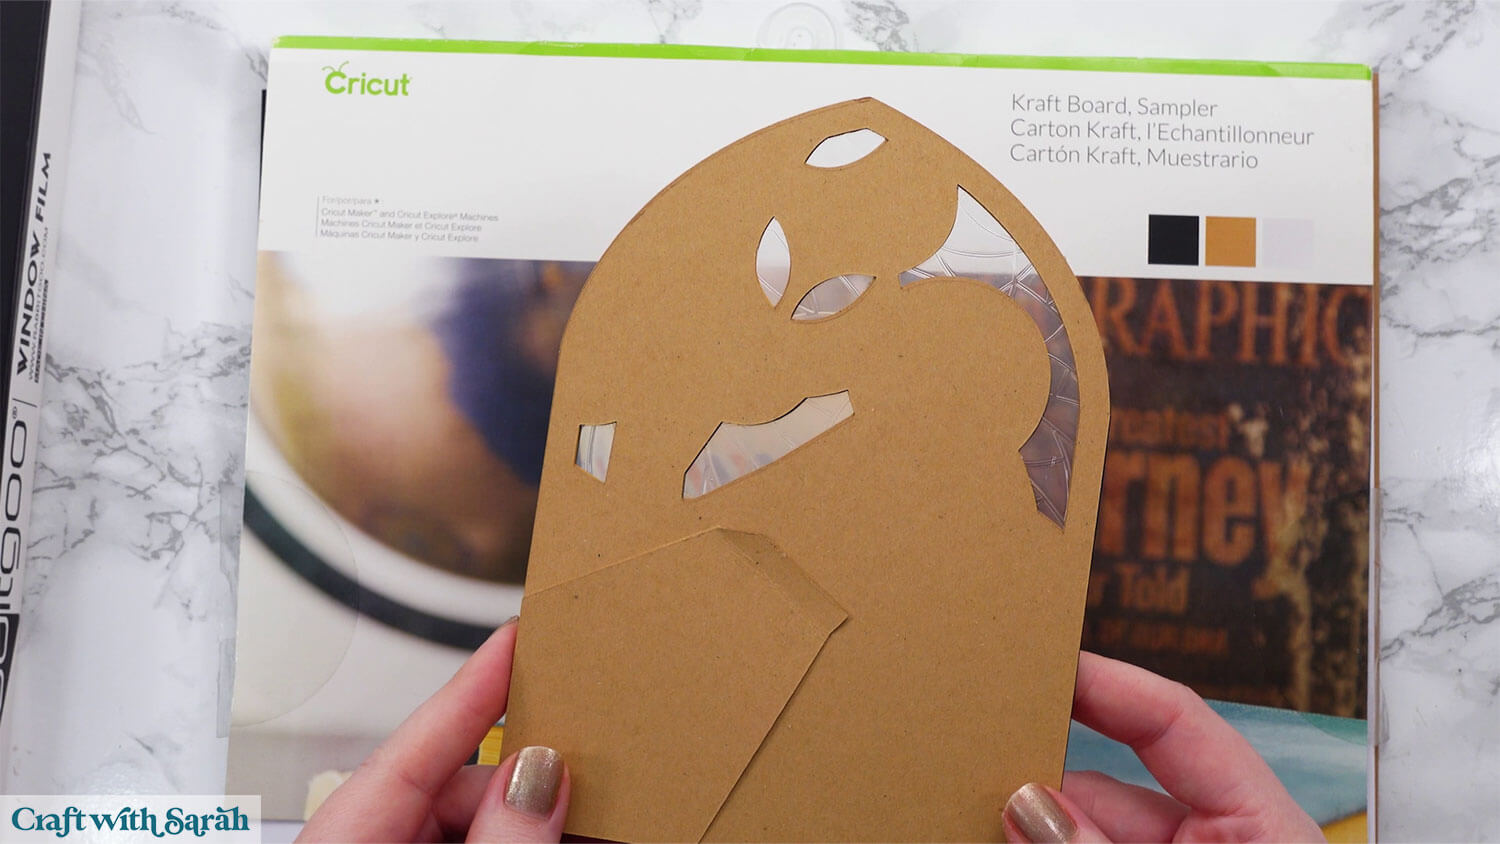
In the photo below, I’ve moved some of the layers about to show you what to expect.
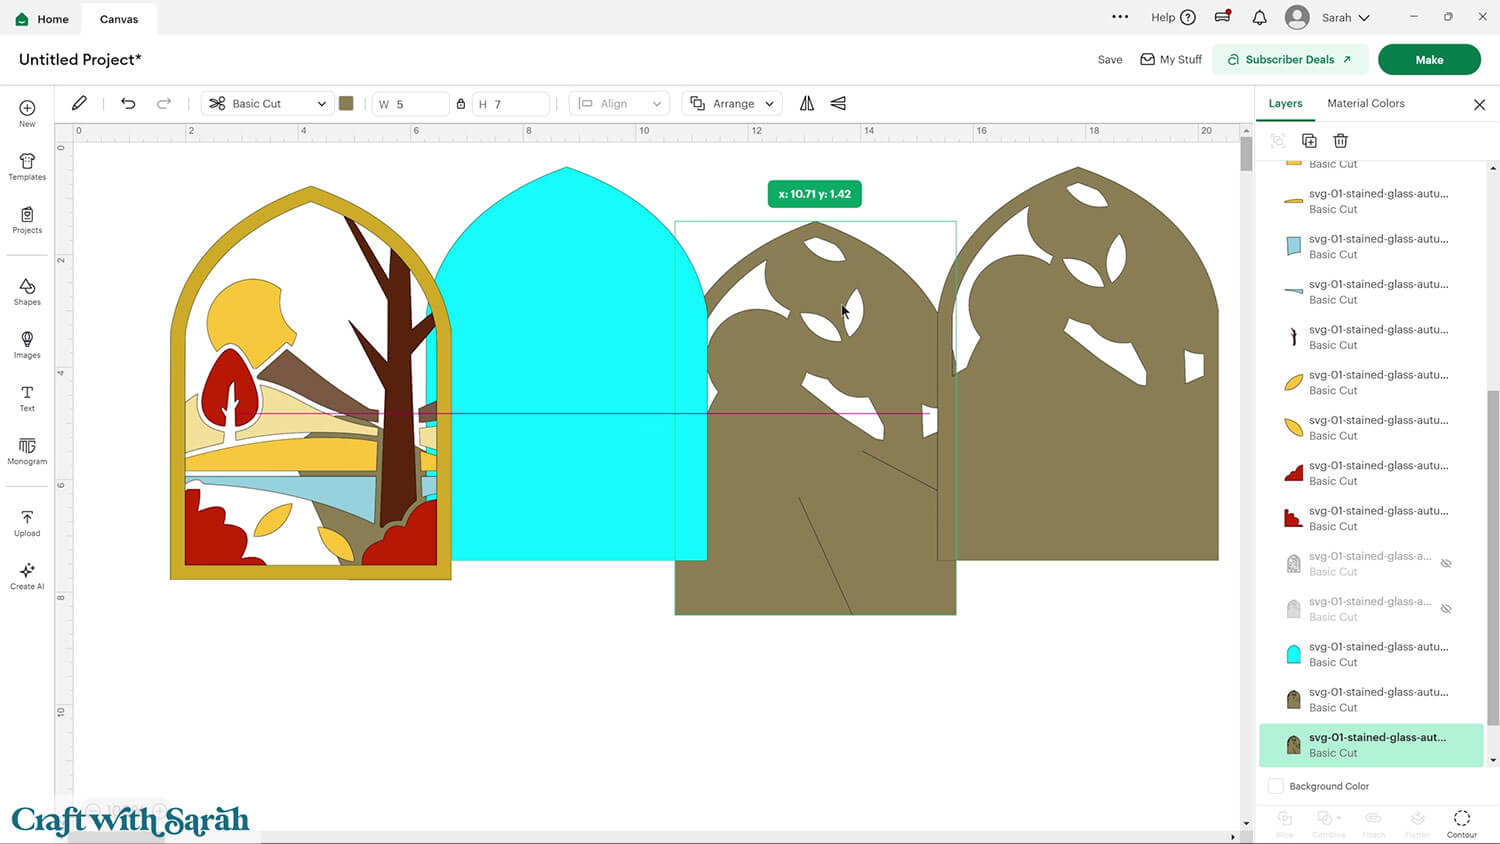
The bright blue layer in the file represents the window cling.
The three brown pieces form the stand and backing, which should be cut from Kraft Board or thick cardstock.
The other layers are your colored cardstock pieces.
When you’re happy how the stained glass window SVG is looking in Design Space, click “Make” and follow the instructions on-screen to cut out all the layers.
Change the paper size with the dropdowns on the left of the screen. You need to change it for every colour.
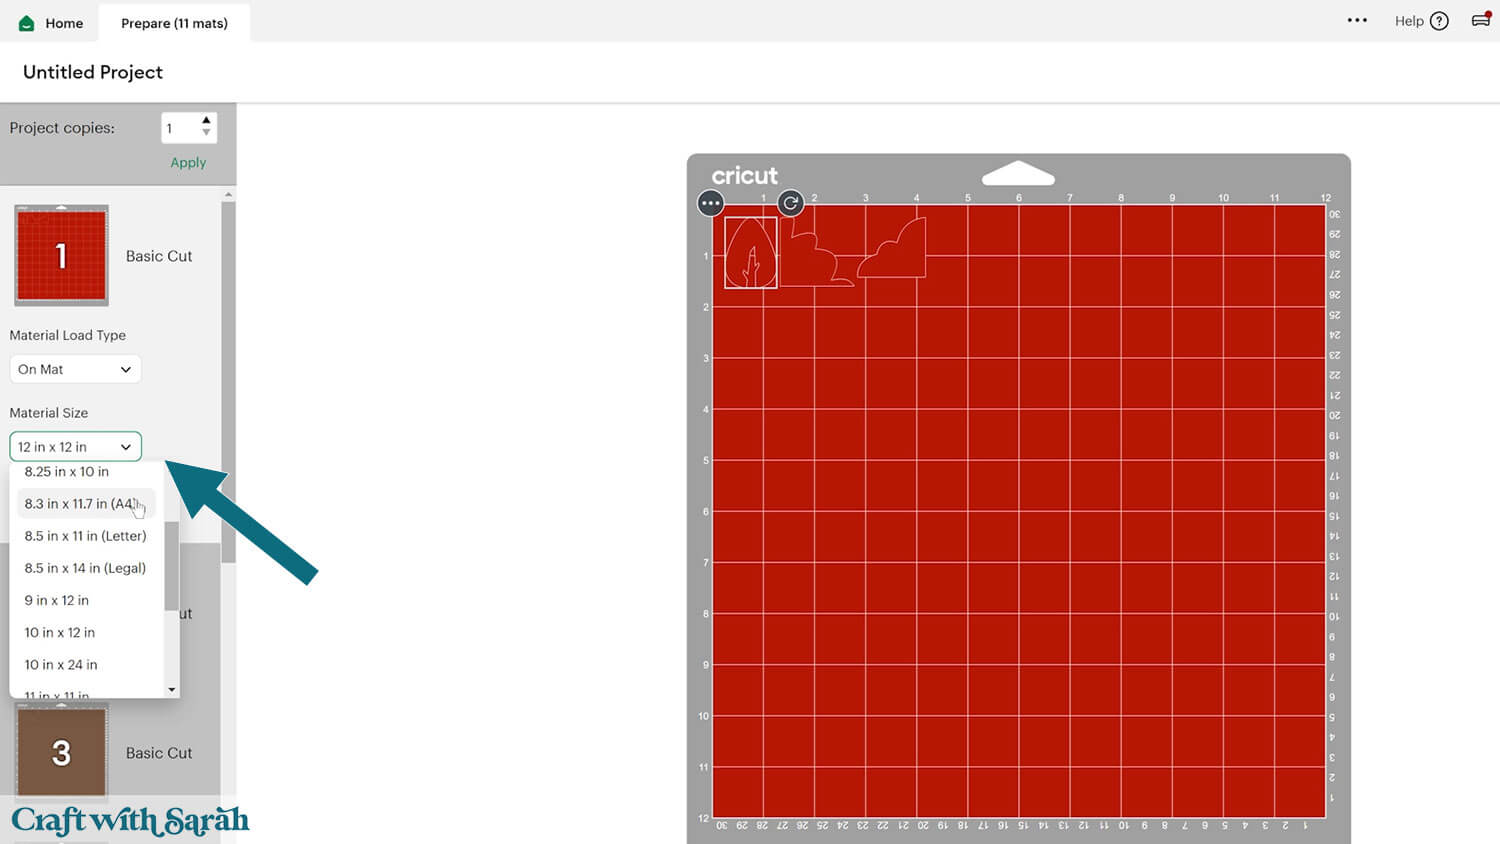
You can drag-and-drop the pieces on the screen to move them about to take up less space on your cardstock.
Make sure that no pieces overlap, otherwise they won’t cut out correctly.
This project is a great opportunity to use up those smaller scraps of cardstock!
Step 4) Assembling the window
Now comes the fun part — putting it all together!
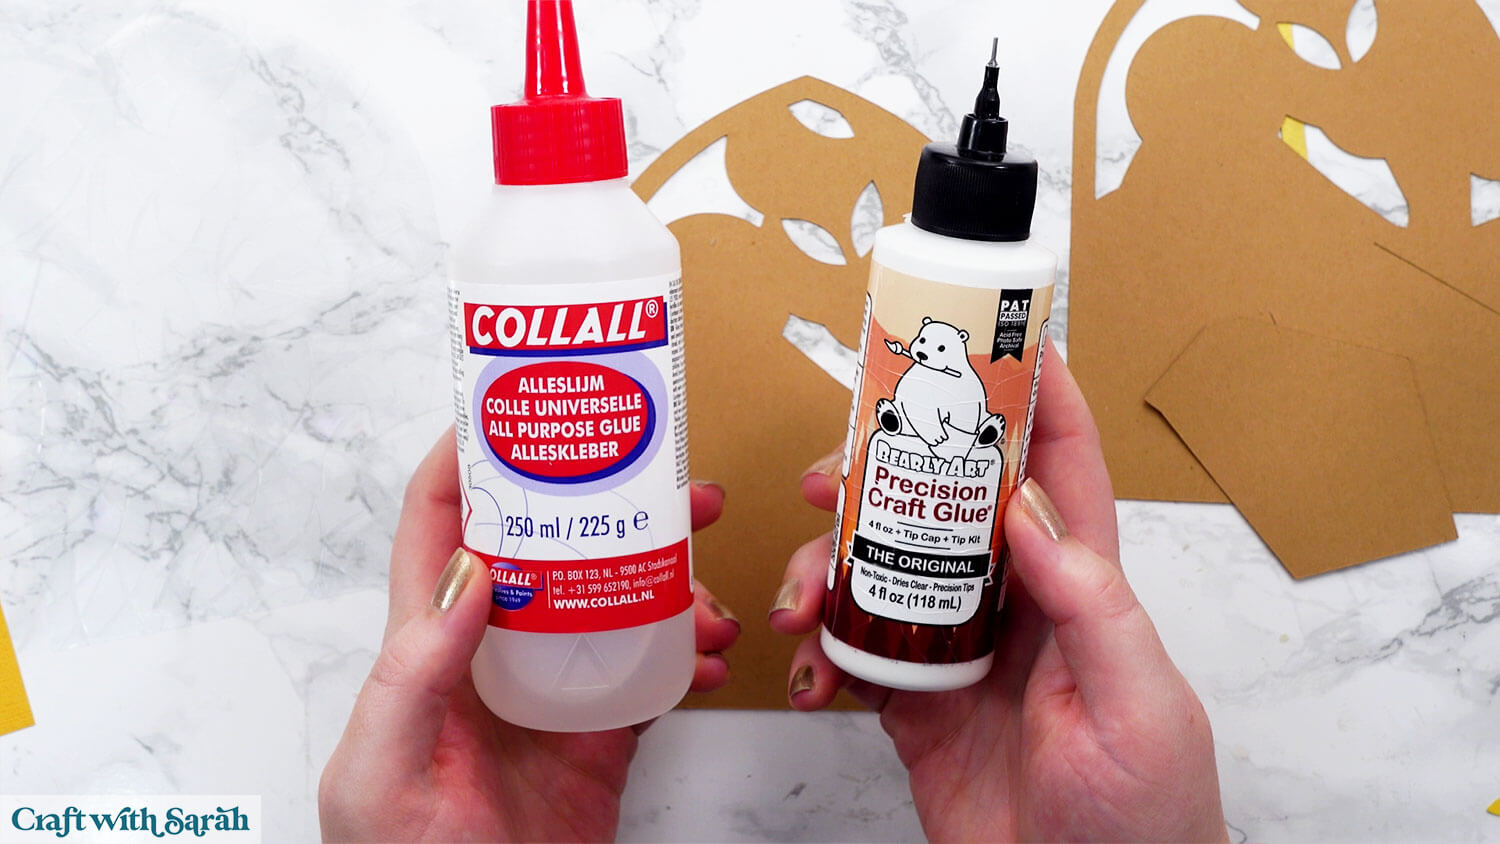
I used Bearly Art Glue to stick the project together.
It’s SO good because it doesn’t “warp” or bend the cardstock like some glues do. You can use as much of it as you want and the card stays perfect – and it dries perfectly clear too!
Collall All-Purpose Glue is another great one to use for cardstock.
Add glue to the top of the Kraftboard window piece that does NOT have the stand cut out of it.
Peel the protective backing off of the window cling.
Stick the tacky side (the side you’ve just pulled the backing away from) onto the glue.
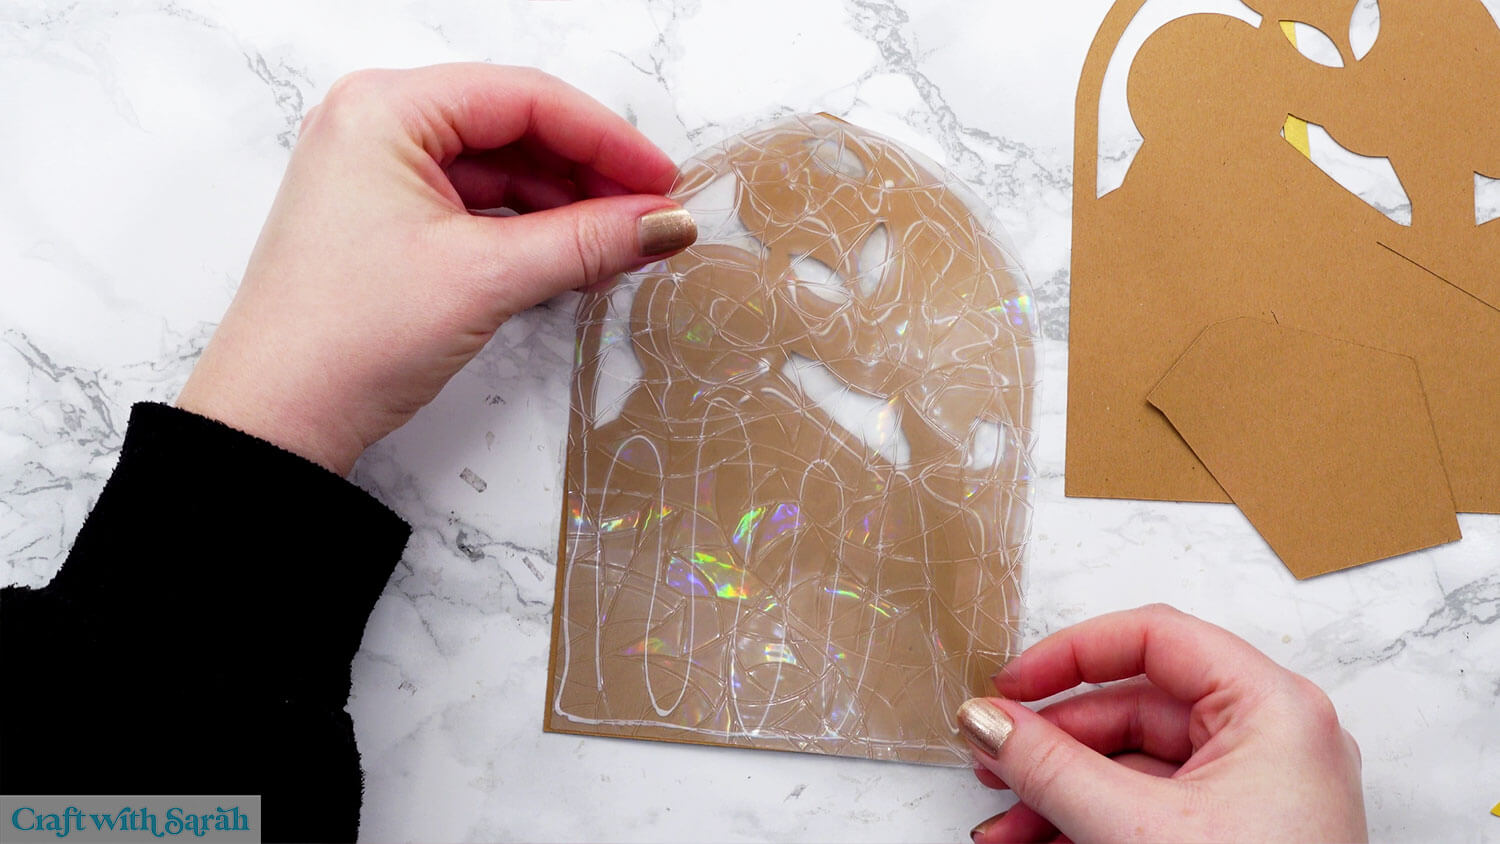
Glue the large coloured piece on top.

Glue the black “leading” piece on top. Be gentle — the lines are delicate. Apply glue carefully so it doesn’t ooze out.
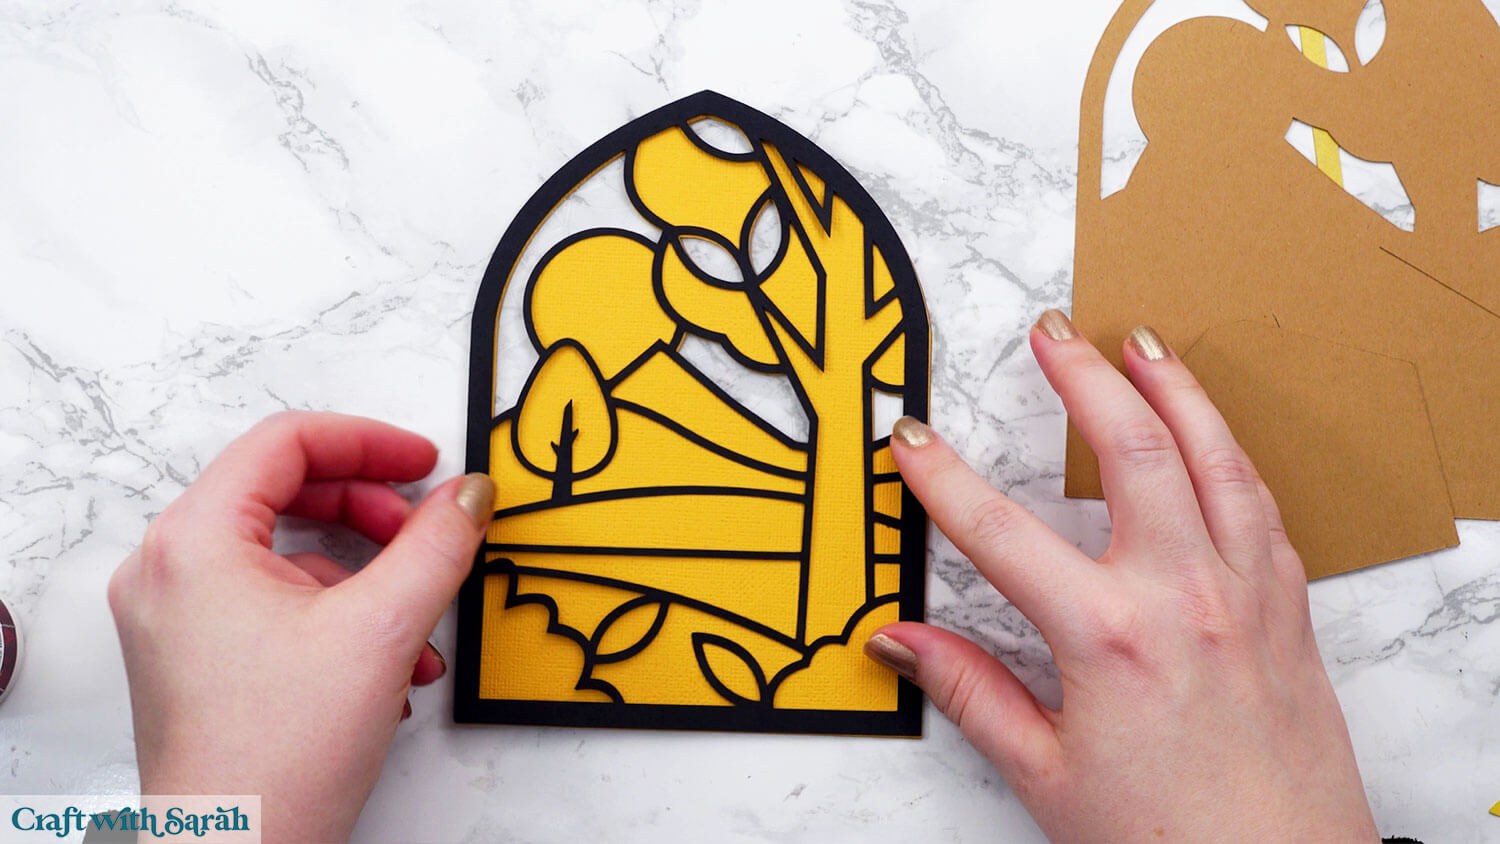
Glue all the small pieces of the window design into the gaps in the black layer.
Each shape fits neatly into the black outline. Work one piece at a time, gluing each in place.
If your colored cardstock is thicker than the black layer, some pieces may sit slightly higher, but that’s okay.
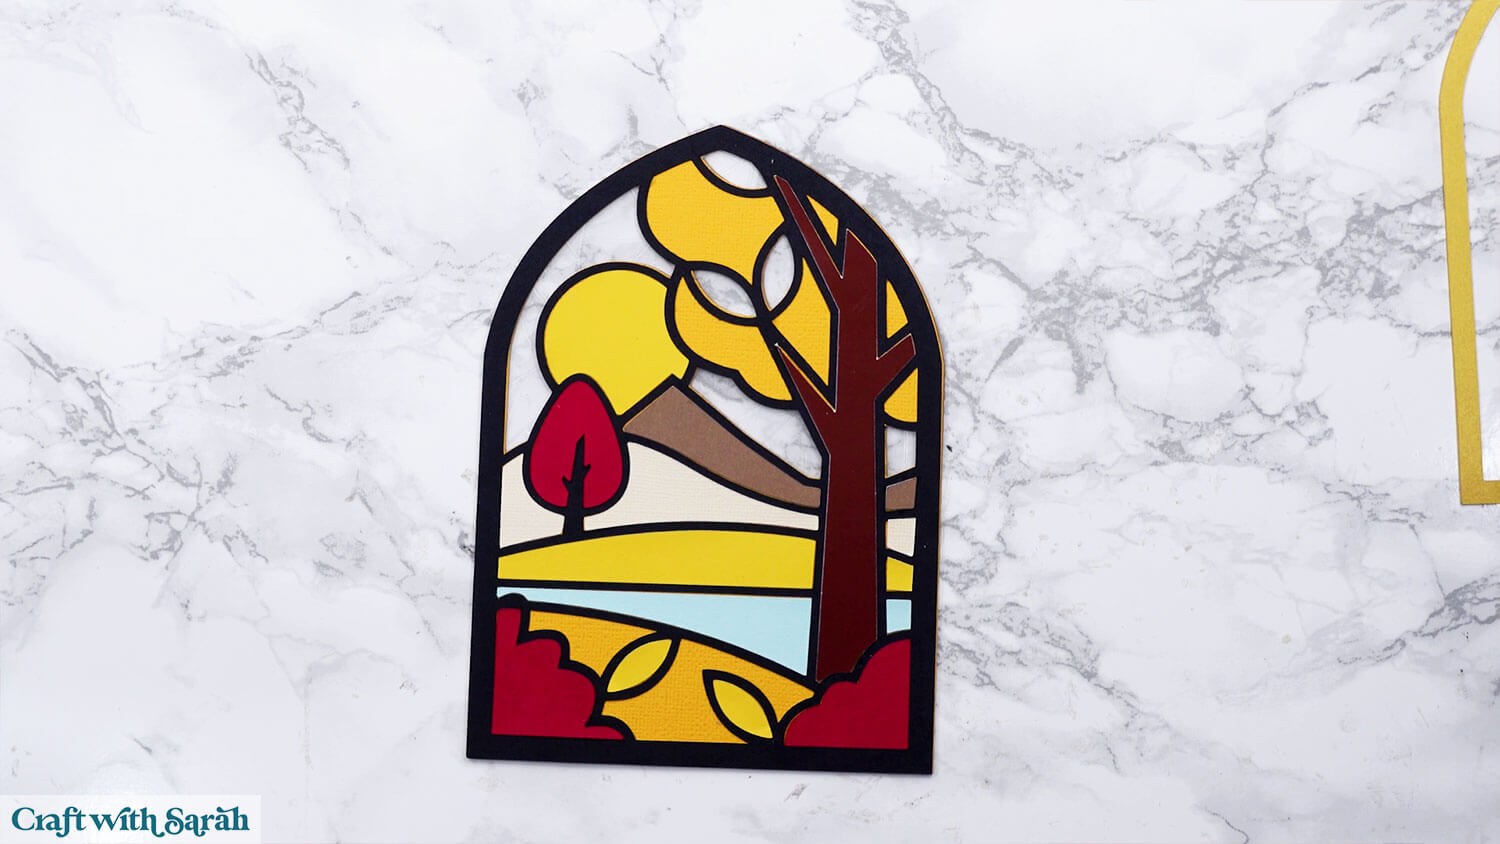
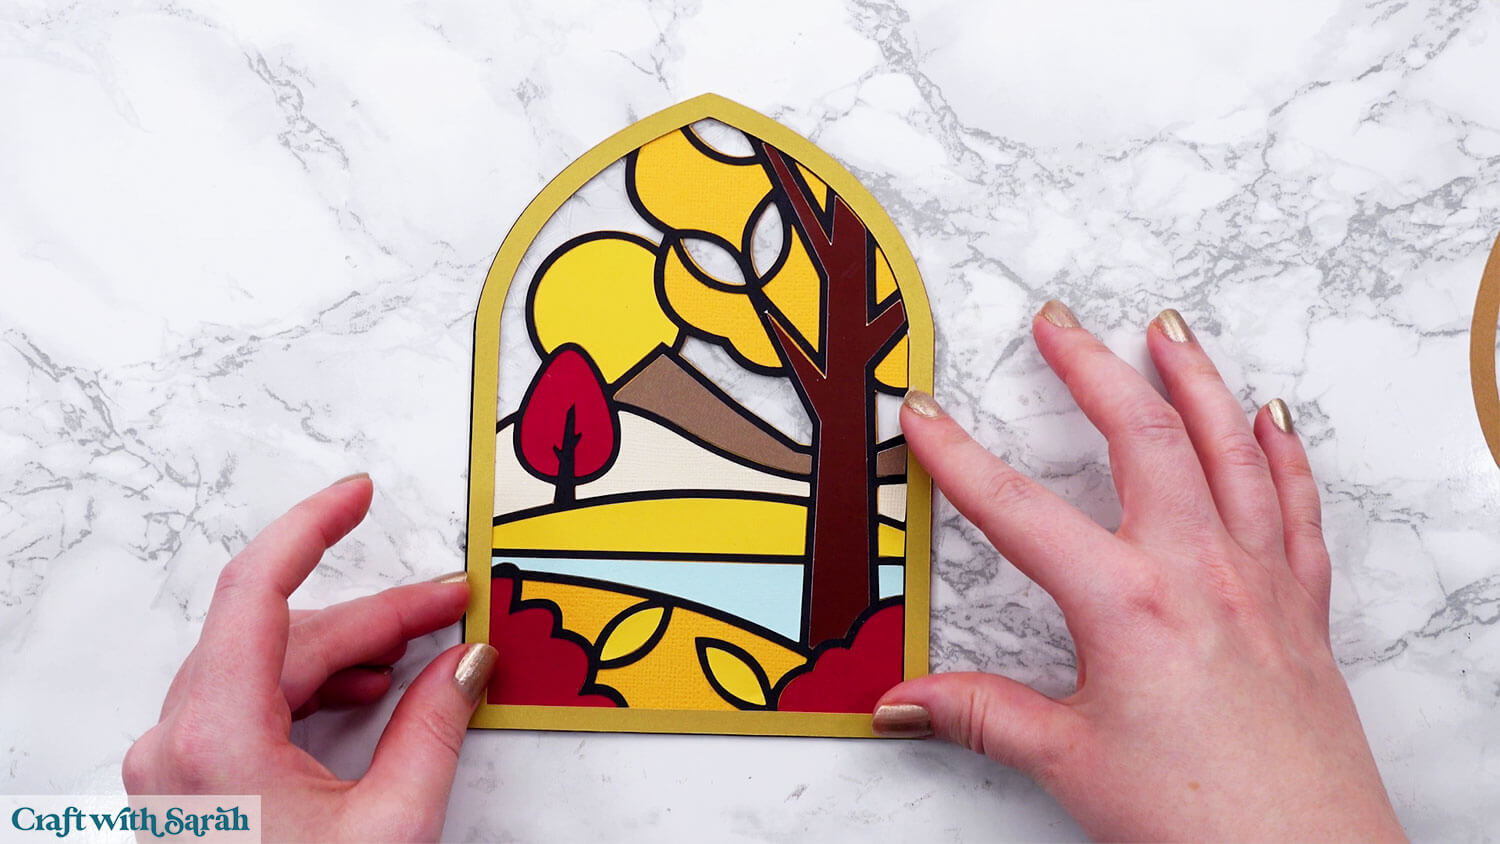
Finish the front of the window by gluing the gold frame around the edge.
Step 5) Create the stand on the back
To make your window freestanding, take the Kraftboard piece with the flap cutout and fold the flap outward along the two cut lines.
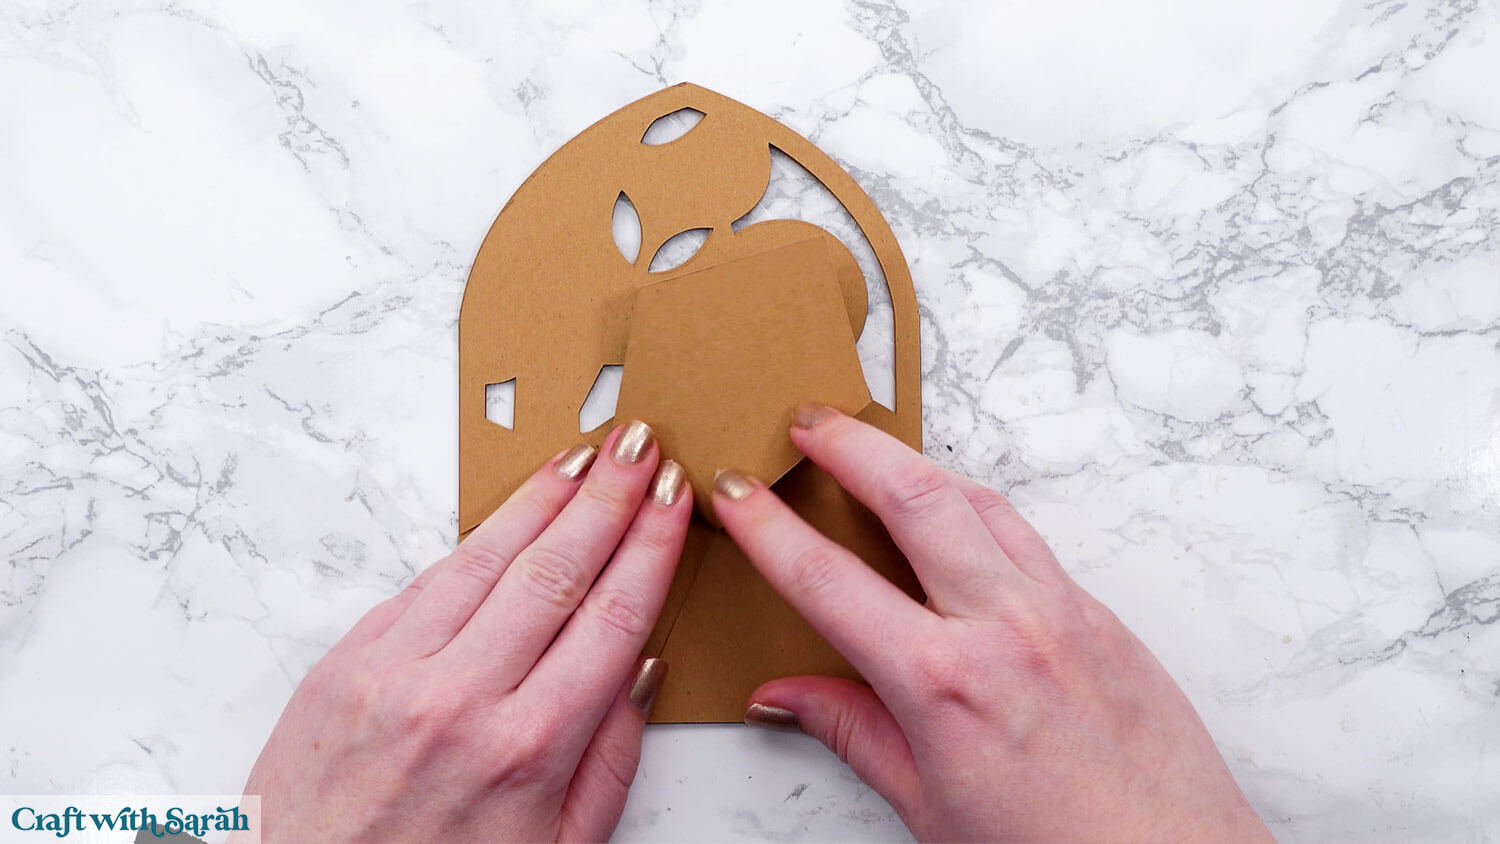
Glue the flat part of the Kraftboard to the back of your window design, leaving the flap unglued.
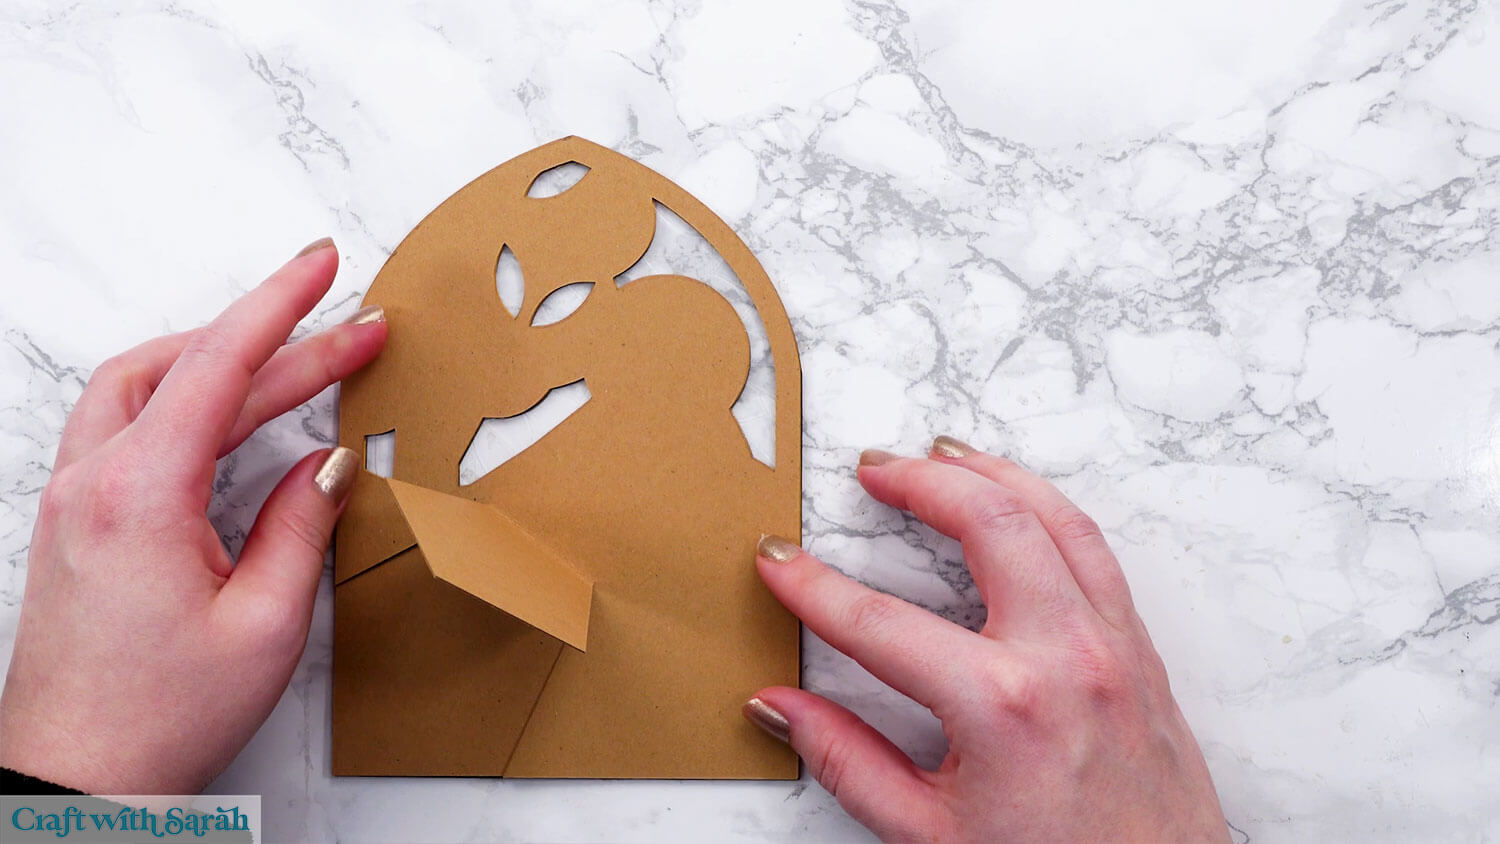
Add the smaller Kraftboard backing piece on top for extra strength.
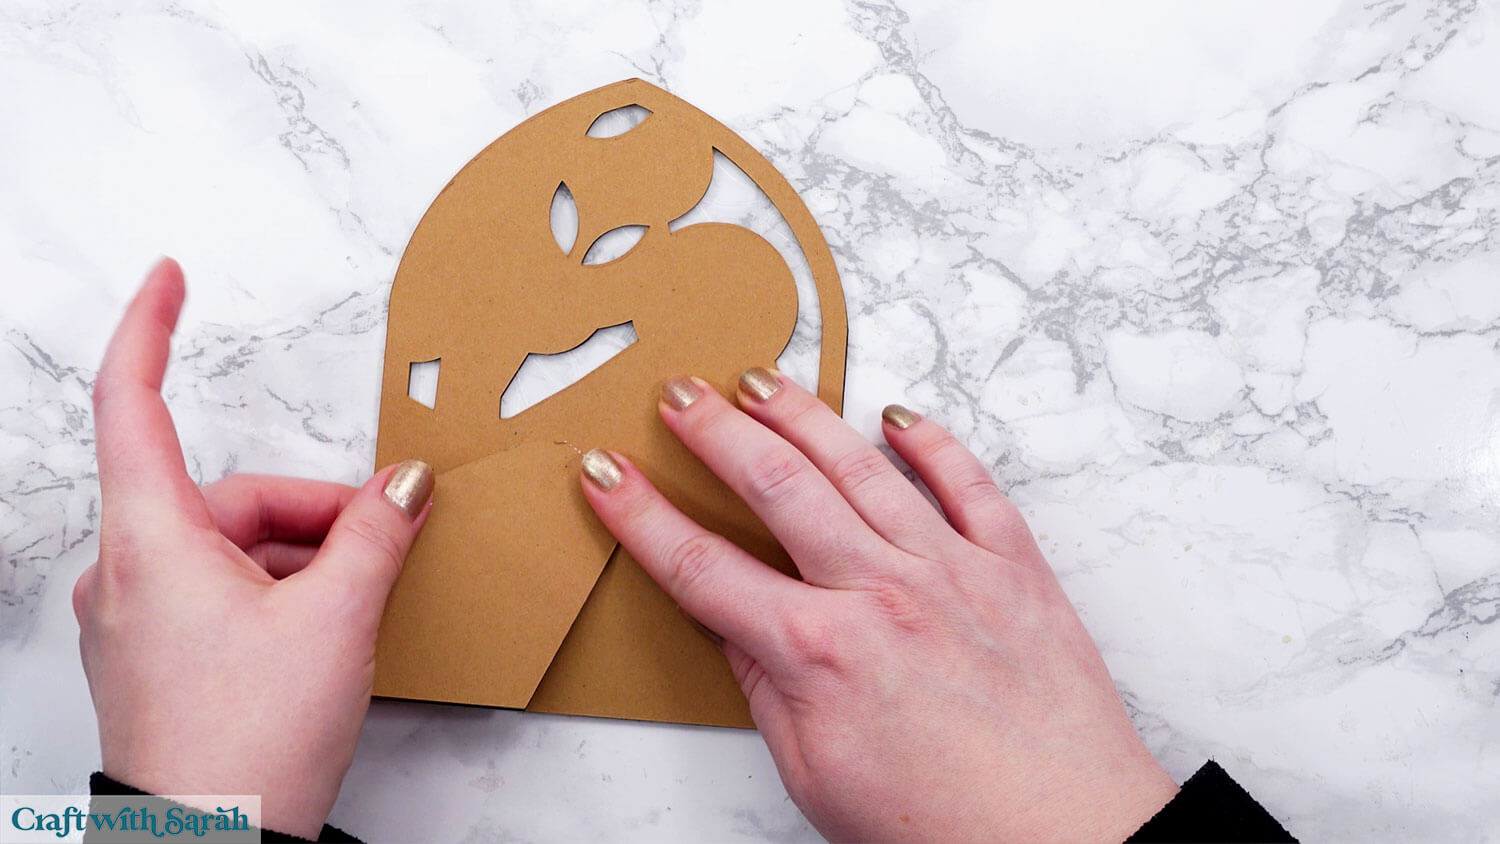
Once dry, gently fold the flap again so it stands at an angle. Your window should now stand beautifully on its own!
If it feels a little wobbly, just cut another back piece and glue it in place to reinforce the stand.
And there you have it — your very own freestanding autumn stained glass window made from cardstock, Kraftboard and window cling!
Year-round stained glass fun
If you enjoyed making this autumn design, you can create the full seasonal collection!
I’ve also designed spring, summer and window windows that show the same scene with the tree, mountains and lake at different times of the year.
There are also the following landscape designs: mountains, forest and beach.
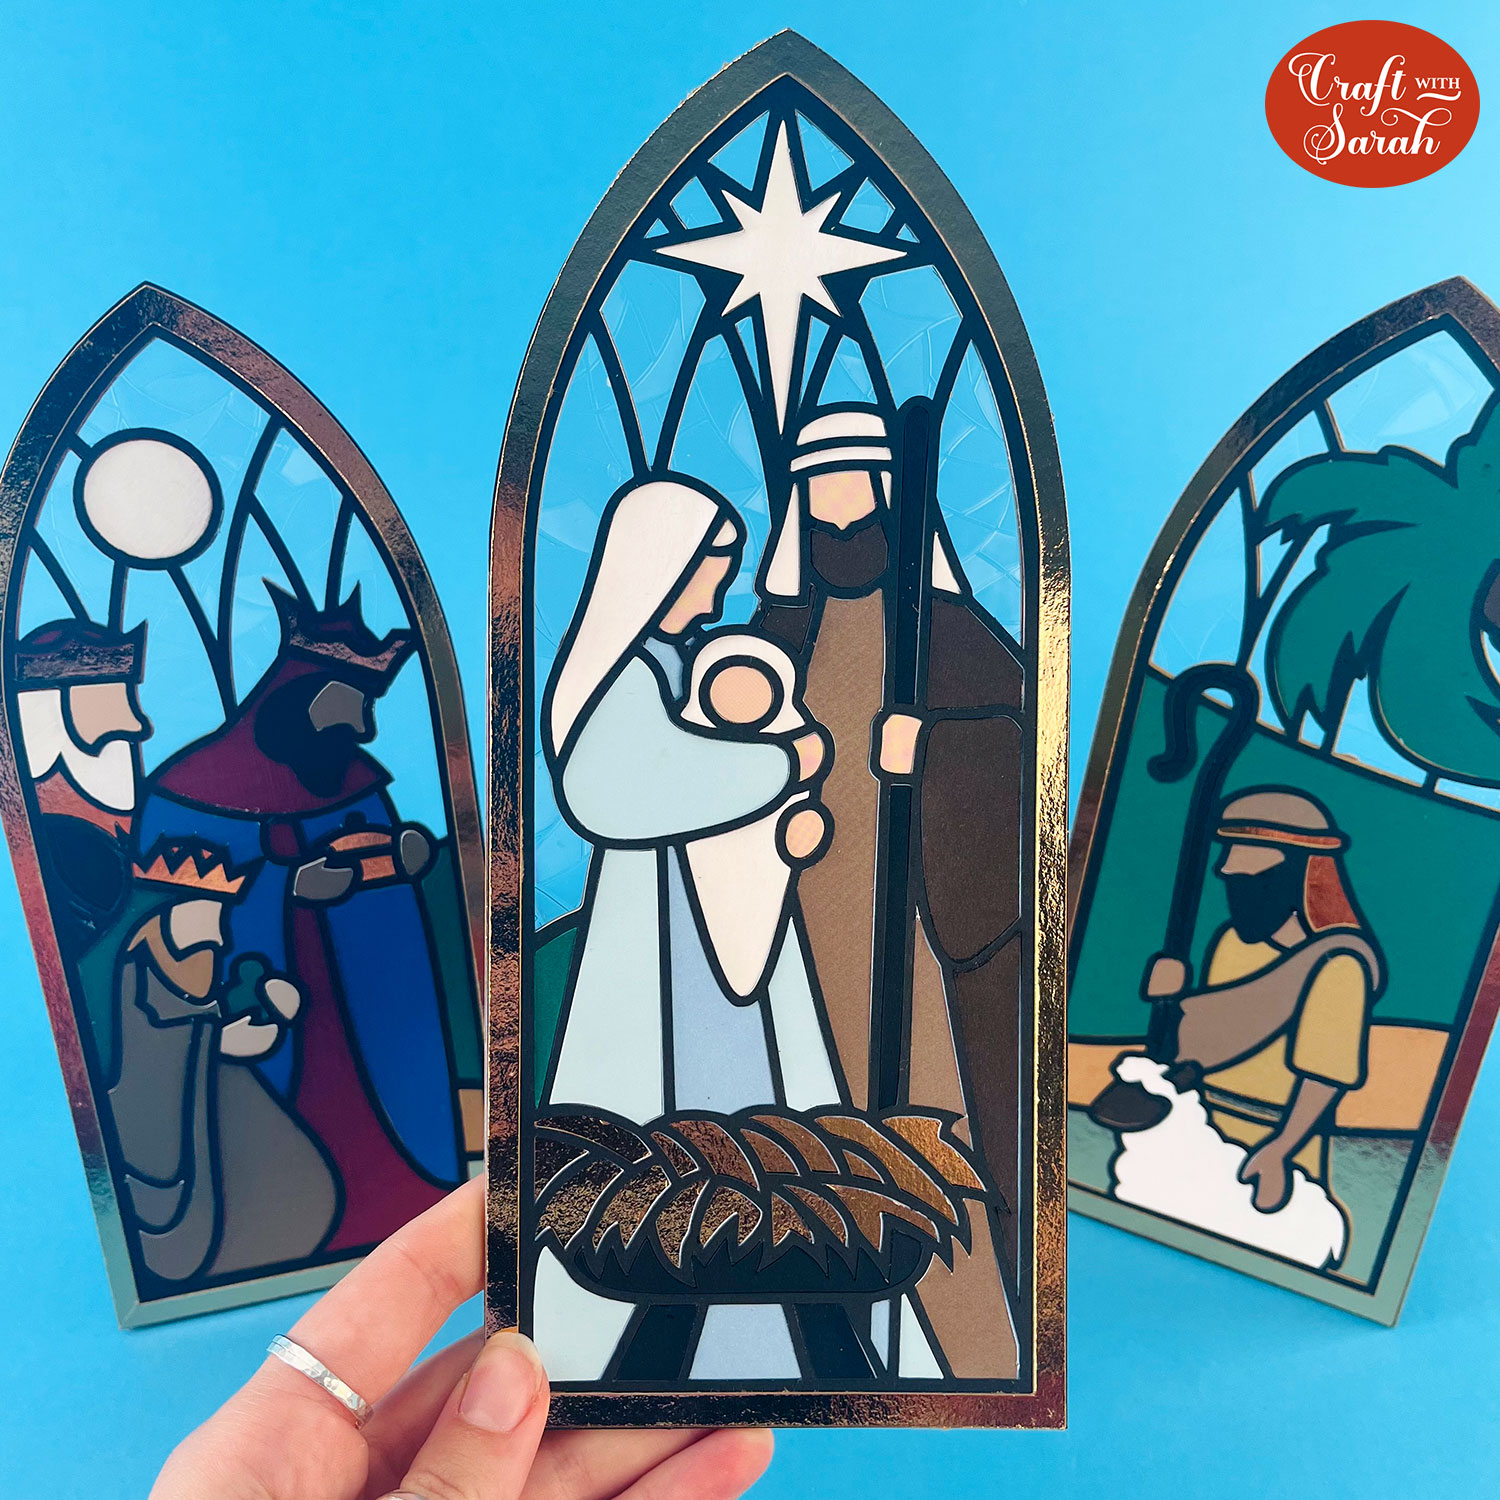
Plus a beautiful Christmas Nativity collection.
View all stained glass designs
If you’re part of Papercraft Porch, you can download all of these designs using your monthly Design Credits.
Papercraft Porch members also have access to an exclusive video Class on designing your own stained glass windows, where I show you how to combine graphics, adjust stands, and personalize your scenes in Cricut Design Space, Silhouette Studio, and Canvas Workspace.
If you enjoyed this window cling project, I’d love to see your creations! Post your finished designs to social media or share them in our Community. Seeing what you make always brightens my day!
Happy crafting,
Sarah x

