How to Make a Shaped Shaker Card with Cricut (Card 2 of 4)

Welcome to this tutorial on how to make shaped shaker cards with a Cricut machine.
Cricuts are amazing for this project as they let you cut out whatever shape you want, really easily, which is perfect for creating shaped shaker cards.
This is part 2 of a 4-part series on how to make shaker cards.
As each episode in the series is released, the shaker cards will get more complex and exciting – so let’s get started with Part 2!
Contents:
Please note that some of the links included in this article are affiliate links, which means that if you click through and make a purchase I may receive a commission (at no additional cost to you). You can read my full disclosure at the bottom of the page.
What is a shaped shaker card?
A shaped shaker card is one step up from having a simple square, circle or other geometric shape cut out from your card.
For shaped shaker cards, you cut a non-geometric shaped window to put your shaker embellishments behind.
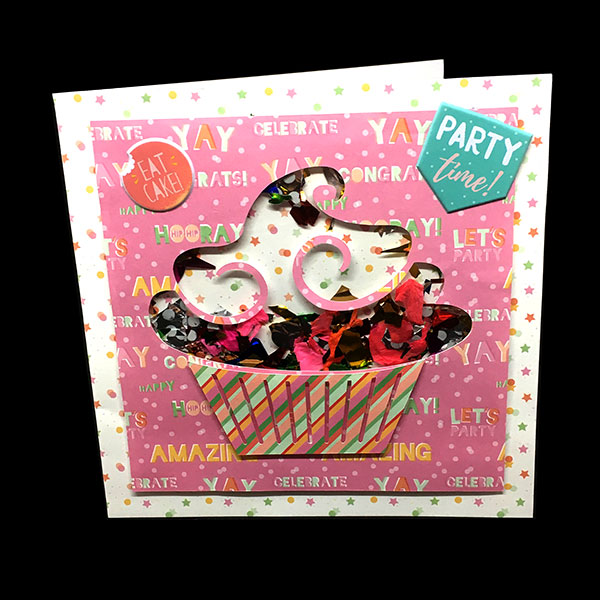
For this tutorial I did a cupcake shaped card, but you can choose any shape you want!
I include some tips later on for choosing the best type of image to use for your shaped shaker card.
Video tutorial: How to make a shaped shaker card
Watch the video below to find out how to make a shaped shaker card with your Cricut.
This is part 2 in a 4-part series on Shaker Cards. Watch the other videos on YouTube now!
Shaker Card Materials list
Here is a list of materials of what I used to create this shaker card.
- Cricut Maker
- 3D foam tape
- Tape runner
- 6×6 inch card base
- Acetate
- Confetti
- Dovecraft ‘Make a Wish’ puffy stickers
[cws_clubhouse design=’1065′]
Part 1: Cricut Design Space tutorial
If you’re using a Cricut machine then follow these instructions to cut the window of your shaker card using your Cricut.
1) Choose your image
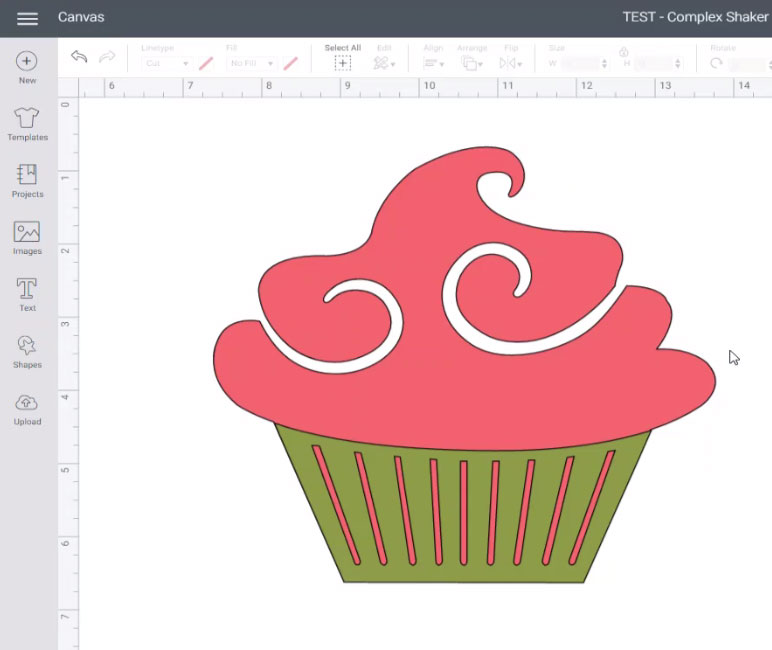
Choose the image you want to use for the shaker card.
It’s best to choose a fairly simple image without more than about 3 layers, that has a large area which you will use for the shaker part of your card.
I have chosen this cupcake design.
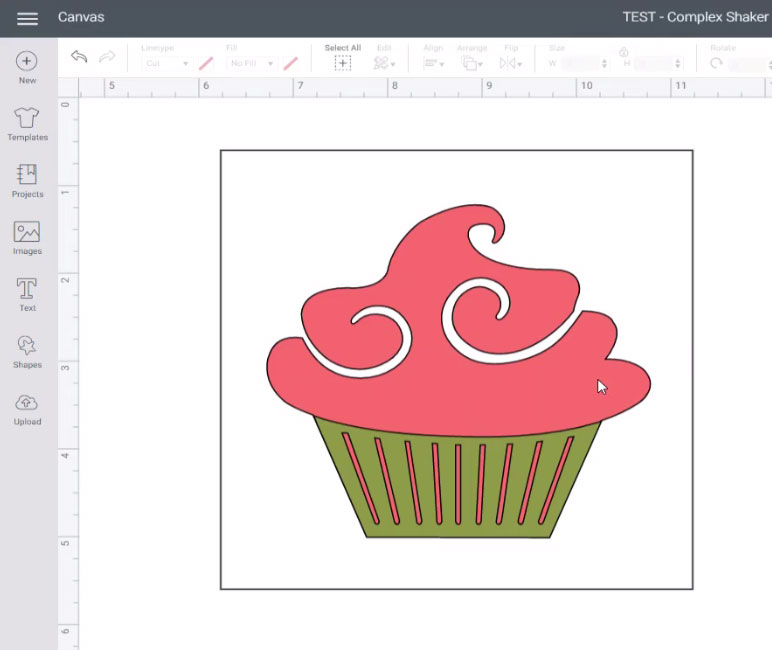
2) Create a square
Go into “Shapes” and make a square.
Resize it to how big you want the shaker panel to be on your card.
I am making a 6×6 inch card and I want a border of my base card around the edge, so I’ve made the square 5×5 inches in Design Space.
Position your image on top of the square and resize it as appropriate.
You can use the “Align” button along the top menu and then click “Center” from the dropdown list to perfectly align the image in the middle of your square.
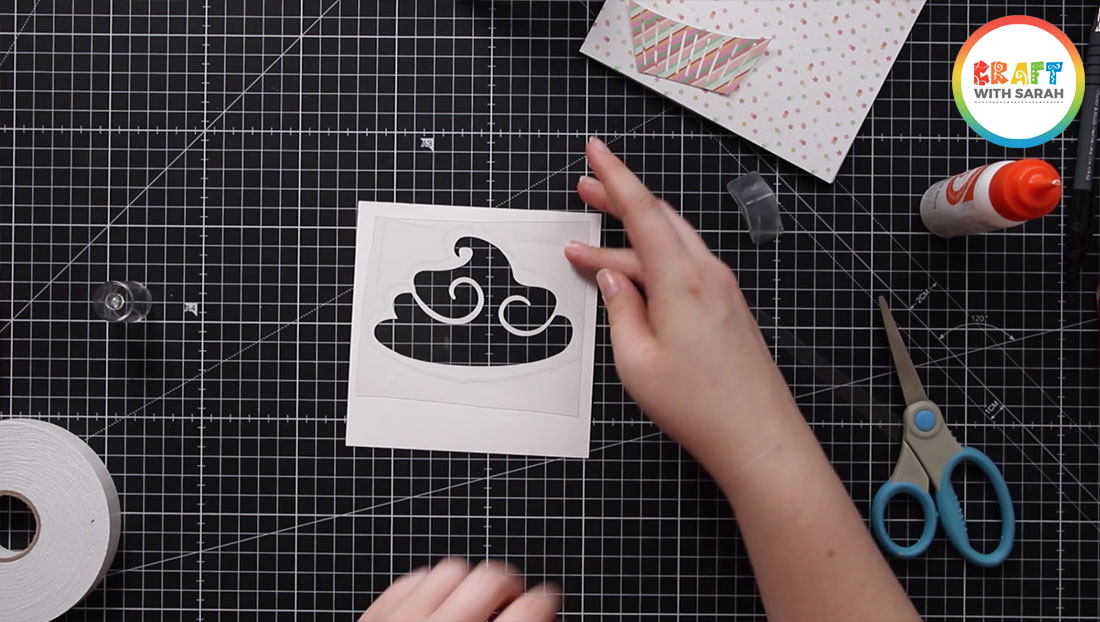
3) “Slice” out your shaker window
Depending on the image you have chosen, you may need to do a little bit of extra work before you can cut the card.
For example, if I had used this cupcake image as it was when I added it, it would have cut the whole cupcake shake (icing and cake/wrapper) out of my square, but I only wanted to cut out the icon part.
Use the “Slice” and “Contour” tools to format your image so that it will only cut out the parts you want to turn into a shaker.
Watch the video above for step-by-step instructions on how to do this.
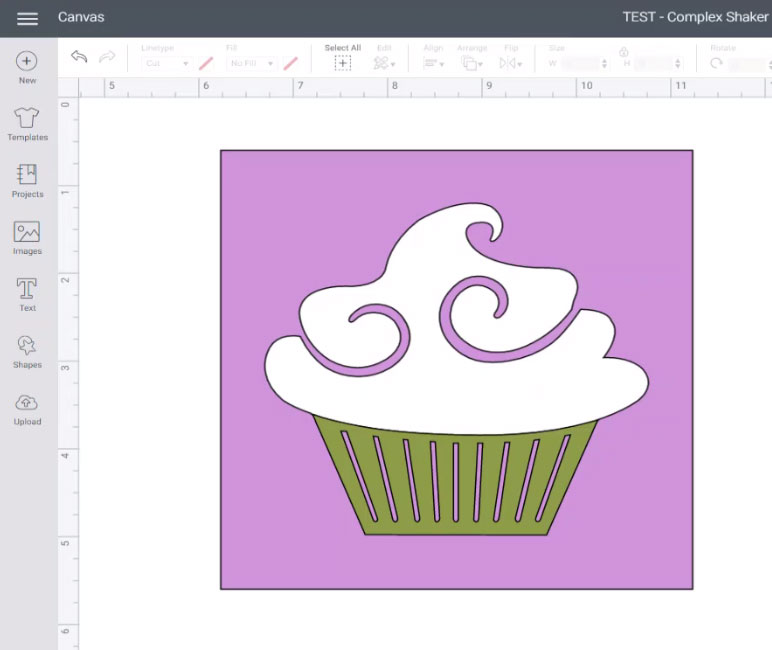
I’m going to cut the cupcake wrapper from a different colour of card and stick it on top of my card, so I need to make sure I cut that out as well.
When you’re happy with how your shapes are looking, click the “Make It” button and follow the instructions to cut out the shapes with your Cricut machine.
Part 2: How to assemble a shaped shaker card
Now that you have cut the window and any other parts of your shaped card with your Cricut machine, it’s time to start making the card.

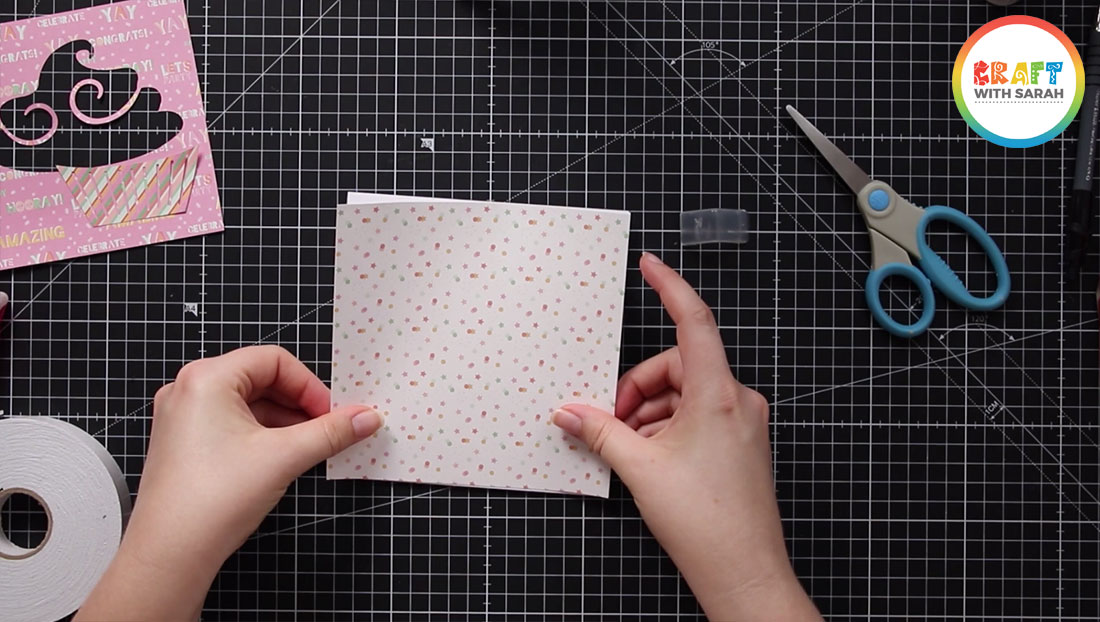
4) Decorate your base card
Decorate the base of the card that you are using. I wanted to keep mine quite simple, so I just cut a 6×6 piece of patterned paper and used double-sided tape to attach it to my 6×6 inch card blank.
5) Add the acetate
Cut a piece of acetate slightly larger than the gap that you cut out from your square and then use glue to stick it to the back of the card piece.
You don’t need to worry about being neat with how you cut the acetate – as long as it covers the gap in the middle without overlapping the outer edges of the square, it’s fine.
Try not to leave any gaps in the glue when sticking, as that might cause issues when you have added the embellishments to the middle of your shaker card if they are small as they may try to escape through the holes.
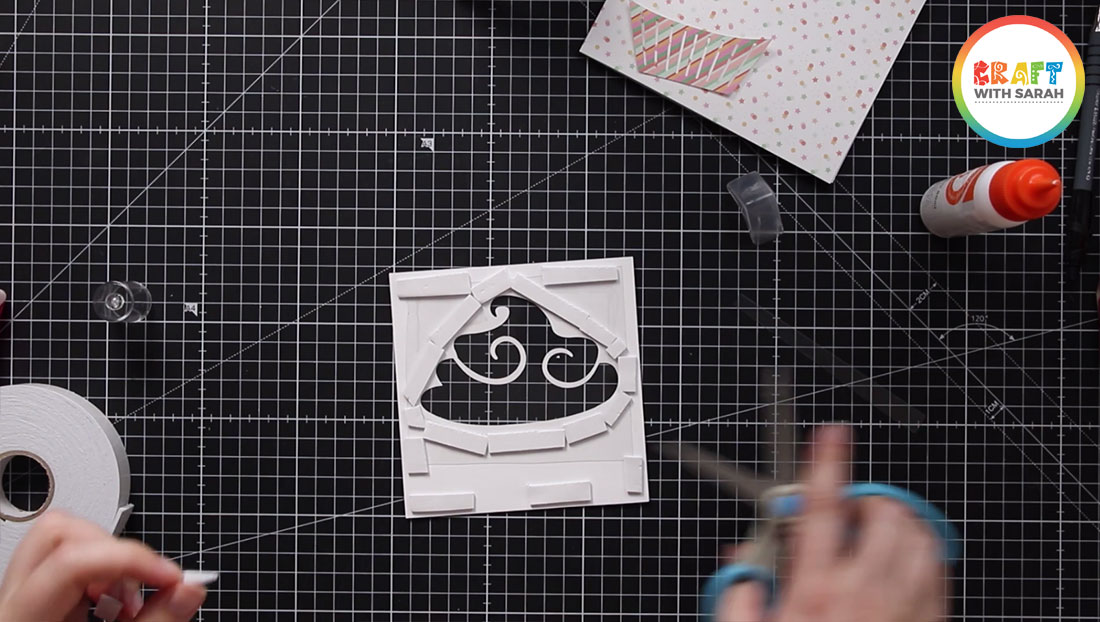
6) Add foam tape
Cut pieces of foam tape and stick them around the edges of the cutout of your square.
For best results, follow the outline of your shape as closely as you can.
If you need to, add some pieces of tape the the corners and edges of the square to create stability.
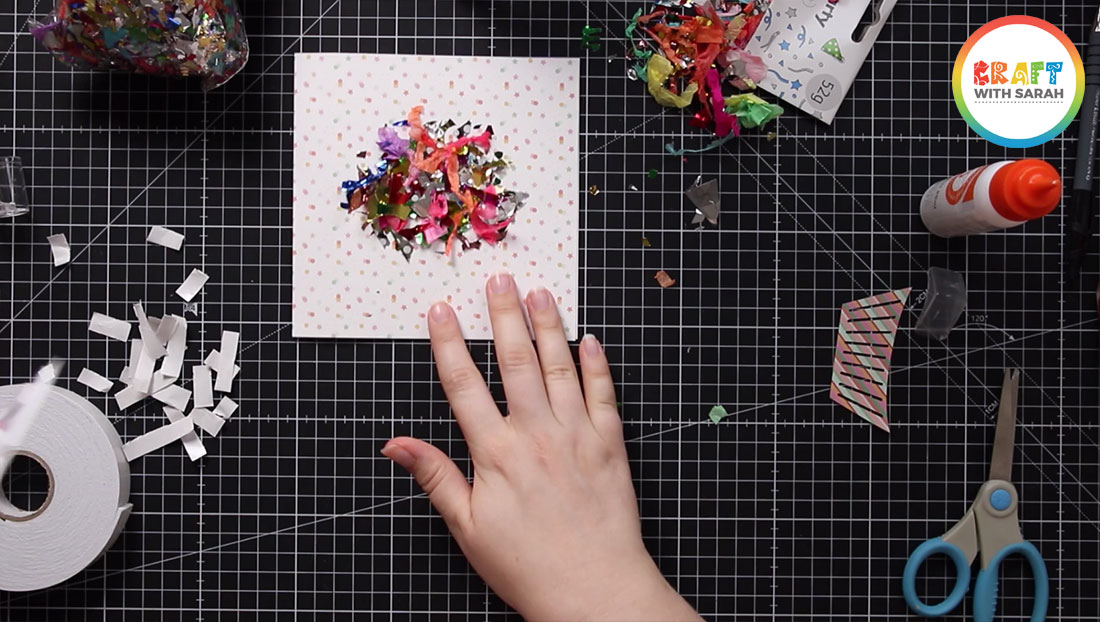
7) Add shaker embellishments to your card
Choose your shaker embellishments and add them to the middle of your base card.
Spread them out so that the pile doesn’t get too tall, otherwise the shaker window won’t fit in top.
I’m using confetti in my card.
You *can* use glitter, but I don’t recommend it as it becomes very “static” inside the card and can stick to the acetate rather than producing the nice shaker effect that we’re aiming for.
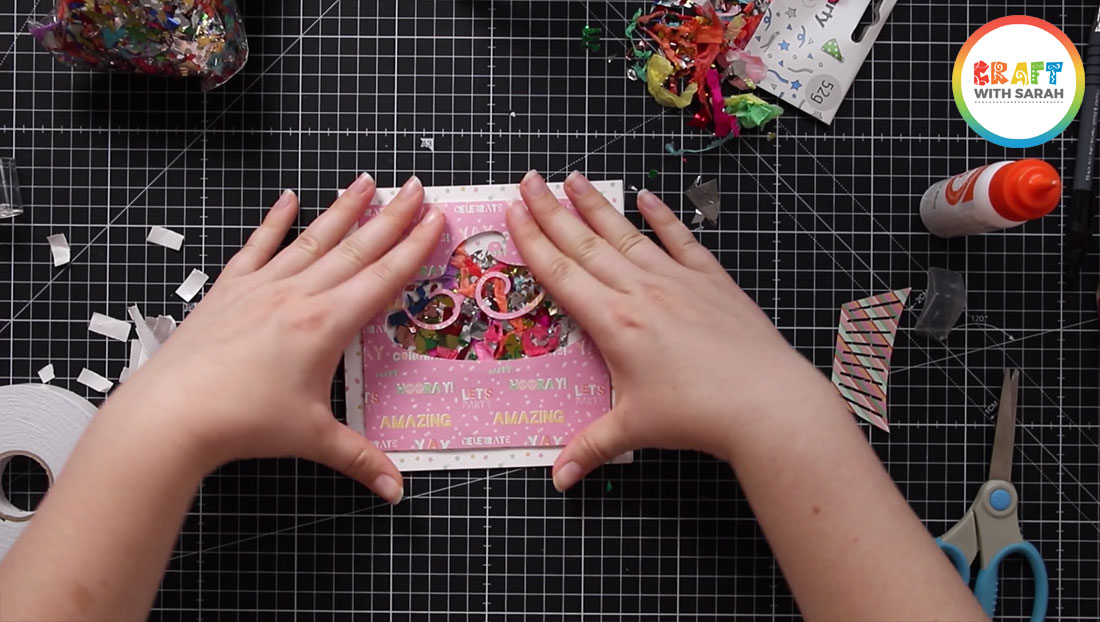
8) Stick on the acetate window
Peel the top layer of paper off of the foam tape to reveal the sticky top.
Stick the window piece of card on top of your main card.
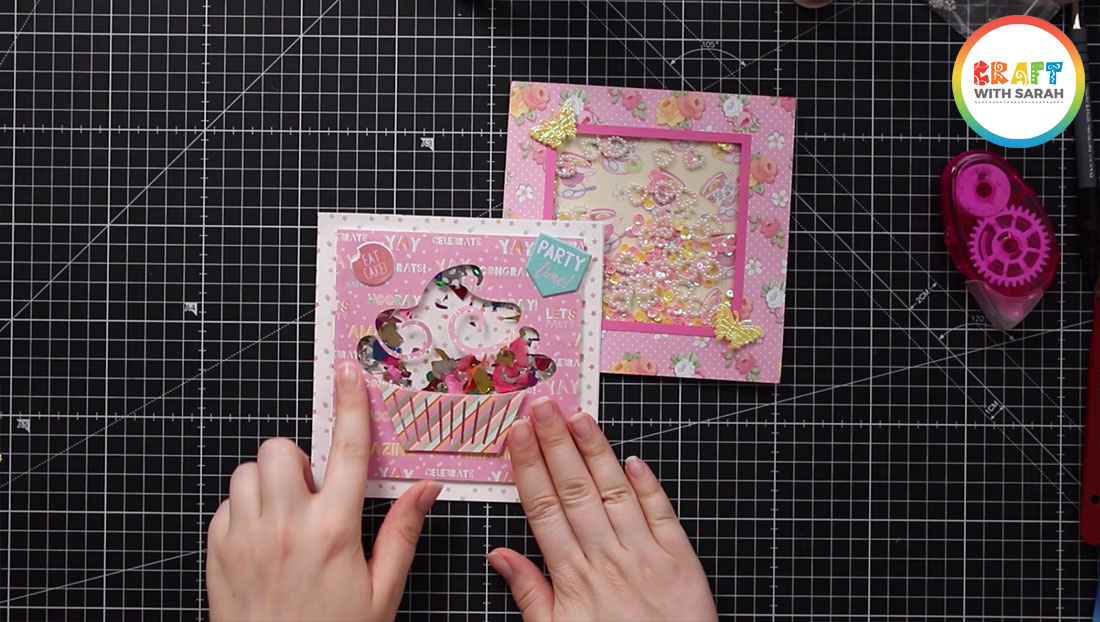
8) Add your other cutouts and decorate the card
If you cut any other parts of the image earlier, add them now.
I stuck the cupcake wrapper to my card using 3D foam pads to give it some depth.
I then finished the card with a couple of birthday themed “puffy stickers”.
I hope that you enjoyed this tutorial on how to make a shaped shaker card.
Don’t forget, this is only Part 2 in a 4-part series on shaker cards. Check out the other tutorials below:
- Part 1: Simple shaker cards
- Part 2: Shaped shaker cards
- Part 3: Complex shaker cards
- Part 4: Rainbow Shaker Card
Once you have done this technique once, it becomes much easier.
There are endless possibilities at creating shaped shaker cards using the images in Design Space and Cricut Access.
For example, here’s another shaped shaker card I made for Christmas using a fun multi-shape cutout image from Cricut Access:

Happy crafting,
Sarah x

