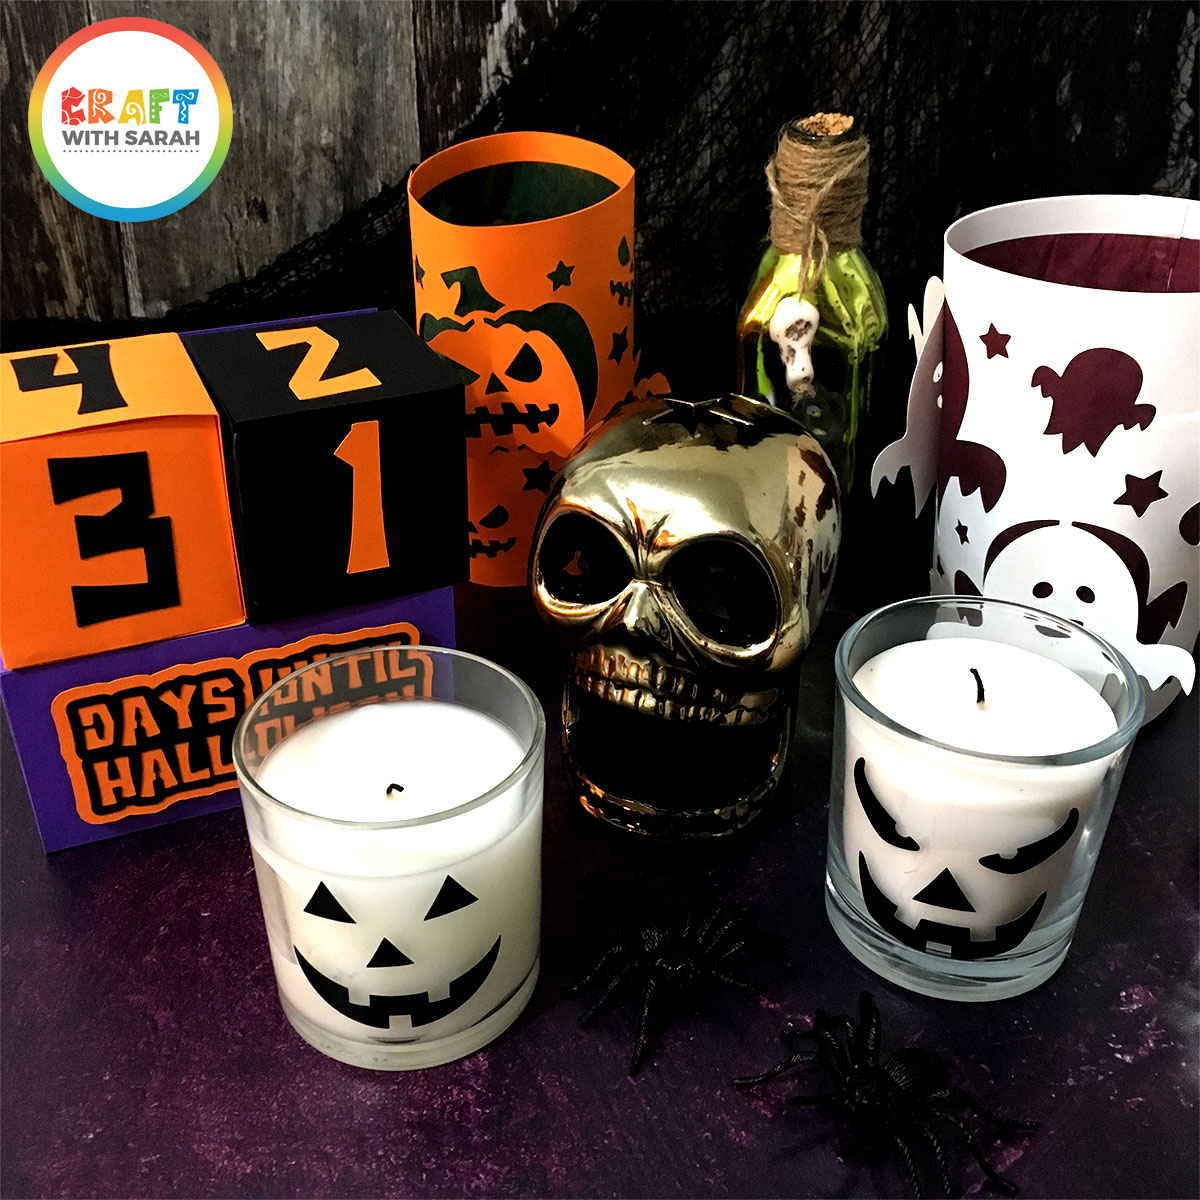
Make Pumpkin Face Candles with Free SVGs

Customize boring store-bought candles for Halloween with these cute pumpkin faces.
This is a really quick but SUPER cute Halloween Cricut craft to make for your Halloween decorations this year.
Find out how to make them below…
Contents:
Please note that some of the links included in this article are affiliate links, which means that if you click through and make a purchase I may receive a commission (at no additional cost to you). You can read my full disclosure at the bottom of the page.
Make your own customized candles for Halloween
One of the best things about a Cricut machine is that it lets you customize objects REALLY easily.
For this tutorial, I’ll show you how to use vinyl to add jack-o-lantern faces to store bought candles in glass jars.
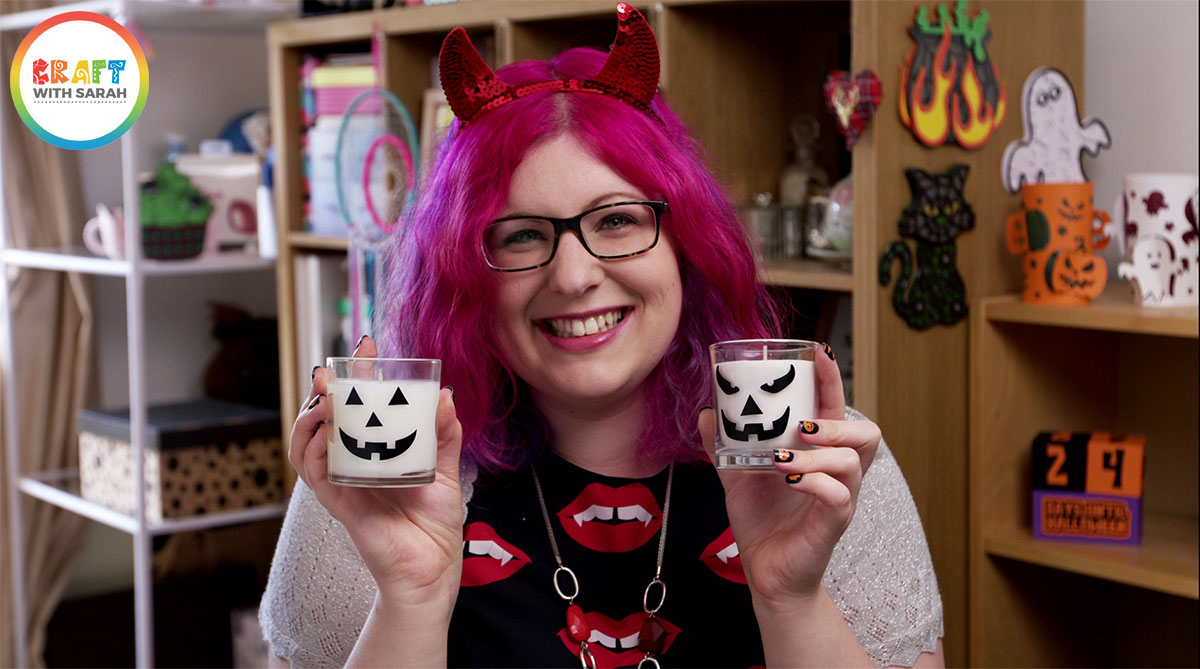
Video tutorial for pumpkin face candles
Watch this step-by-step video to find out how to make these cute Halloween candles.
Materials list for pumpkin face candles
- A digital cutting machine such as a Cricut Maker or Cricut Explore
- A light-grip Cricut mat
- Candles in a glass jar (I got mine from Tesco for about £2 each)
- Black removable or adhesive vinyl
- Free pumpkin face SVGs
Free pumpkin face SVGs
There are not one, not two but FIVE different pumpkin face designs to choose from.
Download the Free Cutting File
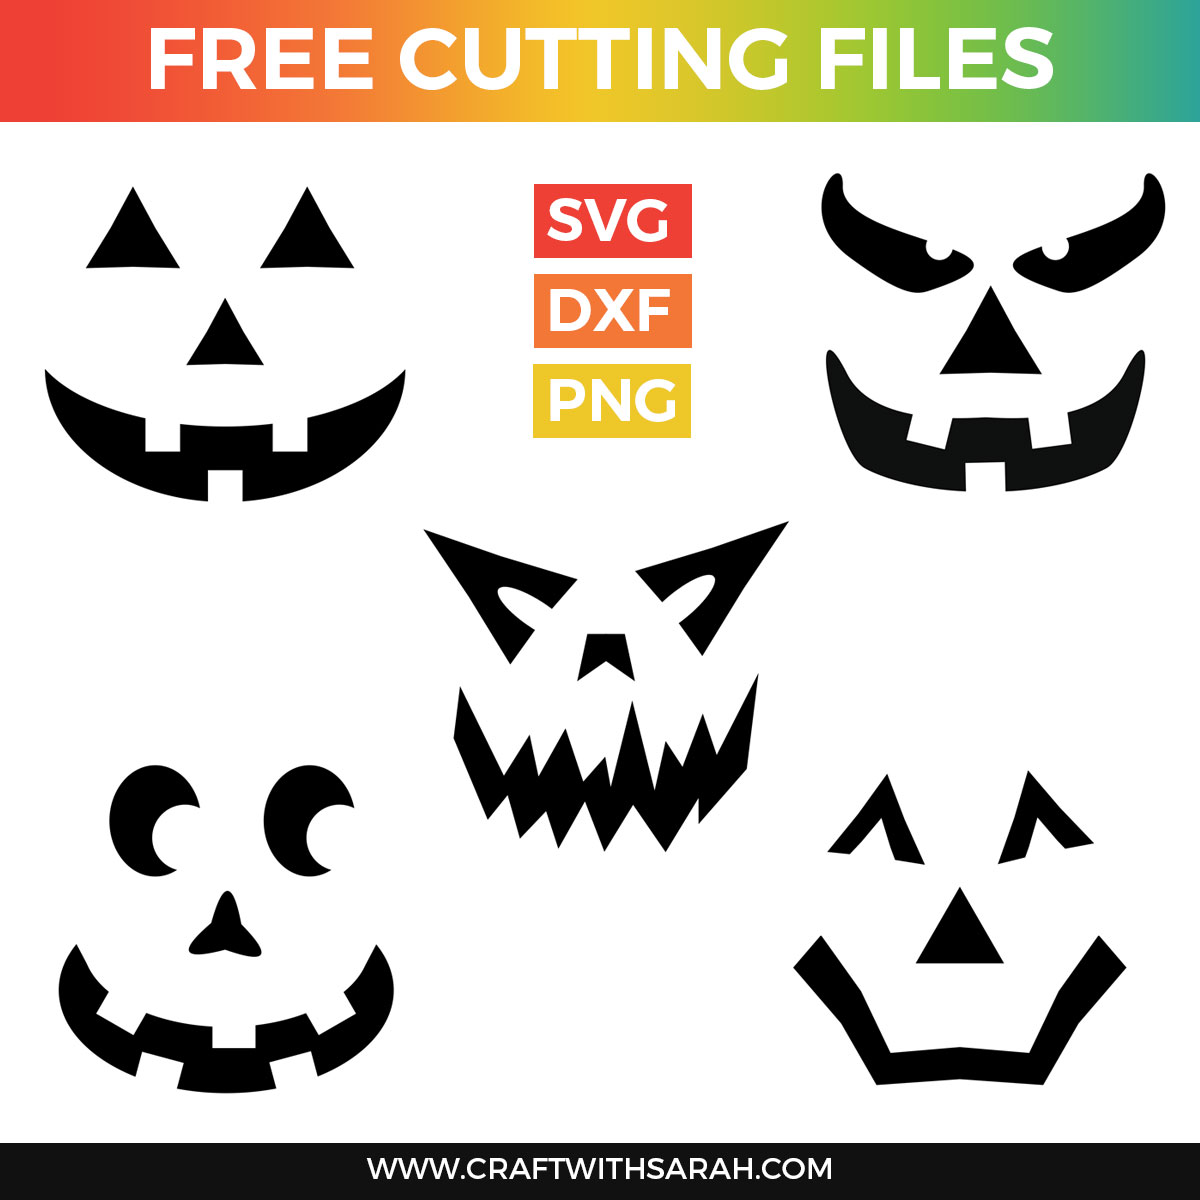
Please login to your account to download this file.
TERMS OF USE:
You may sell finished, handmade physical craft items that you have made using this product but must not sell or share the digital files. Read full terms of use
How to make pumpkin face candles with a Cricut
Step 1) Choose your candles
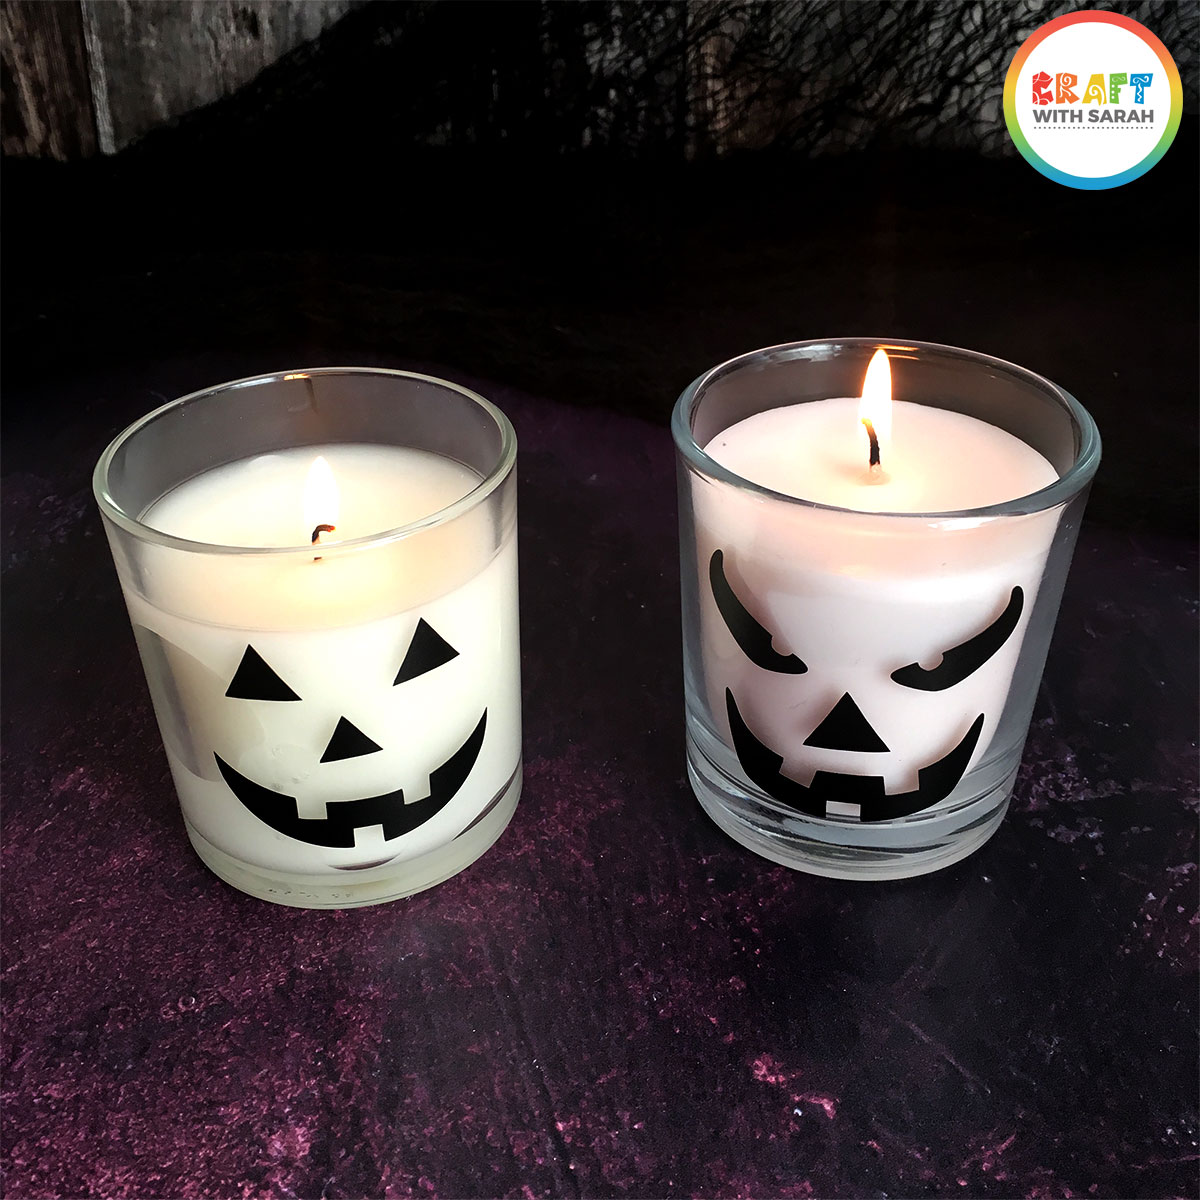
Here are my candles that I’ve chosen for this project.
I got these two candles from Tesco, which is a grocery store in the UK, and I think I paid £2 each for them so they were quite affordable.
I’ve got white candles as that’s all I could find, but this would work really well with orange candles to make them look more like little pumpkins.
You’ll want to choose candles in glass jars so that you’ve got something sturdy to stick the pumpkin faces to that isn’t part of the candle itself.

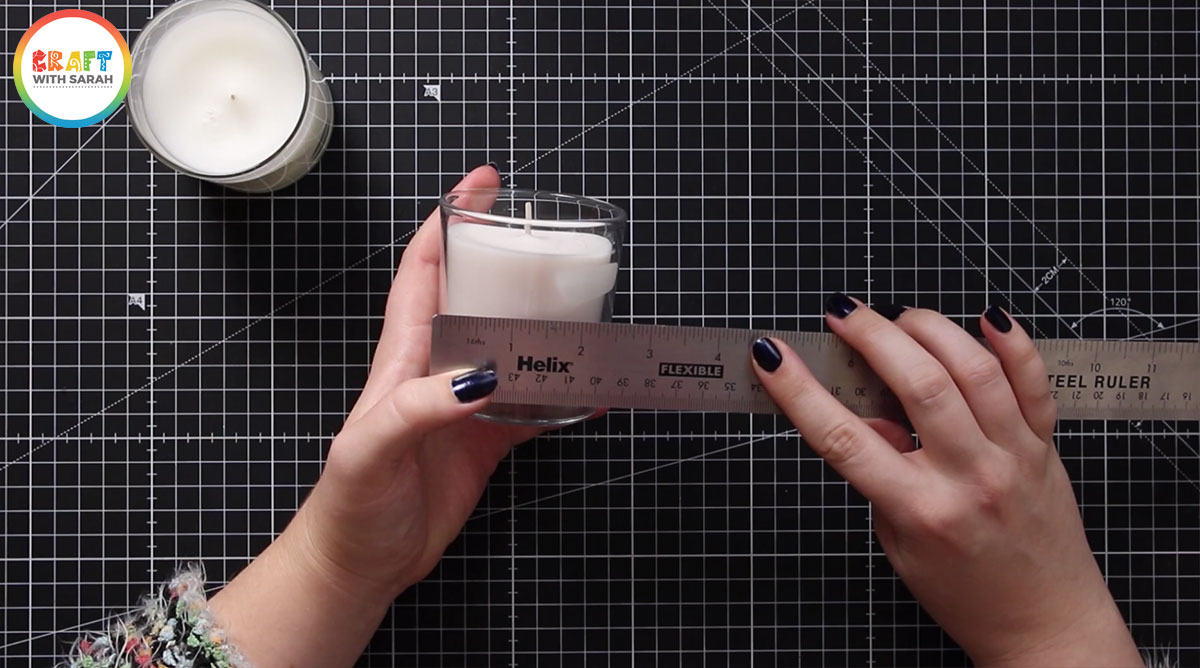
Step 2) Measure the candles
We need to decide how big to make the pumpkin faces, so take a ruler and hold it up to your candle.
Place the ruler against the side to determine how big to size the pumpkin faces in Design Space.
For this one, I think about two inches will be fine. The second candle is almost the same size, so two inches should work well for that one too.
For both candles, I want to be able to see the whole of the pumpkin face without it bending too much around the sides.
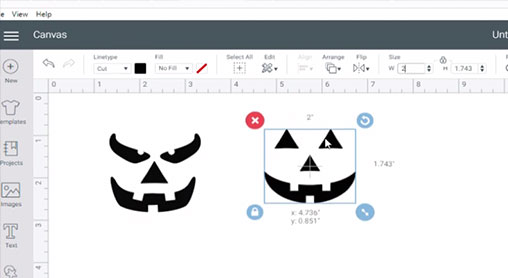
Step 3) Cut the pumpkin face SVGs
Open up Design Space and upload the free pumpkin face SVGs.
Resize each design to the size that you measured earlier.
Cut the designs from black adhesive vinyl and then weed away the excess vinyl to leave just the faces on the backing paper.
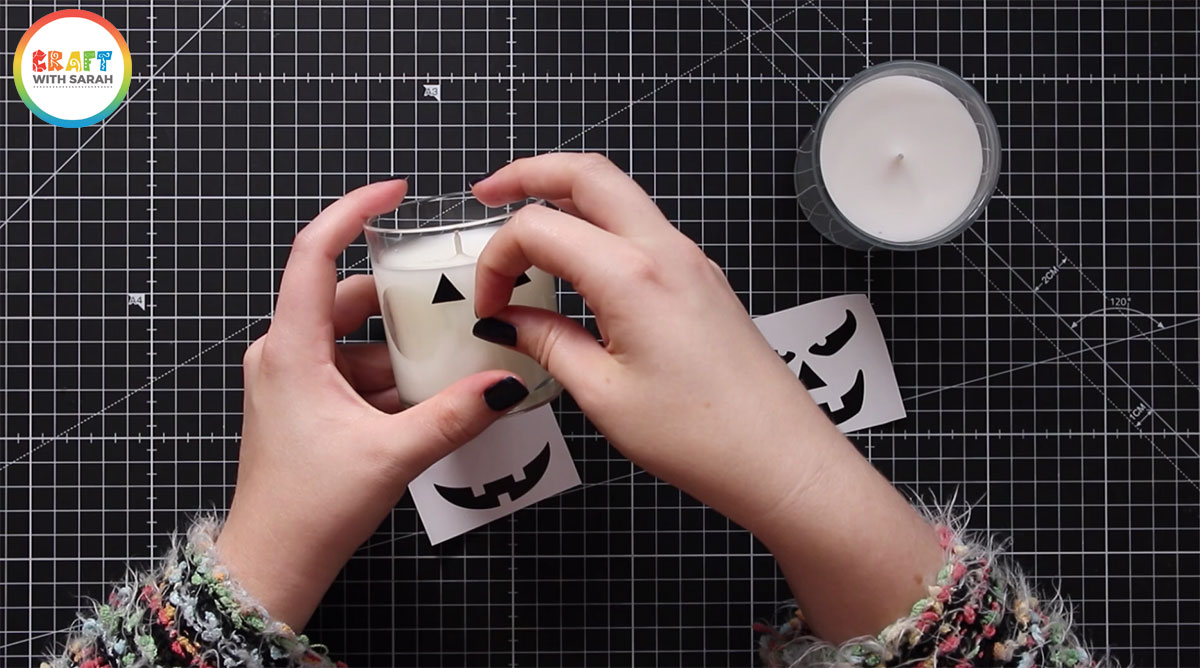
Step 4) Stick the vinyl onto the candles
You could use transfer tape to move all the pieces to the candles, but as there aren’t very many pieces I think it will be easier just to stick them on by hand.
Peel each piece of the pumpkin face off of the backing paper and stick it onto the candle. Be sure to press down firmly to ensure a good stick.
And then here we are – our two finished candles for Halloween! Wasn’t that easy?
I hope that you enjoyed this super-quick tutorial on how to customize store-bought candles with your Cricut machine.
Happy crafting,
Sarah x

