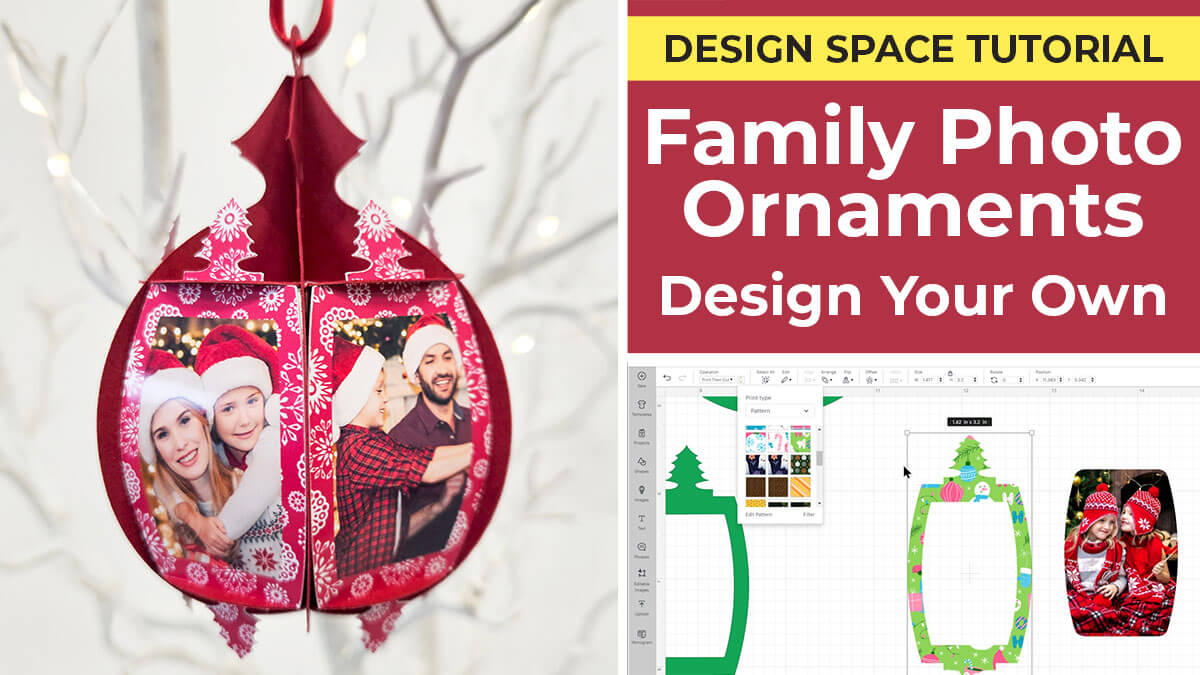
Custom Family Photo Ornaments with Print Then Cut
Welcome to my third tutorial on making 3D papercraft ornaments with a Cricut Machine.
In the first tutorial I showed you how to make slot-together ornaments using some pre-made designs which I created for you.
The second tutorial was on how to add custom pictures and decorations into the side panels to make custom ornaments.
For this tutorial, we’re making family photo ornaments with print then cut.
To do this, you’ll need to download the free baubles templates that are available further down this page. There is a circular/round ornament template and also an oval shaped one for if you want to make slightly different shaped ornaments.
In this tutorial, I’ll show how to add your favorite photos into the side panels of the ornament AND how to add festive patterns into the edges for even more Christmas cheer!
Let’s get started!
Materials supply list
Here is a list of the materials that I used to make this project.
Please note that some of the links included in this article are affiliate links, which means that if you click through and make a purchase I may receive a commission (at no additional cost to you). You can read my full disclosure at the bottom of the page.
- Cricut machine
- Light blue Cricut cutting mat
- Coloured card
- Collall All Purpose glue or similar
- Needle tip applicator bottle
- Ribbon
- Glossy photo paper
- Colour printer
This project is suitable for the following types of Cricut machine: Explore Air 2, Explore Air 3, Maker, Maker 3, Venture and Joy Xtra. It is not suitable for the Cricut Joy as they cannot do print then cut.
Video tutorial
Watch the video below to see how to design your own family photo ornaments. Keep scrolling for a written tutorial.
Written tutorial (with photos!)
Here’s how to design your very own family photo Christmas ornaments using Cricut Design Space
Step 1) Download the cutting file(s) & unzip the downloaded folder
Download the Free Cutting File

Please login to your account to download this file.
TERMS OF USE:
You may sell finished, handmade physical craft items that you have made using this product but must not sell or share the digital files. Read full terms of use
Before you upload the SVGs to Design Space, you need to unzip the download folder that they come in.
Step 2) Upload the SVG file into Design Space
Open up Cricut Design Space and start a new Project.
Click “Upload” and then find your unzipped version of the downloaded files for this project.
Go into the “SVG Files” subfolder and select a design to upload.
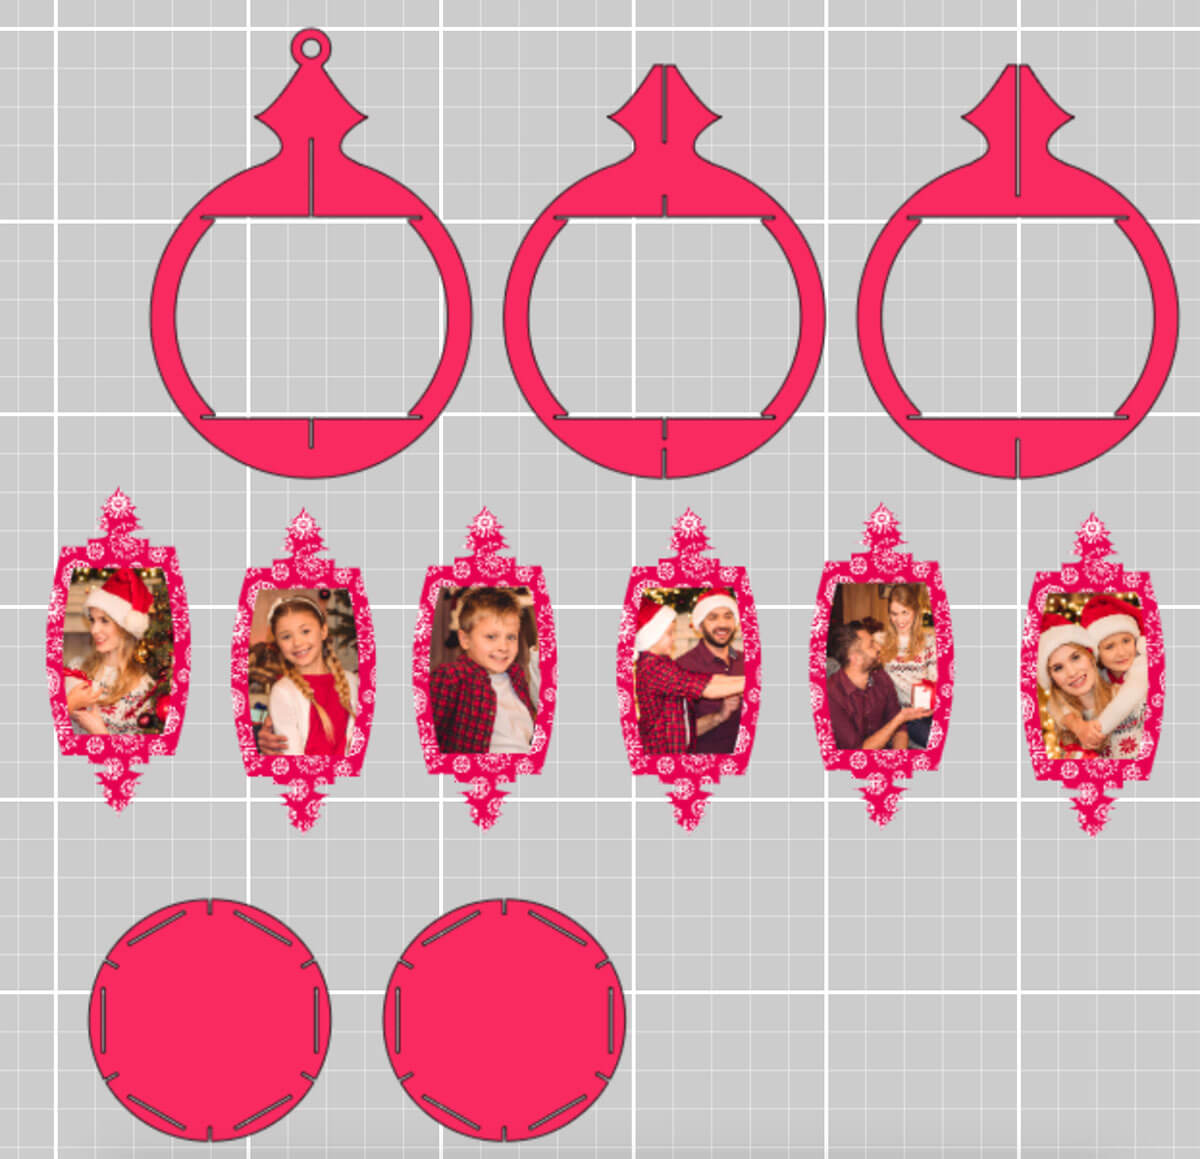
There are two different shapes to choose from – a circular ornament and an oval ornament.
Each ornament shape comes in five different versions. These have different “slots” on the ornaments to give different effects.
Choose from a gothic triangle, heart, star, Christmas tree and a circle.
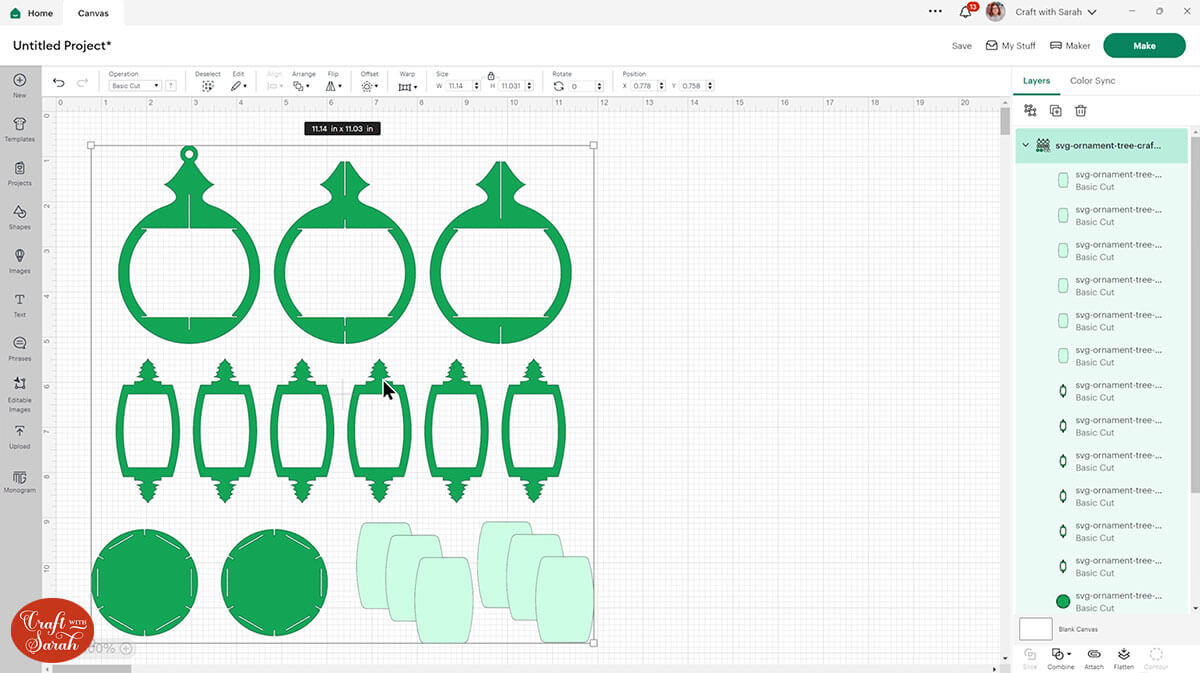
For this tutorial, I’m using the Christmas tree version of the circular ornament.
This is how it should look after you have uploaded the file:
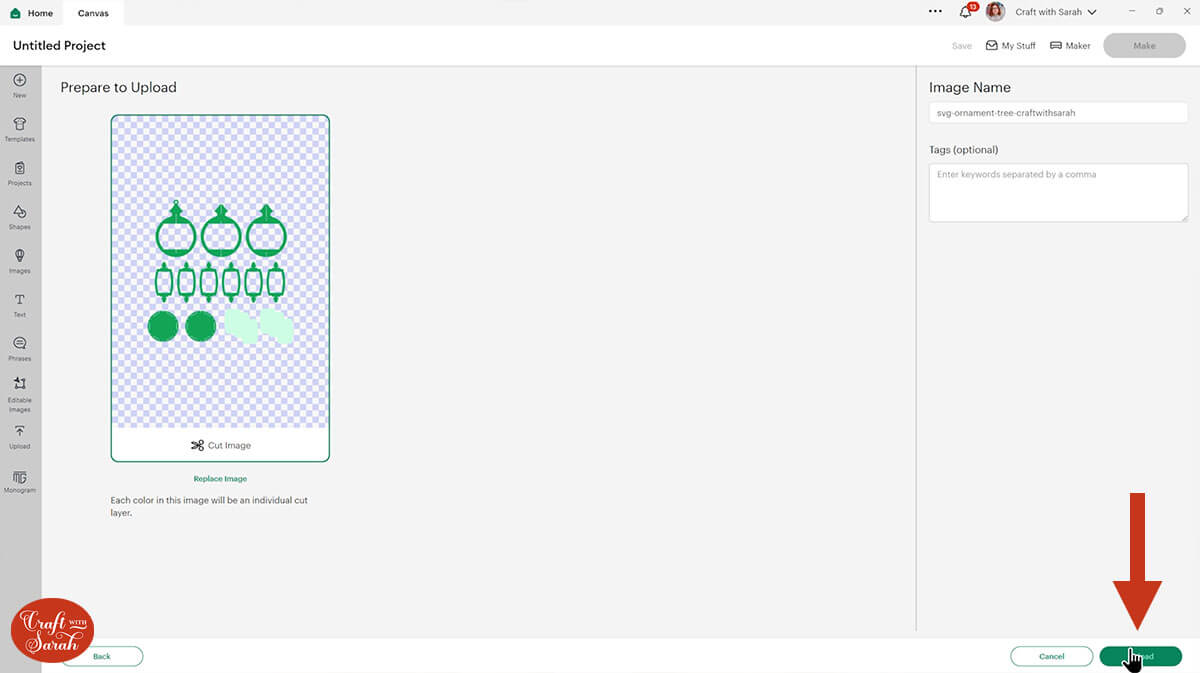
Make sure you upload the file which starts svg- in the filename!!
After uploading, the design will show in your “Recently Uploaded Images”.
Click on it and then press “Add to Canvas” to put it onto your Project.

The ornaments will load in at the correct size to make a finished decorations that’s approximately 4.5 inches tall from the top of the ribbon hold right to the bottom.
TIP: If you resize the ornaments, make sure the padlock icon above the width/height boxes is CLOSED before you resize. If it appears “open”, click it with your mouse to close it.
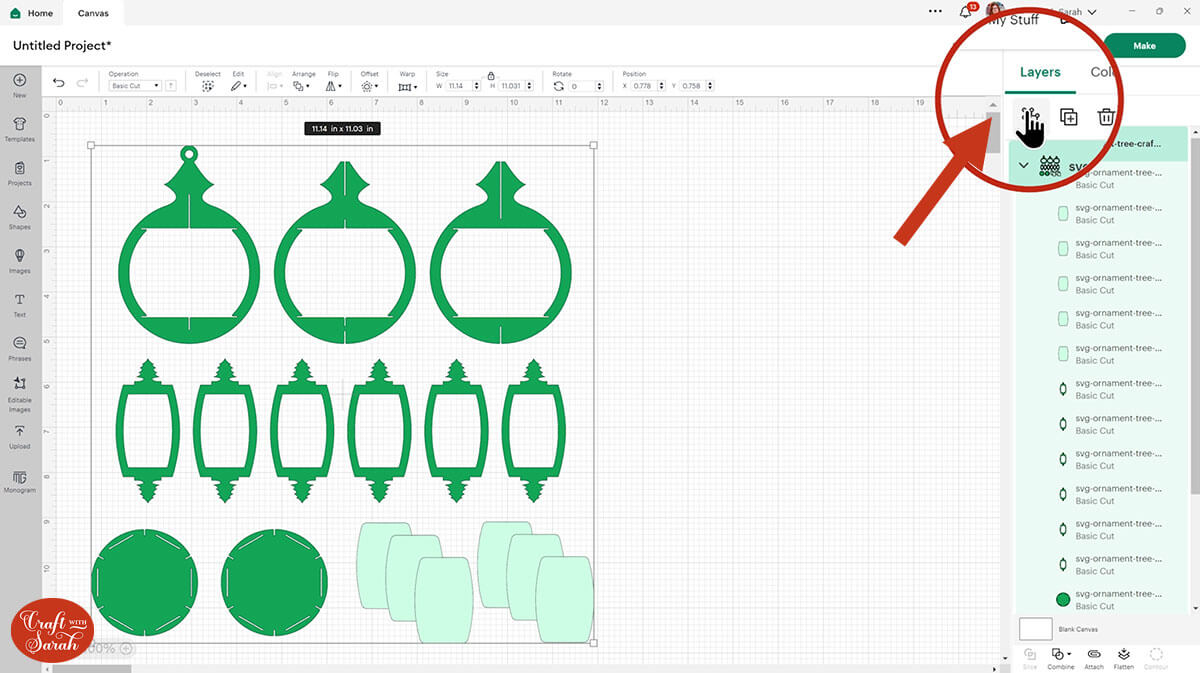
Step 3) Ungroup the layers
Click the bauble design and press the “Ungroup” button at the top of the layers panel to separate out the layers.
Step 4) Upload your photos
Click “Upload” and “Upload Image”.
Choose your photograph and choose “Complex” as the image type.
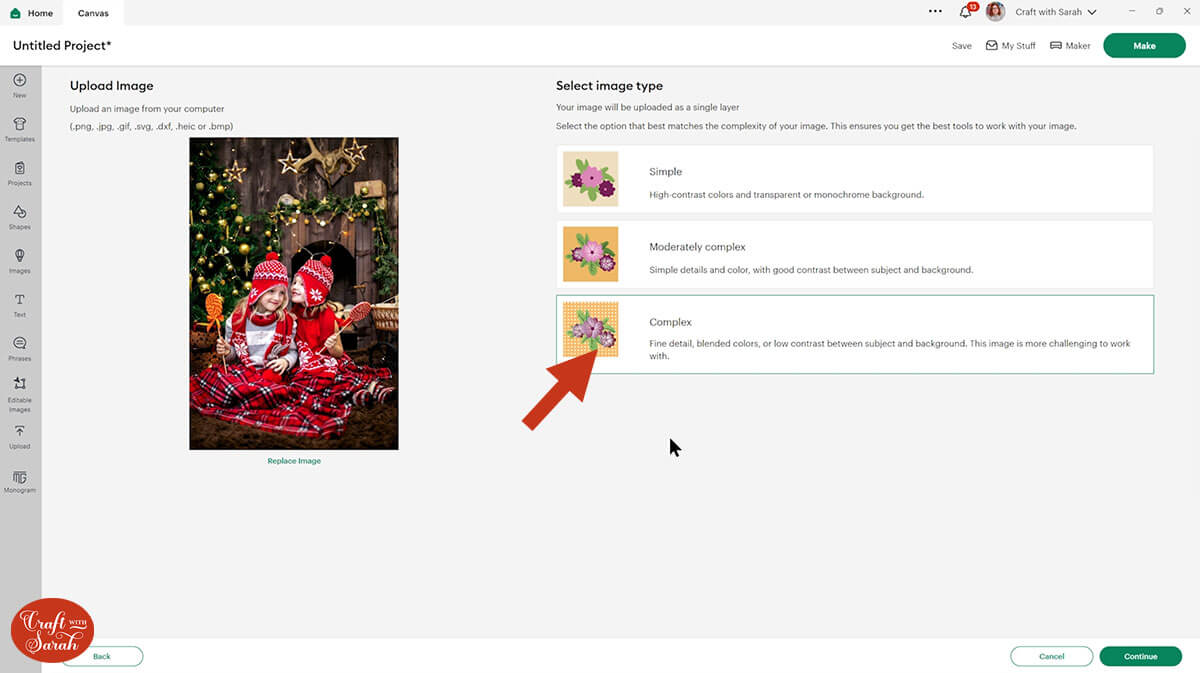
Don’t change anything on the next screen – just press “Apply & Continue”.
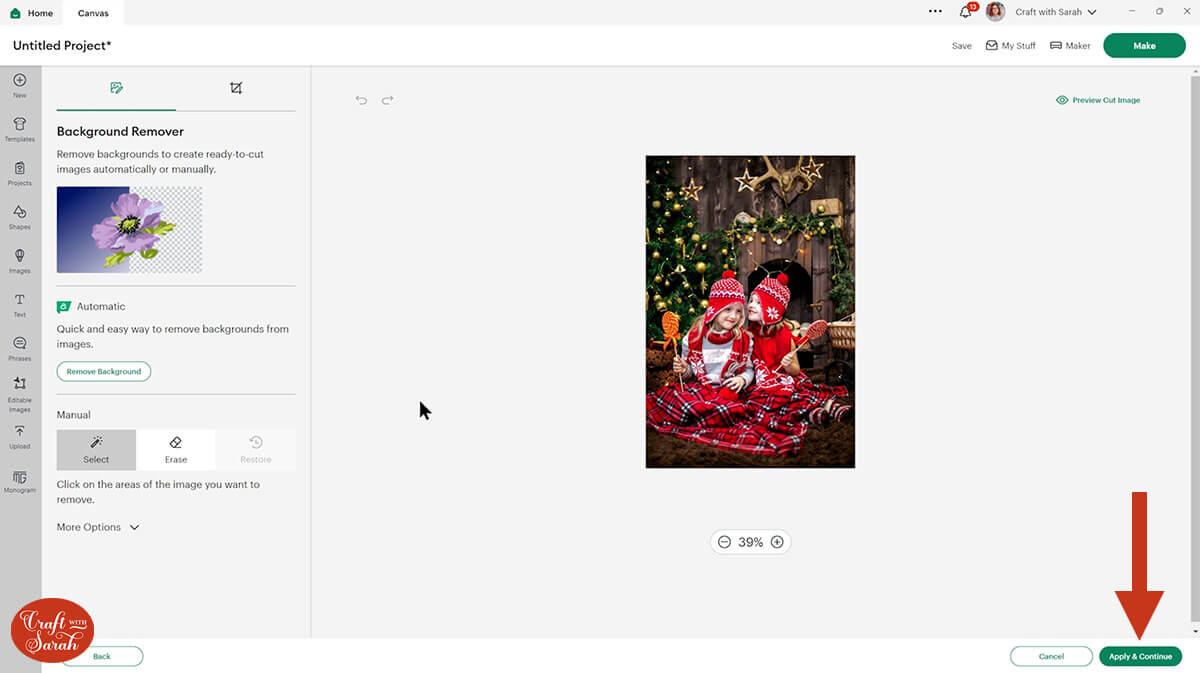
Choose “Print Then Cut Image” and then “Upload”.

Click the photo in your Recent Uploads and add it to your Canvas.
It will probably load in really big. Make it smaller so that it will be easier to work with.
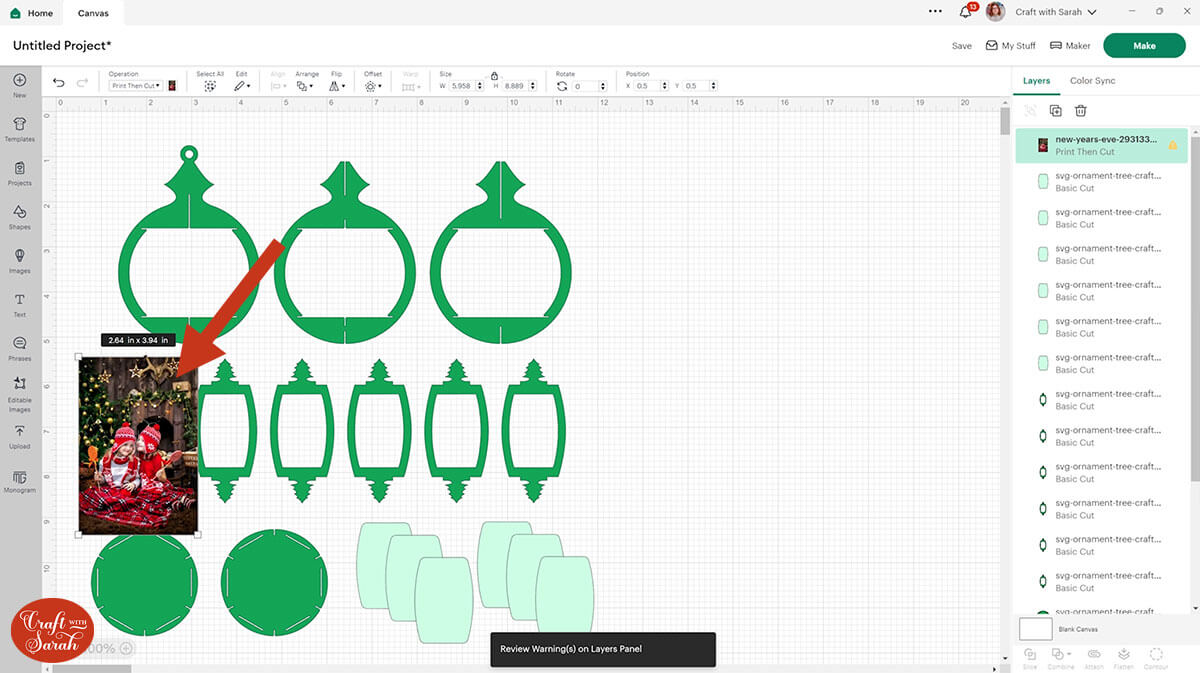
You can either upload ALL your photos now, or work one-at-a-time.
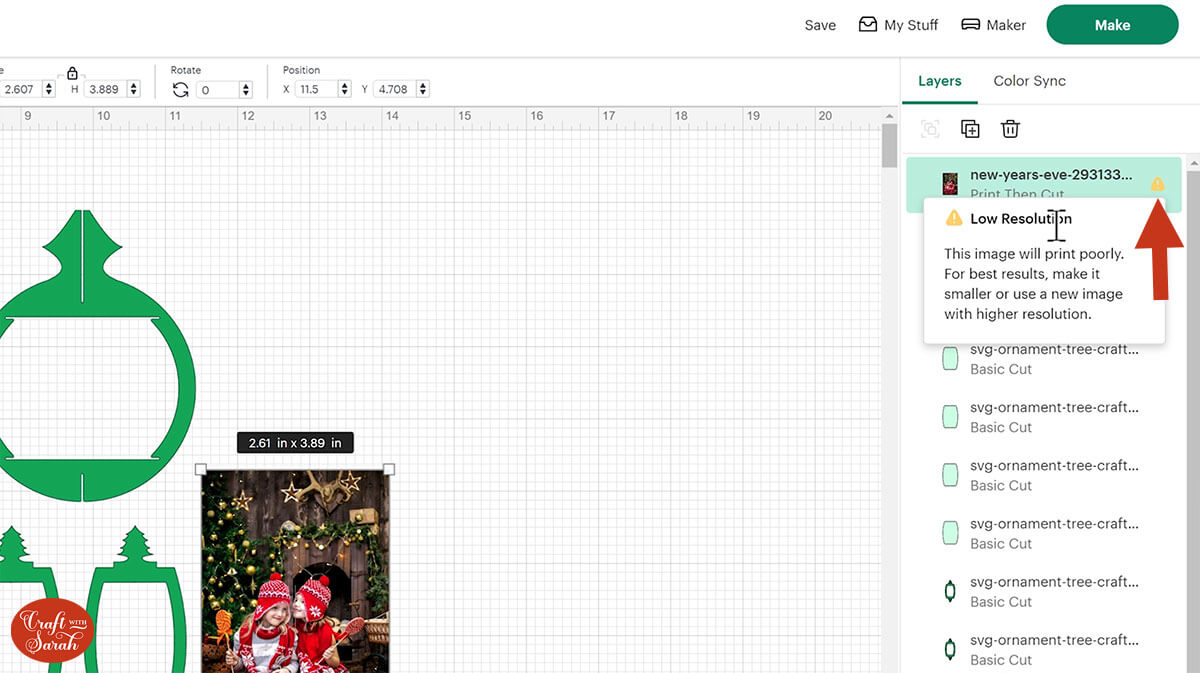
NOTE: You might see a yellow exclamation mark in the layers panel which says “Low Resolution”. You can ignore this message – your photos will print out fine.
Step 5) Create the side panels
Click on one of the inner shapes of the ornament. Click “Align” and then “Bring to Front” to move it above the photo.
Change the inner shape to a “Guide” layer in the “Operations” dropdown.
This will change it to look like a thin pink outline.
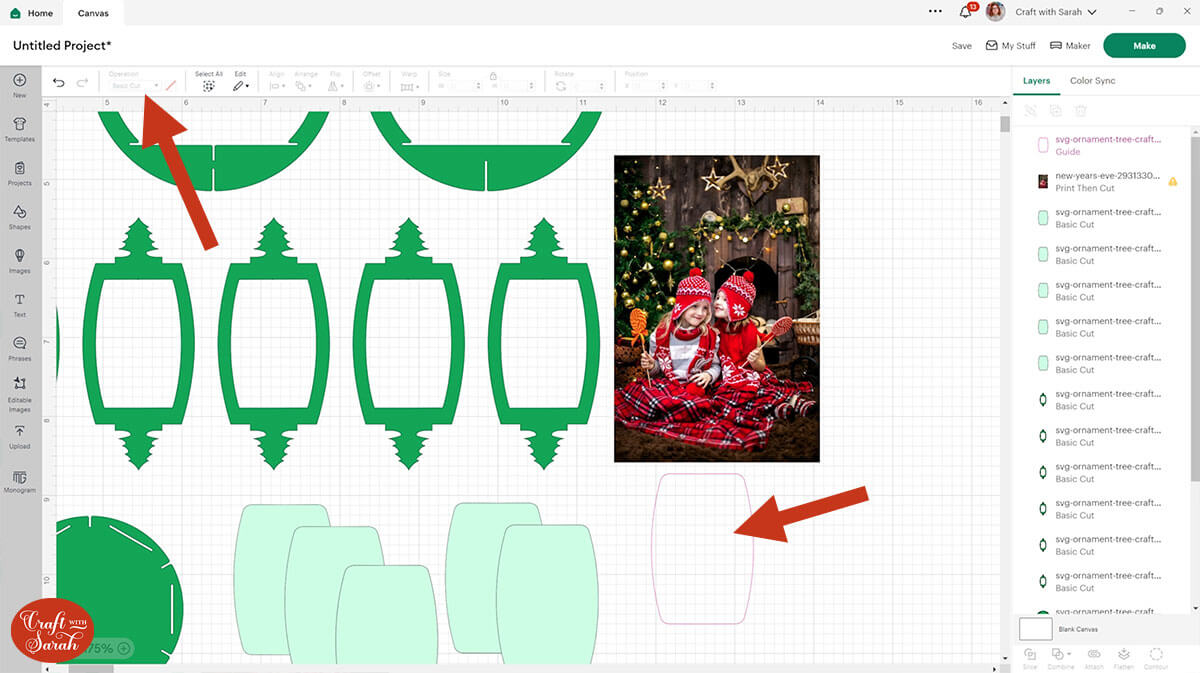
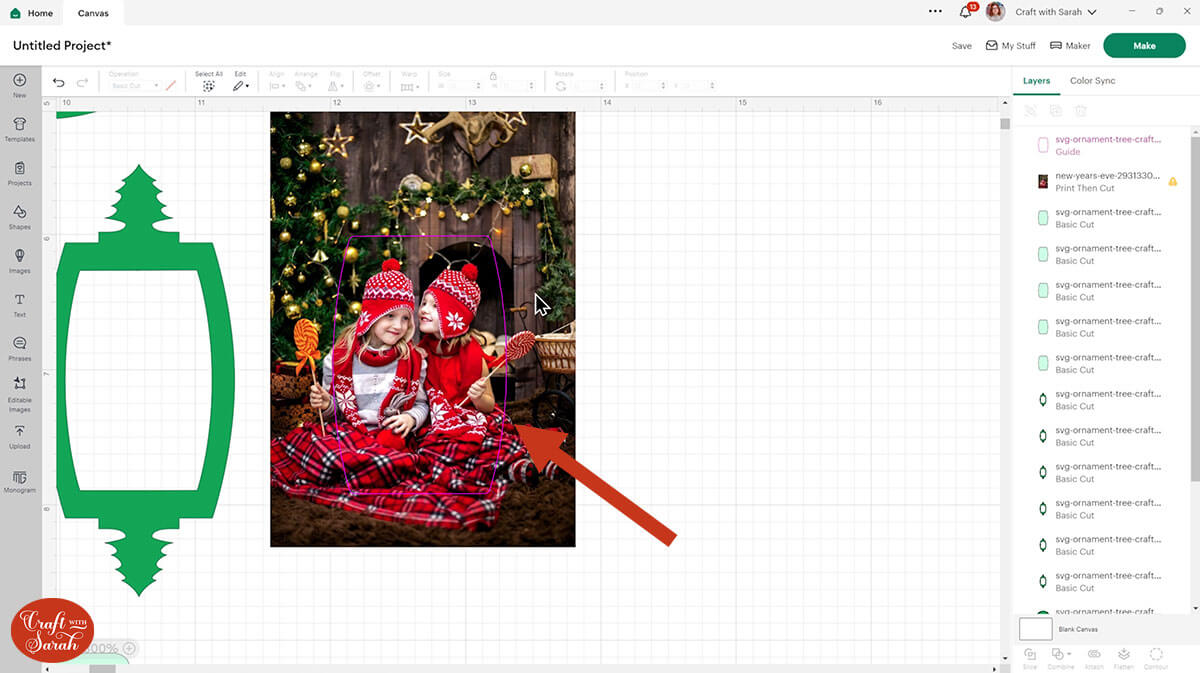
Position the pink guide over the photo.
Resize the photo so that you are happy with the part of the image showing inside the guide.
IMPORTANT: Do not make any size changes to the guide. ONLY resize the photograph.
Select the photo and the Guide layers and press “Slice”.
That will cut the Guide shape out of the photo to give you several “Slice Result” layers in the layers panel.
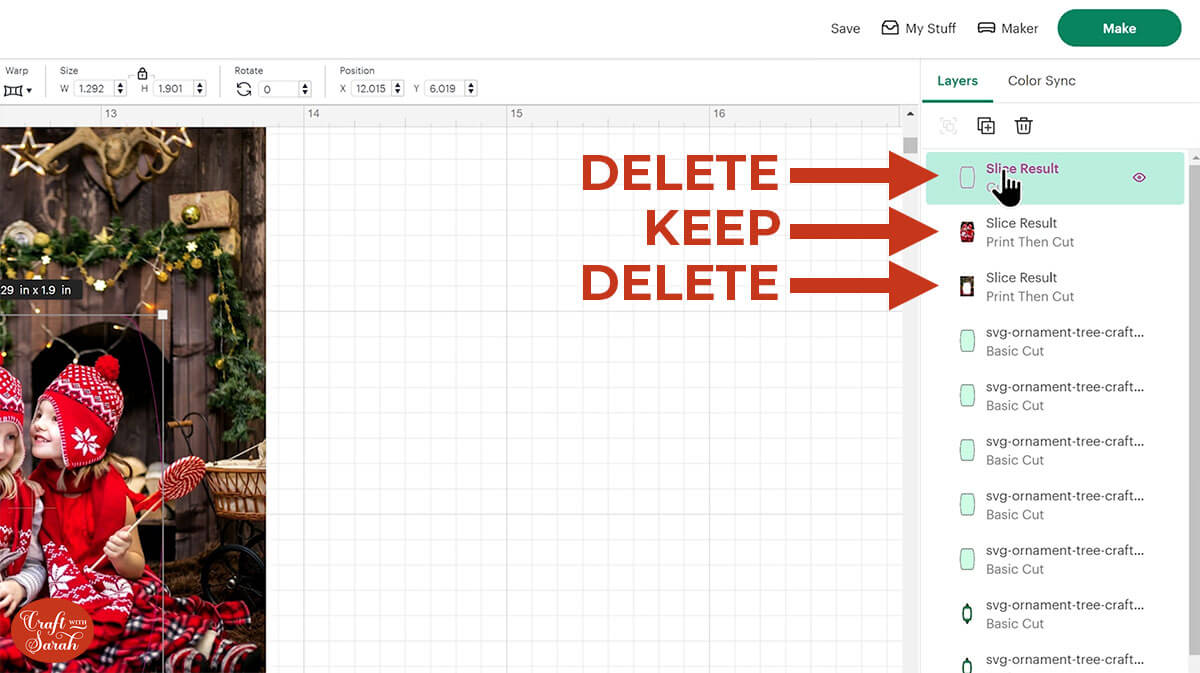
Delete the Guide layer and the outer part of the photo so that you are just left with the piece of the photo that’s been cut into the correct shape.
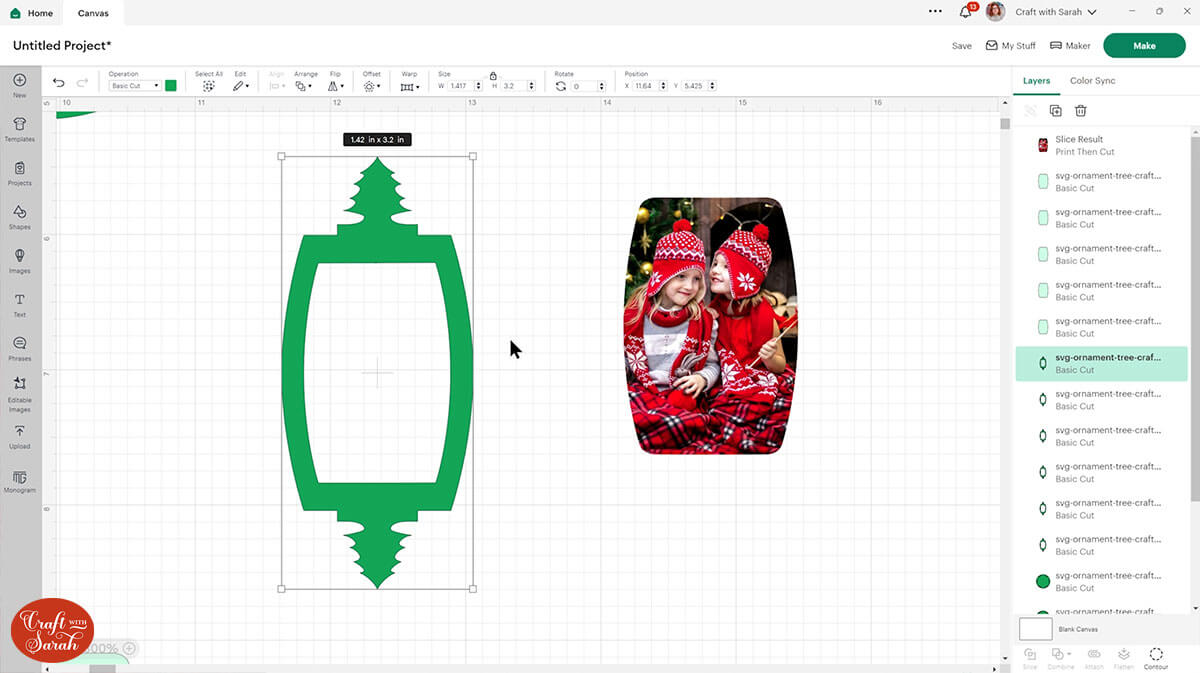
Get one of the window panels and press “Arrange” > “Send to Front” to move it above the photo in the layers panel.
Select both layers and press “Align” > “Center” to put them one-on-top of the other.
Change the colour of the window panel to match your photo.
You can keep the layers separated like this, and cut the window panels from cardstock and only print-then-cut the photos to glue inside.
OR…. you can take things one step further by adding printable PATTERNS to the window patterns!
Step 6) Add patterns into the window panels
To add a printed pattern inside the window panel, click it and then change it to a “Print Then Cut” layer under the Operations dropdown.
You can then select “Pattern” as the print type.
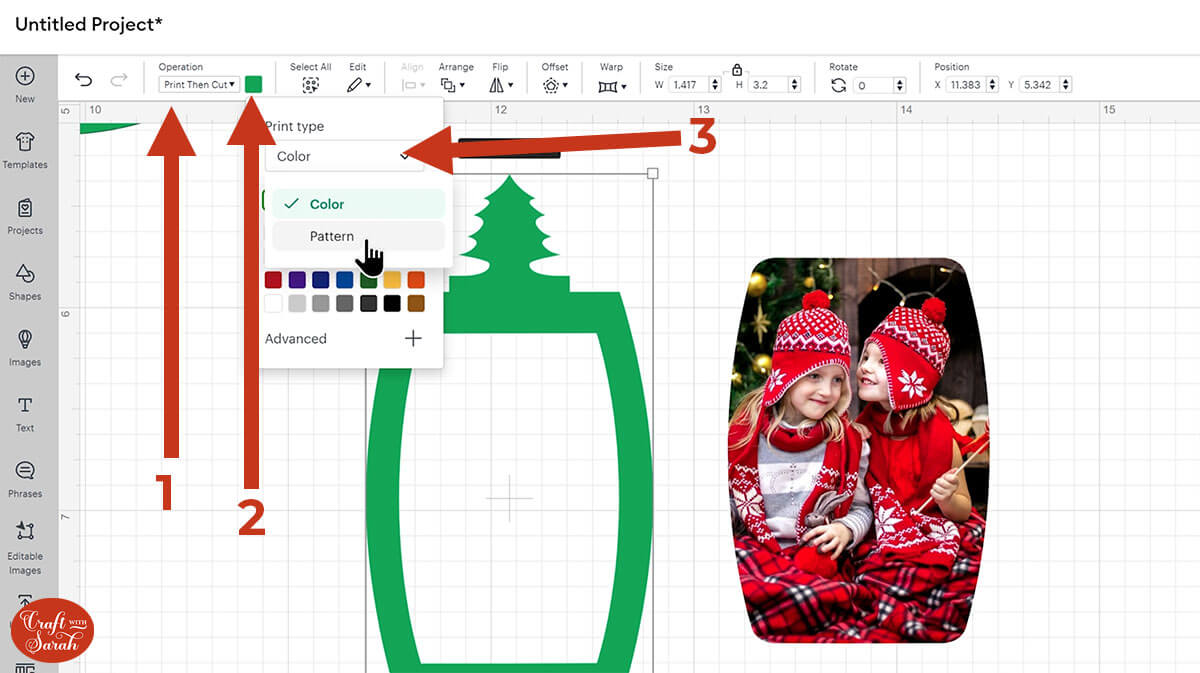
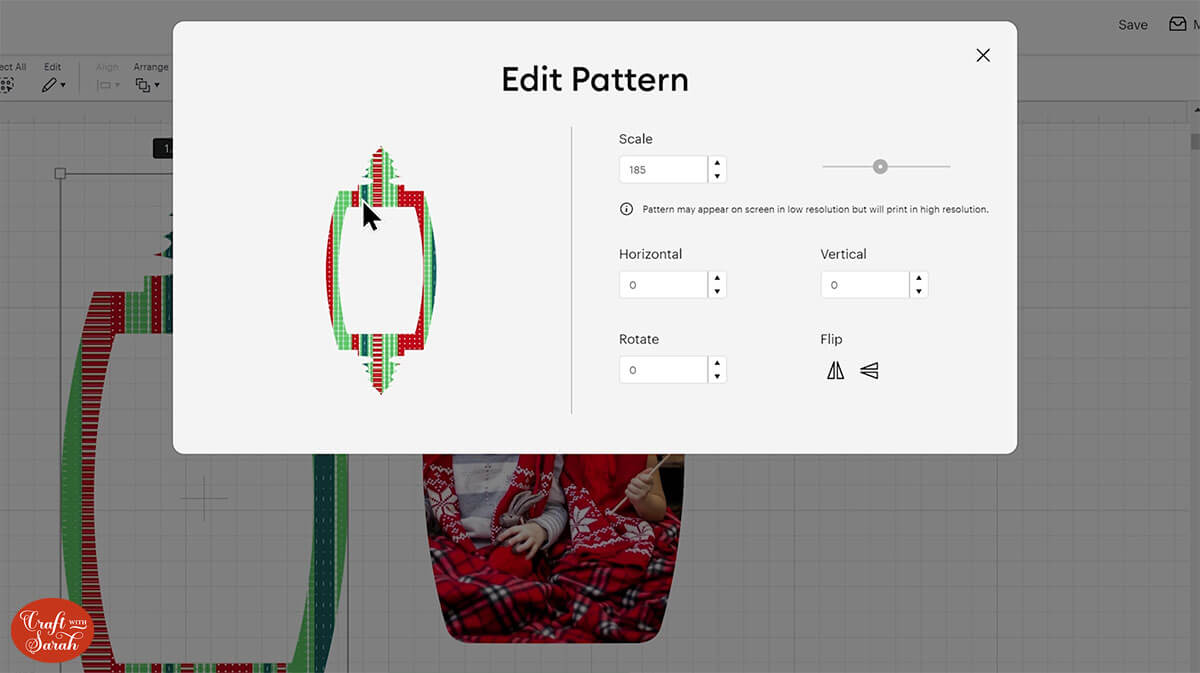
Choose a pattern. Press “Edit” to change the settings and appearance.
To upload your own pattern, click “Upload” and then “Pattern fill”.
I get my patterns from Creative Fabrica.
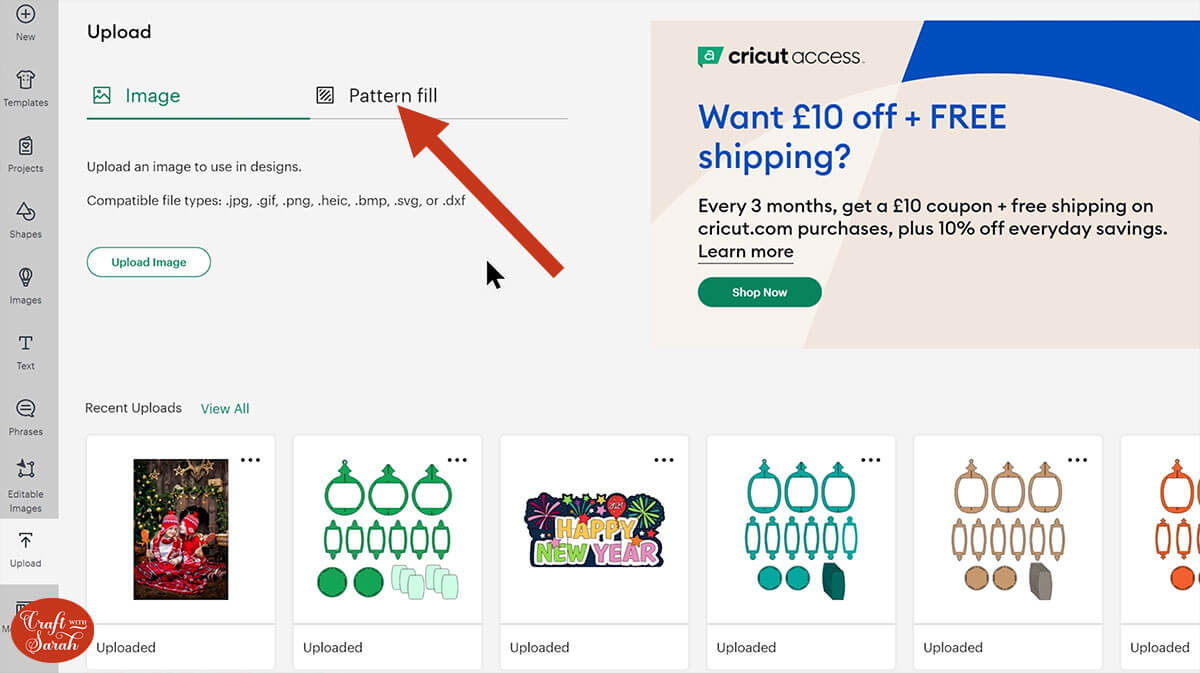
Choose your pattern, give it a name and upload it.
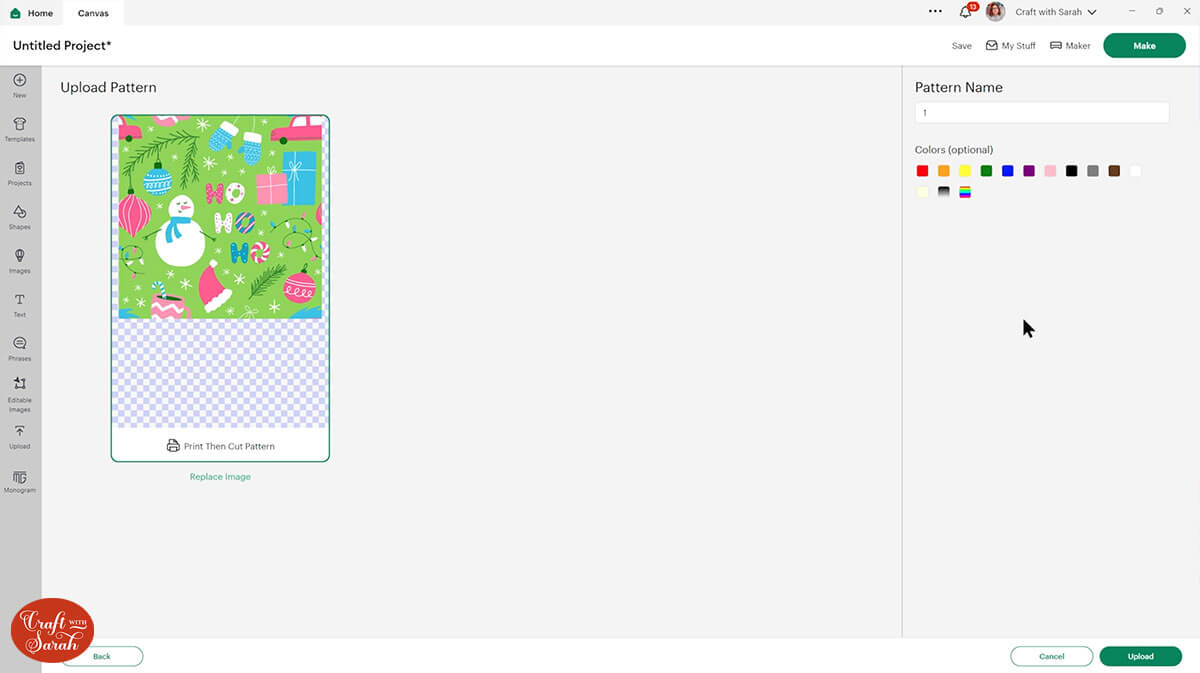
The pattern will NOT show up in your Recent Uploads.
Instead, it will show in the “Pattern” dropdown that we were looking at previously.
NOTE: At the time of writing this, in early December 2023, there is currently a bug in Design Space where uploaded patterns are not appearing in this dropdown after they have been uploaded, so they cannot be used. Hopefully Cricut will fix this soon, but in the meantime you can use the default Design Space patterns instead of uploading your own.
Choose your pattern and edit the settings if desired.
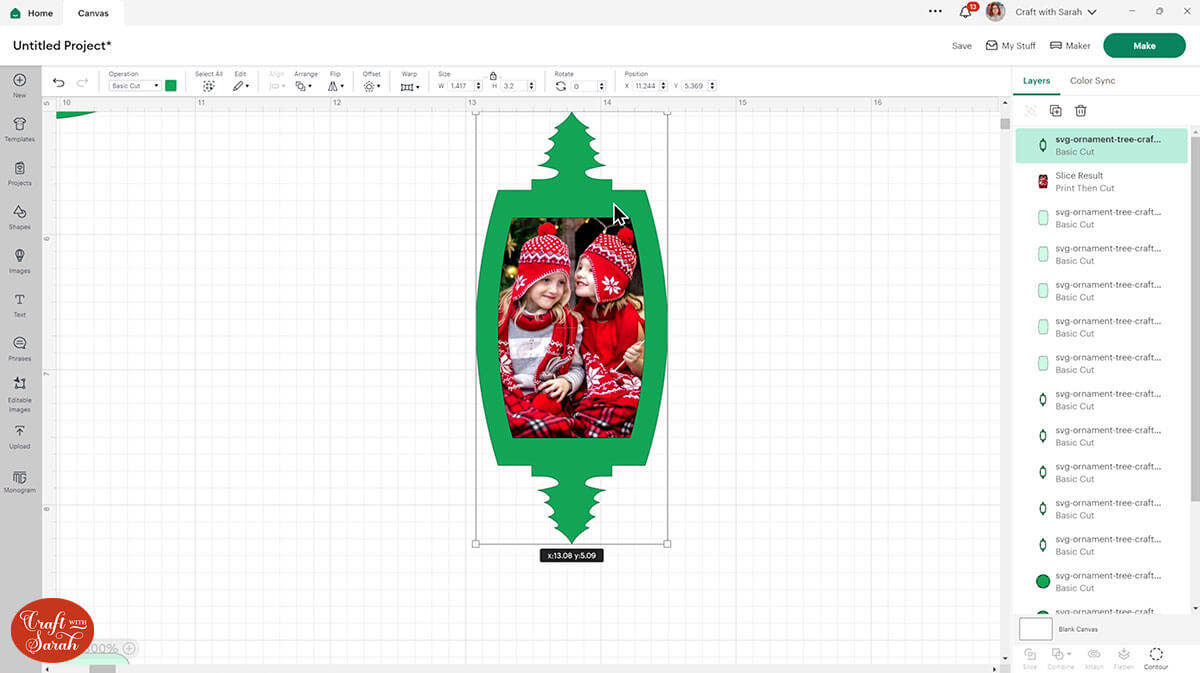
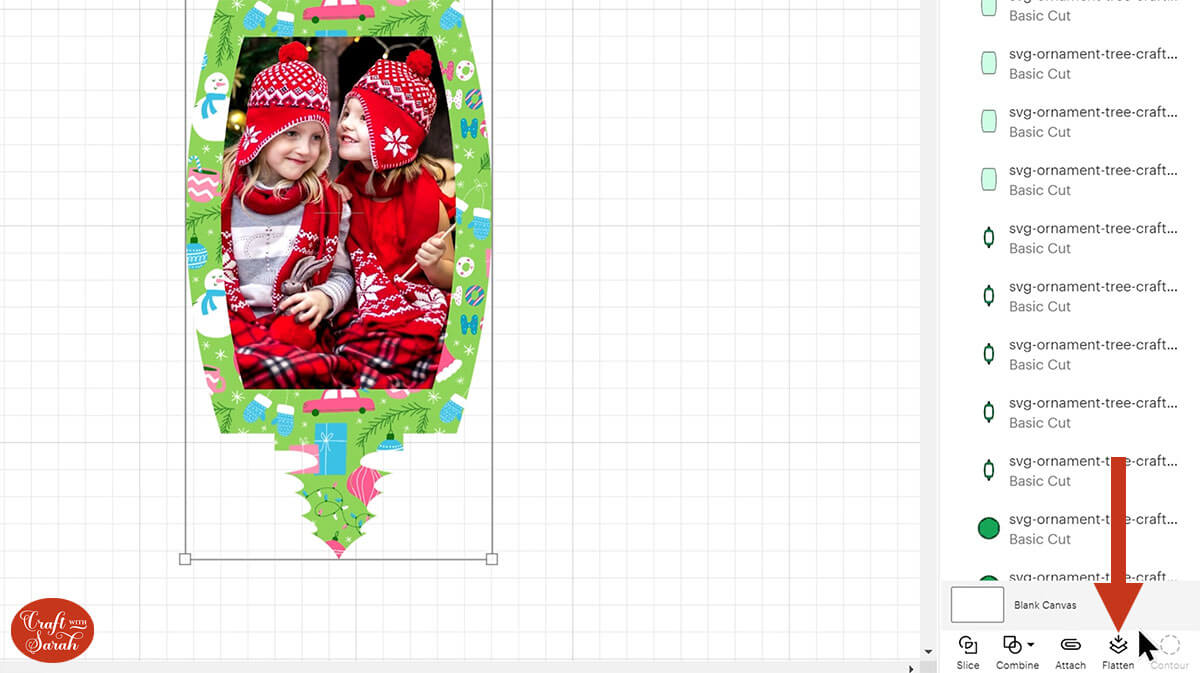
Select your window panel layer AND the photo layer and press “Flatten” to turn them into one single layer.
Step 7) Colour the cardstock layers
Once you’ve finished adding your photos, change the colour of the rest of the pieces of the ornament to match your photos.
Press the “Make” button on the top-right of the screen and follow the on-screen instructions to get everything cut out from cardstock.
Step 8) Put the ornament together
Once your custom ornament is cut from cardstock, it’s time to put it together!
Here is a video which shows how:
If you would prefer a written version of the instructions, visit the separate tutorial on how to make 3D papercraft ornaments.
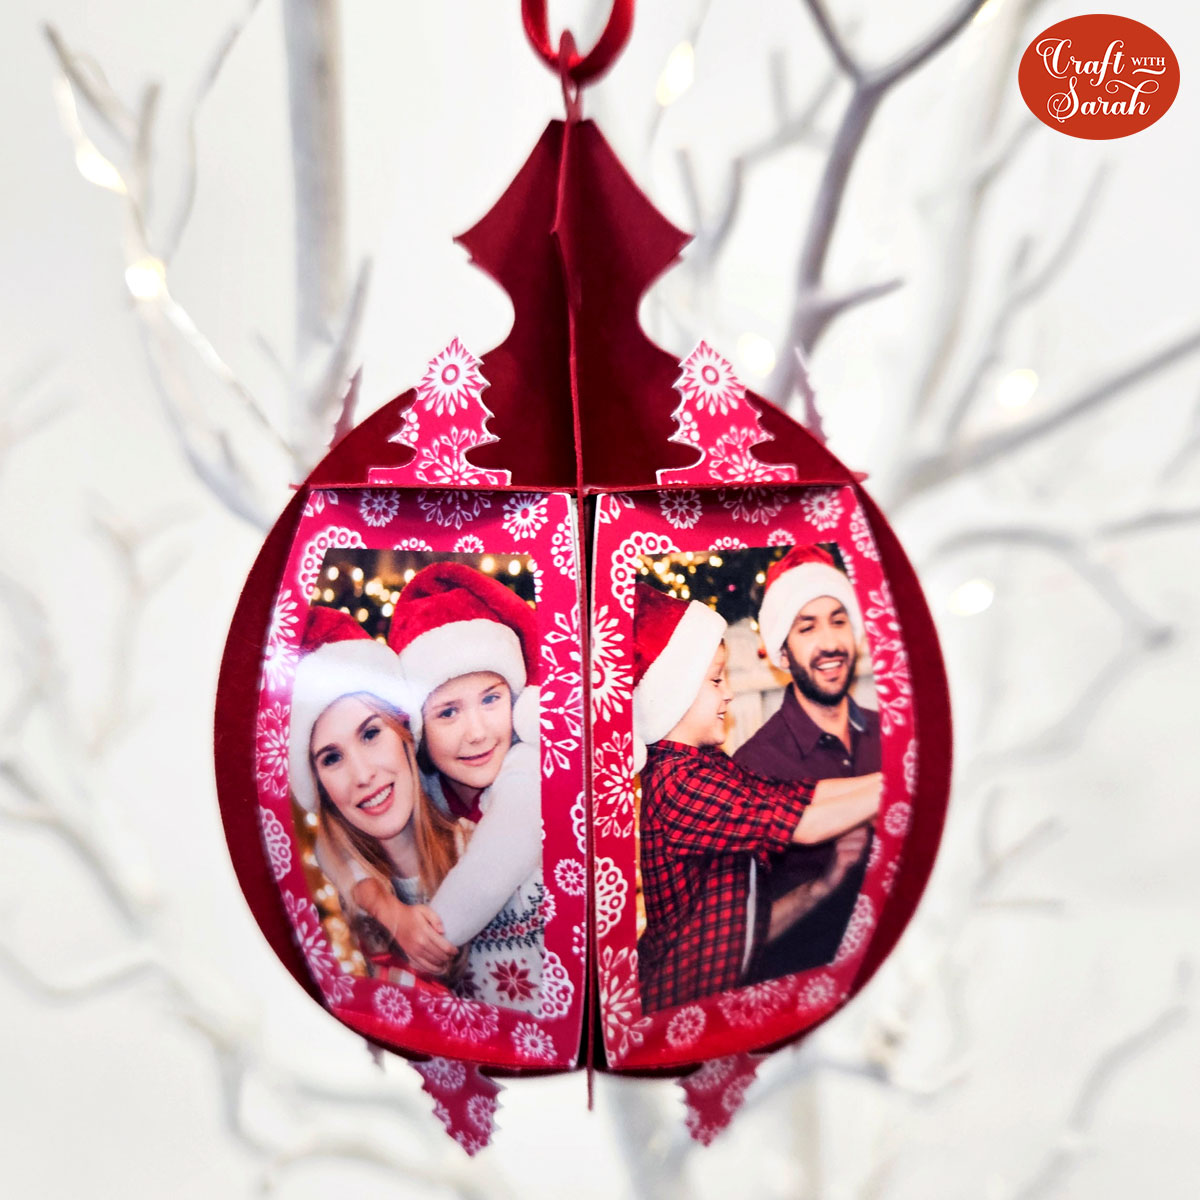
Here’s how my ornament looks when put together:
Family photo ornaments in Cricut Design Space
I hope you enjoyed this tutorial on how to make your own family photo ornaments in Cricut Design Space.
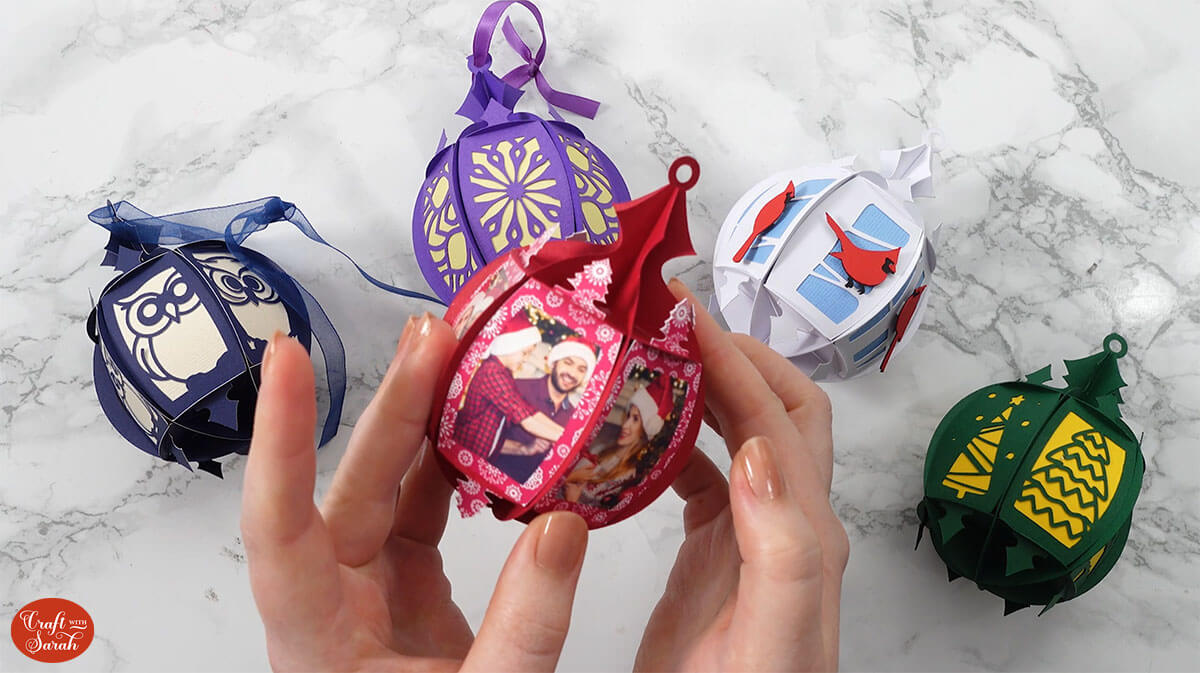
Here are some examples of other ornaments I have created using Cricut Access images.
You will need the Cricut Access subscription to be able to cut them for free.
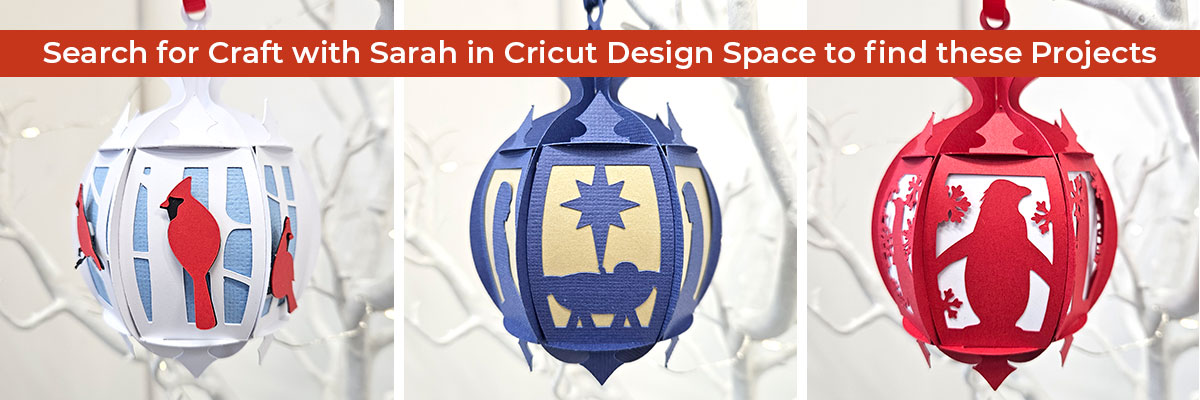
- Snowflake design
- Festive images design
- Santa and reindeer design
- Cardinals design
- Nativity design
- Penguins design
- Blank design to add your own images to (Cricut Access version that you can share on your DS profile)
Happy crafting,
Sarah x

