How to Make Glitter Ornaments with HAIRSPRAY!!
Let’s find out how to make perfect sparkly glitter ornaments for Christmas!
In this tutorial I’m going to show you how to make glittered Christmas baubles using hairspray to attach the glitter.
Please note that this tutorial works best with the baubles that come in two pieces that you then “press” together.
If you’ve got the baubles that just fill with the little hole at the top rather than one that comes apart then this isn’t going to be the best method for you to choose because you’re not going to be able to spray the hair spray through that little hole. There are other ways you can do the same kind of technique with those baubles though, for example by using certain floor cleaners or types of glue.
Glitter bauble video tutorial
The video below shows you how to make glitter ornaments using hairspray.
If you prefer to read rather than watch, keep scrolling for a full step-by-step tutorial.
[cws_christmas2020]
Supply list for glitter ornaments
To make these glitter baubles, you will need:
- A small tub/plastic container
- Kitchen roll to line the container
- A plastic bauble/ornament that comes in two halves that press together
- A microfiber cloth or other clean non-static cloth
- Glitter
- Hairspray (any kind)
- A vinyl decal sized to your bauble
- Something to scrap off excess glitter
- A clean paintbrush
- Ribbon to hang the bauble
How to make glitter ornaments for vinyl
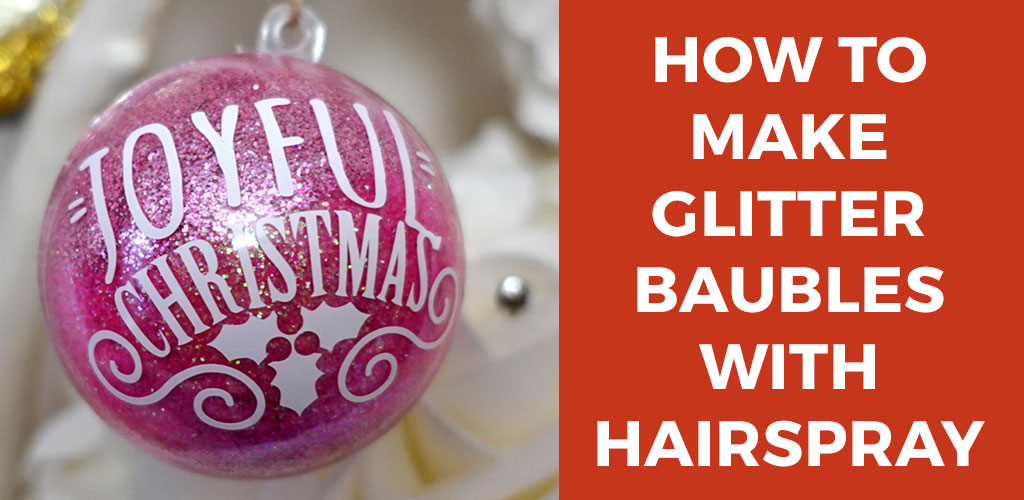
Step 1) Clean the inside of the bauble
Carefully wipe clean the inside of the bauble with a microfiber cloth. This is to get remove any dust or blemishes that might stop the hairspray from sticking.
Place the bauble into a small tub that’s been lined with kitchen roll to help protect your work surface from all the glitter we are about to unleash!
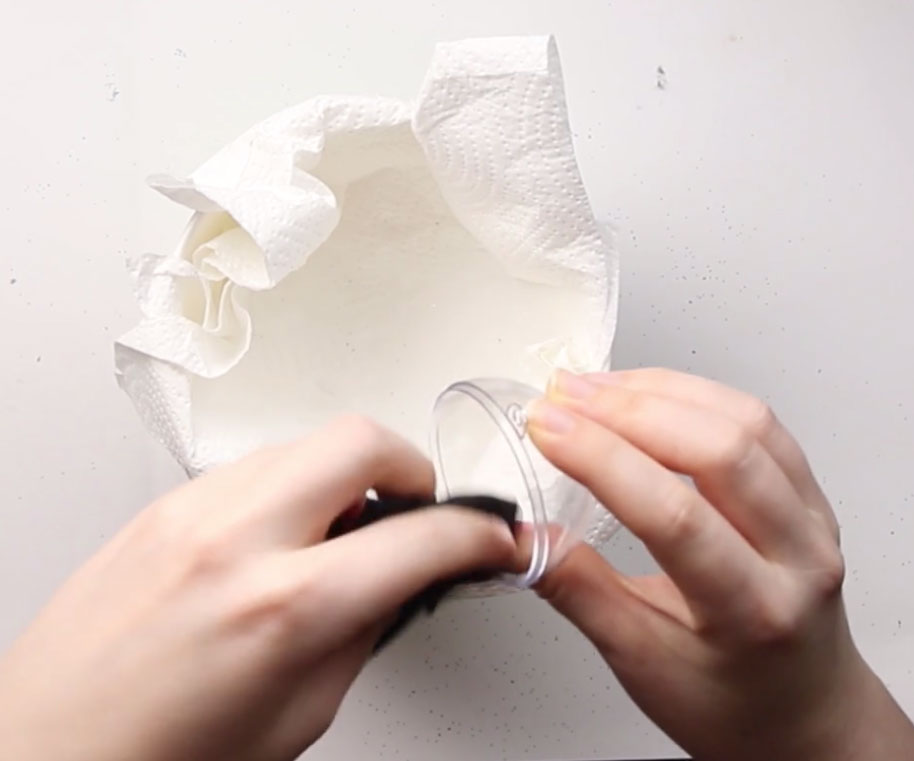
Step 2) Spray the hairspray
Spray the inside of the ornament with your hairspray.
Give it a nice even coat so it’s going to cover the entire inside of the bauble.
Be careful not to spray the outside because we don’t want the glitter on the outside – we just want it on the inside.
Make sure that you’ve got hairspray up all the sides as well as in the bottom. Tip it upside down to make sure you’ve not got any drips.
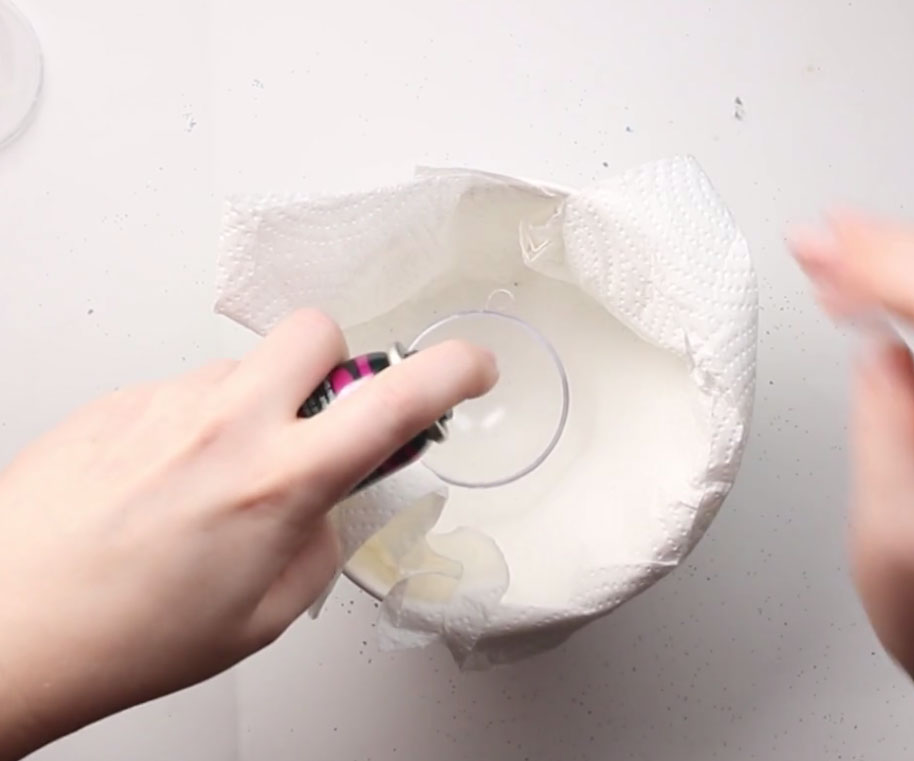
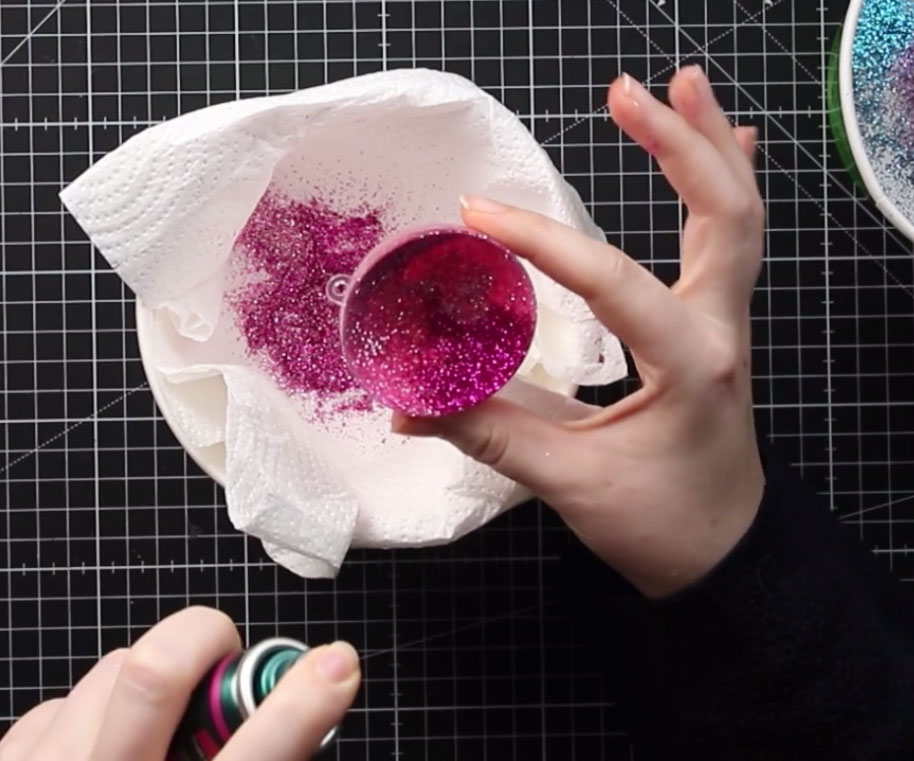
Step 3) Add the glitter
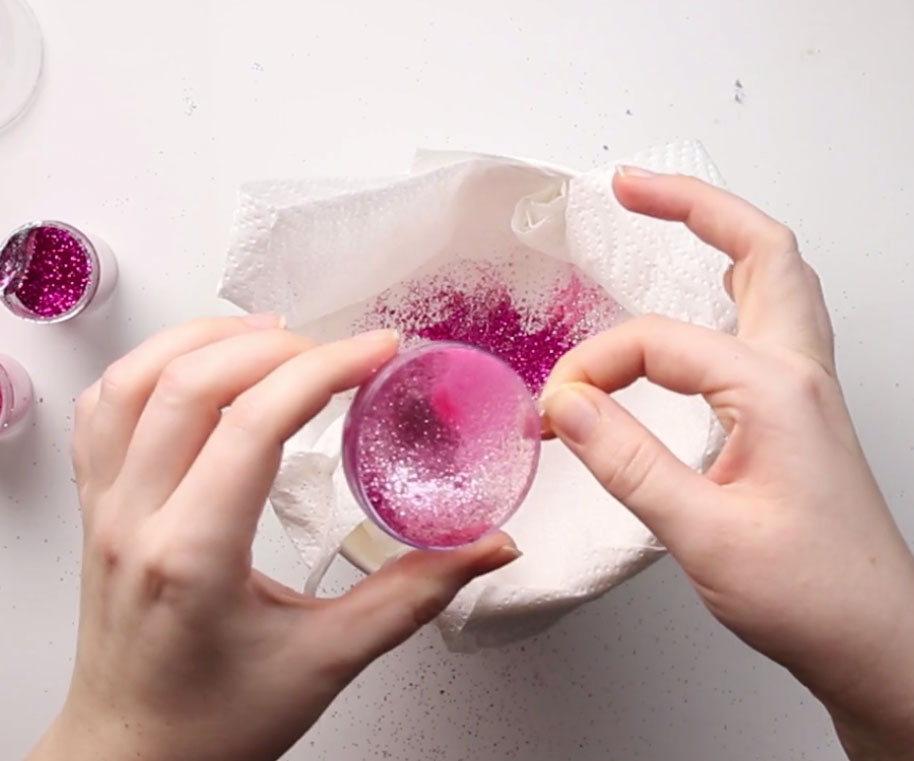
Working quickly so that the hairspray doesn’t dry, sprinkle glitter to the inside of the bauble.
I found that the easiest way to do this (with the least amount of wastage) is to pour a little bit in and then tilt the bauble to spread the glitter around the edges.
For an “ombre” (gradient) effect, use different shades of the same colour of glitter and add them in strips.
If you get any patches that haven’t been covered in glitter, add a bit more of the hairspray and then add more glitter to that part. Be careful to spray from a distance and only spray lightly so that you don’t dislodge any of the glitter that’s already there.
Leave the bauble to dry for around an hour.
Step 4) Add a second coat if needed
When the hairspray is dry, turn the bauble upside down and gently tap it to remove any excess glitter. Don’t be tempted to pour this glitter back into your glitter pots – it’s got hairspray in it so it will clump together.
You may find that your ornament needs a second coat of glitter, particularly if you have used pale coloured or transluscent glitter.
If it does, follow the directions from Step 3 again and then wait for it to dry once more.
Step 5) Seal the glitter
Once you’re happy with the glitter coverage and the hairspray is completely dry, it’s time to seal it to stop the glitter coming off.
Gently spray the hairspray from a distance into the bauble so that it covers the glitter to form a layer of protection.
Wait for another 20 minutes or so for that coat of hairspray to dry, and then you can apply your vinyl decal.
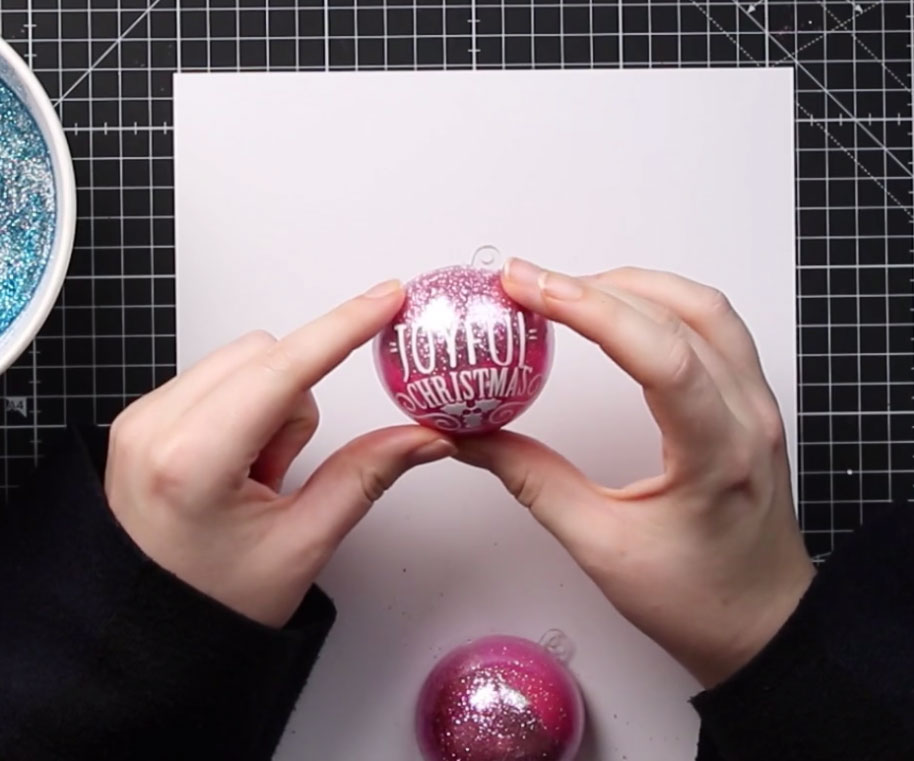
Step 6) Apply the vinyl decals
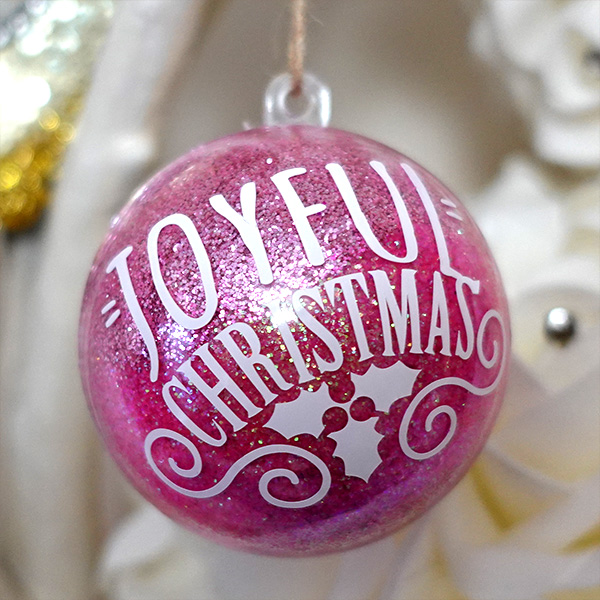
Cut you vinyl decals and stick them to the outside of the ornaments.
I used an image that I found in Cricut Access which says ‘Joyful Christmas’.
The video below has some great tips for applying vinyl to a curved surface.
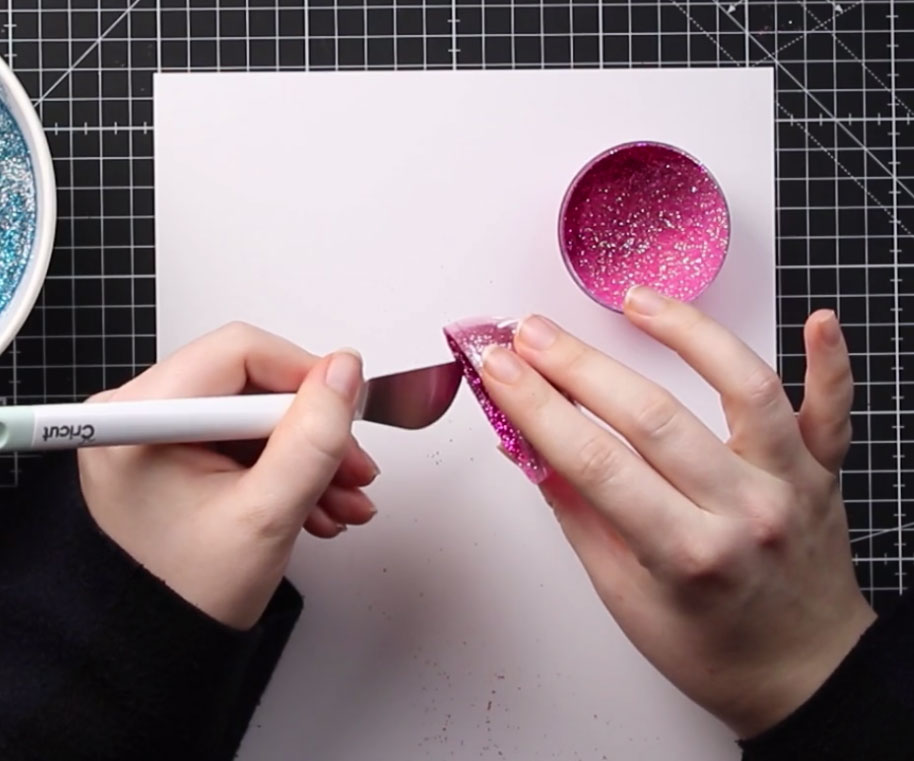
Step 7) Clear away excess glitter from the join lines
If you try and put the two halves of your bauble together, you’ll probably find that they don’t fit any more.
This is because we’ve covered the “ridge” that joins the two pieces together with glitter, so it’s now too small to fit over the other half of the decoration.
To fix that, work out which side of the bauble is the one that slides on top of the other and then use a scraper tool (or something similar) to carefully scrape away the glitter on the top ridge of the bauble.
Once the glitter is loose you can use a clean paintbrush to brush it away.
Make you only go down to the bottom of the join ridge and no further because if you go any further then it means you’ll start making holes in the glitter that you’ll be able to see.
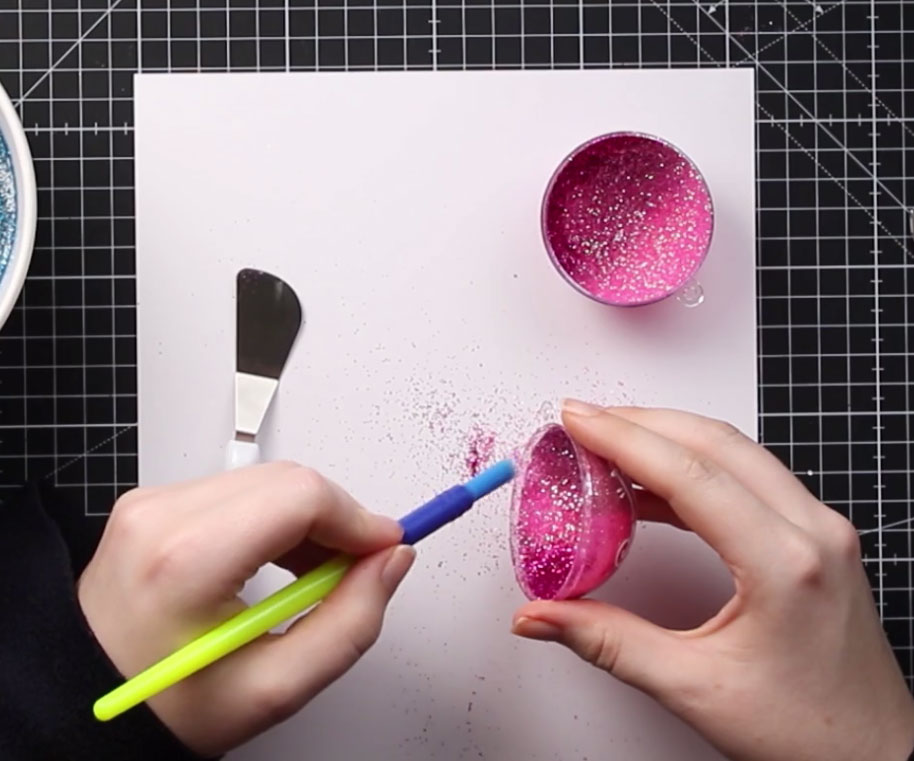
Clearing the ridge of glitter won’t make a difference to the overall appearance because it’s going to be slid over the matching bit on the other side so you’ll see the glitter from that section.
It is definitely worth the time to be very precise on this, so take it slowly. Don’t worry if you can’t get all the glitter off – as long as the majority of it is off then your bauble pieces should be able to go together.
When I was testing out this technique for the glitter baubles I did try a couple of other ways of doing this. The first way I tried was to try and tape this part before I put the hairspray in with masking tape so I could just pull the tape off but that didn’t work because it was just too hard to be accurate enough with the tape that it didn’t go down inside the bauble and it left me with gaps.
The second thing I tried was after I’d sprayed it with the hairspray, I went around with a tissue and just tried to clean the hairspray off of this little ridge, but again that left me with gaps underneath so I wasn’t quite accurate enough and also it didn’t get enough of the hairspray off so I still ended up scraping it anyway.
So even though it sounds a bit counterintuitive to glitter the whole inside of the bauble and then take it away again, this does seem to be the best way to do it that I found.
Step 8) Join the two halves of the bauble
Now that the ridge is clear, the two sides of the bauble can be pressed together to seal them.
So now, here is my pink lovely glittered bauble with vinyl all ready for some ribbon and then it can go onto my Christmas tree!
You see there’s no gap where we just took that glitter off because you’re seeing the glitter from the other side of the bauble.
I hope you have enjoyed this tutorial on how to make glitter Christmas ornaments using hairspray!
Happy crafting,
Sarah

