Layered Halloween Decorations with Cricut Access
Make these fun layered Halloween decorations using your Cricut machine. There are over 10 different designs to choose from, and all can be found in Cricut Access.
Keep reading to find out how to search for these amazing layered designs, as well as how to turn them into hanging decorations.
Please note that some of the links included in this article are affiliate links, which means that if you click through and make a purchase I may receive a commission (at no additional cost to you). You can read my full disclosure at the bottom of the page.
How to make layered Halloween decorations with a Cricut machine
I wanted a quick and easy Halloween craft to help decorate some of the areas in my living room.
Whilst browsing Cricut Access, I came across these layered designs that were just TOO good to pass up!
Here’s how I turned them into hanging decorations for my home this Halloween…

Video tutorial for hanging Halloween decorations
Watch this video to see where to find these fun layered scenes in Cricut Access, and how to turn them into double-sided hanging decorations.
A full written tutorial is available further down on this page.
[cws_halloween2020]
Materials list
- A digital cutting machine such as a Cricut Maker or Cricut Explore
- A light grip Cricut mat
- Layered graphics from Cricut Access
- Coloured card in black, dark orange and bright orange
- Hessian/twine/ribbon
- 3D foam pads
- A glue gun

How to make layered Halloween decorations with a Cricut
Here is how to make these decorations with your Cricut machine.
Step 1) Find the images in Cricut Access
If you are a CWS Clubhouse member then you can use the button below to open the Project straight up in Design Space.
[cws_clubhouse design=’1122′]
If you aren’t a CWS Clubhouse member then you can still make this project. Click into “Images” and then “Image sets”.
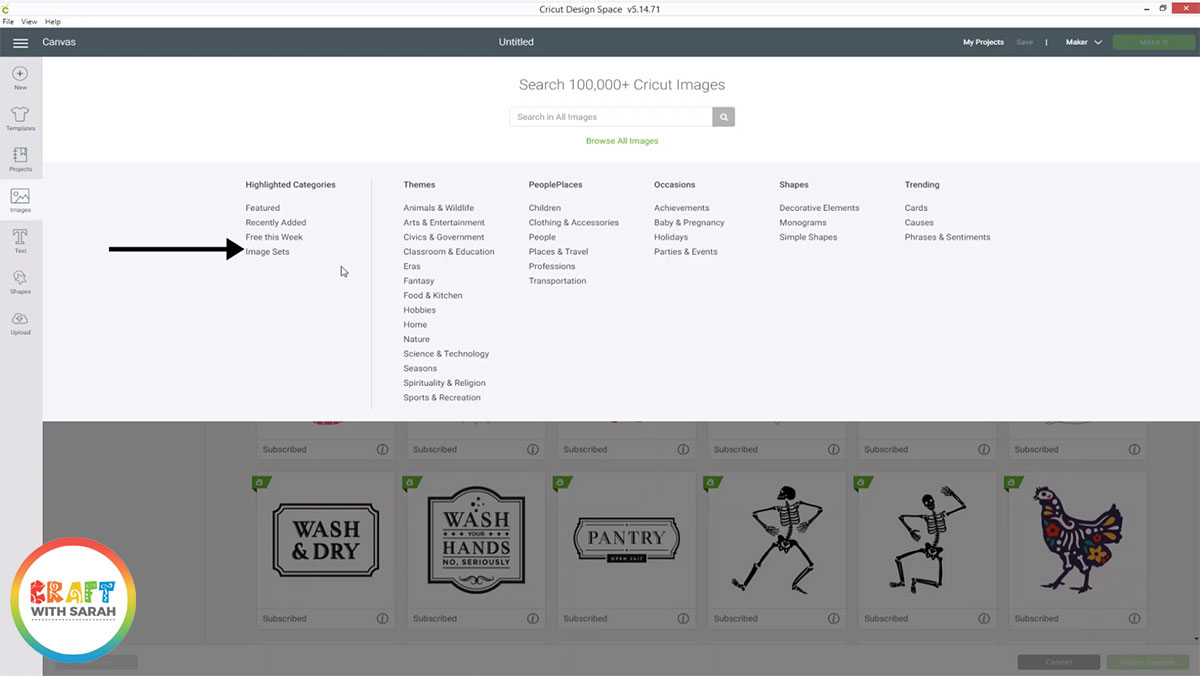
Search the image sets for “Halloween Scene” and click on the one called “Mini Halloween Scenes” and then choose your designs by clicking as many as you want to make, then press “Insert Images”.

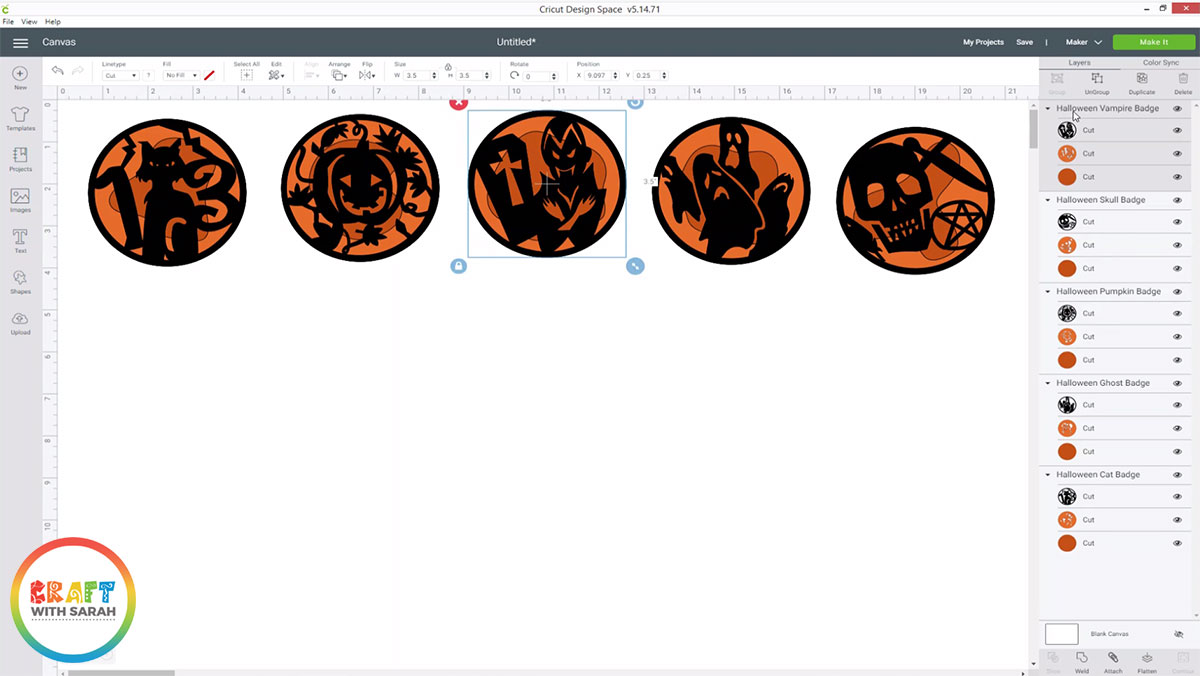
Step 2) Resize the images
Resize each image to the size you want to make your decorations. I made mine 3.5 inches in width.
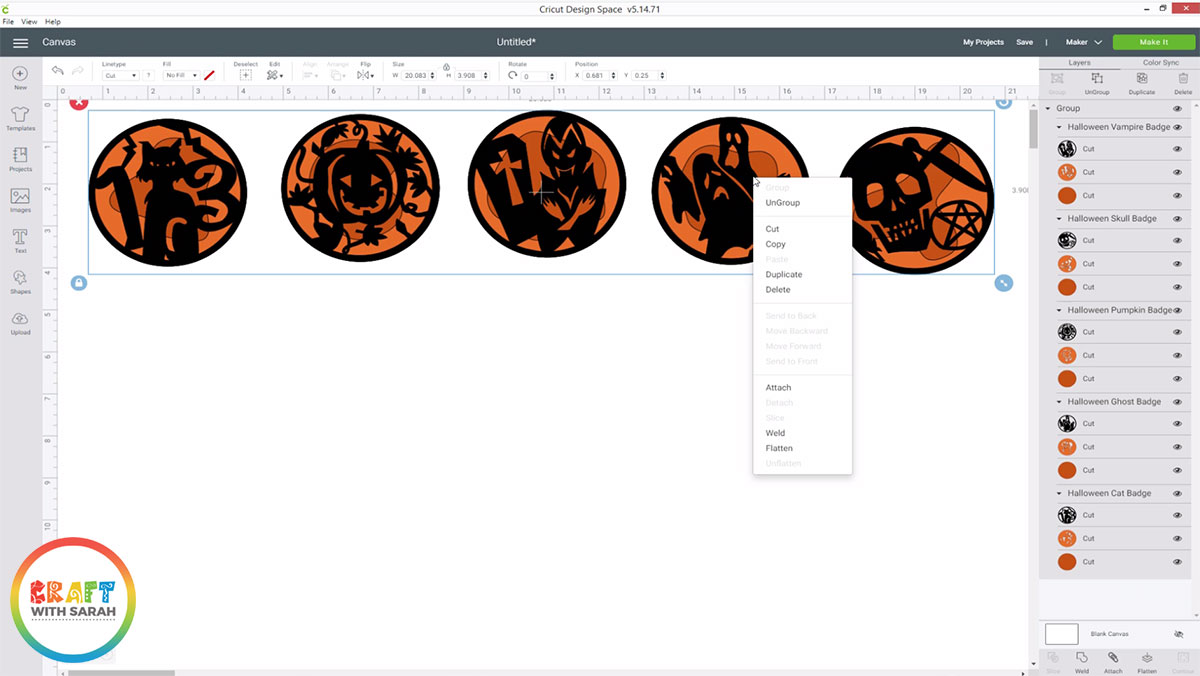
Step 3) Duplicate all the graphics
Drag a box around all the graphics to select them all, then right-click and press “Duplicate”.
This will make a copy of all the images so you can make double-sided decorations.
Click “Make It” and cut everything out with your Cricut machine.
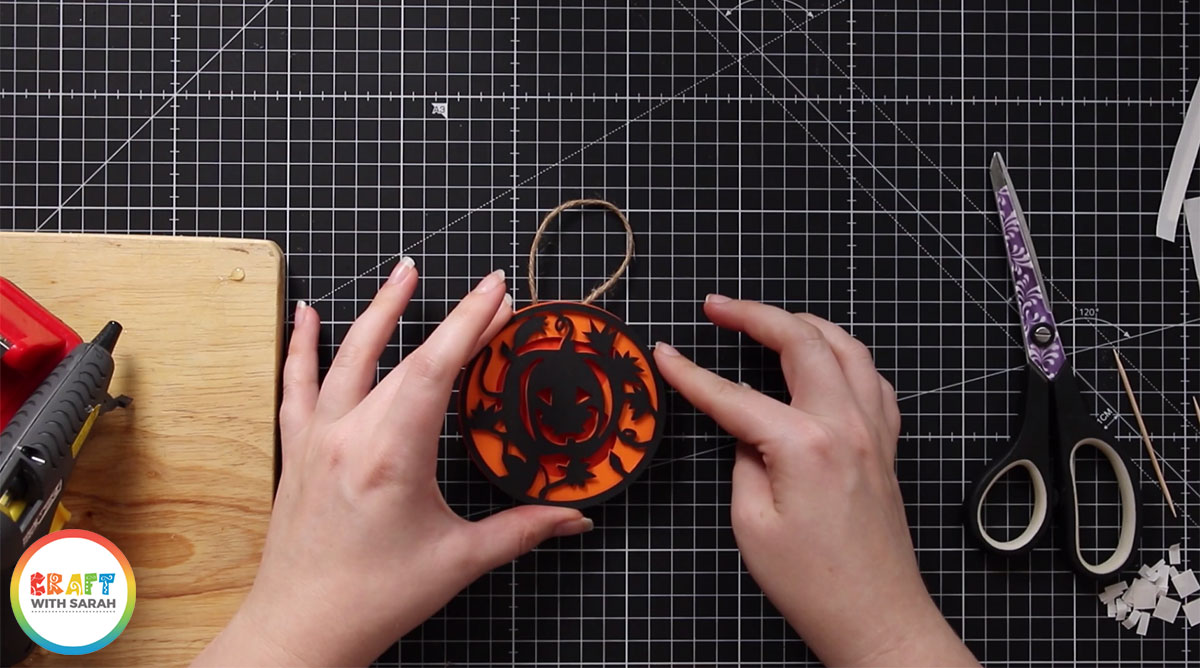
Step 4) Assemble the decorations
Use 3D foam pads to stick all the layers of your designs together.
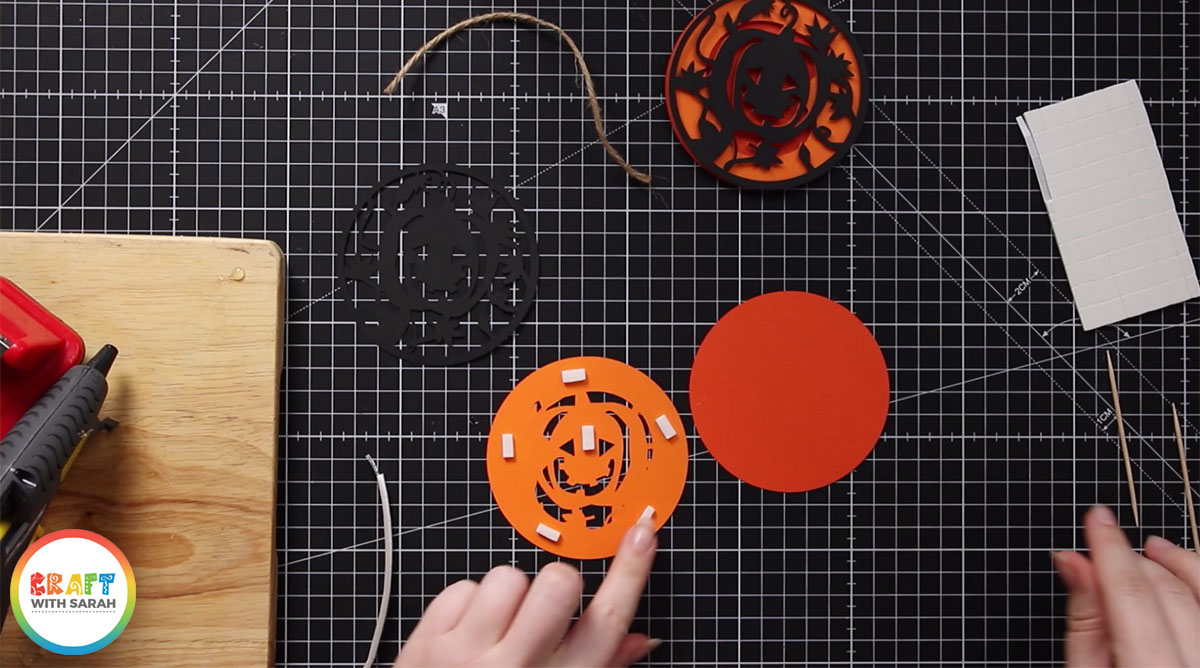
When you’ve completed the two parts of one design, turn one of them upside down and add foam pads to the sides, bottom and middle but leave the top clear.

Use your glue gun to add some glue to the top of the design and then press in some twine or ribbon.

Put some more glue over the twine to secure it, then press on the matching decoration part and press firmly to seal.
Step 5) Make all of your decorations
Now you can repeat those steps for all of the decorations you want to make.
I made five different ones and then put them onto a white decorative tree that lives in my living room, along with some fairy lights.
It’s the perfect Halloween centrepiece!

I hope that you enjoyed this tutorial on how to create layered Halloween decorations with your Cricut machine.
Happy crafting,
Sarah x
[cws_halloween2020]

