Tasty Halloween Treat Boxes Made with a Cricut

Customize existing Design Space box templates to make them Halloween themed treat boxes with this easy-to-follow Cricut Design Space tutorial.
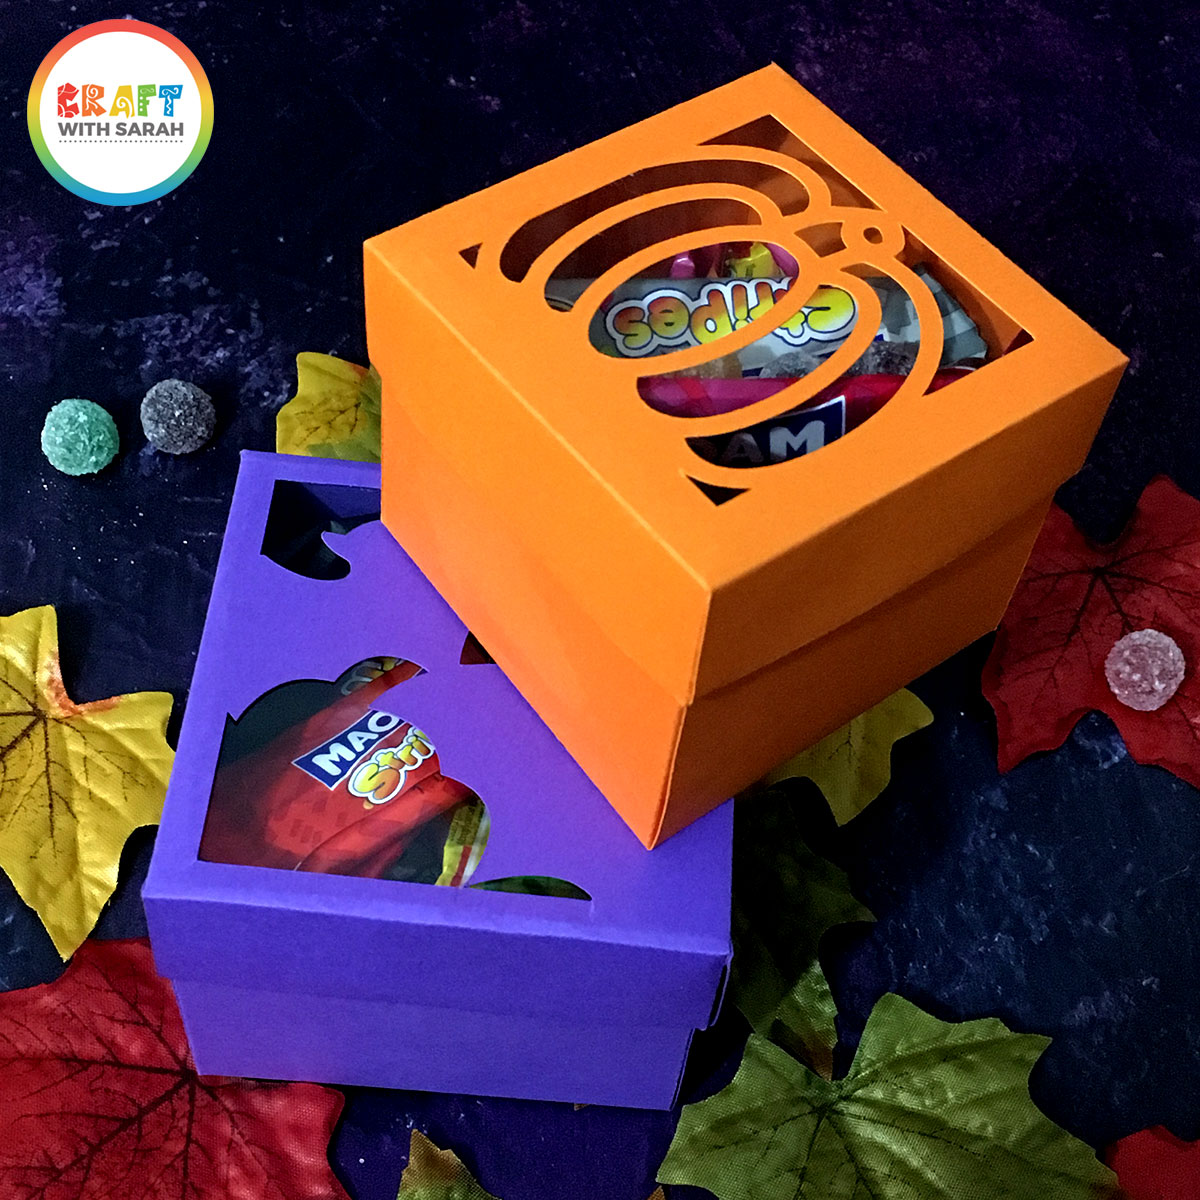
Fill these cute Halloween treat boxes with sweets, candy or chocolate to make drool-worthy DIY Halloween gifts that kids AND adults alike will love!

Please note that some of the links included in this article are affiliate links, which means that if you click through and make a purchase I may receive a commission (at no additional cost to you). You can read my full disclosure at the bottom of the page.
Video tutorial for Halloween treat boxes
Watch this video to find out how to create custom Halloween themed favor boxes in Cricut Design Space, and how to cut and assemble them.
A full written tutorial is available further down on this page.
[cws_halloween2020]
Halloween Treat Boxes with Cricut Access
I wanted to include a written tutorial for this project as I know that many of my readers prefer this to watching a video, however if you are new to Design Space then I’d recommend watching the video because you’ll be able to see exactly how I use the Design Space software, in real-time.
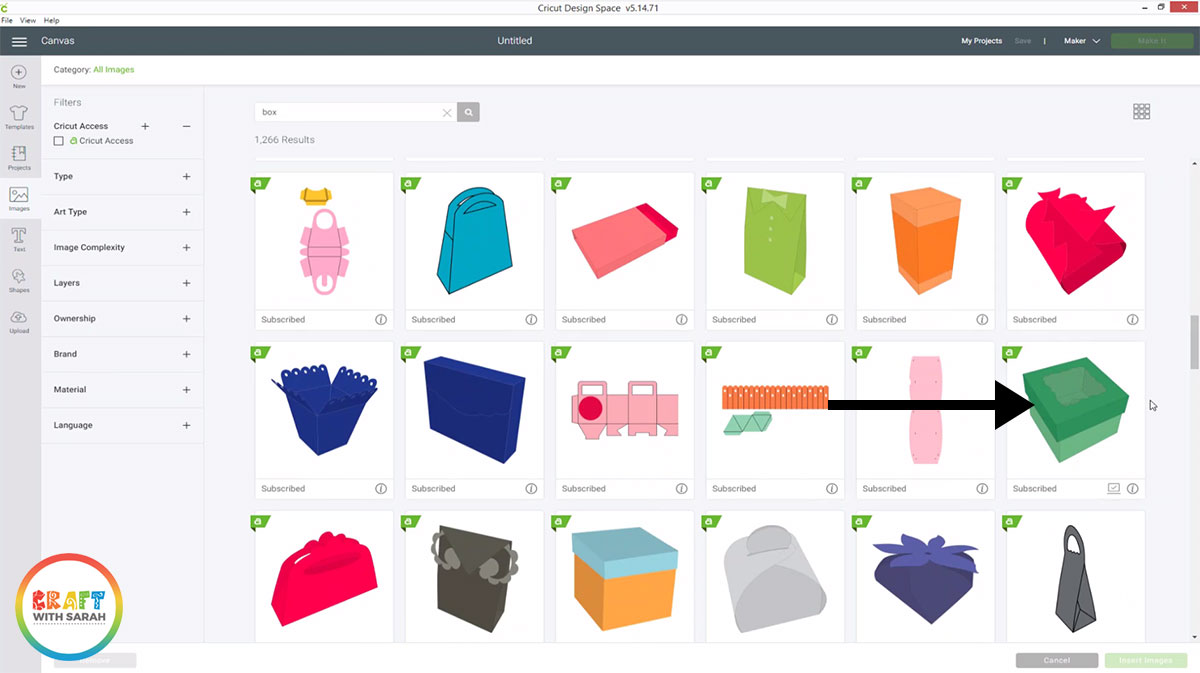
Step 1) Choose your box template
Click “Images” in Design Space and then type “box” into the search.
This will give you lots of different sizes and shapes of boxes. You can choose whichever you like, but I chose the one in the image below.
Step 2) Resize the box
The box I chose loaded in fairly big by default, so I needed to make it smaller.
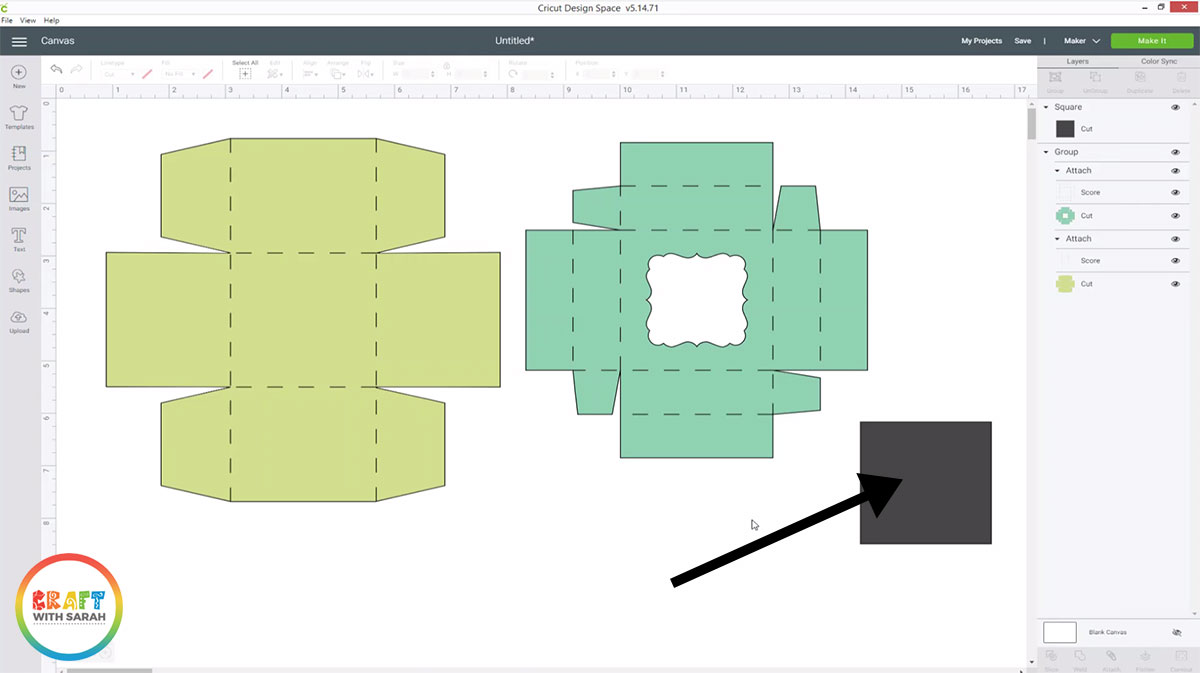
I wanted a 2.5 inch box, so I went into “Shapes” and chose a square, resized that to 2.5 inches and used it as a guide to resize the box templates.
Keep this square shape but make it slightly smaller so it fits inside the box lid, but is larger than the hole in the top of the lid. You’ll cut this square out of acetate to cover the hole so that you don’t lose any of your tasty treats.
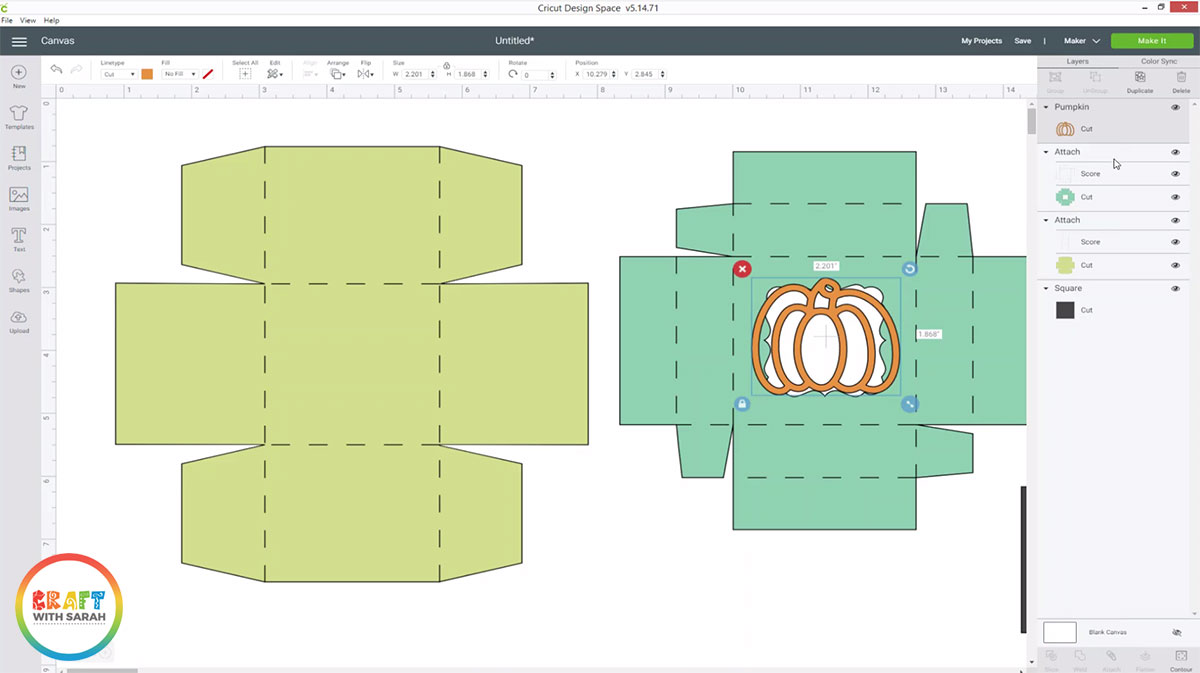
Step 3) Add Halloween imagery
It’s time to make our plan old box into something HALLOWEEN-Y!
Choose a Halloween themed image and position it over the gap in the lid of the box.
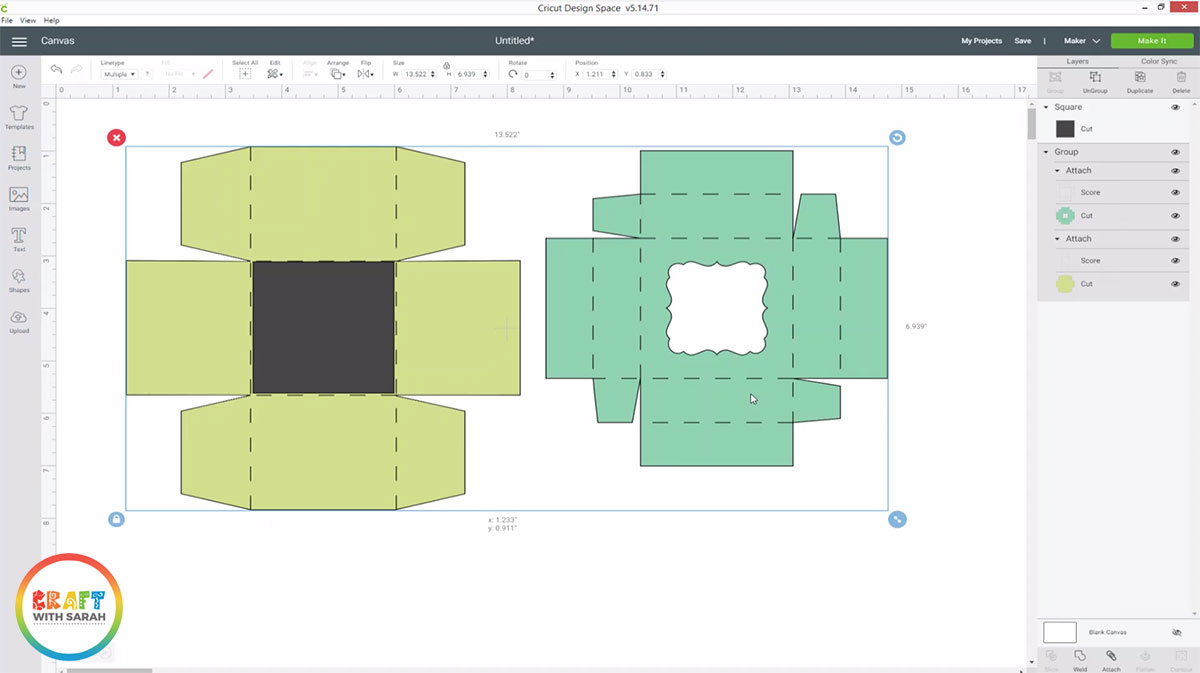
I didn’t really like the fancy shape in the lid of the box and wanted a plain square instead.
To achieve that, click the box group and press “Ungroup”.
Click the lid section and press the “Contour” button down the bottom of the layers panel, then click into the “fancy shape” to hide it.
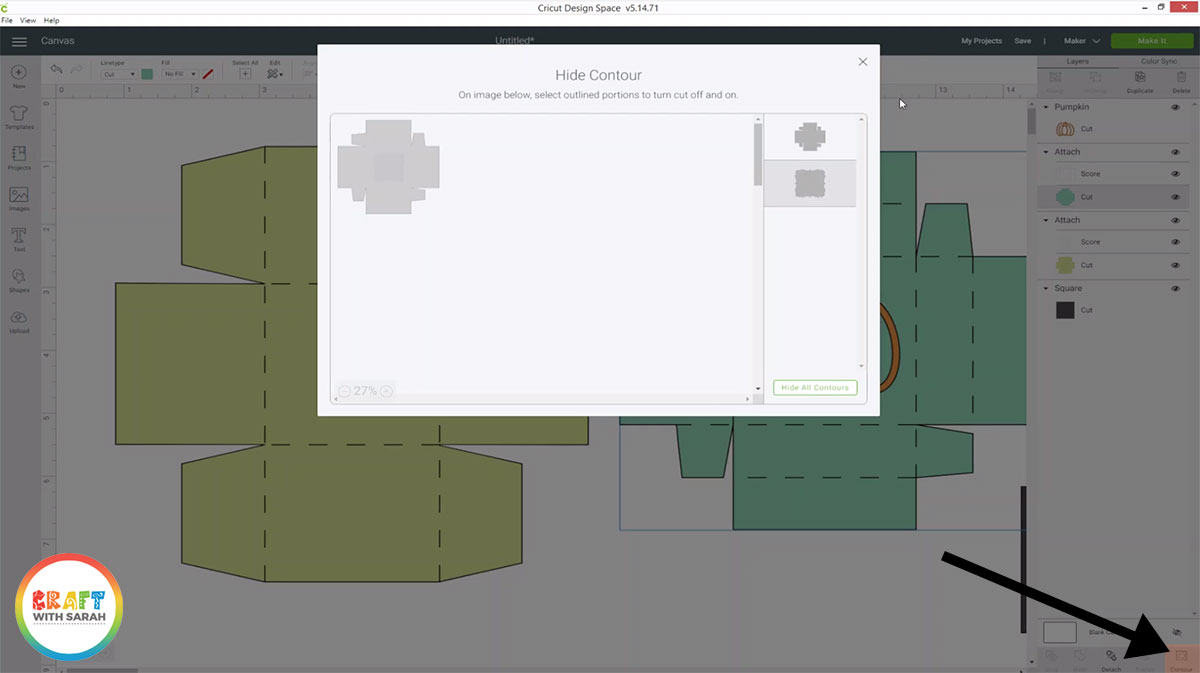
Draw a square shape over the lid section instead, making sure you leave a good sized border of the lid section otherwise it will fall apart when you try to make it.
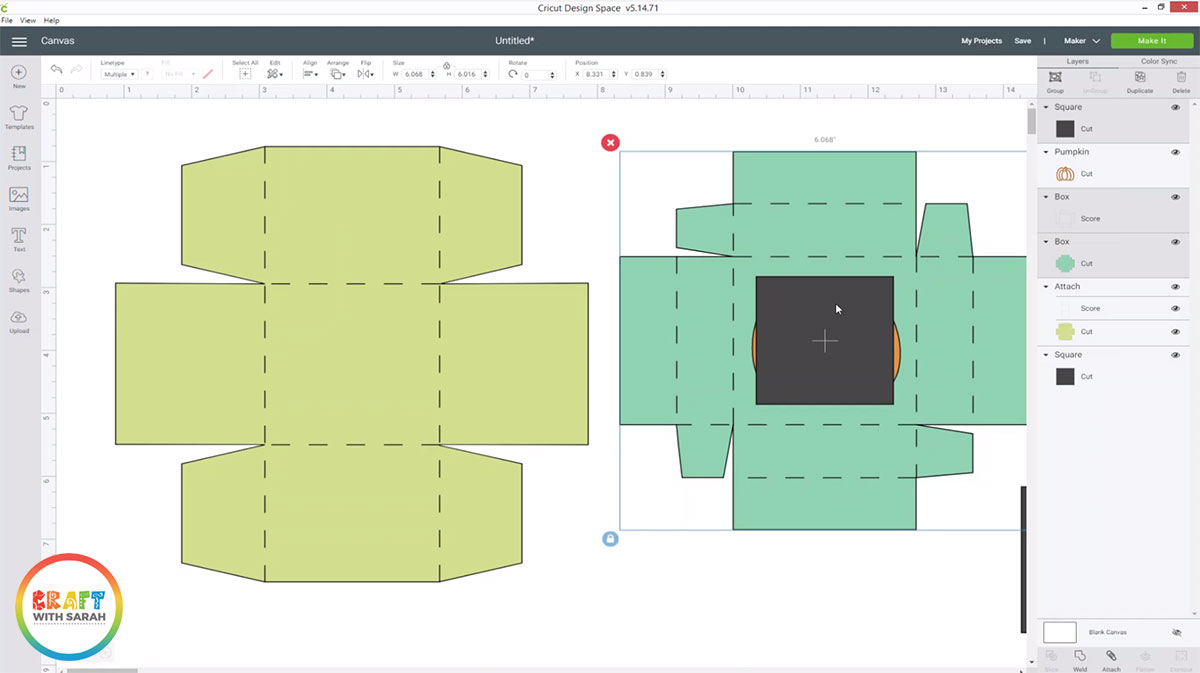
Select the lid section in the layers panel and press “Detach” to separate out the cut layer from the score lines. You MUST do this, otherwise the next steps won’t work.
Select the square layer AND the box lid layer, and press the “Slice” button.
This will cut the square shape out of the box lid.
Hide or delete the first two slice result layers by clicking the “eye” icon next to them in the layers panel.
Drag the score line layer back on top of the box.
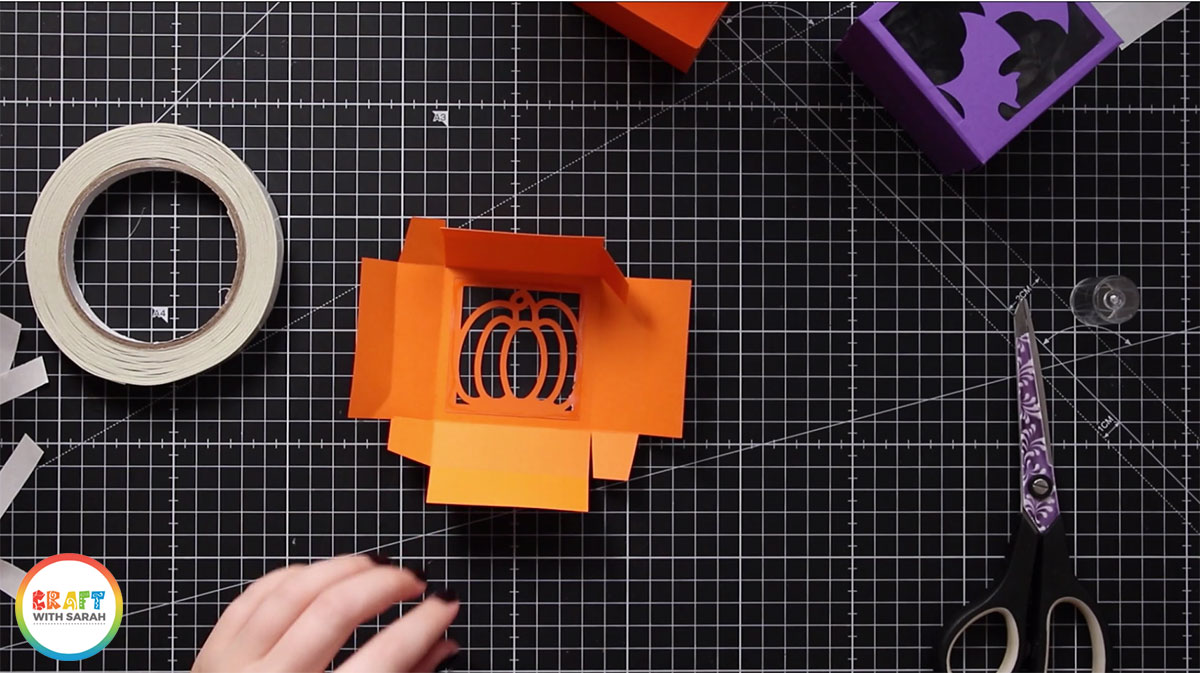
Now, you can re-position your Halloween image over the gap in the lid.
Make sure your image overlaps the edges of the gap on at least two sizes so that it won’t fall apart when you cut it out.
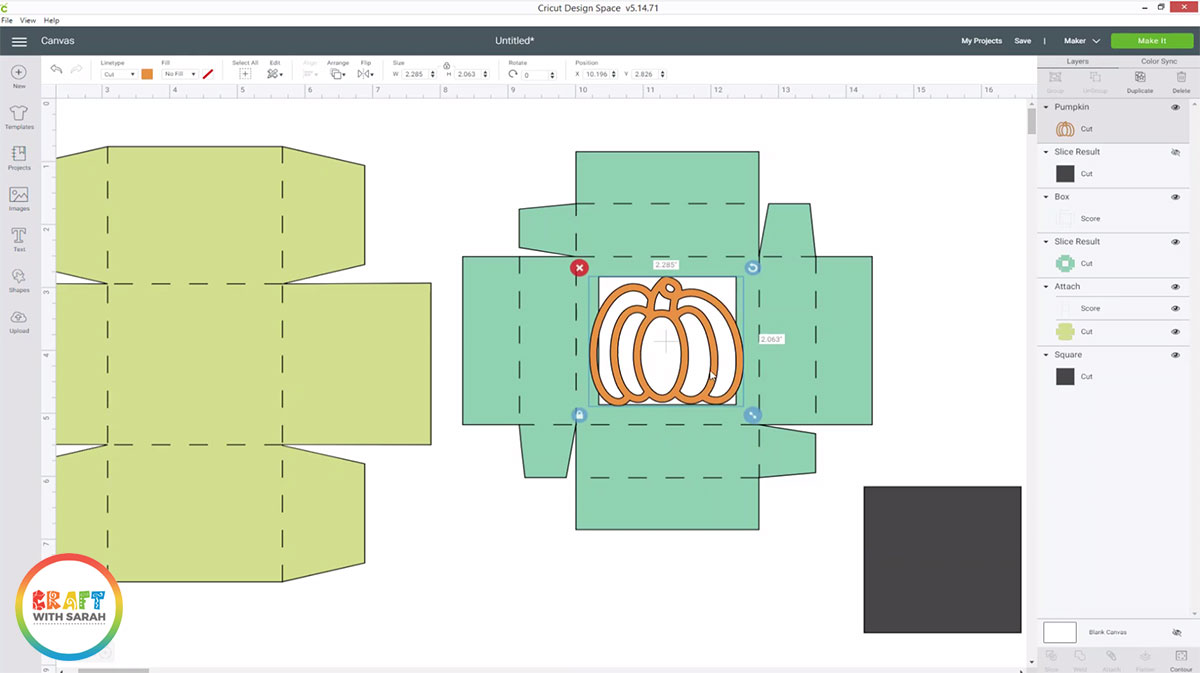
When you’re happy with the positioning, select the Halloween image AND the box lid, and press the “Weld” button.
This will fuse both layers together so that they’ll cut out as one.

Finally, select the box lid layer and the corresponding score line layers, then press “Attach”.
If you don’t do that, the score lines will be scored on a different piece of card than the lid – eek!

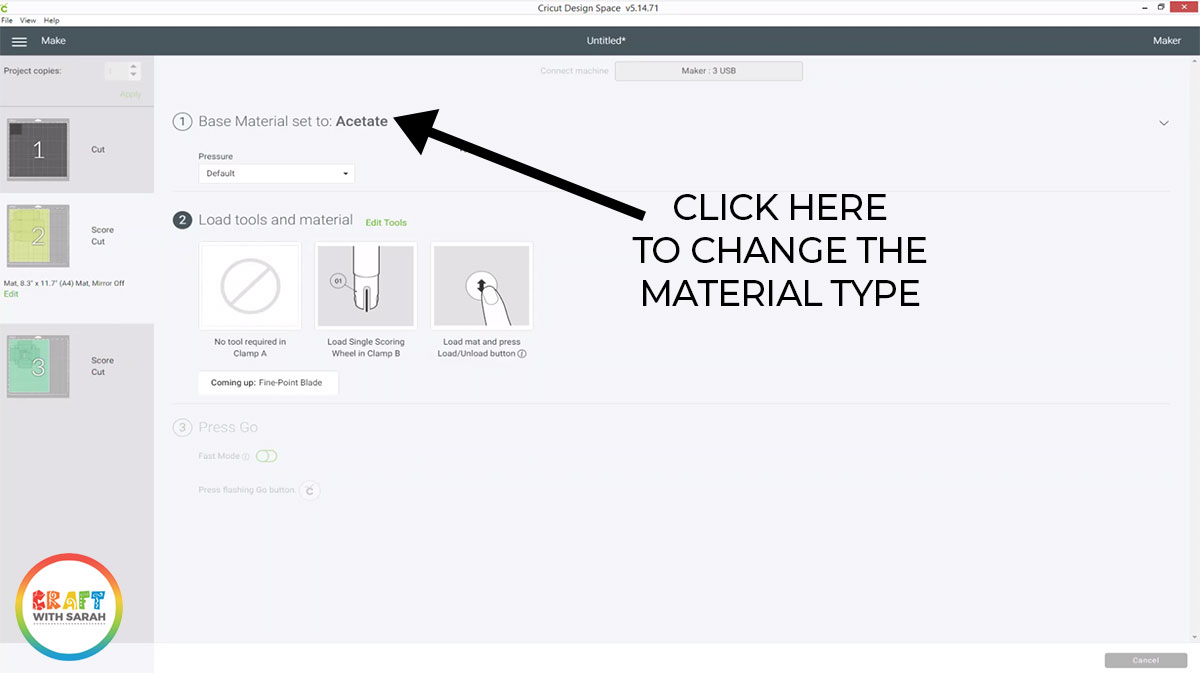
Step 4) Cut the treat box from acetate and card
Click “Make It” and change the material type to “Acetate”.
Cut the square shape from acetate.
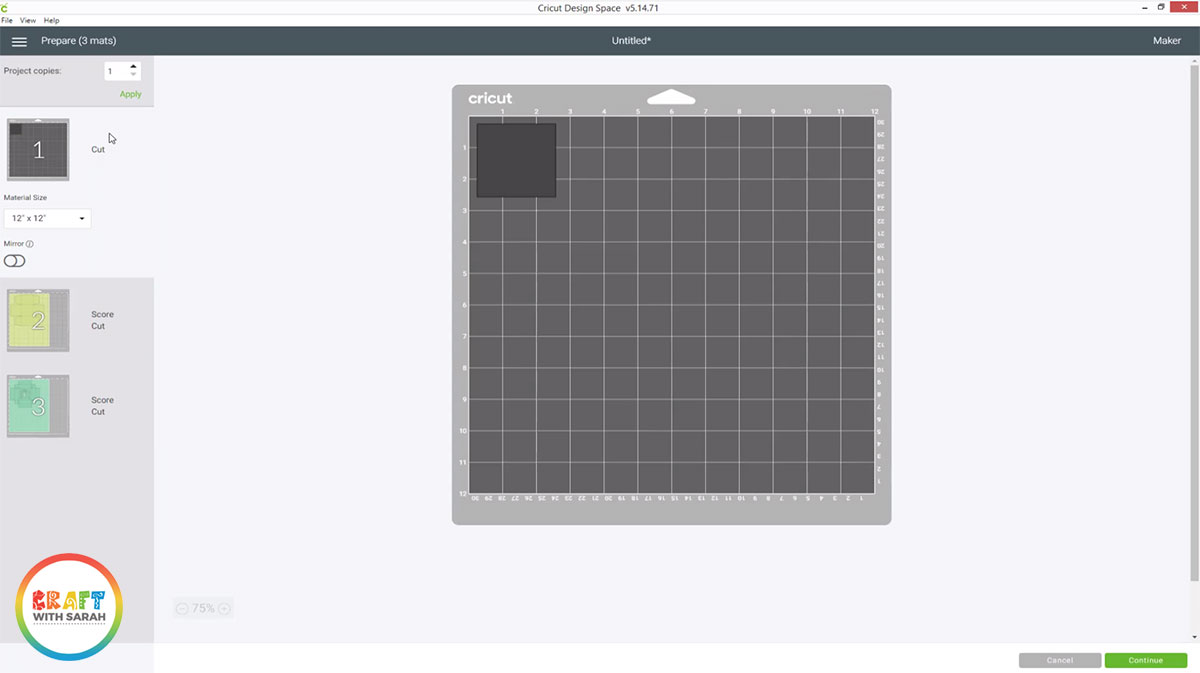
Once this has cut, change the material type to cardstock by clicking where it says “Material selection: Acetate”.
This opens the material selection options, so choose the appropriate cardstock option and then continue to cut out the box lid and main box shape.
Step 5) Assemble the treat box base
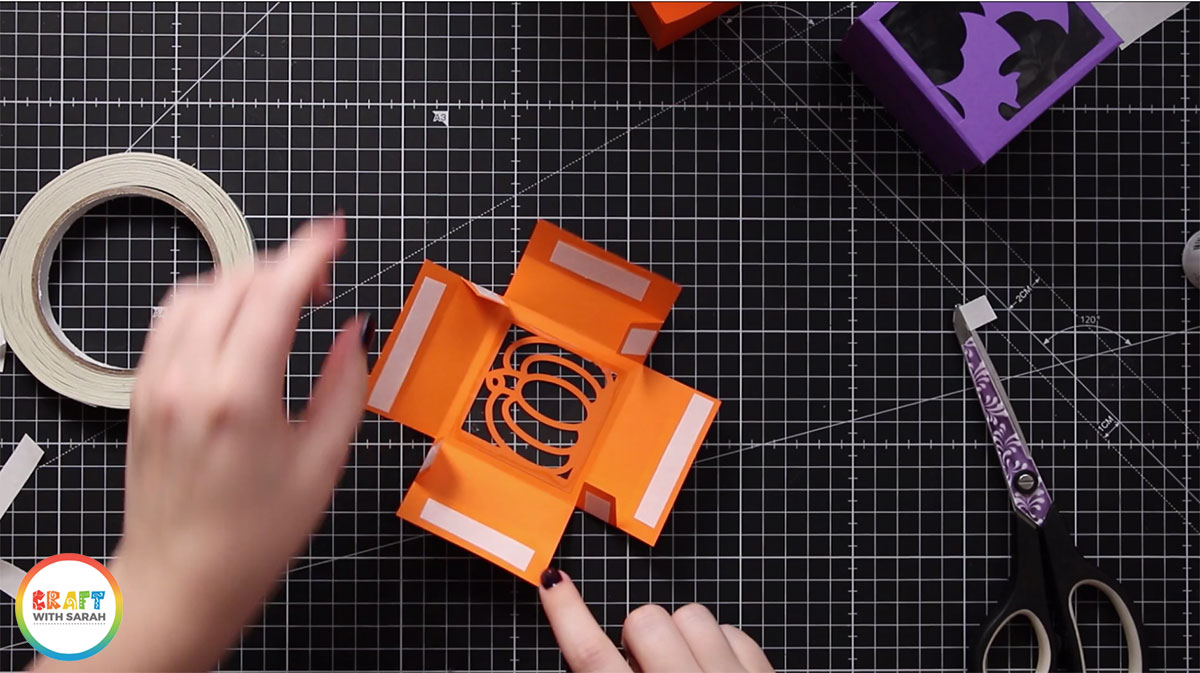
Turn the base shape upside down and then fold all the score lines upwards/towards you.
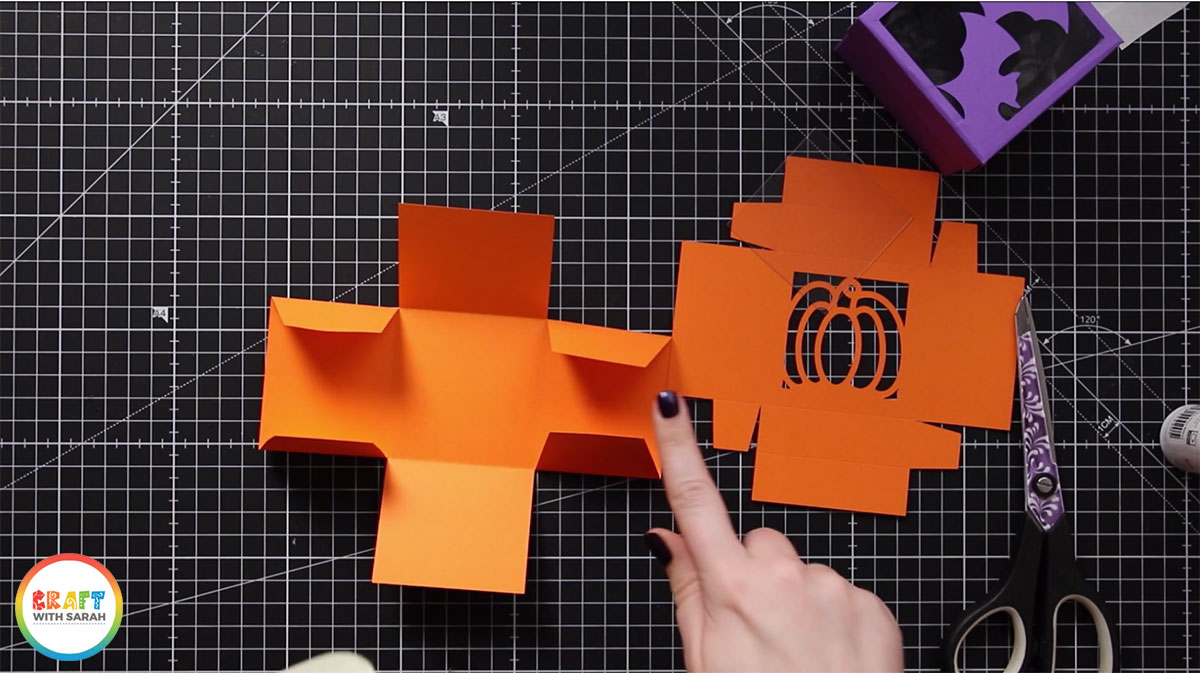
Place double-sided tape on the “tabs”.
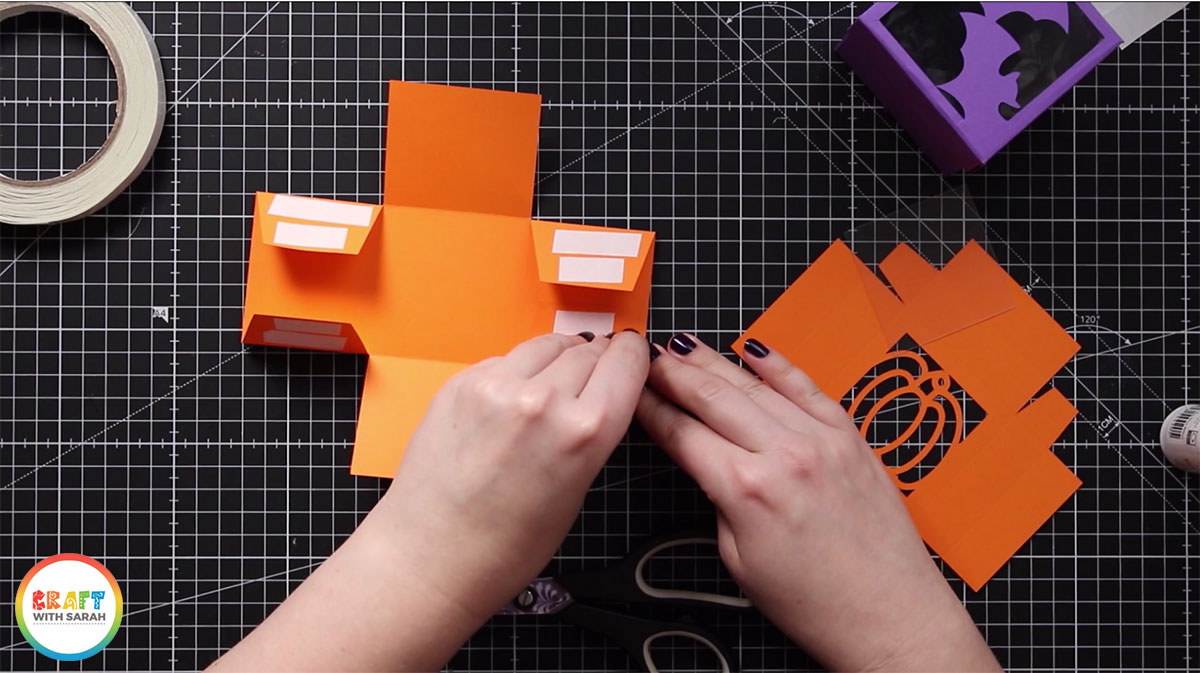
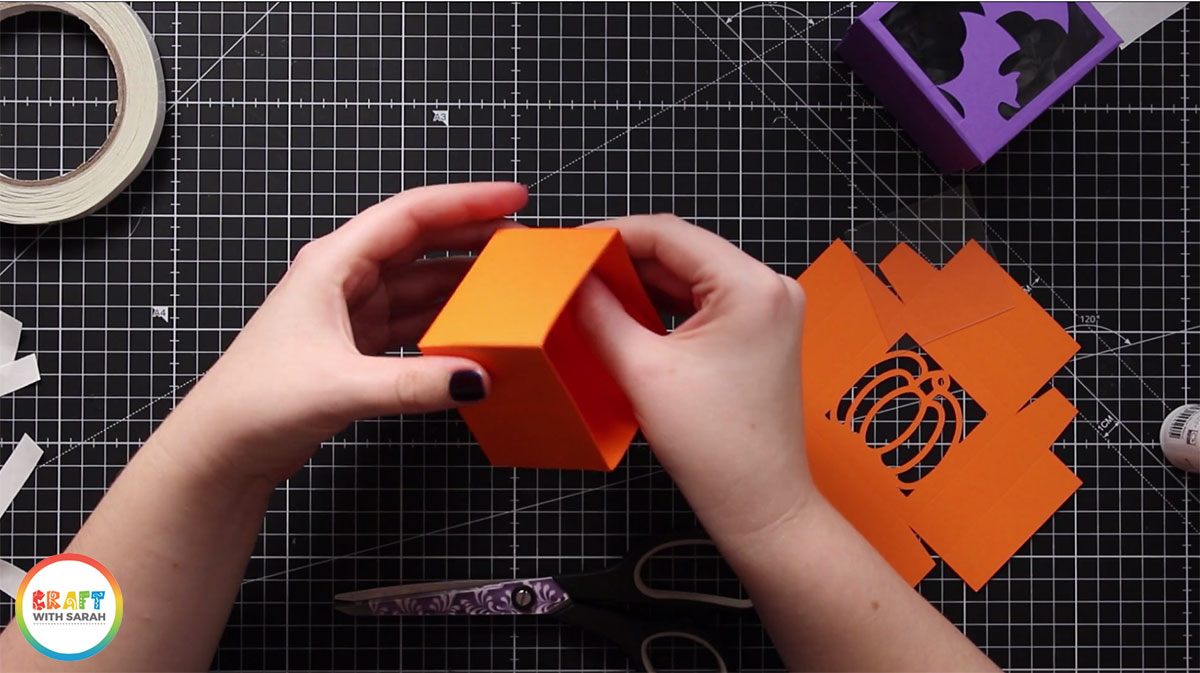
Stick the box together by attaching the tabs to the appropriate side of the box.
Step 6) Stick the box lid together
Turn the box lid upside down and fold along all the score lines.

AFTER folding the score lines, stick your acetate over the hole using glue or double-sided tape.
Whilst the glue is drying, add double-sided tape to all of the small tabs, and the edge rectangles along each of the sides, like this:
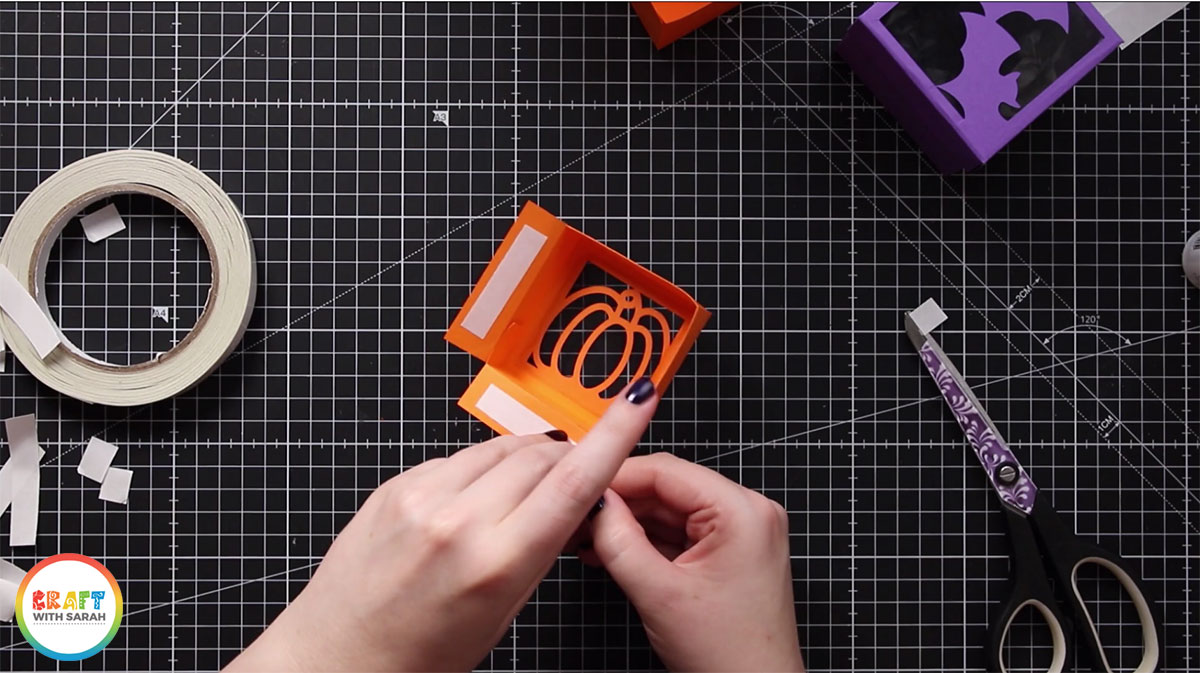
Peel the top off the double-sided tape along the four small tabs and stick the box lid together.

One-by-one, peel the double-sided tape topping off each of the edges and fold inwards to cover up the tabs to make a prettier/neater box.
Step 7) Add your treats!
Your candy box is now complete – yay!
You can now add all the sweets and chocolate that you wish 🙂
If your box is a little on the large side, use some scrunched-up tissue paper to fill up some of the space before you add the sweets in.
I hope you enjoyed this tutorial on how to use the pre-designed box templates in Cricut Access/Design Space, customize them to a Halloween theme and how to assemble the treat boxes once they have been cut.
[cws_clubhouse design=’1112′]
[cws_clubhouse design=’1114′]
Happy crafting,
Sarah x
[cws_halloween2020]

