Make Easy Halloween Hair Bows from Faux Leather
Make adorable faux leather hair bows for Halloween with 3 free spooky hair bow cutting files and a step-by-step tutorial.
Adding hair bows to your outfit is a great way to add a bit of Halloween fun without going too “over the top”.
Keep reading to find out how to make them…
Please note that some of the links included in this article are affiliate links, which means that if you click through and make a purchase I may receive a commission (at no additional cost to you). You can read my full disclosure at the bottom of the page.
How to make hair bows with a Cricut machine
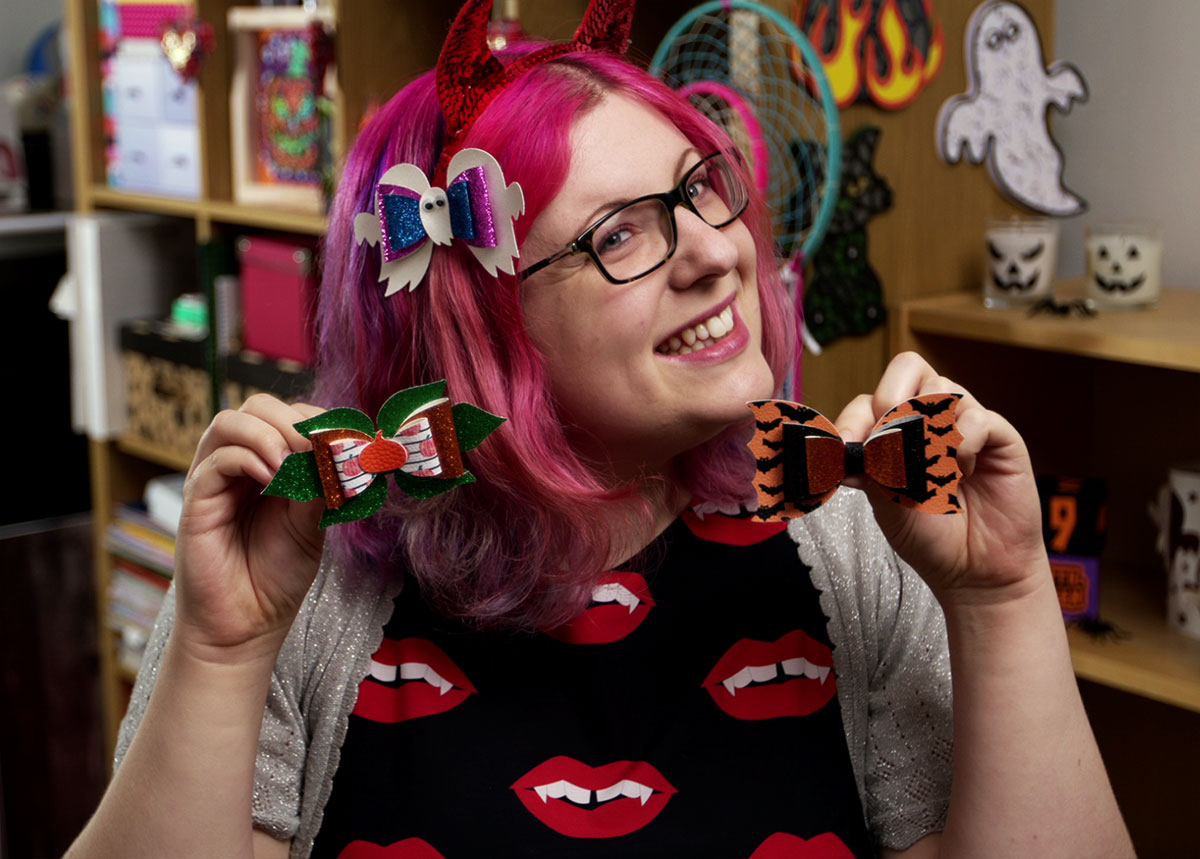
If you’ve been following along with the Halloween Craft Countdown and watching my tutorial videos then you’ve probably noticed that I have pink hair!
This is a new thing for me – I changed from brown to pink, purple and blue (aka galaxy hair!!) back at the beginning of September.
With such funky hair colours, I wanted something EVEN MORE EXCITING to accessorize for Halloween, and thought that hair bows would be JUST the thing to add to my outfits!
These hair bows work well for children and adults, and of course you can resize them in Design Space to make them smaller or larger as needed.
Video tutorial for Halloween hair bows
Watch this video to see how to cut faux leather with your Cricut machine and then turn it into these spooky hair bows!
A full written tutorial, along with a link to the free hair bow SVGs, is available further down on this page.
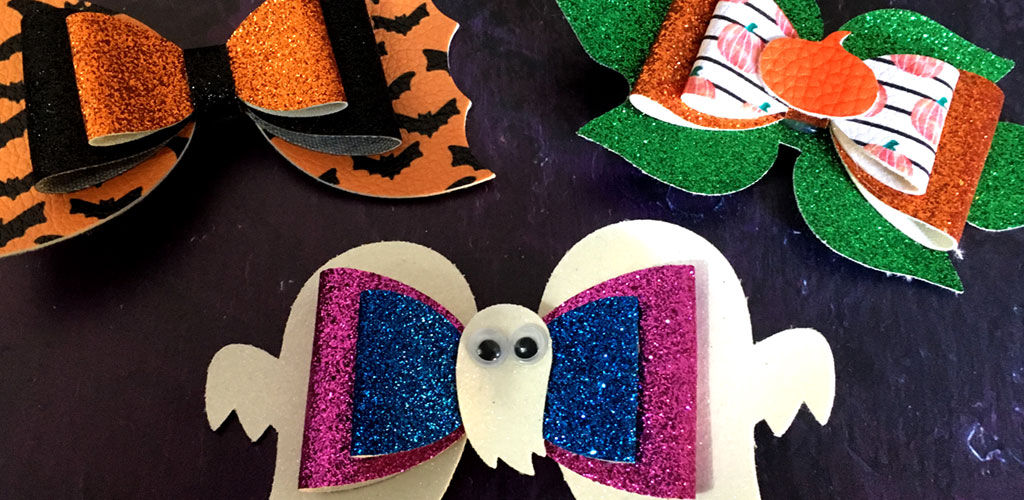
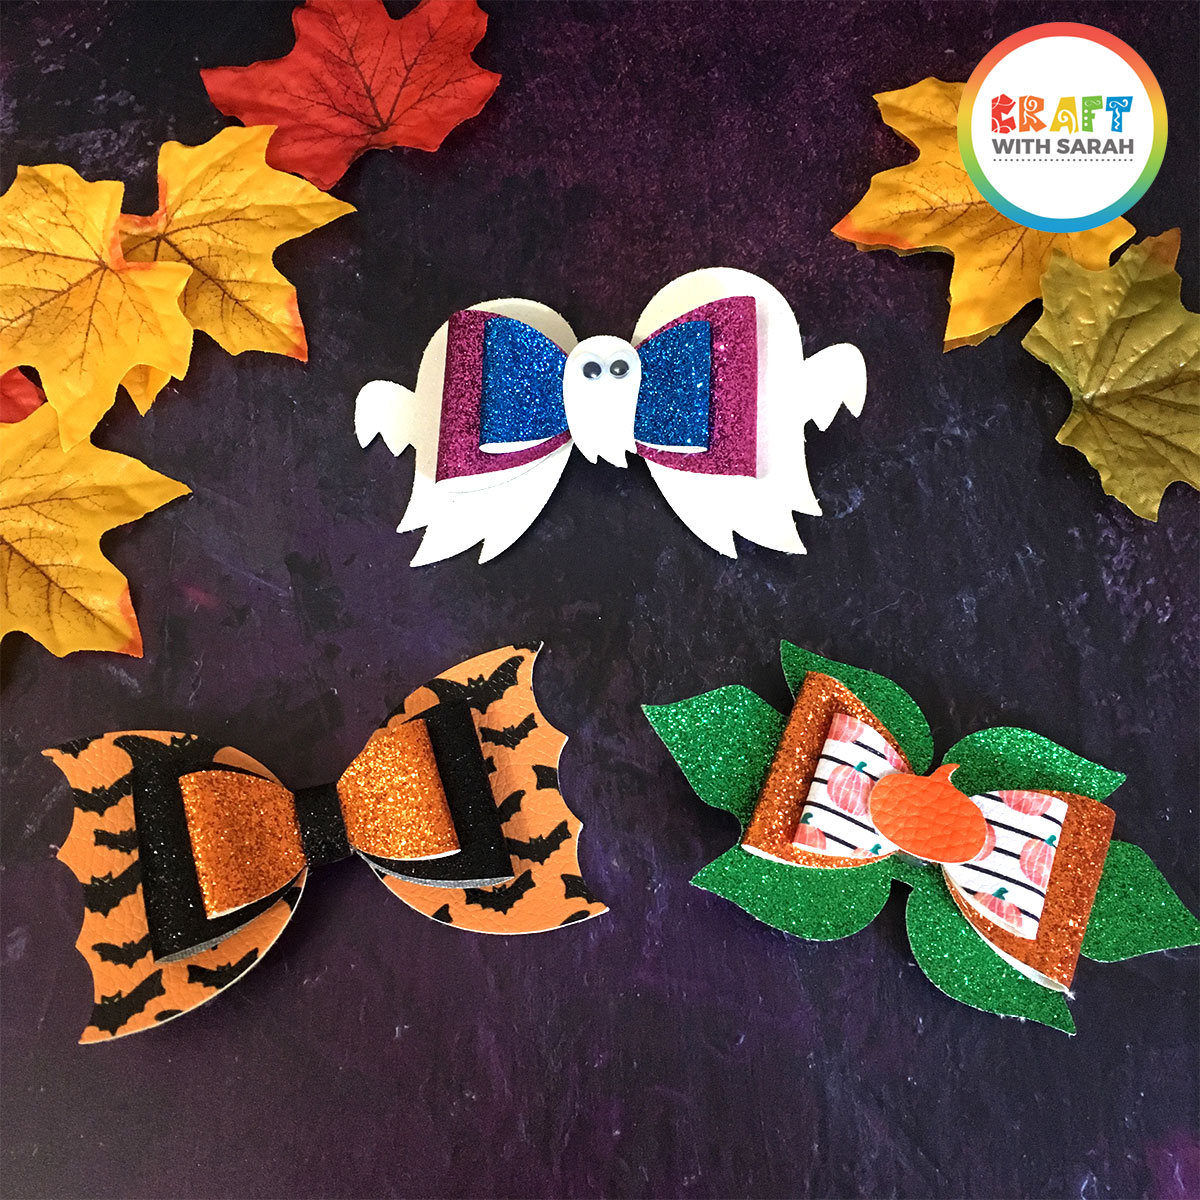
Free Halloween hair bow SVG templates
I’ve designed three different Halloween hair bow cutting files which you can download for free:
Download the Free Cutting File

Please login to your account to download this file.
TERMS OF USE:
You may sell finished, handmade physical craft items that you have made using this product but must not sell or share the digital files. Read full terms of use
Materials list for Cricut faux leather hair bows
- A digital cutting machine such as a Cricut Maker or Cricut Explore
- A medium grip or strong grip Cricut mat
- Free Halloween hair bow SVGs (see links above)
- Faux leather – I used this halloween faux leatherand this glitter variety pack
- Strong transfer tape (or regular transfer tape if you don’t have strong)
- Masking tape / painters tape / washi tape
- Crocodile clips
- A glue gun
How to make faux leather hair bows with a Cricut
Step 1) Choose your design
Download my free hair bow SVGs and open your chosen design in Design Space.
They will probably need resizing when you upload them. I find it’s best if you make the group that contains all the layers 5.8 inches in width.
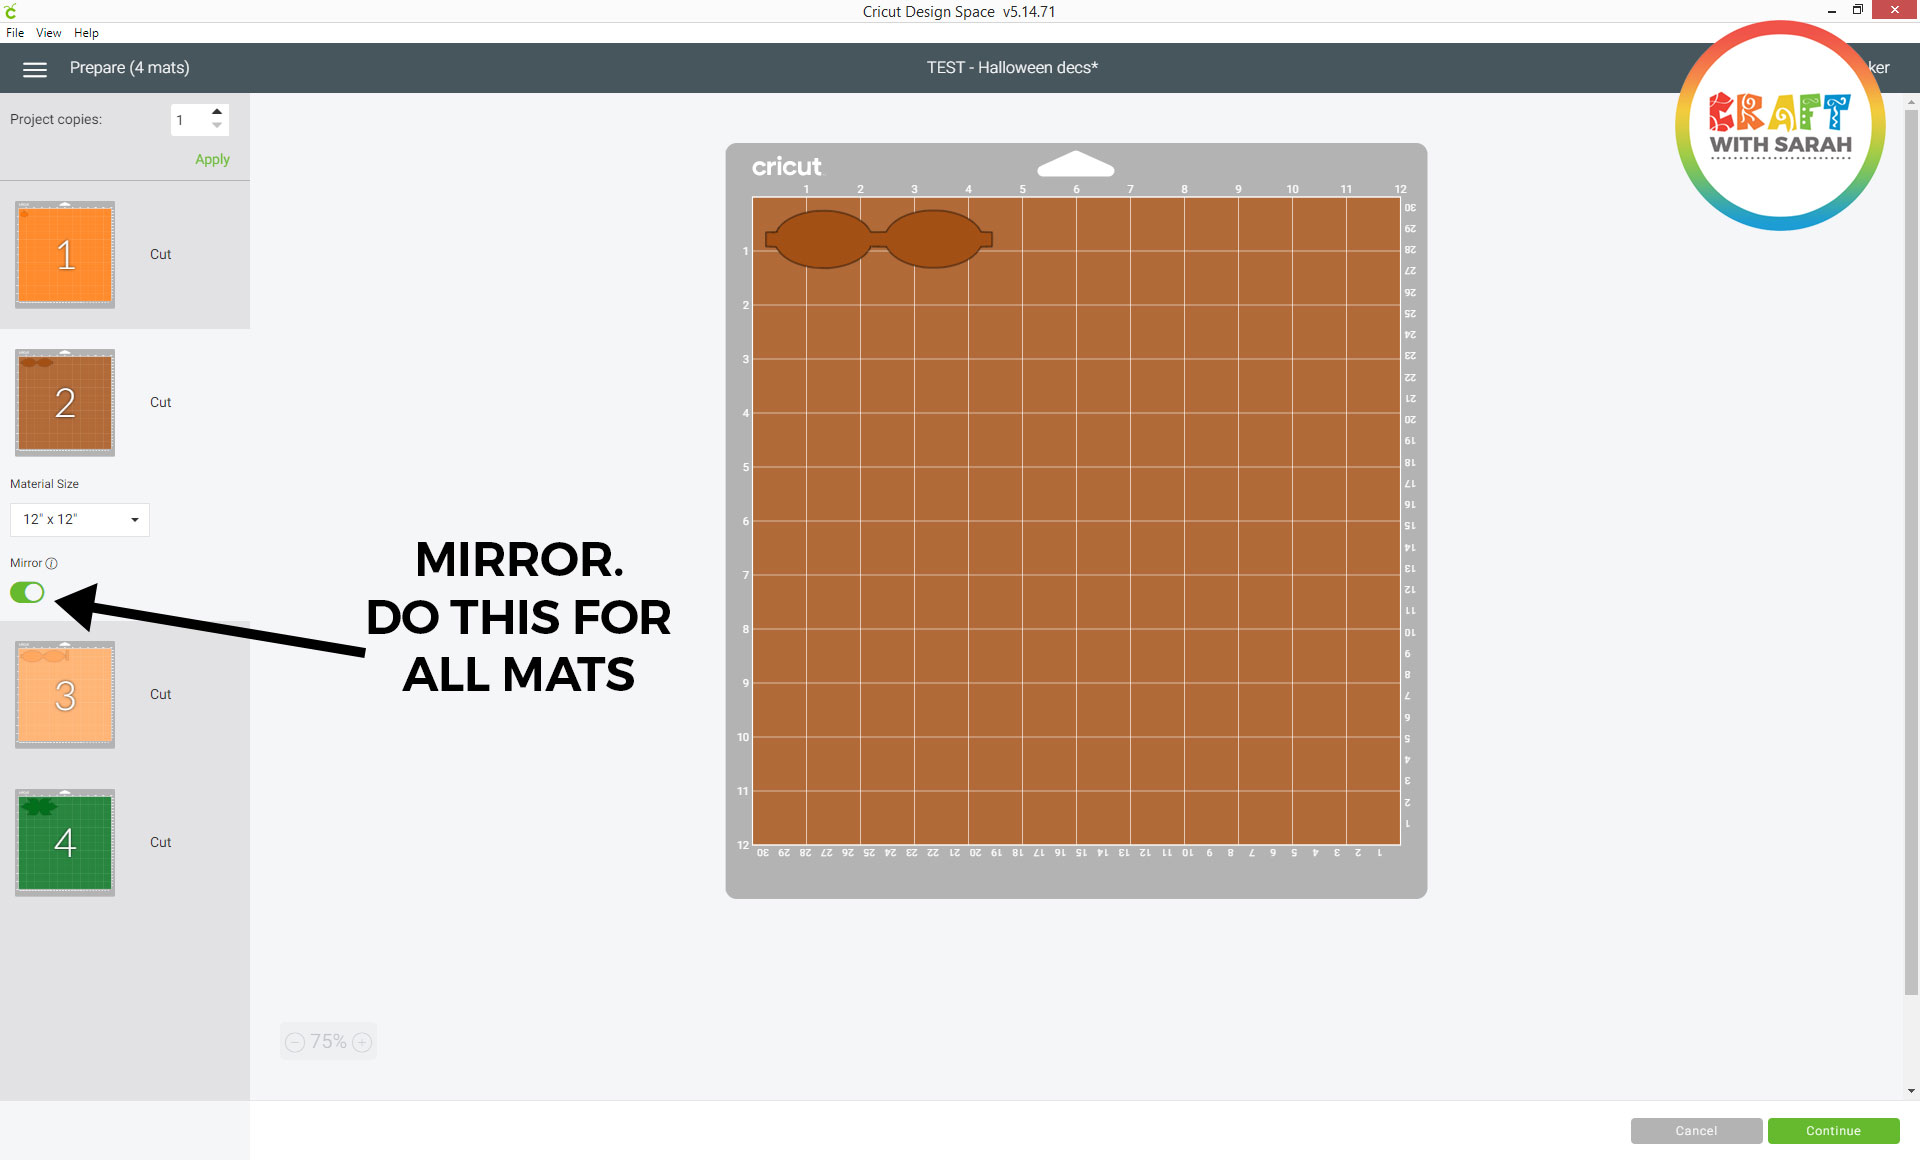
Click “Make it” and select the “Faux Leather (paper thin)” material type.
Don’t forget to mirror your designs as you’ll be cutting the designs out with the leather placed pretty-side-down on the mat.
Step 2) Cut out the hair bow design
Cut out the hair bow design. Use a strong grip mat if you have one, but if not then a green standard grip one should work fine as long as it is still quite sticky.
Faux leather cuts best when you put the pretty side facing down on the mat.
To stop any fibres from the faux leather (or glitter, if you’re using glitter faux leather) from coming off on your mat, I like to put a piece of transfer tape sticky-side up on the mat and then stick the faux leather to that instead of the mat.
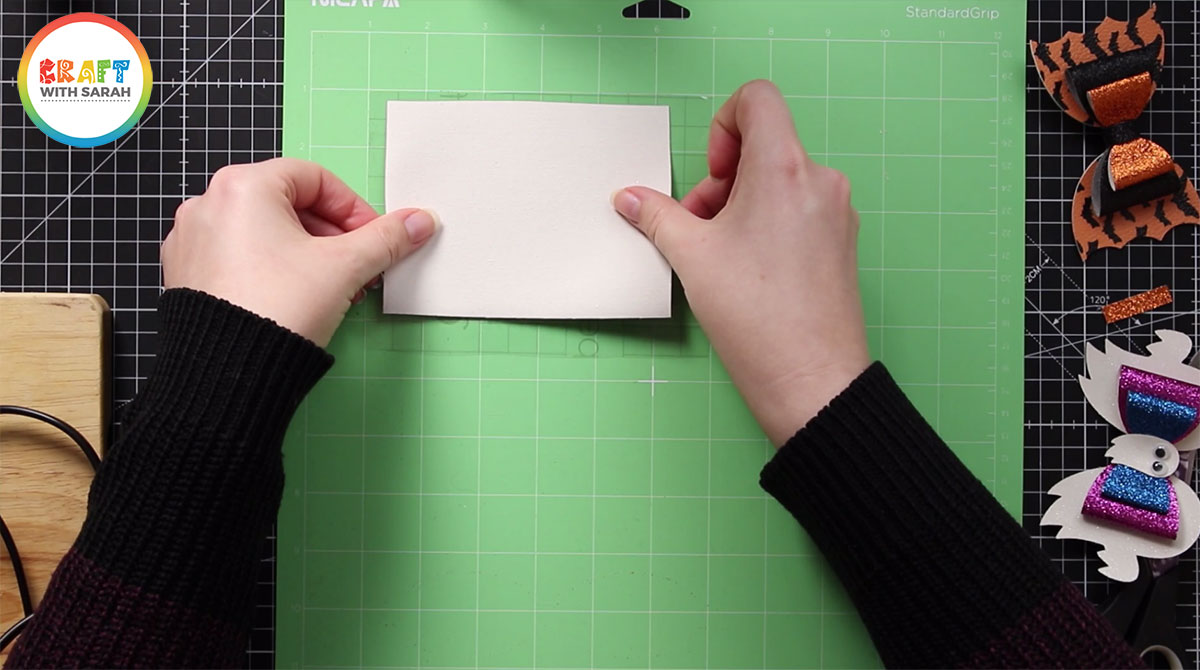
That way, any little bits that come off the leather don’t end up stuck on your mat – you can just peel off the transfer tape to remove it!
Add masking tape, blue painters tape or washi tape down all the sides of the faux leather before you cut it, just as an extra precaution to make sure it’s really stuck well to your mat!
Step 3) Stick the faux leather bow shapes together
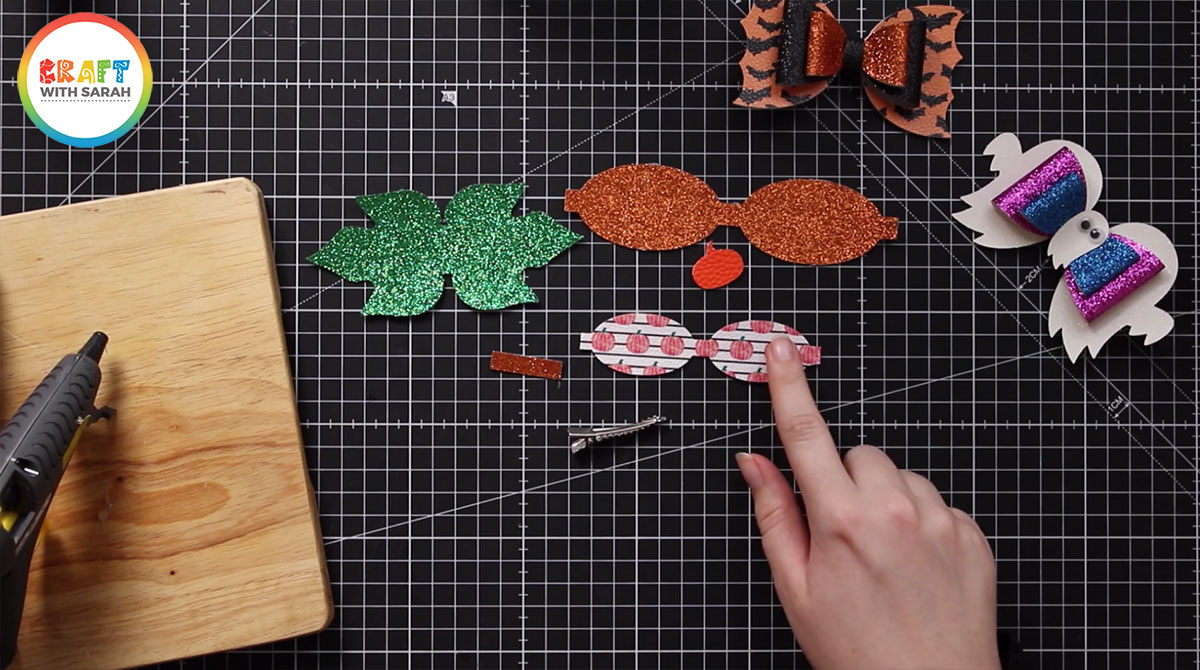
Once you’ve cut all the layers, you’ll end up with something like this:
Heat up your glue gun and select the larger of the two “bow” shapes.
Turn the faux leather upside down so that the underside is facing up, and then put some glue in the middle.
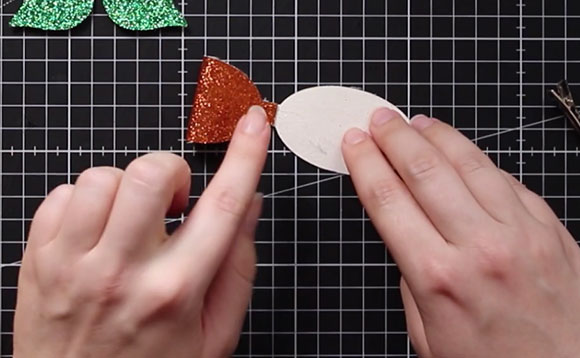
Fold over one of the sides and glue it into the middle.
Repeat with the other side.
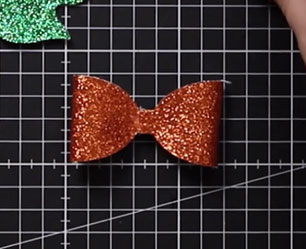
Follow those same steps with the smaller bow shape.
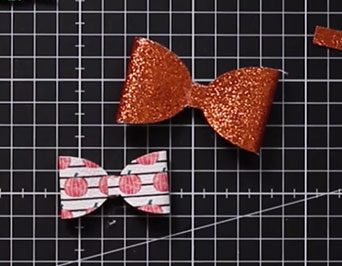
Glue the small bow into the middle of the larger bow.
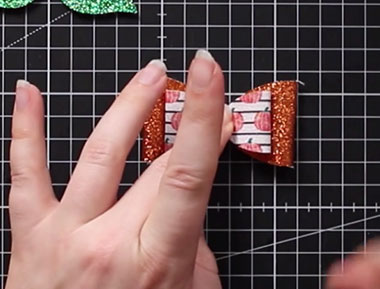
Step 4) Wrap the bow leathers around the middle
Take the small rectangle of faux leather and wrap it around the middle of the two bows.
This is to hide the glue from sticking the bows together, and to pull the two bow shapes tightly together.
Put some glue on the back of the bows and pull the rectangle tight around it.

You’ll be left with something that looks like this…
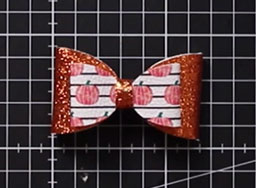
Step 5) Add the bow shapes to the back shape
Put a little bit of glue in the middle of the back shape; for this design this is the leaf shape.
Stick the bows in the middle and press firmly until they are stuck.
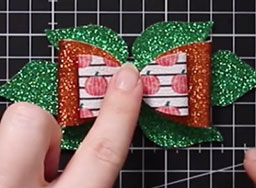
Step 6) Add the front embellishment
Glue the small pumpkin shape to the front of the bow.
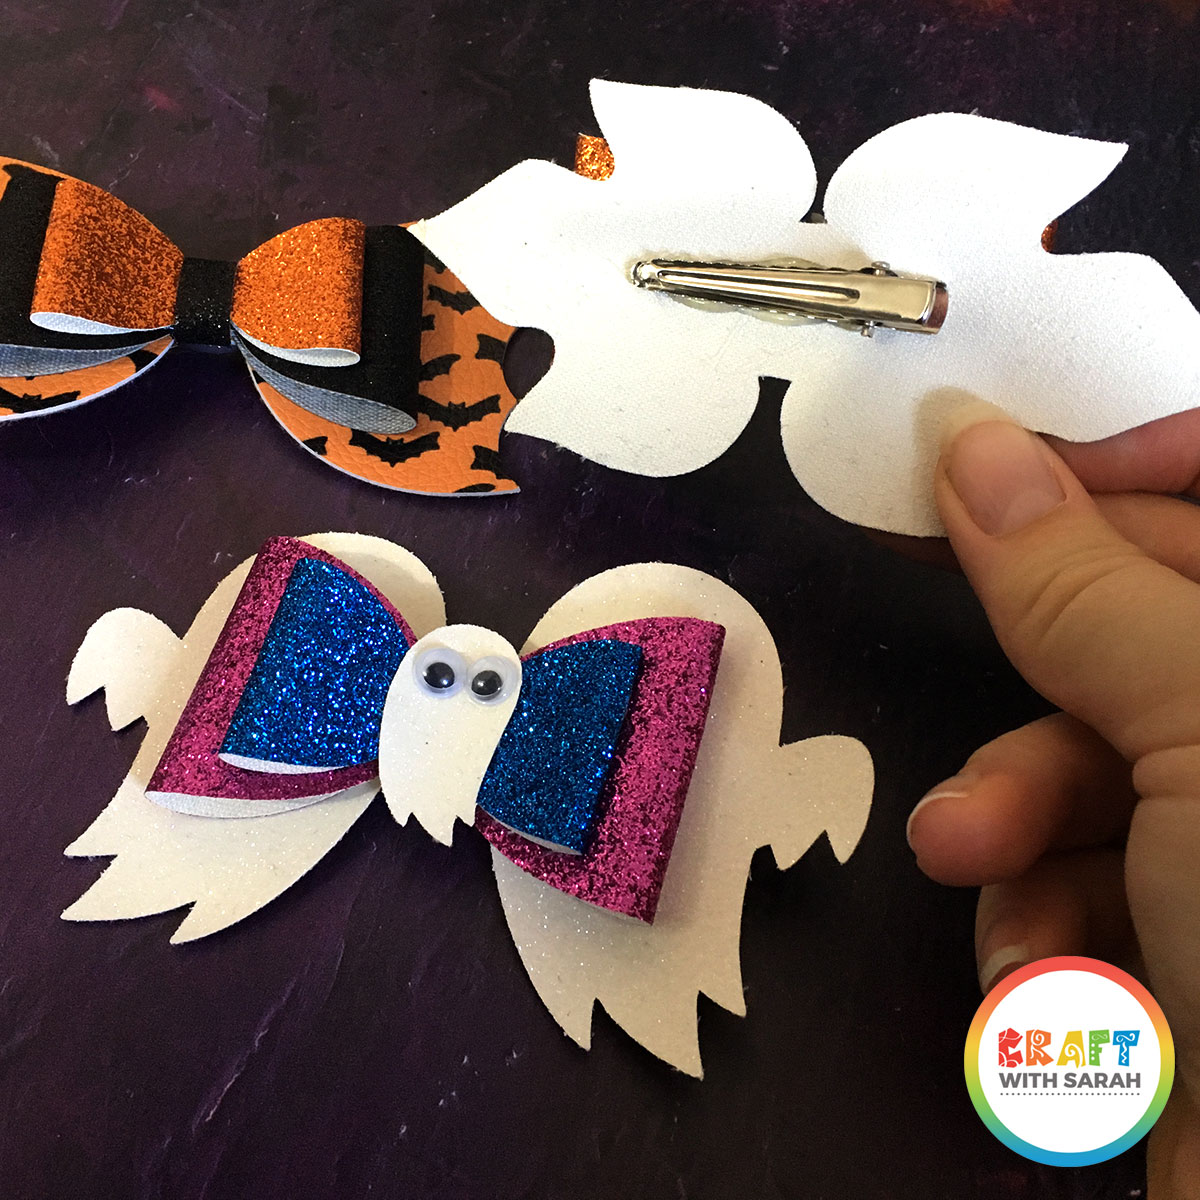
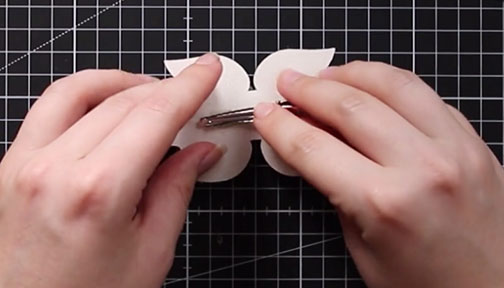
Step 7) Glue a crocodile clip to the back
When the glue you’ve already stuck on is dry, turn the bow upside down and add a strip of glue to the back.
Press a crocodile clip into the glue and hold it until the glue is dry.
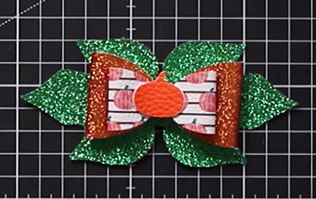
And that’s it, your cute little hair bow is now finished!
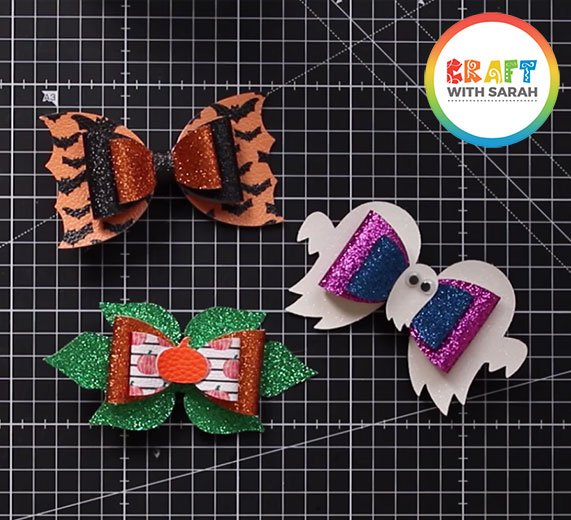
Pair it with the other two designs to make a lovely collection for Halloween 🙂
I hope that you enjoyed this tutorial on how to make Halloween faux leather hair bows with your Cricut machine.
If you missed the links to the free SVGs, scroll up to the section called “Free Halloween hair bow SVG templates” to find the links.
Happy crafting,
Sarah x
[cws_halloween2020]

