DIY Spider Egg Halloween Centrepiece that LIGHTS UP!
Make something special for the table this Halloween dinner with a this super spooky light-up Halloween centerpiece, filled with juicy, slimy “spider eggs”.
Can you believe that the Halloween Craft Countdown ends tomorrow? It’s gone so quickly and I hope you’ve enjoyed all of the Halloween crafts that I have been sharing.
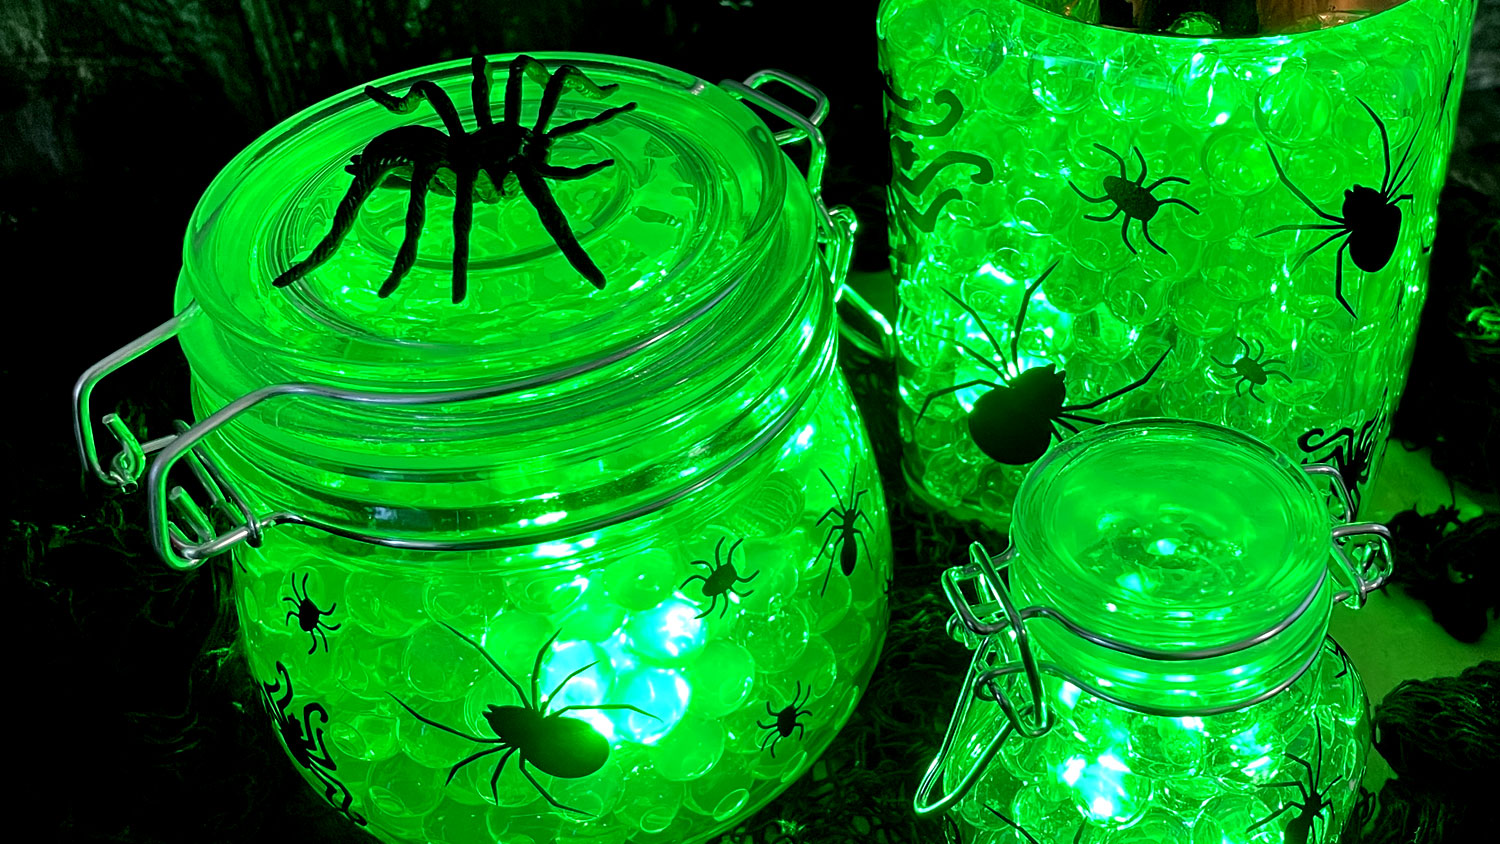
We’re going to fill some glass jars with water beads, make them glow all different colors and add some vinyl spiders to the outside for a really creepy appearance.

Halloween centrepiece ideas
Watch the video below to find out how to make this light-up Halloween centrepiece. Or, keep scrolling for a written tutorial.
Spider egg jars materials
Here is a list of the materials that I used to make this project.
Please note that some of the links included in this article are affiliate links, which means that if you click through and make a purchase I may receive a commission (at no additional cost to you). You can read my full disclosure at the bottom of the page.
- Cricut Maker
- Light blue Cricut cutting mat
- A selection of jars (from The Range)
- Cricut brand black matte permanent vinyl
- Water beads
- Submersible LED lights
- Plastic spiders
- Spider web material (from Poundland a few years ago)
- Wooden slice (mine is a chopping board from Home Sense!)

How to make a DIY Halloween centrepiece
Let’s get started on our vinyl spiders and their “eggs”!
Step 1: Soak the water beads
Here are the water beads that I’m going to be filling my jars with. They really don’t look like very much at the moment, but how these work is you put them in water and then they absorb it all and they get really really big so that they will then fill the jars.

Get one jug/bucket/bowl for each colour of water beads you are making and add about 1 liter of tap water in each. Check the instructions of the particular beads that you’ve bought because some of them may vary based on how much water you need.
Cut the water bead bags open and add them to the jugs.
They will take around 12 hours to soak up all the water.

Step 2: Make the vinyl spiders
Whilst the beads are soaking, you can decorate the outside of the jars with vinyl spiders.
Open up Design Space and start a new project.
Go to “Images” and type in “Spider”. Use the filters on the left to look for one-layer Cut files and choose a selection of different spiders.

Use the Duplicate button to make copies of the spiders. Depending on the size you make them, and the size/amount of jars you are filling, you will probably need around 30-50 individual spiders.


Cut from black adhesive vinyl (permanent or removeable) and then weed the excess vinyl away.

Peel each spider off the backing paper like a sticker and stick it to the outside of the jars.

Step 3: Fill the jars
When the water beads have finished expanding, drain the jugs into a colander to get rid of any leftover water, then add the beads back into the jugs.

Fill your jars with the beads. You can choose to just use one colour, or “layer” different colours within the same jar.

Step 4: Make the Halloween centrepiece
Open up the submersible LED lights and remove the battery protector.

Screw them shut and the light should turn on.
Places several lights into each jar and use the remote control to turn them the colour you want.

The water beads will hide the lights from view so you won’t see the lights themselves, just the lovely glow of the different colours.
Continue the process for all the jars, then add to a wooden slice and cover in fake spider web material and plastic spiders for the ultimate creepy Halloween centrepiece.
I hope you’ve enjoyed this tutorial on howto use water beads to make spooky Halloween centerpiece.
I really like how they look when they’ve got the lights in them to light them up and of course the vinyl on the outside really adds to that Halloween vibe.
Happy crafting,
Sarah x

