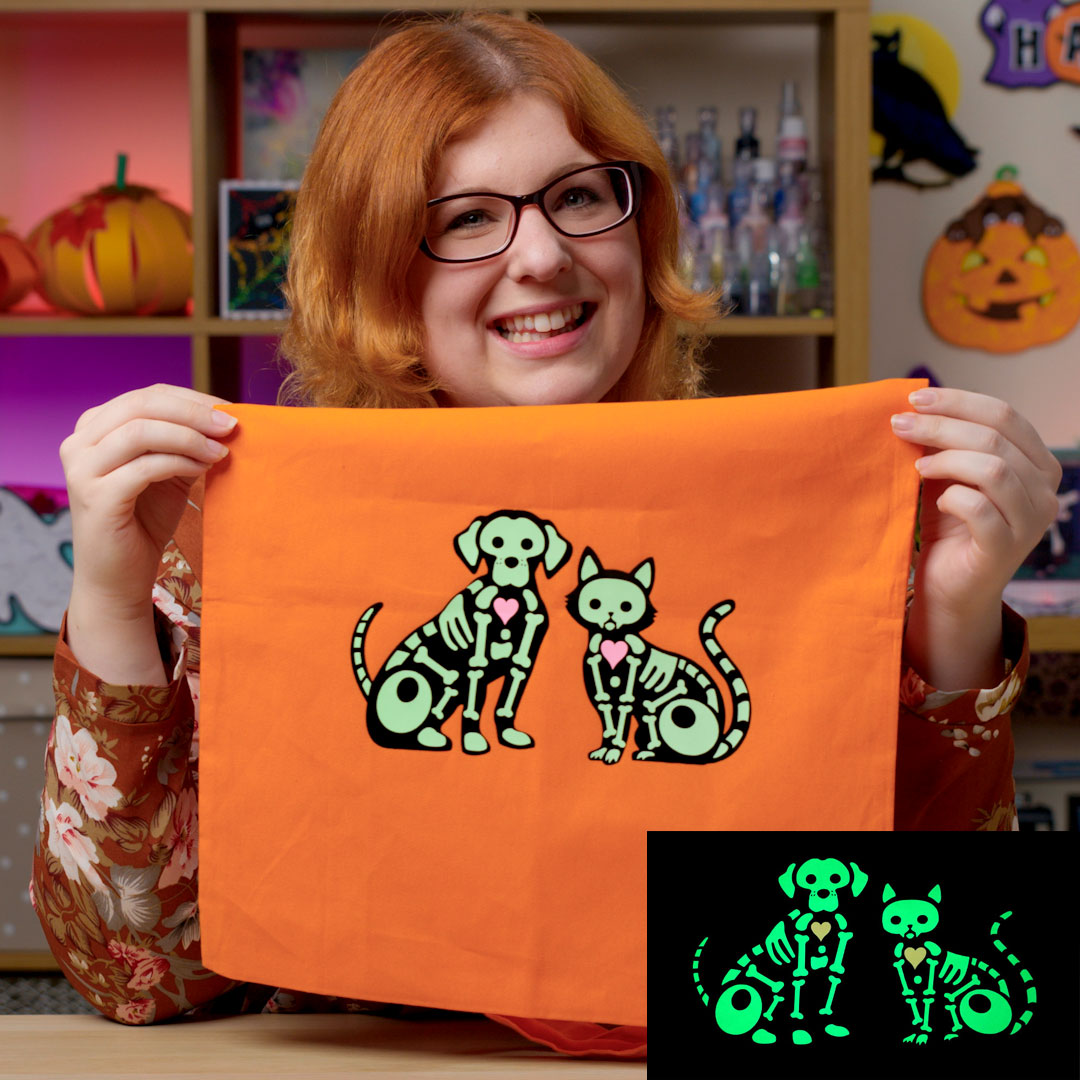
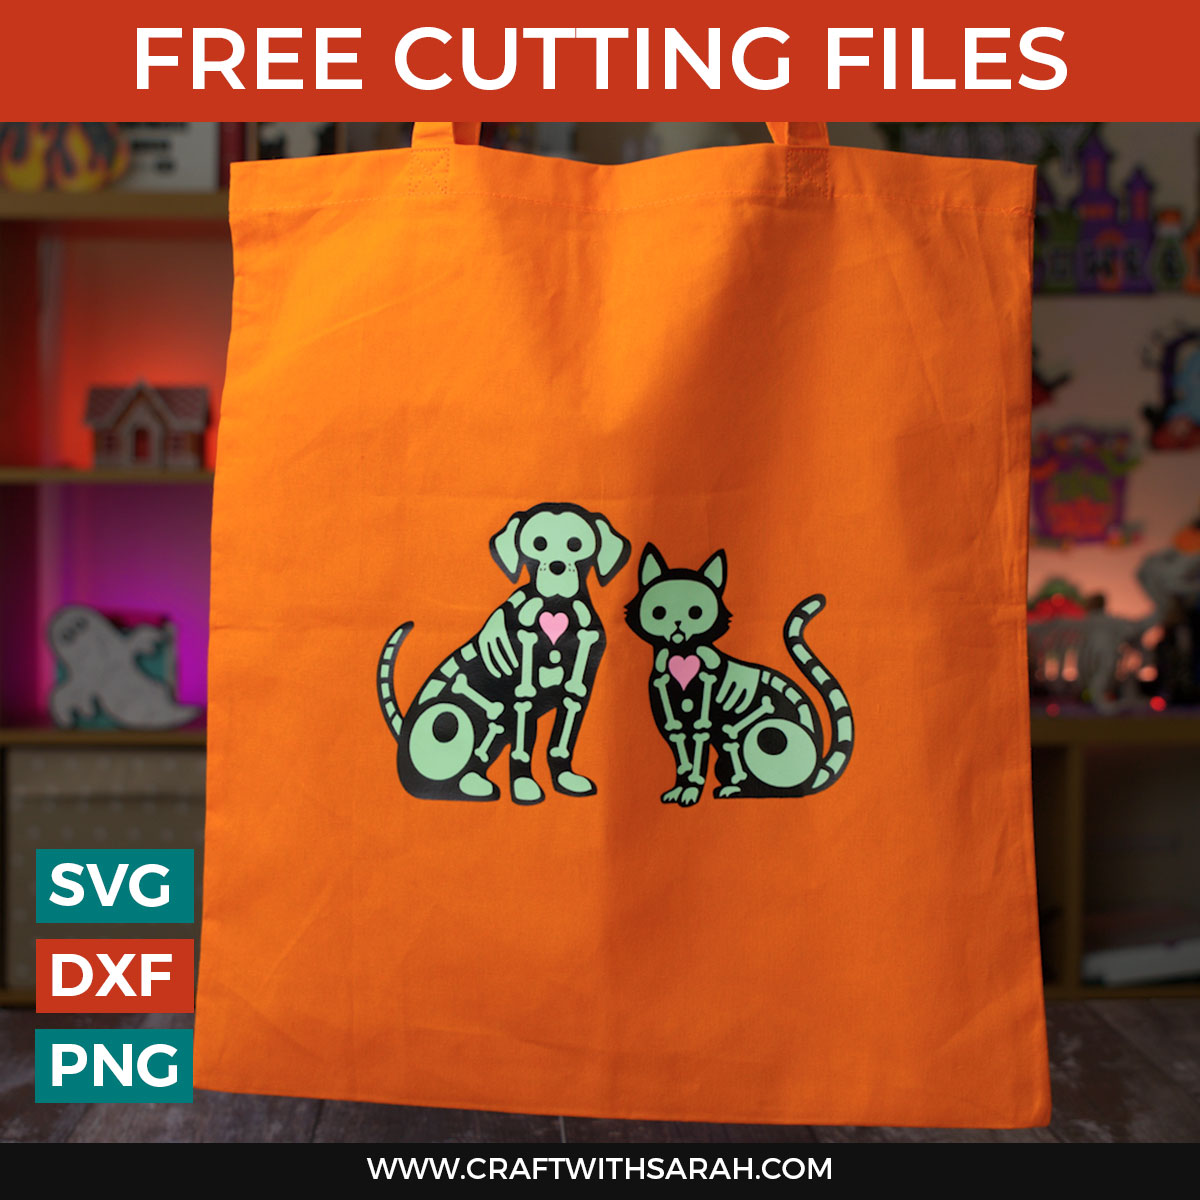
Halloween Skeleton Tote Bags with Glow in the Dark HTV
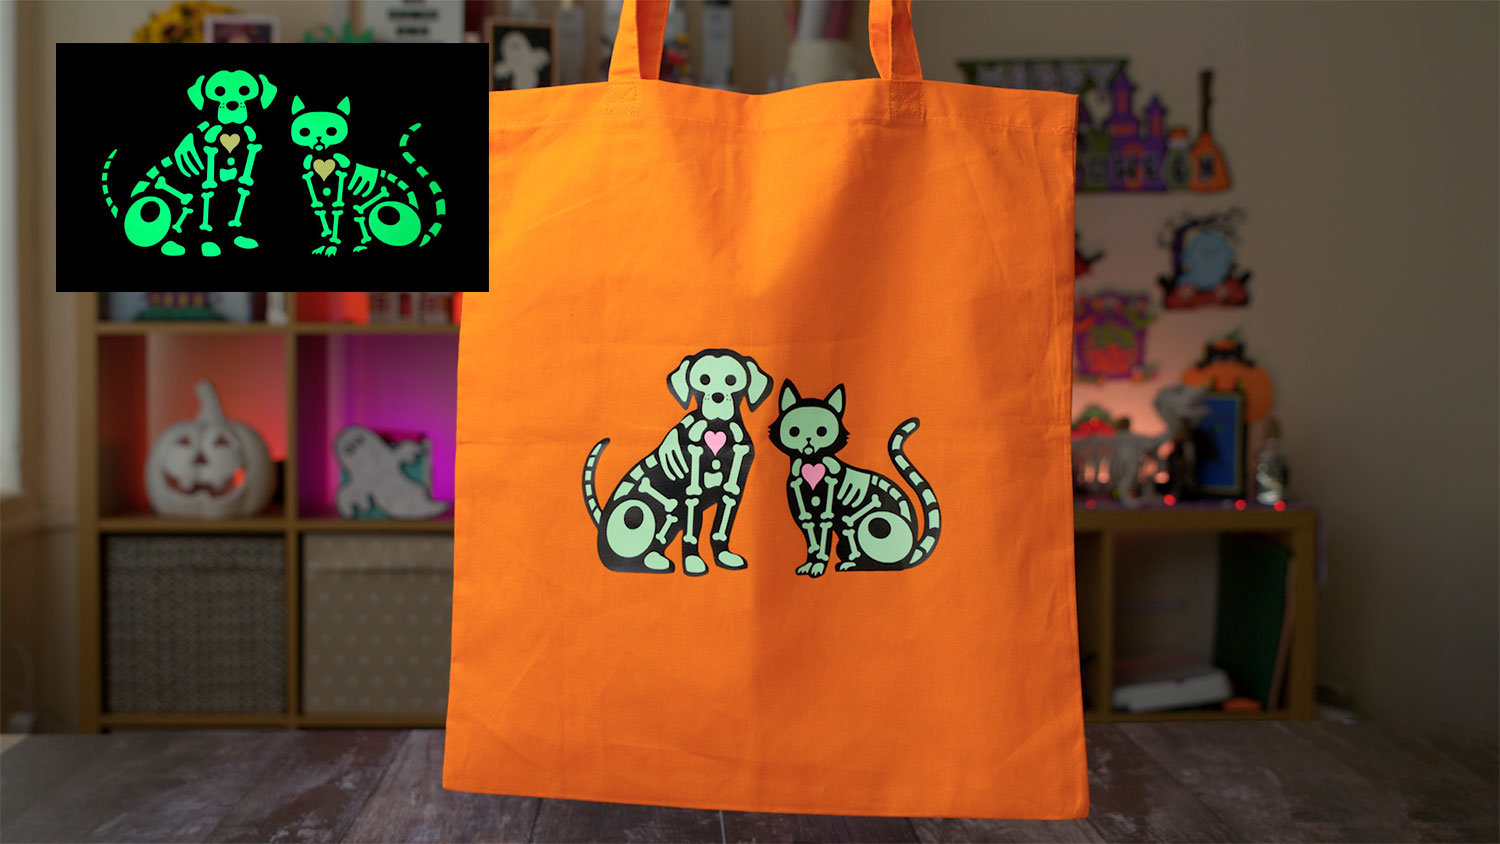
Make a spooky skeleton tote bag for Halloween that glows in the dark!
Glow in the dark HTV is fun to use and give an amazing effect when the lights go out!
When it’s dark, all you can see are the glowing skeleton bones with the little pink hearts inside.
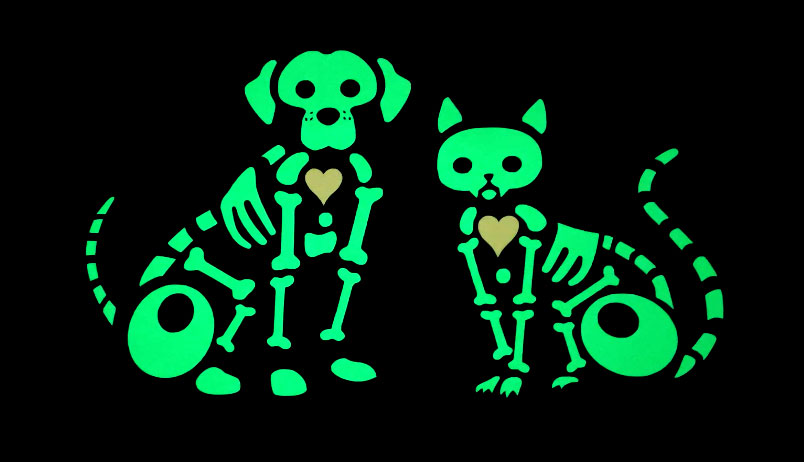
Glow in the dark Halloween tote bags
Watch the video below to find out how to make this glow in the dark Halloween tote bag. Or, keep scrolling for a written tutorial.
The link to download the free SVG is a little further down this page. Look for the pale green box 🙂
Glow in the dark tote bag materials
Here is a list of the materials that I used to make this project.
Please note that some of the links included in this article are affiliate links, which means that if you click through and make a purchase I may receive a commission (at no additional cost to you). You can read my full disclosure at the bottom of the page.
- Cricut Maker
- Light blue Cricut cutting mat
- Orange tote bag
- Black HTV
- Glow in the Dark HTV
- Swing away heat press
- Teflon sheet
I purchased my glow in the dark HTV from Greenstik Materials in the UK. Other supplies worldwide include 143 Vinyl and Teckwrap.
How to use glow in the dark HTV
Here’s how to make this cute Halloween tote bag with glow in the dark heat transfer vinyl.
Step 1: Download the free SVGs
Download the Free Cutting File
Please login to your account to download this file.
TERMS OF USE:
You may sell finished, handmade physical craft items that you have made using this product but must not sell or share the digital files. Read full terms of use
The cat and dog designs come separately within the same download.
Before you upload the SVGs to Design Space, you need to unzip the download folder that it comes in.
- How to unzip a folder on Windows computer
- How to unzip a folder on a Mac
- How to unzip a folder on an iPad/iPhone
- How to unzip a folder on an Android device
Step 2: Upload the SVG file(s) into Design Space
Open up Cricut Design Space and upload the SVG files.
The cat and the dog come separately, so you can choose to just use one of them, or to put them together into the same Project to cut both together, as I did.
Make sure you upload the files which start SVG_ in the filename!!
After uploading, the designs will show in your “Recently Uploaded Images”. Click on them and then press “Add to Canvas” to put it onto your Project.
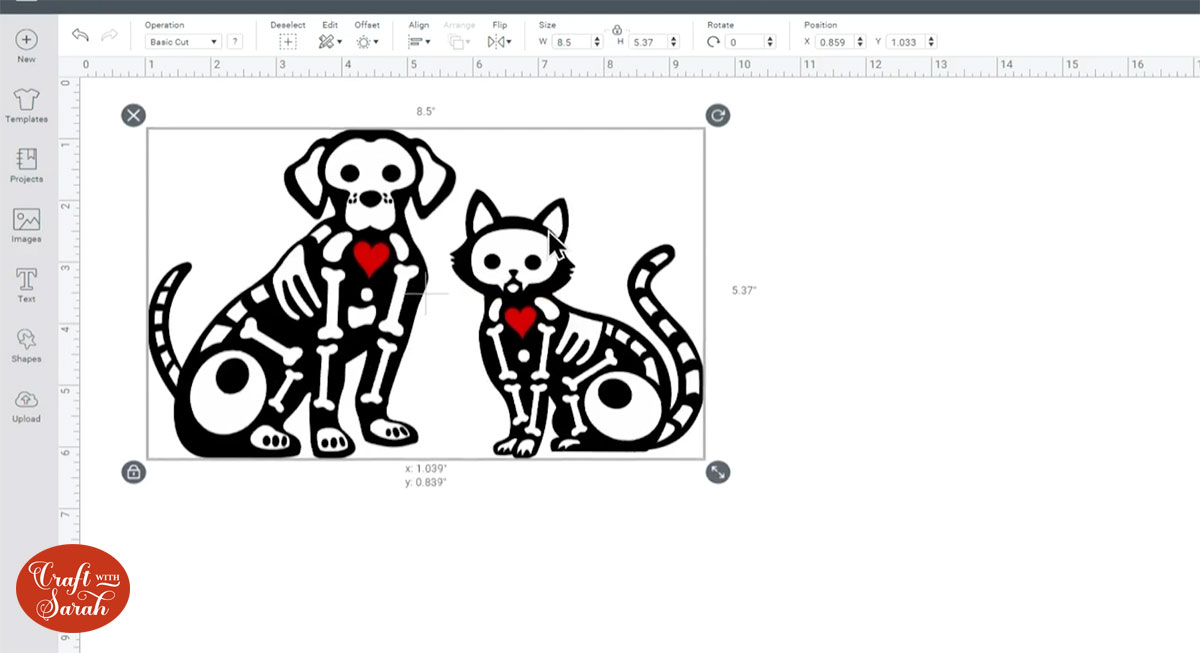
Step 3: Resize the SVGs
Resize the designs to fit on the tote bag, clothing or other apparel that you will be ironing it to.
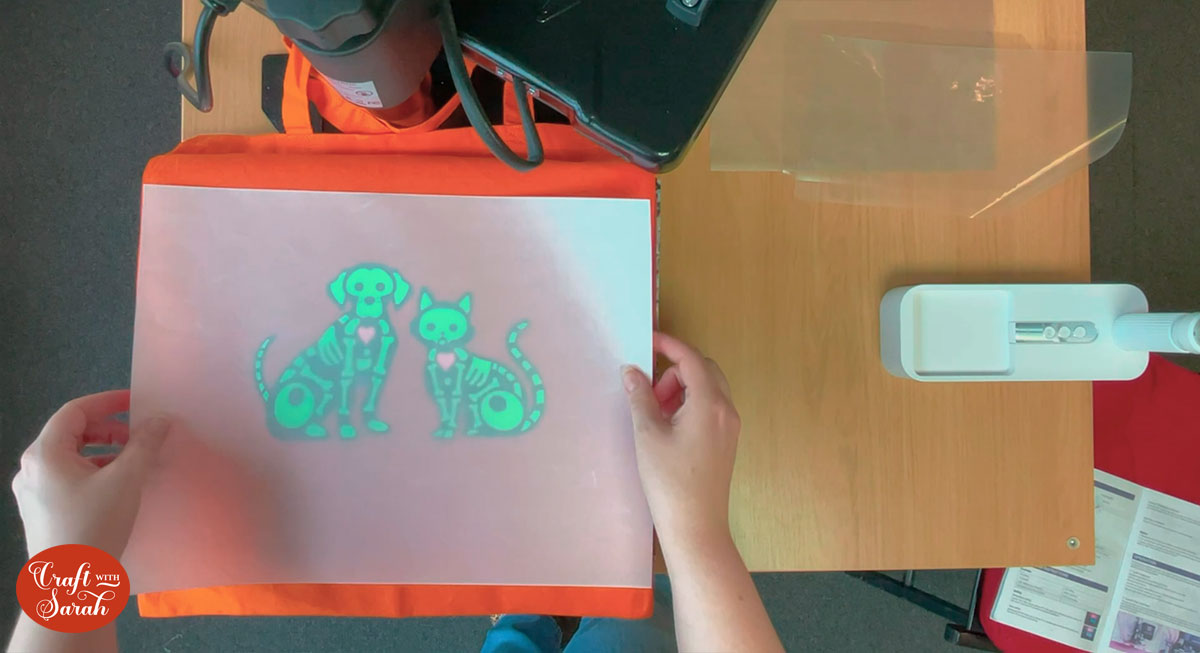
I made the cat image slightly smaller than the dog and placed them next to each other.
If you are using both images, select them both and click “Group” so that you can resize them together.

I resized the Group to 8.5 inches in width.
Step 4: Attach layer together
If you want the cat and dog layers to stay “in position” when you cut them, which makes it easier to apply the iron-on, you will need to “Attach” the same coloured layers to each other.
Click your Group and press “Ungroup”.

Click one of the black layers in the layers panel and then press shift on your keyboard and choose the other black layer.
Press “Attach” to tell the Cricut you want these two layers to cut in exactly the same way as they are appearing on the screen.

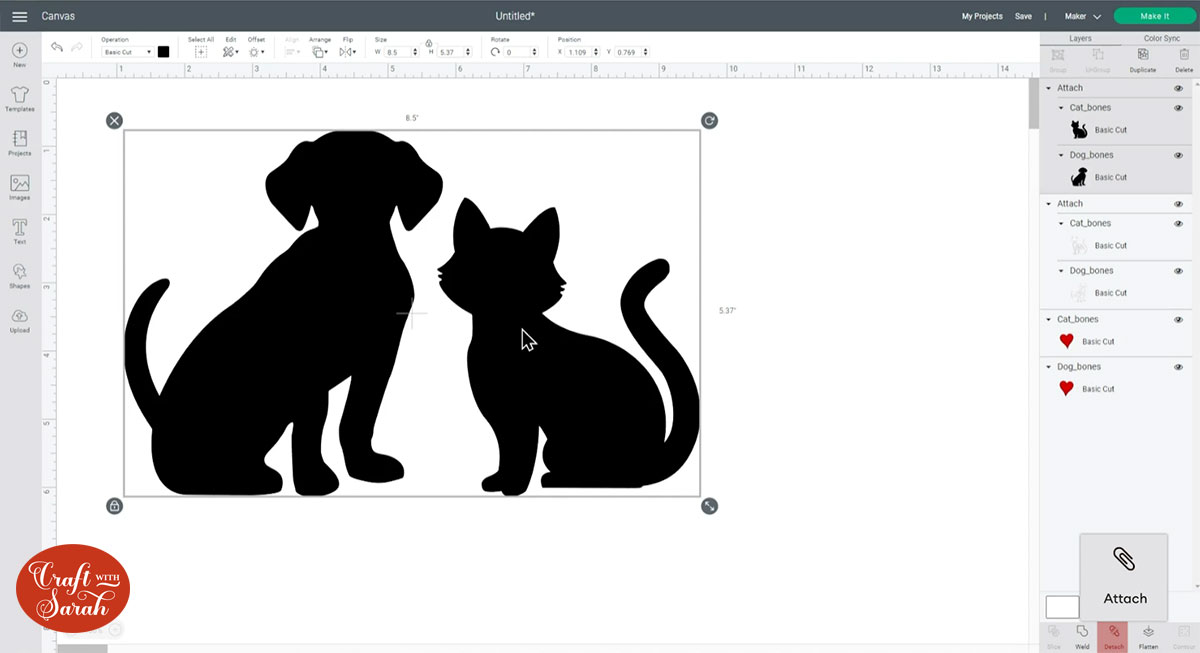
Do the same for the skeleton layers.
I didn’t attach the heart layers as they are so small that I didn’t want to waste HTV by attaching them as then they would cut with a big empty space of material between them.
Step 5: Cut the heat transfer vinyl
Click “Make It” and mirror your black HTV by clicking the toggle button underneath that mat colour.
Check your manufacturer’s instructions on the glow in the dark vinyl to see if you need to mirror it or not. Some brands can be different, so it’s important to check.
I DID need to mirror mine, so I clicked the “mirror” toggle on both the bones and hearts mats.
Mirroring “flips” the design so it cuts “the wrong way round”. Don’t panic by this – when you iron the design onto your project it will magically appear the correct way round!
The vinyl instructions should also tell you what cut setting you need. If in doubt, Everyday Iron On works well for me on most types of HTV.
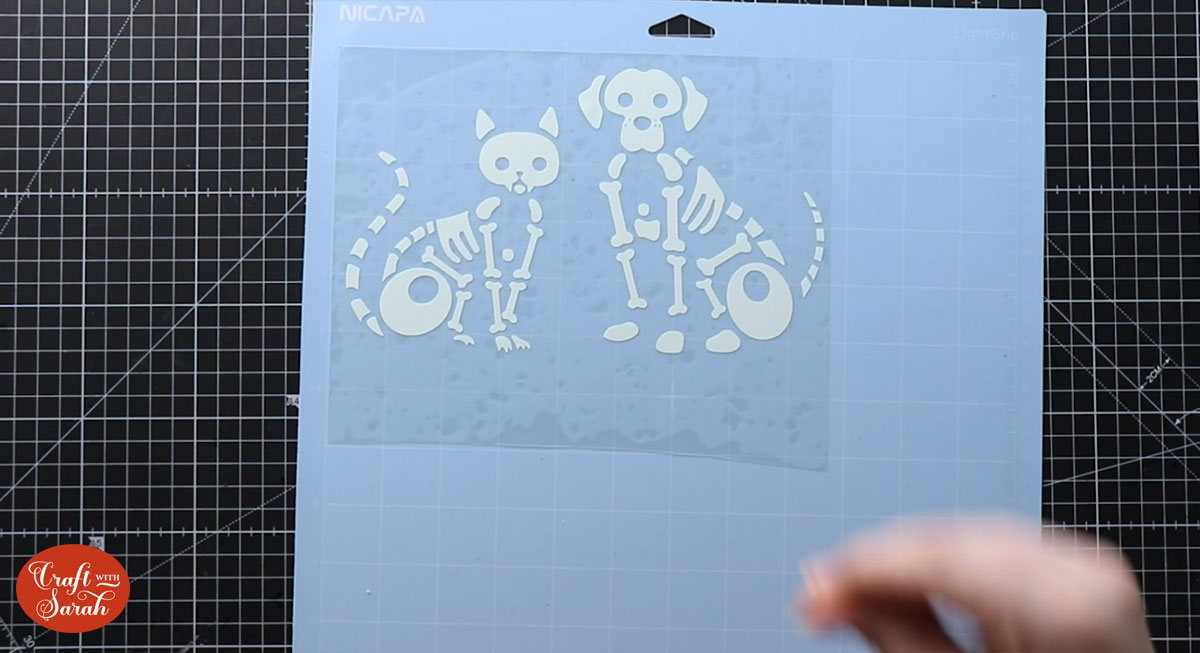
Step 6: Weed the design
Use a weeding tool or similar to “pull away” all the parts of the vinyl that you won’t need. This is called “weeding”.
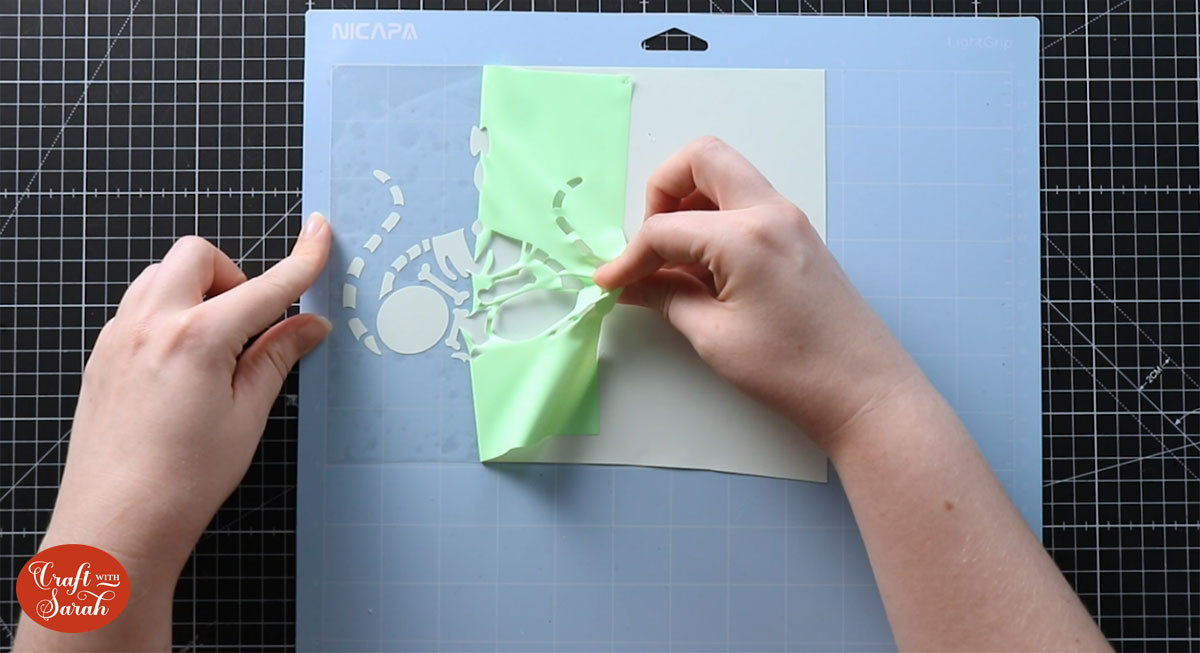
Be sure to take out the eyes and nose in the animals, and the tiny shapes on the dog’s face.
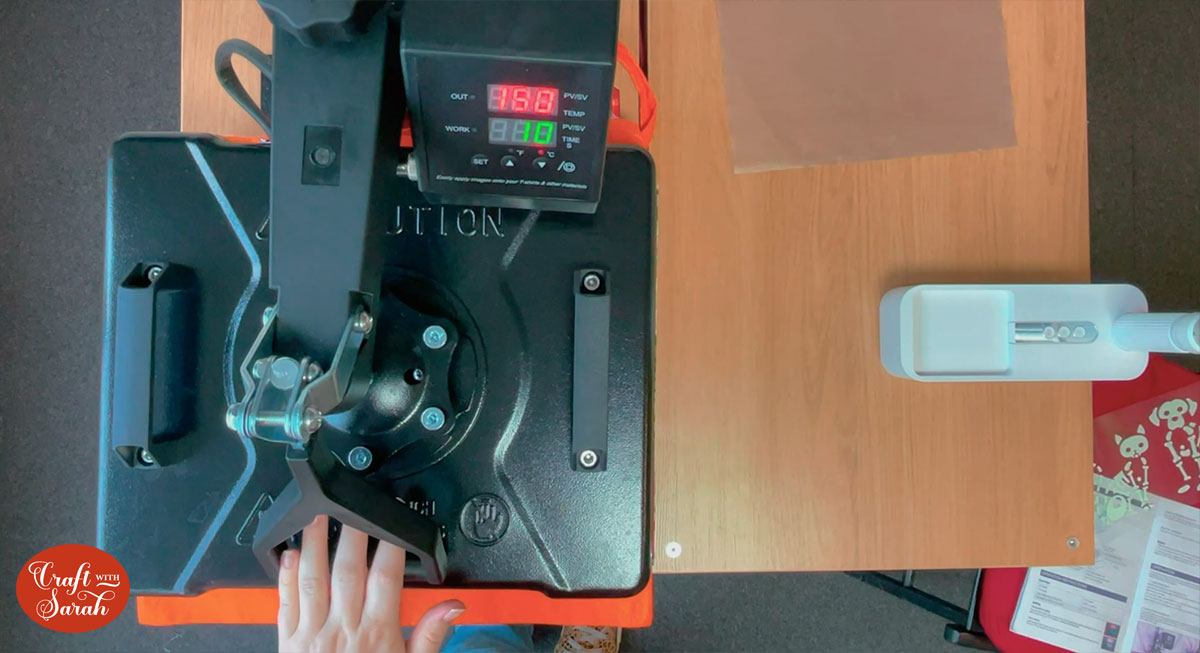
Step 7: Press the design
Pre-heat your heat press to the temperature stated on the HTV instructions. Mine was 150 degrees.
Put the tote bag into the heat press and press it for about 5 seconds.
This helps to iron out any creases and removes any moisture from the material.
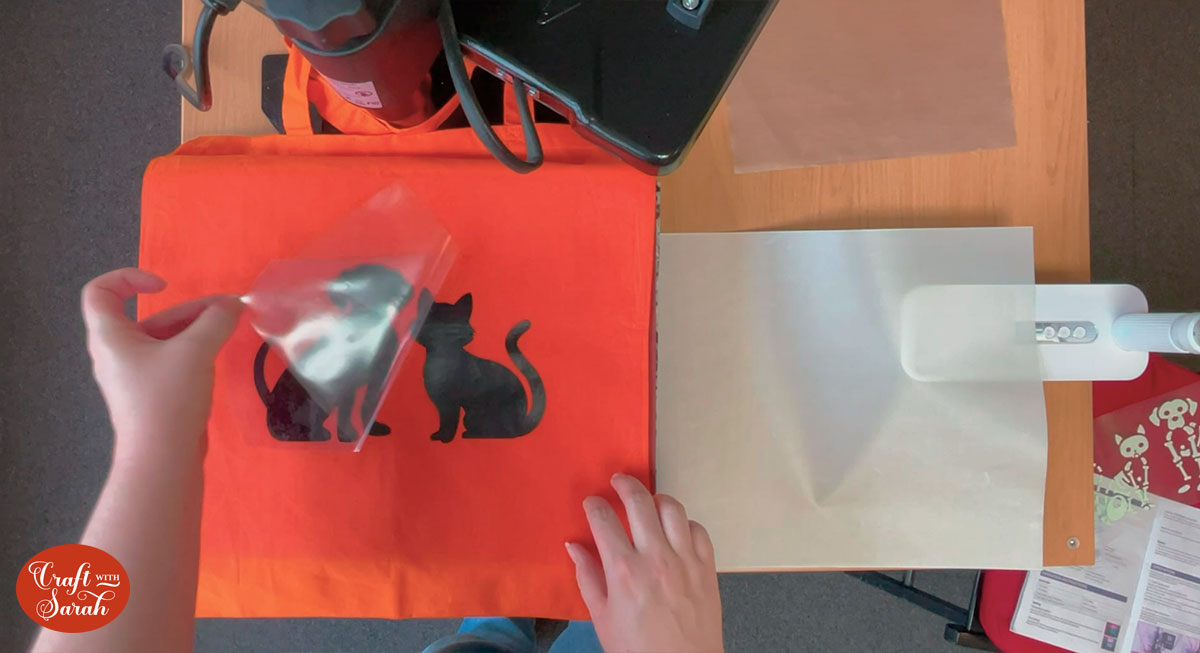
Next, put the black HTV onto the bag and press according to the vinyl manufacturer’s instructions.
The plastic carrier sheet goes on sticky-side-down to help keep the design in place.
Make sure you add a teflon sheet or similar to the top of the HTV before you press it. I forgot to do this on my first attempt, and the vinyl stuck to the top of my heat press – eek!! Luckily I managed to pull it off, but it messed up the design…
After pressing the black HTV, peel off the plastic backing. Some HTV requires it to be peeled off when the design is still warm, but others are a cool peel. Again, this should be included on the manufacturer’s instructions.
Next, add the bones layer and press again.
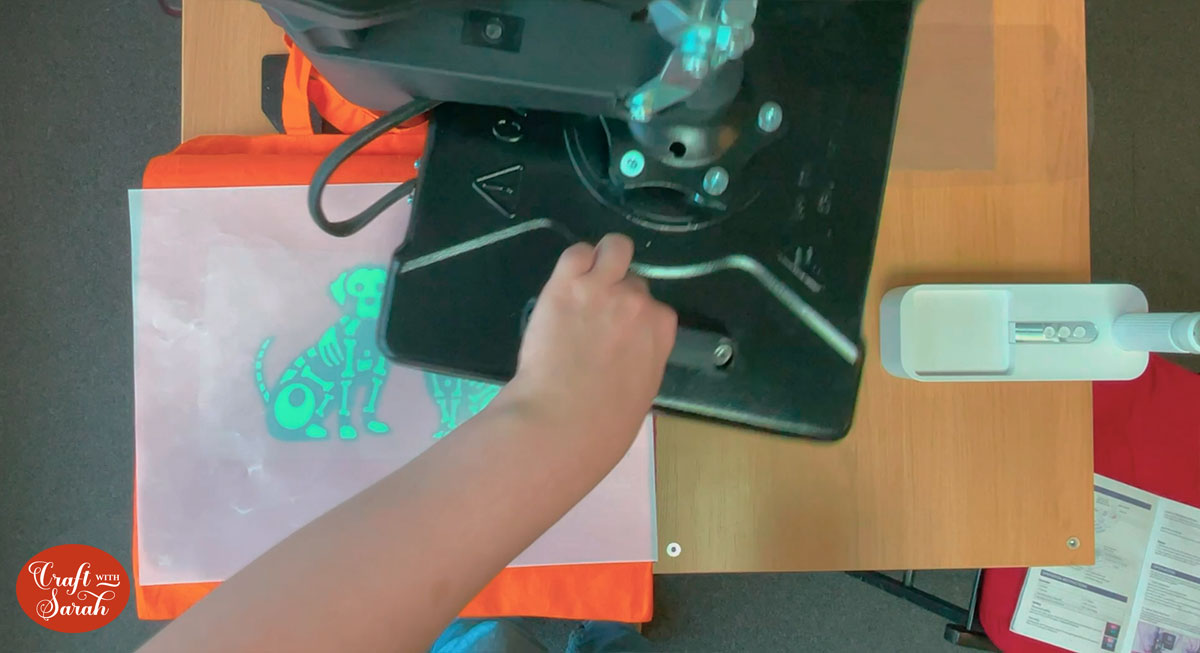
Finally, press the hearts onto the design.
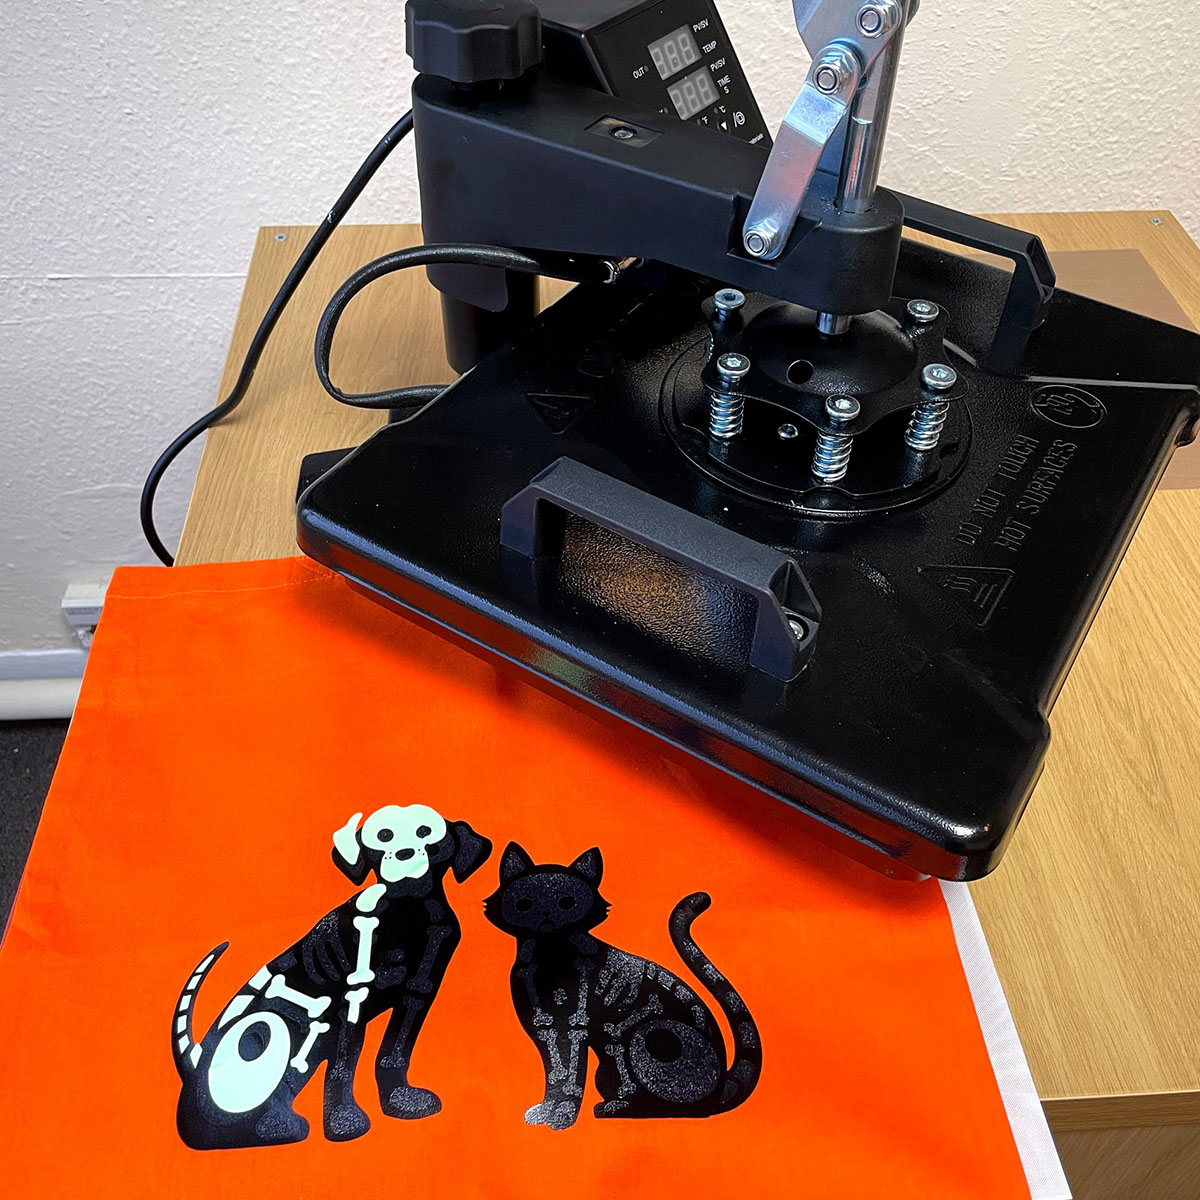
There you have it – your completed skeleton cat and dog tote bag with glow in the dark vinyl!

Happy crafting,
Sarah x

