Make Beautiful DIY Heart Ornaments for Valentine’s Tree Decorations
Decorate your home for Valentine’s Day with beautiful DIY heart ornaments!
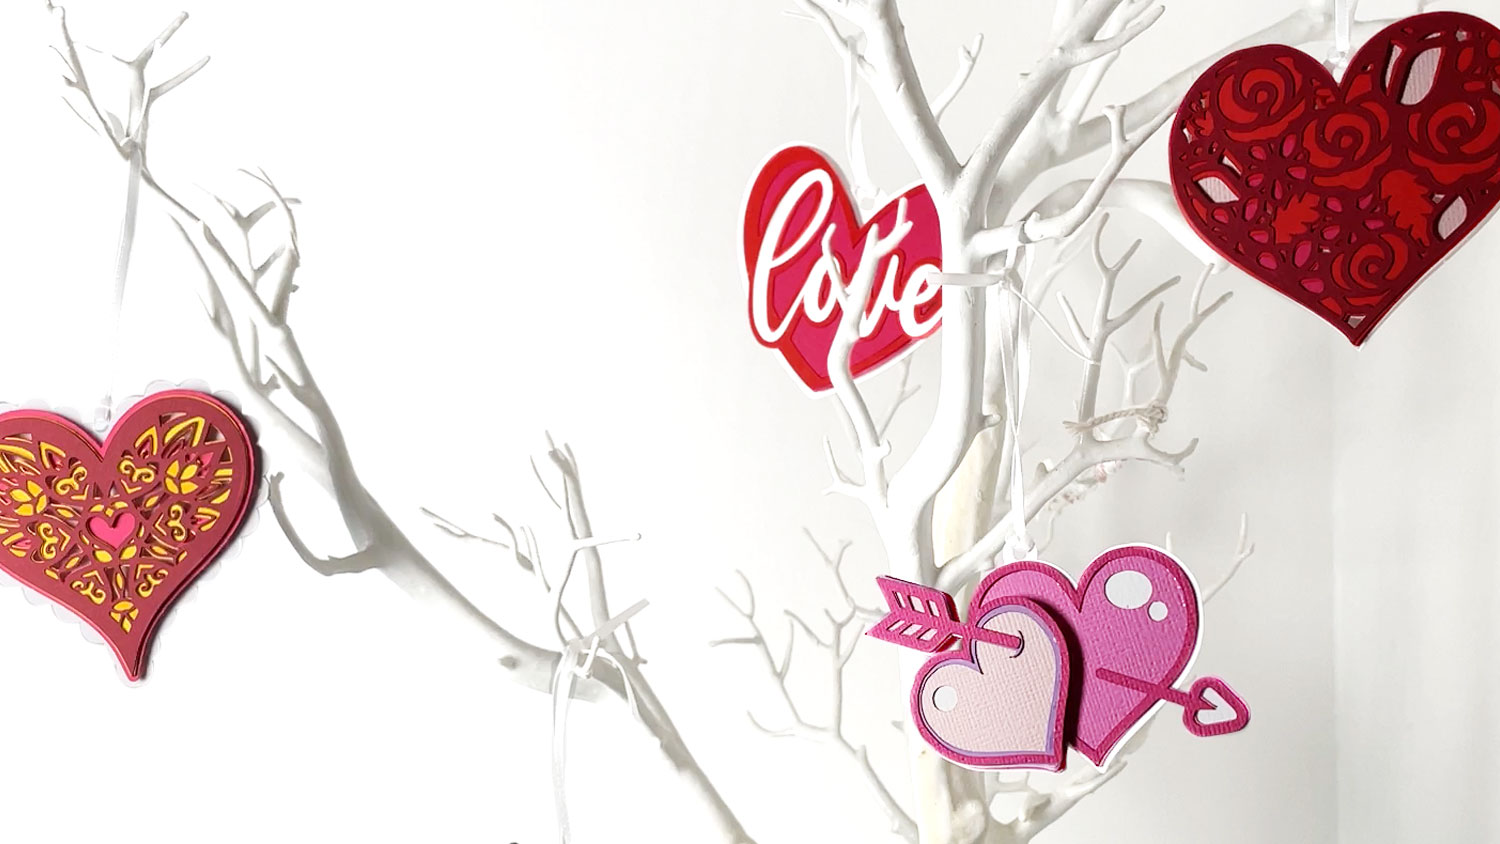
These Cricut Valentines decorations look gorgeous hung from a white Manzanita tree, or you could even spruce up your Christmas tree and make a love-themed version!
Valentine’s Day trees have been all the rage in the USA for the past few years and the trend is finally coming to the UK which I am super happy about!
Any excuse for papercrafting is great with me, so here are five layered heart SVGS to add to your tree for the season of lurrrveeee!
How to make heart ornaments
Here is a video tutorial on how to use the free layered heart SVGs with a Cricut machine. Keep scrolling for a written tutorial!
Note: The video was recorded in Design Space version 7.0.5. Later versions may look a little bit different.
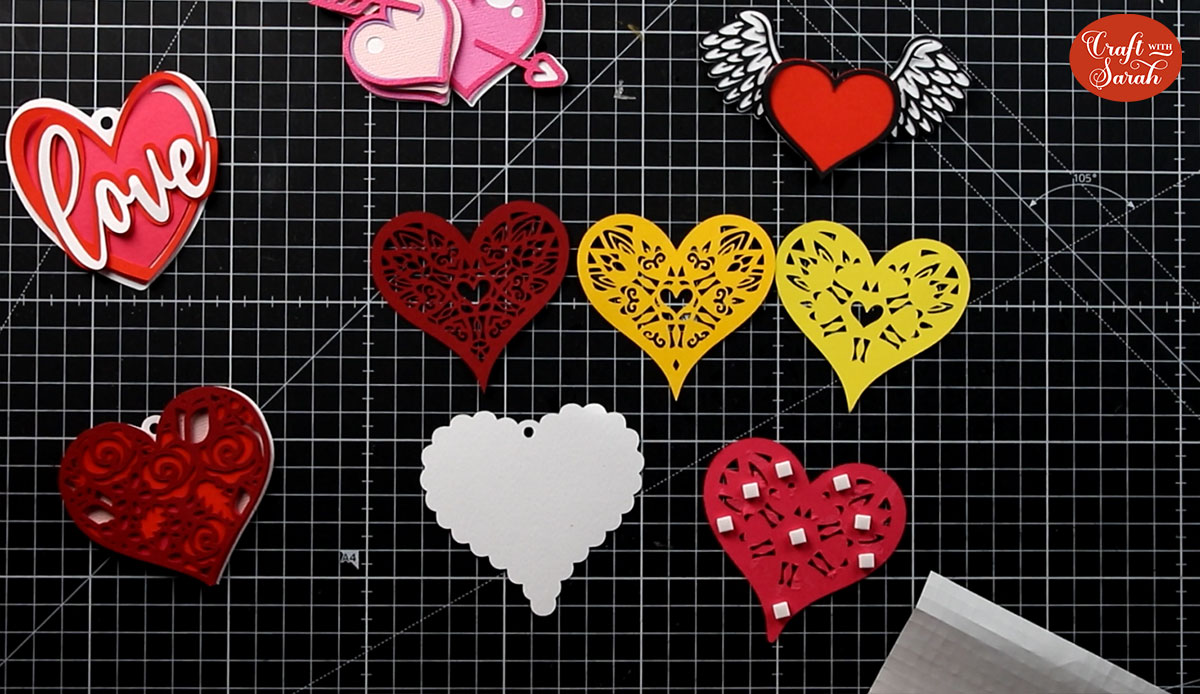
Layered papercraft heart ornaments
Here is a list of the materials that I used to make this project.
Please note that some of the links included in this article are affiliate links, which means that if you click through and make a purchase I may receive a commission (at no additional cost to you). You can read my full disclosure at the bottom of the page.
- Cricut Maker
- Light blue Cricut cutting mat
- Coloured Card (I used 160gsm weight of card)
- White ribbon
- Collall All Purpose Glue
- Needle Tip Applicator Bottle
- 3D foam pads
- Artificial tree (mine is from Hobbycraft with a custom-made base)
How to make DIY heart ornaments with a Cricut
Here’s how to make your very own Valentine’s Day tree using a Cricut machine!
Step 1) Download the free files & unzip the downloaded folder
Download the Free Cutting File

Please login to your account to download this file.
TERMS OF USE:
You may sell finished, handmade physical craft items that you have made using this product but must not sell or share the digital files. Read full terms of use
Before you upload the SVGs to Design Space, you need to unzip the download folder that they come in.
- How to unzip a folder on Windows computer
- How to unzip a folder on a Mac
- How to unzip a folder on an iPad/iPhone
- How to unzip a folder on an Android device
Step 2) Upload the SVG files into Design Space
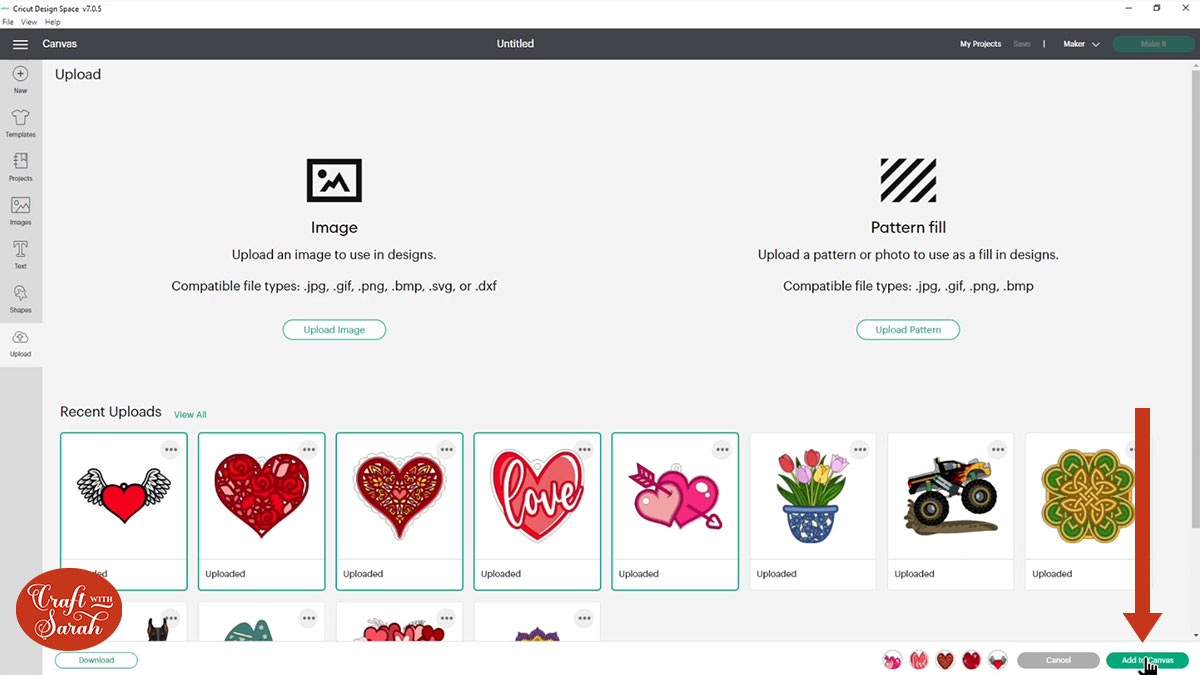
Open up Cricut Design Space and upload the five files which start SVG_ in the filename. You will need to upload them one at a time.
Make sure you upload the file which starts SVG_ in the filename – the other files won’t work in Design Space!!
This is how they will look during the upload process:
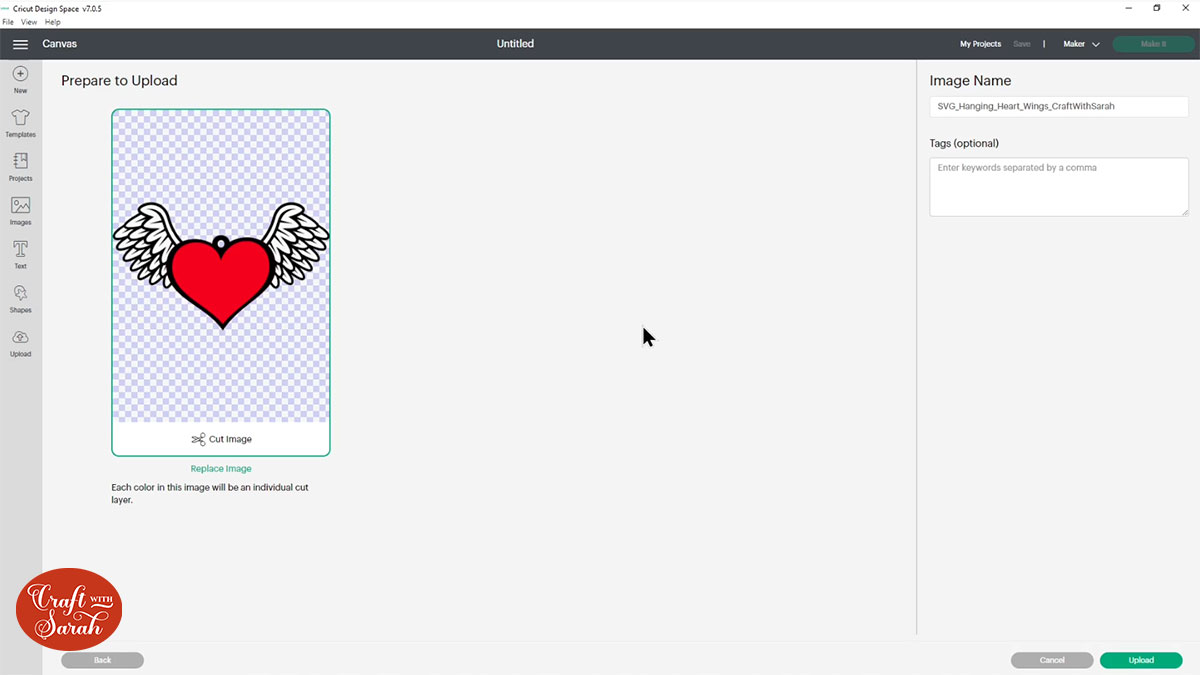
After uploading, all give hearts will show in your “Recently Uploaded Images”. Click on them all and then press “Add to Canvas” to put them onto your Project.
To cut all five designs as they come, you’ll need four shades of pink cards and three shades of red. If you’d like to change this, the easiest way is to click “Colour Sync” on the top-right of the screen.
This changes how the layers are displayed down the right of the screen so they are split by colour.
You can click-and-drag the layer images to recolour them.

When you’re happy with the colours, it’s time to resize the heart ornaments as they load in a little bit big by default.
Click the hearts on your canvas and use the width/height boxes near the top of the screen to make the the size that you want to cut them.
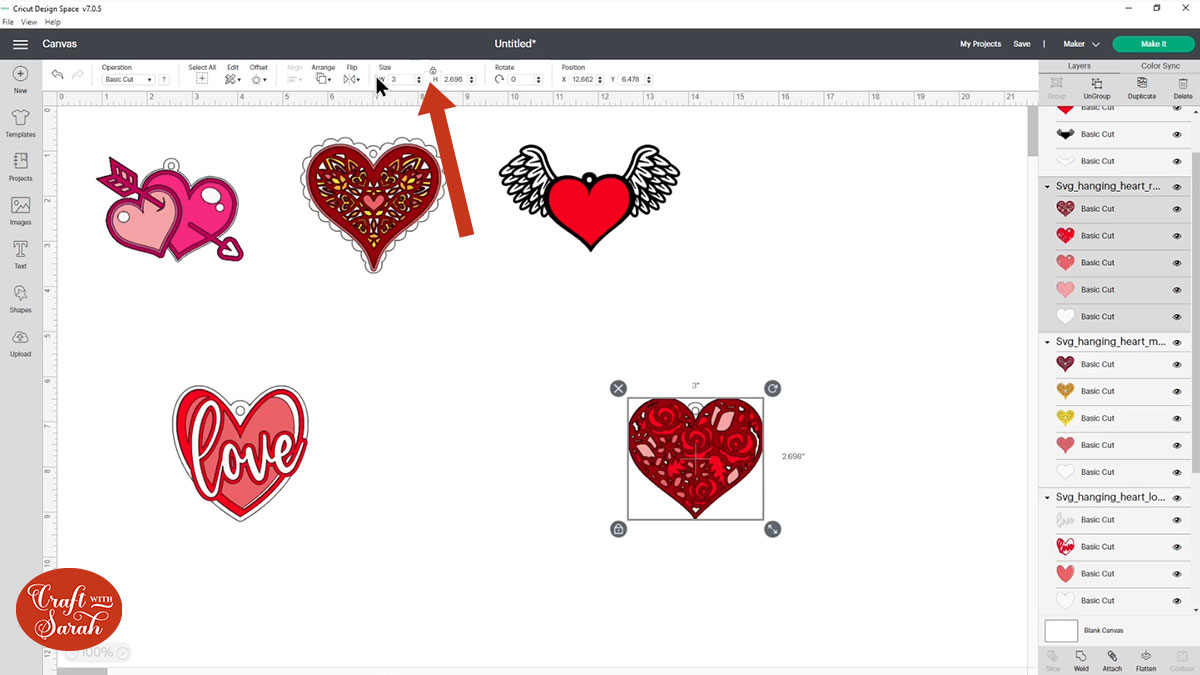
Here are the sizes I used:
- ‘Love’ heart – 3 inches wide, 2.999 inches tall
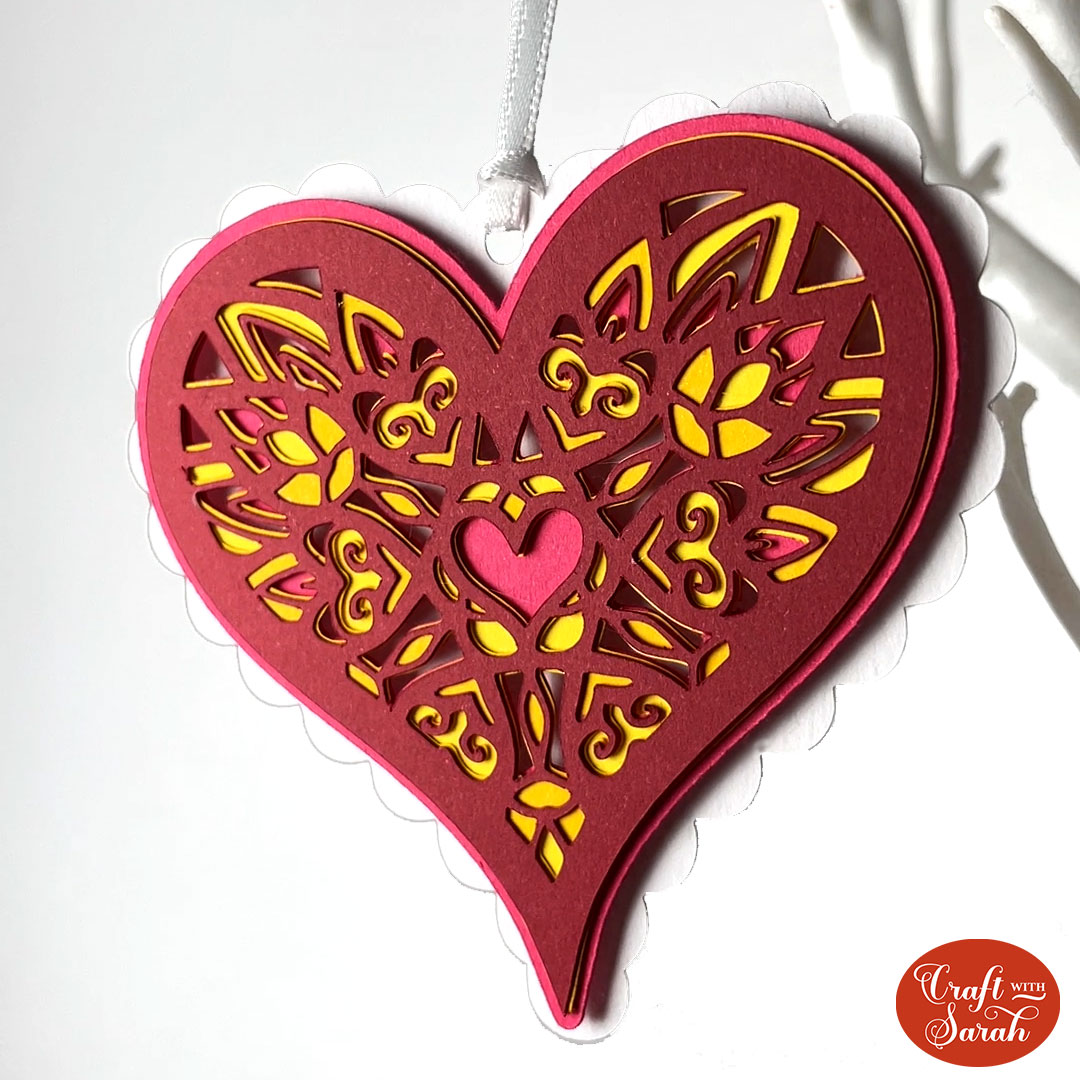
- Mandala heart – 3.232 inches wide, 3 inches tall
- Winged heart – 4 inches wide, 2.359 inches tall
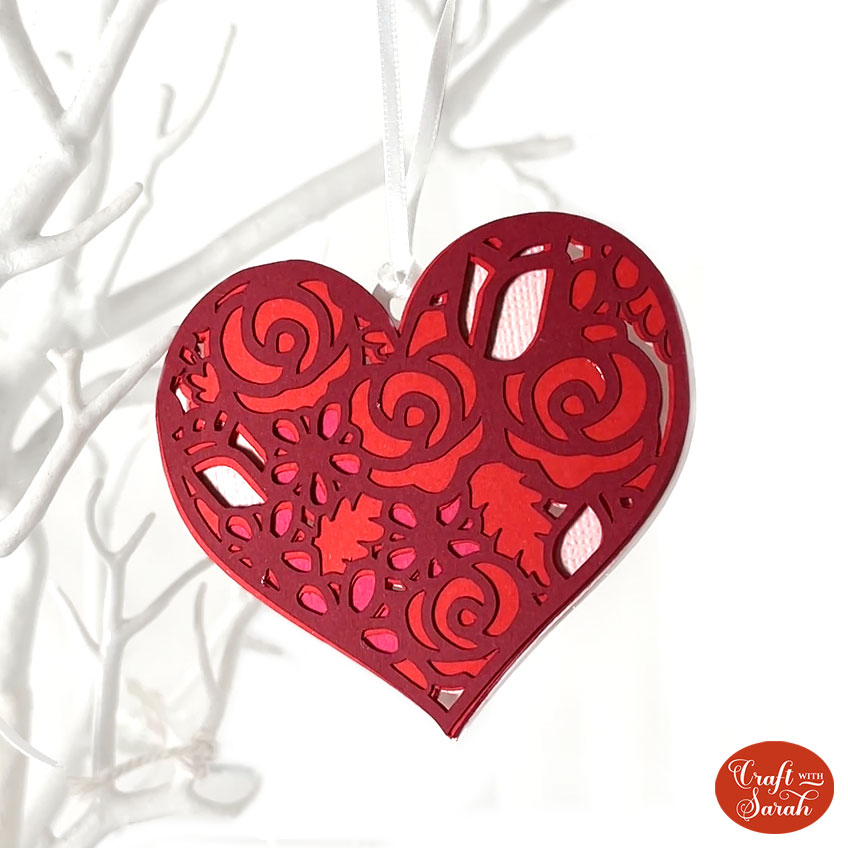
- Rose heart – 3 inches wide, 2.699 inches tall
- Two hearts – 3.25 inches wide, 2.322 inches tall
I don’t recommend making them any smaller than that, as those sizes make quite tiny decorations. I wish I had made them a little bit bigger! Maybe half an inch bigger on the longest sides.
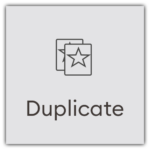
I made single-sided decorations for my Valentines tree, but if you would like to make double-sided hearts then click each design and press “Duplicate” to make a copy.
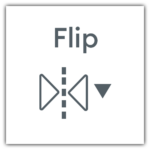
Click the duplicated versions and then click “Flip” and “Flip Horizontal” to make a mirror image.
You need to do this so that the two sides will line up when you place them back-to-back.
The only design this doesn’t really work for is the heart that says “Love” as the word will be backwards on the duplicated version.
When you’re happy with the size of the hearts in Design Space, click “Make It” and follow the instructions on-screen to cut out all the layers.
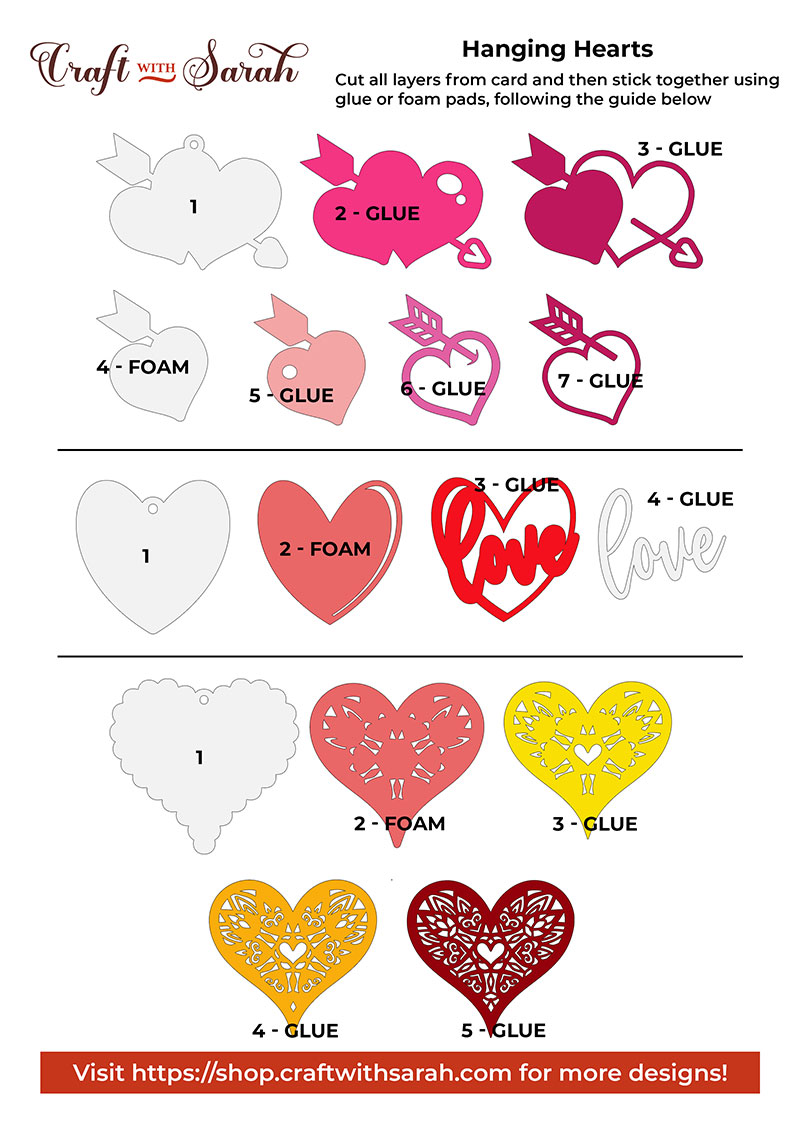
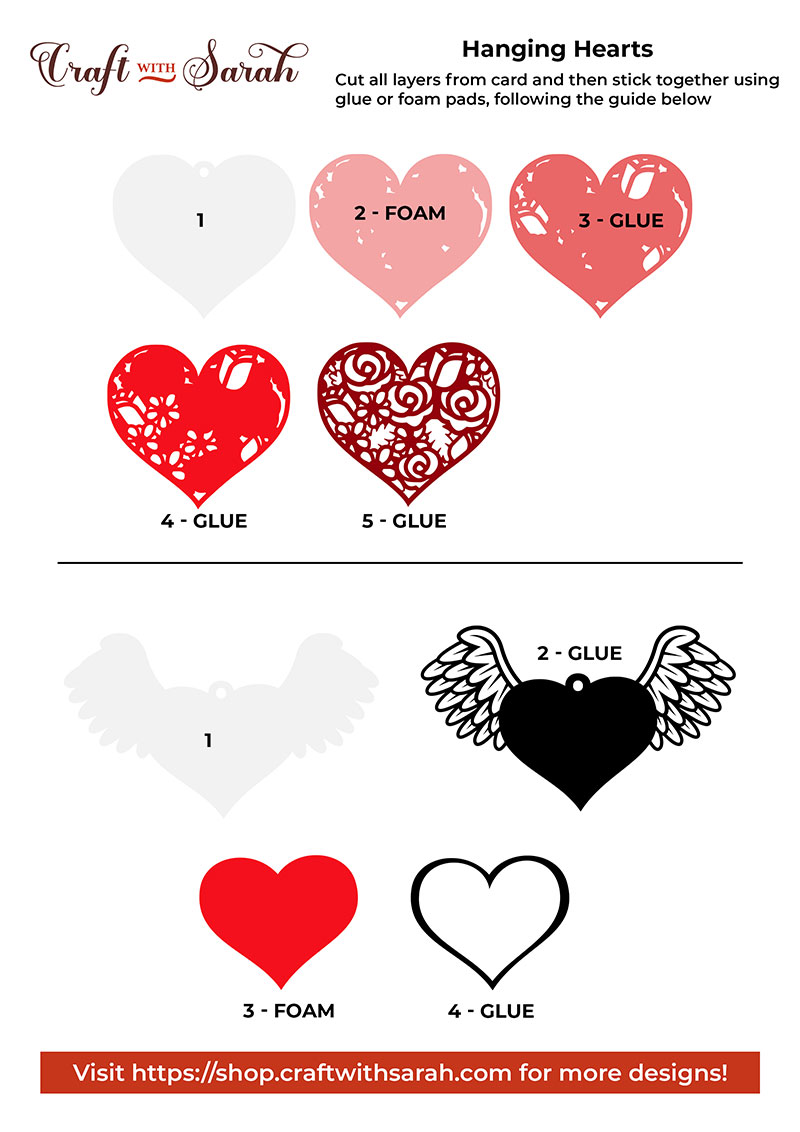
Step 3) Stick the hearts together
Place all the layers of the hearts in the correct positions to make sure none get forgotten when you stick them together!
Use a combination of sticky foam squares and glue to stick the heart ornaments together.
Be careful not to put the foam pads over any gaps” in the cardstock otherwise you will see them when you stick the heart ornament together.
My favourite glue to use on papercraft projects is Collall All Purpose Glue.
It’s SO good because it doesn’t “warp” or bend the cardstock like some glues do. You can use as much of it as you want and the card stays perfect – and it dries perfectly clear too!
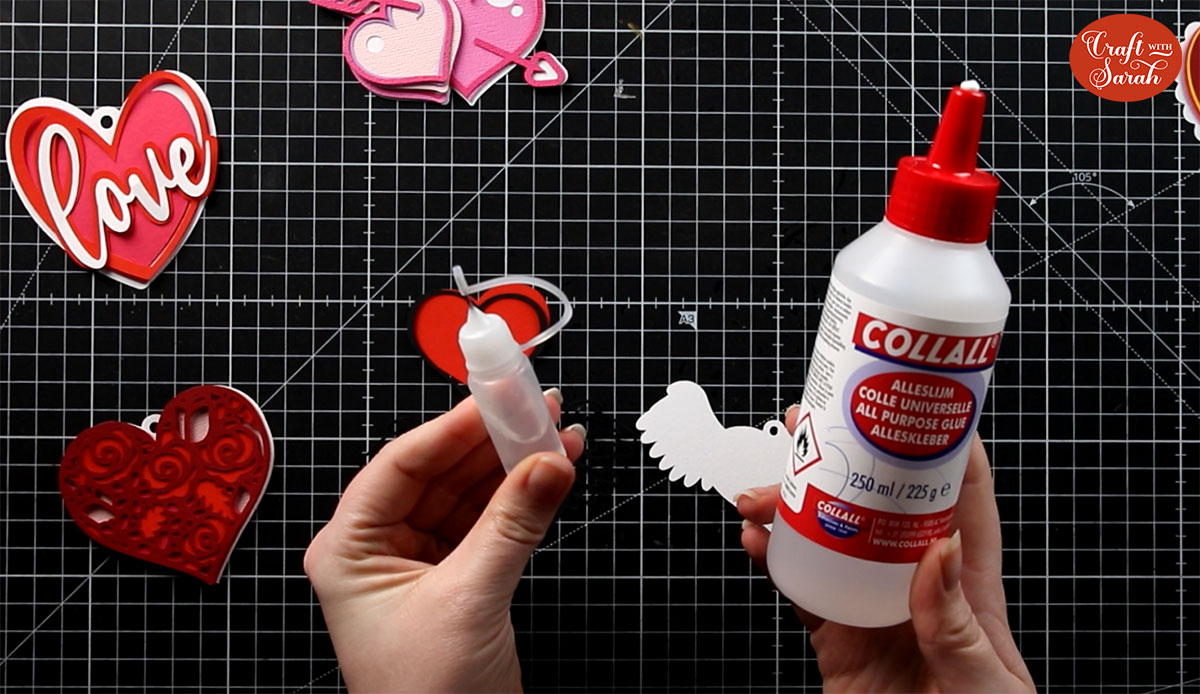
To make it even easier to apply glue to layered card projects, I highly recommend getting some of these needle tip applicator bottles to put the glue into.
The nozzles are REALLY tiny which makes them perfect for putting glue in the tiny pieces of these layered hearts.
Here is a guide on how to stick each heart together. A full size printable version is included in your download folder.
Step 4) Add ribbon and hang on your Valentine’s tree!
Cut some pieces of ribbon and thread them through the holes in each heart.
I folded my ribbon in half to make a “loop” and then threaded the ends through to secure the ribbon to the rings on each heart.
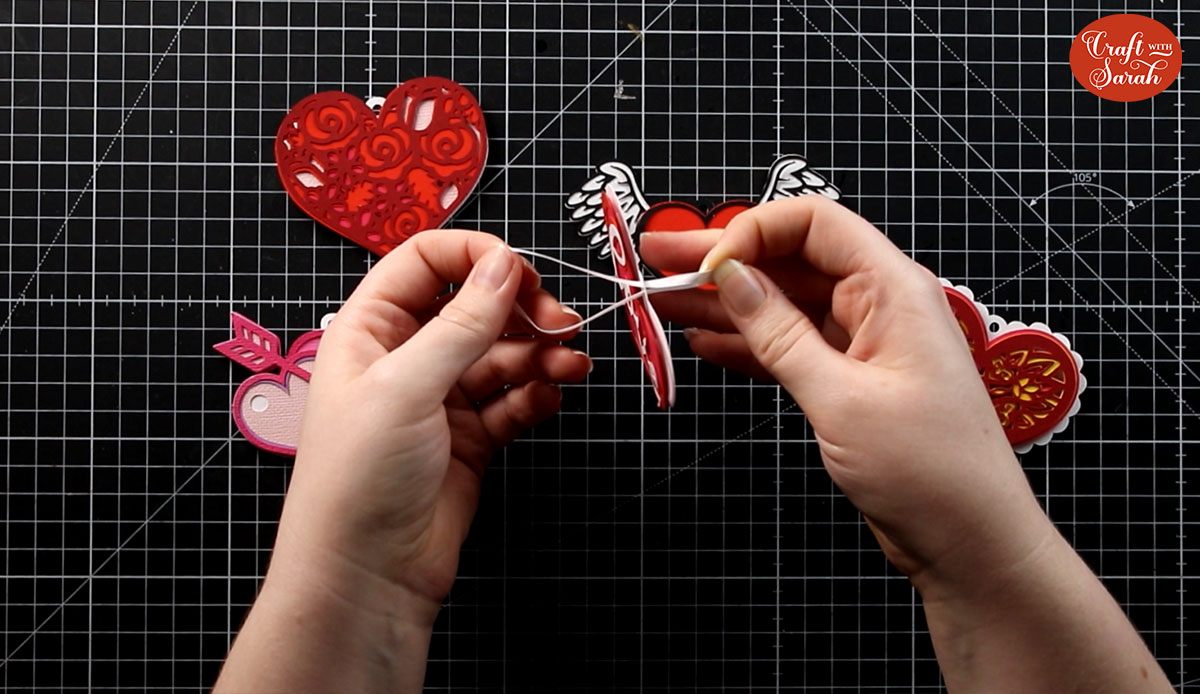
Then, I tied the ends of the ribbon into a knot, all ready to hang on the tree!

I hope that you enjoy these free layered heart SVGs for Valentines Day!
Love layered SVGs? Check out my other free layered SVG files
Happy crafting,
Sarah x

