How to Design Cupcake Toppers in Design Space

Customize cupcakes to match your party theme with this tutorial on how to design your own cupcake toppers in Cricut Design Space.
I lovvveeeee cupcakes – baking them, decorating them and OF COURSE eating them!
Cupcake toppers bring an extra-special touch to your sweet treats and they are fairly quick and simple to design in Design Space.
They work beautifully for any type of cupcake – whether they have been made for a Halloween celebration, for birthdays, Christmas, weddings or any other special occasion.
Please note that some of the links included in this article are affiliate links, which means that if you click through and make a purchase I may receive a commission (at no additional cost to you). You can read my full disclosure at the bottom of the page.
Video tutorial for designing cupcake toppers
Watch this video to see how to design cupcake toppers in Cricut Design Space and then how to assemble them once cut.
A full written tutorial is available further down on this page.
[cws_halloween2020]
How to design cupcake toppers in Design Space
I wanted to include a written tutorial for this project as I know that many of my readers prefer this to watching a video, however if you are new to Design Space then I’d recommend watching the video because you’ll be able to see exactly how I use the Design Space software, in real-time.
Step 1) Create circle bases
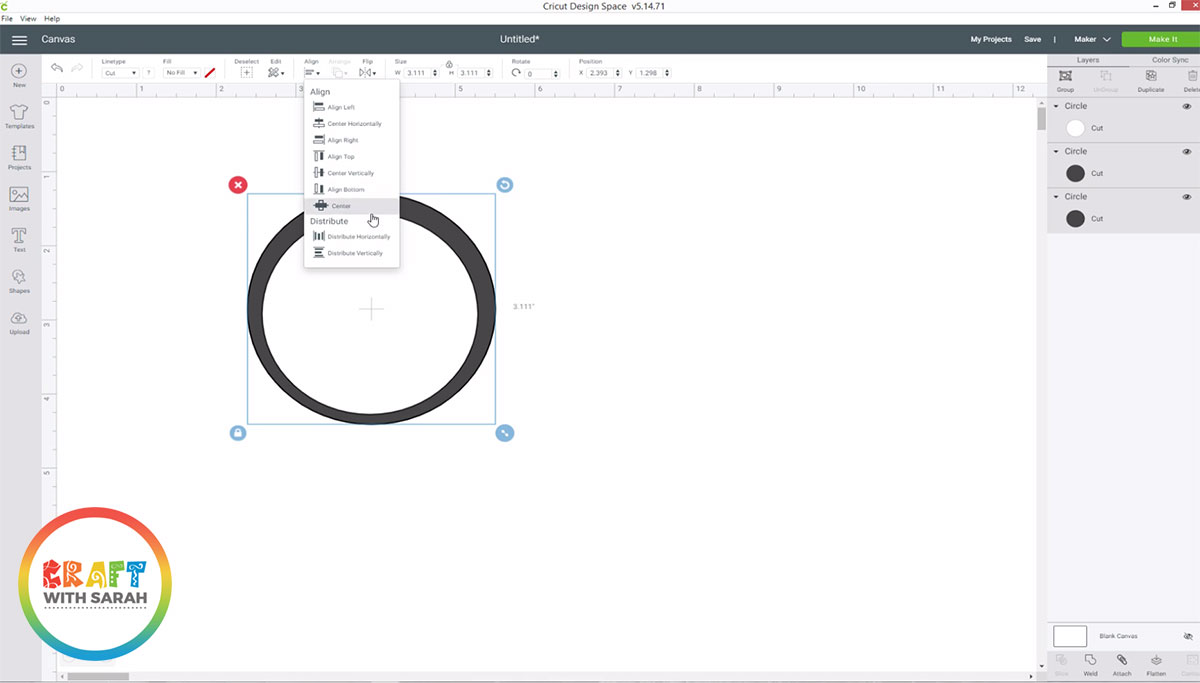
Draw a circle shape, then right-click on it and ‘Duplicate’.
Duplicate one of the circles again and change the colour to white. Resize to make it smaller so that when it sits on top of one of the larger circles you get a good sized border.
Select all three circles by clicking and dragging a box around them and then go into “Align” in the top menu and then “Align Center”.
This will position all three circles perfectly one-on-top of the other.
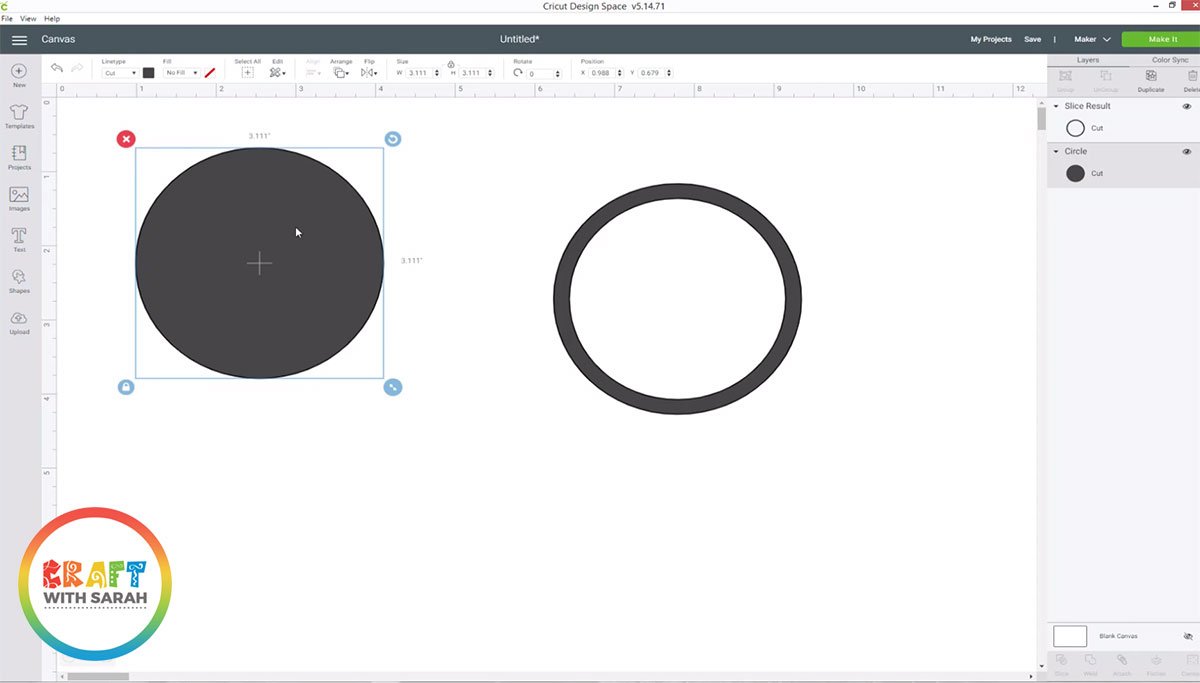
In the layers panel, click on the smaller white circle and then press CTRL on your keyboard and click ONE of the original (larger) circles.
Go down to the bottom of the layers panel and click “Slice”.
This will cut the smaller circle out of the larger one.
Delete the first two “slice results” layers by right-clicking and then press “Delete”.
This will leave you with two shapes: A filled-in circle and a border one:
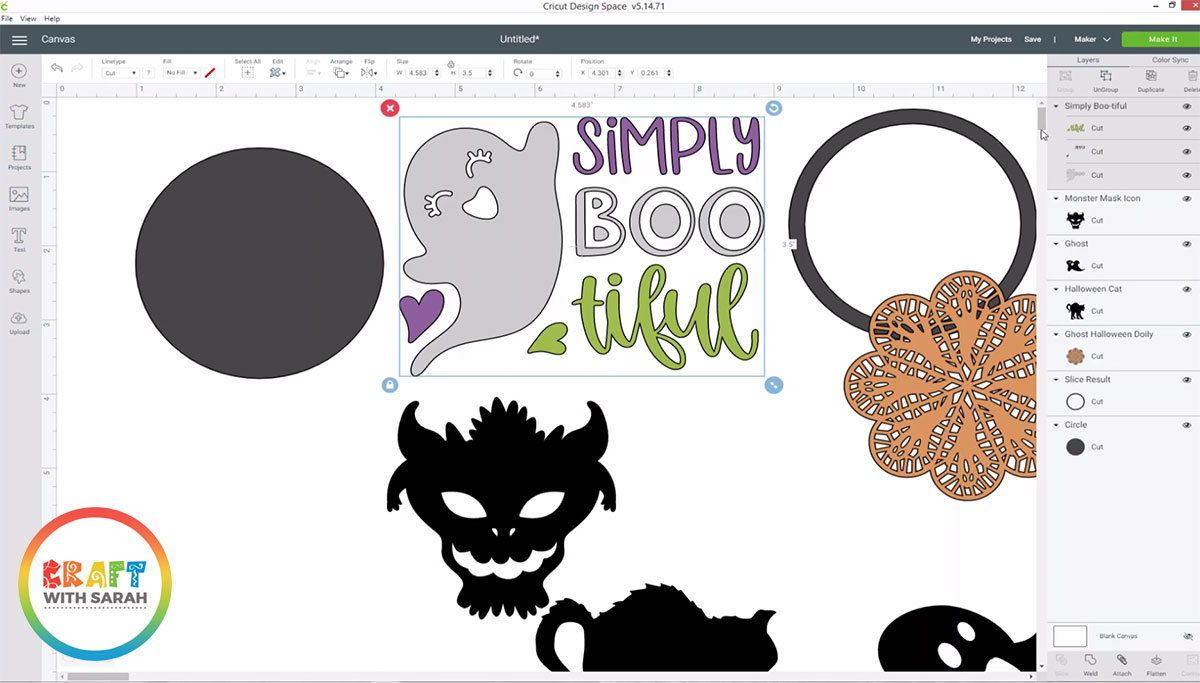
Step 2) Add the images
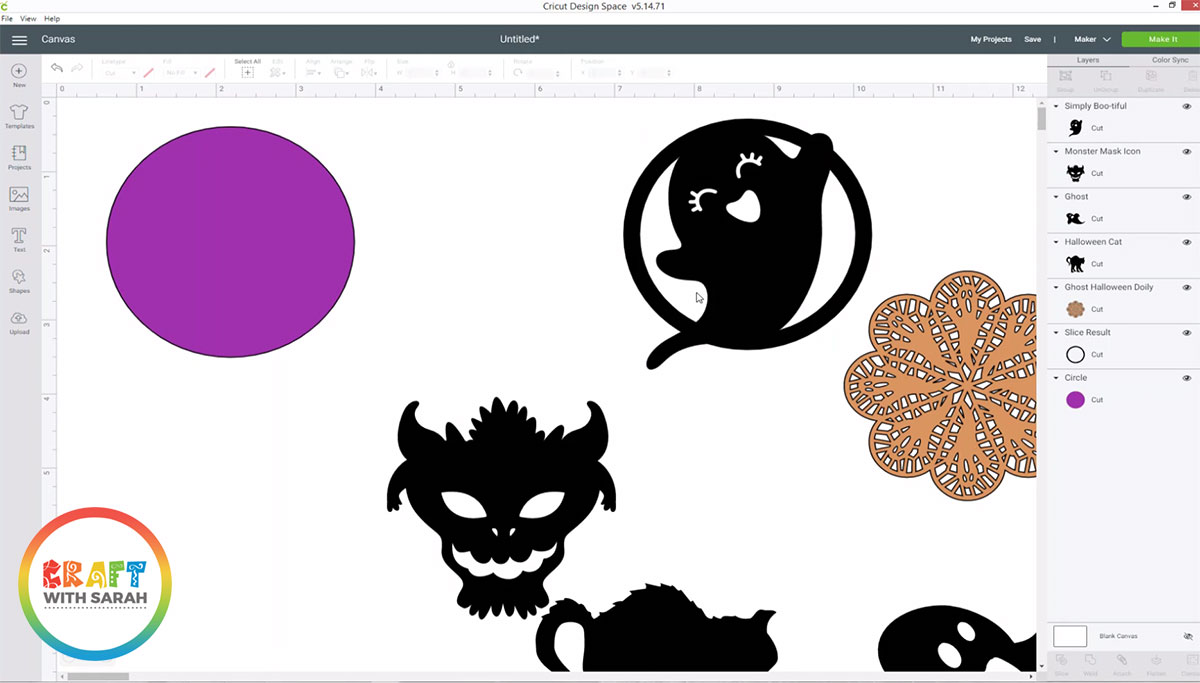
Choose your graphics by clicking “Images” and then searching for your chosen pictures.
You’re ideally searching for fairly simple images which are one-layer and only one colour.
If they are more layers/colours then you will need to simplify them. Watch the video above to find out how to do that.
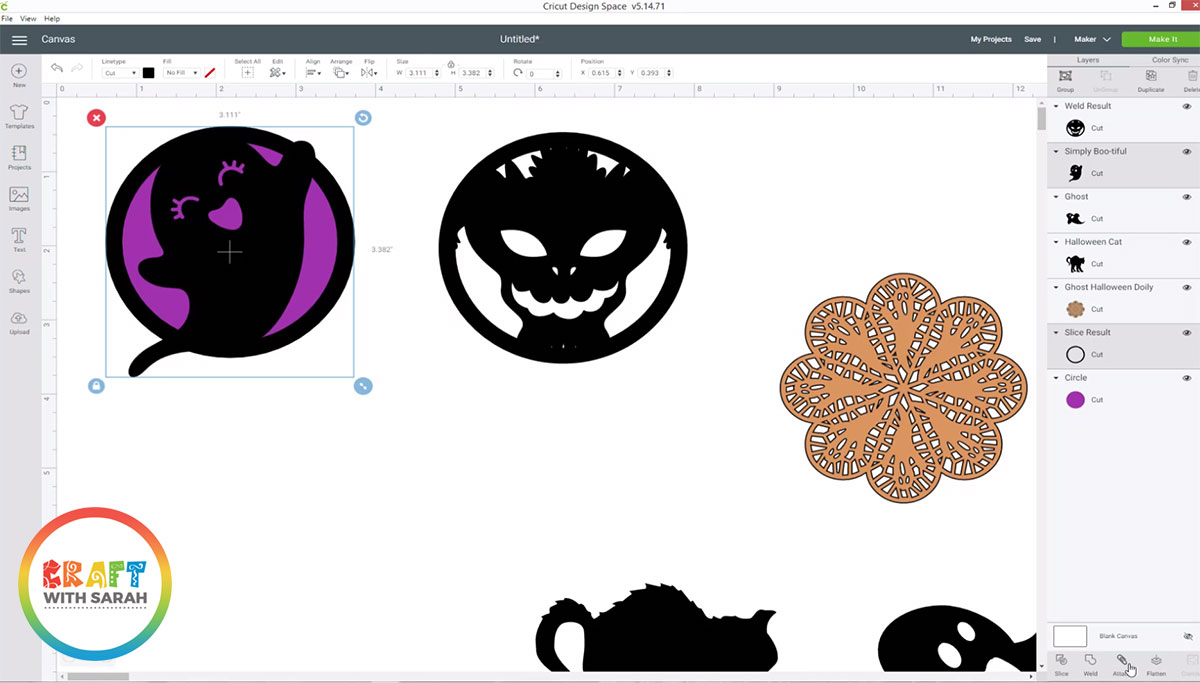
For example, this ghost image is too complicated as it has multiple colours, multiple layers and the words/letters aren’t touching each other which would mean that they would all fall apart if you tried turning it into a cupcake topper in its current state.
After simplifying the graphic, it looks like this…

Change the colour of the border circle and any graphics you are using to black as that will make it easier to position them how you want them to appear.
Position the image on top of the border circle so that the edges of the graphic touch the border in several places. It needs to touch the border so that when you cut it out, it cuts it all as one piece and doesn’t fall apart.
Even though you have positioned the graphics over the border, your Cricut will still cut them as separate shapes at the moment.
In order to connect the circle and graphic together so that they cut as one, we need to Weld the layers together.
Select the border circle in the layers panel and then press CTRL on your keyboard and click the graphic.
Press the “Weld” button down the bottom of the layers panel.
This will “merge” both of those layers into one, which joins them together so your Cricut will see it as one shape instead of two.
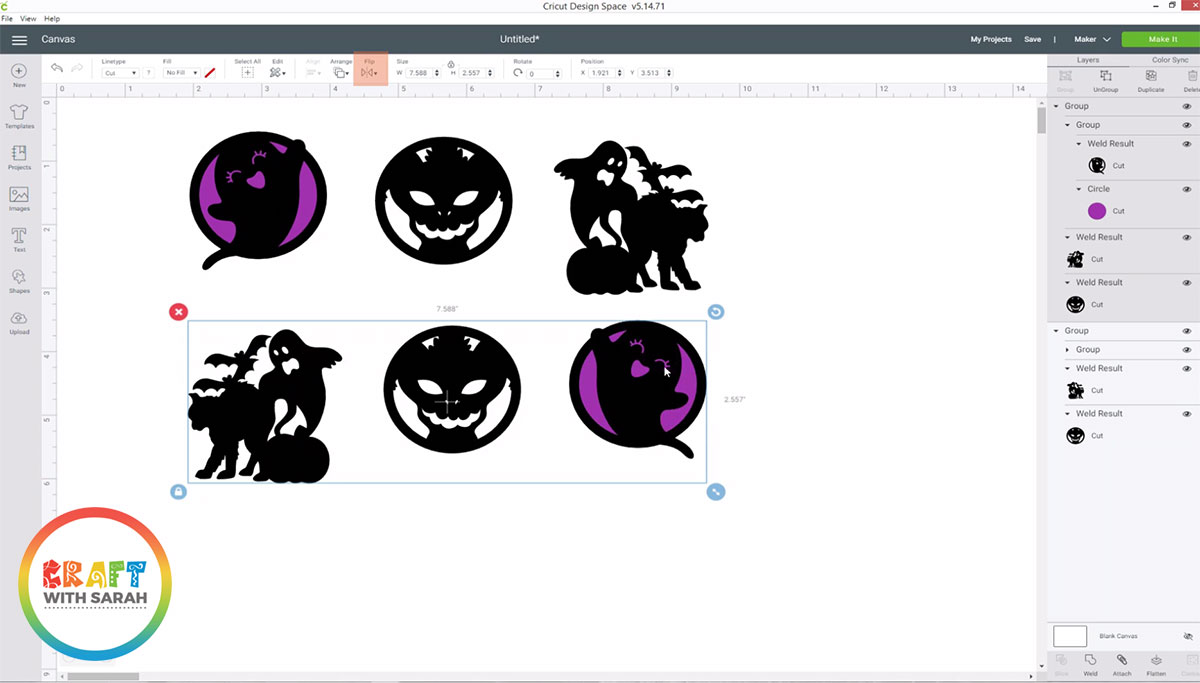
Step 3) Duplicate and flip the designs
When you have finished designing all of your individual cupcake toppers, we need to make a copy of each one so that we can make a double-sided cupcake topper.
Before you duplicate them, resize each topper to your desired size. I recommend around 2-3 inches in width.
After you have resized all of the toppers, click-and-drag a box around all of the toppers and press the “Group” button in the top of the layers panel.
Right-click on the group and press “Duplicate”.
This will make a copy of all your cupcake toppers. To enable us to glue them back-to-back, we need to flip them to create a mirror image.
Click the “Flip” button in the top menu and then “Flip horizontal”
Your cupcake toppers are now ready to cut, so click “Make It” and then follow the steps to cut out from your chosen materials.
Step 4) Assemble the cupcake toppers
If your cupcake has multiple layers on each side, stick the layers together.
I used 3D foam pads to create some depth to the cupcake toppers.
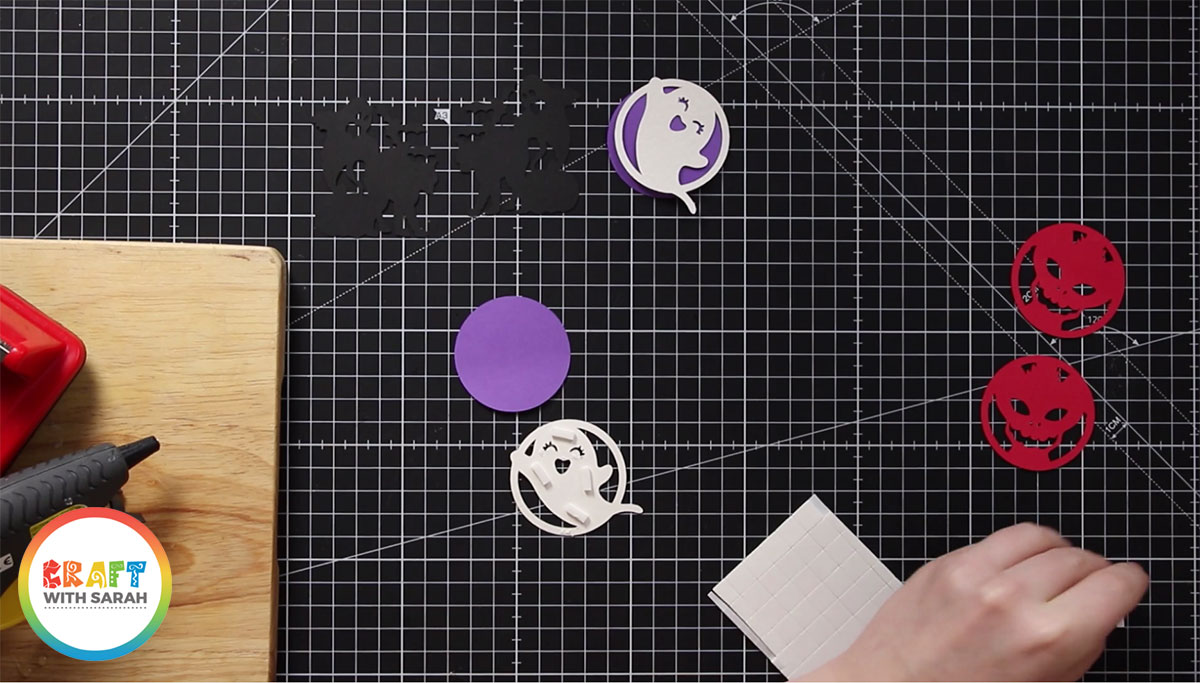
After you have cut out all of the pieces, you’ll need to stick them together.
I’ve found that the easiest way to do that is by using a glue gun as it’s nice and fast to dry and gives a really firm stick.
Turn one of the sides of your cupcake topper upside down and glue a cocktail stick to the back.
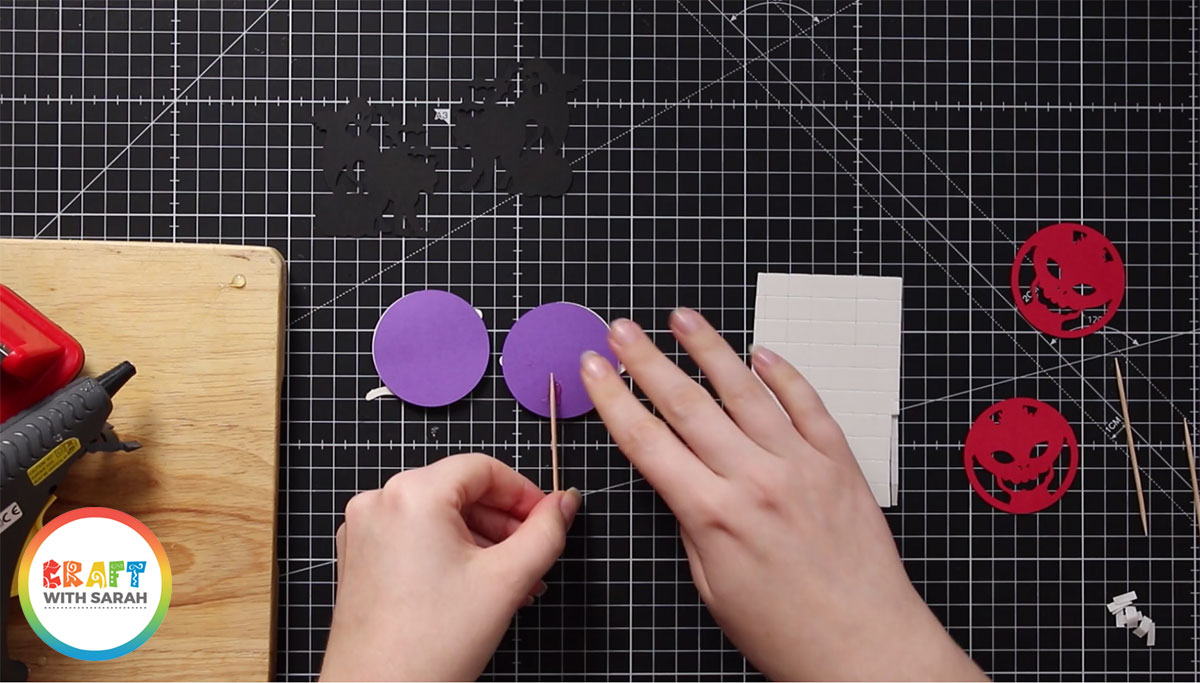
Add more glue to that side of the topper and then stick the matching piece on top.
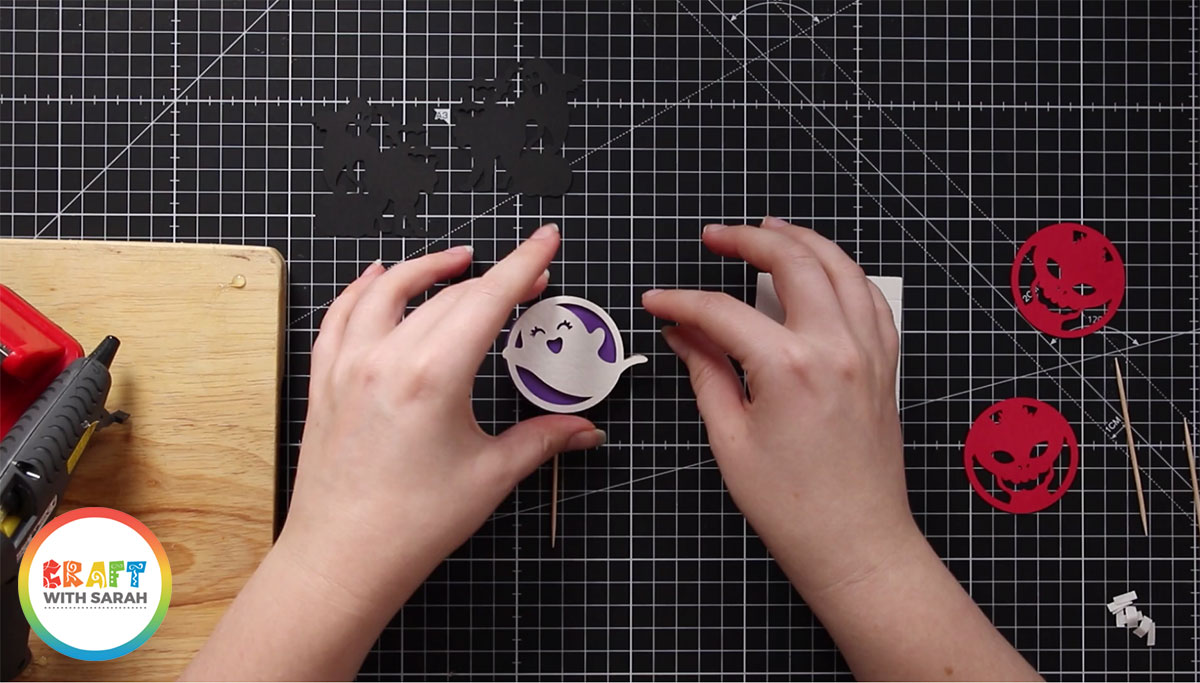
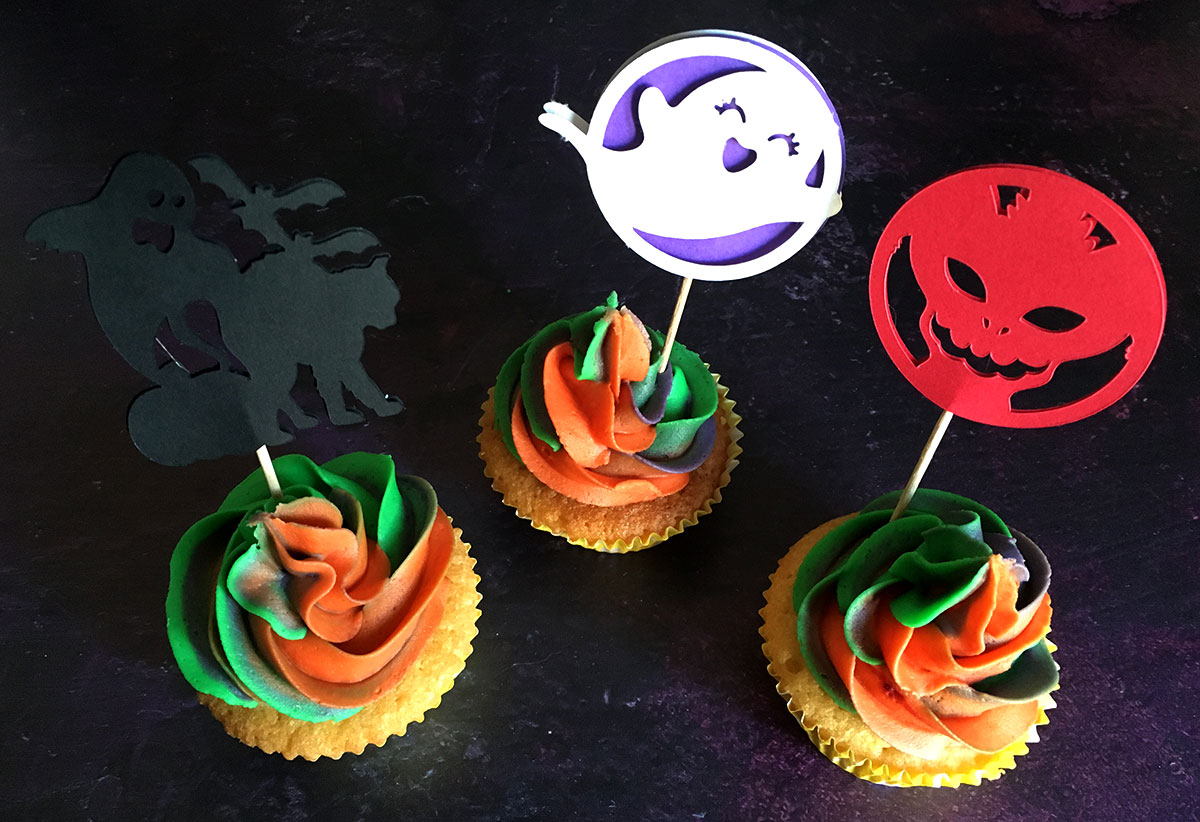
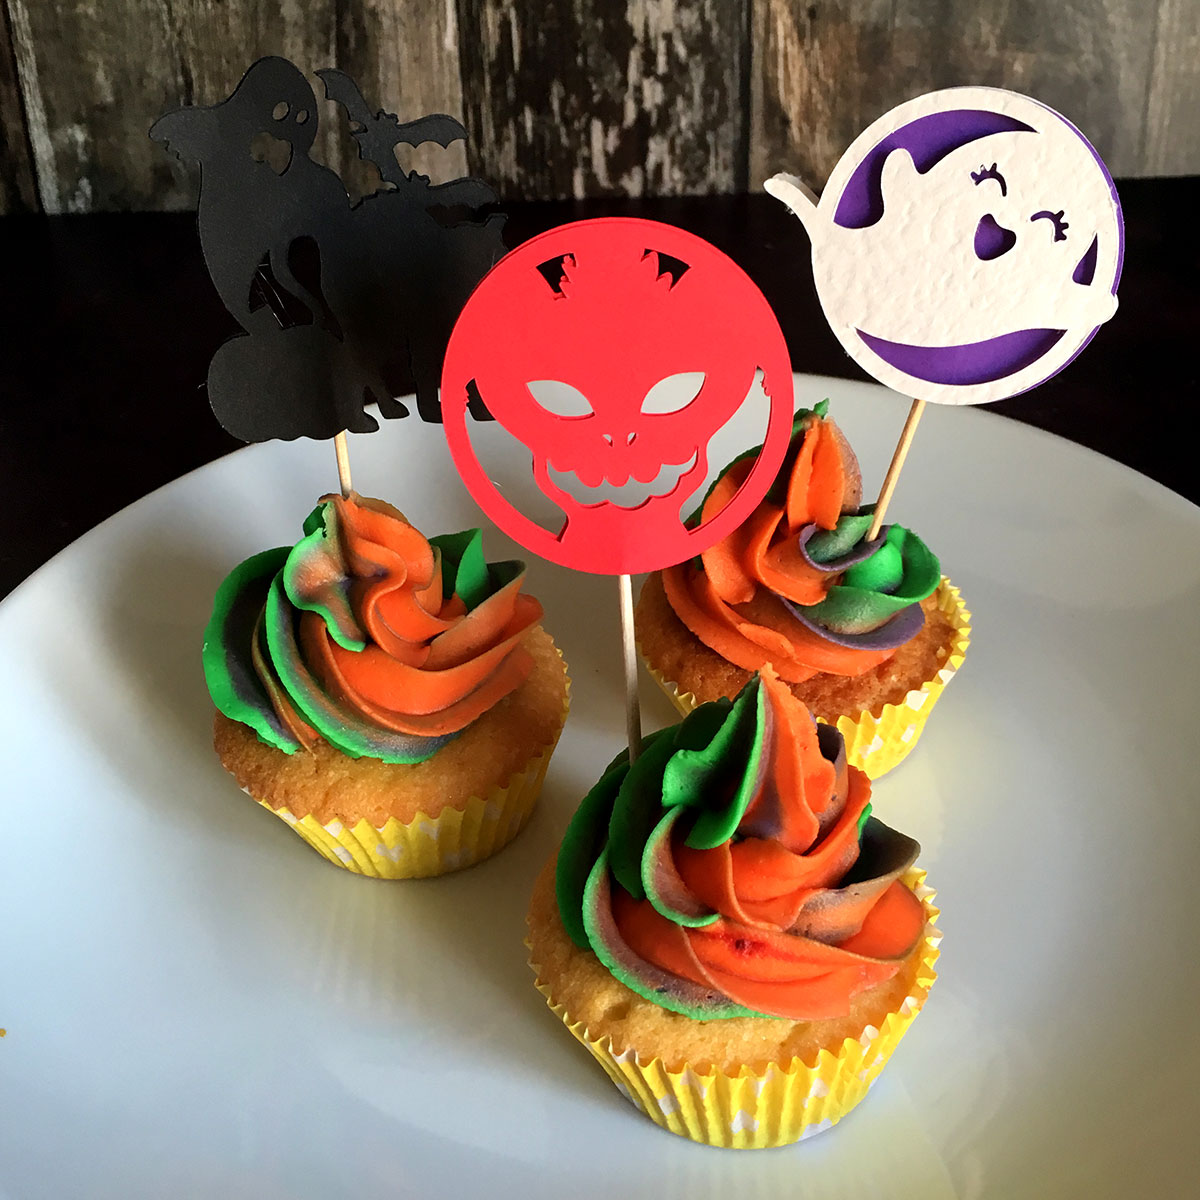
Wait for the glue to dry/set and then that’s your DIY cupcake topper, all finished!
Repeat this step for all your cupcake topper designs, and then they are ready to be put into your cupcakes, like this:
I hope that you have enjoyed this tutorial on how to design your own cupcake toppers.
If you love cupcakes as much as I do, you might also like these free cupcake wrapper SVGs to make the cases of your cupcake extra special!
[cws_clubhouse design=’1106′]
Happy crafting,
Sarah x
[cws_halloween2020]

