How to Add Vinyl to Round Ornaments

In this tutorial I’m going to show you some tips on how to apply adhesive vinyl to curved surfaces like these plastic Christmas baubles.
I’ll show you some easy ways to get bubble-free vinyl application on your Christmas decorations.
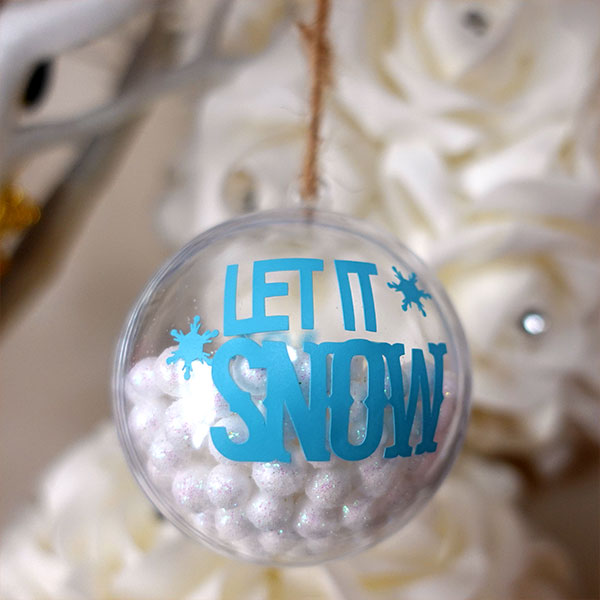
We’re going to add a snow-themed decal to the ornament and then fill it with some little polystyrene snowballs to make a lovely wintery Christmas decoration.
The video below shows the whole process, but if you’d prefer to read written instructions then scroll down for a full step-by-step tutorial.
[cws_christmas2020]
How to measure spherical ornaments for adding decals
The first thing you’ll need to do is to measure your bauble. I’m using these plastic ones which slot together, but you can also use the same techniques for the baubles that come already assembled with a little hole in the top.
When you’re designing your vinyl, you want to make sure your decoration isn’t too big. The bigger it is, the harder it’s going to be to apply. For this one, I want to make my vinyl around 1.5 inches wide which will cover a nice amount of the front but without it being so big that it’s going to cover the whole thing.
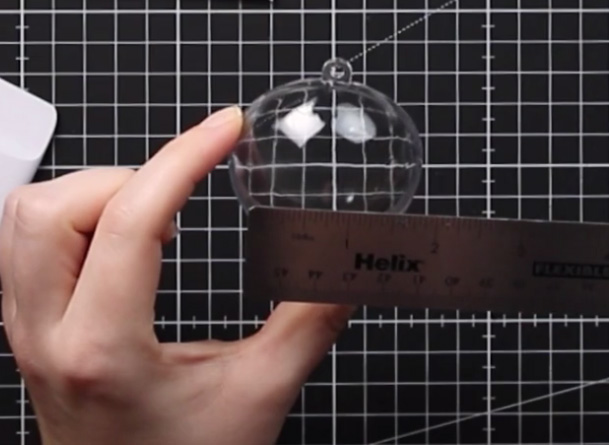
It might take a little bit of trial and error in Design Space to get your vinyl shape exactly the right size, but you can see for mine they’re going to cover a lot of that front but it’s not going to go all the way to the edges.
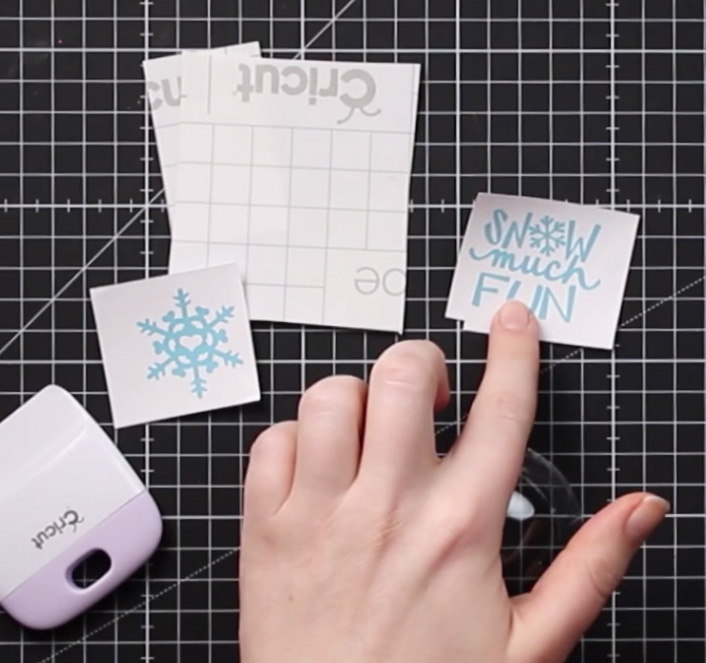
The next thing is to choose your design. I chose this ‘Snow much Fun’ design from Cricut Access and cut it out of blue adhesive vinyl. For the back of the bauble I chose a snowflake which again is from Cricut Access.
If you don’t have Cricut Access then there are loads of free places online to get SVGs like this and you can also pick them up very affordably from websites such as Creative Fabrica or Design Bundles.
How to choose vinyl decals for rounded ornaments
When you’re choosing your design, here are some top tips to make for easier vinyl application:
- Avoid large solid shapes – for example, if I was going to try and put just a circle of vinyl on here that was pretty much the whole size of the bauble that’s going to be pretty much impossible to get on there without some kind of bubbling and that’s because you’re trying to force that vinyl to follow the curve of the ornament rather than it’s intended use, which is to lie flat.
- Avoid designs that need lots of layering. Designs that use multiple colours that all sit in separate places are fine; the problems may start when you are layering vinyl one on top of the other and making it thicker because then it gets harder to curve it around the shape of that bauble.
- Designs with lots of separate parts are easiest to add to curved surfaces. For example, in the “Snow much fun” design all of the words are separate and so are each individual letter in “Snow” and “fun”.
How to apply vinyl to spherical surfaces
Step 1: Clean the bauble
I want to clean the outside of the bauble to make sure I’ve got a dry and clean surface for my vinyl to stick to.
The best thing to use is rubbing alcohol, but I don’t have any of that so I’m using a clean microfiber cloth instead.
Once you’ve cleaned the surface, try to avid touching it with your fingers and you don’t want to leave fingerprints on it.
Step 2: Add your transfer tape
Transfer the vinyl design onto some standard grip transfer tape.
Use a pair of scissors to cut into the transfer tape at various points around the different letters/shapes of your vinyl design.

Be careful that you don’t cut any of the vinyl otherwise you’ll damage it. You’re just cutting into the tape, and the reason we’re doing this is it’ll make it easier to bend the tape around the shape of the bauble.
I’m going in between all of these letters and words and cutting into that transfer tape without cutting the words themselves.
It also helps to trim your transfer tape quite small so that you don’t have too much excess.
Step 3: Apply the vinyl to the ornament
I’m going to line the decal up vaguely where I want it to go.
I find it easiest to get the middle part of the design roughly stuck in place first, so I’m going to push down the middle bit of the word “much” gently and then I’m going to start work on the letters above.
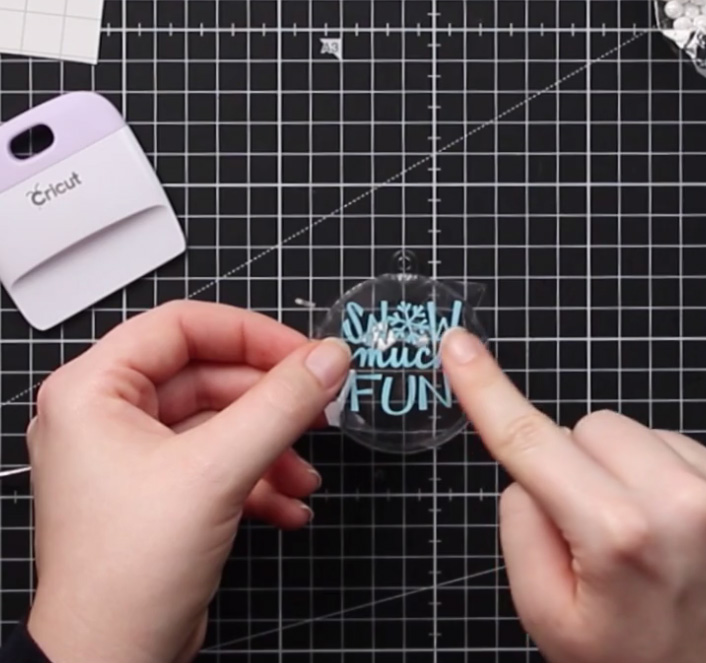
Take each letter and (starting at the bottom) gently push it up to get it stuck.
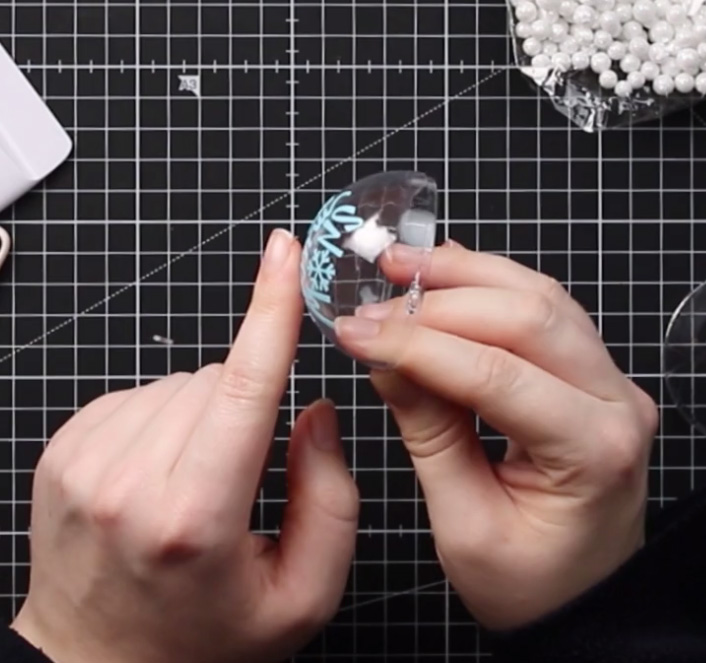
Because we’ve cut the transfer tape, it’s making it easier to push things around. The snowflake didn’t want to push flat, so I added another couple of cuts in the transfer tape which meant I could then gently stick it to the plastic.
When you’ve finished a particular part of the design, carefully rip off those pieces of transfer tape and discard.
By removing the parts of transfer tape that have already been used, it’s going to make it easier to stick the rest of the decal.
Now, you can work through the rest of the design. Apply one section at a time, being careful to make sure there are no bubbles under any of the parts of the vinyl as you apply it.
If you do get any bubbles you can gently lift up that piece of vinyl and try again.
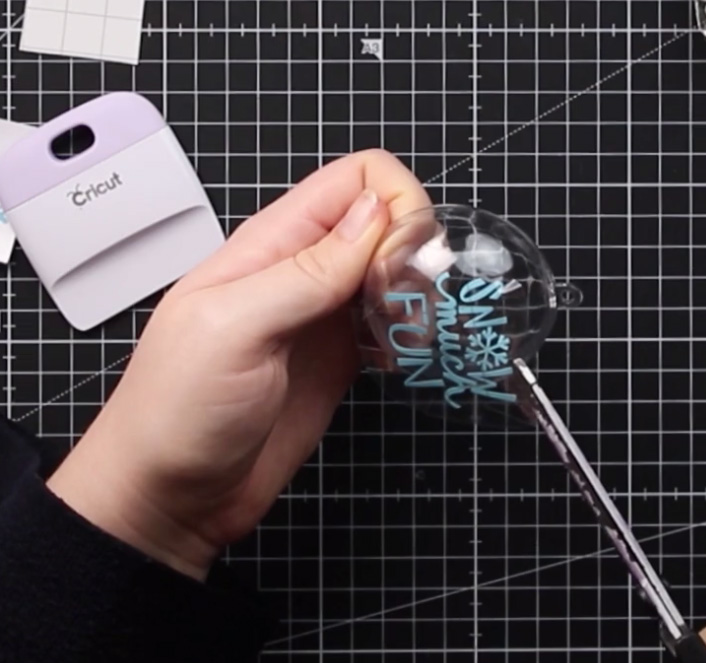
Step 4: Check it’s all stuck down
After you’ve stuck on the whole decal and removed the transfer tape, you may need to apply a bit more pressure on any bits that are coming up to make sure it’s firmly stuck.
To do this, rub your finger along the vinyl to press it firmly to the ornament.
Now, your vinyl has been applied with absolutely no bubbling underneath and it’s fitting the curve of the ornament perfectly!
Step 5: Complete the other side
As my design for the back of the bauble is just one shape, I don’t need the transfer tape.
I’m just going to peel the snowflake off like a sticker, put it where I want it to go and then start in the middle and gently press out all of the ‘spikes’ on the snowflake to get them to stick.
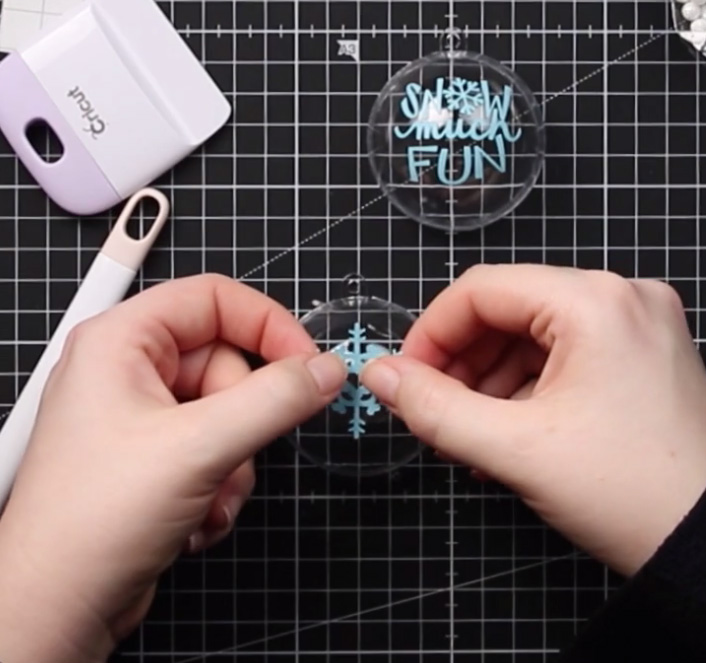
By using a rolling motion with your fingers, it helps make sure there are no bubbles underneath the vinyl, and doing it one part at a time also helps the vinyl to curve to the shape of the bauble.
Step 6: Put the ornament together
Now all that’s left to do is to fill one half of the bauble with snow decorations, push the two sides together and add some ribbon!
I hope you enjoyed this tutorial on how to apply adhesive vinyl to curved surfaces.
Happy crafting,
Sarah x

