HCC 2023 Day 11 🦇 Spider Web Shaped Card
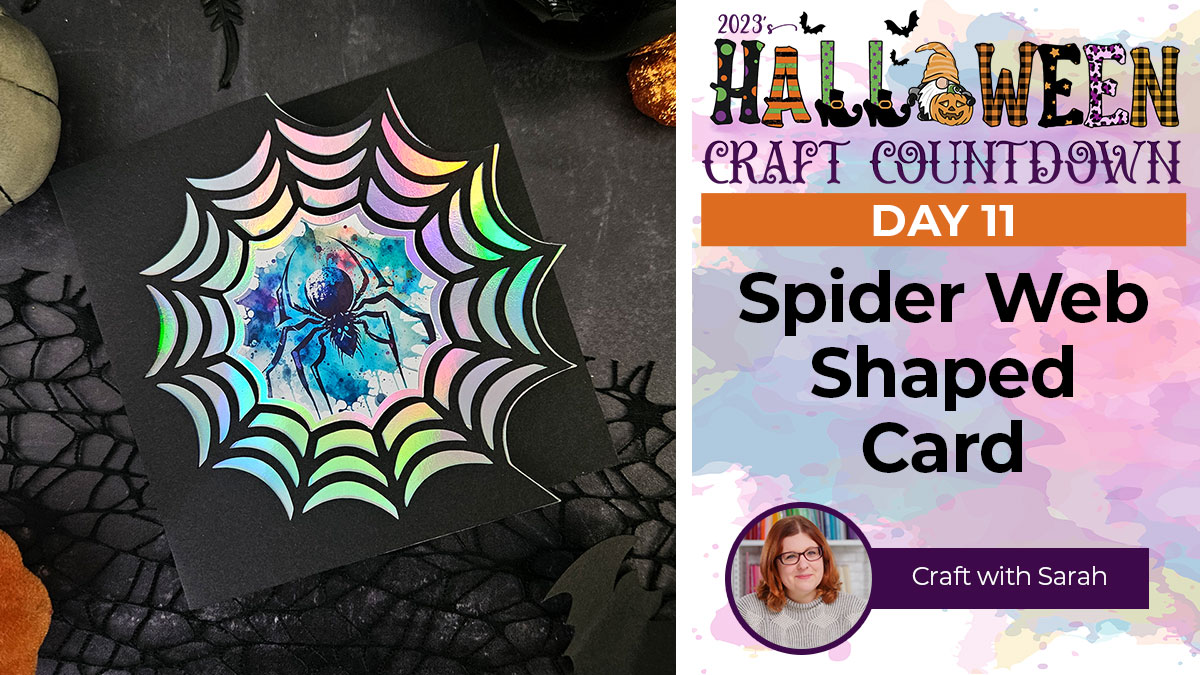
Make a Halloween card with a difference with this spider web shaped card.
Welcome to Day 11 of the Halloween Craft Countdown!
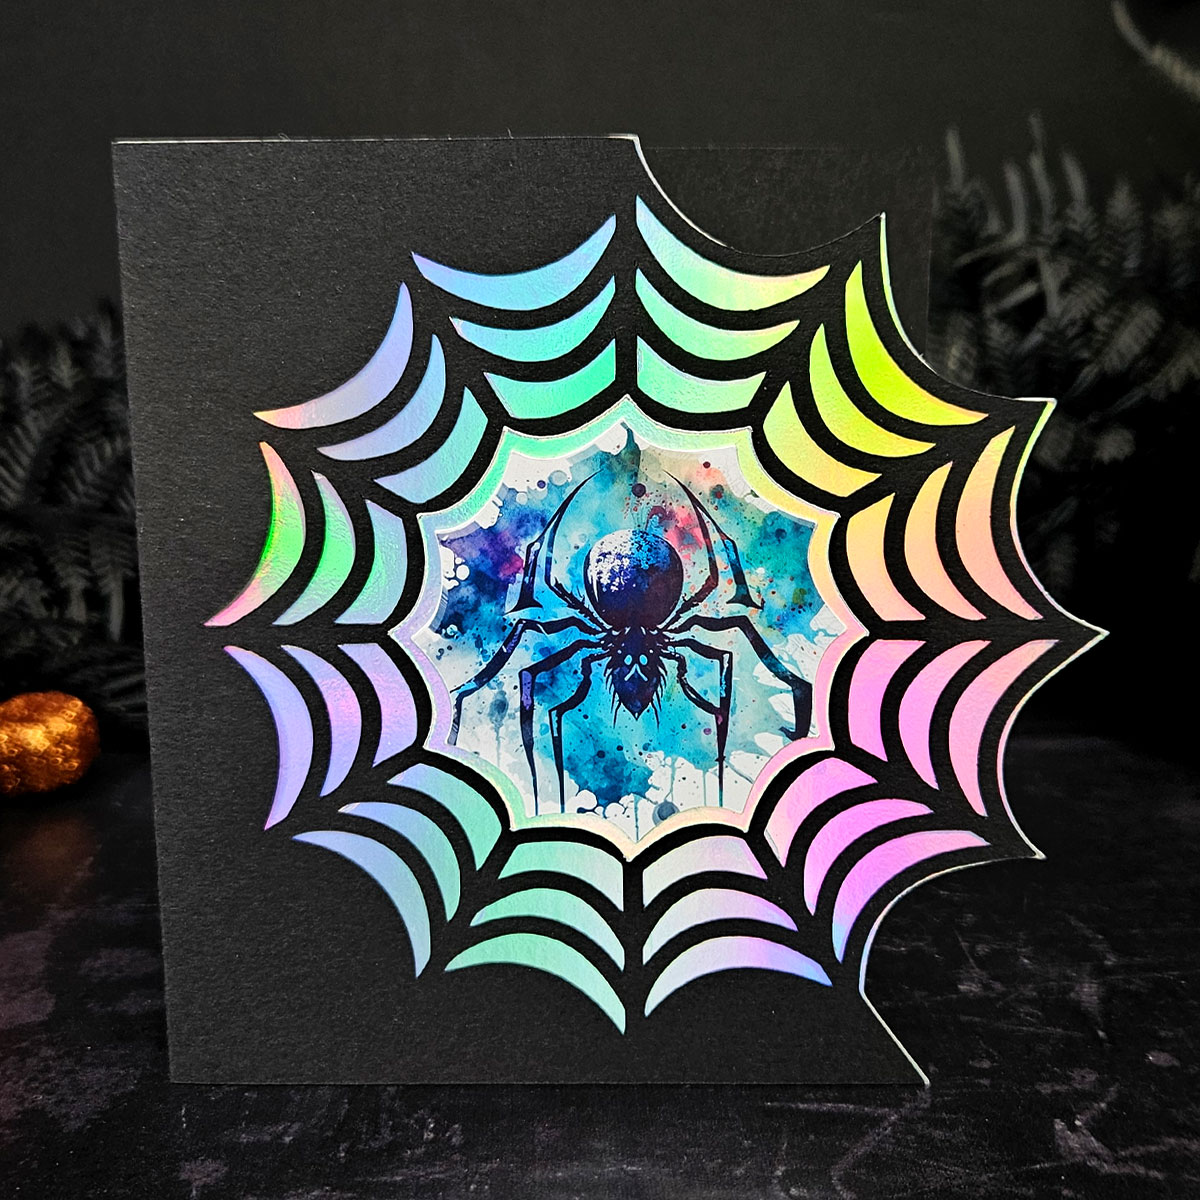
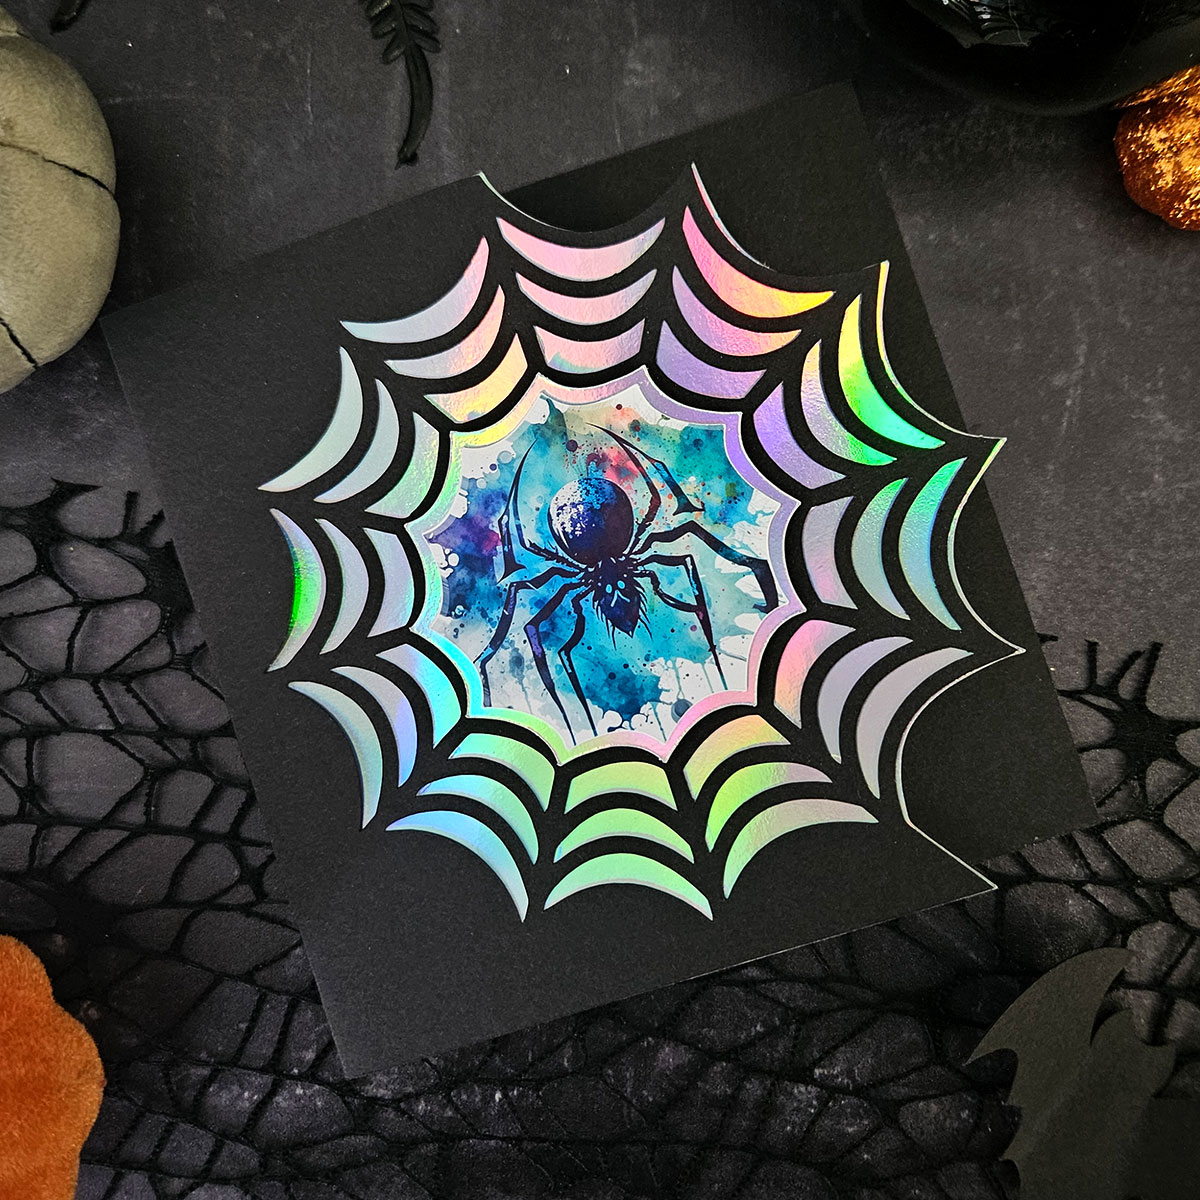
This easy-to-make greetings card has a cutout edge in the shape of a spider web. The middle of the card comes blank so that you can add your own image or photo.
I’ve chosen a watercolour effect spider to fit with the web theme, but you can put whatever you like in the middle.
This Project was part of the Halloween Craft Countdown 2023
Materials supply list
Here is a list of the materials that are required to make this project.
Please note that some of the links included in this article are affiliate links, which means that if you click through and make a purchase I may receive a commission (at no additional cost to you). You can read my full disclosure at the bottom of the page.
- Cricut machine
- Light blue Cricut cutting mat
- Cricut Scoring Wheel or Cricut Scoring Stylus
- Black card
- Holographic or metallic card
- White paper or card
- Glue
- 3D foam pads
- Glossy Photo Paper
- Colour printer
- Image or photo for the middle of the card (I used these watercolor spiders)
This project is suitable for the following types of Cricut machine: Explore Air 2, Explore Air 3, Maker, Maker 3, Venture, Joy Xtra. It cannot be used on the original Joy machine as it requires print-then-cut functionality.

Video tutorial for spider web shaped card
Watch the video below to see how to make this spider web card.
If you prefer to read rather than watch, keep scrolling!
Resources mentioned in video
Written tutorial (with photos!)
Here’s how to make your very own Halloween card using a Cricut machine!
Step 1) Download the cutting file(s) & unzip the downloaded folder
Download the files using the box below.
Purchase the File(s)
This cut file is available as part of the Instant Access Bundle.
Or, purchase this design individually here
Before you upload the SVG to Design Space, you need to unzip the download folder that it comes in.
- How to unzip a folder on Windows computer
- How to unzip a folder on a Mac
- How to unzip a folder on an iPad/iPhone
- How to unzip a folder on an Android device
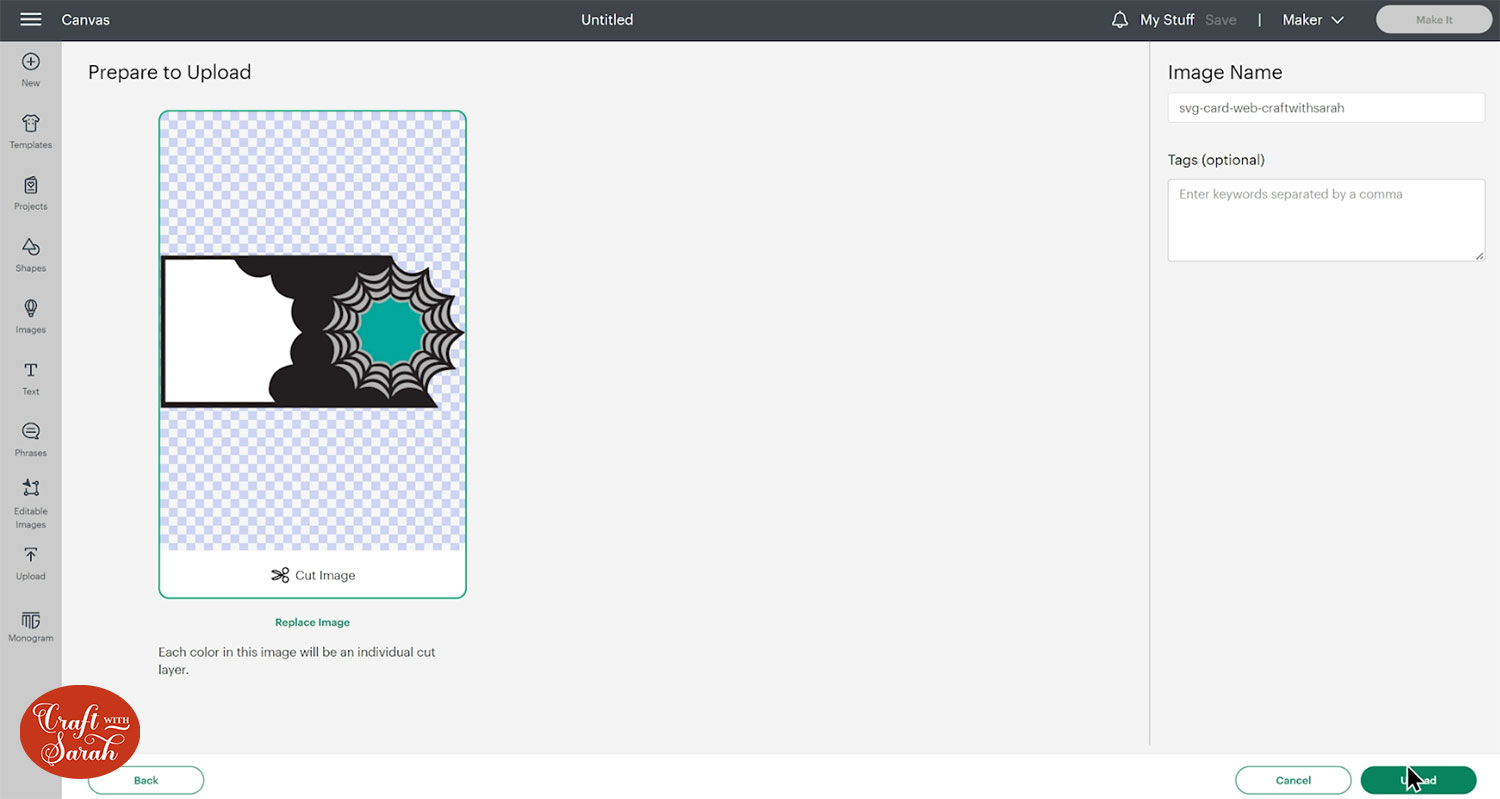
Step 2) Upload the SVG file into Design Space
Open up Cricut Design Space and start a new Project.
Click “Upload” and then find your unzipped version of the downloaded files for this project.
The file to upload for Cricut Design Space is the one called svg-card-web-craftwithsarah.svg
Make sure you upload the file which starts svg- in the filename!!
This is how it should look after you have uploaded the file:
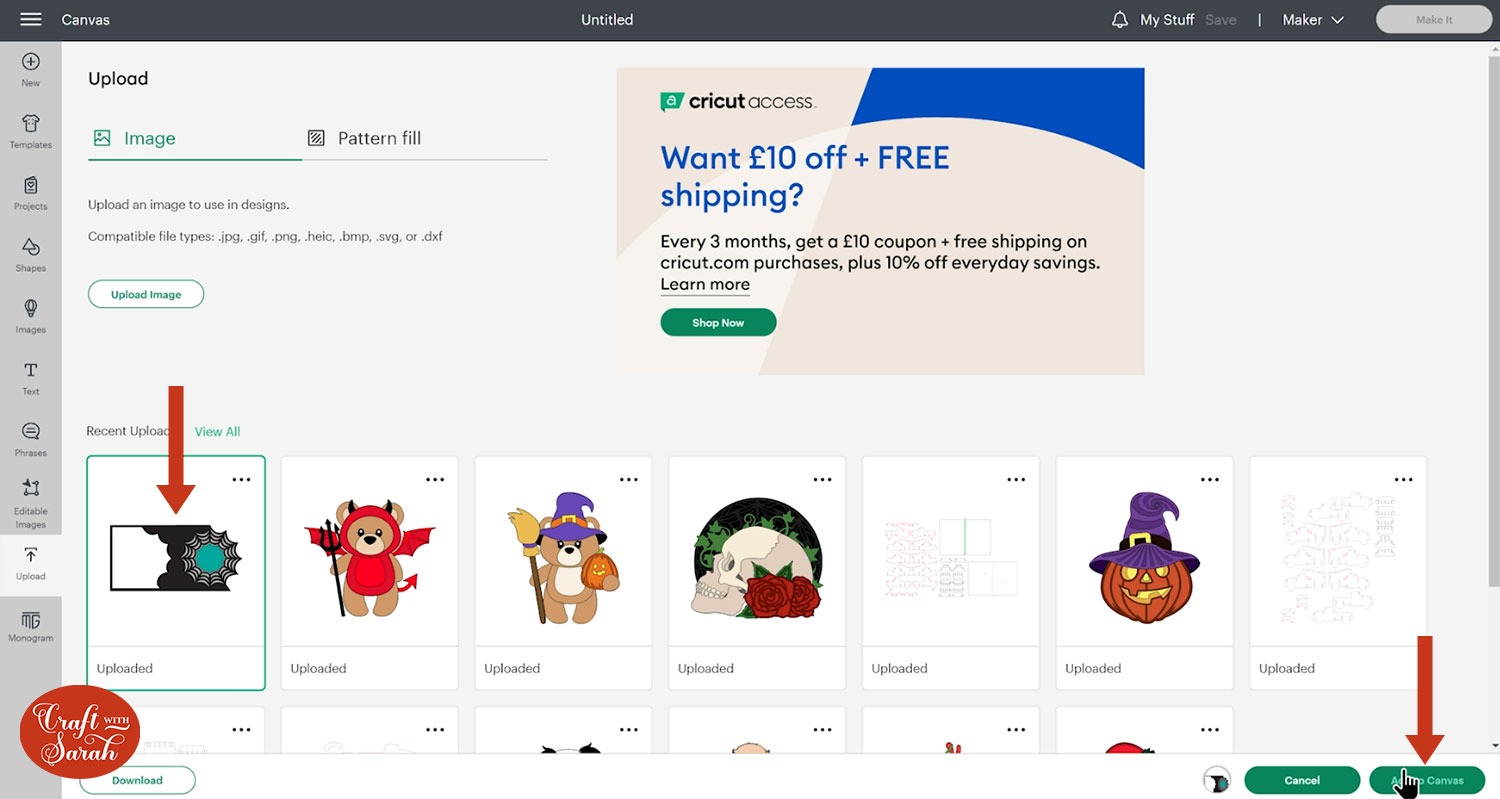
After uploading, the design will show in your “Recently Uploaded Images”.
Click on it and then press “Add to Canvas” to put it onto your Project.
Here is how it should look:
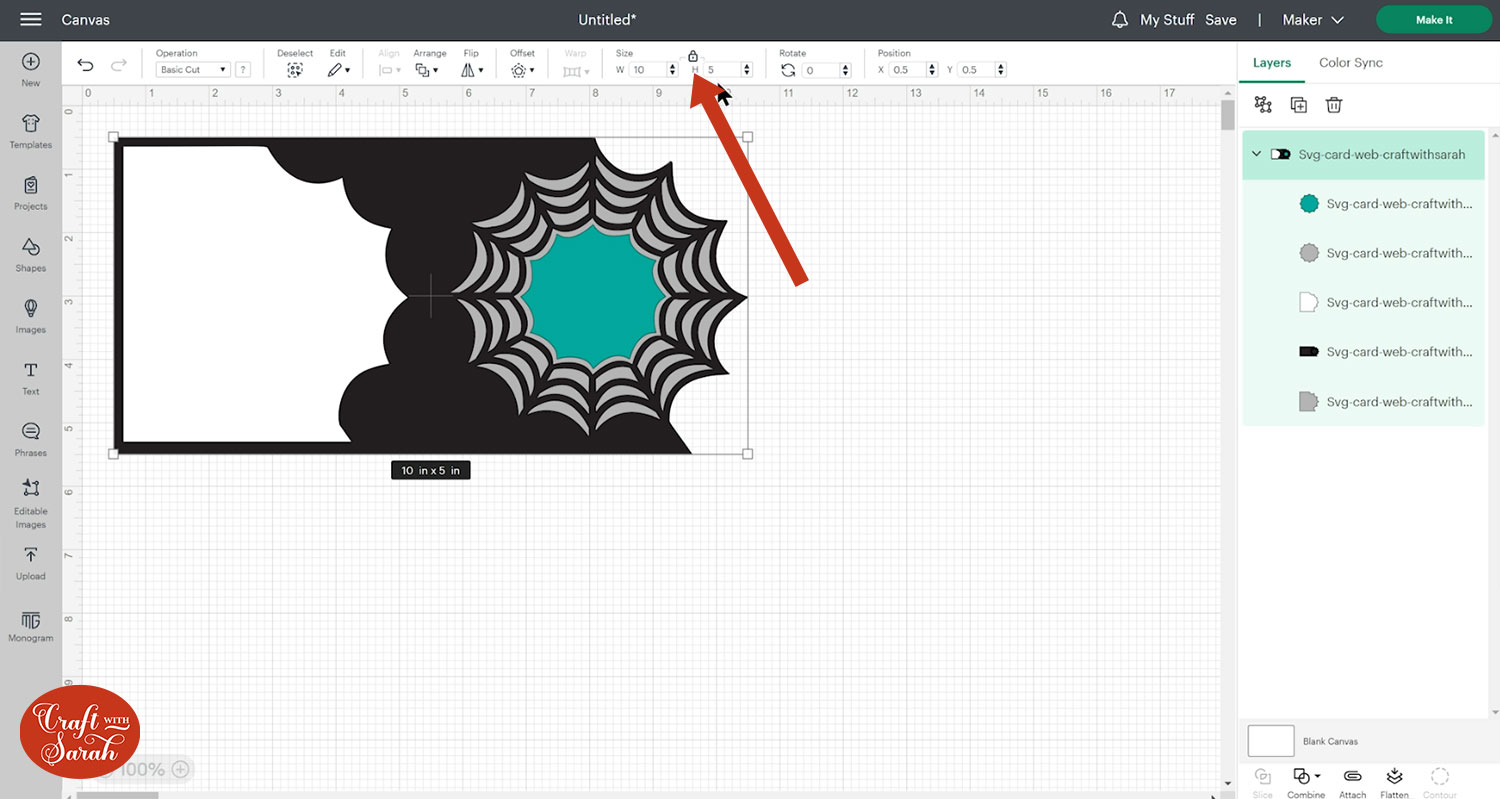
Check that the card is 10 inches wide and 5 inches tall. Resize to those specifications if it has loaded it differently.
Step 3) Add a score line
If you have a Cricut scoring stylus or scoring wheel then I recommend adding a score line to the card to make it easier to fold.
I moved the white layer over to the right of the card to separate it from the rest of the design, as this is to be cut from white paper to be stuck inside to write your message on.
Click the card and Ungroup the layers.
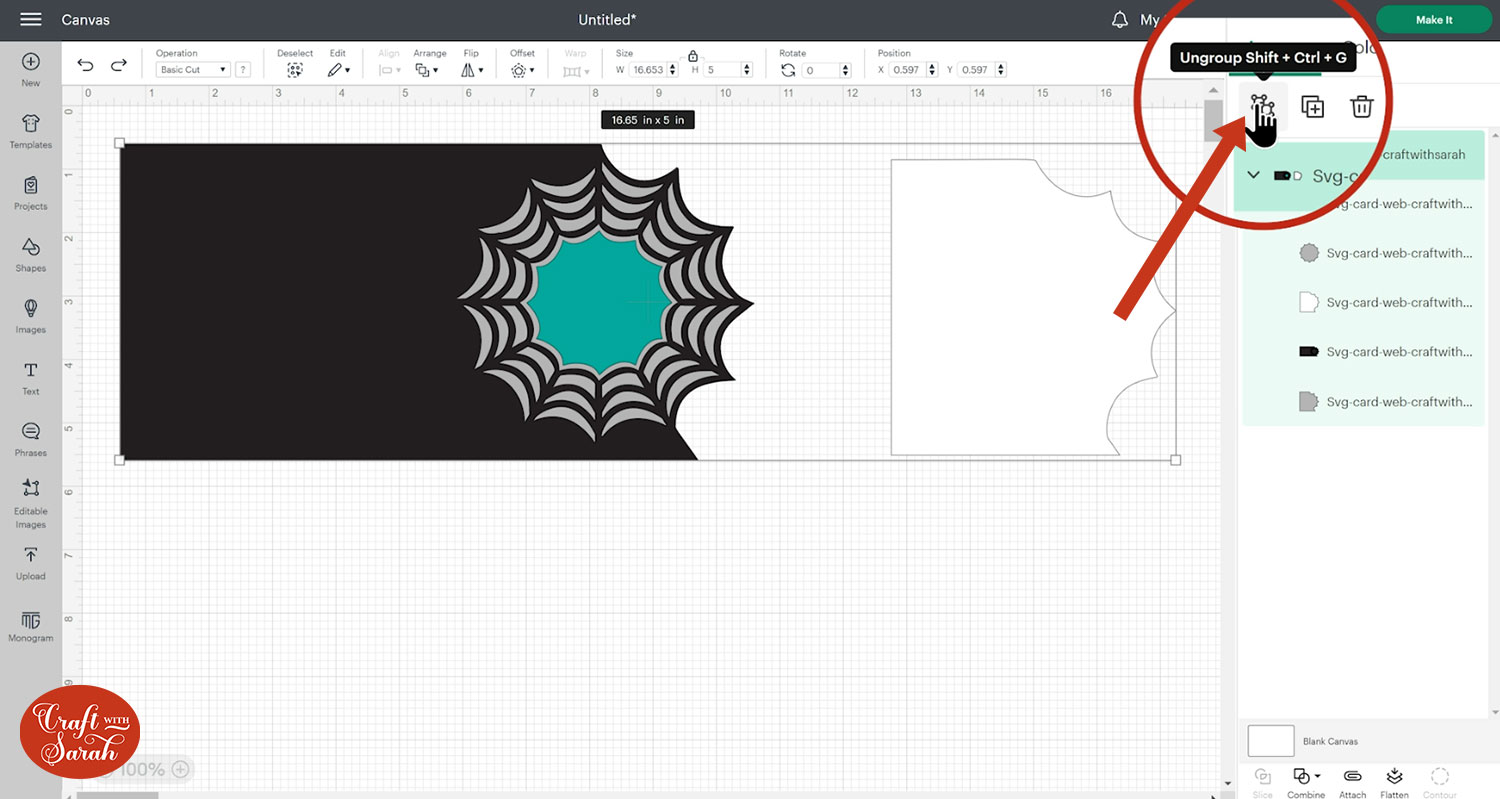
Go to “Shapes” and insert a score line.
Make it 5 inches tall.
Select the score line and the black base card layer and press Align > Center.
This will put the score line exactly in the middle of the card.
With those two layers still selected, press “Attach”.
Attach is what tells the Cricut where to do the score line.
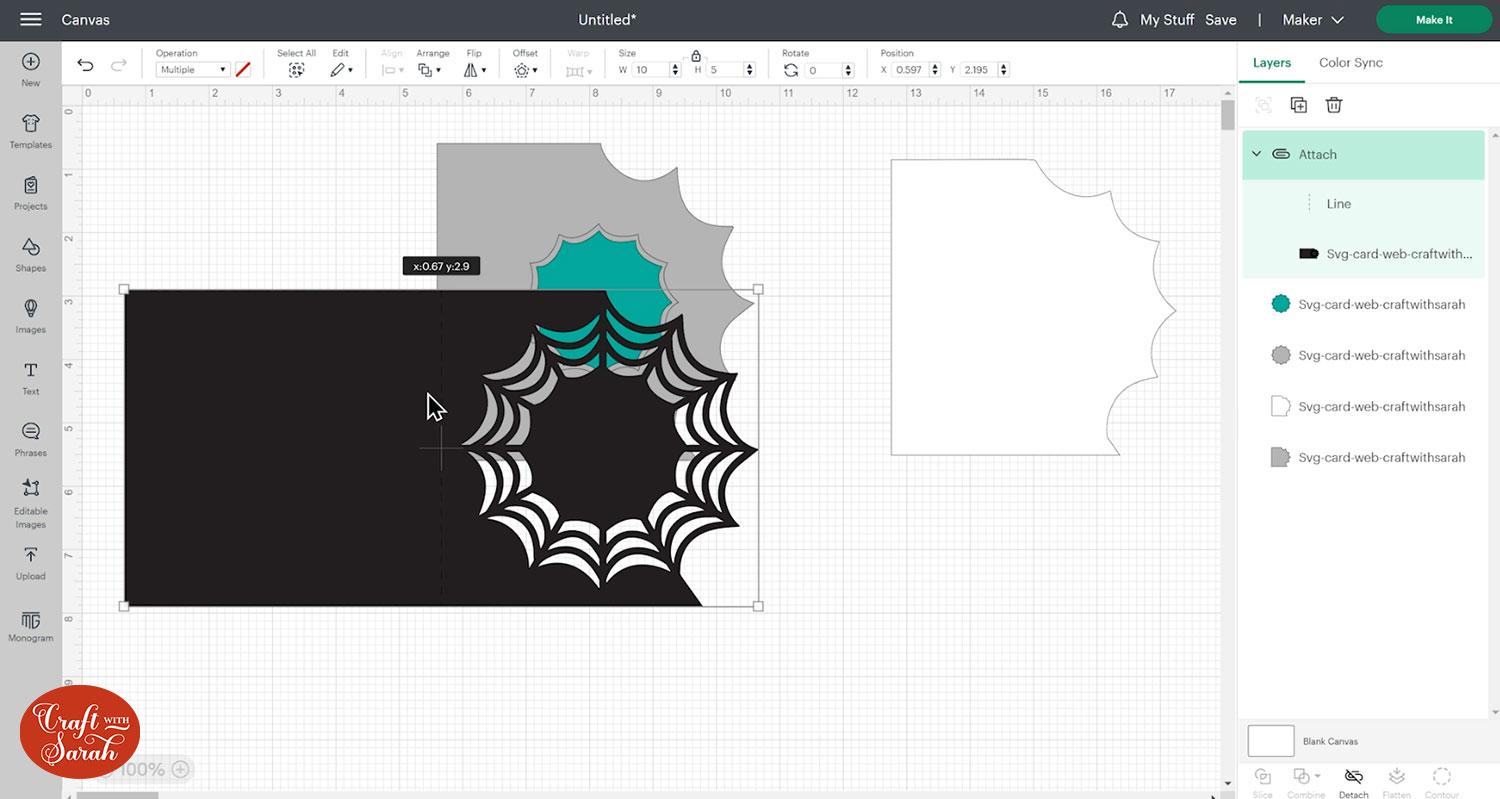
Attaching layers together moves them to the top of the layers panel. Drag the base card back down to the bottom of the layers panel.
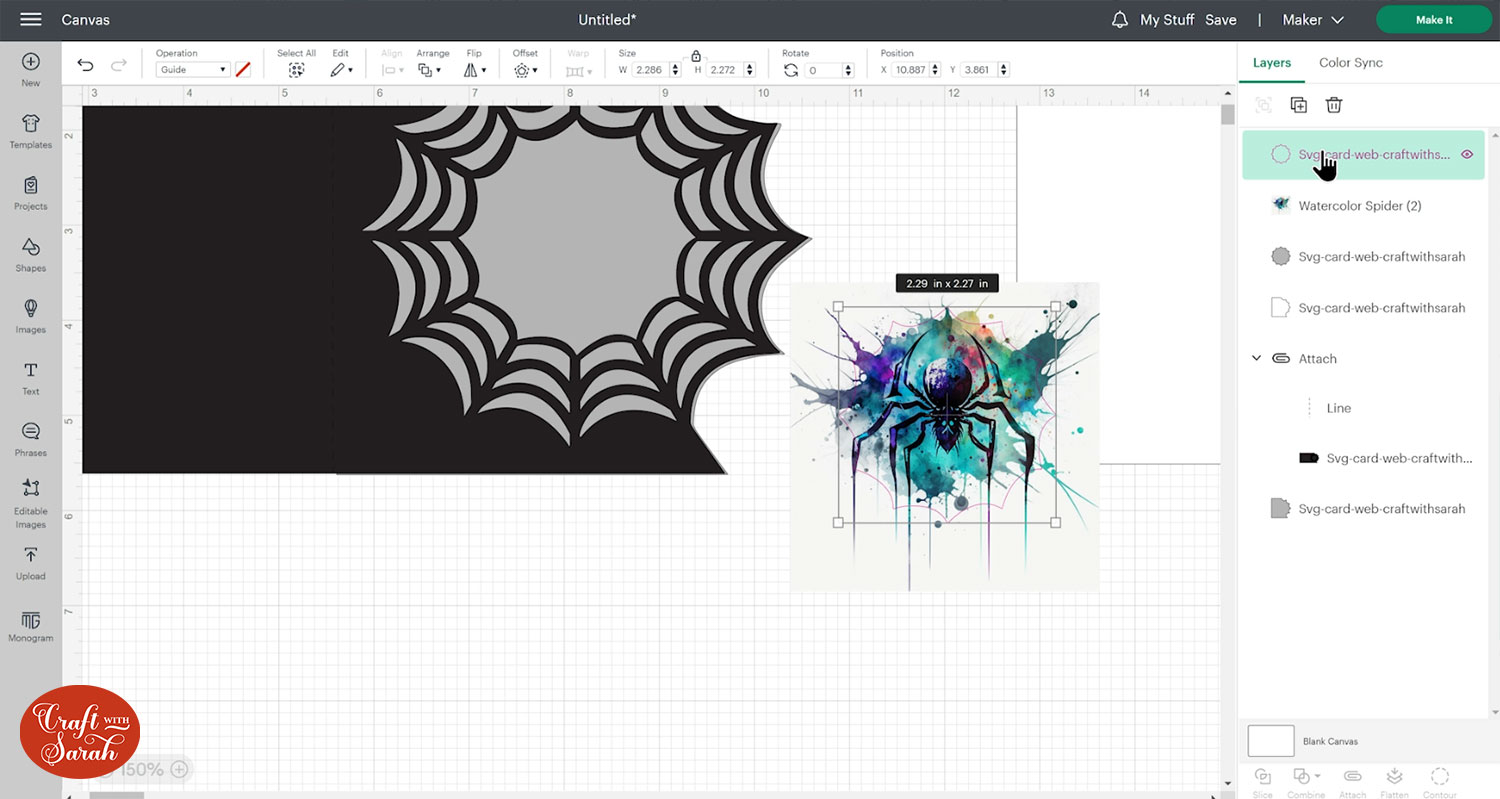
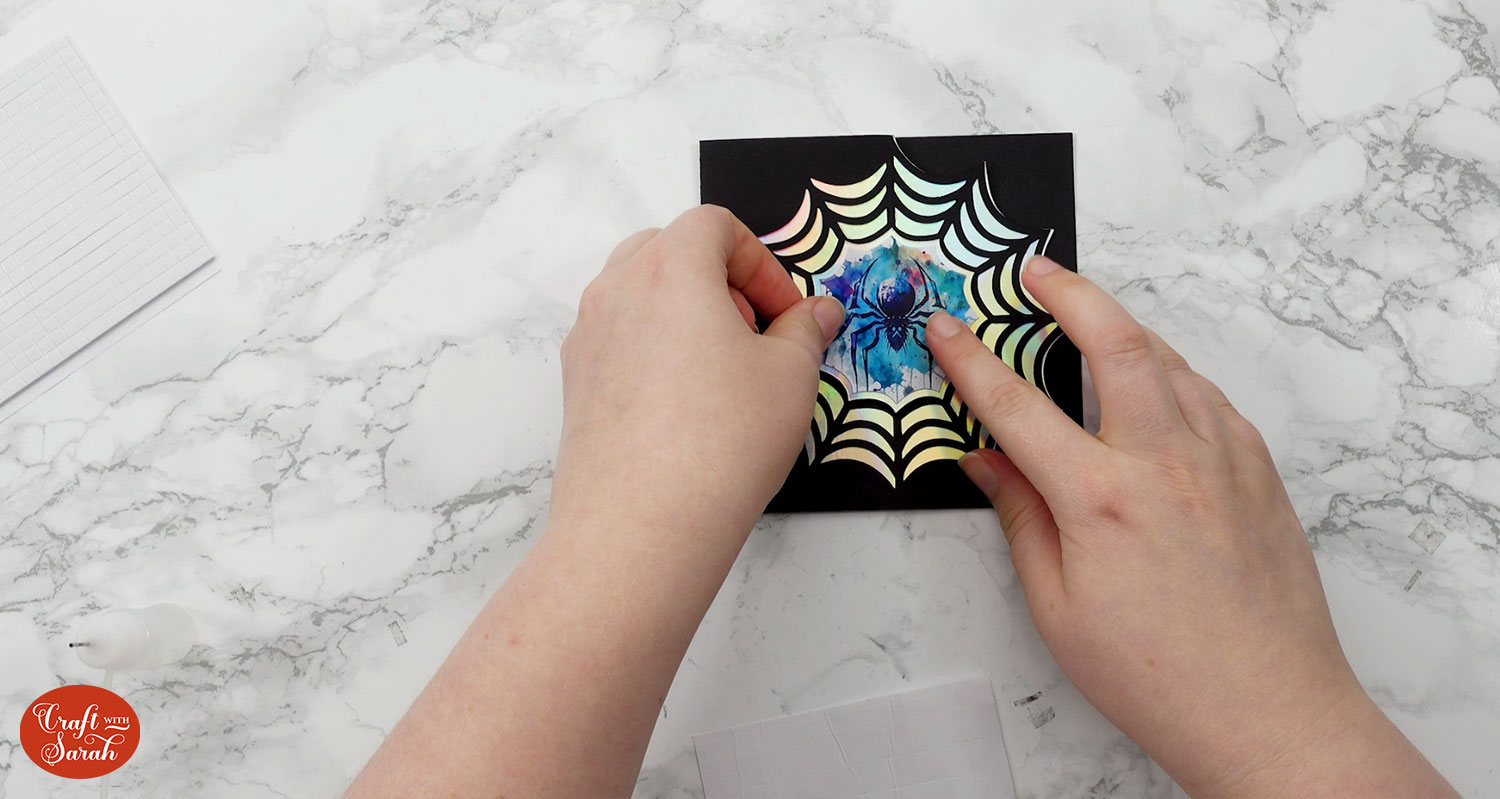
Step 4) Add an image to the middle of the spider web
The green shape in the middle of the spider web is for you to get creative with!
You can add any image you want, including photos.
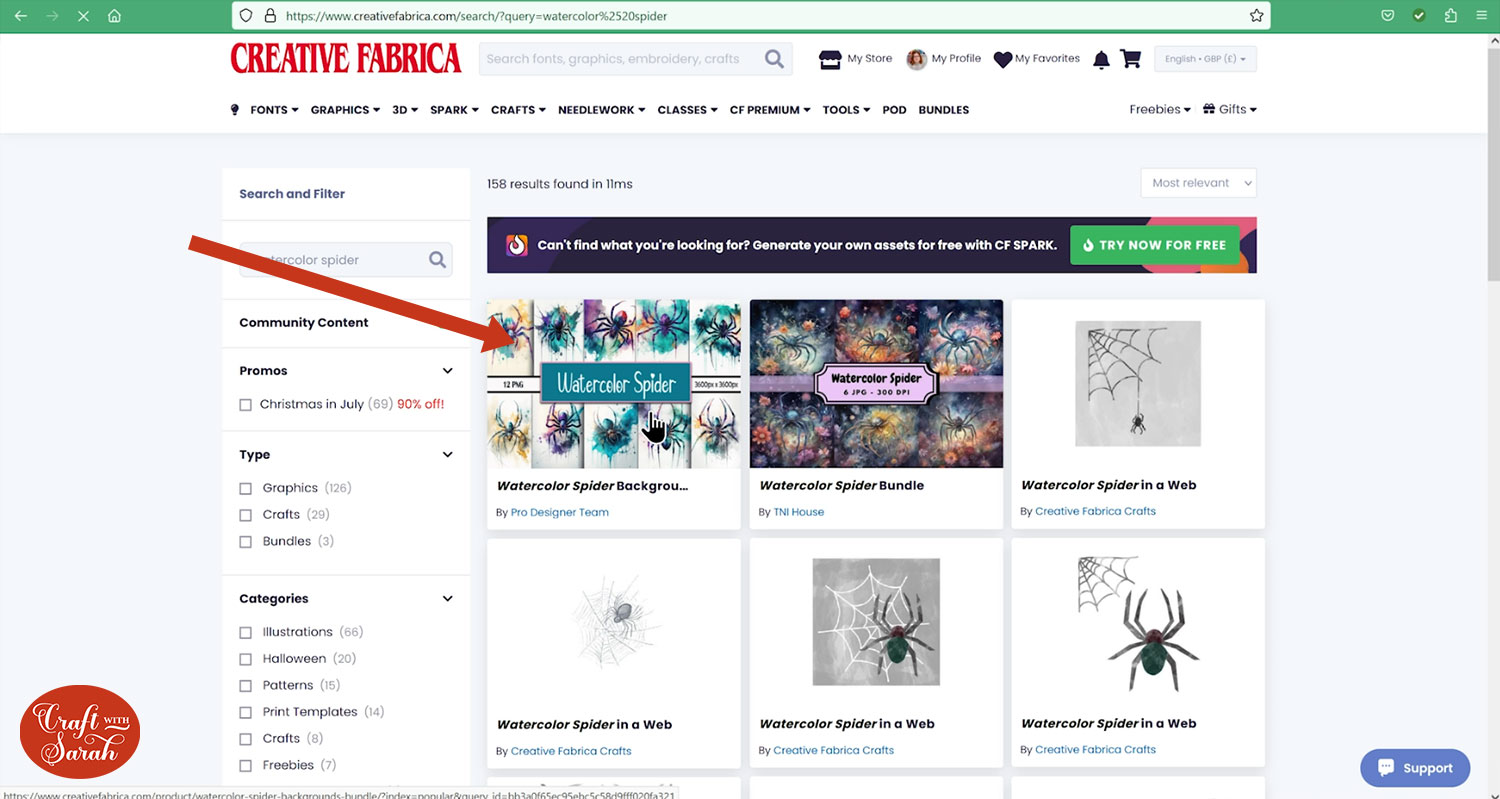
I decided to add a spiderweb graphic from Creative Fabrica.
Click here to try out Creative Fabrica for just $1!!
Once you’ve chosen your image, Upload it into Design Space.
Choose “Complex” as the image type.
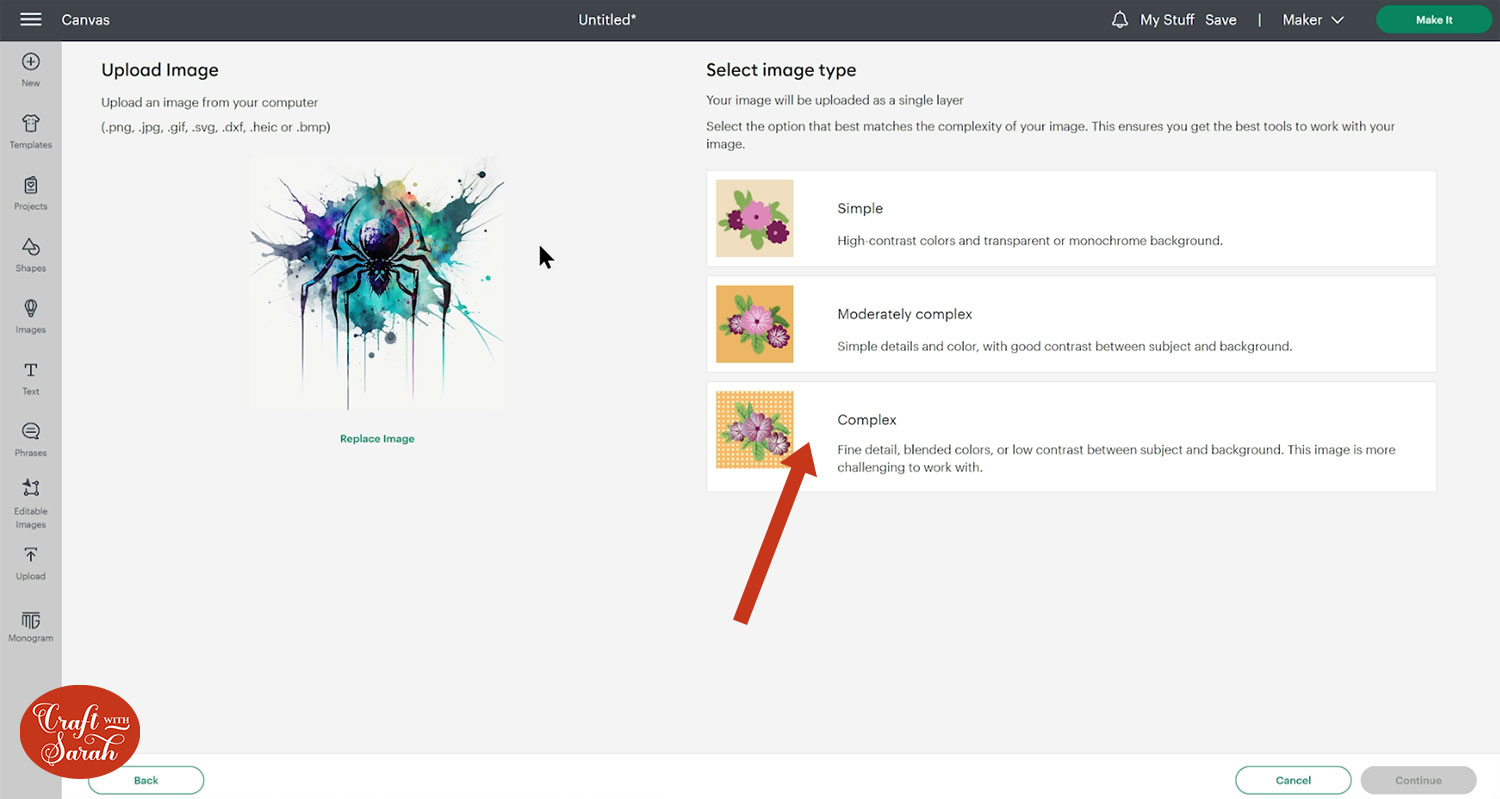
No changes are needed on this screen so just press “Apply and Continue”.
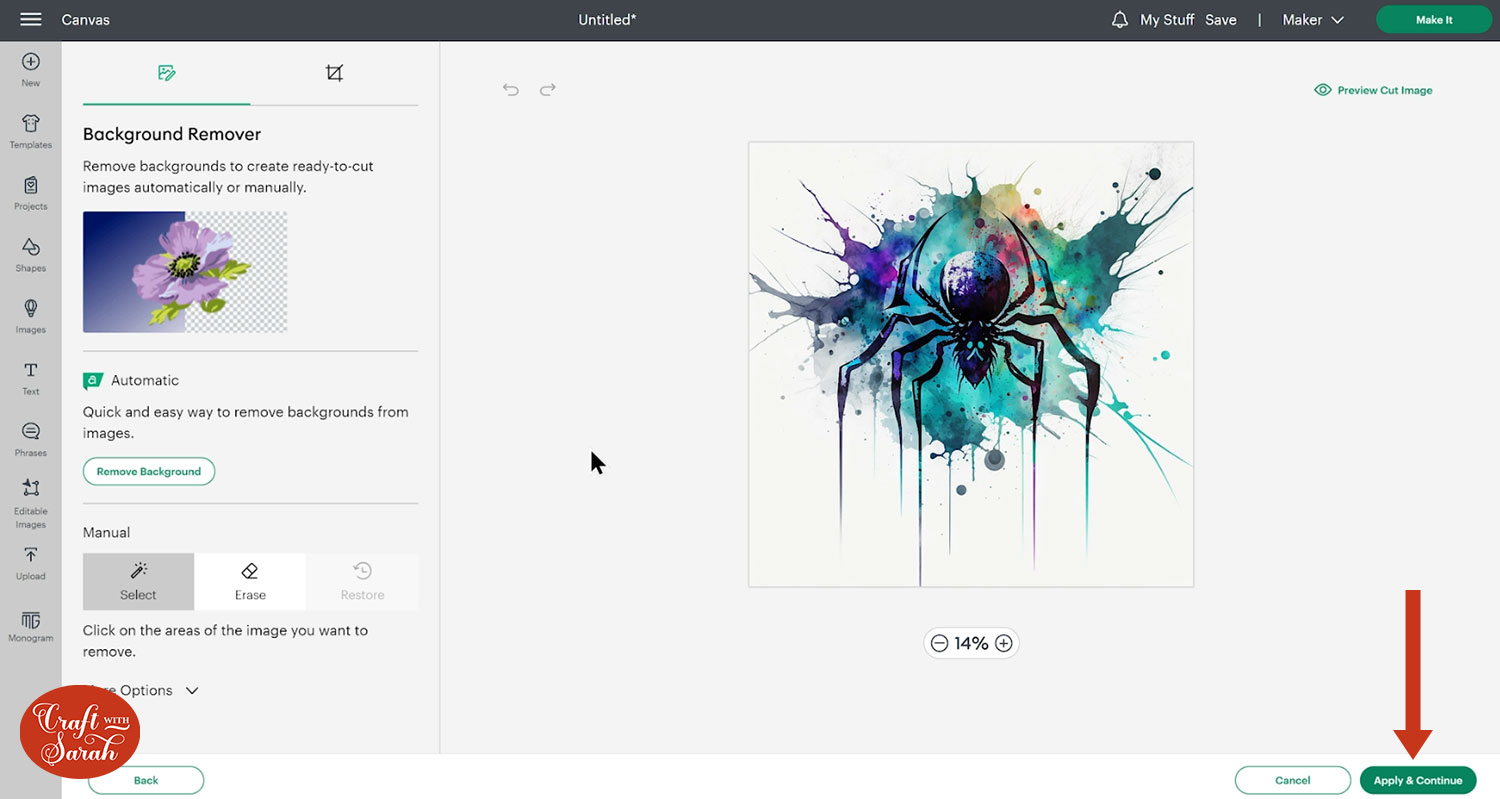
Select “Print then Cut” as the image type.
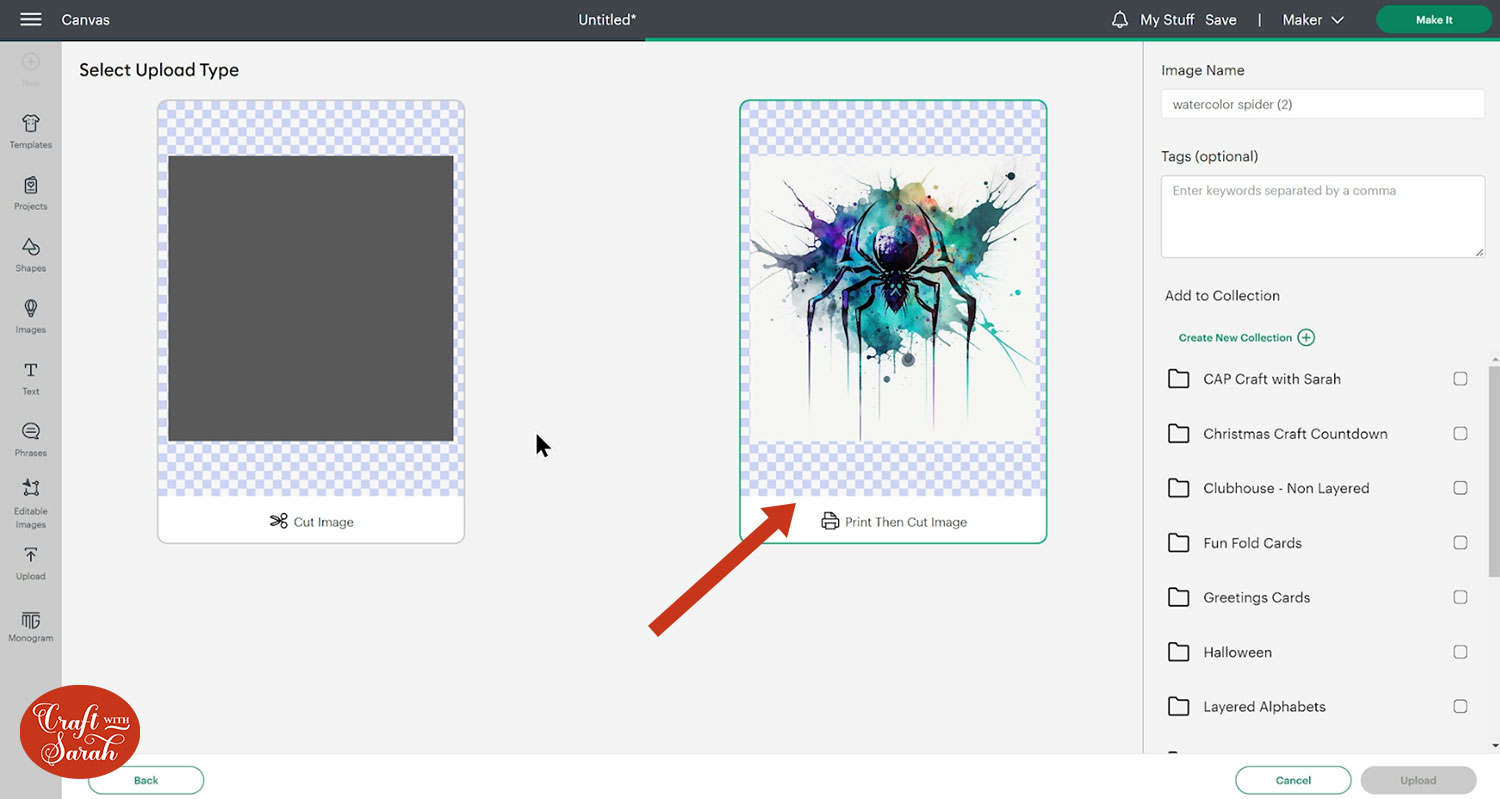
Insert the image onto your project. It might load in really large – if it does, resize it smaller so that it’s easier to work with.

Change the green shape layer in the middle of the spider web to a “Guide” in the Operations Dropdown.
This changes it to an outline of the shape with a transparent middle.
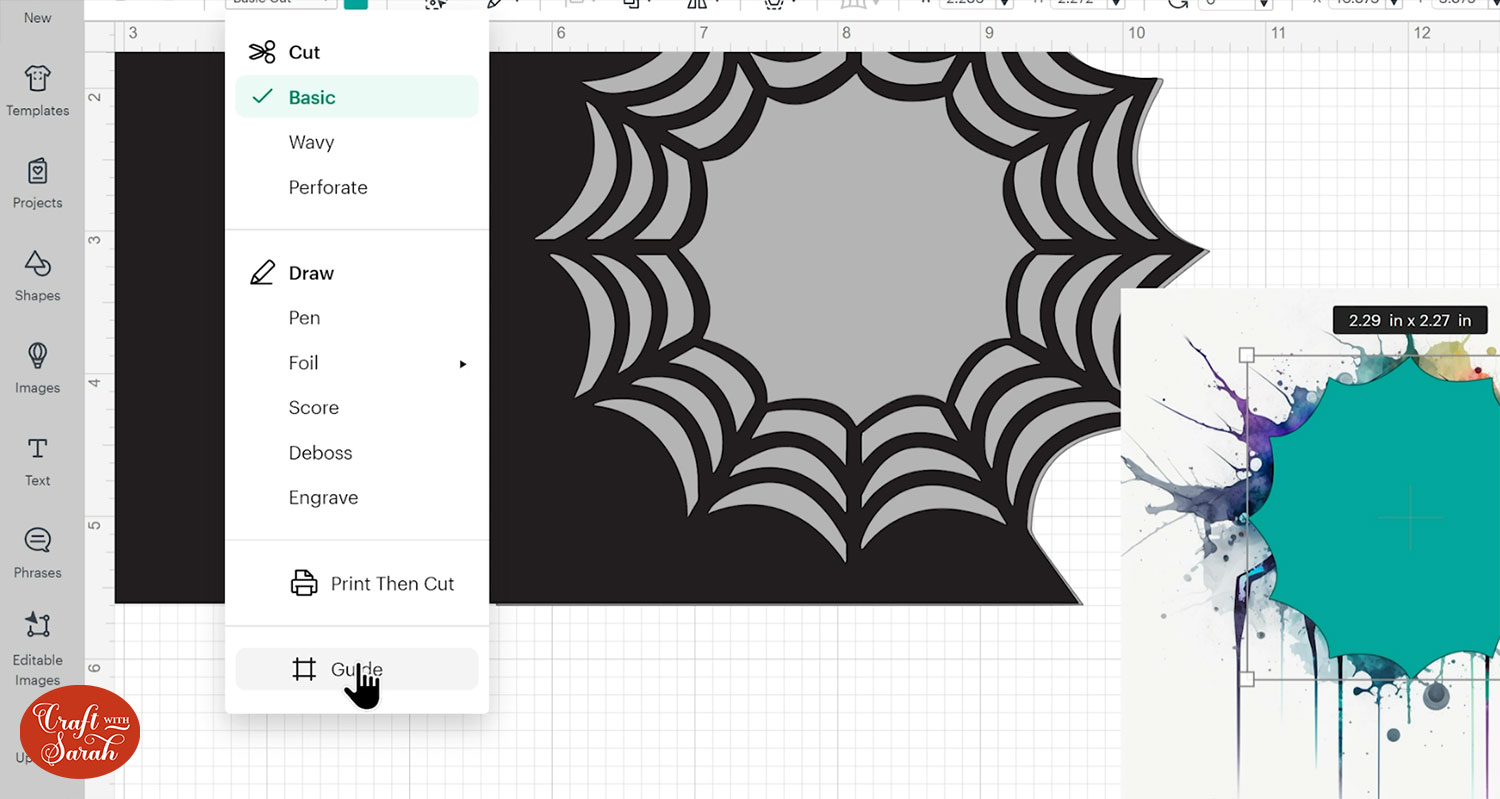
Position the shape on top of your image and resize the image (do NOT resize the green shape!!) to fit.
When you’re happy with how it’s looking, select the image layer and the shape layer and press “Slice”.
That will cut the shape out of your image and you’ll end up with several “Slice Result” layers.
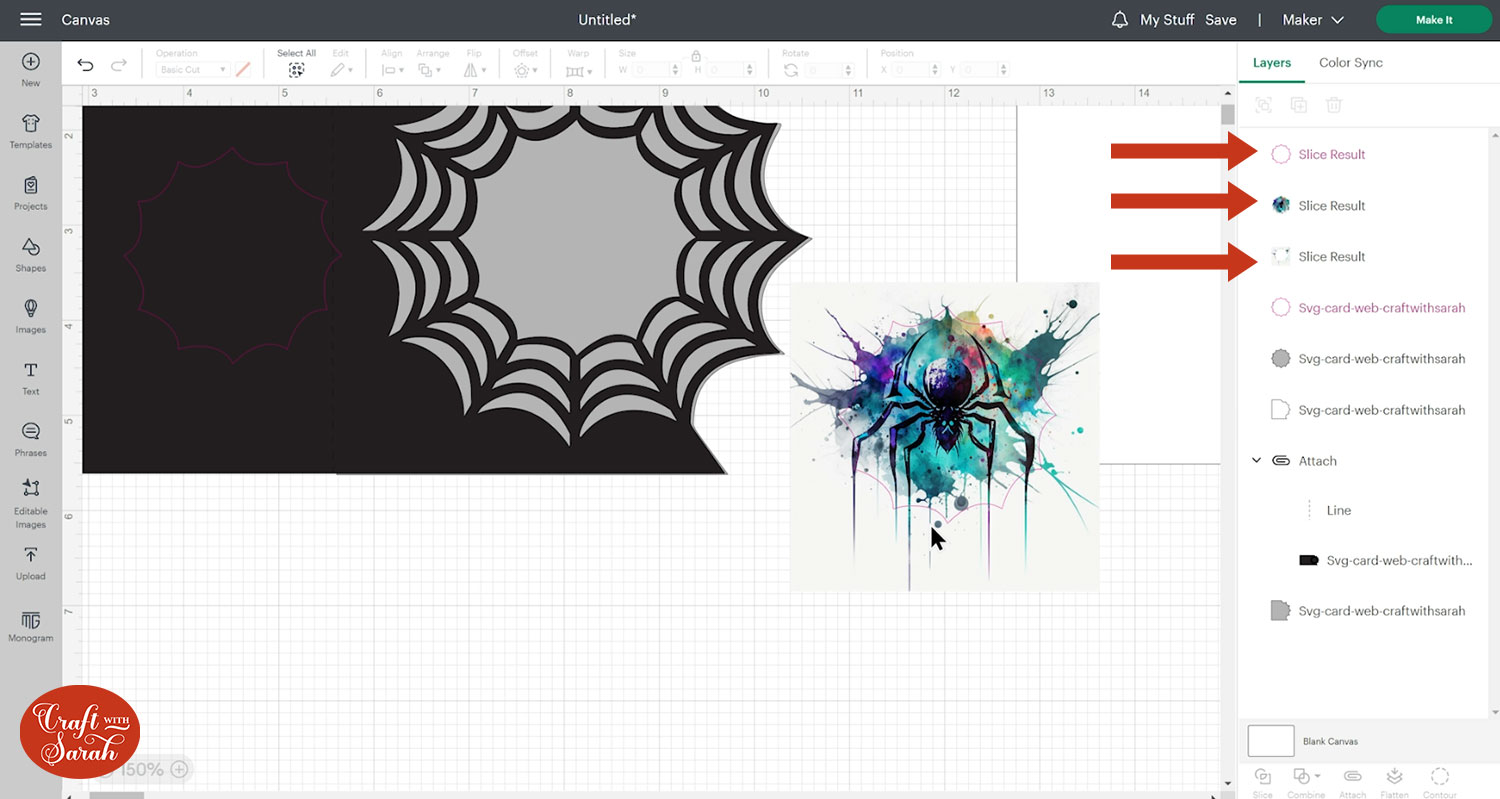
Delete the original shape layer and the excess of the image until you’re just left with the correct cutout.
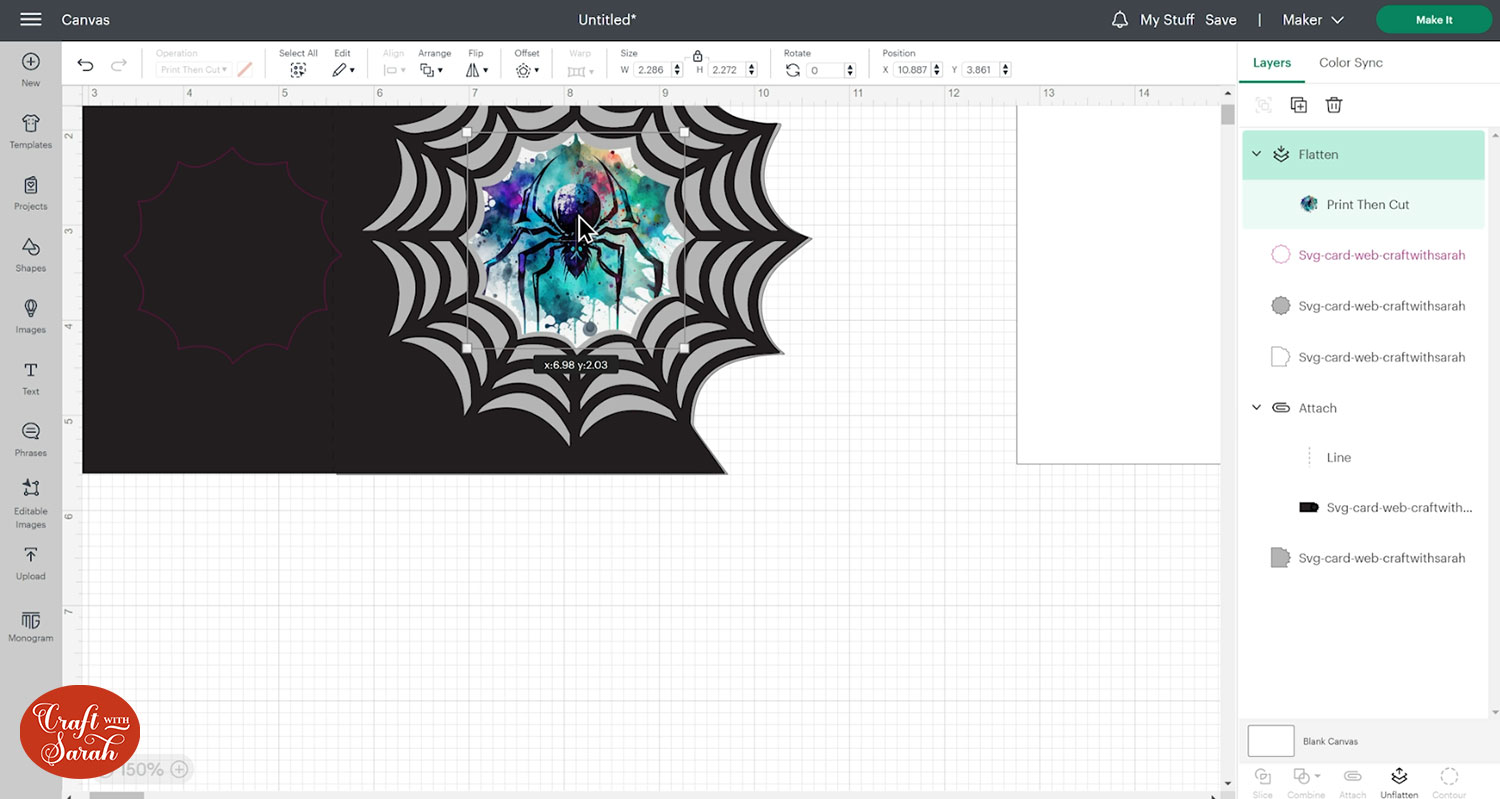
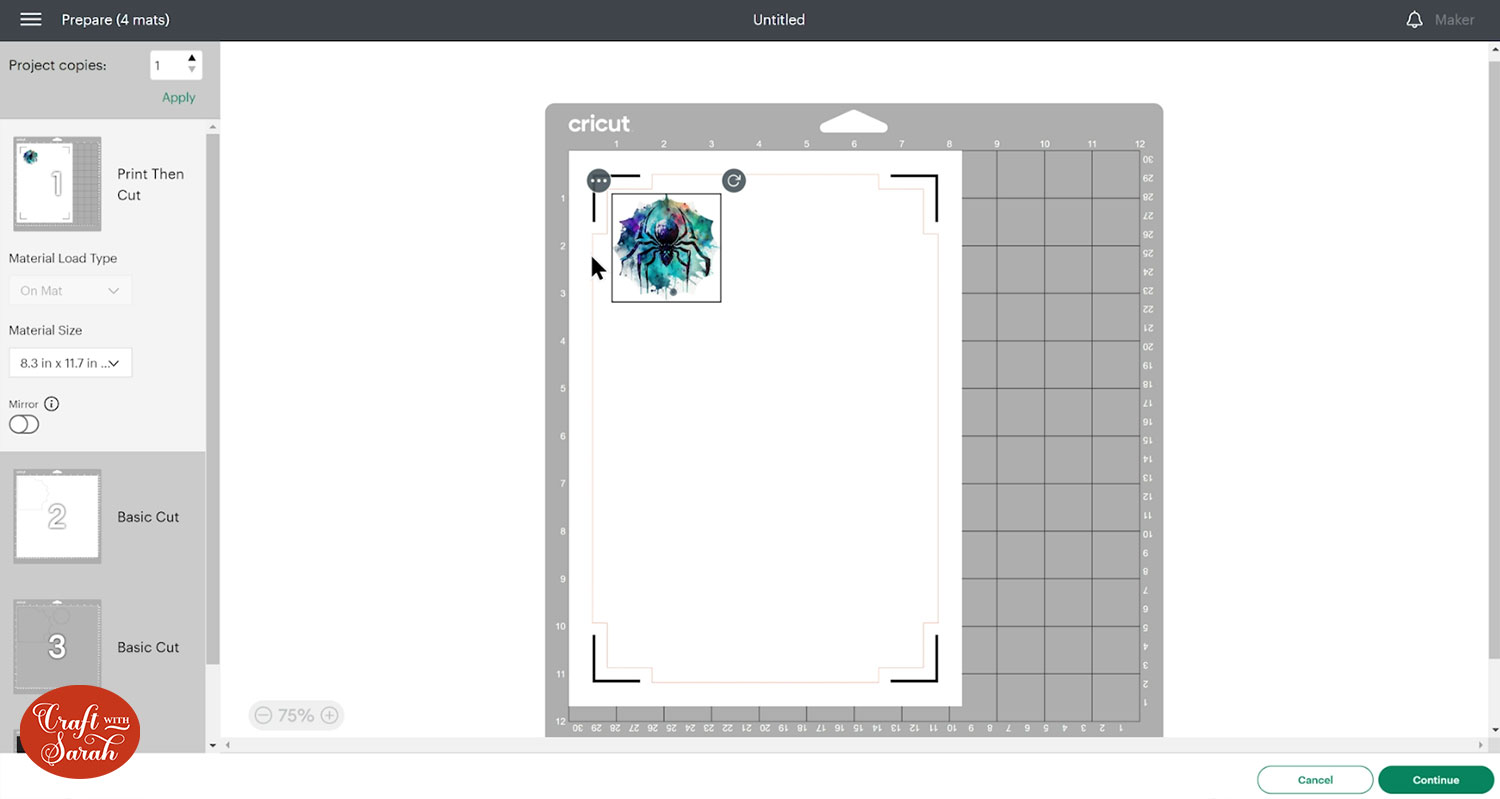
Step 5) Cut the card
When you’re happy with how everything is looking in Design Space, click “Make It” and follow the steps to get everything cut out with your Cricut.
The image will be a “print then cut” layer which means you print it on your printer and then the Cricut cuts it out.
Check out this Cricut print then cut tutorial if you are new to this technique.
Step 6) Stick the card together
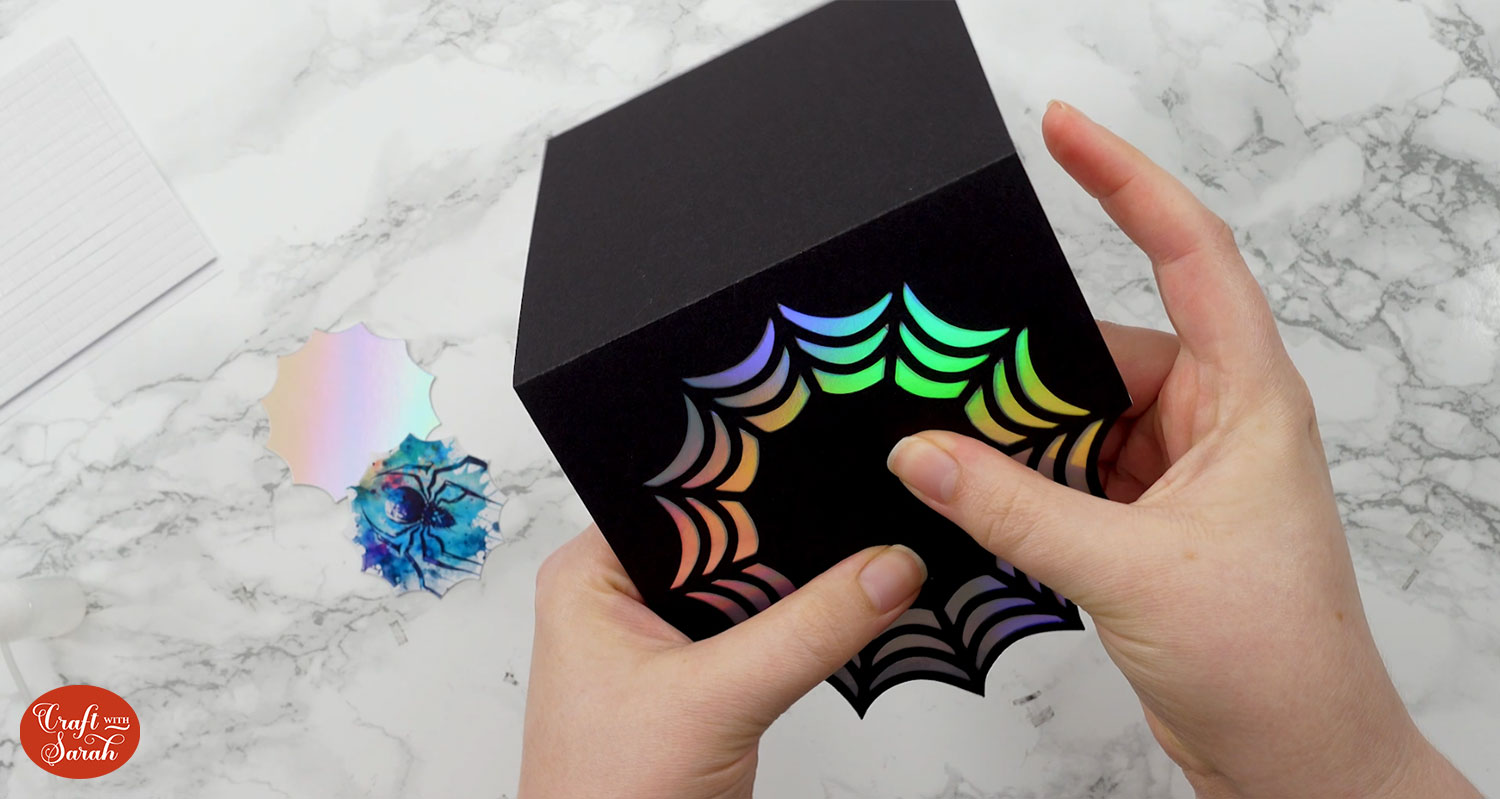
Fold the base card down the score line.
Glue the white piece to the inside of the card. This is where you will write your message.
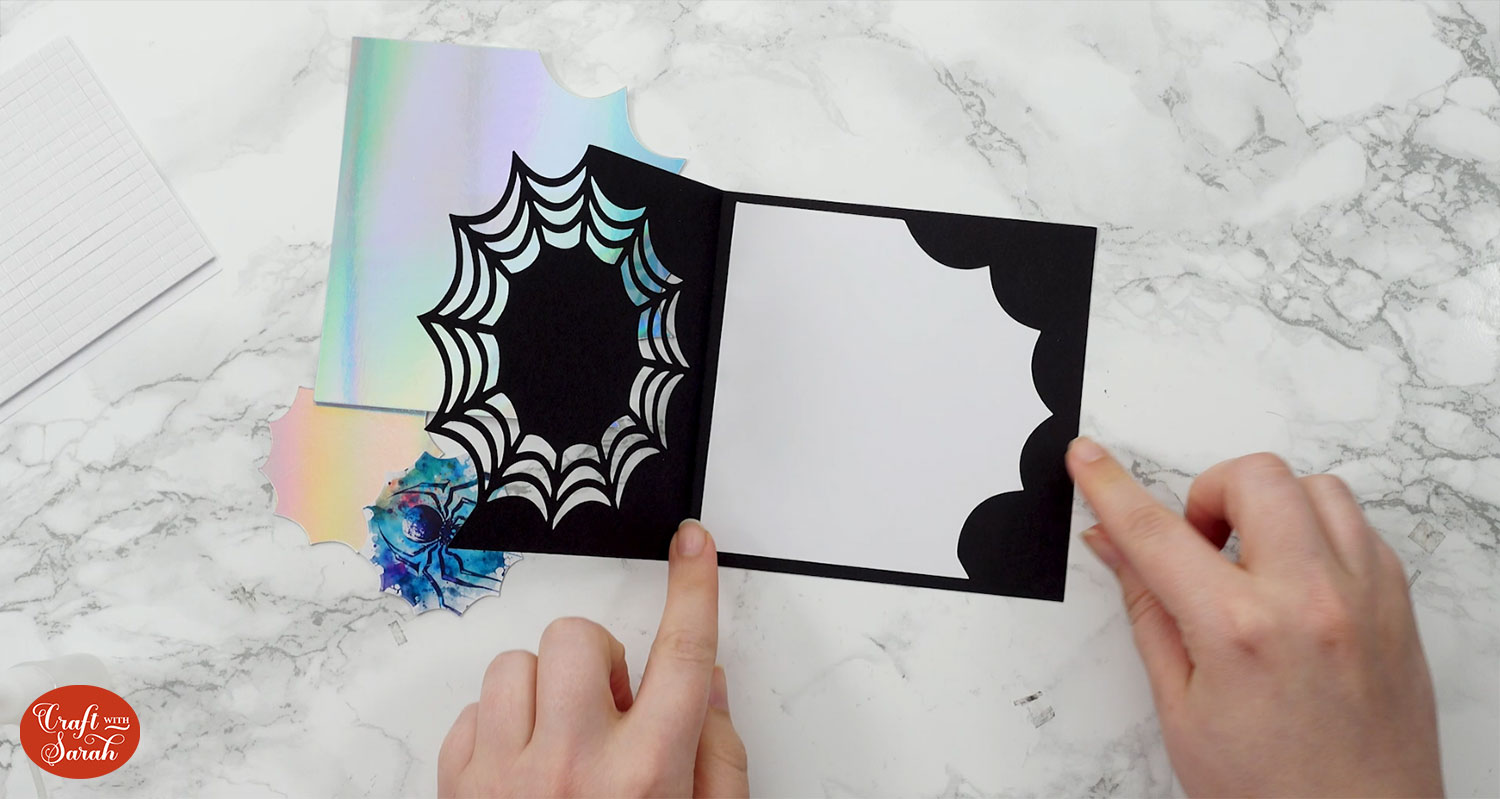
Glue the cutout of the spiderweb shape to the inside of the card so that you can see the colour through the gaps when you look at the card from the front.
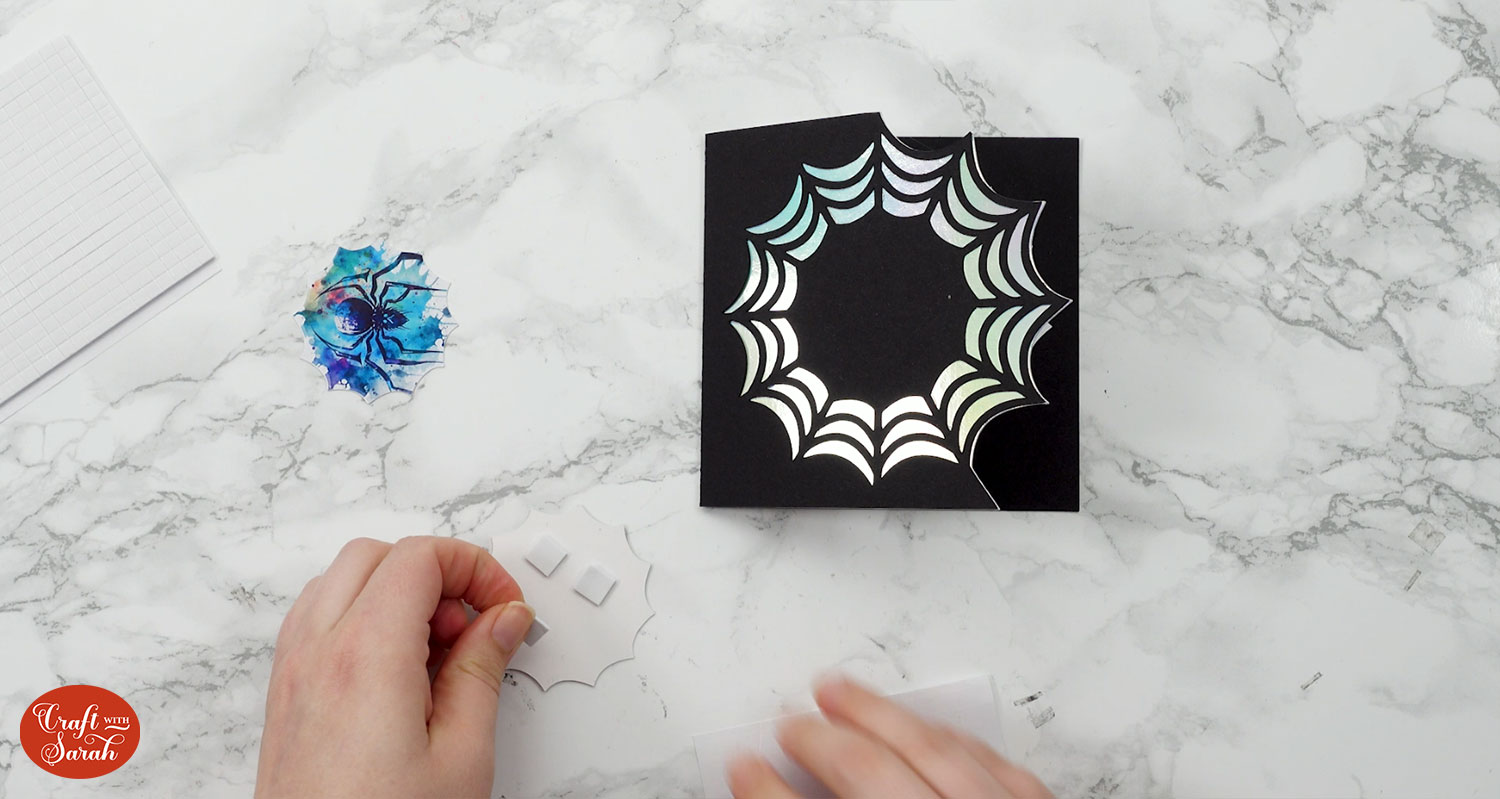
Use foam squares to attach the larger piece that goes in the middle of the spider web.
Glue or foam your printed image into the middle.
Print then cut greetings card for Halloween
I hope you enjoyed this tutorial on how to make a print then cut greetings card with a Cricut machine.
It’s quick to make which means it’s excellent for if you have lots of Halloween cards to make.
You could change out the image in the middle of the spider web for each card to make them individually tailored to the person you are giving them to.
Happy crafting,
Sarah x

