HCC 2022 Day 03 🎃 Halloween Luminaries (Paper Lanterns)
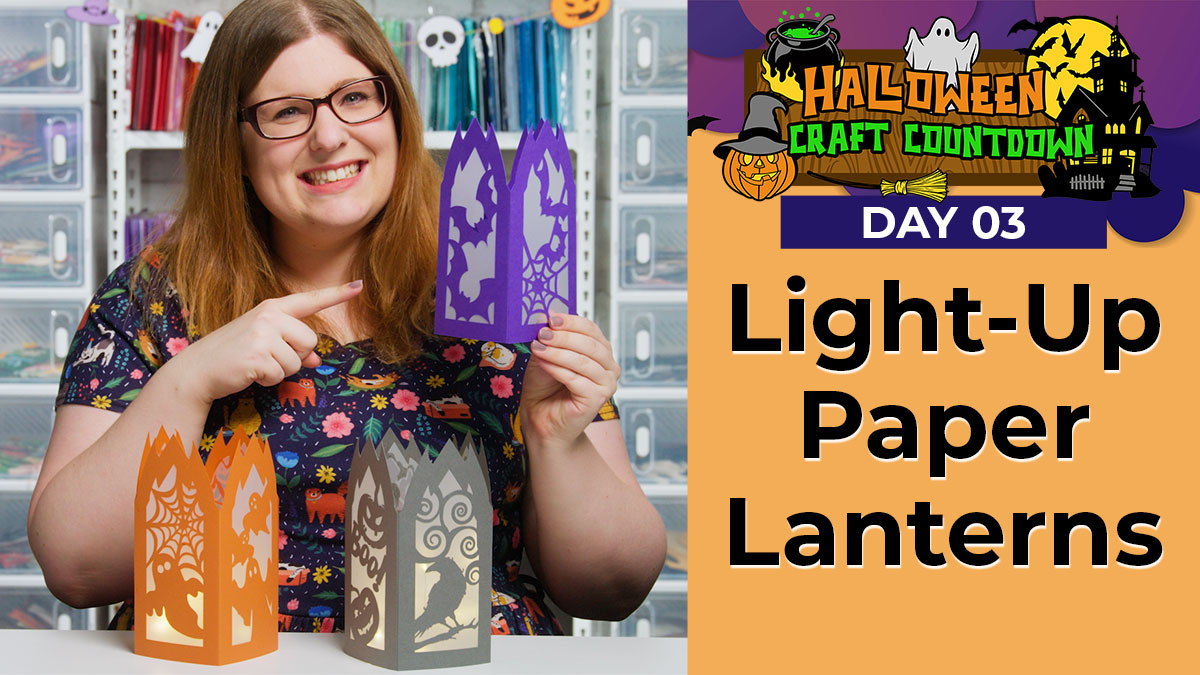
Today’s projects are these beautiful luminaries, or paper lanterns.
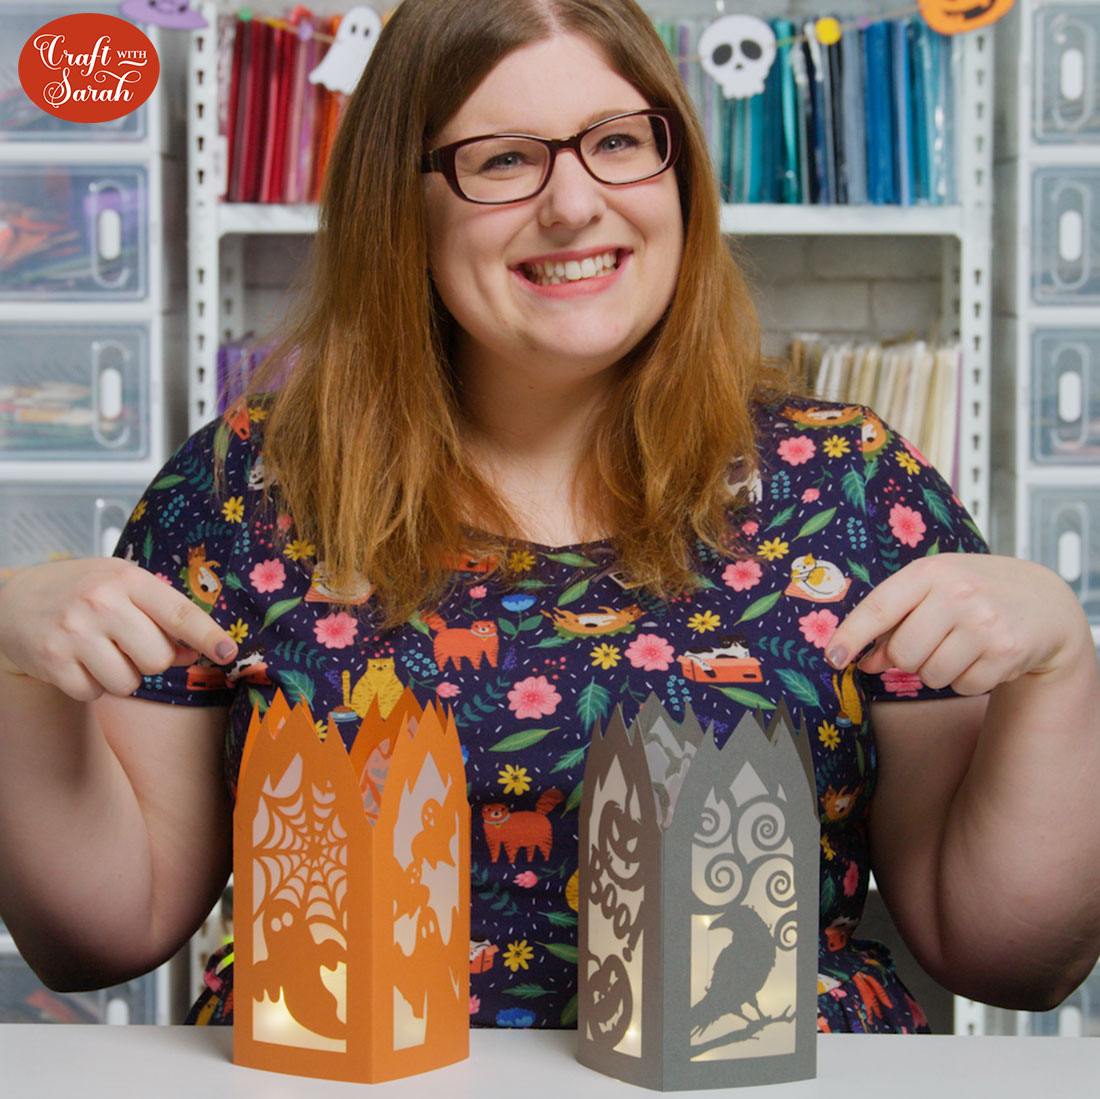
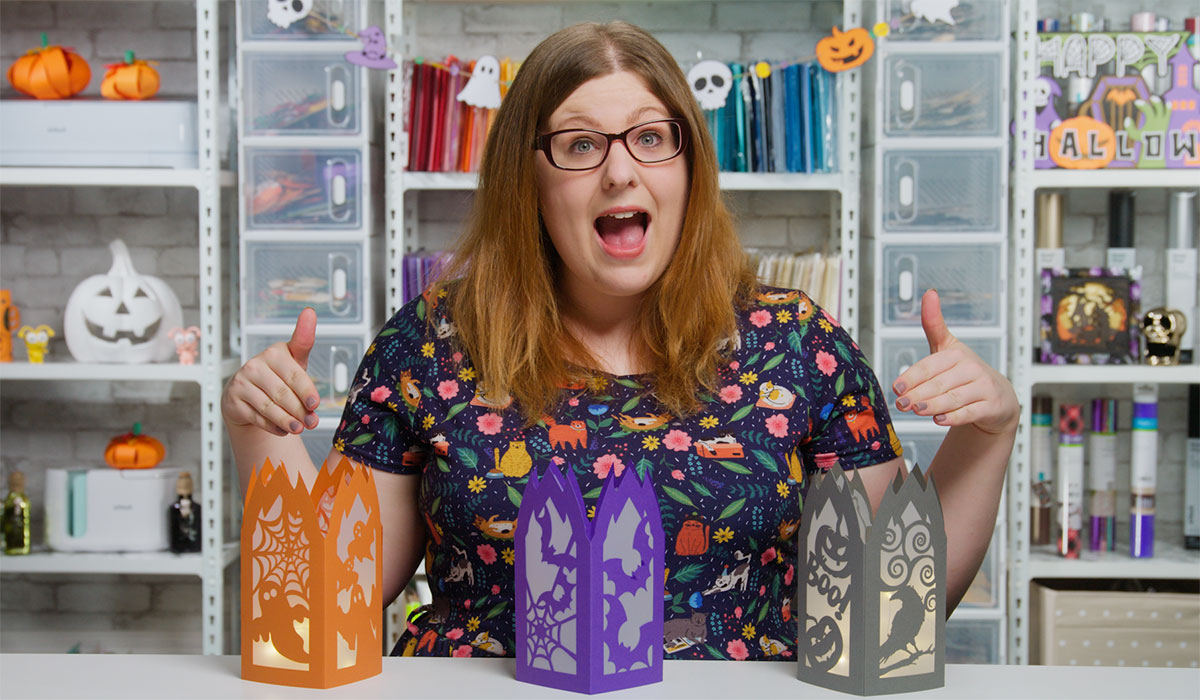
Three different designs are included: bats & cobwebs, ravens & pumpkins and ghosts.
These are really easy to cut and make. They look lovely as a set of three, but equally nice displayed individually on their own.
To make them light up all, simply place them over a battery powered tea light or put some some fairy lights in the middle.
This Project was part of the Halloween Craft Countdown 2022
Materials supply list
Here is a list of the materials that I used to make this project.
Please note that some of the links included in this article are affiliate links, which means that if you click through and make a purchase I may receive a commission (at no additional cost to you). You can read my full disclosure at the bottom of the page.
- Cricut machine
- Light blue Cricut cutting mat
- Coloured cardstock (thicker card works better as it leads to a sturdier lantern)
- Semi-transparent material such as vellum, diffusion paper, parchment paper or tracing paper
- Glue, double-sided tape or a glue gun
- Battery powered candles, tealights or fairy lights
- Cricut scoring stylus or scoring wheel (optional)
Video tutorial
Watch the video below to see how to make this project. Keep scrolling for a written tutorial.
Written tutorial (with photos!)
Here’s how to make your very own paper luminaries using a Cricut machine!
Step 1) Download the cutting file(s) & unzip the downloaded folder
Error: No countdown timestamp set.
Before you upload the SVGs to Design Space, you need to unzip the download folder that they come in.
- How to unzip a folder on Windows computer
- How to unzip a folder on a Mac
- How to unzip a folder on an iPad/iPhone
- How to unzip a folder on an Android device
Step 2) Upload the SVG file into Design Space
Open up Cricut Design Space and start a new Project.
Click “Upload” and then find your unzipped version of the downloaded files for this project.

Go into the “Cut Files” subfolder and then select your chosen card design from the “SVG” folder.
For this tutorial, I’ll show you how to make the ghost lantern which is SVG_Lantern_Ghosts_CraftWithSarah, but it’s exactly the same for any of these designs.
Make sure you upload the file which starts SVG_ in the filename!!
This is how it should look after you have uploaded the file:
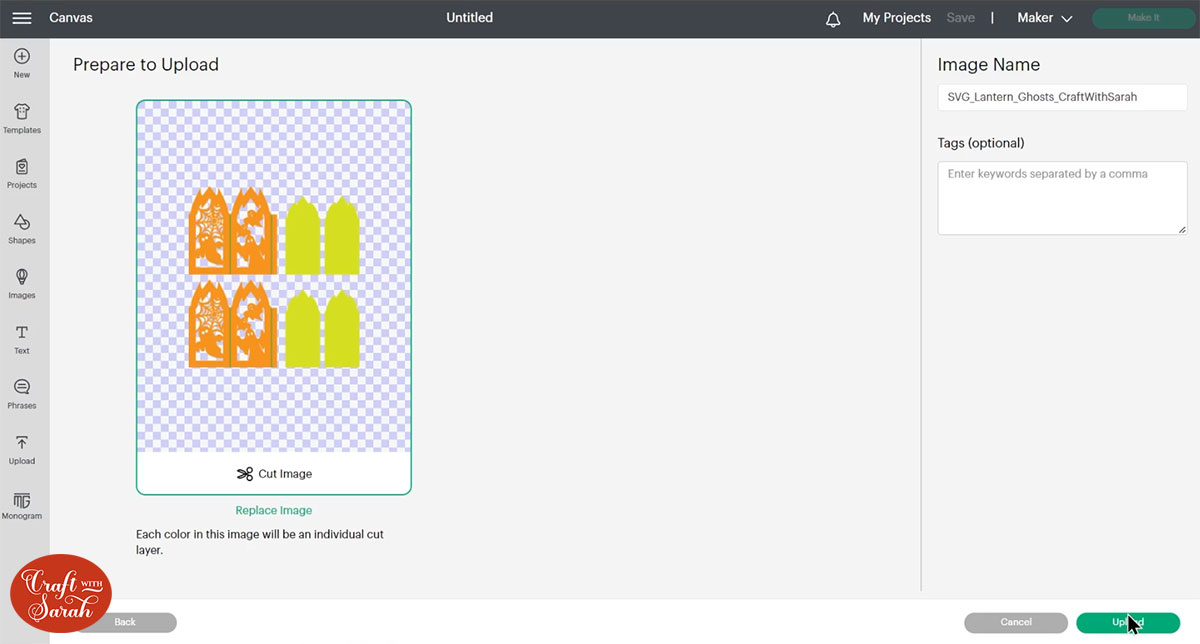
All the layers and sections of the luminaries will appear separate on the upload screen.
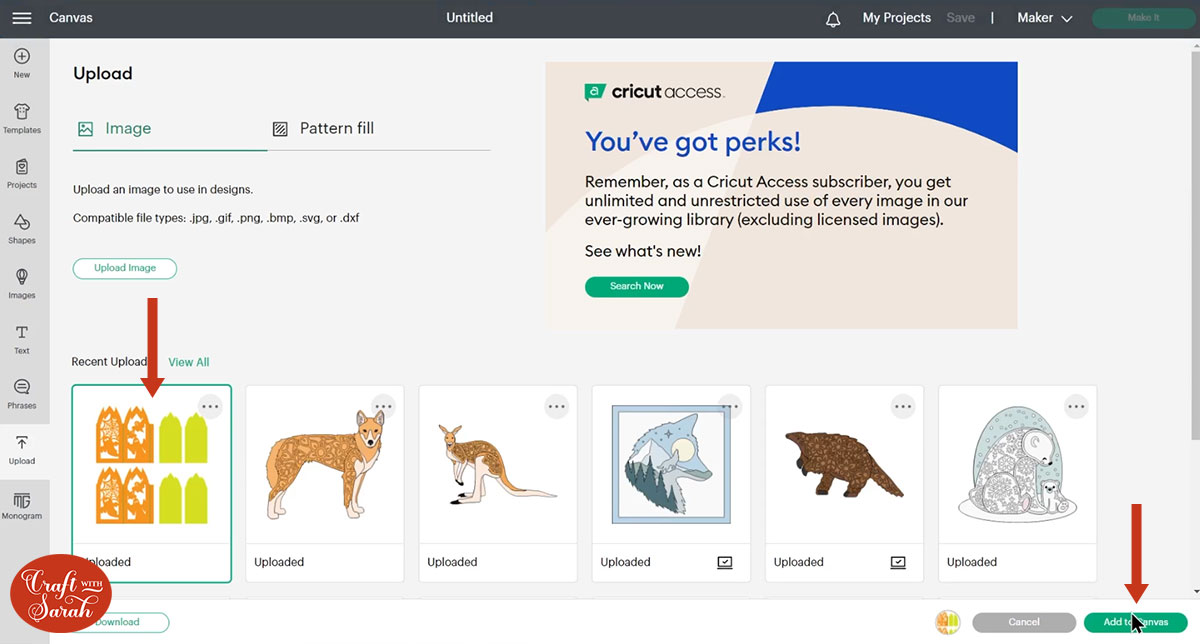
After uploading, the design will show in your “Recently Uploaded Images”.
Click on it and then press “Add to Canvas” to put it onto your Project.
Step 3) Resize the design if desired
By default, the SVG files make luminaries that are approximately 7.5 inches tall and 3.5 inches wide.
Sometimes Design Space changes file sizes when you upload them, so it’s a good idea to check the size before proceeding.
To make them at the size listed above, make sure the files are showing in Design Space as:
- Ghost design – 14.621 inches wide, 15.535 inches tall
- Bats and spider webs design – 14.343 inches wide, 15.518 inches tall
- Raven and pumpkins design – 14.651 inches wide, 15.438 inches tall
If you would like to resize the design, do so now as it’s easiest to resize it before making the rest of the changes from the next part of this tutorial.
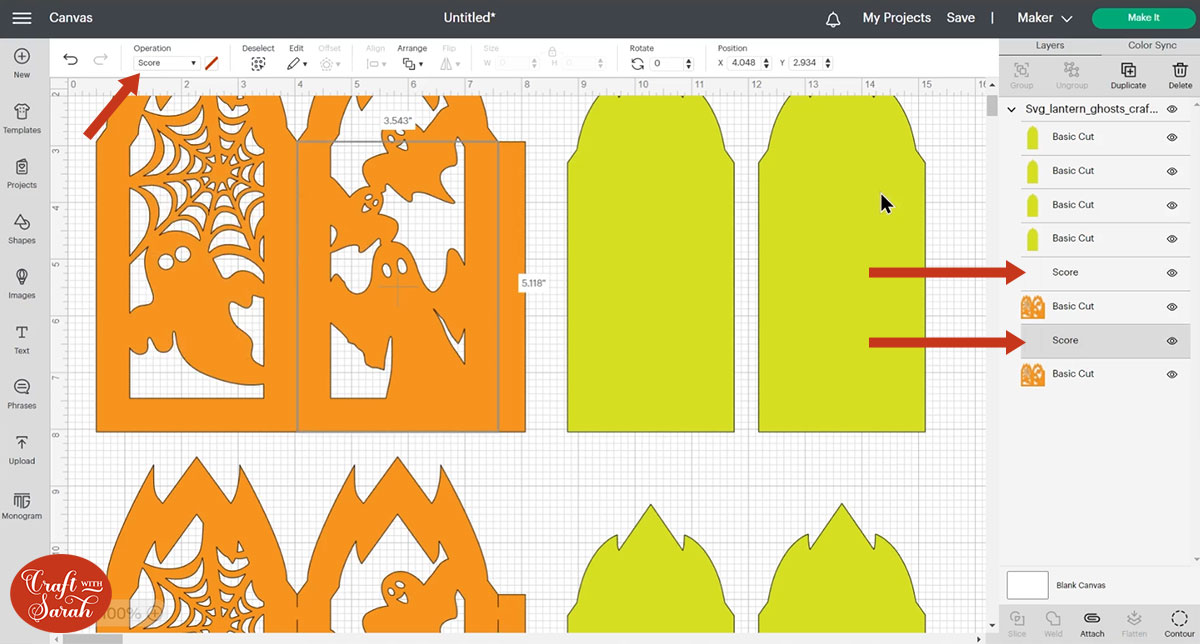
Step 4) Format the score lines
If you have a Cricut scoring wheel or a scoring stylus then change the vertical lines to score lines so that you will know exactly where to fold the luminaries.
Click on the layers in the layers panel that show the vertical lines and change them to “Score” in the operations dropdown.
TIP: If you don’t have a scoring tool then you could change them to a “Pen” layer and draw the lines on instead, that way you can manually score them once it’s all been cut out.
Next, click the design and press “Ungroup” to separate out all of the layers.

If you don’t have a scoring tool and don’t want to draw the lines on then you can delete them. To do this, click on one of the two line layers and press delete on your keyboard. Then, repeat for the other one.
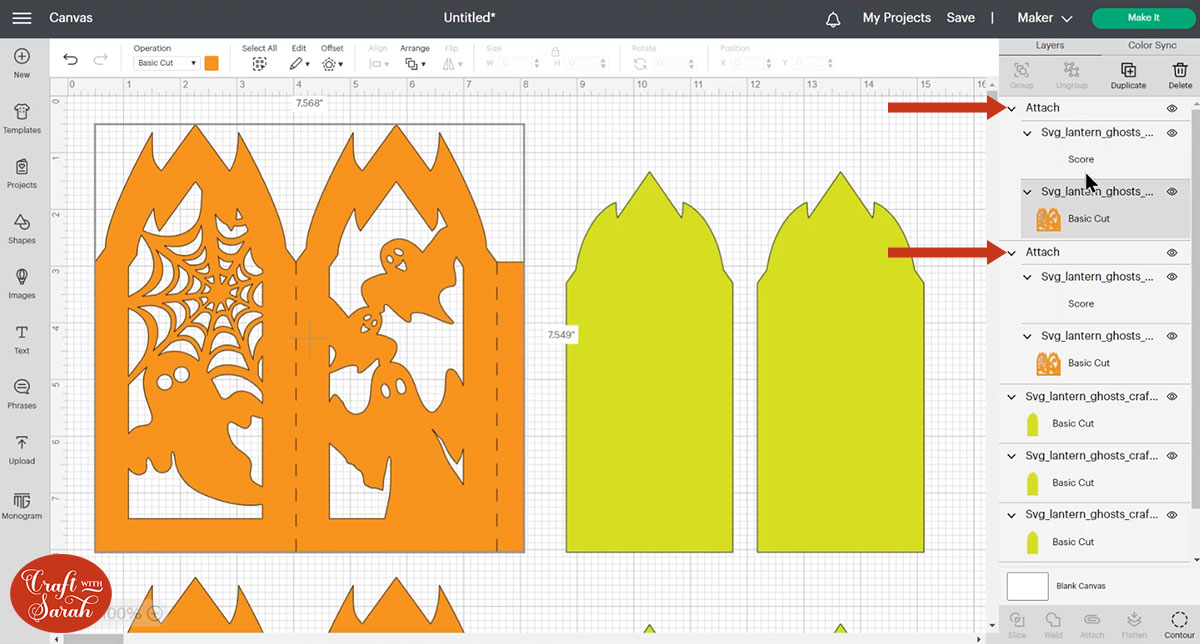
If you are using score or pen layers, you need to “Attach” them to the luminary layer underneath. Attach is what tells the Cricut where we want it to score or draw.
Select one of the vertical line layers and the luminary template layer underneath it.
Click “Attach” down at the bottom of the layers panel.

Then, repeat that for the other set of score lines and its matching luminary template layer.
Your screen should now be looking like this:
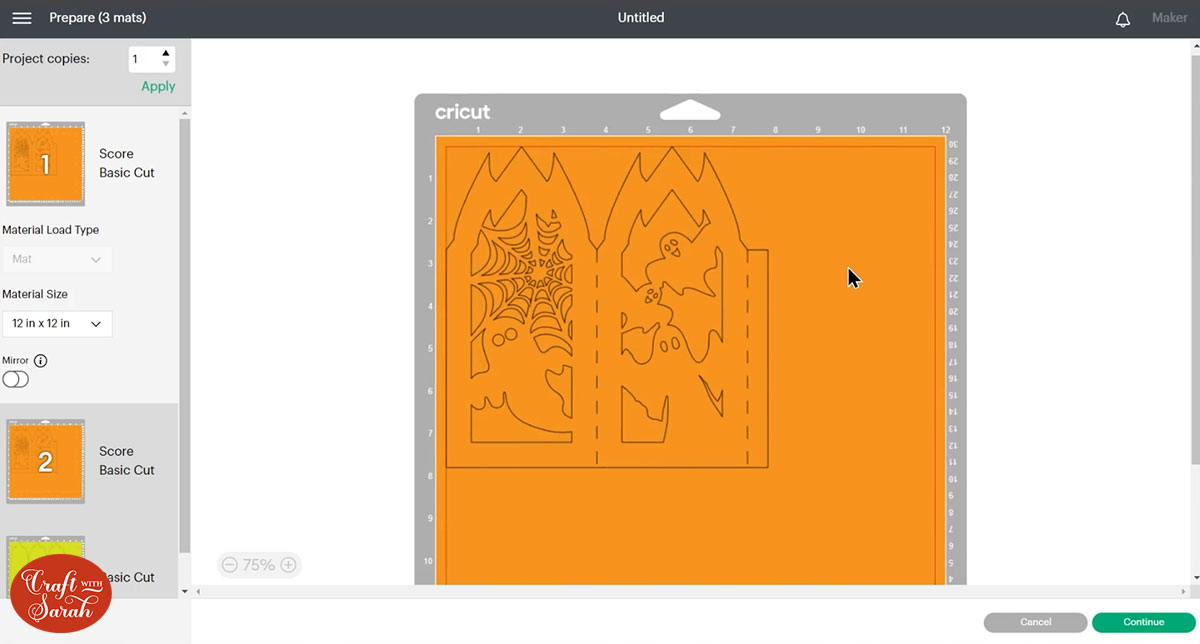
Step 5) Cut the luminary with your Cricut
Save your Project and then click “Make It” and follow the instructions on-screen to get everything cut out with your Cricut machine.
Cut the “inside” pieces of the luminary from a semi-transparent material such as vellum, diffusion material (for camera lights), parchment paper or tracing paper.
If you don’t have anything semi-transparent then either leave those layers off and don’t cut them, or use something transparent such as acetate.
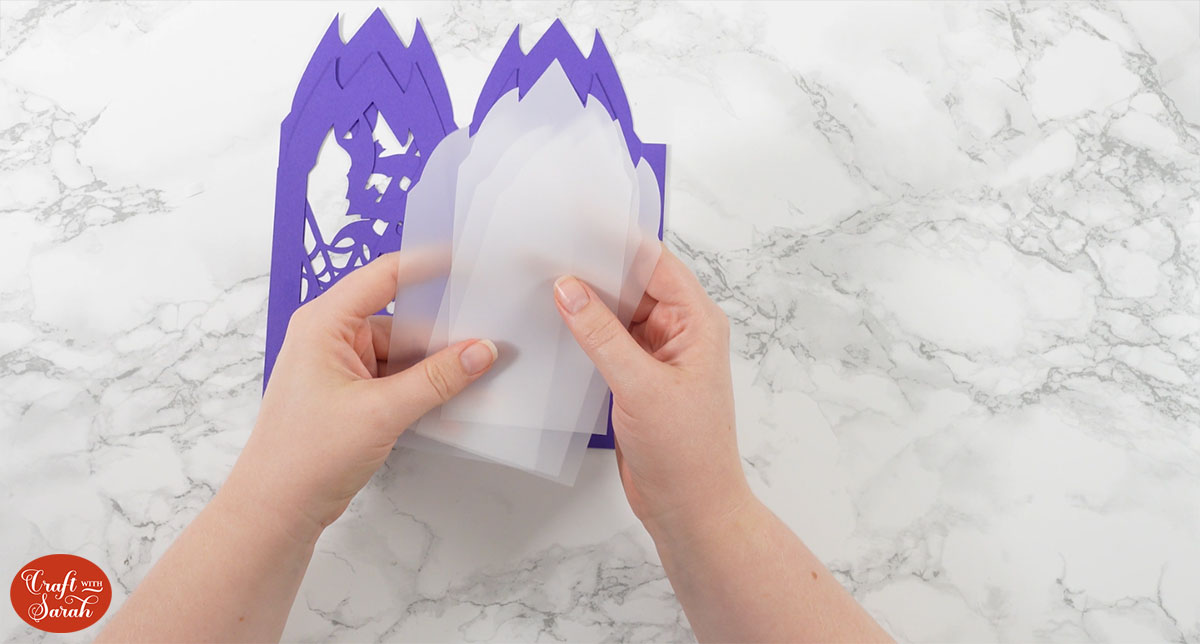
I recommend using quite a thick cardstock for the main pieces as it will lead to a sturdier luminary.
Step 6) Assemble the luminary
Turn the main pieces of the luminary upside down so you are viewing the back of the card.
Fold upwards/inwards along all of the score lines on both pieces of the luminary (valley folds).
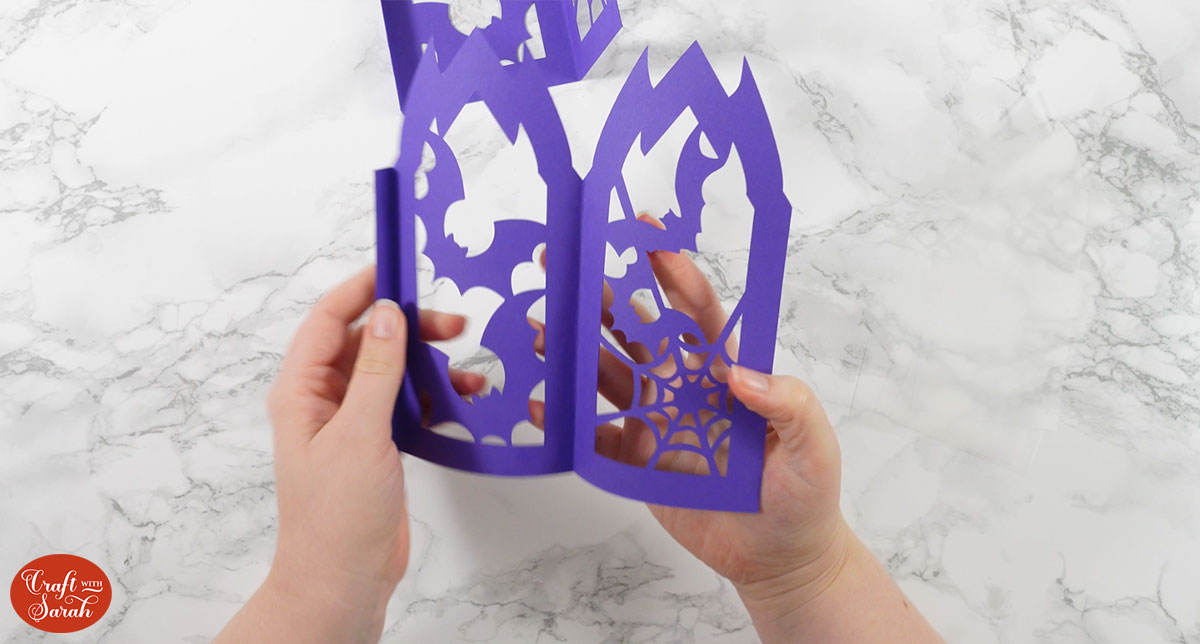
Glue the inside pieces into the luminary.
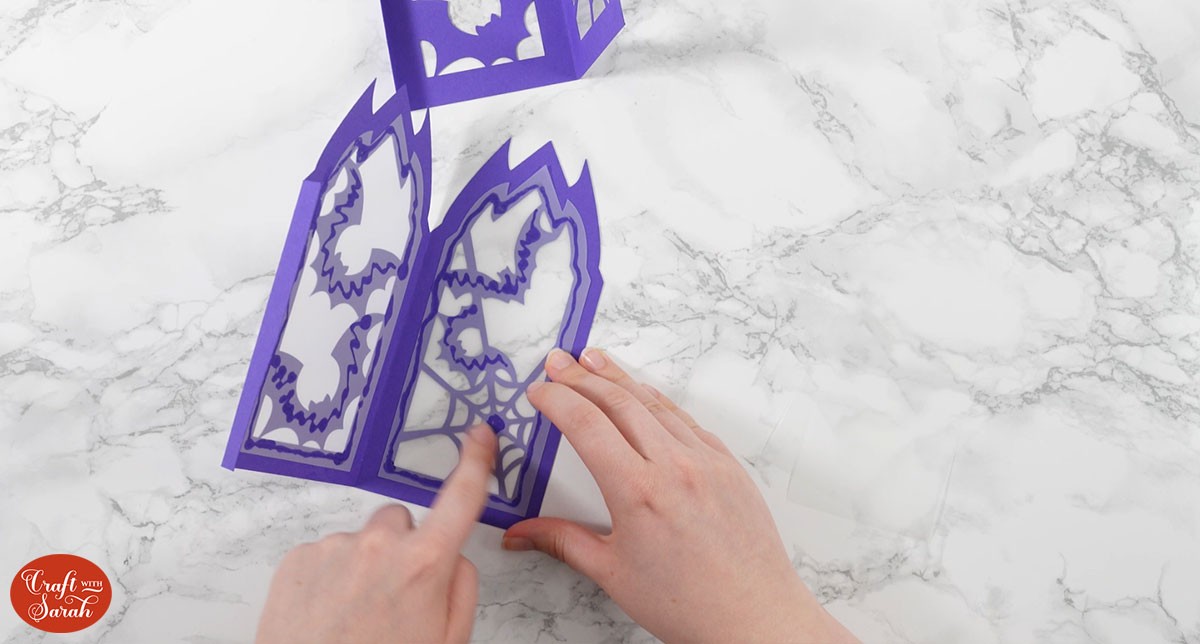
Wait for the glue to completely dry before moving on to the next step.
TIP: Don’t want to be able to see the glue marks and edges of the inner pieces? Watch the video at the top of this page for my trick on how to hide them!
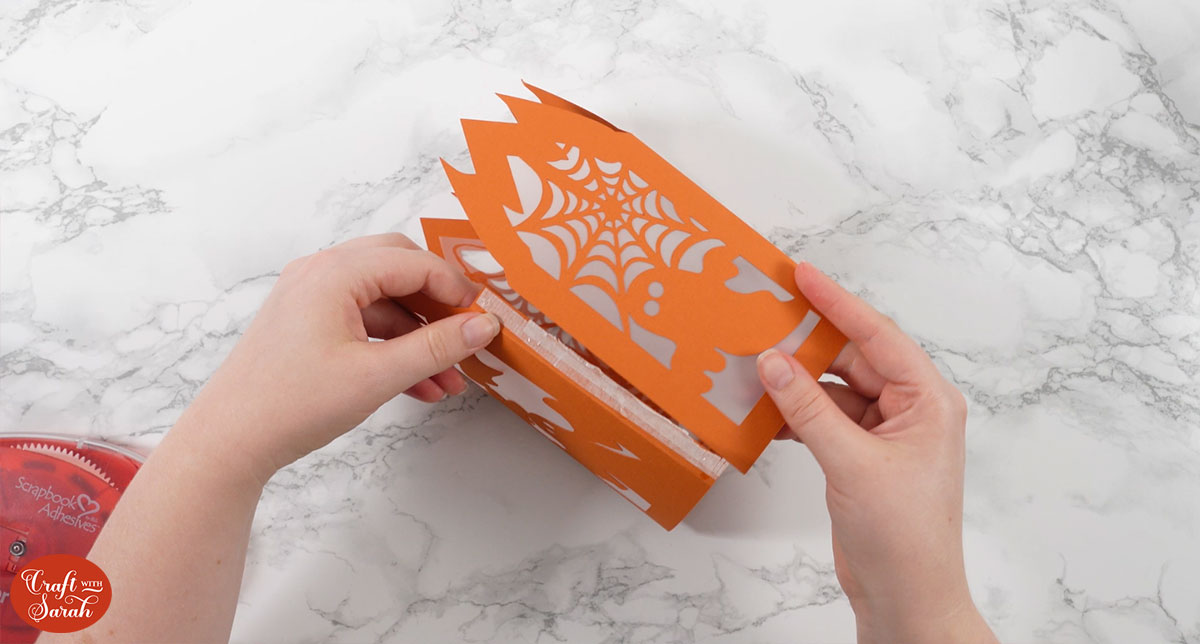
Put double-sided tape, glue or use a glue gun down one of the tabs as shown in the image below.
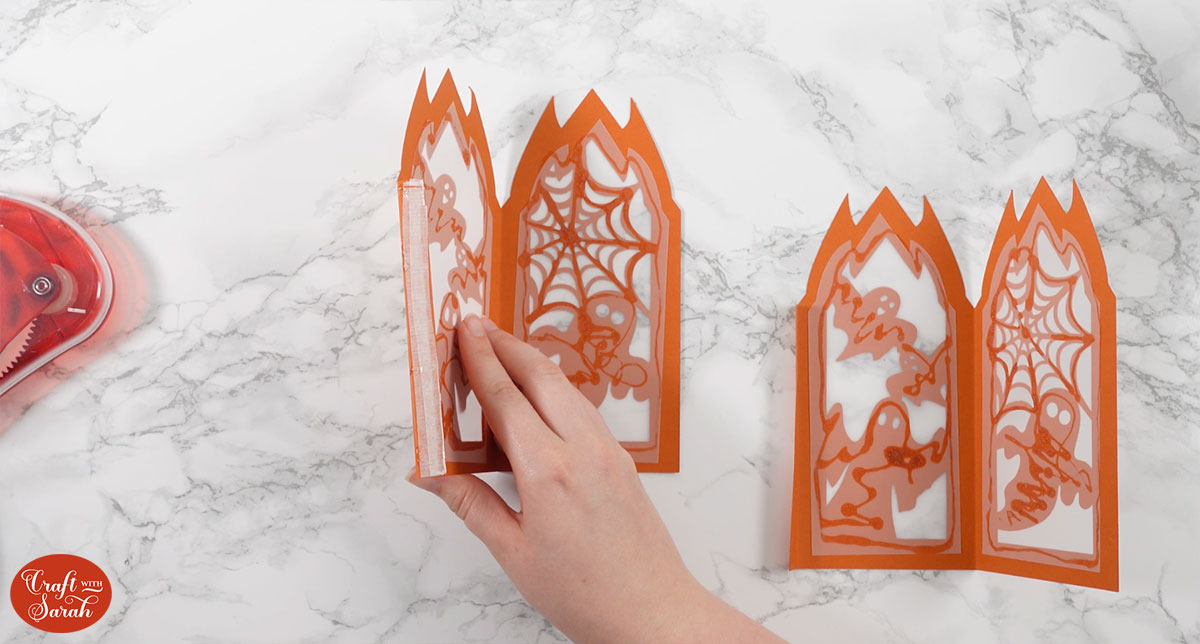
I used double-sided tape AND a couple of blobs of glue, to get a better hold than just using tape alone.
Stick this to the other half of the luminary to the edge that does NOT have the tab on it.
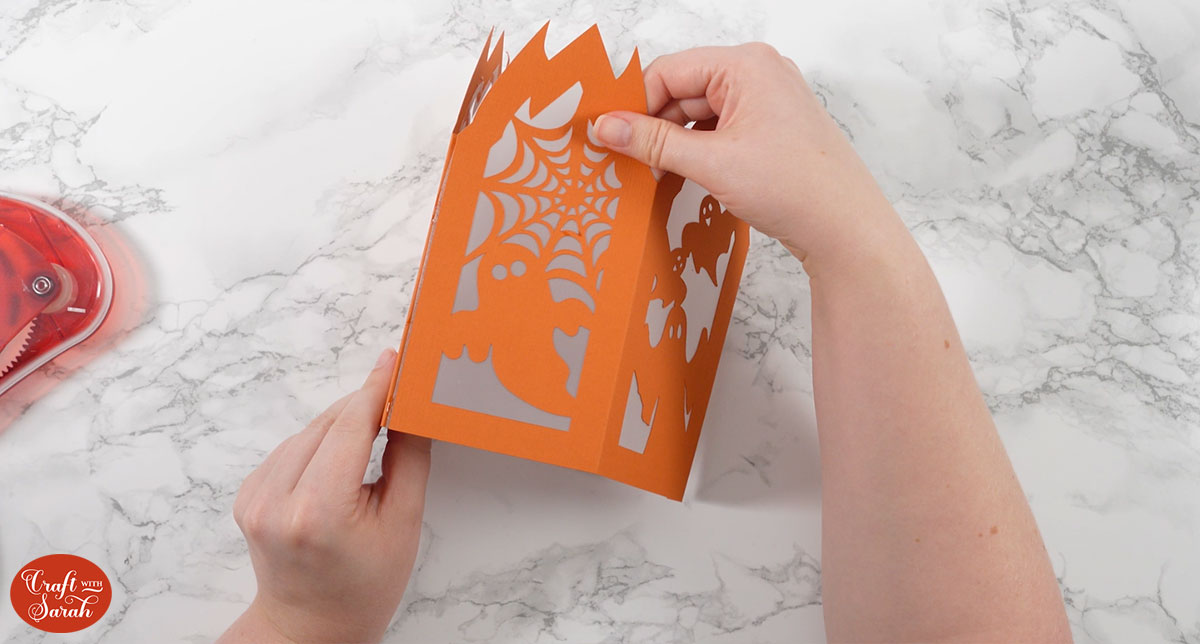
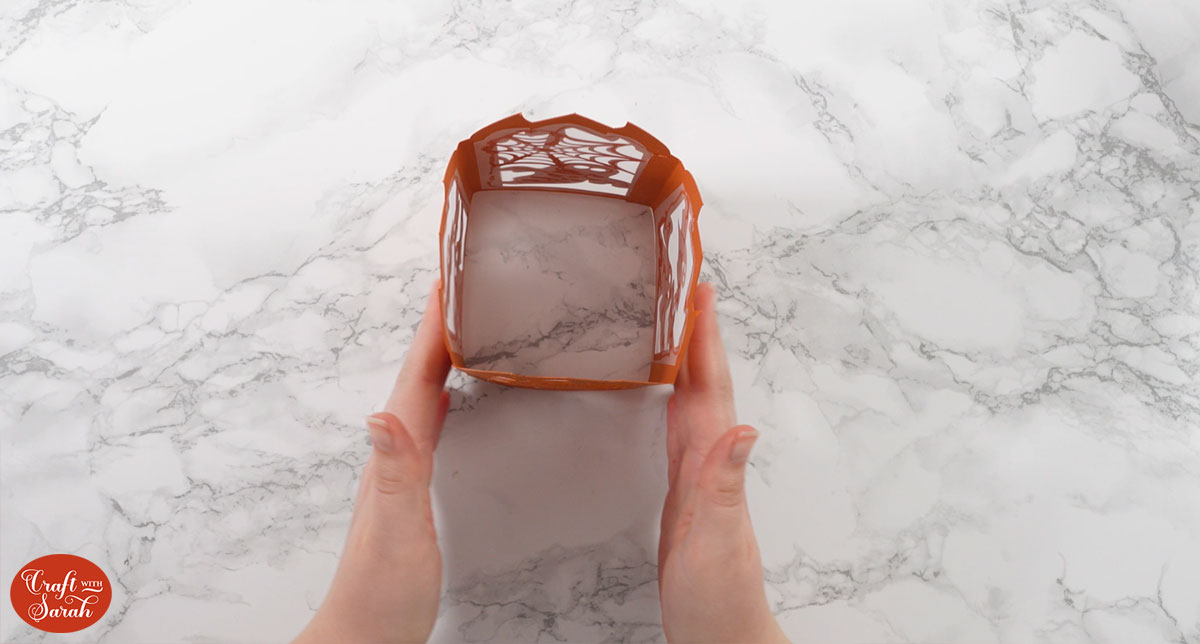
Stick the other tab to the inside of the matching side to form your finished luminary.
It should now stand up by itself. You may need to squidge the edges a little bit to get it to look perfectly square.
Halloween luminaries or paper lanterns
After sticking your luminary together, add a battery-powered tealight or candle, or battery-powered fairy lights inside to light up the paper lantern.
Happy crafting,
Sarah x

