CCC 2023 Day 18 ☃️ Faux Leather Christmas Ornaments
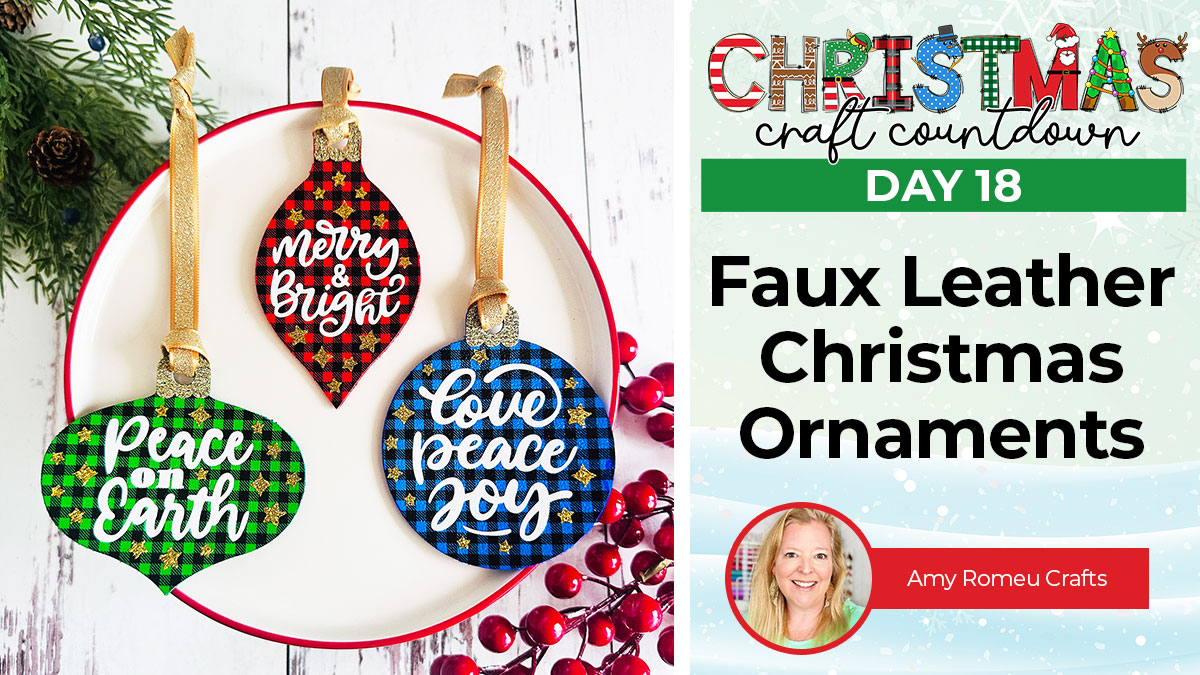
Make your own faux leather ornaments to hang on the Christmas tree this year.
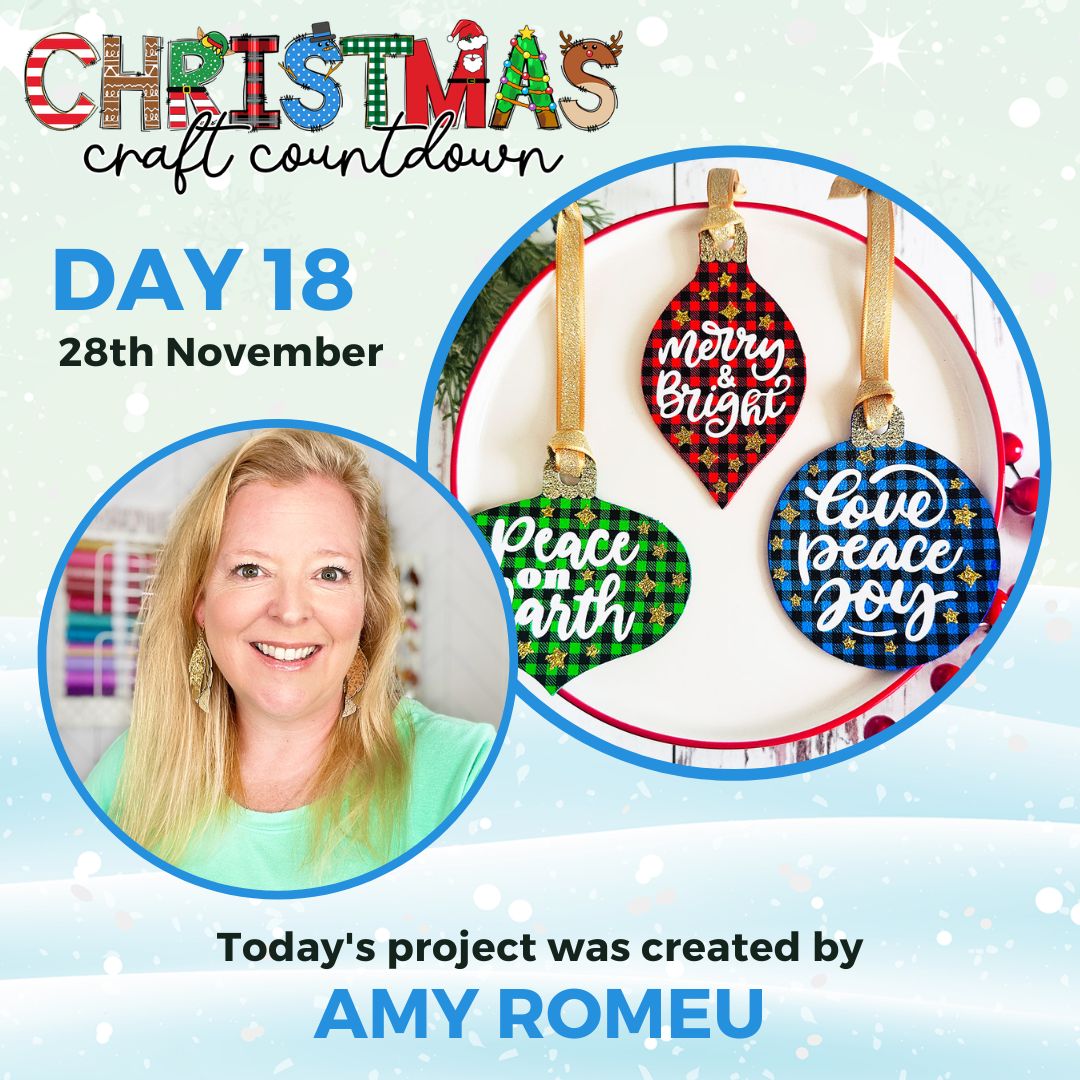
It’s Day 18 of the Christmas Craft Countdown and today’s project is by Amy Romeu Crafts.
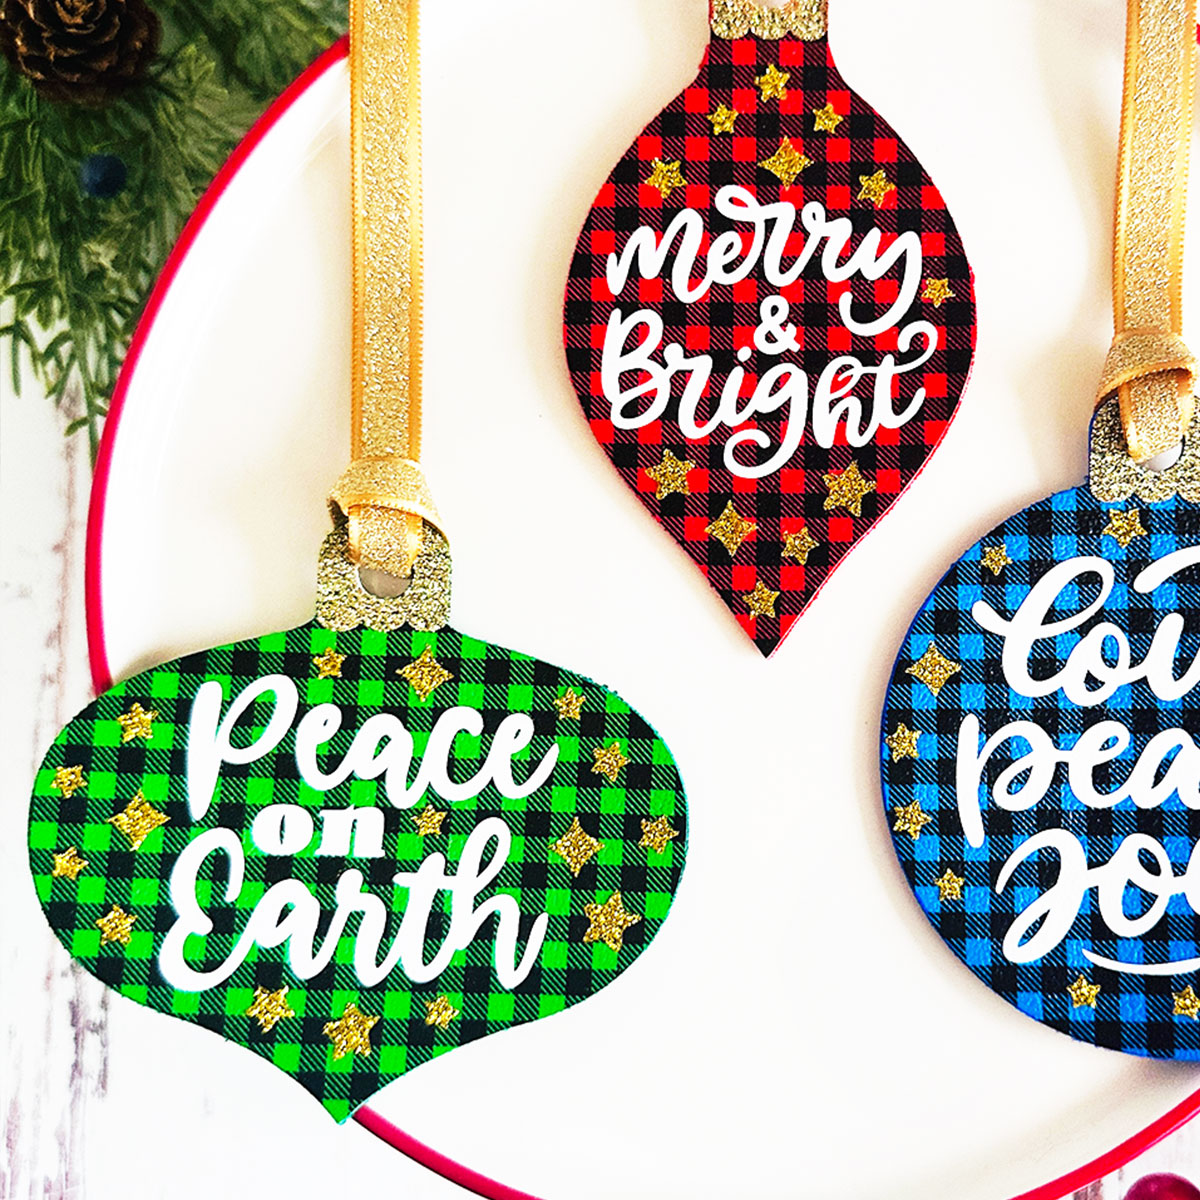
She is sharing these beautiful gingham-inspired faux leather Christmas ornaments with heat transfer vinyl layers.
There are three of these lovely ornament designs which will look fantastic on your Christmas tree. You can choose one of the designs or make them all!
Grab your faux leather and some glitter heat transfer vinyl for an extra Christmas sparkle and Amy will take you through step-by-step how to make them.
This Project was part of the Christmas Craft Countdown 2023
Materials supply list
Here is a list of the materials that Amy used to make this project.
Please note that some of the links included in this article are affiliate links, which means that if you click through and make a purchase I may receive a commission (at no additional cost to you). You can read my full disclosure at the bottom of the page.
- Cricut machine
- Strong grip cutting mat
- Standard grip cutting mat
- Fabric glue
- Faux leather (Amy used a gingham pattern)
- White and glittery gold heat transfer vinyl (HTV)
- Ribbon
- EasyPress Mini (or other heat press)
- Teflon sheet
- Painters tape/masking tape/washi tape
- Weeding tool
- Scissors
- Sharpies
This project is suitable for the following types of Cricut machine: Explore Air 2, Explore Air 3, Maker, Maker 3, Venture, Joy Extra and Joy.
Video tutorial
These would look beautiful with all sorts of patterned faux leather.
Watch the video below to see how to make these faux leather ornaments.
If you prefer to read rather than watch, keep scrolling!
This project was created by Amy Romeu Crafts
Amy is a lifelong crafter and jewelry maker who loves to create and share her original designs, projects and tutorials with the worldwide crafting community. Amy has dabbled in many creative pursuits over the years, but her current favorites are Cricut crafting, laser cutting, and sublimation.
Her passion for teaching and sharing is evident on her crafting blog, amyromeu.com, and her YouTube channel.
Written tutorial (with photos!)
Here’s how to make your very own faux leather Christmas ornaments using a Cricut machine!
Step 1) Download the cut files & unzip the downloaded folder
Download the files using the box below.
Before you upload the SVG files to Design Space, you need to unzip the download folder that they come in.
Step 2) Upload the cut files into Design Space
Open up Cricut Design Space and start a new Project.
Click “Upload” and then find your unzipped version of the downloaded files for this project.

Choose one of the three ornament designs to upload.
This is an example of what one of them looks like:
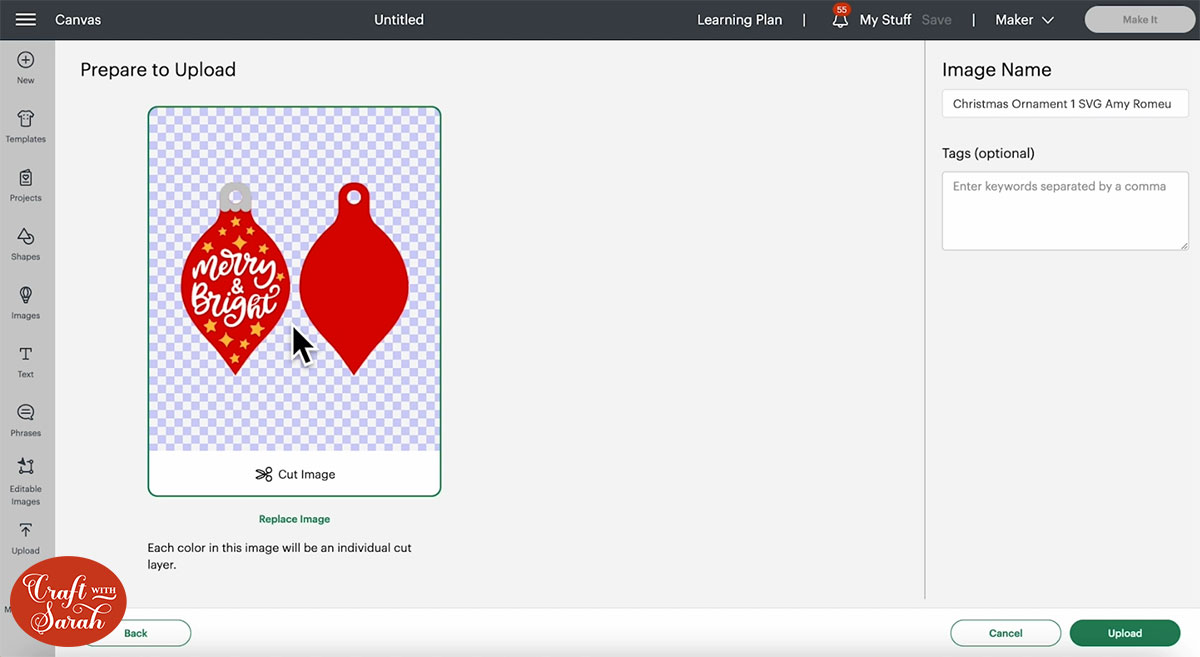
After uploading, the design will show in your “Recently Uploaded Images”.
Click on it and then press “Add to Canvas” to put it onto your Project.

Tip: The process will be the same for all of the ornaments even though they differ in design.
The ornament will load in at a size which is perfect for hanging on your Christmas tree so you don’t need to change the size.
However, if you would like to change the size, you can do so using the width/height boxes at the top of the screen.
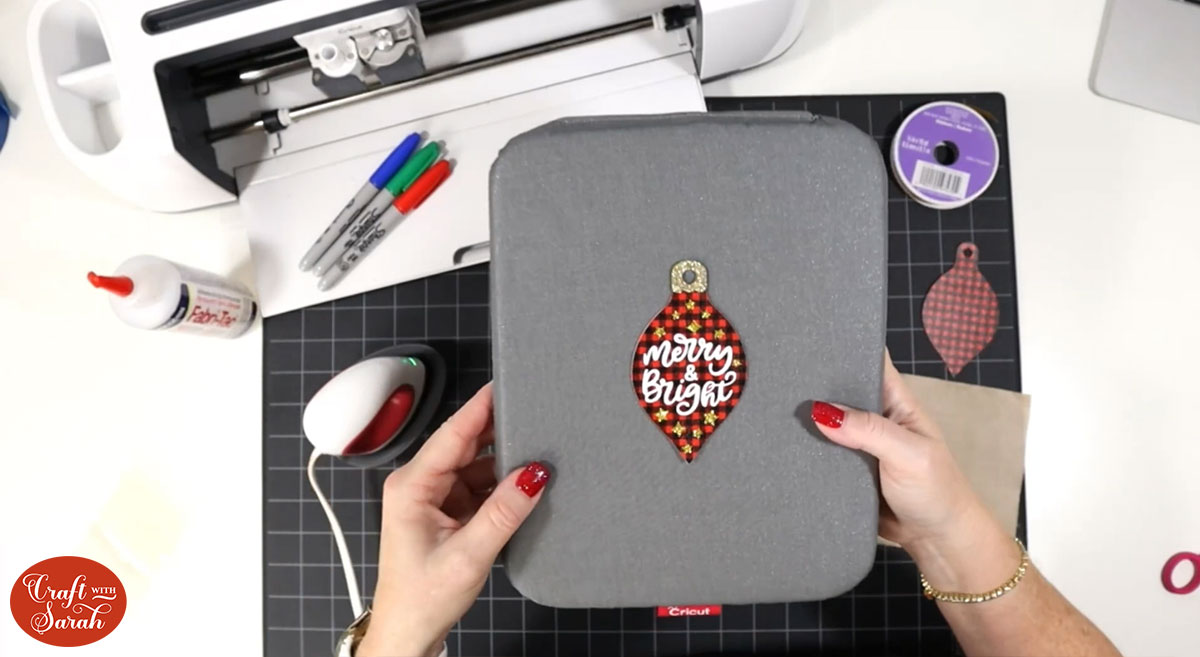
You will see both a front and a back to the ornament in Design Space. Amy cut the main body of both sides of the ornament out of a patterned faux leather.
The text was cut using white heat transfer vinyl and the stars and top of the ornament from gold glitter heat transfer vinyl.
Step 3) Cut the faux leather ornaments
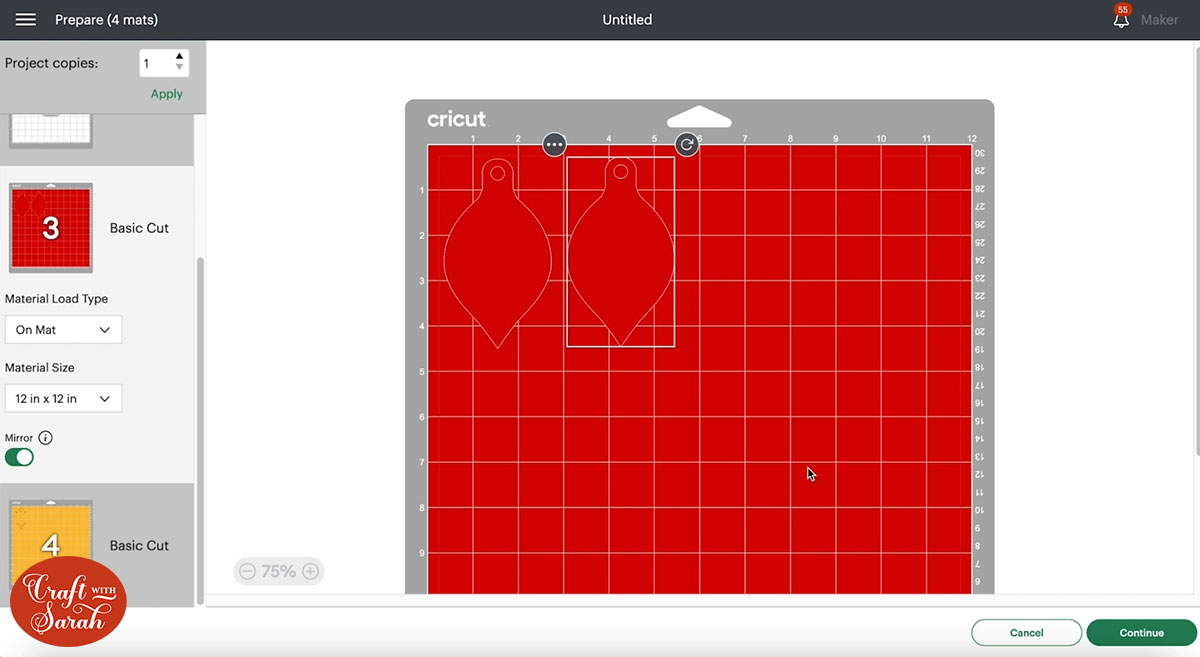
Click Make It to begin the cut process and so that you can see the design split up into the separate mats.
Mirror each of the mats as both heat transfer vinyl and faux leather cut in reverse.
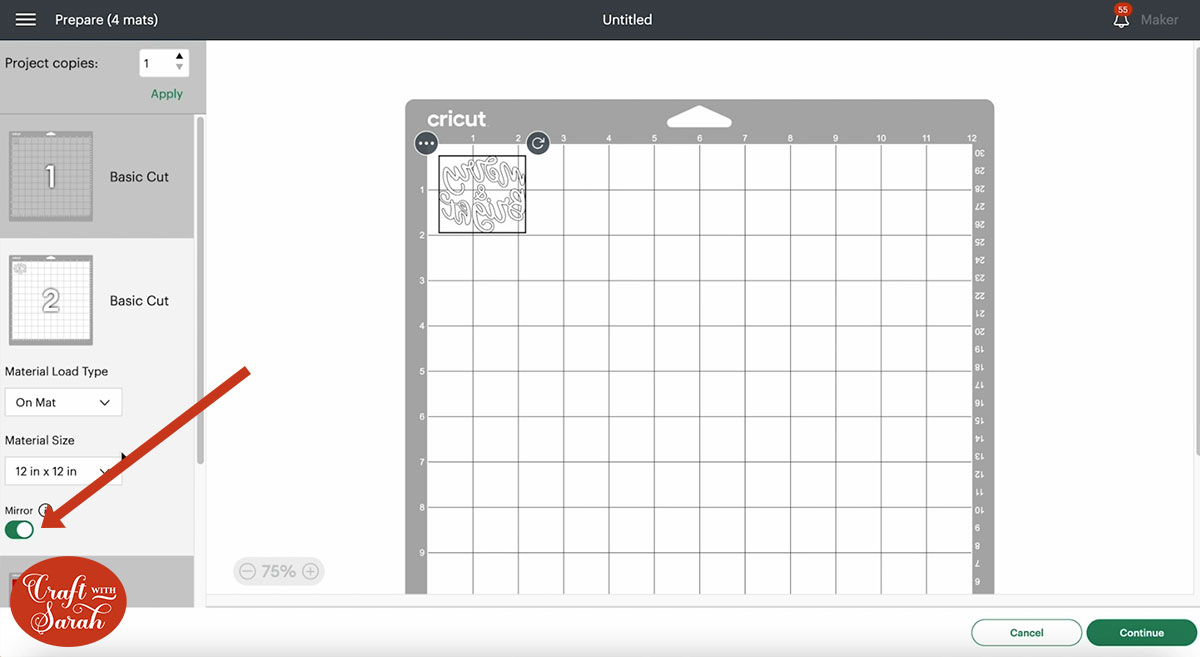
If you happen to be using permanent vinyl instead of heat transfer vinyl, you will not need to mirror the design.
You may want to move the cuts slightly apart from one another and from the edges of the mat to help them cut properly.
Amy cut the faux leather using the Faux Leather (Paper Thin) setting with More pressure.
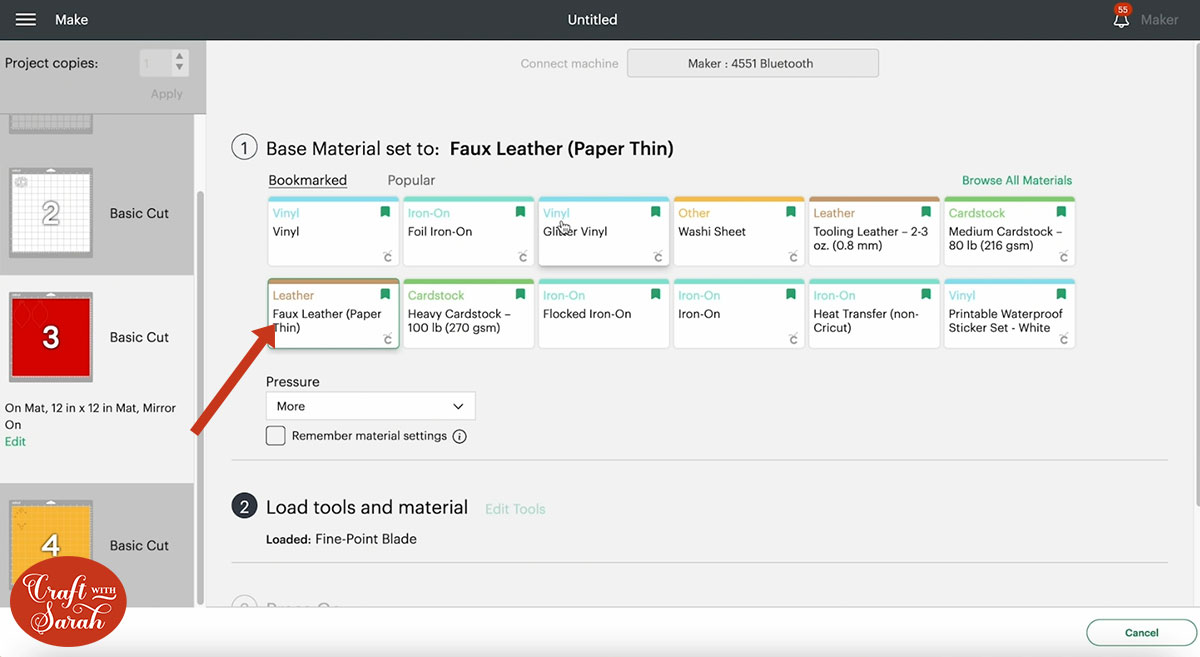
When cutting the vinyl layers, it is best to the cut setting recommended by the manufacturer.
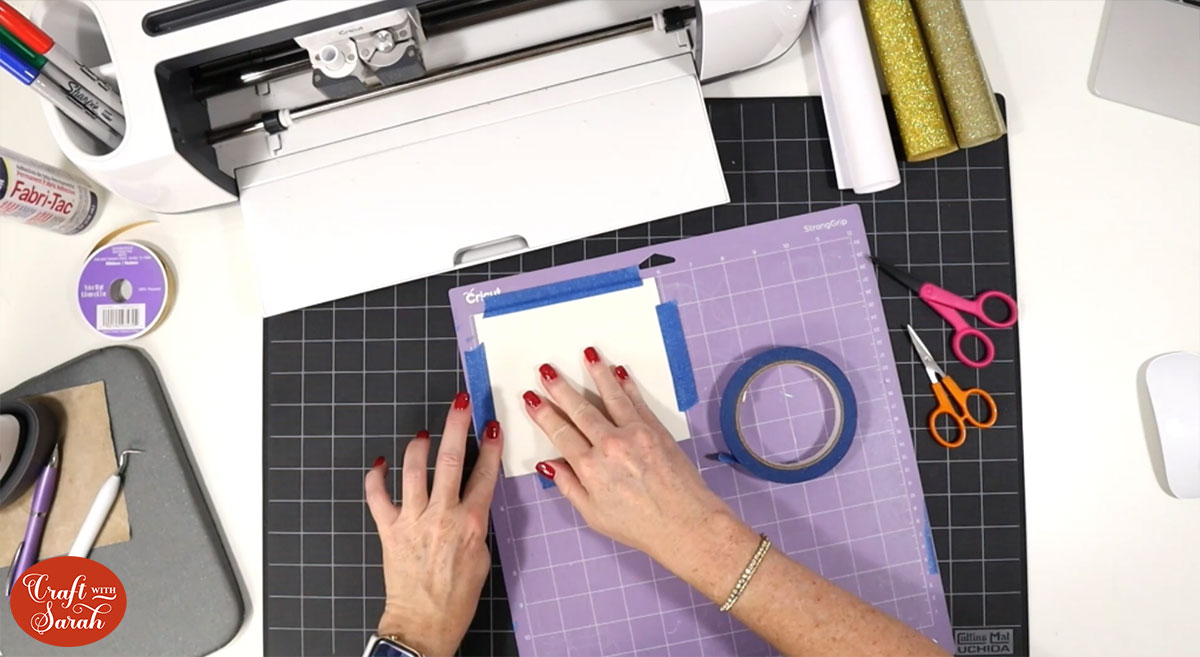
Place both your faux leather and heat transfer vinyl pretty side down when cutting.
Use a strong grip mat for the faux leather and a standard grip mat for the heat transfer vinyl.
It may be helpful to use painters tape, masking tape or washi tape to secure your faux leather to the strong grip mat.
When the cut is complete, take your weeding tool and lift up a corner to check that it has cut all the way through before ejecting the mat.
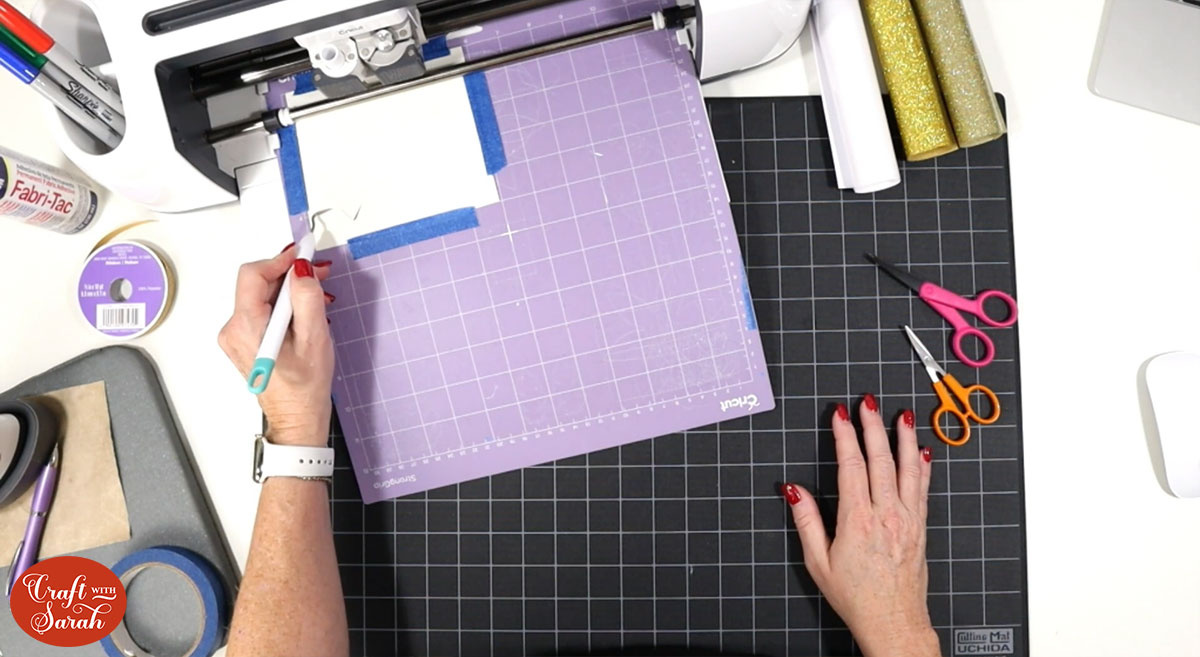
If it hasn’t cut all the way through then go can press the Go button to repeat the cut in the exact same place.
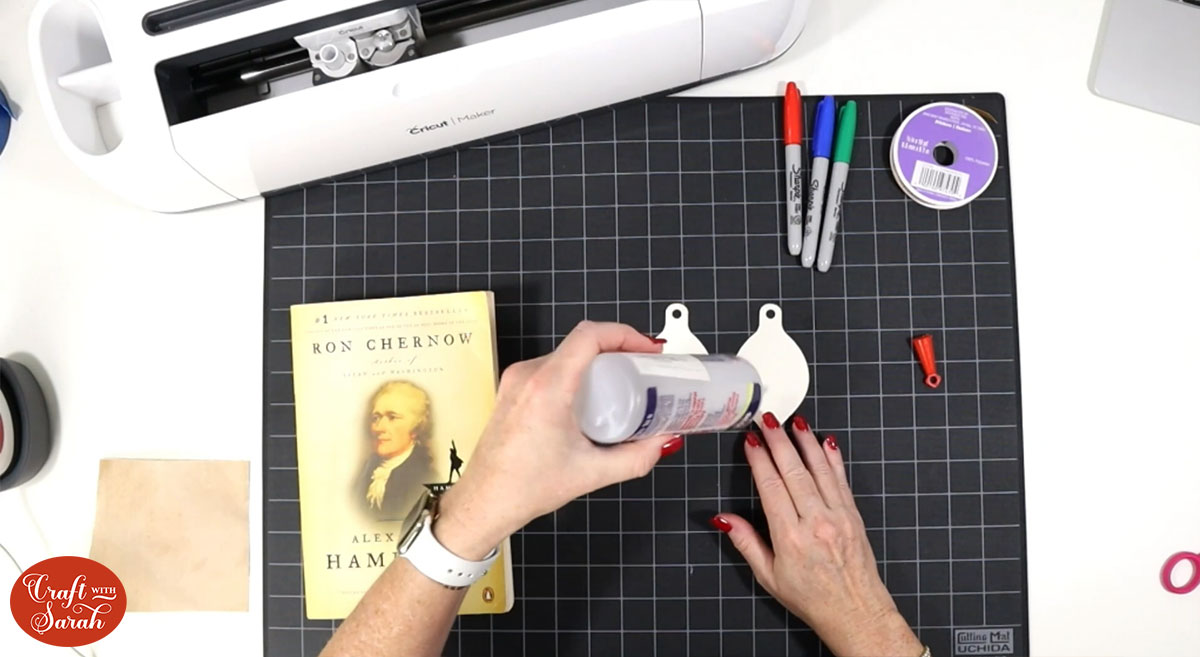
Take the faux leather off the mat and don’t forget to take the hole out of the top of the ornament.
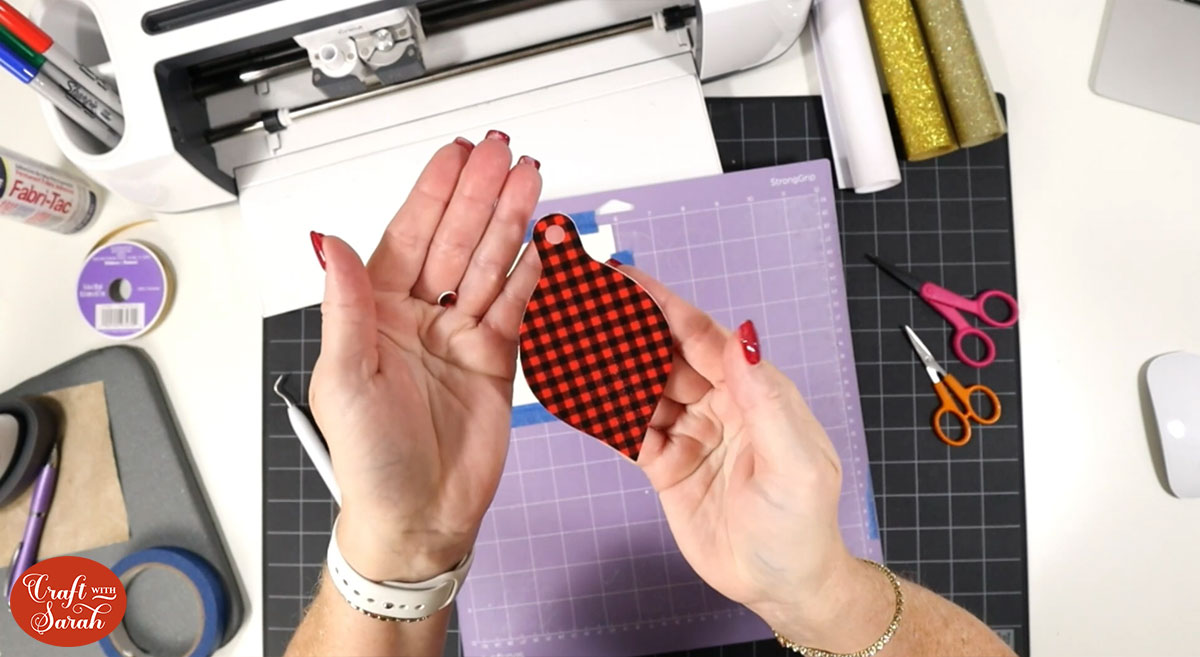
Cut and weed all of the heat transfer vinyl cutouts.

Step 4) Press the heat transfer vinyl
With everything cut out and weeded, it’s time to press the vinyl onto the faux leather.
It’s important to do this before glueing the front and back of the ornament together because the glue can bubble whilst using the heat press which could ruin your ornament.
Put your EasyPress Mini to a low setting or your standard heat press to 265 degrees fahrenheit.
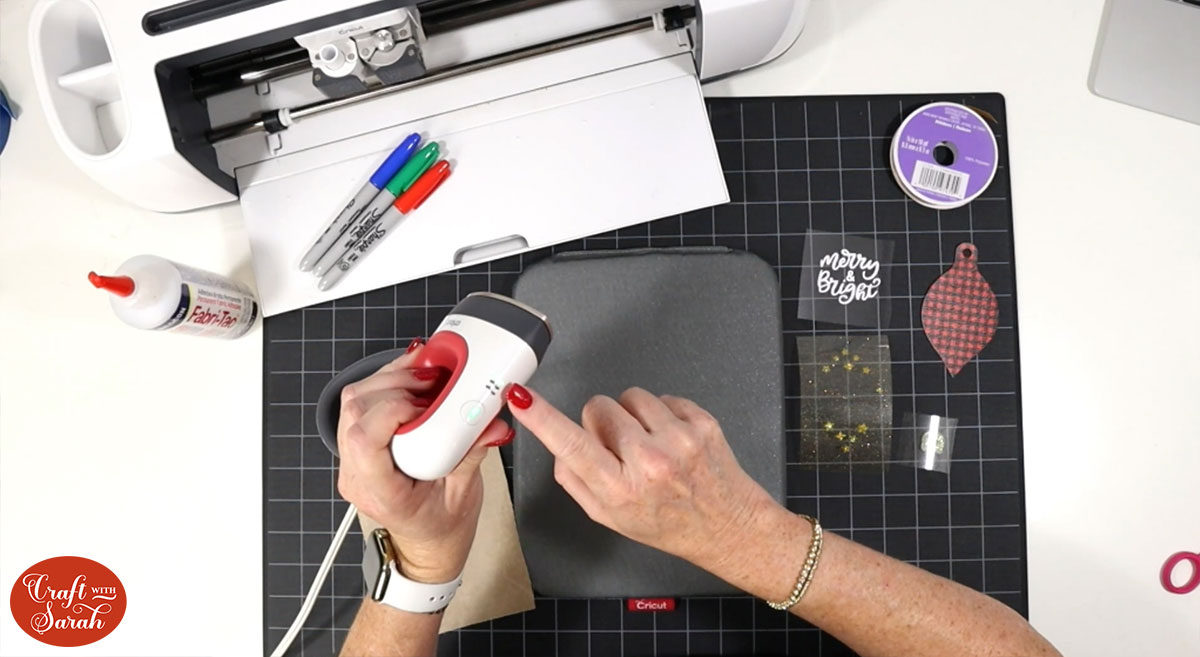
Use a Teflon sheet between the heat press and the ornament to protect your heat press.
Press the star layer for 5-10 seconds.
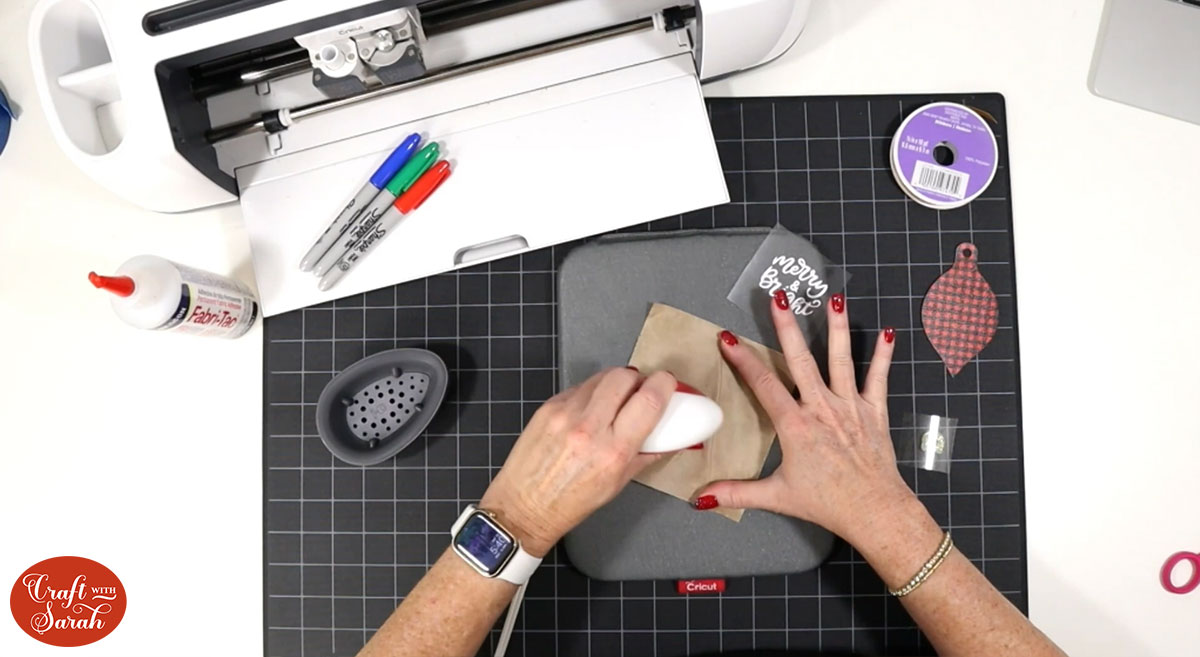
Peel away the cover sheet. Re-press for a few more seconds if the vinyl hasn’t adhered properly.
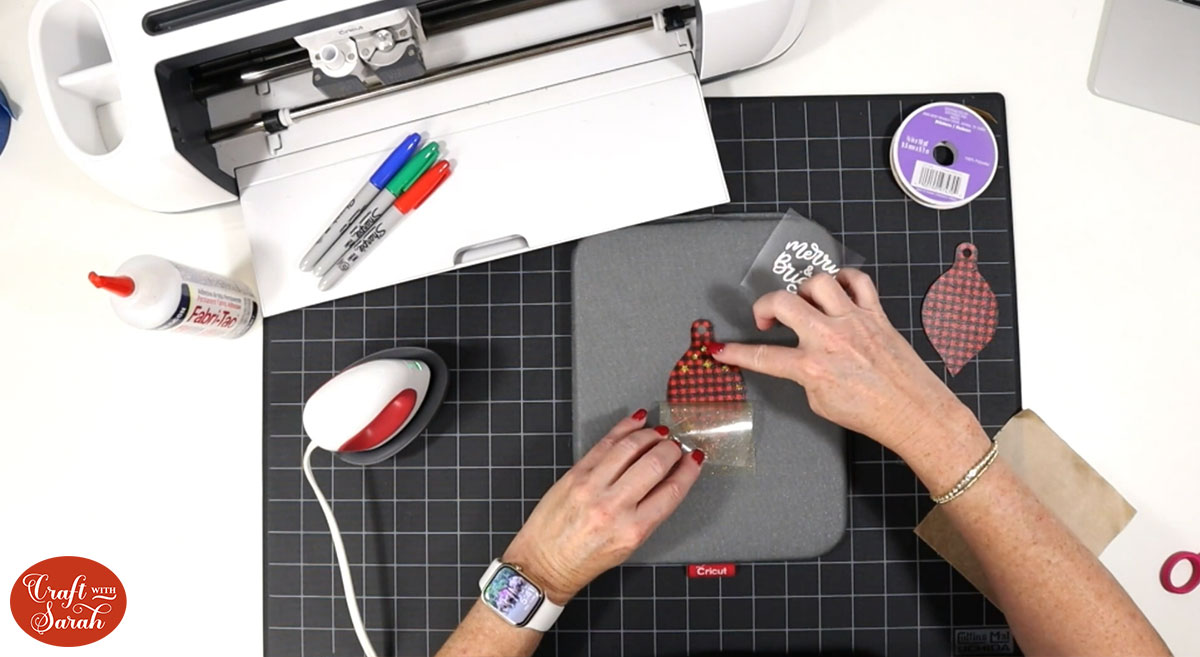
Repeat the same steps for the text layer and the top layer of the ornament that sits around the hole.
Allow the ornament to cool flat.
Step 5) Stick the ornament together
Glue the front and back of the ornament together with fabric glue.
Be sure to line up the edges and wipe up any glue that may seep out the edges.
Press the ornament under a heavy book for an hour or so to allow the edges to close tightly for a smooth finish.
You can use a colour coordinated sharpie and colour round the sides to cover up the white edges.
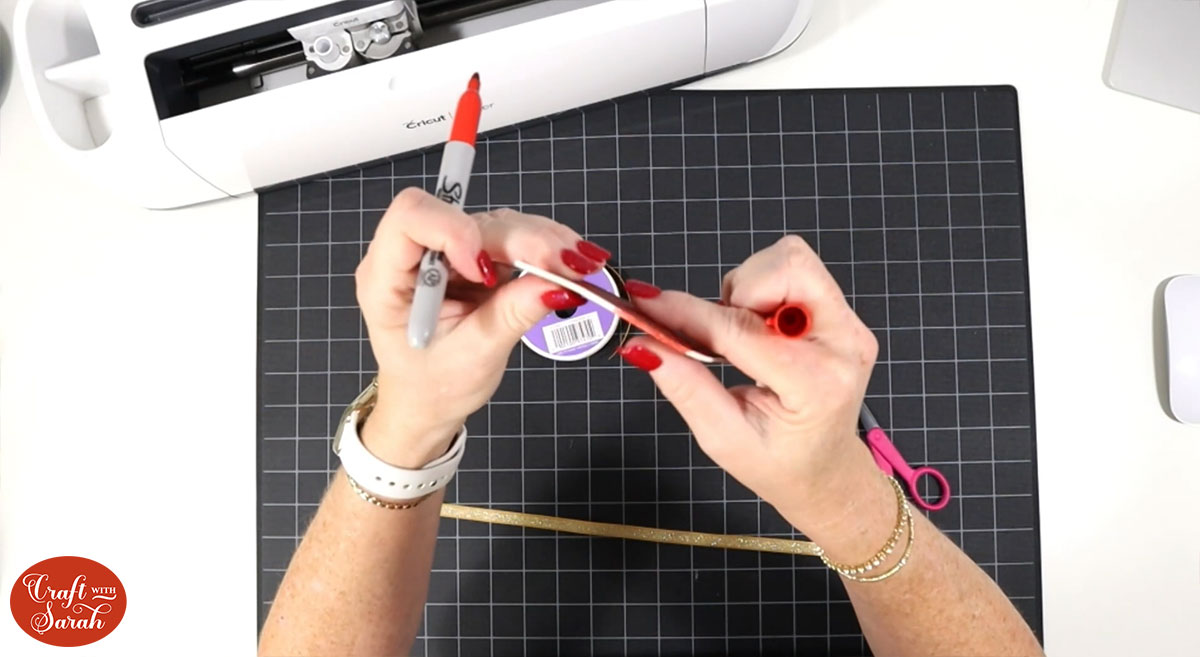
Take the ribbon, fold it in half and post it through the hole from back to front. This will make a loop which you can then push the ends through and pull tight.
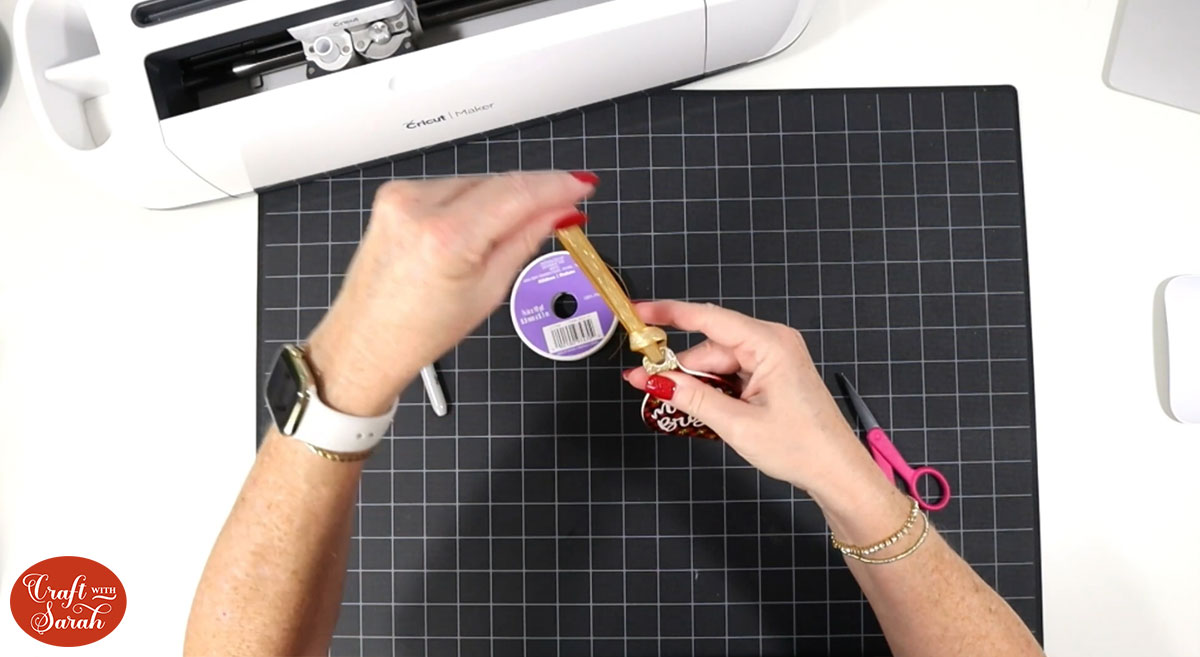
Tie off the top of the ribbon with a simple knot.
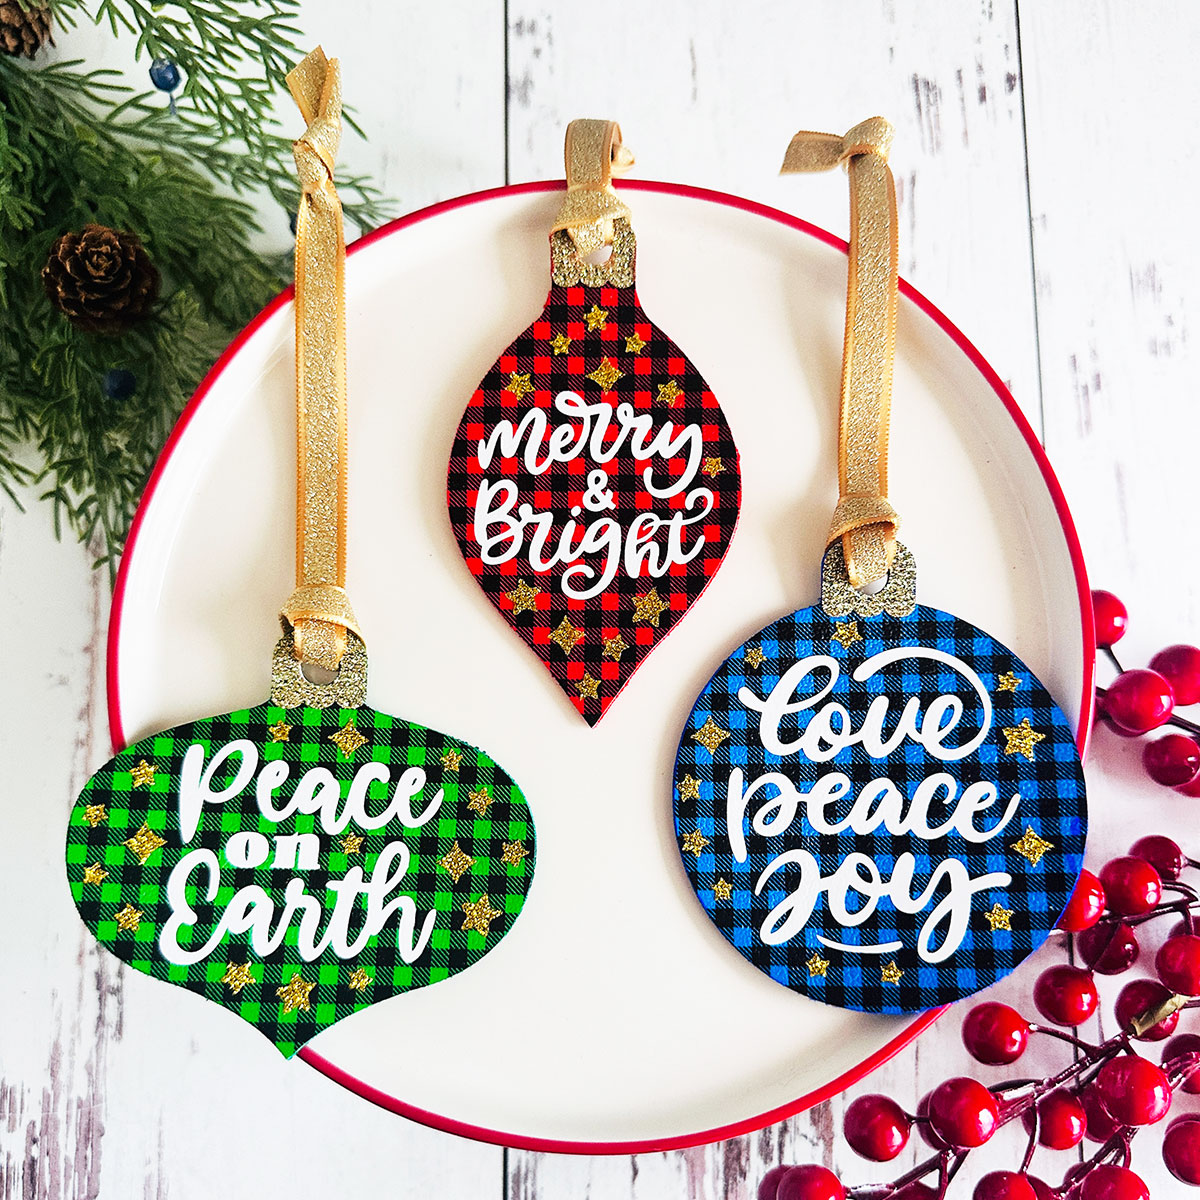
The PRETTIEST faux leather Christmas decorations
Now your ornament is finished! There are three different ornaments to make which all use the same process. They will look beautiful on your Christmas tree this year.

I love the sparkly gold stars which match so nicely with the ribbon and the font used for the text is beautiful!
Happy crafting,
Sarah x

