CCC 2023 Day 20 ☃️ DIY Christmas Crackers
Ever wanted to upgrade your Christmas crackers? Now you can make DIY Christmas crackers yourself and add all sorts of goodies inside!
Today is the final day of the Christmas Craft Countdown and I have saved these Christmas crackers till the end to keep you busy crafting.
I’ve wanted to create my own Christmas crackers for YEARS, so I’m super excited to be sharing these with you today.

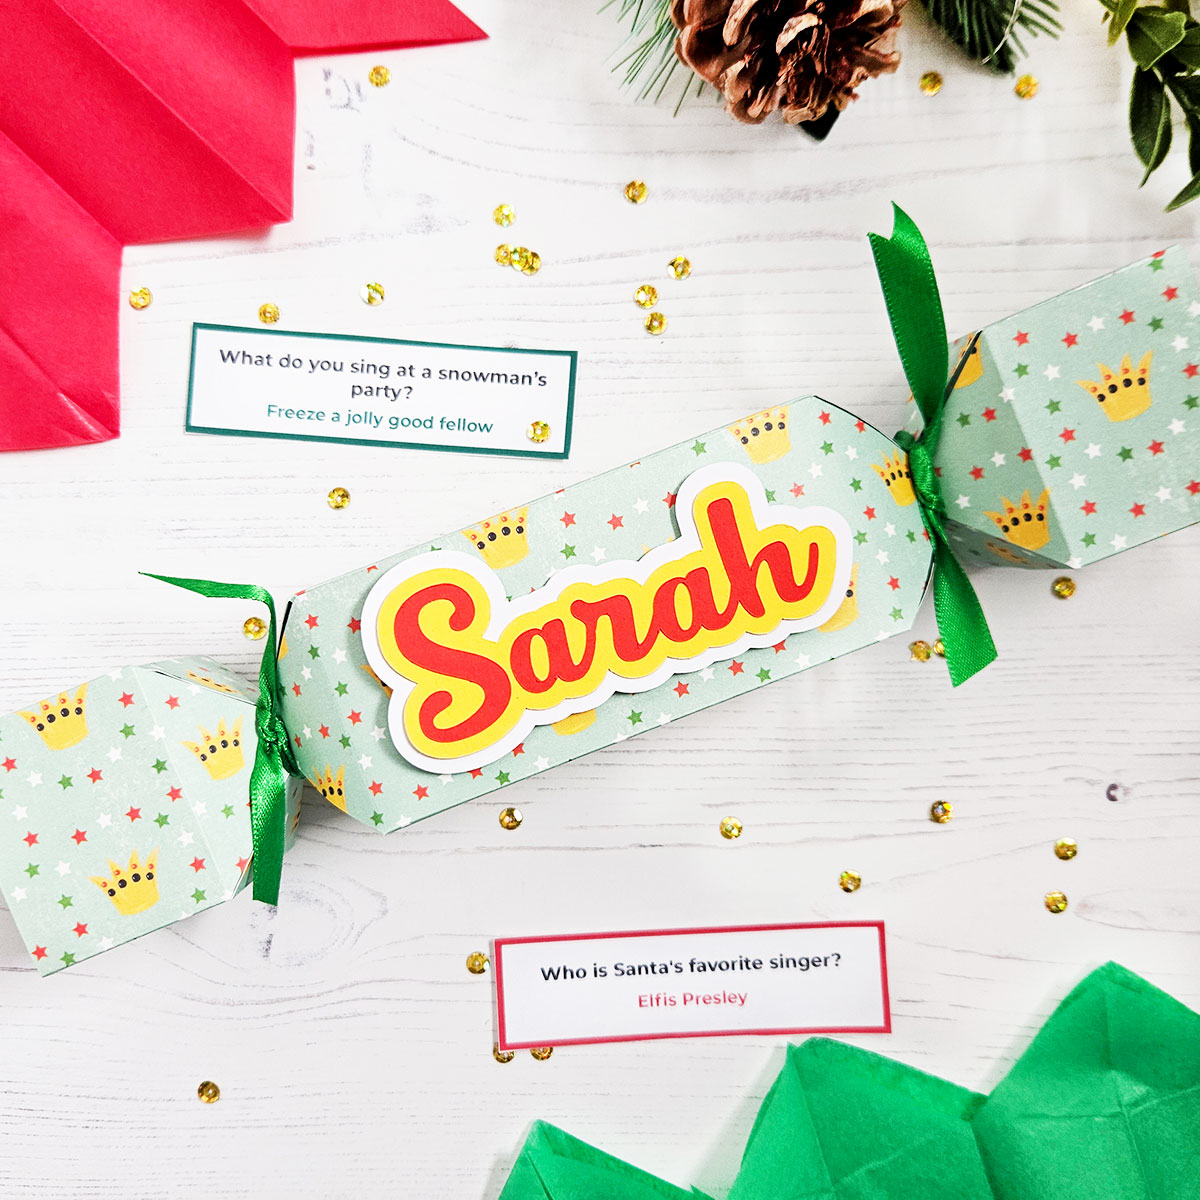
As with all good crackers, they are filled with a treat or toy, a paper hat and of COURSE some absolutely TERRIBLE Christmas jokes. You can even add the “snap” for some extra drama when they are pulled at the dinner table.
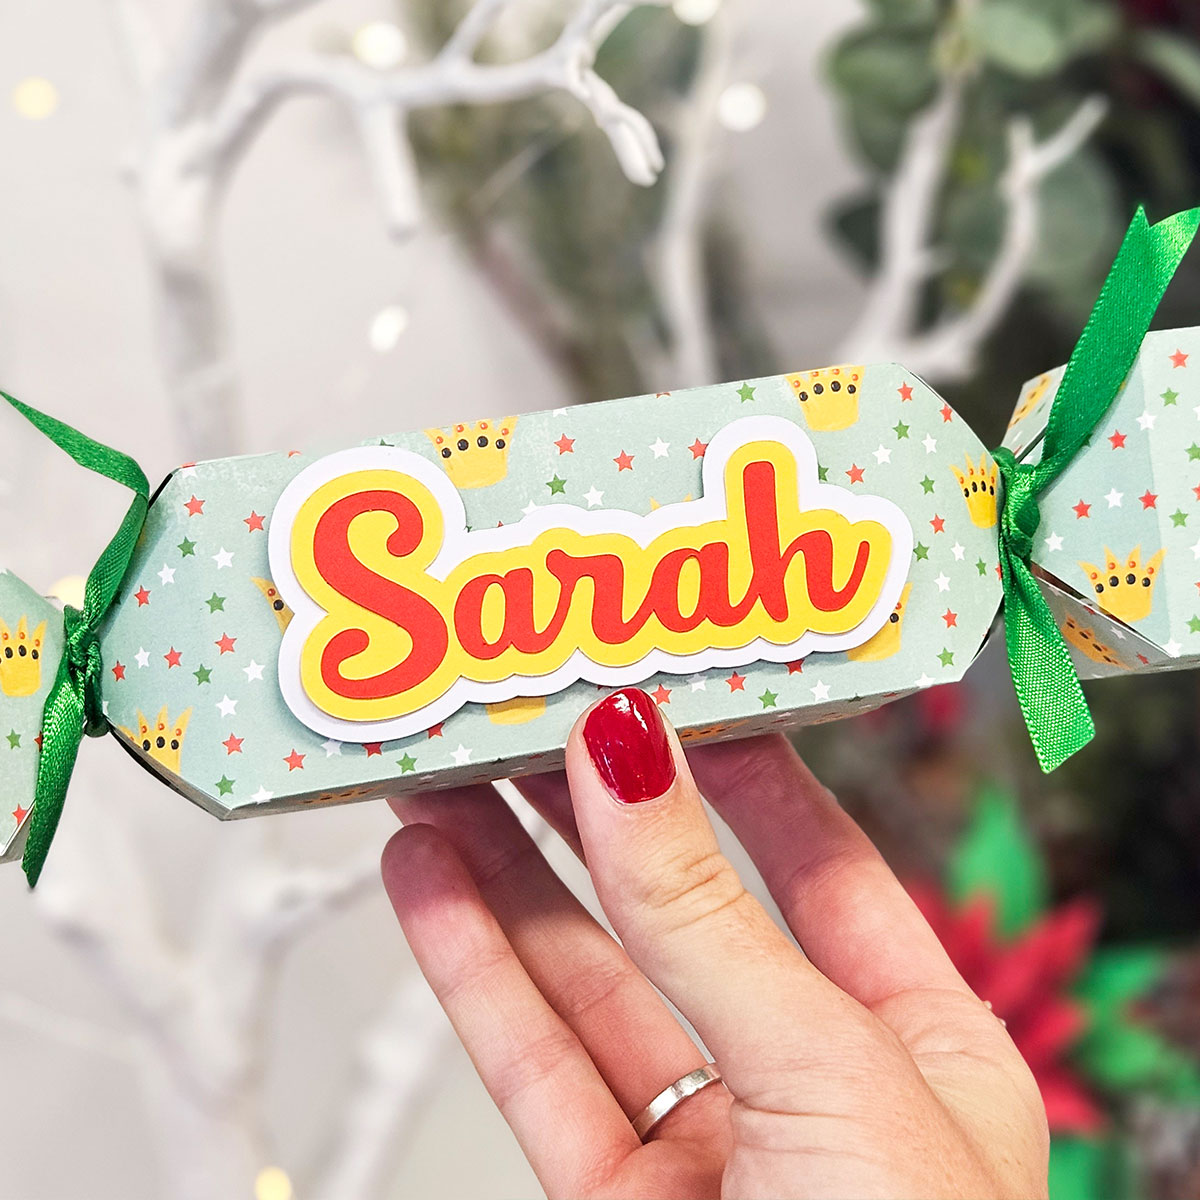
I’ve added names to my crackers so that they can also act as table place settings for my team’s Christmas party.
Let’s get started!
This Project was part of the Christmas Craft Countdown 2023
Materials supply list
Here is a list of the materials that are required to make this project.
Please note that some of the links included in this article are affiliate links, which means that if you click through and make a purchase I may receive a commission (at no additional cost to you). You can read my full disclosure at the bottom of the page.
- Cricut machine
- Light blue Cricut cutting mat
- Cricut Scoring Wheel or Cricut Scoring Stylus
- 12×12 inch double-sided scrapbook paper
- Coloured card
- Glue or double-sided tape
- 3D foam pads (optional)
- Ribbon
- 11-inch cracker snaps/bangs (optional)
- Cracker hats (optional)
- Small gifts to go inside the crackers
- Printer and plain paper to print out the included sheet of jokes (optional)
- Brayer/scraper tool (optional)
This project is suitable for the following types of Cricut machine: Explore Air 2, Explore Air 3, Maker, Maker 3, Venture and Joy Xtra.

Video tutorial for DIY Christmas cracker templates
You can use all sorts of Christmas patterned paper to make the crackers extra special.
Watch the video below to see how to make a Christmas Cracker.
If you prefer to read rather than watch, keep scrolling!
How to make custom Christmas crackers
Here’s how to make amazing handmade Christmas crackers with a Cricut machine.
Step 1) Download the cutting file(s) & unzip the downloaded folder
Download the files using the box below.
Purchase the File(s)
This cut file is available as part of the Instant Access Bundle.
Or, purchase this design individually here
Before you upload the SVG to Design Space, you need to unzip the download folder that it comes in.
Step 2) Upload the SVG file into Design Space
Open up Cricut Design Space and start a new Project.
Click “Upload” and then find your unzipped version of the downloaded files for this project.

The file to upload for Cricut Design Space is the one called svg-cracker-craftwithsarah.svg
This is what it should look like during the upload process:
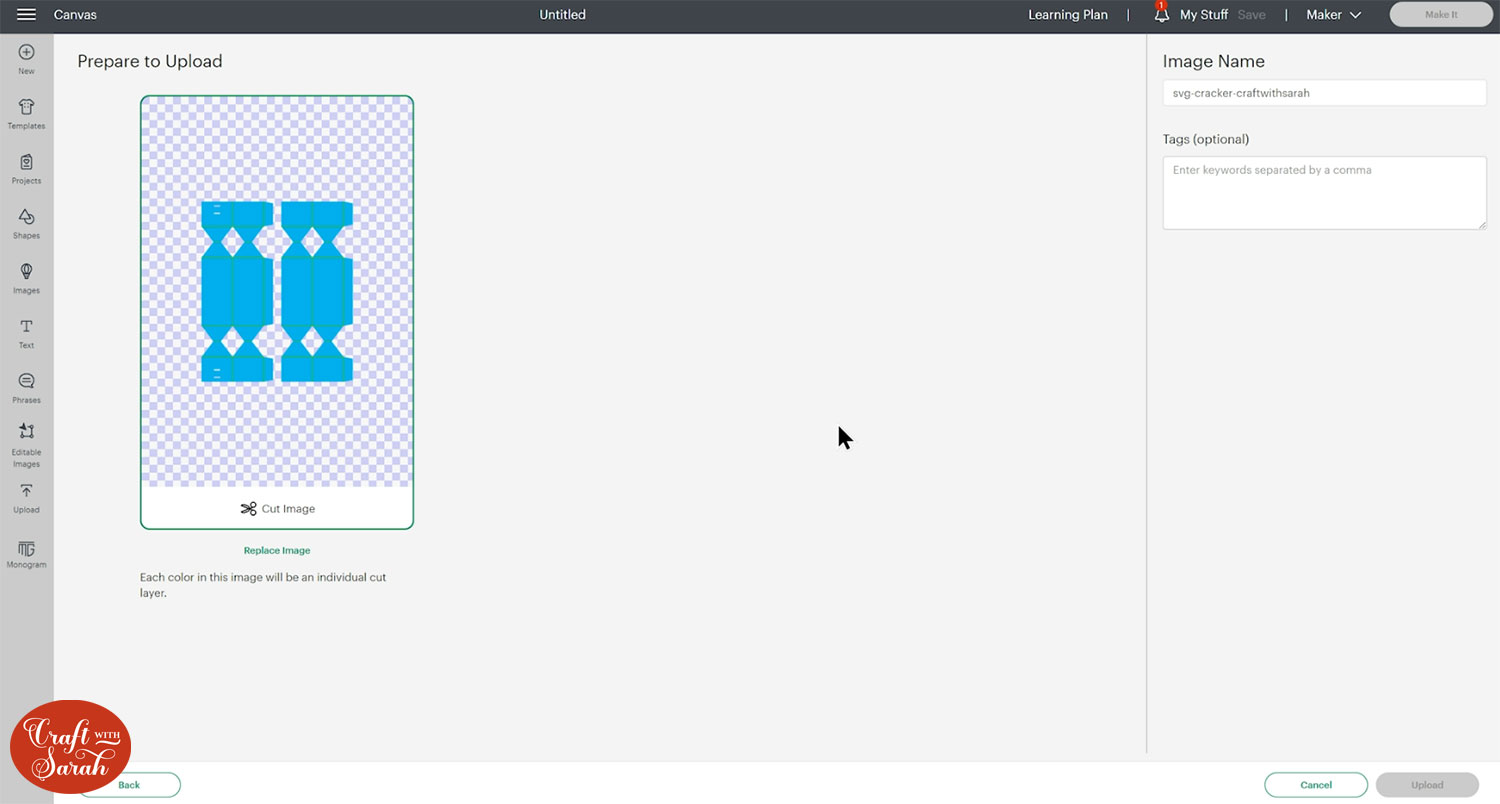
Make sure you upload the file which starts svg- in the filename!!
After uploading, the design will show in your “Recently Uploaded Images”.
Click on it and then press “Add to Canvas” to put it onto your Project.
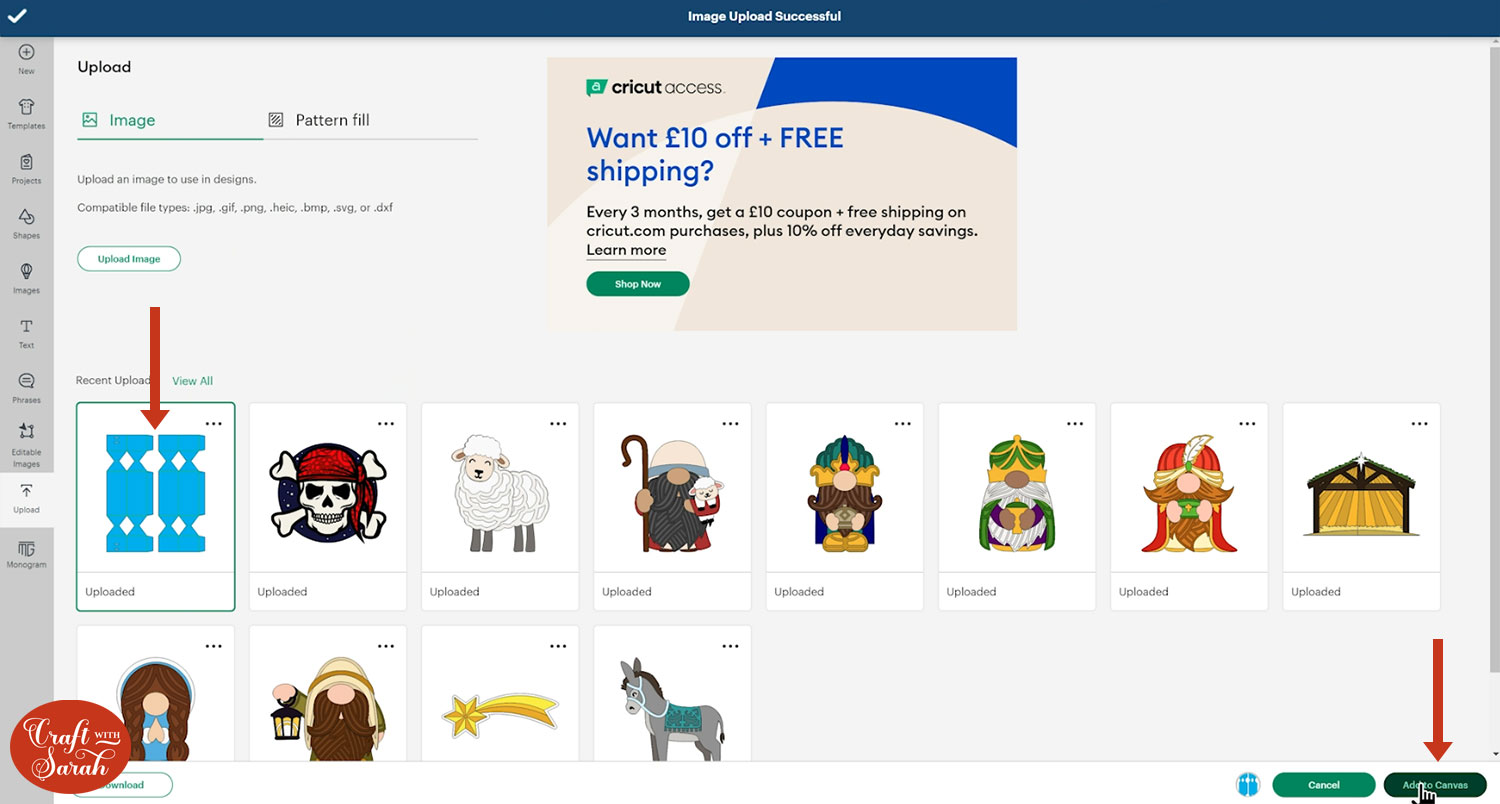
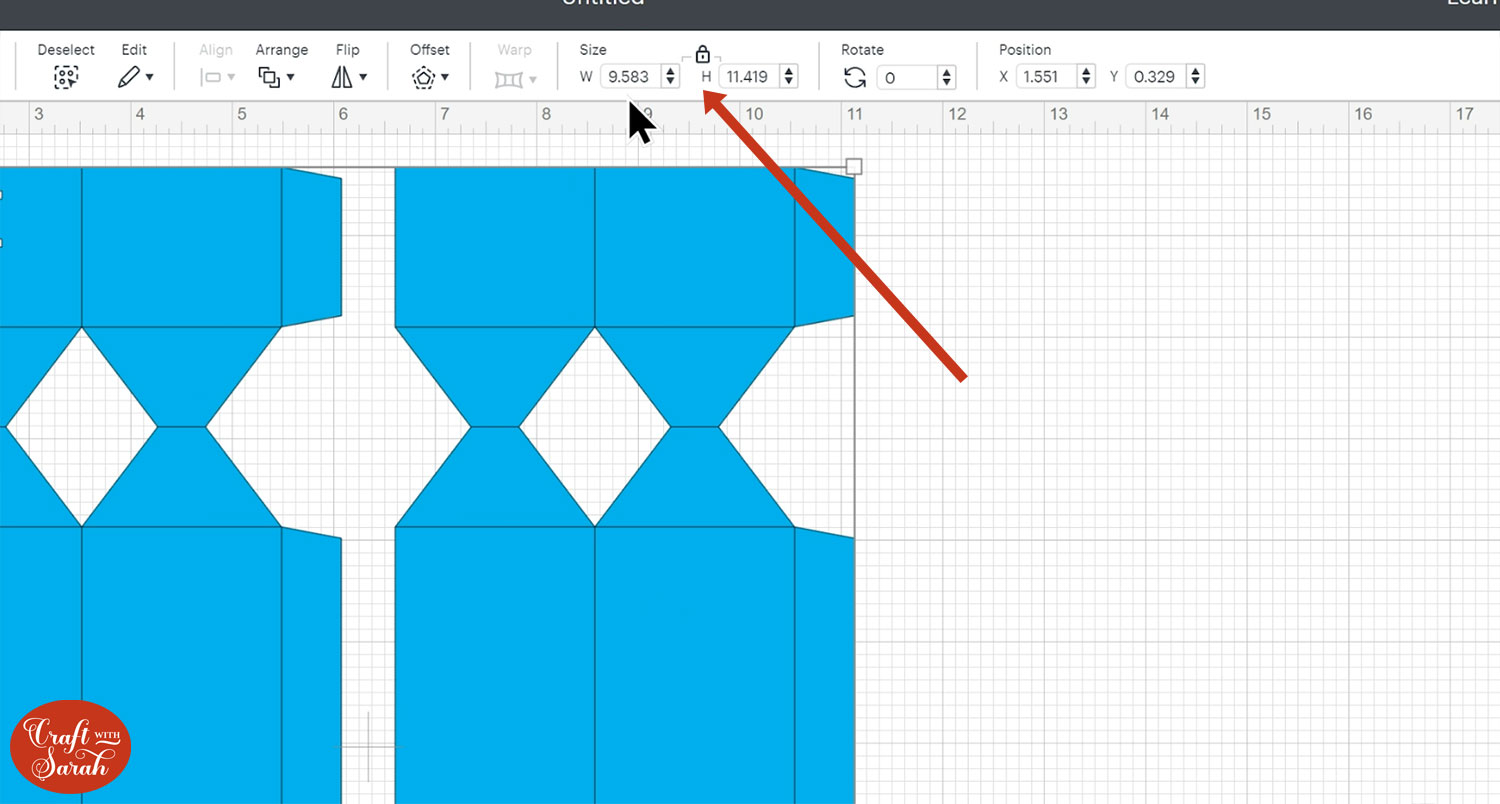
It will load in at the correct size which is just 9.583 inches wide and 11.419 inches tall.
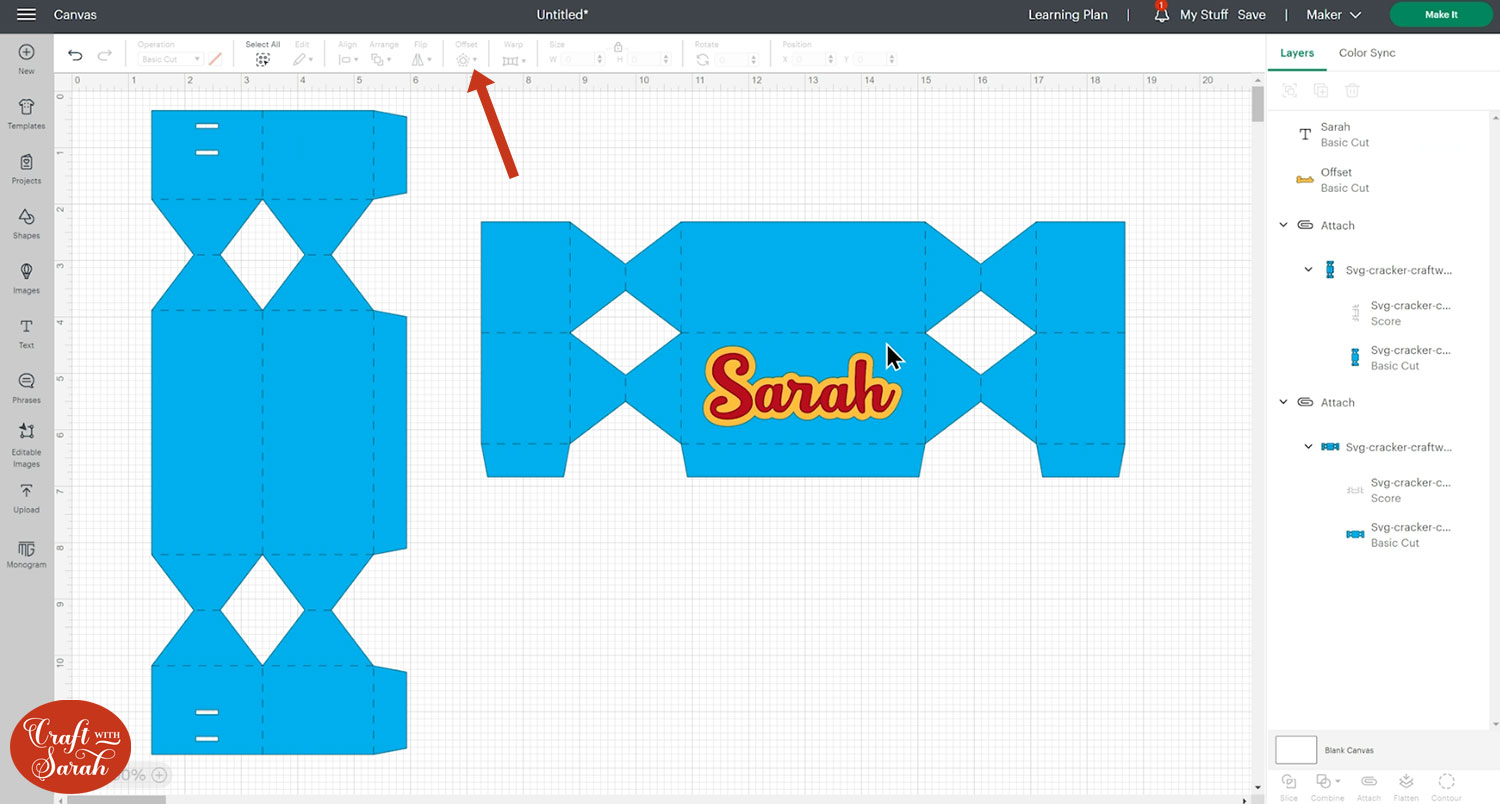
Step 3) Format the score lines
Separate out the layers by clicking the design and then pressing the Ungroup button at the top of the layers panel.
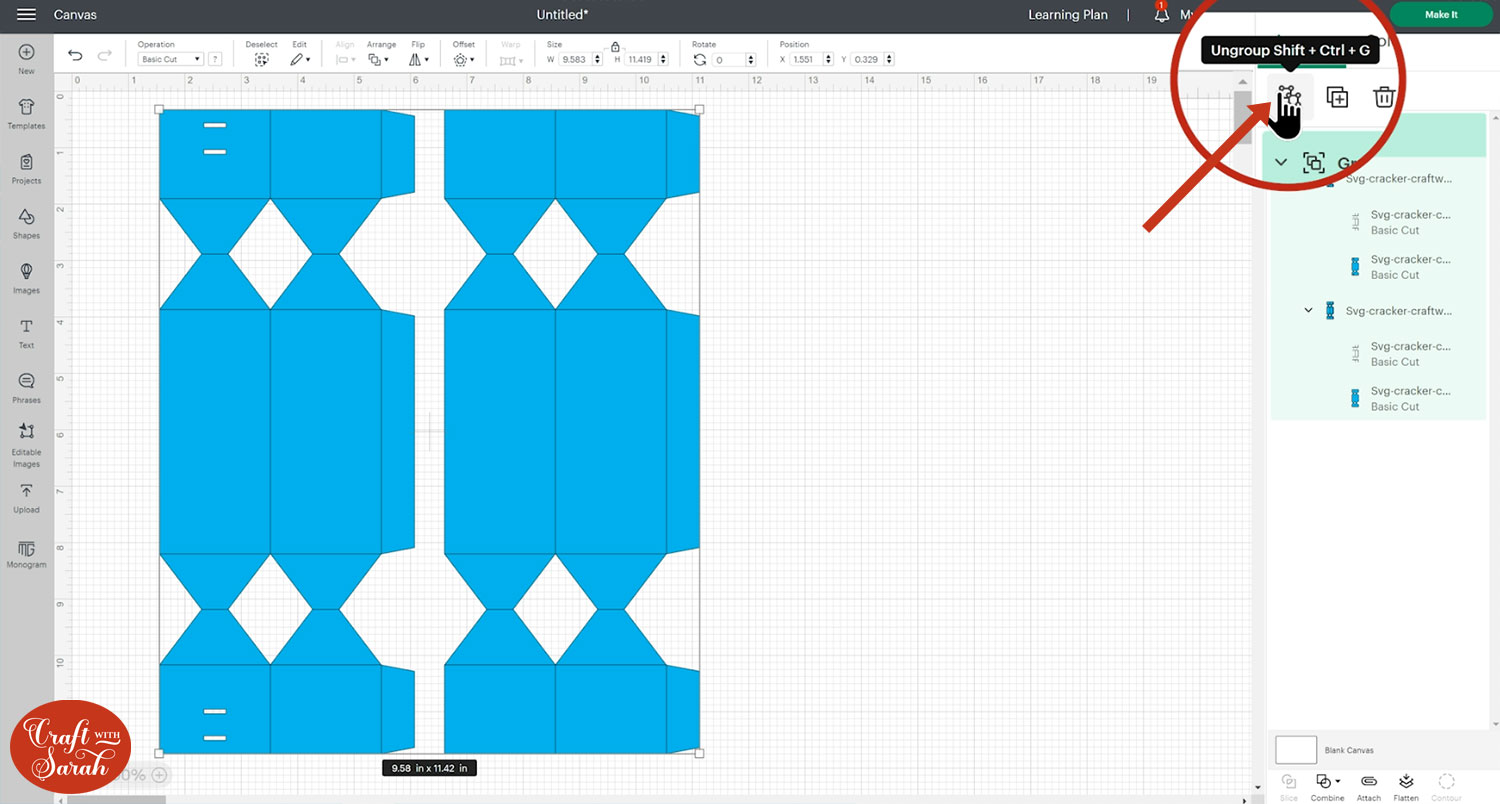
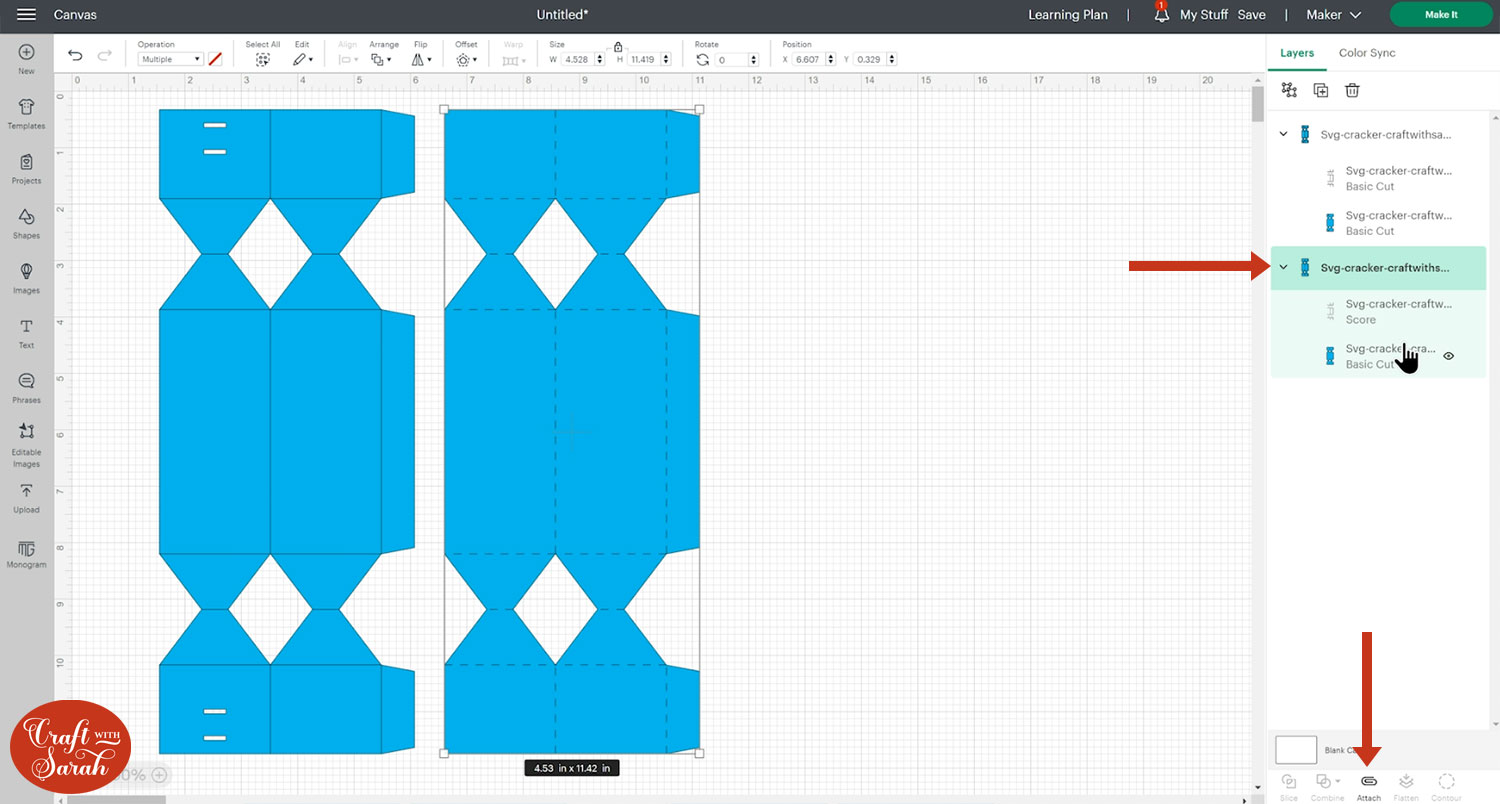
You’ll now see you’ve got two subgroups remaining in the layers panel. Each of those has a blue piece and then a piece on top which looks like lots of lines. These are the lines which we need to change to score.
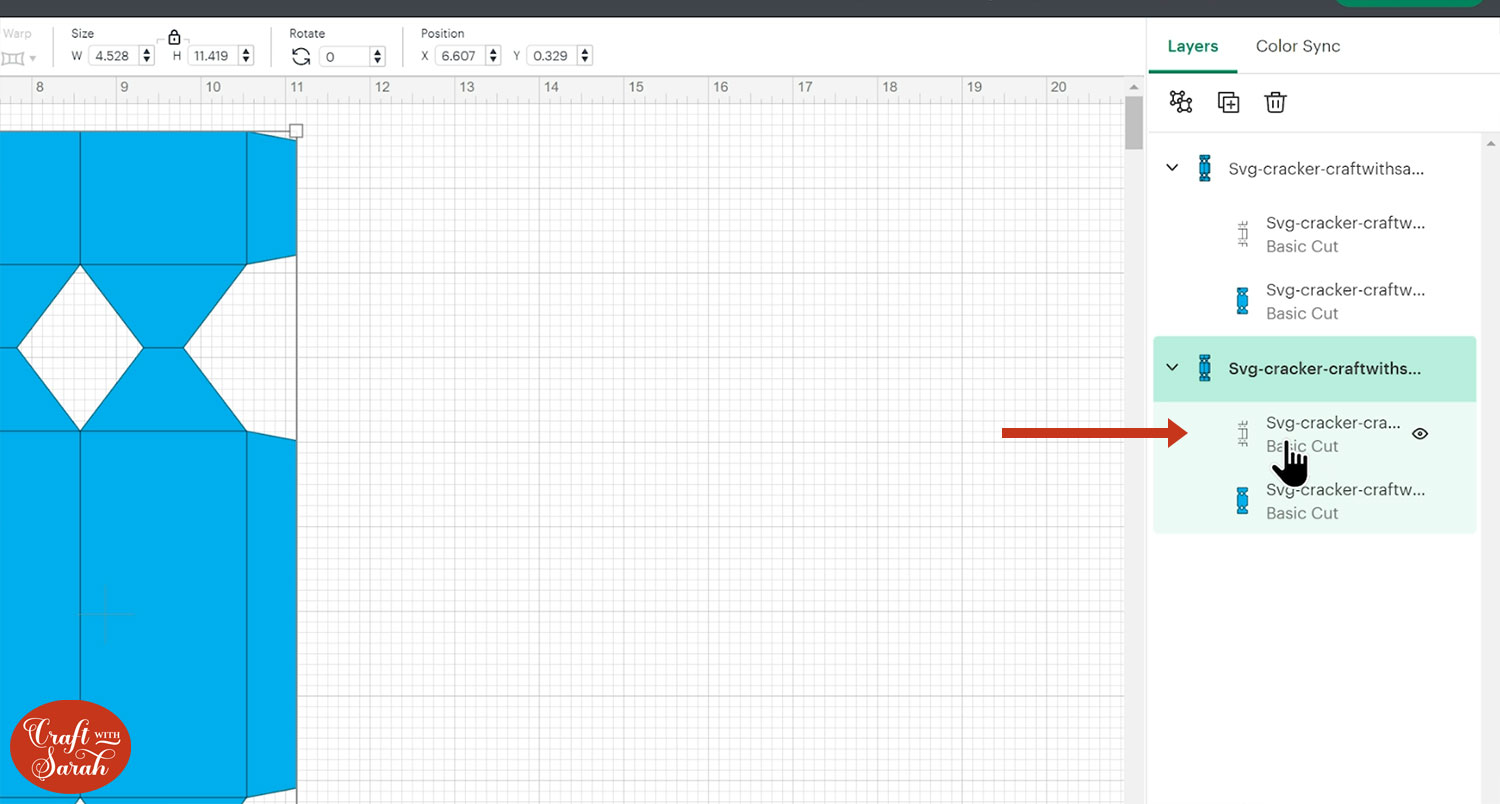
Click the layer which has all those lines. Make sure you don’t have the whole group selected – just that one layer.
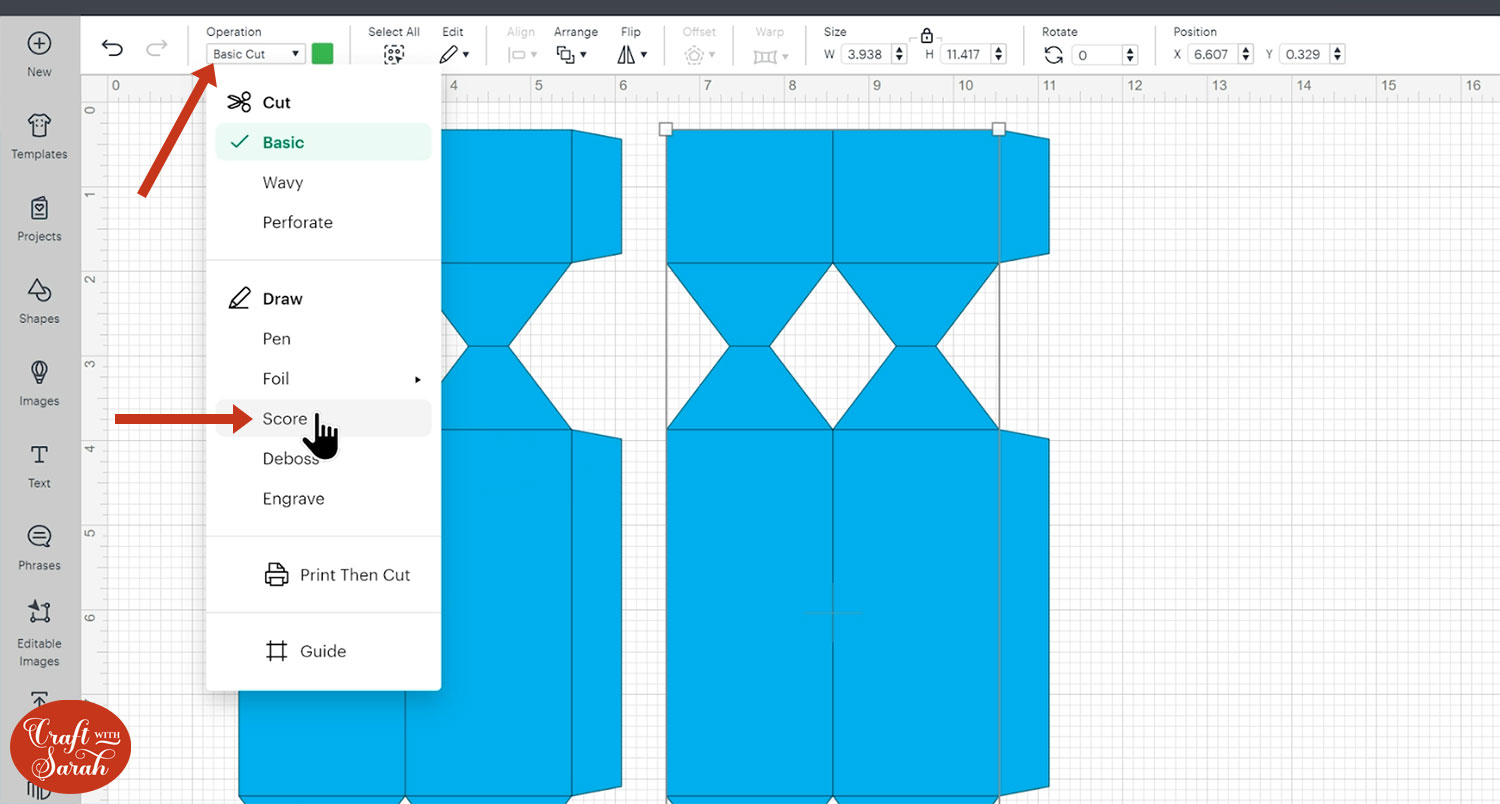
In the Operations drop down, change the layer to Score.
Click the Group title in the layers panel so that both of the layers are selected and then press the Attach button. Attach is what tells the Cricut to do the score line on the piece underneath.
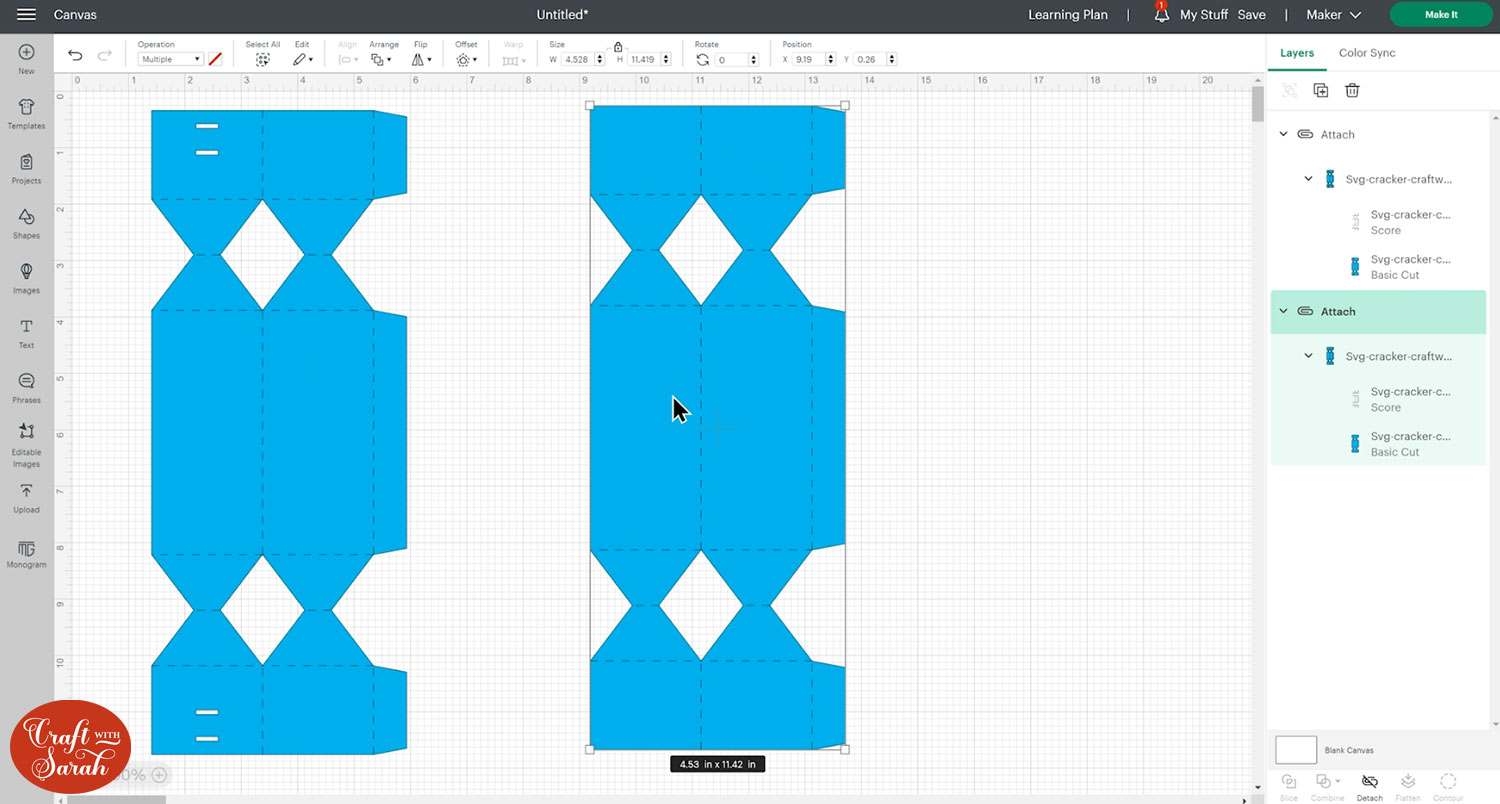
Repeat this process for the other piece of the cracker.
This is how it should look when you are finished:
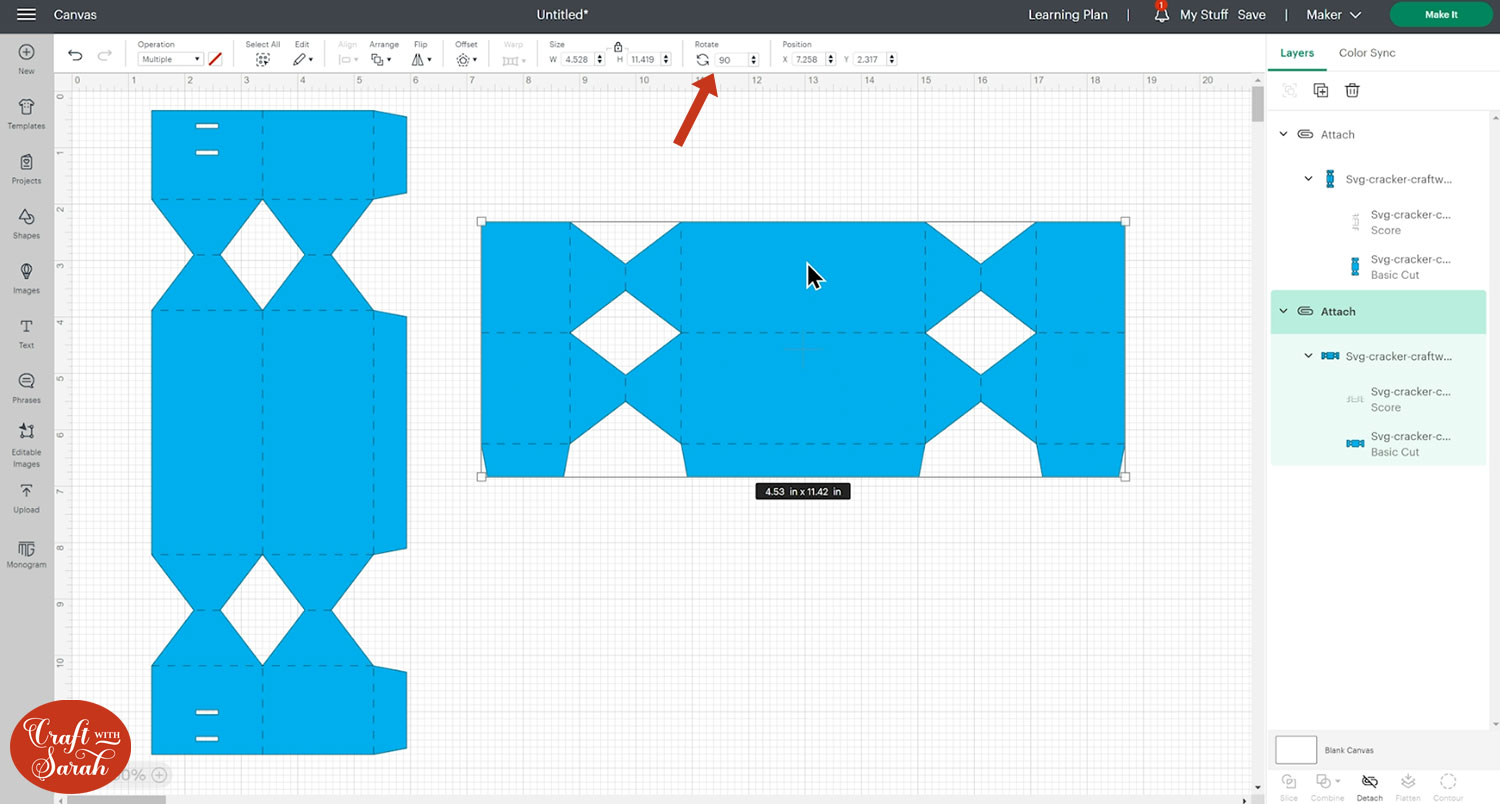
Step 4) Personalise your cracker
To add a name to the cracker, rotate one of the pieces by 90° by typing 90 in the rotate box and pressing enter on your keyboard. This will make it easier to see the size you are making the name.
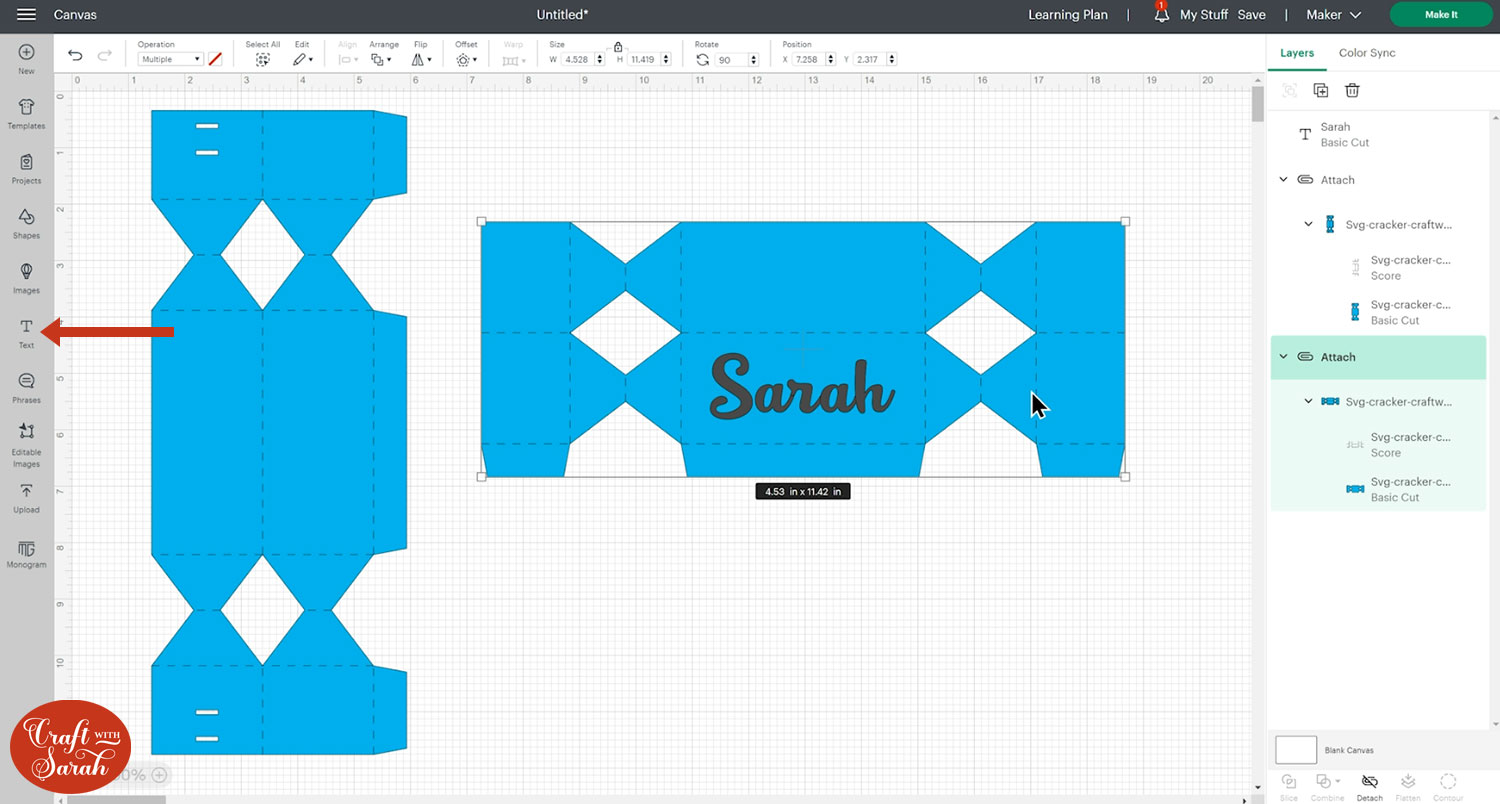
Click the Text button and type out the name you would like on the cracker.
To make it easier as it will be cut from cardstock, you may want to choose a font where all the letters are going to be touching. This will make it easier to glue on as it will be one piece rather than separate pieces for each letter.
I used a font called “Double Whipped” which is a Cricut Access font.
I like to cut the crackers from a patterned scrapbook paper because it adds that extra fancy effect, so for now I’m just going to add some placeholder colors and choose the card when I cut it so that it matches the pattern.
To add a border to the text, click the name and then press the Offset button.
Make a small offset and click Apply. The offset will give it an extra fancy effect and it helps the name to stand out against the colours of the cracker.
You can then offset the offset to make another layer.

If the offset layers have gaps/holes in them, you can use the Contour button at the bottom of the layers panel to remove them.
Step 5) Cut out the pieces from cardstock
Once you’re happy with how everything is looking, click “Make It” and get everything cut from cardstock.
If you have a printer at home, print off the sheet of jokes included in the download folder. Every cracker should have a terrible joke inside!
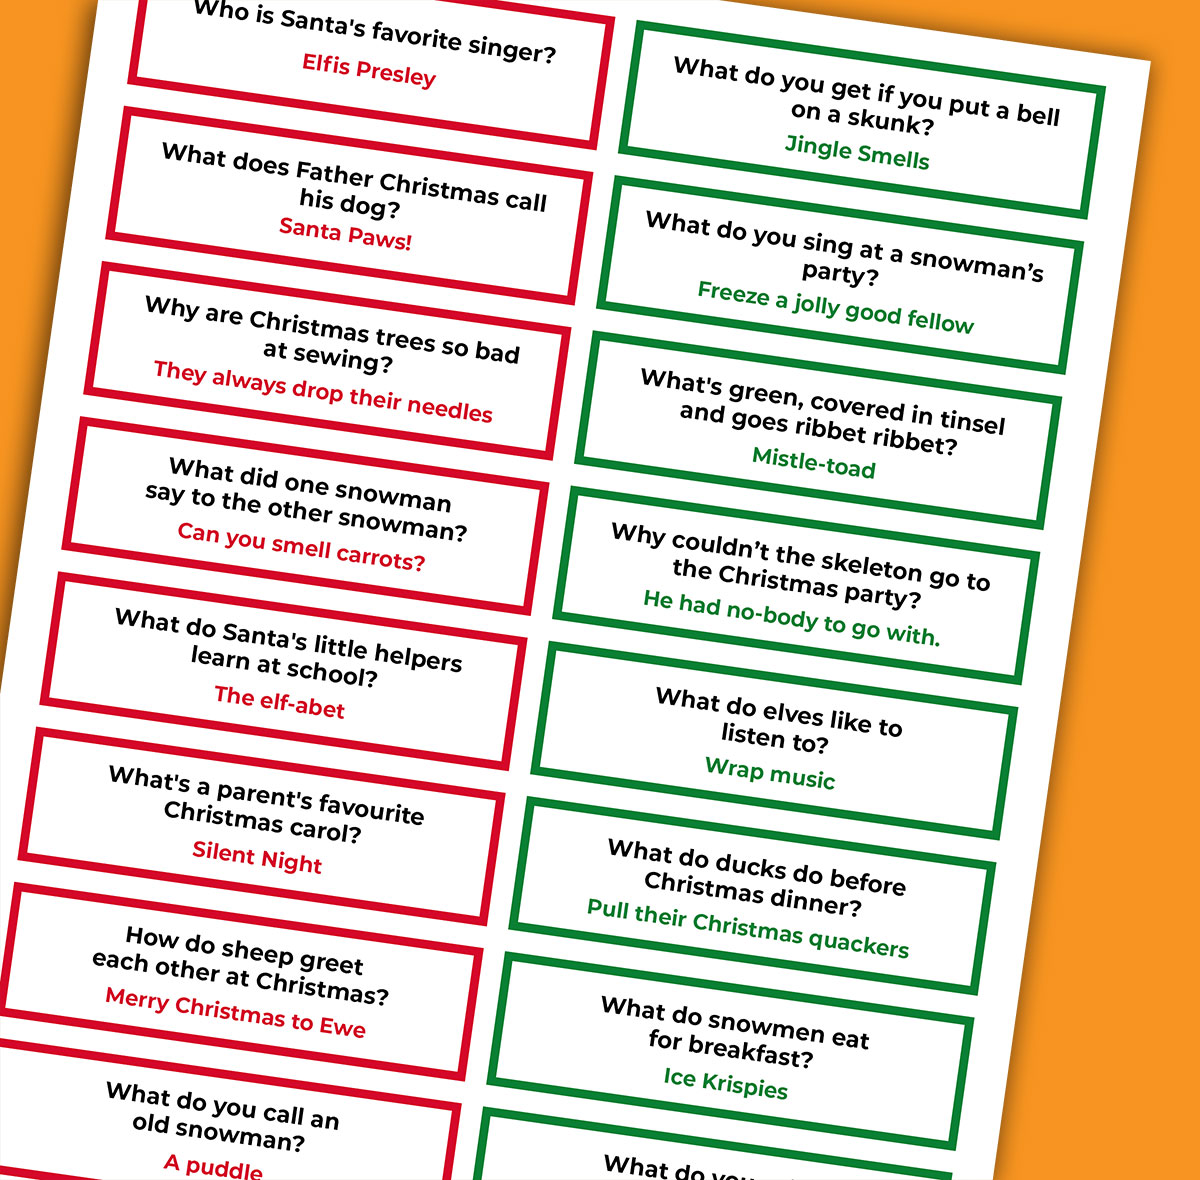
Use a pair of scissors to cut up your jokes into single pieces.
Step 6) Build the Christmas cracker
If you would like to add a snap/bang to your cracker, make sure it is 11 inches wide. If yours is bigger you can cut it down to size but you won’t be able to use your snap if it is smaller than 11 inches.
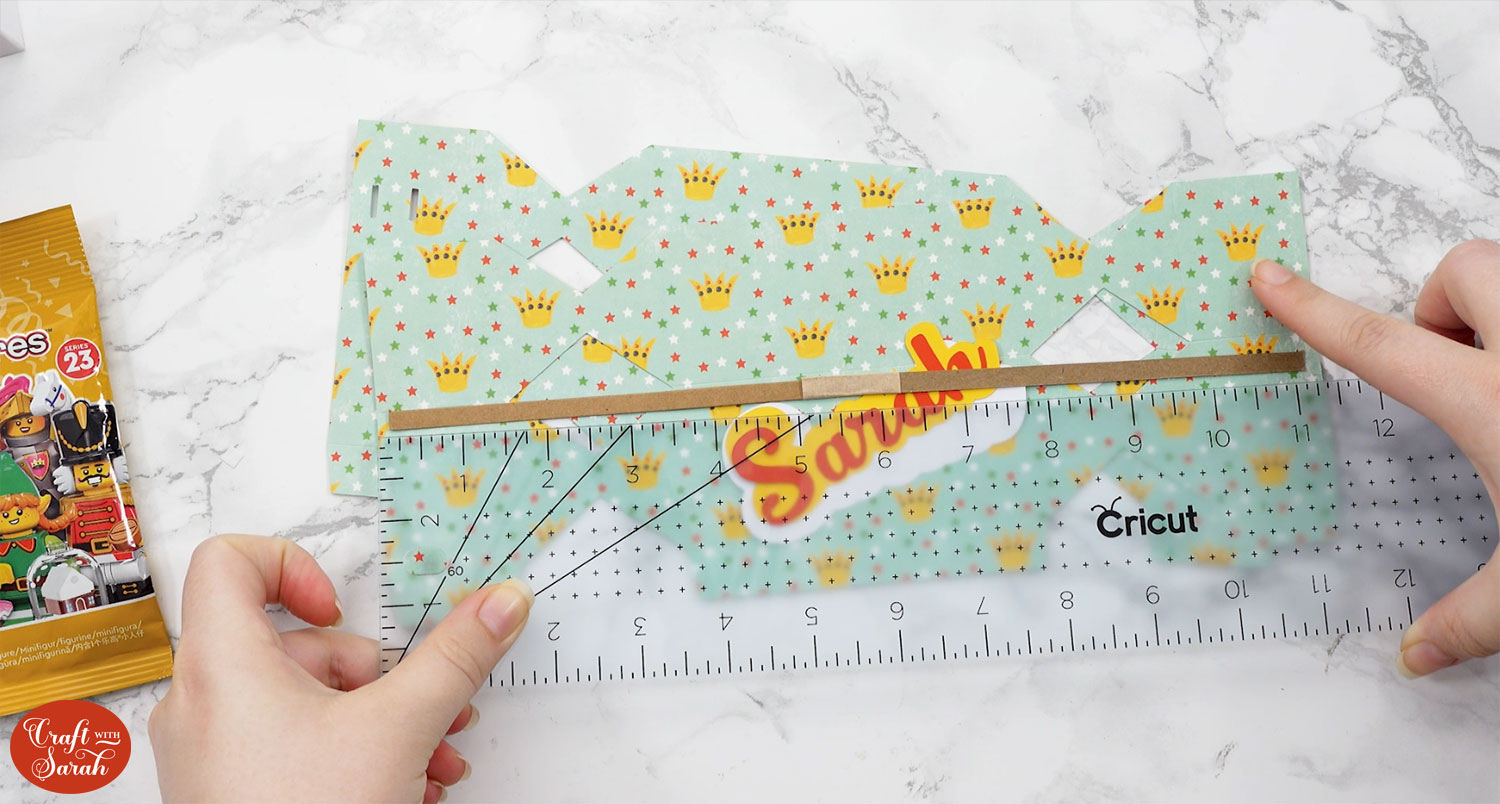
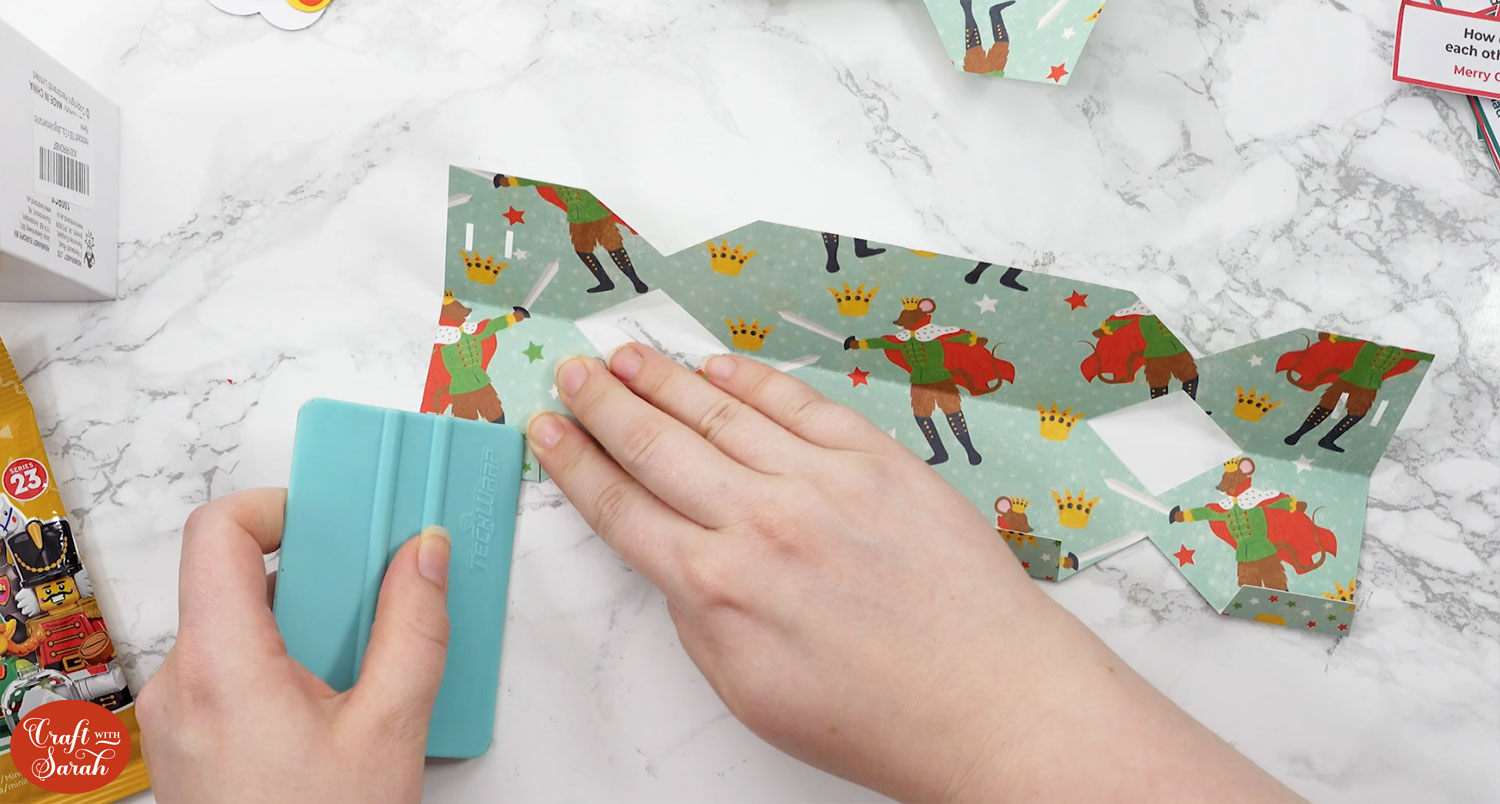
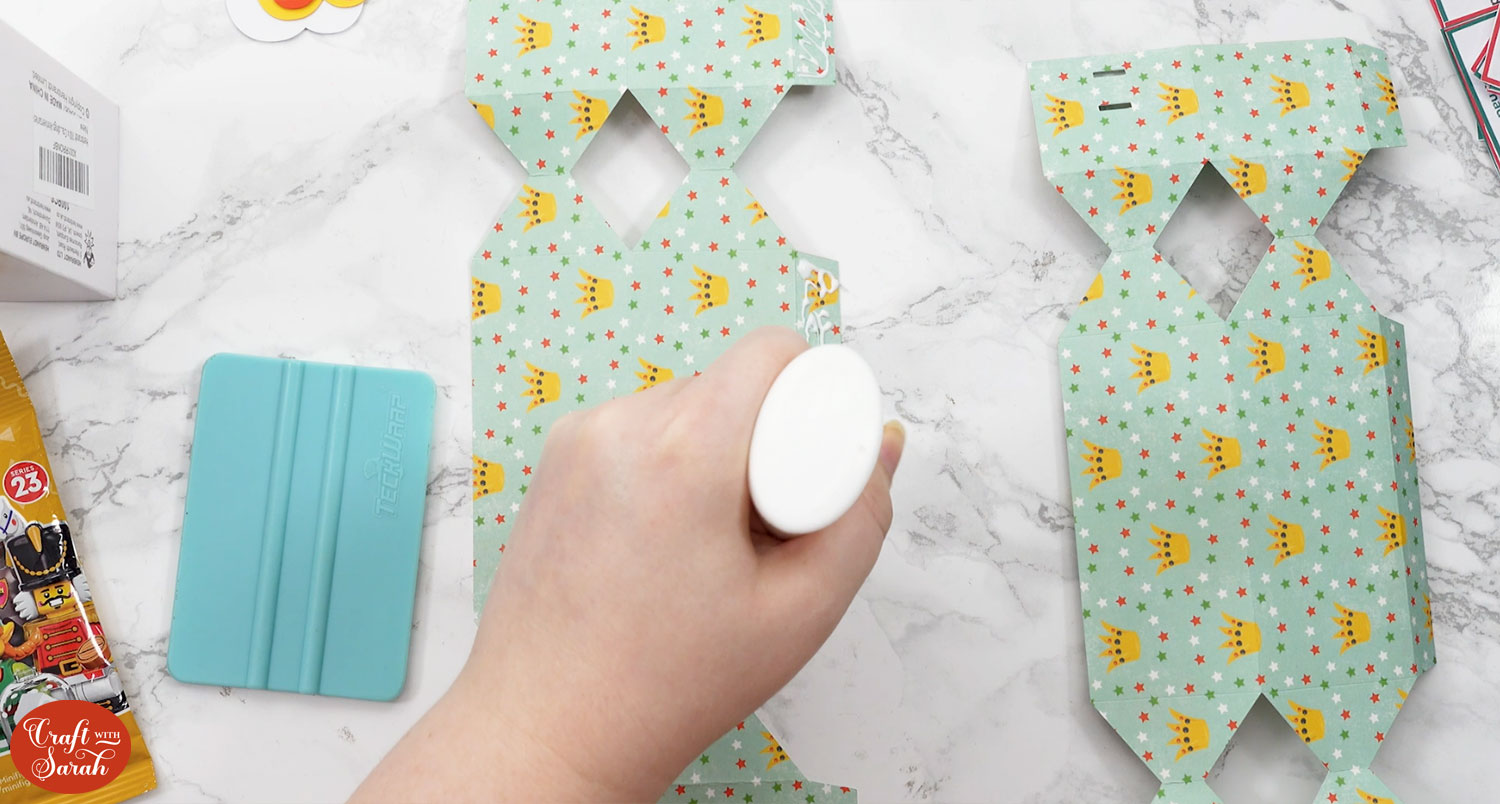
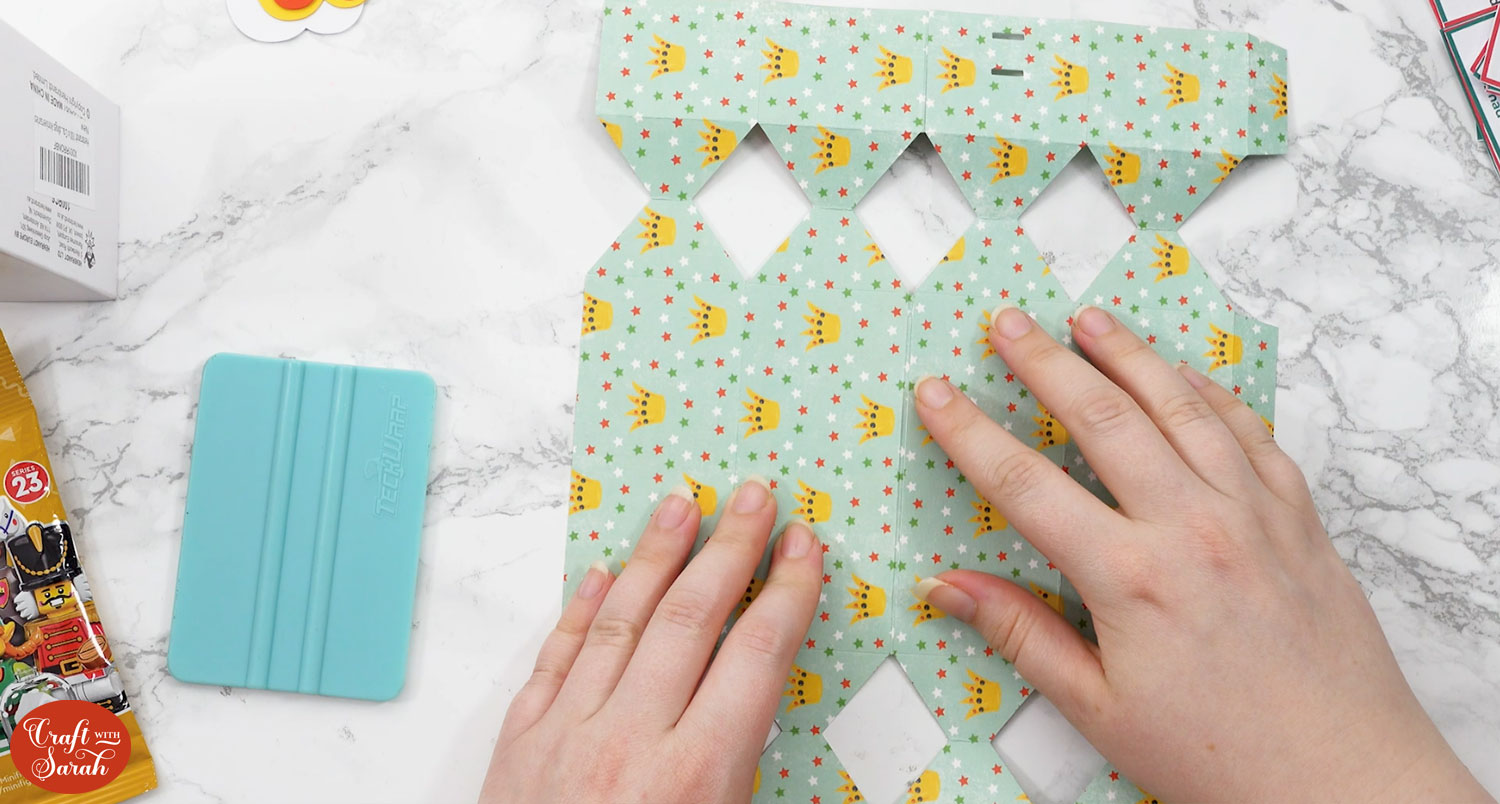
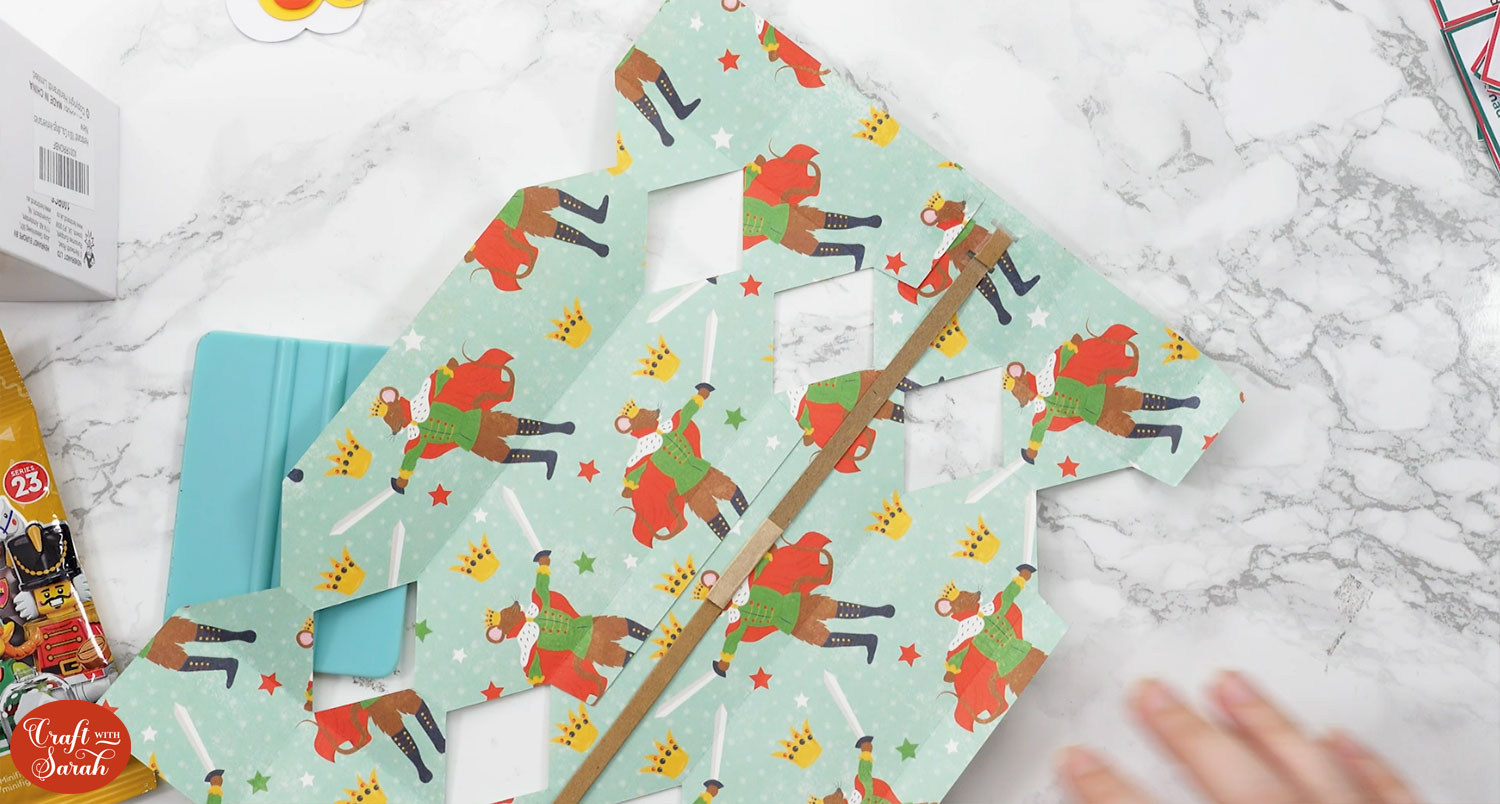
Turn the cracker upside down (so you are looking at the “inside”) and fold inwards along the score lines. Go over the folds with a brayer or scraper tool to give it a crisp crease. You will need to do this for both pieces.
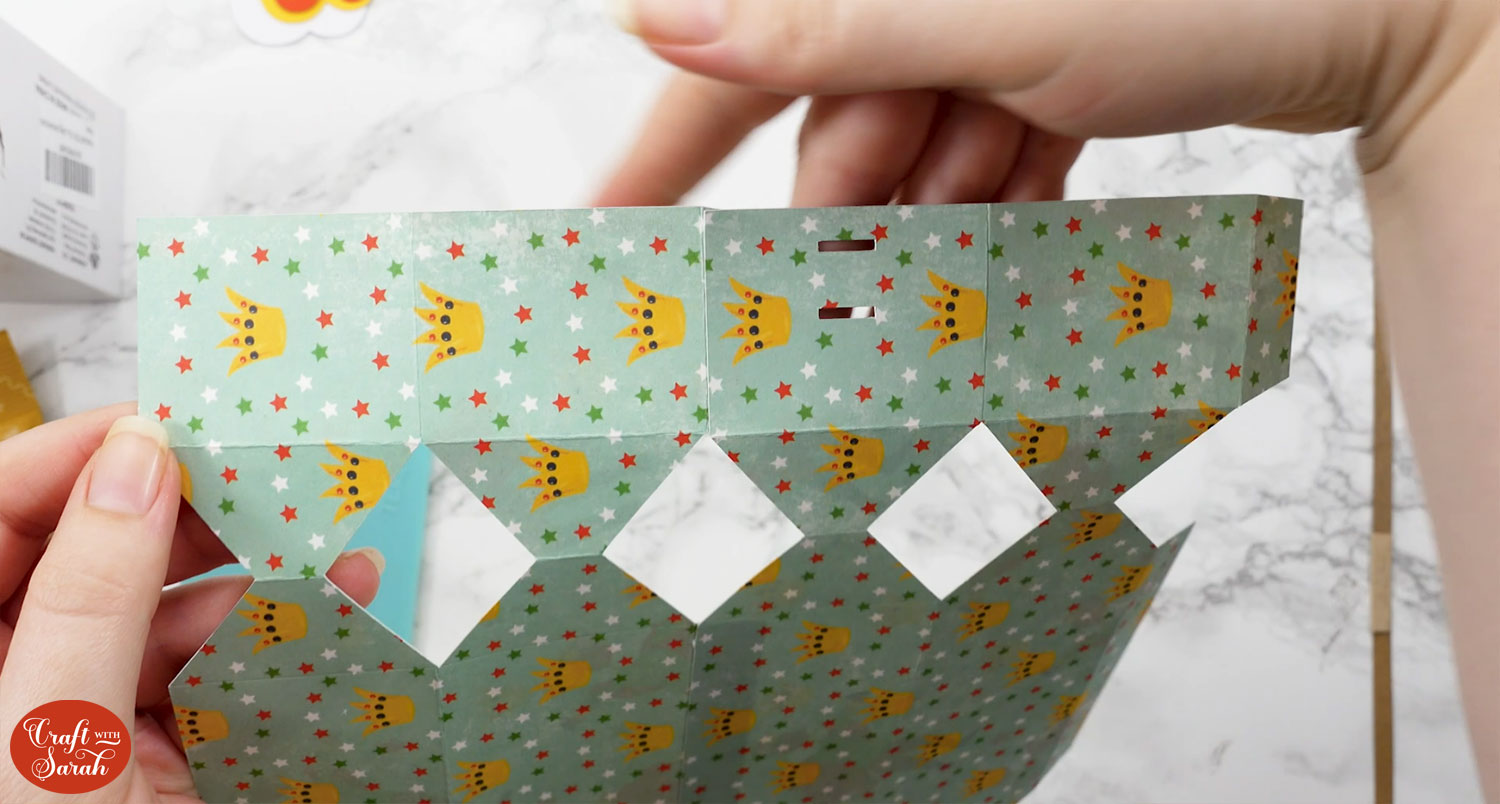
Turn the pieces the right way around. Add glue to one of the tabbed sides.
Stick the other piece onto the tabs, lining them up with the score line on all three tabs.
Allow the glue to dry before proceeding.
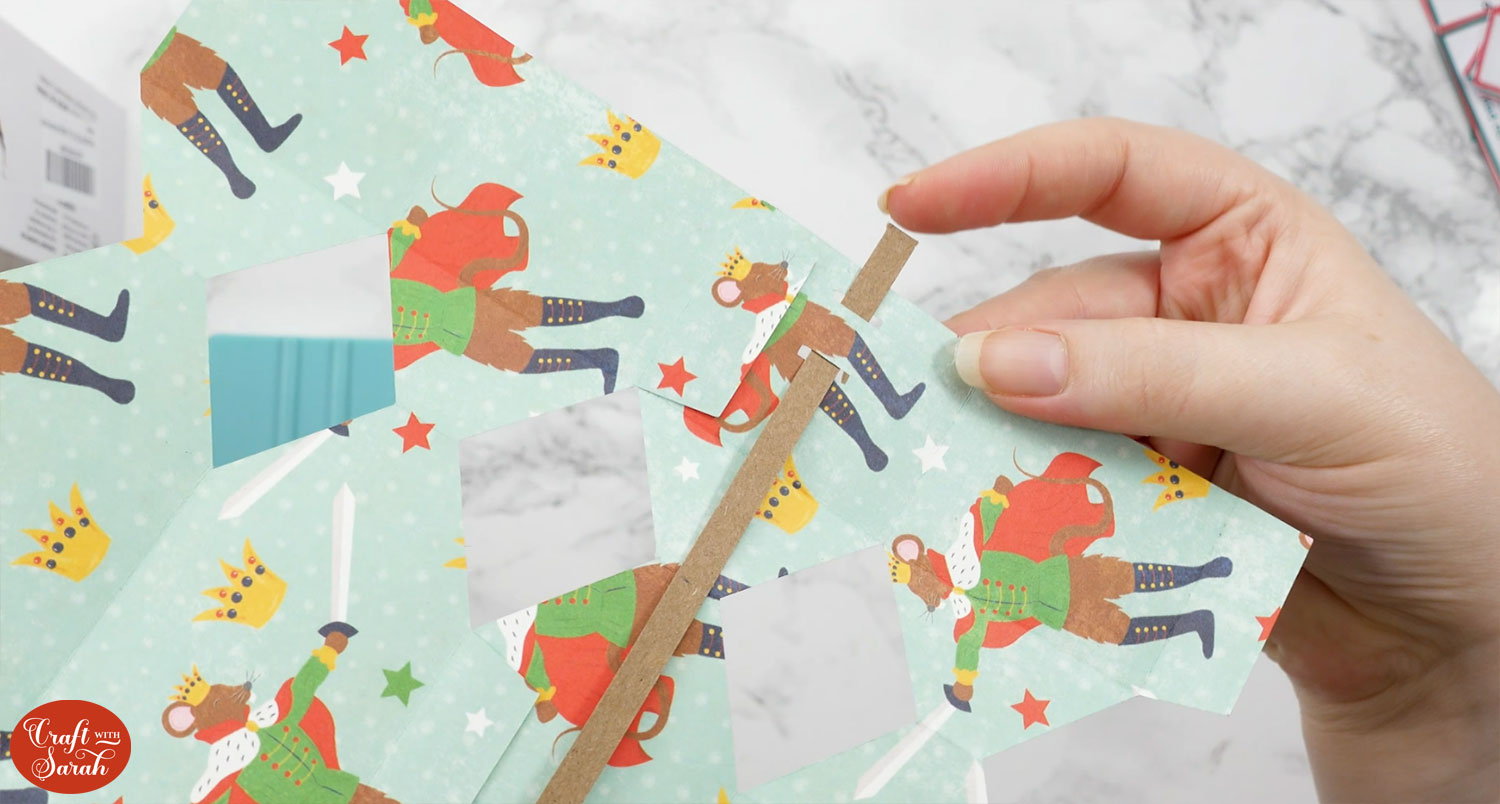
Next we will add in the snap. You will notice two slits at the top and the bottom of the cracker.
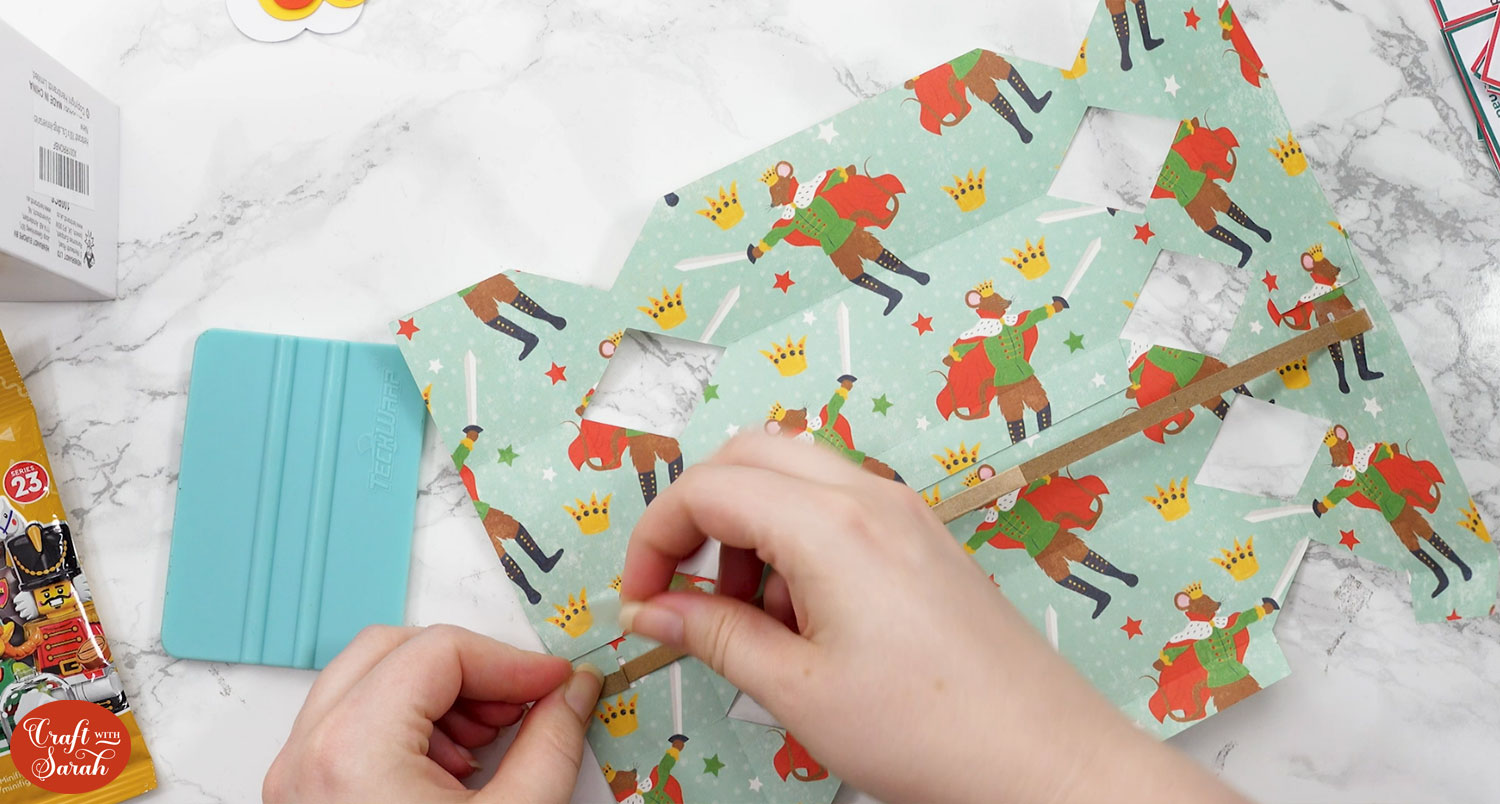
Turn the cracker over so you are looking at the “inside” and thread the end of snap through the hole furthest from the edge, threading it back out of the other hole.
Take about 1cm of the end of the snap and fold it back on itself. Glue or tape it in so that it’s secure.
Do the same thing on the other side. Don’t worry that it may pull the cracker shape a bit as you do this.
Take the joke, cracker hat and your chosen gift/treat and place them inside. I used a Lego figure for the gift which I taped up slightly to help it fit better inside.
You can put whatever you like inside!
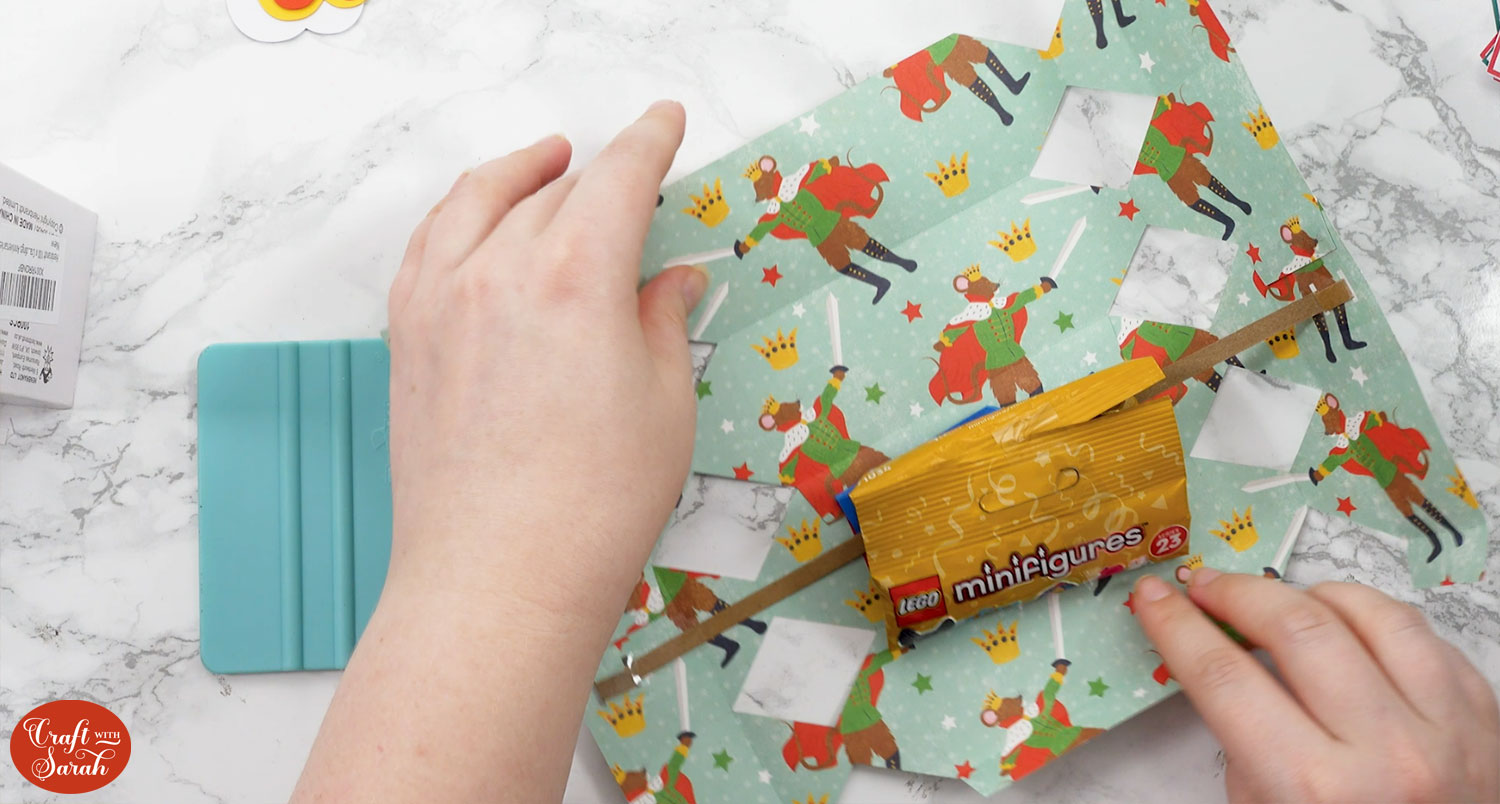
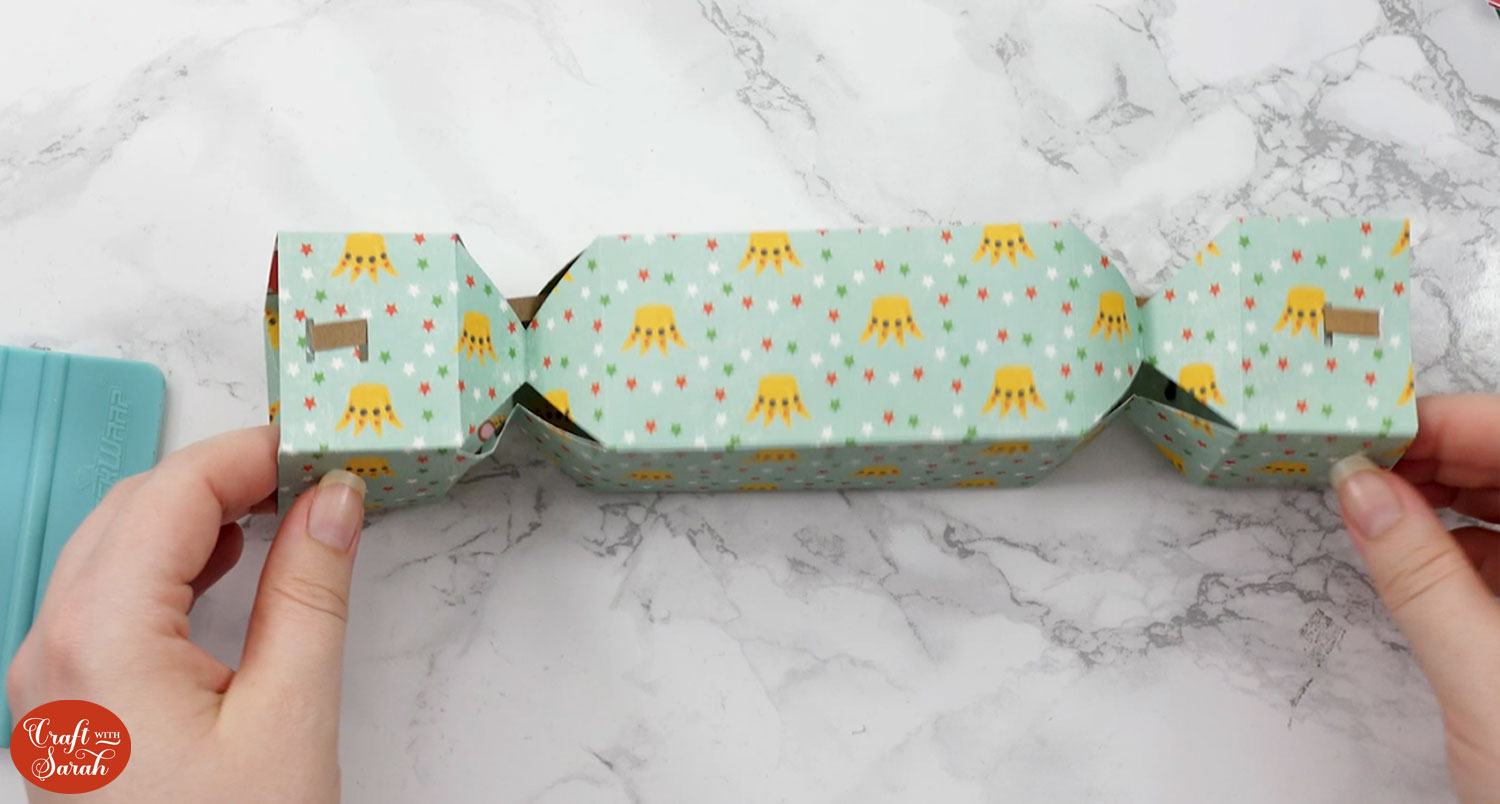
Fold the cracker over so that it traps everything inside.
Stick the cracker together using the tabs. I used double sided tape rather than glue, as that makes it a bit easier.
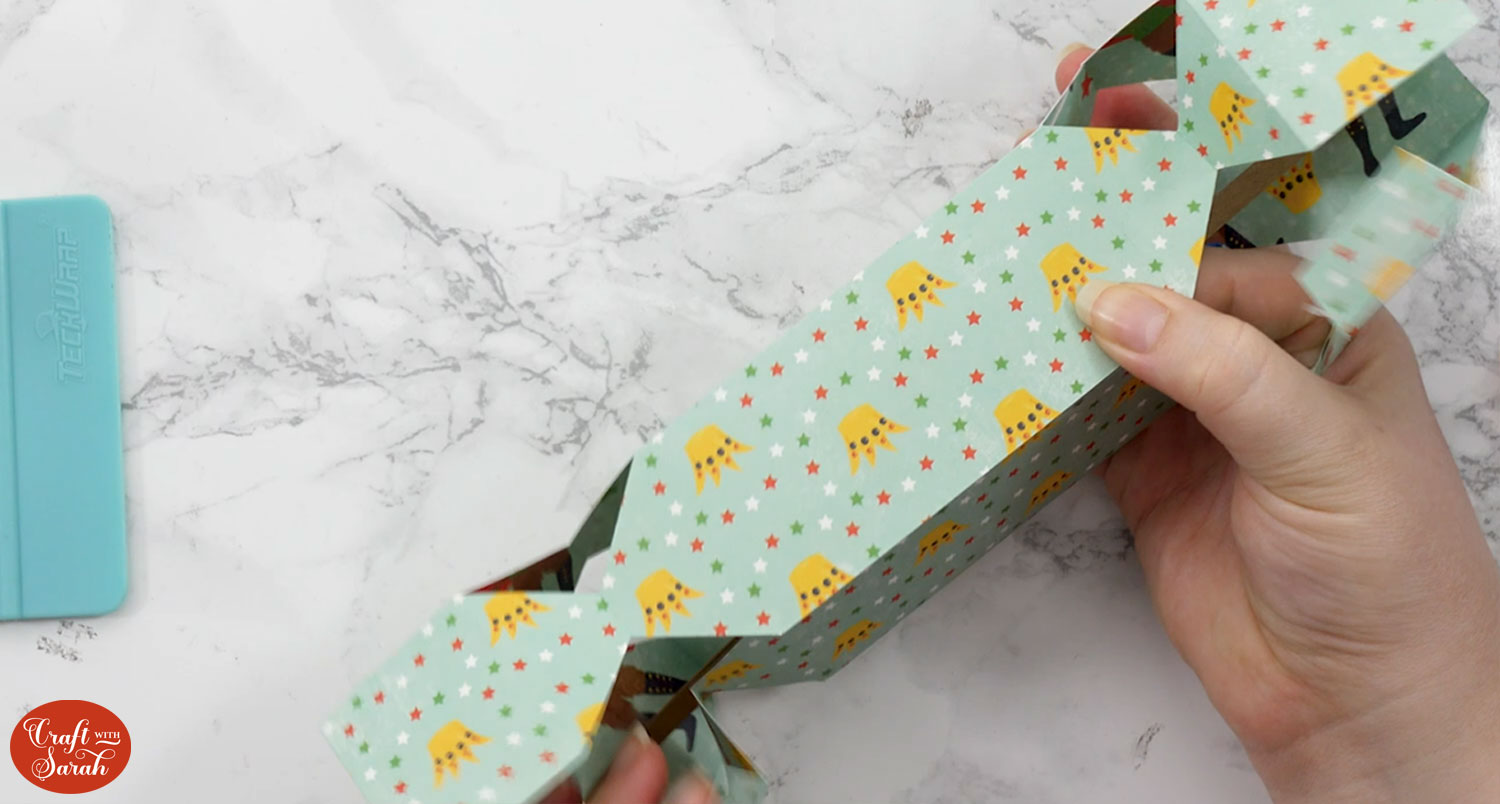
Your cracker is now taking shape.
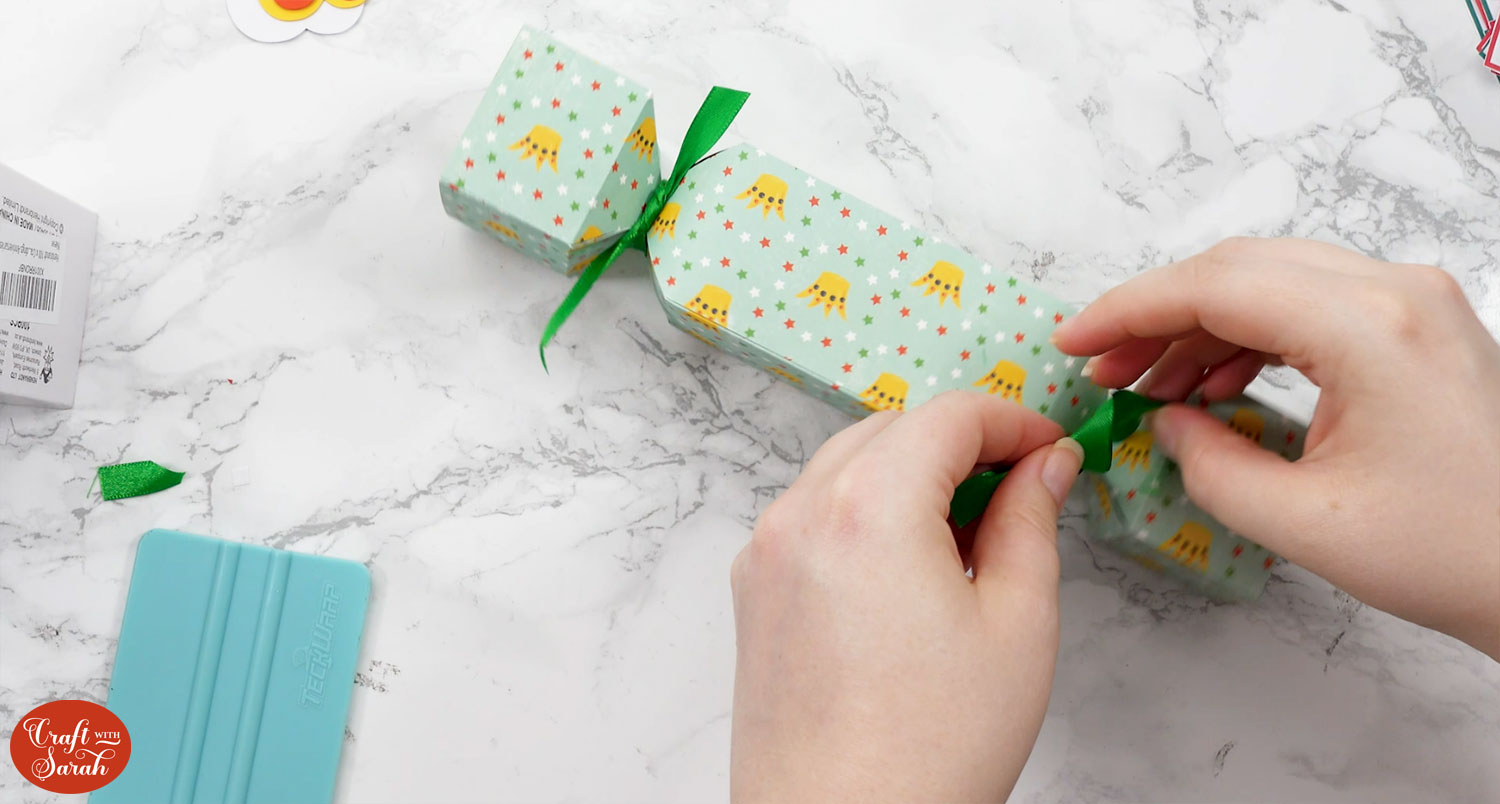
Locate the sides with the holes that you threaded the snaps though. This is the bottom of the cracker.
Position it with that side on the bottom, then tie ribbons onto the two sides to secure the contents of the cracker. Pull it tight but not so tight that it might break the card.
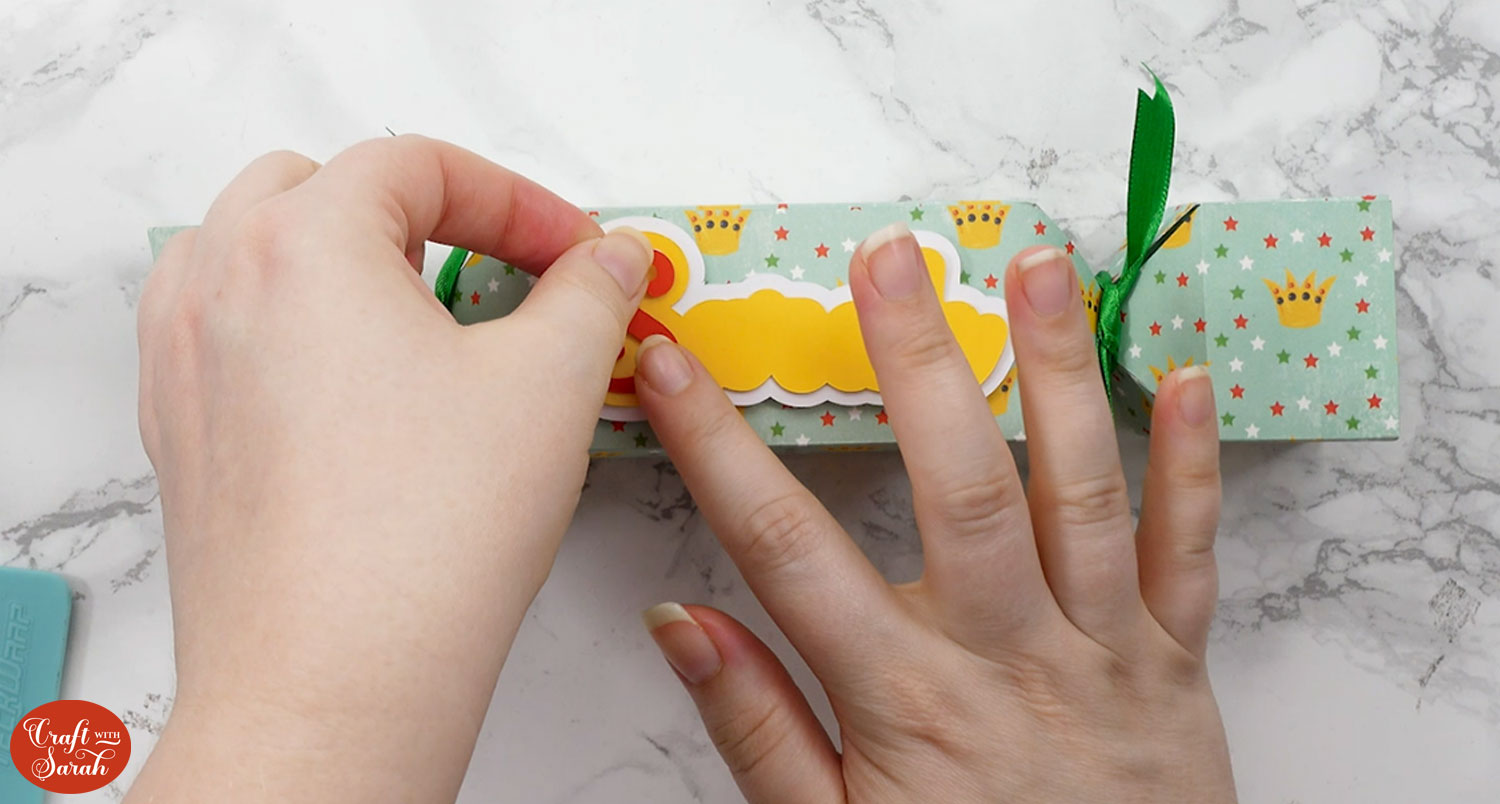
If you are adding a name to the cracker, use glue or foam squares to stick the pieces together.
I glued my pieces together and then used some foam squares to stick the name onto the cracker.
DIY Christmas crackers with a BANG!!
Now your bespoke Christmas cracker is finished! How easy was that?!
Now you can make them for all your Christmas dinner guests.
These are so much more exciting than the standard crackers you can buy in the shops at Christmas!
I can’t wait to see all the different patterns and designs you use for yours.
Happy crafting,
Sarah x

