CCC 2023 Day 09 ☃️ Hanging Bird Decorations
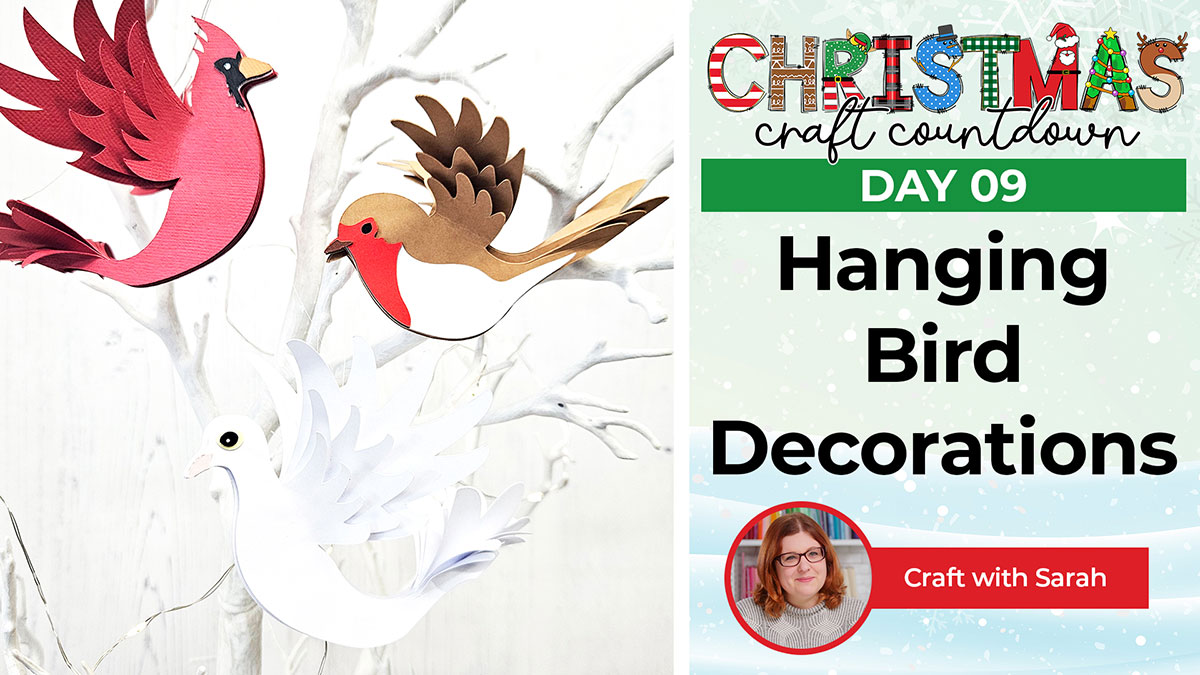
It’s so easy to make these papercraft bird decorations to hang on your tree this Christmas.
They have lots of pieces to them which makes them really sturdy and realistic.
They hang from the tree beautifully and look so lifelike with all the feather details.
Three designs are included: a cardinal, robin and dove.
This Project was part of the Christmas Craft Countdown 2023
Materials supply list
Here is a list of the materials that are required to make this project.
Please note that some of the links included in this article are affiliate links, which means that if you click through and make a purchase I may receive a commission (at no additional cost to you). You can read my full disclosure at the bottom of the page.
- Cricut machine
- Light blue Cricut cutting mat
- Cardstock in various colours
- Glue
- 3D foam pads
- Thread or ribbon (I used a transparent thread)
This project is suitable for the following types of Cricut machine: Explore Air 2, Explore Air 3, Maker, Maker 3, Venture, Joy Xtra and Joy.
Video tutorial for hanging bird decorations
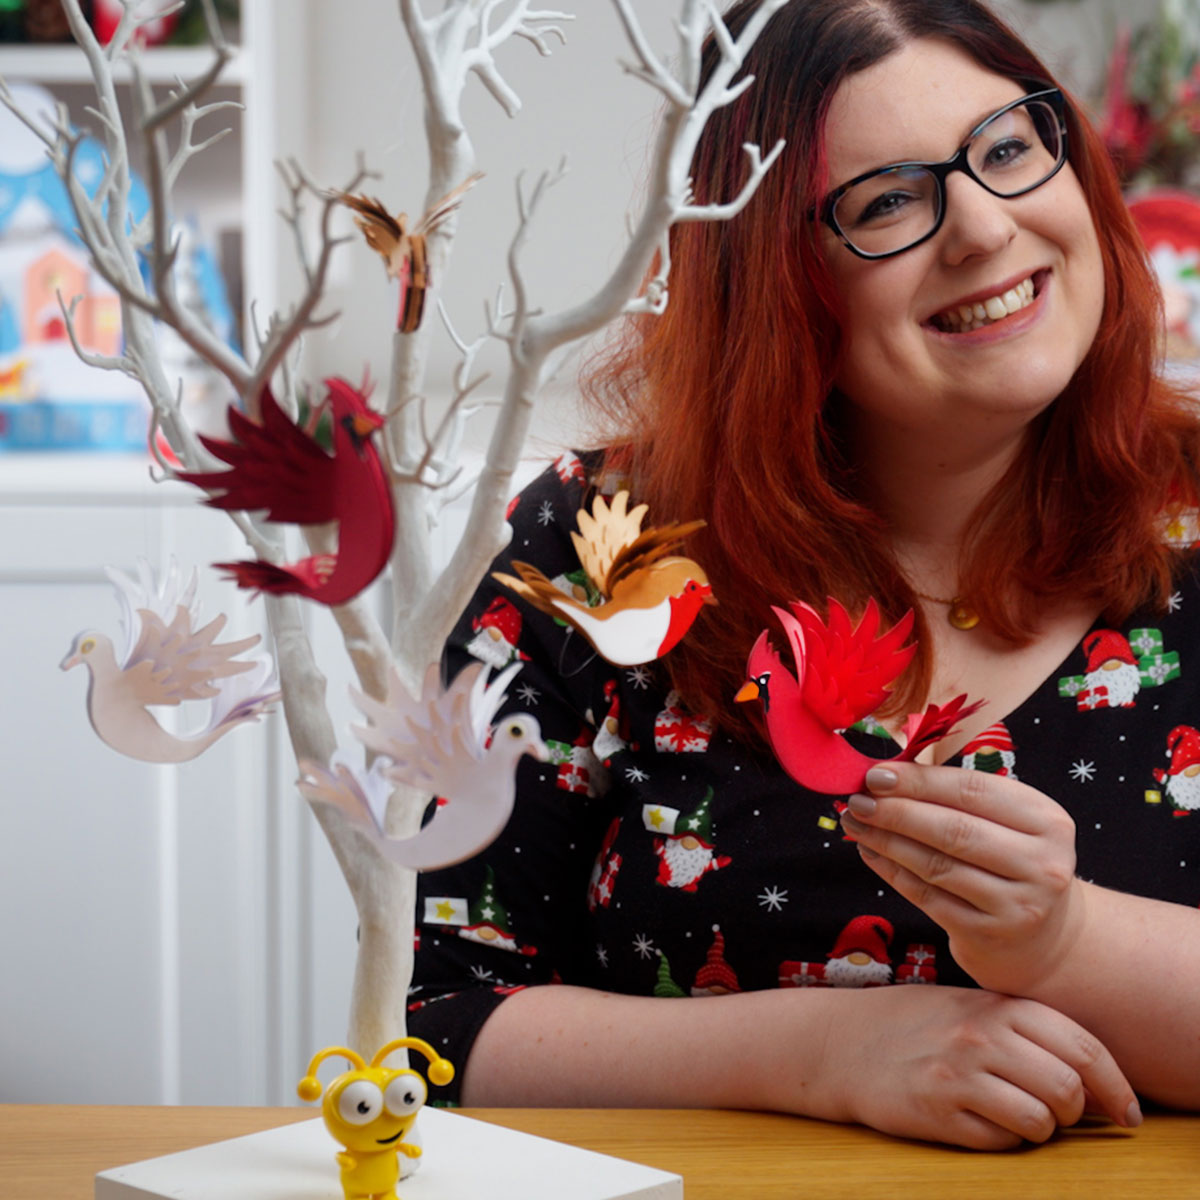
I love the depth to these bird papercrafts and the details in their wings; they look so realistic!
Watch the video below to see how to make them.
If you prefer to read rather than watch, keep scrolling!
DIY paper birds
Here’s how to make your very own robins, cardinals and doves with a Cricut machine.
Step 1) Download the cutting file(s) & unzip the downloaded folder
Download the files using the box below.
Purchase the File(s)
This cut file is available as part of the Instant Access Bundle.
Or, purchase this design individually here
Before you upload the SVGs to Design Space, you need to unzip the download folder that they come in.
Step 2) Upload the SVG files into Design Space
Open up Cricut Design Space and start a new Project.
Click “Upload” and then find your unzipped version of the downloaded files for this project.

The files to upload for Cricut Design Space are the ones which start svg- in the filename.
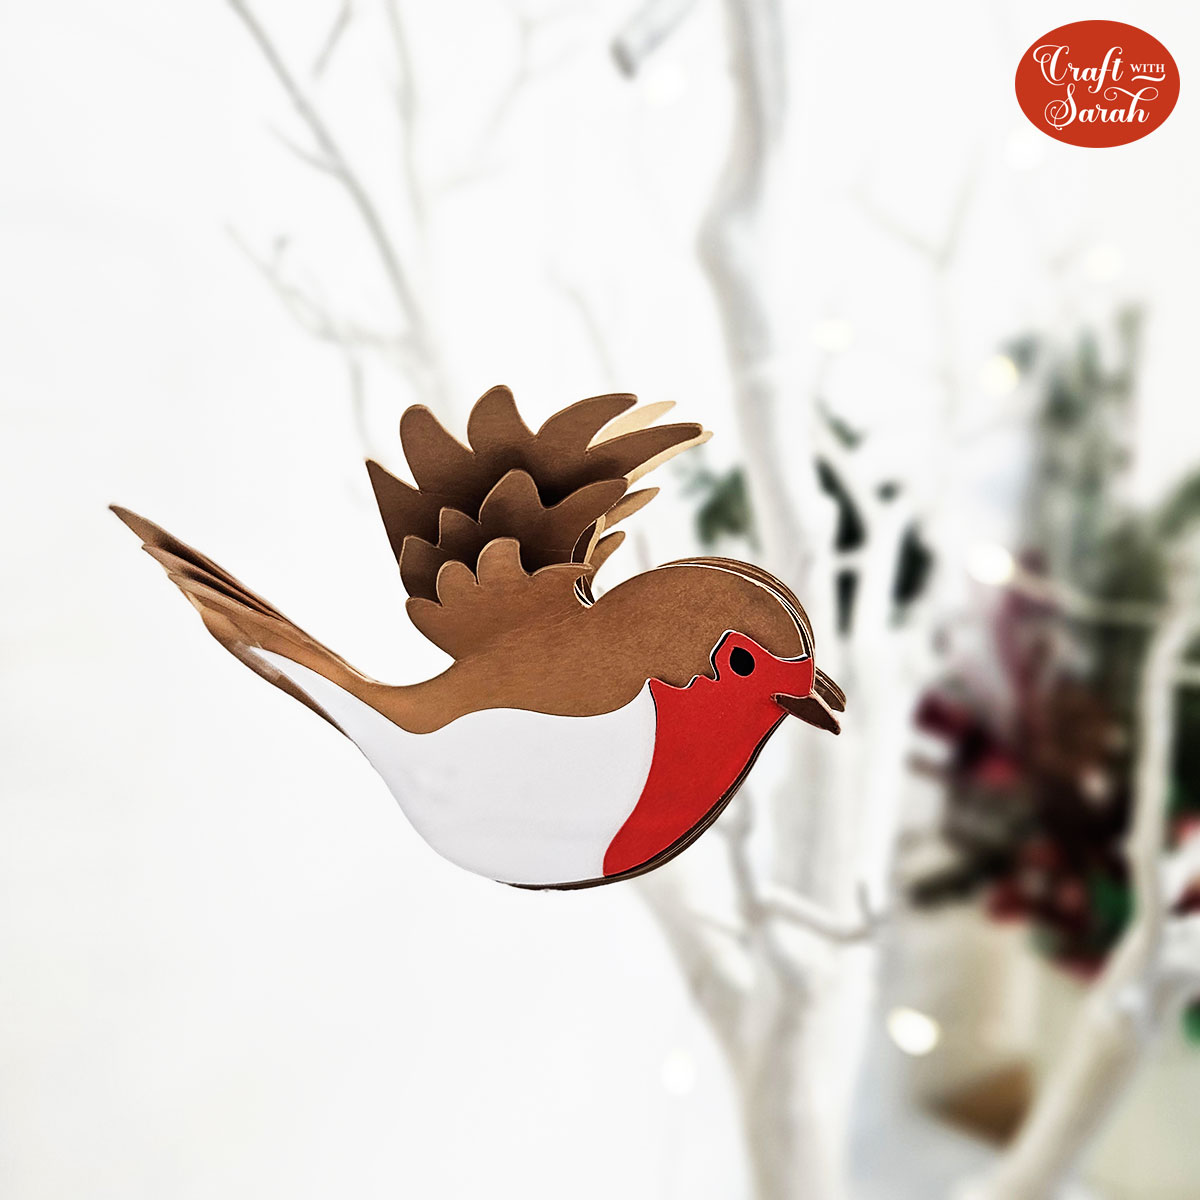
For this tutorial, I’m showing how to make the cardinal bird, but the dove and robin work in exactly the same way. Referring to the assembly guides will help you to get each piece exactly where it needs to be.
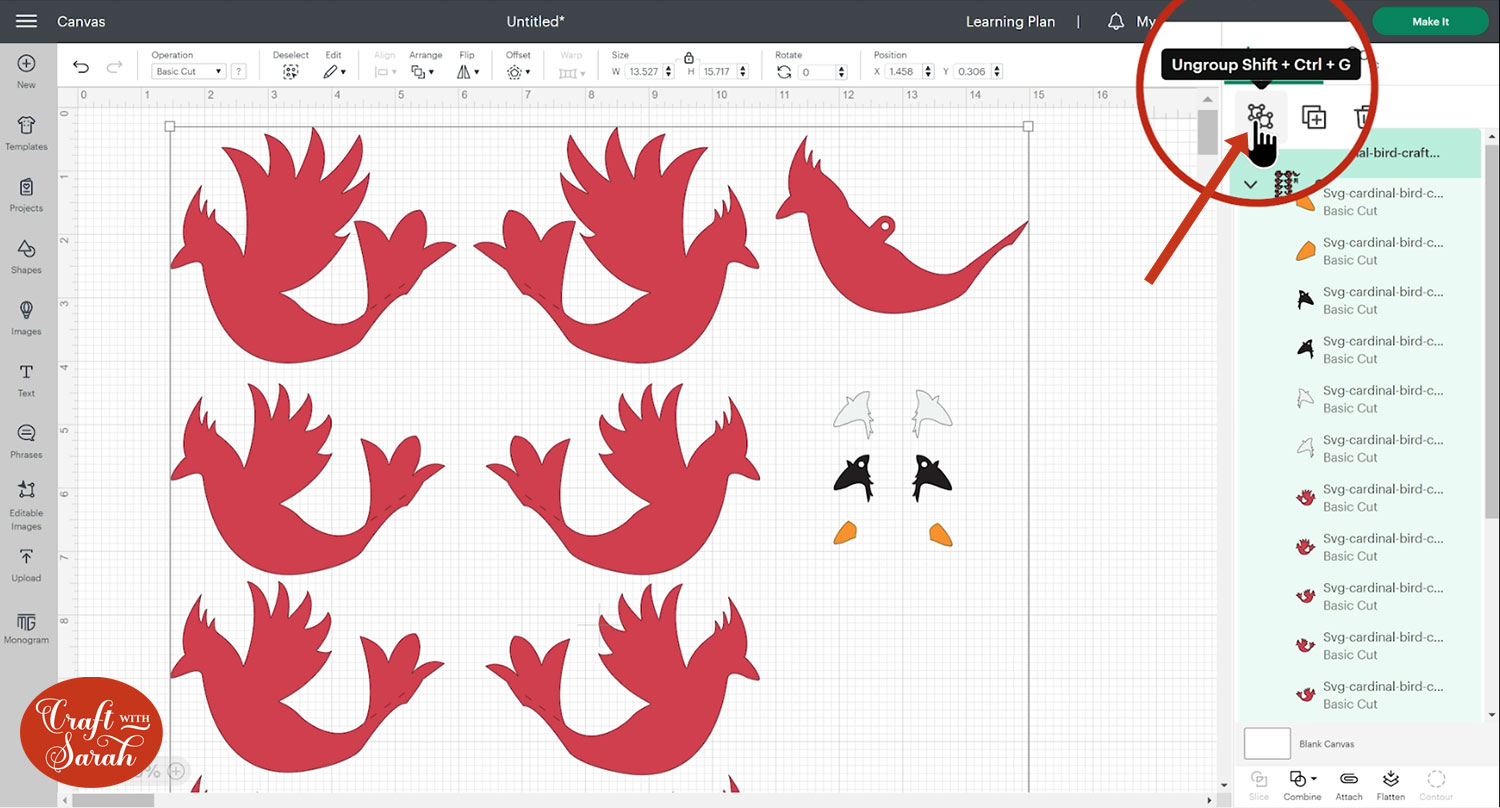
This is what the birds look like during the upload process:
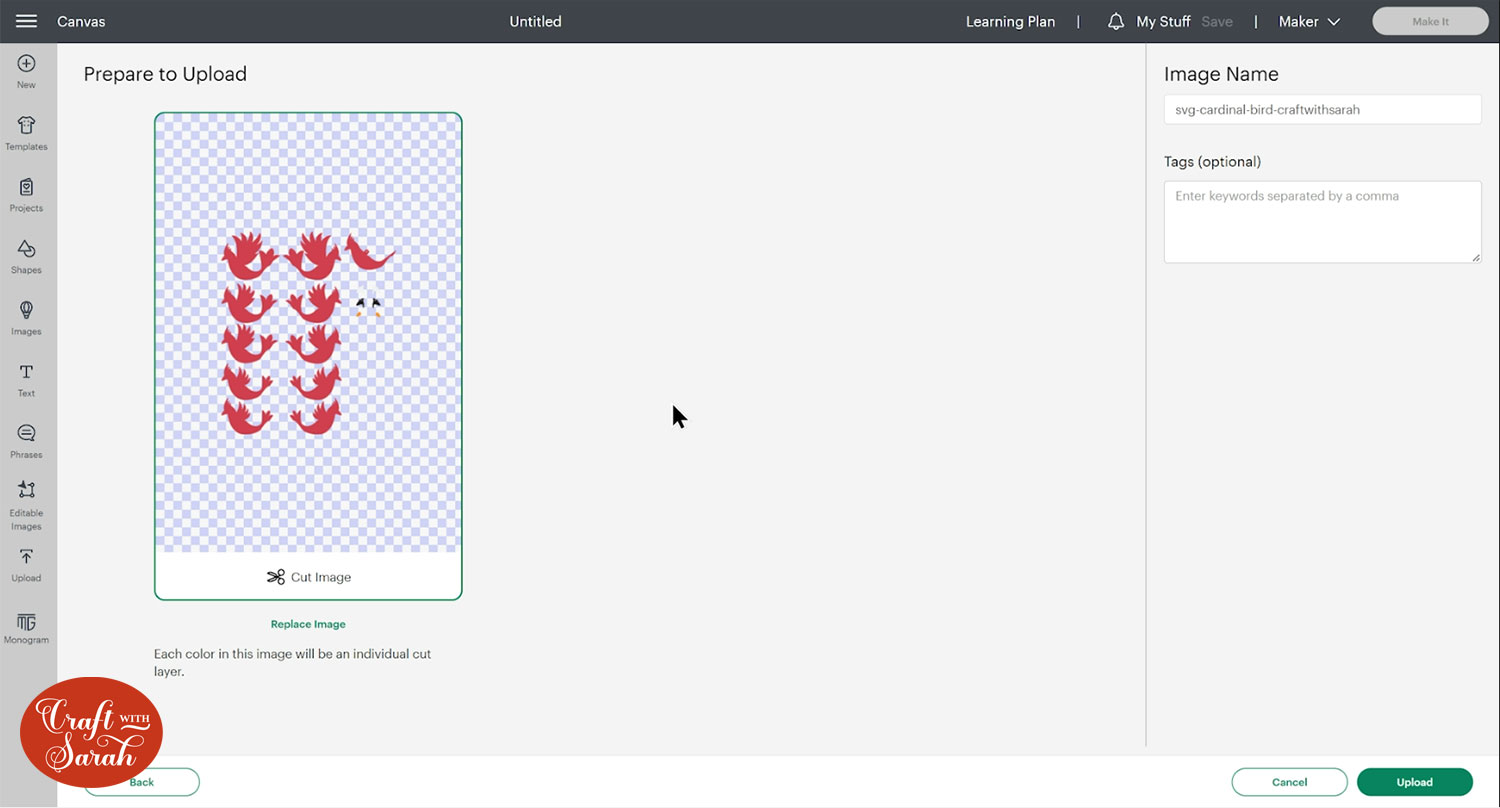
Make sure you upload the files which start svg- in the filename!!
You may notice that the files look different to my regular ones. The layers are next to each other instead so that it’s easier to see what you’ve got to work with.
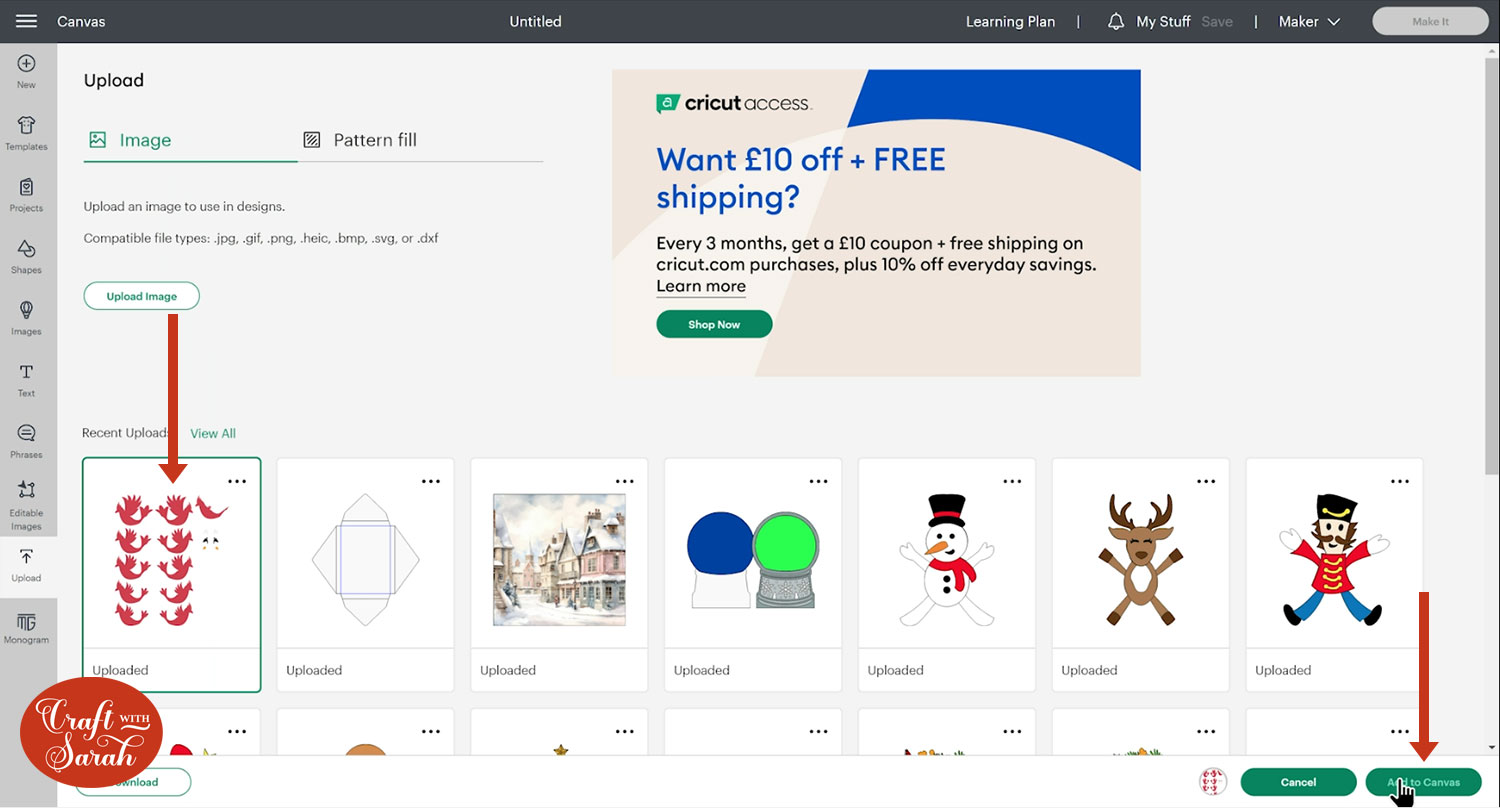
After uploading, the design will show in your “Recently Uploaded Images”.
Click on it and then press “Add to Canvas” to put it onto your Project.
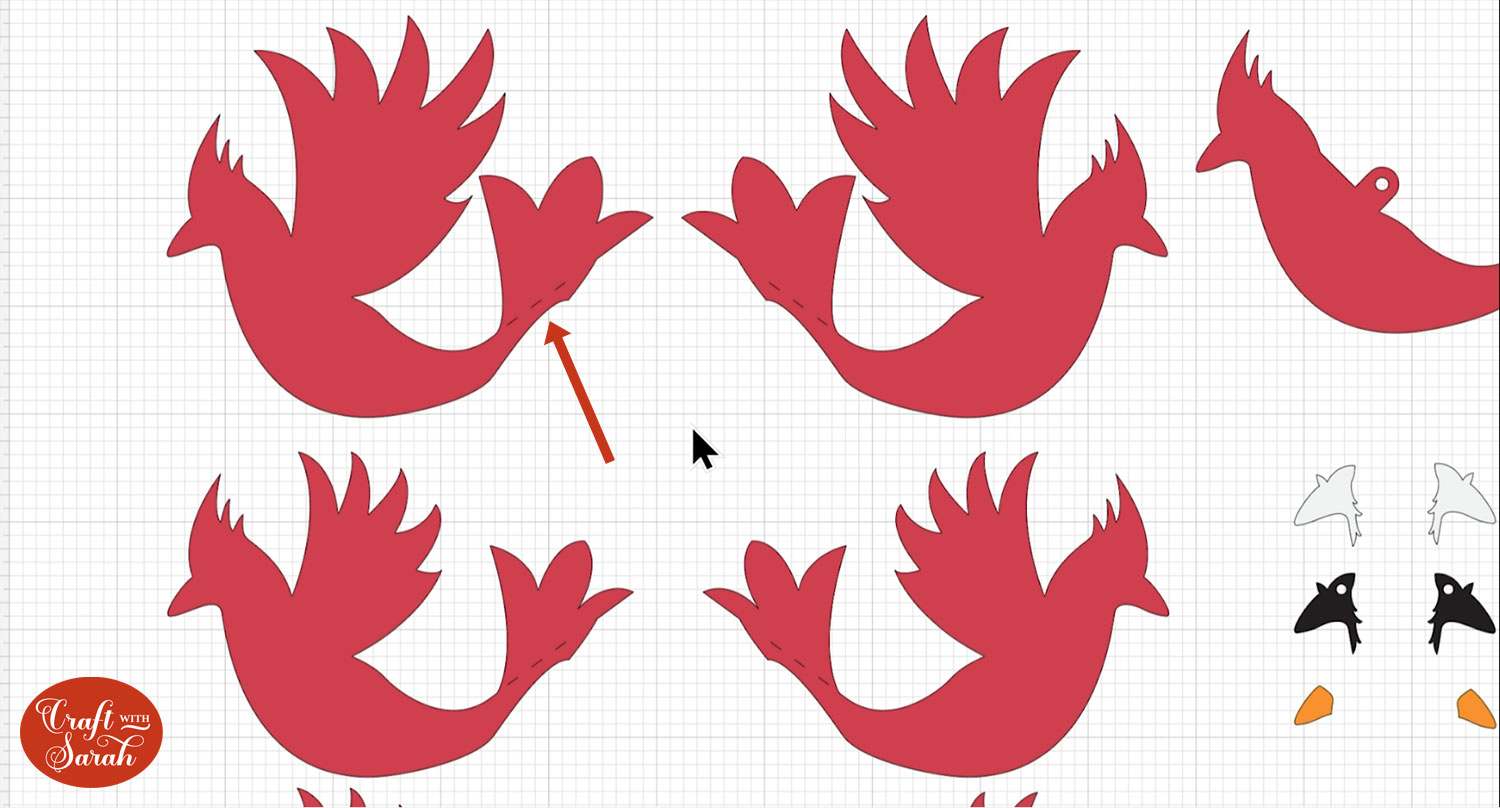
You may spot the dashed lines in the tail. These are tiny cut lines to help us fold the tail later on.
Step 3) Size the bird cut files
The birds should all load in at the appropriate size so you don’t have to make any size changes if you don’t want to.
However, if you would like to make the birds at a particular size then here’s how to do it.
To check what size it is already, locate a layer which has the biggest wings which will be one of the first ones in the layers panel.
You will see that the larger layer is 4.51 x 3.73 inches. Once it is cut out, we will be bending the wings over slightly so it won’t be quite as tall.
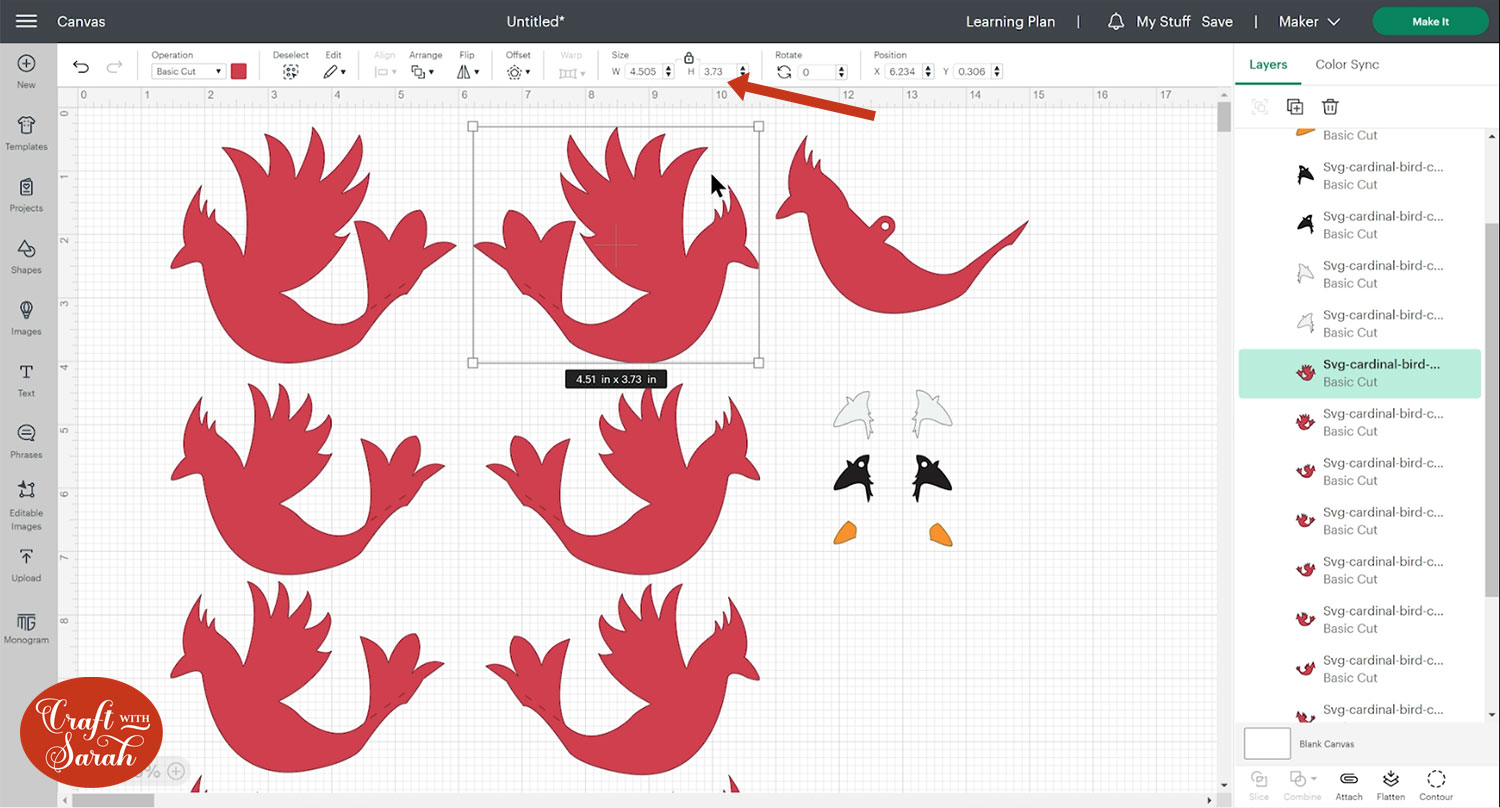
To change the size, click the design and separate out the layers using the Ungroup button.
With everything still selected, go to Align > Center.

This puts all the layers on top of each other.
It looks a bit messy on the screen, but this is the easiest way to set the bird to a certain size.
Make sure all layers are selected, then press Group.
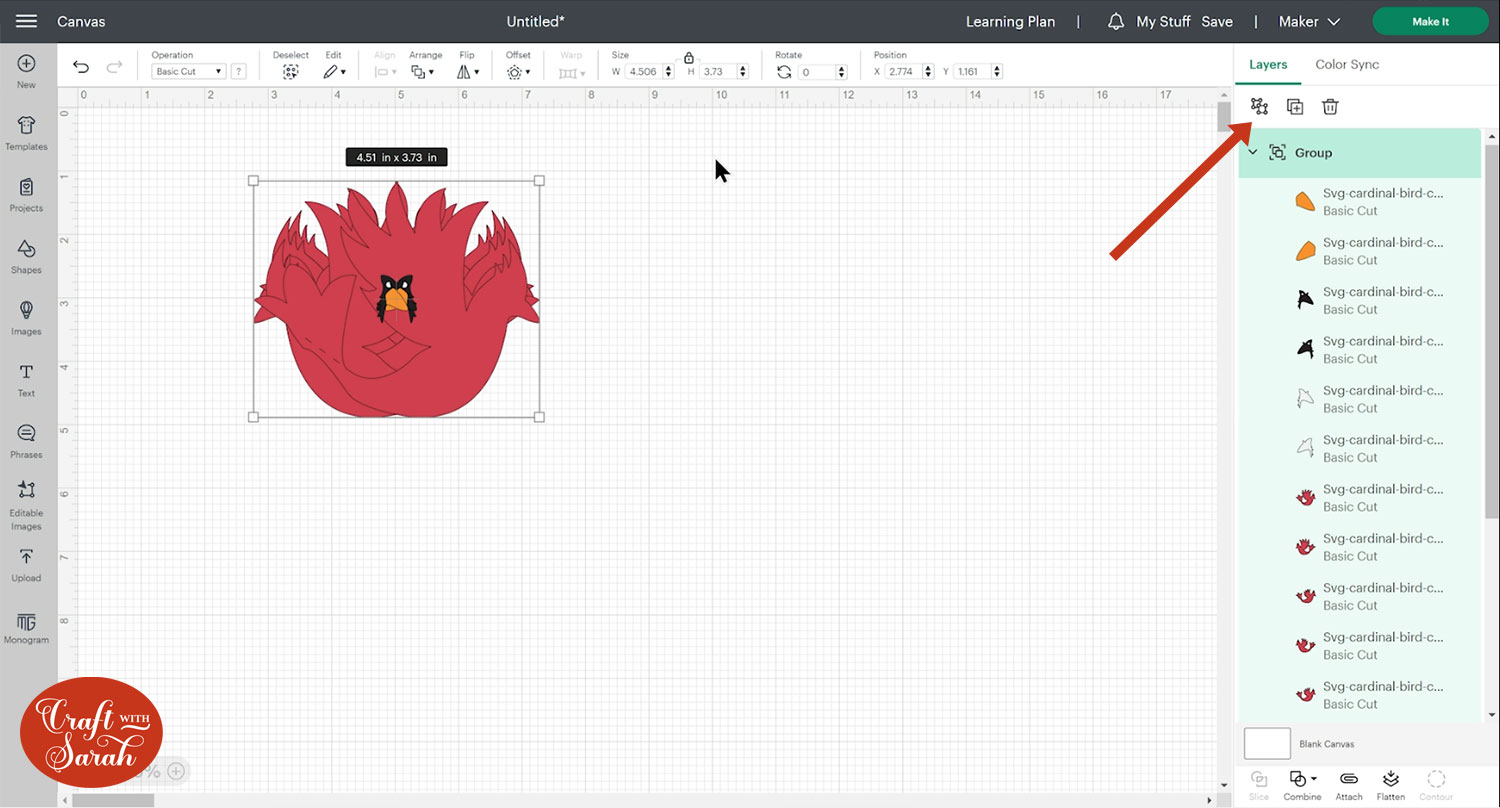
Your group’s size is now the exact height and width of the largest layer of the bird.
That means you can resize the Group and all the pieces will change in proportion.
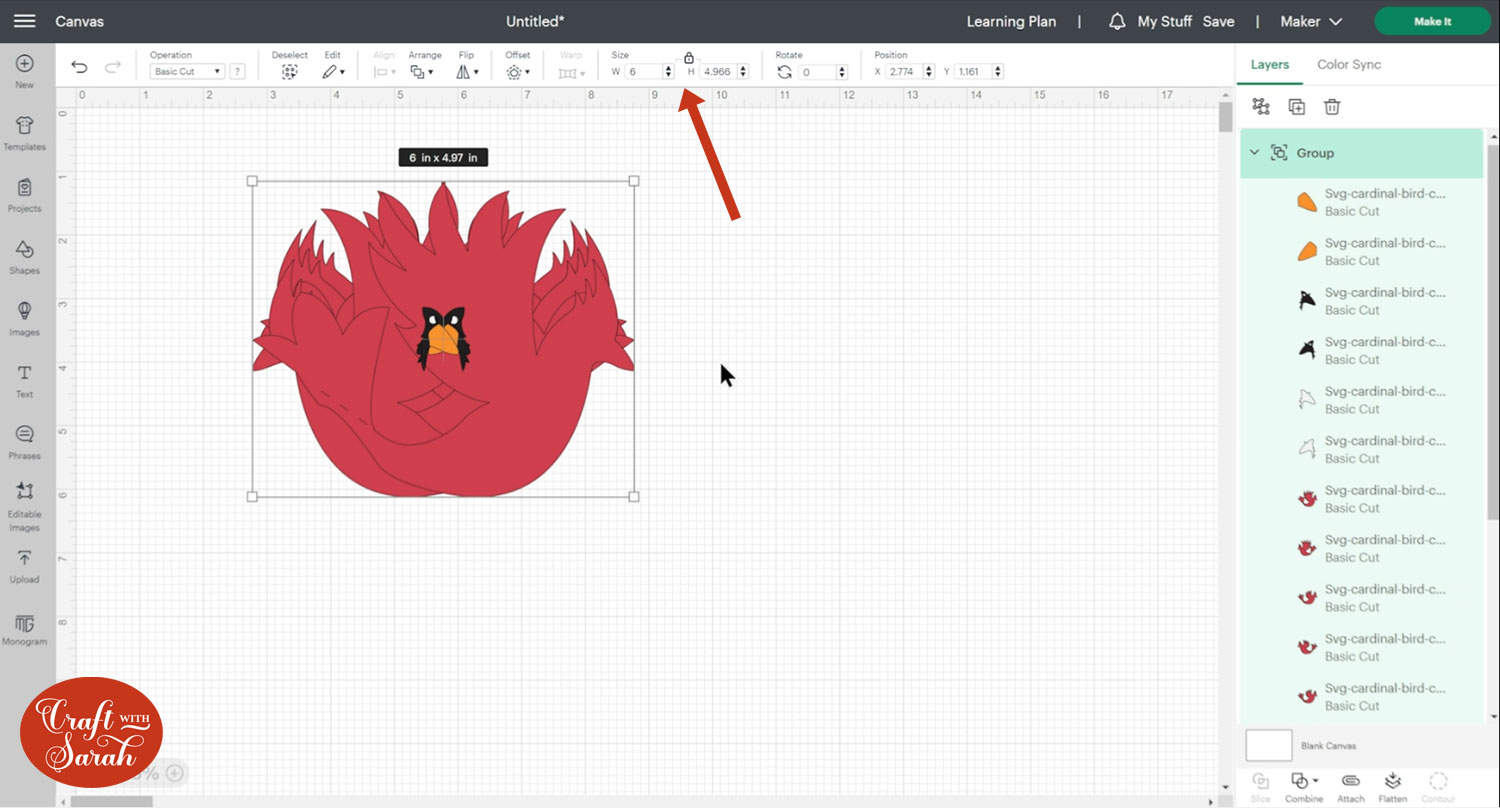
Make sure the padlock icon above the width and height box is closed when you are resizing. If it’s open, click it to close it.
For instance, here’s how the cardinal bird could look at 6 inches wide:
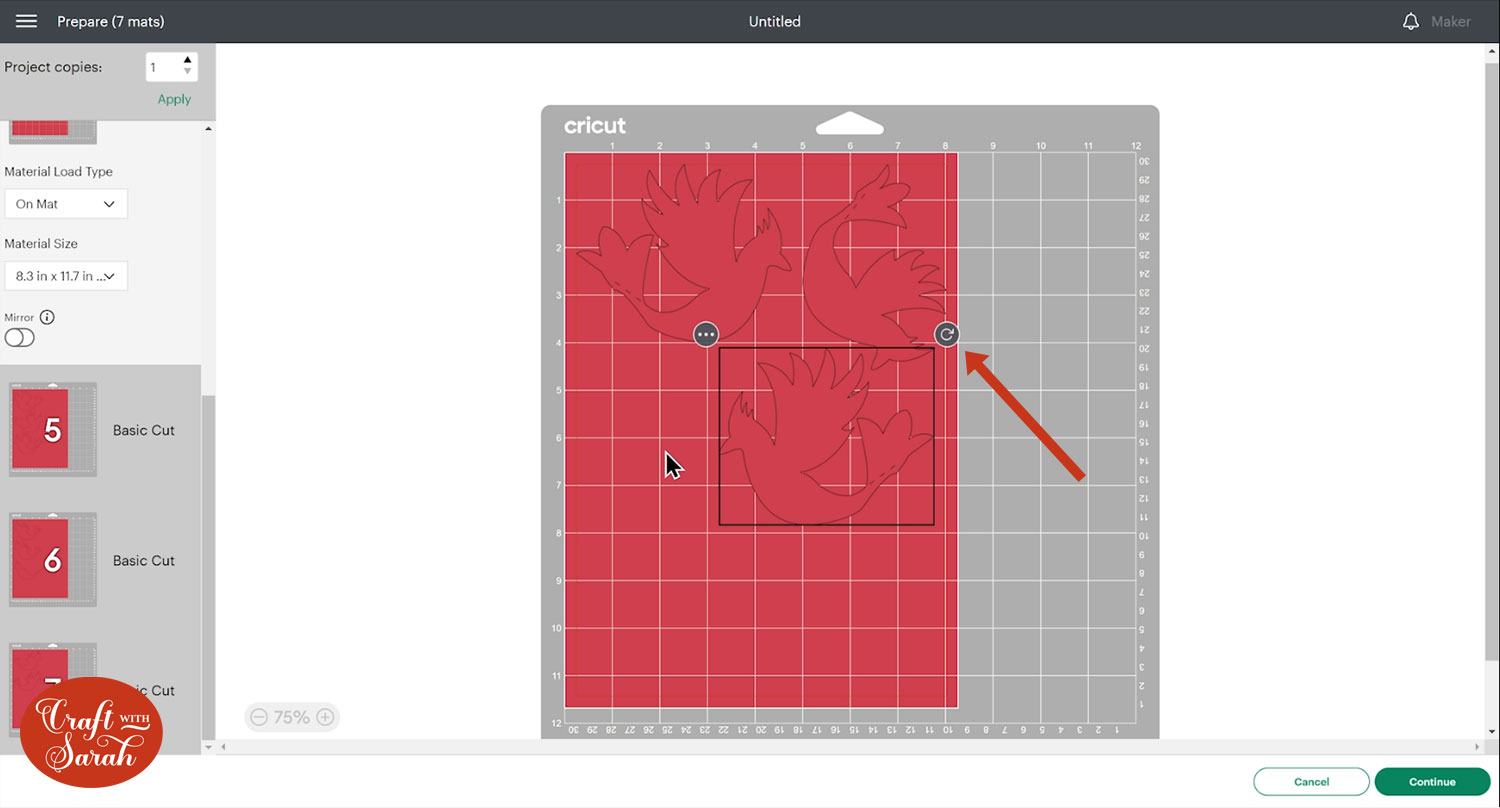
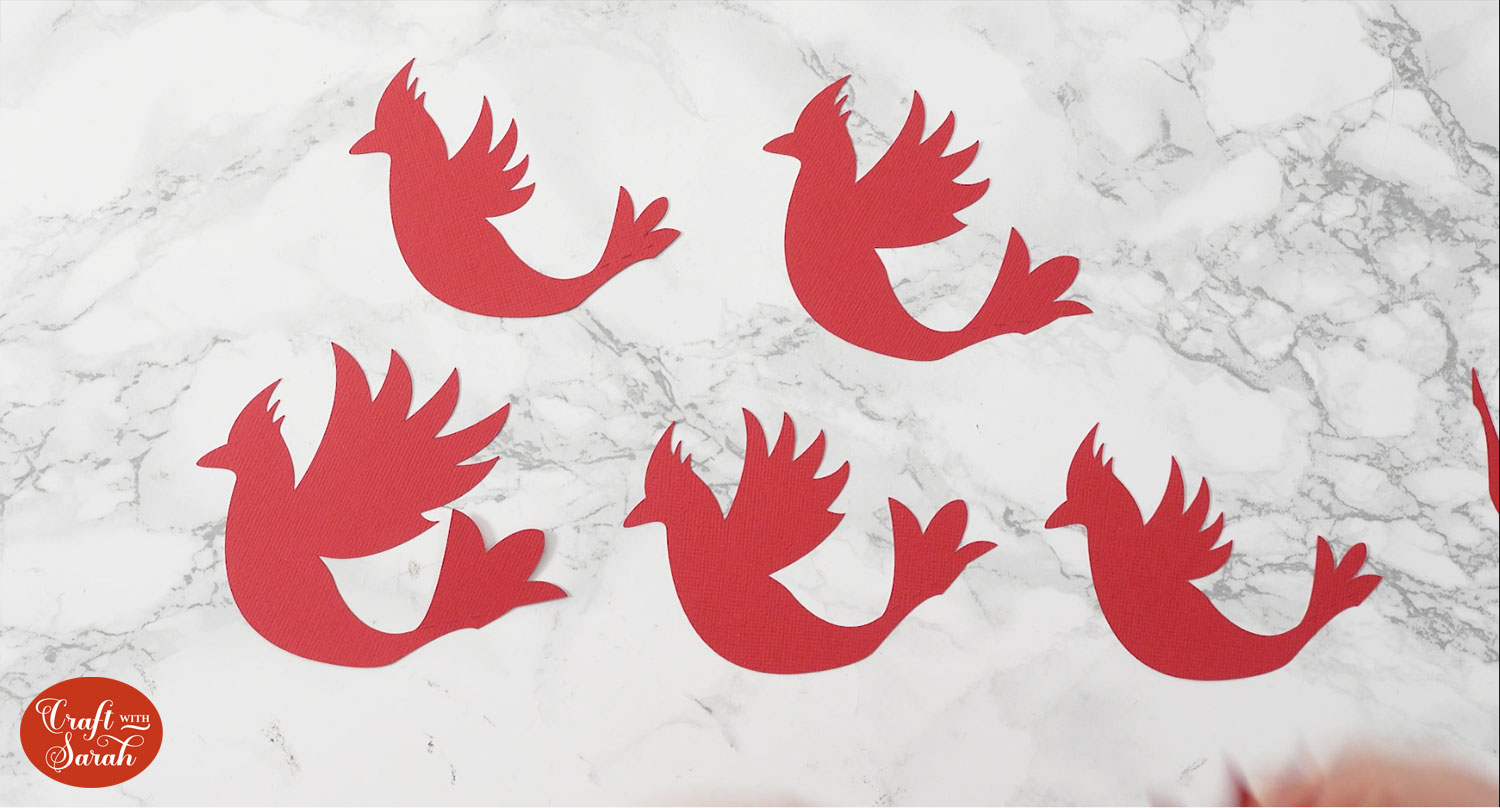
Once you’re happy with the size of the bird, click “Make It” and follow the on-screen instructions to get everything cut out from cardstock.
You may want to move the pieces around on the page to save cardstock.
Step 4) Stick the birds together
Print out the assembly guide(s) for the bird(s) you are making, or open them on your computer so that you can refer to them to make sure the pieces are in the correct order.
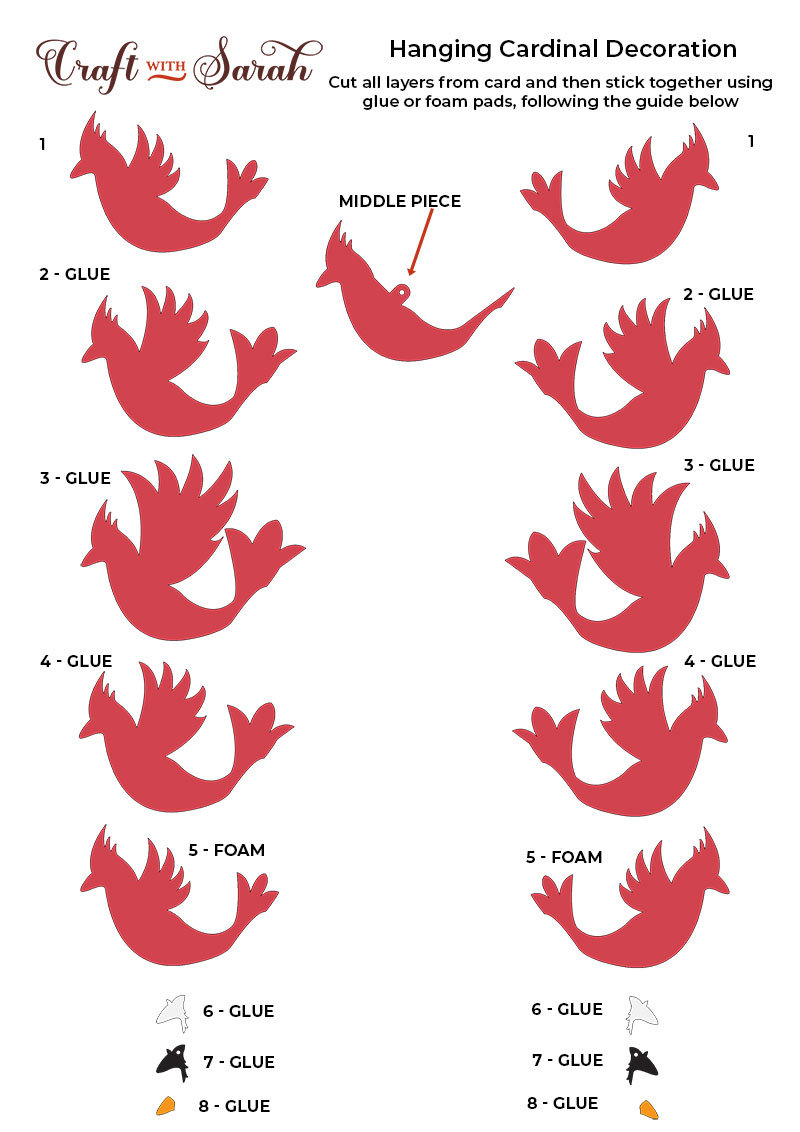
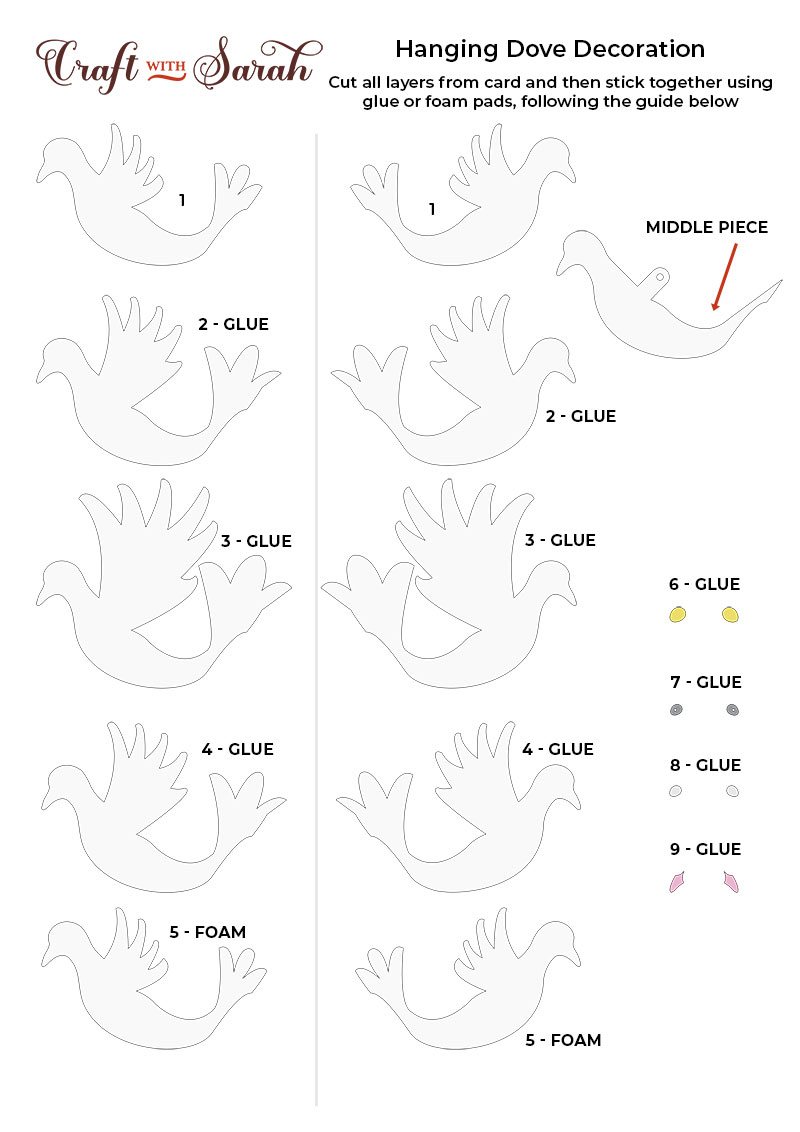
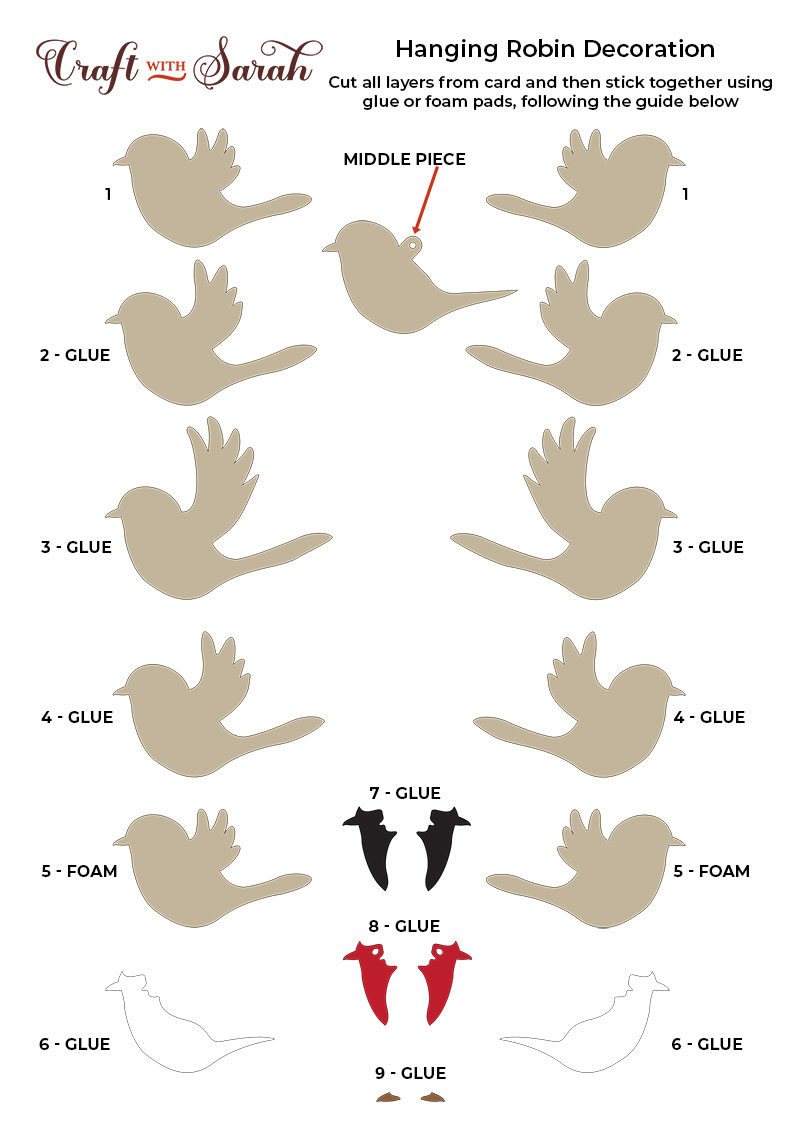
Each side of the cardinal body is separated into five pieces with a middle piece that includes the hole that you will use to hang it. You will also have the little face pieces.
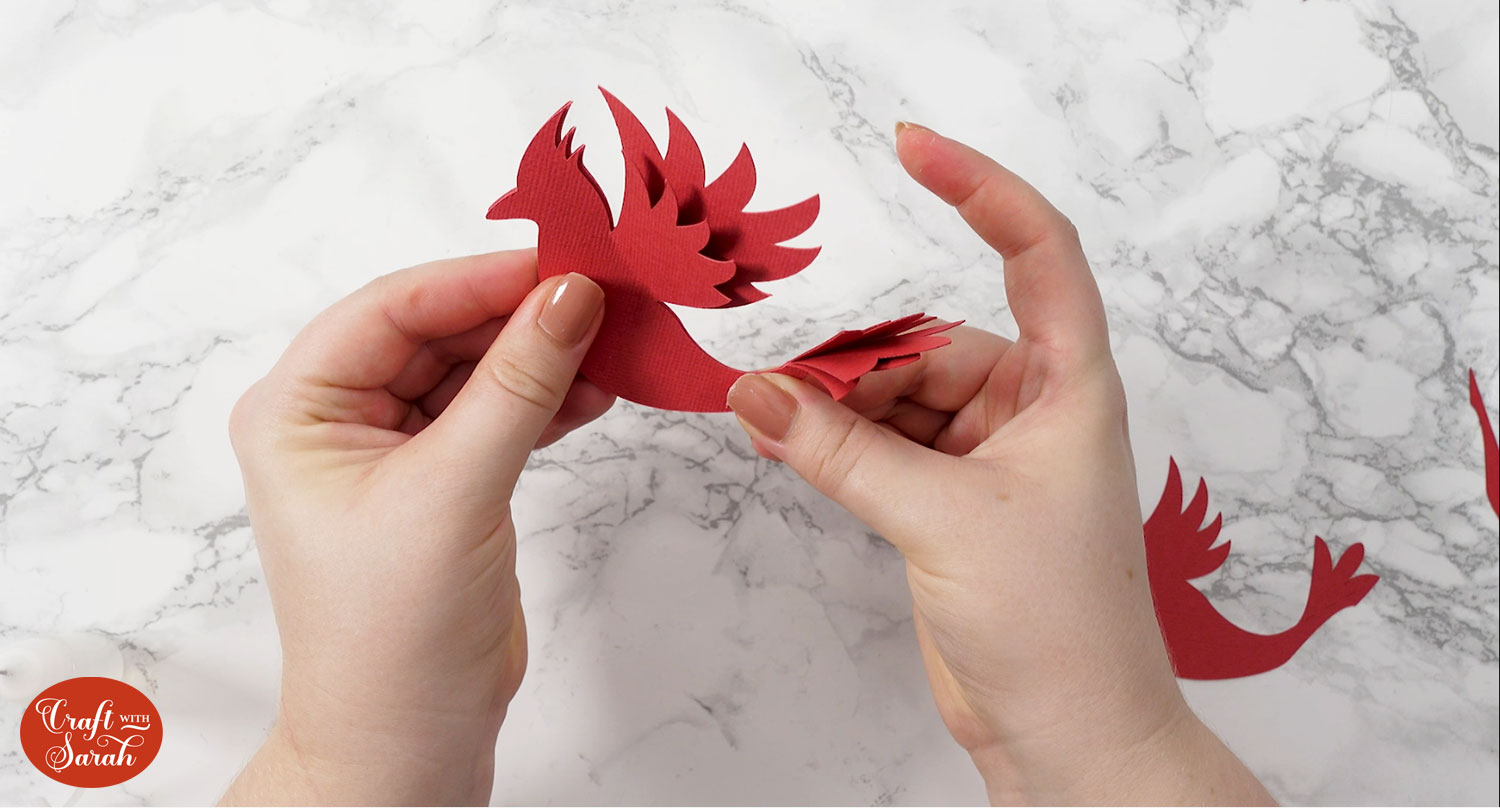
Starting with one of the sides, it may help to lay out the pieces which will start smaller, get bigger and get smaller again to create depth. We will glue them in this order.
Take the first piece and fold out the tail along the small cut lines. The wings are more of a gentle bend.
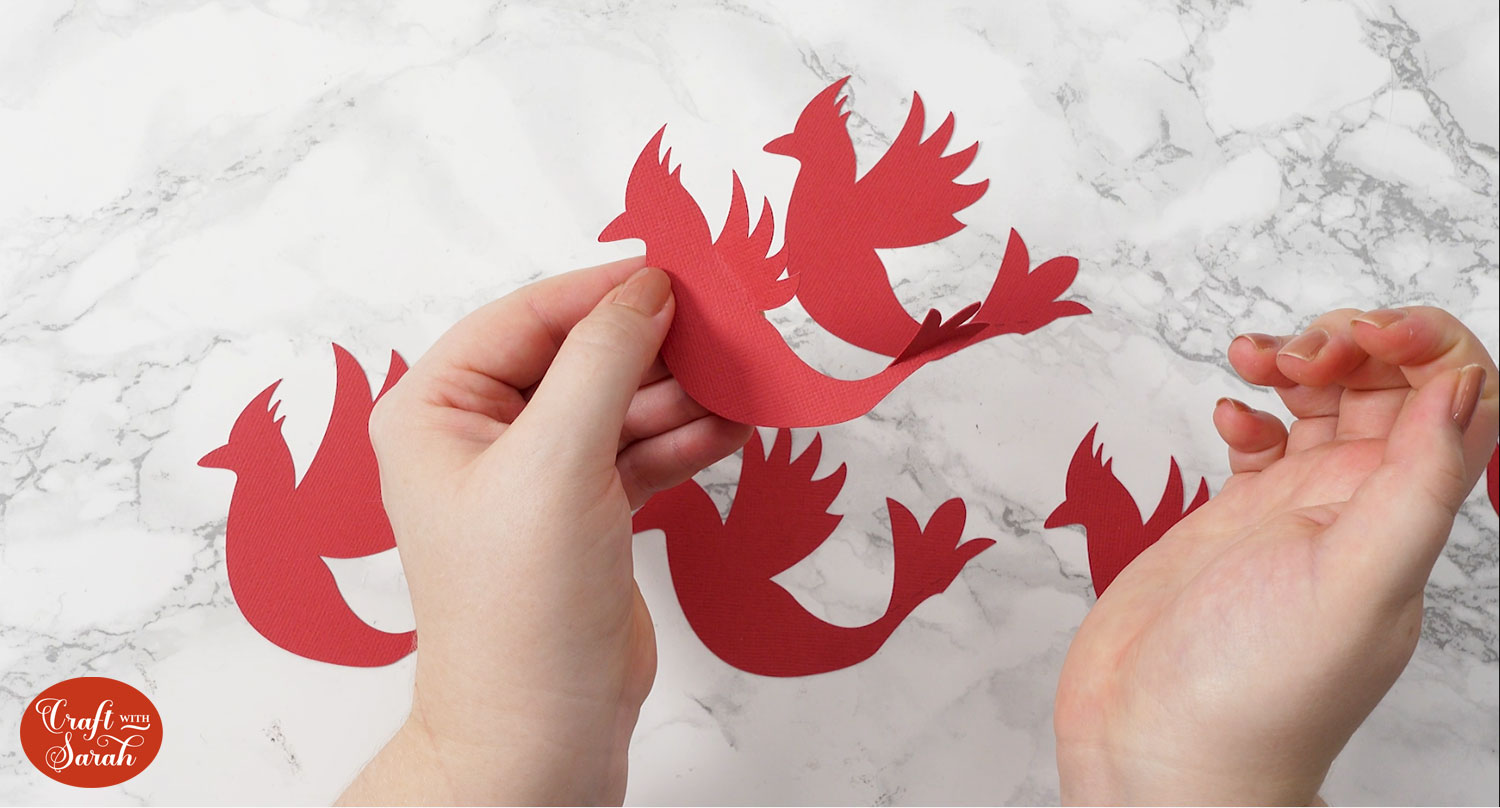
Find the next piece, fold the tail and bend the wings. Glue it to the first piece, using the head and body to line it up.
Make sure you don’t add glue in the areas that are folded outwards.
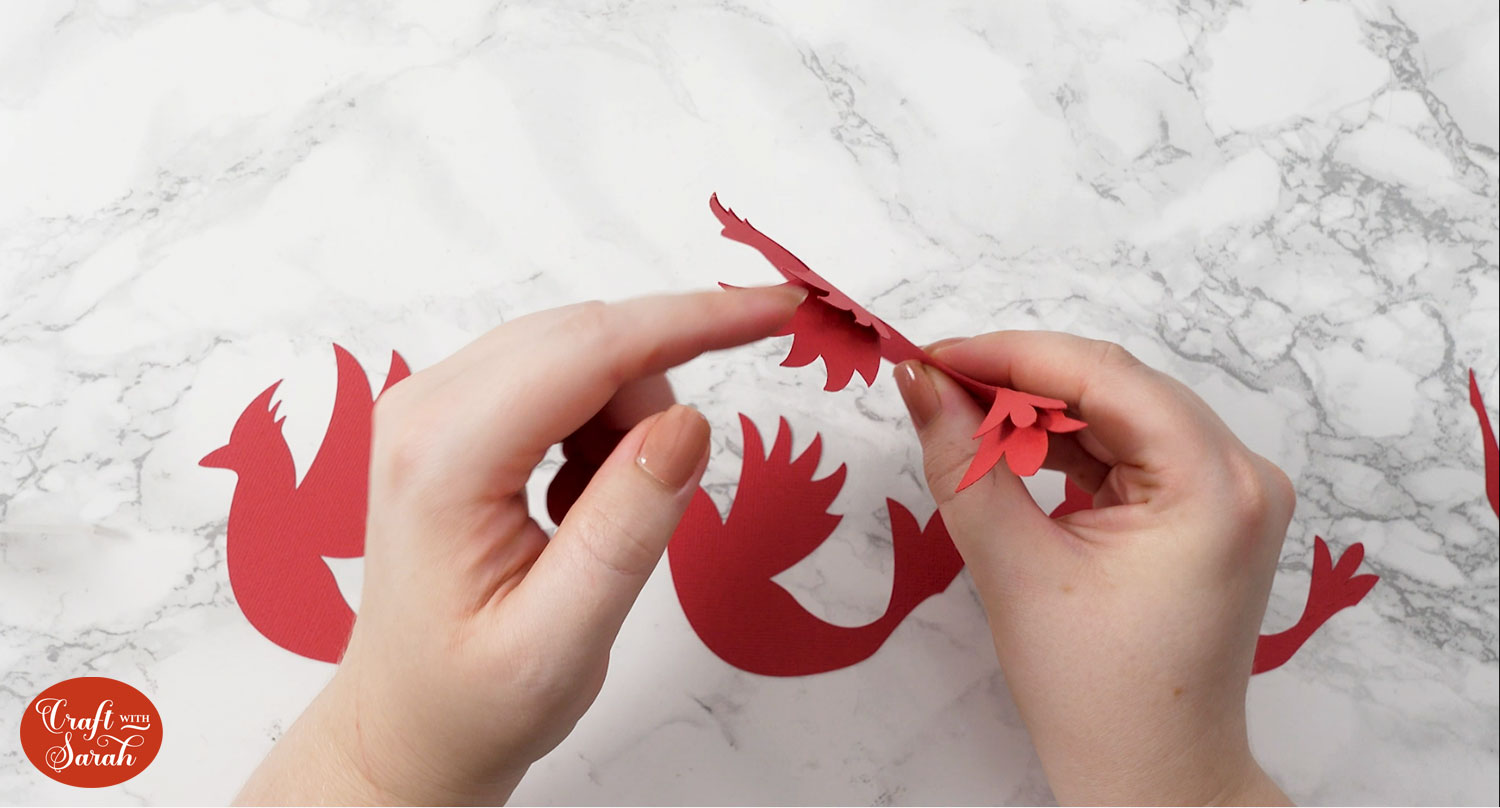
Don’t worry if the wing/tail effect doesn’t quite look as you’d like it to now, we can fix that at the end.
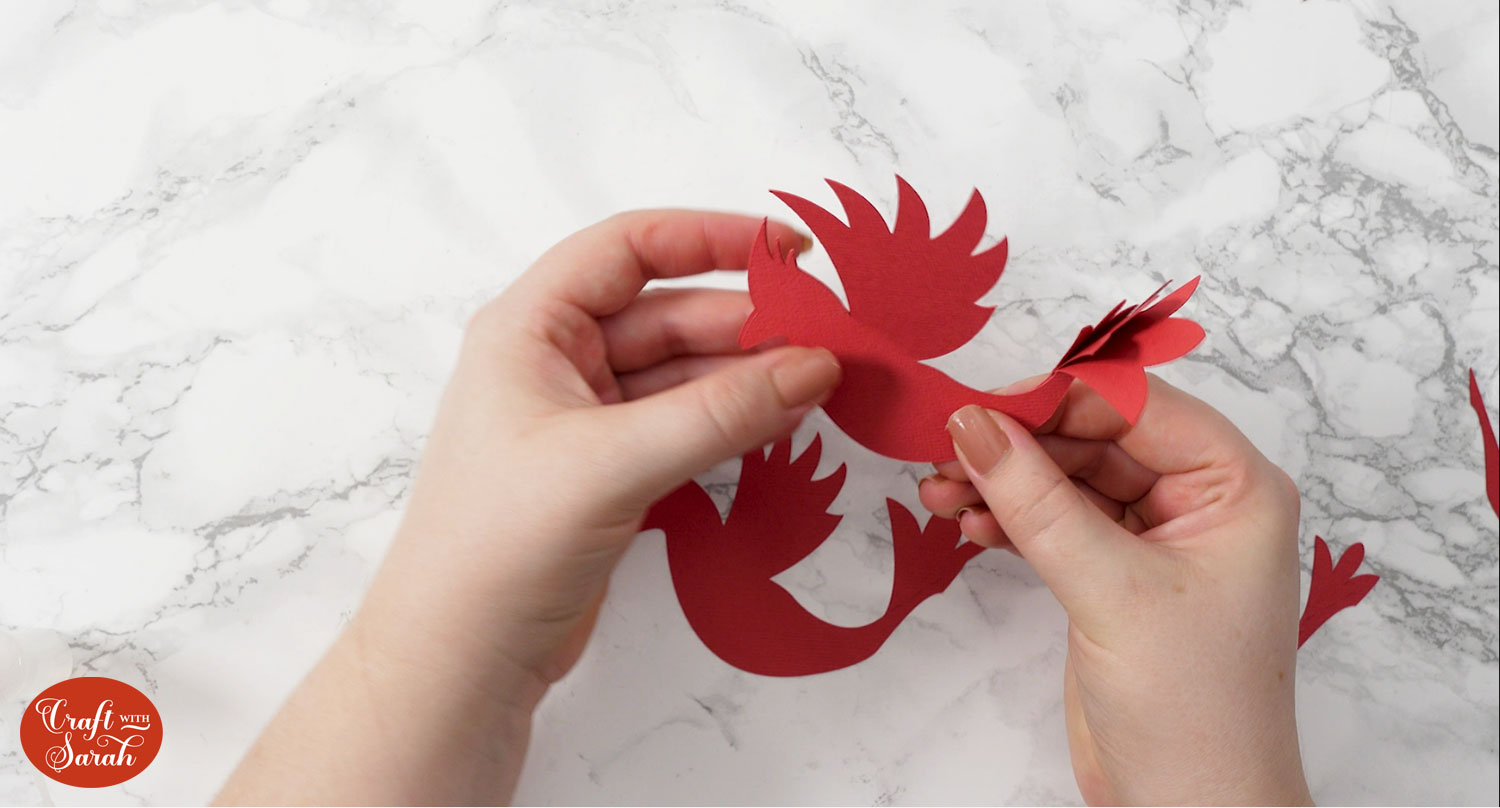
Fold and glue the third bird shape.
Fold and glue the fourth bird shape.
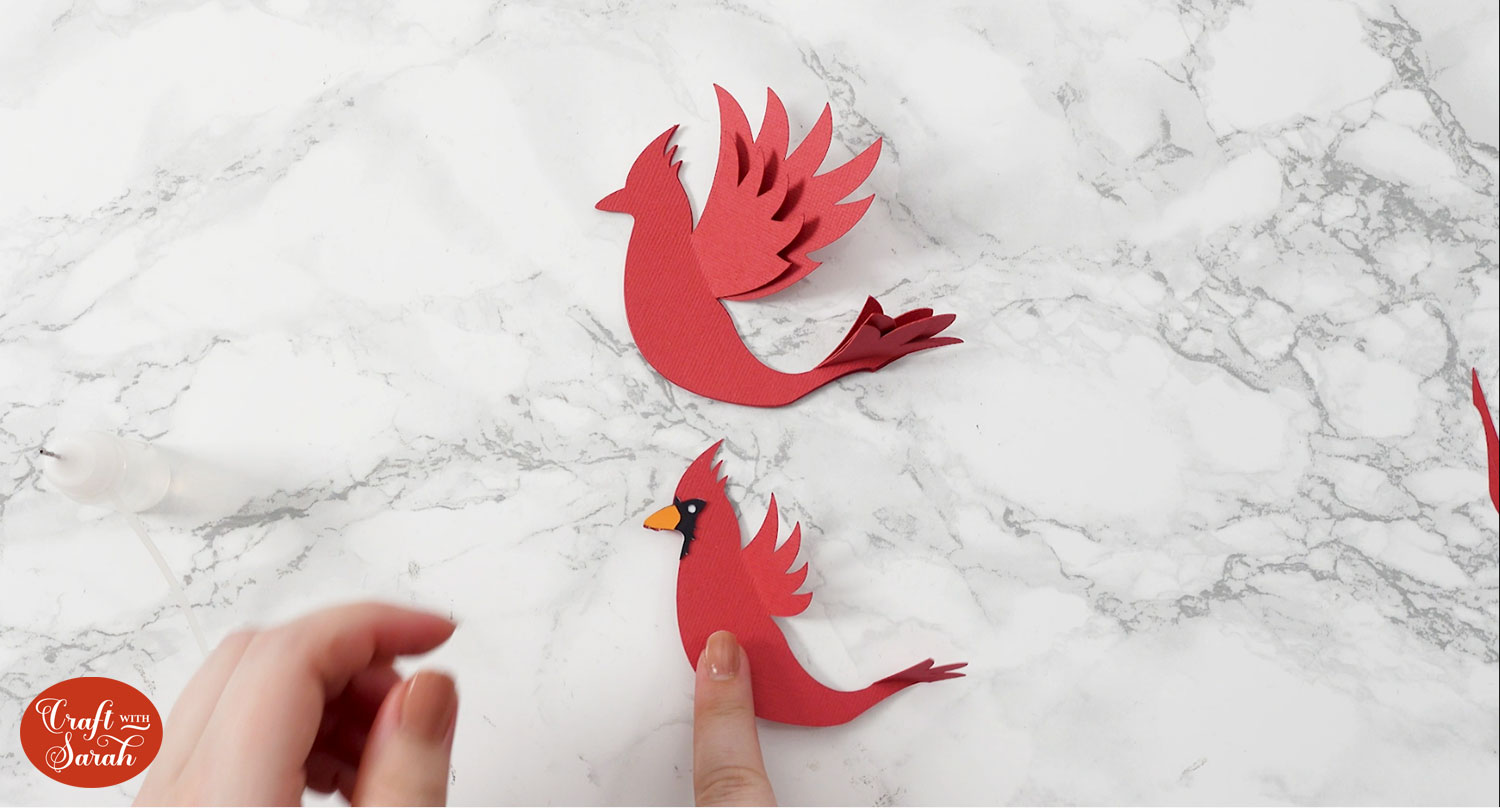
Glue the face pieces to the final layer (fifth body piece). There are a few more pieces for the robin.
Whilst allowing the glue for the face pieces to dry, you may want to begin working on the other side before sticking the final piece on.
Use foam squares to stick the final pieces to each side of your bird to give it one last pop of dimension. You can use glue if you would rather.
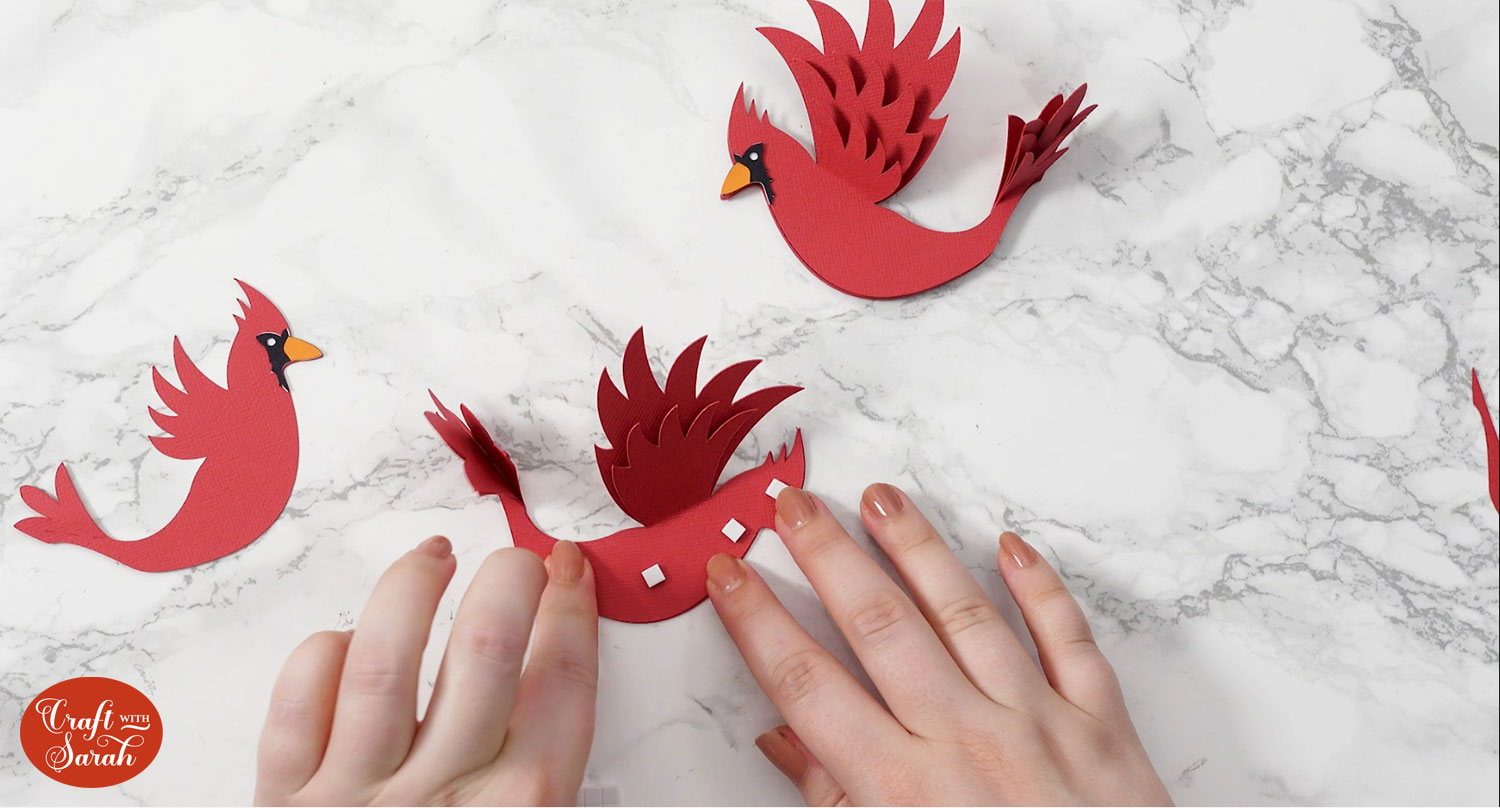
Take the middle piece of the bird that contains the hole and thread your ribbon or thread through the hole. Tie a simple knot to fasten it.
As I’m using transparent thread, it doesn’t really show up in the photo!
Glue each side of the bird to the middle section.
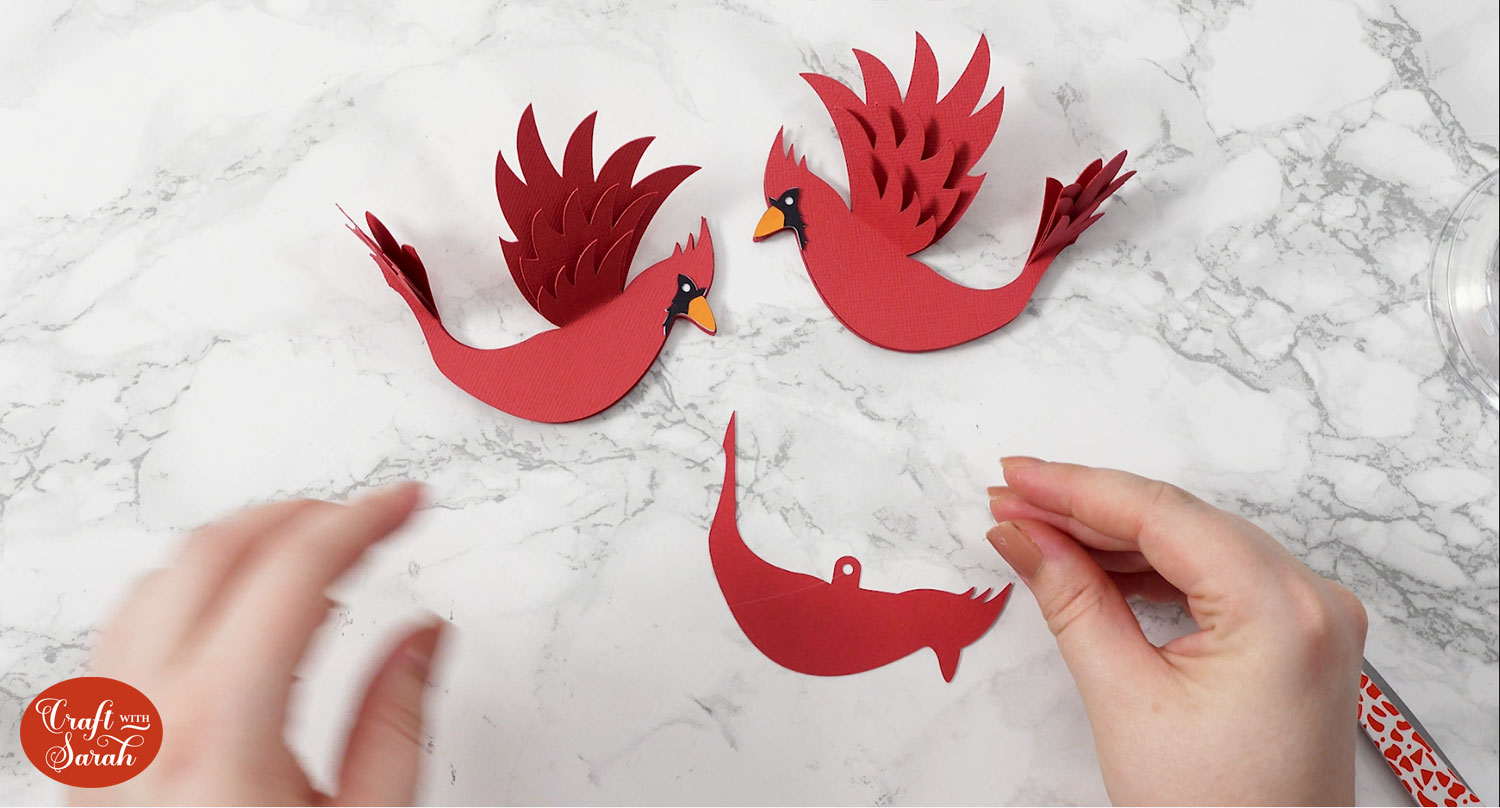
You can now play around with the wings and tail feathers to get them exactly as you would like them.
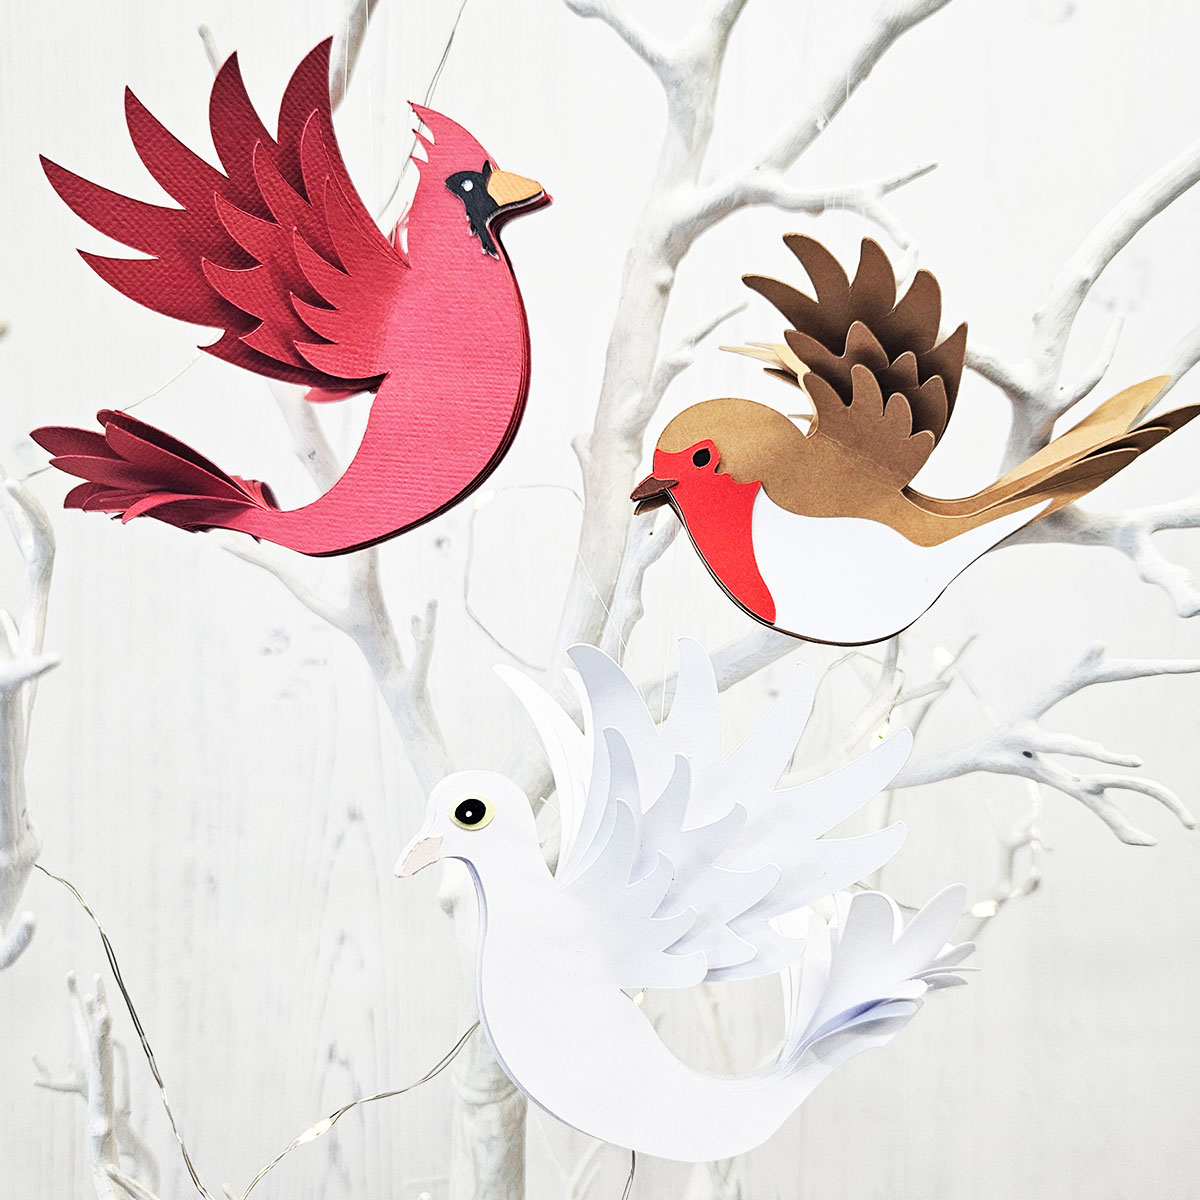
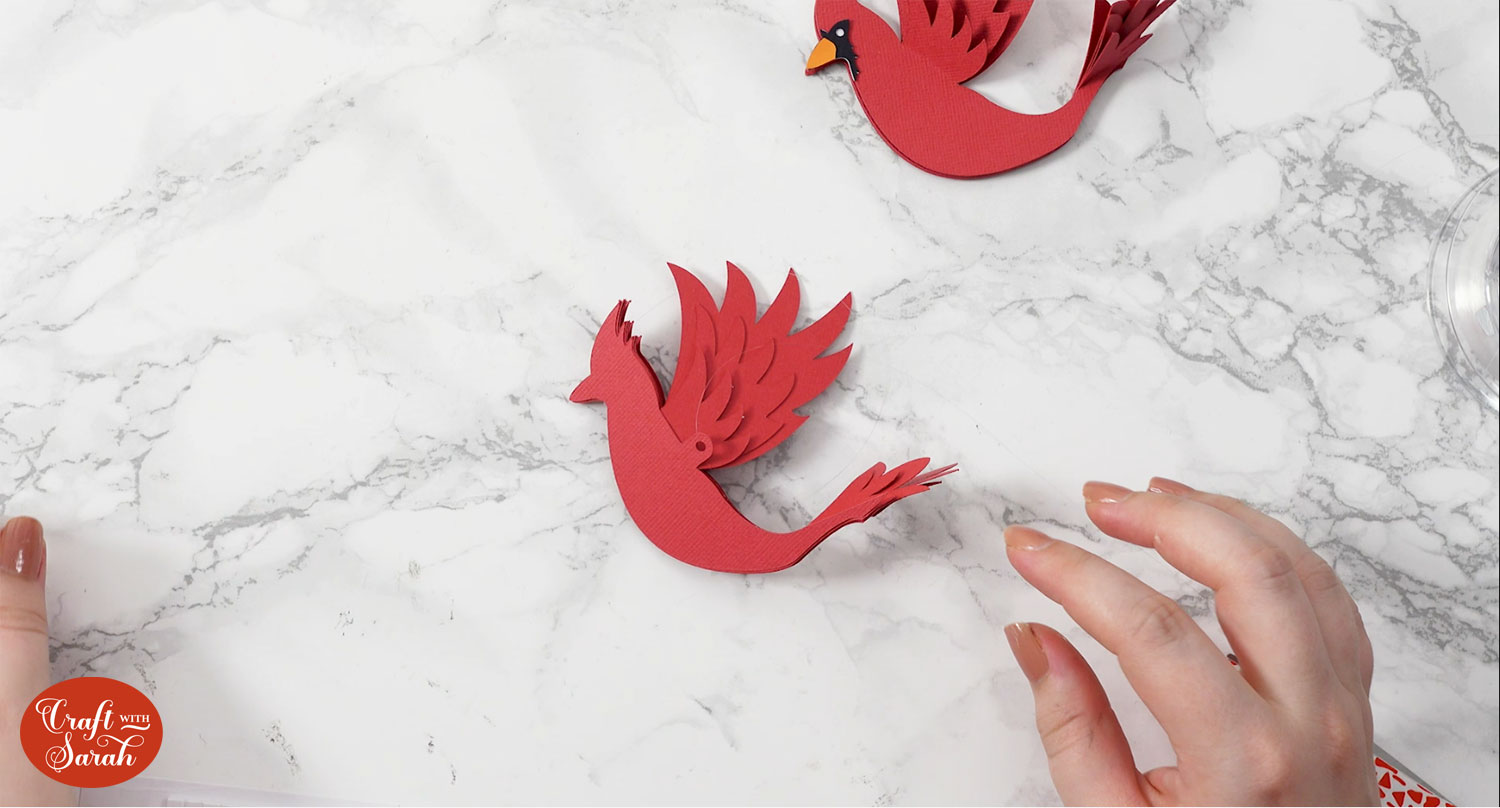
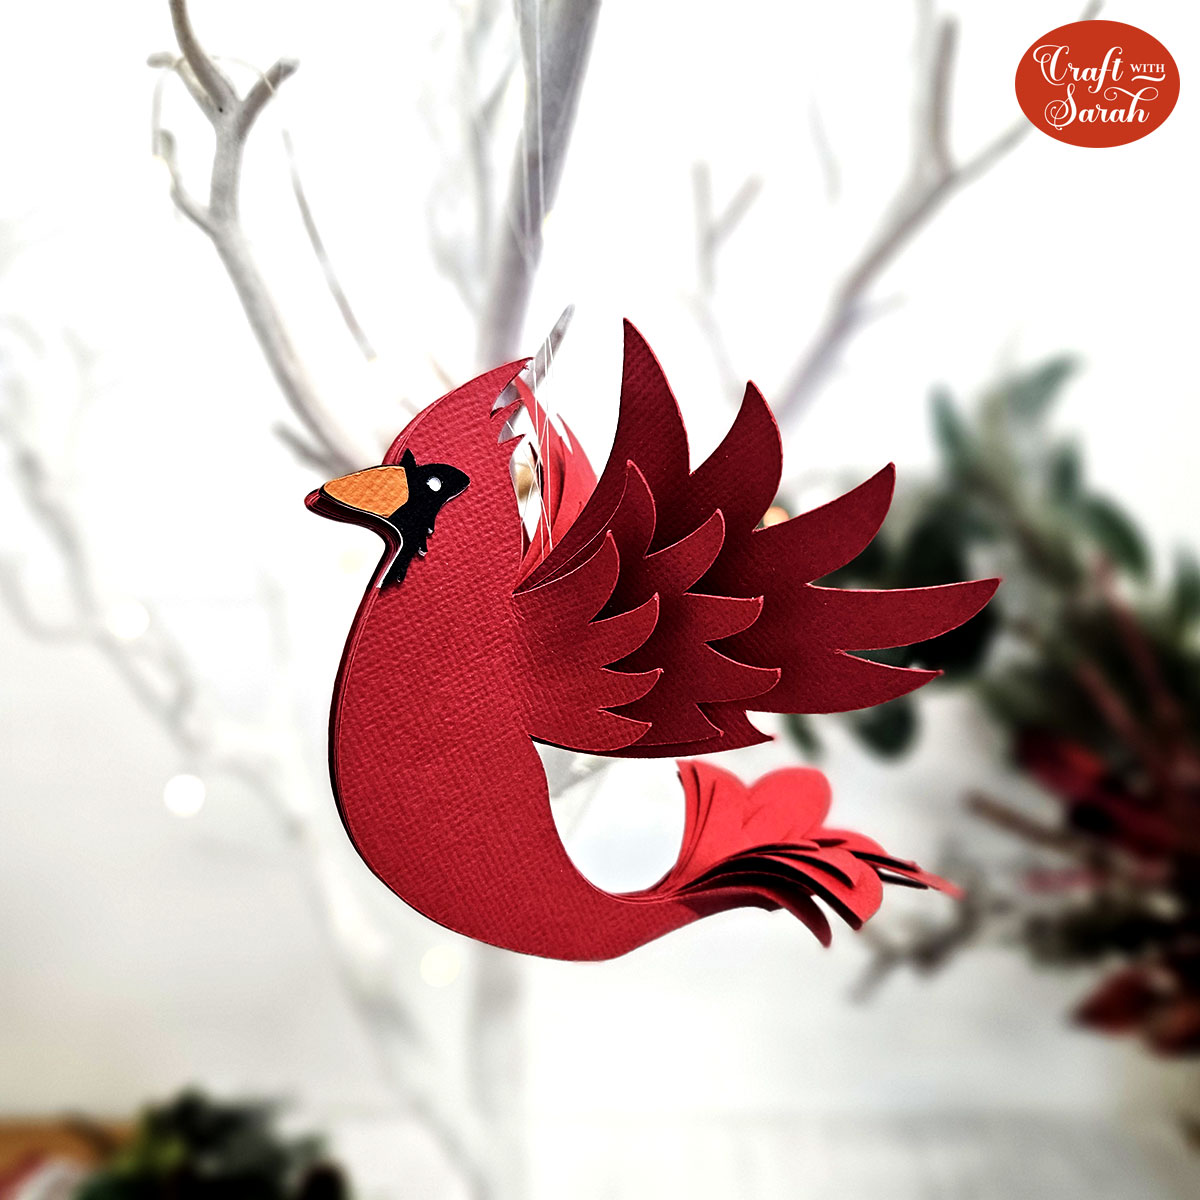
Now your hanging cardinal bird is finished!
Handmade papercraft bird cut files
If you are making the robin or dove birds, they go together in a very similar way.
I love the feathering effects on all of these birds, they are so lifelike!

They will be beautiful hanging on a Christmas tree as they look like they are flying around.
Or, why not make a whole series of them and string them together to create some bunting?
Happy crafting,
Sarah x

