How to make your own decoupage cards with 2D stickers

Find out how to make your own three dimensional decoupage cards using 2D stickers with this easy-to-follow tutorial.
Please note that some of the links included in this article are affiliate links, which means that if you click through and make a purchase I may receive a commission (at no additional cost to you). You can read my full disclosure at the bottom of the page.
A couple of months ago I discovered a brilliant craft website called Every Crafts a Pound. They sell end-of-line and retiring craft products for £1 each which gives you a HUGE saving compared with buying from the bigger craft stores.
I placed an order for about £80 and when it all arrived I couldn’t help but add up the retail prices to see how much I had saved… and it was over £200!
As the prices were just SO good, I bought some items that I wouldn’t usually purchase such as these cute little Christmas stickers:
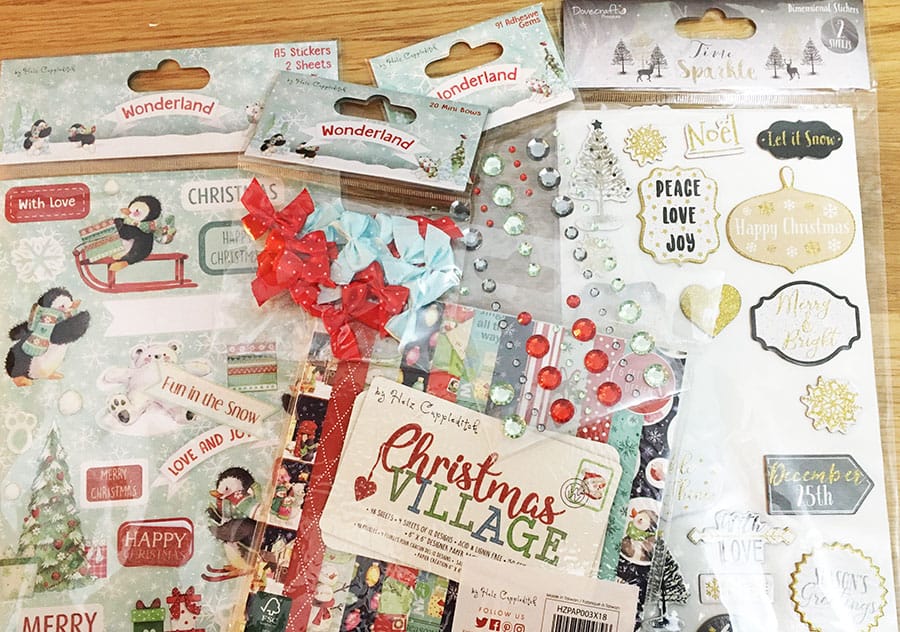
I also got some matching background papers and embellishments from the same ‘Wonderland’ collection by Helz Cuppleditch as well as the adorable backing papers and some gold Christmas sentiments from Dovecraft’s ‘Time to Sparkle’ collection.
I’m not quite sure why cute little character stickers have never really appealed to me as a crafter – especially when I LOVE peel-off border/corner stickers and flat-backed gemstones.
It’s probably because I like to make 3D cards, and stickers are – well – flat!
… or ARE they?!
When I was card making earlier today, I had the revolutionary idea that I could use the sticker pack to create me own 3D decoupage scene on my card.
Here’s how I did it…
How to turn flat stickers into 3D decoupage for your handmade cards
I needed something to add to one of the shapes on the card sketch that I was using as a guide for the card design (scroll down to grab the sketch!).
None of my die-cut decoupage toppers fit in the space, so I was feeling a little bit stuck.
As I’d already used the penguin papers, I thought – why not make my own decoupage with the stickers?
I really don’t know why I’ve never thought of it before!
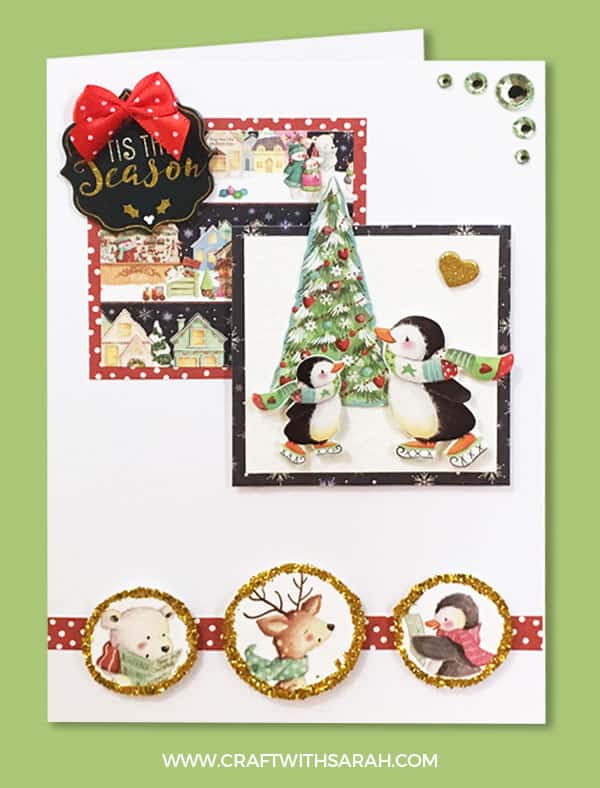
I chose three stickers from the collection, stuck them to some scraps of white card and then carefully cut them out using decoupage scissors to help to get around all the fiddly bits.
I then stuck the stickers to my card using 3D foam pads.
Thin pads are used behind the tree to give it a little raise from the card and then I’ve used standard sized pads behind the penguins so that they “pop” out further from the card.
And it really is as easy as that!
It’s a shame that the sticker sheets only had one of each design, as I would have loved to have decoupaged them further by using a matching sticker of each and layering up the penguins.
Alas, it was not to be!
Still though, I’m really pleased with how my little custom winter scene turned out and I hope you like it too. ?
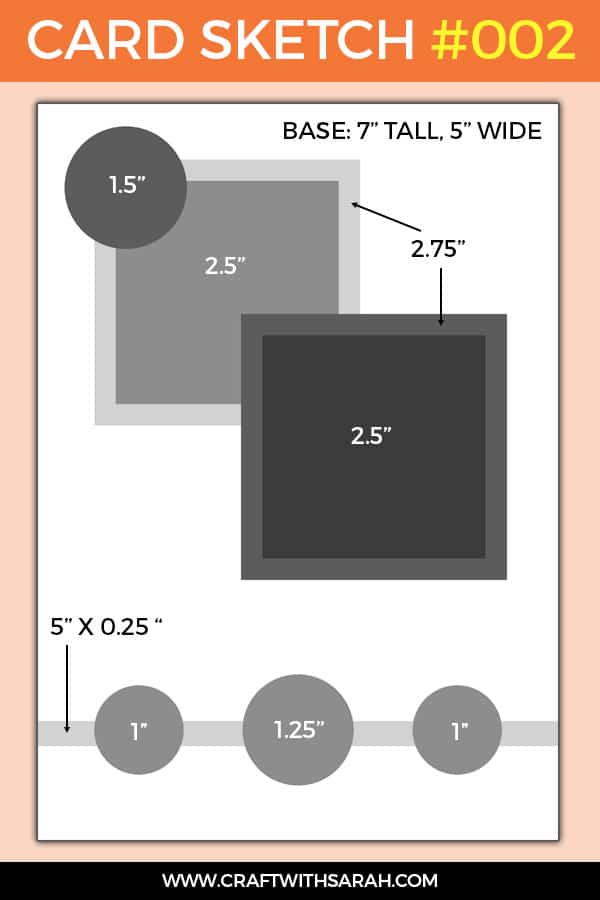
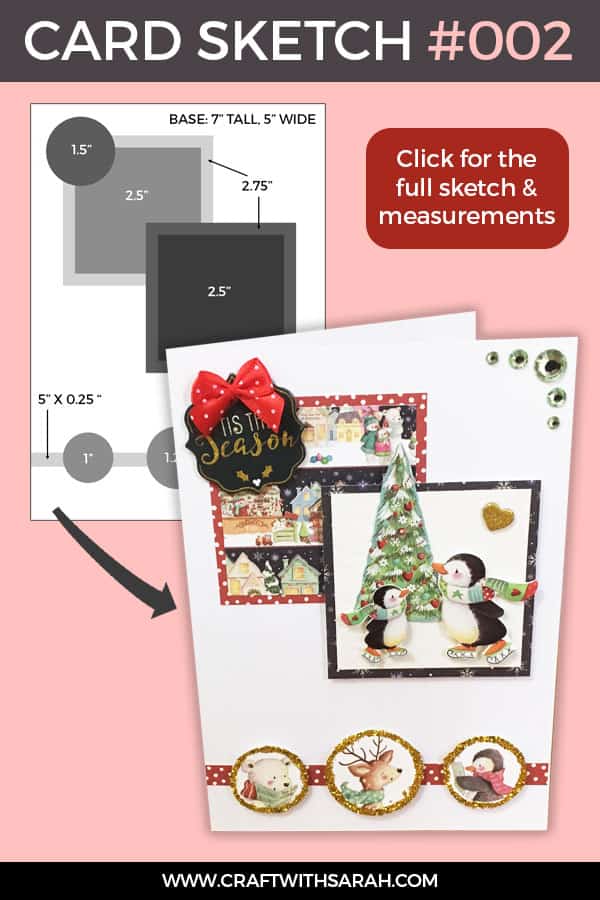
Card Sketch #002
I mentioned earlier that I was following a card sketch to make this card.
I’ve only recently discovered card sketches, and I’m a little bit in love with them as they are a great way to kick-start your creativity when you sit down for some craft time.
Here’s the sketch that I used for this penguin-tastic Christmas card:
How to make a Christmas penguins handmade card
If you’d like to make a matching card, here’s what you’ll need:
Materials list
- 5×7 inch white card blank
- ‘Christmas village’ paper pack
- White hammered card
- Red ribbon embellishment
- Green stick-on gemstones
- ‘Wonderland’ stickers by Helz Cuppleditch
- ‘Time to Sparkle’ stickers from Dovecraft
- Gold glitter
- Tacky glue
- 3D foam pads
- Paper trimmer or a craft knife, ruler & craft mat
- Small piece(s) of scrap card
Card making tutorial
- Cut out three squares of the ‘Christmas village’ papers, following the dimensions on the card sketch. The larger squares are 2.75 inches wide and the smaller squares are 2.5 inches.
- Cut the second smaller square from white hammered card. This will be used as the base for our penguin ‘decoupage’.
- Use tacky glue or double-sided tape to stick the smaller squares onto the larger ones.
- Stick the patterned layered squares to the top left of your card, using the card sketch as a guide. I used glue for this so it’s flat, but you could use 3D foam pads for some added depth.
- Stick the second set of layered squares (with the white hammered card) using 3D foam pads.
- Choose your character stickers and stick them onto scrap card.
- Cut around them using decoupage scissors to help with the tiny edges.
- Use 3D foam pads to build up your decoupage Christmas scene onto the white hammered card.
- Choose one of the ‘Time to Sparkle’ sentiment stickers and stick it to the top left of the card, overlapping slightly with the first squares as shown on the card sketch.
- Stick a matching bow to the top for that extra Christmas cheer!
- Cut a piece of matching paper to 5 inches wide and 0.25 inches tall and glue it near to the bottom of your card.
- Find the ‘Christmas village’ paper that has all of the animals in circles/bubbles and cut out three of the shapes.
- Carefully glitter the edges by putting tacky glue around the edge of each circle and sprinkling on some gold glitter. Careful, this bit gets messy!
- When the glue is dry, stick the circles over the small rectangle of patterned paper using 3D foam pads.
- Finally, add some colour-coordinating gemstones to the top right of the card for some extra Christmas bling.
Want more inspiration for Card Sketch #002?
As well as making a physical handmade card for each card sketch that I design, I also like to create a digital design in Photoshop.
Here’s Card Sketch #002’s digital card making design – still on the Christmas theme of course!

Happy crafting,
Sarah x

