Free 3D Bird SVGs 🐦 Make Adorable Blue Tit & Wren Papercrafts
Learn how to craft 3D birds with a Cricut machine with the included free SVGs.
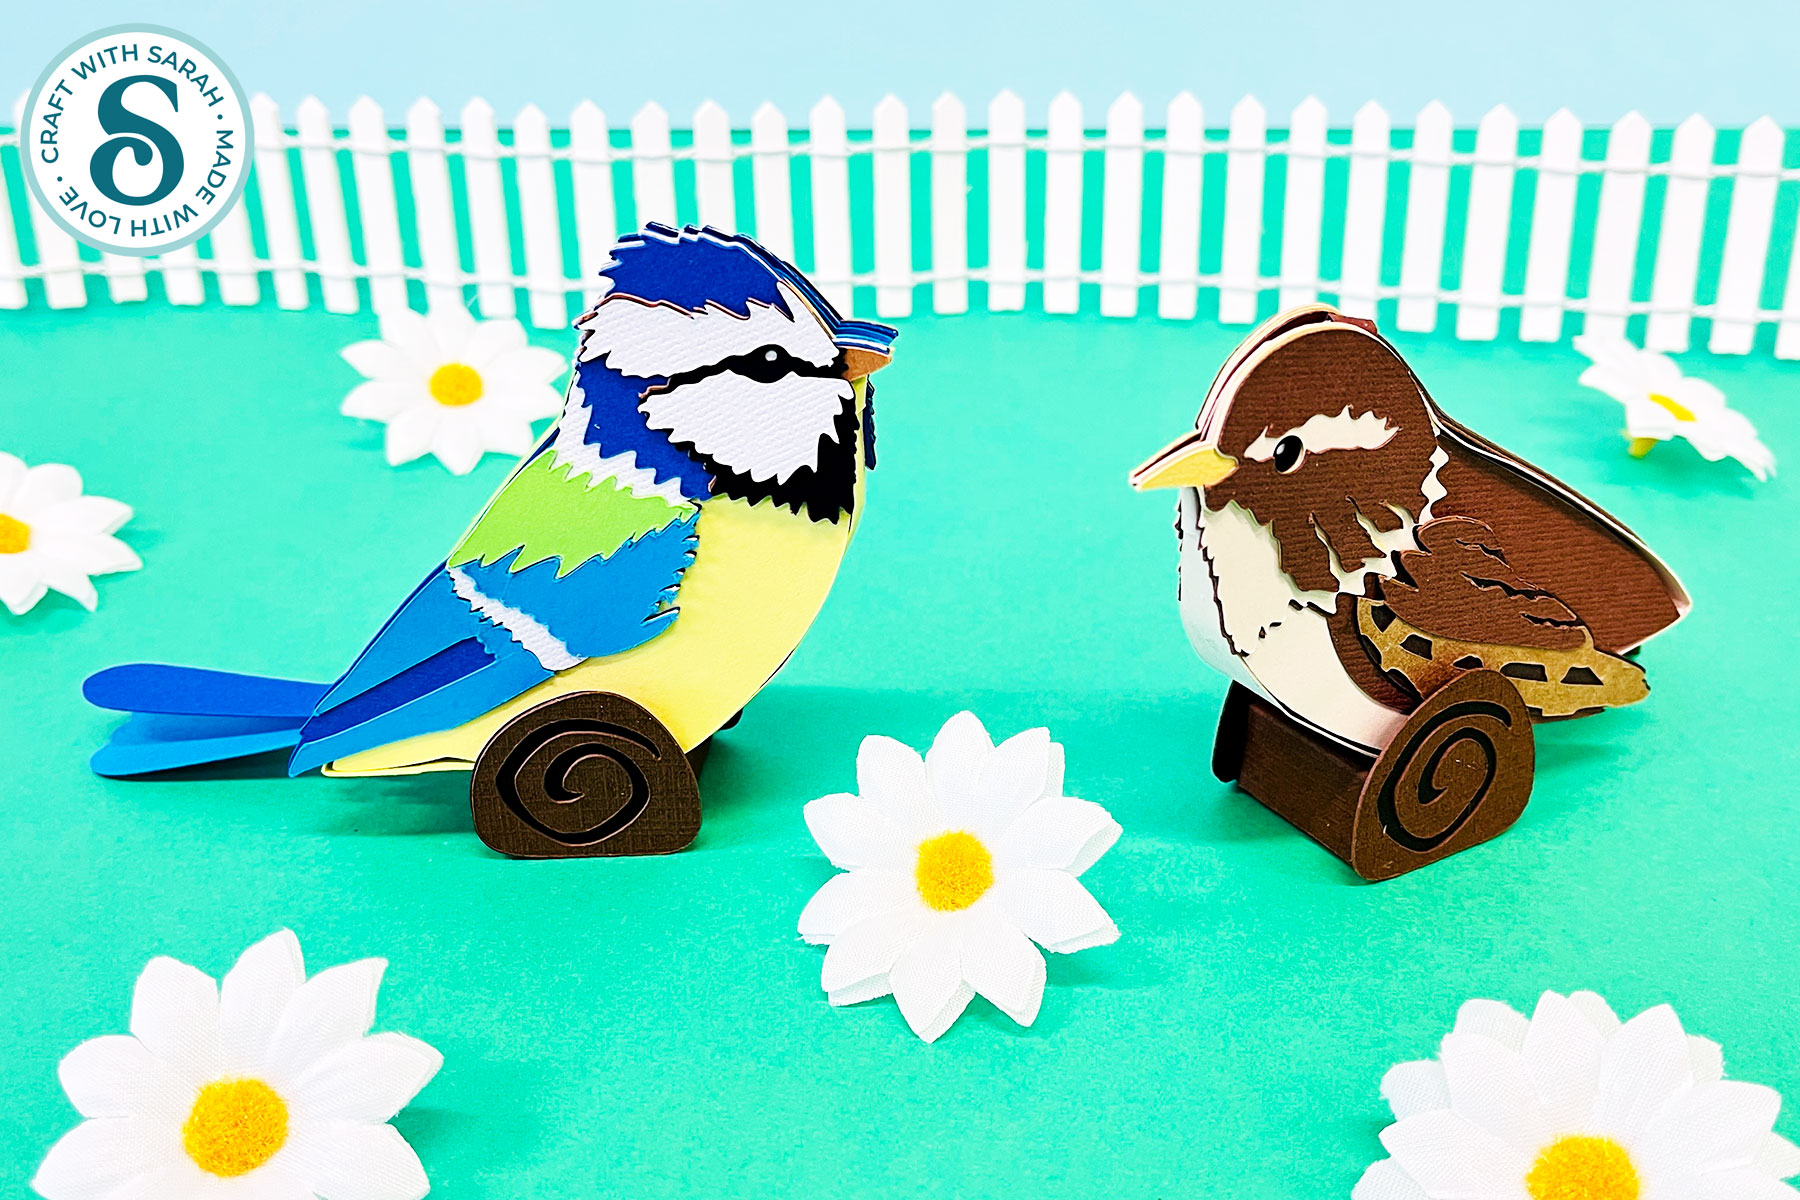
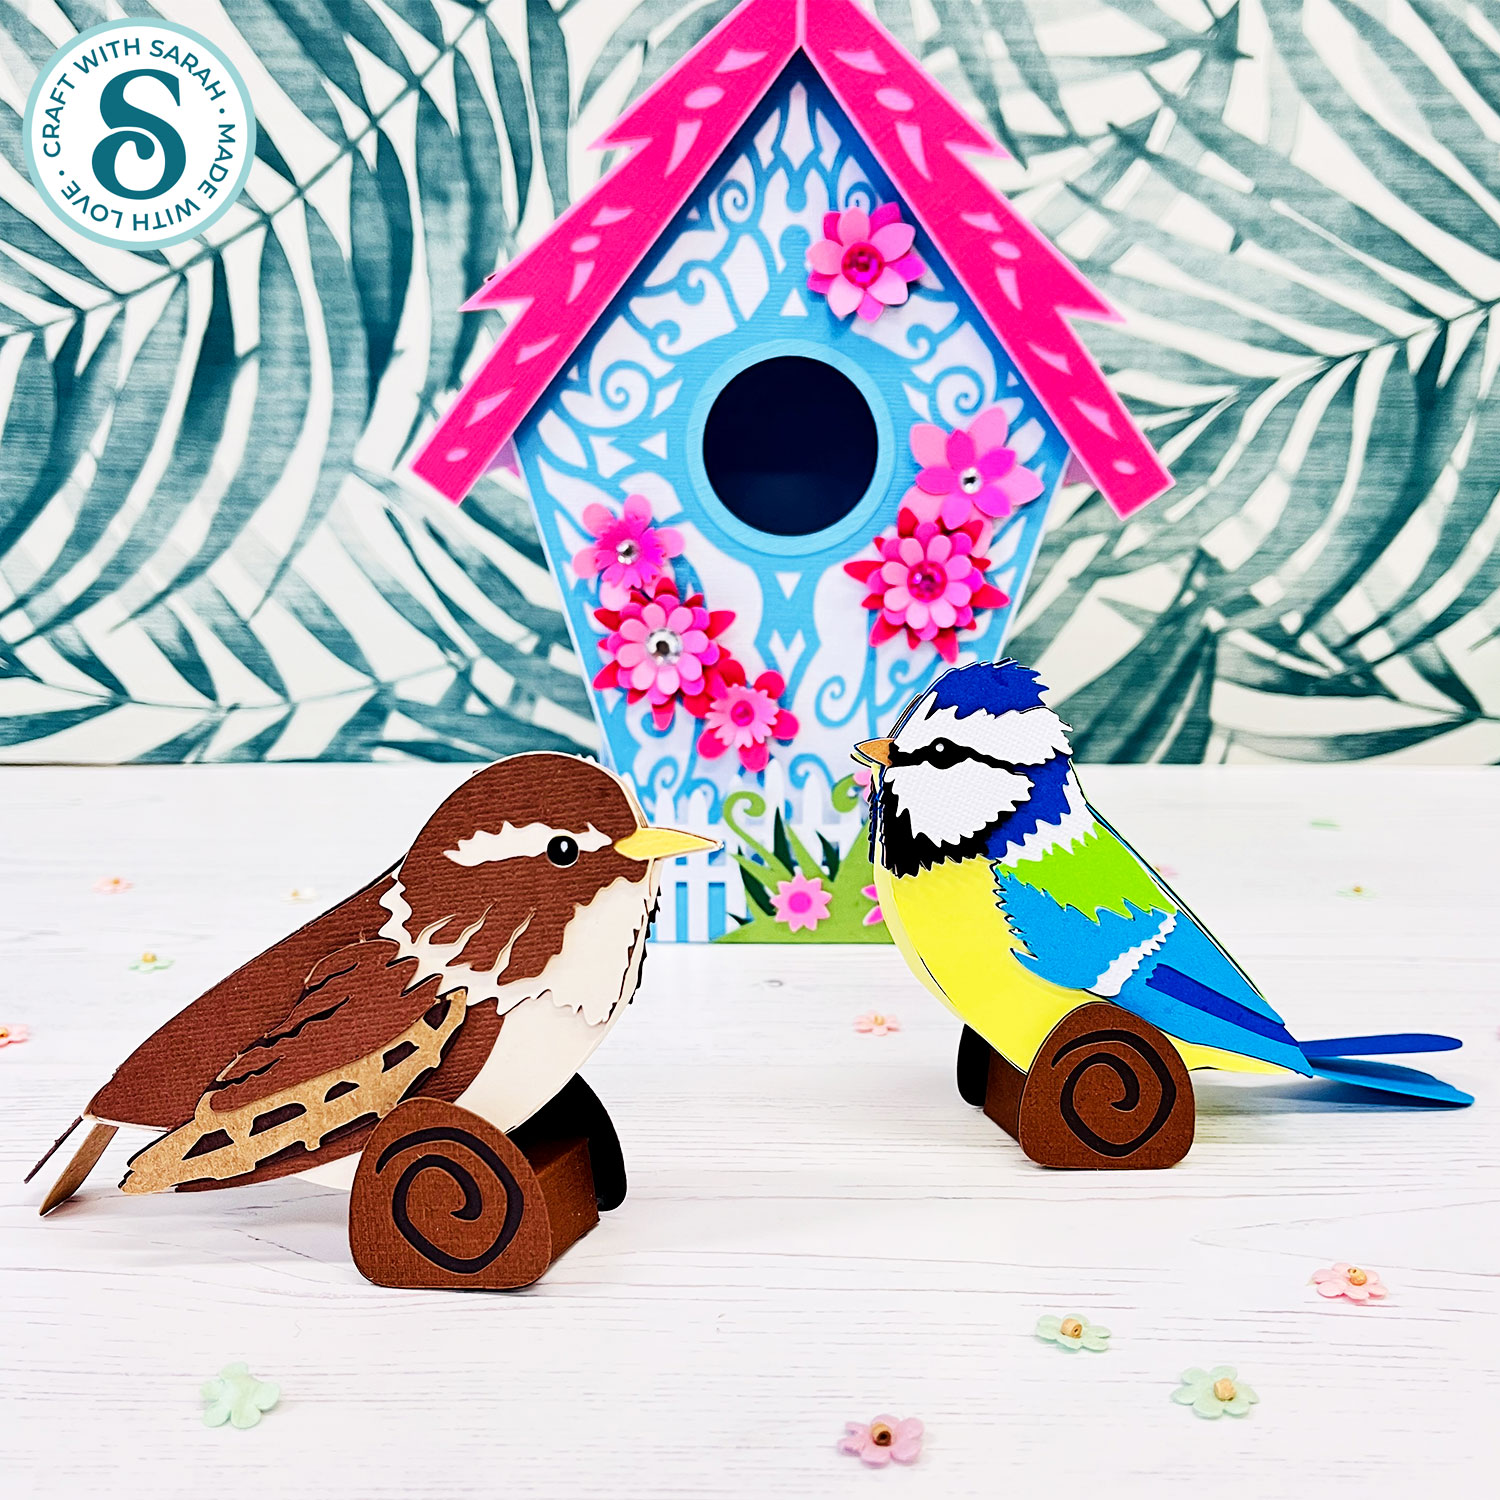
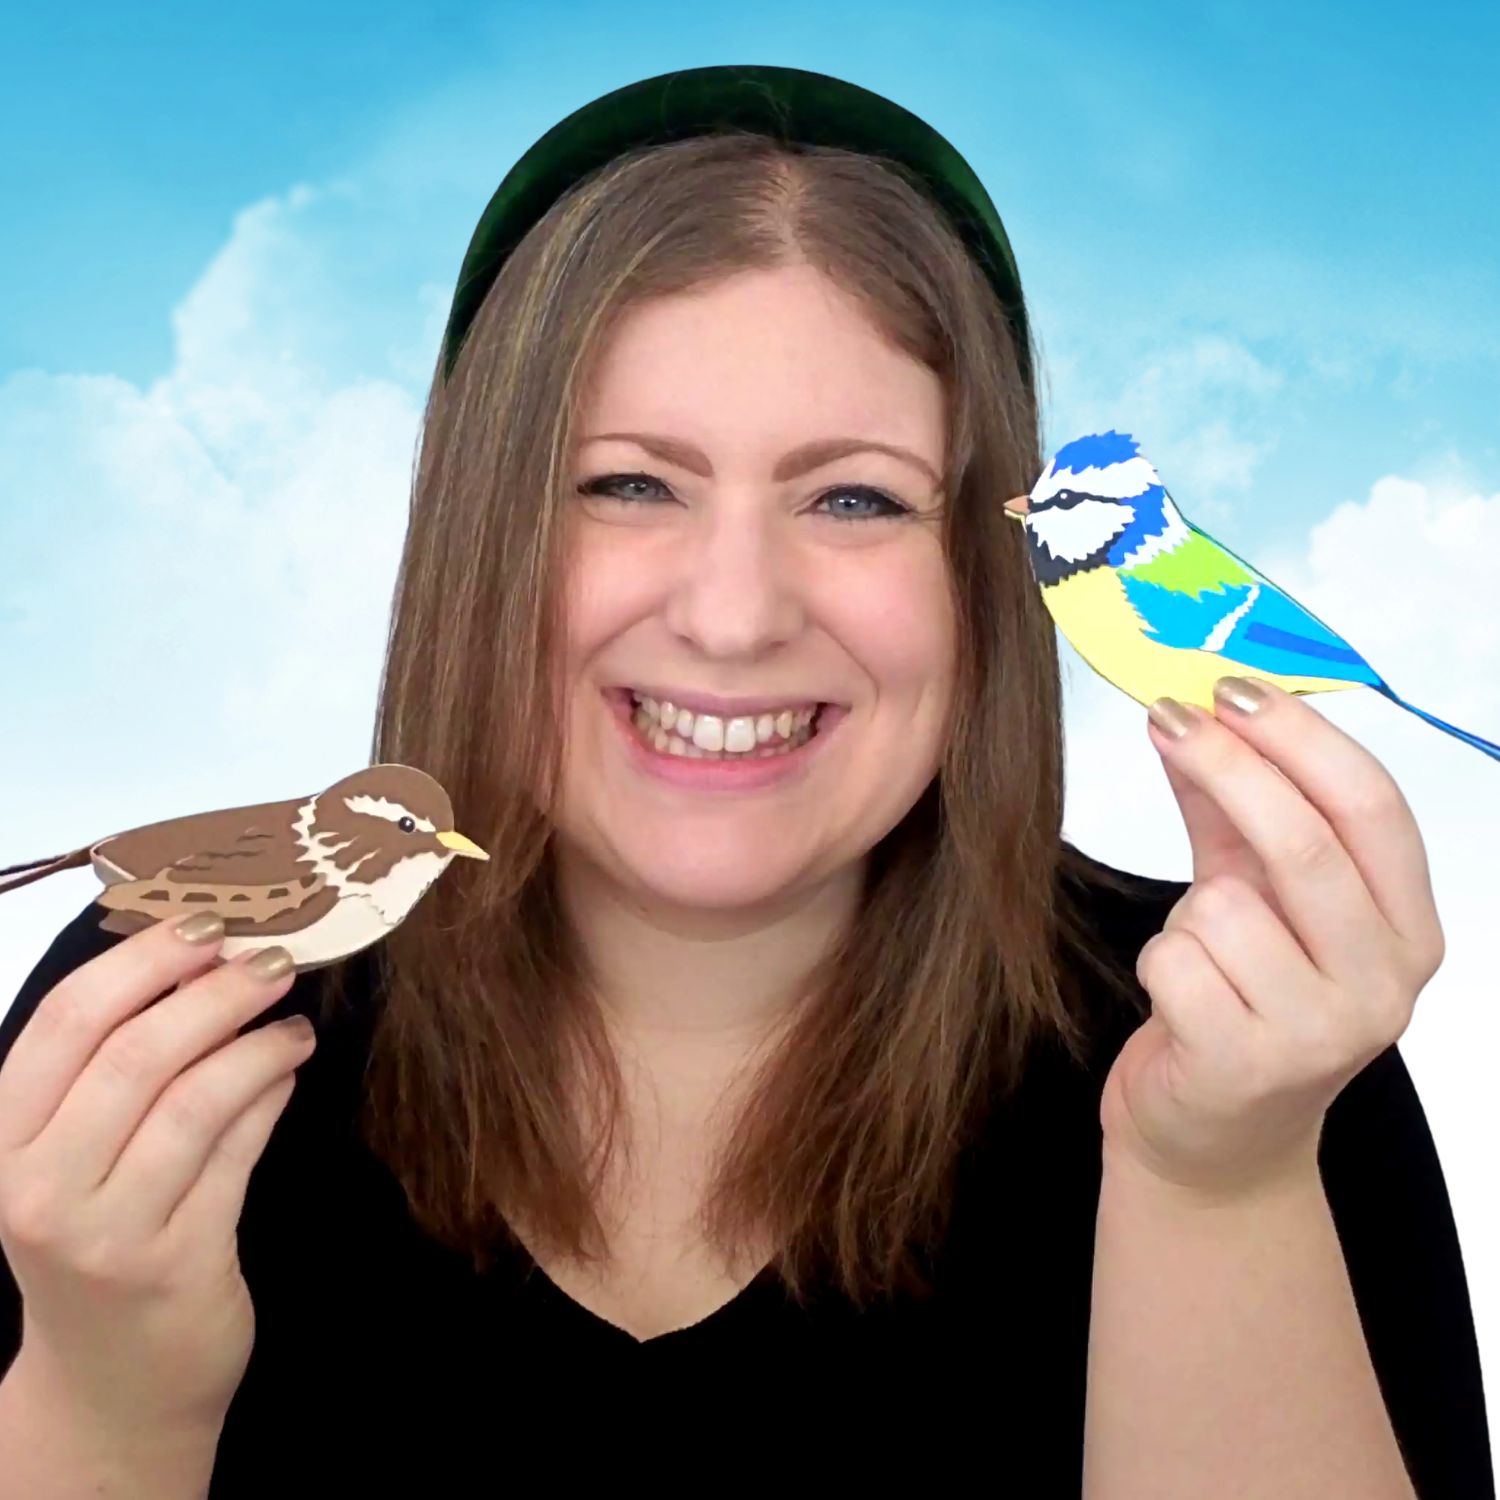
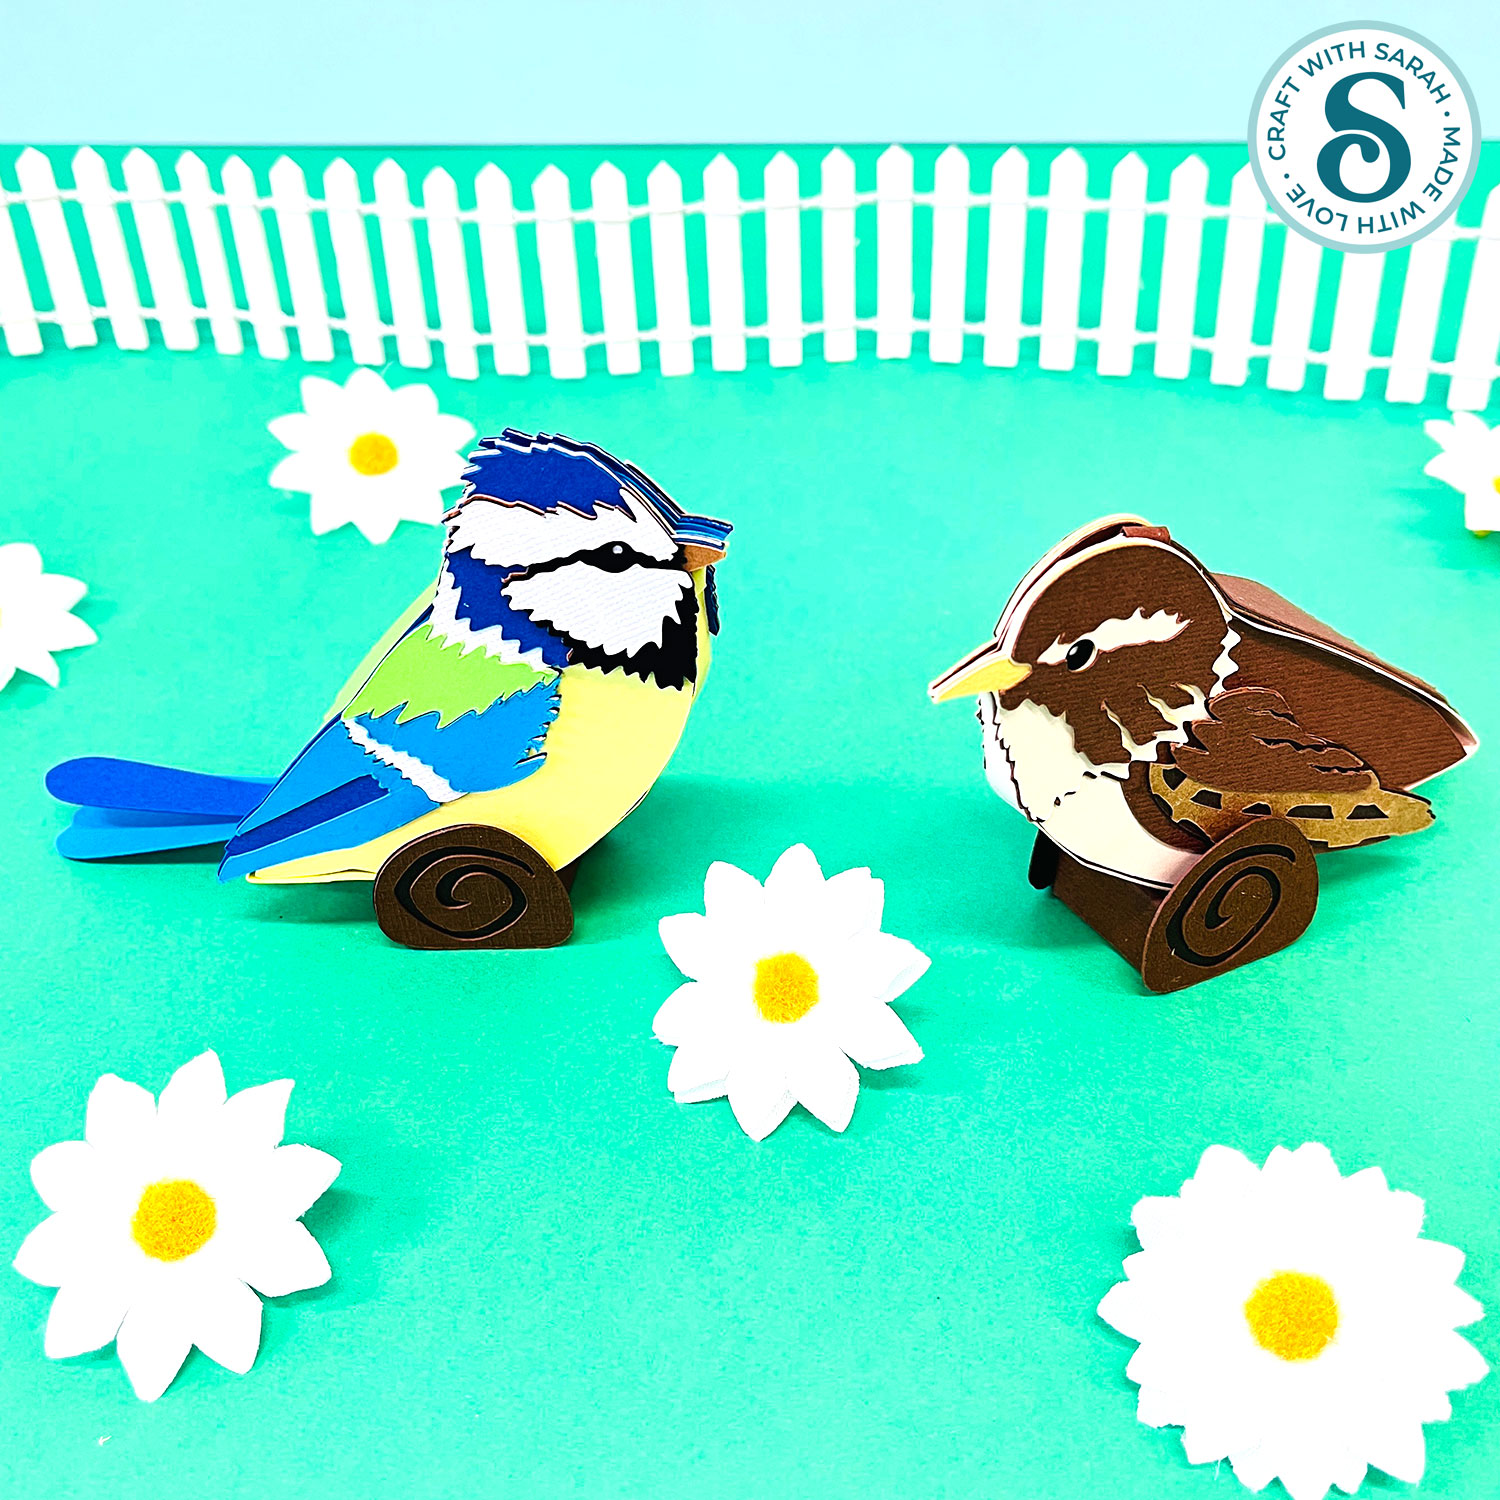
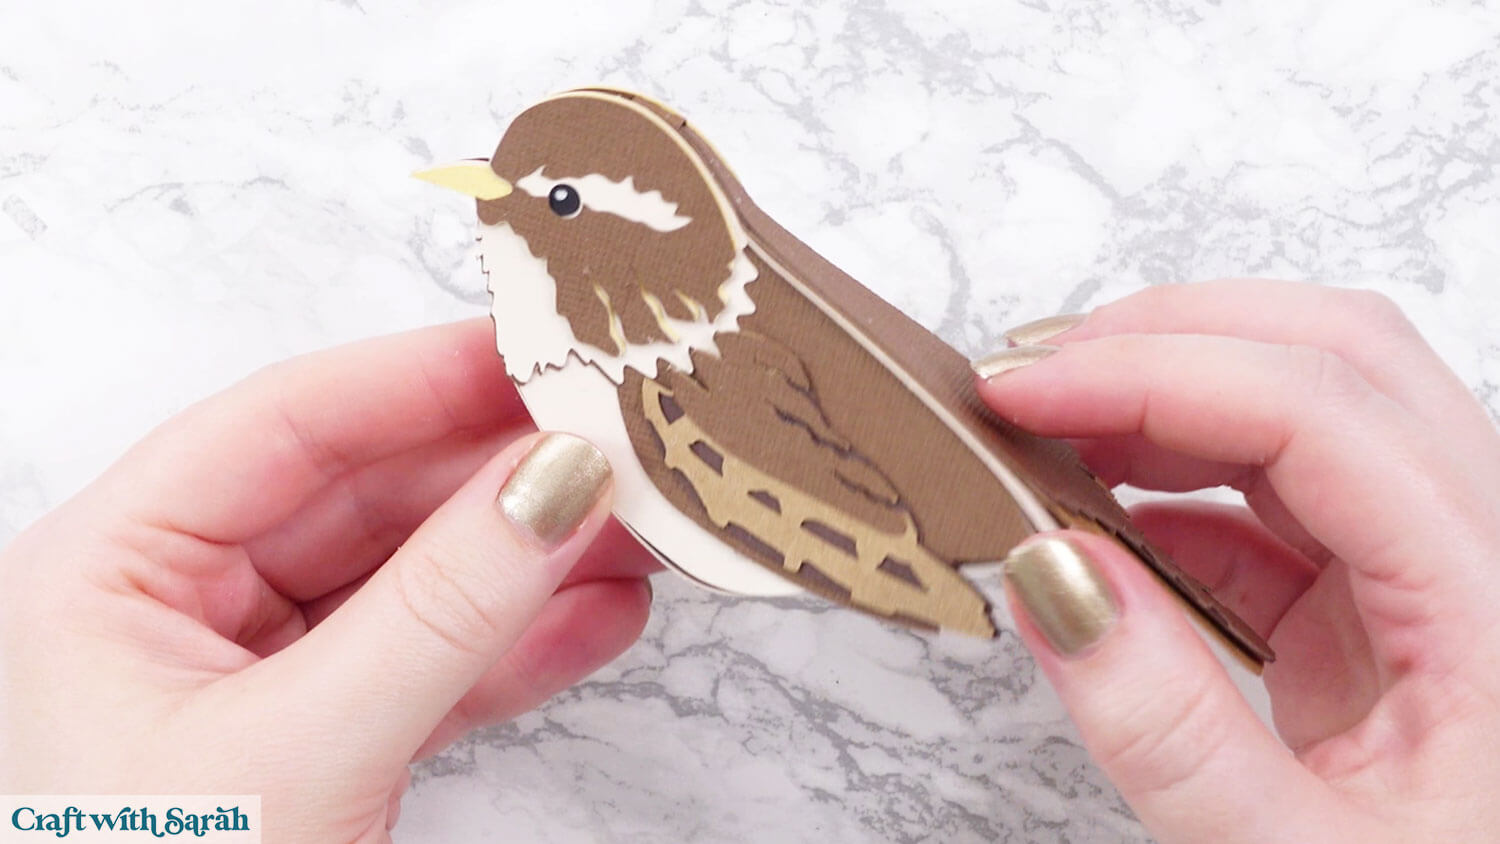
These wren and blue tit bird SVGs are a beautiful way to bring nature into your home this spring.
The bird templates come with a tree branch to hold them upright so they they can sit beautifully on your shelves.
This project is made with layered cardstock, cut with a Cricut or similar type of electronic cutting machine.
Printable hand-cutting versions are included too.
Grab your cardstock, open up Design Space, and let’s start cutting. ✂️
Video tutorial for 3D birds craft
Watch the video below to see how to make this craft project. Keep scrolling for a written tutorial.
Materials list for 3D papercraft birds
Here is a list of the materials to make this project.
Please note that some of the links included in this article are affiliate links, which means that if you click through and make a purchase I may receive a commission (at no additional cost to you). You can read my full disclosure at the bottom of the page.
- Cricut Machine
- Light blue Cricut cutting mat
- Coloured Card
- Craft Glue – I like Bearly Art Glue and Collall All Purpose Glue
- Cricut scoring wheel or scoring stylus
How to use the free bird SVGS
Here’s how to make this craft project for mom using a Cricut machine.
Step 1) Download the free file & unzip the downloaded folder
Download the Free Cutting File
Please login to your account to download this file.
TERMS OF USE:
You may sell finished, handmade physical craft items that you have made using this product but must not sell or share the digital files. Read full terms of use
Before you upload the SVGs to Design Space, you need to unzip the download folder that they come in.
- How to unzip a folder on Windows computer
- How to unzip a folder on a Mac
- How to unzip a folder on an iPad/iPhone
- How to unzip a folder on an Android device
After unzipping, upload the SVG file(s) into your cutting machine software.
Not sure how to use cut files with your type of machine? The following links lead to videos on how to open cut files in:
- Cricut Design Space
- Silhouette Studio
- CanvasWorkspace (for ScanNCut machines)
The download folder also contains printable PDF versions of the templates for hand cutting.
Step 2) Upload the SVG files into Design Space
If you are using Cricut Design Space, start a new project and then click the “Upload” button on the left of the screen.
You can then either click “Browse” to find the file on your computer, or drag-and-drop it.
Upload the files from the “01 Cricut Version” subfolder.
There are separate SVG files for the wren and blue tit birds.
For this tutorial I am showing the wren version, but the steps are the same for the blue tit.
Not sure how to upload SVGs? Check out this Design Space video for a full walkthrough.
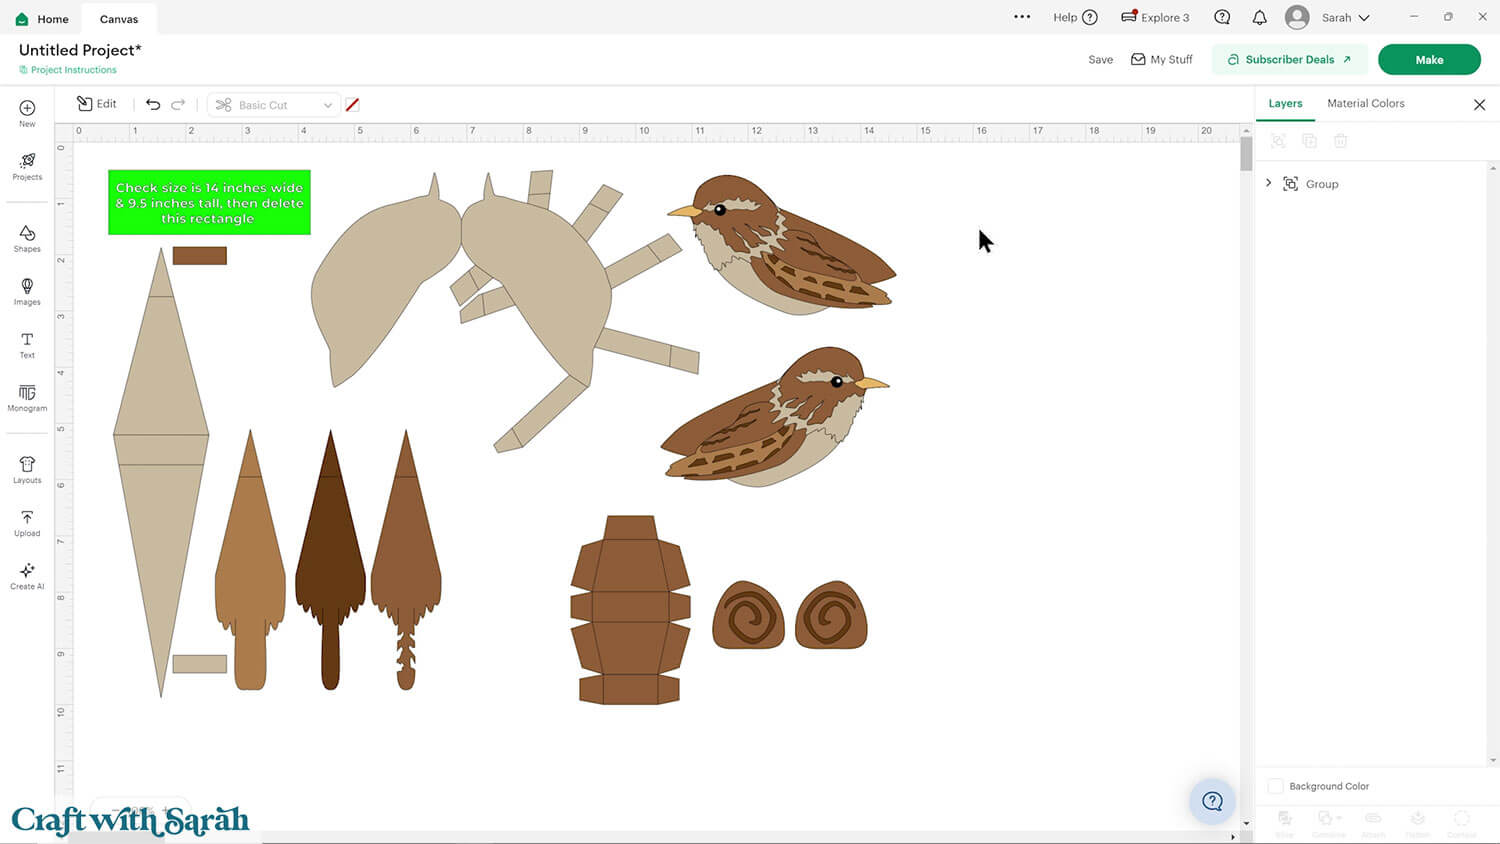
Step 3) Check the size
Click the design on your canvas and check the size matches what is in the lime green box on the top-left of the design.
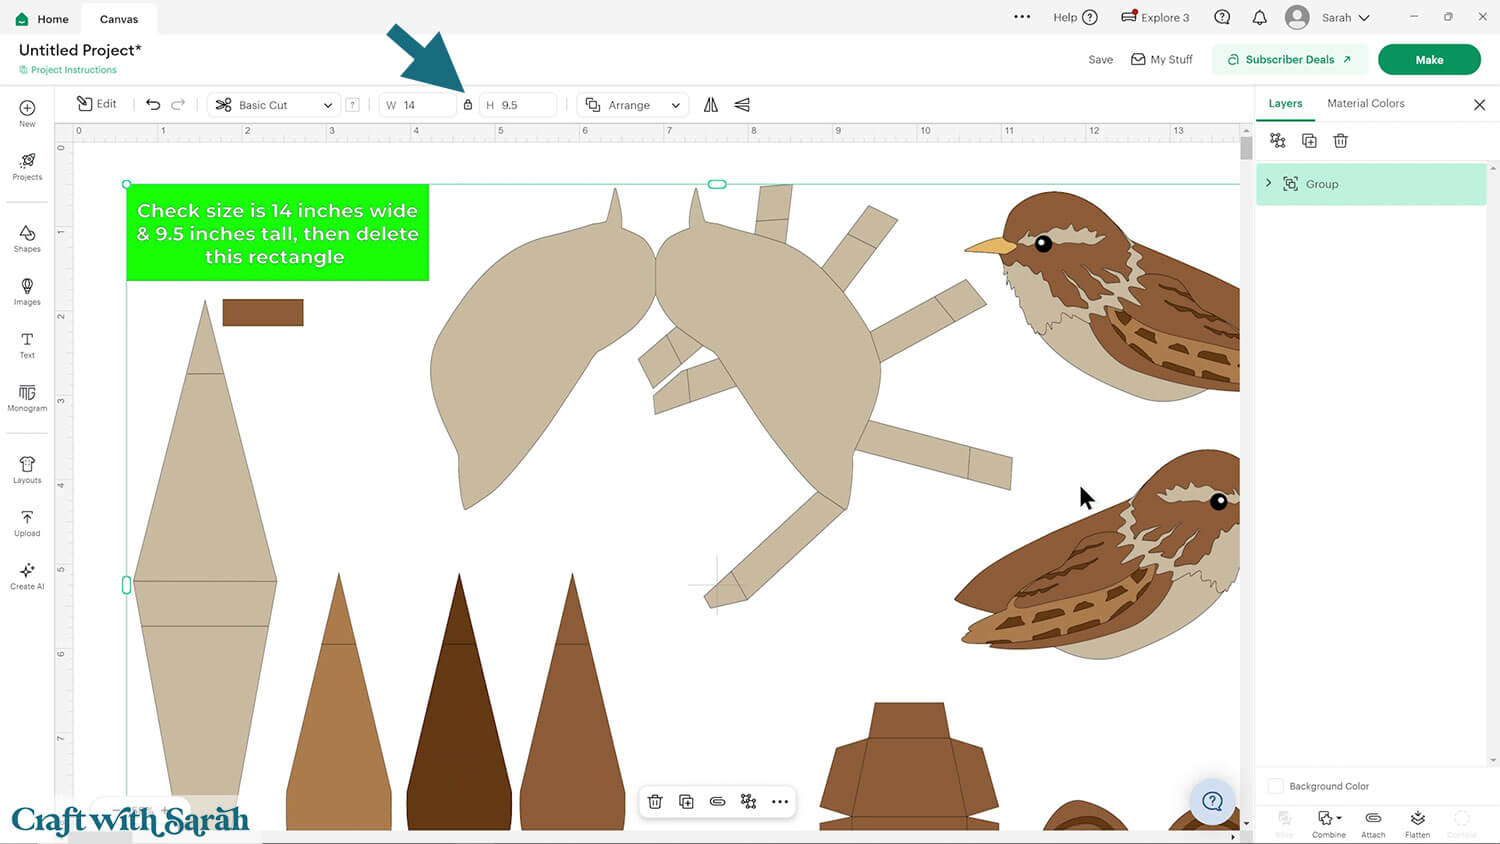
If yours is different, change the size to match what’s in the lime green box.
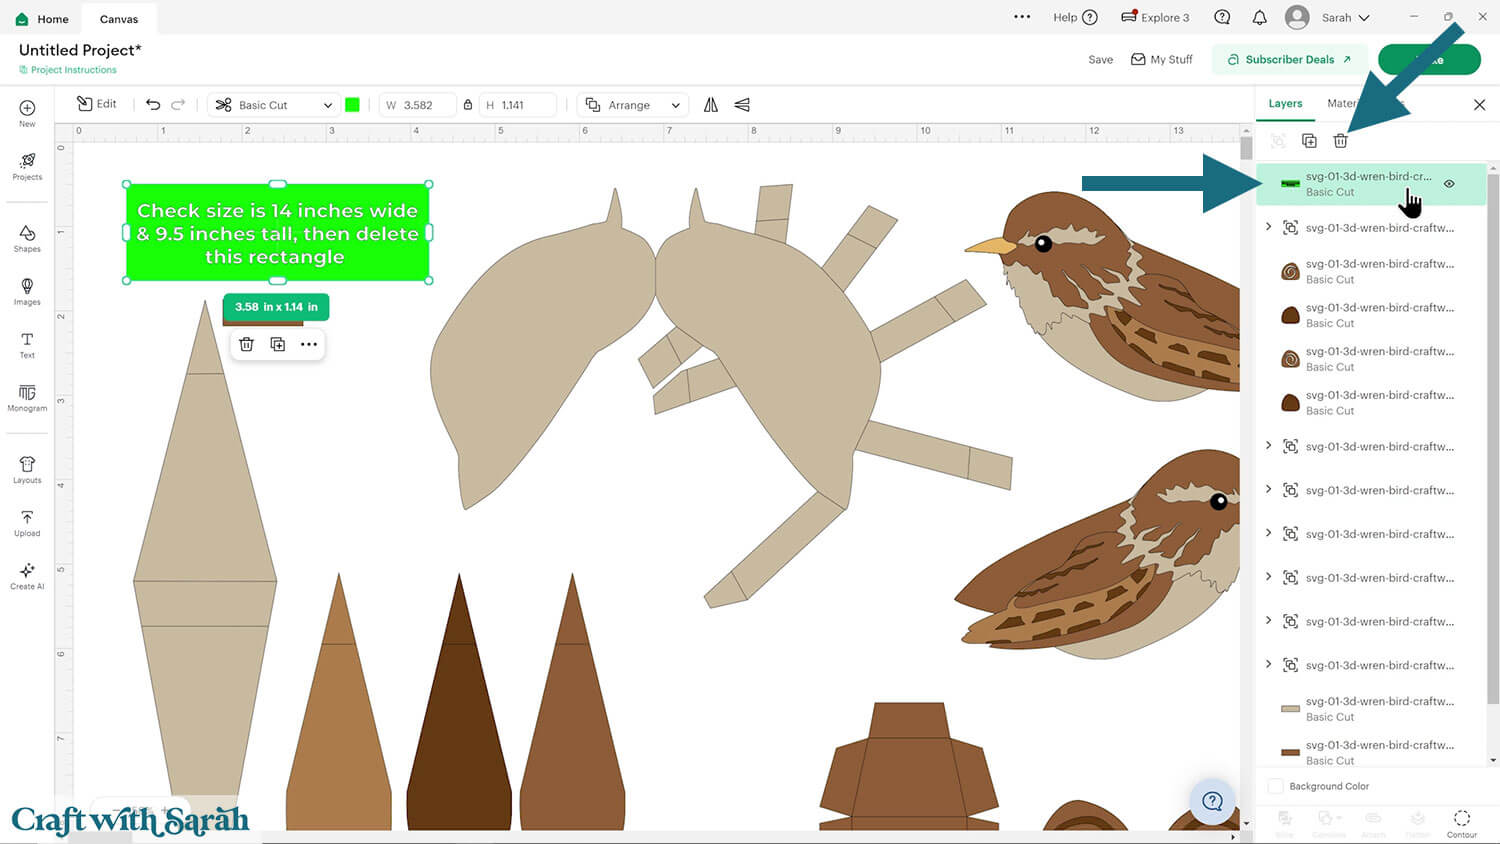
With the design selected, press “Ungroup” at the top of the layers panel.

Click the lime green size guide layer and delete it.
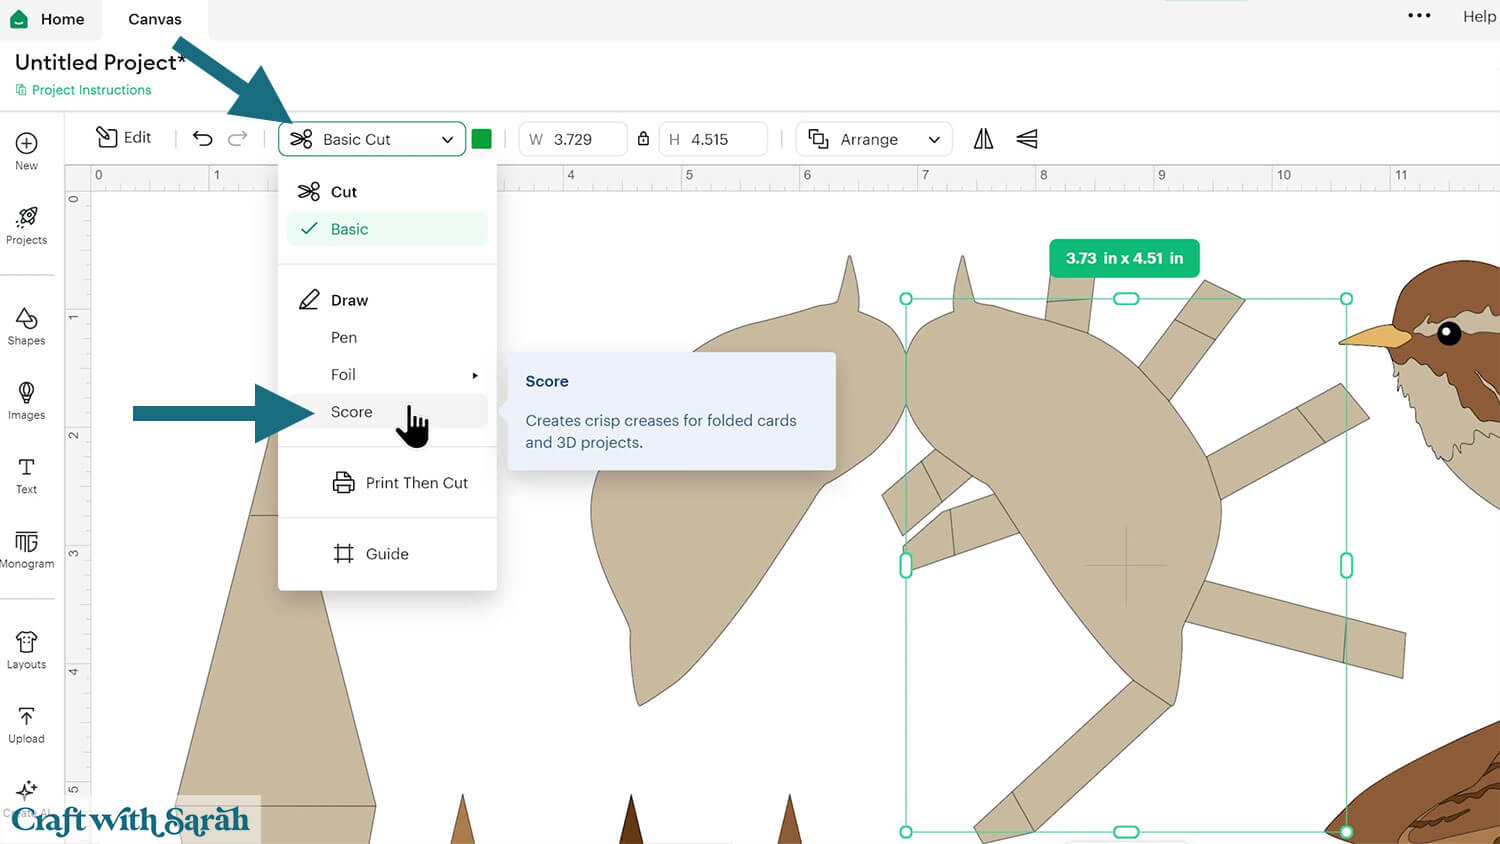
Step 4) Format the score lines
Design Space doesn’t automatically understand that some of the lines should be scored, so we need to manually tell it that.
Click the main body structure piece (the large shape with tabs coming out the sides).
This will highlight a Group in the layers panel.
Click the chevron arrow to open up the Group, then click to select only the top layer within that Group.
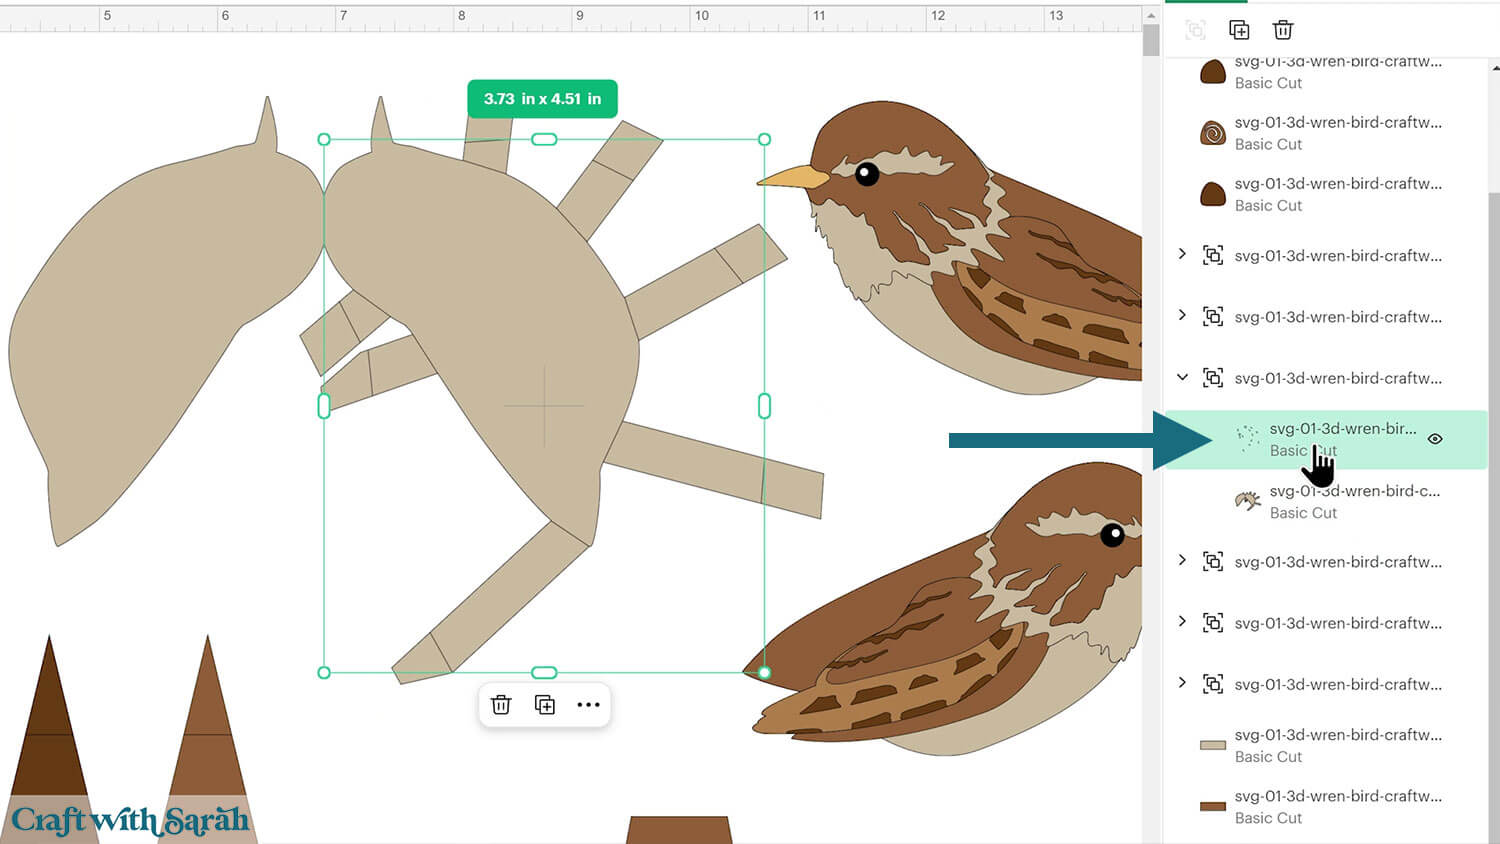
Change this layer to “Score” in the Operations dropdown menu.
Click the Group name in the layers panel to select both layers within it (the new score layer and the solid piece underneath).
Press the “Attach” tool at the bottom of the layers panel.
Attach is important as it is what tells the Cricut to do the scoring on top of the piece underneath.
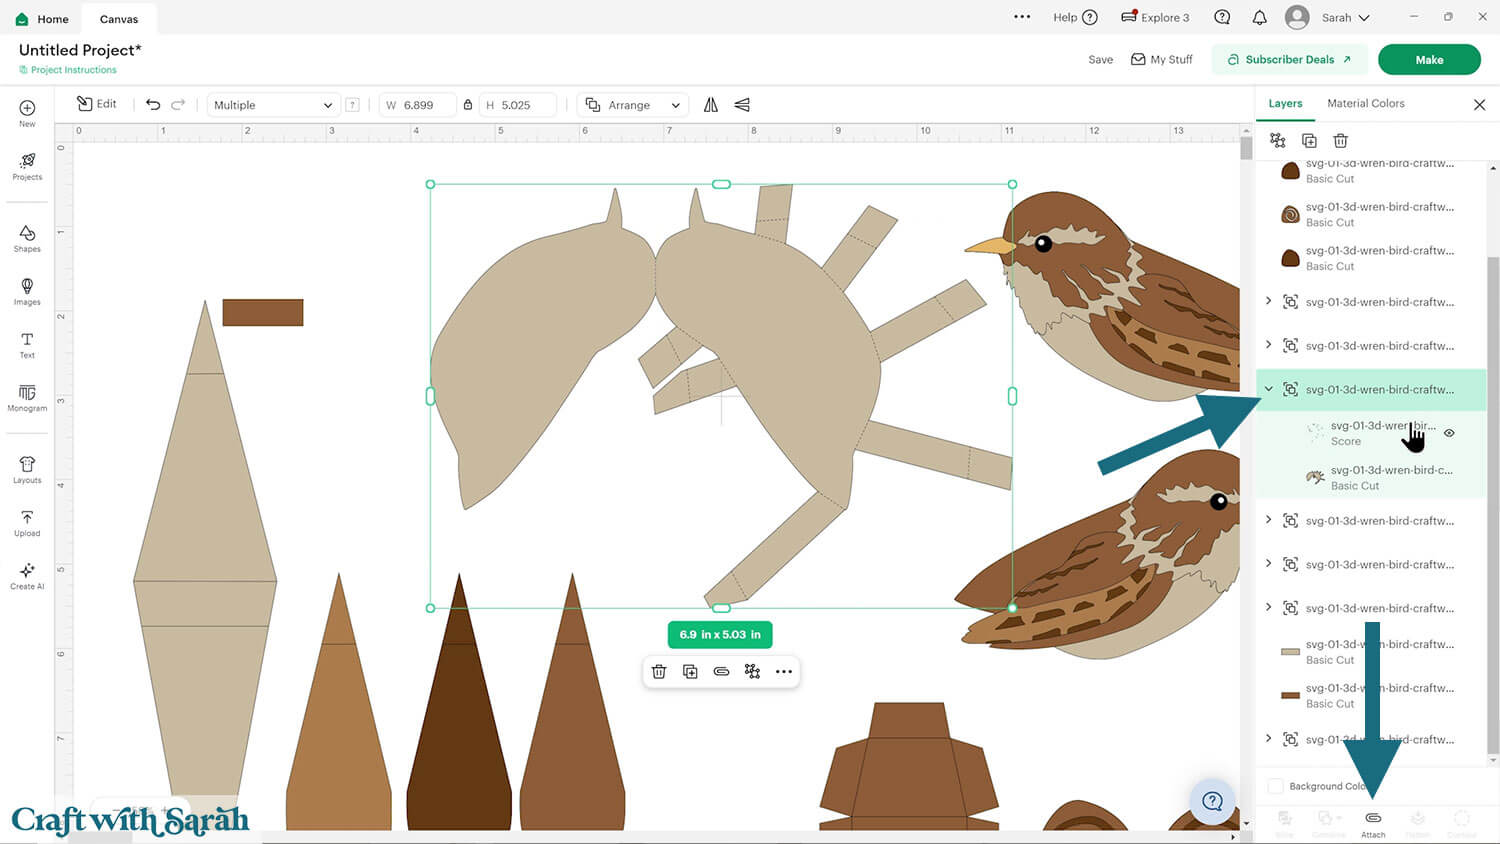
After attaching, the Group will change in the layers panel to have a paperclip icon and the word “Attach”.
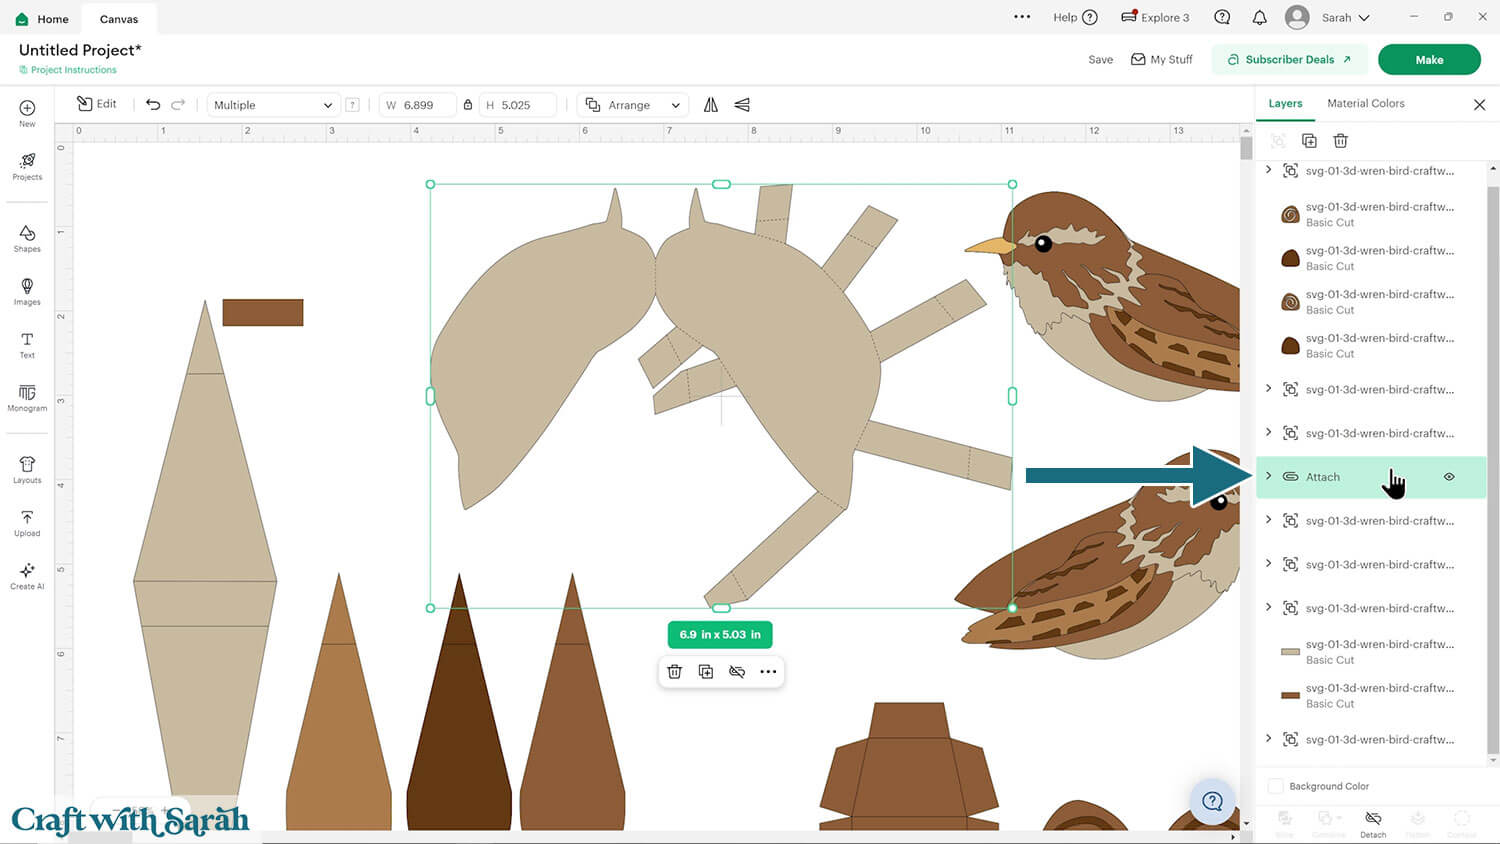
Repeat this process for the back piece of the bird (it looks like a long thin diamond shape on the left of the project), the three tail pieces and the tree branch box shape.
Step 5) Cut the design
When you’re happy how the bird SVG is looking in Design Space, connect to your Cricut machine then click “Make” and follow the instructions on-screen to cut out all the layers.
Change the paper size with the dropdowns on the left of the screen. You need to change it for every colour.
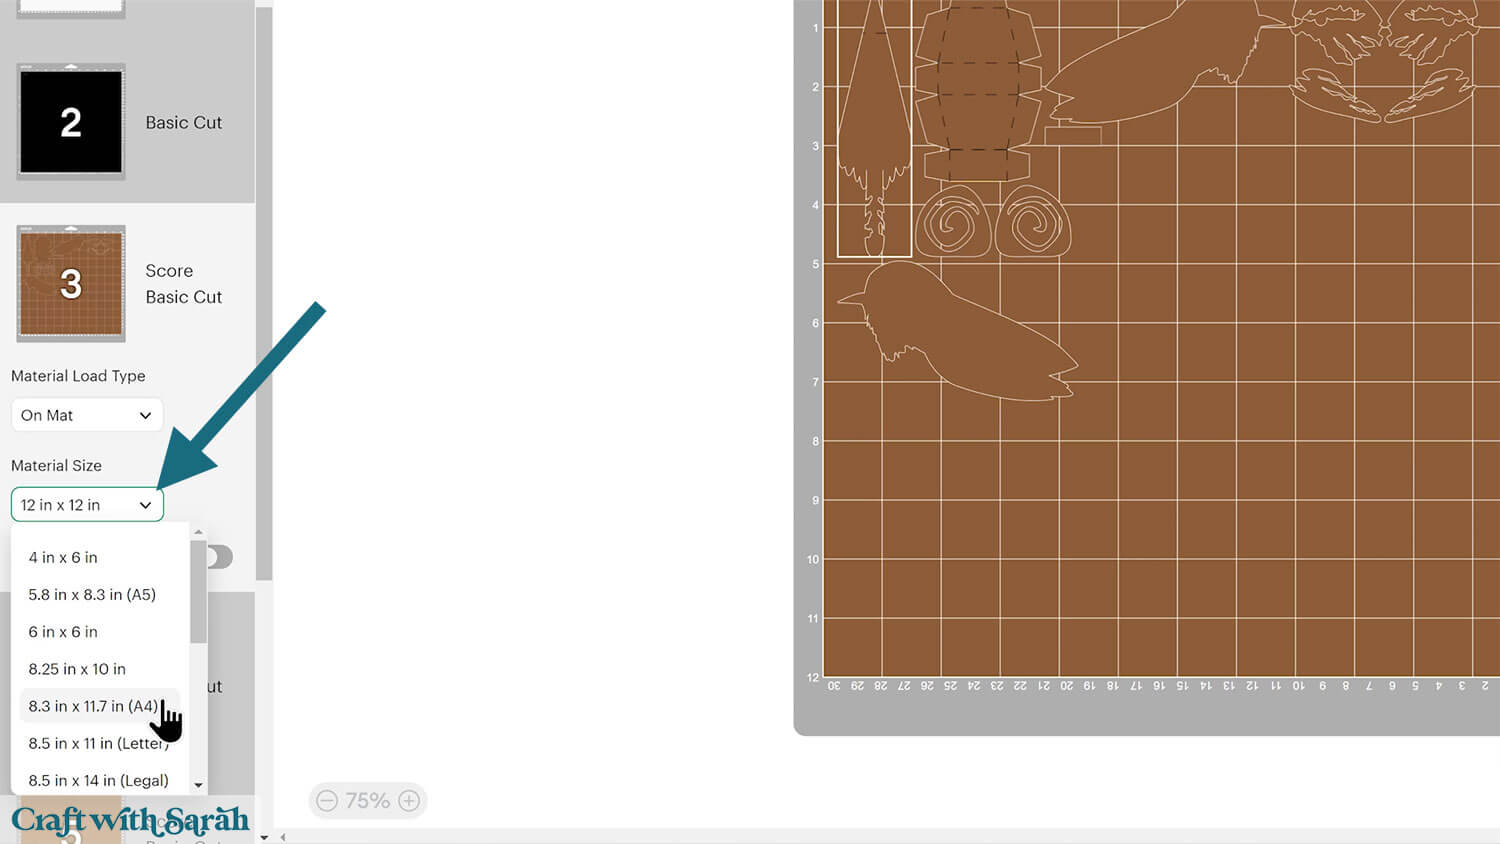
You can drag-and-drop the pieces on the screen to move them about to take up less space on your cardstock.
Make sure that no pieces overlap, otherwise they won’t cut out correctly.
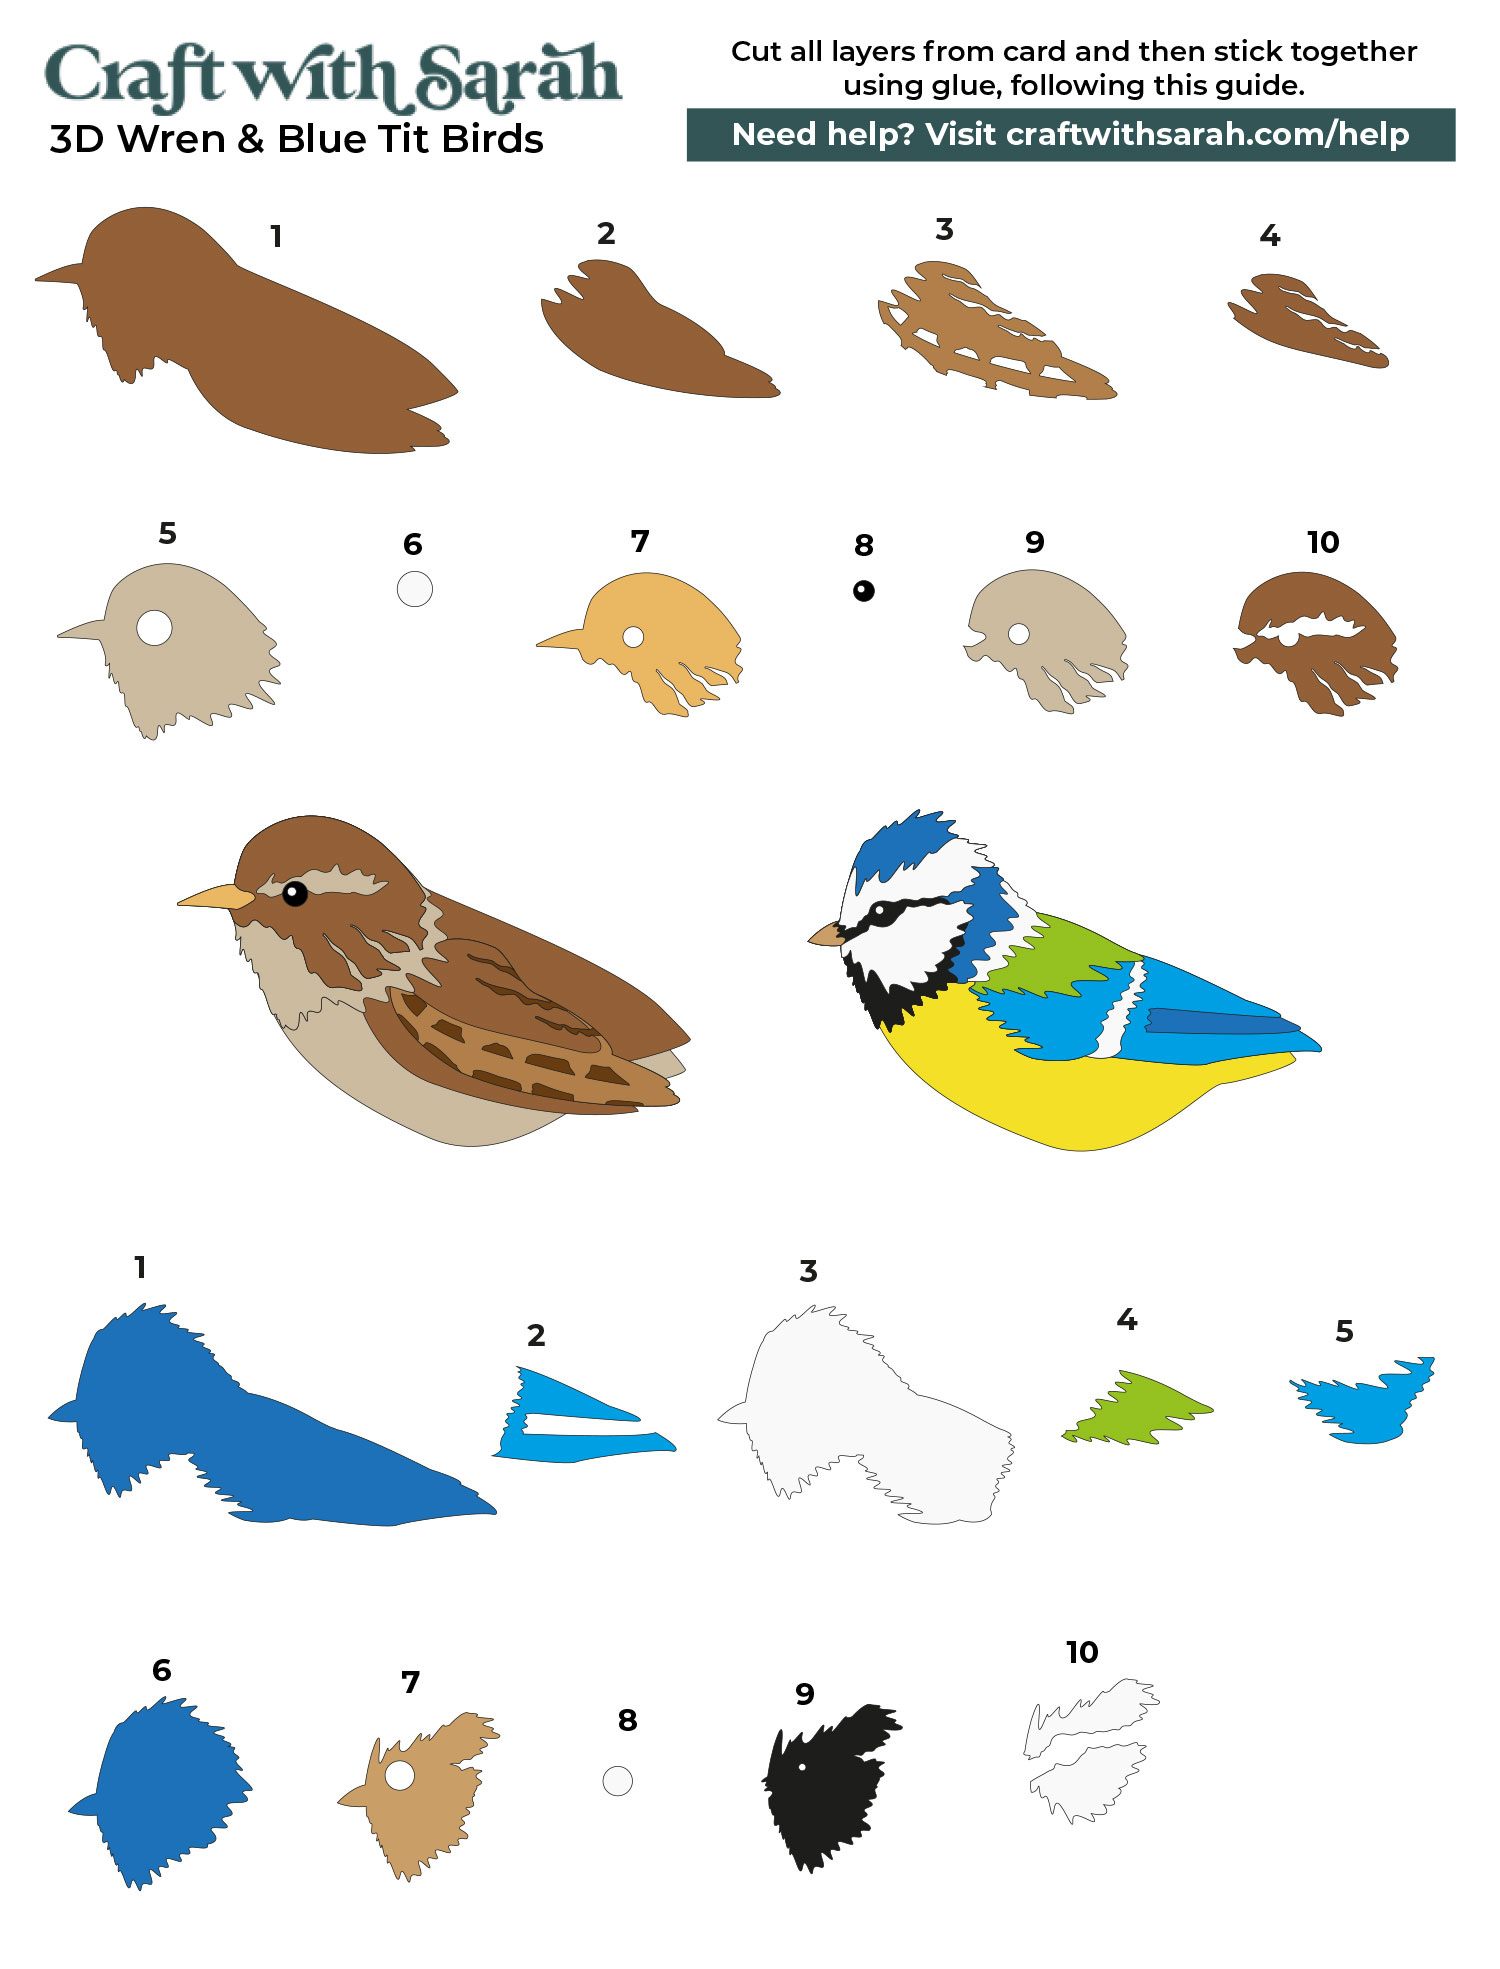
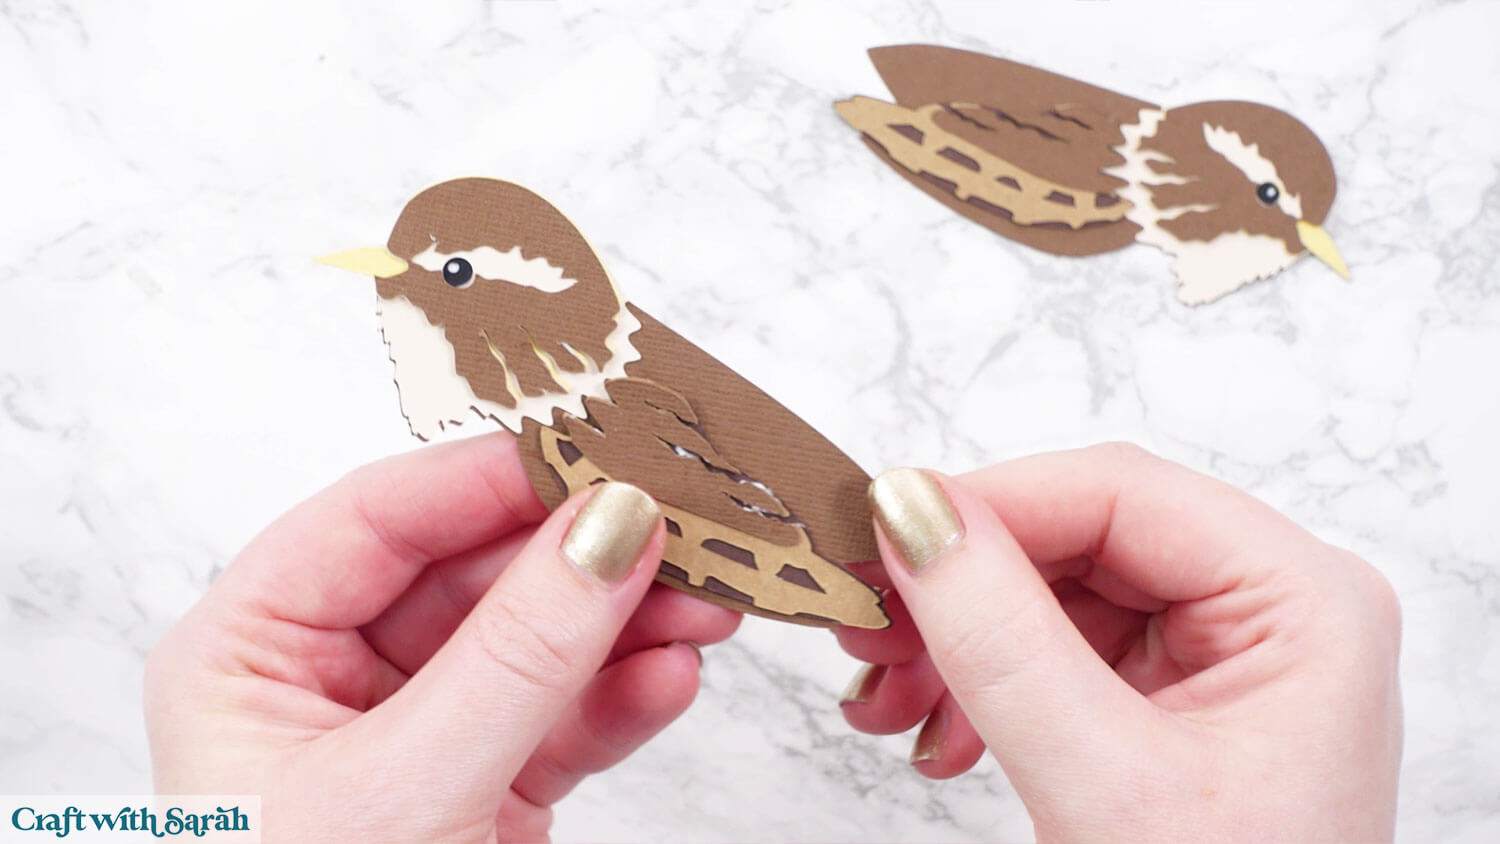
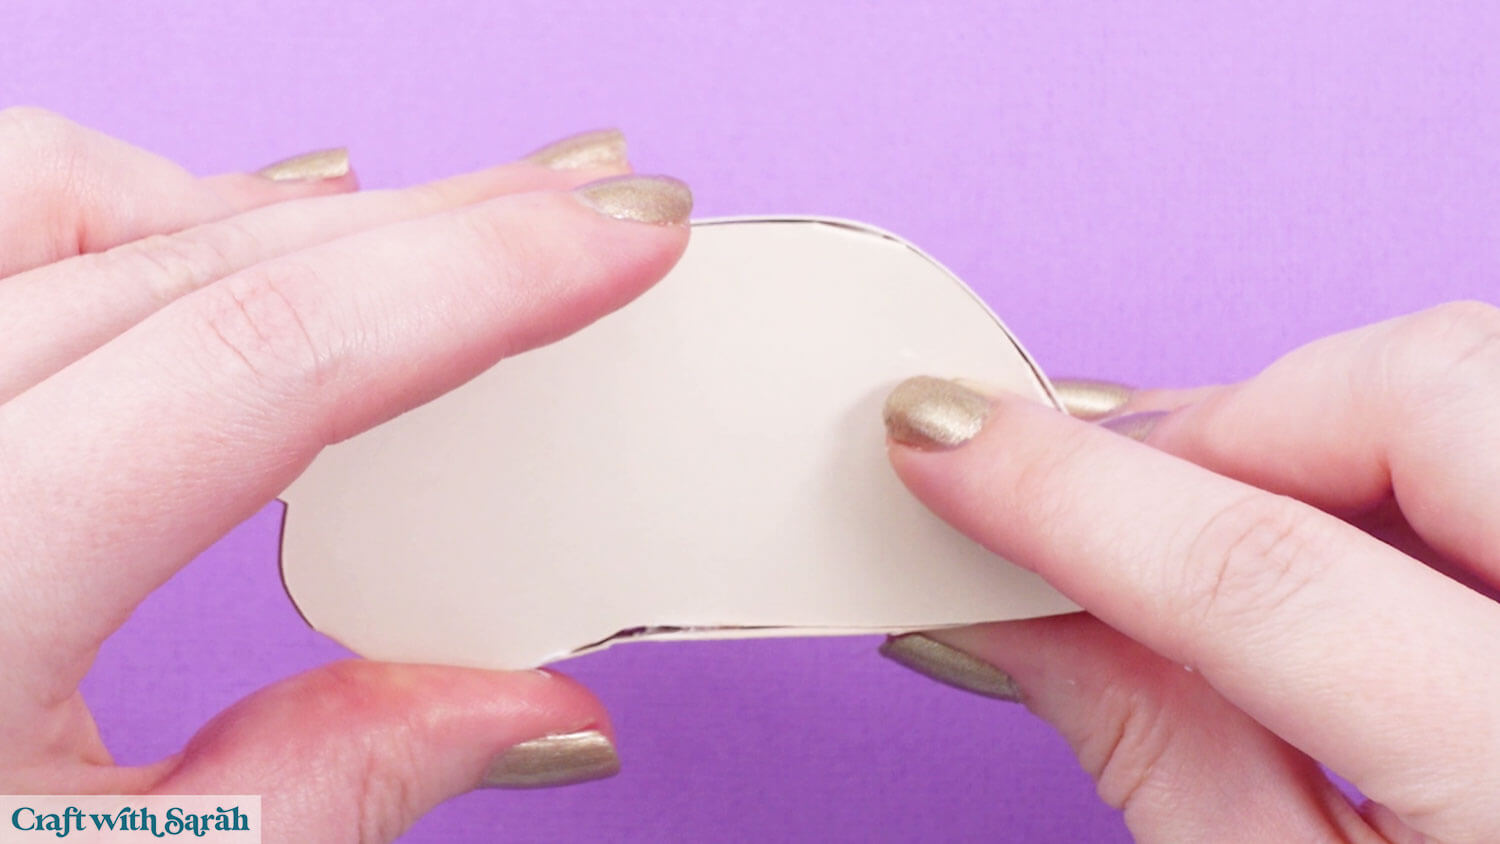
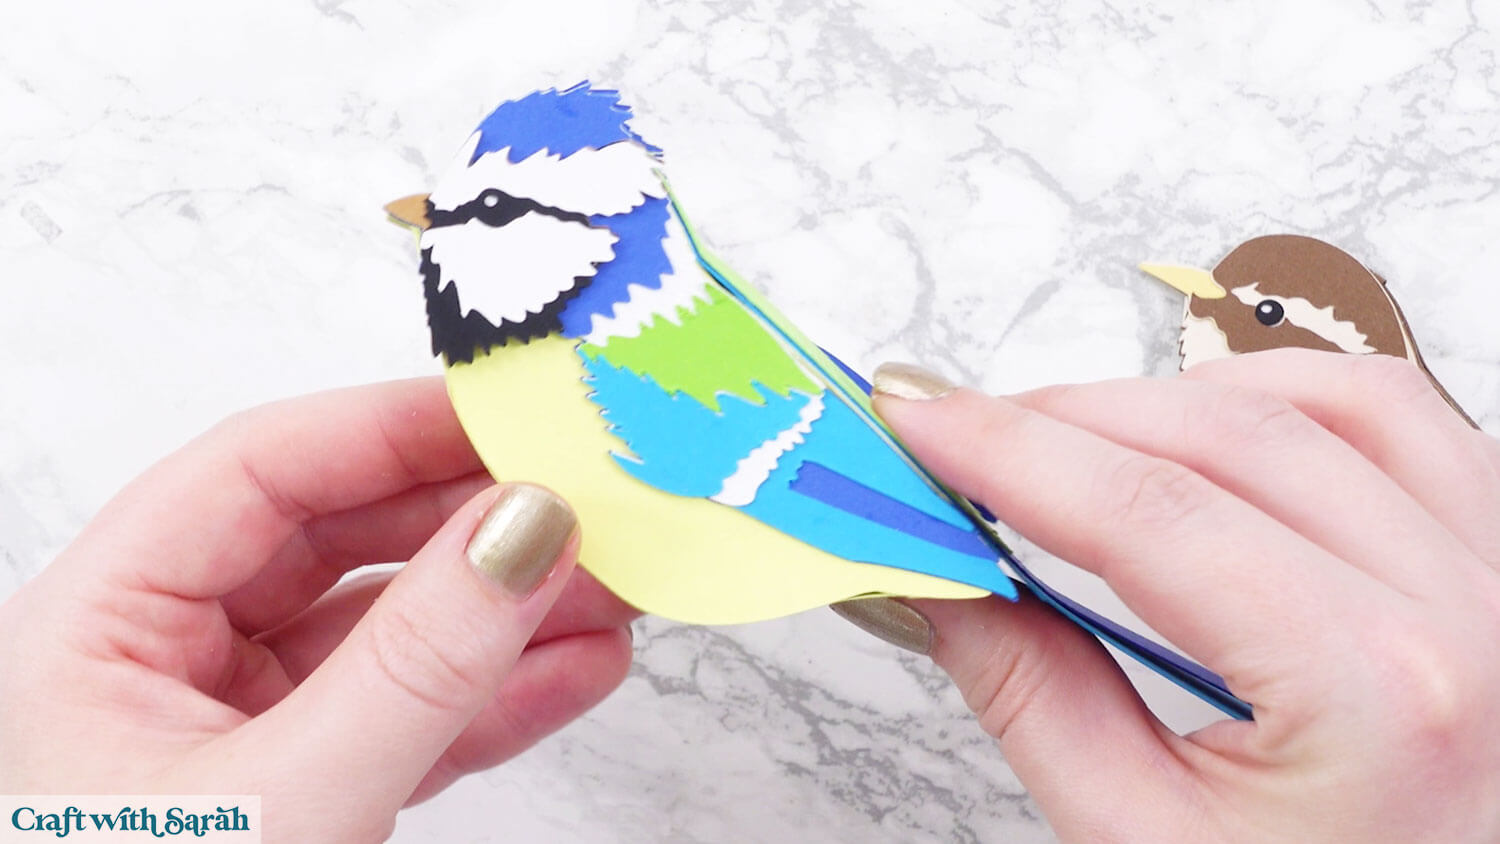
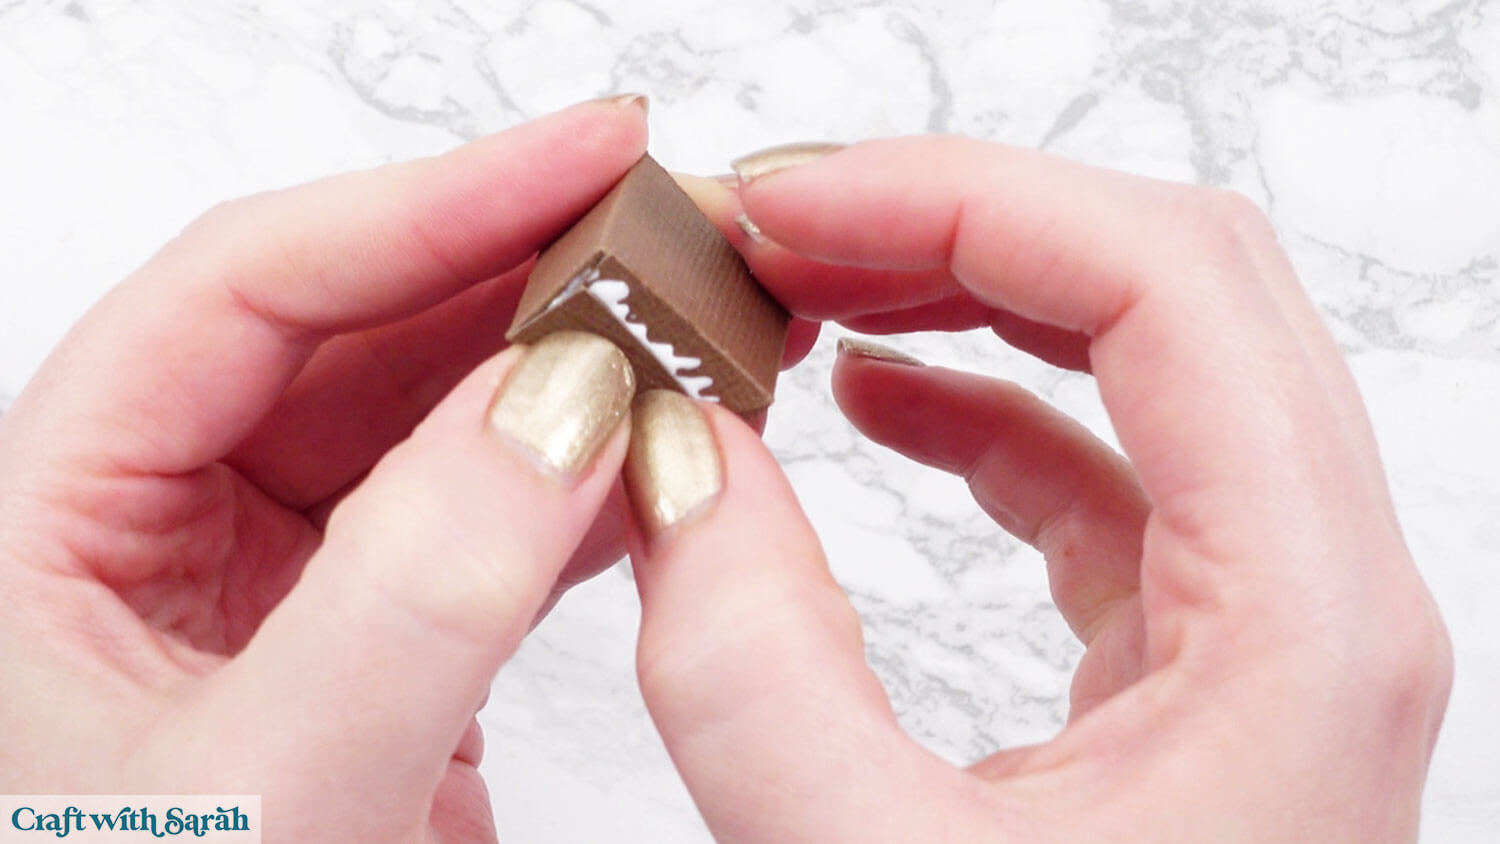
Step 6) Stick the sides of the bird together
Glue the pieces that make up the sides of the bird.
Use this guide to see the order to stick the layers together in. A high quality printable version of this assembly guide is included in the folder when you download the bird SVGs.
I used Bearly Art Glue to stick the project together.
It’s SO good because it doesn’t “warp” or bend the cardstock like some glues do. You can use as much of it as you want and the card stays perfect – and it dries perfectly clear too!
Collall All-Purpose Glue is another great one to use for cardstock, which is more readily available in the UK.

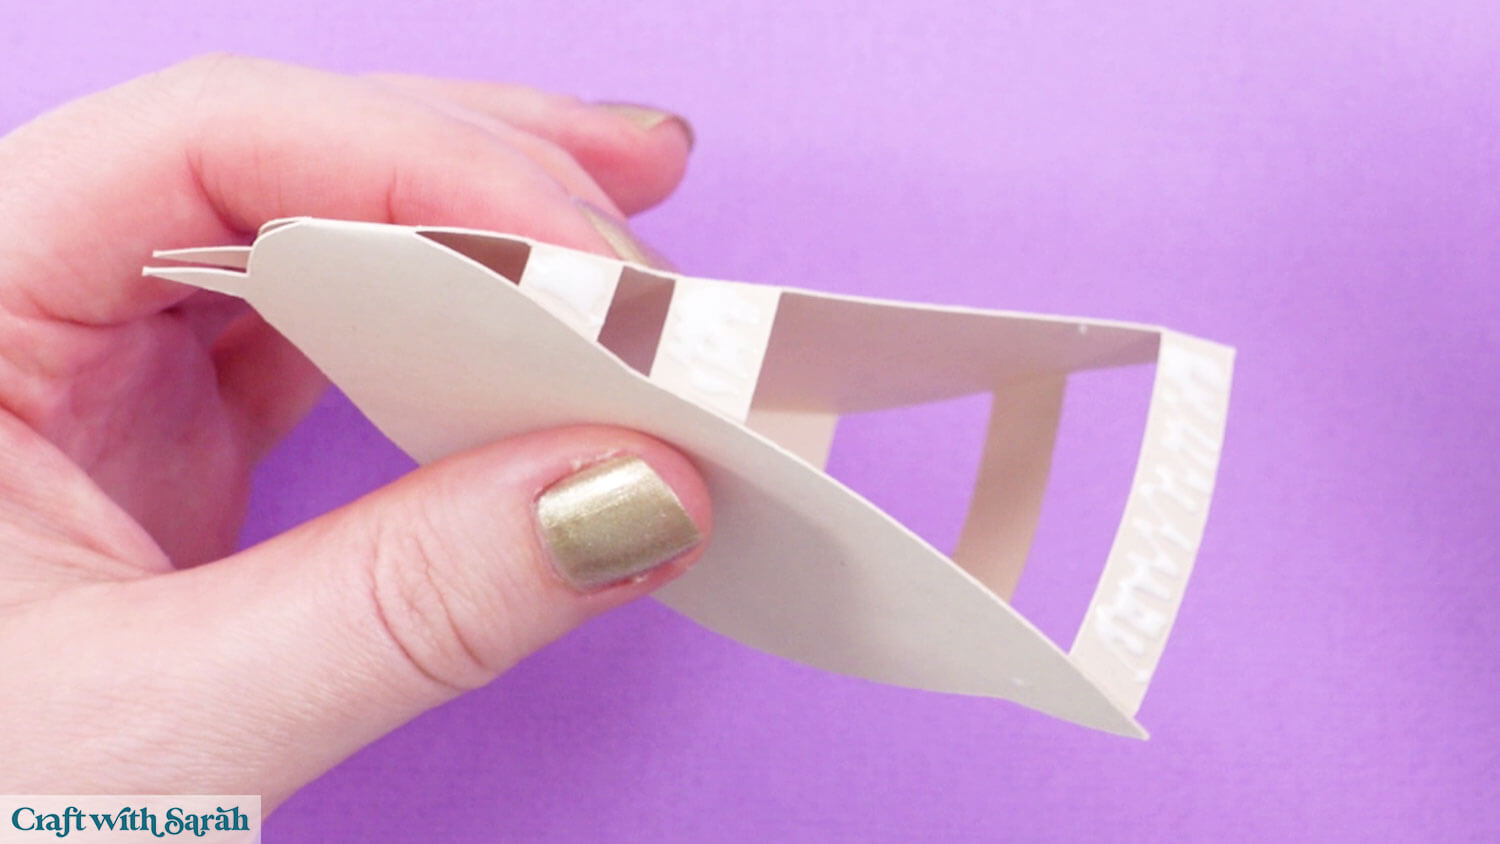
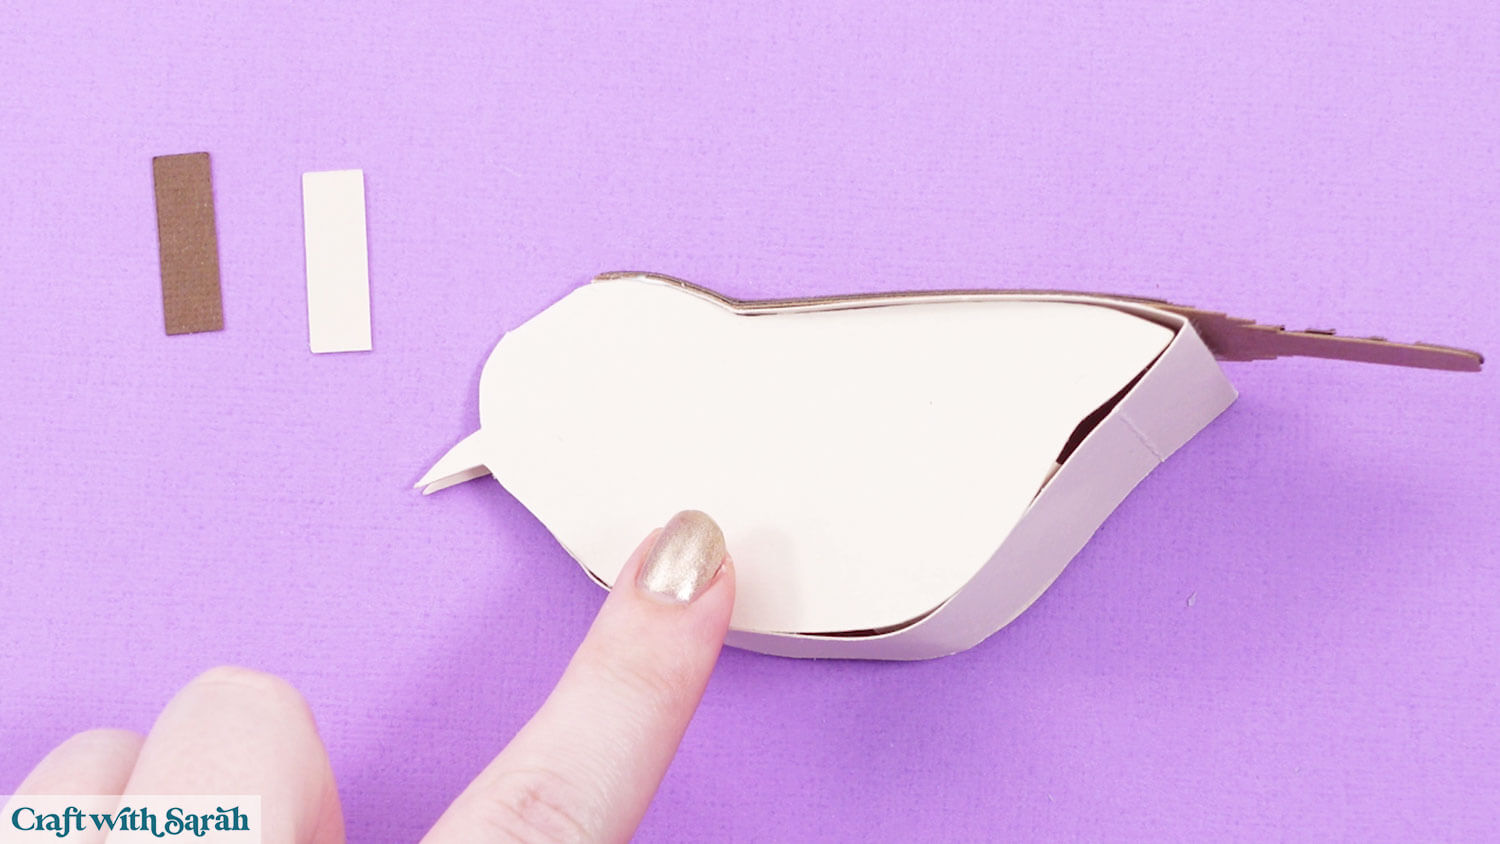
You will end up with a left-side bird and a right-side bird. The pieces go together in the same way for each side.
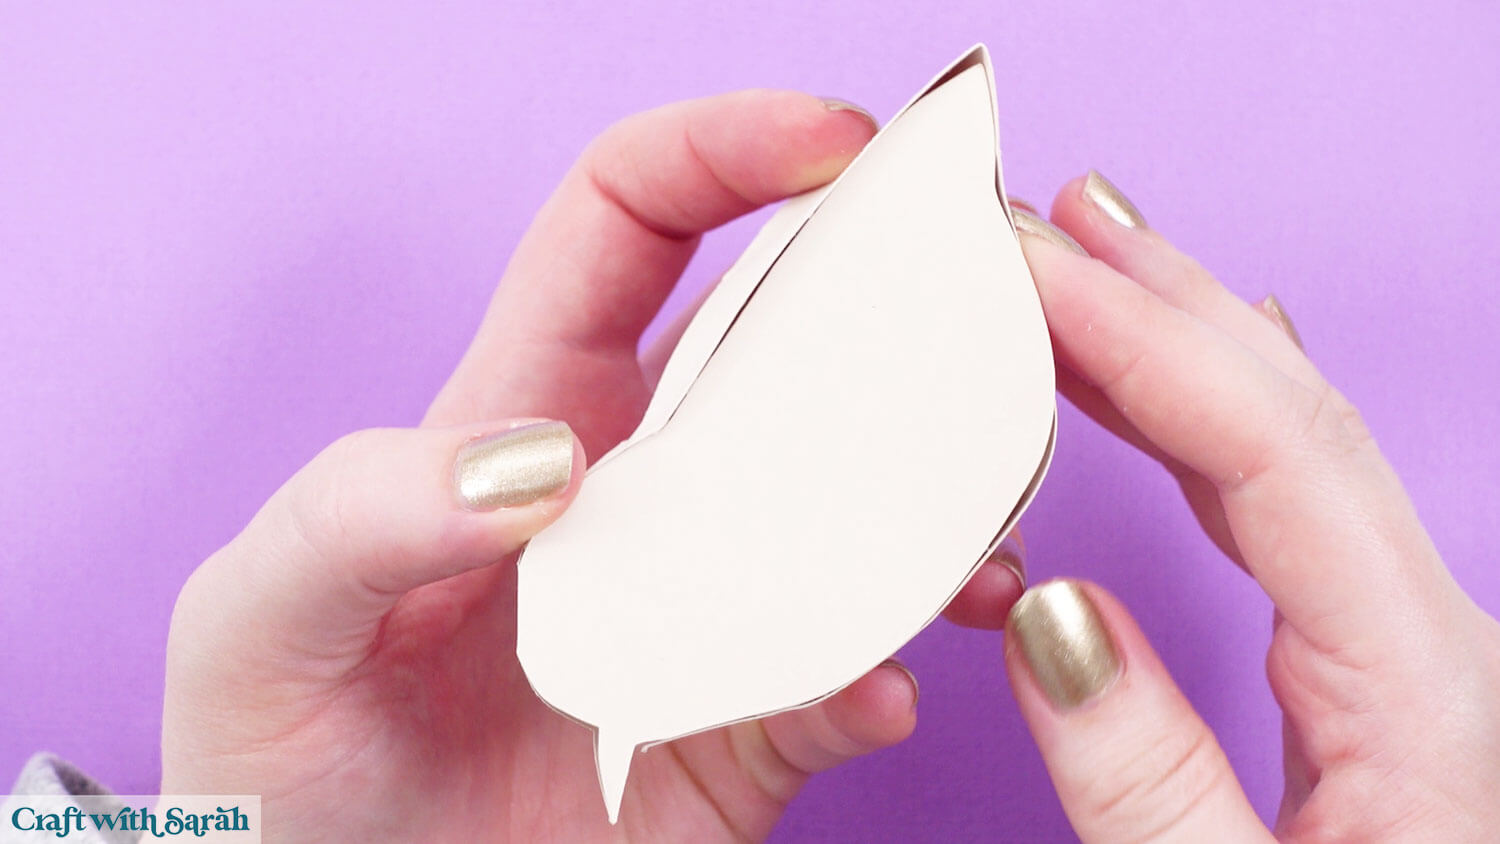
Step 7) Build the bird bodies
Select the main bird structure piece and fold down all of the score lines.
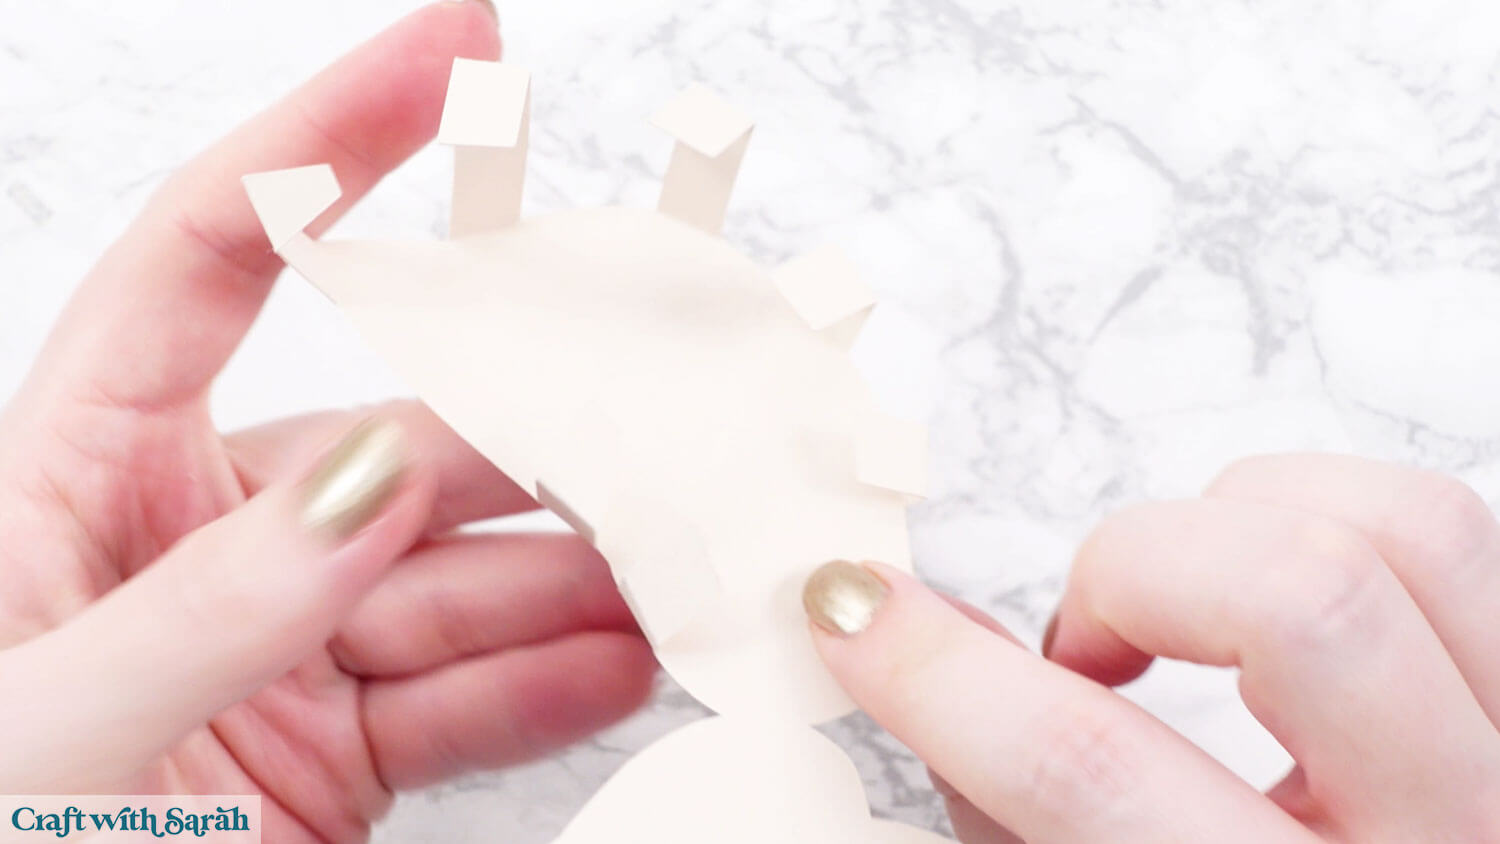
Apply glue to each of the tabs.
Fold the other half of the bird over and stick to the tabs.
Be as accurate as you can at lining the tabs right up to the edge of the bird shape.
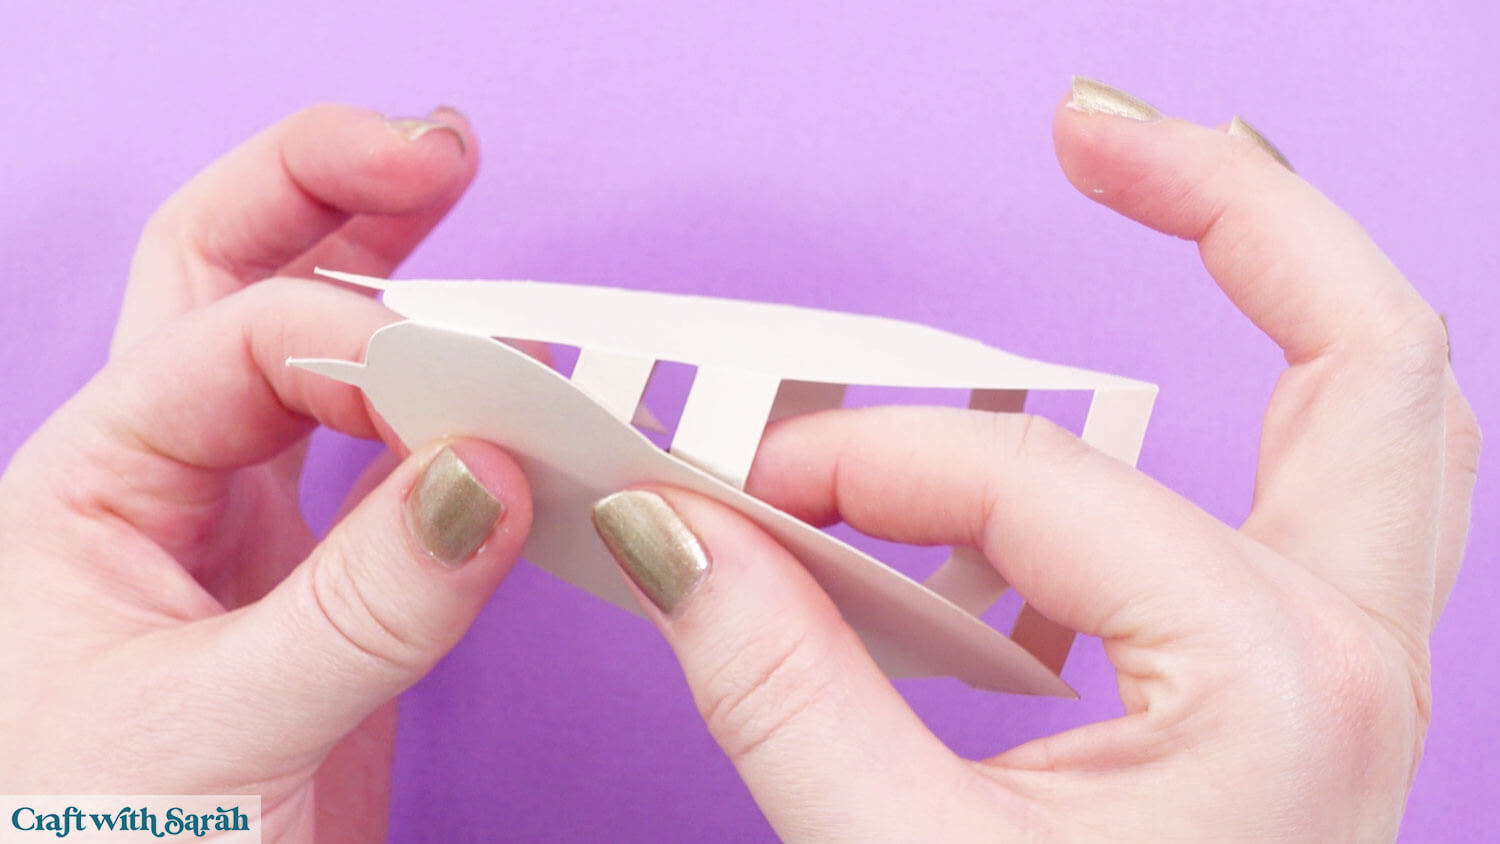
Hold in place while the glue dries.
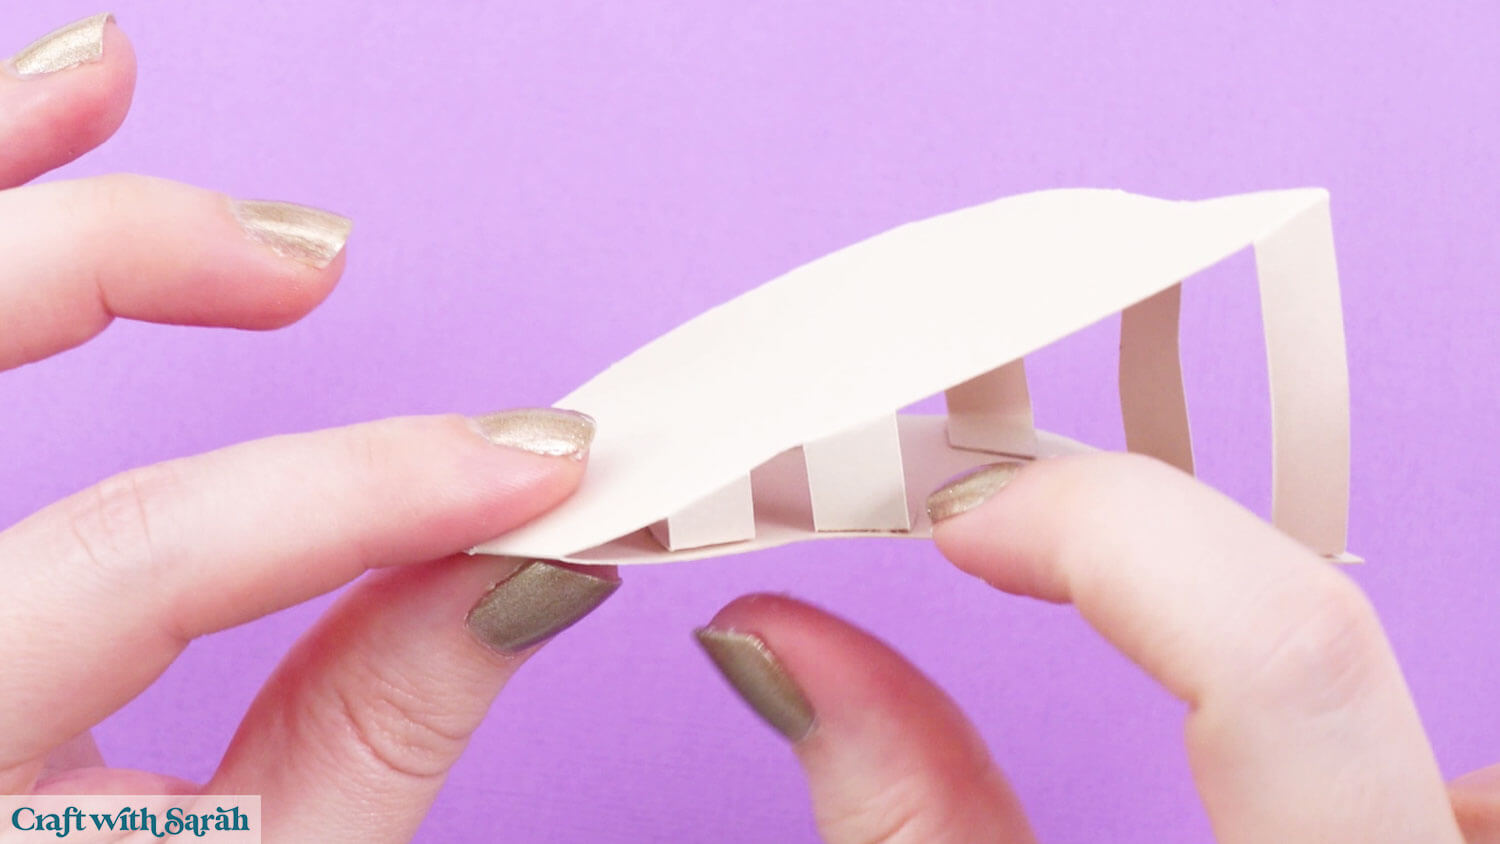
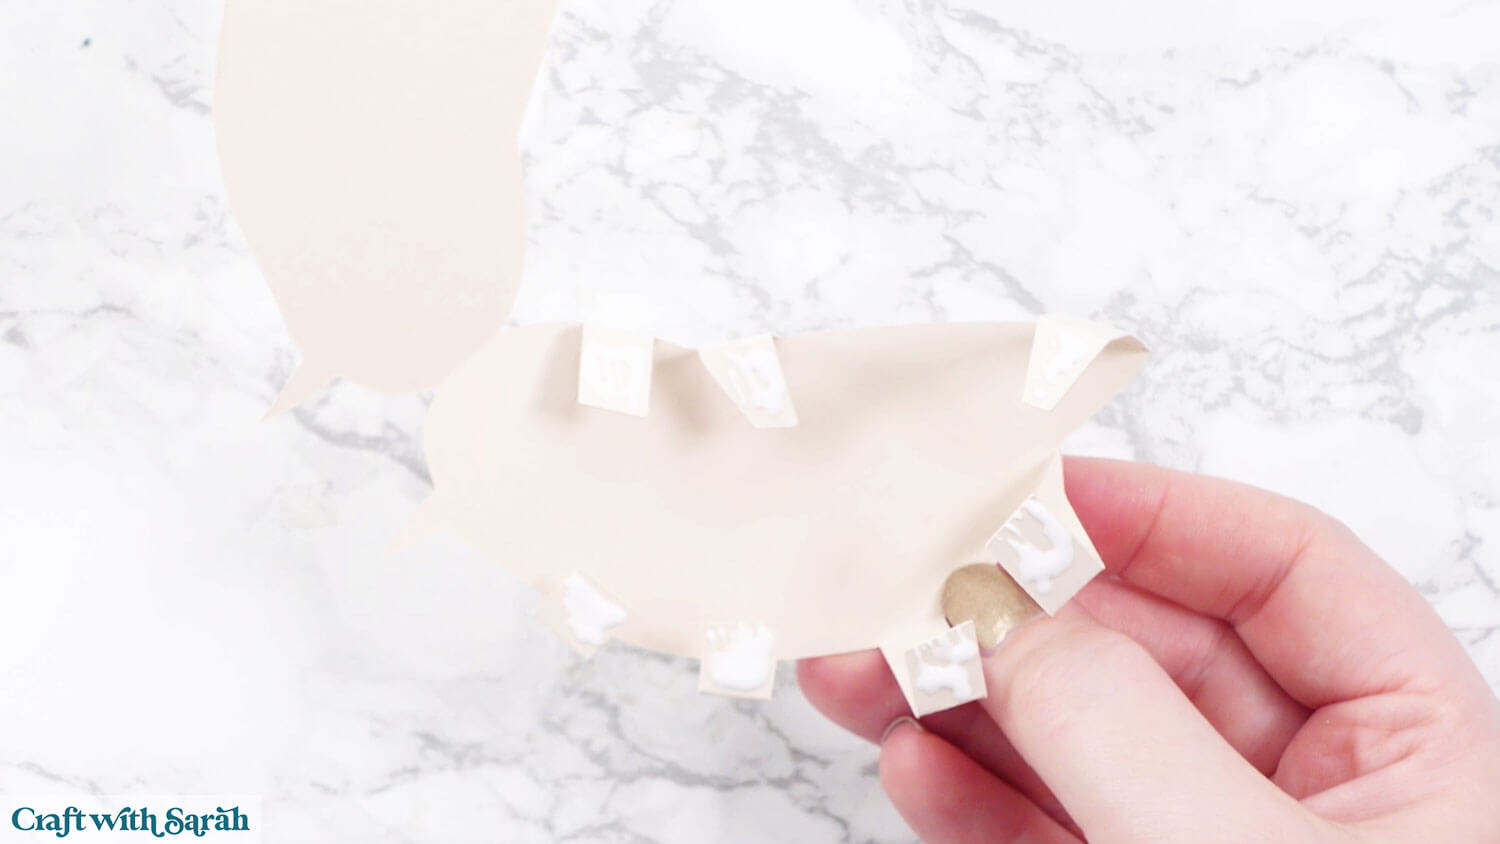
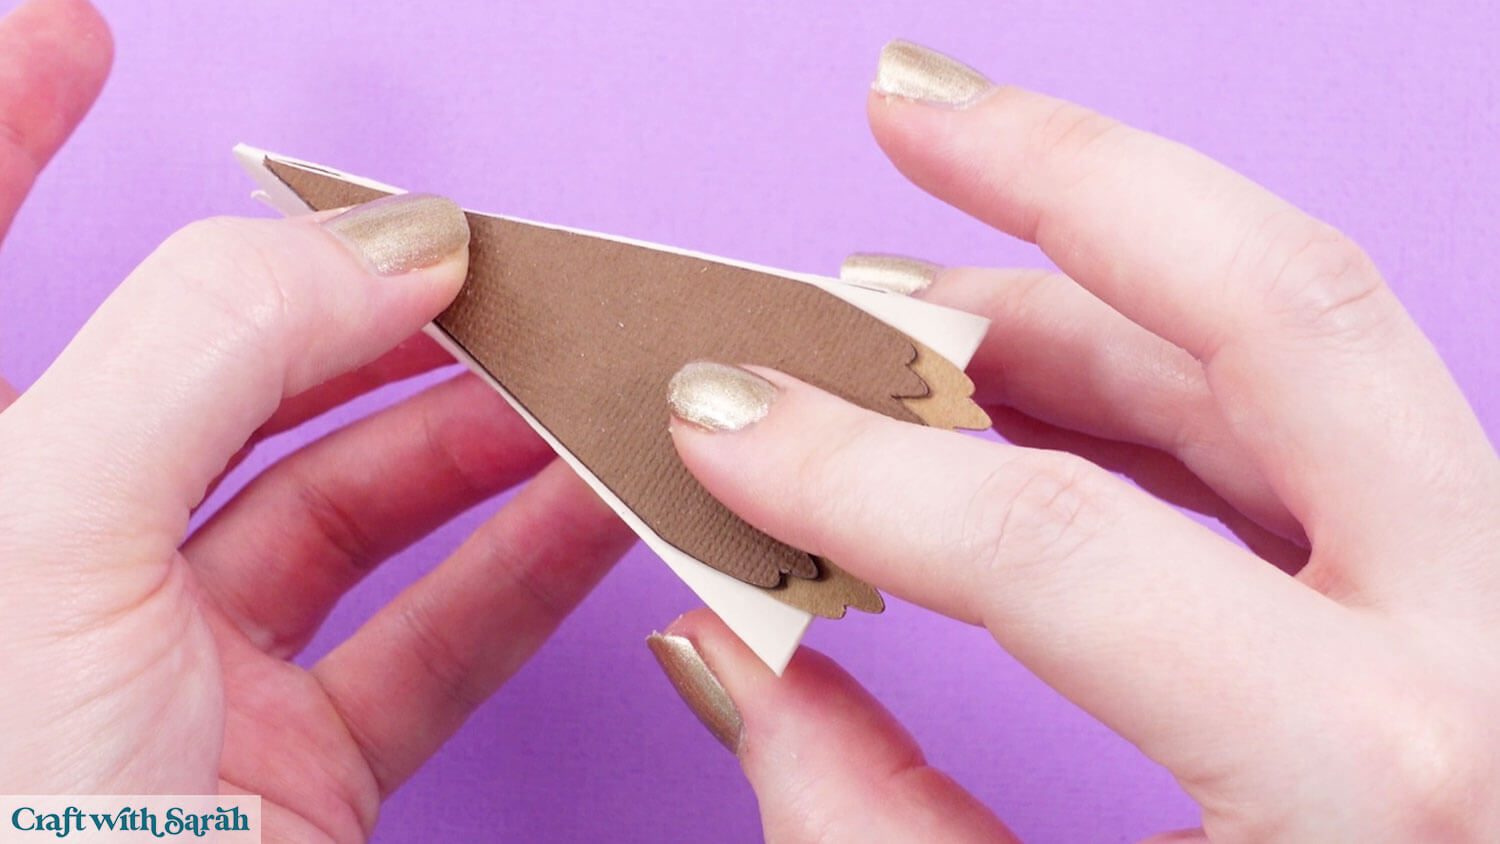
Select the diamond shape piece and fold down the score lines.
Add glue to all the visible tabs on the main bird structure piece. I find it easiest to glue everything at once, so that the diamond shape can be pulled tightly into place, but you may wish to to the top half first and then the bottom part.
Glue the diamond piece onto the tabs, pulling it into the shape of the bird as tightly as you can to avoid any gaps.
The side of the diamond with the score line near the “point” goes at the top of the bird (above the head).
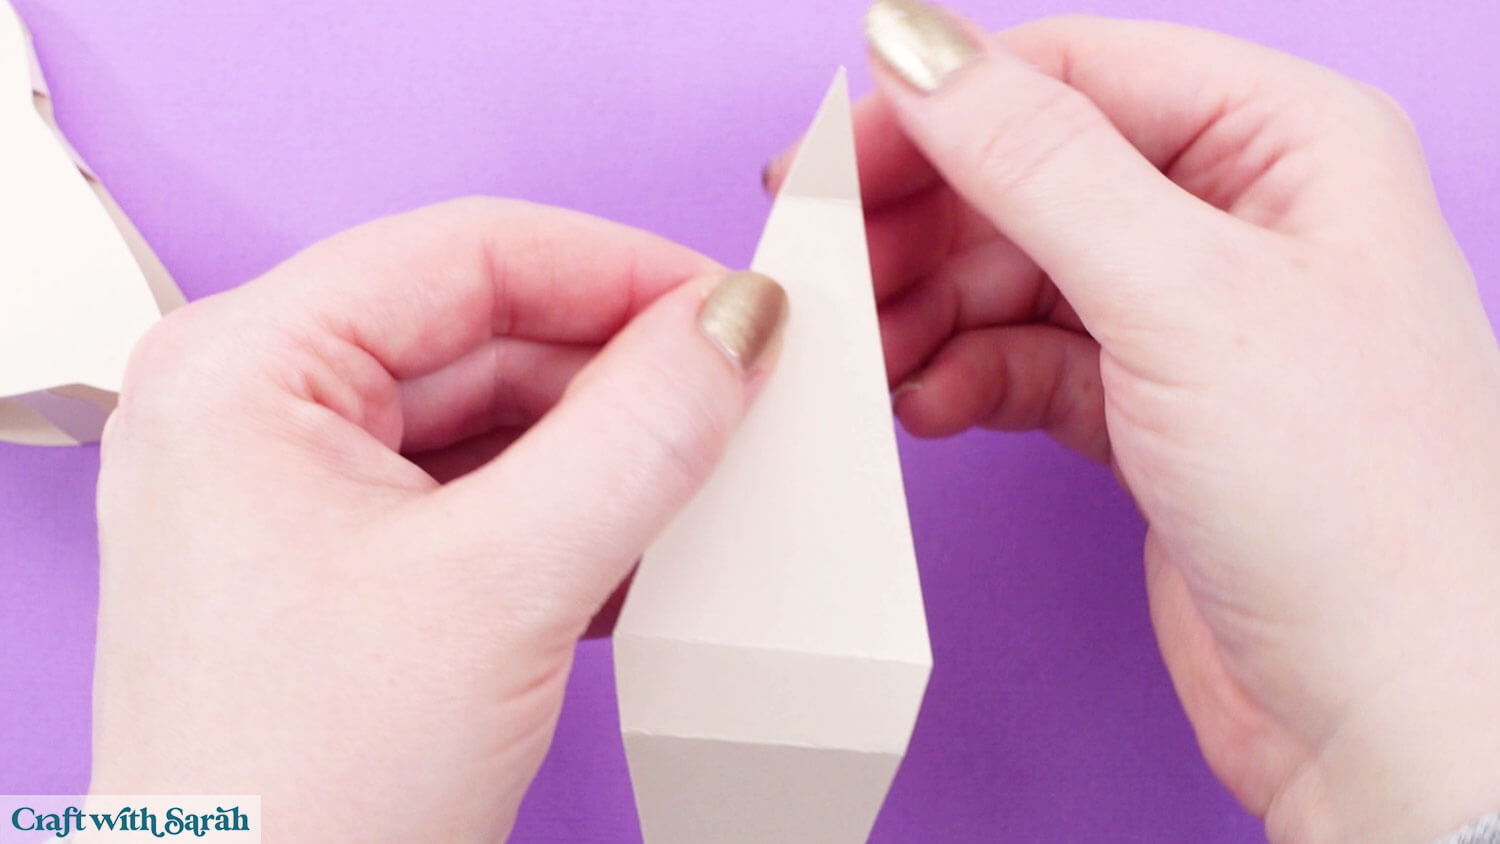
Valley fold the score line on the three tail pieces, then glue them on top of each other.
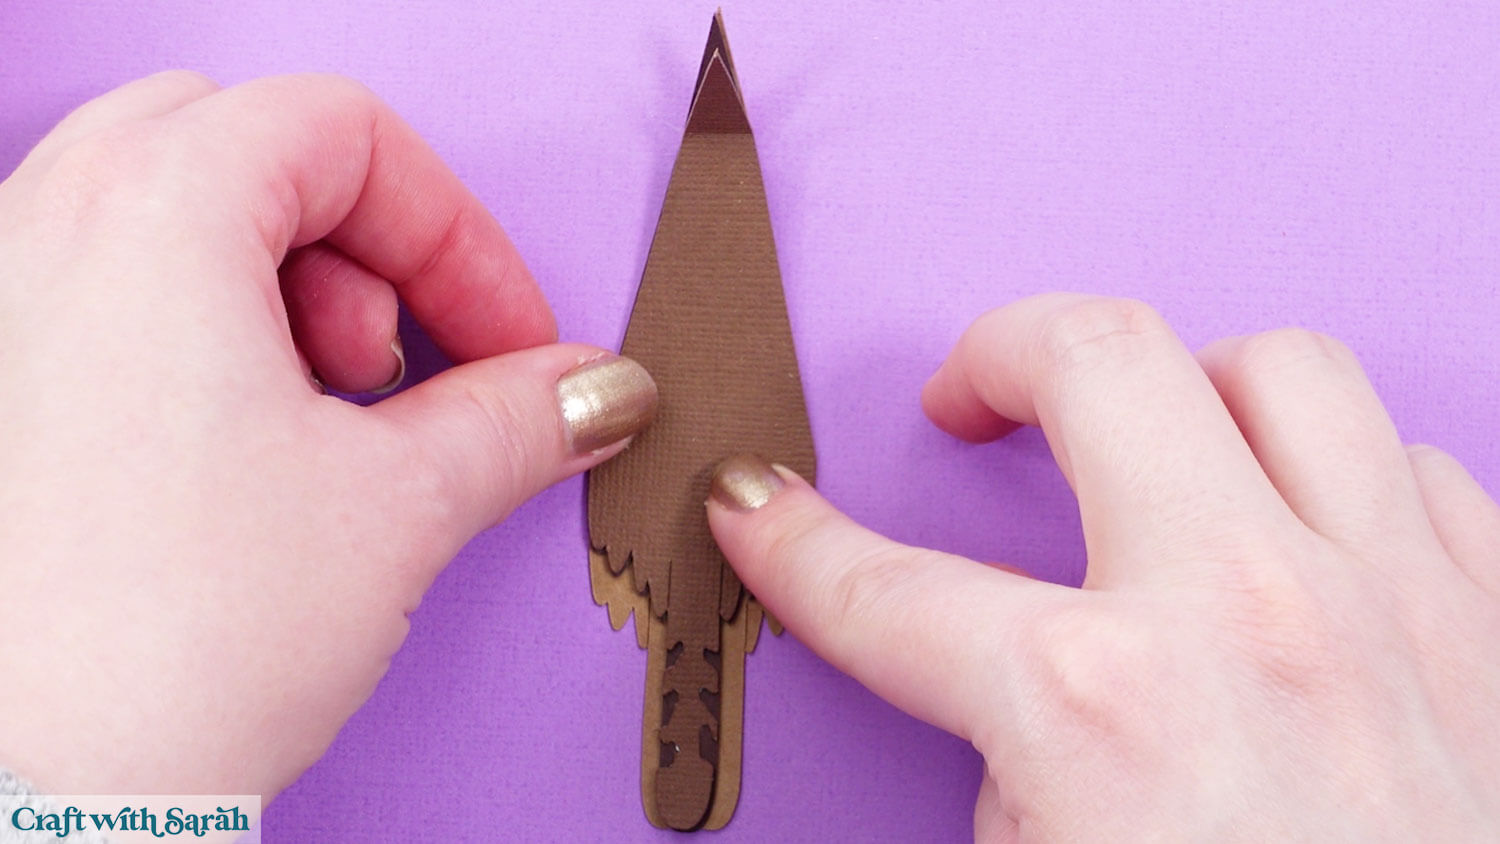
Glue to the back of the bird. Don’t add glue to the bottom part of the feathers as they overhang the body.
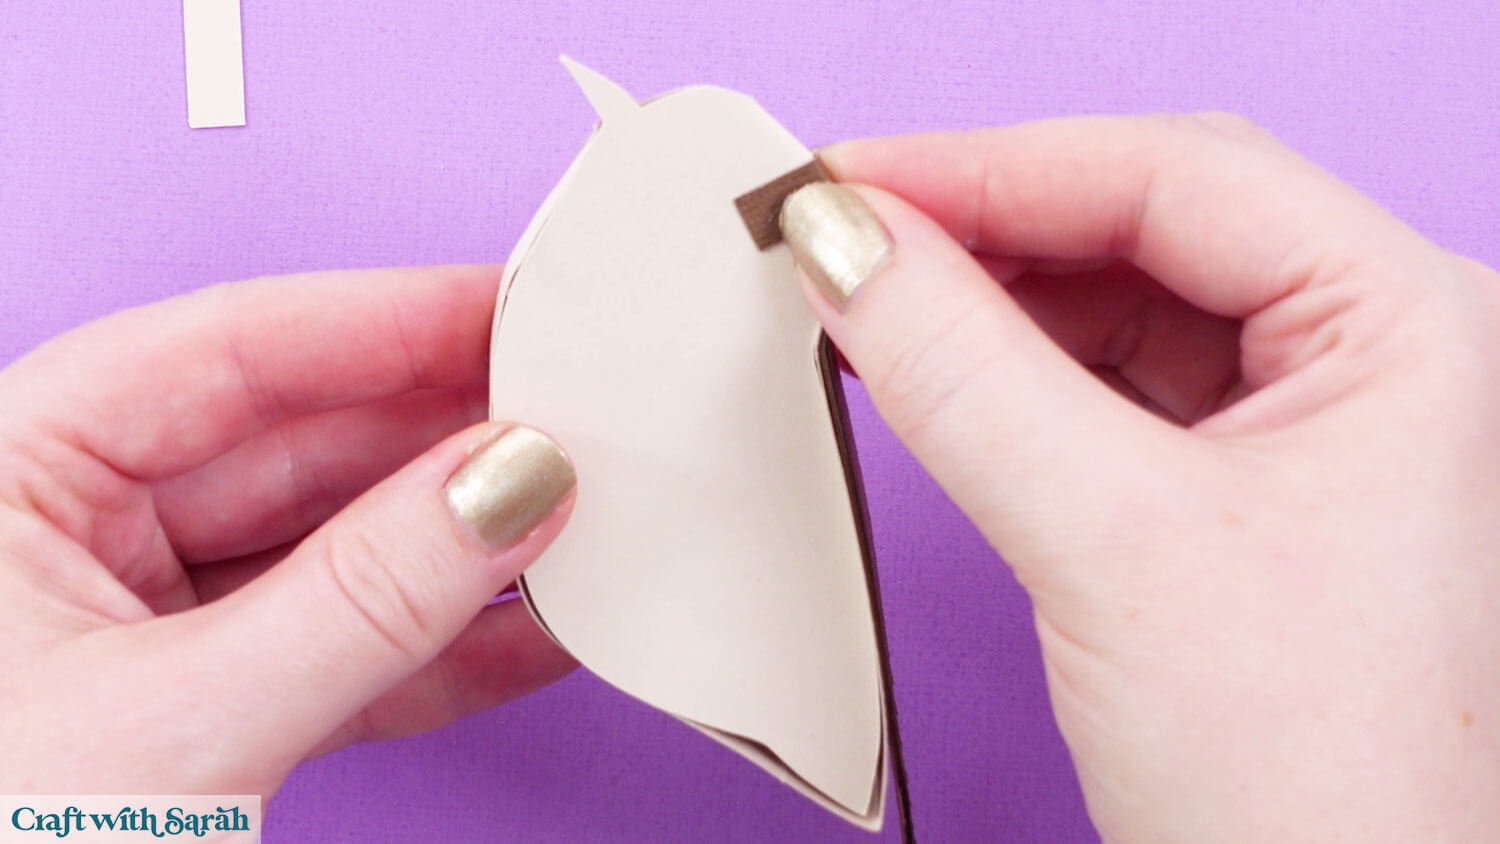
The two small rectangles are to pull the points of the diamond in place and hold them firmly.
For the wren, glue the brown rectangle to cover the point of the diamond at the top of the head. Pull it tightly.
Glue the creamy coloured piece to the point of the diamond under the beak.
For the blue tit, the green rectangle goes on top of the head and the yellow rectangle goes under the beak.
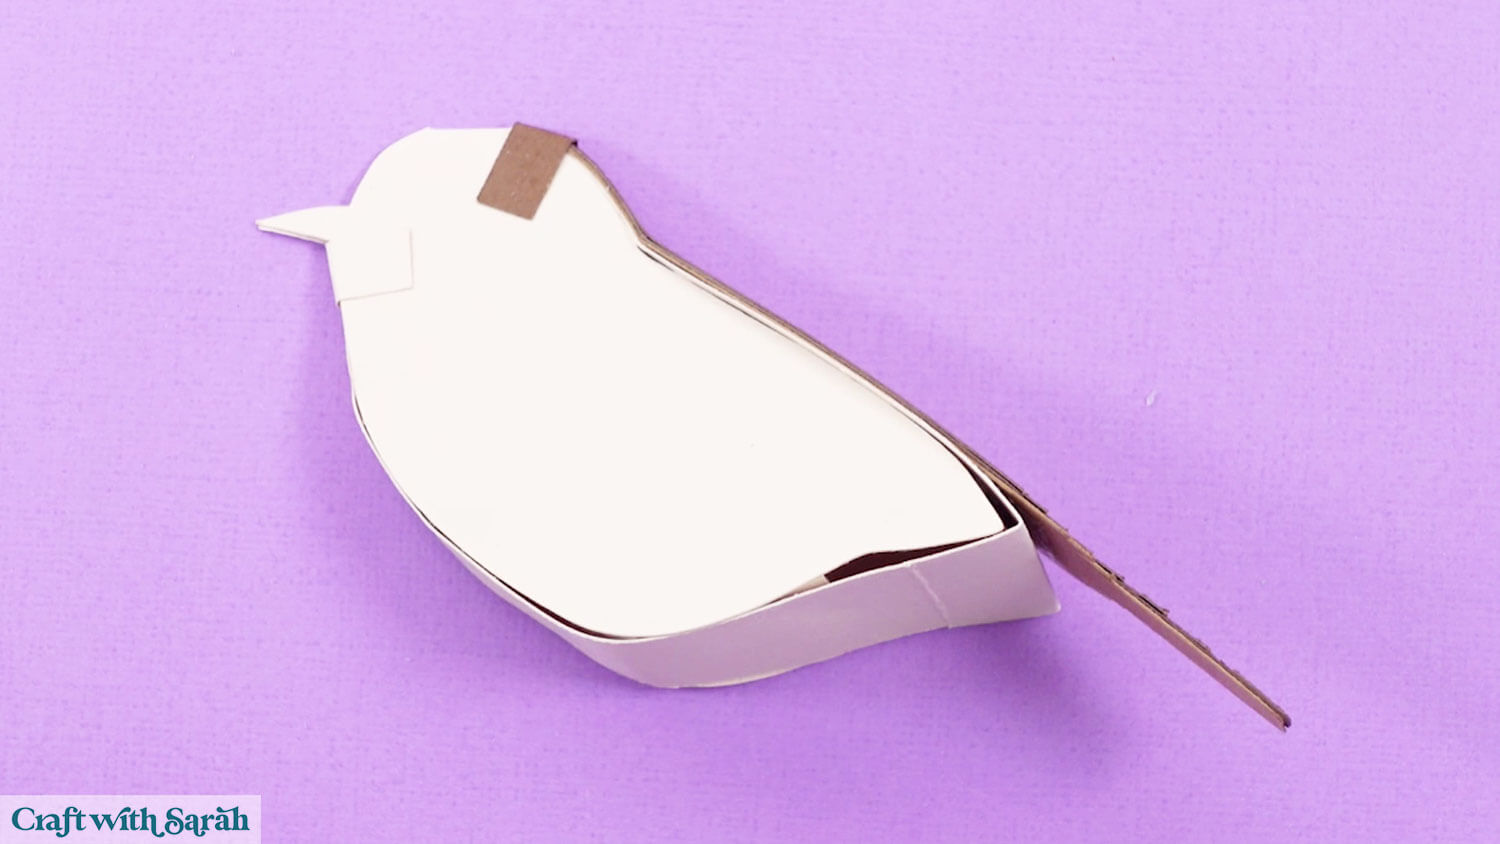
Glue the sides of the birds in place.
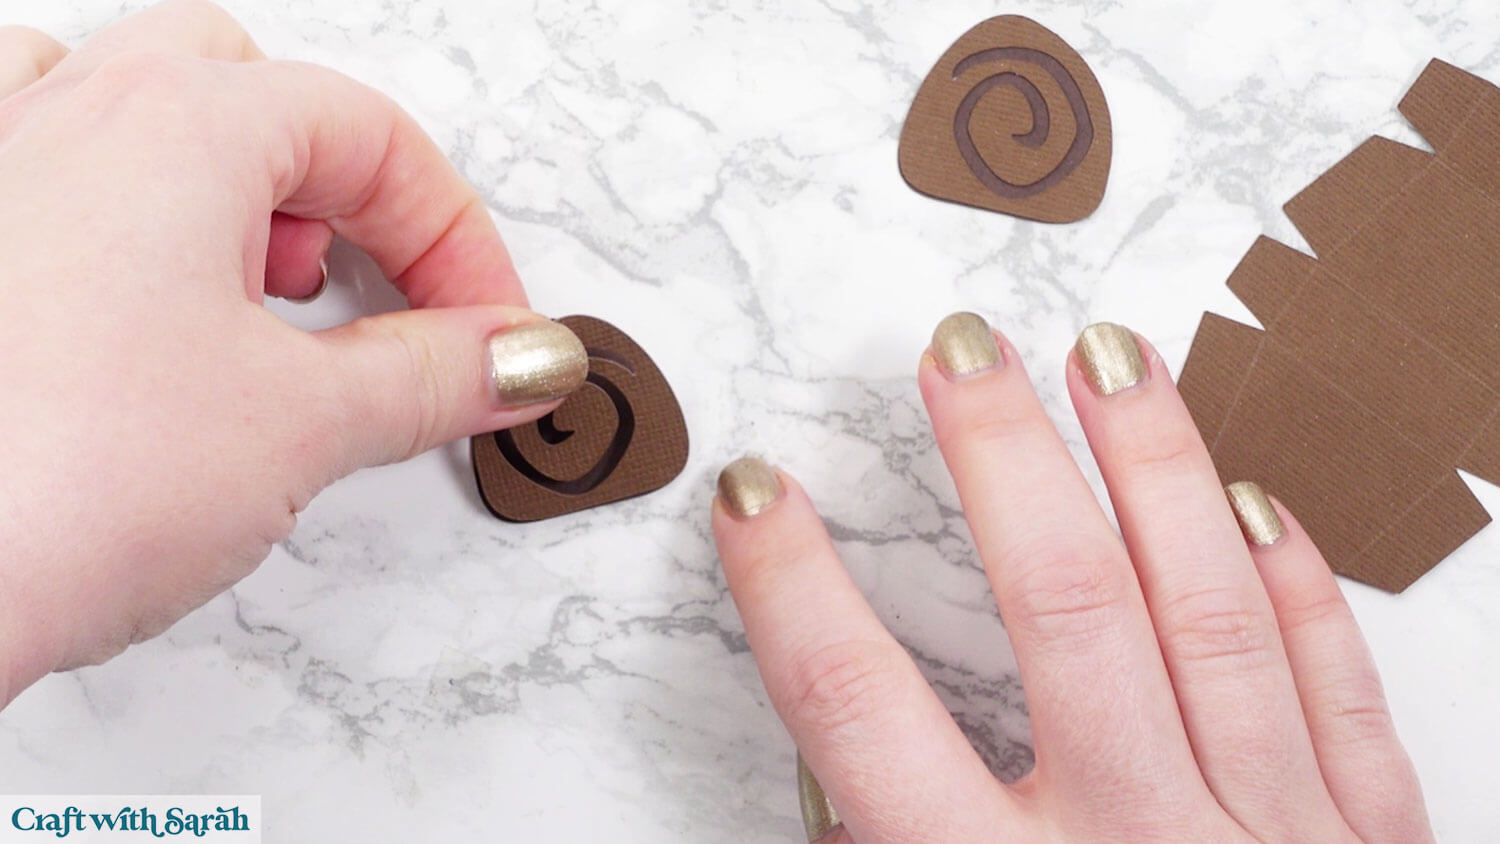
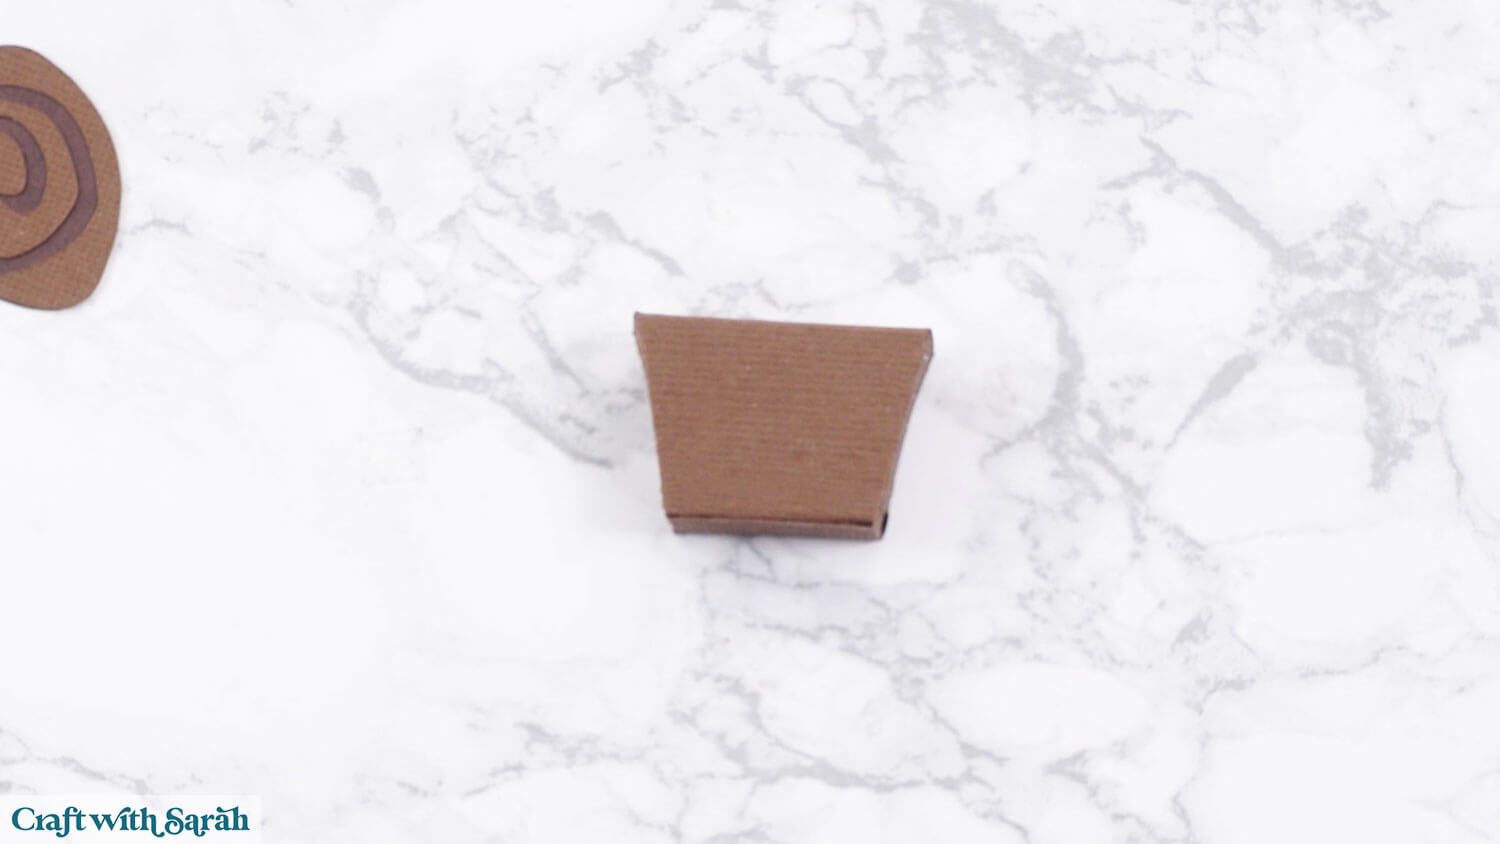
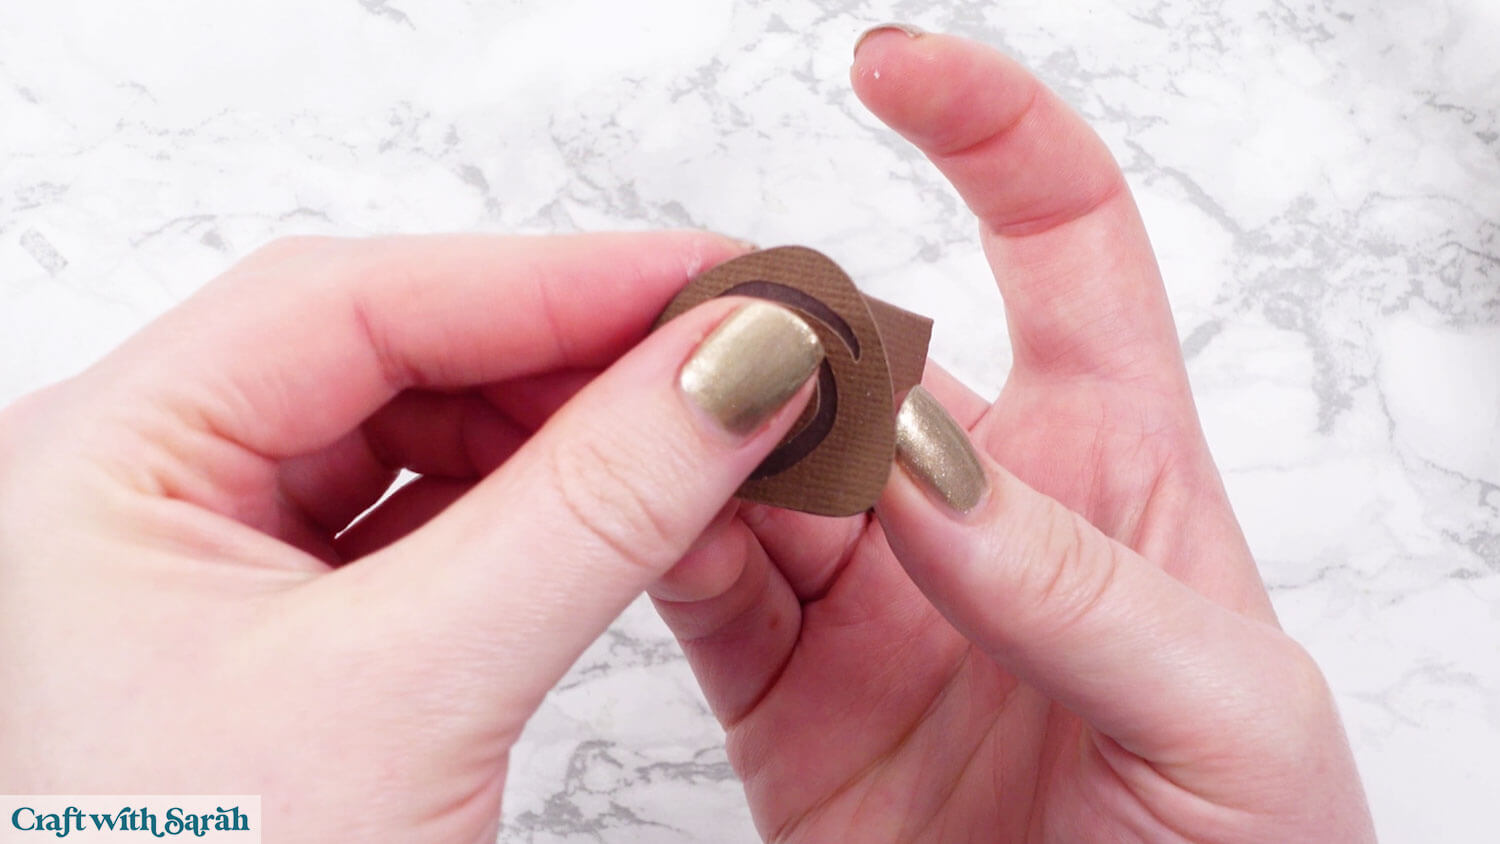
Step 8) Build the tree stands
Glue the swirly cutout shapes of the end of the tree stands to the solid darker brown shapes.
Fold along all the score lines of the stand piece.
Add glue to the top of the lengthways tab.
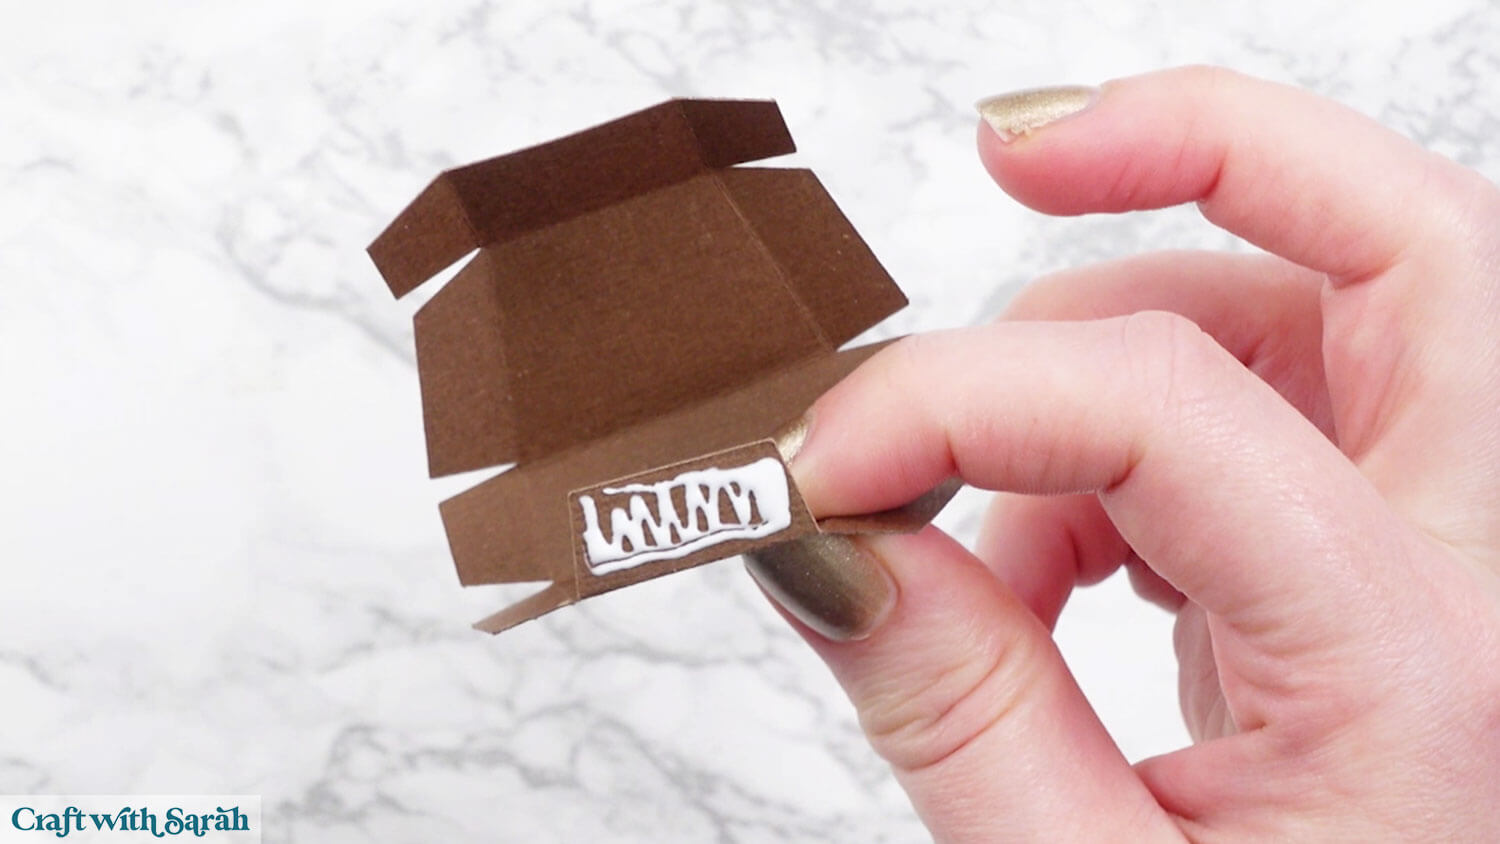
Glue to the other end to make a box shape.
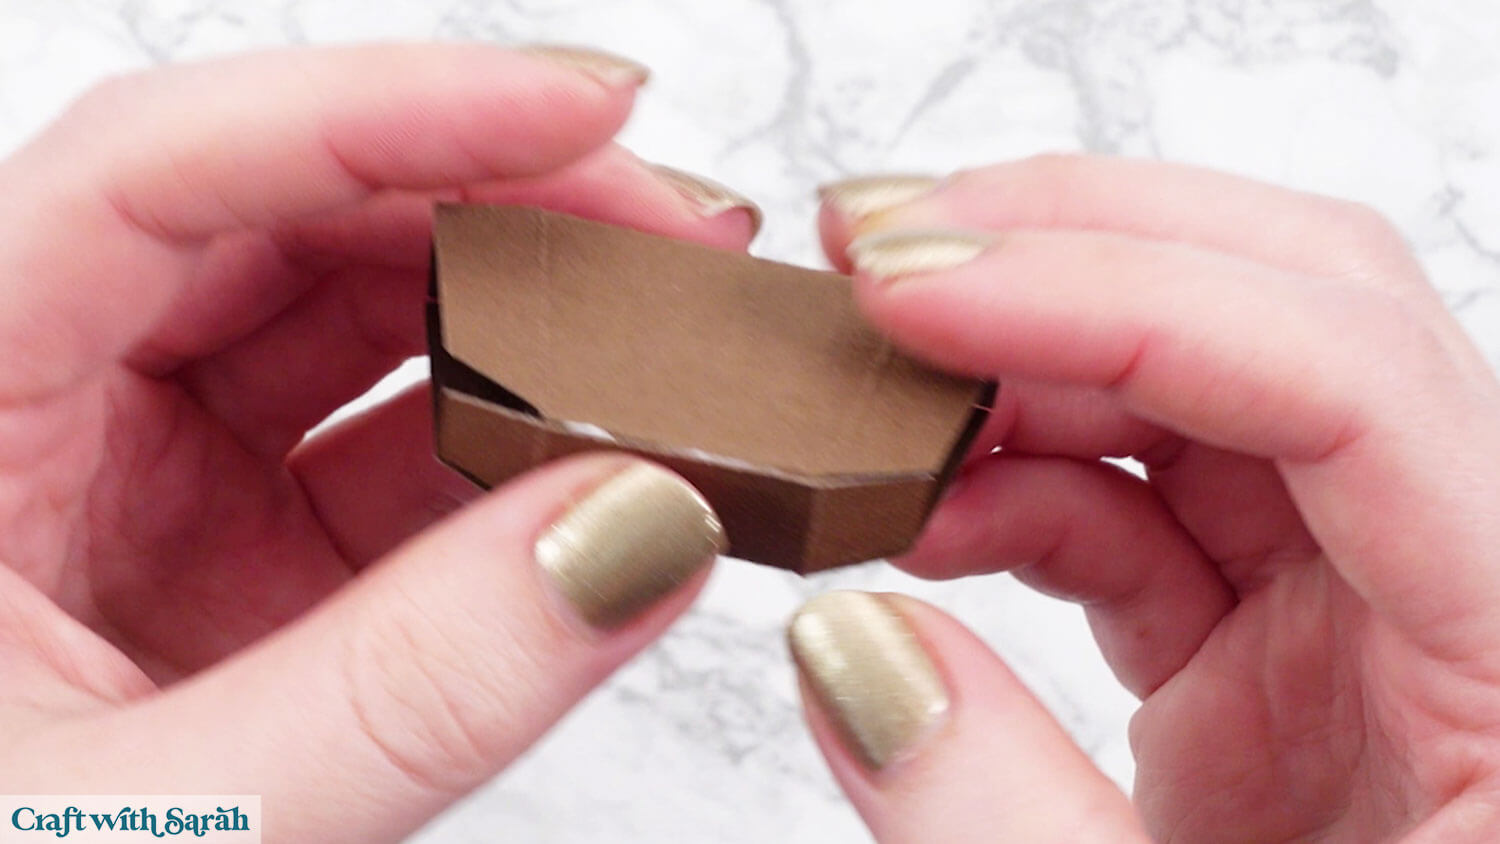
Glue the tabs on each side together to seal the ends.
It’s ok if you are a bit messy with your glue (like I was!!) as these ends will get covered by the detail pieces.
Place the tree stand so that it is flat against your work surface, in the position shown below.
Glue the decorative pieces to each end to cover the tabs.
Wait for the glue to fully dry before balancing the birds in place,
Realistic 3D birds to make with a Cricut
The birds can now balance on the tree pieces, making them stand up beautifully.
It might take a few tries to get the birds to stay in place.
Use the tails to help add extra balance by touching the tails against your display surface.
You could glue the birds to the stands if you would like them to be a bit sturdier and less likely to fall off.

If you enjoyed this project, I’d love to see your creations! Post your finished designs to social media or share them in our Community. Seeing what you make always brightens my day!
Happy crafting,
Sarah x

