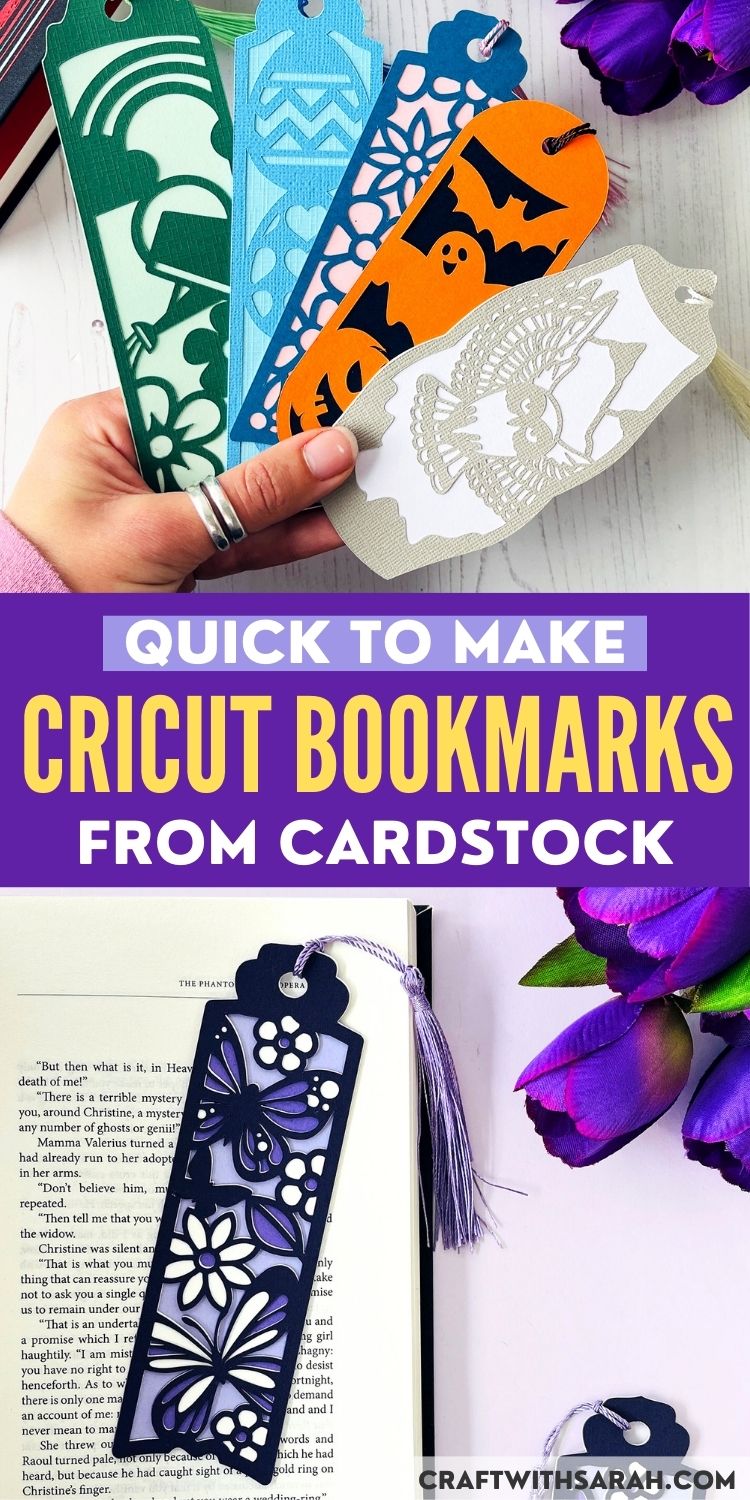
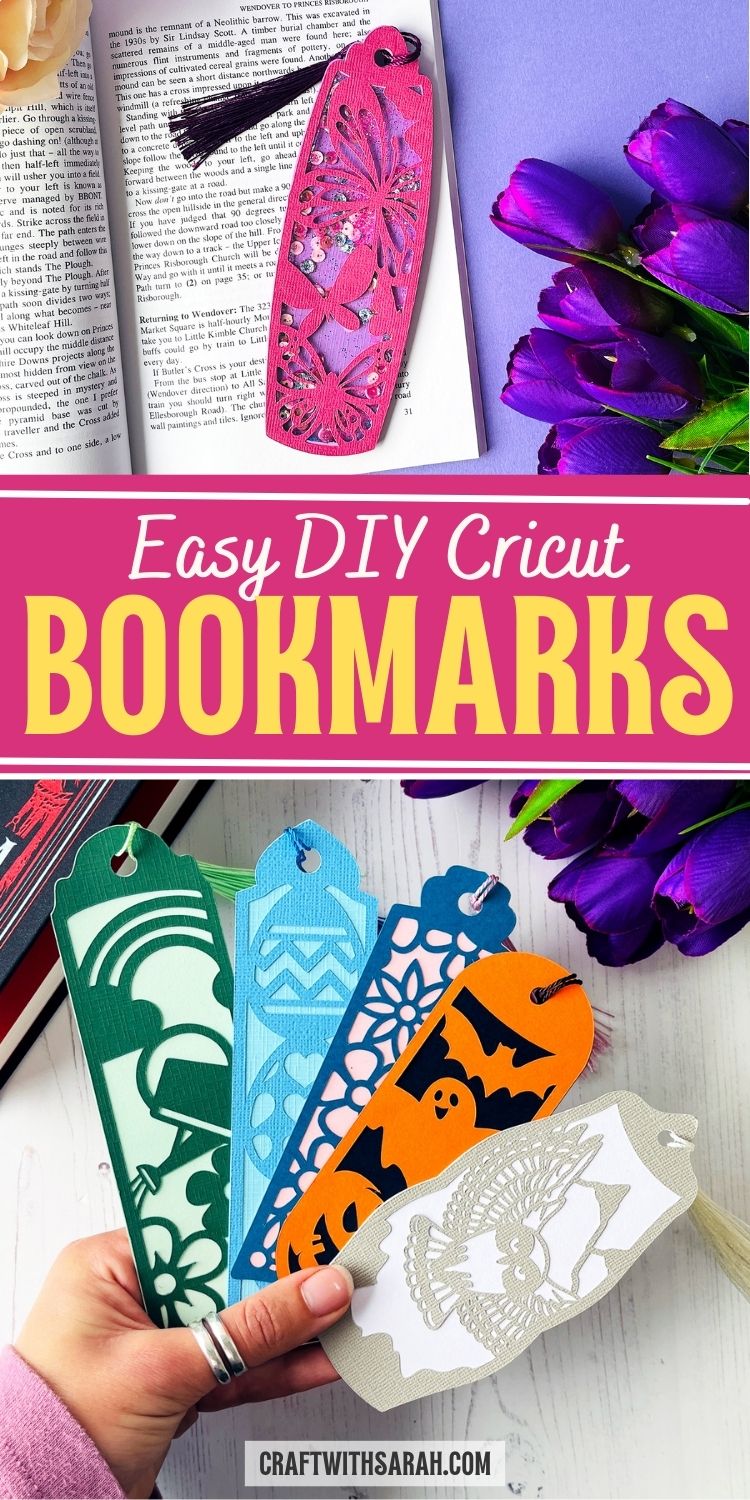
How to Make Bookmarks with a Cricut 🦋 Including SHAKER Bookmarks!
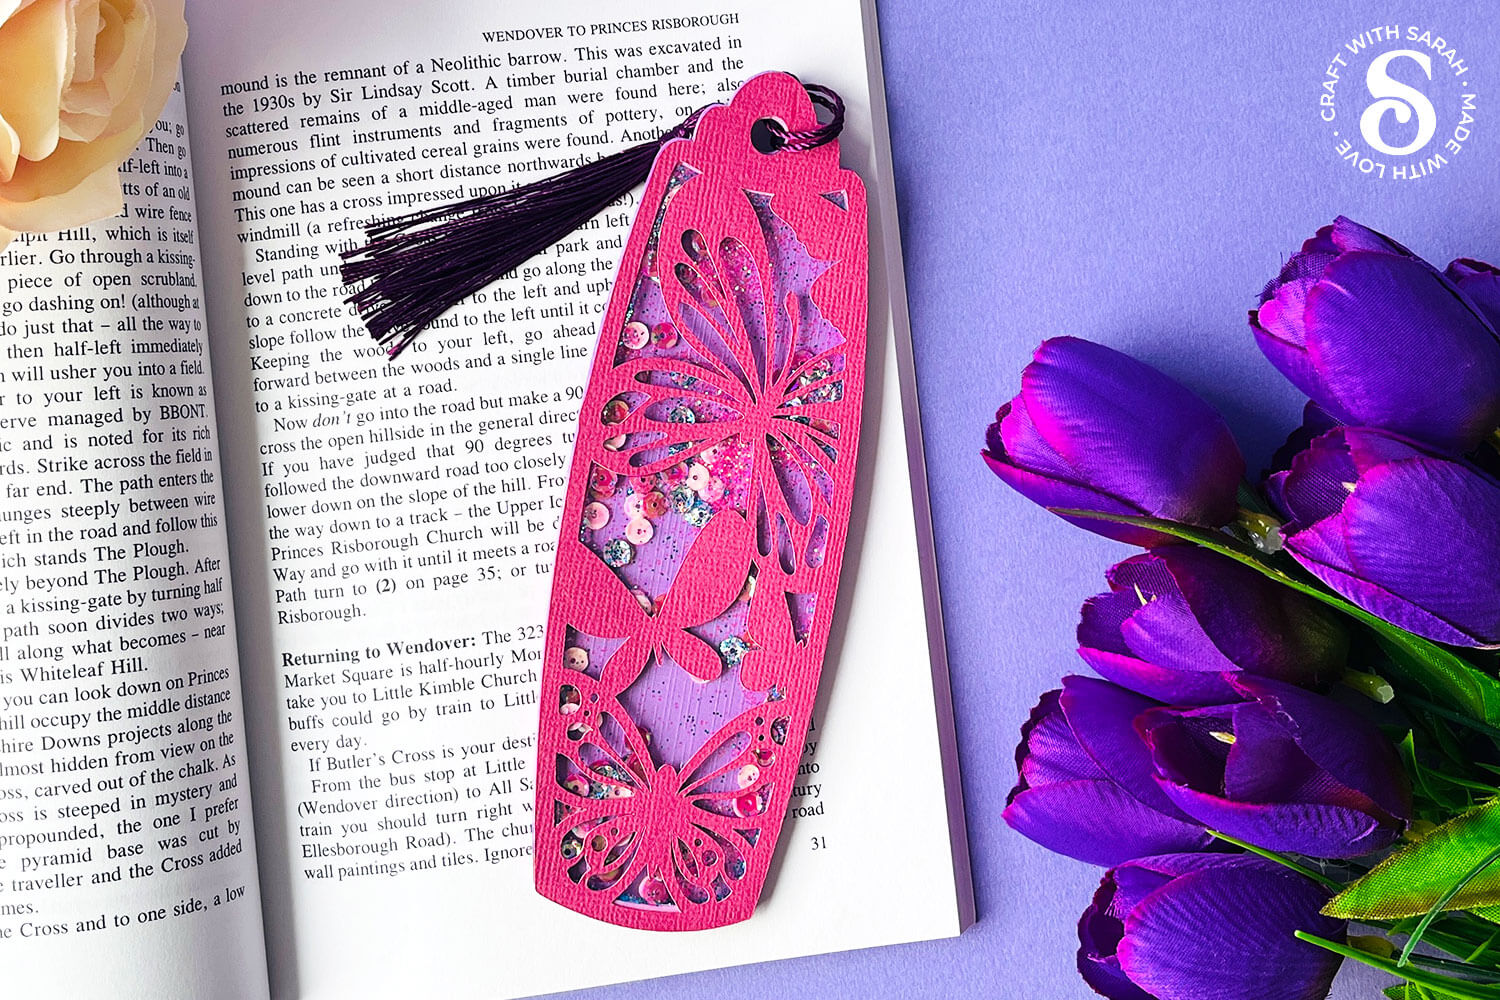
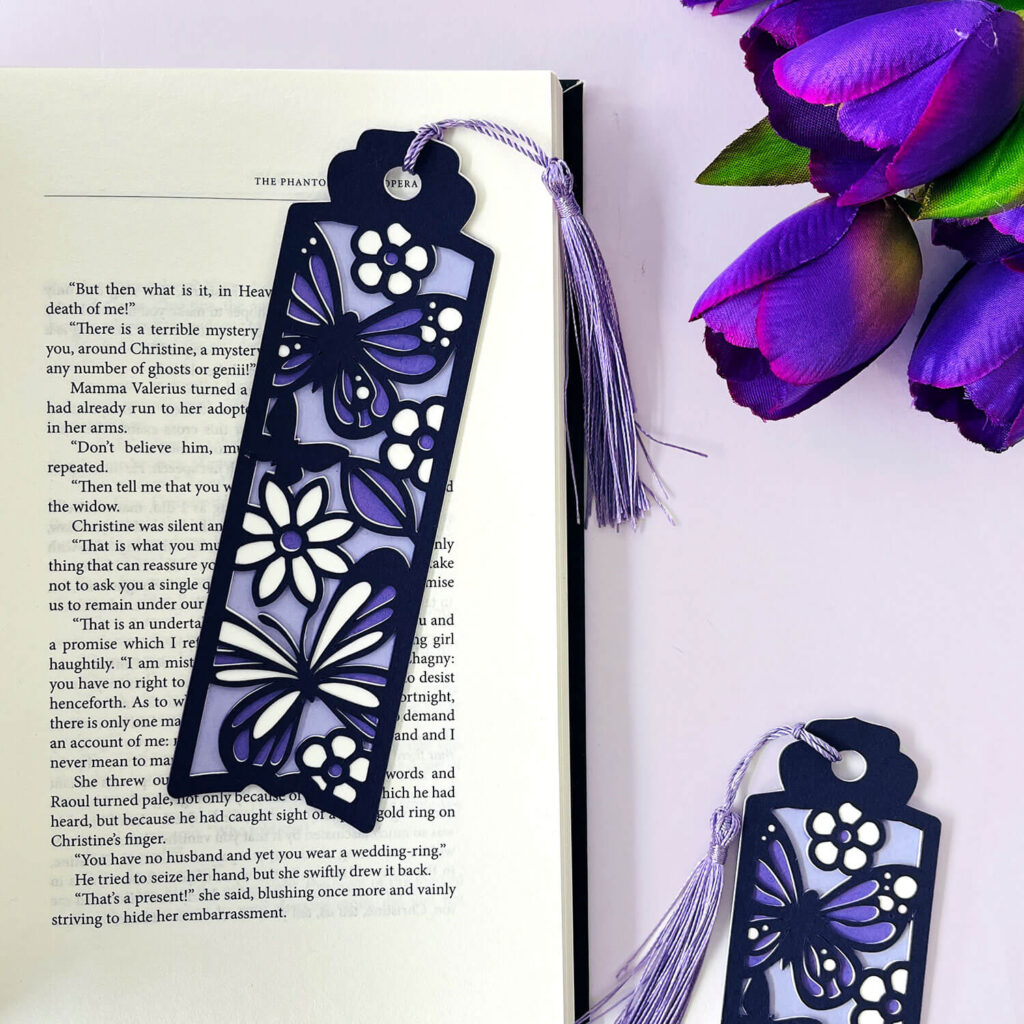
Make beautiful butterfly bookmarks using a Cricut machine with this step-by-step papercraft tutorial.
These bookmarks are extra special because you can turn them into shaker bookmarks filled with glitter and sequins.
Or, keep things simple by sticking to the layered cardstock design.
Adding a tassel or some ribbon on the top is a lovely additional touch to finish off your handmade bookmark.
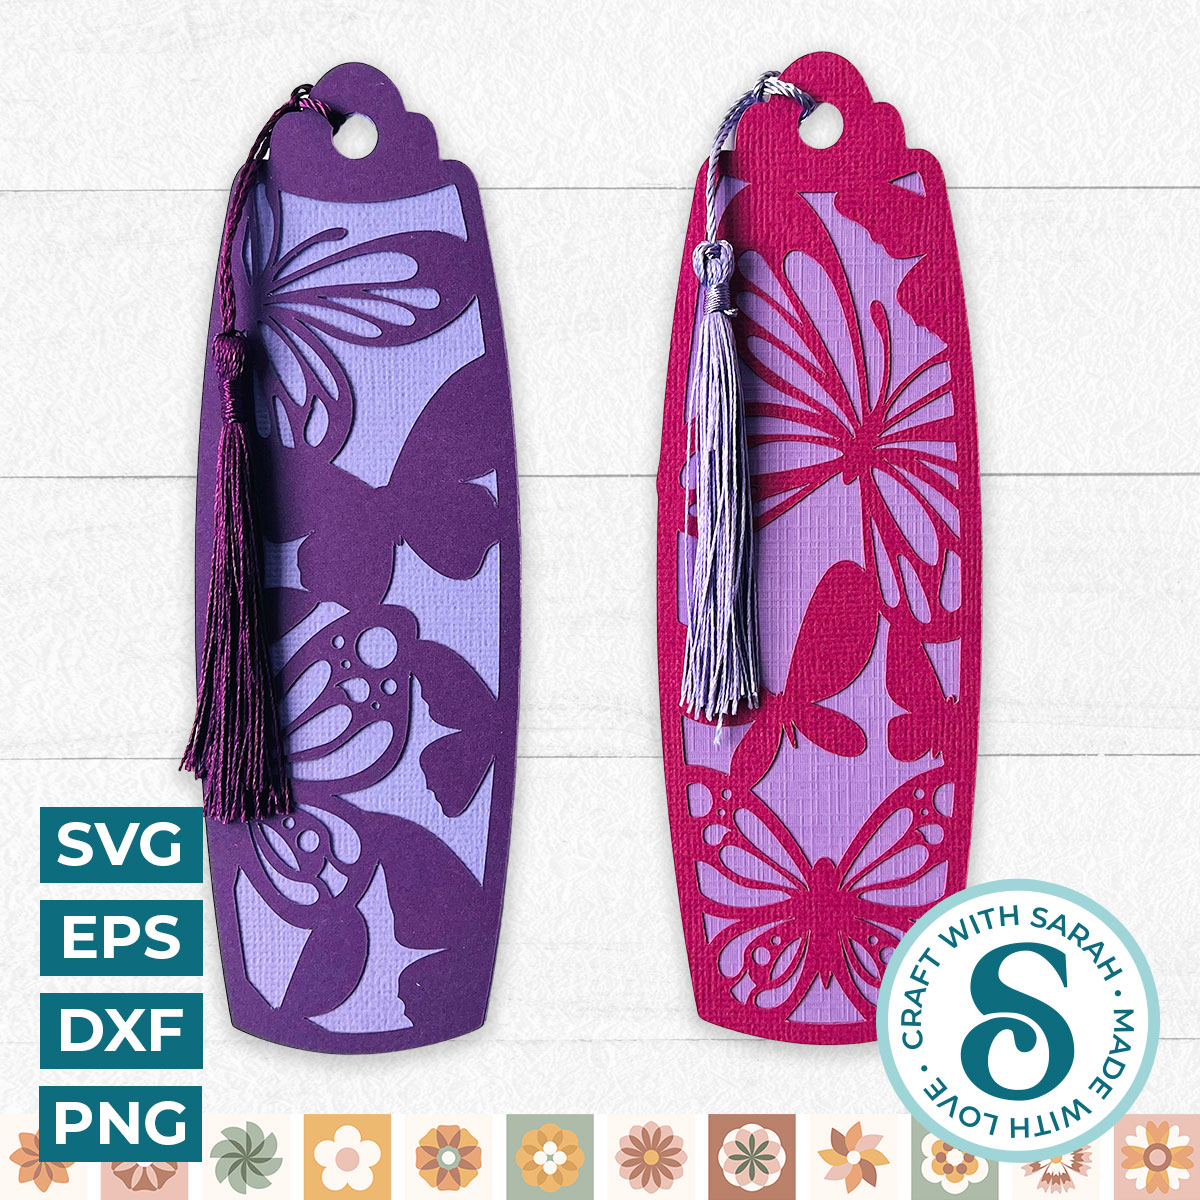
The butterfly bookmark design is double-sided, with a different design for the front and back.
Whether you’re a Cricut beginner or have been crafting for years, this project is a fun and creative way to make something both pretty and practical.
Cricut bookmarks tutorial
Watch the video below to see how to make your own DIY papercraft bookmarks. Keep scrolling for a written tutorial.
Materials list for cardstock bookmarks
Here is a list of the materials to make this project.
Please note that some of the links included in this article are affiliate links, which means that if you click through and make a purchase I may receive a commission (at no additional cost to you). You can read my full disclosure at the bottom of the page.
For standard papercraft bookmarks:
- Cricut Machine
- Light blue Cricut cutting mat
- Coloured Card
- Collall All Purpose Glue, Bearly Art Glue or similar
- Tassels or ribbon
Additional materials for shaker bookmarks:
- Craft foam (example product)
- Acetate (any thickness)
- Sequins, glitter or other fillers

How to make Cricut bookmarks from cardstock
Here’s how to make bookmarks using a Cricut machine.
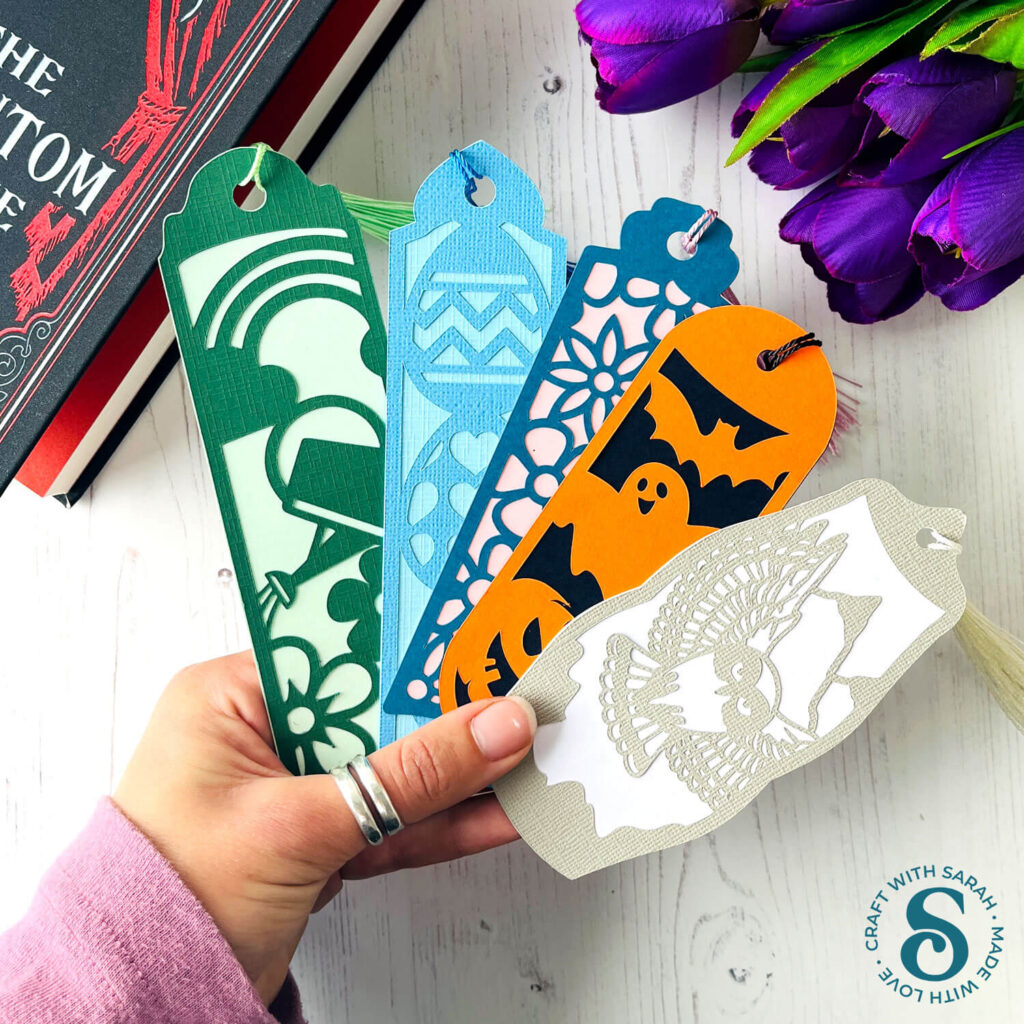
The tutorial shows a butterfly design, but there are a range of other bookmark designs available here.
Step 1) Download the free file & unzip the downloaded folder
Download the Free Cutting File
Please login to your account to download this file.
TERMS OF USE:
You may sell finished, handmade physical craft items that you have made using this product but must not sell or share the digital files. Read full terms of use
Before you upload the SVGs to Design Space, you need to unzip the download folder that they come in.
- How to unzip a folder on Windows computer
- How to unzip a folder on a Mac
- How to unzip a folder on an iPad/iPhone
- How to unzip a folder on an Android device
After unzipping, upload the SVG file(s) into your cutting machine software.
Not sure how to use cut files with your type of machine? The following links lead to videos on how to open cut files in:
- Cricut Design Space
- Silhouette Studio
- CanvasWorkspace (for ScanNCut machines)
The download folder also contains printable PDF versions of the templates for hand cutting.
Step 2) Upload the SVG file into Design Space
If you are using Cricut Design Space, start a new project and then click the “Upload” button on the left of the screen.
You can then either click “Browse” to find the file on your computer, or drag-and-drop it.
If you’re using the butterfly design, upload the file in the “Cutting Machine Versions” subfolder called svg-bookmark-butterflies-craftwithsarah.svg
This is how it should look after you have upload it:
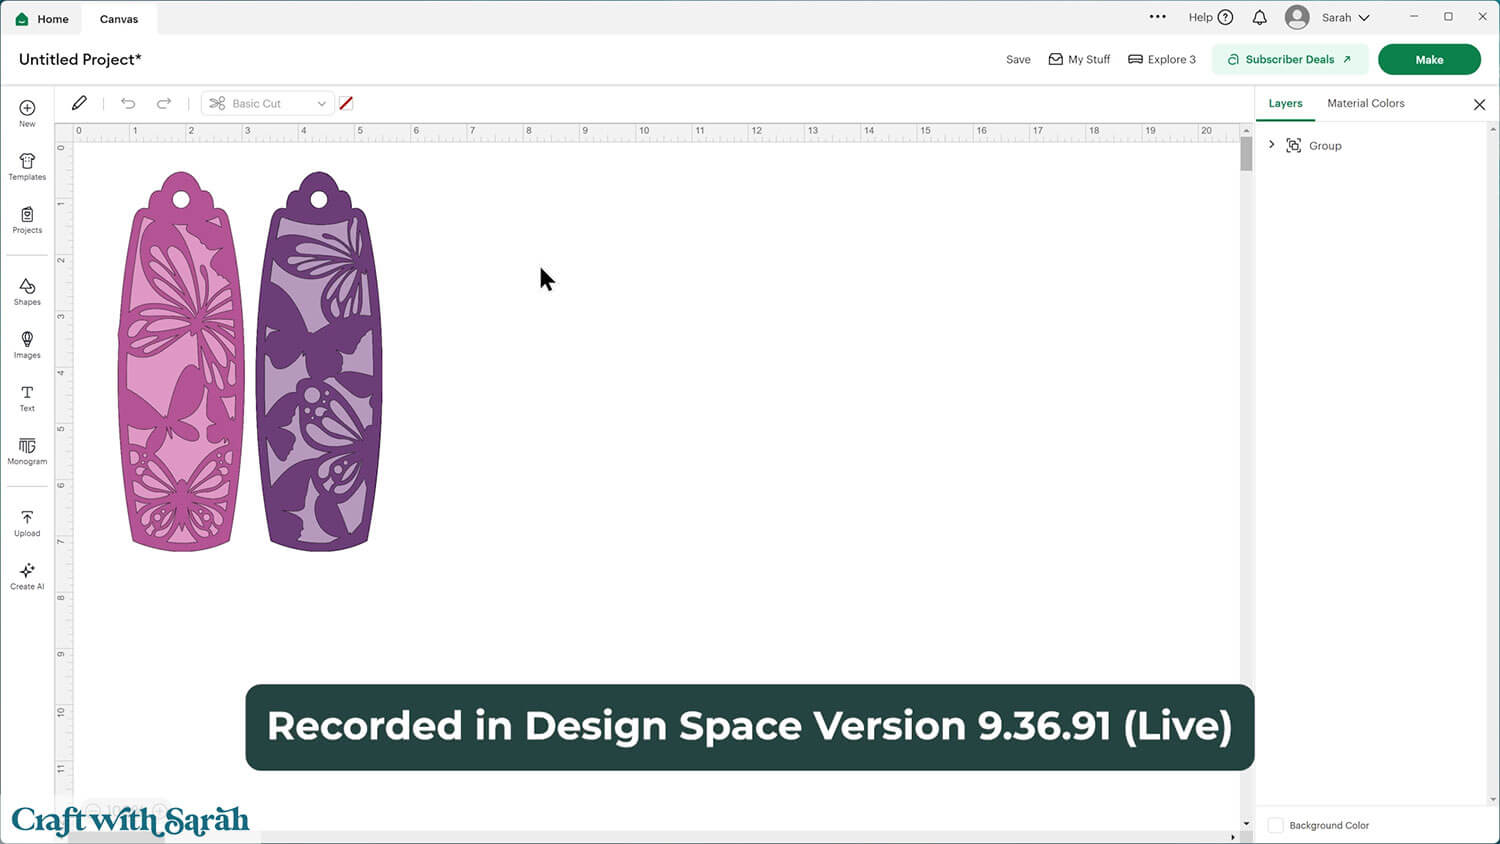
If the design doesn’t get inserted onto your Canvas, it will show under “Uploads” in your “Recently Uploaded Images”. Click on it and then press “Add to Canvas” to put it onto your Project.
The bookmarks will load in at the correct size to cut.
Not sure how to upload SVG files? Check out these machine help guides for Cricut, Silhouette and ScanNCut.
Step 3) Prepare the bookmarks for cutting
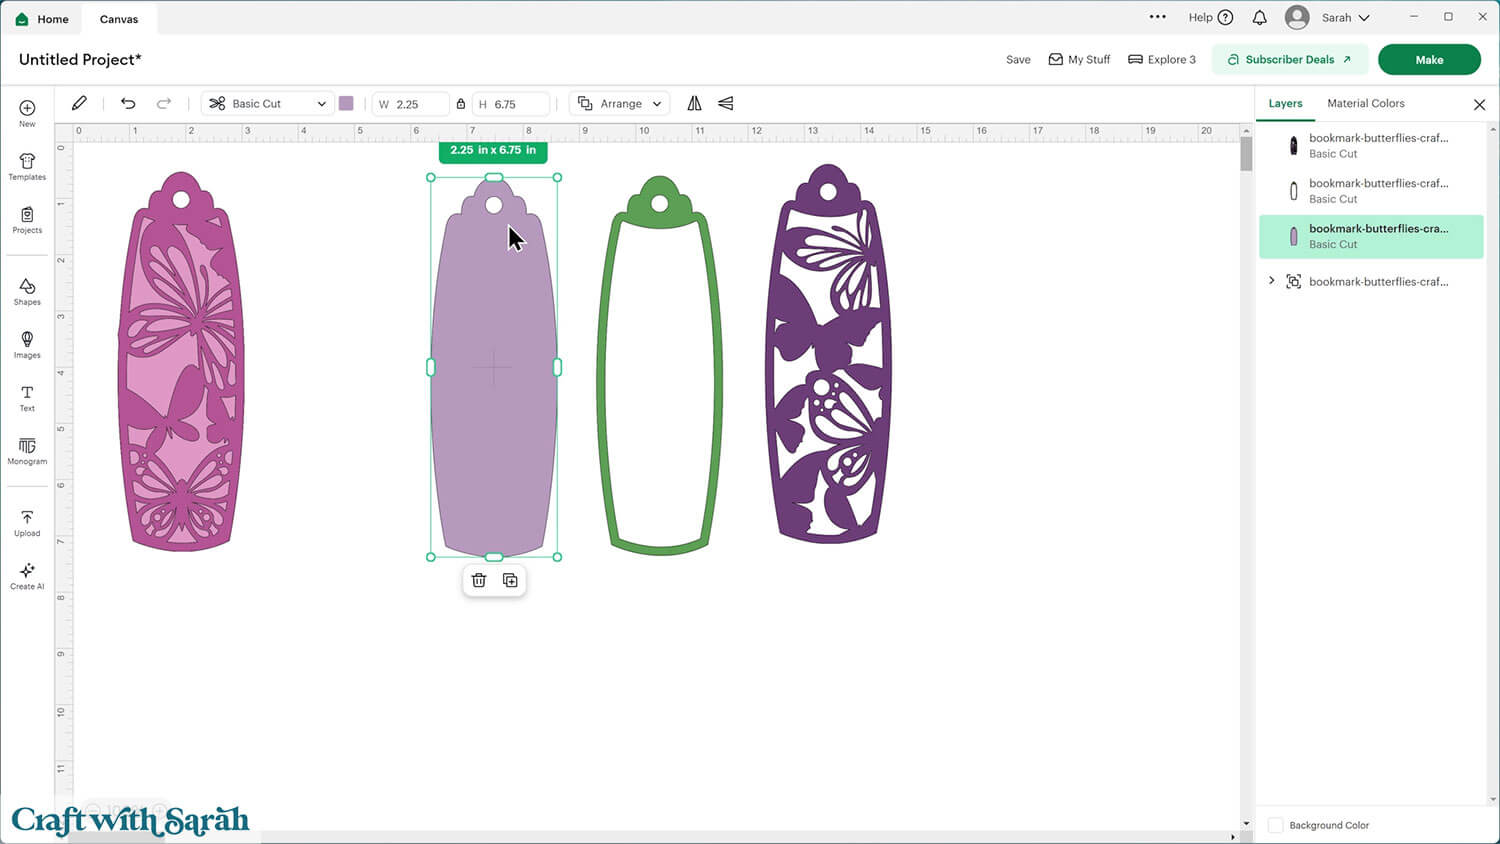
When you open the file in Design Space, you’ll see two bookmarks. Each bookmark includes three layers:
- The top layer, which has a decorative design.
- The middle frame layer, which gives your bookmark some depth.
- The bottom layer, which forms the solid base.
The layers are all “on top of each other” on the design, but you can Ungroup them and drag them apart to see how they look.
If you’re making a simple two-layer bookmark, you can delete the middle layer and just cut the top and bottom from cardstock.
But if you’d like to make a shaker bookmark (the fun, glittery kind that rattles when you move it!), keep all three layers.
If you’re cutting the spacer (frame) piece from craft foam, you only need to cut one.
If you don’t have craft foam, you can cut the spacer from cardstock instead but you’ll need to cut it multiple times and glue them one-on-top of each other to make it tall enough to fit your shaker elements inside.
If that’s what you’ll be doing Duplicate the green piece a few times to cut multiple copies.
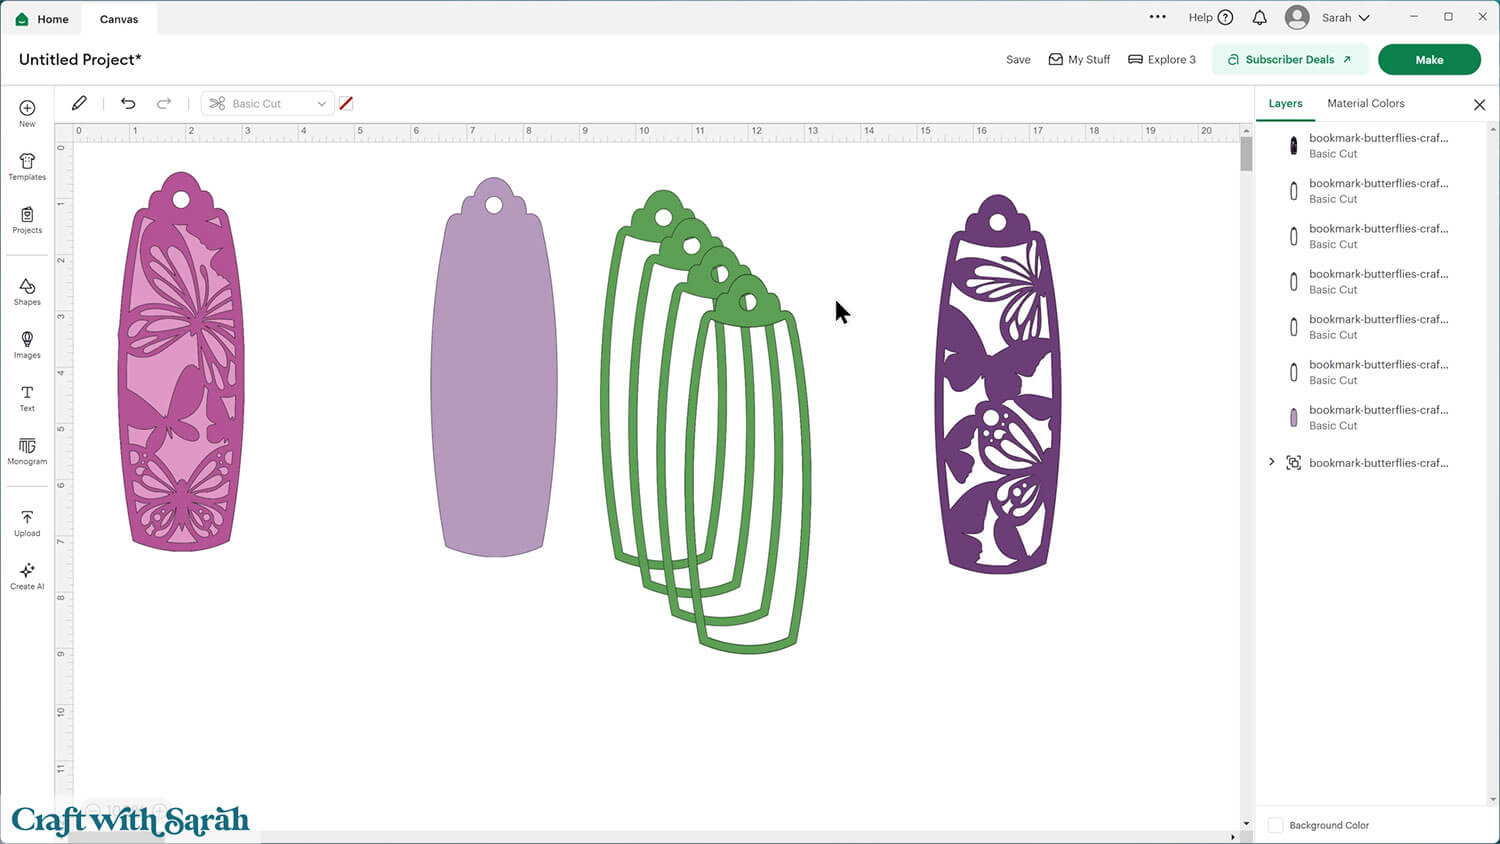
I’m going to use craft foam, so I only need one copy of the middle piece.
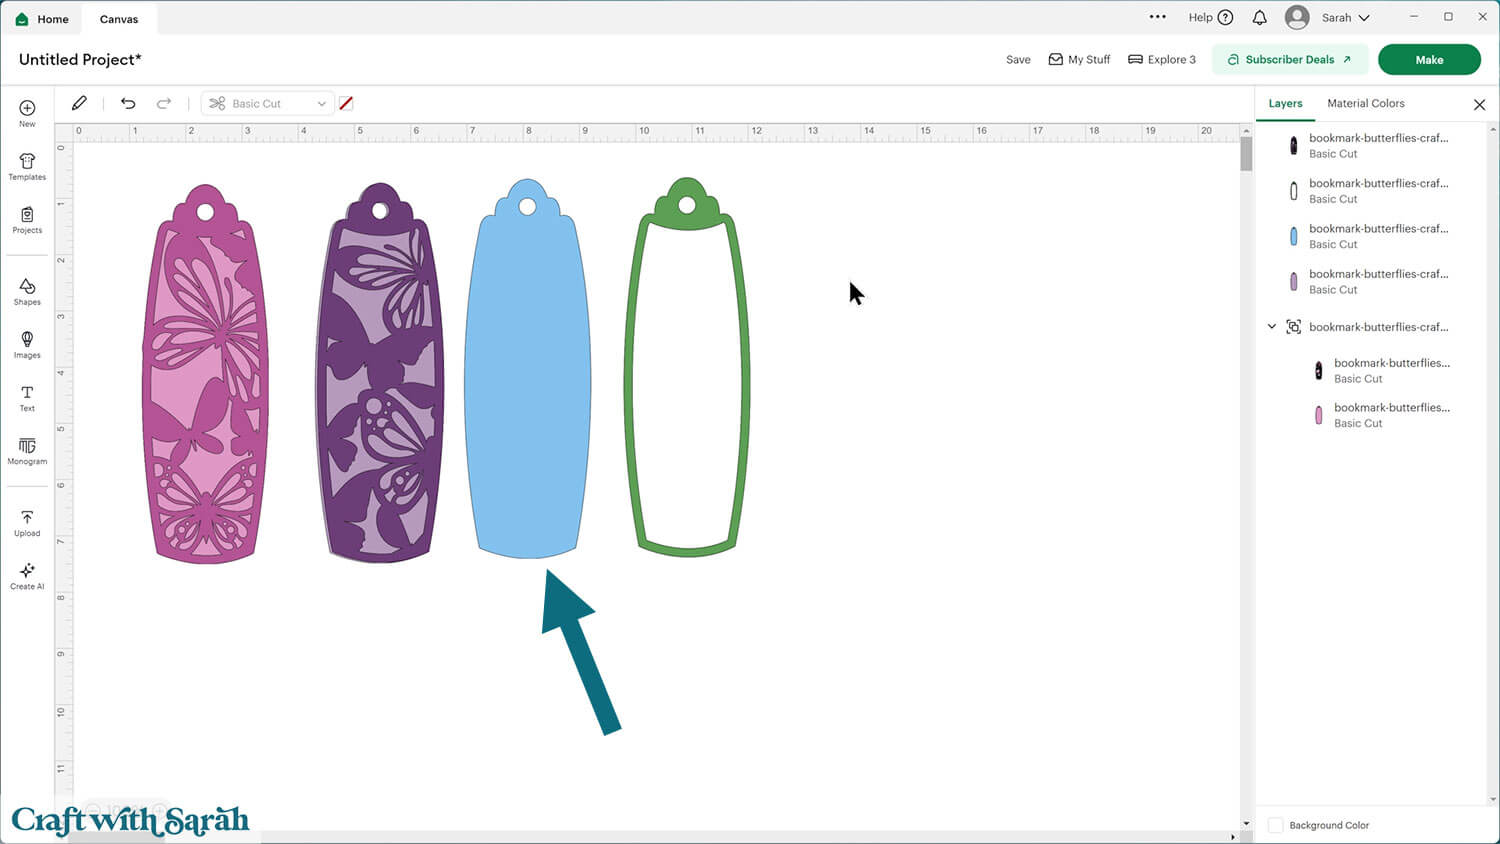
Duplicate the solid bottom layer and make it another color (this will be your acetate layer to make the “window” on the front on the shaker).
Step 3) Cut the project
When you’re happy how your bookmark SVG is looking in Design Space, click “Make” and follow the instructions on-screen to cut out all the layers.
The top and bottom layers (the ones with the pictures on them) should be cut from cardstock.
The middle layer (spacer) from craft foam (or several layers of cardstock glued together).
The window piece from acetate — or even the clear plastic cover from an old Cricut mat!
If you’re not sure how to cut craft foam with your Cricut, check out this craft foam Cricut tutorial that shows how to cut the material with all types of Cricut machine.
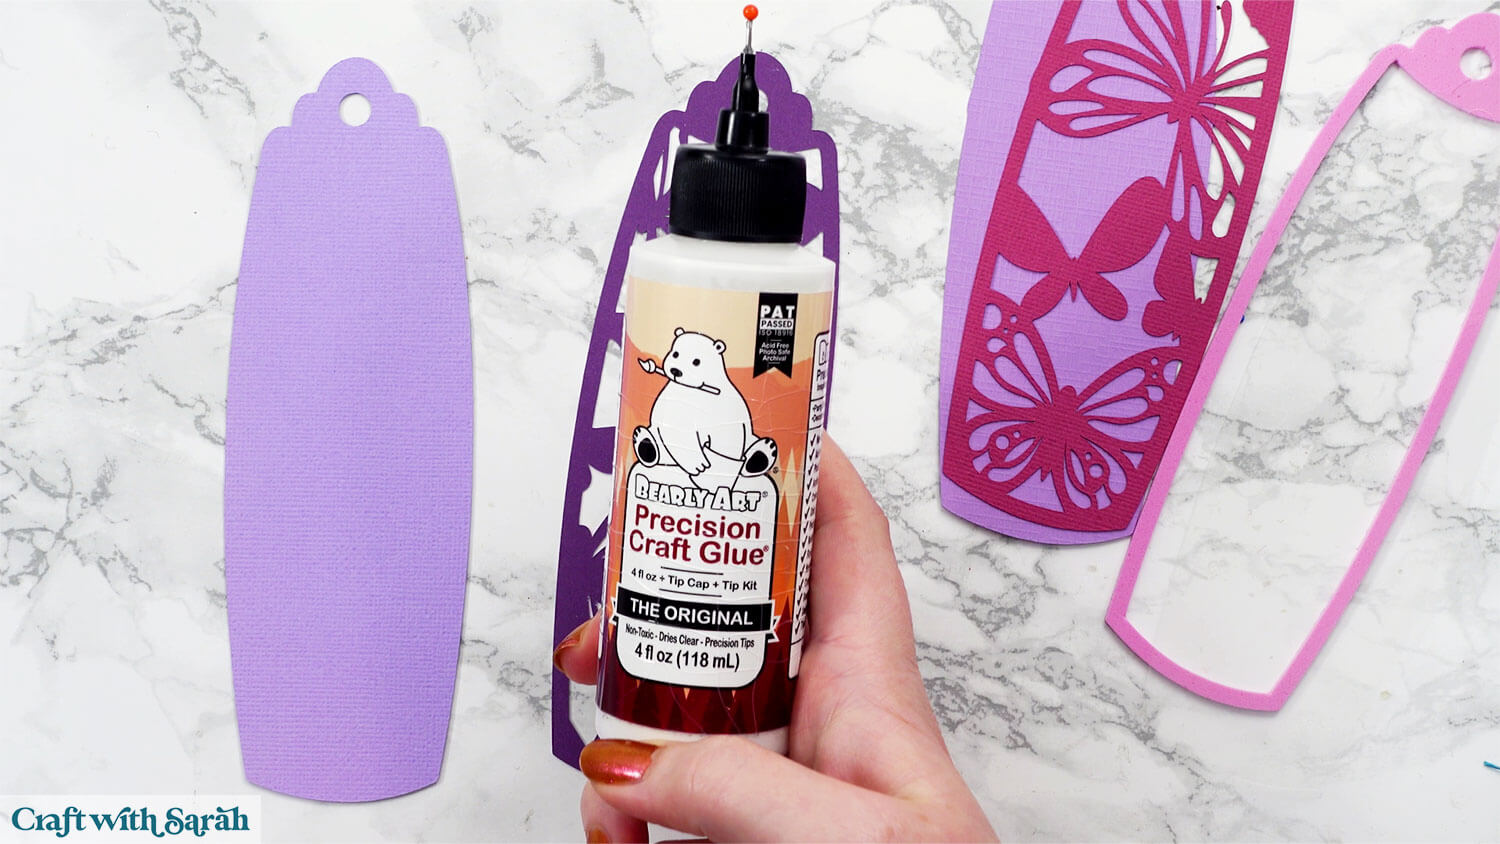
Step 4) Stick the bookmarks together
I used Bearly Art Glue to stick the project together.
It’s SO good because it doesn’t “warp” or bend the cardstock like some glues do. You can use as much of it as you want and the card stays perfect – and it dries perfectly clear too!
Collall All-Purpose Glue is another great one to use for cardstock, which is more readily available in the UK.
Start by gluing together the two pieces for the back of the bookmark.
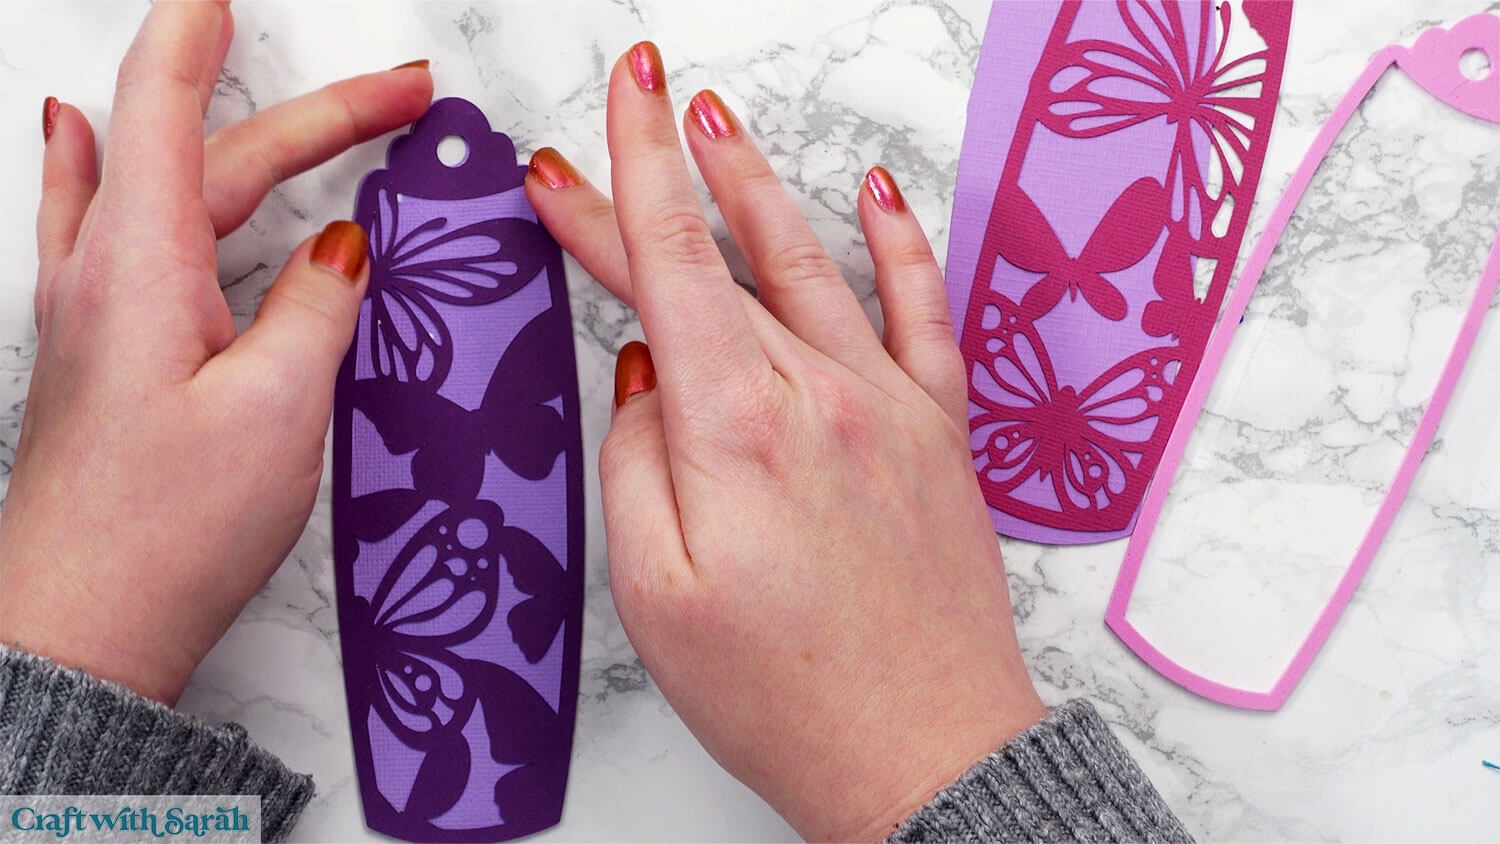
If you’re NOT making the shaker, glue the other two pieces together and then glue them back-to-back to make your double-sided bookmark.
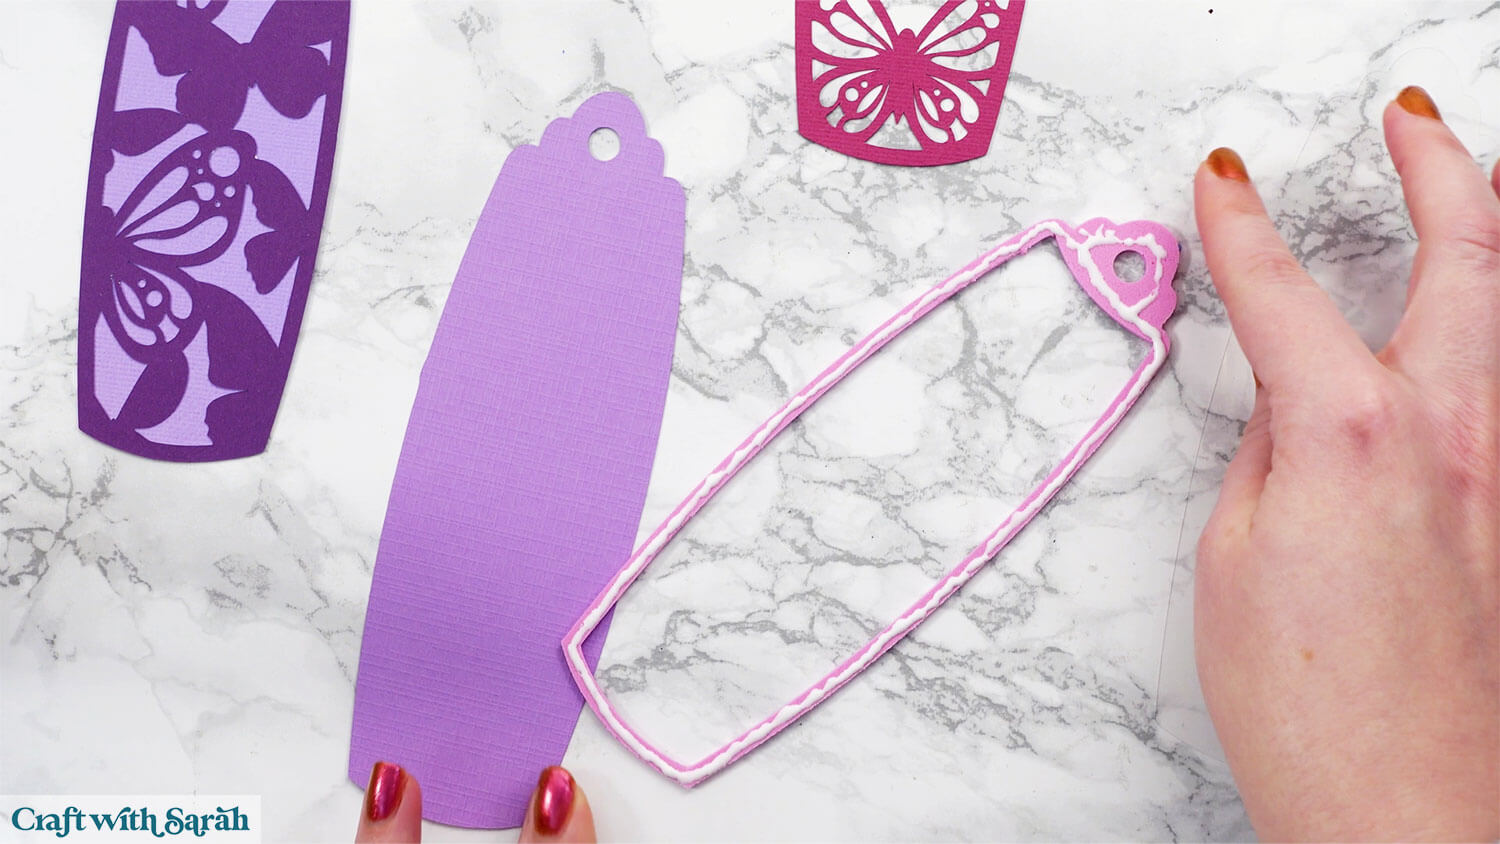
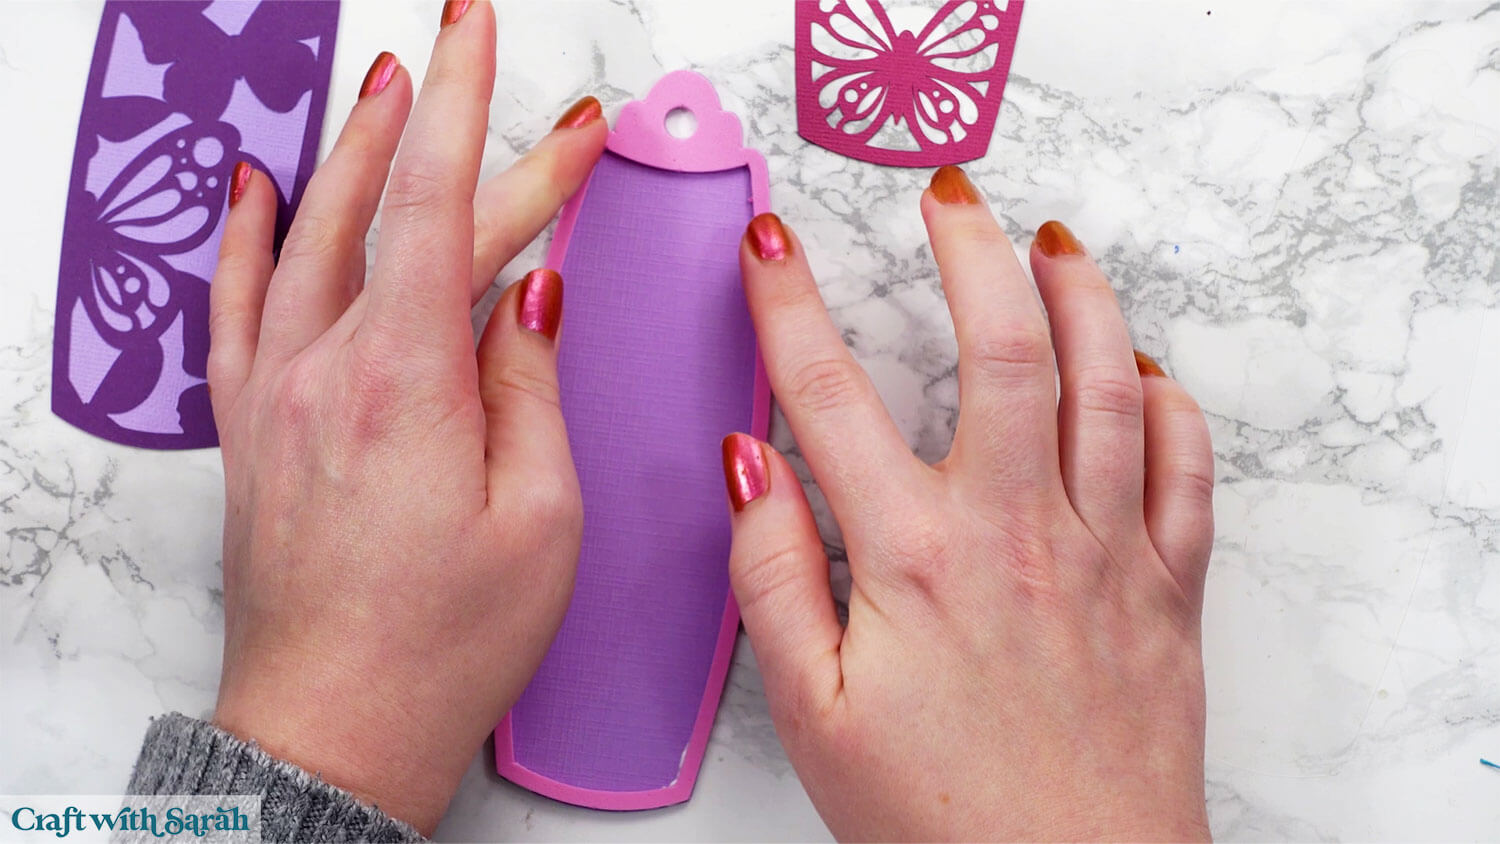
If you ARE making the shaker, add glue to one side of the craft foam and carefully stick it on top of the other base piece.
Be sure to apply glue all the way around the edges so there aren’t any gaps where glitter could escape later. Press gently so the glue doesn’t squish out too much.
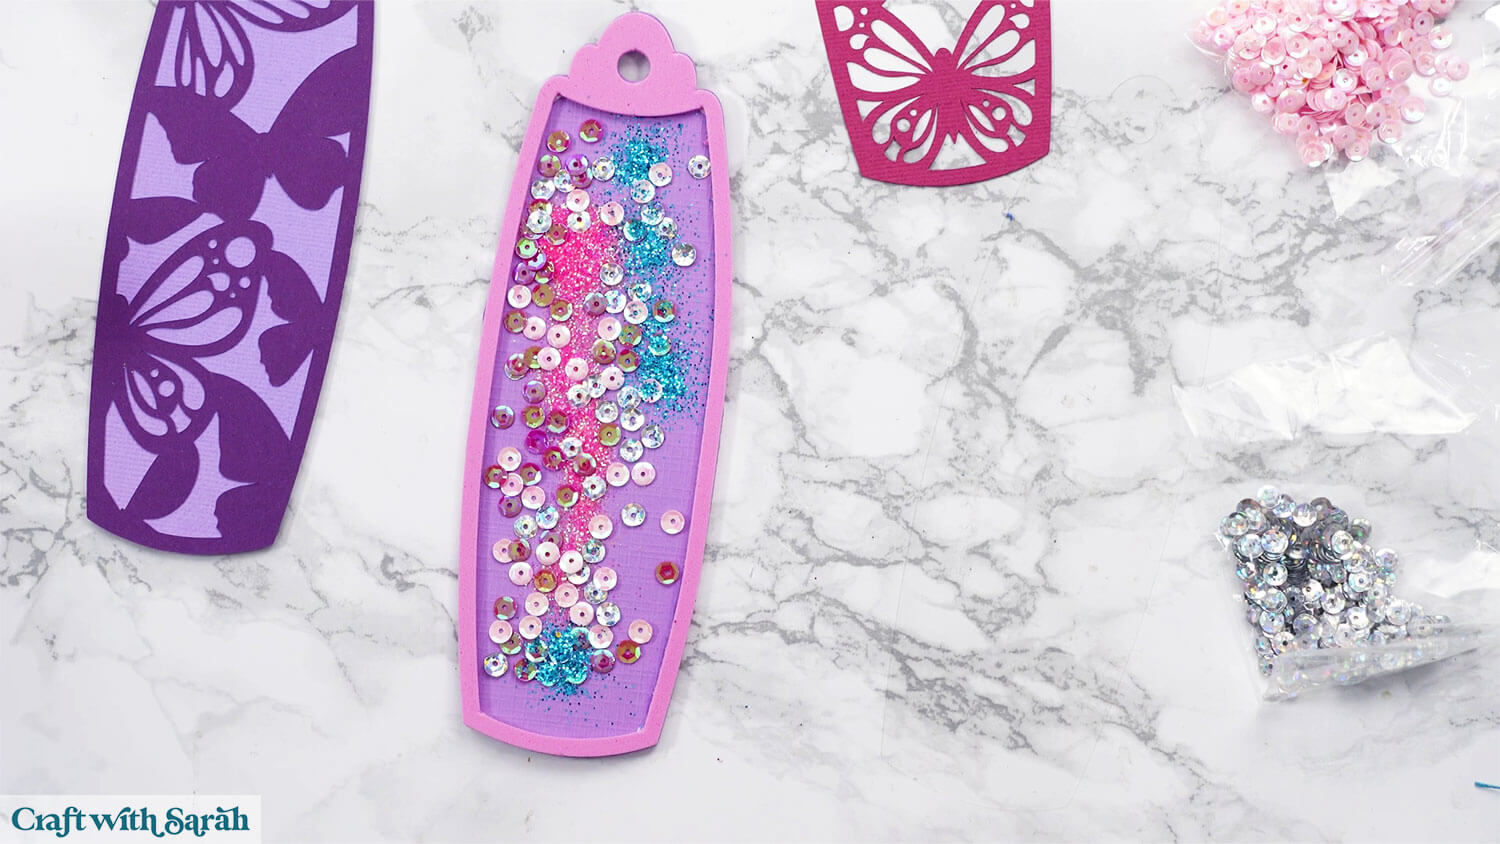
Let the glue dry completely before adding any sequins or glitter. This prevents the sparkly bits from sticking where you don’t want them!
When your base is dry, sprinkle some glitter and sequins inside the open area.
Make sure it’s spread out so that none of it is taller than the height of the foam, otherwise the acetate will not fit flat on top.
If you have one, rub the acetate with an anti-static sheet or even a dryer sheet to help keep the glitter from clinging.
I don’t have either of these but it was still fine 🙂
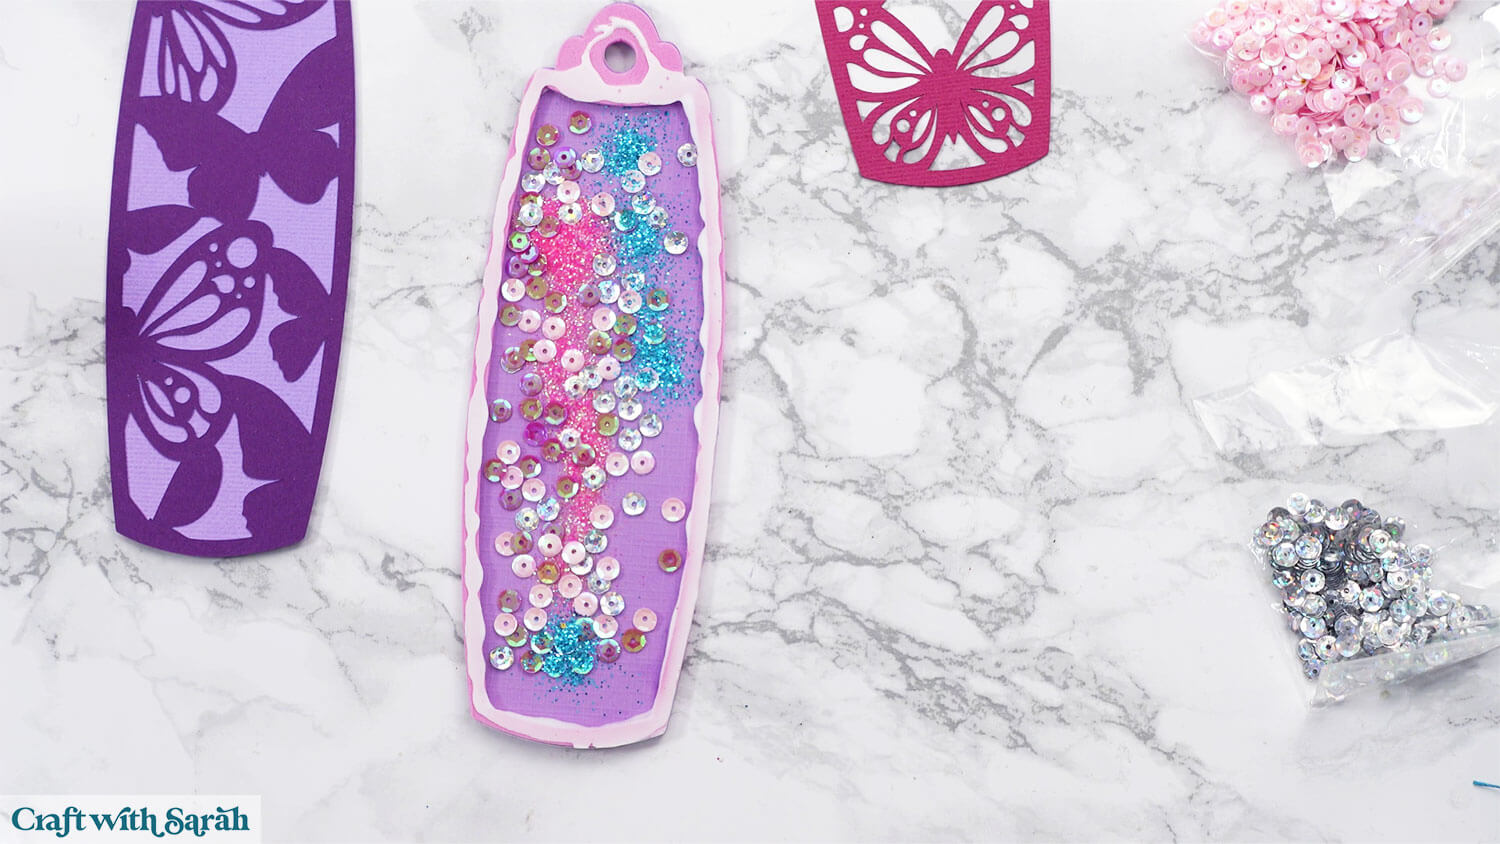
Glue the acetate piece on top. Again, make sure there are no gaps in the glue that your glitter could escape from.
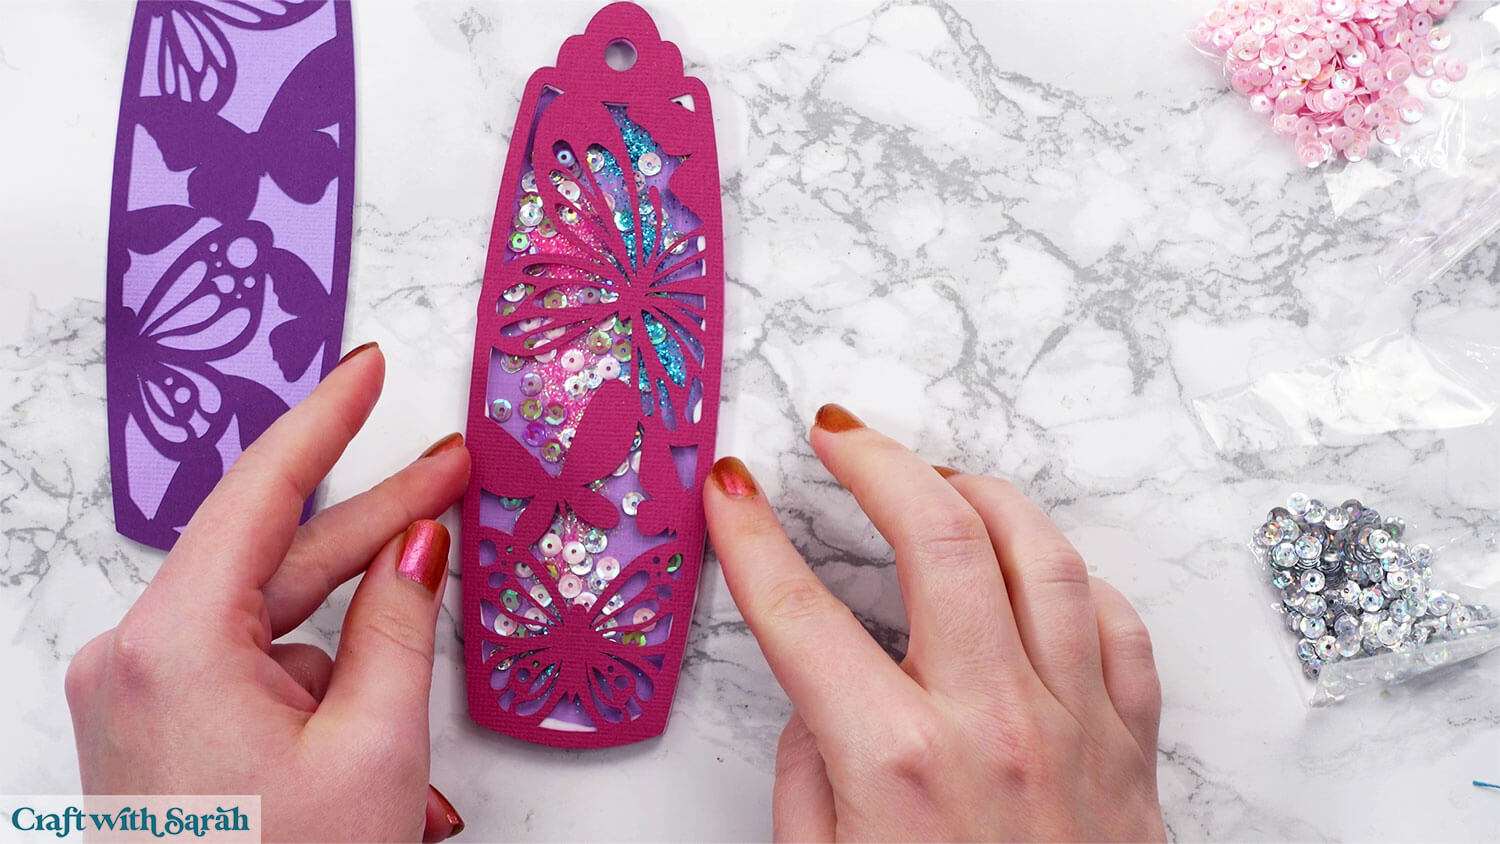
Glue the final decorative piece on top.
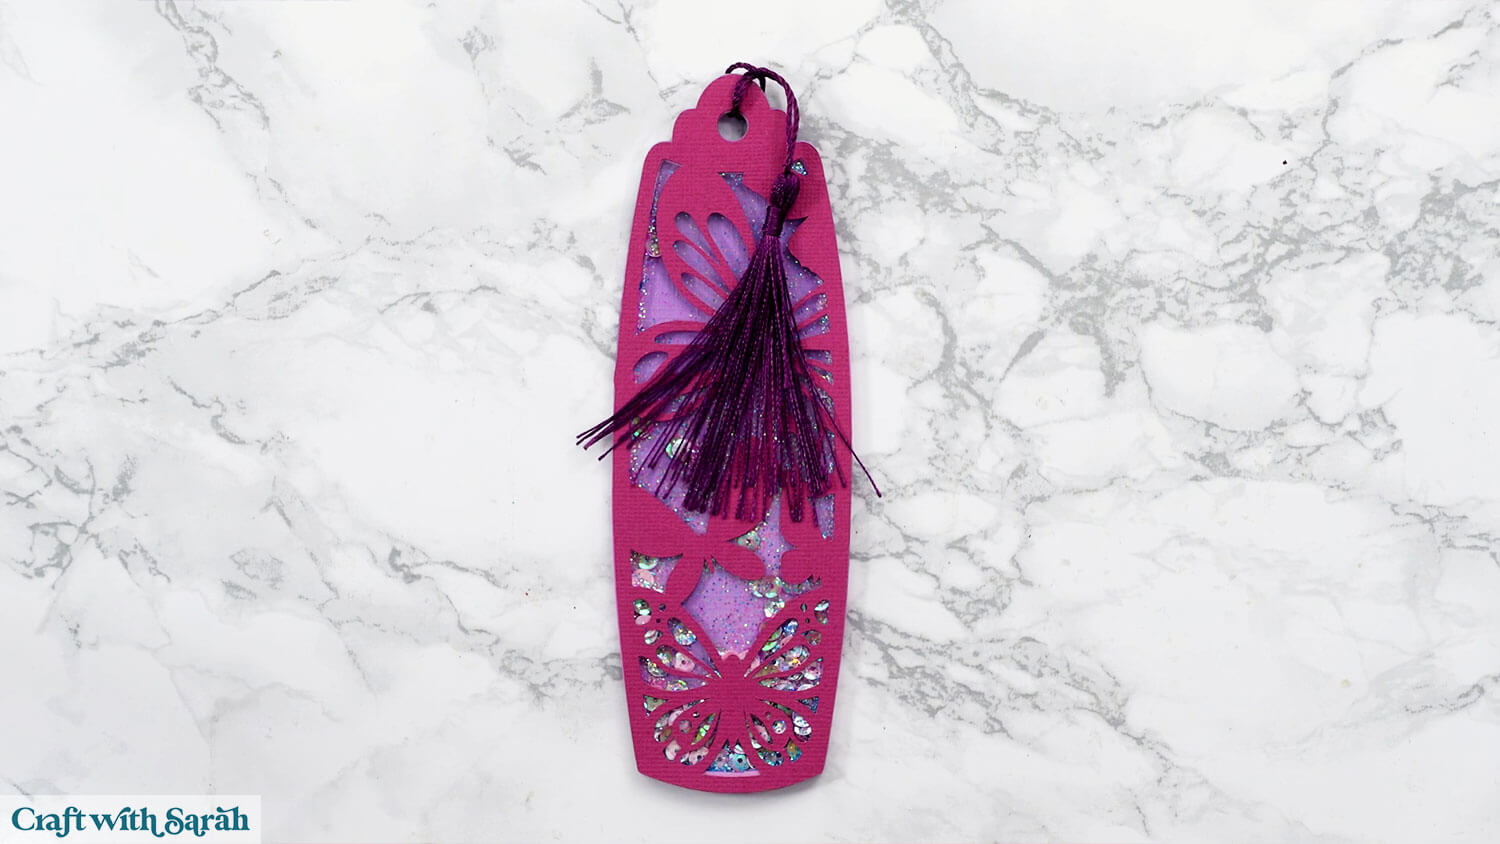
When all the glue is completely dry, thread a tassel or some ribbon through the top.
More bookmark designs to try
If butterflies aren’t your style, there are plenty of other designs available, including snowy owls, flowers, Halloween, gnomes, and more!
You can mix and match the designs to suit any season or personality. These make wonderful little gifts for friends, teachers, or family members who love to read.
Browse other bookmark SVGs here
Design your own bookmarks
If you’d like to take your creativity further, check out this online Class to learn how to design your own bookmarks from scratch.
Learn how to design your own layered bookmarks, with ten different shapes of bookmark templates included.
The Class teaches how to build up your bookmark designs using different images/SVGs and how to cut all the images into the correct shape so that no parts go outside the edge of the bookmark sides.
Then, I’ll show you how to turn them from simple two-layer bookmarks into multi-coloured designs.
The Class includes lessons for Cricut Design Space, Silhouette Studio, and Brother CanvasWorkspace (for ScanNCut machines).
Find out more or view all video Classes.
DIY Cricut bookmarks with cardstock
I hope that you enjoyed this tutorial on how to make bookmarks with a Cricut machine.
I like to make a new bookmark as we enter each season or get close to a new holiday, such as Easter, Halloween or Christmas.
If you stick to the layered cardstock bookmarks then you can get your new bookmarks made in about 20 minutes, including the cutting time!
It takes a little longer for the shaker bookmark versions, but the end results are very pretty.
Happy crafting,
Sarah x