Back to School Flowers ✏️ Good Luck!
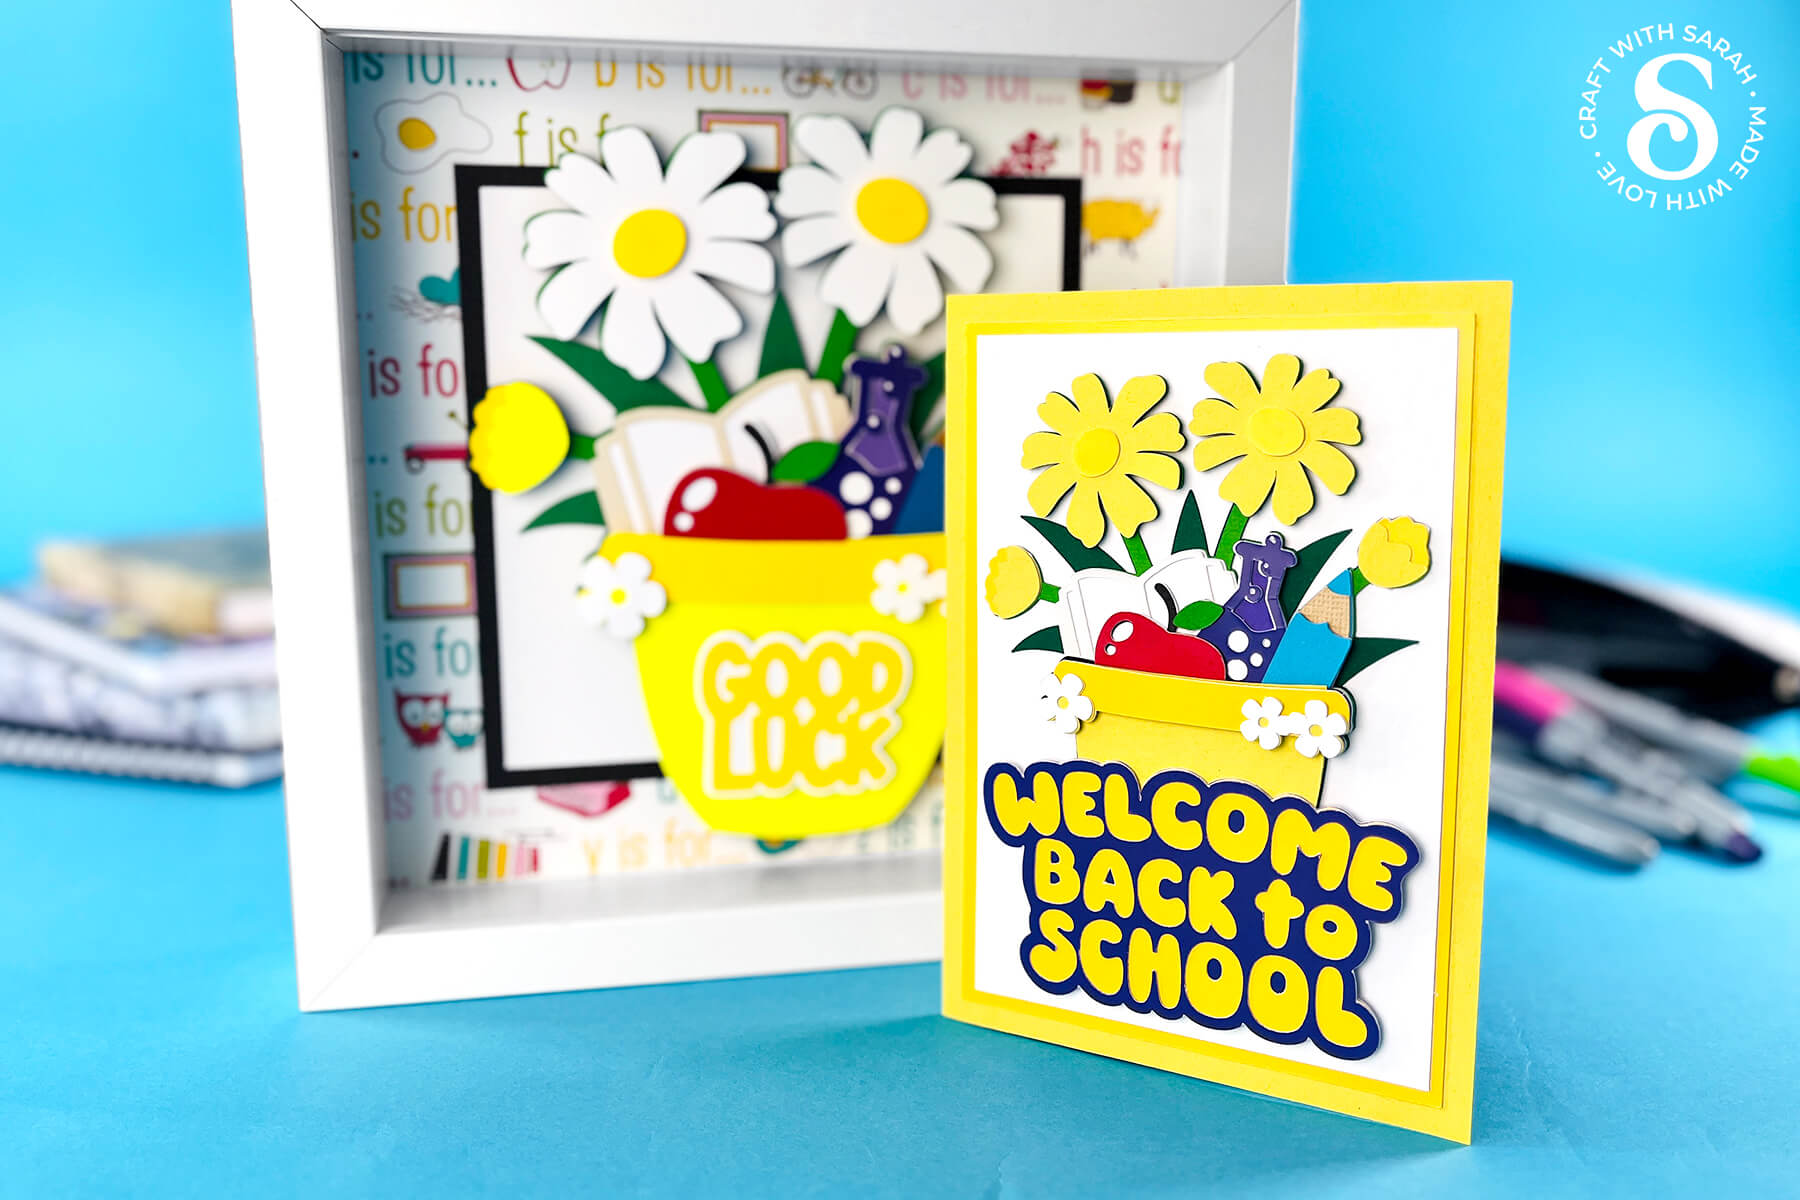
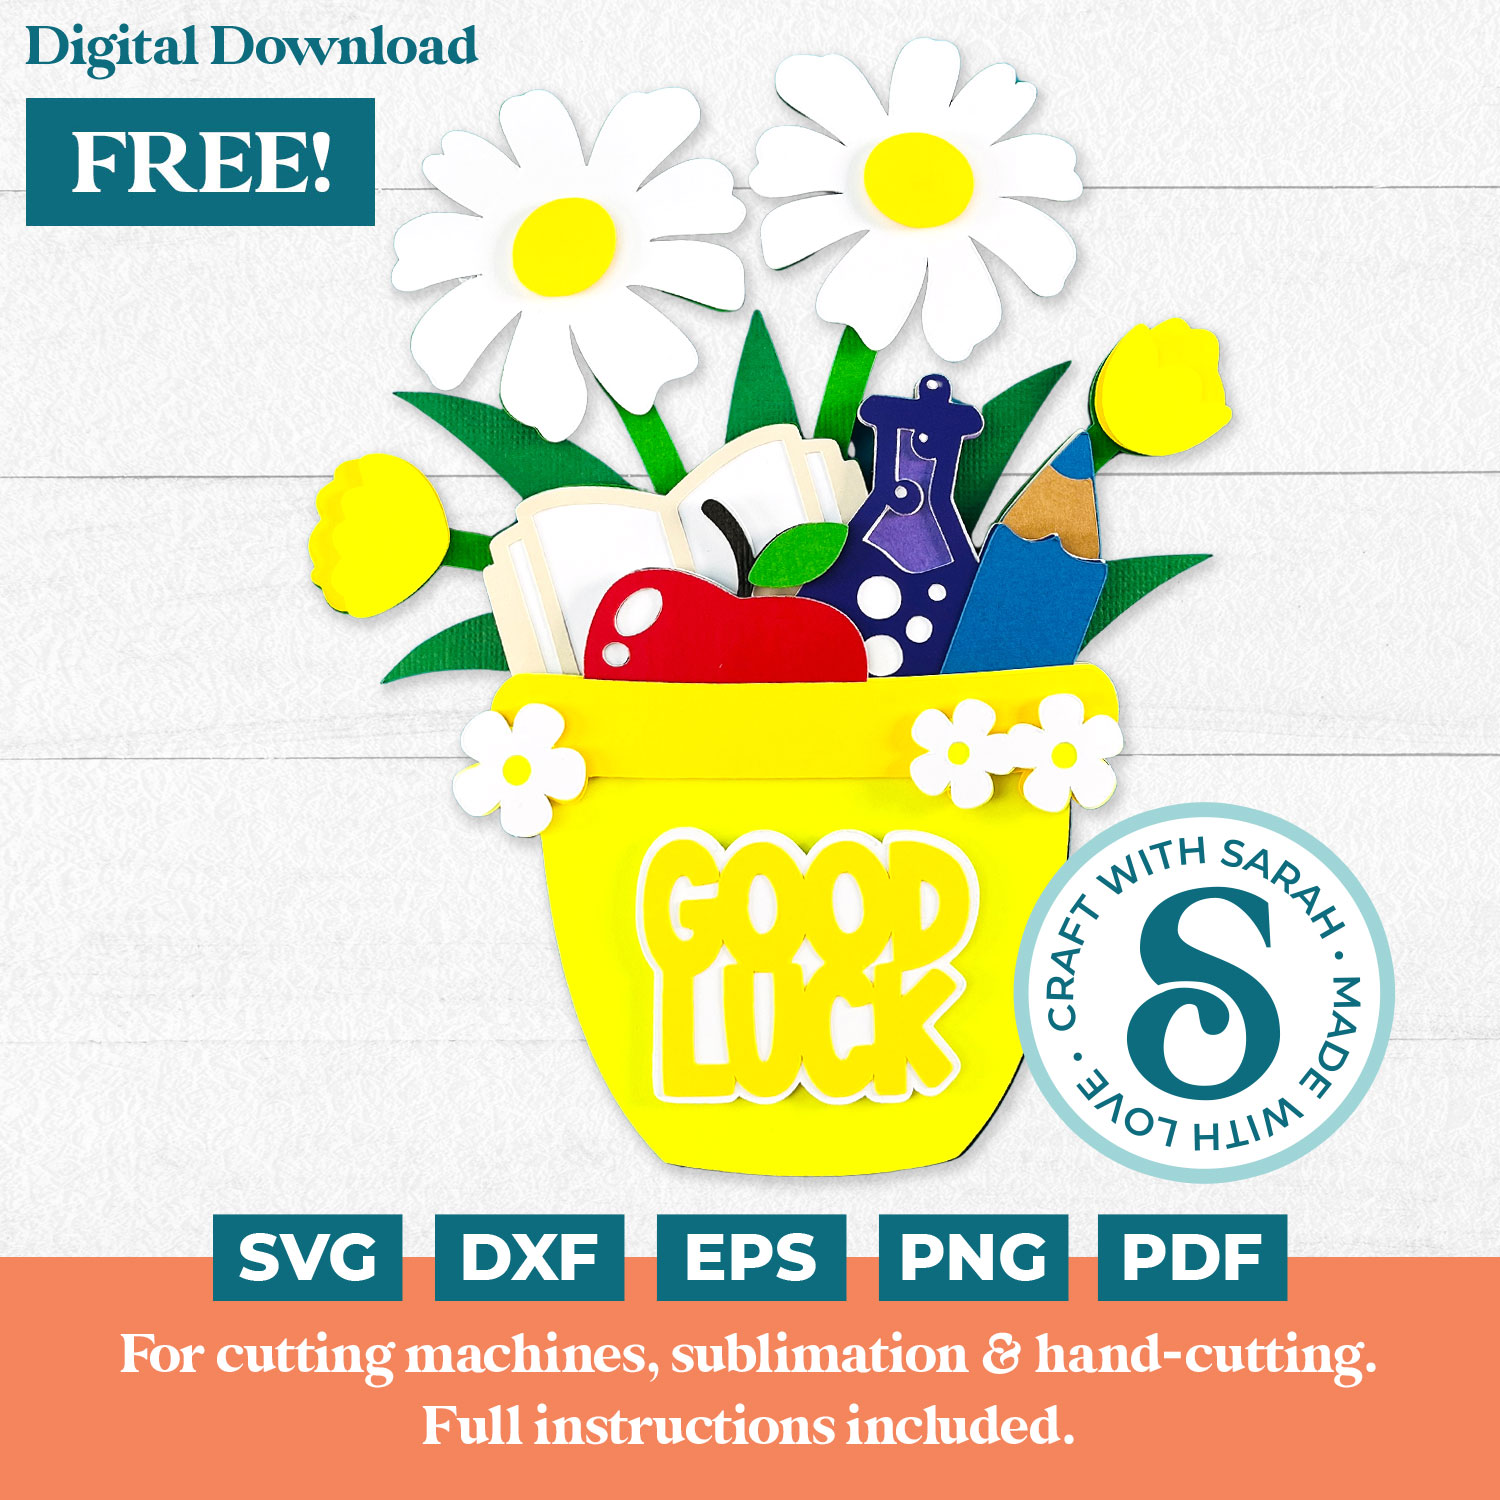
Welcome your loved ones to the new academic year with this free SVG for back to school well-wishes.
The start of a new school year always brings a mix of emotions – a little excitement, a few nerves, and plenty of hope for what’s ahead.
Whether it’s a child, grandchild, or friend starting their next chapter, a thoughtful handmade gift can be a lovely way to show your support.
In this tutorial, we’re making a cheerful back to school craft that’s perfect for cards, shadow boxes and scrapbook pages.
This free SVG design features a flower pot filled with a mix of symbolic back-to-school elements: a textbook, a shiny red apple, a science beaker, and a pencil.
Smaller flowers, including tiny daisies, decorate the rim of the flower pot, giving the design a soft, welcoming touch. It’s a great balance of playful and thoughtful, ideal for wishing someone well as they begin a new academic adventure. 🍎
An optional “Good Luck” sentiment is included as part of the cut file, so you can choose to add an encouraging message to the front of the pot.
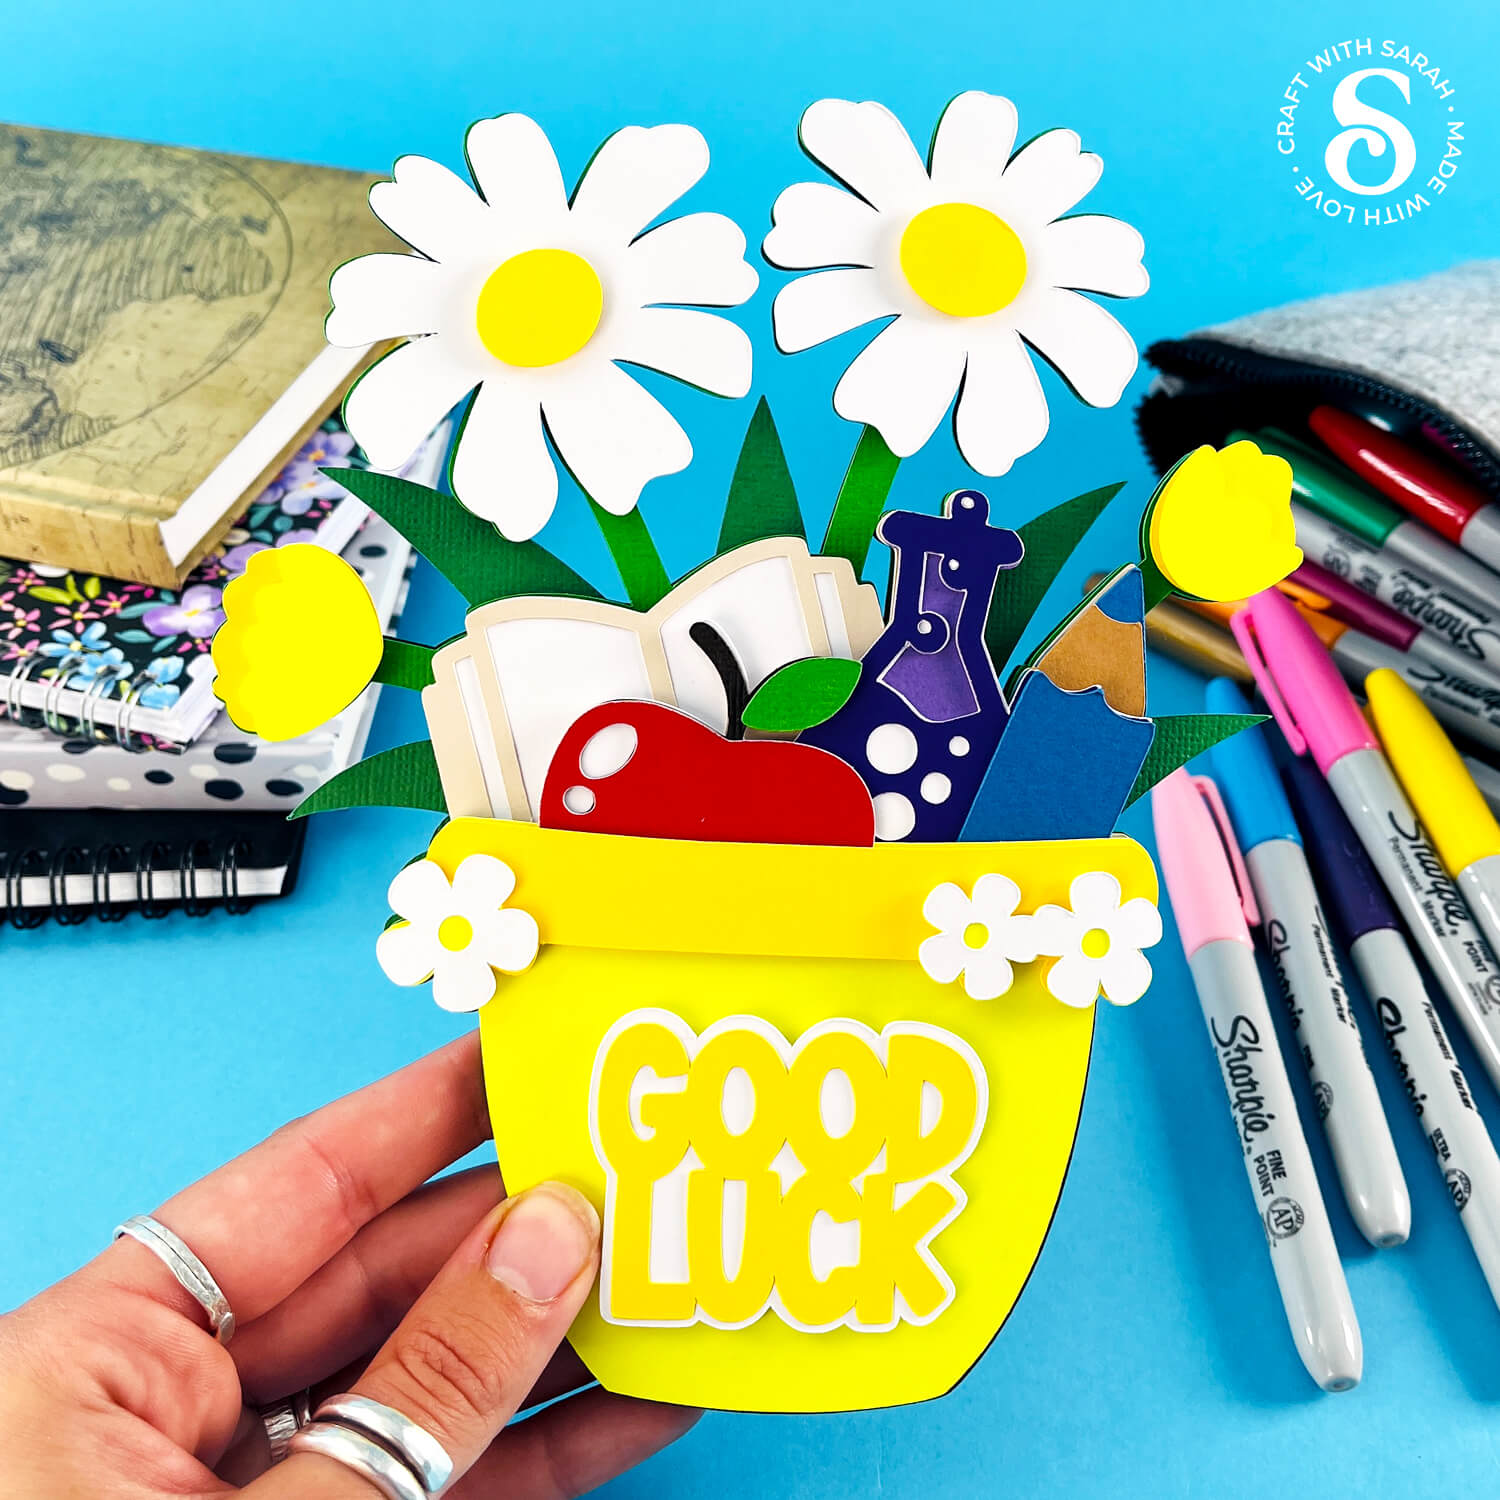
Whether you’re sending best wishes to a student, a teacher, or even someone returning to learning later in life, this paper project is a lovely way to say “you’ve got this.” It’s also a fun project to make with your Cricut, using pieces of cardstock layered together to build dimension and interest.
This free school SVG is easy to cut and assemble and it gives you a unique way to celebrate the season.
Add it to a handmade card, frame it for a desk, or use it in a scrapbook layout to mark the occasion. However you use it, this project is a thoughtful, creative way to mark the beginning of a brand-new school year.
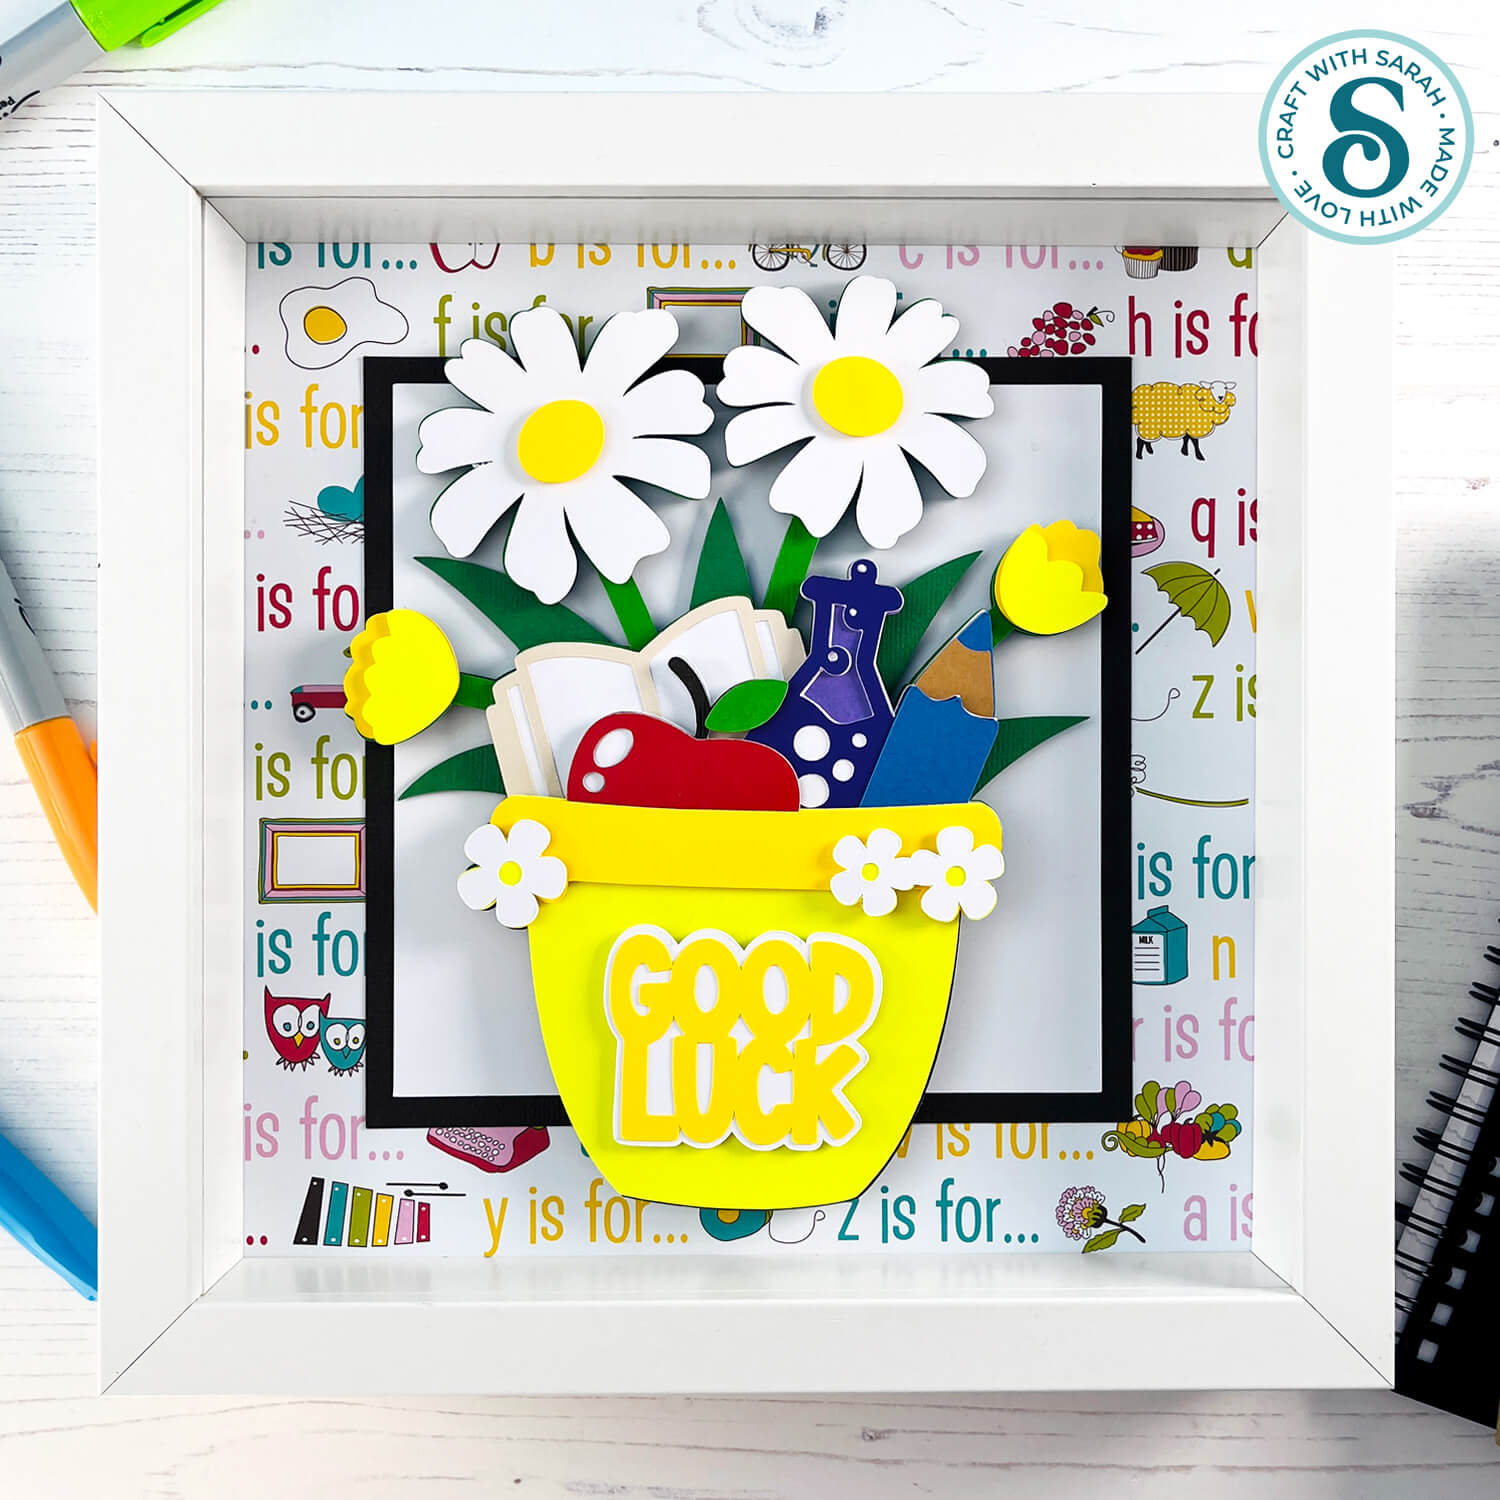
This tutorial includes a free SVG file so you can easily cut the layers using your Cricut or other cutting machine. Scroll down this page for step-by-step guidance on setting up the project in Design Space, cutting the design and layering each piece.
Print/sublimation and hand-cutting versions are included too.
The SVG is easy to cut and layer, making it ideal for both experienced crafters and those newer to papercutting.
So, gather your cardstock, turn on your cutting machine, and let’s bring this back to school flower pot to life. ✏️
Video tutorial for back to school flower pot design
Watch the video below to see how to make this craft project. Keep scrolling for a written tutorial.
Materials list for good luck flower pot craft project
Here is a list of the materials to make this project.
Please note that some of the links included in this article are affiliate links, which means that if you click through and make a purchase I may receive a commission (at no additional cost to you). You can read my full disclosure at the bottom of the page.
- Cricut Machine
- Light blue Cricut cutting mat
- Coloured Card
- Collall All Purpose Glue, Bearly Art Glue or similar
- 3D foam pads
Free layered school themed SVG assembly instructions
Here’s how to make this timeless “back to school” SVG design using a Cricut machine.
Step 1) Download the free file & unzip the downloaded folder
Download the Free Cutting File
Please login to your account to download this file.
TERMS OF USE:
You may sell finished, handmade physical craft items that you have made using this product but must not sell or share the digital files. Read full terms of use
Before you upload the SVGs to Design Space, you need to unzip the download folder that they come in.
- How to unzip a folder on Windows computer
- How to unzip a folder on a Mac
- How to unzip a folder on an iPad/iPhone
- How to unzip a folder on an Android device
After unzipping, upload the SVG file(s) into your cutting machine software.
Not sure how to use cut files with your type of machine? The following links lead to videos on how to open cut files in:
- Cricut Design Space
- Silhouette Studio
- CanvasWorkspace (for ScanNCut machines)
The download folder also contains printable PDF versions of the templates for hand cutting.
Step 2) Upload the SVG file into Design Space
If you are using Cricut Design Space, start a new project and then click the “Upload” button on the left of the screen.
You can then either click “Browse” to find the file on your computer, or drag-and-drop it.
Upload the file in the “01 Cricut Version” subfolder called svg-01-flower-pot-school-craftwithsarah.svg
This is how it should look after you have selected the file:
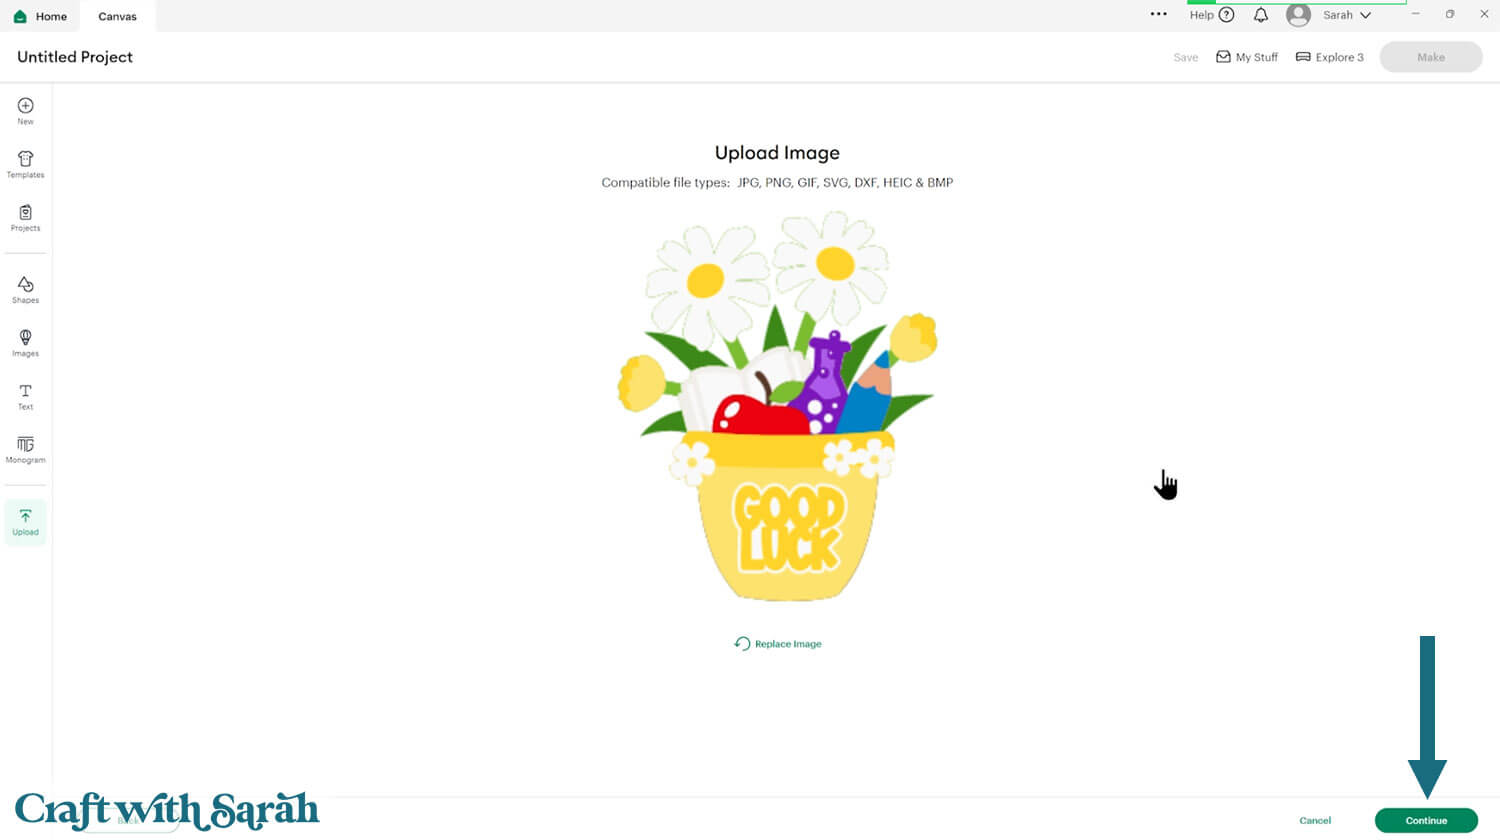
Don’t worry if the image preview appears blurry – it will show in full quality once it’s inserted onto your project.
Press “Upload” on the next screen.
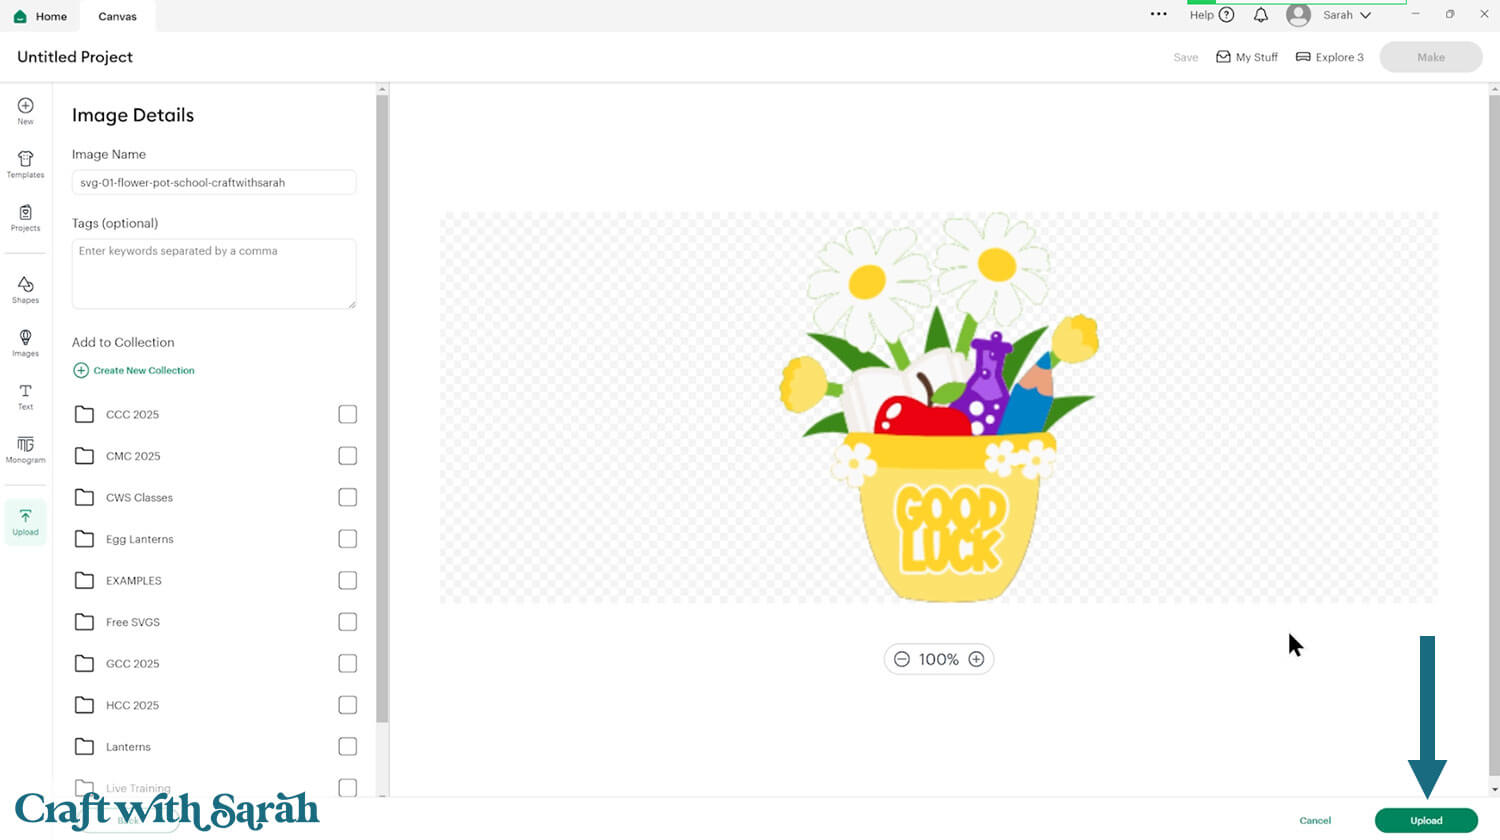
After uploading, the flower pot design should be automatically inserted onto your Canvas.
Cricut have recently (as of June 2025) introduced a feature where you get a “pop out” bar of similar images when you Upload a design. To hide this bar (to give you more space for designing!), click the arrow that’s about half way down the page.
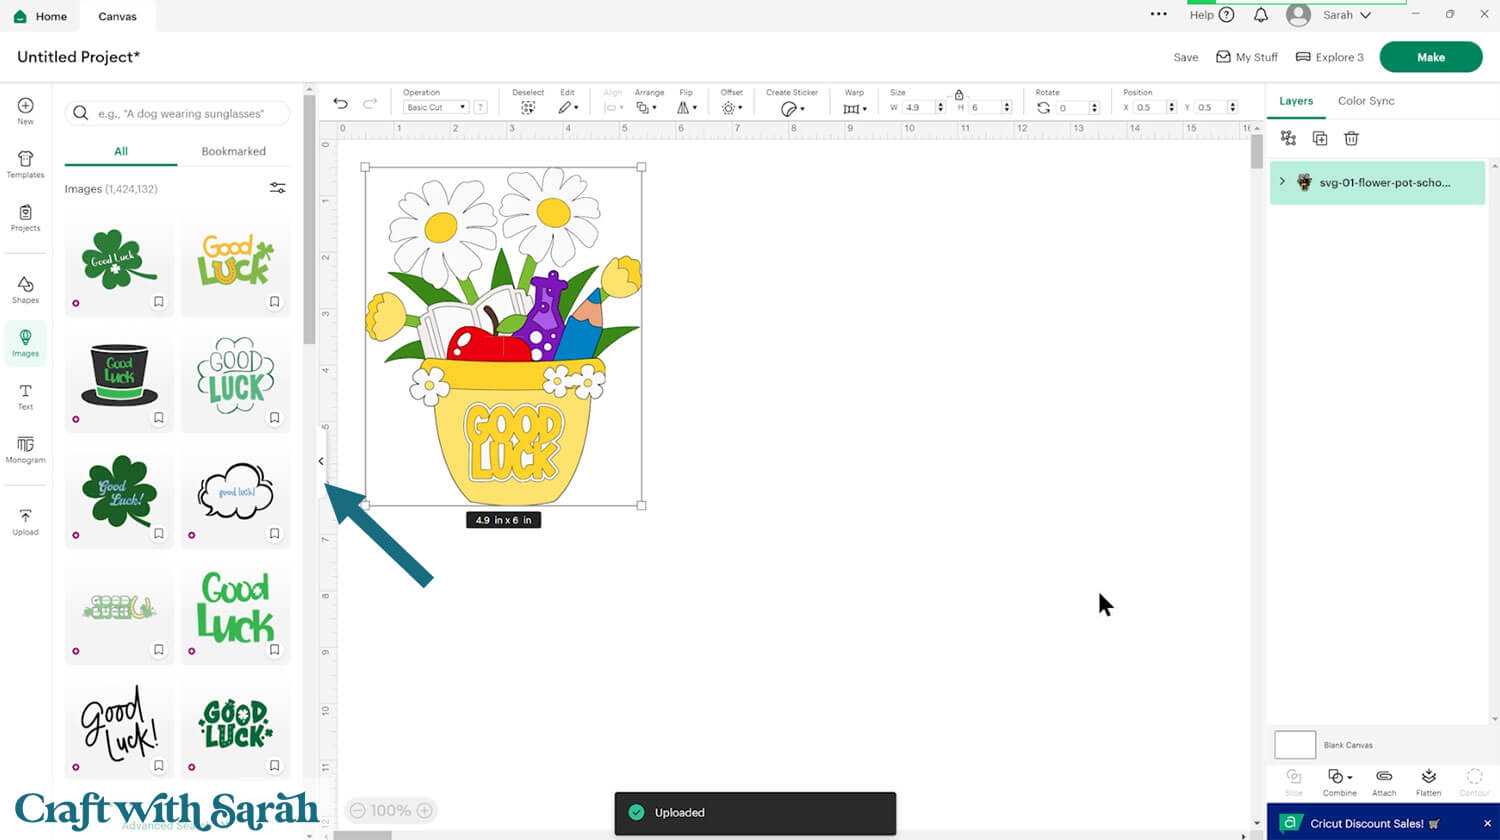
If the design doesn’t get inserted onto your Canvas, it will show under “Uploads” in your “Recently Uploaded Images”. Click on it and then press “Add to Canvas” to put it onto your Project.
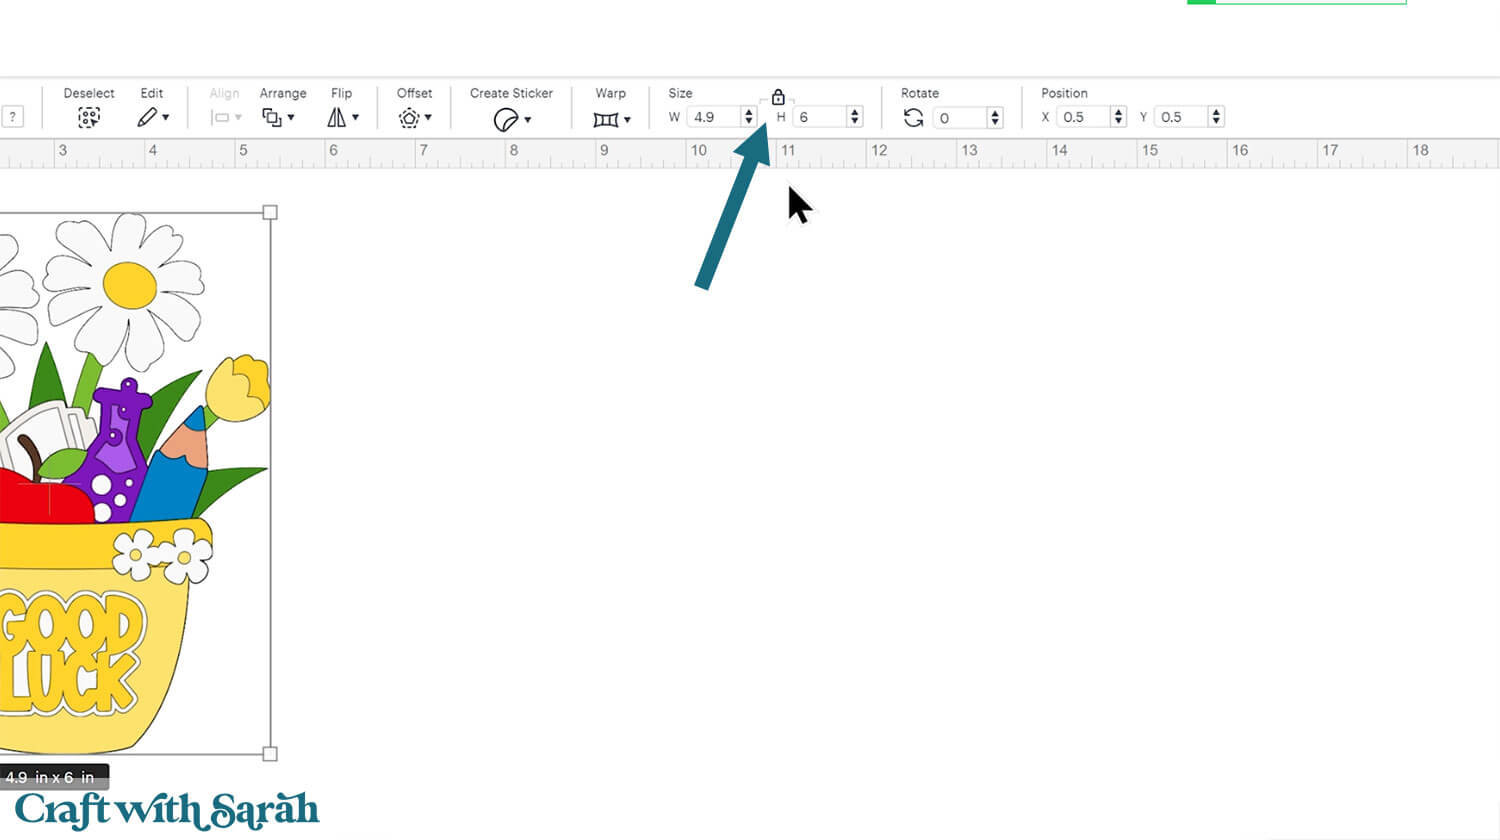
Click the design on your canvas and use the width/height boxes near the top of the screen to make it the size that you want to cut it.
Make sure that the padlock icon is closed when you are resizing so that all the pieces stay in proportion.
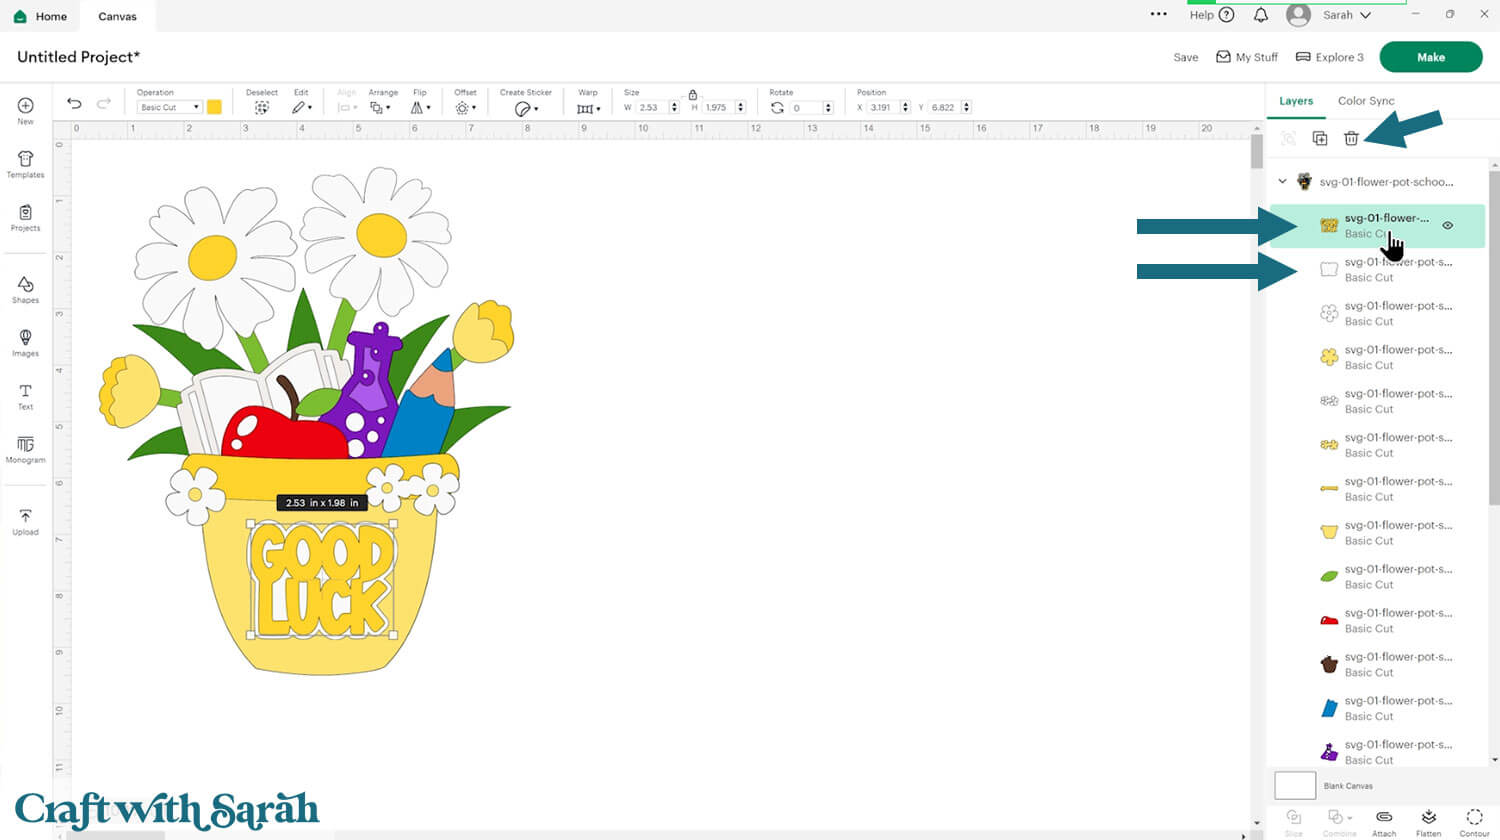
You can hide the “Good Luck” wording by clicking on the top two layers in the layers panel and deleting them. Do this one-layer at a time.
This design has been specifically created to cut well at small sizes, so you can size it down to around 3 inches tall and it should still cut perfectly.
Here are some tips for making sure the design fits perfectly into a shadow box frame:
The below video has some tips on how to frame your craft project, including my Number One hack for making sure that your design will fit perfectly every time without wasting any of your craft materials.
Don't have a Cricut? Check out my top framing tips for:
- Silhouette Studio (for Silhouette machines)
- CanvasWorkspace (for ScanNCut machines)
Want to learn more about designing your own shadow box backgrounds? Check out this CWS Premium Class on creating custom backgrounds for frames and greetings cards.
There are matching versions of this video for Silhouette and ScanNCut machines on the Cutting Machine Help page.
Here’s how my shadow box design looks in Design Space. I’ll use patterned paper for the green square.
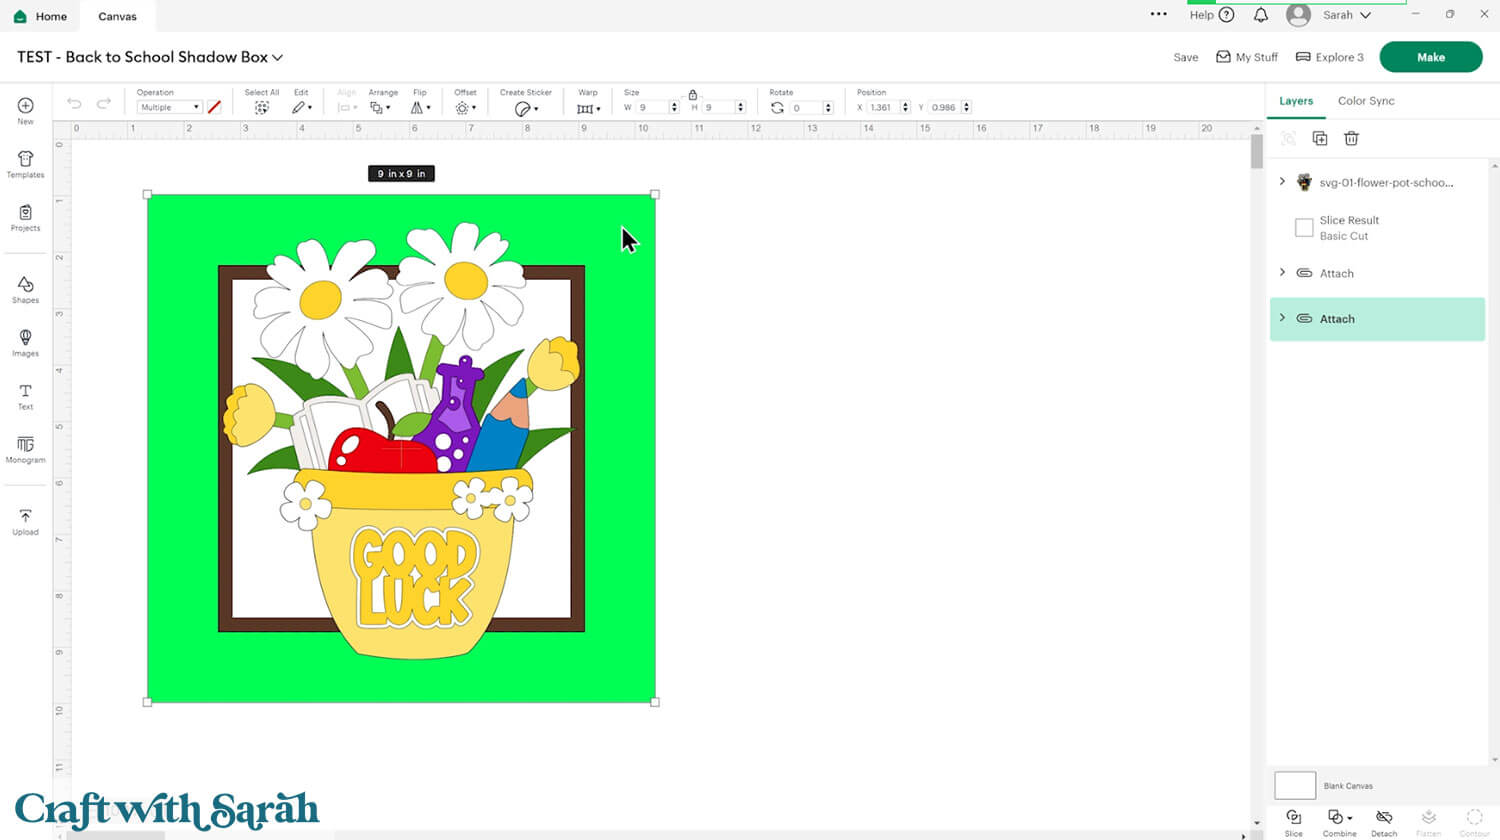
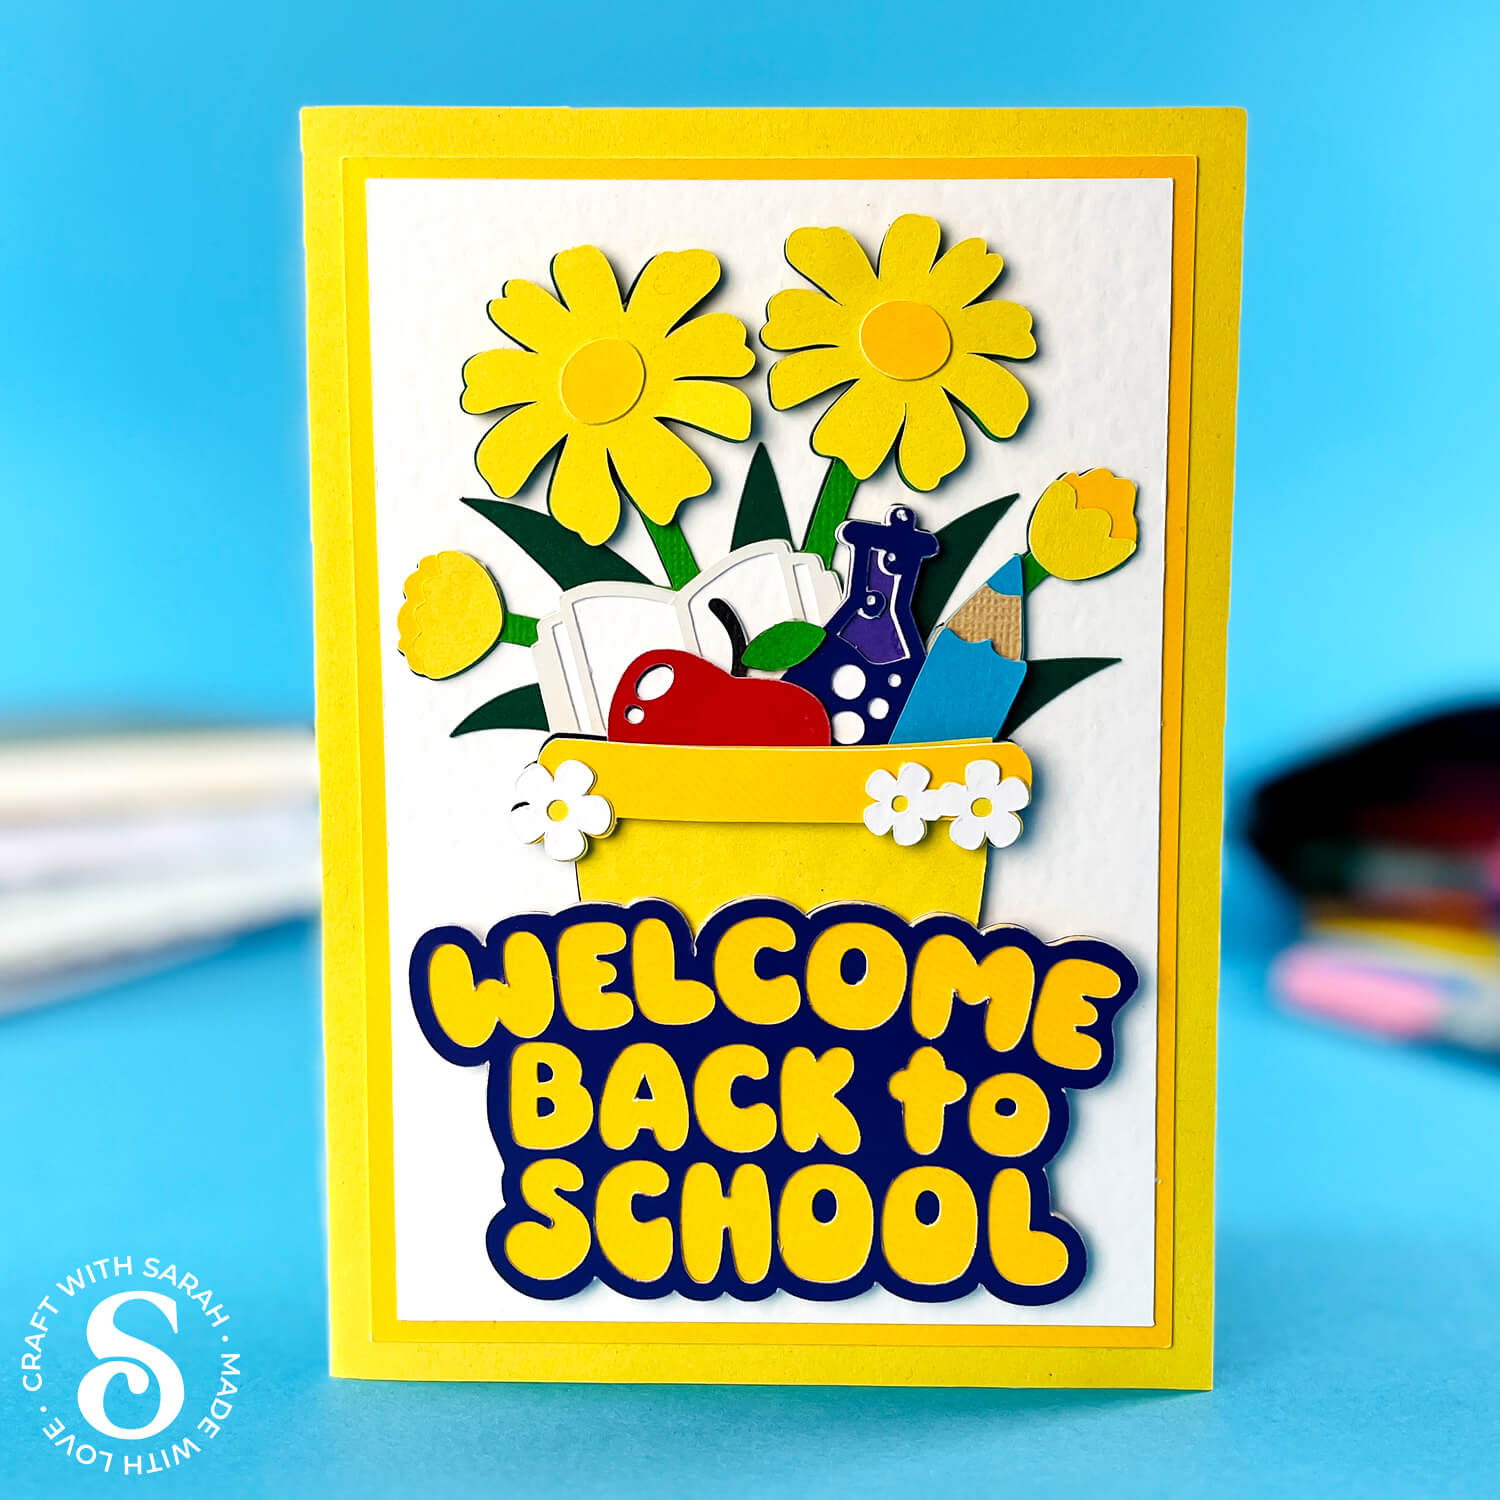
You could add the design to a greetings card by drawing square or rectangle shapes to make the size of the card you want to make.
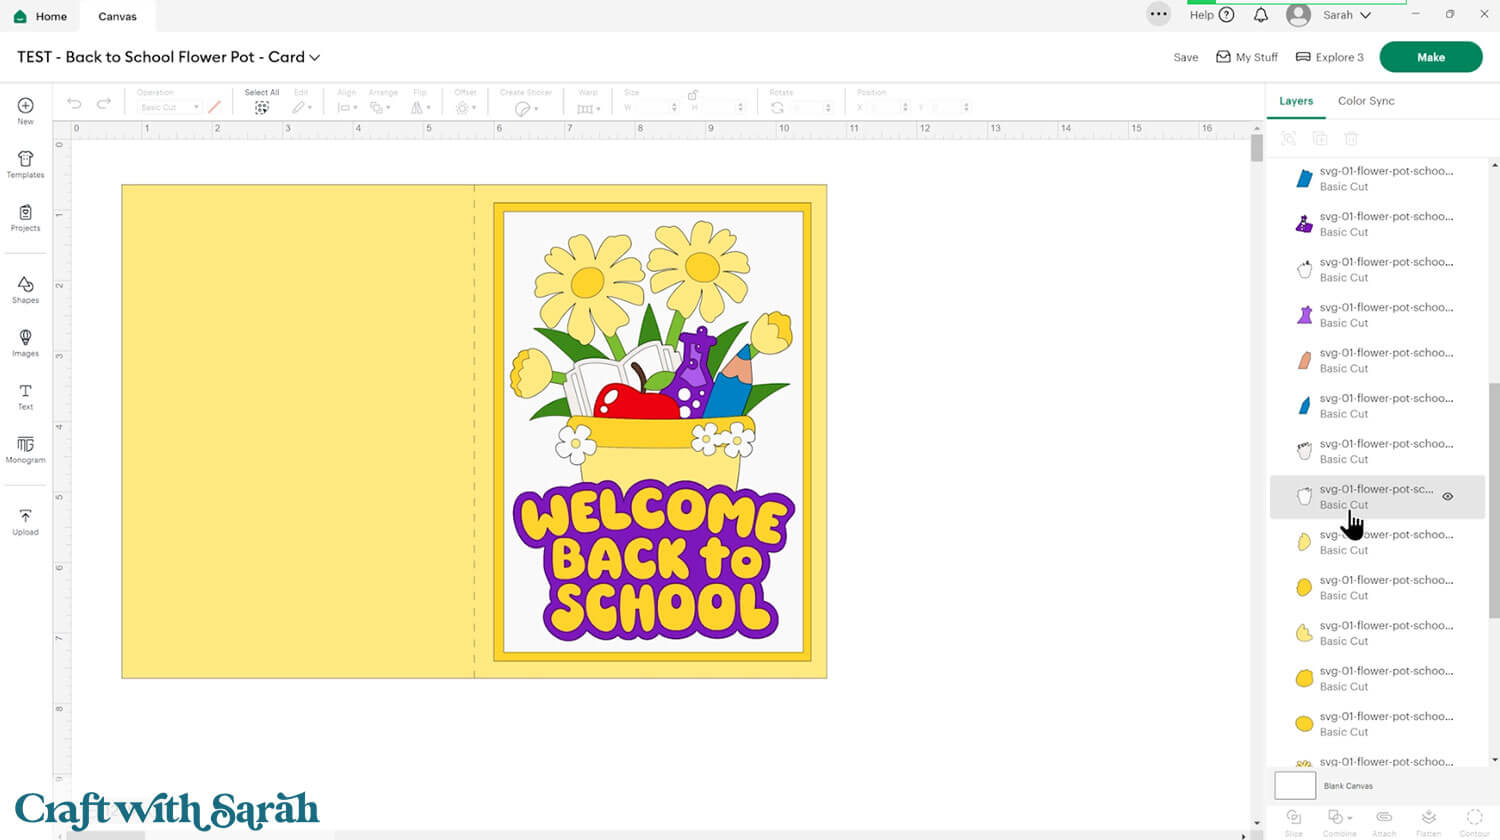
The “Welcome Back to School” sentiment is from Cricut Access. The ID number is #M505E442E.
I changed the colours of some of the layers on the flower pot for my greetings card, to emulate the colours of a traditional yellow school bus.
Step 3) Cut the design
When you’re happy how the flower SVG is looking in Design Space, click “Make” and follow the instructions on-screen to cut out all the layers.
Change the paper size with the dropdowns on the left of the screen. You need to change it for every colour.
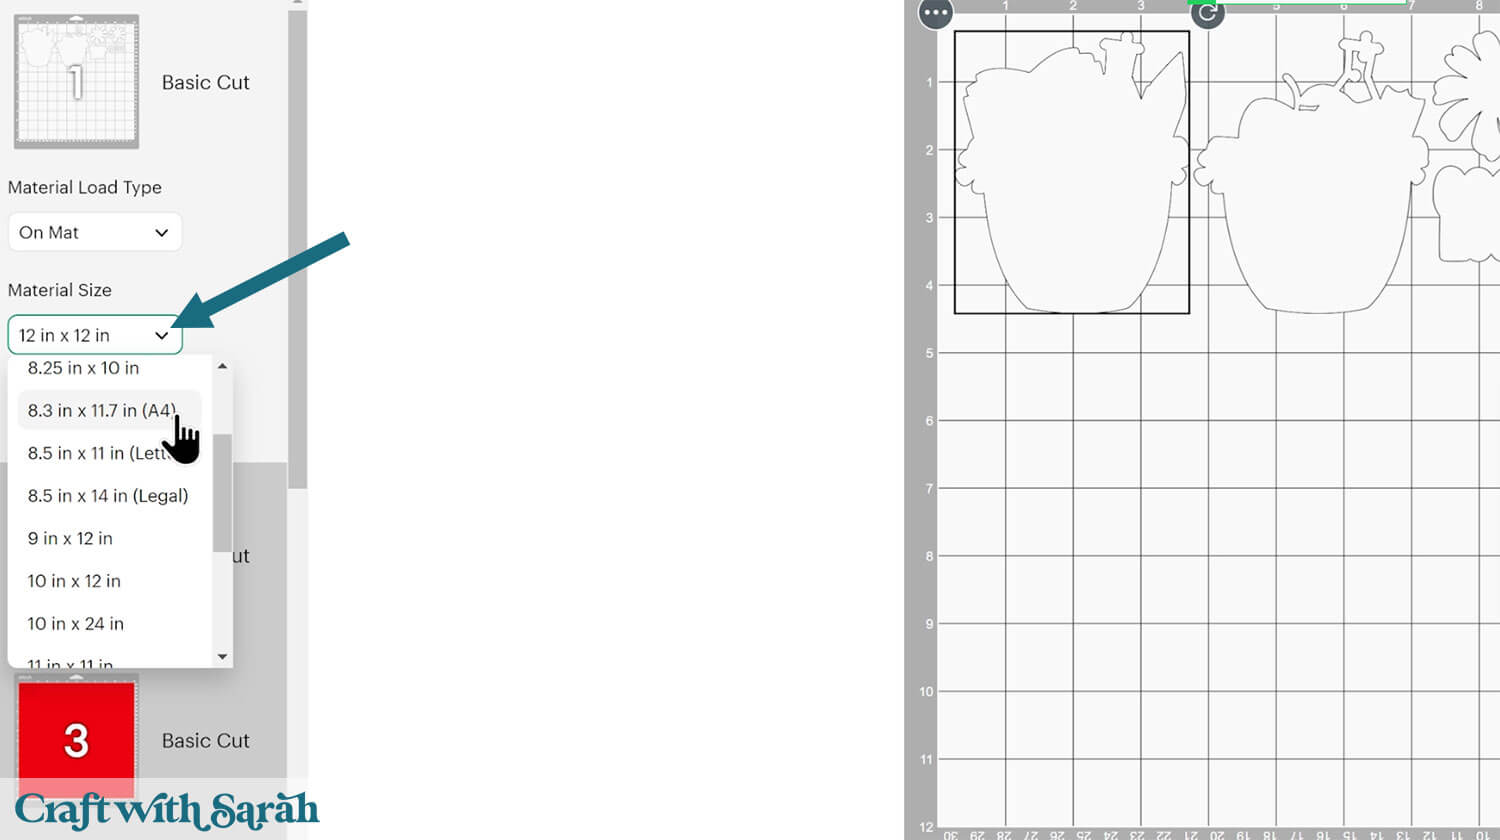
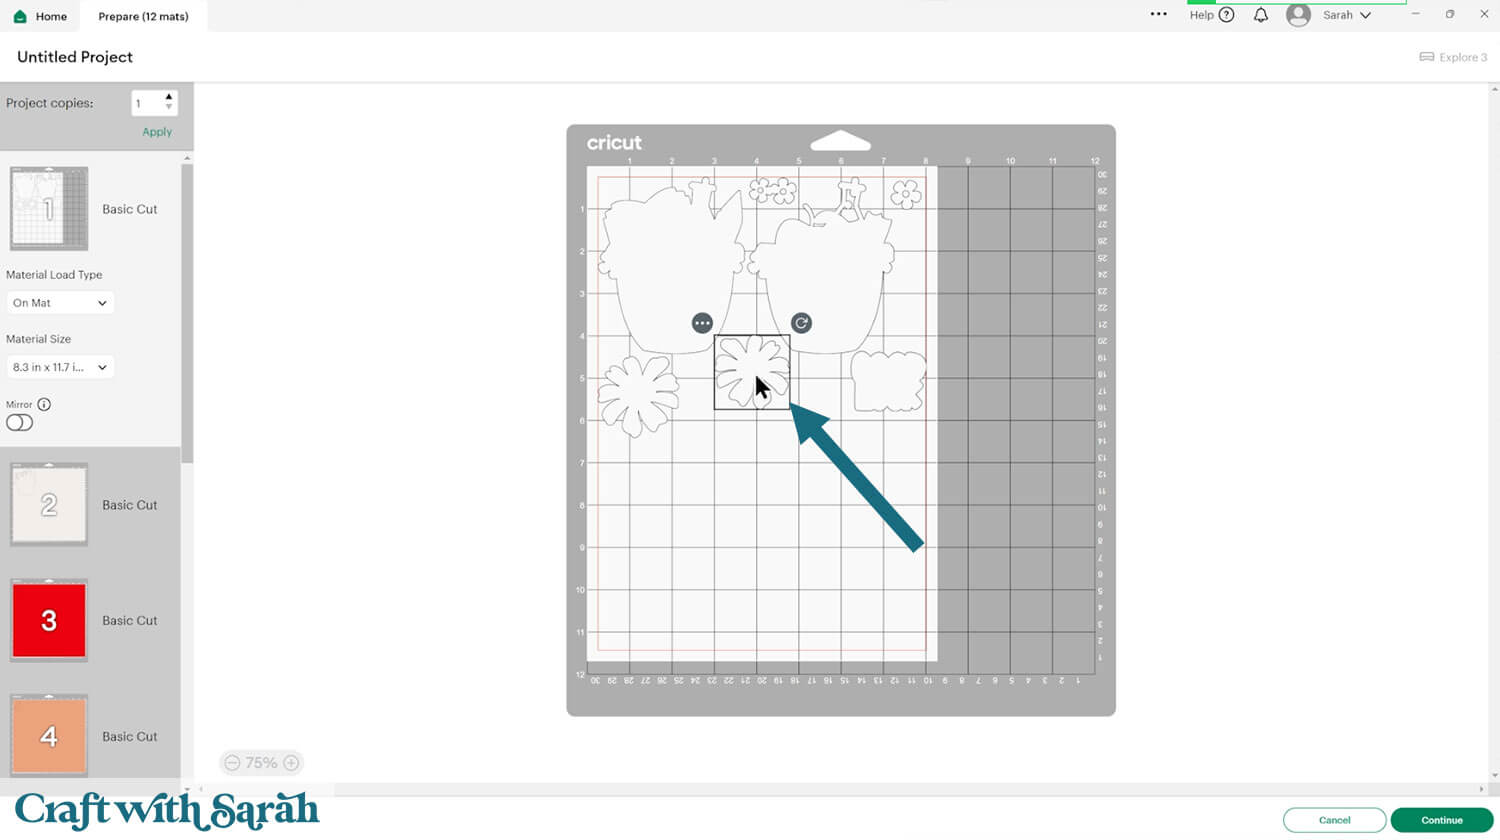
You can drag-and-drop the pieces on the screen to move them about to take up less space on your cardstock.
Make sure that no pieces overlap, otherwise they won’t cut out correctly.
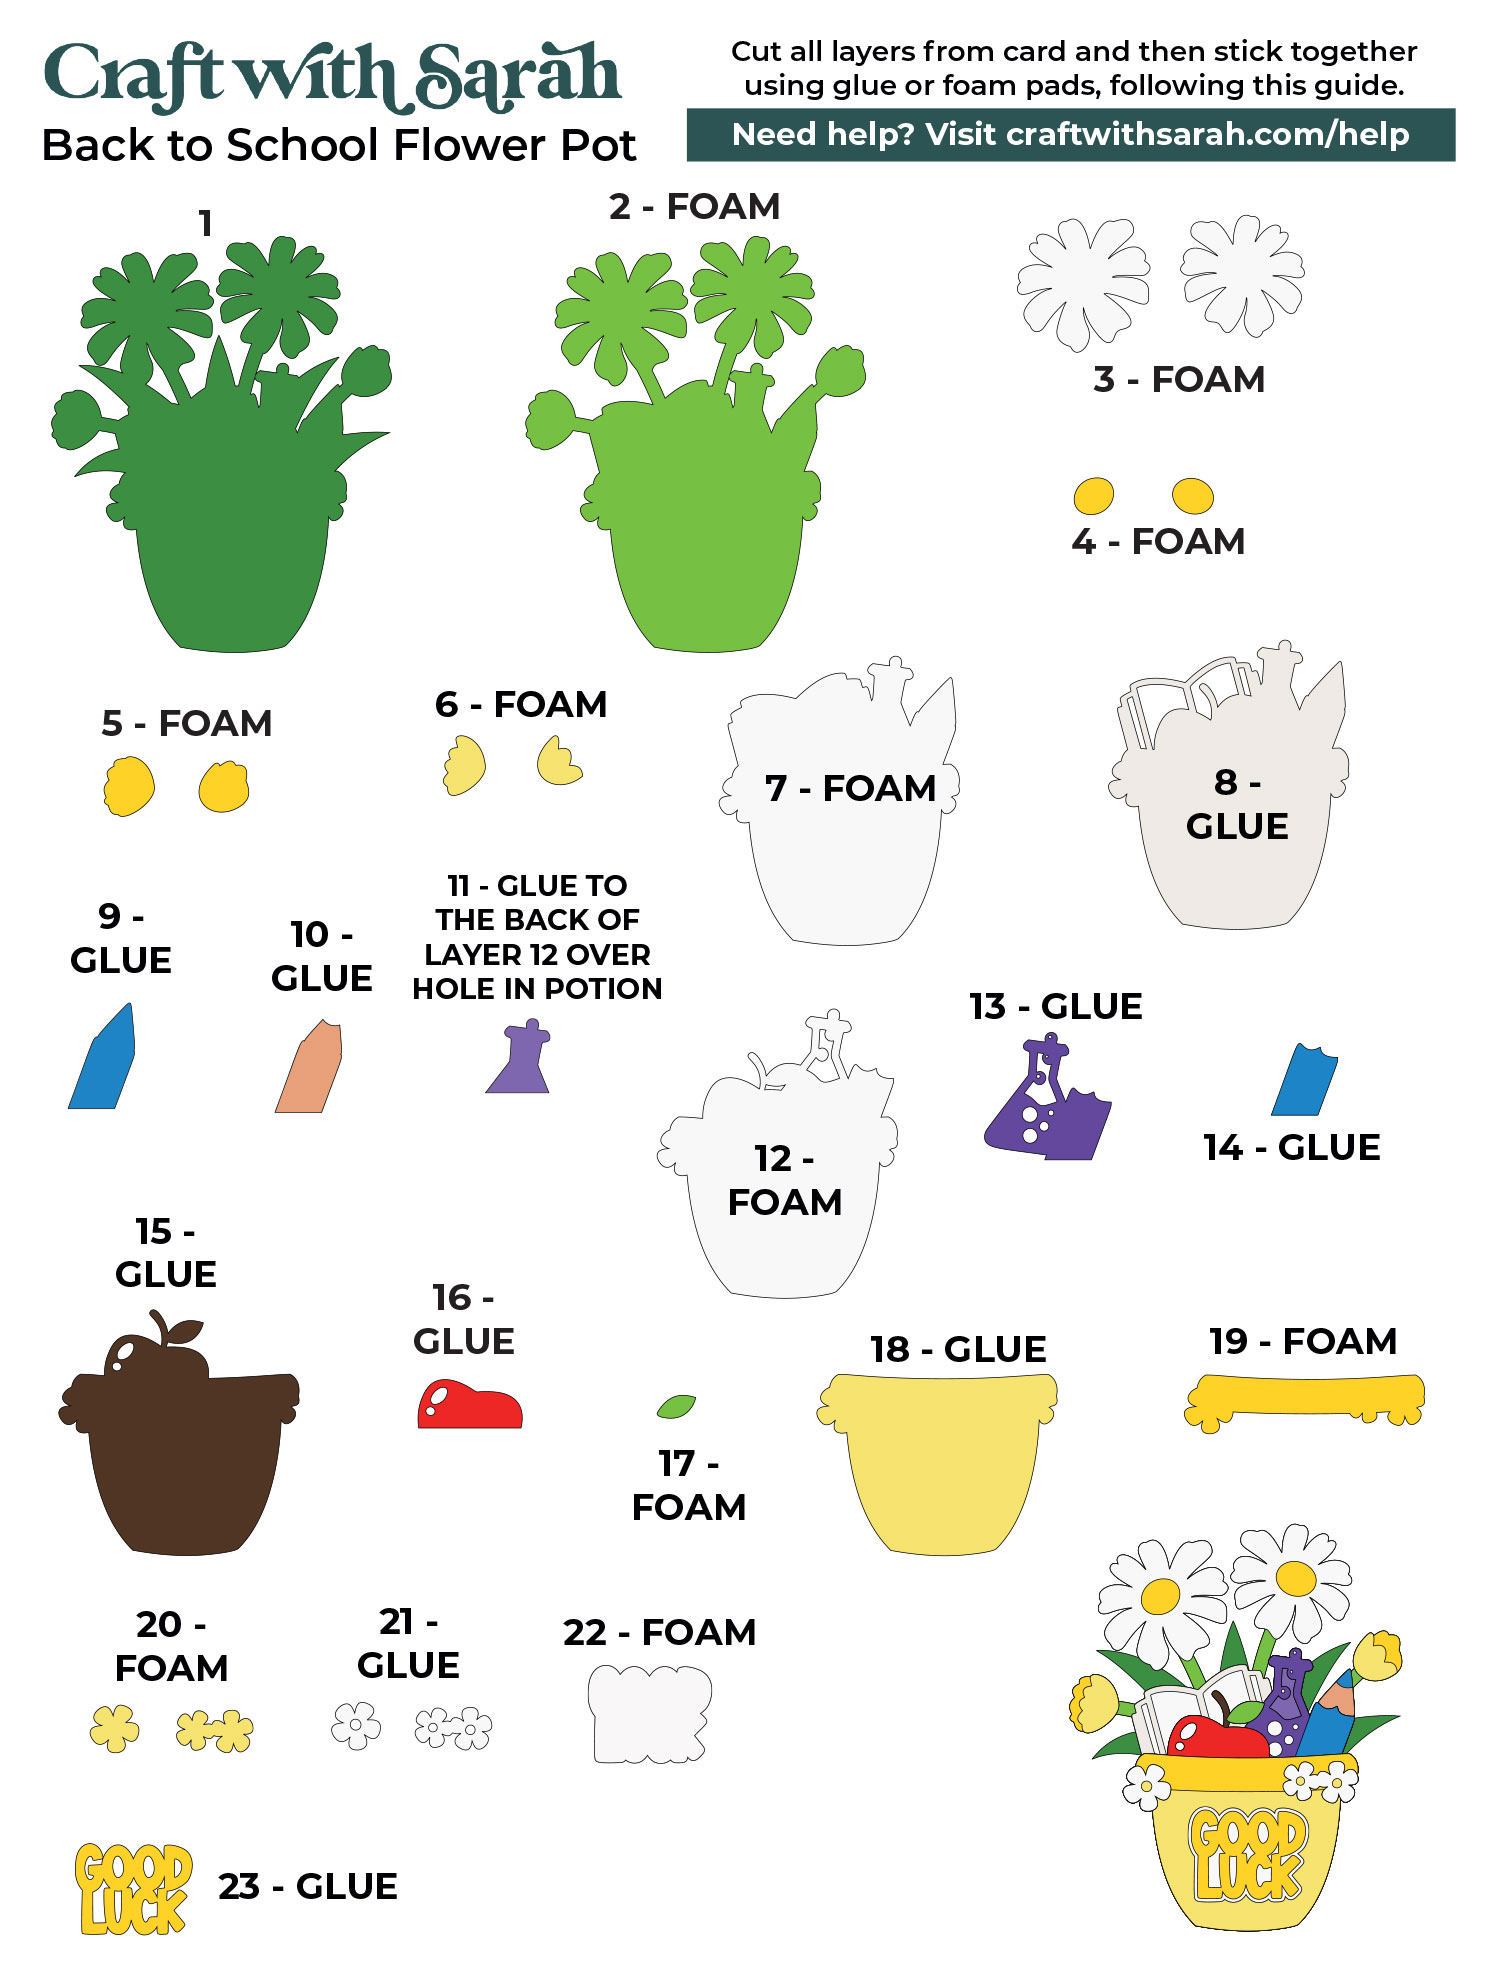
Step 4) Stick the layered flower pot together
Use 3D foam pads and glue to stick the layers together.
Use this guide to see the order to stick the layers together in. A high quality printable version of this assembly guide is included in the folder when you download this SVG.
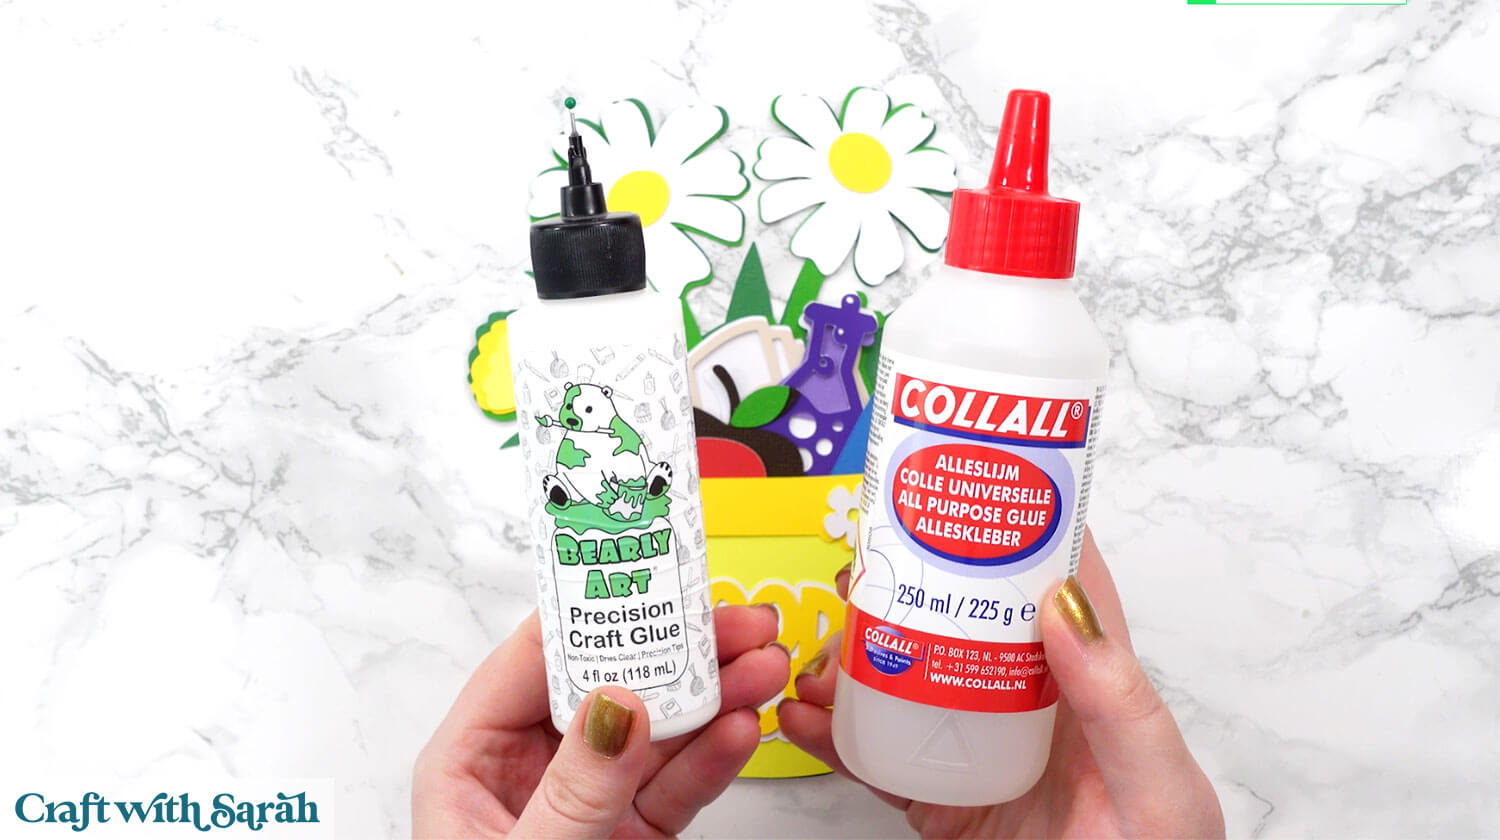
I used Bearly Art Glue to stick the project together.
It’s SO good because it doesn’t “warp” or bend the cardstock like some glues do. You can use as much of it as you want and the card stays perfect – and it dries perfectly clear too!
Collall All-Purpose Glue is another great one to use for cardstock, which is more readily available in the UK.
I like these foam pads from “Dot & Dab”, but any will do. If yours are large then you might need to cut them smaller with a pair of scissors.
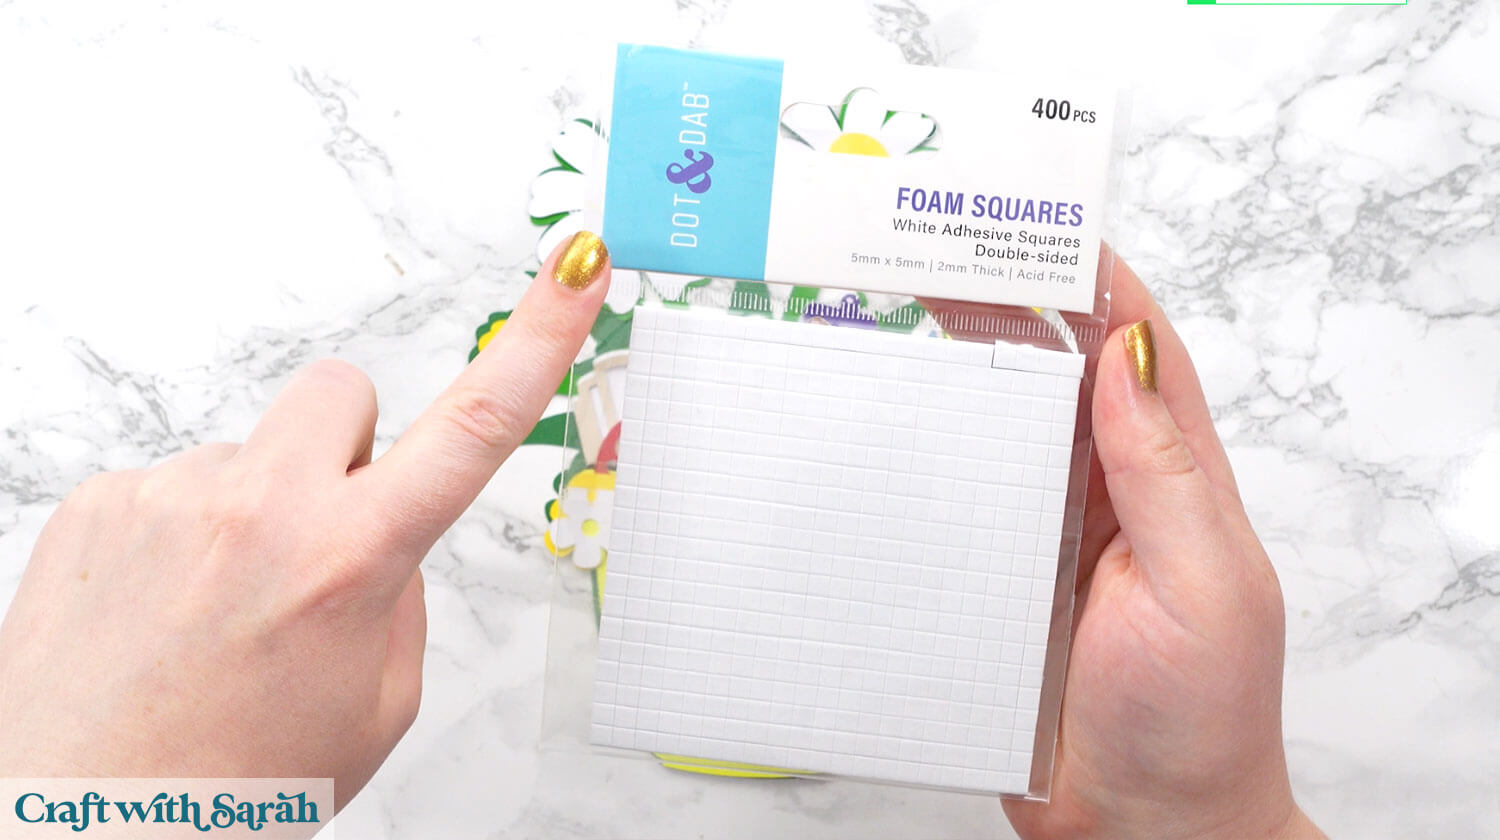
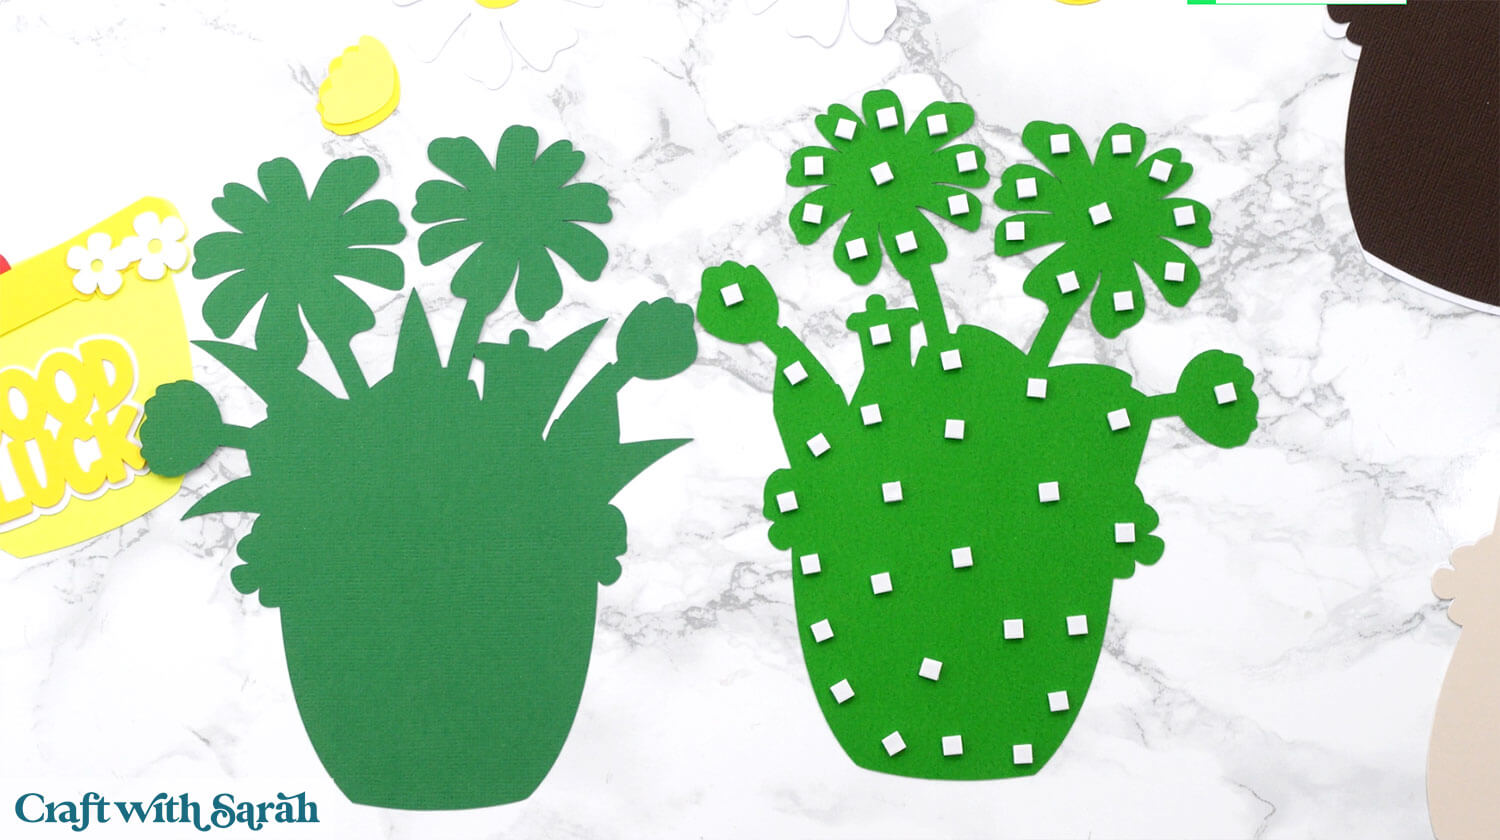
When adding the foam pads to larger pieces, make sure you add some in the middle of the pieces of card so it gives some stability to the middles. If you don’t add any foam pads in the middles then it can dip/sag down under the weight of the other layers which doesn’t look as good.
Once you have finished sticking all the pieces together, your floral project is ready to be framed, added to a greetings card or scrapbook page – or, however else you are planning on displaying it!

Paper flowers for back to school celebrations
And there you have it – a gorgeous layered papercraft that’s perfect for welcoming your children back to school after the long summer.
This design is part of my brand new year-long flower pot series, so be sure to check back for more designs to suit upcoming holidays and special occasions.
Here are all the other free flower pot cut files that have been released so far:
- General flower pot (for all occasions)
- 4th July flower pot
- Back to school flower pot (good luck)
- Birthday flower pot (with balloons)
- Canada Day flower pot
- Christmas flower pot (with poinsettias)
- Easter flower pot (with tulips and eggs)
- Folk art flowers (for Mother's Day)
- Graduation flower pot (with sunflower)
- Halloween flower pot
- Hanukkah flower pot
- Mardi Gras flower pot
- New baby flower pot
- St Patricks' Day flower pot (shamrock shaped flowers)
- Sunflower characters (for Father's Day)
- Thanksgiving flower pot (sunflowers & pumpkins)
- Valentine's Day flower pot (heart shaped flowers)
- Wedding flower pot (with roses and rings)
Don’t forget, all the designs in this series will be free and easy to cut, making them perfect for both beginners and seasoned crafters alike.
If you enjoyed this project, I’d love to see your creations! Post your finished designs to social media or share them in our Community. Seeing what you make always brightens my day! 🌸
Love layered SVGs? Check out my other free layered SVG files
Happy crafting,
Sarah x

